A Very Special Invitation

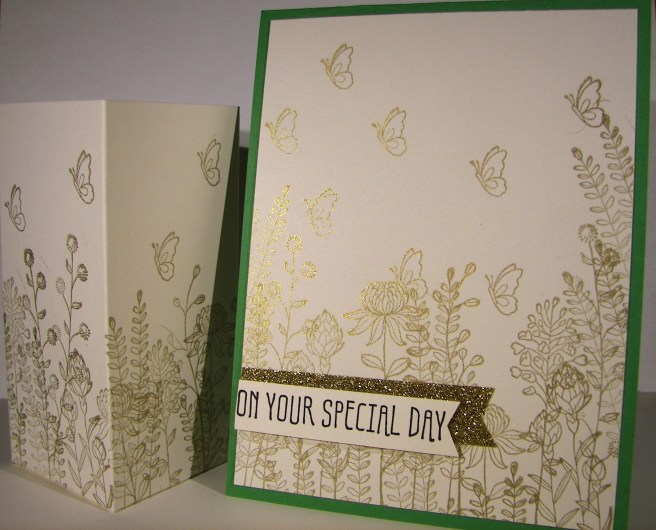
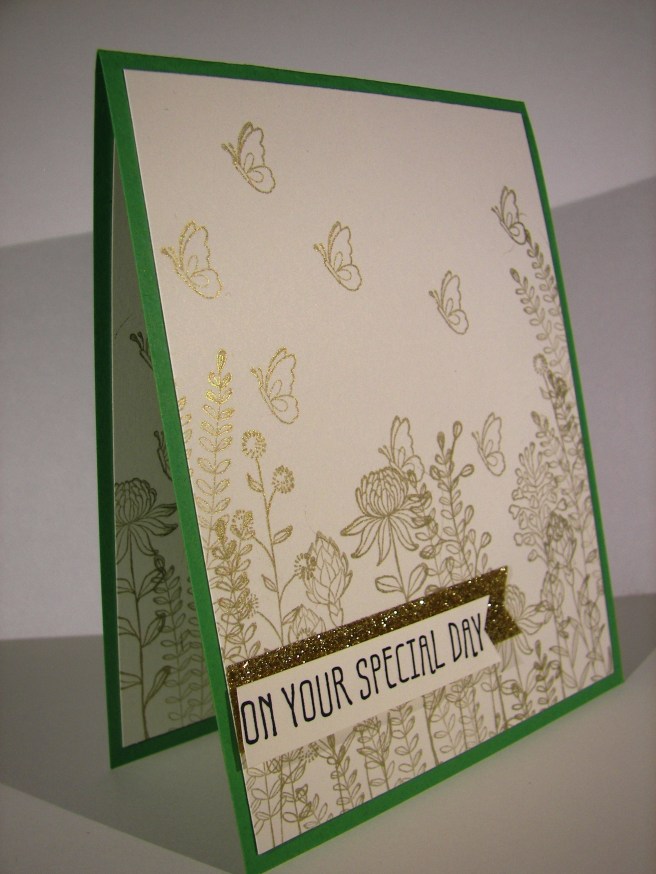
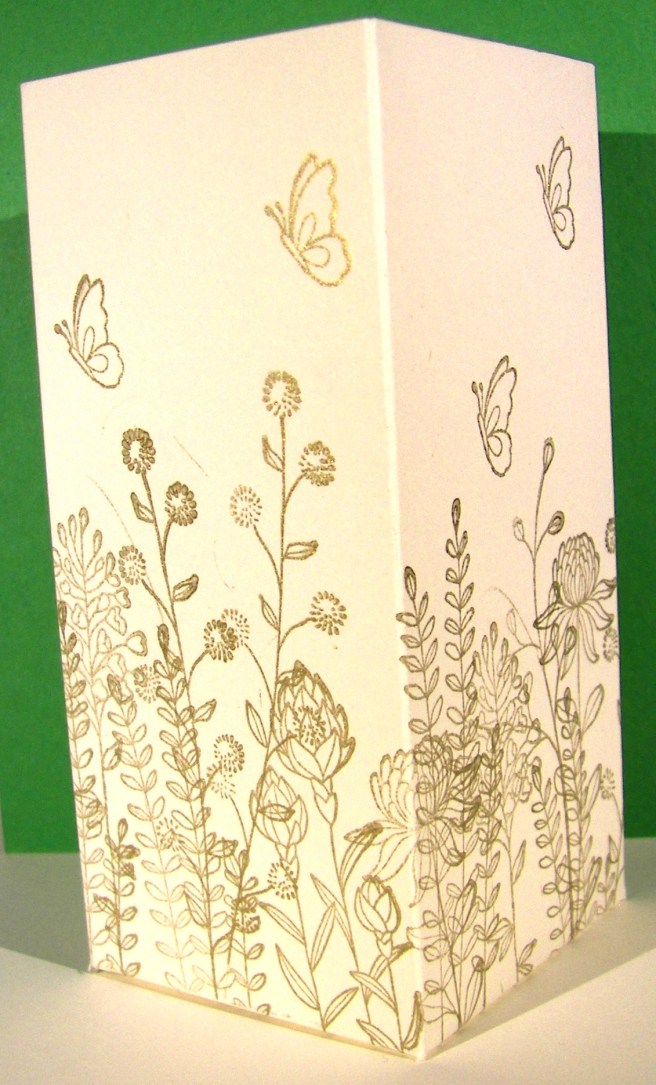
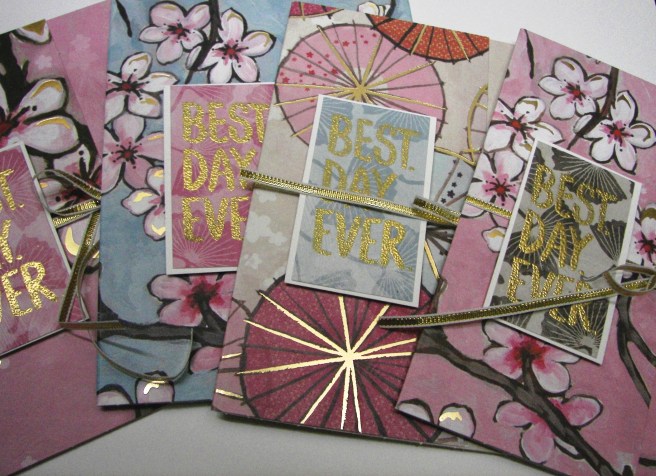
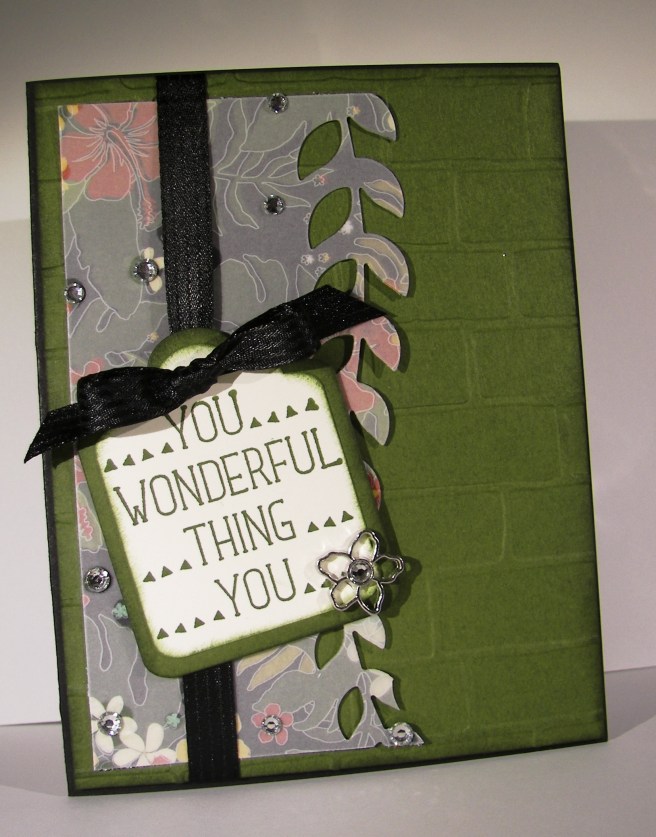
I know I used a bunch of retired product, but I still love it too!  The wonderful thing about tools is that you can use them again and again no matter how long you have them.  This stamp set and coordinating embossing folder are retired Christmas product.  I think they are still beautiful and perfectly wonderful for this project.  So there, use the product you have and love!

3-21

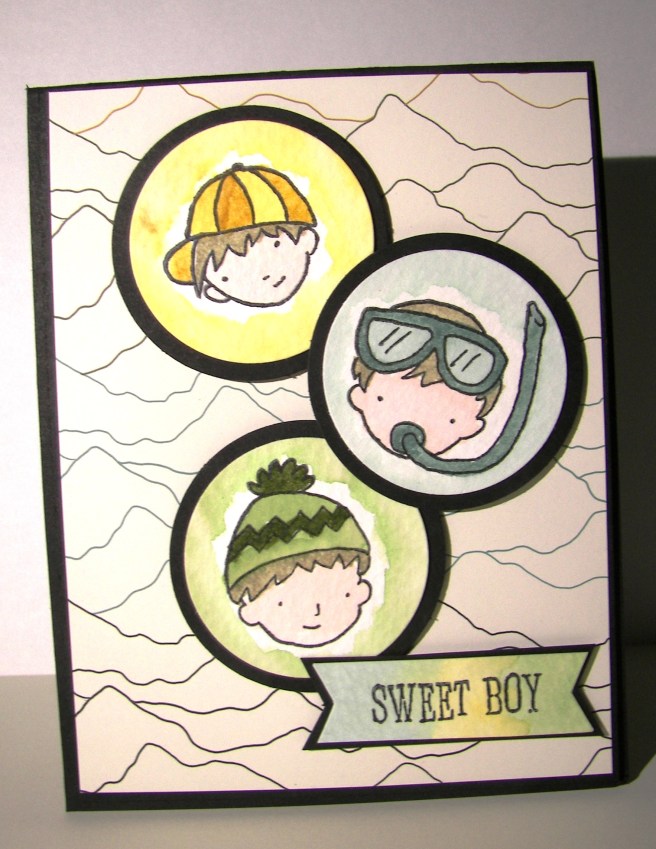
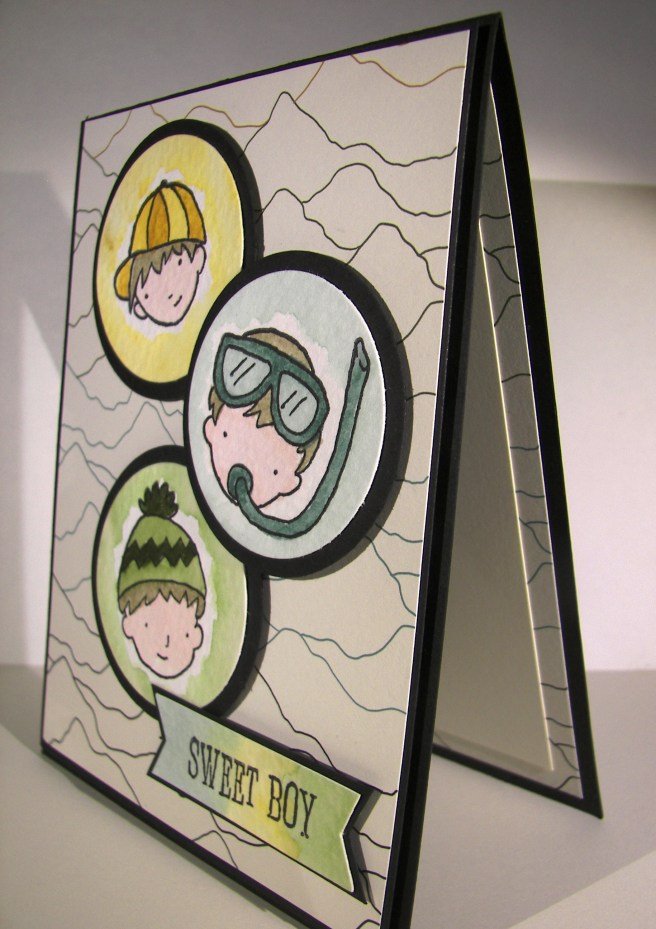
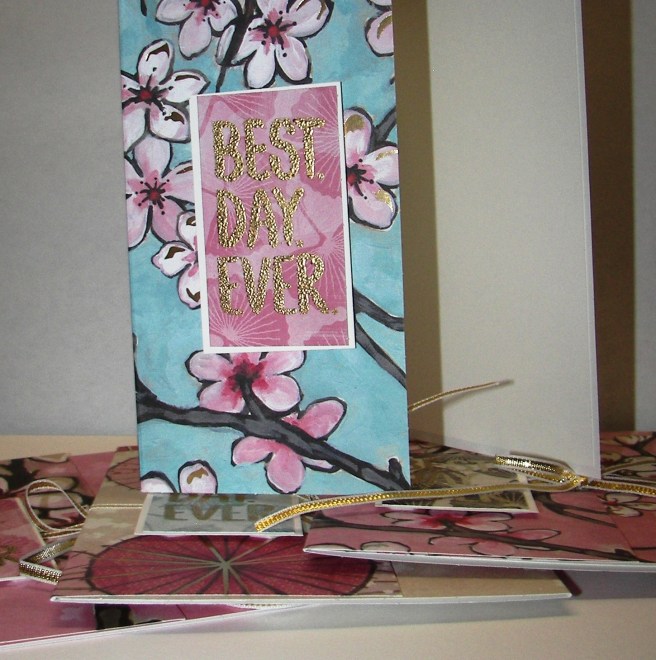
These were special handouts for a Sunday church lesson I taught to a group of 14 & 15 year old girls.  They are so dear to my heart, I can’t help myself but make them something special every time I teach.

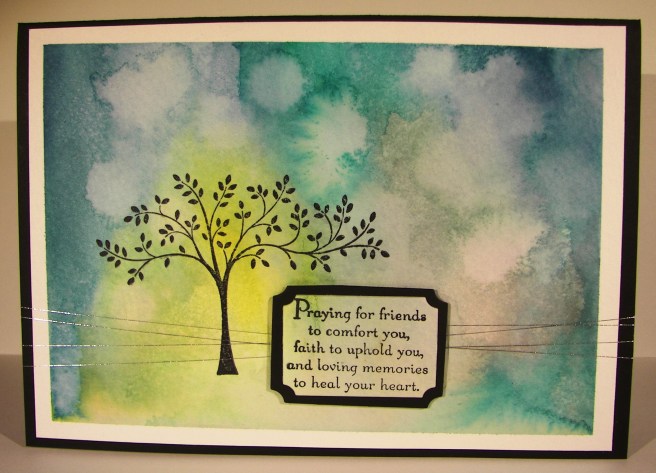
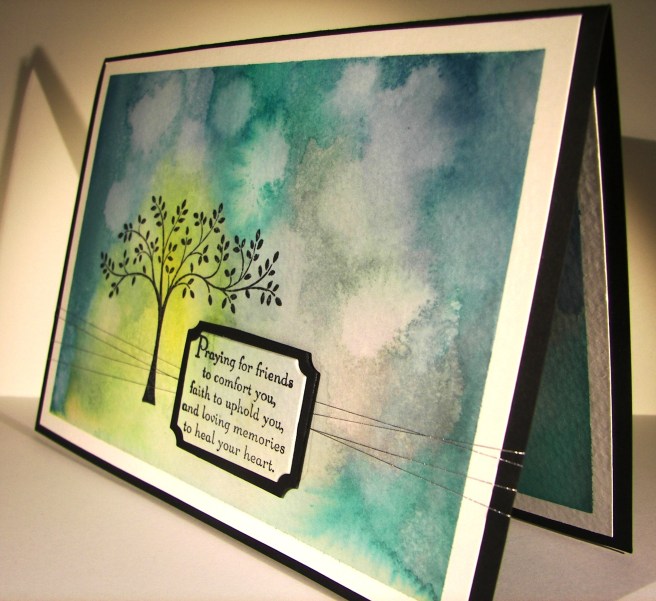
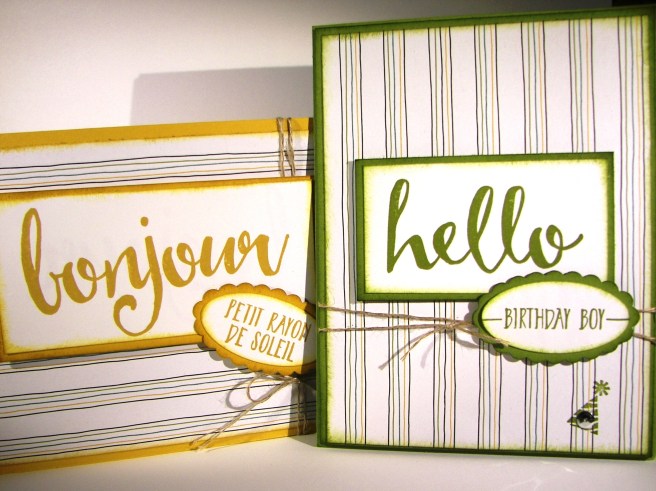
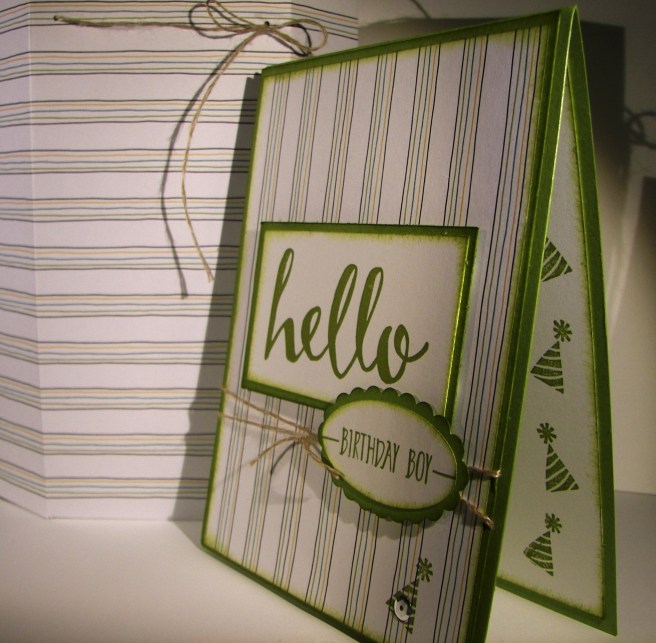
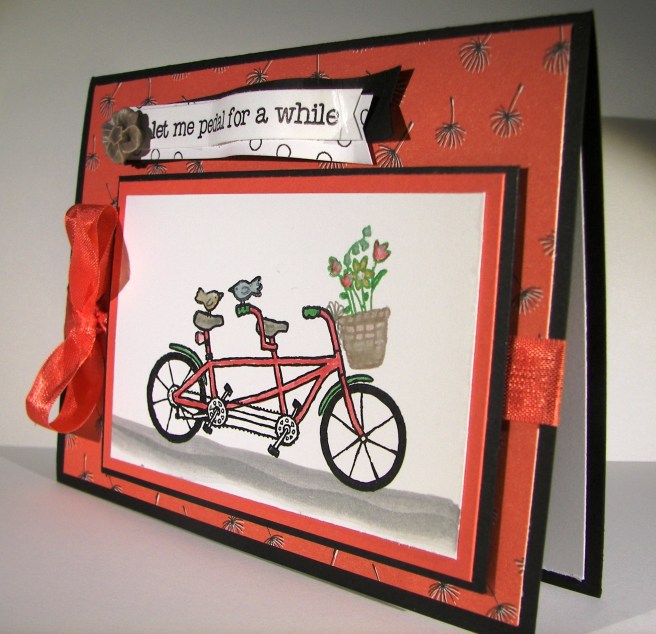
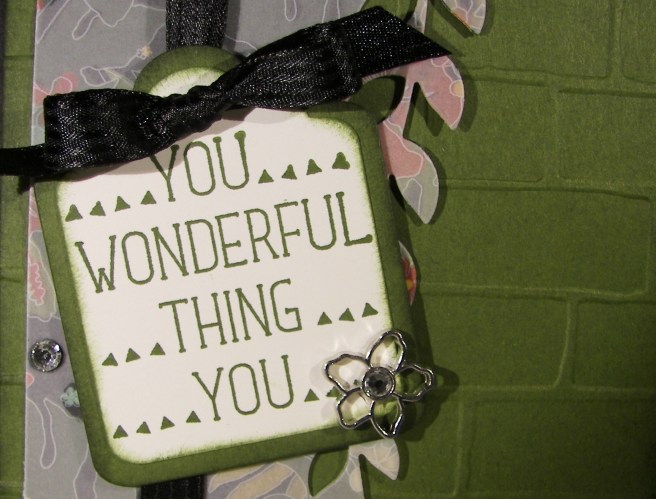
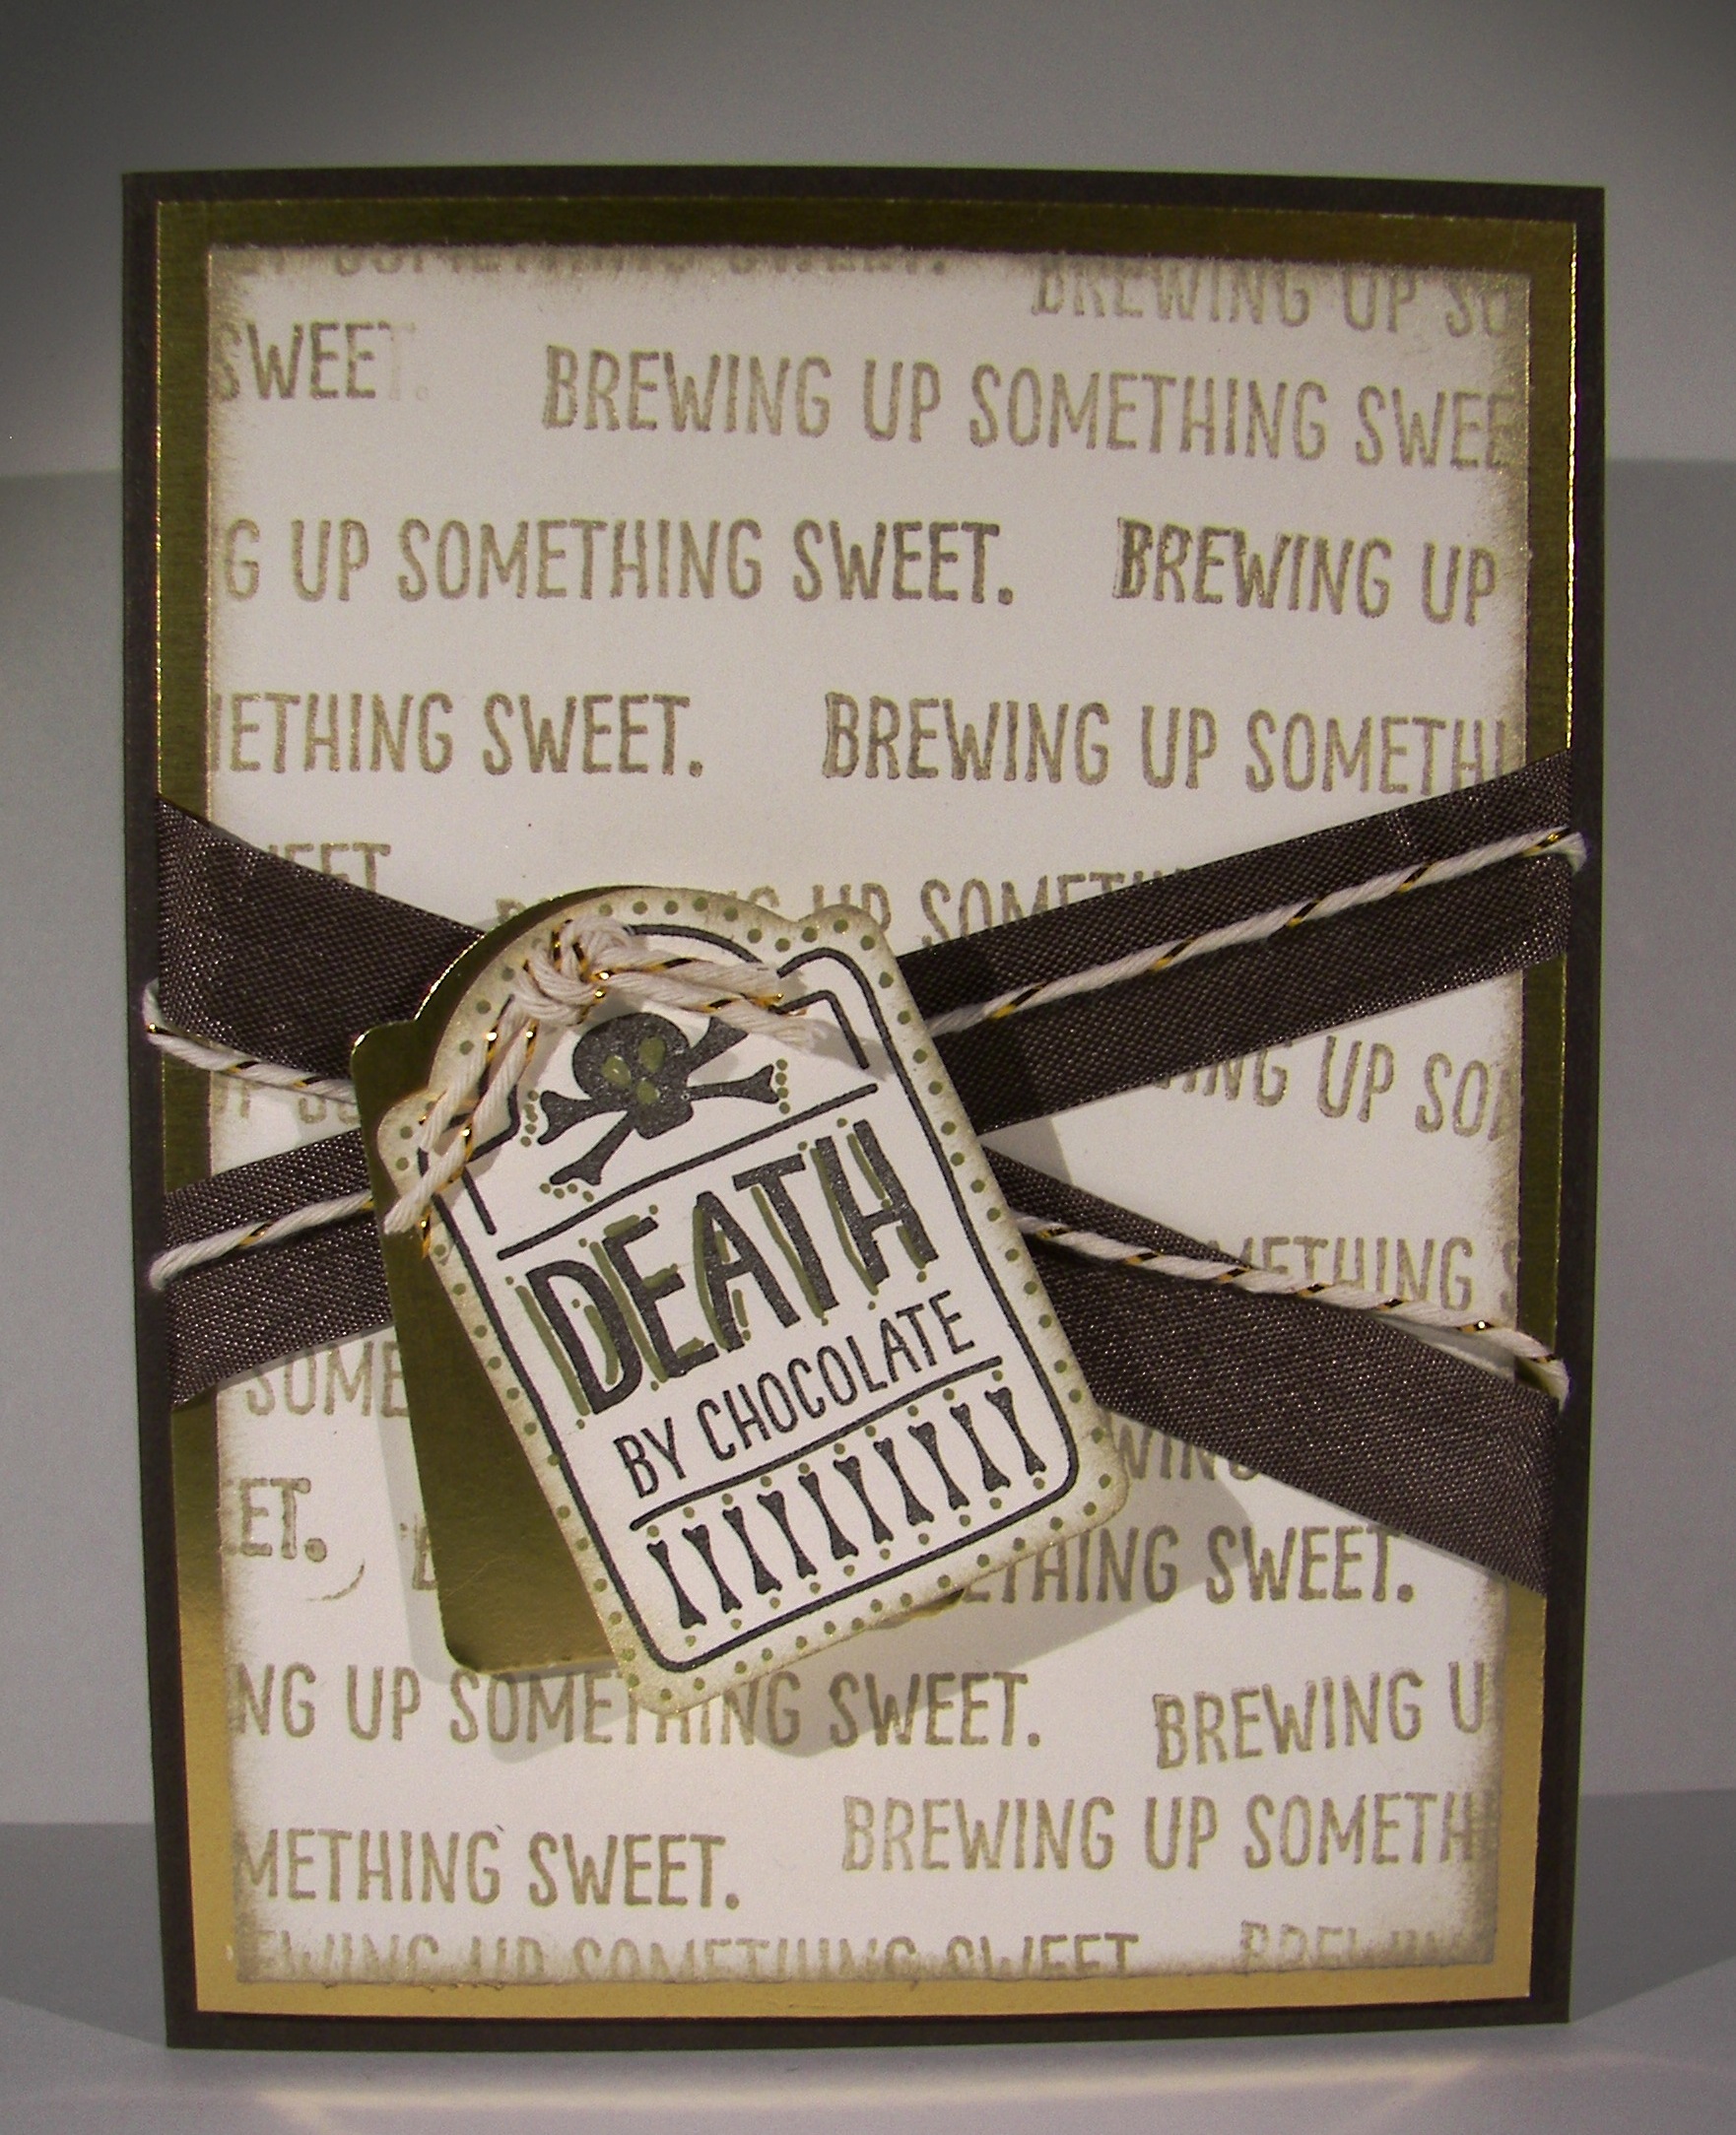
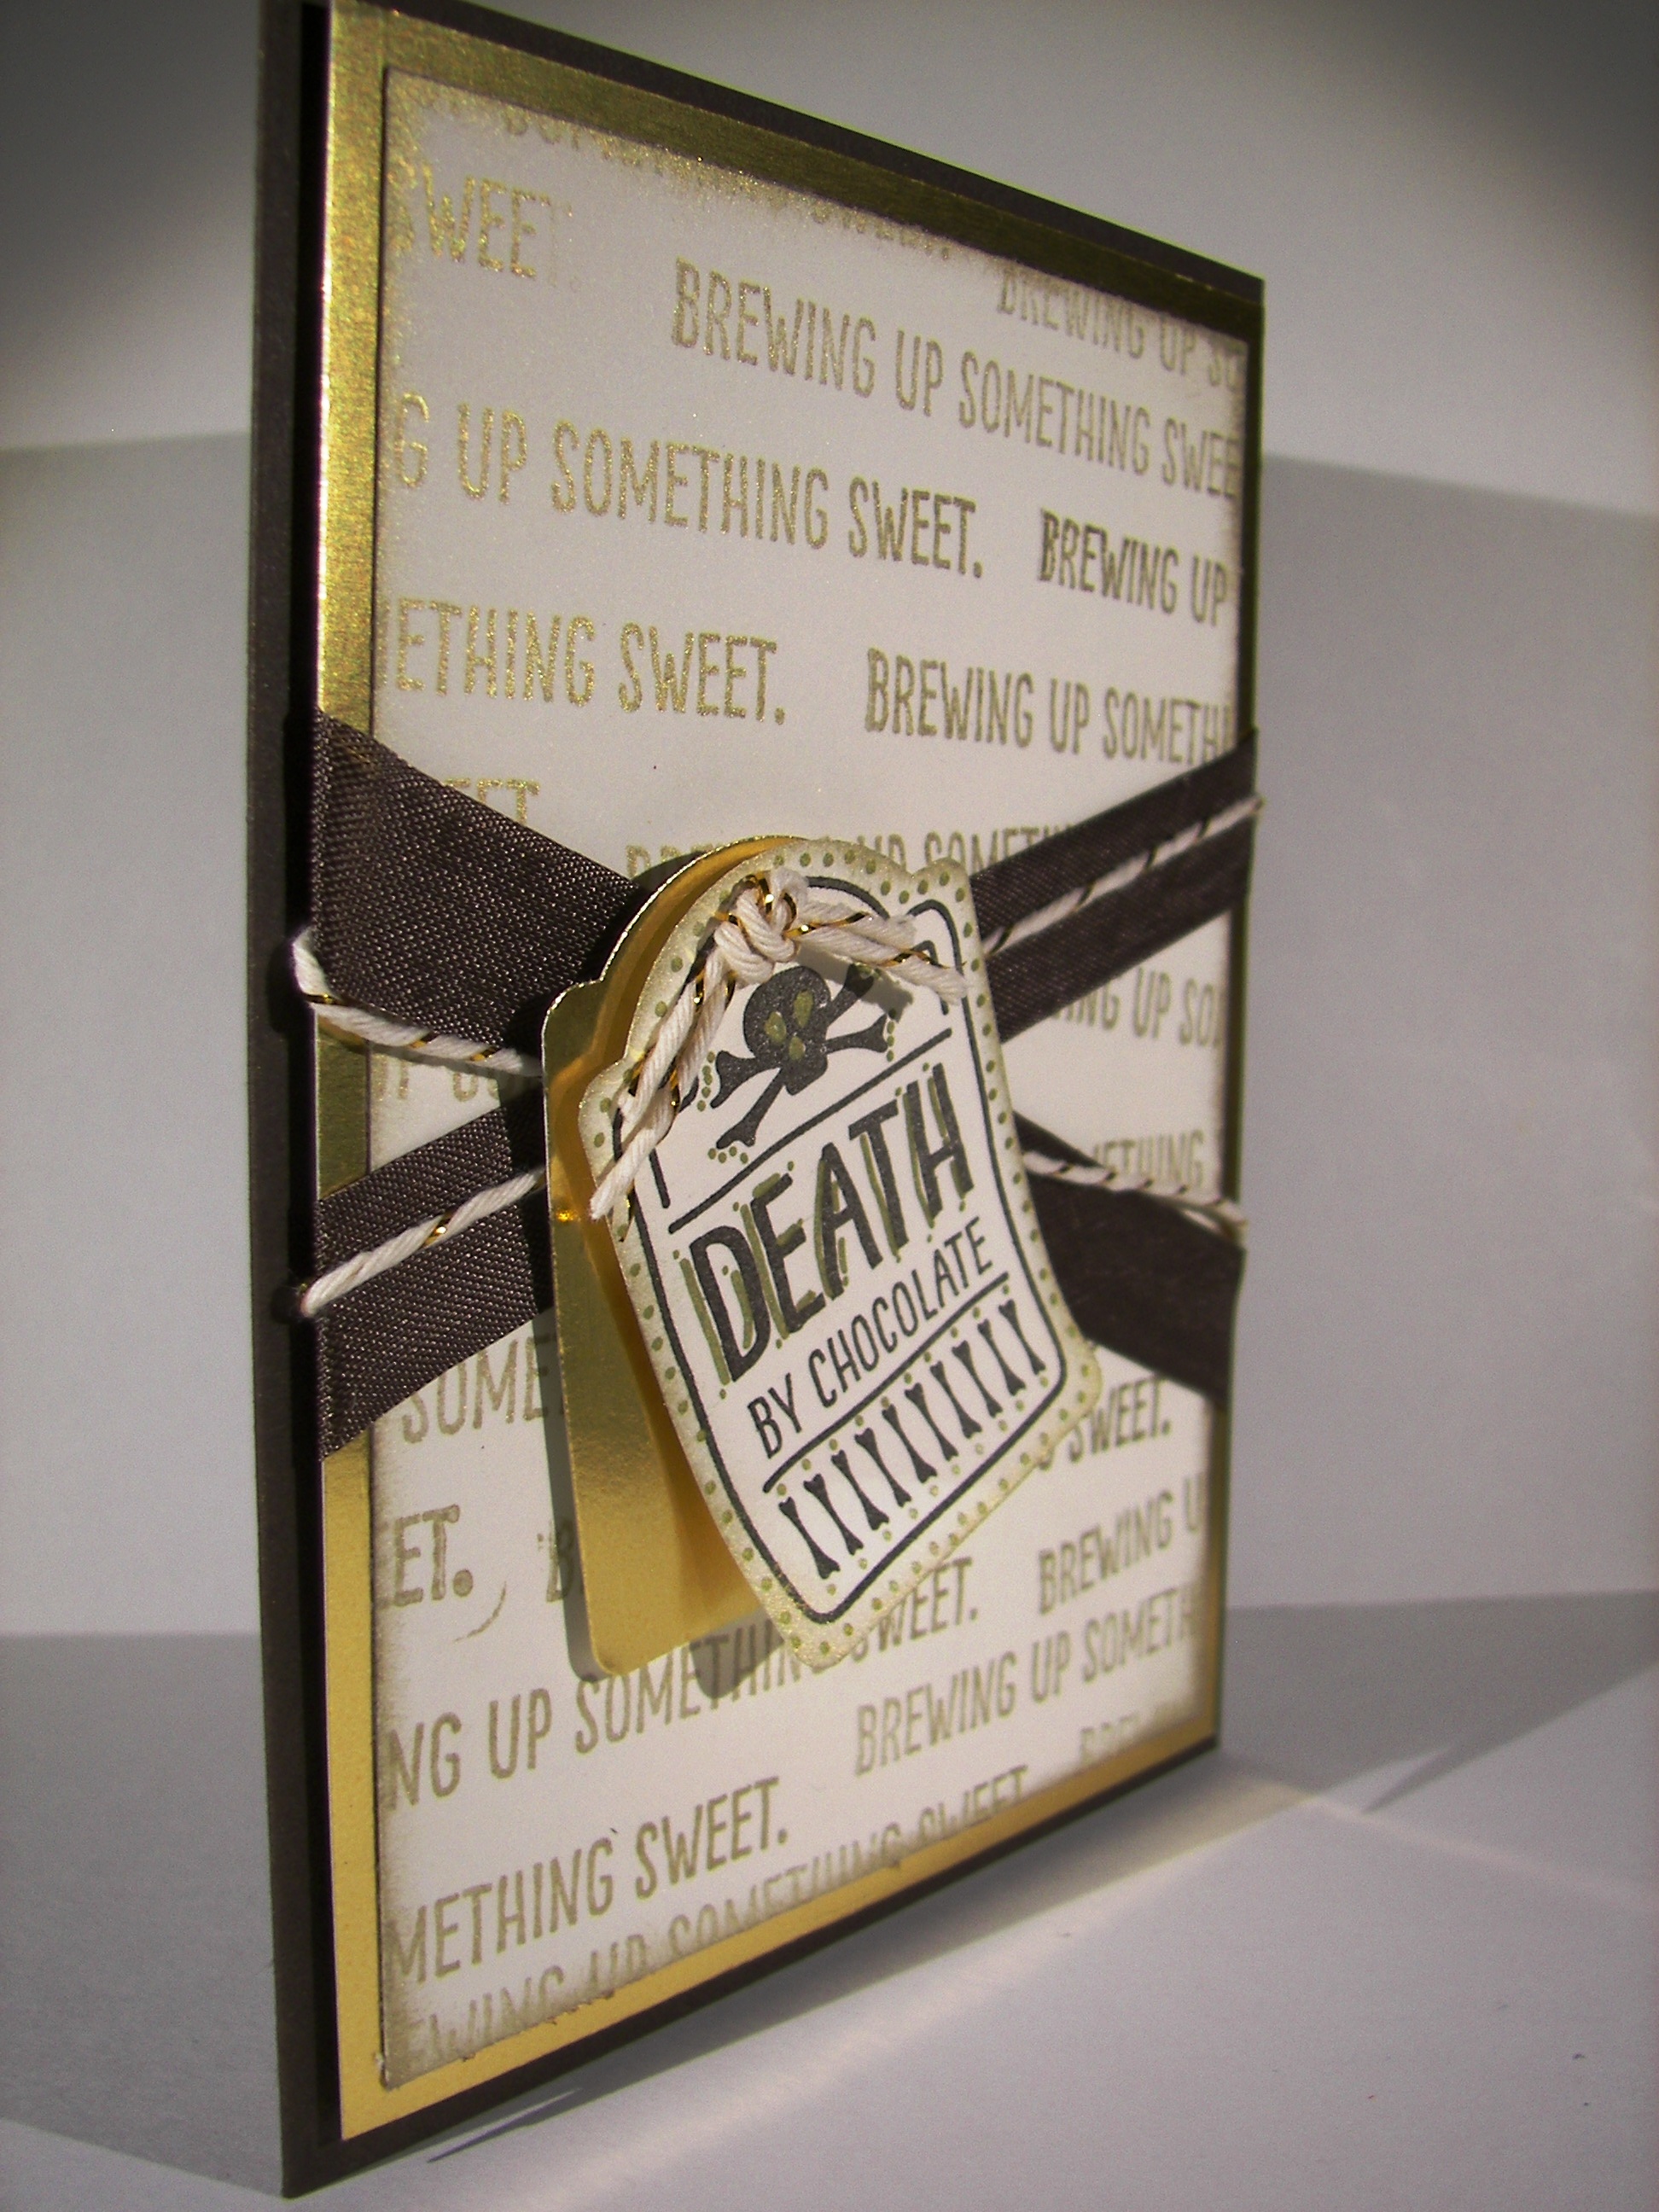
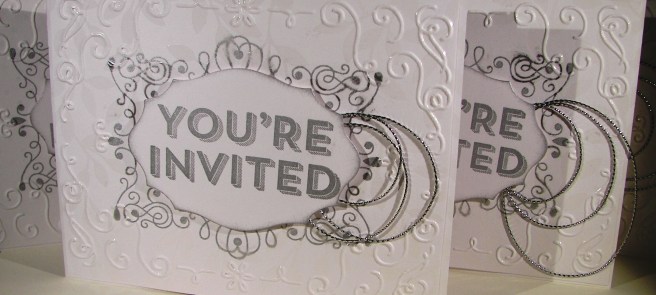
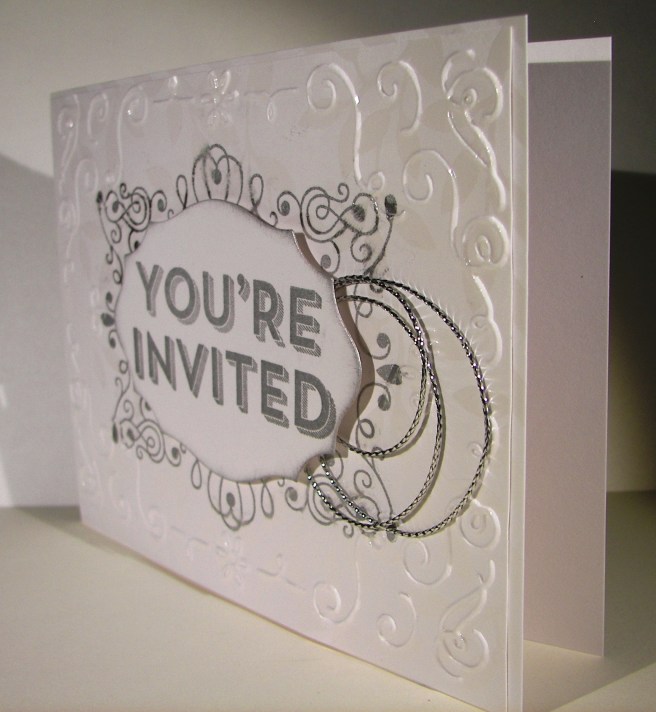
I embossed my card front after I did my stamping.  The stamp is photopolymer, so exact placement was super easy.  Then I centered my folder just where I wanted it to be.  I traveled through my framelit collection to find one that had the shape to match the background stamp and my sentiment stamp.  Of course it was the last one I looked at.  But it was a perfect fit.  A touch of sponging on the diecut piece and it was done.

I did get the cording out and do a few loops of it behind my card front.  After I had placed my dimensionals behind my diecut, I looped the cording and set it on the exposed sticky side.  I added a couple of glue dots over the top and stuck it down on the card front.  No problems there!  The cording wants to loop because it is stored on a spool.  Even better!]

3-21 (1)

Have a creative day!

Moana

Dear Heart, Sweet Boy

This project was all about giving myself a challenge.  I grabbed a piece of dsp, decided on three colors, picked a stamp set I hadn’t used a long time and went for it.  This was definitely not my usual style, but it felt good.

3-20

The card itself wasn’t too complicated, just one layer for the background.  I stamped my little boys on water color paper with black stazon and opened the ink pads.  Their faces were done with a very diluted wash of pink pirouette with the hair in tip top taupe.  I wanted them to look like the same boy just doing different things.

Each boy face was accented with one color only.  For the darker areas I kept the ink fairly strong.  When I accented I diluted it a bit more and even more for the outlined areas in the background.  I left it simple because I wasn’t really going for perfection, just soft coloring. I punched their faces out with the 1 3/4″ circle punch and a background of black with the 2″ circle punch.  They were arranged on the front and layered with a bit of dimensionals.

The banner was stamped from the same set and a light wash of each color was put on its own section.  Then each end was punched with the bitty banner punch.  I also put that up on dimensionals.  I repeated the pattern of paper inside with more dsp and a smaller piece of very vanilla to write my message on.  Such a sweet card, for a very sweet boy indeed.

3-20 (1)

Have a creative day!

Moana

Flowering Fields with Botanicals for You

I did start out with a St. Patrick’s Day card set in mind.  Hence the green and gold. However, it quickly changed into something more elegant and much more useful.  I do know several people that truly do love to celebrate this holiday and this would work wonderfully for them as well.  What fun, right?

101_1224

This Flowering Fields stamp set will be gone soon.  I do love the fun free products available during Sale-a-bration, but always are sad to see them go.  I do know that there are always new things on the horizon that I will love equally well, but I do have my favorites that stick around year after year.

101_1225

I ended up using a full sheet of very vanilla, part for the card front and inside, and used the rest to make a gift bag.  I prefer to have paper used up with as little waste as possible.  I even used the snipping left from cutting the front and inside to be my sentiment tag.  Very little waste today indeed.

This glitter tape is so much fun.  I admit I have stashed it a bit too long, I thought I had learned my lesson.  Guess not.  So, I broke it out and put it to work.  Just a little bit does so much.  And it is so tidy, no glitter messes to be found.  A win for everyone for sure. I do think I will use some tape to close the bag when it gets filled with a treat or two.  Yeah!

101_1226

Have a creative day!

Moana

Thoughts & Prayers for my Friend

When someone close to you experiences loss it is always painful, more for some than others.  This is a time when I spend an extra amount of time for just the right expressions and feelings.  There are just so many.

3-15

This young man recently lost his twin brother to cancer at the tender age of 15.  He battled very hard, three times  over, but just couldn’t prevail in the end.  I must say though, he never complained or looked unhappy.  Truly inspiring.

3-15 (1)

I spent a lot of time with color and layering for both the outside and the inside of the card.  I really wanted to spend plenty of time.  It helped me gather my thoughts so I could write what I really wanted to say.  It definitely means more to me to have a hand made card for occasions like these.

3-15 (2)

Have a creative day.

Moana

Watercolor Wings Just for You

Saturday mornings are usually busy with everything under the sun and then some.  I had the opportunity to chat with my oldest daughter while she got ready for work.  We put each other on speaker phone so we could keep moving along.  This is what I did during our chat.

3-12

With all of the excitement of Sale-a-bration products and the wonderful spring catalog, it is easy to put aside all of the great product in the annual catalog.  This set, Watercolor Wings, has been a favorite since it came out.  I hadn’t had it put to use lately and thought that was long overdue.

I stamped my ink layers onto watercolor paper this time not quite sure how it would all turn out.  The initial stamping was a bit too detailed for the effect I was going for, but I remained patient and kept going.  I moved in with the aqua painter and began blending, but still wasn’t satisfied.  Perhaps because I had stamped off to get the tones I wanted the ink didn’t want to move around too much.

I thought things were a bit stark still so I came in with pear pizzazz for my background. That really helped out a lot.  But the butterflies still weren’t what I wanted.  I got a spritzer out and put more water on.  Which led to dabbing water off, spraying again, and moving along to the heat tool and doing it all over again.  I did finally get a result I liked, but decided to bring out the wink of stella pens, both the clear and gold glitter ones, and put in finishing details.  I think it all worked out, but I wasn’t sure for a while.  Sometimes watercolors can be that way.

3-12 (1)

Have a creative day!

Moana

Beautiful Ride for My Nali Bug

This card has been in the planning part of my brain since the spring catalog came out.  I waited to get the set because I thought it would be one more for me than anything else.  I just might turn out to be wrong on that one, but we will see.  I made this one for my oldest daughter, Denali.  Some of my pet names for her are Nali, Bug, and the coziest is My Nali Bug.  That is just what this card is, My Nali Bug.  I shared it with her before this blog went live and she was so cute about it.  How fun is that!

3-10

I simply stamped the car in the lower portion of my water color paper and got the ink out.  I had originally thought to write her name on the car door, but changed to the balloon last minute.  I think I could get lost in this stamp.  How many creative ways have you seen one of these cars painted in the years they have been driving on the roads?  My brain is thinking of ways to make them on this little guy too.  So much fun and never enough time.

Simple layering of my two focal colors, and this card was done.  I enhanced the layering inside the card to give it a bit more color, but that is really it.  I added some wink of stella to the windows and the silver ink areas of the car.  I touched up the rims with a white gel pen.  It wasn’t perfect, but the surface wasn’t ideal for that pen.  The texture of cold press water color paper is my favorite, so there will be some concessions here and there.  Good enough.

3-10 (1)

Have a creative day!

Moana

Hello and Bonjour!

Can  Sale-a-bration be any more fun?  How about getting another free stamp set just so you can have it in french?  I saw another awesome demonstrator, Mary Fish, use this set with the bonjour stamp and I knew I wanted it as well.  Isn’t that just how we work?  Well, it was worth it.  I love it!

3-9 (3)

The dsp I am using here is also from a free Sale-a-bration set.  Most of the patterns are floral, hence the wildflower fields title, but not all of them.  These simple stripes are adorable.  I thought I would create two color choices and a gift bag that could go with either one.  It worked out great.

3-9 (1)

I thought for sure the bonjour card would be my favorite, but the birthday boy is also very adorable.  I think the party hat stamp really made it.  You can never have enough birthday cards, especially when I get to share most of them with my mother-in-law.  She is so good about remembering literally everyone’s birthdays.  And she loves sending out special ones much more than a store bought card.  Who wouldn’t?

3-9 (2)

Have a creative day!

Moana

Best. Day. Ever.

Sometimes you need to step outside your comfort zone and do something different.  I usually work exclusively with Stampin’Up! product, but that doesn’t mean that is all I have. I have been know to purchase an odd pack of paper now and again, but I do try to refrain.  This one was purchased for a daughters school project on Japan and ended up not being used.  Lucky me.

3-8 (4)

I decided to use it for a special handout for a church lesson I had the opportunity to teach this last Sunday to some very special young women.  The lesson turned out rather nice, tissues were used, mostly by me of course, but I was so impressed with their knowledge and ability to learn.  When people talk about the youth today being lost, I don’t always agree.

3-8

Yes, this stamp is from last years Sale-a-bration.  I loved it so much I couldn’t part with it.  Remember, we buy creative products because they bring us and others joy.  And when you purchase quality product, it is built to last.  Stampin’Up! surely does that.

Each of these card handouts was made from a 6 x 12 sheet of cardstock.  They were scored at 4 1/4 and 8 1/2″ to create the tri-fold.  I wanted a bit more stability, because it was intended to be opened and closed as well as written on, so I inserted three panels of white card stock on each portion.  It really made a difference and provided a great writing surface.

While I might not always start with the best attitude for my service opportunities, I can honestly say that I always end up with great feelings of joy and gratitude.  Nothing better.

3-8 (2)

Have a creative day!

Moana

Because You’re So Nice

Nice people are just, well, so nice.  Saying thank you is always fun and feels great, but why not take it up a notch.  That is just the kind of thank you a super nice person deserves.

3-3

My daughter got some much needed study notes help last night from a friend.  She had re-written her notes for a big test, threw away the old messy ones, or so she thought.  Yup, she threw out the new ones, with the latest additions as well.  She reached out to a friend and they came to the rescue.  Favorite candy bar, MilkyWay.  Mission accomplished and the thank you is on it’s way.

3-3 (1)

This is a smaller version of a sliding box I had made earlier last month.  Instead of using full sheets of 12 x 12, I used two 6 x 6 pieces.  Same principal of making the score lines just 1/8″ in and it works pretty darn good.  I think I would have liked it more snug, but the candy needed the room so I didn’t want to chance it.  My daughter was so excited to take it to school today and share it with her buddy.  Me too.

3-3 (3)

Have a creative day!

Moana

Pedal Pusher Through Wildflower Fields

I was so excited for this stamp set to show up I could hardly stand it!  Last year during Sale-a-bration Stampin’Up! added some new freebies half way during the sale to perk things up. It went so well they did the same thing this time.  This little set is one of them and it is the best!  It even made my husband grin.

2-26

There are other sentiments, but this one is my favorite.  There are several different items that could be stamped in the basket, but I chose flowers to coordinate with my background paper choice.  Talk about riding through a spring meadow, wish I really could though. Having a tandem bicycle is something my husband and I can’t wait to have.  Maybe that is why I love this set so much.

I also broke out some markers to do my coloring.  I tend to prefer my aqua painter, but it is good to use other things too.  They worked great, of course!  I did water color the basket, the bike seats, and my country road.  What a fun time I had creating this project.  Like I said, I just got it yesterday.  The rest of my box is still on the kitchen table, not gone through, not inventoried or anything.  I just dug through it, got this set out and made something right away.  The sign of a great stamp set for sure.  This could also be a workshop project I think.

2-26 (1)

Have a creative day!

Moana

Everything Botanical

Well, this project started somewhere else, but the results are great.  Sometimes it is hard to see past your ‘opportunity mistakes’, I managed though.  Once I fussy cut designer series paper I am totally committed.

2-8 (3)

The free items you can earn from Sale-a-bration are all unique, but this one caught my eye right away.  A patterned velum paper that not only coordinates, but actually outlines designer series paper, well that is amazing.  I fussed a bit matching it up, but found the exact spot.  I almost did a 6 x 6 card just so I could see the whole pattern line up.  It would have been worth it, it looked so pretty all lined up.  I moved on though.

2-8

My opportunities came from the glue experience.  I thought I could put tiny tiny dots of glue on little flowers and it would look kind of neat, and hide the adhesive at the same time.  Well, my tiny dots were not as tiny as they needed to be.  Several fixes later, it worked out.  Basic rhinestones, a larger sentiment with tag layering, and using one of the many coordinating framelits.  Phew!

I added a touch of inside stamping with a leaf from the coordinating stamp set.  I don’t usually go for a whole suite of product.  This one is different, I loved all of it.  However, it is my favorite color pallet, floral, and it goes together so wonderfully.  I couldn’t resist it.  So I didn’t.

2-8 (1)

Have a creative day!

Moana


My Heart Smiles

As my husband and daughter were heading out the door early this morning, I asked them to pick a pattern for today’s project from the Love Blossoms DSP stack.  Didn’t they choose awesome ones?

2-3

I was initially thinking of a Valentine’s Day card, but this quickly changed into more than that.  It definitely has that vibe, but not exclusively.  I do enjoy a project that is versatile. I used new product like crazy today.  The paper of course, I hadn’t taken one piece out of the stack yet.  Such pretty patterns.  This stamp was a first too.  And wouldn’t you know it, the sentiment fit perfectly inside the extra-large oval punch.  Too perfect!  I hadn’t tried the fine tip glue pen yet, but it was perfect to stick down my tiny baby linen thread bow.  Can’t see my adhesive, can you.  Nope.  And of course, the lovely blushing bride glimmer paper.  It is so fun.  I know we can’t have glimmer paper in all of the colors, but wouldn’t that be fun?

This card was just blocked on heavy weight whisper white card stock, with the base also being heavy.  I really enjoy a white card, but the paper has to be heavy enough to hold up all the fun stuff on the front.  This paper is totally up to the task.

2-3 (1)

Have a creative day!

Moana

Hooray! for Perfect Pairings

I could probably keep making samples for these bridal shower invitation choices.  Where do you draw the line?  Is three enough?  How about five?  Perhaps four is just right…

1-27

Even though this is still floral, it is has a much stronger navy blue influence.  With the soft seam binding ribbon, the navy doesn’t seem too overpowering.  Not too complicated a card here.  There are 1/8″ simple borders layered with a decorated front.  I started with the navy flower background stamping and then included the pink centers.  How fun is it to have just the colors you want.  The beauty of stamping.

1-27 (2)

Have a creative day!

Moana

Hello Little Sunshine

It is so wonderful to have stamp sets that speak to you.  I literally would say this phrase over and over to my children when they were little.  Now that they are much older, it still manages to sneak in for a tender moment or two.

Hello Little Sunshine

When I started making the background for the card by just stamping off as I went along, I knew I needed to make a coordinating gift bag.  That little sunshine stamp is so adorable.  I could see myself sneaking it in lots of places.  And to top it off, the Hello stamp set is a free one during Sale-a-bration!  Free is nice, but free and adorable is not a common thing.

Hello Little Sunshine

A tall slender gift bag was in order today.  I was feeling like a different gift option, but of course I could totally see a big yummy candy bar going inside.  How about a fat quarter of fabric instead?  Yes, my quilting friends would totally agree with that one.  Maybe I could find some sunshine paper too?  Or stamp some to match?  A project and a gift, sounds great!

Hello Little Sunshine

Have a creative day!

Moana

Perfectly Artistic Gift Box

Sometimes you just need a big box to fill with treats.  I have found that if I keep treats on hand to put in my blog projects, I just eat the treats.  So this guy is on display empty, but I imagines it with Lindt truffles, the white chocolate ones that come in a white and silver wrapping.  Wouldn’t that be lovely?  Thought so too.

Perfectly Artistic Gift Box

I did use a whole sheet of paper for this project.  But when it is a free paper pack, love that Sale-a-bration, it is easier to do that.   I had to fight the urge to tack down my banners so the sentiment was easier to read.  I will need to remove the ribbon to fill it up for gifting, so I  had to just let them dangle.  I do like how they look with the ribbon tails though, so I am good with it.

After I did my scoring and folding I ran the paper, folded in half and half again, through the big shot all at once with my oval framelit.  I know they are designed to be used with one layer of paper at a time.  I have found that when the design is simple, they do great with more than one layer.  I would be cautious with cardstock, but the dsp worked like a charm.  That way my oval windows were all exactly the same placement.  And that makes me very happy.

Perfectly Artistic Gift Box

Have a creative day!

Moana

Flowering Fields Thank You

So I was looking through my blog site and discovered this as a draft and not a blog.   Oooops on my part.  I really loved this one too.  Enjoy!


While browsing a catalog I came across this book.  The title was awesome, but to be honest, I knew I had to make a card that looked like it.  It sat at my desk for several days until I had a little time to experiment.  I got my inks out and went to work.

Flowering Fields Thank You

I went back and forth on using just ink, or a versamark with gold embossing powder.  I went with just ink and then used my aqua painter with some ink to add details and make the flowers a bit more prominent.  Aren’t these pretty?  Yet another awesome free set during Sale-a-bration!  Wheeee!  The thank you came from Another Thank You.

Flowering Fields Thank You

I masked the water color paper and brushed it heavily with water before I added ink.  I added, dobbed, and added more until I was satisfied.  So much fun, honestly.  I could do that a lot.  Wouldn’t it be fun if we could just hide away in a creative bubble?  Either way, I absolutely loved making this card.  But not more than sending it to share a very special thank you.

Flowering Fields Thank You

Have a creative day!

Moana

Inspired First Sight

I have a thing for unique mugs and my oldest daughter gets me.  She found this little treasure and couldn’t resist.  It reminded me of simple water coloring, so I thought I would create a card around it.

Inspired First Sight

Of course it had to be water color somehow to go with the simple brush strokes on the mug.  I matted a card base with painters tape to leave me a clean 1/4″ border and brushed the whole surface with plenty of water.  I then dabbed my aqua painter in the ink colors to coordinate with the mug and created a very soft background.  When I was satisfied I went looking for the perfect stamps.

Inspired First Sight

One of the new sets in the spring catalog caught my eye.  It is called First Sight and has more than one use.  It isn’t all about Valentine’s Day, or Mother’s Day but really has several uses.  For me, that is when a set gets purchased.  Having a stamp for just one use better be pretty darn amazing to get into my collection.  And as of today, the catalog is live so you can have the stamp set too.  How fun!

Inspired First Sight

Have a creative day!

Moana

Death By Chocolate

Another card with this wonderful set.  How much fun is a stamp that says, ‘Death by Chocolate’.  I am sure many would agree that is more than a fun idea.

Death By Chocolate

I did think it would be nice to make it with non-traditional coloring though.  When I think of chocolate, these are the colors I come up with.  A pretty gold wrapper with something dark and rich inside.  Sounds like a winner!

Death By Chocolate

Stamping perfectly isn’t always my strength, so when I make a background like this I stamp off center on purpose just to take the stress off.  Has to be fun, right?  And this card was.  Some simple layering with a few embellishments to spruce it up.  I applied the ribbon in kind of a caution tape fashion giving the hint of Halloween, but not right out saying it.  Maybe a gift card from a candy store should go inside for the perfect grown up Halloween treat?  I like it!

Death By Chocolate

Have a creative day!

Moana

Sheltering Tree

Who doesn’t love the look of the beginning of fall?  The leaves are just starting to turn in my yard.  Some bright, some darker, and then there are those lovely dark ones that look almost burgundy.  Those would be my favorite.

Sheltering Tree

The tree is stamped in tip top taupe, the leaves in pear pizzazz and the turning leaves in perfect plum.  The card base is also in perfect plum with a slight framing in tip top taupe.  Very clean look for sure.  A few wraps with some linen thread and it was nearly done.

Sheltering Tree

I did a little echo stamping inside the card with the accent leaf color, just a bit in opposite corners.  I like to have enough there to connect to the front, but not so much that it interferes with the writing room.  It is still a card after all.  The front is popped up on dimensionals and that is all there is to it.  the outer dimensions are 4 1/4 x 4 1/4, a little different for me.  I am not prone to square cards, but I was working with my scrap pile, and that is what I had at ready.

Sheltering Tree

Have a creative day!

Moana

You’ve Got This

Sometimes simple words are all you have, and sometimes that is all you need.  That is just how I feel this morning.

You've Got This

I took my time painting this lovely flower with a few of my favorite inks.  I stamped the flower in almost artichoke and did light water coloring to get the base down.  I added cajun craze but kept it light the first time through.  Adding more water helped to do a little blending, but I didn’t want too much of that.  I like that two colors together can create a third unexpected surprise.  In person, you can see the blended areas have nearly a cherry cobbler tone.  Cool, right?  I thought so too.

You've Got This

The entire image was accented in gold encore ink, still using the aqua painter.  That really creates a fun look and is surprisingly easy to control.  One simple sentiment in black stazon ink with a little gold metallic thread and this simple card was done.  Well, I did have to stamp inside as well.  I stamped off twice before I placed the stamp on the inside paper.  Nice and light.  And look, absolutely no sponging!  Crazy.

You've Got This

Have a creative day!

Moana