Birthday Bouquet Duo

Another adorable gift set just ready for a fun birthday event.  This is my version of a one sheet wonder.  I enjoy a matching gift set just as much if not more than making several cards from that same sheet.  What can I say, more isn’t always better to me.

5-18

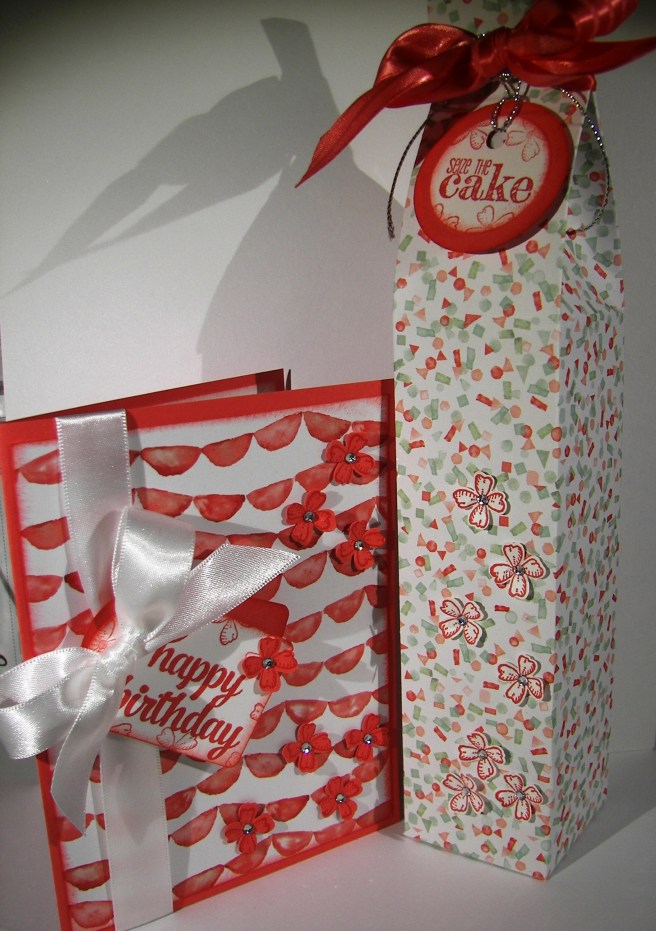
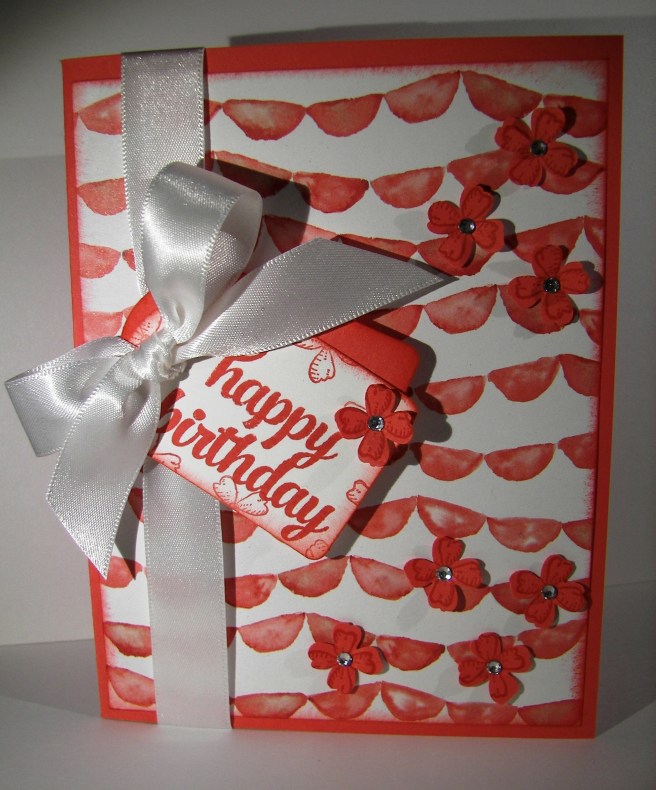
The card is actually quite simple.  Only one piece of designer series paper was used.  A ribbon wrapped around the front and a double tag slid under the bow.  A collection of tiny flowers scattered around and centered with basic rhinestones.  Most of the items were sponged with watermelon wonder, including the inside whisper white piece.

5-18 (1)

This adorable tall bag was made from the large remainder of the designer series paper.  The other side was just as fun for a birthday theme, don’t you think?  It was topped with a huge ribbon which was used to hang the cute birthday tag with silver cording trim.  Bitty flowers were also stamped and punched in whisper white centered with basic rhinestones again. What a great companion to an adorable simple card.

5-18 (2)

Have a creative day!

Moana

Happy 29th Birthday {Again}

And the third workshop project has arrived.  Good thing too, since tomorrow is workshop! I often know further in advance what I want to do, but not this time.  I have been doing a lot of detailed water coloring and that doesn’t go well for large group instruction.  Folks need their own tools and materials for that kind of work.  We are doing one water color and that is stressful enough.

4-22

Isn’t this one so adorable?  The paper, matching stamps, and the ease of stamping and die cutting the numbers really make this one fantastic.  It isn’t too difficult to make, but sure brings a smile. Believe it or not, I tried several times to add die cut flowers for a fun layered look, but had to leave them off.  Sometimes that happens.

I took the background dsp and put it through the bigshot  with an oval framelit centered.  I then took that piece and turned it over to fill that same oval hole.  The two sides coordinate so nicely I could resist.  I used the next smaller framelit to make an oval from whisper white.  The numbers were stamped in blushing bride, cut with their coordinating framelits and centered on the oval.  I did raise them up on dimensionals.  Then the sentiment was stamped centered over the top and bottom of the numbers.  The tiny ‘th’ was die cut first, then stamped.  The framelit for that tiny one doesn’t have a window to look through, so I had to.  But with photopolymer stamps you can see exactly where you are placing your image.

I stamped inside with the largest flower from the Birthday Blooms set in each corner using a different portion of the stamp to make it look different.  The center phrase ‘again’ was the last thing added.  How fun is that?

4-22 (1)

Have a creative day!

Moana

A Little Organization Please?

Sitting down to have a little fun and make something pretty can be cut short if you aren’t organized.  This can often happen when I get a little extra filing built up.  What does a crafter need to file?  More than you might think.  What I get built up is extra kits from workshops.  I used to just break them back down and file the unused paper back.  But I have found that it is a great way to make a quick card if you have materials all cut and ready to go.

4-18 (2)

I don’t have to make the exact project, but the cutting is done.  All there is to do is pick a fun stamp or two and maybe a punch and it is ready.  For a busy mom on the go, the constant go, a quick creative burst is always needed.  So this morning I put this little number together and cleared up those kits.  Feels really good and looks adorable.  I love being able to make just what I need.

4-18

Have a creative day!

Moana