Crazy About You at First Sight

Today has started no differently than many other Saturday’s, but I was not going to let another one go by without sharing a project.  I have let my weekends get carried away and it just bugs me that I don’t keep this blog current daily.  Sharing creative projects is my favorite thing and it really keeps me balanced.  So here we go!

101_1302

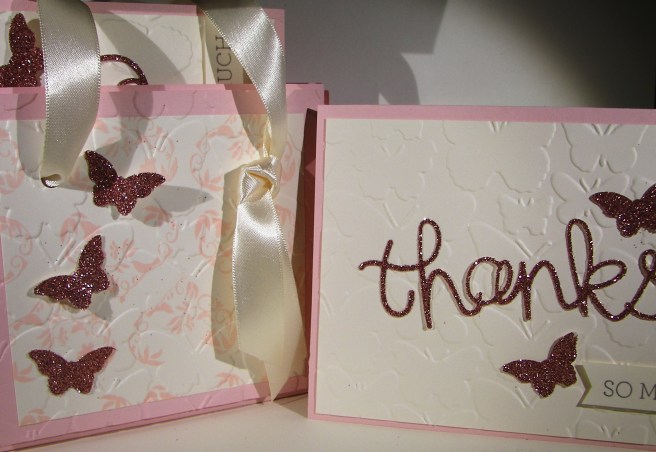
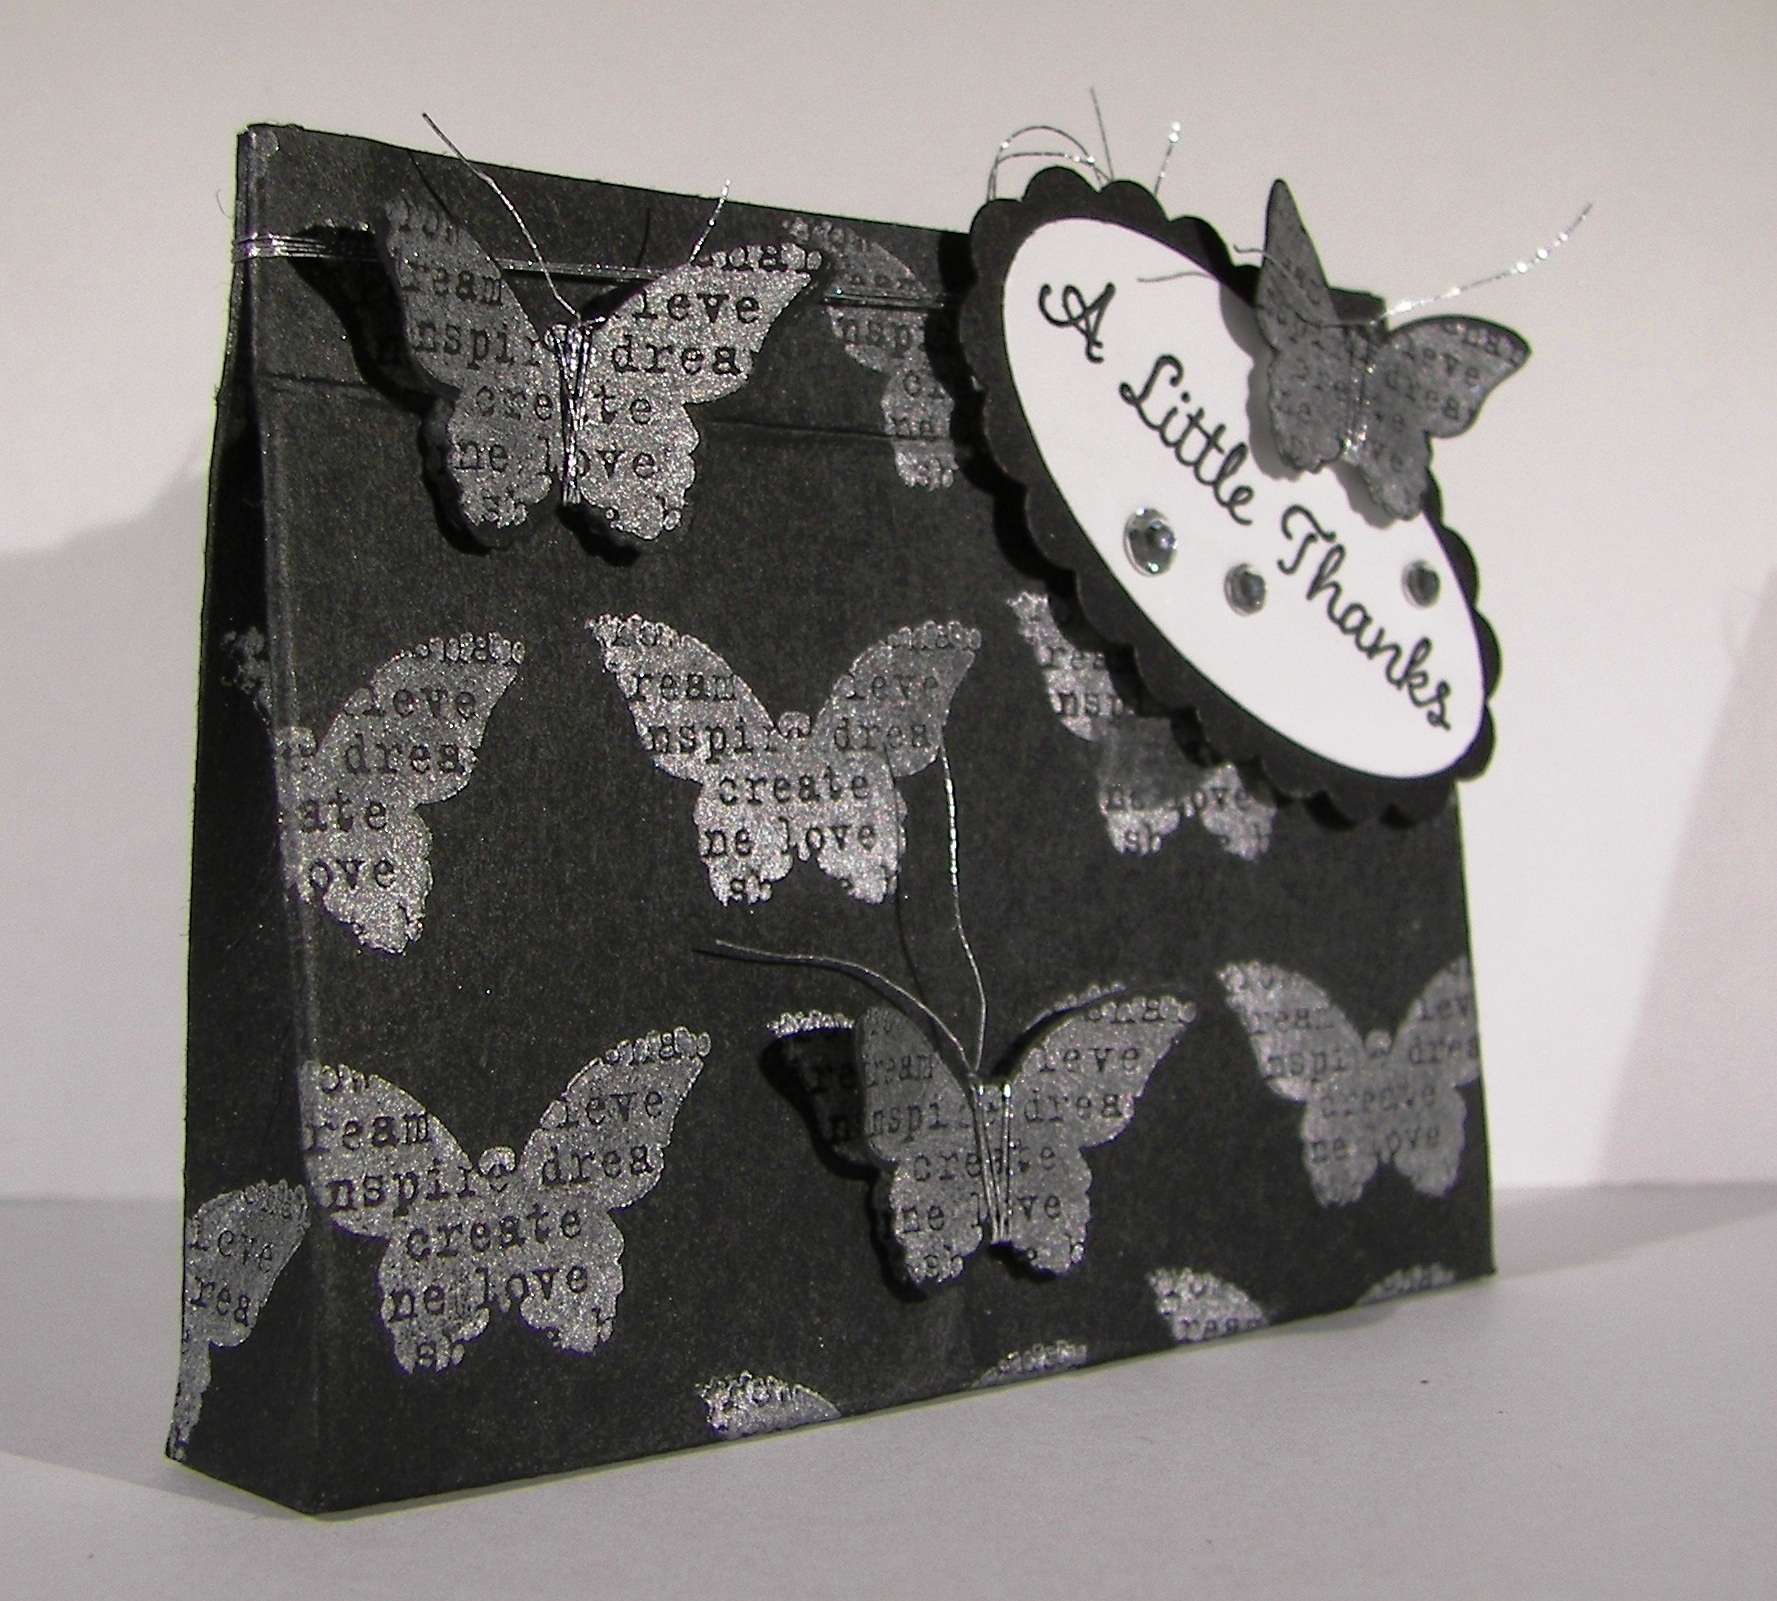
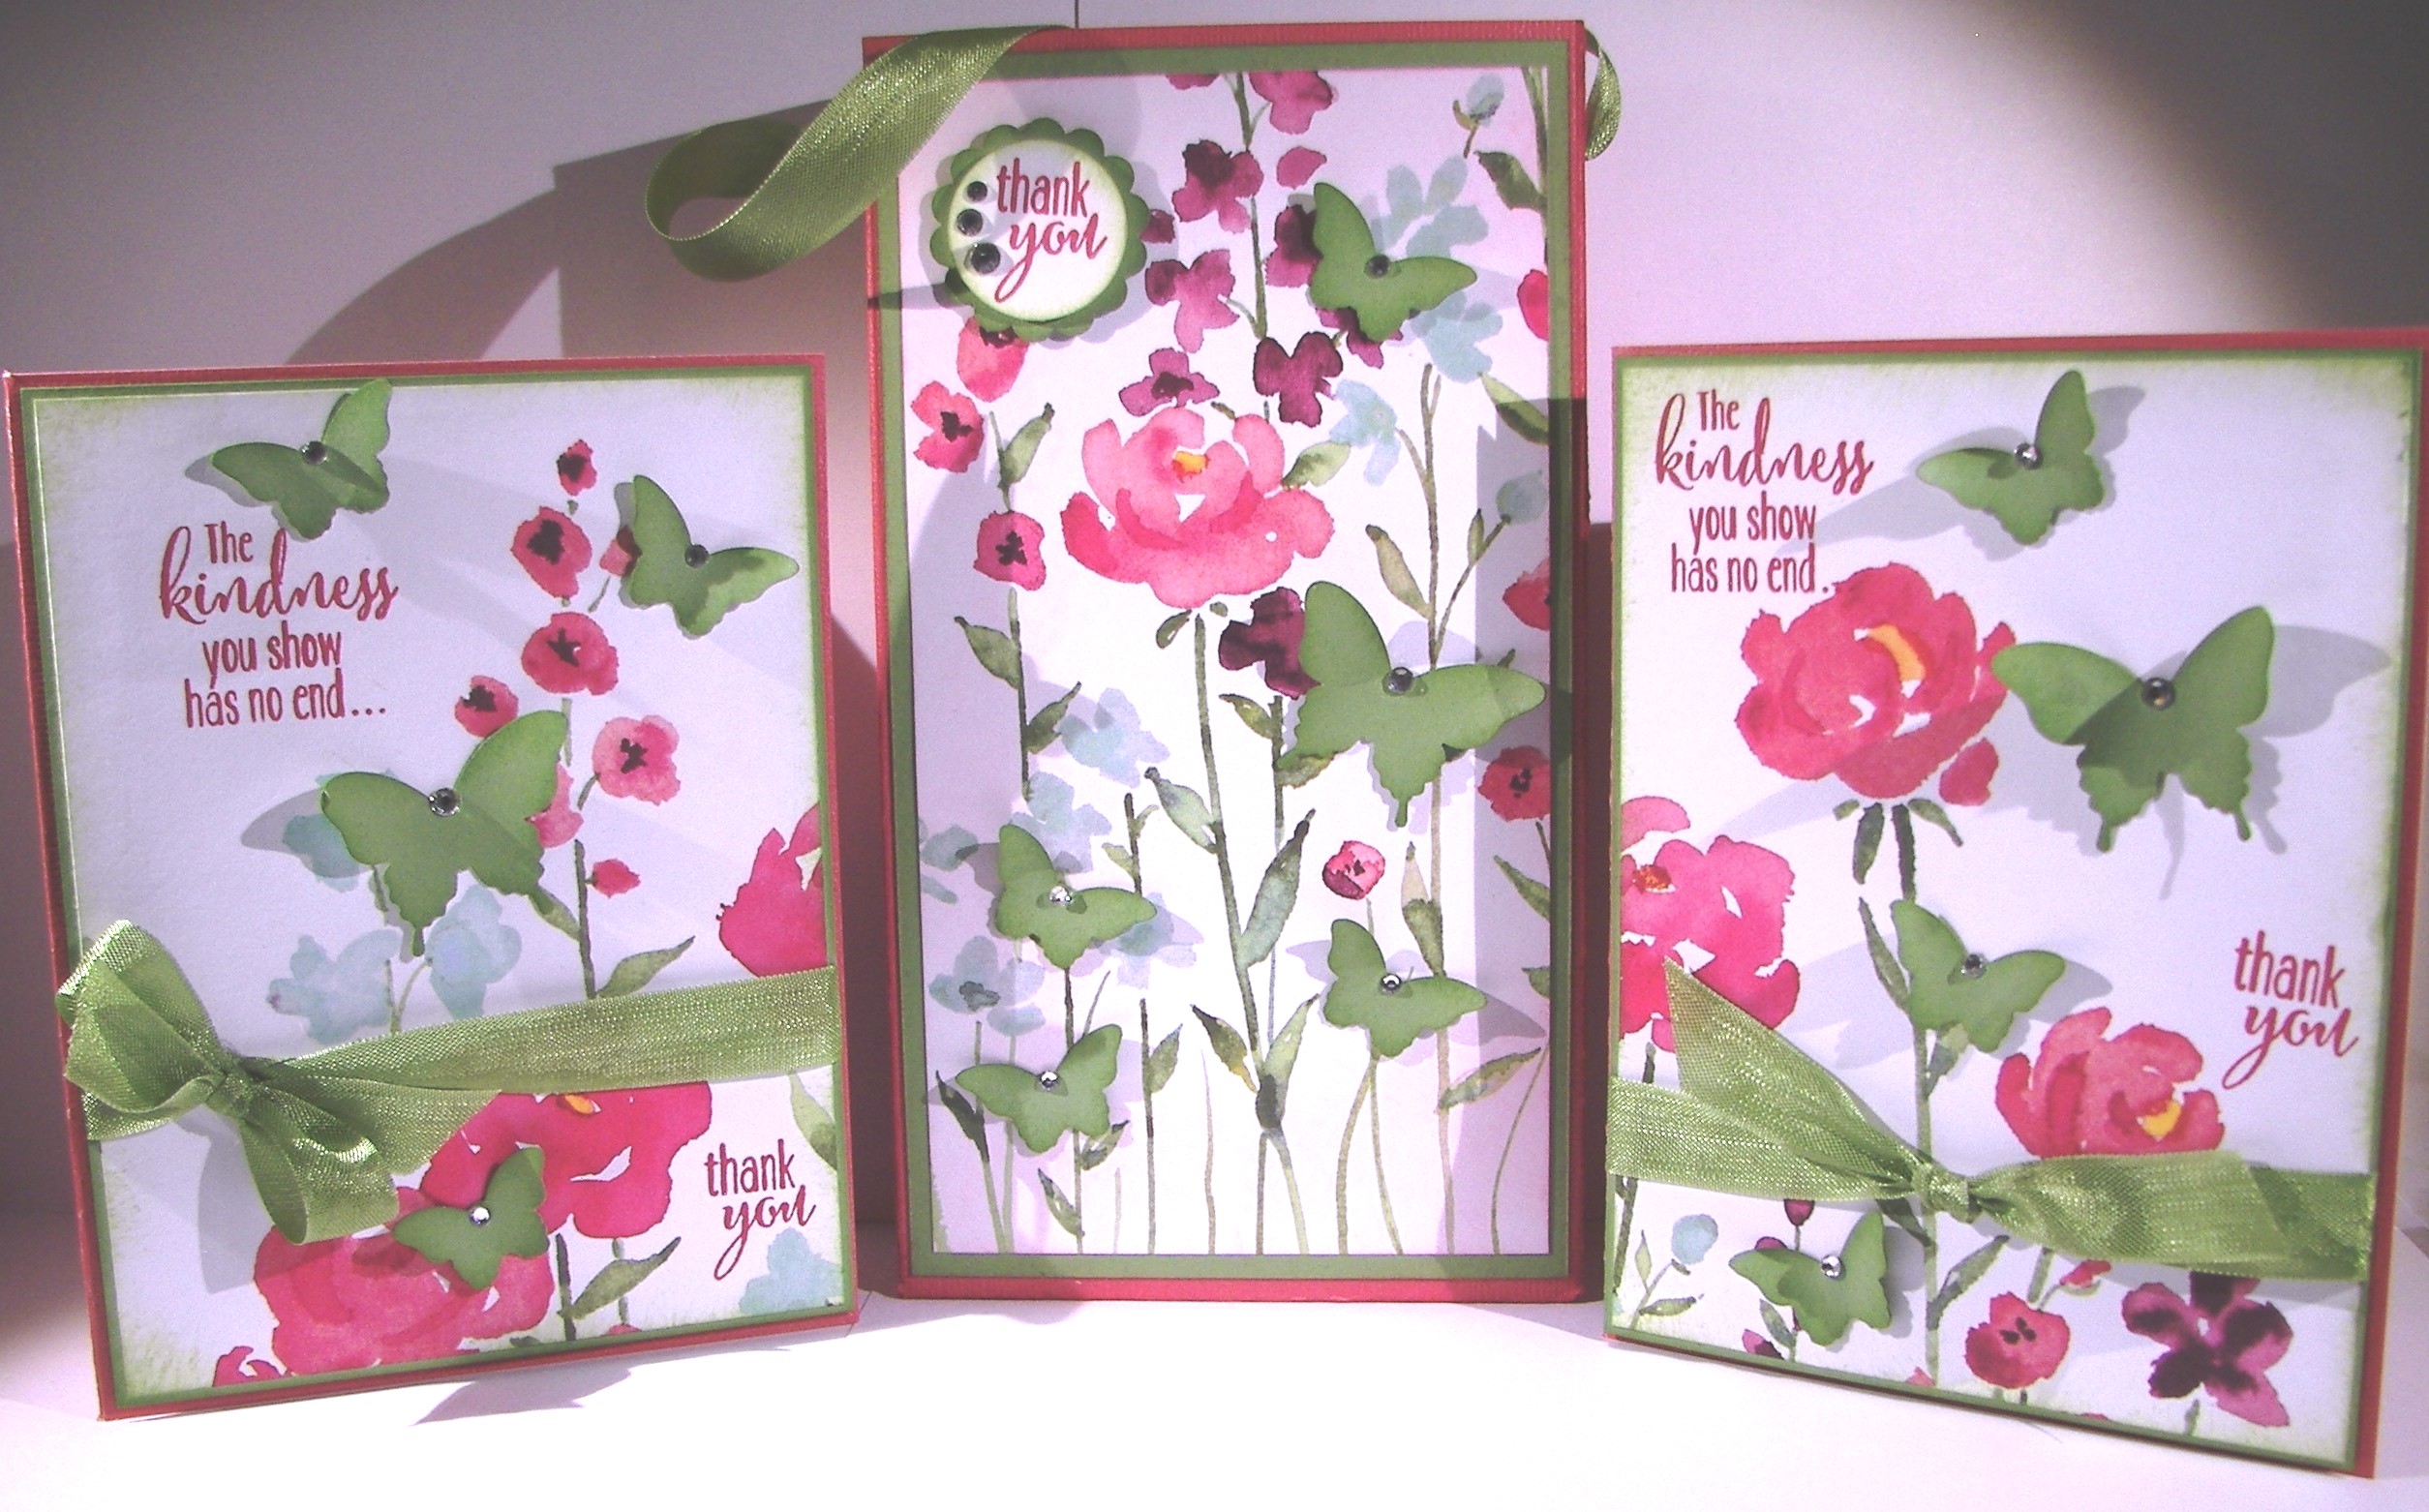
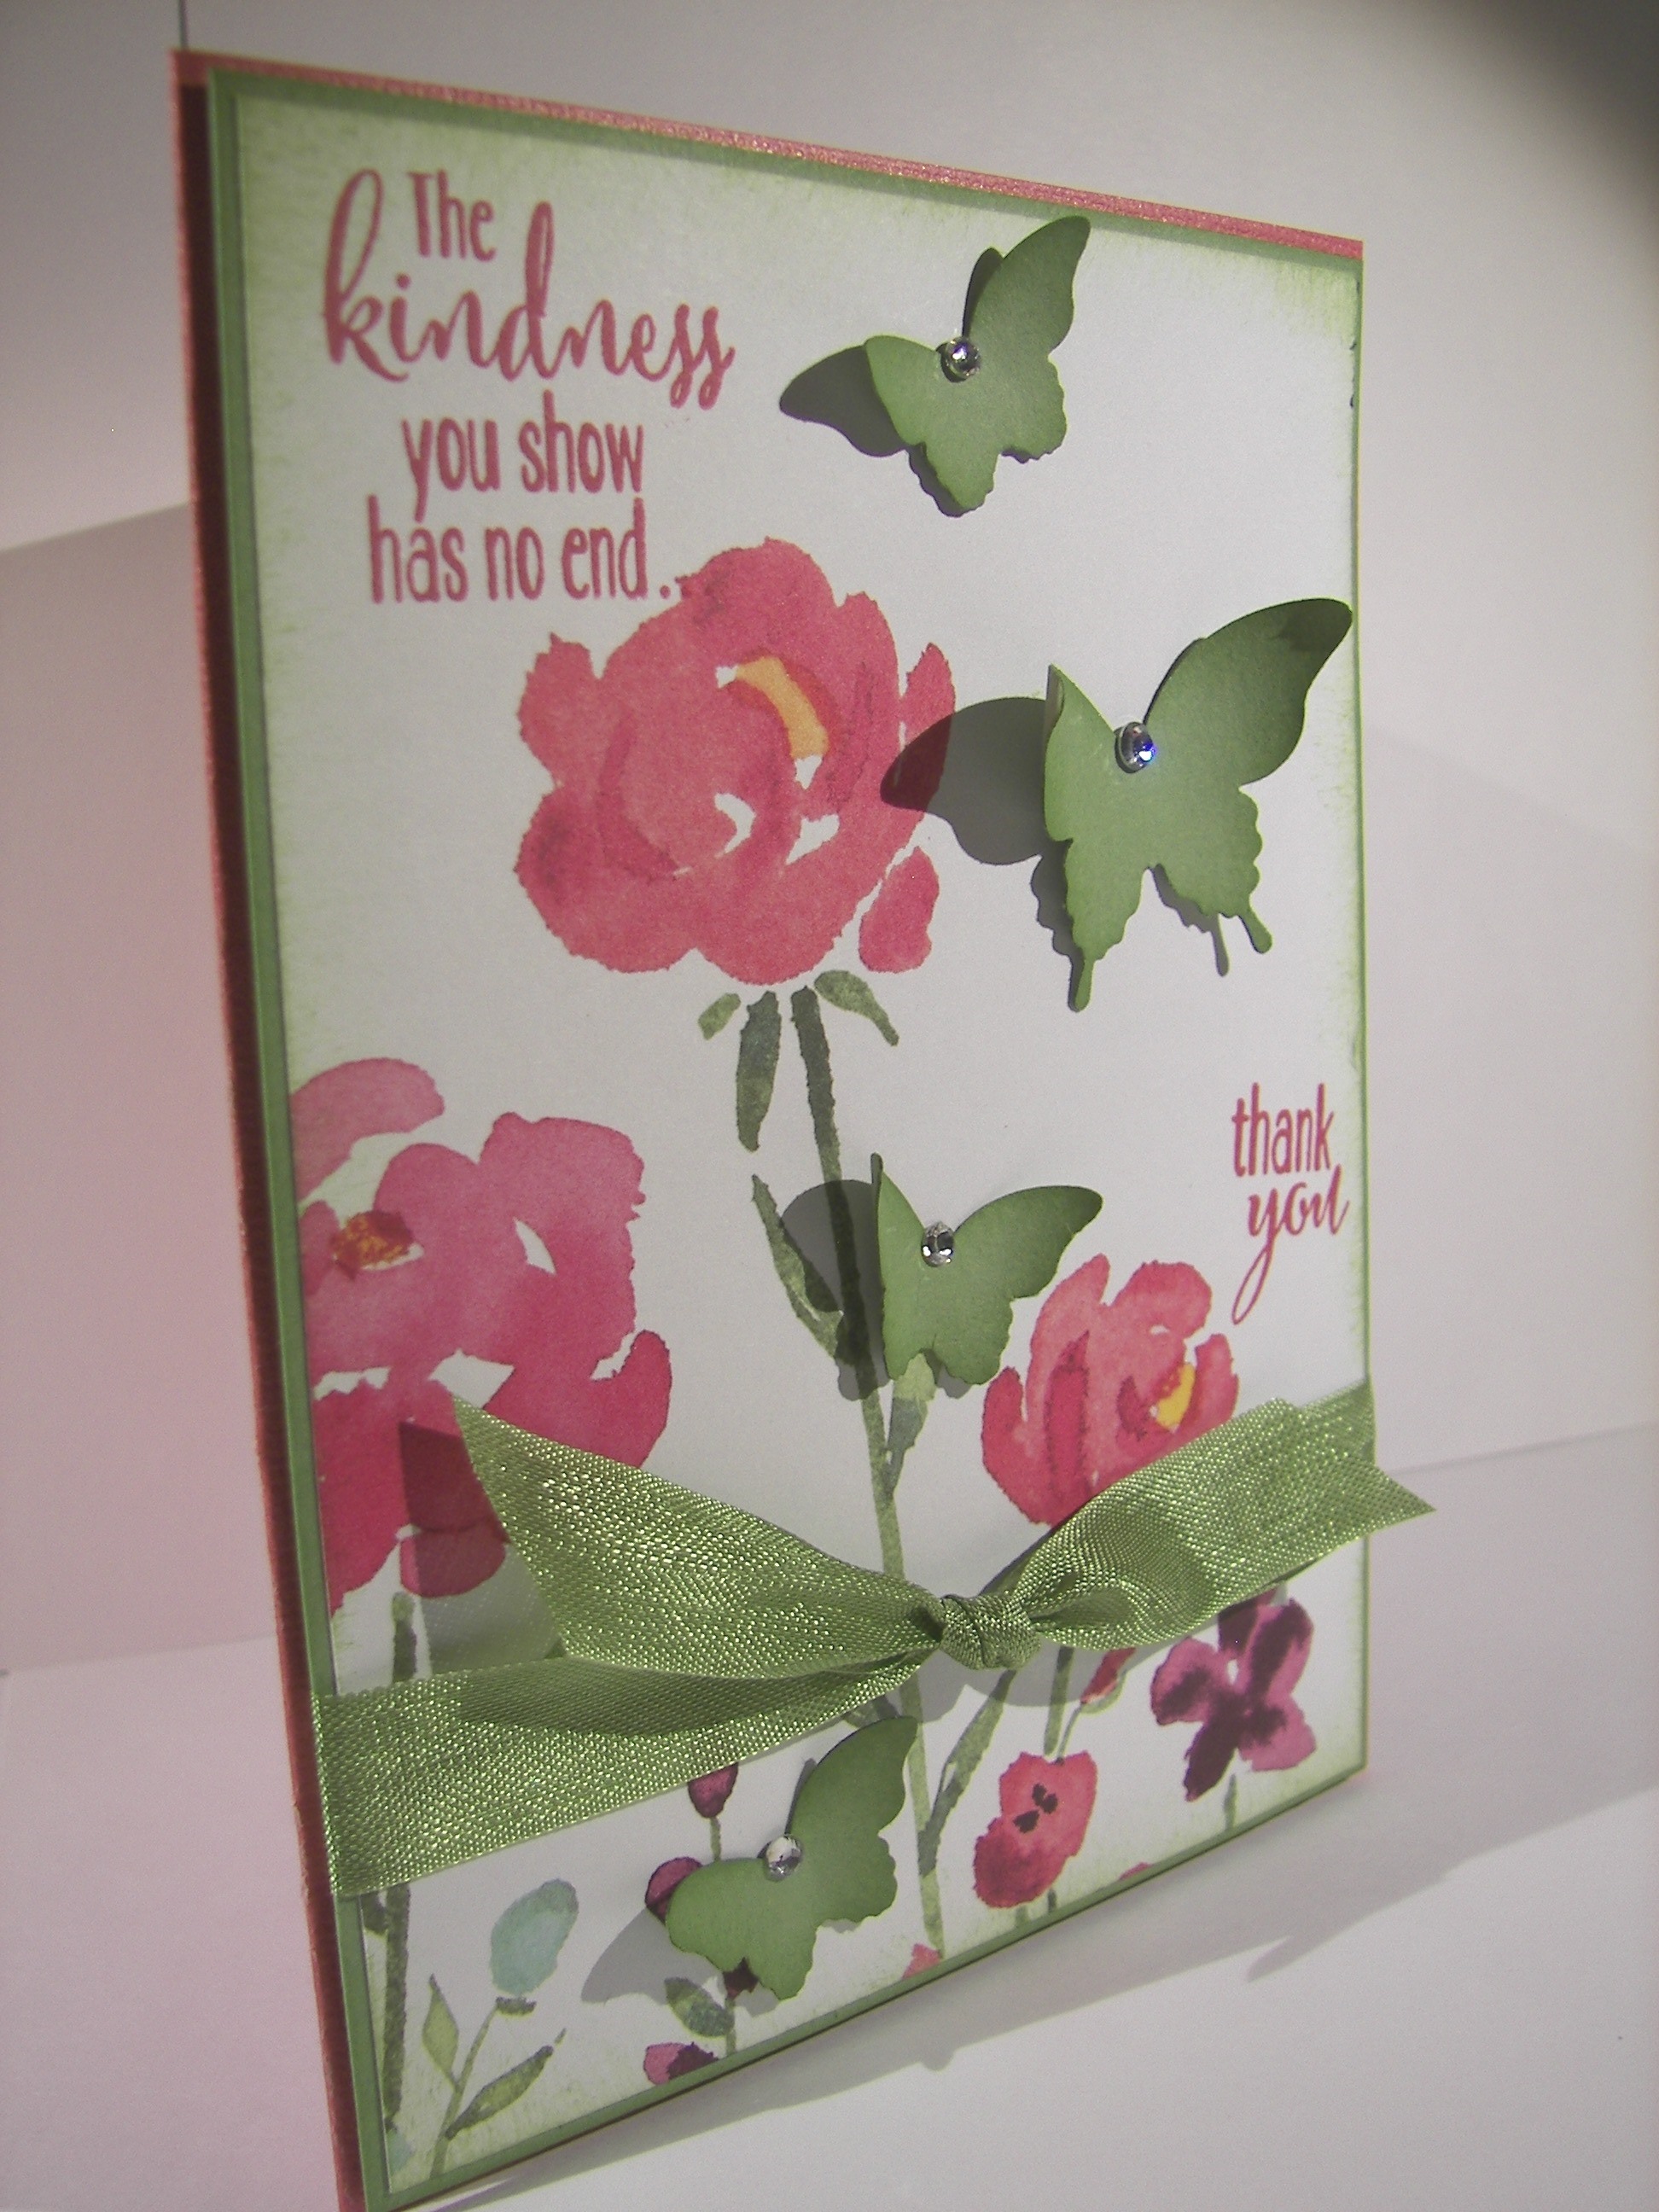
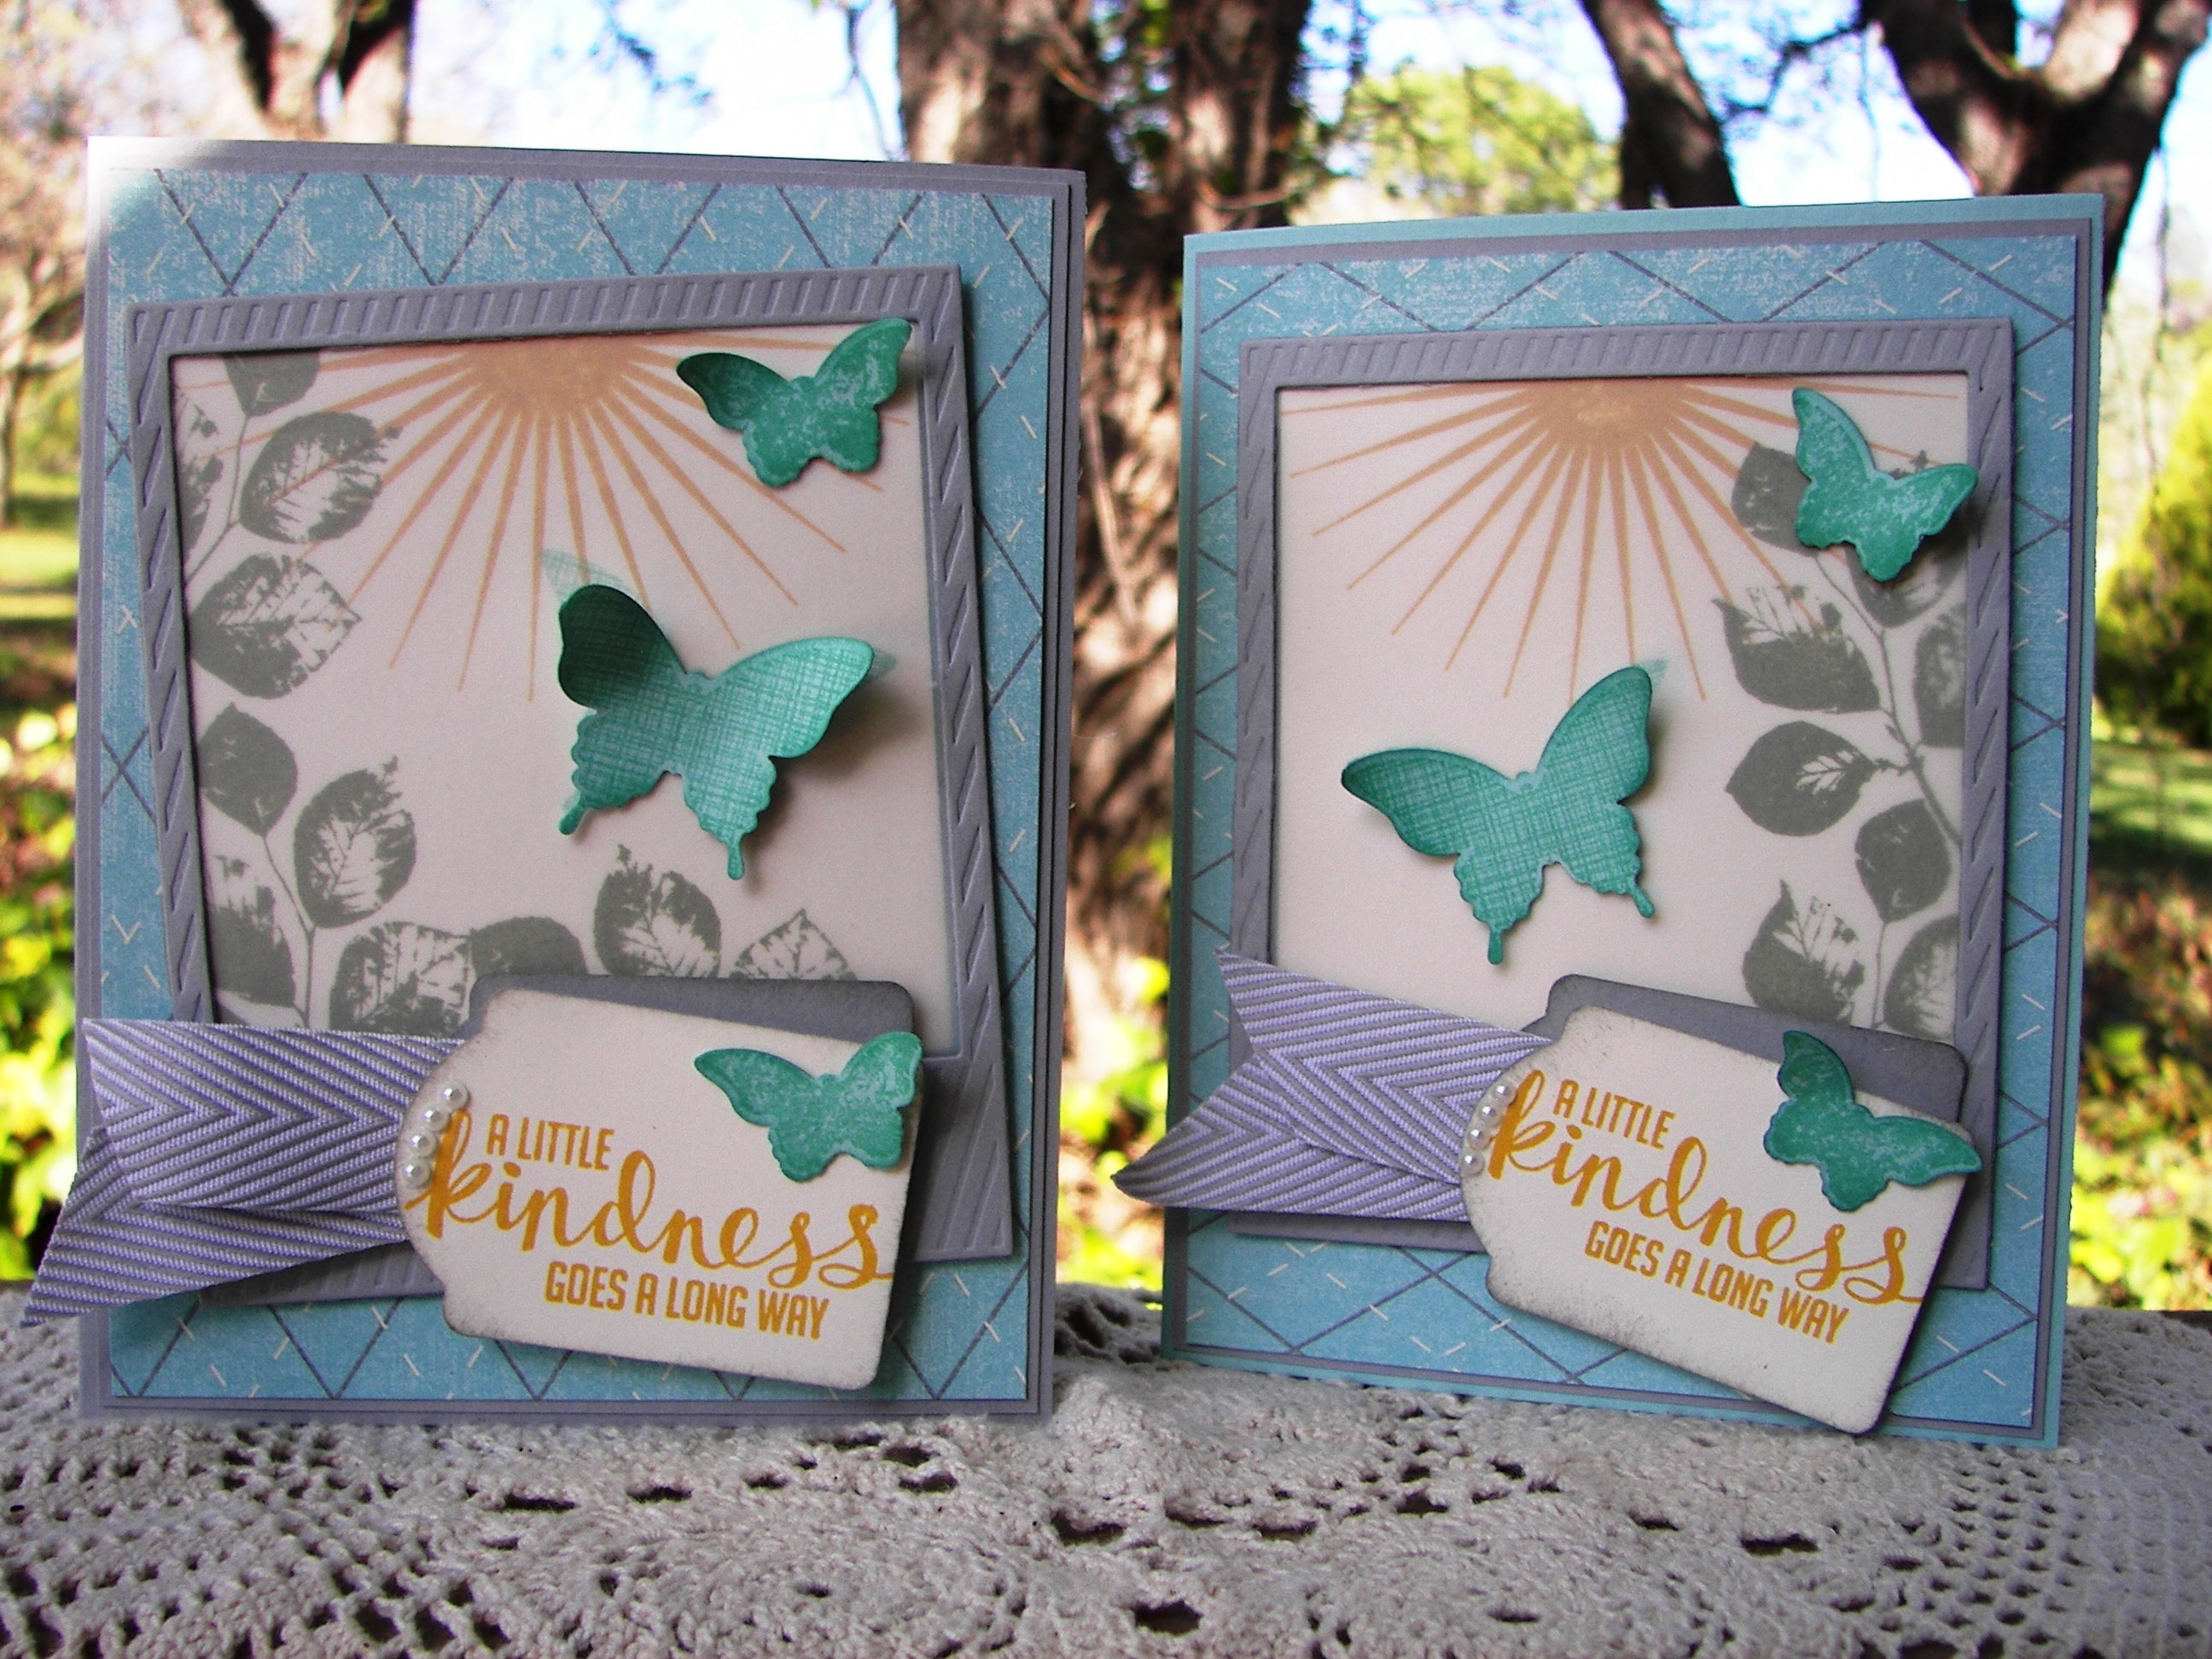
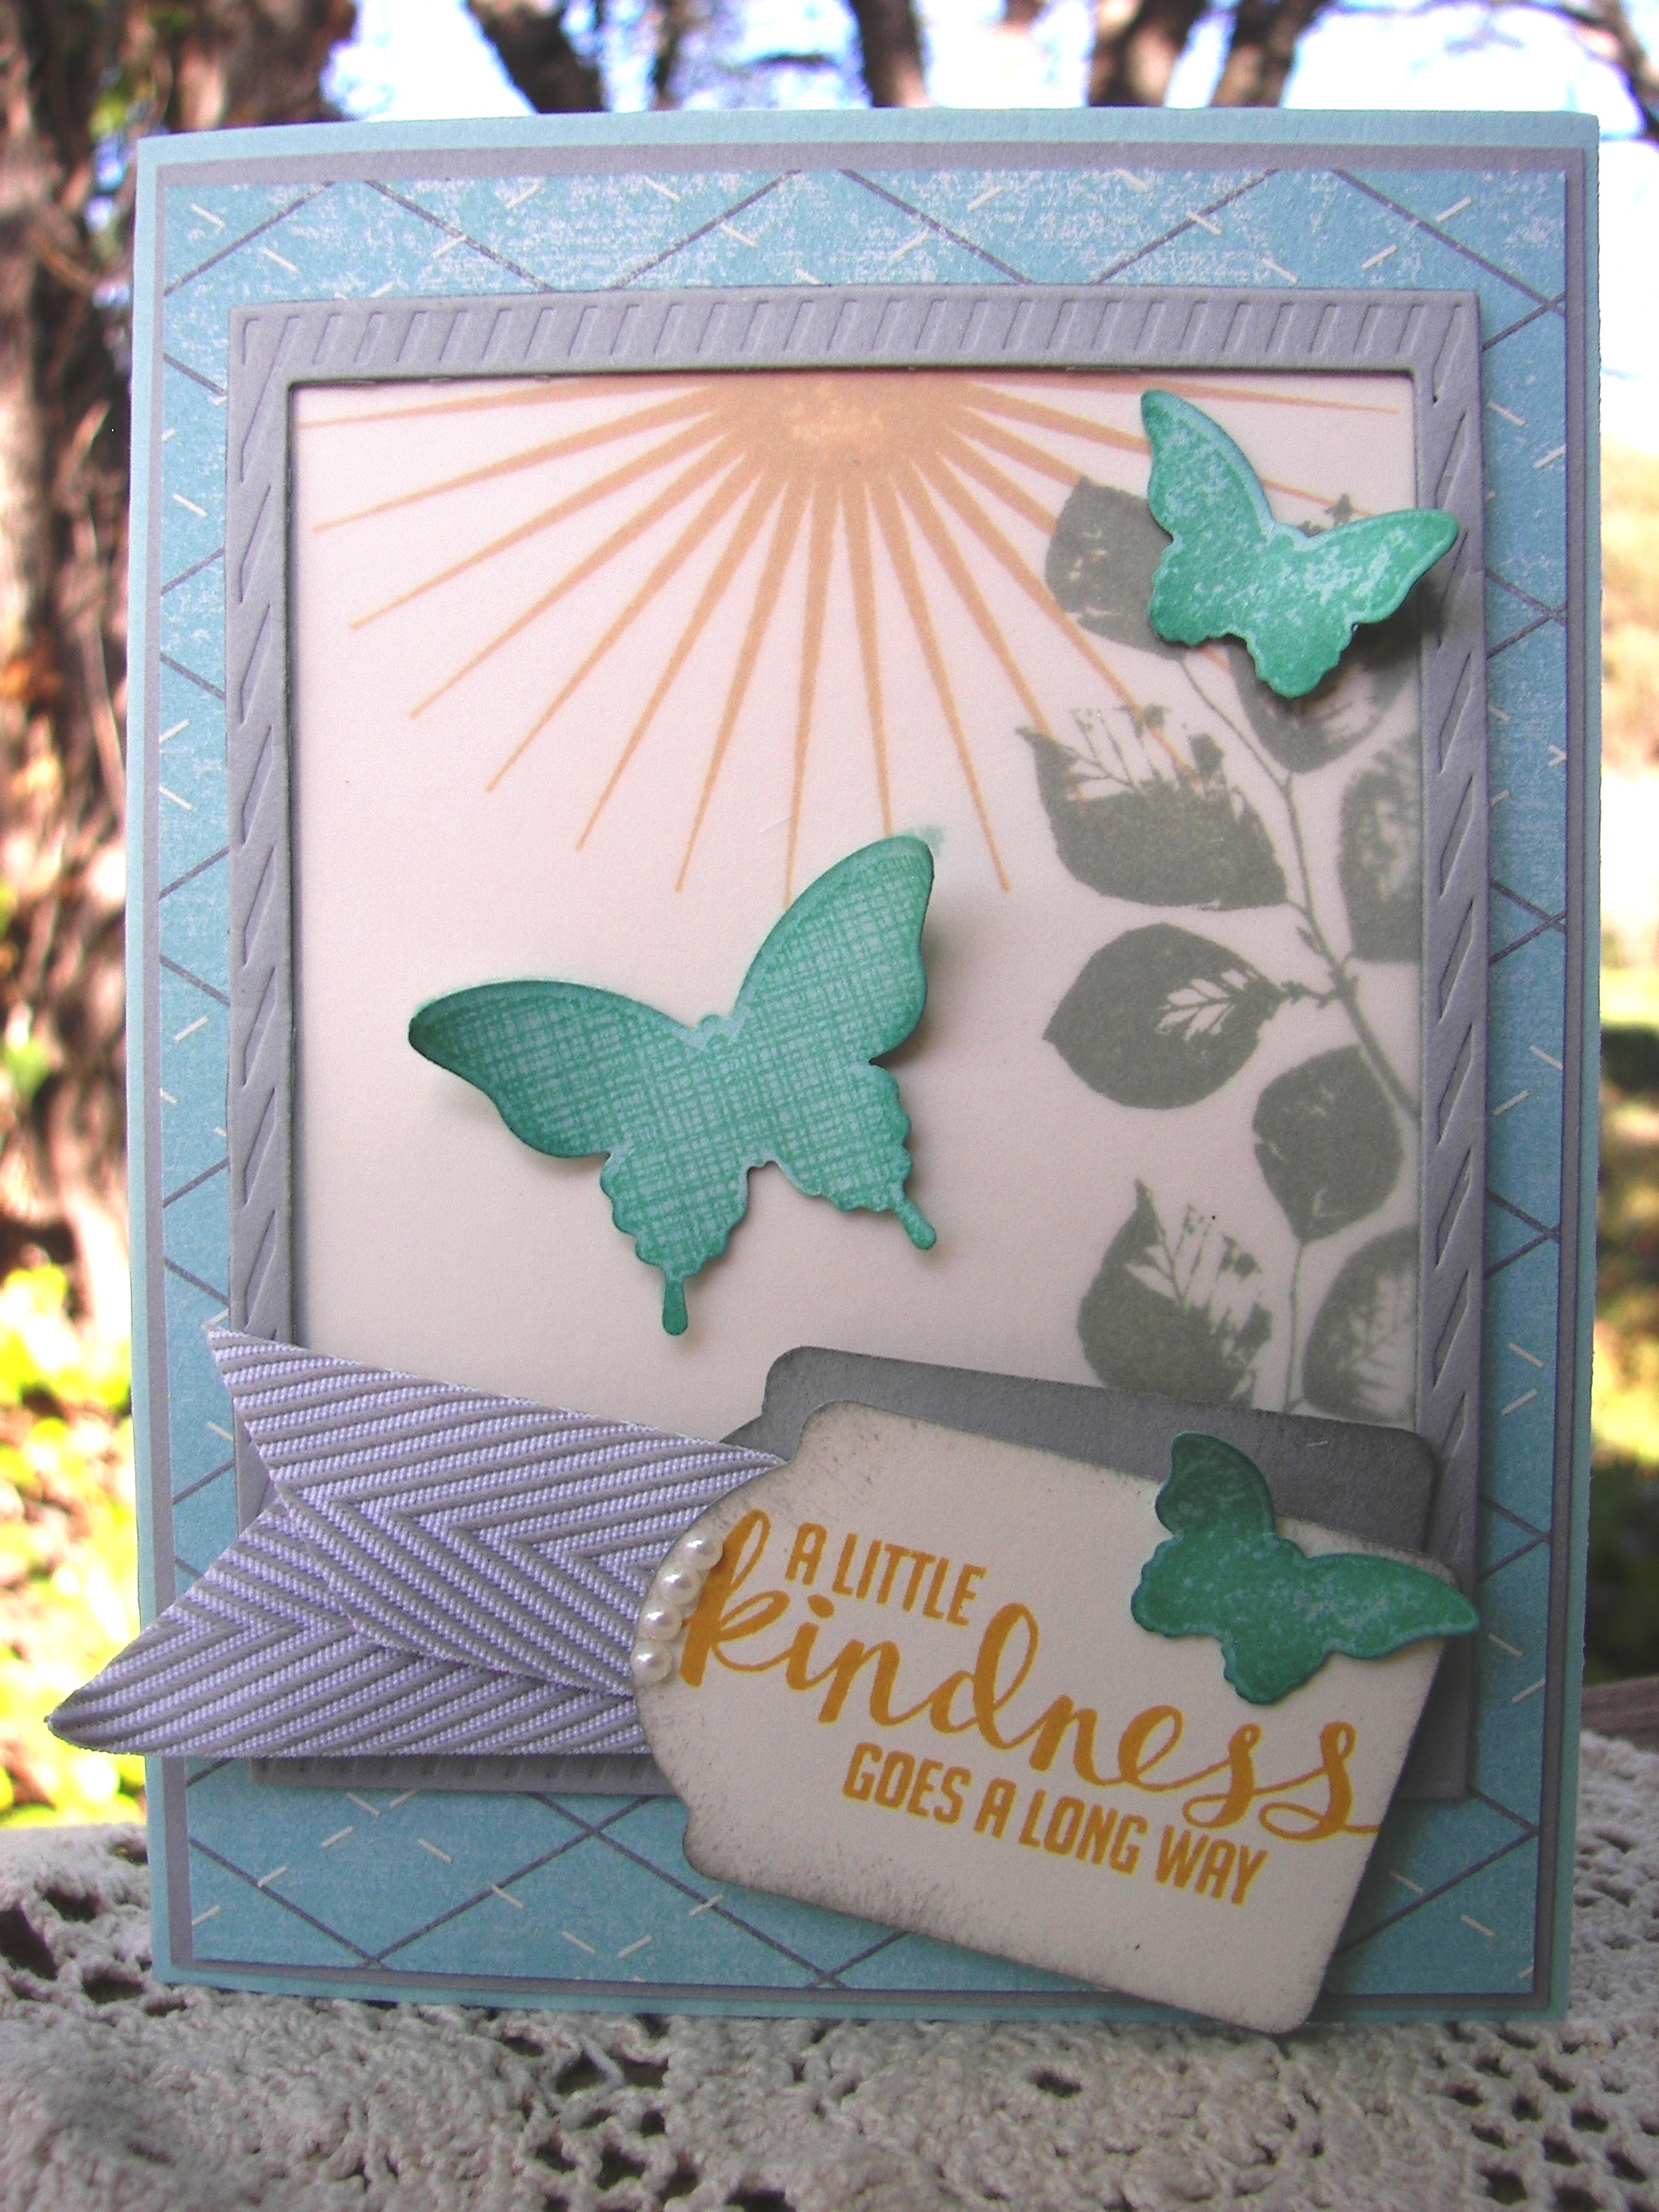
I get to attend a bridal shower today, how fun right?  Well, I have gotten into giving thank you cards as my bridal shower gift.  I think it is most appropriate, since the bride is going to need plenty of these.  Sometimes though, a special thank you is in order, when someone has really been kind or extra wonderful to you.  That is what these are for.

101_1300

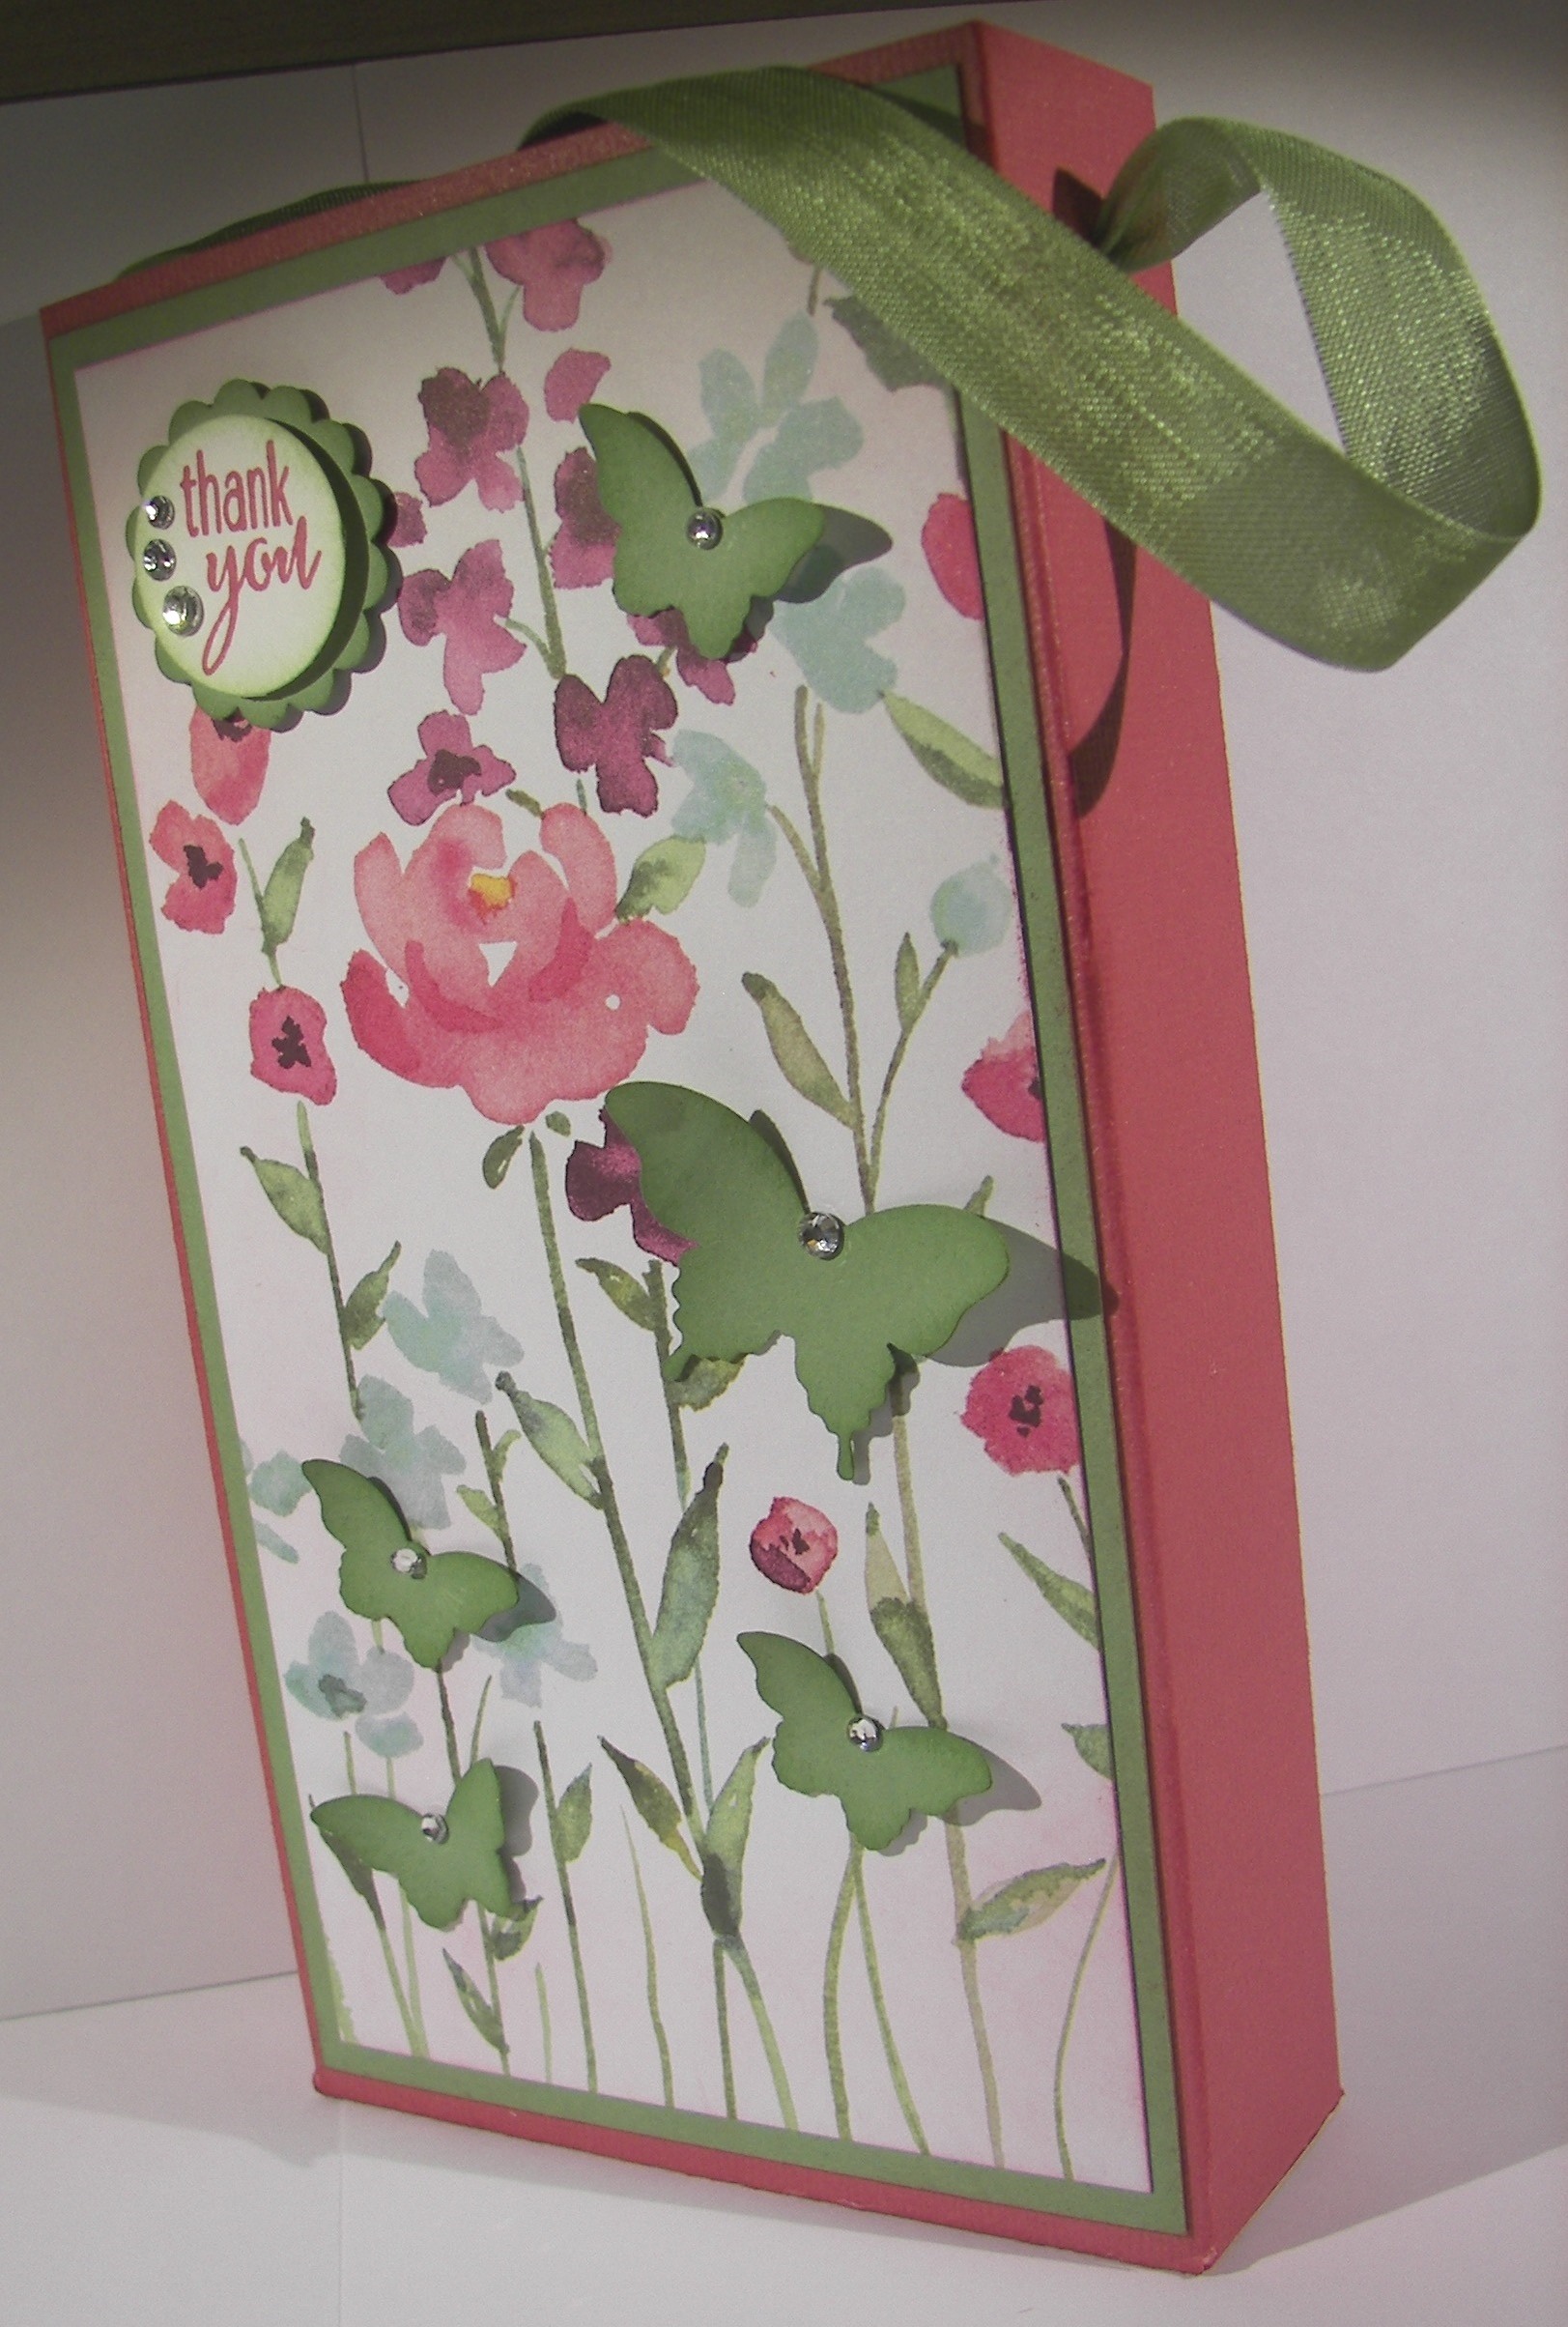
The steps aren’t too complicated, you can really see them from just looking at the project.  I am really bad about tracking how I score my bags and boxes.  I make them different each time because you don’t always need the same size.  I love to say that I don’t have to toss my first attempt too often, almost never.  I do tell my classes that there are never mistakes, just opportunities, so there is always something you can work out.

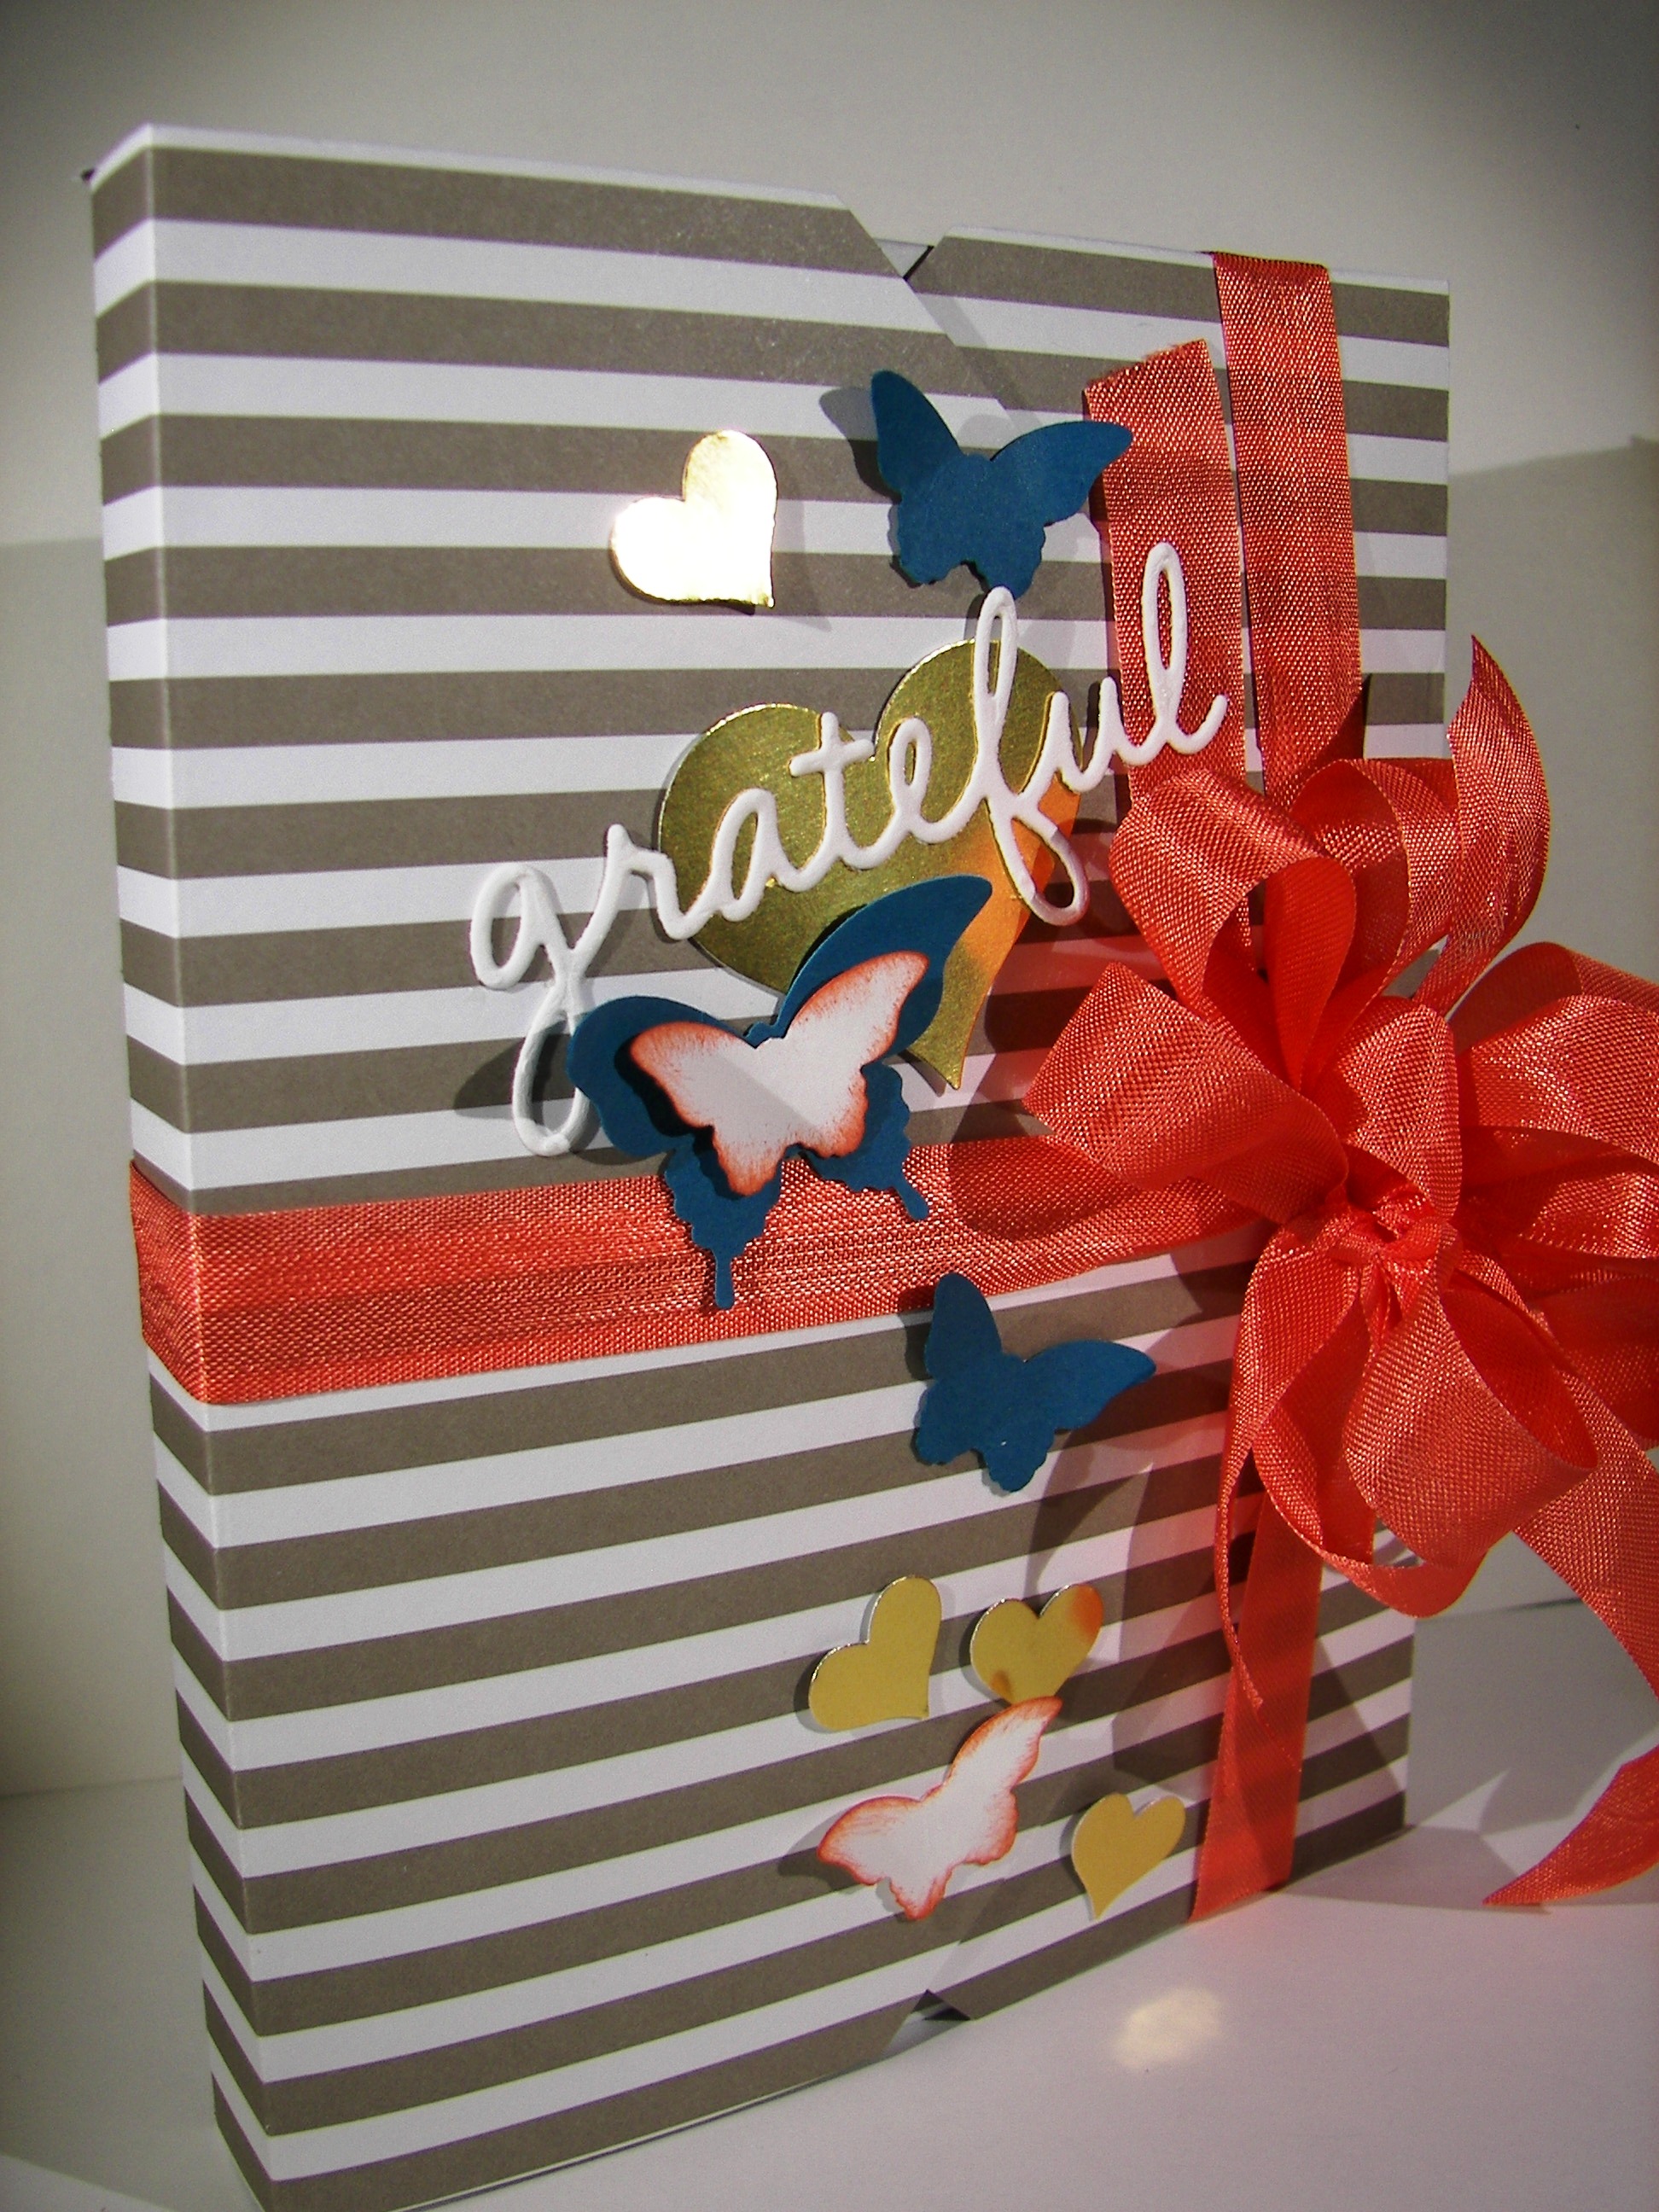
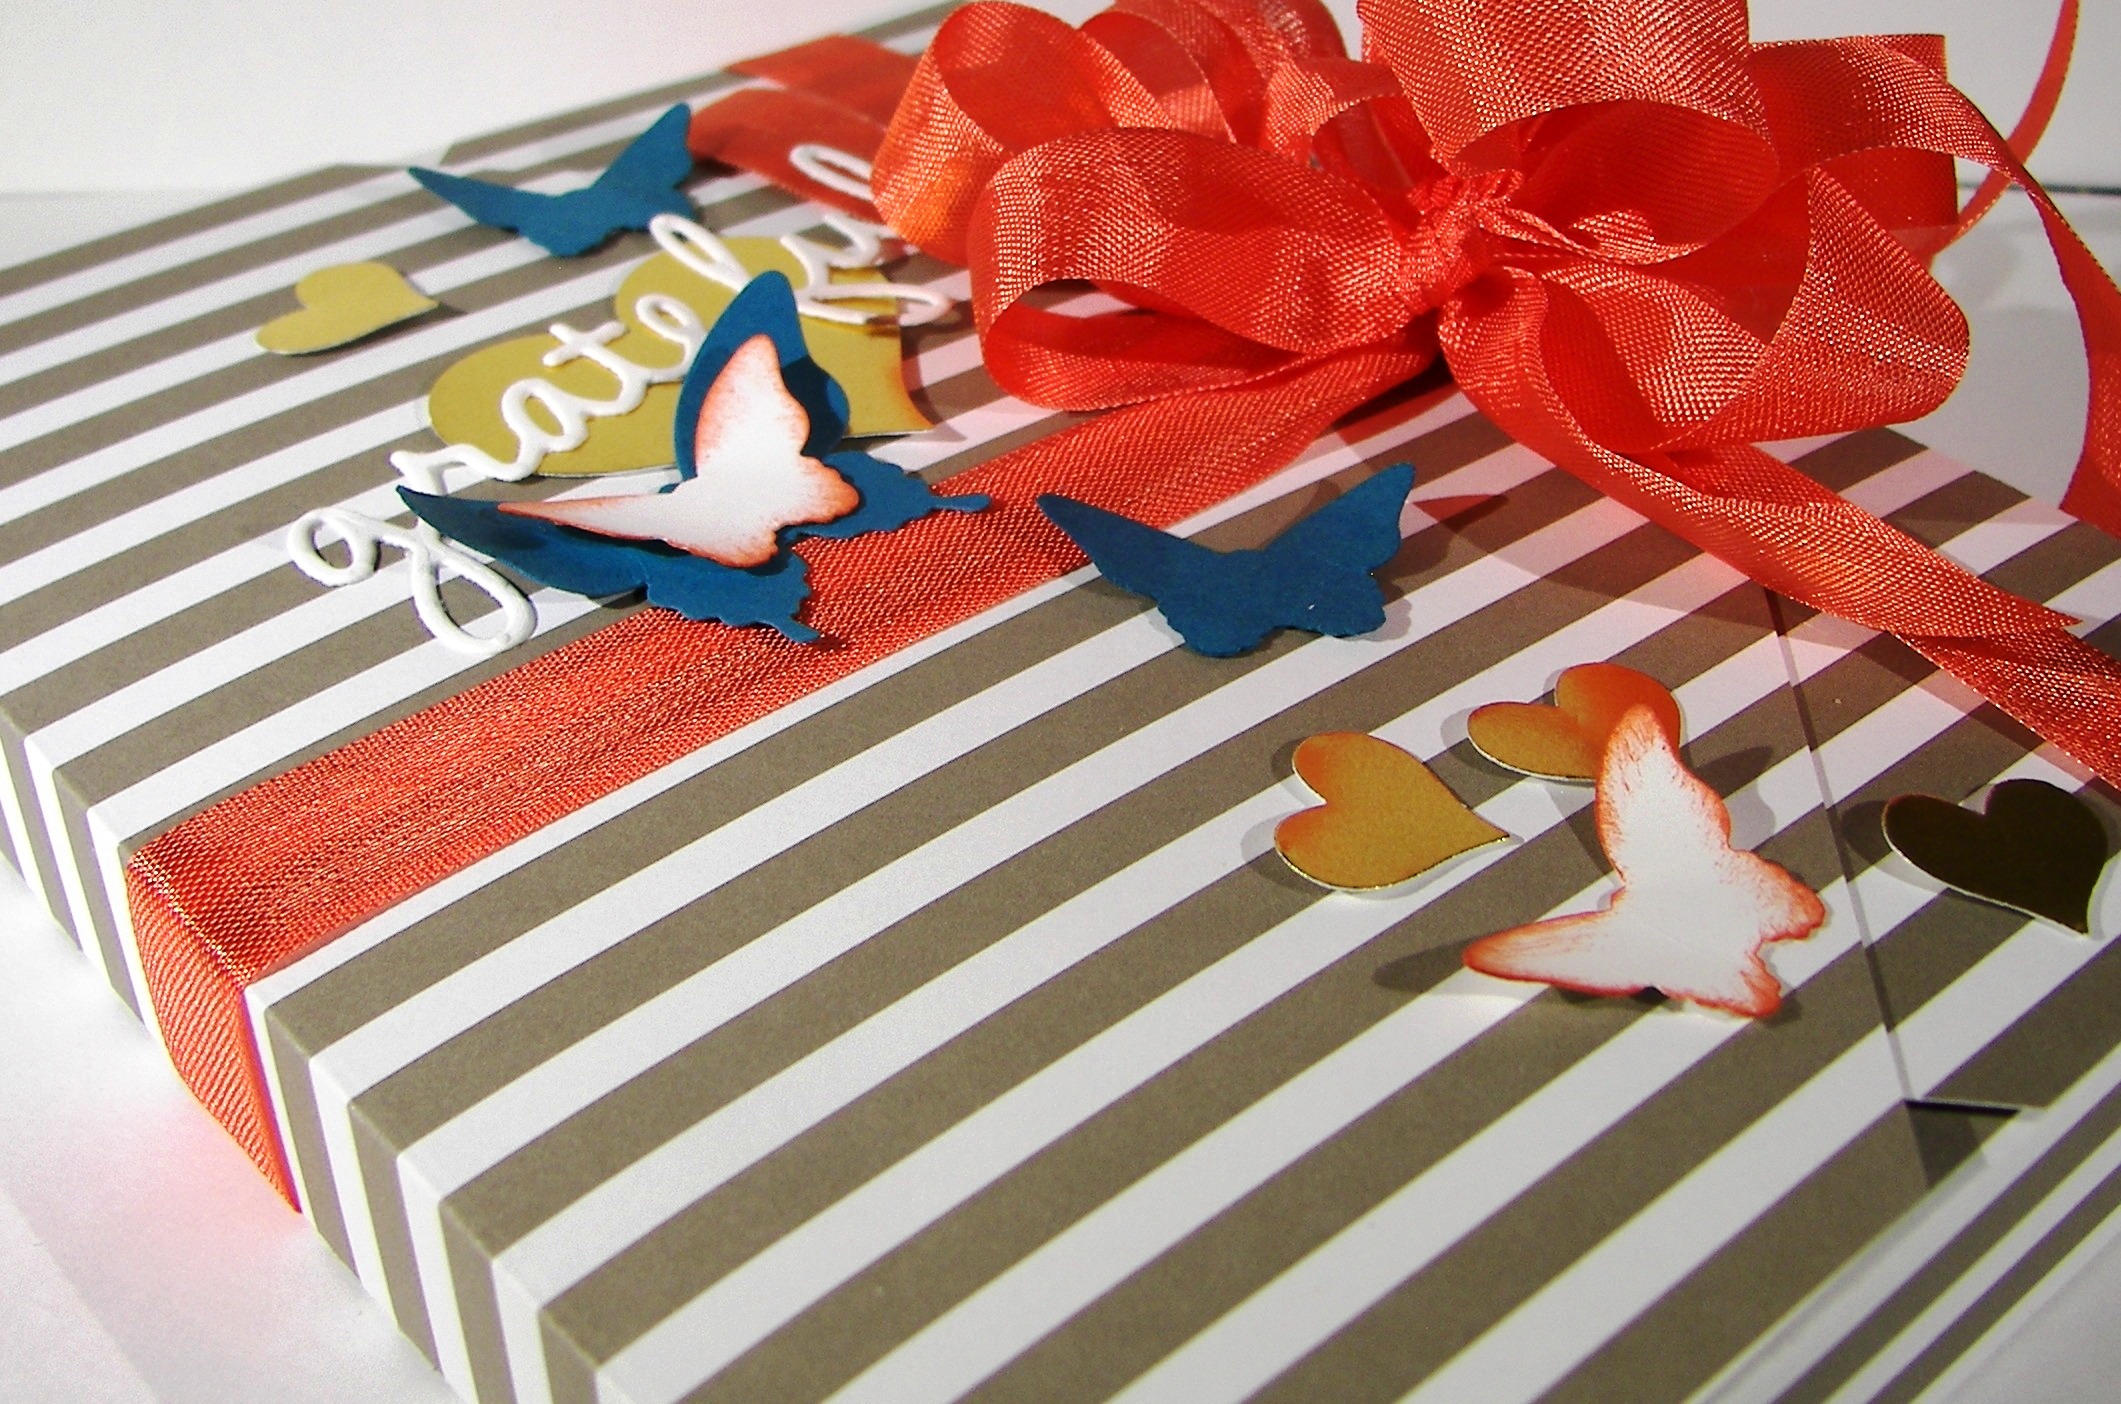
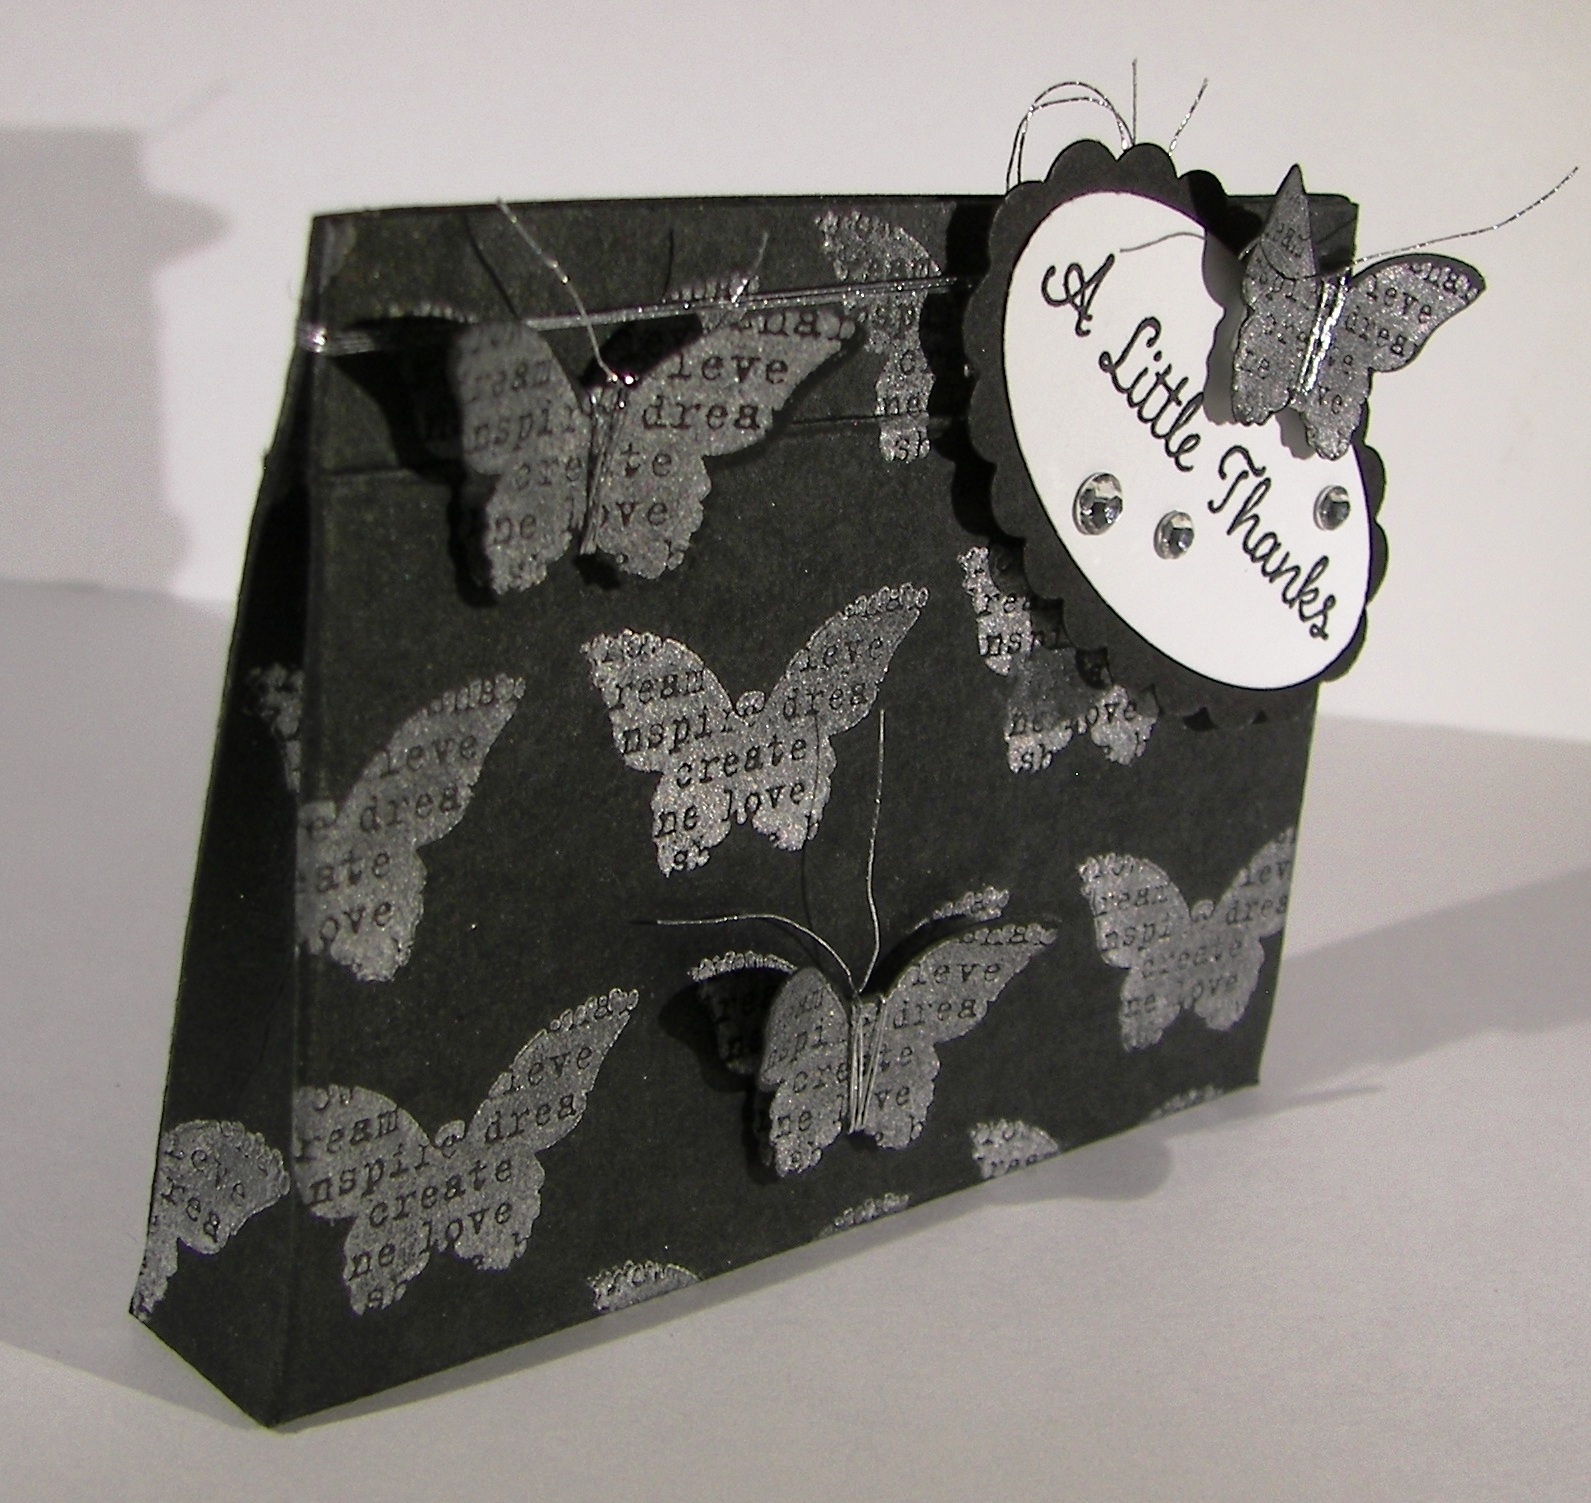
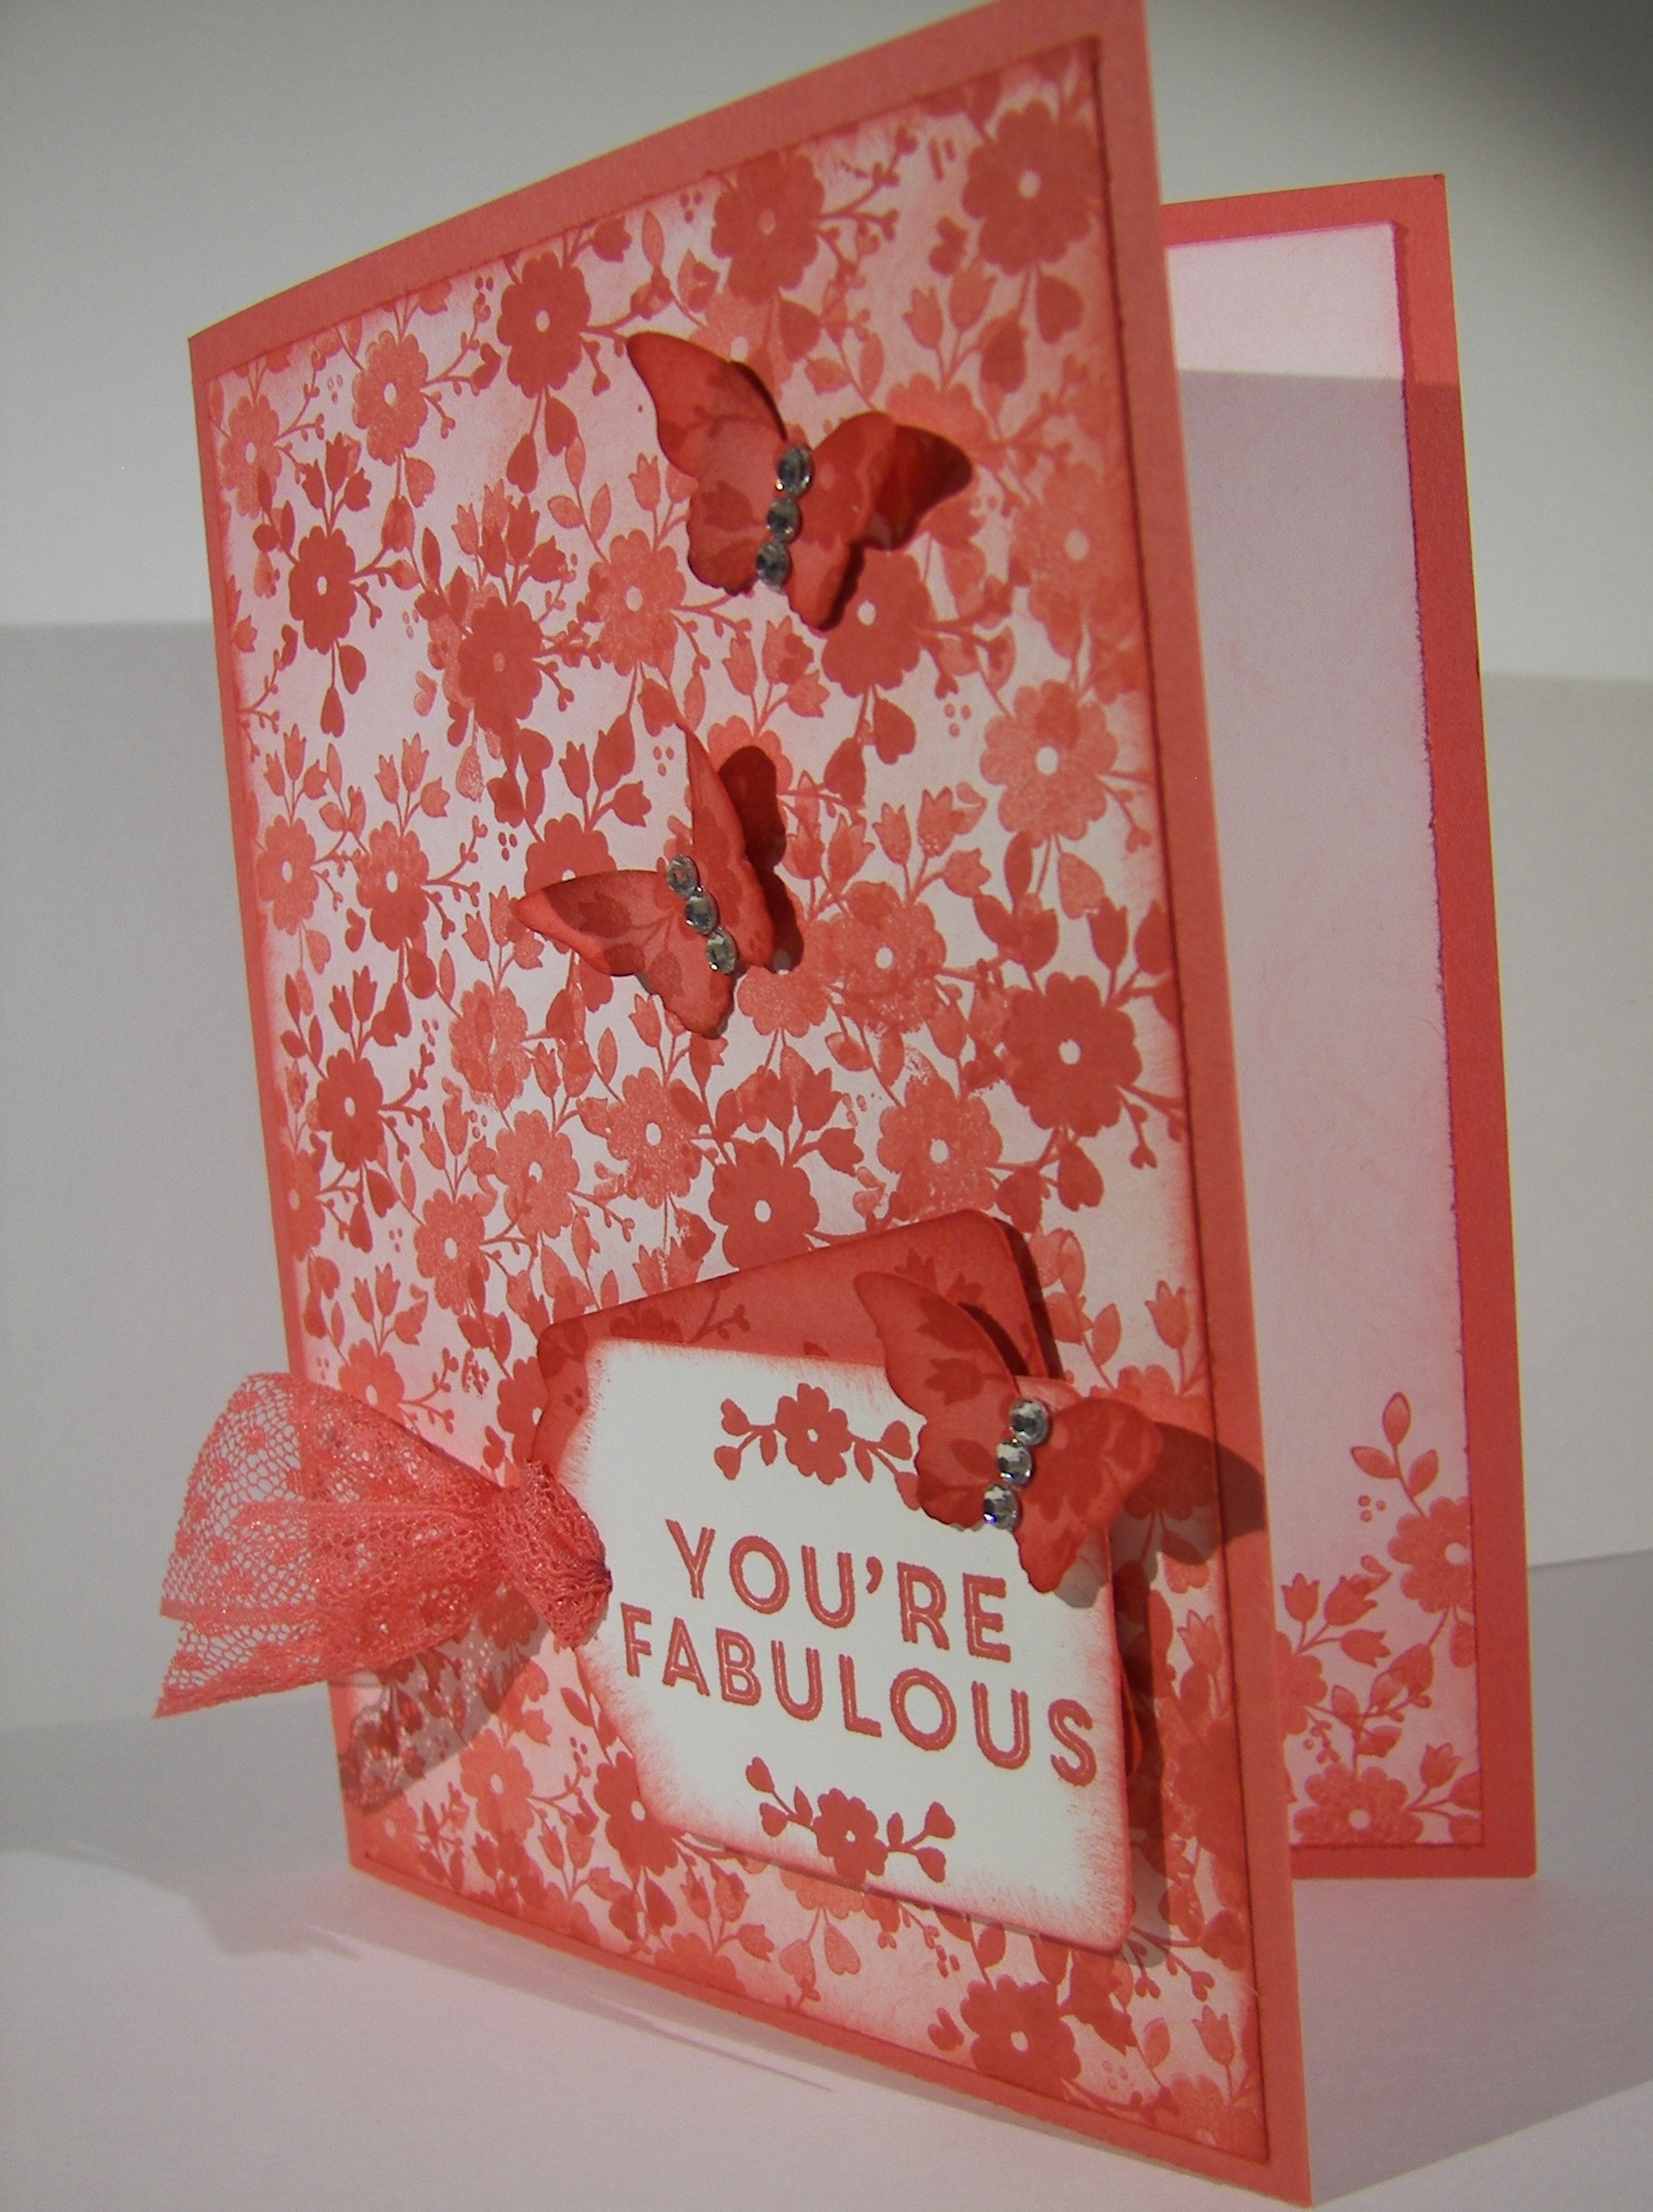
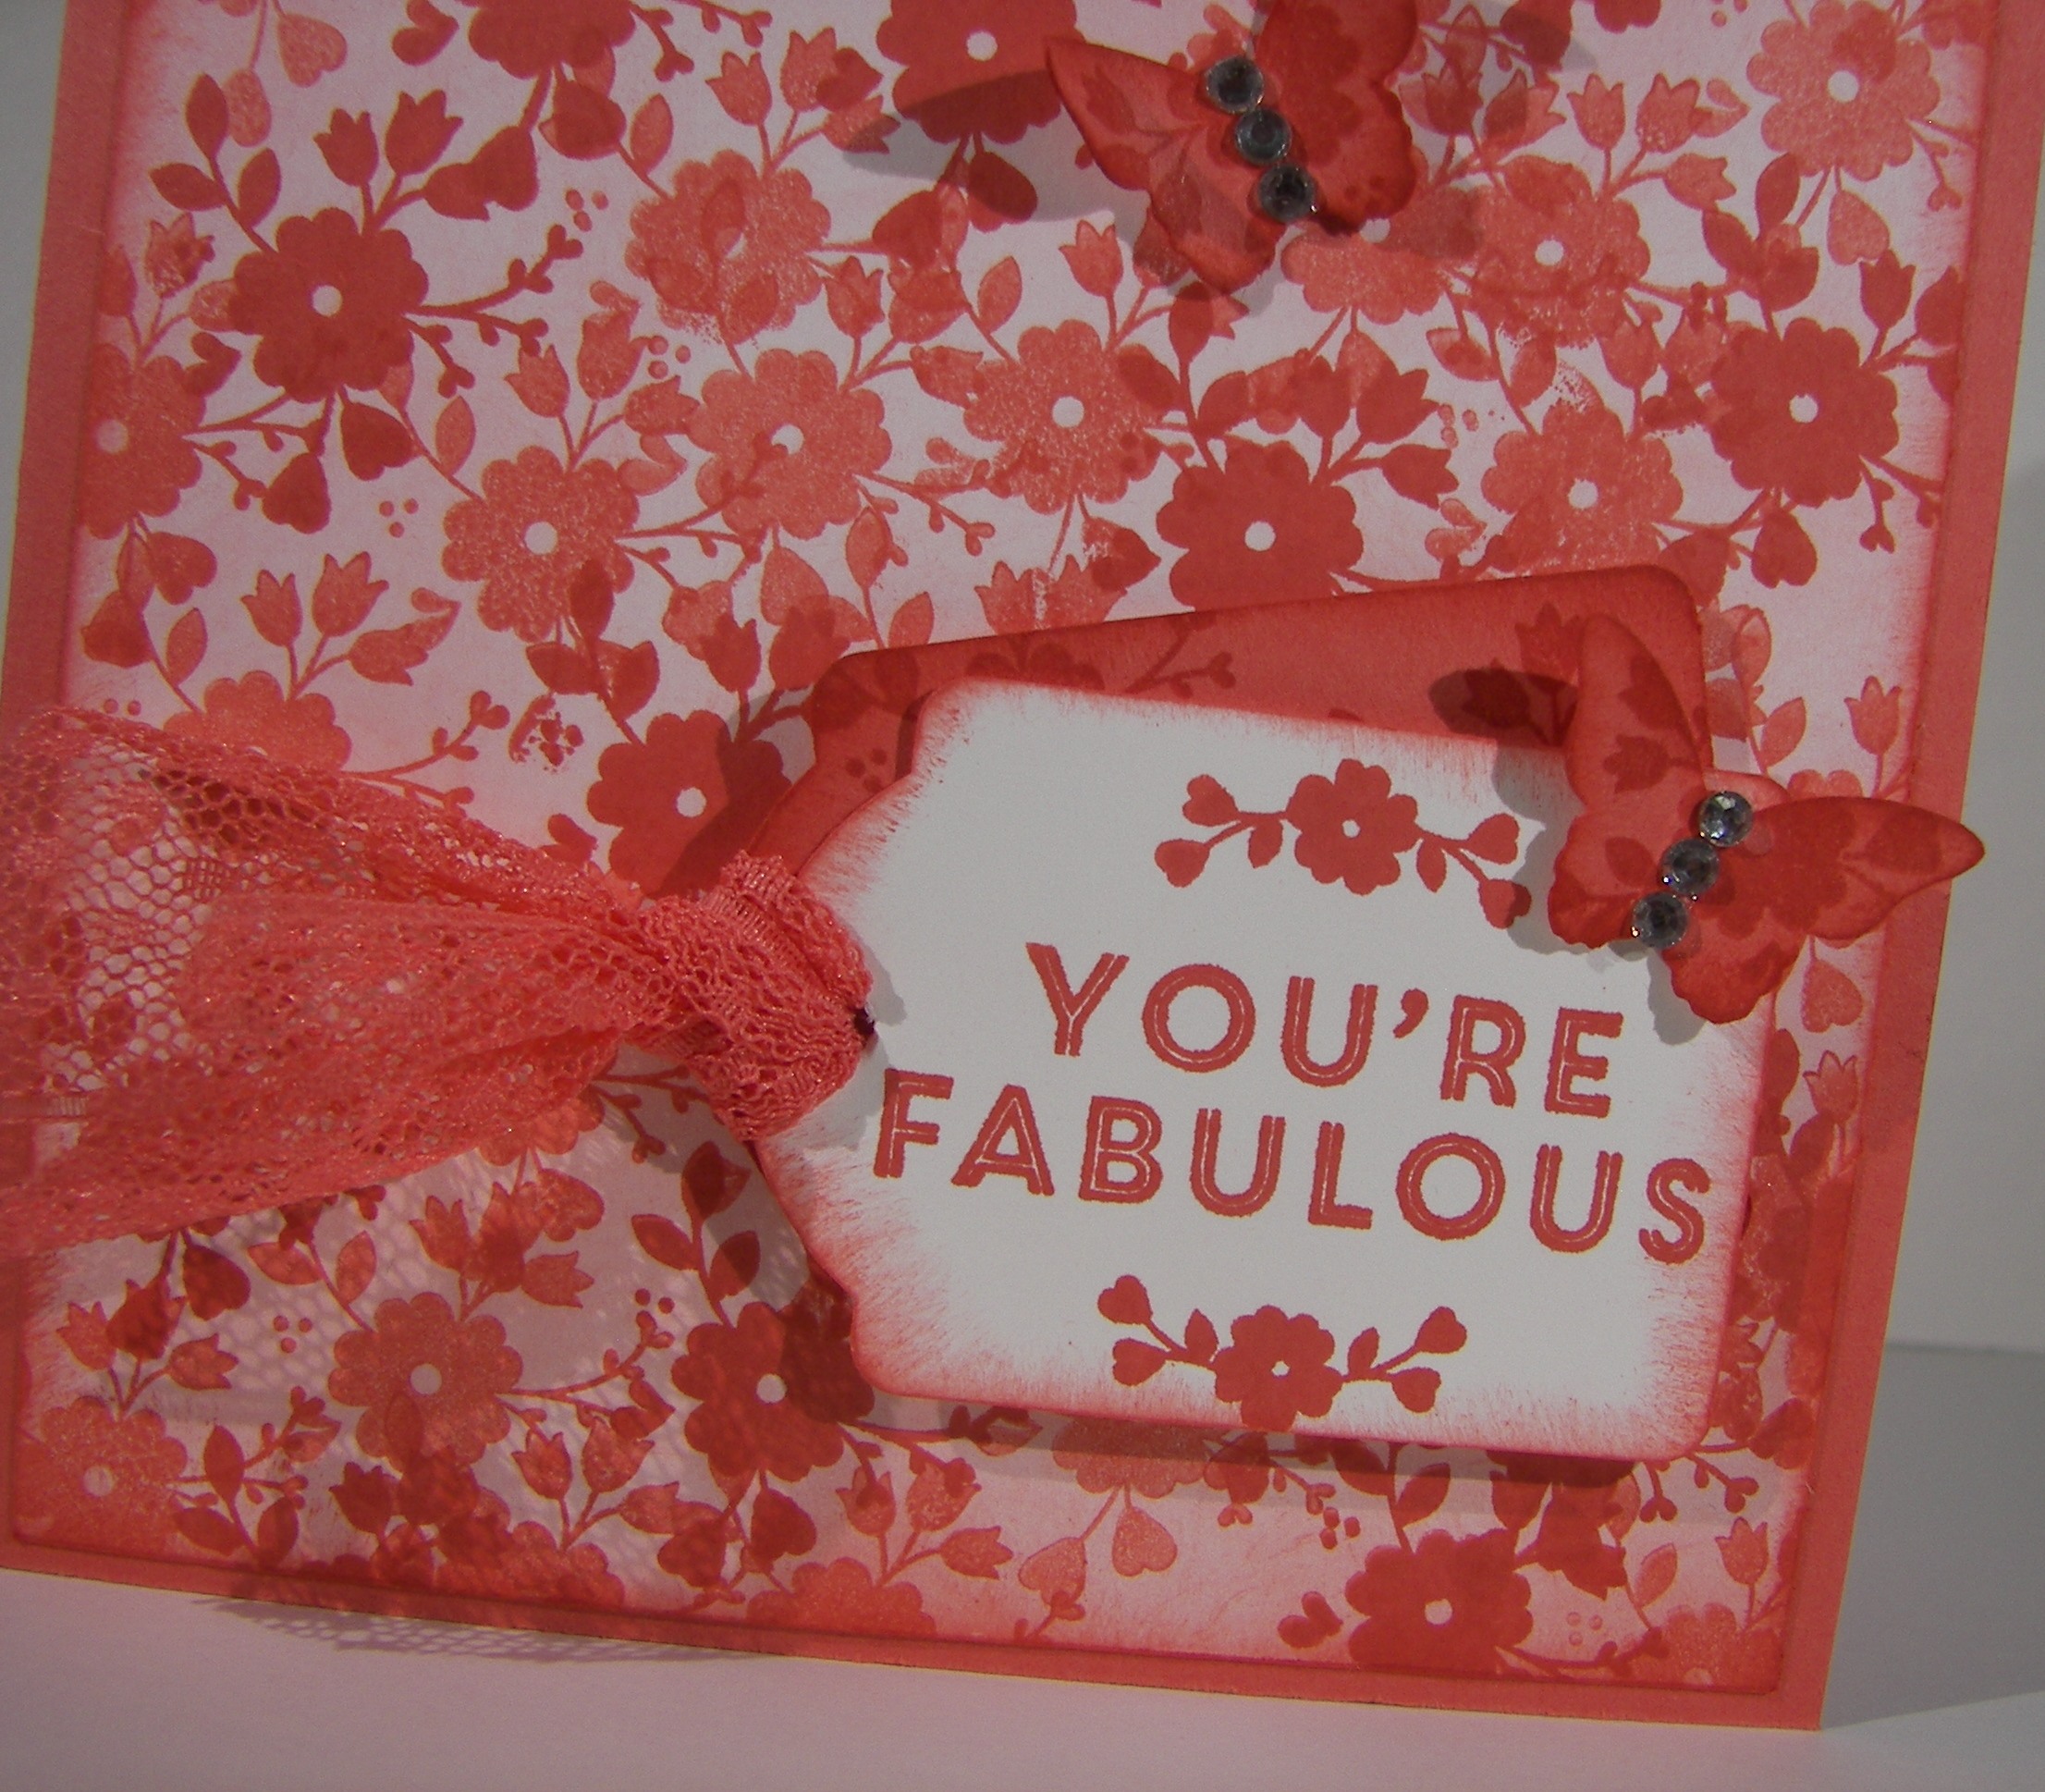
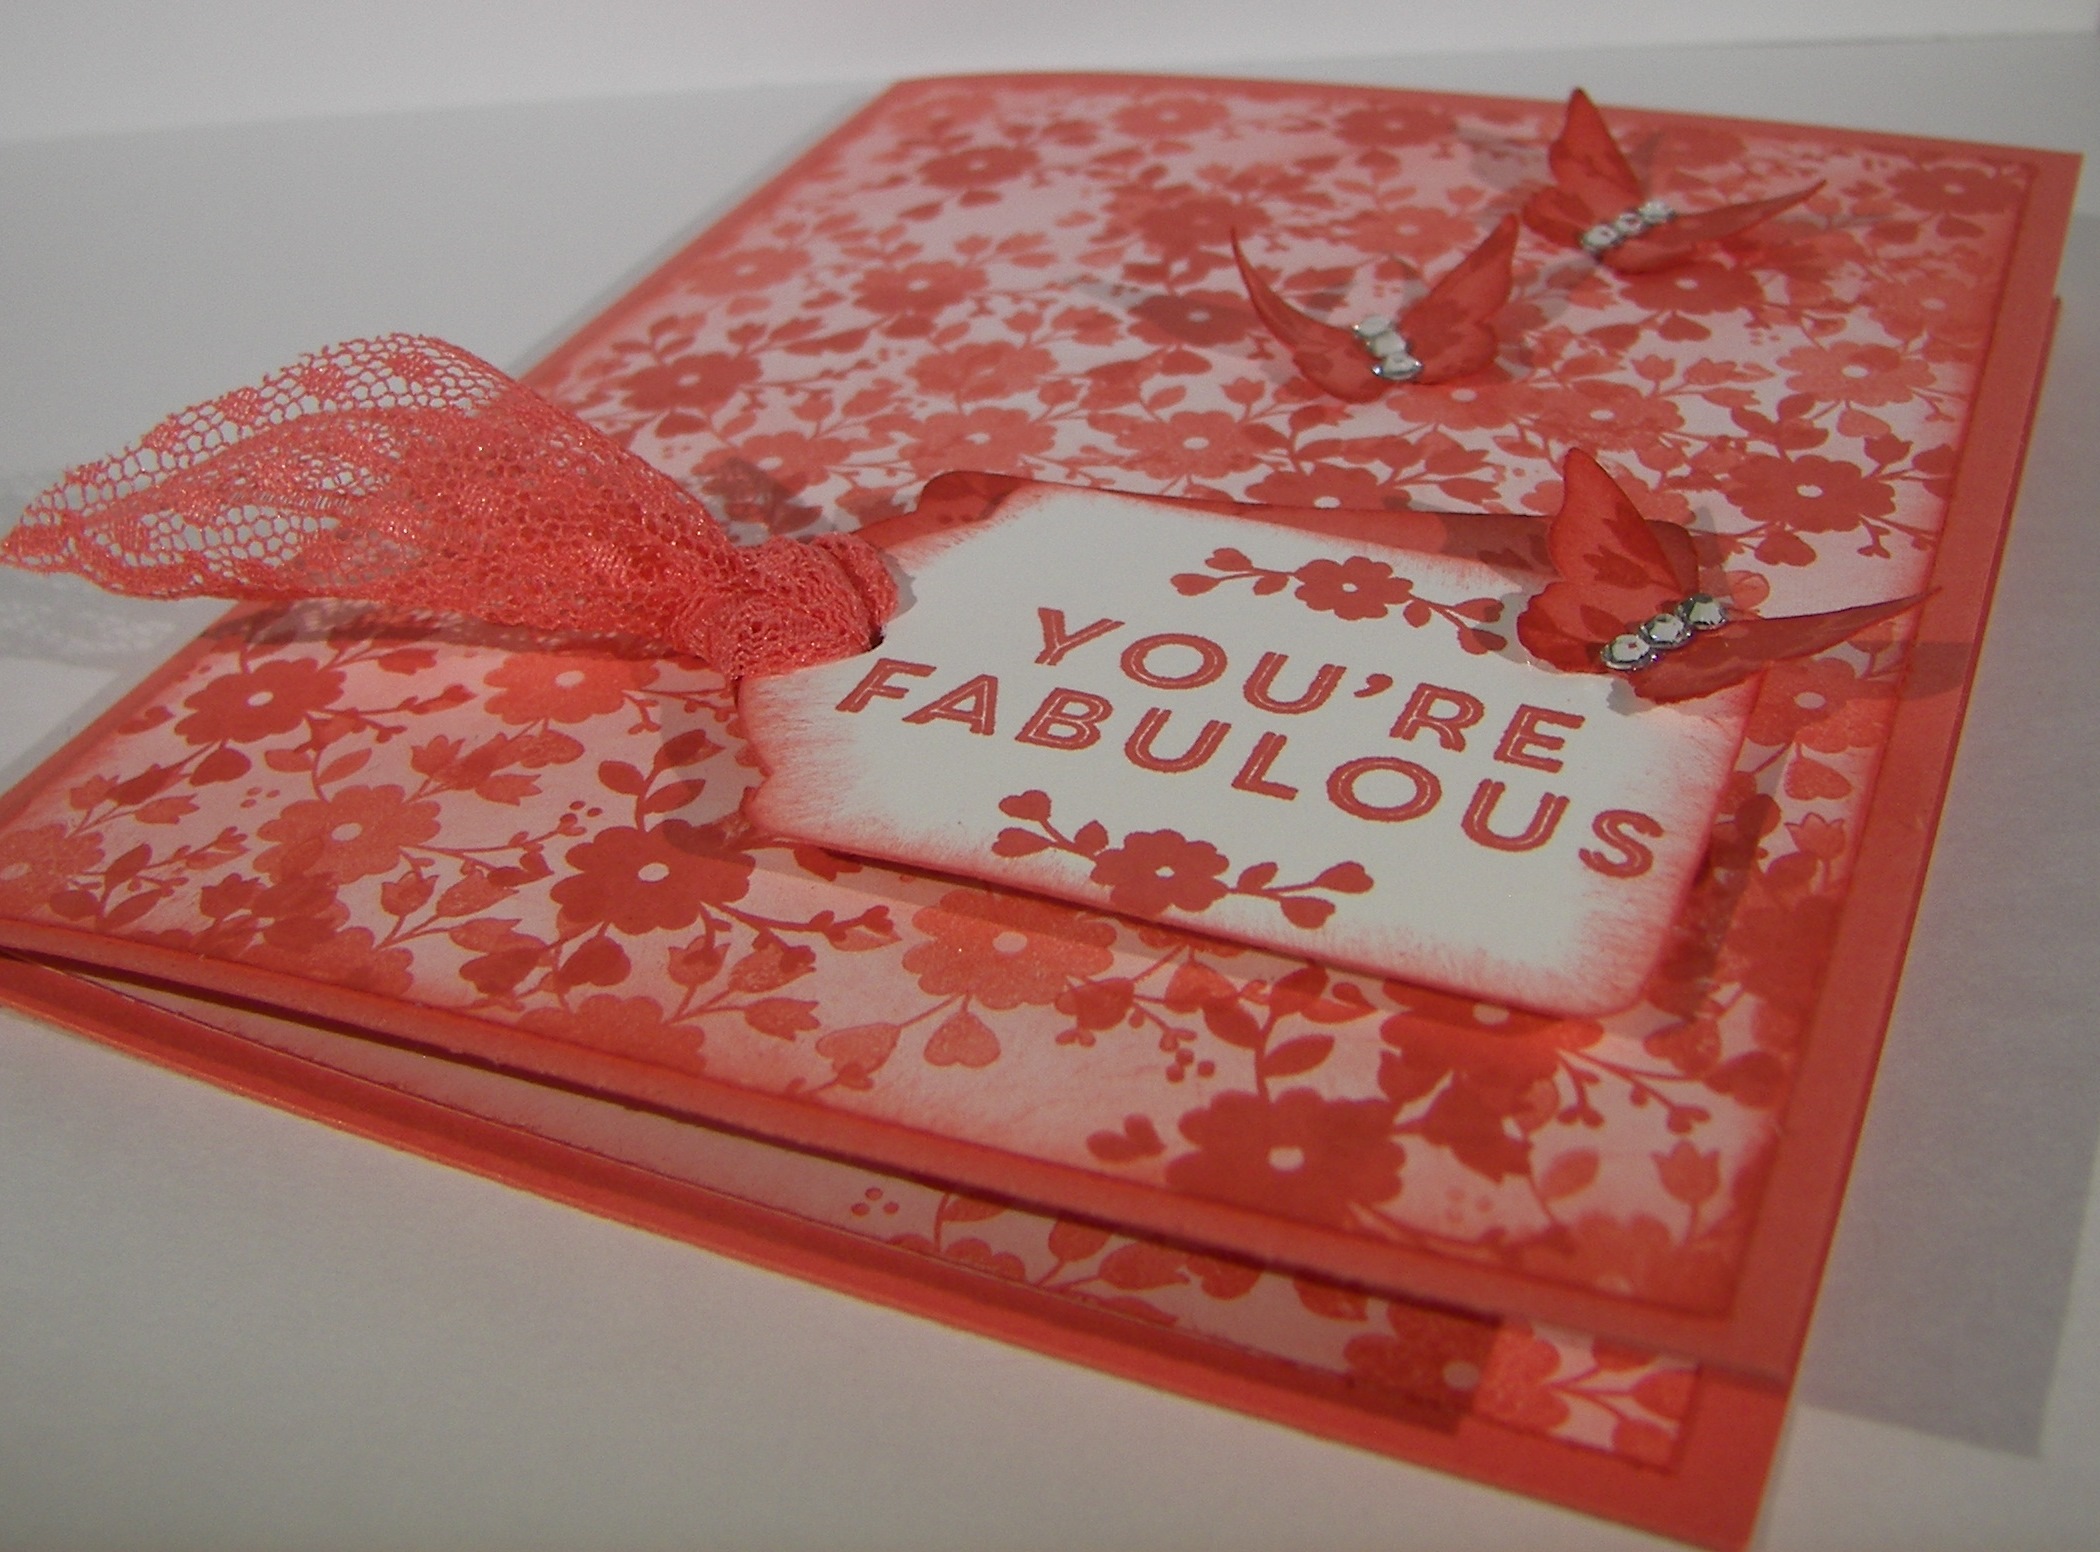
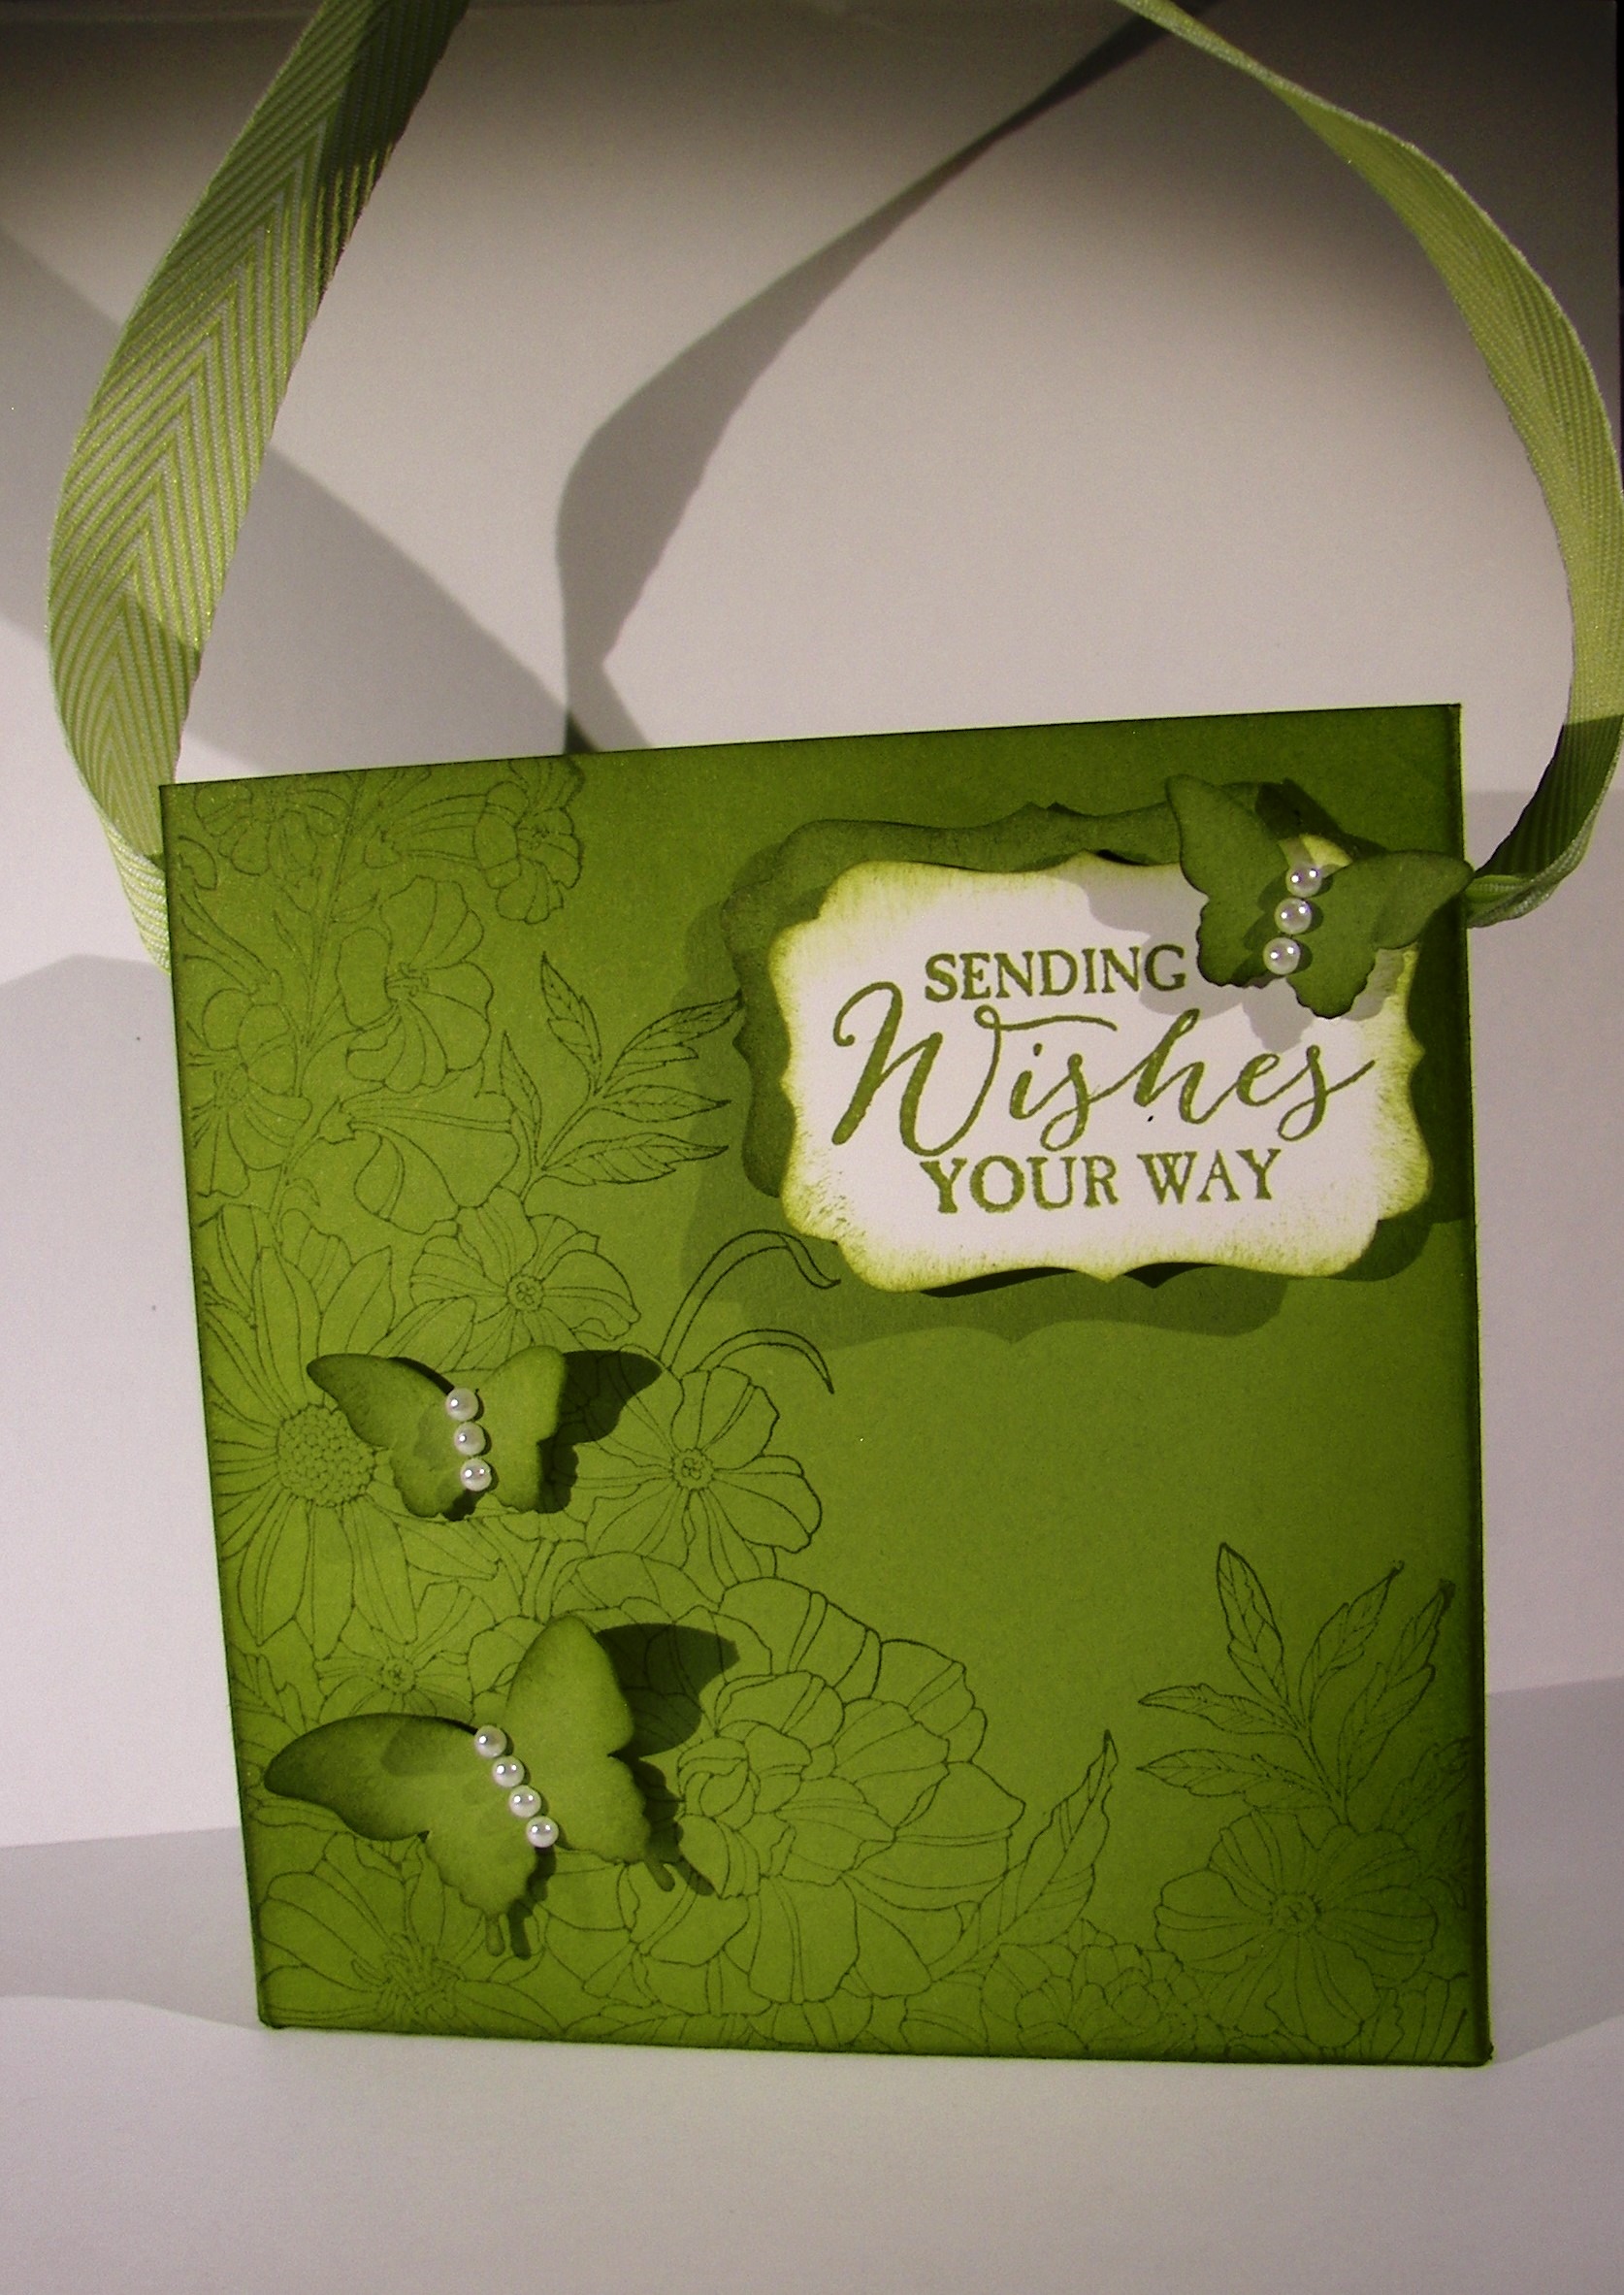
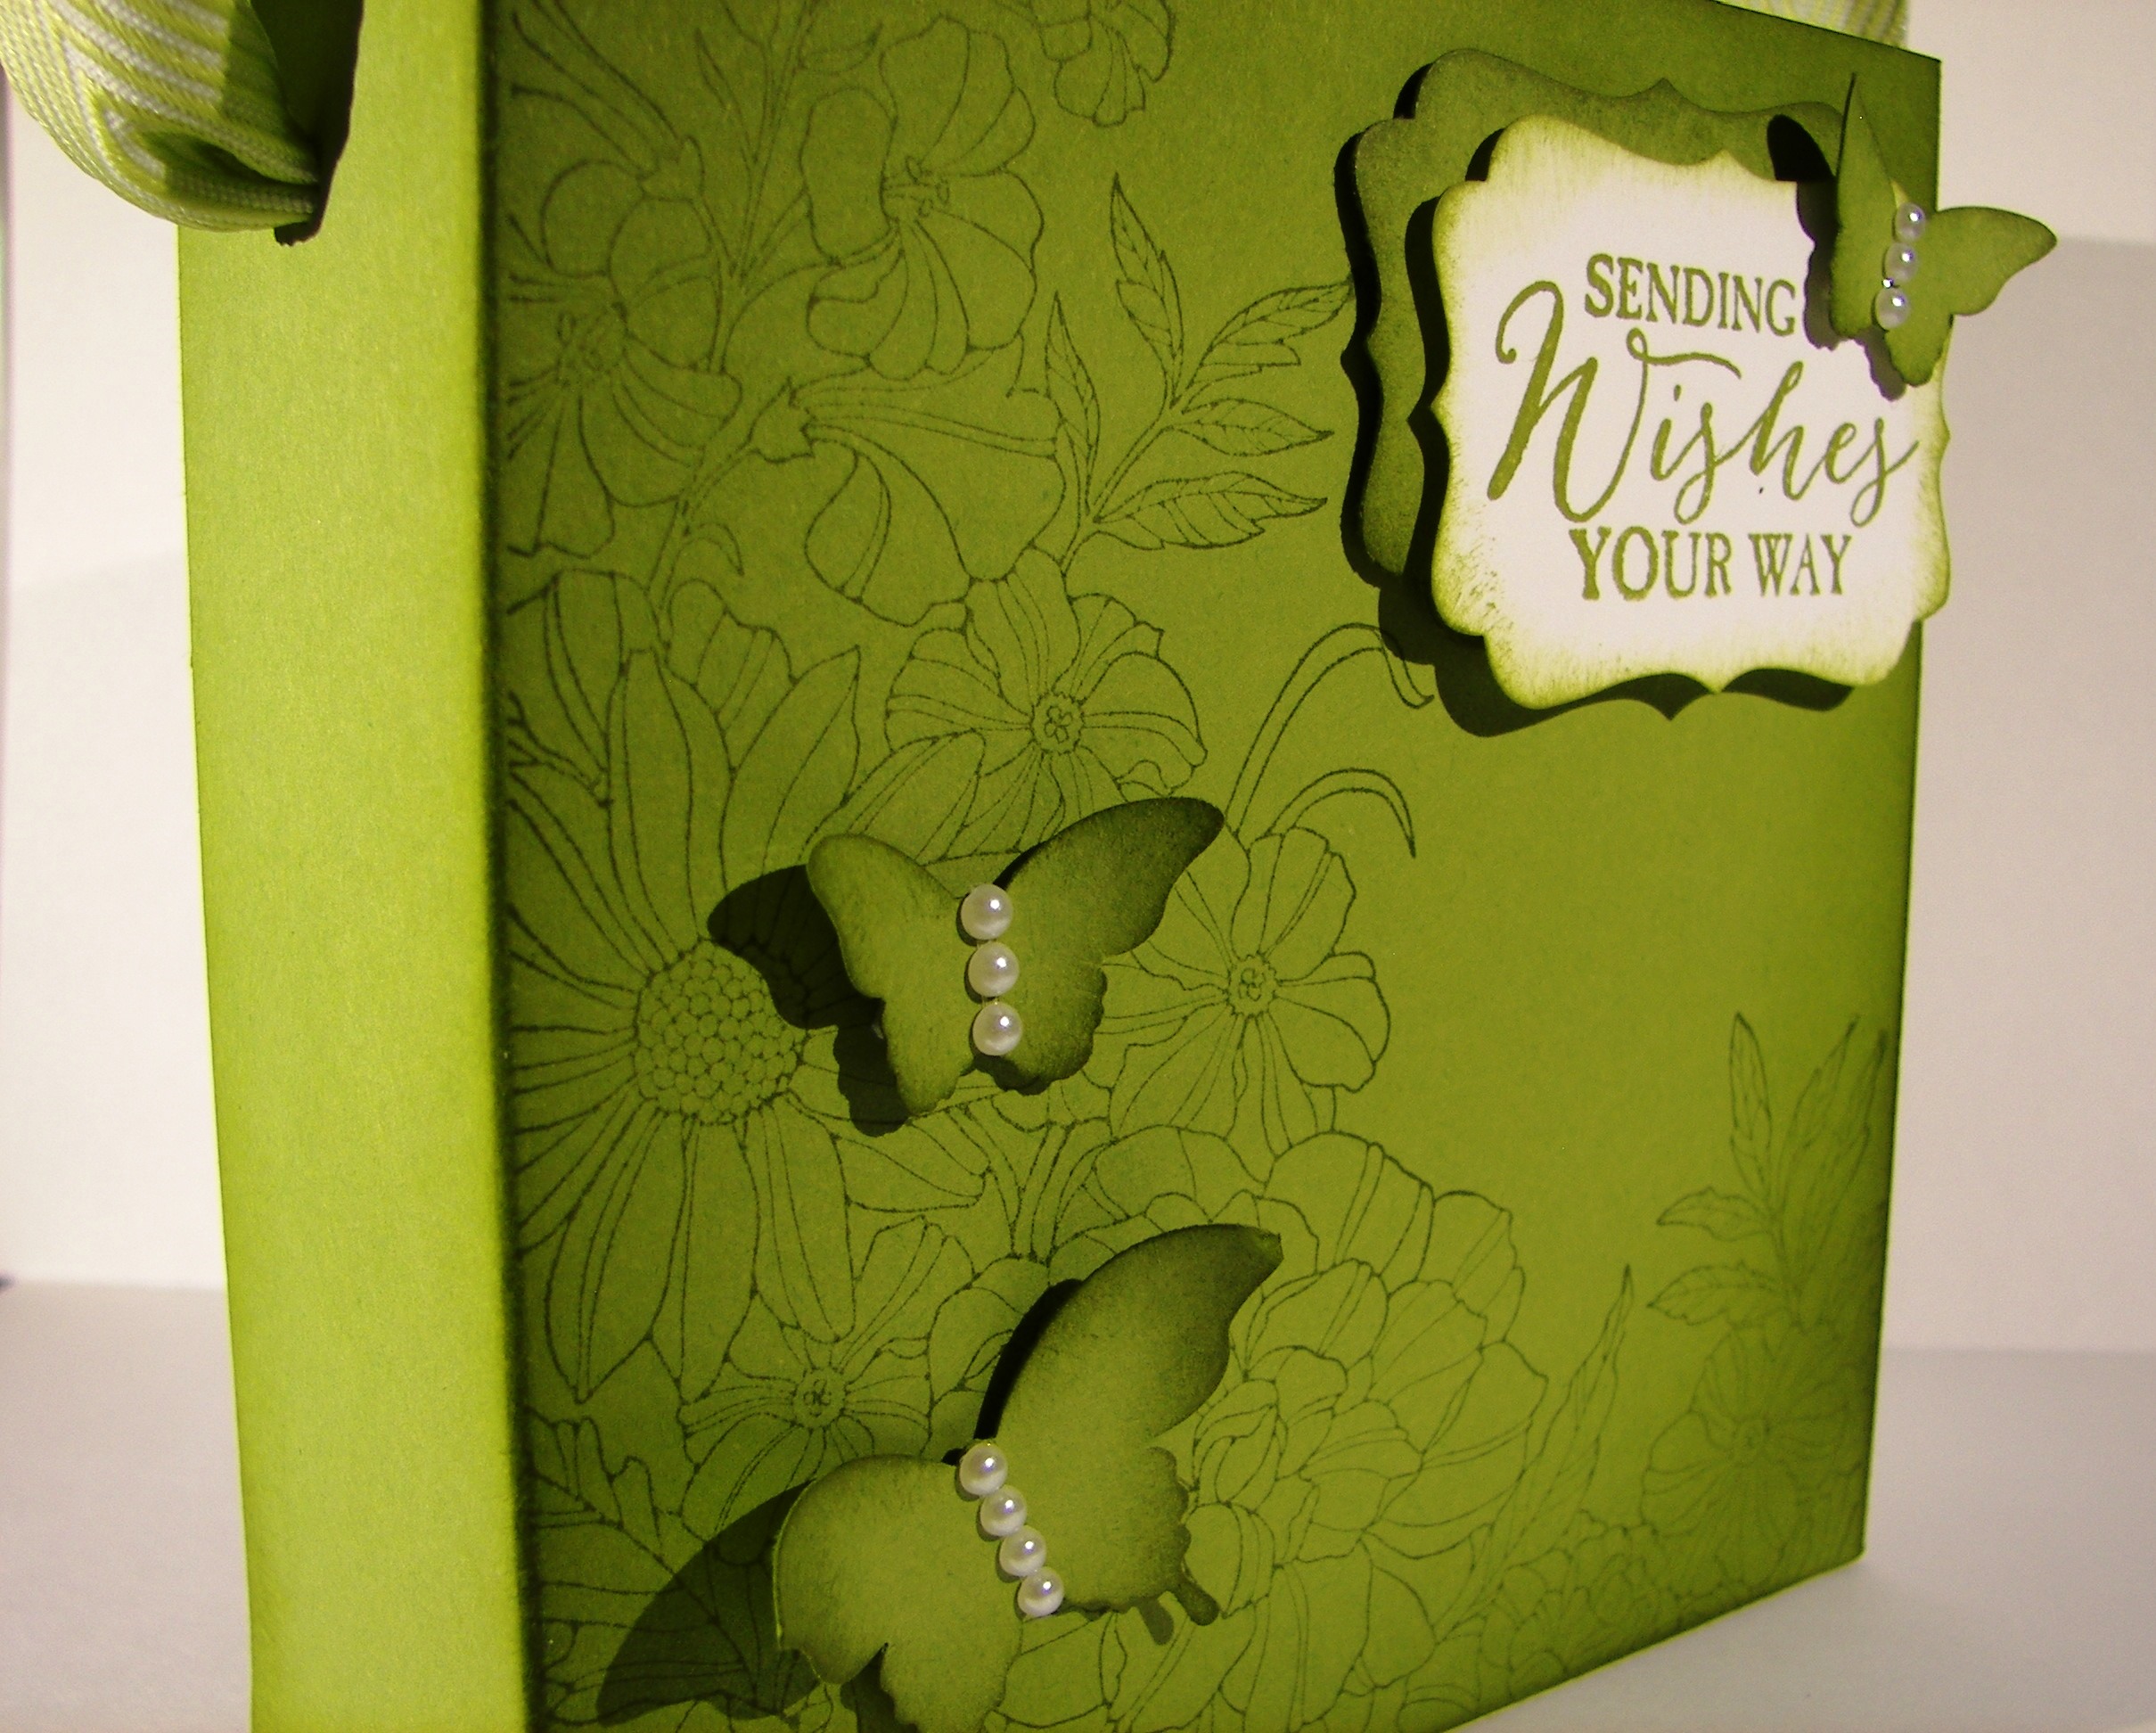
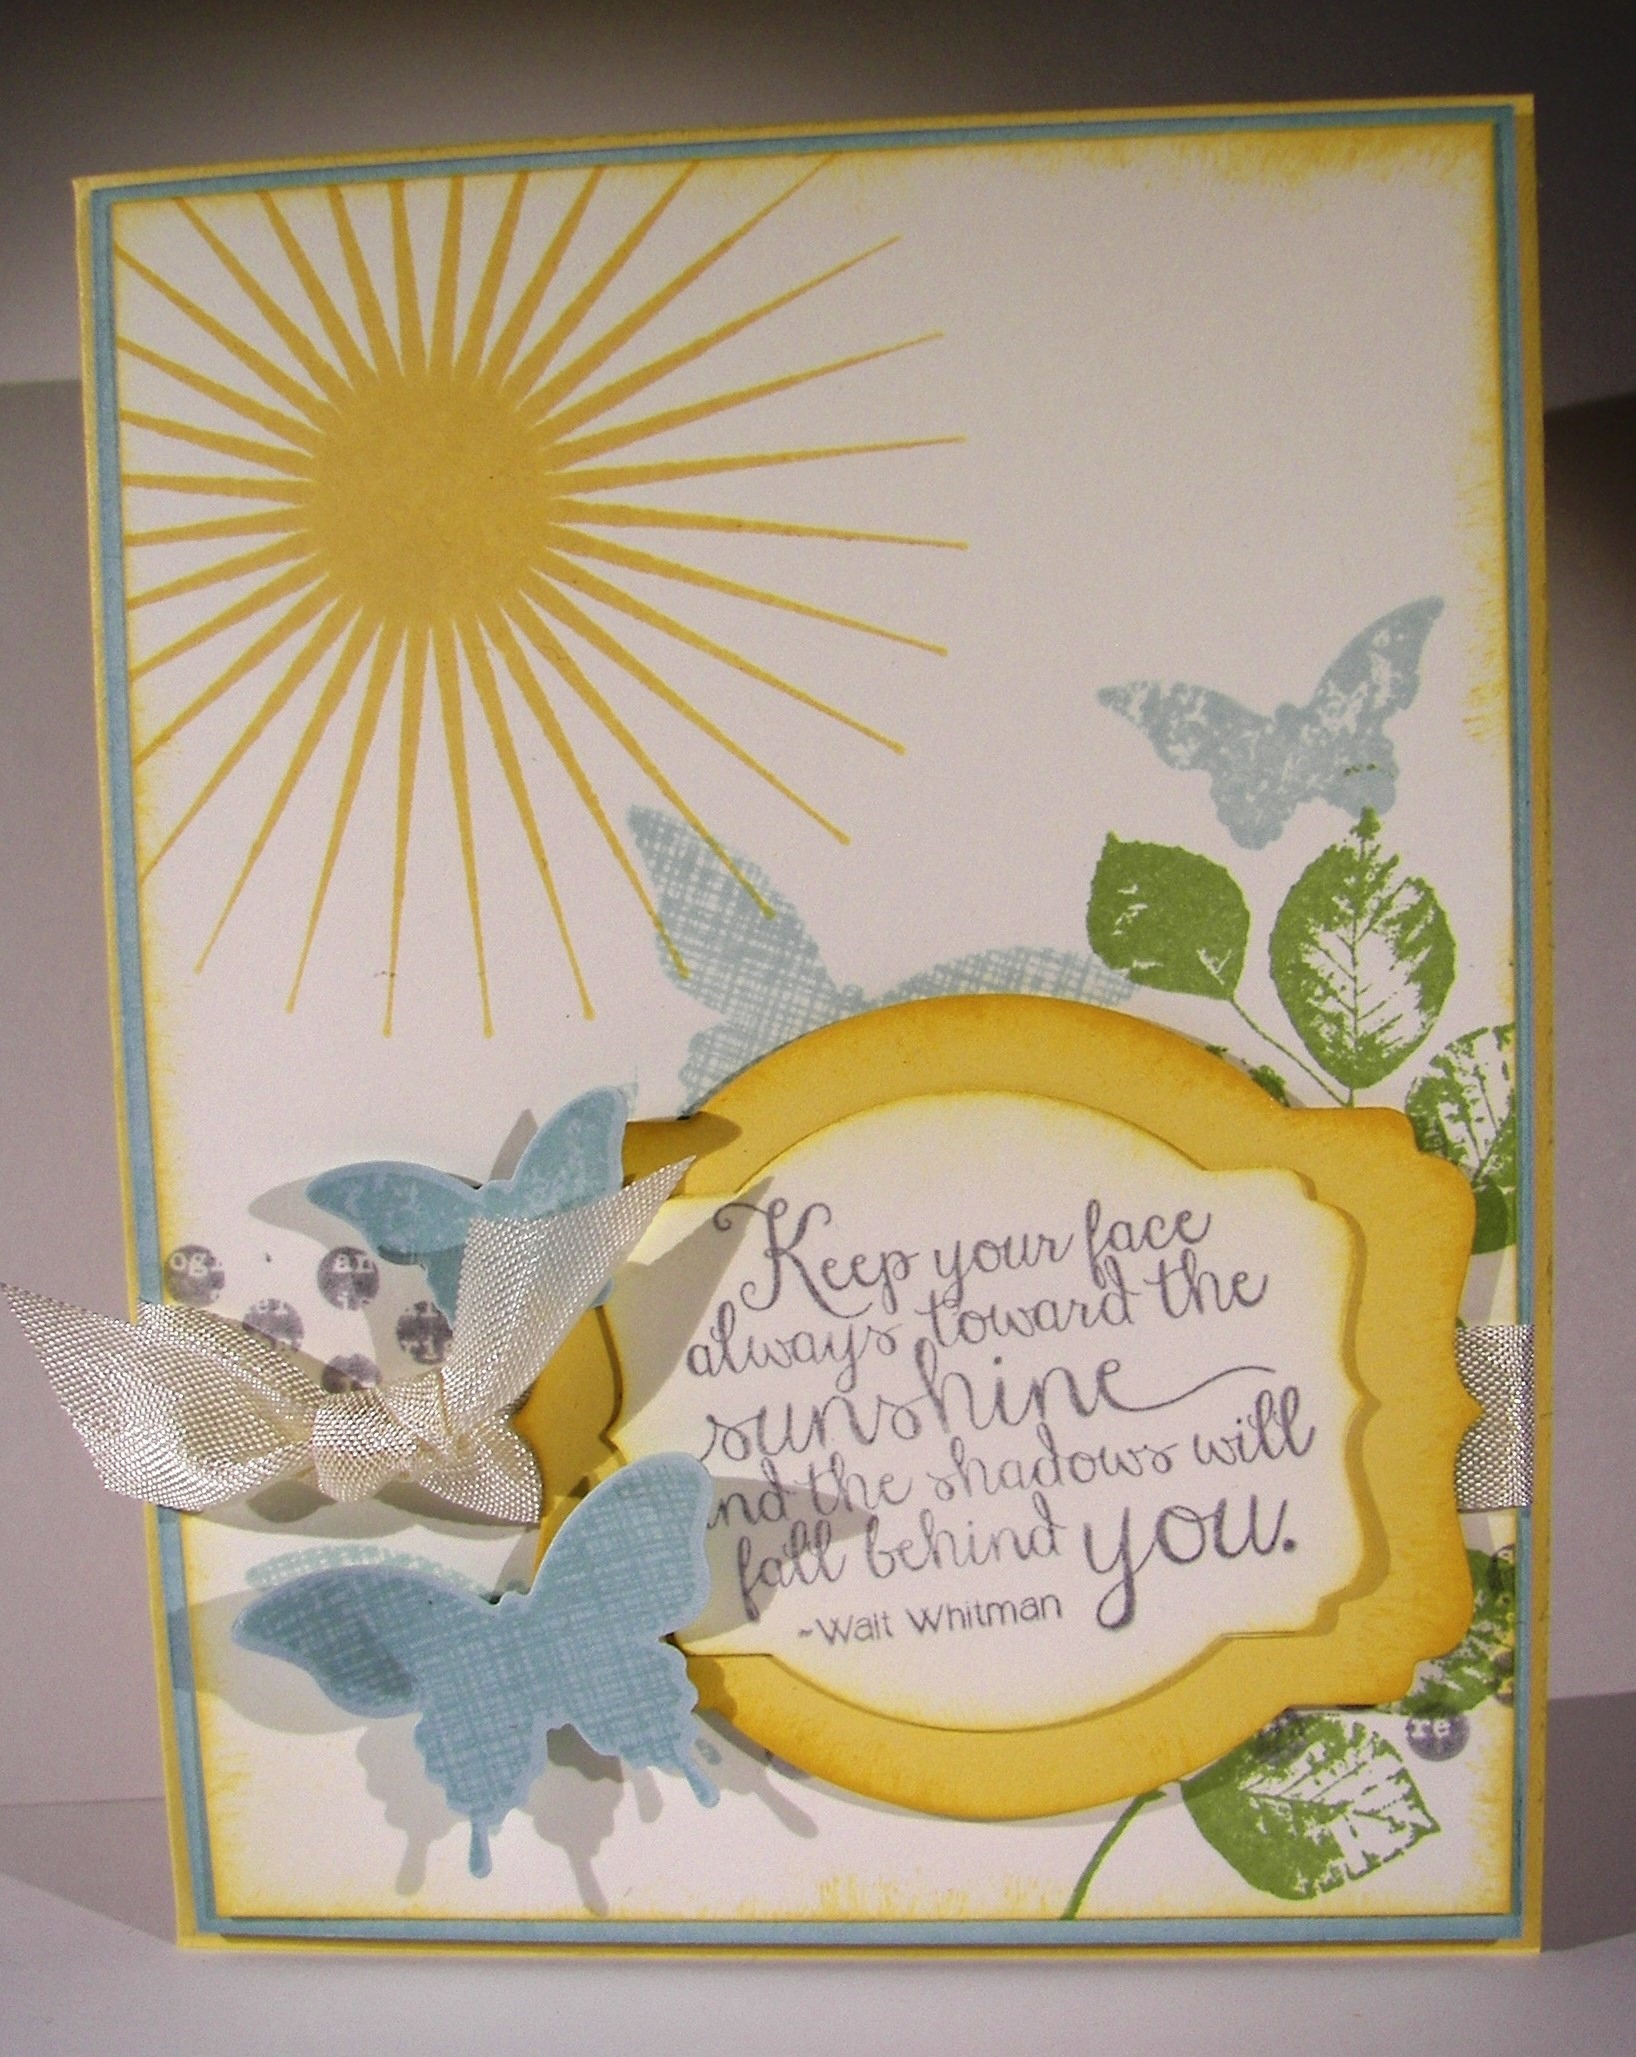
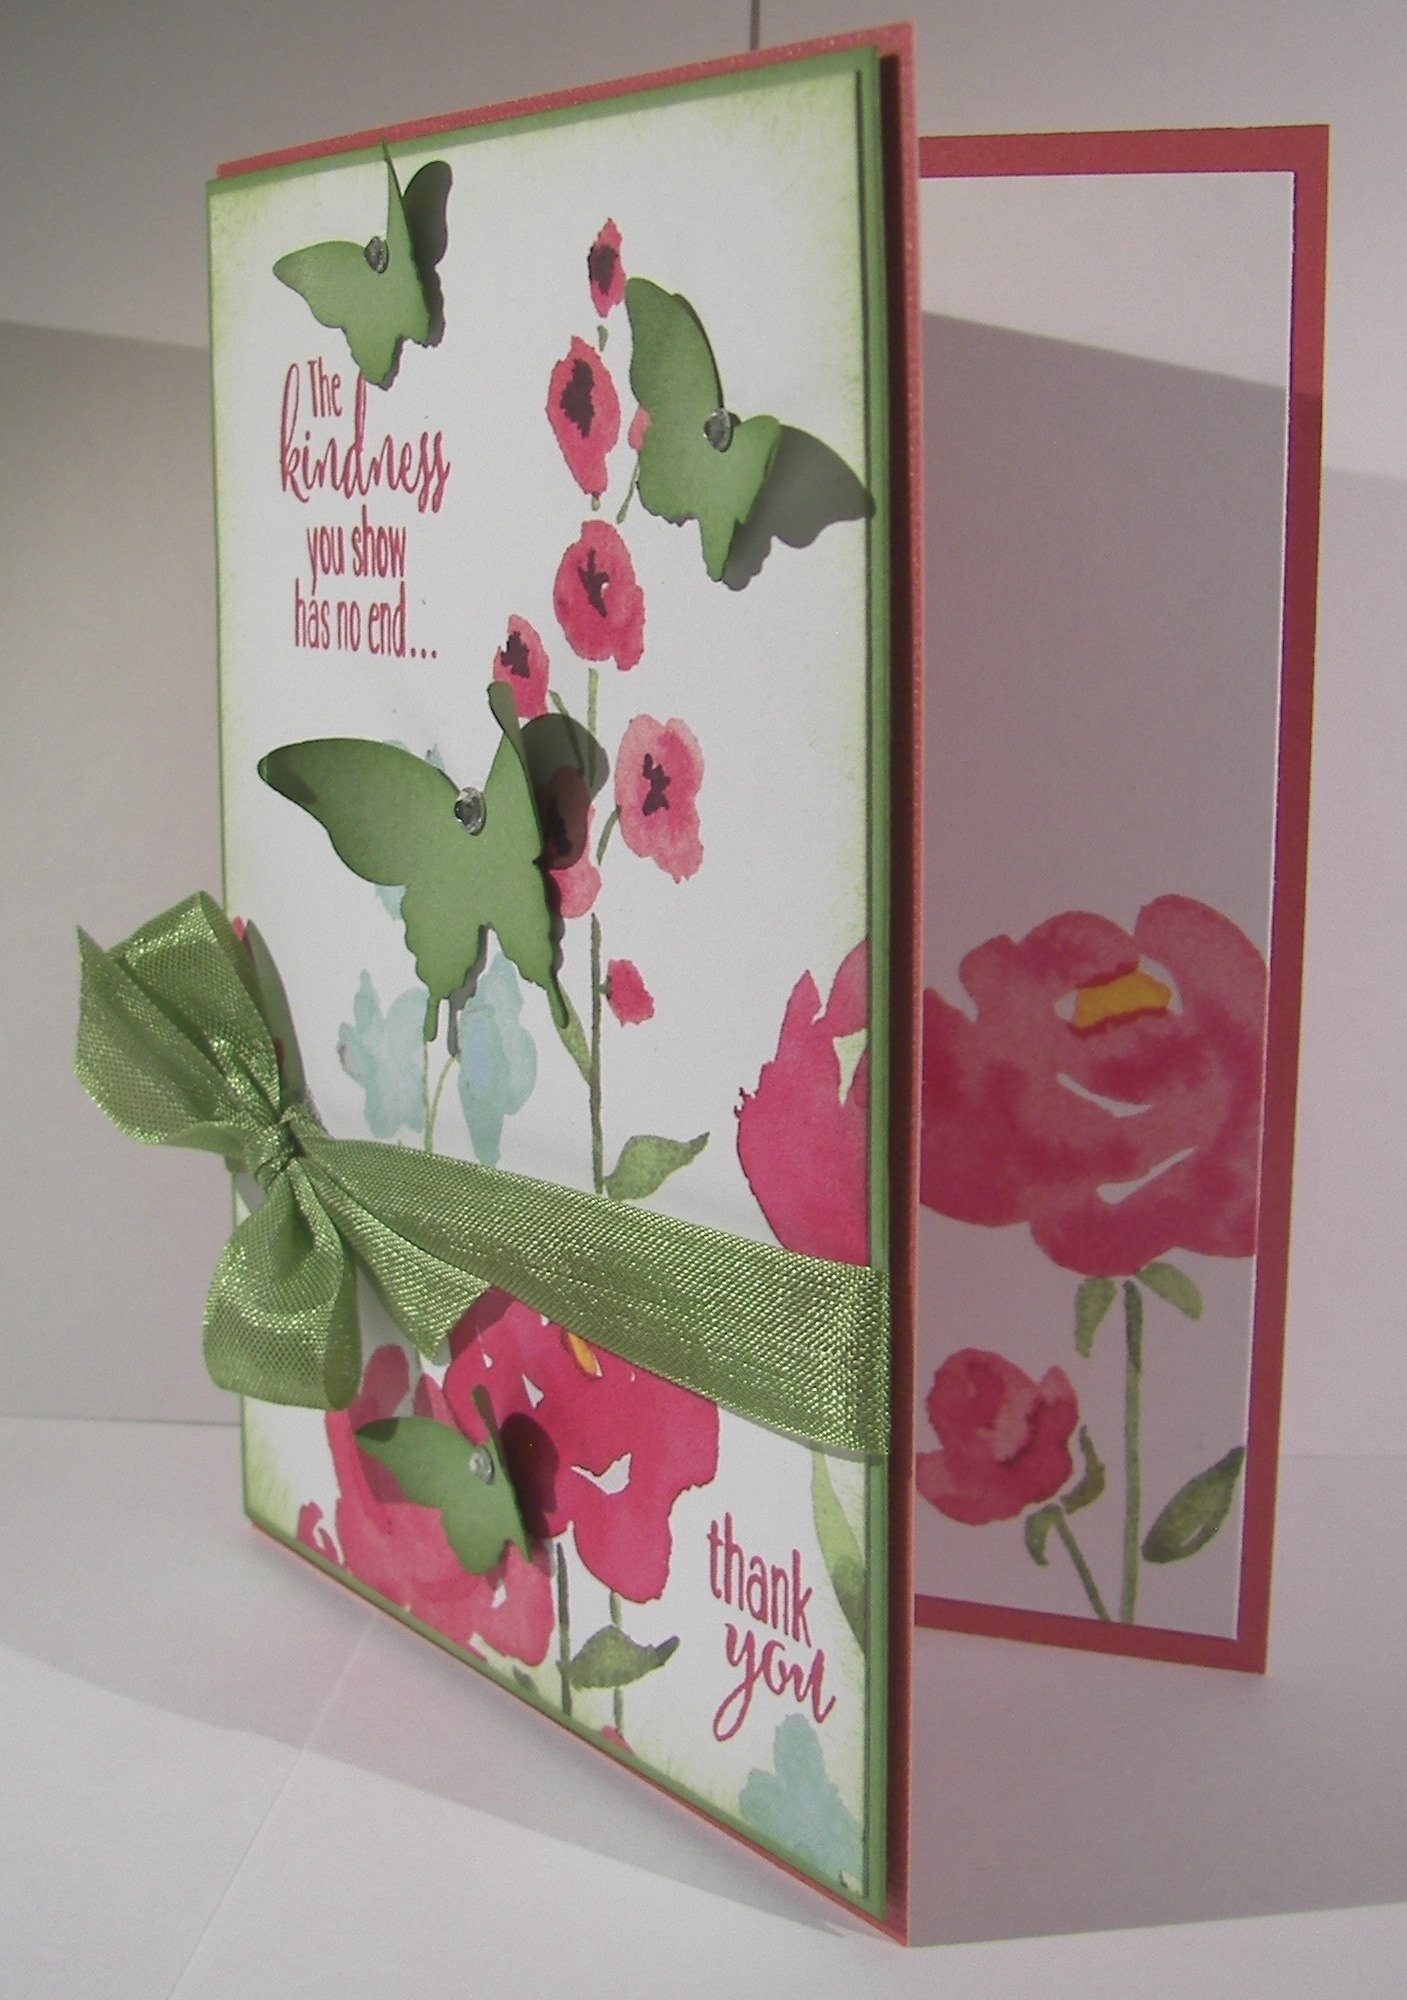
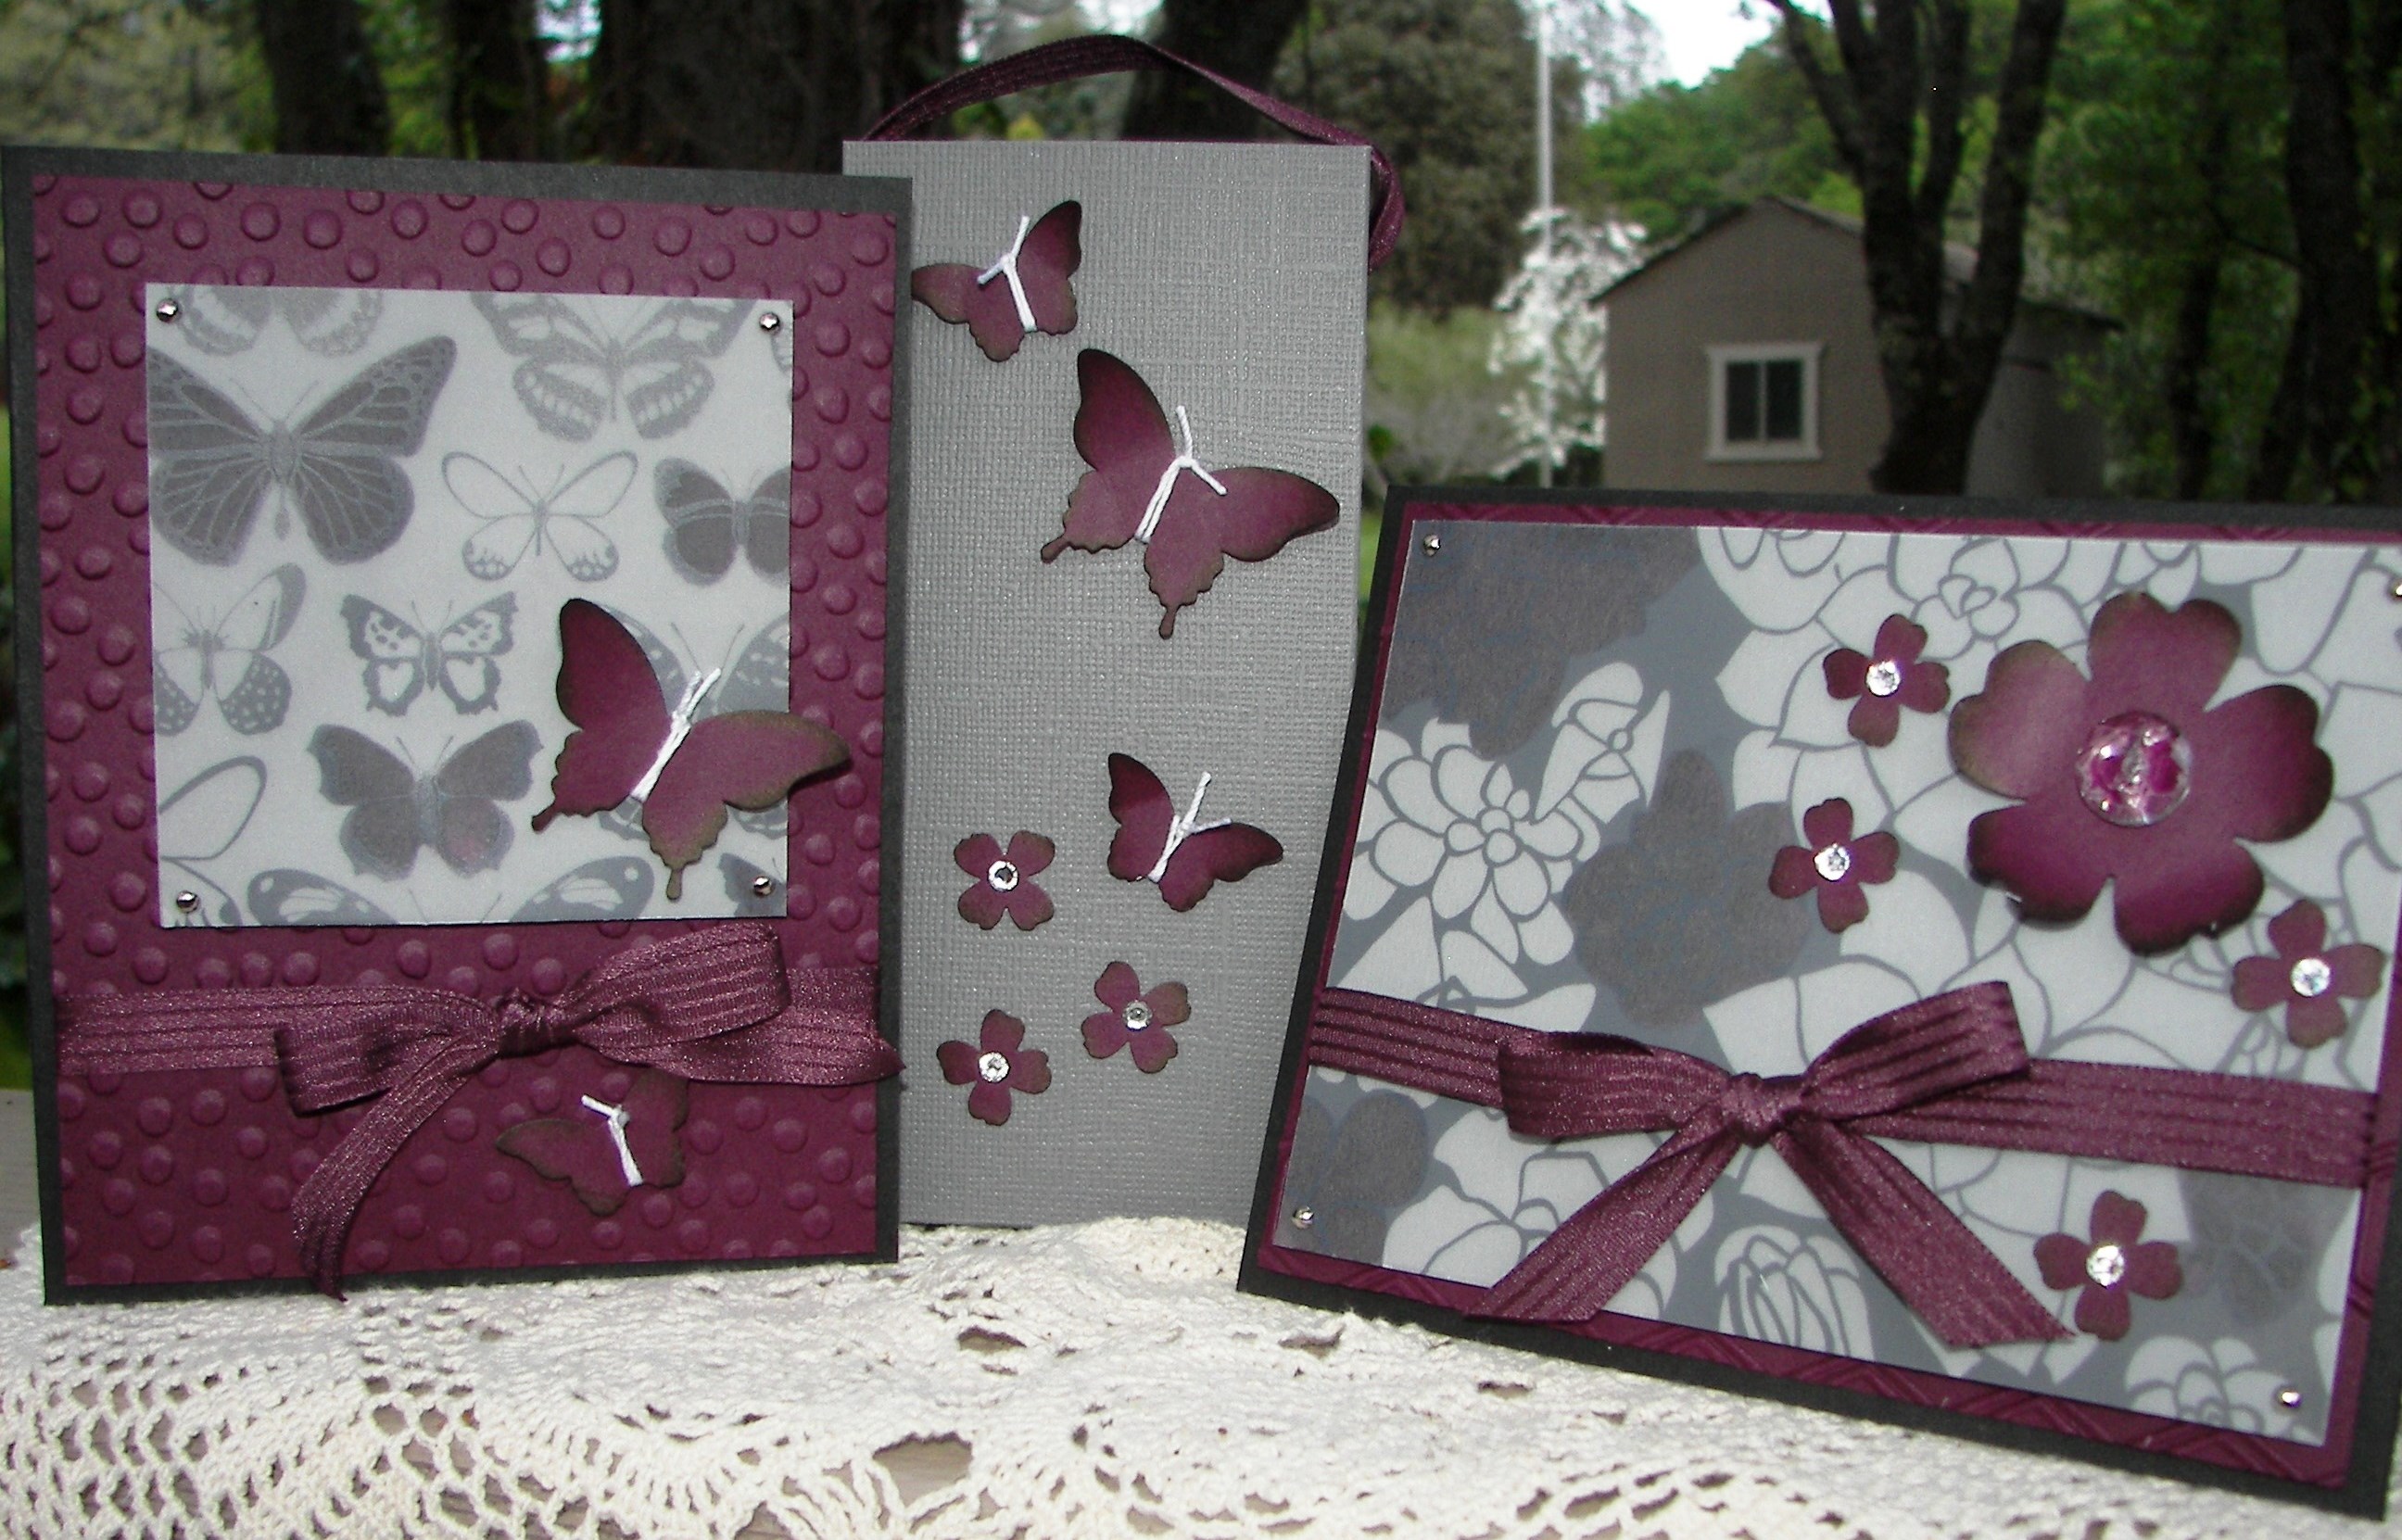
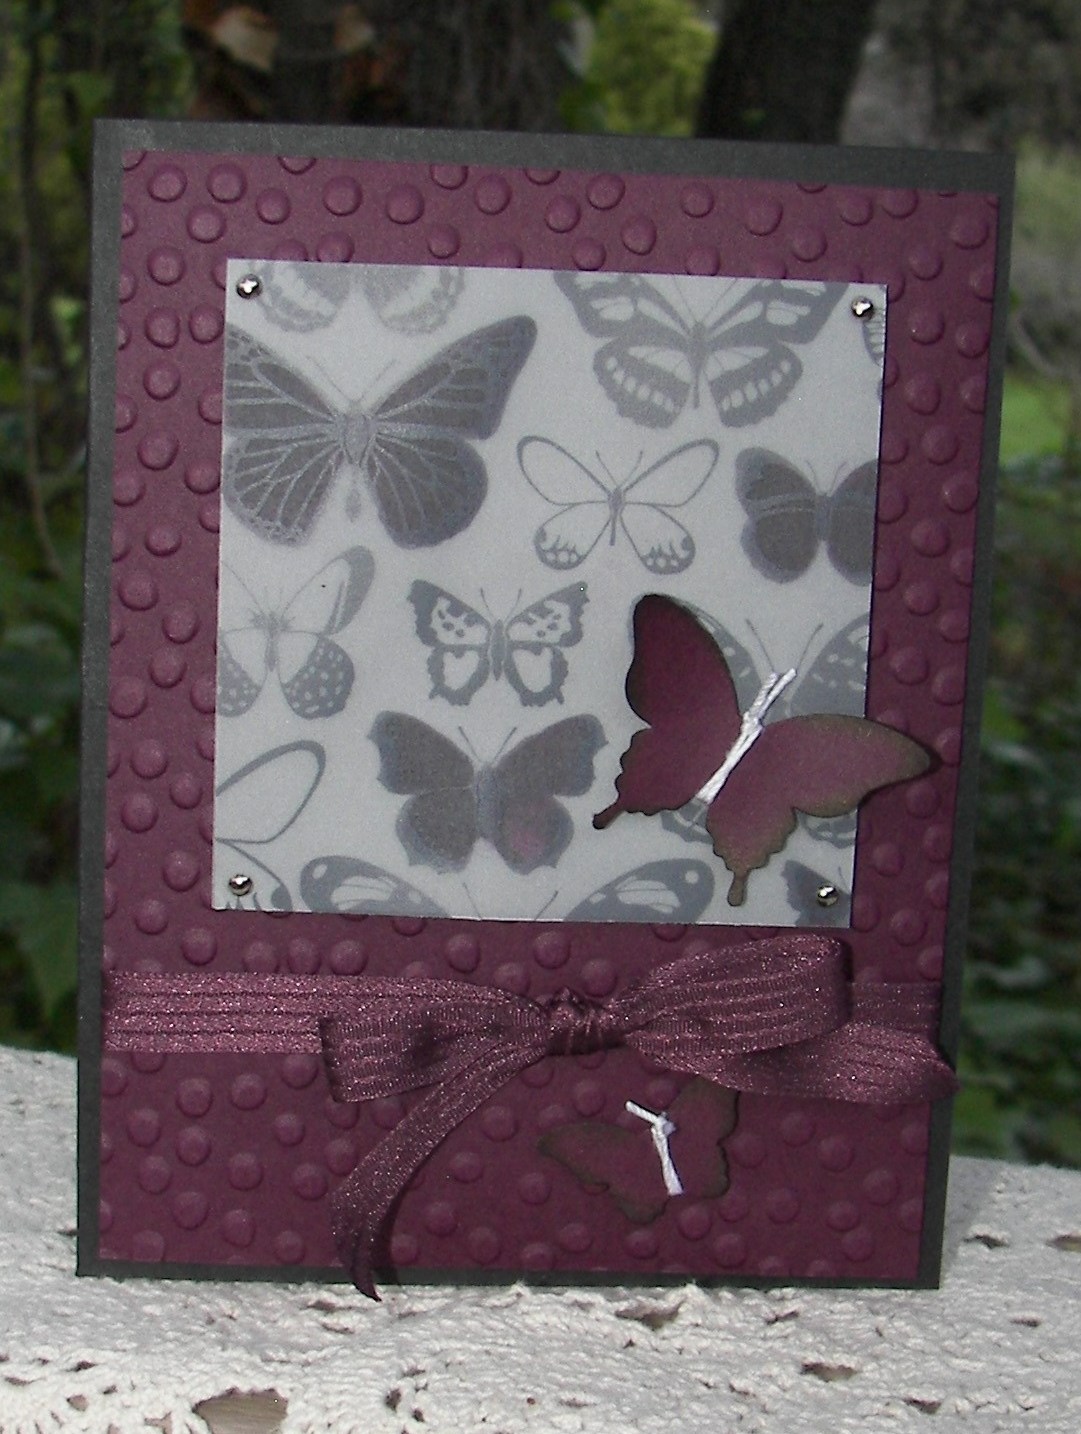
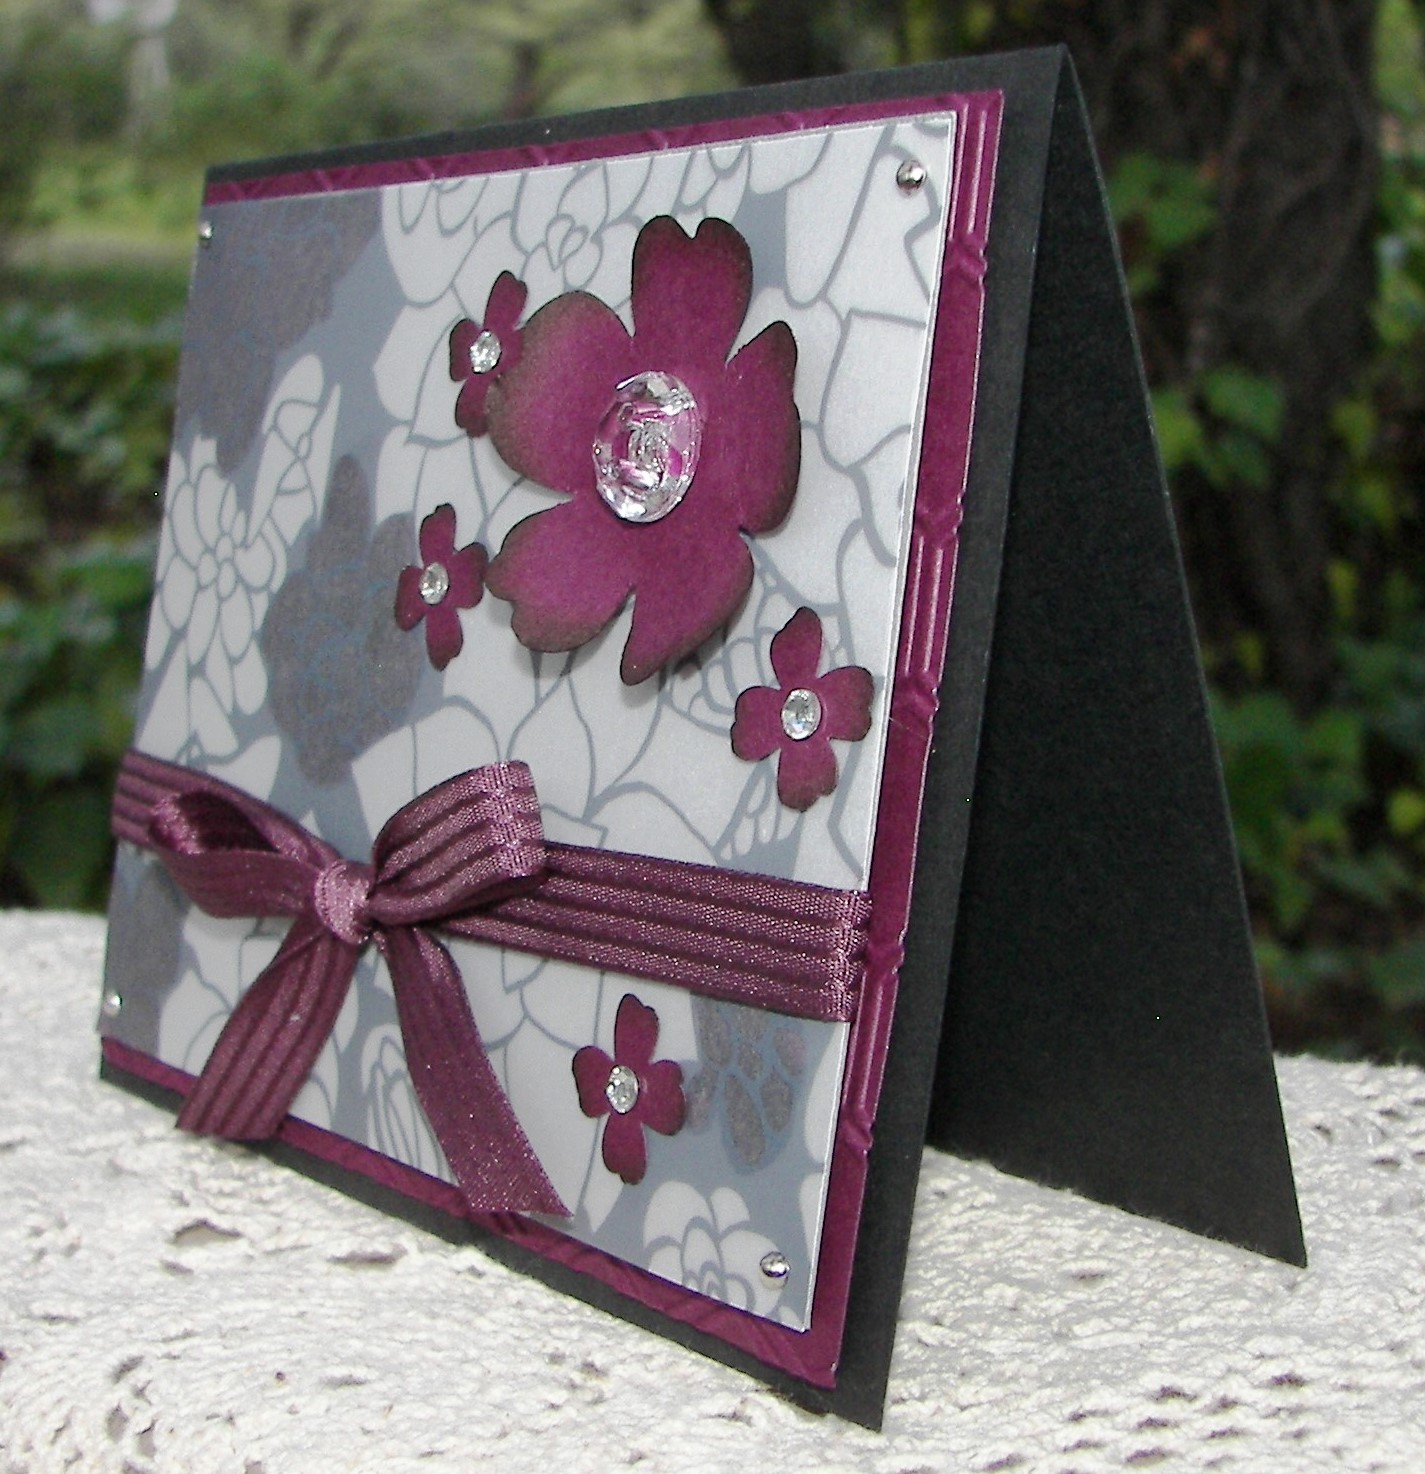
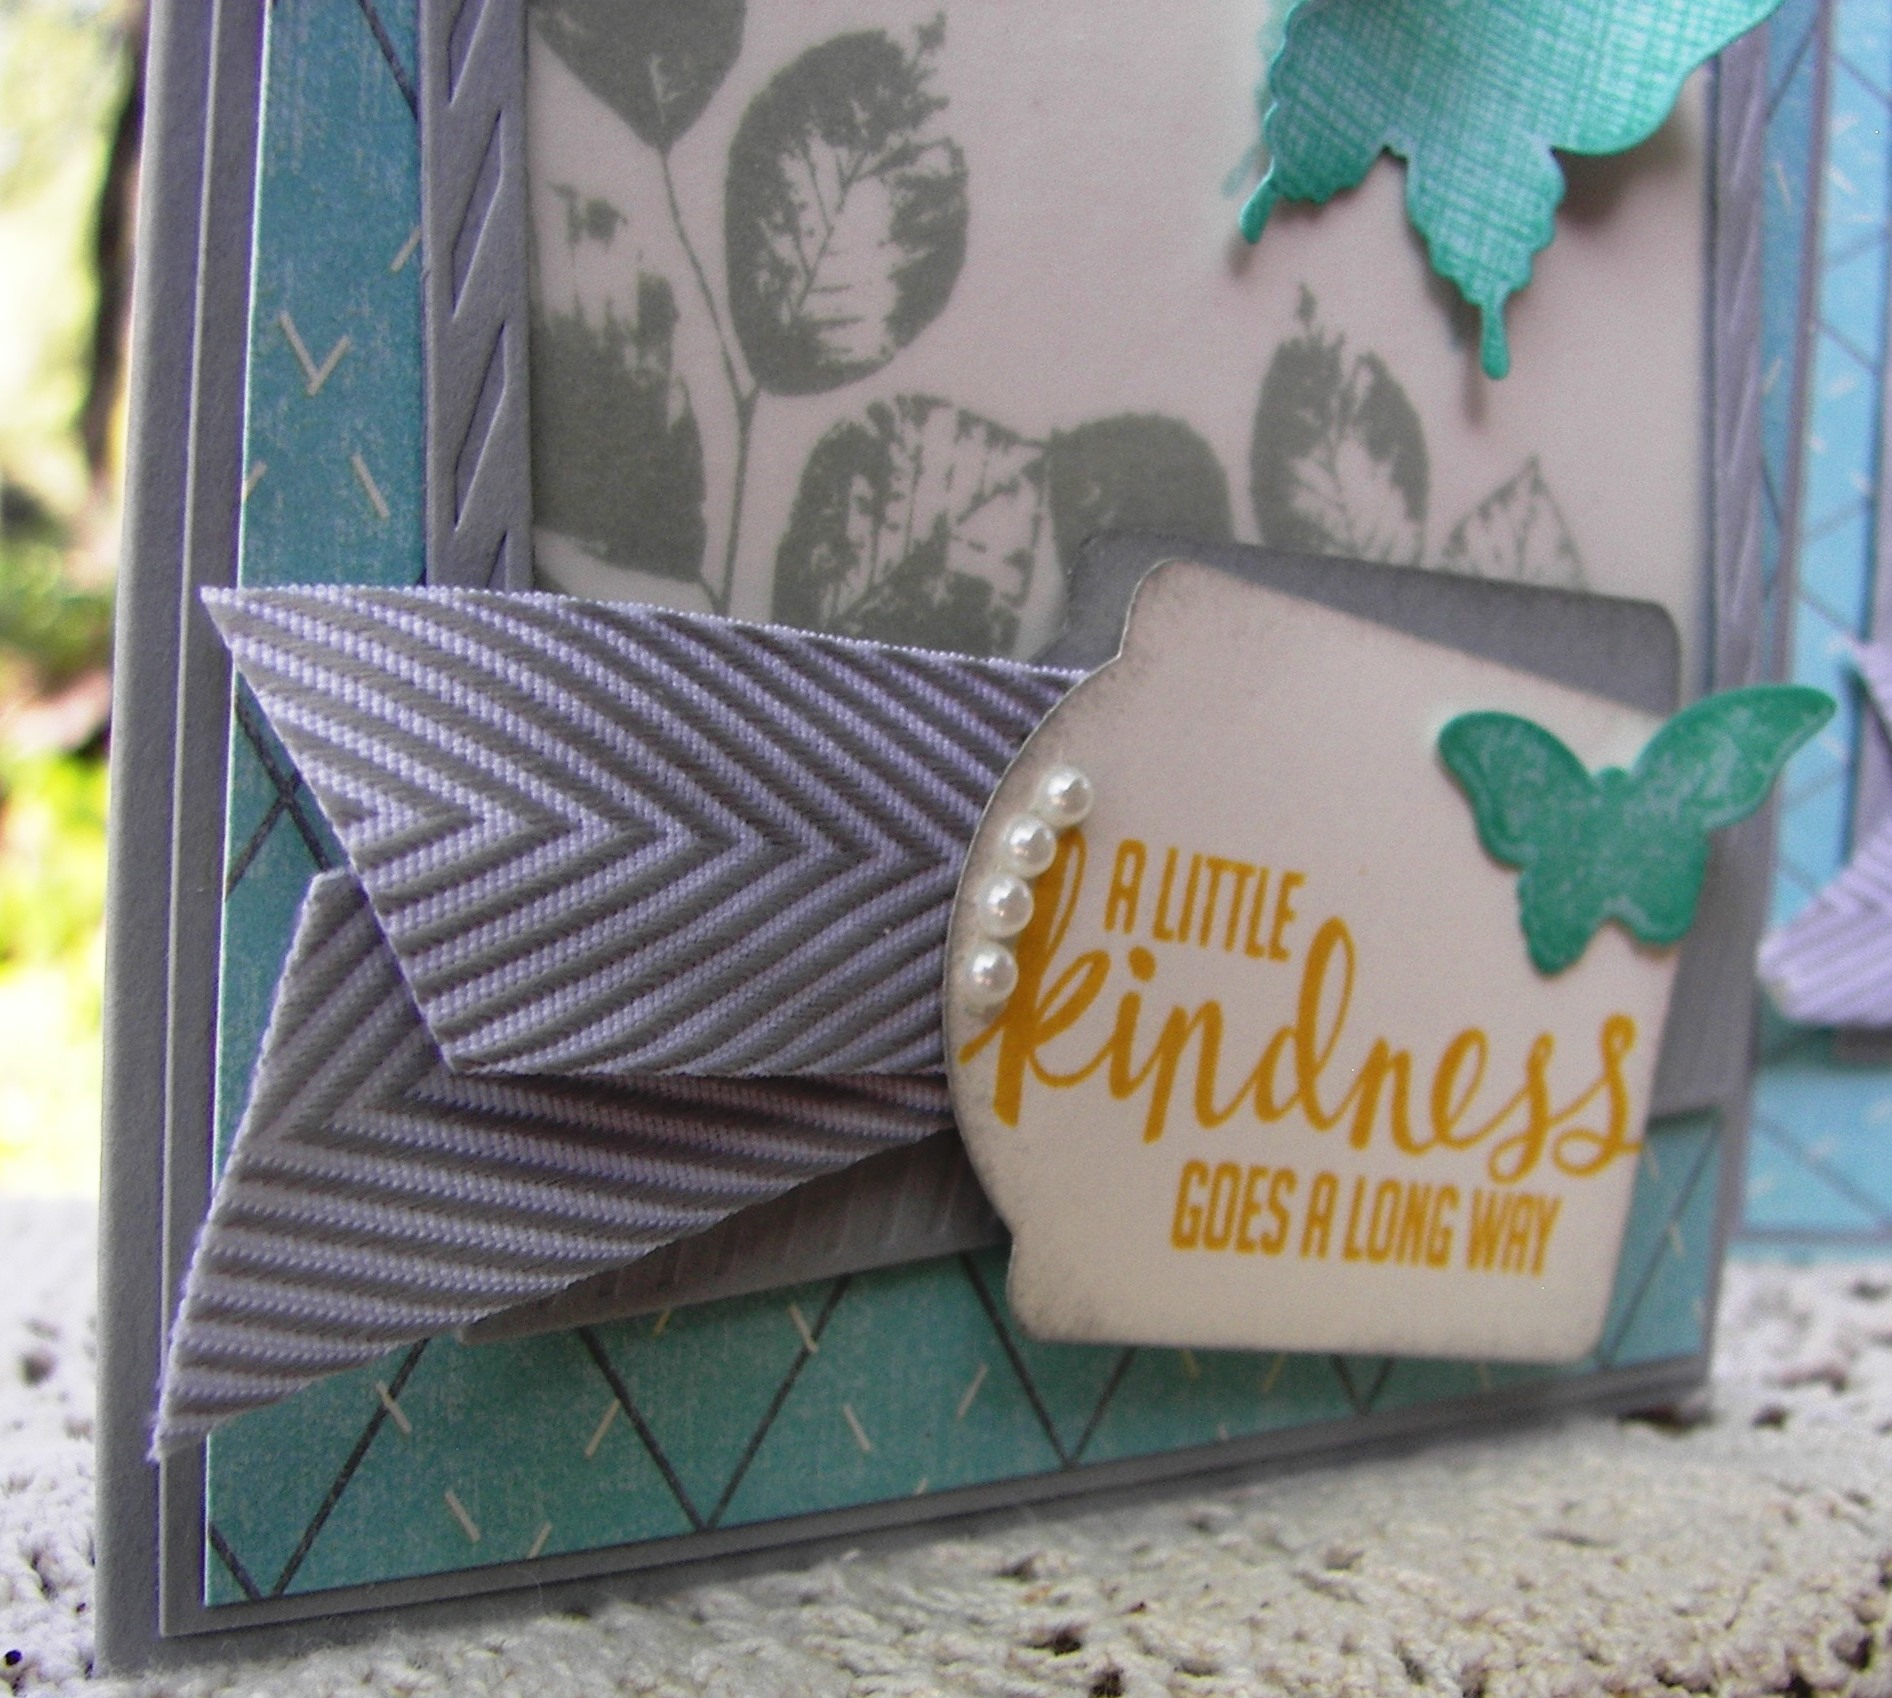
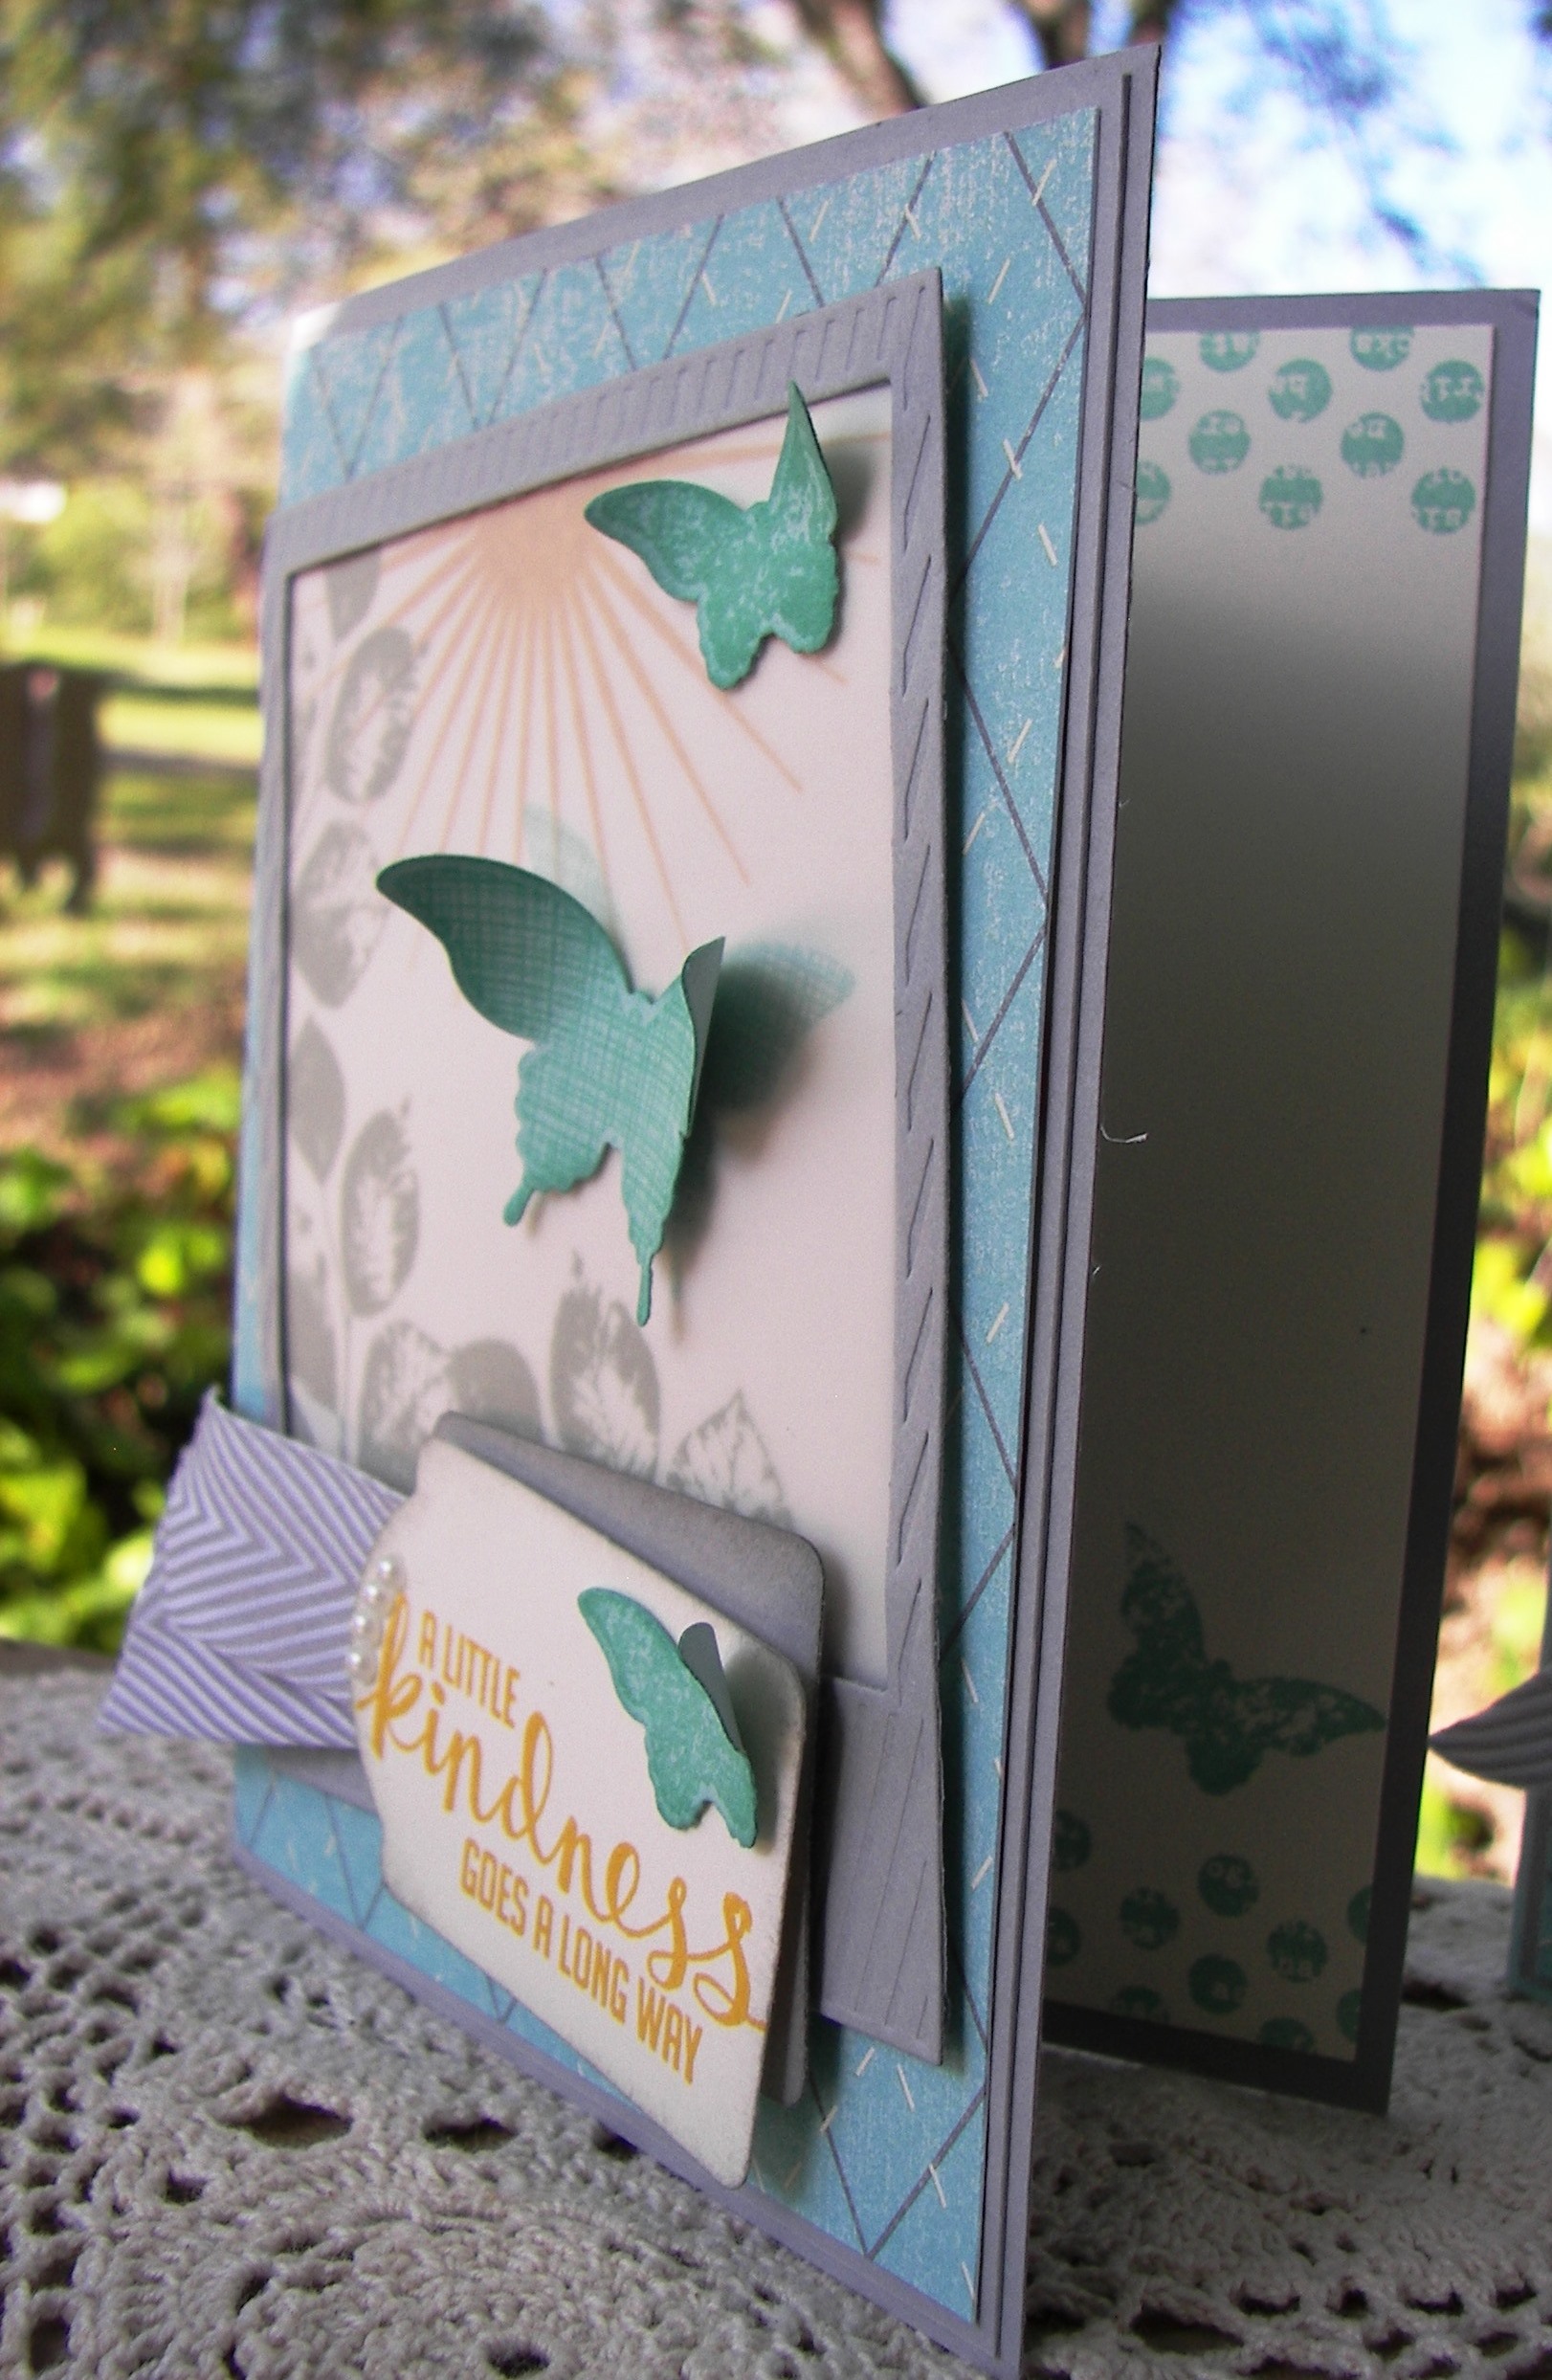
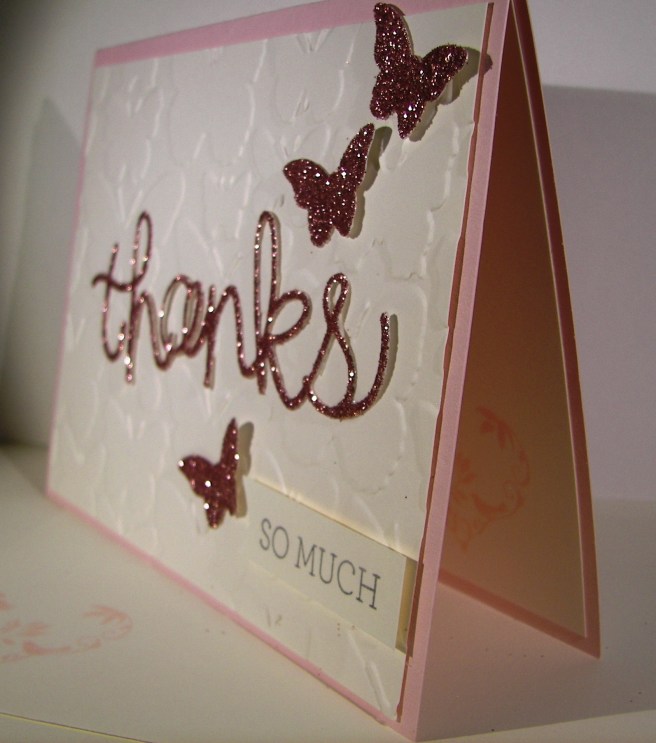
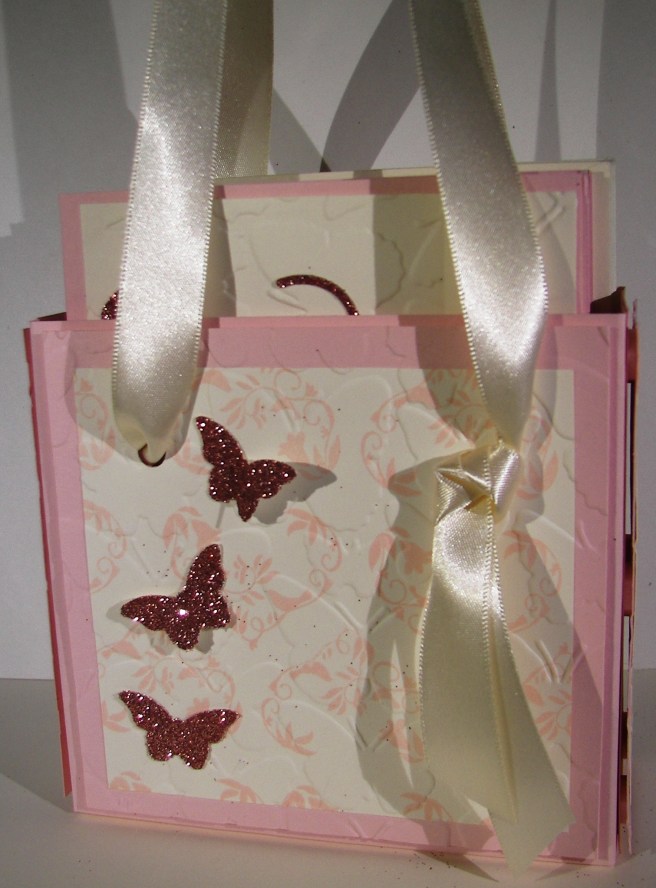
I embossed my card base and the bag fronts with the same fluttering embossing folder.  The blushing bride glimmer paper is everywhere.  And yes, my desk is very sparkly just now. Good thing I love glitter.  The bag fronts are raised up on dimensionals, but the card fronts are adhered down flat.  I used liquid glue to place the ‘thanks’ phrase in the middle of the card.  The ‘so much’ phrase was stamped on a 1/2″ strip of very vanilla, punched on one end with the bitty banner punch and raised up on dimensionals again.  The bitty butterflies are placed with glue dots.

The card bases and bag base were made with pink pirouette, not blushing bride.  I honestly liked how it looked together rather than blushing bride to match the glimmer paper.  Hard to tell sometimes why I like what I do, but that is how it worked out.  The bag handle was made with a bunch of satin ribbon, so very elegant.  And there you have it.

101_1298

Have a creative day!

Moana

Birthday Jar Wishes That Last

It isn’t my usual project to share, but I do make these particularly often.  The idea is lovely and I get to put a lot of retired product to good use.  I do hate to ignore it, so I thought I would share  a way to use it differently.

Birthday Jar Wishes That Last

I bought some of those washi sheets having no idea what I would do with them.  Until this fun series of projects came about.  I work with the young ladies in my church, along with several other ladies, and we come together as a team in a large variety of events from large to small and everything in between.  Of course we celebrate birthdays!  And that is what this is.

Birthday Jar Wishes That Last

I decorate jars and vases with washi paper punches to the mood I am in.  Sometimes I use framelits, or punches, or both.  I have a large collection of last springs sale-a-bration ribbon, so it always goes together.  You know how I love to coordinate as much as possible.  So these jars are created for each young lady or woman in our group.  We all then write inspirational wishes, birthday wishes, and just kind words in general to fill the jar.  Then, the recipient can read them all at once, or read them one at a time, or open them over time when a bad day happens and they need a pick me up.  Something sweet for whenever you want them.  So, try something different with the awesome product you have, either current or retired, it is all wonderful!

Birthday Jar Wishes That Last

Have a creative day!

Moana

Banner Blessings Gift Box

And here is my lovely gift box.  I actually started with this and worked backwards to the cards I put inside.  A different process for sure, but I liked it.  And to be honest, I didn’t take very good notes on the product I used.  Sorry, but now I am out of town trying to keep up.  Ooooops.

Banner Blessings Gift Box

The colors and elements of each card are represented in this box.  Believe it or not, there is an easy way to get inside without messing it up so it can be used again.  I thought that was pretty clever myself.  I used my trusty score board to create this one, with the help of the angled plate.  I wasn’t sure how it would work out, but it did.  Now, on to the next project.  That is after I get home from my drive from Utah.  Maybe the desert will inspire me.

Banner Blessings Gift Box

Have a creative day!

Moana

A Little Thanks

What to do with a spool of silver metallic thread?  Make butterfly antennae of course.  This tiny, oh so tiny, tiny little bag is also closed with the same thread.A Little Thanks

This bag is sized just right to hold a gift card and you could squeeze in a flat chocolate or two.  How perfect a thank you is that?  I do love giving gift cards to people and having them tucked inside something as adorable as this makes it even better.

8-7

I started out with a piece of cardstock measuring 4 1/4 x 5 1/2, yup, that tiny.  I stamped half way down with my little butterflies, flipped it around and went down the other way.  I did that so if you turn the bag around, my butterflies aren’t upside down.  Clever, right?  Thought so too.

8-7 (2)

My score lines were all about the 1/2″ mark.  Just a tiny little bag here, so cute.  Can you tell I love tiny things?  Well, I do!  And this bag is all done and ready to get that special gift card for some lucky friend.

Have a creative day!

Moana

You’re Fabulous

Today I am using the same stamp set as yesterday, even if it is hard to tell.  Stamps can be as versatile as you let them be.  Example, I used the tiny floral stamp in the set to make the background paper.  Yup, it started out as plain whisper white and then got exciting.

You're Fabulous

Watermelon Wonder, what a yummy name for a color.  It is super springy and full of fun.  I experimented with bringing in some basic black, and although it looked elegant alongside, I wanted to keep it monochromatic to showcase it.

You're Fabulous

I started stamping the flowers full strength and continued stamping off on the paper to create the background.  I took it inside as well, but just in two opposite colors.  I did some light sponging inside and on the front.  I liked it so well, I took it across the whole piece and removed any white spaces.  Talk about color, it is all there.

You're Fabulous

A double tag, a few bitty butterflies with rhinestones, and a touch of the new dotted lace trim and it was all done.  Another project that is very likely to be used in next weekends workshop.

Have a creative day!

Moana

Corner Garden Gift Bag

Sometimes I design a bag around a gift or to match some cards I have made.  This time I wanted to work around a specific stamp.  I wanted to do a tone on tone with the Corner Garden stamp set.  The detail is fine and subtle, just the look I was going for.

Corner Garden Gift Bag

The bag is large enough to hold plenty.  It could hold a large set of cards and envelopes, or any number of things.  It is sturdy too.  A nice heavy cardstock bag with my favorite chevron ribbon.  Bring on the heavy gift, I am totally ready.

Corner Garden Gift Bag

At workshop Saturday my ladies teased me about my need to sponge the edges of everything.  I was able to say that I had controlled myself and we only sponged one of our three projects.  So I was feeling the need and definitely got busy on this bag. I just love the look it gives.

Have a creative day!

Moana

Kinda Eclectic Ray of Sunshine

Eclectic is the true nature of this card.  A little bit of everything coming together to create something beautiful.  With these colors, stamped images, punches, and a perfect Walt Whitman quote, how could you go wrong?

Kinda Eclectic Ray of Sunshine

Of course I had to layer in the 1/8th” fashion as is my thing these days.  But it makes me happy, even if it seems a bit wasteful.  I often punch or cut out underneath anyway, so it isn’t too bad.  I didn’t think I would notice if I inked the edges or not in such a narrow border, but you totally do.  It looked almost plain otherwise with this combo.  Interesting.

Kinda Eclectic Ray of Sunshine

When I stamped inside I used just the corner of the sunburst, it was just right.  It made me think of a quilt block I have never been brave enough to try.  I think I have seen it called New York beauty and it involves paper piecing to keep those points just so.  Beautiful, but daunting.  Maybe someday.

Well, today is workshop day, so I had to keep it brief.  No time for a second variation of the card and a matching bag.  I still have to get to the store before I go!

Have a creative day!

Moana

Painted Blooms with Lotus Blossom

I finally gave in and cut into those whole sheet pieces of art in the Painted Blooms DSP.  I have used several of the other patterns, just not the one lovely enough to be framed.  I got brave and was really pleased with the results.

Painted Blooms with Lotus Blossom

A trio of happiness for sure.  Along the top left and top left of the paper it opens us, just like it would in a flower garden.  I used those spaces for stamping and then again as my inside paper.  It was as if I had stamped it, but didn’t need to.  And I didn’t want to not use it, but it wasn’t the right balance for a card front.

Painted Blooms with Lotus Blossom

This need to make matching gift bags is really starting to fill up my work station.  I can count ten bags from where I am sitting.  Seriously now, I need to do some gifting.

Painted Blooms with Lotus Blossom

I really enjoy the combination of rose red and wild wasabi.  They really are beautiful together.  Sweet words, pretty colors, flowers and butterflies, my work is so happy here.

Painted Blooms with Lotus Blossom

Have a creative day!

Moana

Sheer Perfection

I had taken a break from blackberry bliss, since I couldn’t leave it alone.  I went through a pack of that paper pretty darn quick.  Just had to order another.  I absolutely love, love, love that color.  I am glad we get it for another year.

Sheer Perfection

Isn’t this velum paper just beautiful?  It is yet another free gift with a qualifying purchase during Sale-a-bration!  Those folks at Stampin’Up! did a really clever thing during this sale.  By the time we hit March, things have slowed a bit, so they introduced four new gift items!  Wheeeeeee!

Sheer Perfection

I picked my favorites right away of course.  This pack has several patterns and they are all wonderful.  You should really get some of it, really.

Sheer Perfection

The gift bag I made to go with is pretty darn simple.  I probably should have done more, but I was wasn’t feeling it.  My daughter thought it would be perfect with a couple of candy bars inside.  What bag wouldn’t, right?

Either way, I finally got these together.  Some Saturday’s are busier than others, and today was chuck full of very wonderful distractions.  Life can be so good.

Hope you had a creative day!

Moana

Kinda Eclectic with Flashback DSP

Yet another dip into the awesome annual catalog brought out this beauty!  The Kinda Eclectic stamp set looked almost too trendy for my style.  I think we found a middle ground, don’t you?

Kinda Eclectic

We’ve got just about everybody involved today.  There is stamping of course, punches, framelits, stapling, and creative adhesive use.  Phew, what a workout!

Kinda Eclectic

Actually, it wasn’t that hard.  It really is great to have tools that are designed to create an awesome look so easily.  It makes a master crafter out of just about anyone.  You should really give it a try.

Kinda Eclectic

I used pool party, crushed curry and smokey slate.  I think the inside stamping really gives it a nice look.  And who doesn’t love a coordinating stamp and punch!

Kinda Eclectic

Well, I had better sign off and head to my next adventure.  It would be making twenty sour cream box guys for a camp meeting this evening.  How fun!

Have a creative day!

Moana