Thank You for Everything and More

Kind words and a sweet treat.  It doesn’t quite add up to all the gratitude I have been feeling these days, but sometimes that is all you can muster.  Making something yourself means so much more I think.  You should give it a try.

6-3

Clean and simple yet again.  When you want to focus on the lovely sentiment and wonderful paper that is just how it needs to be done.  I did add a layer of mint macaron under the DSP before I attached it to the crumb cake card base.  It gave it a little extra style without becoming a distraction.  So fun!

Have a creative day!

Moana

Thanks Kindly

Here is the official beginning of summer for me.  I do have a wedding reception to host this Saturday, so it isn’t time to head to the lake just yet.  Soon though, soon.

6-4

This series of clean and simple thank you gift sets sure was fun to create.  I enjoyed giving them just as much, and isn’t that why creative people create?  To share with others the joy that comes with creating?  Try your hand at something this simple and realize how rewarding it really can be.

Have a creative day!

Moana

You Are Too Kind.

When you are surrounded by kind people even the simple things are wonderful.  As huge life events come into play it just keeps getting better and better, don’t you think?

6-5

A clean and simple card and gift bag duo can be so rewarding.  This is just as simple as the others in this series and was received with great smiles and even a few giggles.  So rewarding, so very rewarding.

Have a creative day!

Moana

One Tiny Word With One Big Meaning

Today is a day full of gratitude for so many things.  I get to enjoy the experience of my son marrying a wonderful lady.  My heart is more than full.

6-6

Let’s keep this one even more simple, shall we?  I love a simple card that really lets you enjoy the sentiment.  Talk about clean and simple.  The matching gift box is tall and skinny. I filled it up with tiny treats as I shared it.  So much fun!

Have a creative day!

Moana

Remarkable…

This quite simply was round two.  I had this fun idea to emboss this flower with silver powder on black card stock.  Thought that would look pretty cool.  Then, I thought I would water color with a bit of silver encore ink and touch it up with wink of stella.  Can I just say that all went in the trash bin?  True story, not a good combination there.  Next try…better.

5-16

These colors are all I have on my brain lately.  The wedding is three weeks away and the reception I am hosting is four weeks away.  It is hard to find blackberry bliss in the spring out and about. I have managed what I can, and have had to let go of other ideas.  It is going well.  Just like this card duo.

5-16 (1)

Simple stamping and die cutting with oval framelits.  Touches of basic pearls to set it off and wrapped in pretty satin ribbon.  My kind of yummy.  After donating my stash of cards and bags for a fund raiser, this is the first one to begin the rebuilding.  All for a good cause.

5-16 (2)

Have a creative day!

Moana

Happy 29th Birthday {Again}

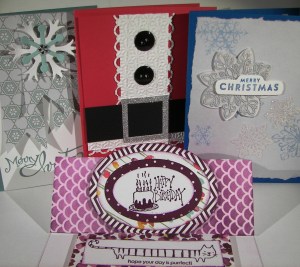
And the third workshop project has arrived.  Good thing too, since tomorrow is workshop! I often know further in advance what I want to do, but not this time.  I have been doing a lot of detailed water coloring and that doesn’t go well for large group instruction.  Folks need their own tools and materials for that kind of work.  We are doing one water color and that is stressful enough.

4-22

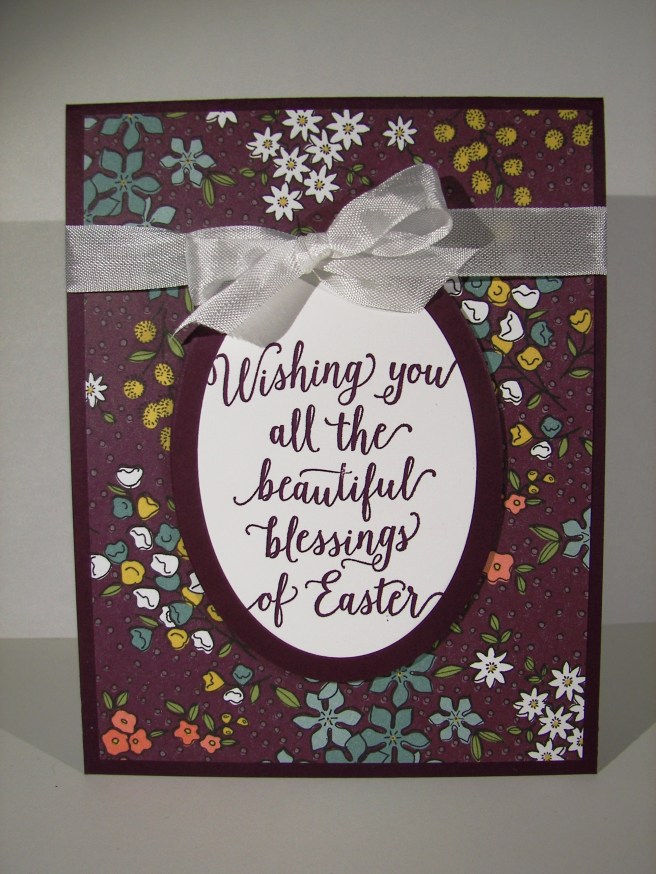
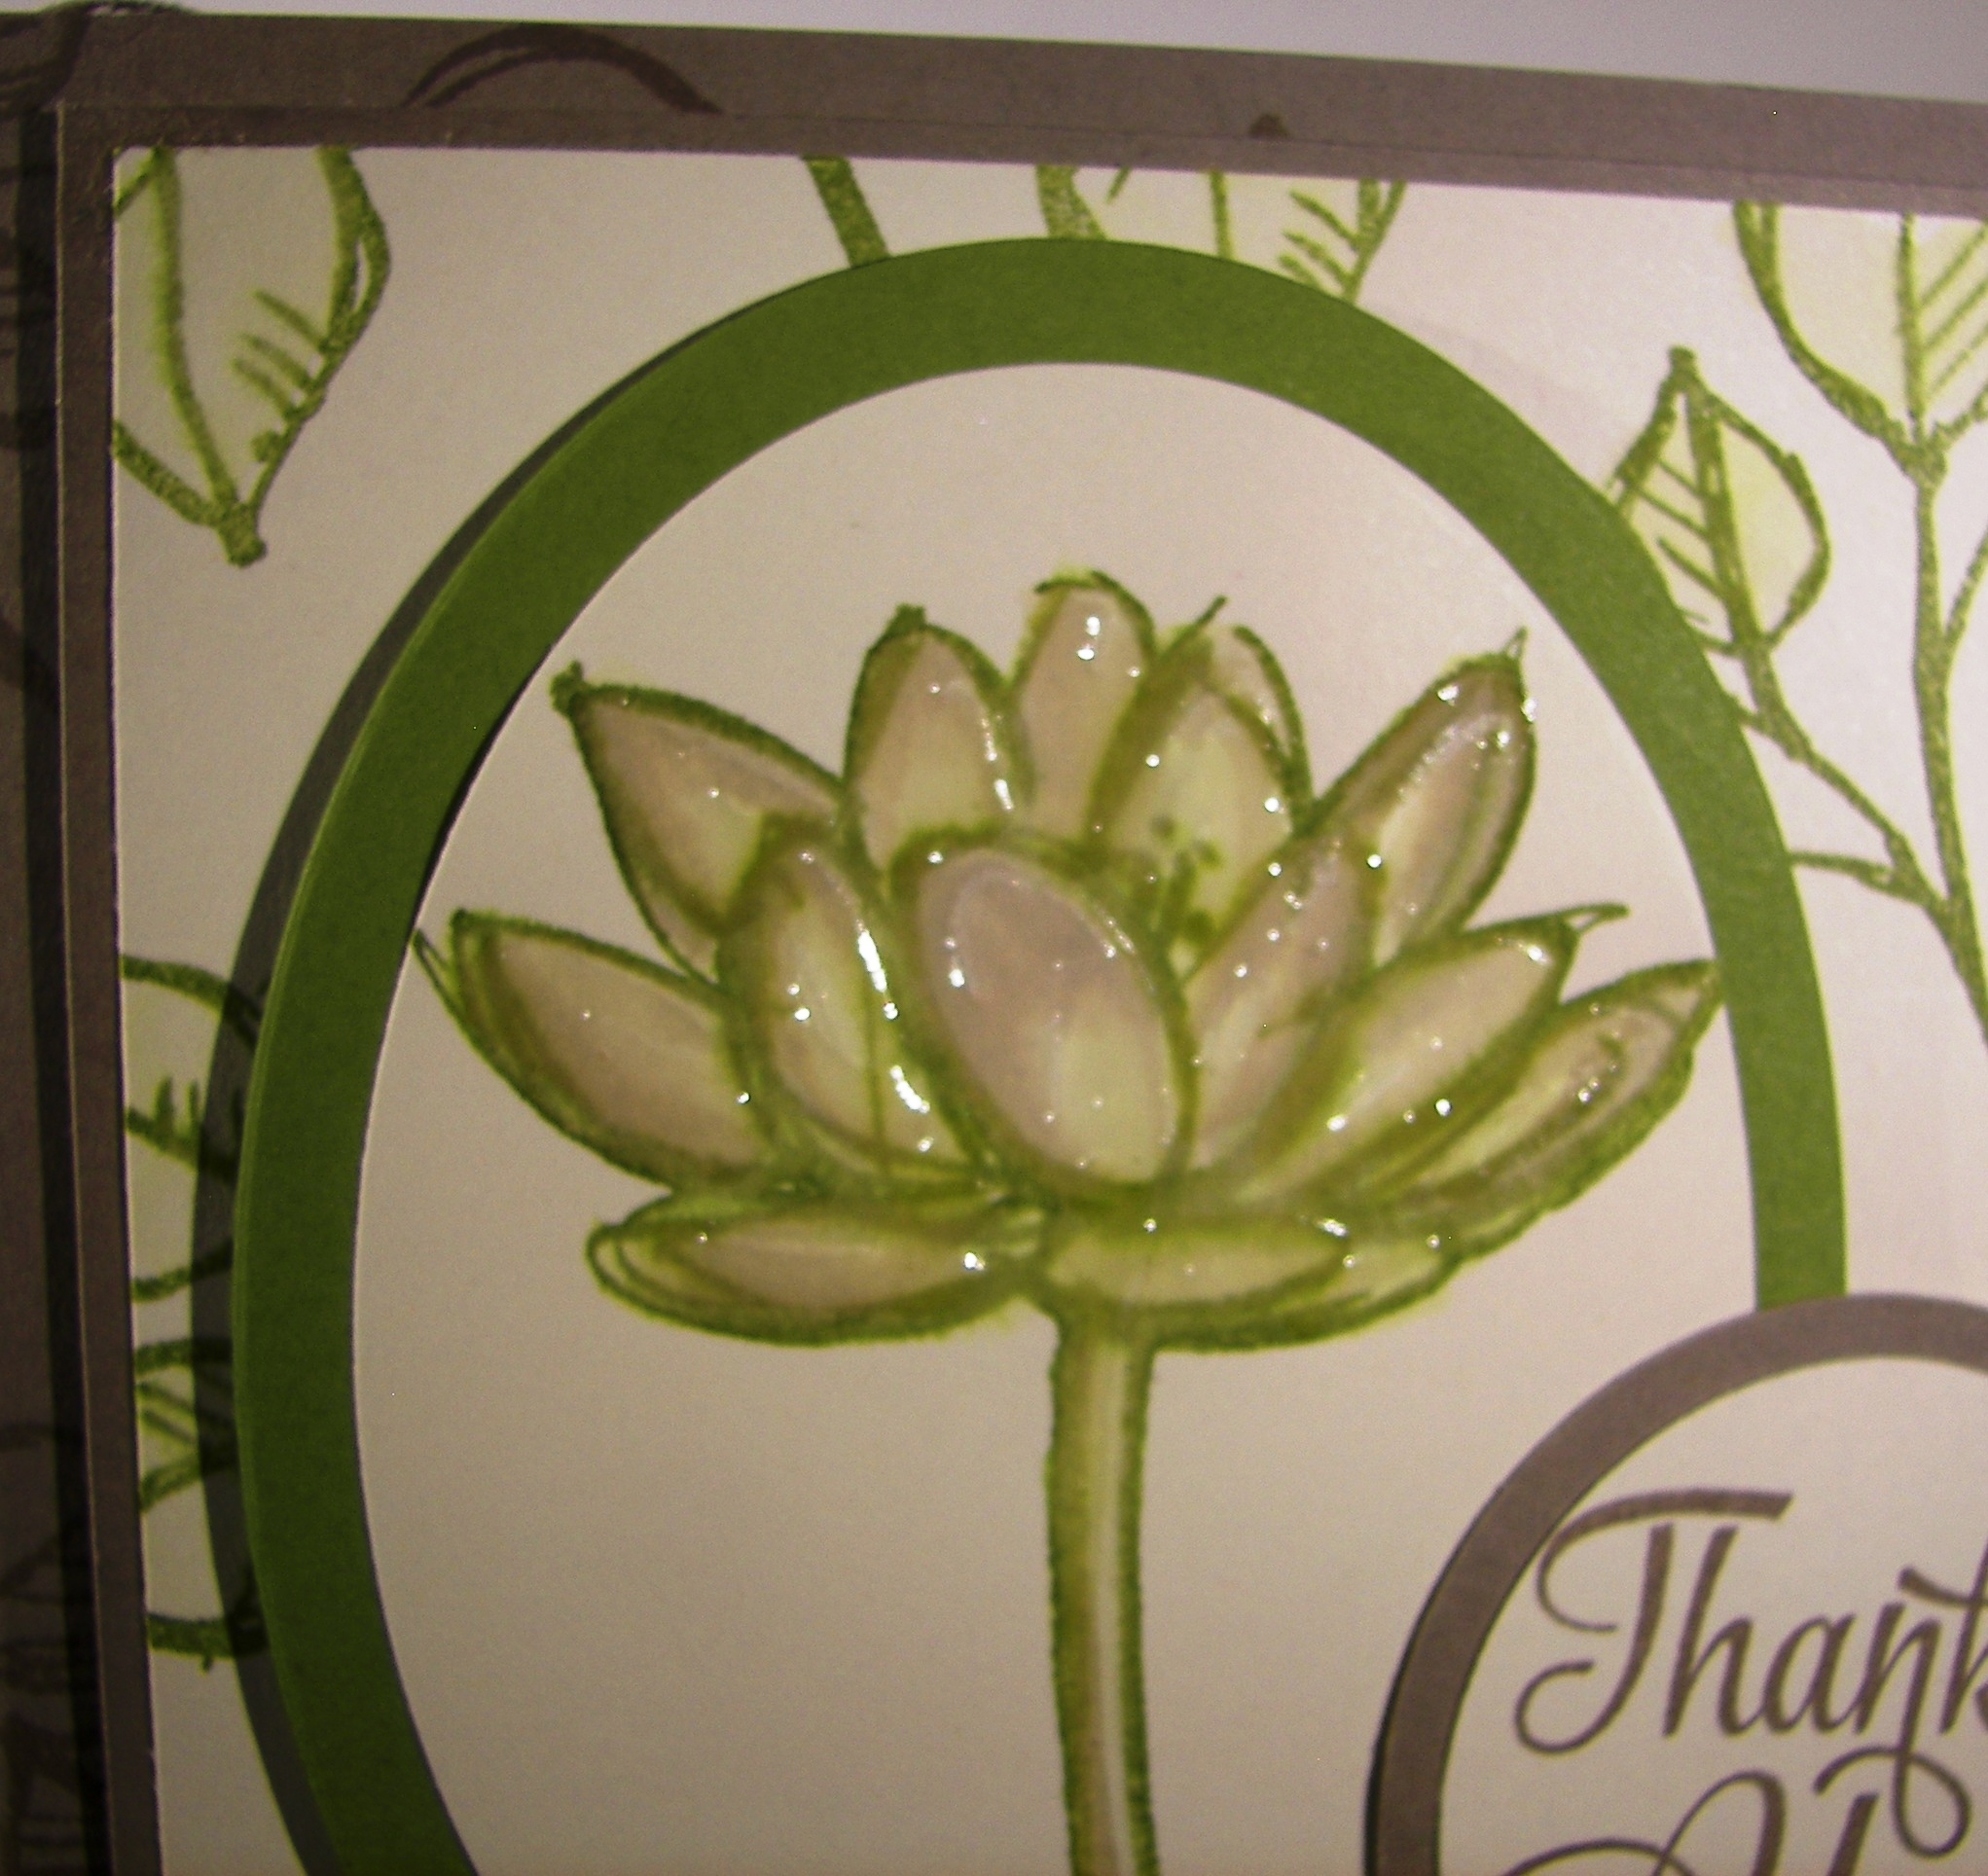
Isn’t this one so adorable?  The paper, matching stamps, and the ease of stamping and die cutting the numbers really make this one fantastic.  It isn’t too difficult to make, but sure brings a smile. Believe it or not, I tried several times to add die cut flowers for a fun layered look, but had to leave them off.  Sometimes that happens.

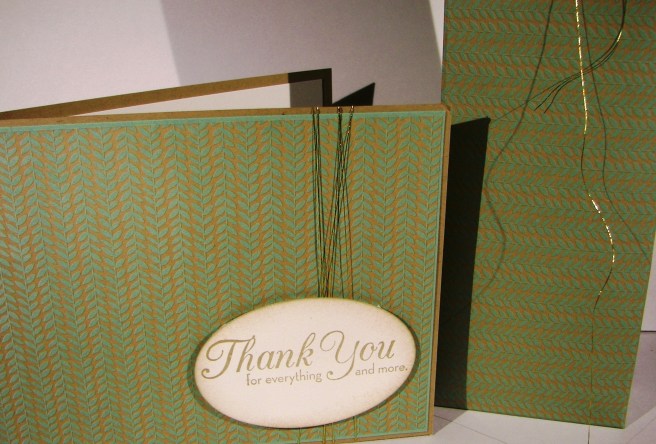
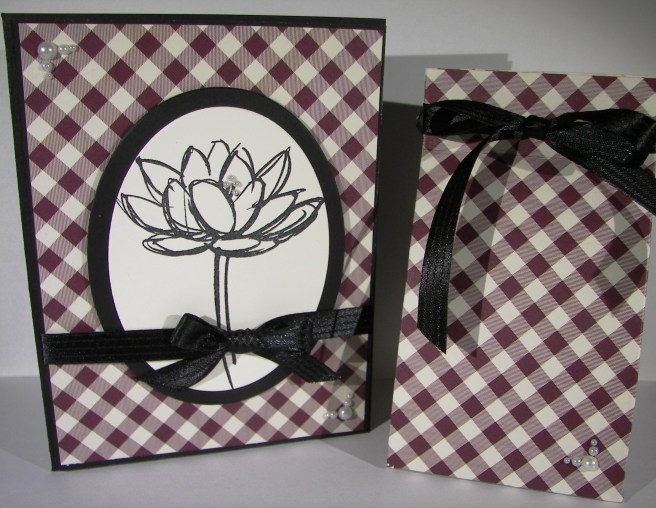
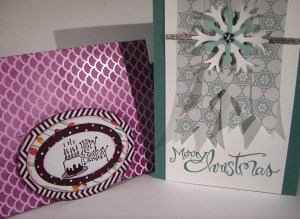
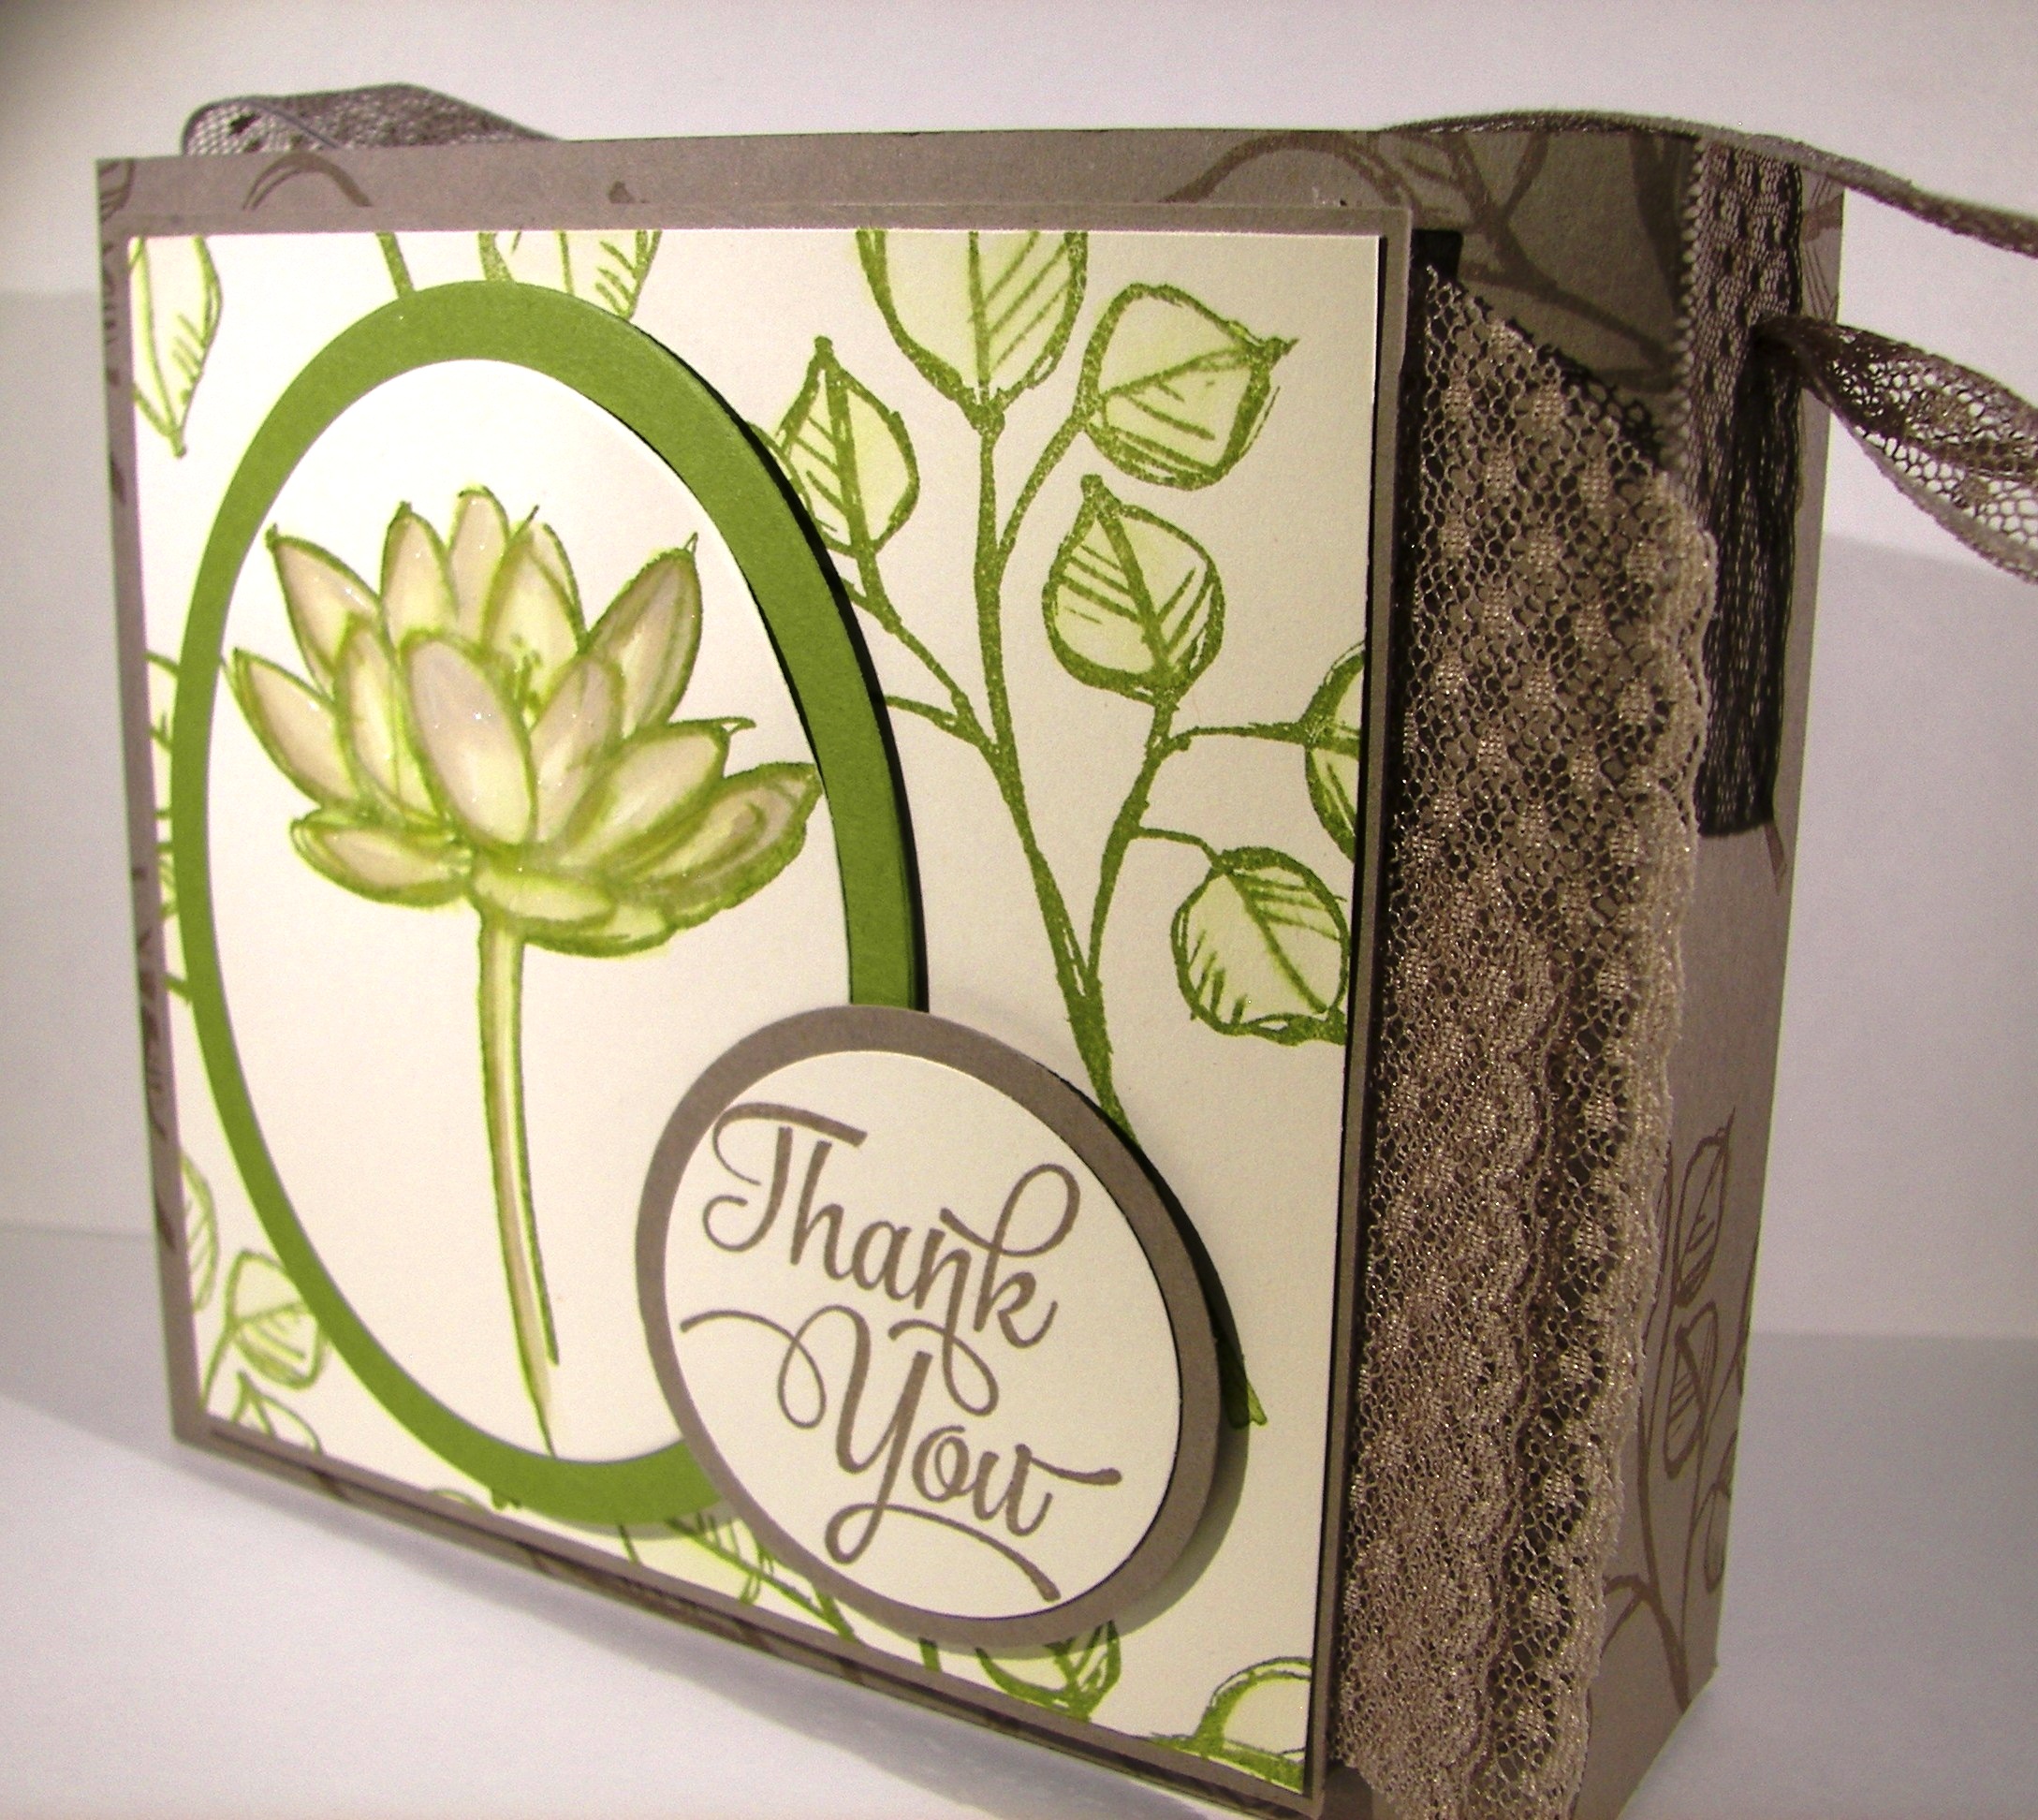
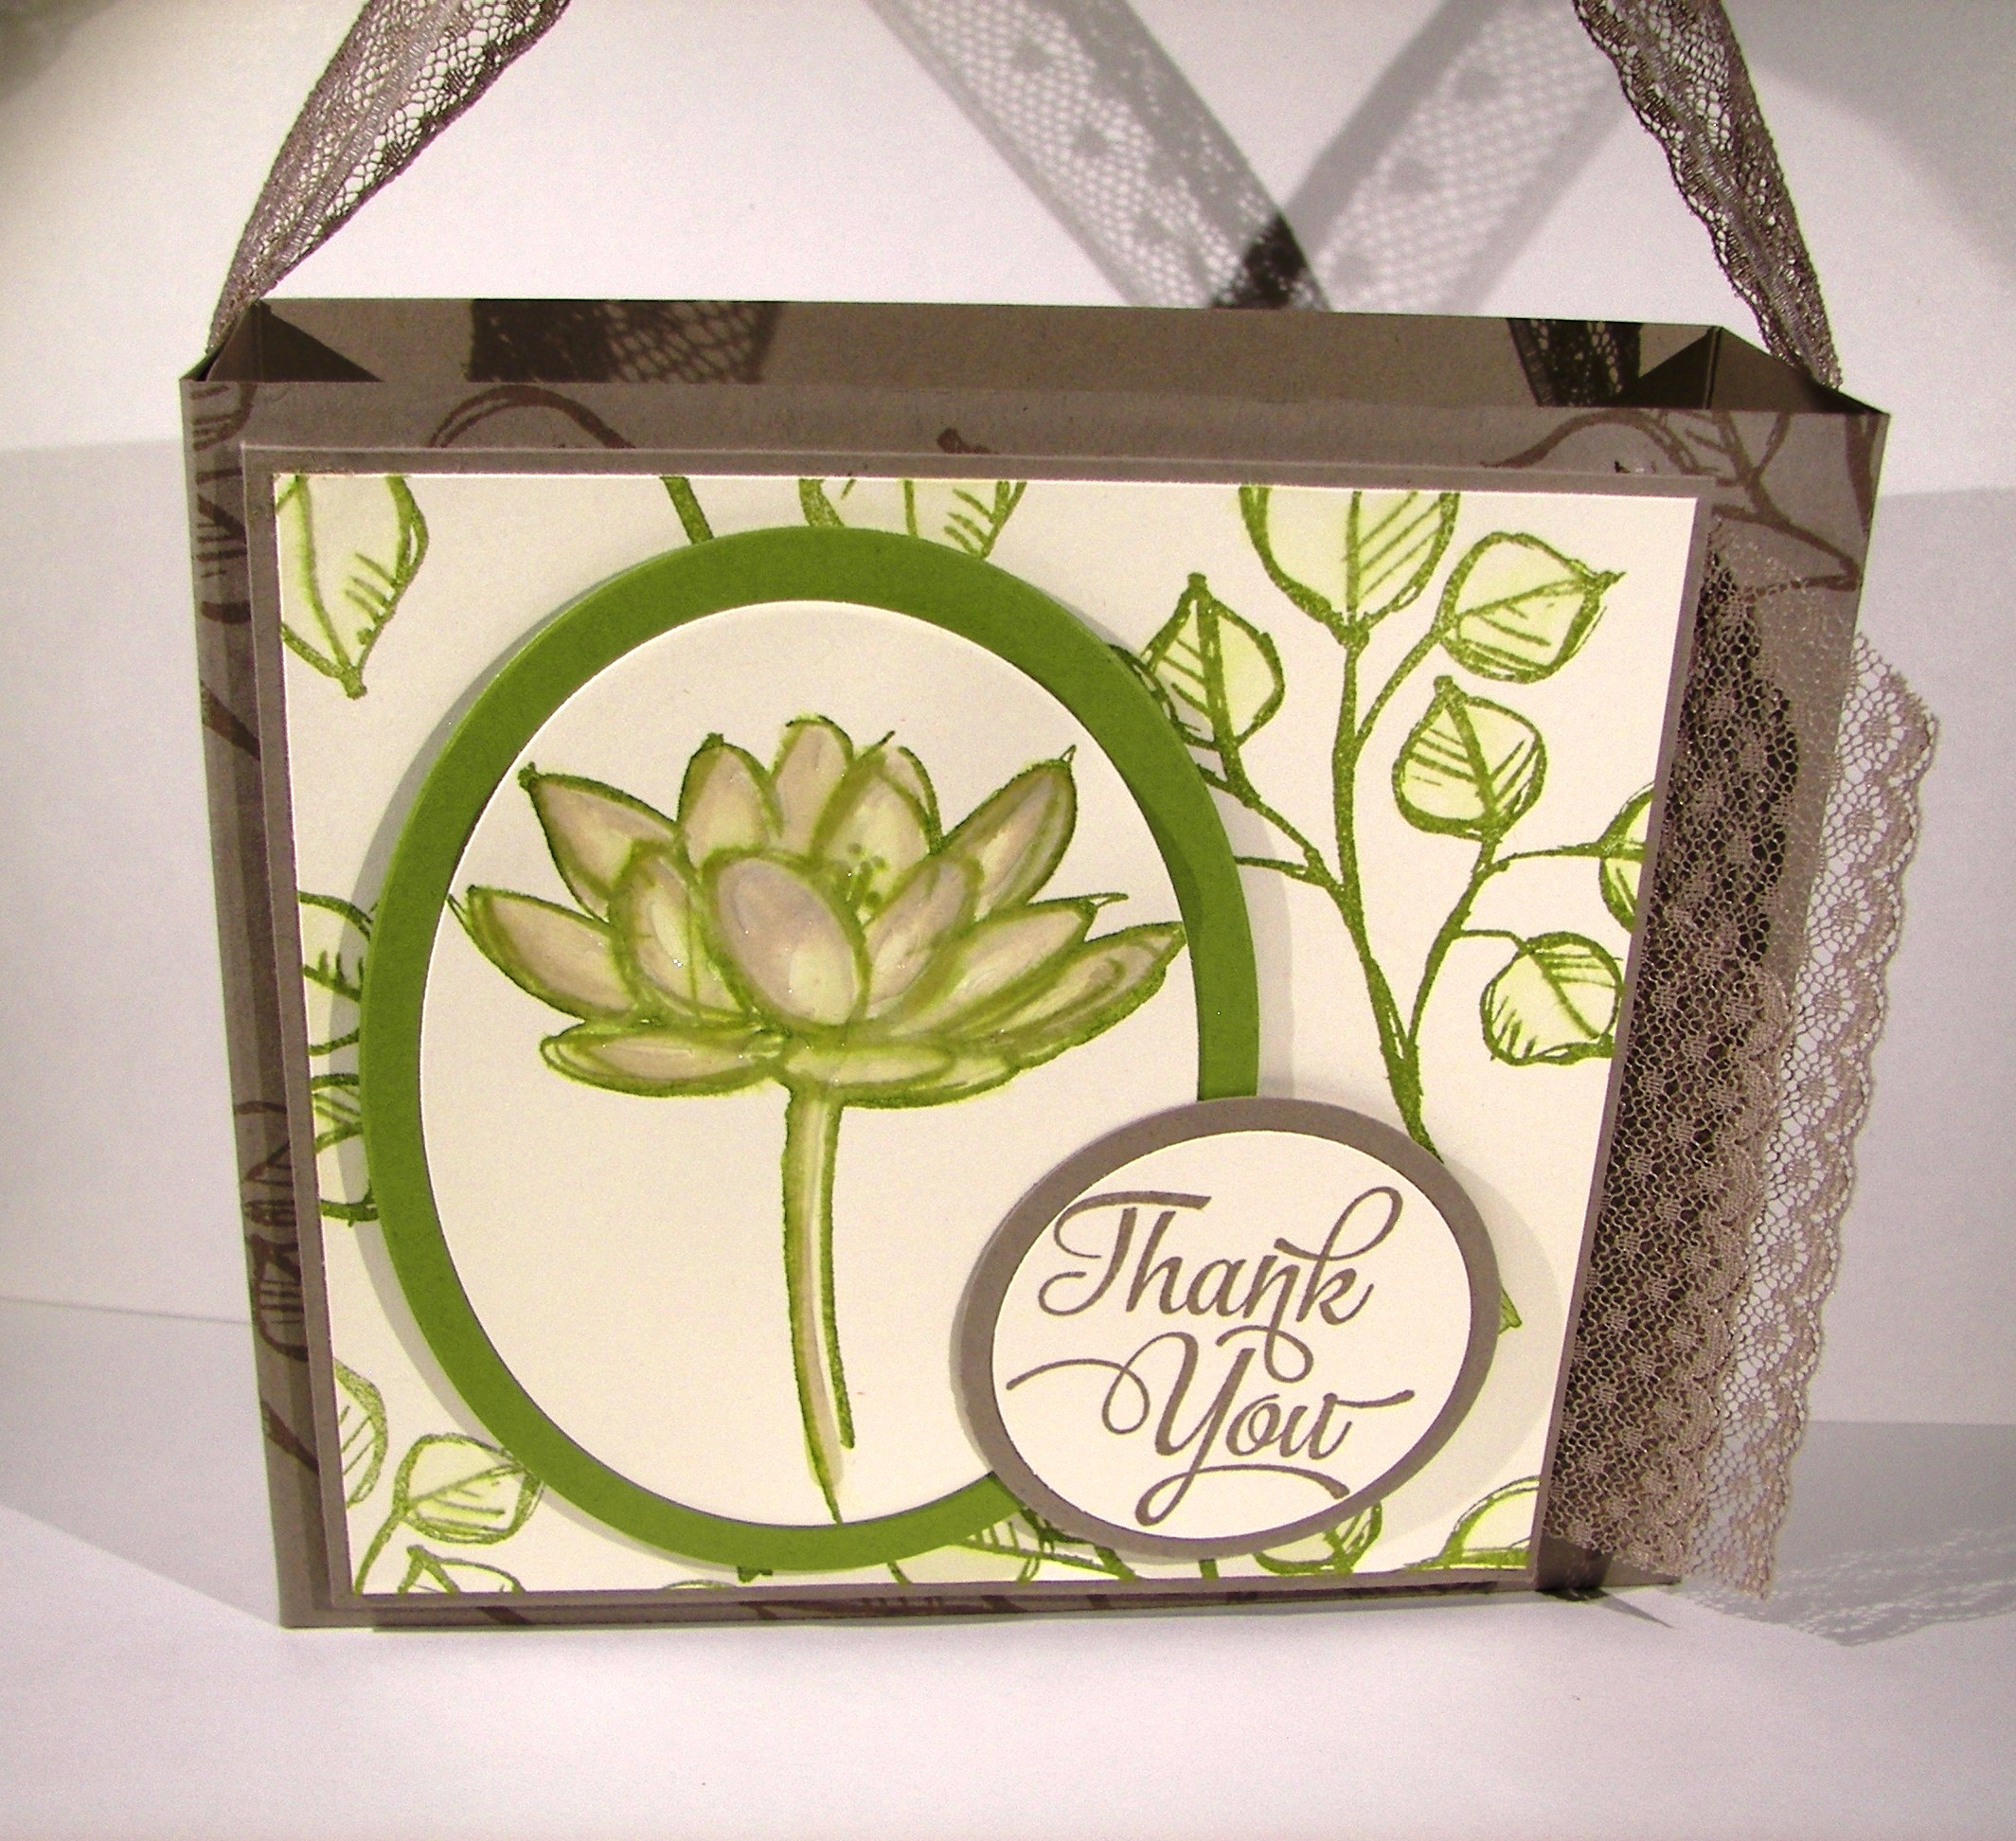
I took the background dsp and put it through the bigshot  with an oval framelit centered.  I then took that piece and turned it over to fill that same oval hole.  The two sides coordinate so nicely I could resist.  I used the next smaller framelit to make an oval from whisper white.  The numbers were stamped in blushing bride, cut with their coordinating framelits and centered on the oval.  I did raise them up on dimensionals.  Then the sentiment was stamped centered over the top and bottom of the numbers.  The tiny ‘th’ was die cut first, then stamped.  The framelit for that tiny one doesn’t have a window to look through, so I had to.  But with photopolymer stamps you can see exactly where you are placing your image.

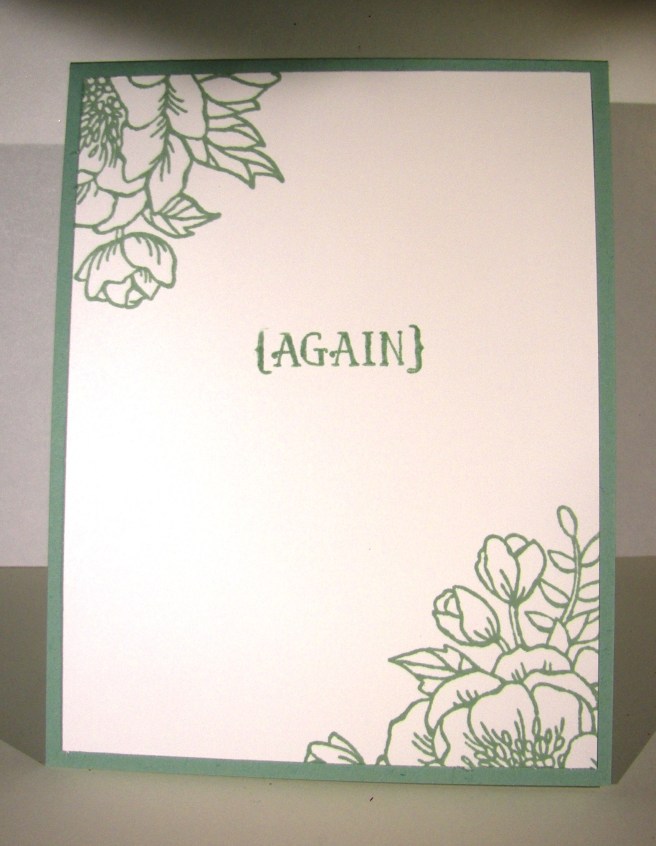
I stamped inside with the largest flower from the Birthday Blooms set in each corner using a different portion of the stamp to make it look different.  The center phrase ‘again’ was the last thing added.  How fun is that?

4-22 (1)

Have a creative day!

Moana

Wishing You all the Beautiful Blessings of Easter

Easter cards don’t have to be all about bunnies and lambs.  An elegant one like this, even in bright colors, is wonderful too.

3-27 (1)

I will definitely miss this beautiful color, blackberry bliss, when it retires this summer.  I do love new colors, but this one just might stay around.  The stamp fits only just inside the oval framelits, which allowed a nice frame and a lovely bow.  No extra embellishments or layering, just a lovely sentiment and strong color.

3-27 (2)

Have a creative day!

Moana

Perfectly Artistic Gift Box

Sometimes you just need a big box to fill with treats.  I have found that if I keep treats on hand to put in my blog projects, I just eat the treats.  So this guy is on display empty, but I imagines it with Lindt truffles, the white chocolate ones that come in a white and silver wrapping.  Wouldn’t that be lovely?  Thought so too.

Perfectly Artistic Gift Box

I did use a whole sheet of paper for this project.  But when it is a free paper pack, love that Sale-a-bration, it is easier to do that.   I had to fight the urge to tack down my banners so the sentiment was easier to read.  I will need to remove the ribbon to fill it up for gifting, so I  had to just let them dangle.  I do like how they look with the ribbon tails though, so I am good with it.

After I did my scoring and folding I ran the paper, folded in half and half again, through the big shot all at once with my oval framelit.  I know they are designed to be used with one layer of paper at a time.  I have found that when the design is simple, they do great with more than one layer.  I would be cautious with cardstock, but the dsp worked like a charm.  That way my oval windows were all exactly the same placement.  And that makes me very happy.

Perfectly Artistic Gift Box

Have a creative day!

Moana

Workshop Wonders

What do you get when you bring together some creative friends?  A really unique workshop that was more fun than work that is for sure.  Just look at these adorable projects they created!

12-14

We really did have a wonderful time sharing ideas, laughing, exchanging gifts and enjoying a lovely luncheon.  I think they impressed themselves more than each other.  And I loved crafting with them.

12-14 (2)

I already blogged mine on Saturday, but wanted to just show theirs.  Two of our group couldn’t attend this one and they sure missed out.  Next time I am sure they will share something wonderful.  The ladies liked the activity so much that we decided to do it twice a year, once in December and once in the summer.  I do love these gals!

12-14 (1)

Have a creative day!

Moana

Joy, Plain and Simple

As we have been showered with much needed rain here in Northern California, all I feel is joy and gratitude.  We have a long way to go, but every little bit helps.  I thought I would put my feelings into a card.

12-10

The Color Me Irresistible  Specialty DSP is so much fun to work with.  It was actually my inspiration.  I knew it had a raindrop pattern and the project just went from there.  I sponged with a dauber in silver encore ink all over in tiny swirls to give a cloudy gray look.  Turned out fantastic I must say.

12-10 (1)

The flowers were punched with the pansy punch hovering over the large dots in the silver fancy foil designer velum, using the dots as the flower center.  Nice idea, right?  I used a bone folder to curl the petals of the velum and decided I needed more flowers.  Basic gray became the flower background color and I punched another six of those.  I distressed those with a large stylus to give them dimension and lift.  Layered with dimensionals and glue dots, the side border came together.

A single stamp from the Your Presents set put the focus just right.  It was framed with a smokey slate oval and both were sponged with more silver ink.  The “i” was dotted with a metal rimmed pearl and a tiny ribbon was wrapped around.  Add one more awesome card to the mix.  A very rewarding project to make and enjoy.

12-10 (3)

Have a creative day!

Moana

Joyful Season

This little red cardinal has eluded me a few times over, but today was my lucky day.  I wasn’t sure just which bird I wanted to create, but decided to stick with the cardinal.  Call it Christmas whimsy.

Joyful Season

The red inside was stamped first and then I added the outline in black.  It was easier for me that way.  I tried to do the outline first and then the inside, but wasn’t happy with my efforts.  I managed to get the extra front stamp pretty good giving the darker black around the face and I even got the beak color in the right spot.  Woo hoo!

 Joyful Season

The oval framelits worked nicely to frame the image.  I decided to frame it in early espresso to match the branch.  Again, nice results for sure.  These were layered up with dimensionals over another layer of real red.  That layer was put through the softly falling snow embossing folder and sanded a bit to add interest to the flakes.  A simple bow with a snowflake embellishment and the card was done.  How nice is that?

Joyful Season

Have a creative day!

Moana

Banner Blessings Gift Set -Shine

This is card four, the last of the set.  The gift box is so lovely.  I can’t wait to show you.  But this card was saved for last because it is my favorite one.  So pretty and such a beautiful sentiment.

Banner Blessings Gift Set -Shine

I used the falling snow embossing folder to give me a starry background.  Since it was more sparse on the top, because it was to show snow not stars, I put it through again turned around and ran it through half way and ran it back out.  That gave a lovely balance I think.

Banner Blessings Gift Set -Shine

The star border punch doesn’t get to come off my shelf much, but this was the perfect job for it.  Stars stars and more stars.  The heavens are full of them and I wanted the card to do so as well.  Mission accomplished.  The card base is made from the heavy weight whisper white.  Sometimes I cannot get enough of this stuff.  I accented the sentiment with a hefty twisting of metallic gold thread. I decided it made my sentiment look kind of like a shooting star or a comet.  I love feeling creative.

Banner Blessings Gift Set - Shine

Have a creative day!

Moana

Banner Blessings Gift Set – Thanks

Another wonderful day with many adventures ahead.  I feel so blessed and grateful to be able to spend time here with my children.  How fortunate I am to have a husband that allows me to do so.

Banner Blessings Gift Set - Thanks

This lovely card came together pretty darn quick. A few simple layers with my favorite sponging left it nearly done.  I wanted to use the trim without covering up the beautiful embossing from my favorite embossing folder.  I think everyone should have this one. It is so great to have a tool like this that can be used in so many ways.  So I just attached a simple knot of trim instead of a card front wrap.

Banner Blessings Gift Set - Thanks

I chose the pattern of the DSP with the tiny flowers.  It went better with the nature look of the trees.   A touch of dimensional a went with the sentiment layer only.  Simple to make and easy to mail.  Sounds like a win to me.

Banner Blessings Gift Set - Thanks

Have a creative day!

Moana

Banner Blessings Gift Set – Joyful

I get to be out of town this weekend and enjoy some time with my two children away at school. Utah is so pretty this time of the year, the rain is making it even better.

Banner Blessings Gift Set - Joyful

This is the second card in the gift set I made for my daughter. Bright and cheery for sure. The color scheme certainly does go with the word joyful.  I love this stamp set.  Very inspiring and the writing style is awesome.

Banner Blessings Gift Set - Joyful

The card base is the heavy whisper white. Love having something this heavy to work with. I stayed away from white cards, but not any more.  I enjoyed sponging  the front to bring out the heart detail. A couple of hearts punched on the front and inside to coordinate.  Second card in the series is done. Wait til you see the gift box.

Banner Blessings Gift Set - Joyful

Have a creative day!

Moana

Banner Blessings Gift Set – Friend

The morning took off without me, and there was nothing I could do about it.  This has sat at my computer waiting for me to take a lunch.  Well, never happened.  How about a tiny break?  Works for me.

Banner Blessings Gift Set - Friend

This is the first card of a set of four with a coordinating gift box.  It was so fun to make.  I actually made it for a special someone and I can’t wait to deliver it.  Should be tomorrow!

Banner Blessings Gift Set - Friend

I attached the island indigo torn card stock to the thin whisper white before I ran it through the fluttering embossing folder.  Everything got done at once.  The sentiment was stamped in black stazon and sponged a bit with coordinating ink.  I love the cotton ribbon, it makes such cute bows.  The inside stamping is actually negative punching.  I punched a butterfly or two from the white insert and revealed the card base.  Simple and very effective!  So fun.  Those pretty pearl accents.  I could really get used to those.  I had it dot the “i”, even though it wasn’t needed, I wanted to use one and it fit the image.  A bit of dimensionals and this card was done!

Banner Blessings Gift Set - Friend

Have a creative day!

Moana


Christmas Snow

So, I took the day off yesterday.  I had the opportunity to attend an event my upline hosted for demonstrators.  It was a bit crazy, but lots of fun too.  So much creativity in one room.

Christmas Snow

This was my project to share and I got to make a whole bunch of others in return.  Yes, I made a lot of these, but it was worth it.

Christmas Snow

I tried to put “snow” on some of the tree branches, but wasn’t happy with these results.  For the event I went “snowless” but I want to get it sorted out with another product or two.  I have time, it is still August after all.  But you get the idea.

8-30 (2)

Three of the products used here are in  the new seasonal catalog that goes live September 1st!  How exciting!

Have a creative day!

Moana

If the Broom Fits

I love halloween!  Well, all of the fun decorations and cuteness that can go along with it.  Orange is also my favorite color, so that makes sense too.  You would think that I make lots of halloween cards from the collection I have to work with, but, not so much.  Same goes for Christmas though.  I am a stamper, and I love stamps!

If the Broom Fits

So, the irony of today’s card is that today is my 25th wedding anniversary.  I don’t think this particularly applies to me directly, but the phrasing of it surely does make me laugh.  Well, giggle actually.  I do have someone I can give it to.  I don’t know if she would laugh or not, but I think she will.

If the Broom Fits

It was a very simple card to create.  One big stamp cut out with the largest smooth oval framleit.  I sponged the edges up and added it to the scalloped layer I cut out with the largest framelit from the same set.   It nearly didn’t fit on the card front.  I did do background stamping on the card base and sponged the edges as well.  A lovely little ribbon between layers to tie in the early espresso ink and it was nearly done.

If the Broom Fits

I managed to use the edge of the stamp to sneak one broom on the inside.  This lovely stamp is another image available in the coming catalog that goes live on September 1st.  Fun little sneak peeks!

Have a creative day!

Moana

One Big Meaning and Remarkable You

To get my mind off the heat last night I sat down at my desk and got a little more creative.  It has been a bit since I spent this much time for one project, but to be fair, I didn’t have any idea what I was going to do when I sat down.

One Big Meaning and Remarkable You

I used a whole sheet of tip top taupe to make the bag.  Just simple scoring there, nothing fancy.  I did forget to stamp before I scored, ooops.  So, my stamping does have little crease marks on the edges.  Can’t be perfect.

One Big Meaning and Remarkable You

The base has two layers, tip top taupe and a stamped layer of very vanilla.  I brought out the aqua painter again, oh how I love that tool.  Just using the ink from the stamp gives such a soft look.

One Big Meaning and Remarkable You


The oval framelits were put to work again for the focal point.  What a lovely flower.  I brought in tip top taupe into the flower and water colored it into the old olive.  I can tell the color difference, but I can also see a hint of lavender forming.  Interesting.  Crystal effects really made a difference in the look of the flower.  I could really use that stuff way too much.  A final stamped sentiment layered with some circle punches finished the front.

A touch of dotted lace trim was put to the side and also used to make a simple handle for the bag.  It really turned out beautiful.

Have a creative day!

Moana

Remarkable You

I think going on that pioneer trek took a little more out of me than I thought.  I tried to sit down at my usual 5:30 this morning, but I could hardly focus.  Time to get into a good summer routine.

Remarkable You

I absolutely fell in love with this stamp set when I saw it in the catalog.  The floral images are so elegant.  They cover several of my favorites.  I had to use this one first, because it is my absolute favorite.

Remarkable You

I started by stamping the image in garden green.  I got out my aqua painter and drew in the color for the stems and some of the outer lining.  I brought in daffodil delight and hi-lighted with so saffron.  Just a touch of color there.

Remarkable You

I used the oval framelits to make my layers with the third largest for the flowers and the second largest for the frame.  I stamped and sponged and put everything I could up on dimensionals.  I tried out the triple banner punch and it works like a champ.  That is going to get a lot of use.  Finally, I hid my glue dot under the velum with a rhinestone.  I used a section to curve around the top left of the frame and called it done.  I didn’t even stamp inside!  Scandalous,  I know.

Have a creative day!

Moana

Age Awareness Vintage Style

By now, I should have made it back from Utah, survived running all over the place, crying several times, and collapsing after a long drive.

Age Awareness Vintage Style

I am writing this ahead, because this morning I should be up to my eyeballs in getting the last things together for our pioneer trek experience!  I put everything together I could before we went to Utah, but there are always last minute things ready to get in the way.

 Age Awareness Vintage Style

I haven’t used soft suede for a really long time and thought it would go with the theme here.  I also just got the oval framelits and put them to work for the first time.  These stamp sets go together quite nicely, don’t you think?  I used the banner punch for the very vanilla strips and finished up the soft suede layered banner with the side of the hexagon punch.  It makes great banner ends.  Who knew!

Age Awareness Vintage Style

Here I go again making my own background paper.  It is a fun challenge that keeps my brain fresh and lets me use more of my fun stamps!  We have a special birthday coming up next month for someone getting up there in years.  He has a great sense of humor and will just love this!

Have a creative day!

Moana