Dream

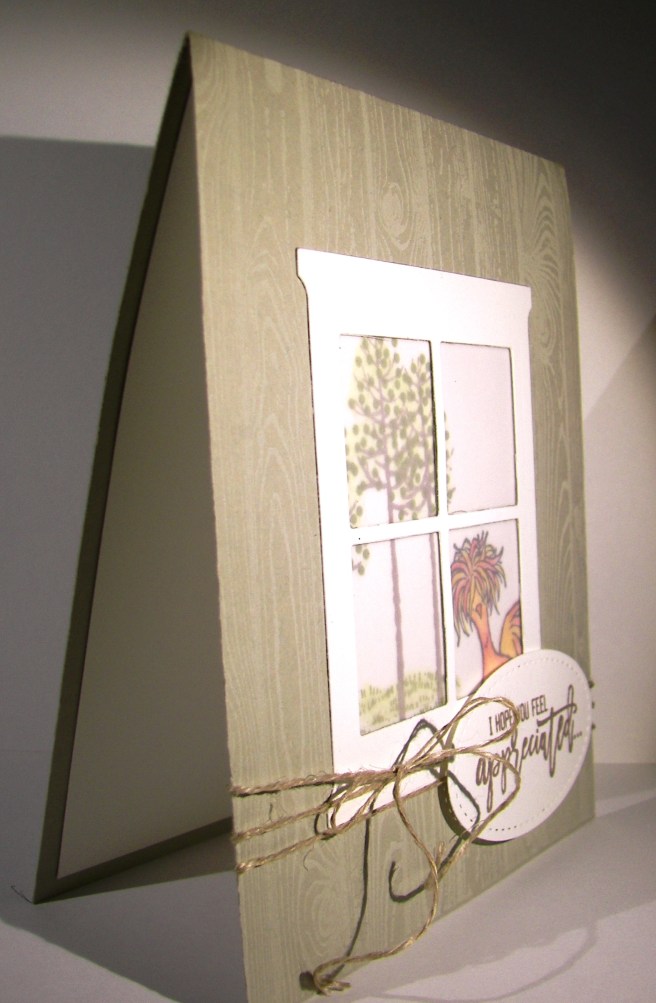
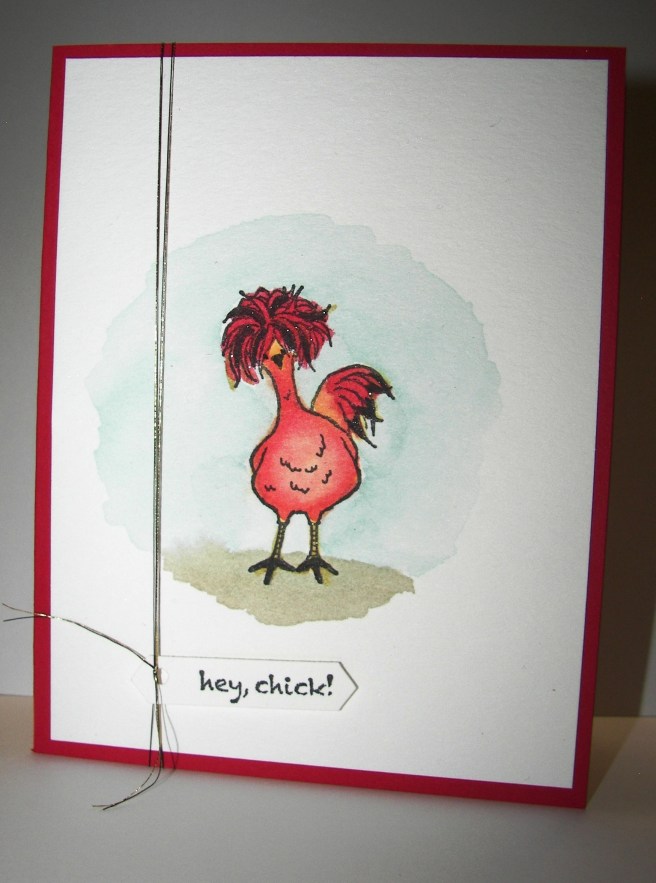
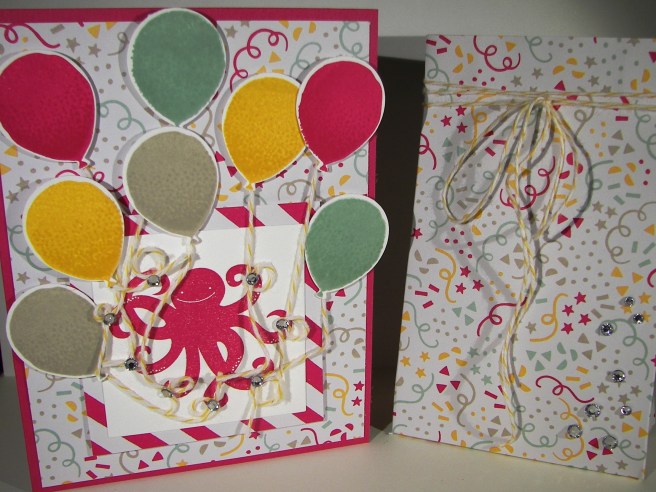
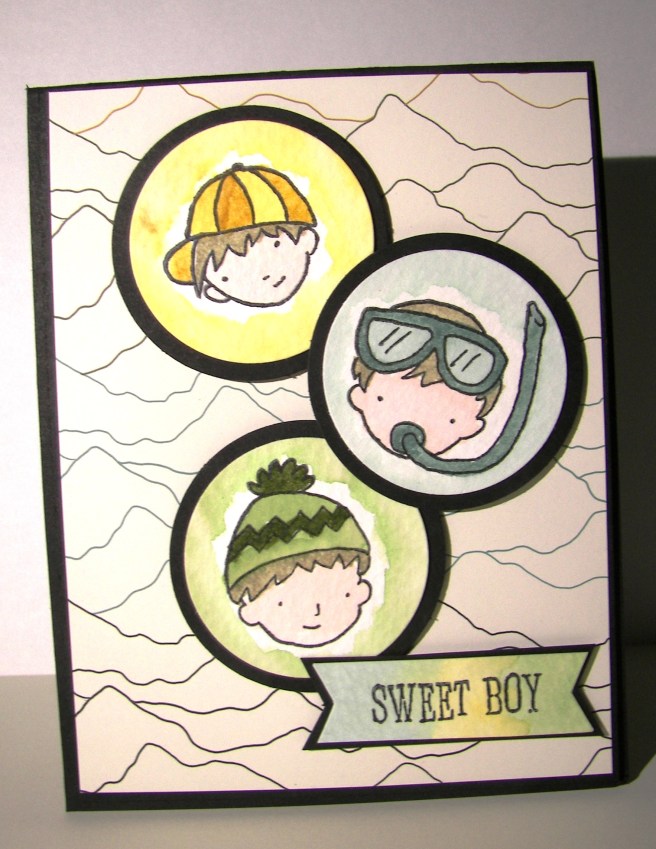
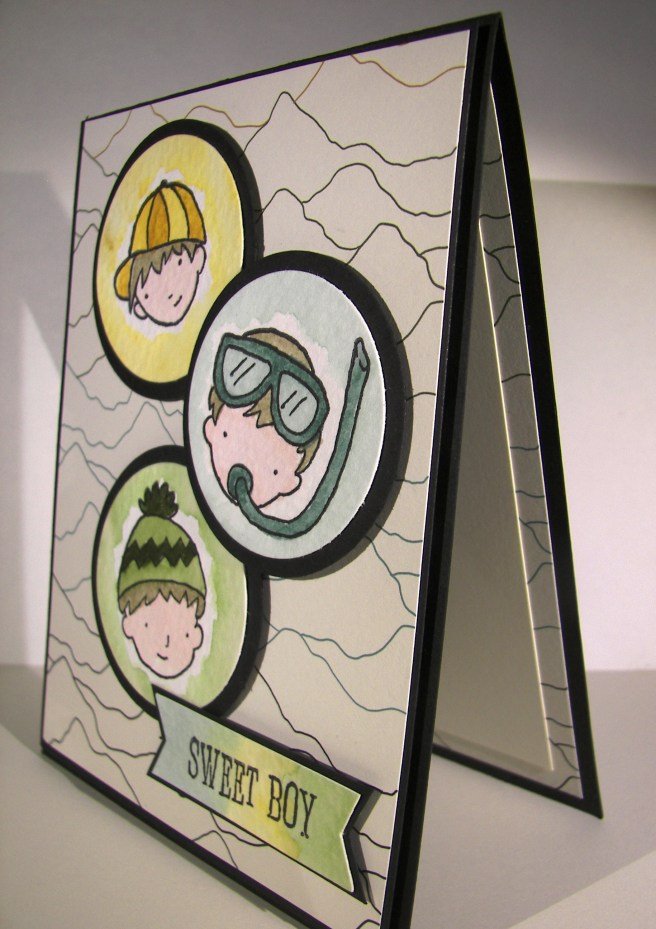
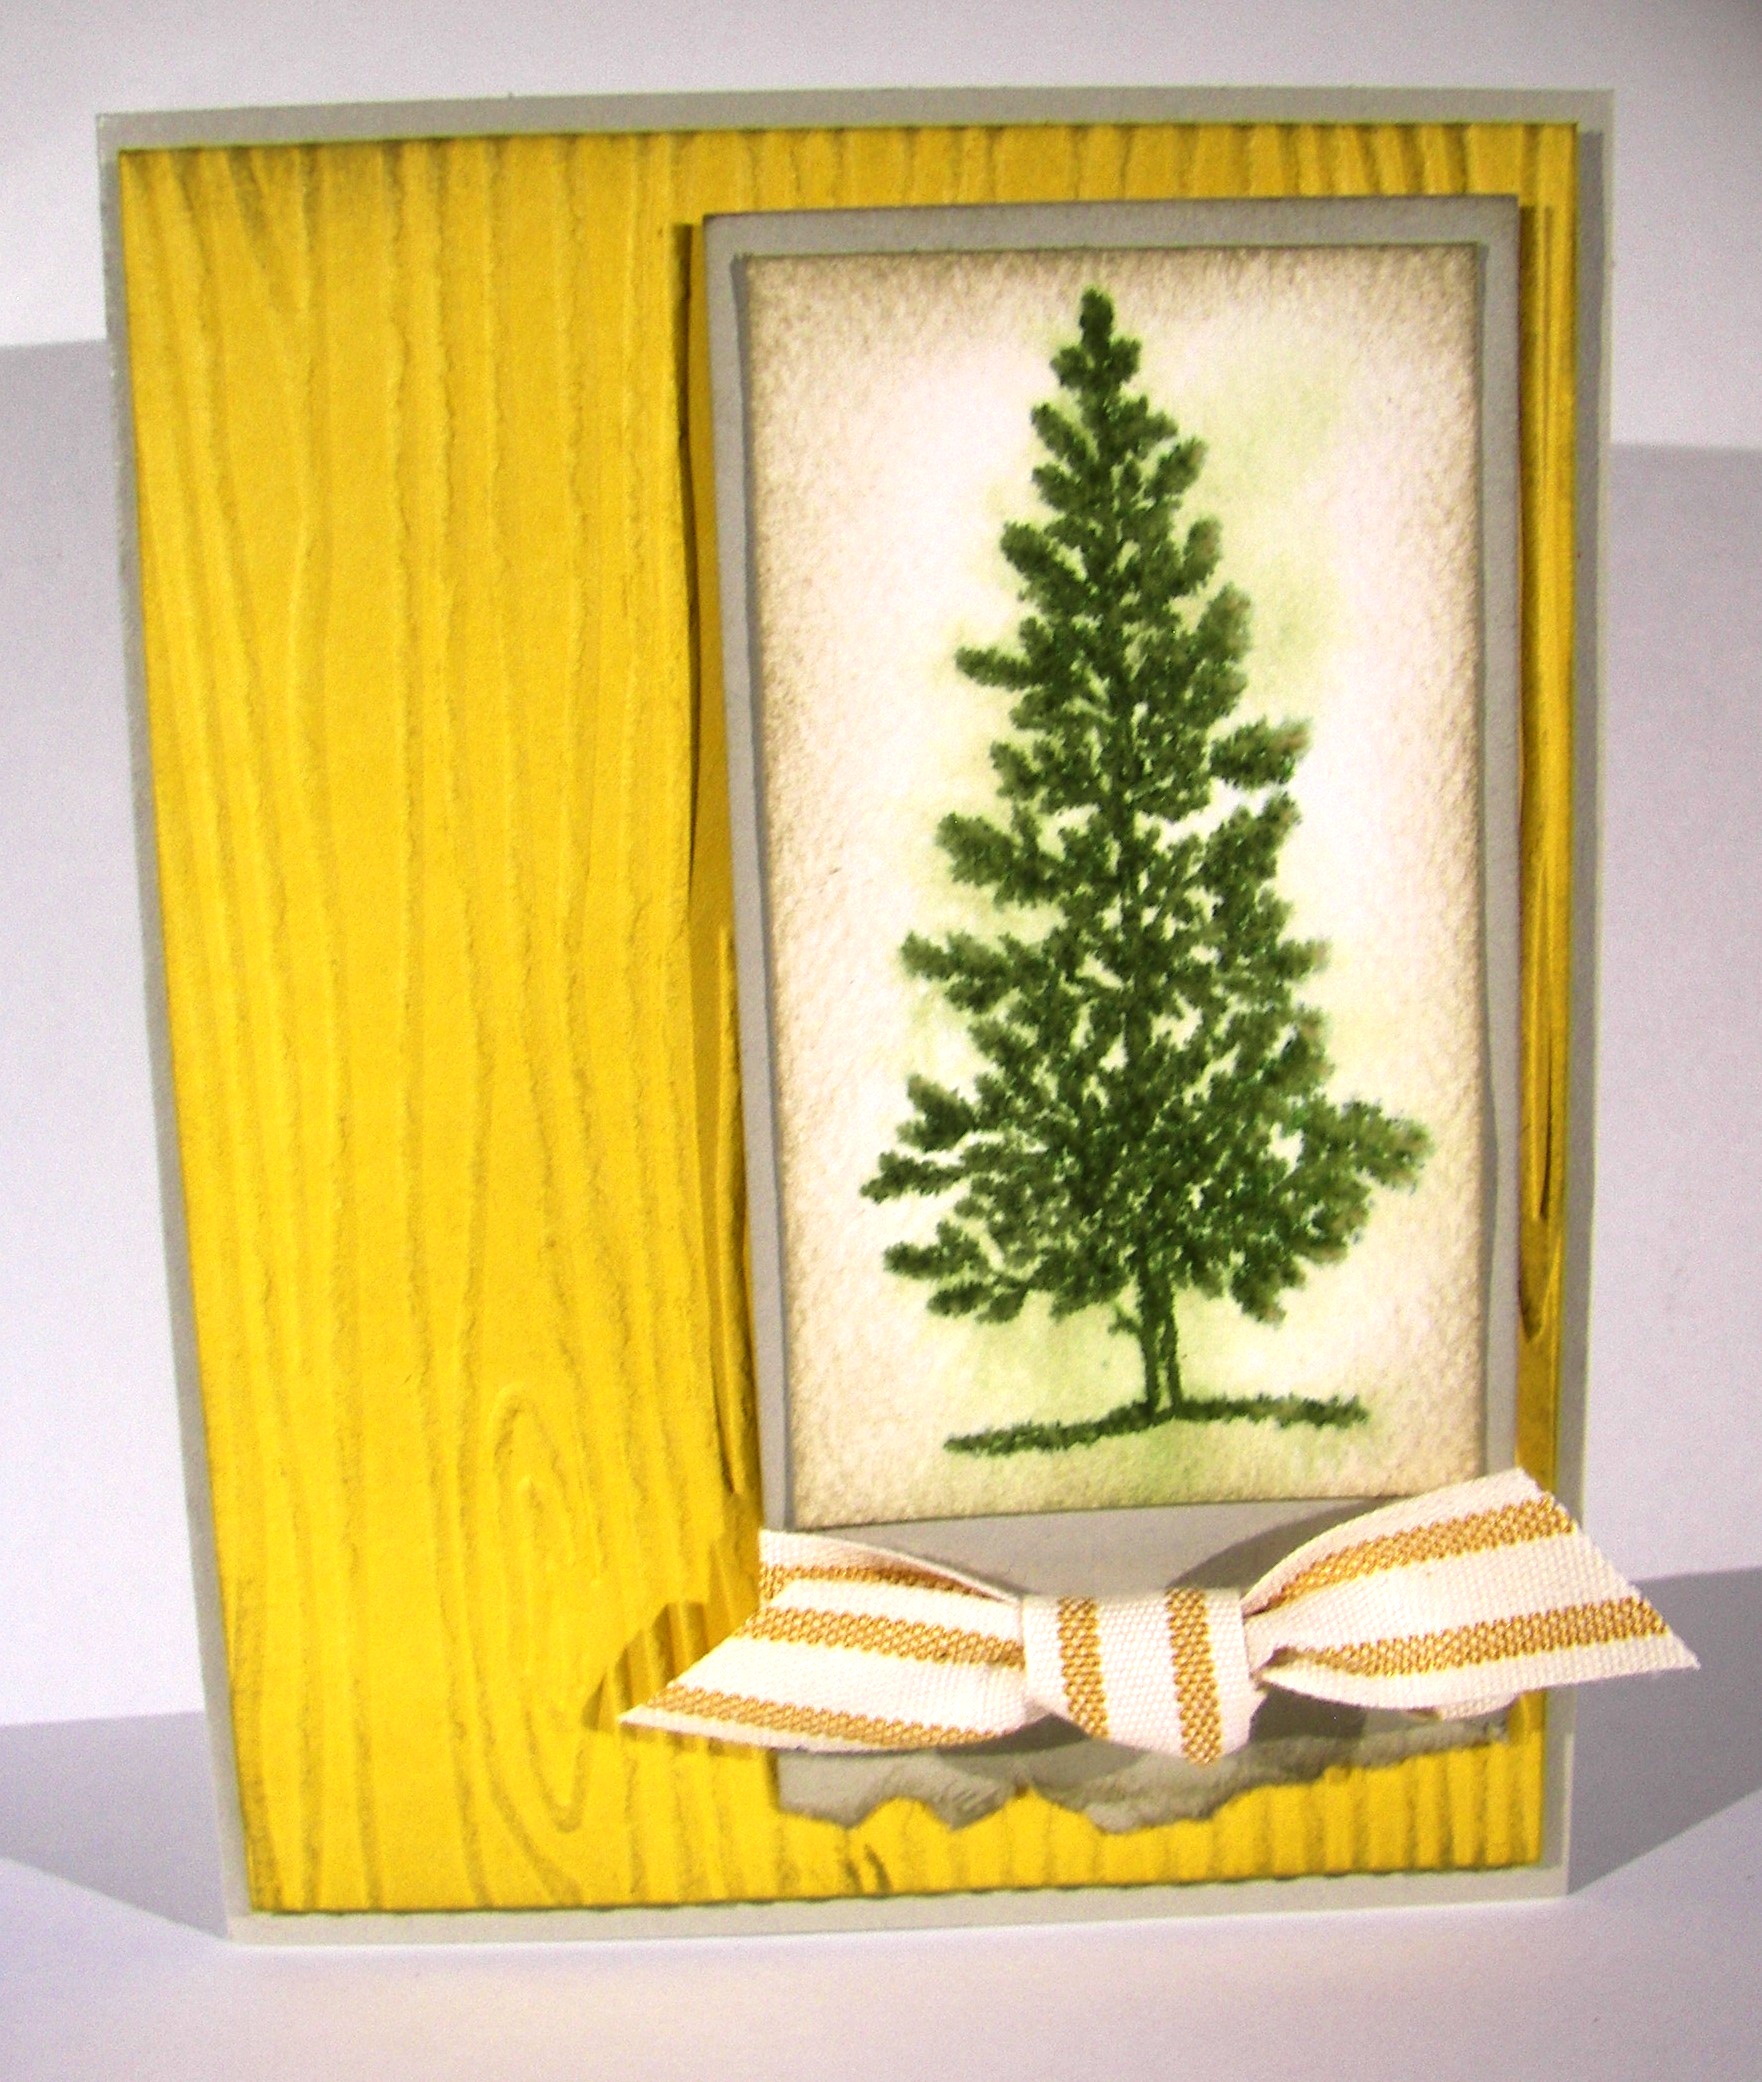
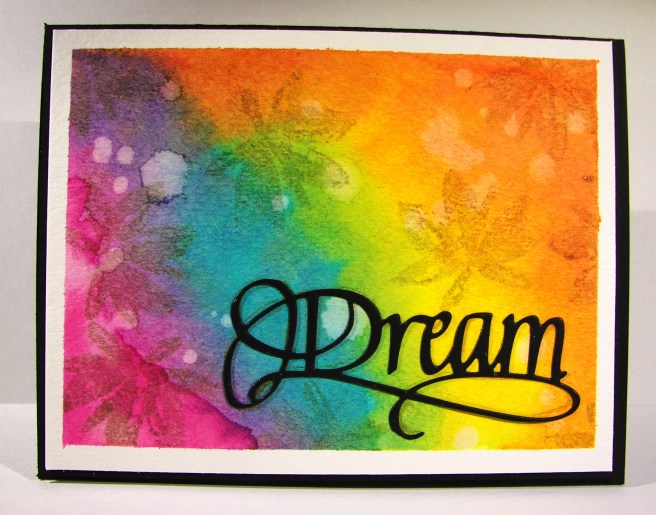
Blending colors can be just too much fun.  What a great set of vibrant colors here, right? I started with four and ended up with eight.  I literally had to tell myself to stop, before the colors went too far, leaving me with a brown mud card.  This project is so alive, I love it!

3-10

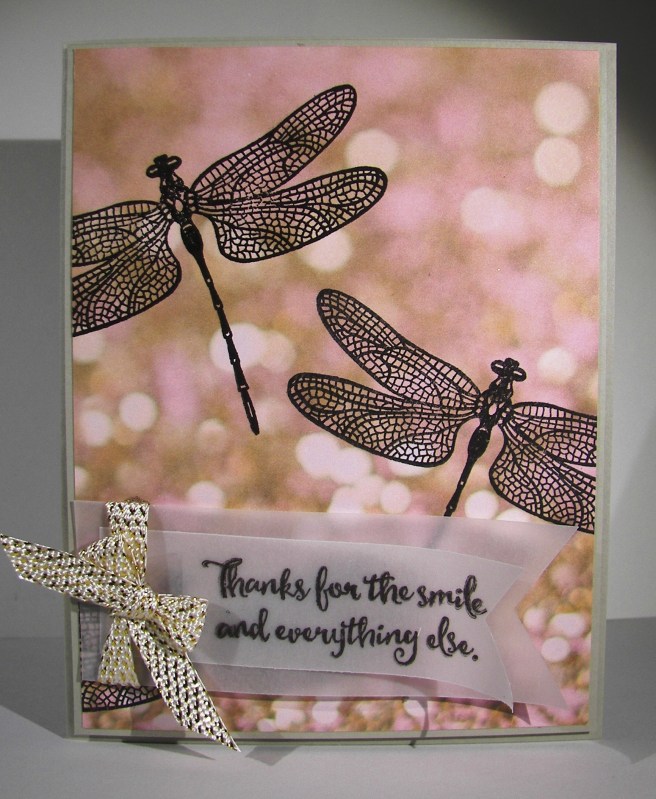
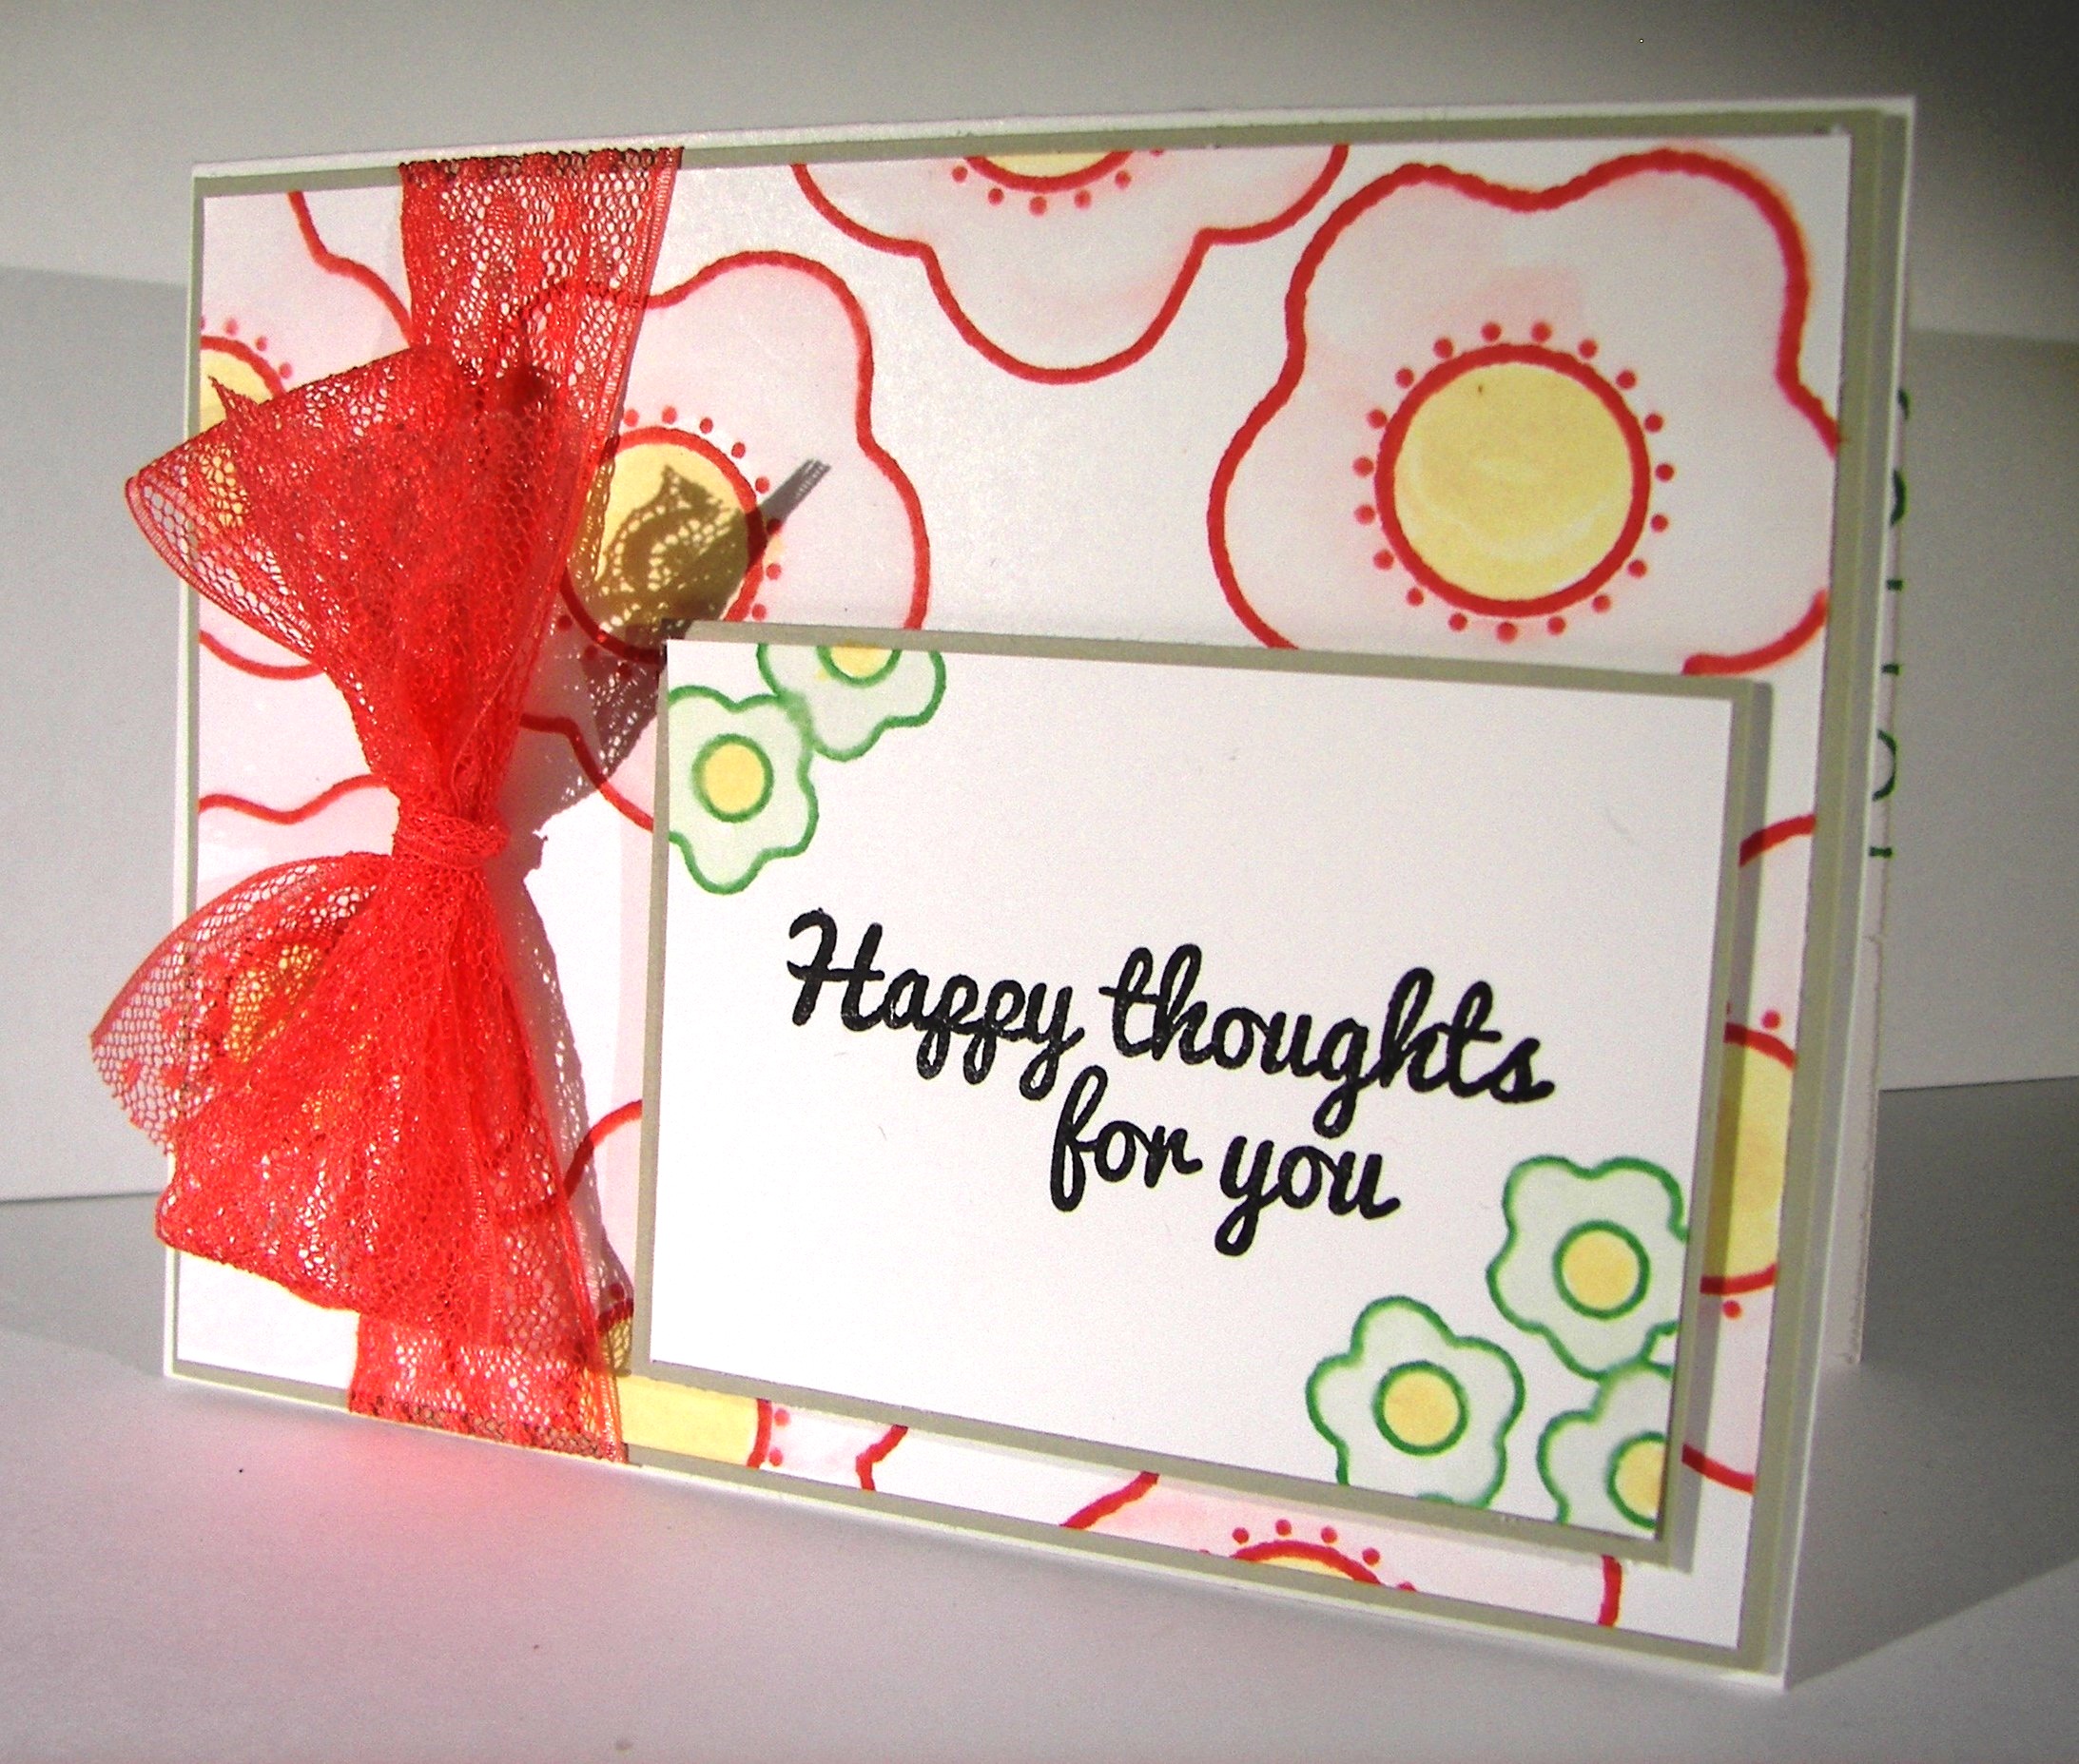
The ink was applied to a lightly wet surface.  I wanted the color to flow, but not all over the place.  I left intentional gaps in between colors to allow for blending, trying not to make too specific a pattern.  My projects often lean toward stripes, and why not, they are great!

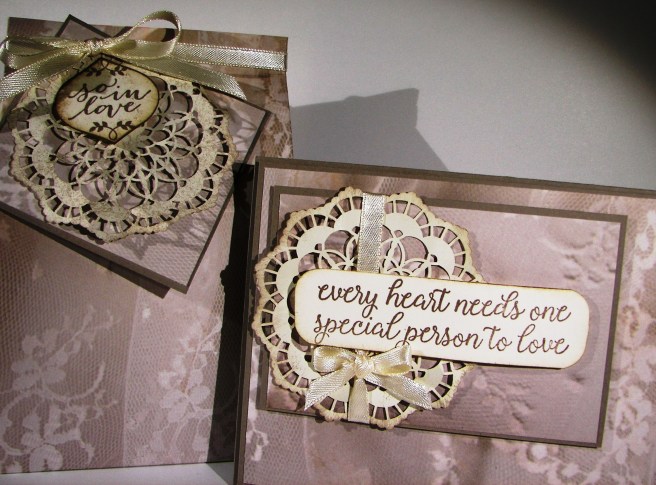
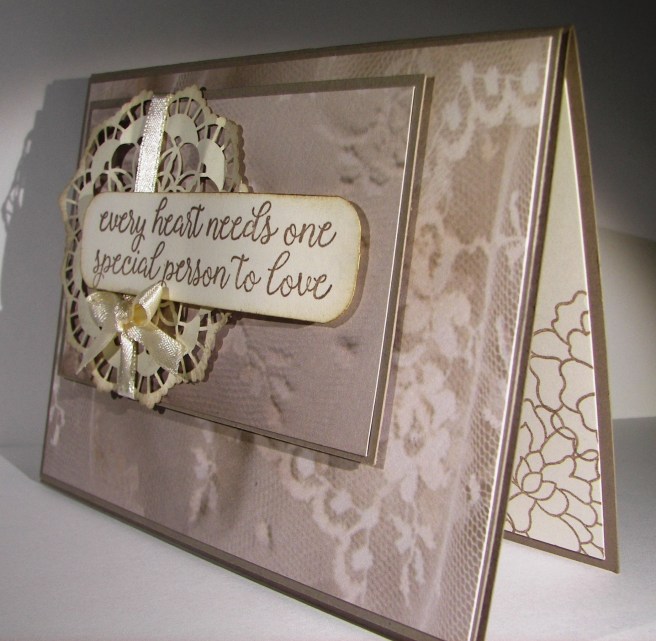
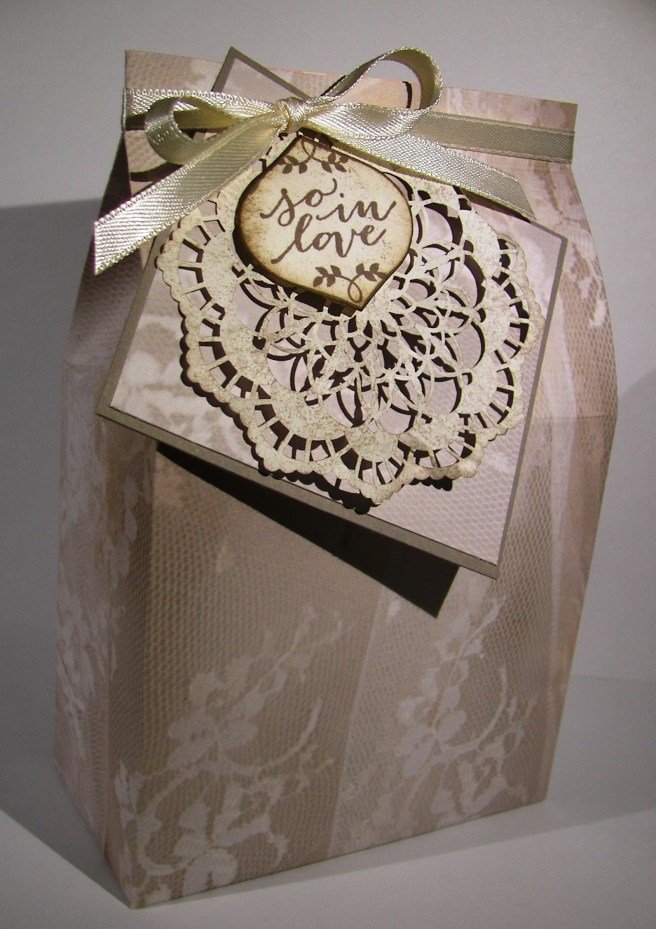
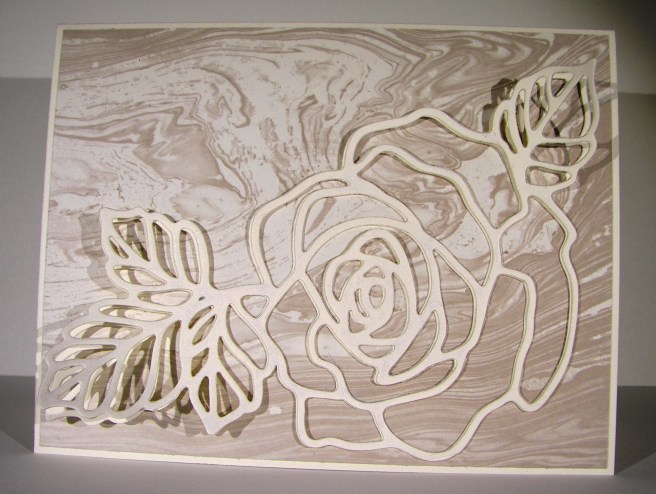
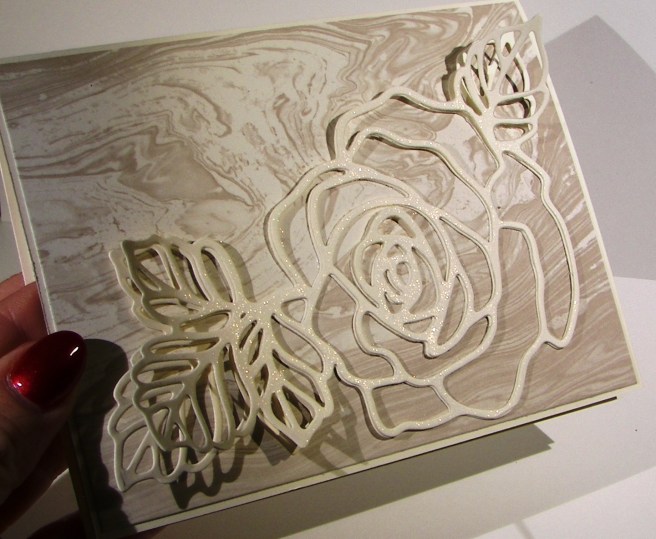
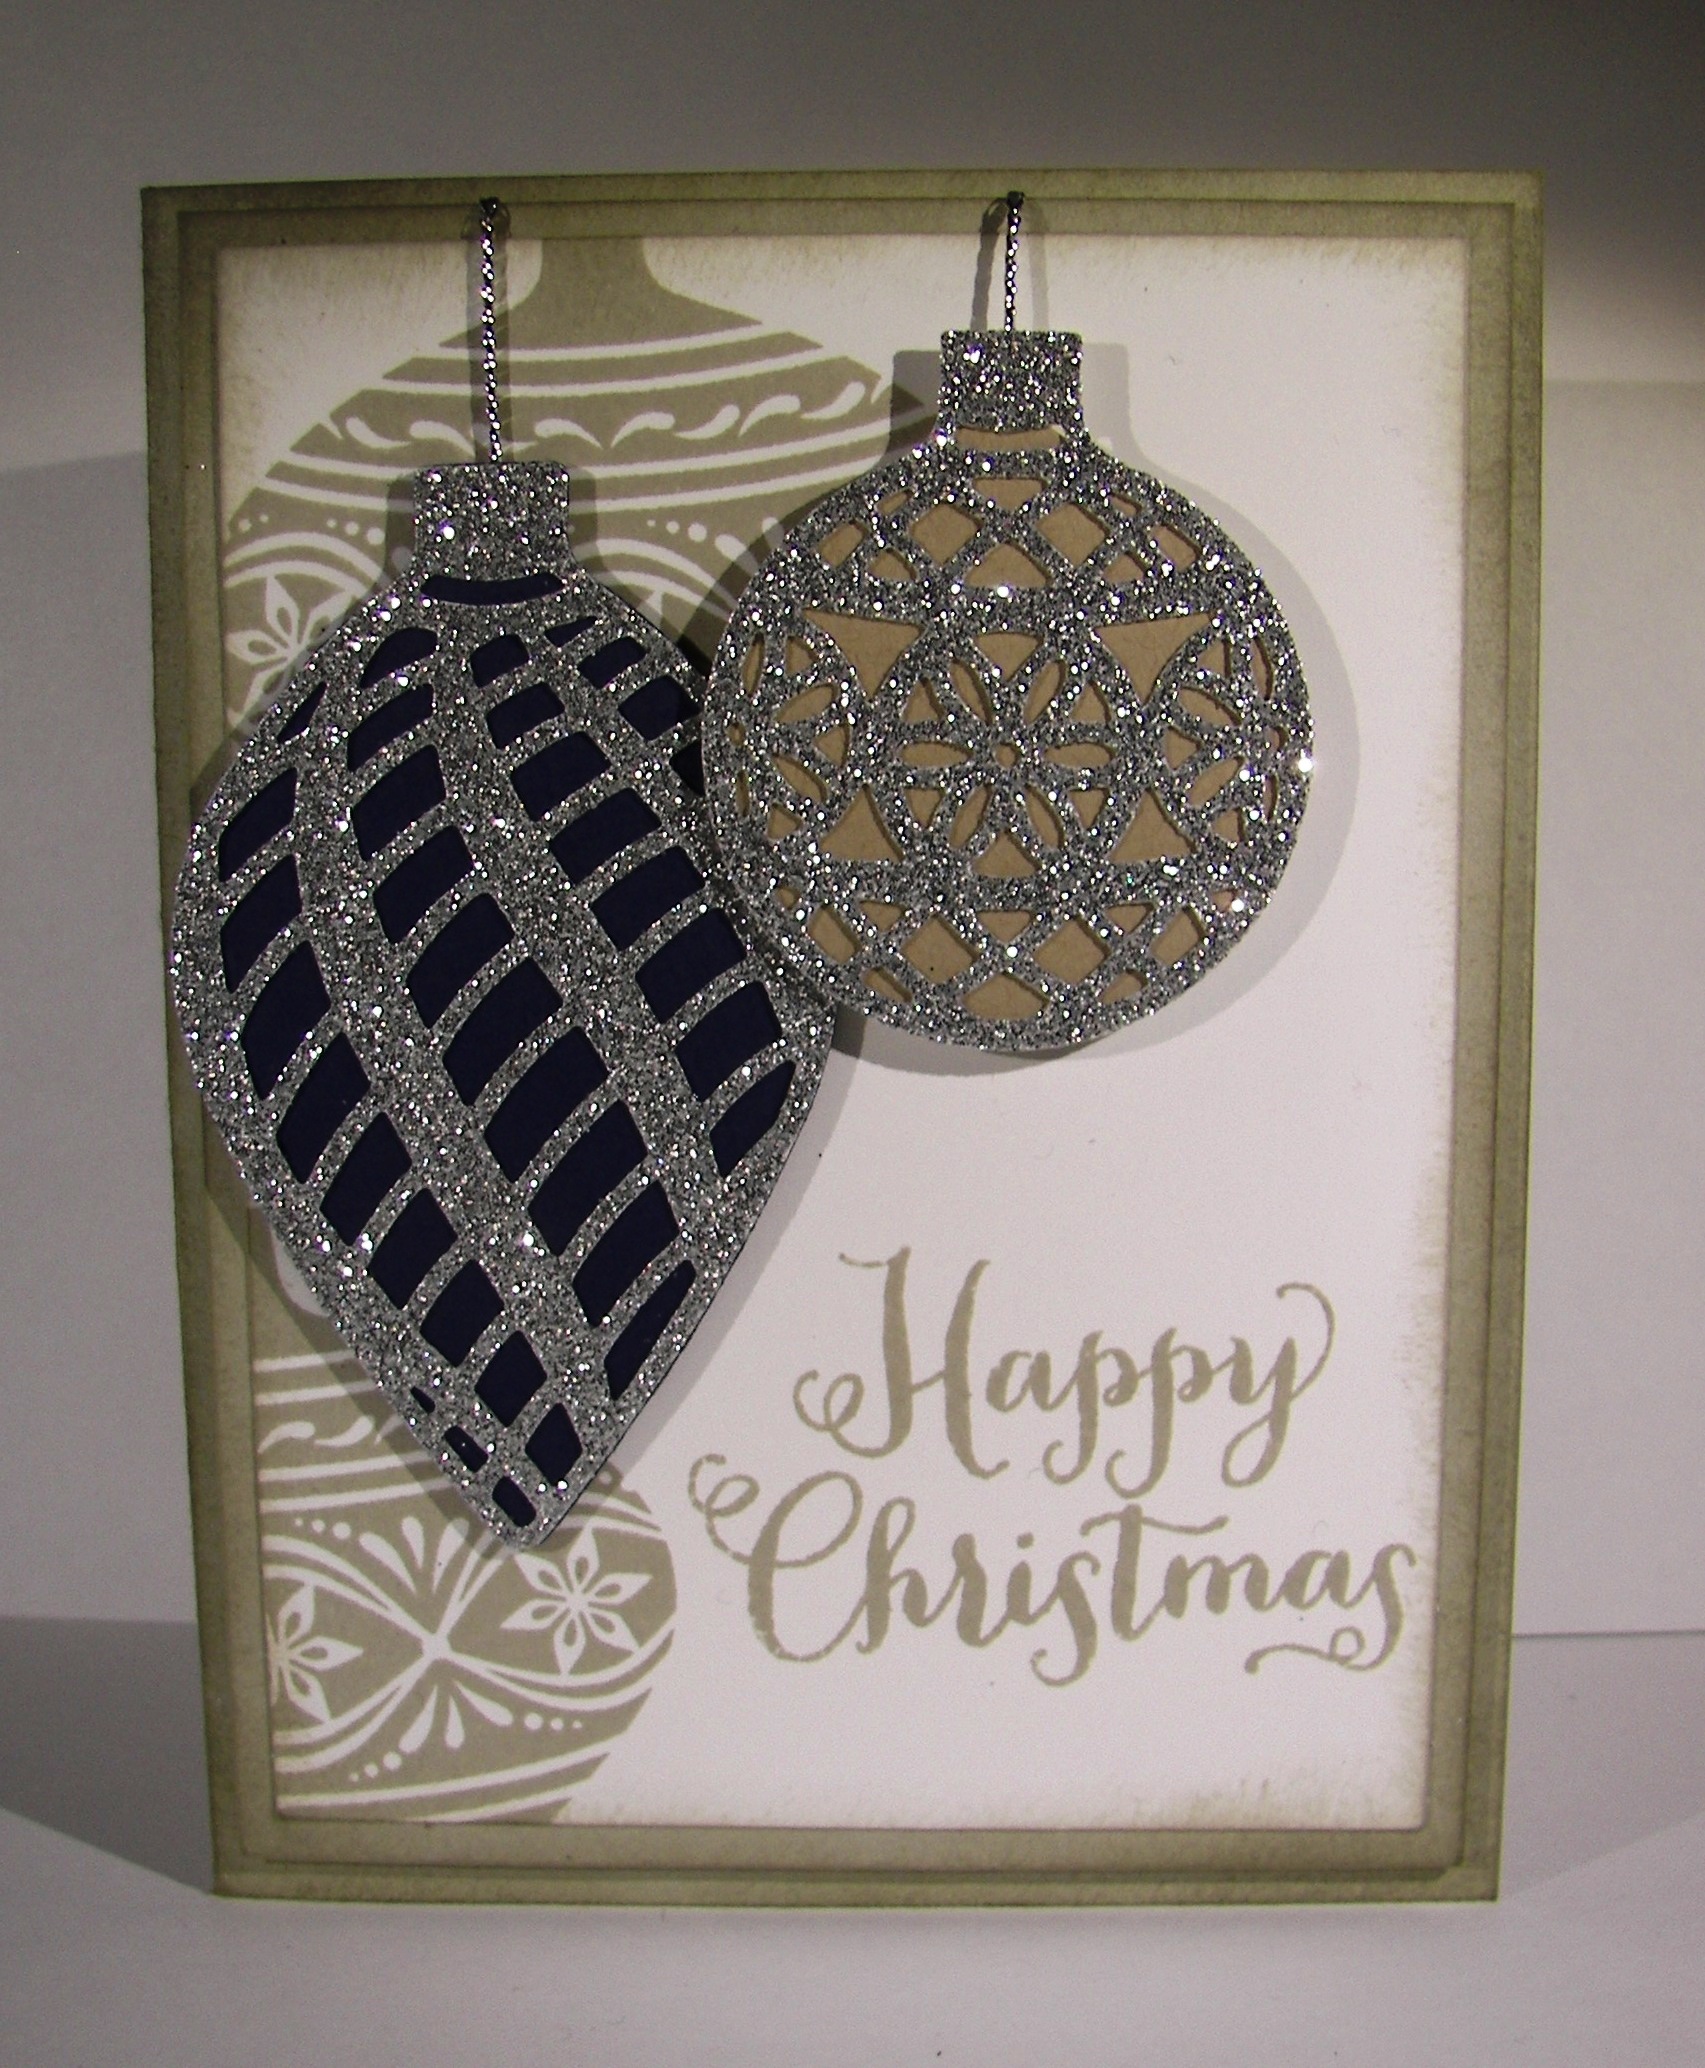
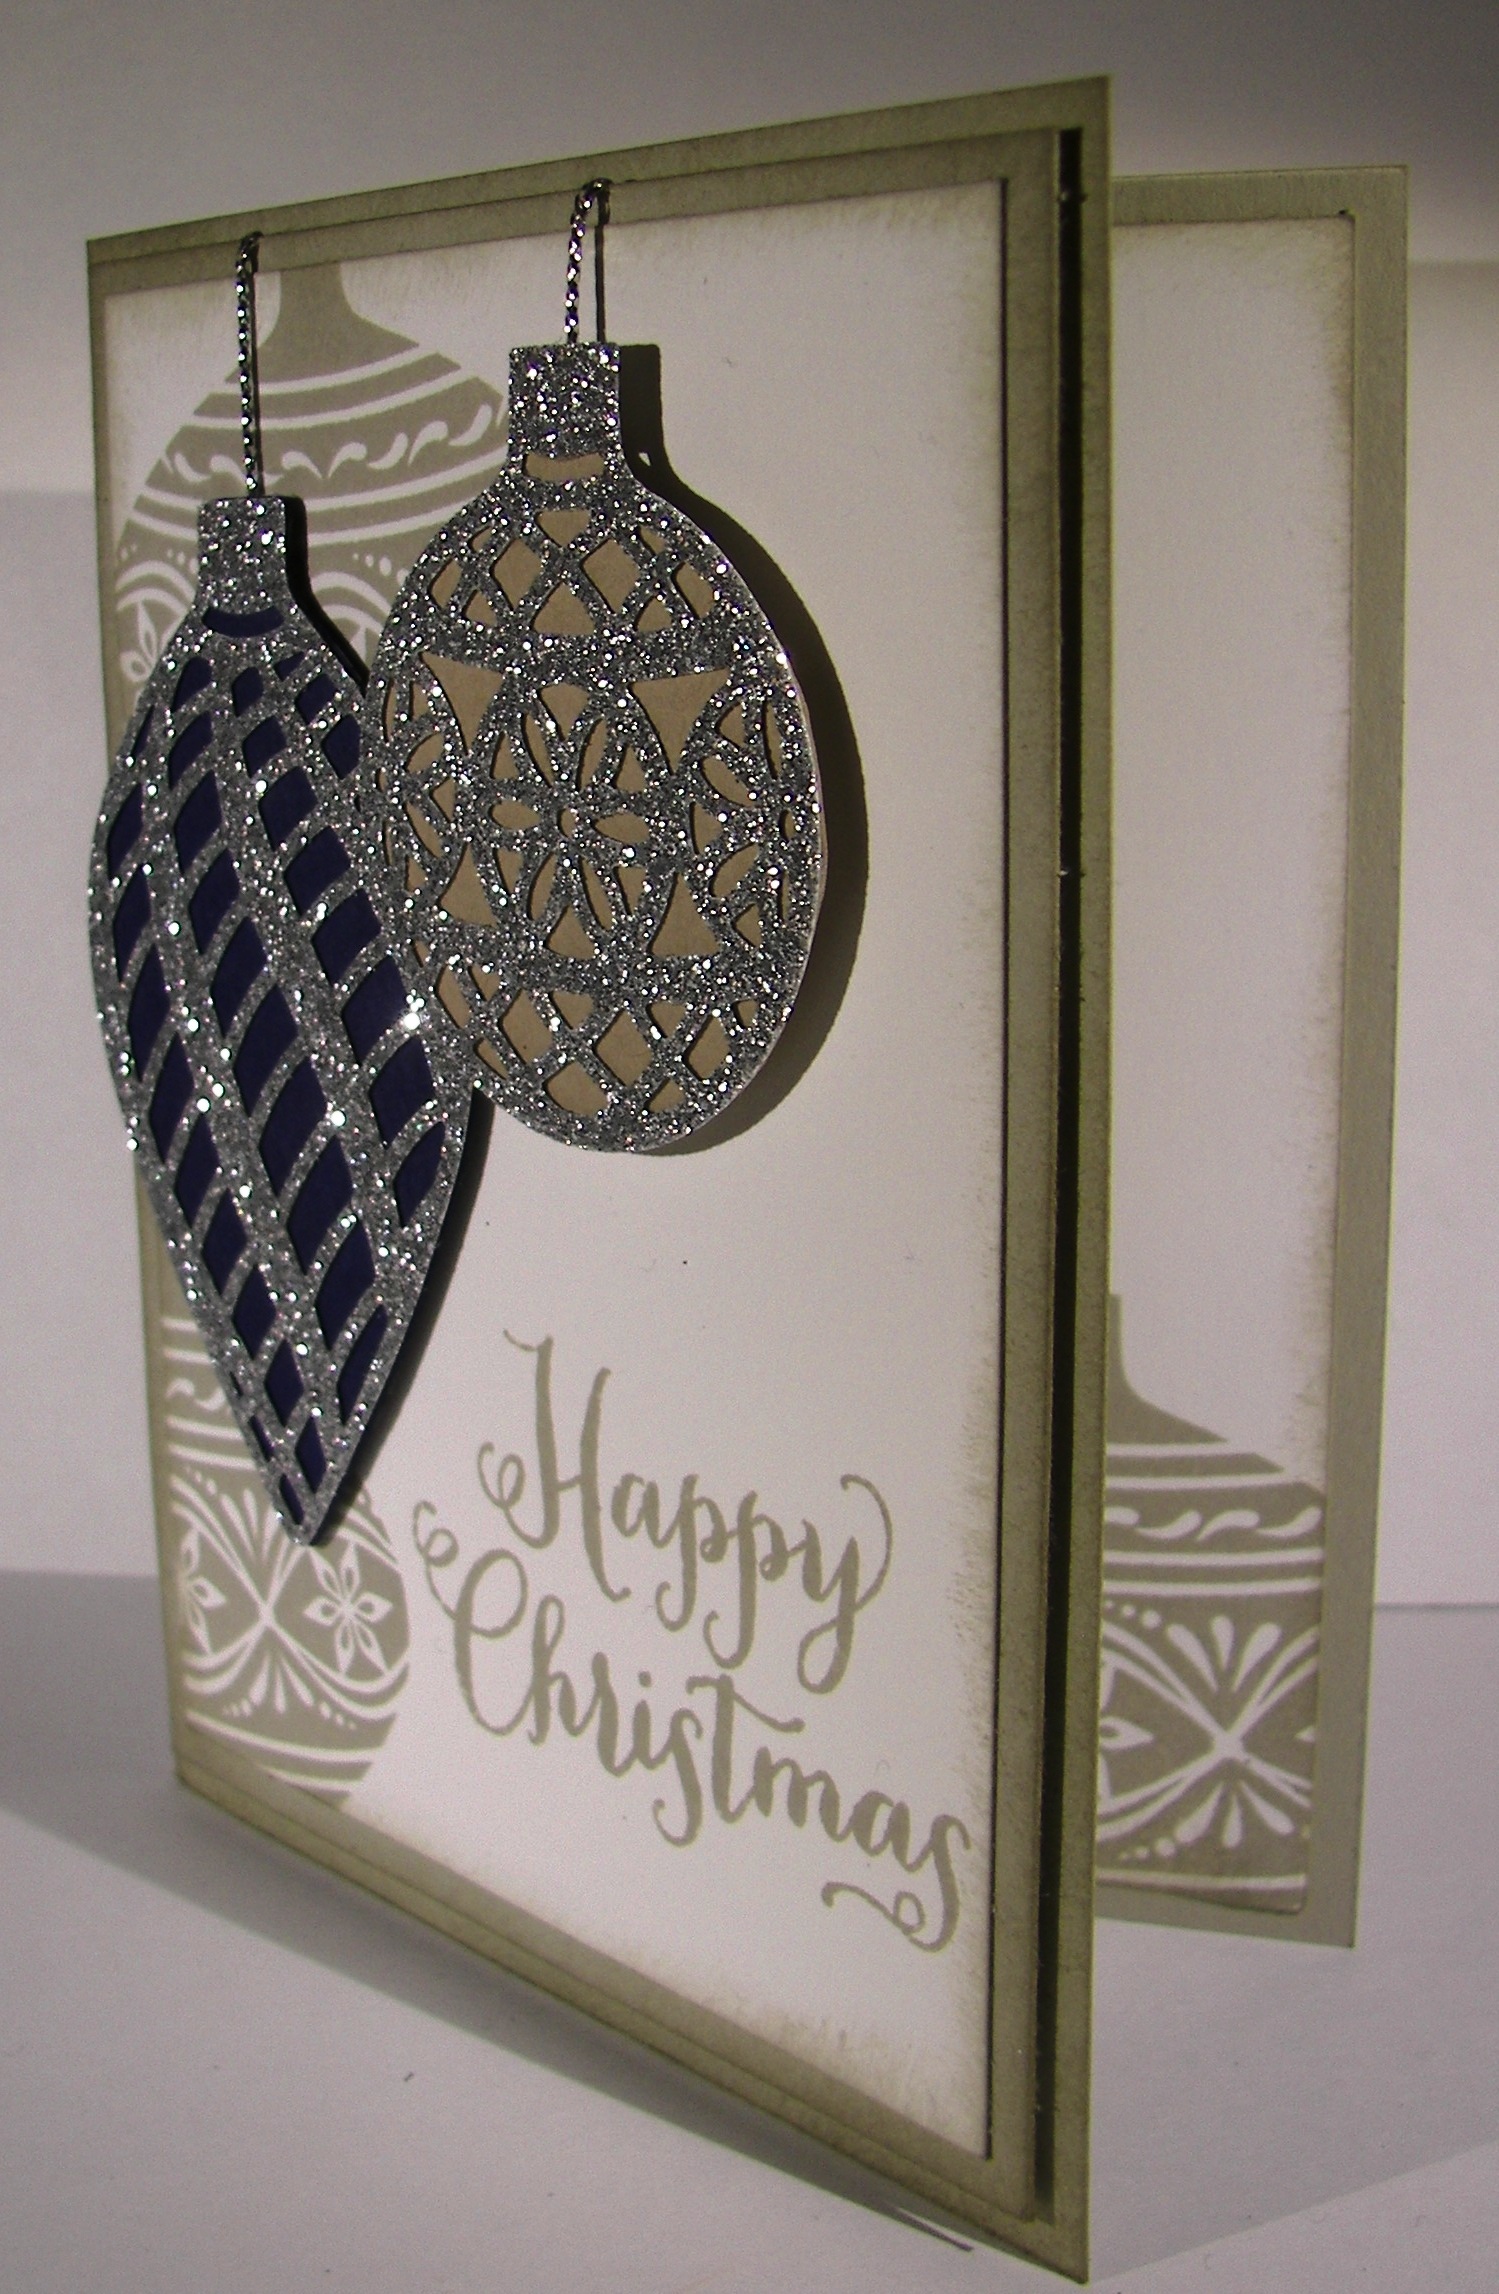
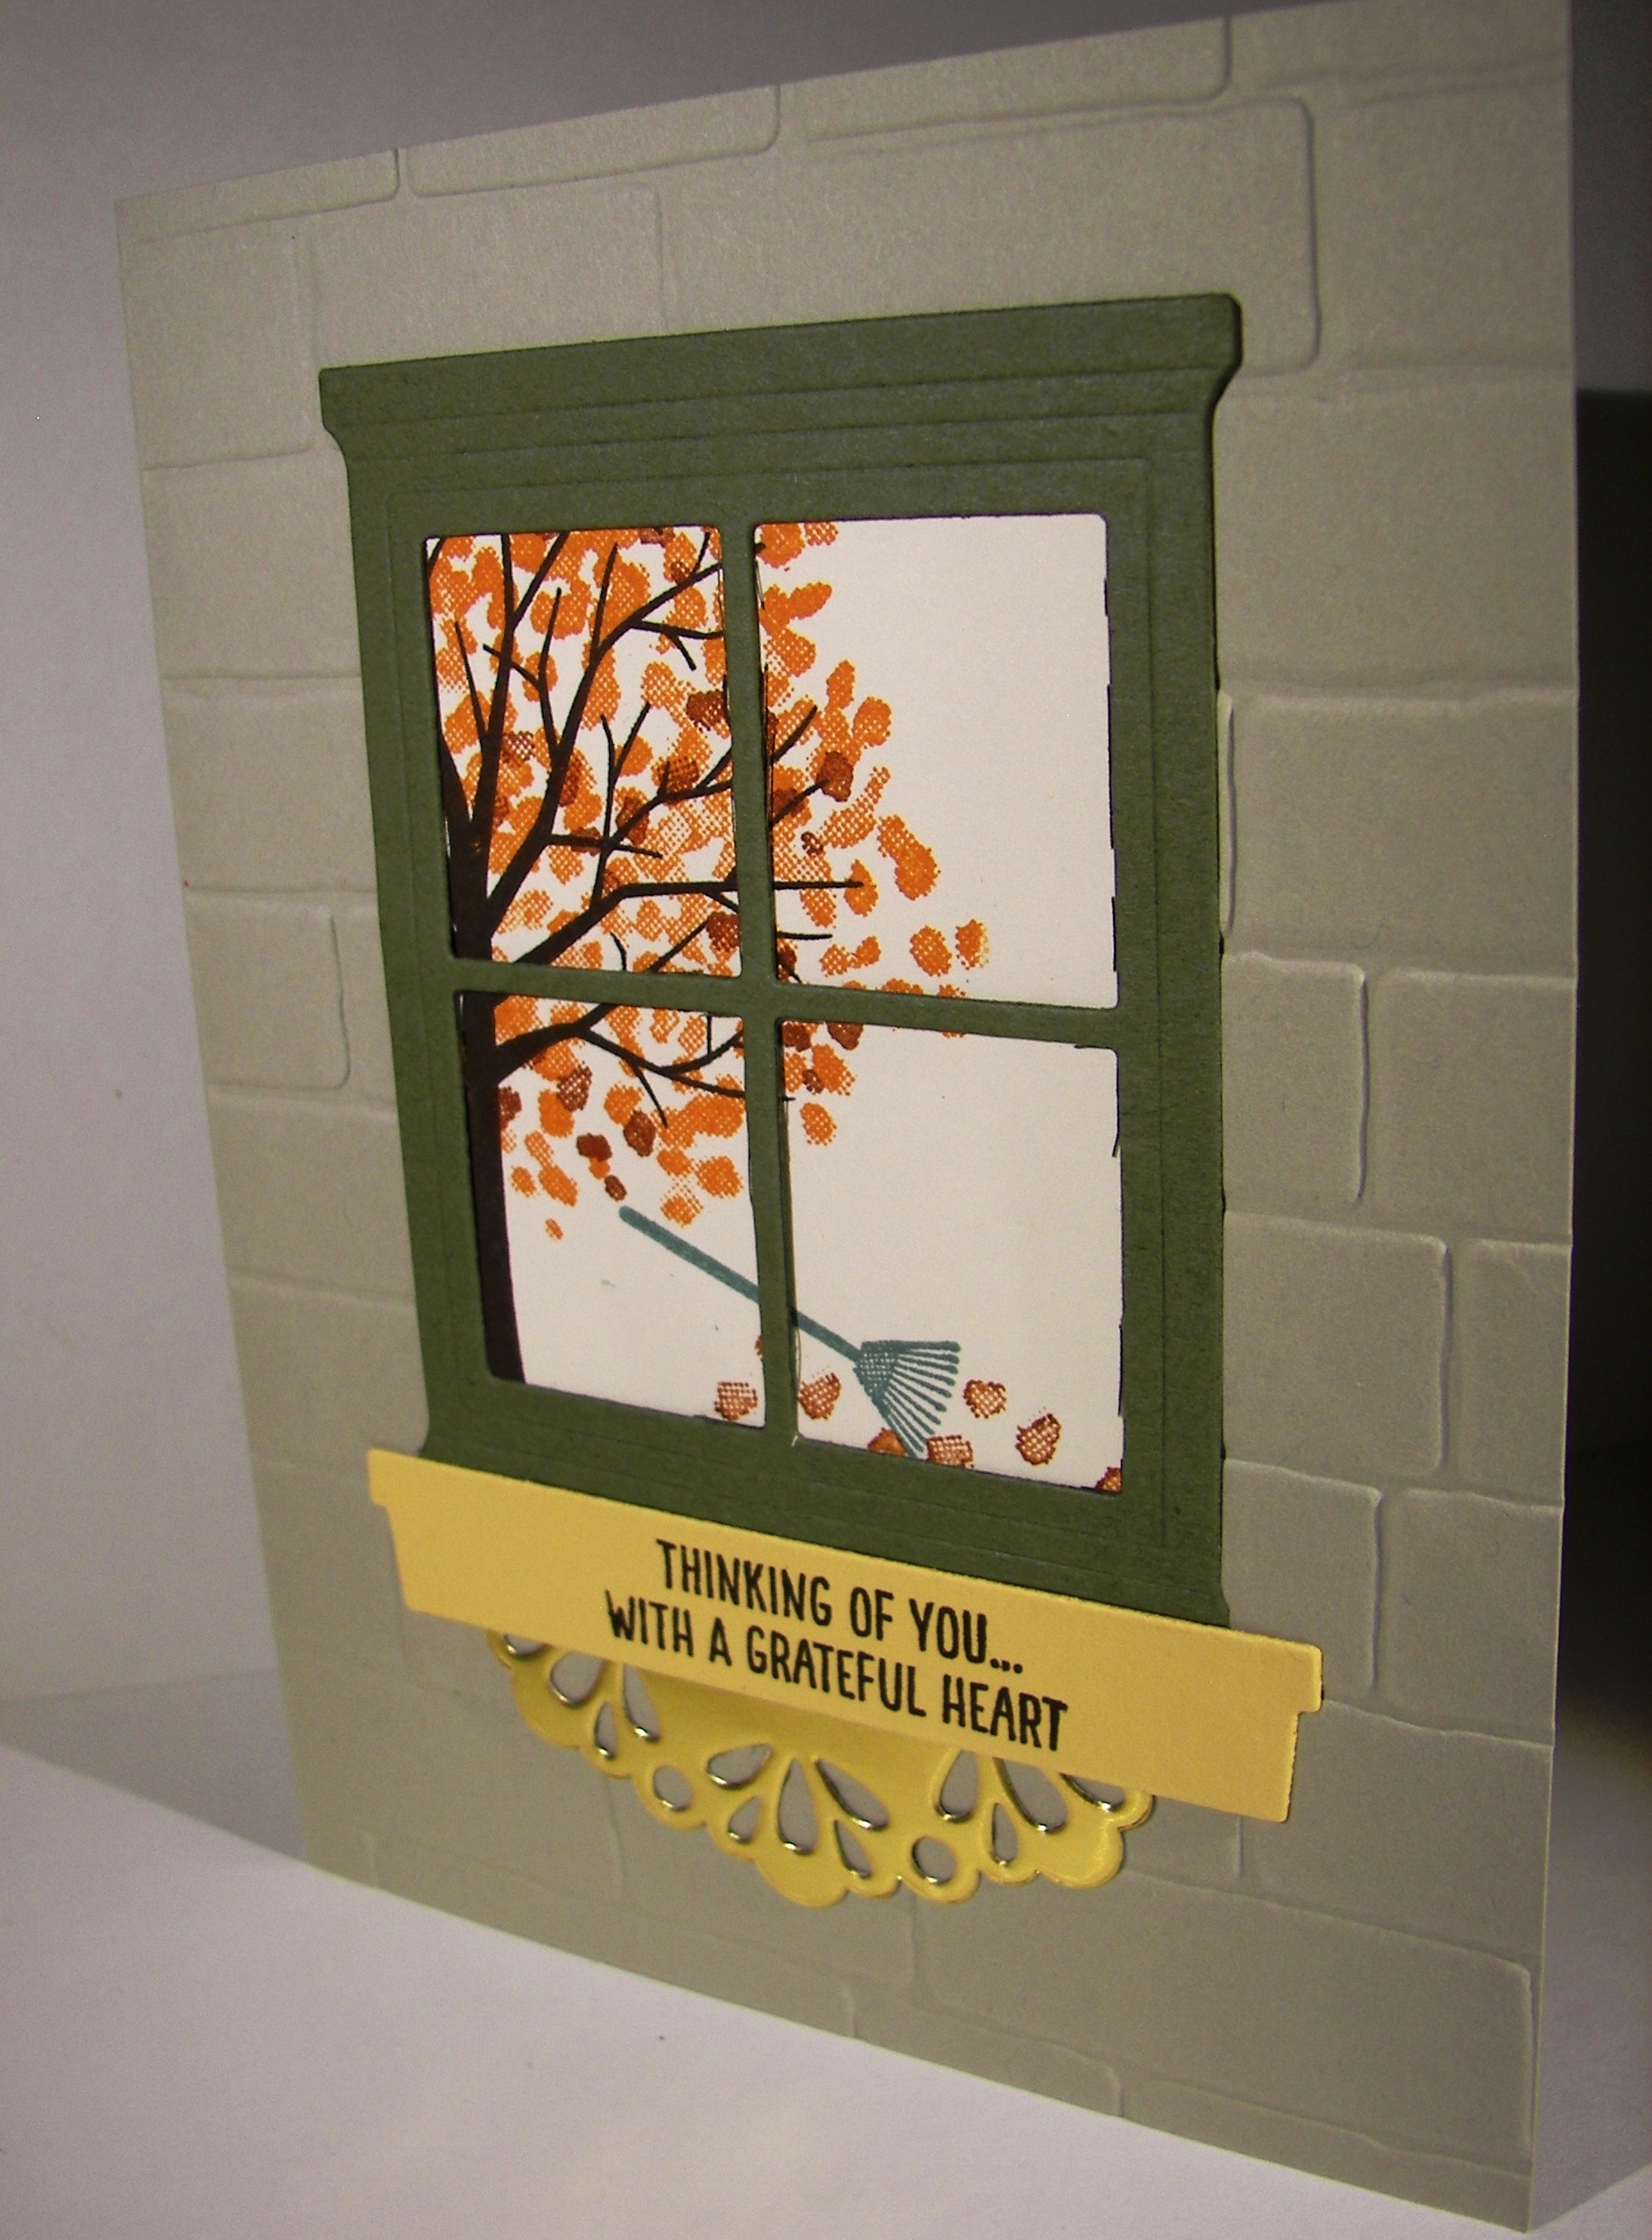
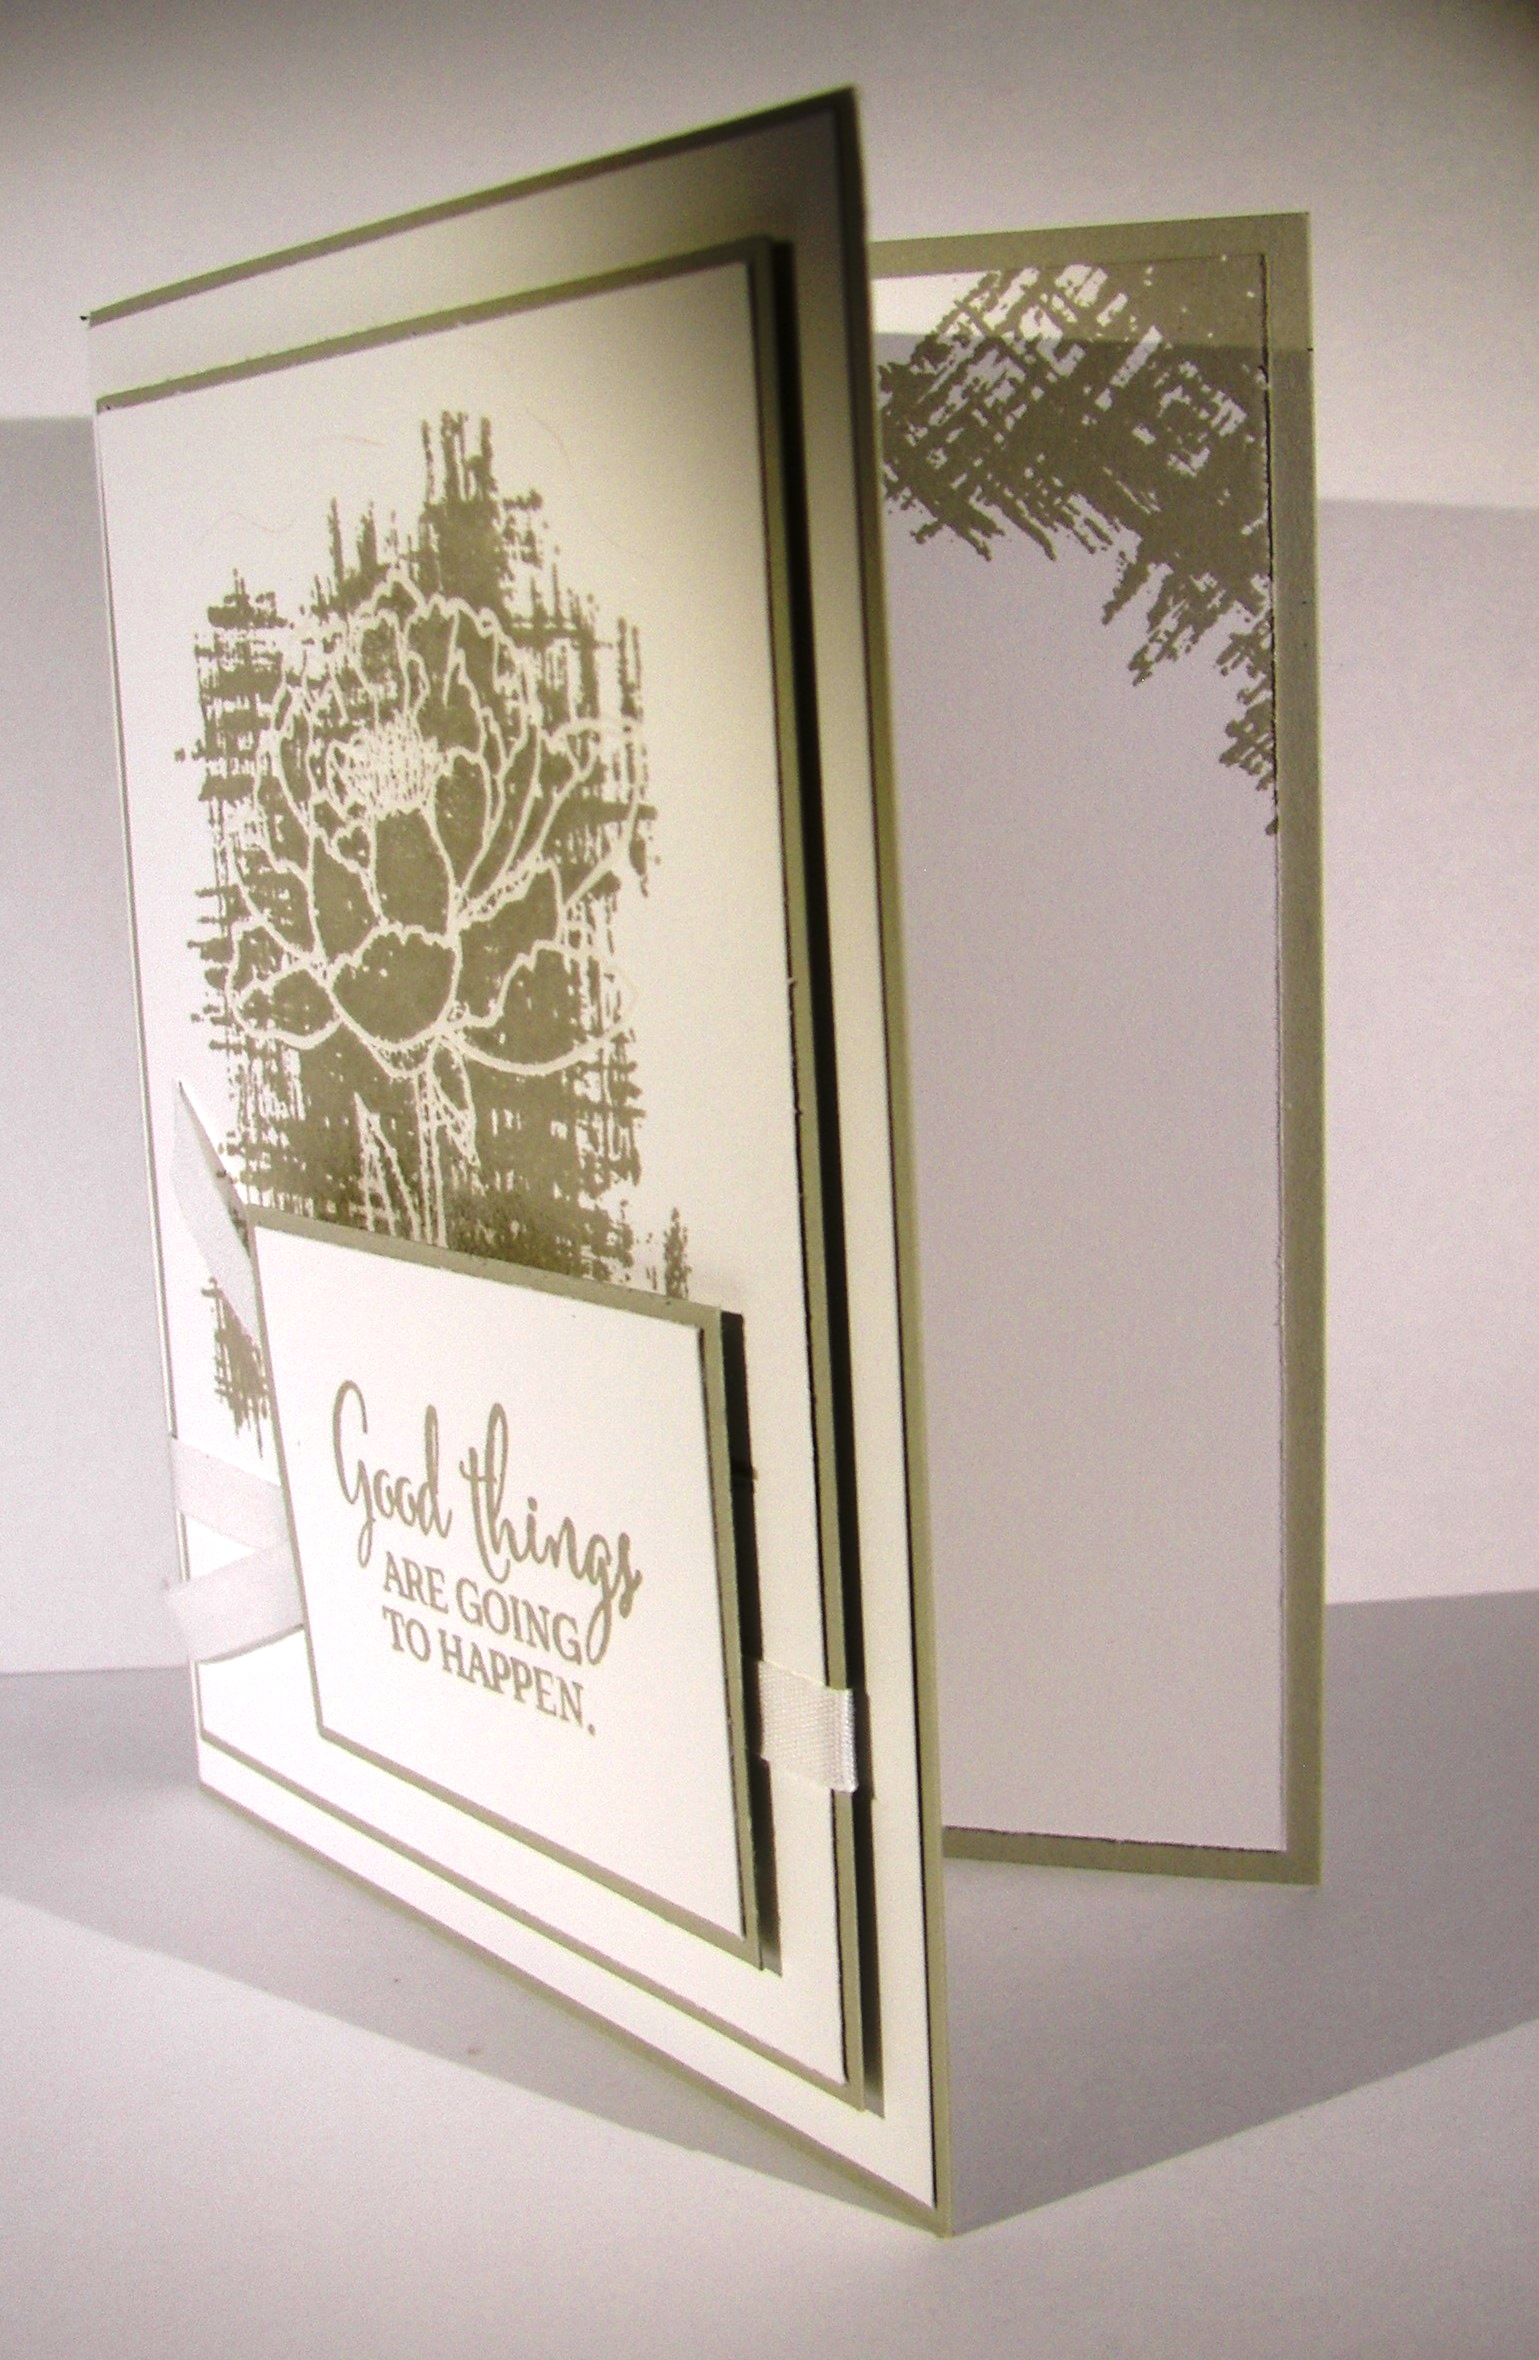
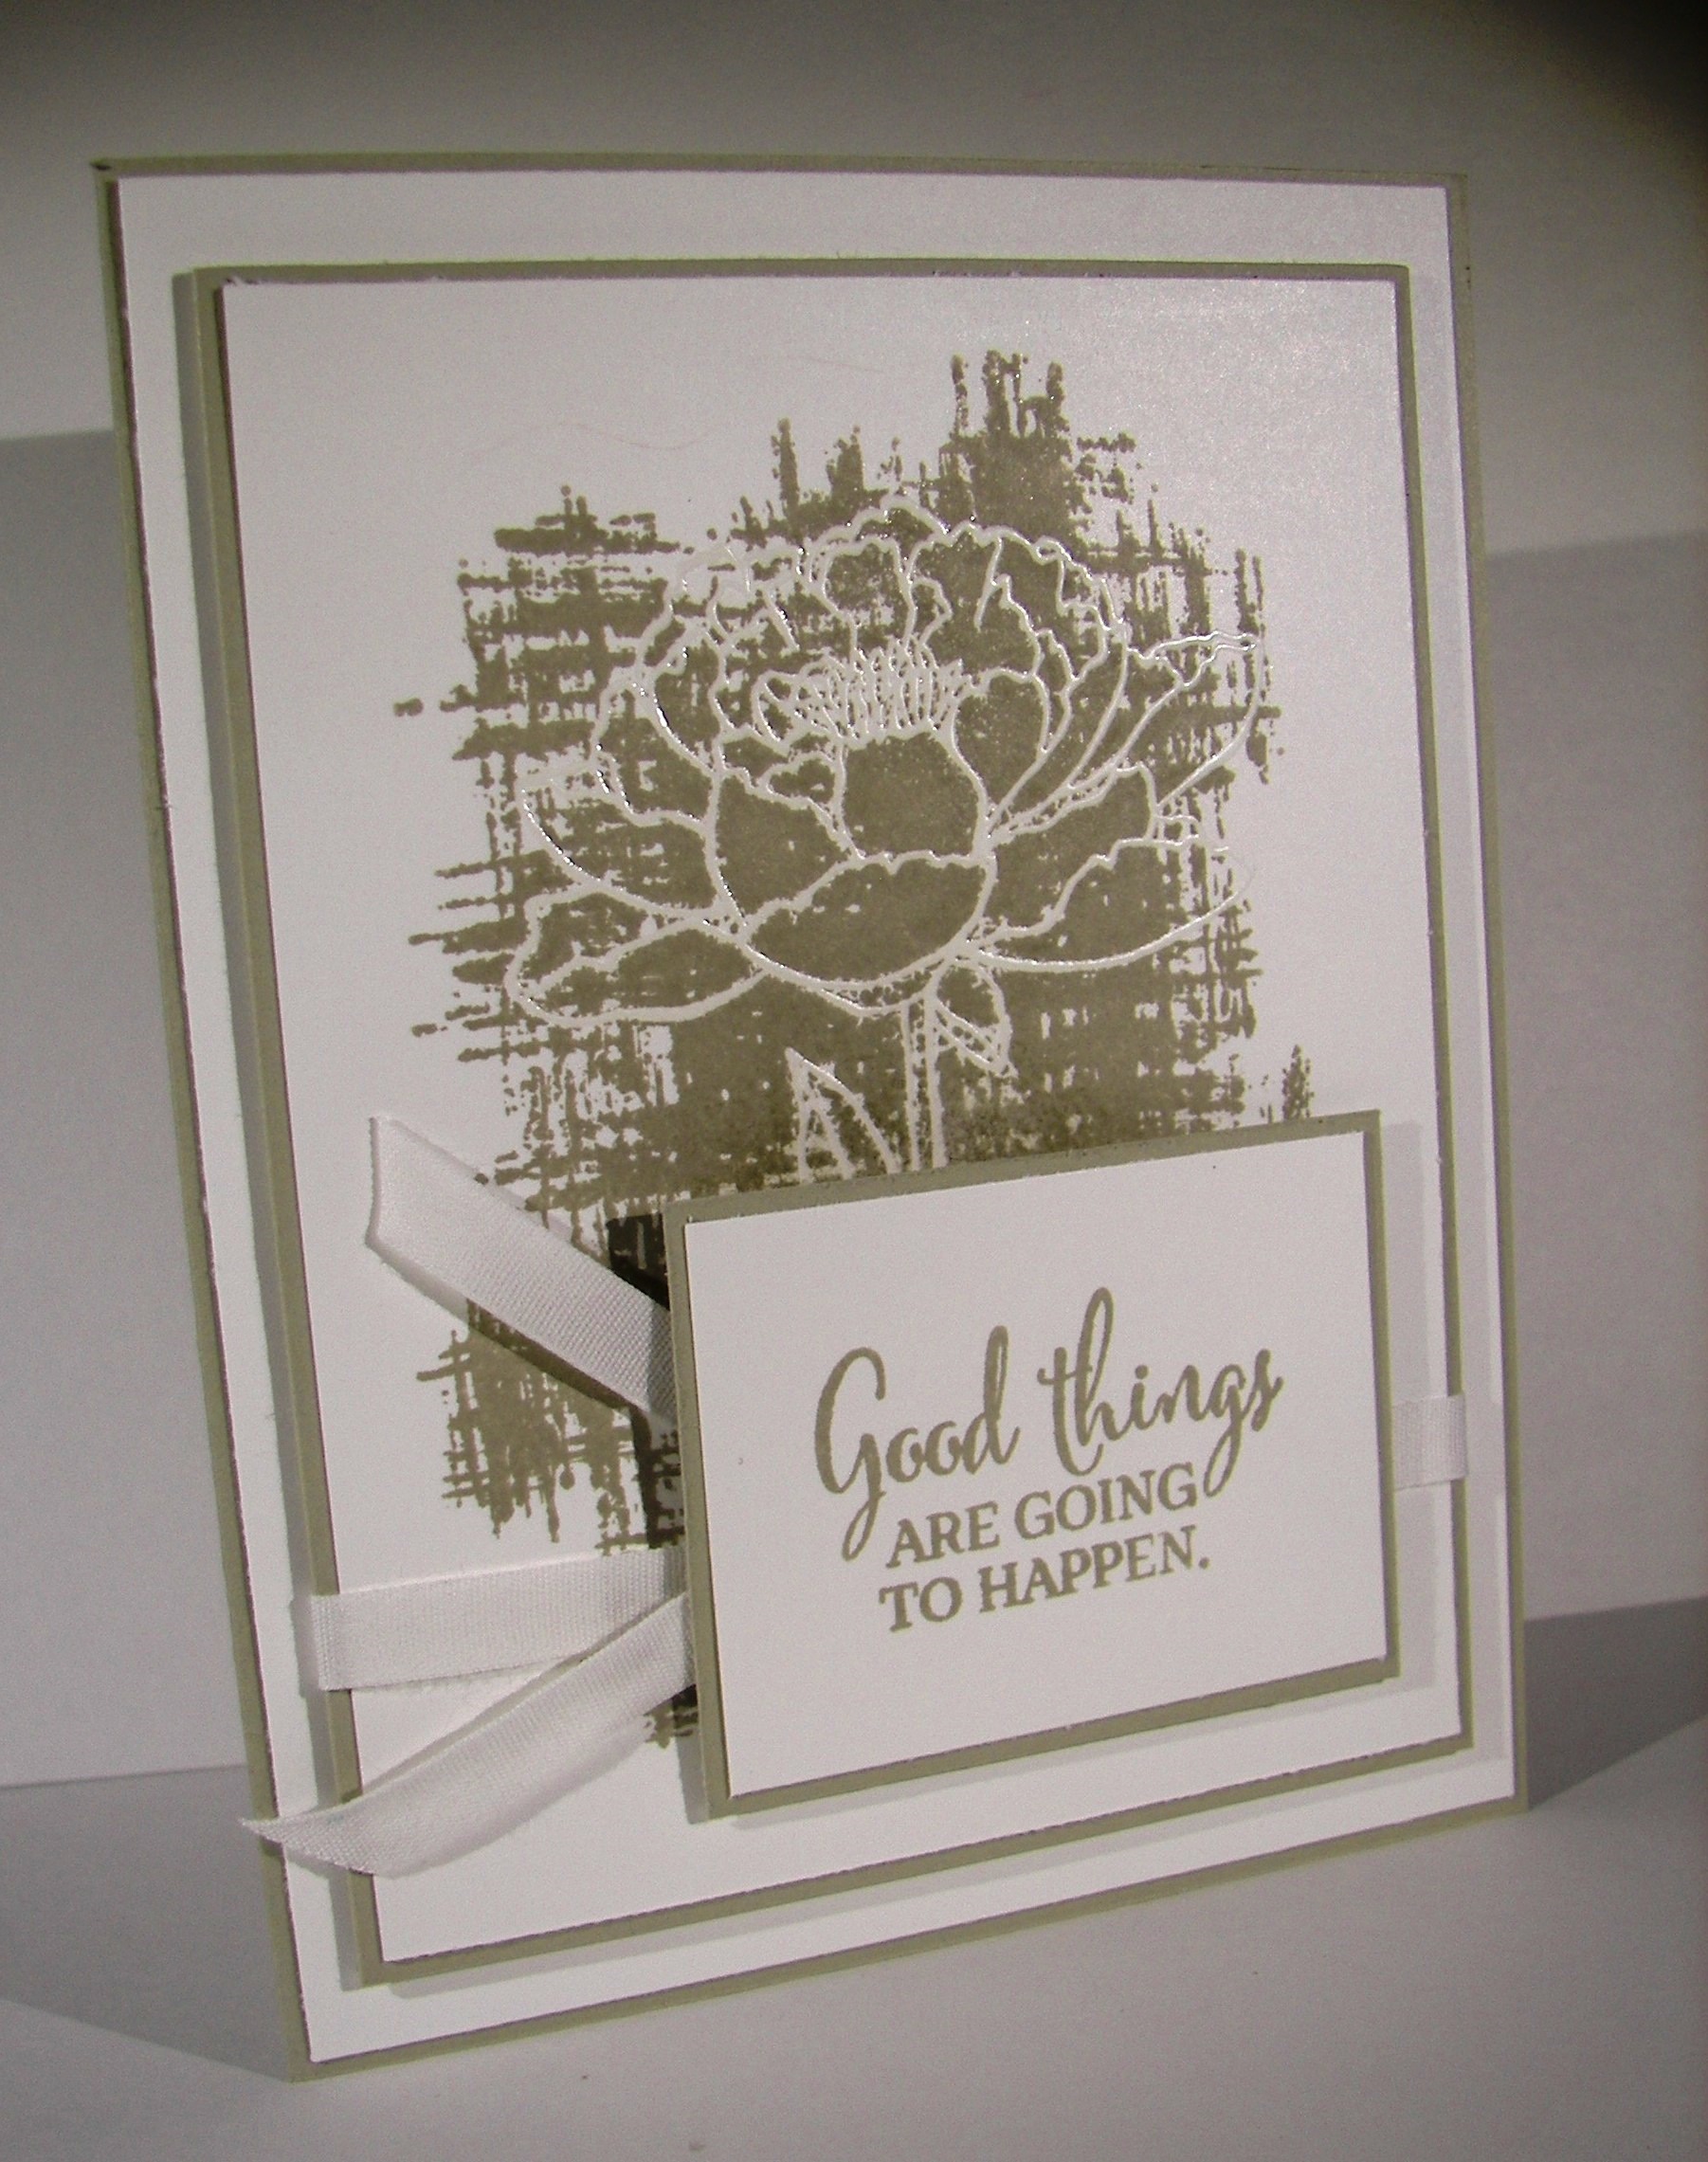
The vision for the die cut was different to begin with, but it did not work out as planned.  No problem, I love it in black as well.  It makes the card look a bit more elegant.  My original thought was to die cut a wide section of adhesive tape and brush it with black glitter. The release paper cut fine, but the adhesive did not want to work with all the detail pieces.  I ended up having to totally clean the die of sticky adhesive before I could use it again.  Live and learn I guess.  But I still want to to make that happen somehow.  Maybe just glitter paper next time?

3-10 (1)

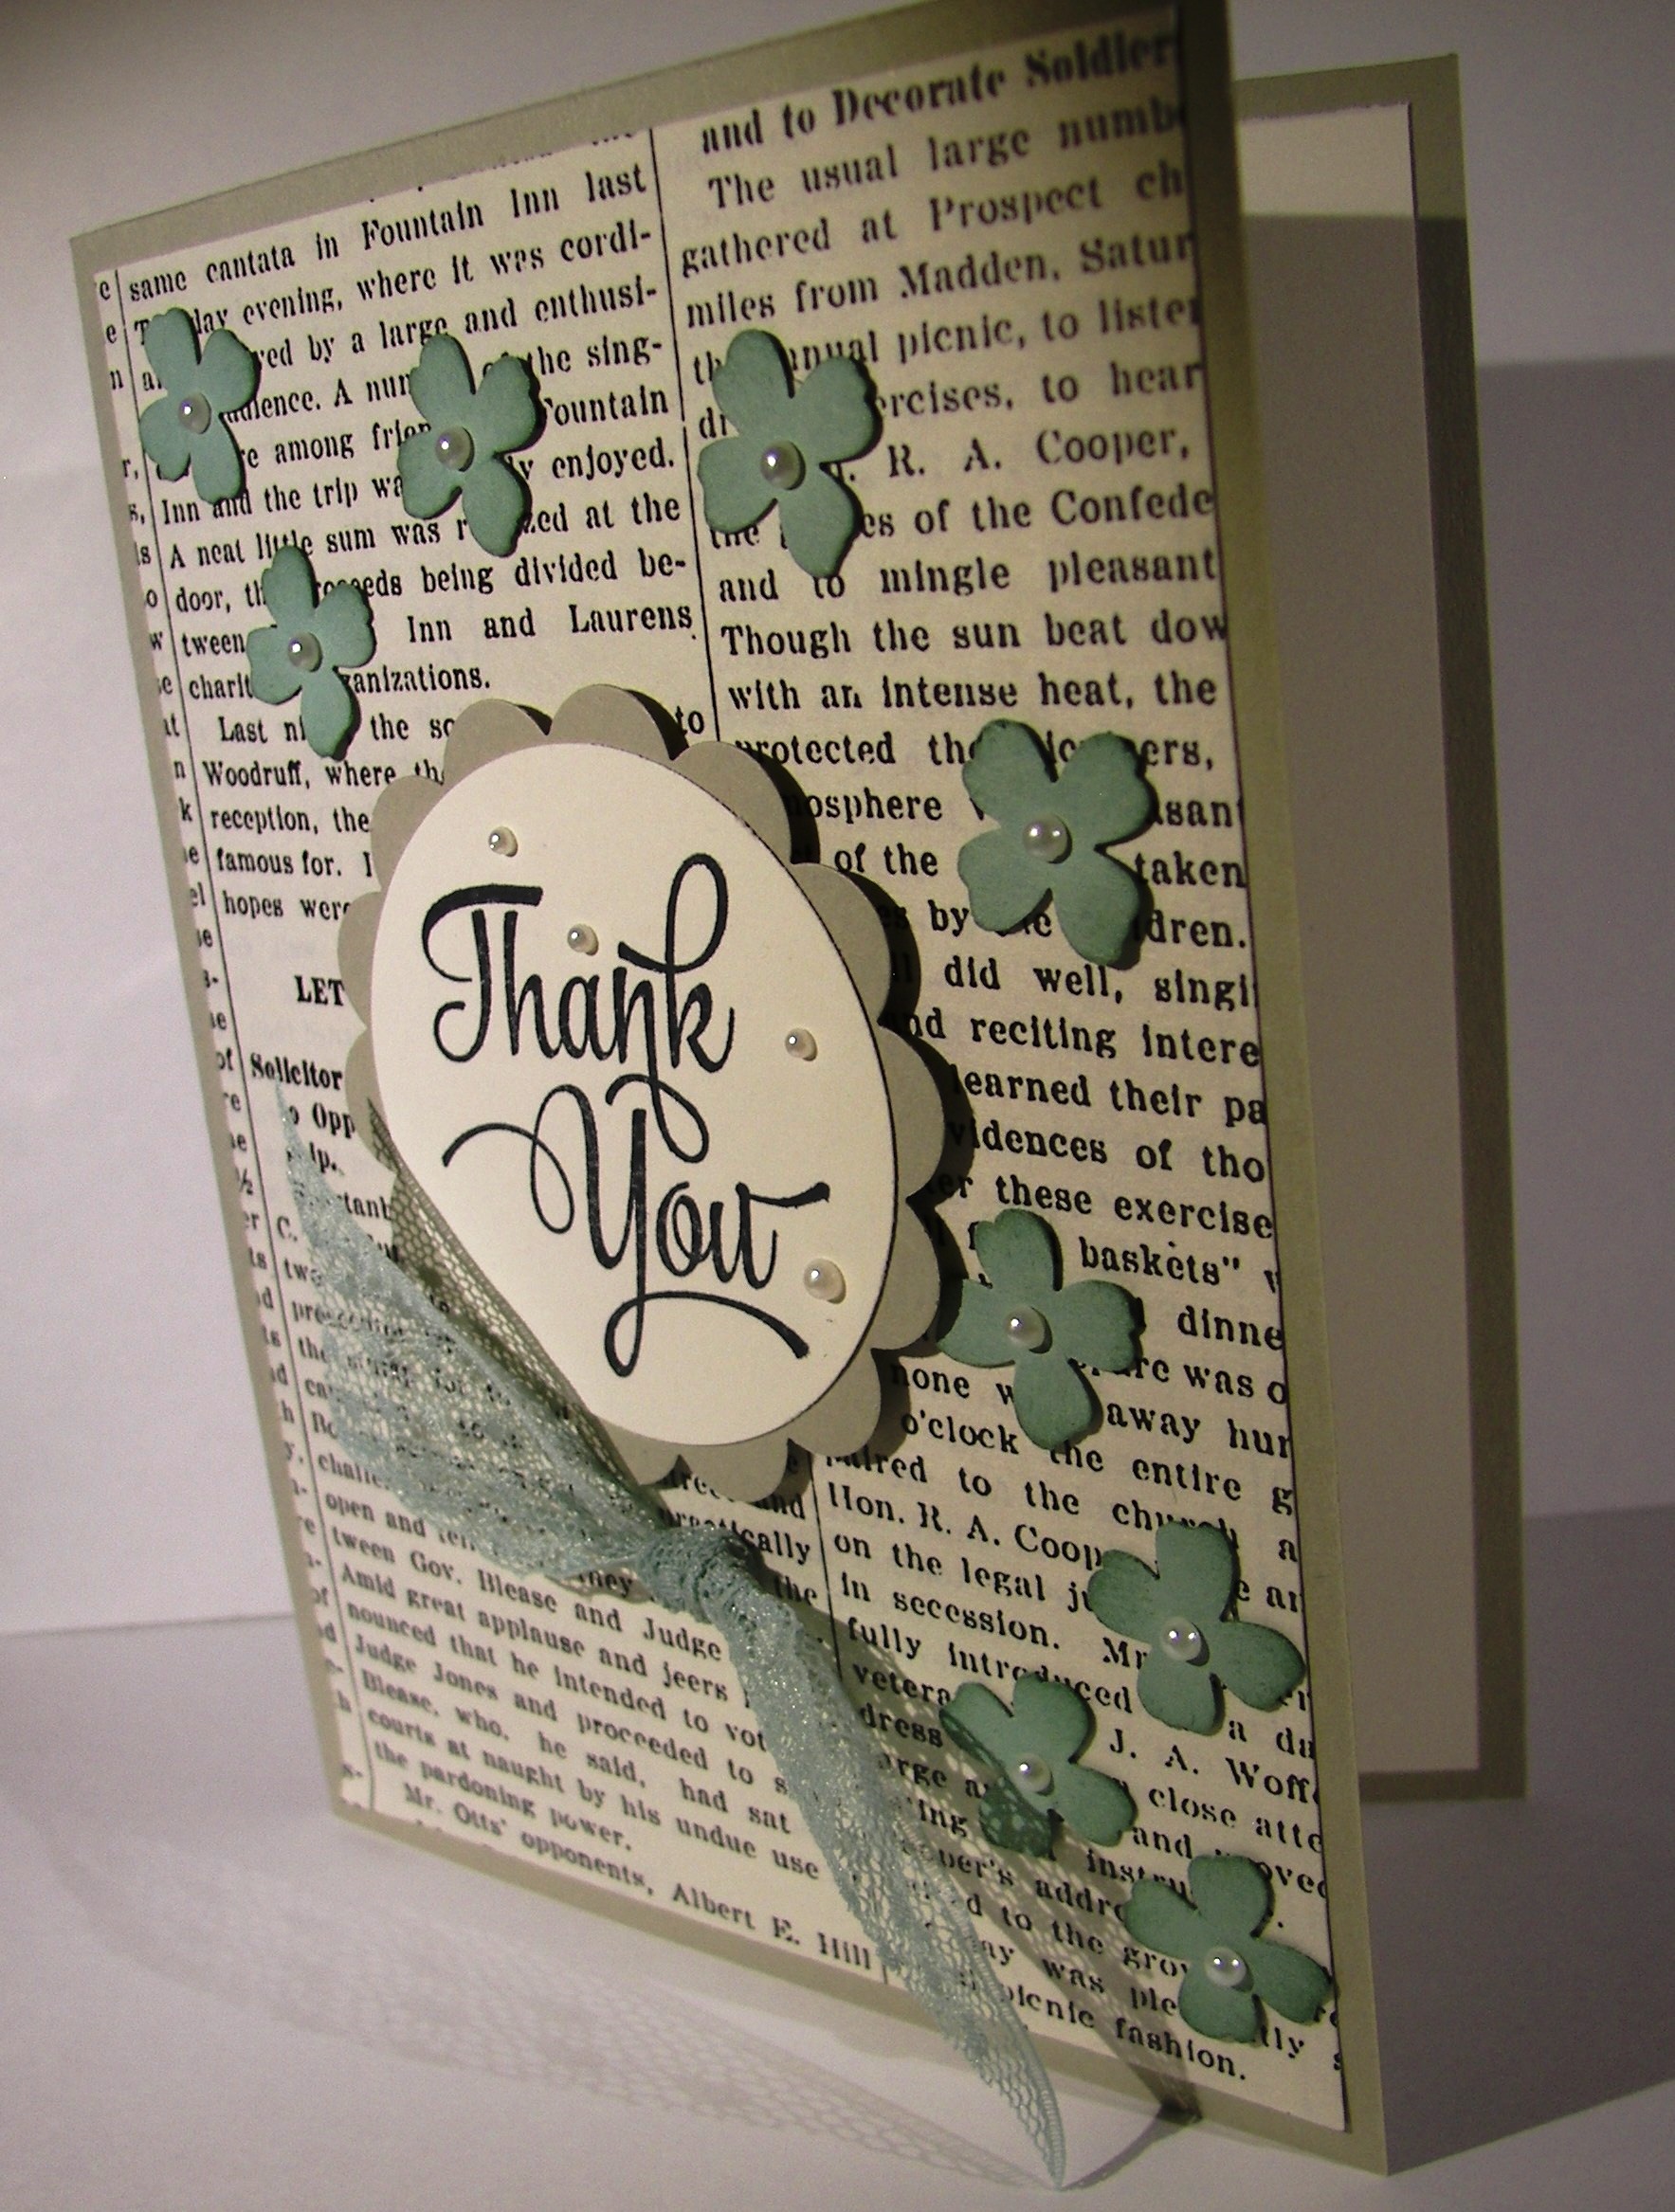
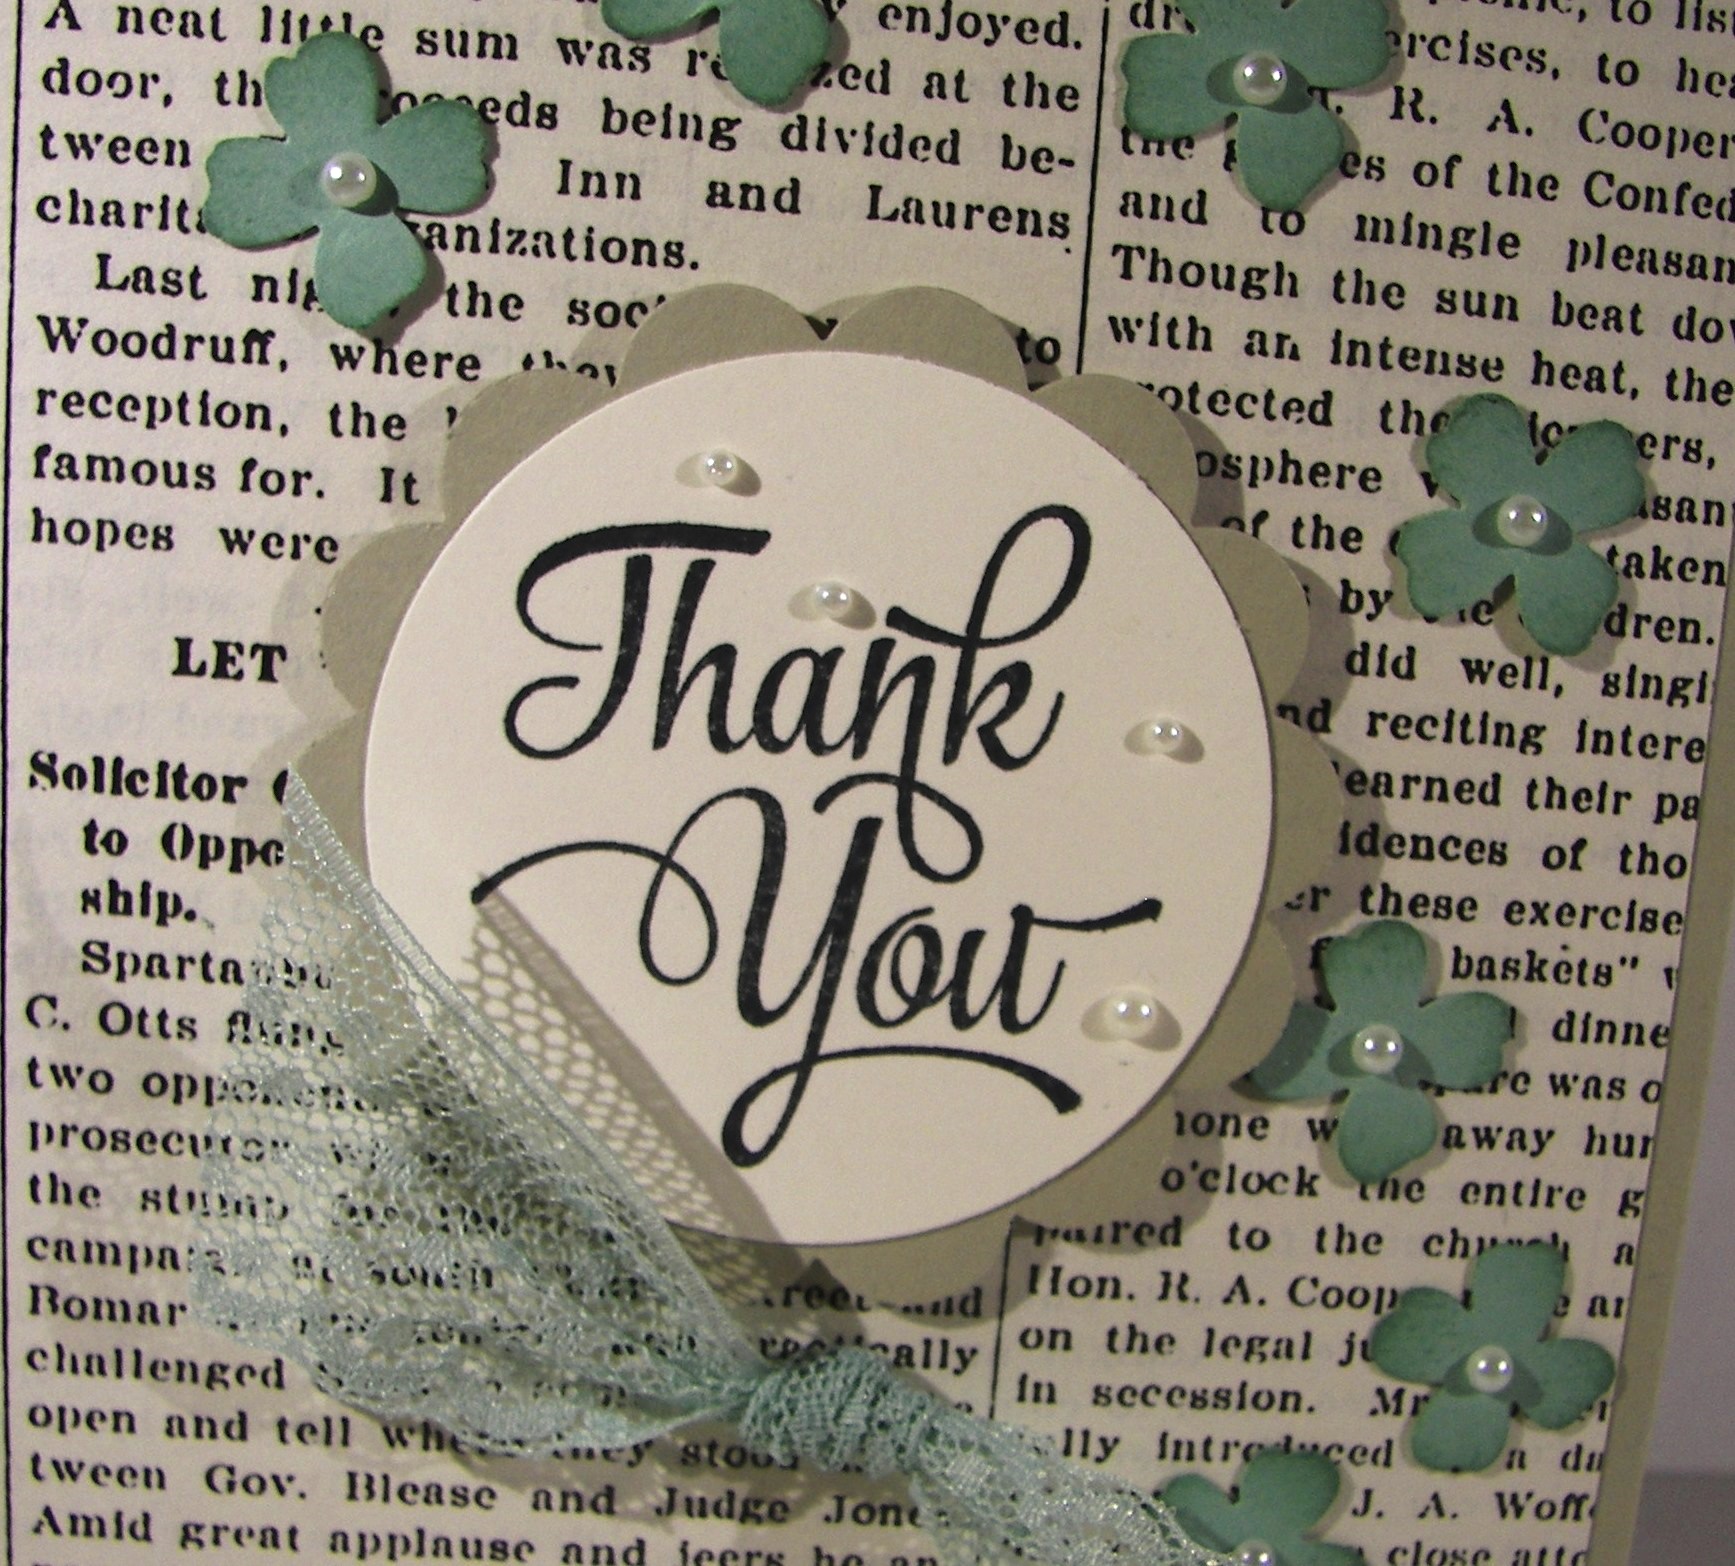
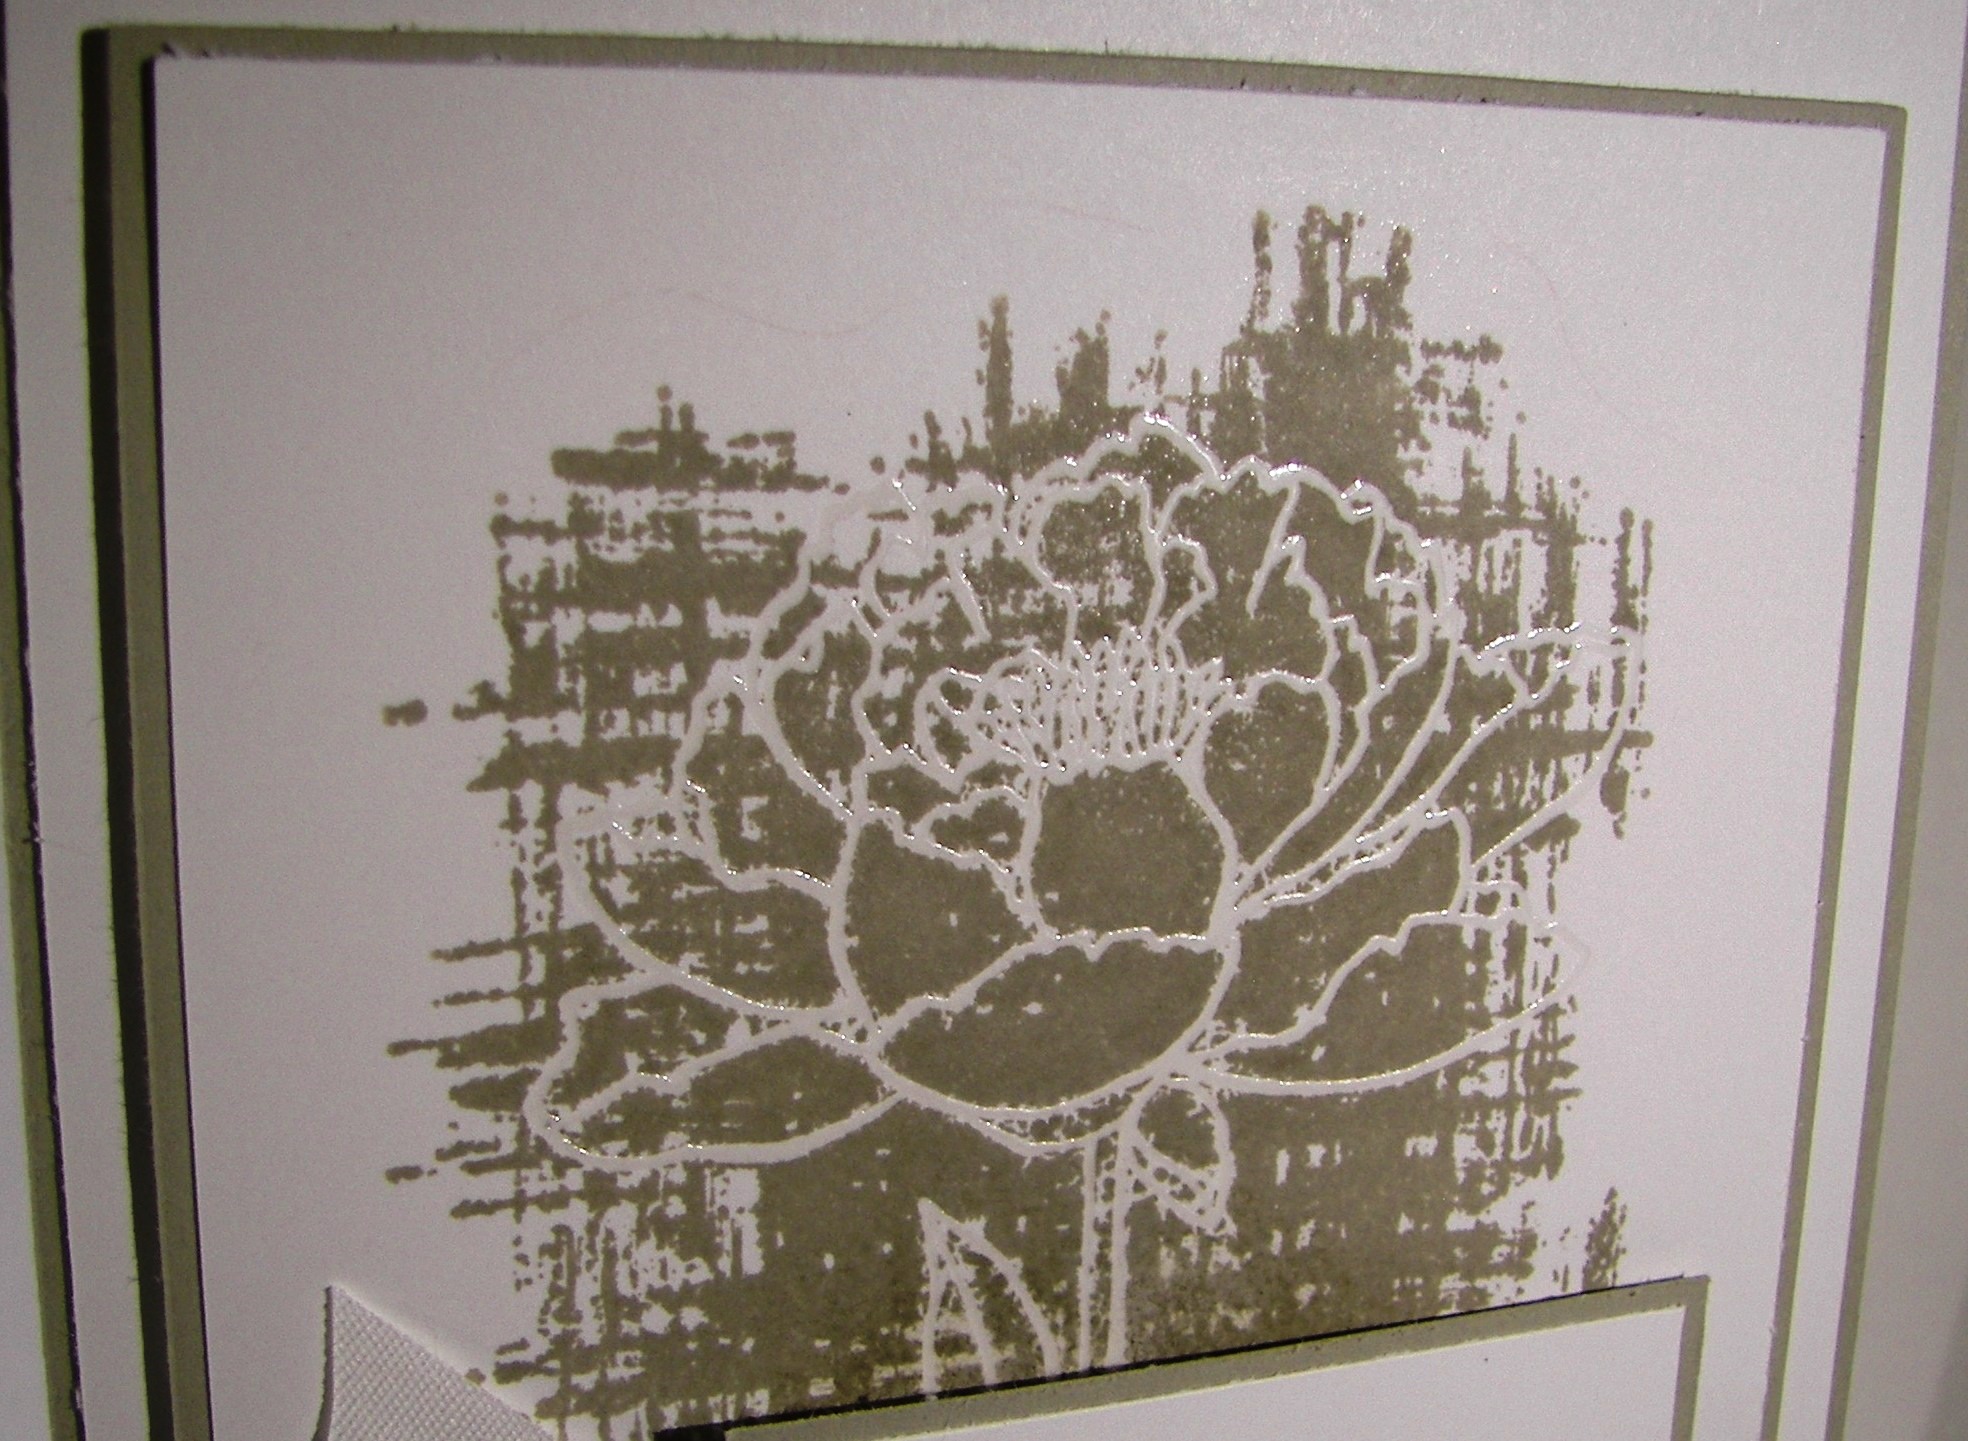
I wanted a bit of interest on the colors, so I opted to add a light flower stamp.  The color is a light neutral, sahara sand.  I thought that would not distract too much from the colors and keep the tone well.  It worked nicely.  I added some droplets of water to distress the background somewhat and called it done.  Such a fun card.

Have a creative day!

Moana

Every Heart Needs

Gift sets are so great! A bit better than this paper series, but not by much.  I usually am not the kind of person that wants realistic photo paper prints, but this set has my attention. The way the lace is folded really looks dimensional here, even if my photos don’t capture it well.  It is lovely.

2-4

I used one 12 x 12 sheet for this set.  The first cut was to give me a sheet 4 x 12, then a second cut at 5 1/4″ for the card front.  I used the remaining piece to trim out the decorative layers.  The larger section left, measuring at 8 x 12, was scored to create the matching bag. Put that pretty paper to work, otherwise you are left with a bunch of paper that you love and cannot bear to part with.  I know it is hard, but how pretty is this set?

2-4-1

The doilies are so lovely.  They are very vanilla on one side and whisper white on the other. So versatile, and made from paper that can be worked with a bit.  As you can tell, I sponged these two and gave them a proper crinkle.  A doily doesn’t lay flat after all.

The sentiments came from two different sets and I went against my usual on this one.  I stamped and fussy cut.  I really love a die cut or punch to take care of that, but it had to be done.  Both projects were finished off with this elegant vanilla satin ribbon.  And yes, it is that smooth and delicious to the touch.  I love beautiful ribbon.

2-4-2

Have a creative day!

Moana

I Hope You Feel Appreciated

I don’t think I will ever find too many places to stamp this awesome chicken, ever.  There are two other adorable chickens and a little egg too, but this guy rocks!  So here he is peepin’ in a little window to say hello.  Too adorable.

2-3

For a very simple card, I sure did use a lot of different products.  Really though, it went together quite fast.  The card base became a one layer card.  I stamped with white stazon onto the card base using the hardwood stamp.  So cool.  It gave me a subtle woodgrain look that was just right.  I die cut the window out of the card base and again out of whisper white. I glued those two windows together so when I nested them back into the opening, the white one would layer up just ever so slightly.

I backed the window with velum to create the ‘glass’.  I traced the window pane openings on my inside piece of cardstock so I knew where to stamp the trees and chicken.  They got a little ink and a little water color pencil activity and then I glued them in place.  I could have left them on the inside back of the card, but I knew I wanted to cover up the back of the window and have plenty of space to write to my friend.  So I adhered it to the inside top flap of the card and put another blank piece down on the inside back.  Then I had double the space to write and my window stuff all covered up.  Total win!

2-3-1

Have a creative day!

Moana

Thanks For the Smile

I love using stamps and paper in a way that creates a new vision.  This background paper comes from a lovely set of paper called Falling in Love.  This particular sheet is actually an artistic view of glitter.  When paired with this amazing dragon fly stamp, from Dragonfly Dreams, is looks like a shimmery pond and sunset.  Wonderful.

1-30

The dragonfly was stamped three times on the front and once on the inside.  That is it.  I used basic black archival ink to give this strong, rich look.  Awesome!  The same ink was used on velum cardstock for the sentiment.  I used the triple banner punch to make this layered tag and wrapped it with some of the free ribbon I earned from my last Sale-a-bration purchase.  Love that stuff!  I hid my adhesive on the ribbon.  I used glue dots, small, strong and easy to hide.  And there you go!

1-30-1

Have a creative day!

Moana

So In Love With You

It isn’t very often I purchase an entire suite of products, but this time I just couldn’t resist. Honestly, I have never purchase a whole set.  There is always an item or two that just don’t suit me, but not this time.  There is also a framelit set that coordinates that is just as beautiful as the rest.  So wonderful.

I made this card for a demonstrator event I was able to attend today.  Which is why I am just sharing this tonight when I managed a few moments to myself.  The rest of the cards I was able to make sure are beautiful.  We all focused on product from the spring catalog and boy did we have fun doing it.

1-14

This card is actually quite simple.  It has a lot of layers, which I love, but no new technique to speak of.  Simple elegance is sometimes all you need.  Each time I think I have the focus of the card it changes.  All of it works so well together, hence a suite of product.  Take a little time and put some of your favorites together, you might just be surprised.

1-14-1

I hope you had a creative day, I sure did!

Moana

Hey, Chick, I’m Back!

Well, I guess that kind of sums it up!  With two children’s weddings within six months, and a heavy dose of regular life, I just found myself taking a few things out of my day to help get through it all.  I have so missed this, it really does help keep me sane and happy.  I have still created, but not at the same volume and just haven’t taken the time to share.  Enough of that, so I am back to stay.

1-12-17-2

What better way than to be greeted by this adorable chicken, right?  Last year during sale-a-bration there was a different chick stamp set.  Here is the new one, and it has taken my number one favorite spot once again.  There are others in the set, but this guy is the best! What makes it better than that?  The set is free with a $50 product order.  Free is cool, but I would have bought this one in a heartbeat.

1-12-17-1

I stamped the chicken in black stazon ink on water color paper.  I knew I wanted the feathers on top red and decided to make the tail feathers match.  It really was a painting process here.  That is usually how my water coloring goes, layer upon layer.  I put out my colors, real red, pumpkin pie, and daffodil delight, and painted until I was happy.  I used a black marker to add some wild feathers and then hi-lighted with gold wink of stella.  His little eyes were a bit tiny, so I used my marker to make them a bit larger.

The tag was stamped on a scrap of water color and punched with the classic label punch. The stamped area was smaller than the punch, so I punched it again on one side to shorted it up a bit.  One quick hole punch and a double wrap of gold and black metallic thread and I called it done.  The water color is adhered down with a heavy dose of fast fuse while the tag got layered up a bit with dimensionals.  I forgot to include a photo of the inside.  I tipped the chicken a bit sideways and stamped him as if he was peeking around a corner.  I lightly water colored him to match the front and just giggled.

It feels good to be back.  Now, to make sure I give myself time to enjoy this lovely process every day once again.  It will be tricky, but worth it.

Have a creative day!

Moana

Thank You So Very Much

Everyone says thank you in their own way.  Me, well I like to do favor boxes or cartons.  A little bit of words along with a special treat.  I always want to give something special and to be honest, the budget won’t often allow that.  Hence my love of paper crafting.  I always have more time than money, so my time can show my gratitude.  It isn’t that people expect, I just enjoy doing it.

6-29

This carton was made with a whole sheet of sahara sand card stock.  I pulled out the trusty simply scored scoring tool and it came together in no time.  I actually made this one while having a lovely chat with my mom and dad.  How wonderful summer can be to me.  I did do my stamping first, because it does bother me when the stamping skips over the score lines. I know, not a real big deal, but it bugs me.  So the stamping first with the Flourishing Phrases large floral image.  I stamped and sponged in crumb cake instead of sahara sand to give a more vintage look.  So adorable.

The tag was cut with from the frame from the Rose Garden Thinlits set.  It it so much fun to put such pretty things together.  The smaller floral image was stamped first, the thank you second and then die cut.  Of course the whole project enjoyed lots of sponging.  I wrapped the top of the carton with gold metallic thread, popped a tricky bow through a bitty hole I punched and topped it all with a large basic pearl.  I refrained from putting those all over the box, I made myself keep it more simple.  So there you go!

6-29 (1)

Have a creative day!

Moana

Sea Street Pop-Up Party

A super happy birthday would be coming your way with this adorable gift set.  I suppose it might be more inclined towards a child, but I have a great appreciation for cuteness, and this is definitely cute.

5-13

I started out with the idea of this octopus holding eight balloons.  I suppose I should have used the bitty balloon punch, but I stayed with it.  Perhaps I will make it again to see how it would look.  I thought the small balloons would get lost in the fun background paper.

5-13(3)

The inside framelit action really makes a statement.  Even though it is in the middle, there is still plenty of room to write a personal message.  I do love the motion of the popup.  I had a large piece of paper left from the card background and went with a matching gift bag. If you are giving a birthday card, odds are you are giving a gift too.  Making a set is always my favorite thing.  It also helps me be brave and use up my designer series paper.  You can’t hang onto that too long you know.

5-13 (1)

Have a creative day!

Moana

Dear Heart, Sweet Boy

This project was all about giving myself a challenge.  I grabbed a piece of dsp, decided on three colors, picked a stamp set I hadn’t used a long time and went for it.  This was definitely not my usual style, but it felt good.

3-20

The card itself wasn’t too complicated, just one layer for the background.  I stamped my little boys on water color paper with black stazon and opened the ink pads.  Their faces were done with a very diluted wash of pink pirouette with the hair in tip top taupe.  I wanted them to look like the same boy just doing different things.

Each boy face was accented with one color only.  For the darker areas I kept the ink fairly strong.  When I accented I diluted it a bit more and even more for the outlined areas in the background.  I left it simple because I wasn’t really going for perfection, just soft coloring. I punched their faces out with the 1 3/4″ circle punch and a background of black with the 2″ circle punch.  They were arranged on the front and layered with a bit of dimensionals.

The banner was stamped from the same set and a light wash of each color was put on its own section.  Then each end was punched with the bitty banner punch.  I also put that up on dimensionals.  I repeated the pattern of paper inside with more dsp and a smaller piece of very vanilla to write my message on.  Such a sweet card, for a very sweet boy indeed.

3-20 (1)

Have a creative day!

Moana

Wink of Stella Rose Garden

I have wanted to use this thinlit for some time, but didn’t want to go traditional.  It is obvious that it is a rose, but what if I didn’t want it to look too realistic.  I do love the matching stamp set and have water colored that one plenty, but I wanted this to be different.

2-16

Different in a good way though.  I think I like it, but am not quite sure.  However, when I start something I just stick with it through the end.  The positives?  No additional postage required.  There is dimension without too much layering.  It is delicate and masculine at the same time.  And, it is definitely different than how I have seen it used.

What is my hangup then?  I honestly don’t know how I feel about the designer paper showing through without the flower being a solid color, or an obvious floral color.  Personal hangup I guess, but still, there it is.

2-16 (3)

I painted the surface of the flower and leaves with the white glitter wink of stella brush.  I love how easy it is to add a lovely glitter look.  And it is almost even goof proof.  I wasn’t too focused on the detail when I painted and it was already adhered when I did.  But it was easier to paint it on the card than trying to hold it at different spots while I got it done.

I normally have my card base heavier to support all of the goodies I layer on, but I really wanted a very vanilla card.  So I gave the inside a little extra layering to keep it strong enough to stand up.  All good here, it worked like a charm.

2-16 (1)

Have a creative day.

Moana

Sparkly Seasons Ballerina

Doesn’t everyone get enchanted with a pretty snow globe?  This particular stamp set has a few options to make one happen, but this pretty ballerina might be my favorite.  She is so delicate and lovely.

Sparkly Seasons Ballerina

The base is stamped in sahara sand and the globe is in soft sky.  That is also the card base and background color. I stamped her in sahara sand as well to give a hint of skin color without having to make it happen.  I did water color her tutu and slippers though, couldn’t resist that.  Her hair just had a touch of marker coloring.

Sparkly Seasons Ballerina

I stamped the ‘sparkle’ inside the globe with versa mark ink and then covered it with dazzling diamonds.  Loved it.  But I needed more.  So I used the 2-way glue pen to color a layer around the bottom of the globe and used more dazzling diamonds.  I liked that a lot better.  Of course I had to put a bunch of rhinestones around as well.  Sparkle means sparkle.  I even put a few inside.

Sparkly Seasons Ballerina

Have a creative day!

Moana

Merry Moments Gift Card Set

A card that looks like a gift, but is a card, or is it?  I guess you could use this when you want to give a gift card and don’t just want to use the tiny envelope provided.  Either way, I like the look of a present shown here.

Merry Moments Gift Card Set

It has a hint of masculine with the color choices, but with that much ribbon I hesitated to give it the full masculine stamp.  You could probably get away with it though.  And I have to be honest, this is the first time I have used this adorable Christmas tree punch.  I guess I needed this awesome paper to inspire me to get it out.  It fit nicely as the gift tag.  So, I guess I will get to use it on other gifts this holiday season as well.

Merry Moments Gift Card Set

The DSP is layered on a piece of sahara sand cardstock with a narrow border showing.  I wanted to have a little more strength as I tied my ribbon on.  I do very much like a snug fit and probably winch it in a bit much sometimes.  I got the look I wanted though.  Why not give it a try your self?

Merry Moments Gift Card Set

Have a creative day!

Moana

Embellished Ornaments

This started out as a pretty darn good morning, but I am having quite the head cold, so my time management isn’t the best.  I think I am going in kind a slow motion mode.  The results still show nicely though, don’t you think?

Embellished Ornaments

New product, new product, new product!  I so enjoy working with new product!  Today was the first time for three different newbies to my collection.  Two stamp sets and one framelit set.  They are sure to get a lot of use this holiday, for sure.

Embellished Ornaments

My photos don’t let you know very well, the colors look off, but I am working with Sahara Sand and Not Quite Navy.  The ornament on the left is backed with a deep navy blue and it looks so pretty.  The smaller ornament is backed with Crumb Cake just to give a better contrast.  The stamping is all done in Sahara Sand, as well as the sponging.  I used the new gold cording to “hang” the ornaments and it worked great.  I have been waiting to use this set, and it was so worth it.  Be patient, you will be seeing it a lot.

Embellished Ornaments

Have a creative day!

Moana

Timeless Elegance Gift Box…Thing

This morning caught me a bit off guard.  Way too much to do and never enough time.  But as always, things come together in the end and everyone gets their needs met.  This little blog of mine often has to wait its turn, and it never even complains, how nice.

Timeless Elegance Gift Box...Thing

I am not sure what to make of this kind of box thing I came up with.  I wanted to use the dsp, but to be honest, it isn’t sturdy enough for the height I had it have.  But I was determined, so it still happened.  I made up the topper as I went.  Boy, did I use a lot of punches.  So glad I have so many to choose from.  I like how it looks though.

Timeless Elegance Gift Box...Thing

I used a full sheet of the dsp.  The box ended up about 8 1/2″ tall.  The band I made used two strips of paper 1 1/4″ x 10″ and I experimented a bit on the scoring to make it fit.  Only took two times.  I hid those on the bottom.  Lots of sponging all the way around really make it look nice.  I sealed up the bottom with tear n tape and left the top open to put stuff inside.  As I said, it will have to be light because the paper won’t handle much.  The band does give it extra structure though.  Give it a try!

Timeless Elegance Gift Box...Thing

Have a creative day!

Moana

More Thankful Swaps

Isn’t this a lovely pairing?  The colors of fall are so beautiful to me, truly my favorites.  It should be turning fall here, but is still hot like summer.  A girl can dream, and enjoy pretty cards about fall, right?

More Thankful Swaps

These are other swaps that were completed samples for me, but I can’t wait to make them myself.  I have a lot of the tools, but didn’t get that cute little bear.  It comes from the Thankful Forest Friends set and I saw it as a bit too whimsy for me.  I think he, and his friends, are adorable and have put it on my wish list.

More Thankful Swaps

This window frame framelit set is a must have.  Paired with the brick wall embossing folder, there are endless options to enjoy.  I can honestly see myself making way too many projects with those in hand.  How fun!

More Thankful Swaps

The Into the Woods designer paper is so wonderful.  As I said, fall colors are my favorite, and these showcase them beautifully.  Hard to resist for sure.

I think my little stamping group would love the swap idea.  We haven’t yet, but I am going to have us try this out for sure.  Everyone has a different style and a unique set of artistic skills.  It is so fun to experience so many all at once.

Have a creative day!

Moana

Lovely as a Tree

This project was actually ready for yesterday, there just wasn’t the time to sit down and put it together.  Yesterday was all about family and it was wonderful.

Lovely as a Tree

I started with ribbon.  Not my usual, but I am trying to get used to this new striped cotton ribbon, and the only way to do that is to use it.  Hello honey was the ribbon color, so I coordinated the card front with the same color cardstock.  It was too smooth so to the big shot it went for some embossing.  Since it was a tree image, woodgrain worked great for me.

Lovely as a Tree

Before I forget, as I finished up with my sponging, I decided I couldn’t see the embossing like I wanted, so I lightly rubbed my inked sponge across the top of the embossing until it was dark enough.  Loved how that turned out.

Lovely as a Tree


For this pretty tree.  A single stamp in mossy meadow on watercolor paper, that is all.  I wanted to soften it a bit, so I spritzed it was water and allowed the image to blend some.  Sponging with  sahara sand for everyone, a touch of tearing, plenty of dimensionals, and this was done.  I don’t often make masculine cards, let alone an all occasion one.  But here you have it.

Have a creative day!

Moana

Thoughts & Prayers, Praying For You

How weird is it to make a card with yourself in mind?  I have to think that sometimes that is more than okay.  More than okay, it is a great idea!

Thoughts & Prayers, Praying For You

I have to say that I am proud of this little card though.  My thoughts were more than scattered as I sat down to work.  I have a small stack of scraps to the side that I just haven’t filed back.  Today I made this project entirely from scrap, with the exception of the pearls and ribbon.  How cool is that!

Thoughts & Prayers, Praying For You

That makes my work easier, cleans up that little stack, and keeps my main stash of paper untouched for one more day.  I do feel a paper order coming on though.

Thoughts & Prayers, Praying For You


I love love love this brick embossing folder.  It makes so many fun looks and I love how it is 6×6 so I can have my bricks facing how I want regardless of my paper direction.  Wheeee!

Have a creative day!

Moana

One Big Meaning

Today is workshop day!  As much as I dislike all the rush to finish up last minute to-do’s, workshop is always fun.  I get to work with a bunch of really great ladies that love to create and do beautiful work.

One Big Meaning

I set out for a super quick project this morning and found it.  I do love how a few good punches can make magic so quickly.  It really was a grab and go kind of card.

One Big Meaning

This was made with a card front in my ever so favorite newsprint designer series paper.  It is so light and clean.  The look of newspaper without all the mess.  Partnered with a card base in sahara sand, all it needed was a simple sentiment and a bit of fluff.

One Big Meaning

I love the new thank you set, One Big Meaning.  I like having choices of how I say thank you.  A heavy dose of itty bitty flowers and basic pearls and it was nearly done.  A full bow was too much, so I opted for a simple knot instead.  When you are working with the beautiful dotted lace trim you can’t go wrong.  Great stuff!

Have a creative day!

Moana

You’ve Got This

My mind is a little more scattered than usual this morning.  That is because there are more than one exciting things going on.  Yes, and that includes me finally getting to showcase this awesome stamp set!

You've Got This

Good things are about to happen, truly.  This is a weekend made for family, friends, and fun.  How exciting, right?

You've Got This

This card though.  I kept the layering very simple and clean.  I wanted to see both of these stamps well and not have one overpower the other.  I think that worked out pretty darn well if I do say so myself.

You've Got This

I stamped the image in versamark ink and heat embossed it using clear embossing powder.  When I stamped over with the background stamp, in sahara sand, the image showed through so nicely.  I did have to rub it a bit with a paper towel to get the ink off the embossing, but not much.  And there you have it!

I repeated the stamping somewhat on the inside using the background stamp edges.  I can see so many possibilities with this set.  I think I will have to set one day aside to see just what I can do with it.

Have a creative day!

Moana

Happy Thoughts for You

When I first subscribed to Paper Pumpkin it was all about getting exclusive stamp sets that I couldn’t purchase through regular shopping.  I didn’t want to miss out.  That was true in the beginning stages, but then the kits started getting better and better and the projects were almost better than the stamps.

Happy Thoughts for You

I had a hard time putting those great stamps to work after I finished up the kits.  So I tried something different this time.  With my last kit, I used the stamps separately before I got into the kit.  These are the stamps, but nothing at all to do with the card kit, which is fabulous by the way.

I am in love with the new heavy weight whisper white cardstock.  I love a white card and it just had to be sturdier.  Job well done.  Sahara sand might be my favorite neutral.  It goes so well with everything.  Just a hint of color without any obvious distraction.

Happy Thoughts for You

A little bit of simple layering and a bunch of dimensionals.  The aqua painter got involved again, it is such a great tool.  Using it along the stamped images to bring in the lightest amount of color.  What a great look and so easy to accomplish.  Finish it off with the lovely dotted lace trim.

Have a creative day!

Moana