Flourish Wishes

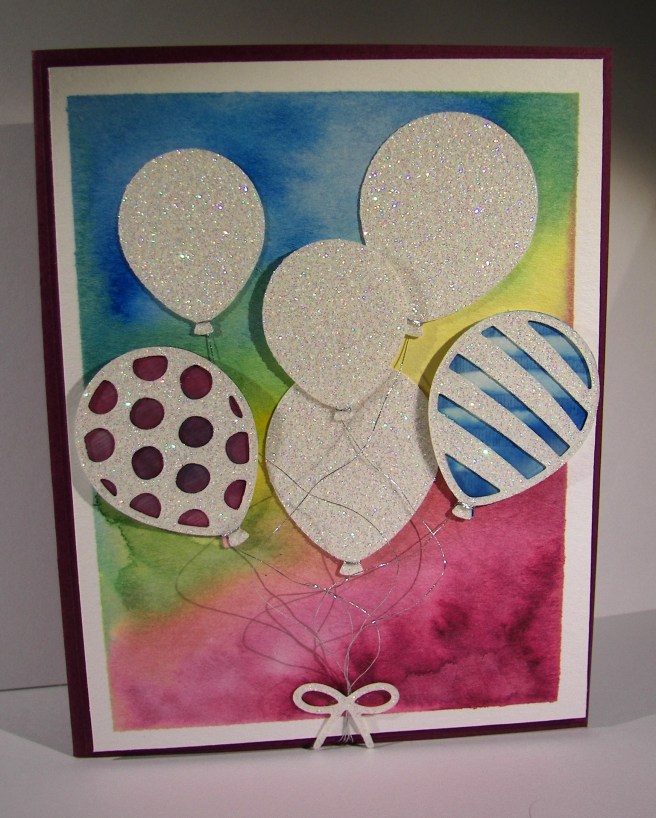
Such a perfect combination here. Nearly all of my favorite things combined into one project. The only thing missing would be some water coloring, but with paper this beautiful I don’t feel like there is anything lacking here. Even better, this took almost no time at all.

3-1

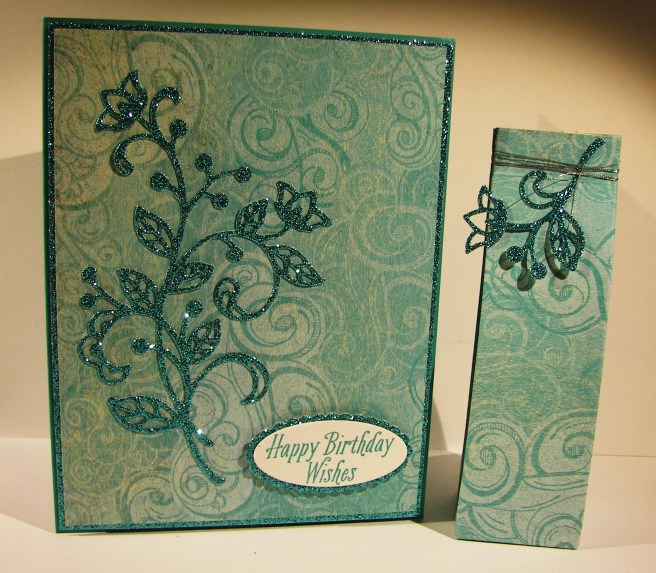
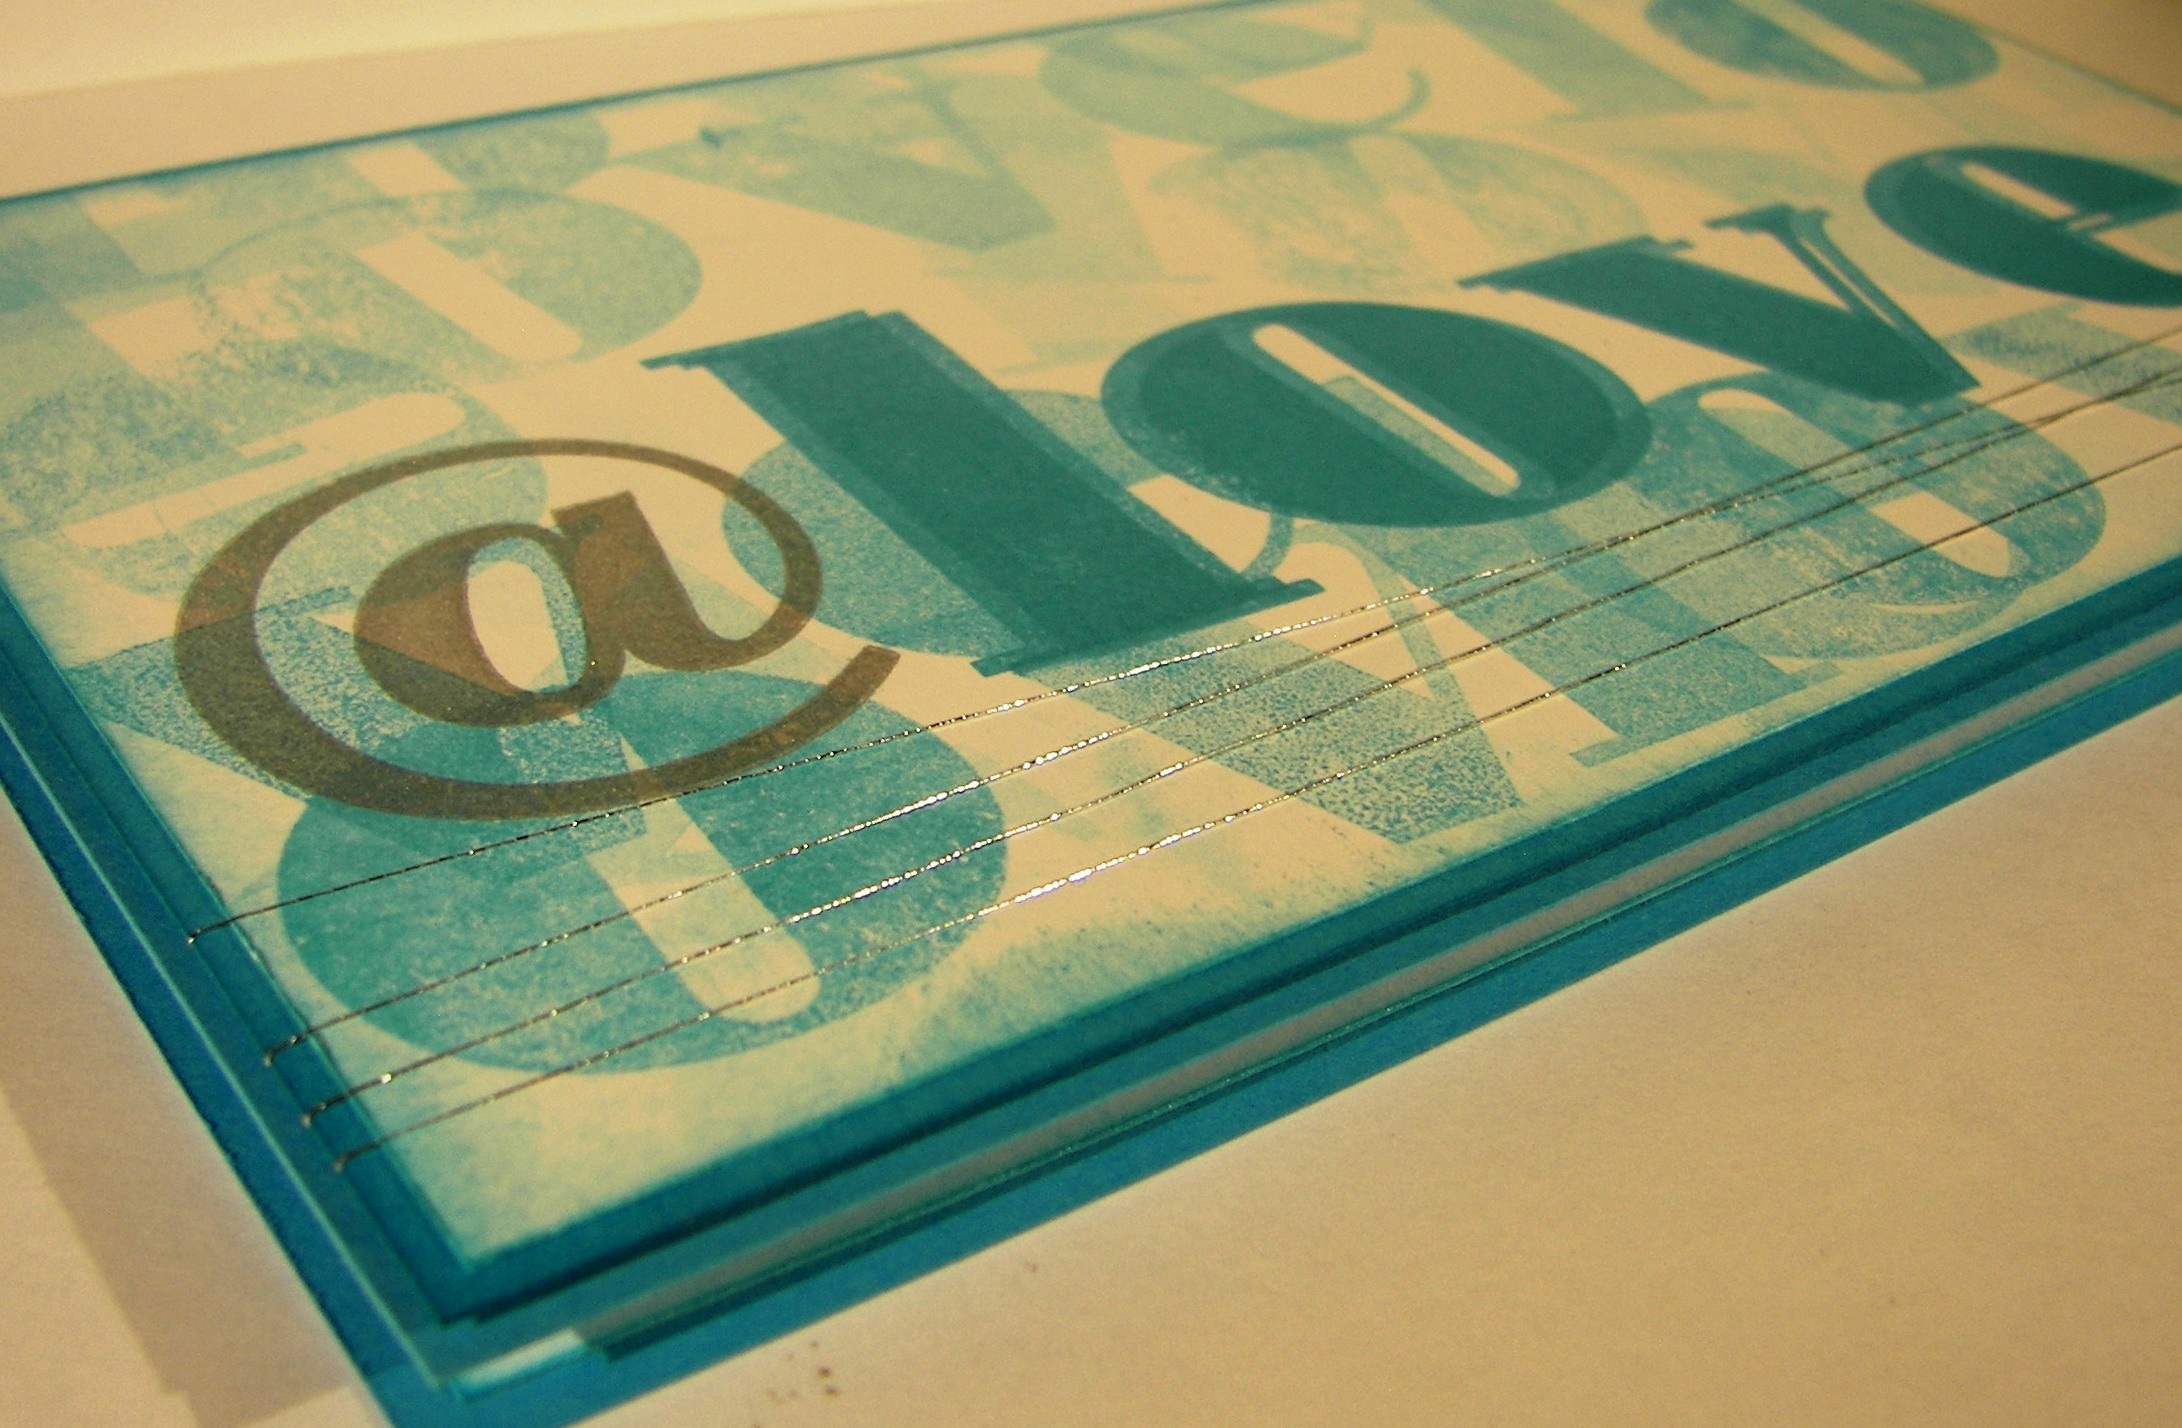
I just received an order that had this glimmer paper in it, one of the new free items during Sale-a-bration right now, and I couldn’t wait to enjoy it.  It comes in three colors, but the bermuda bay tone was on top so it was literally that simple. I knew there was the same color included in the cupcakes and carousel dsp stack and that became step two, pick a pattern. I probably spent the longest just deciding which one to choose.

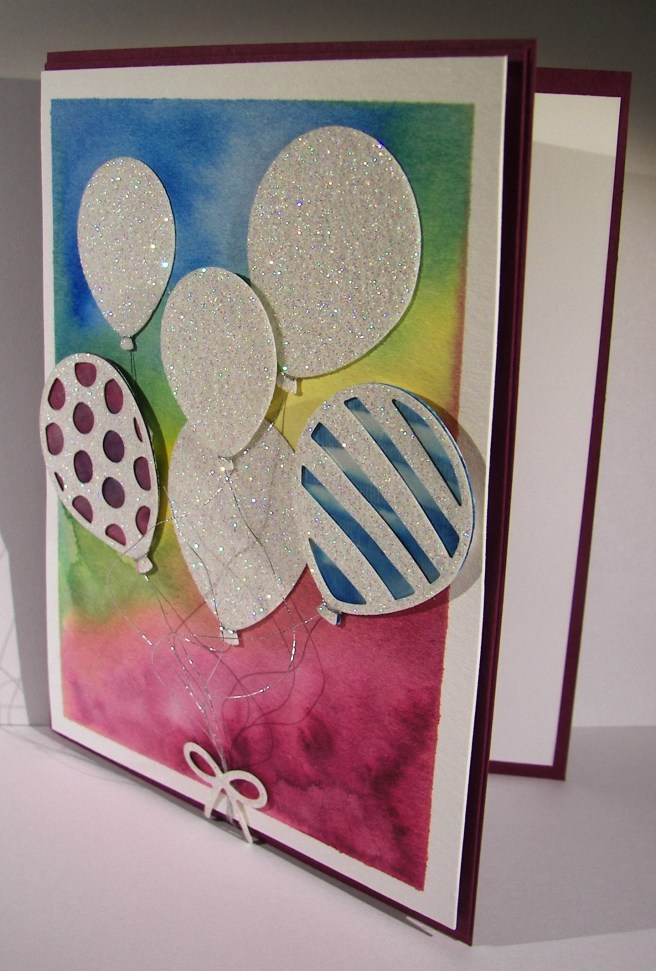
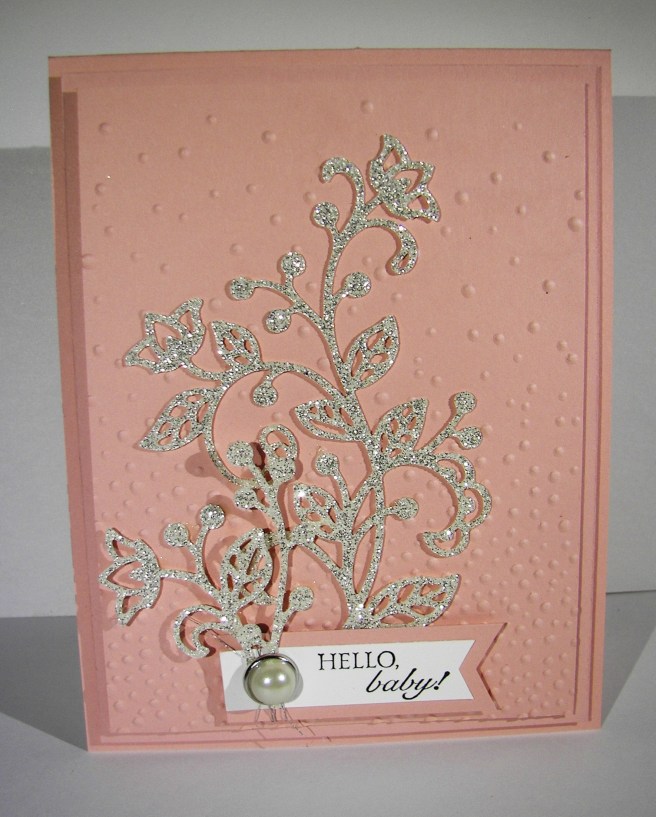
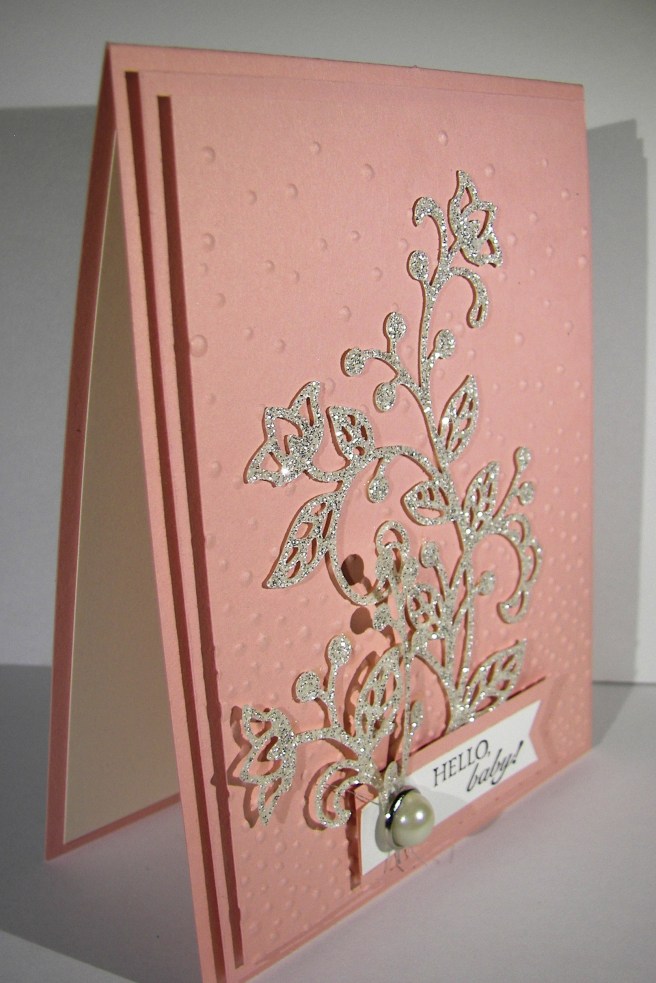
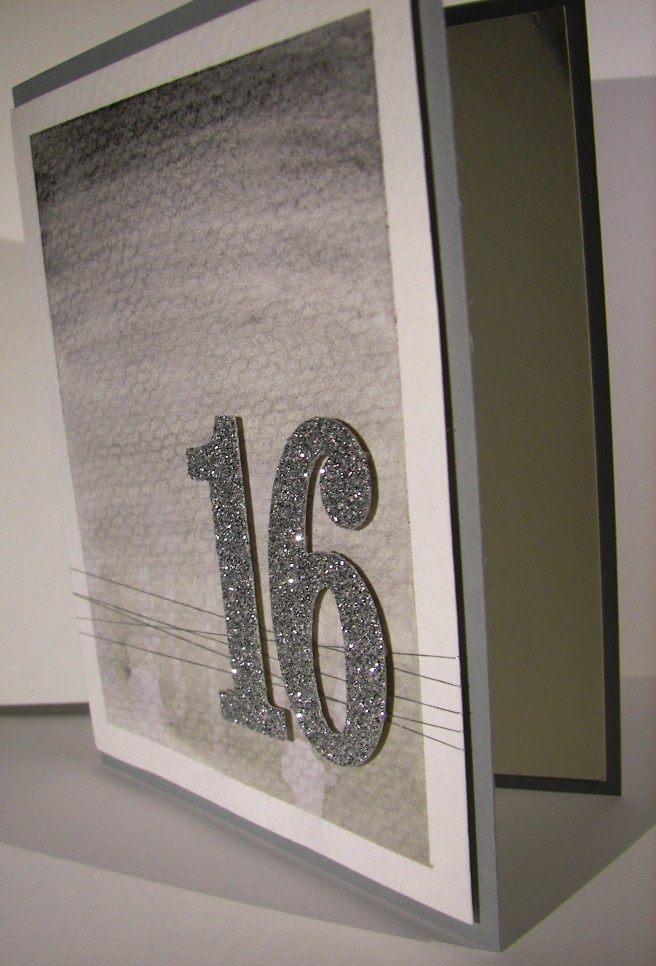
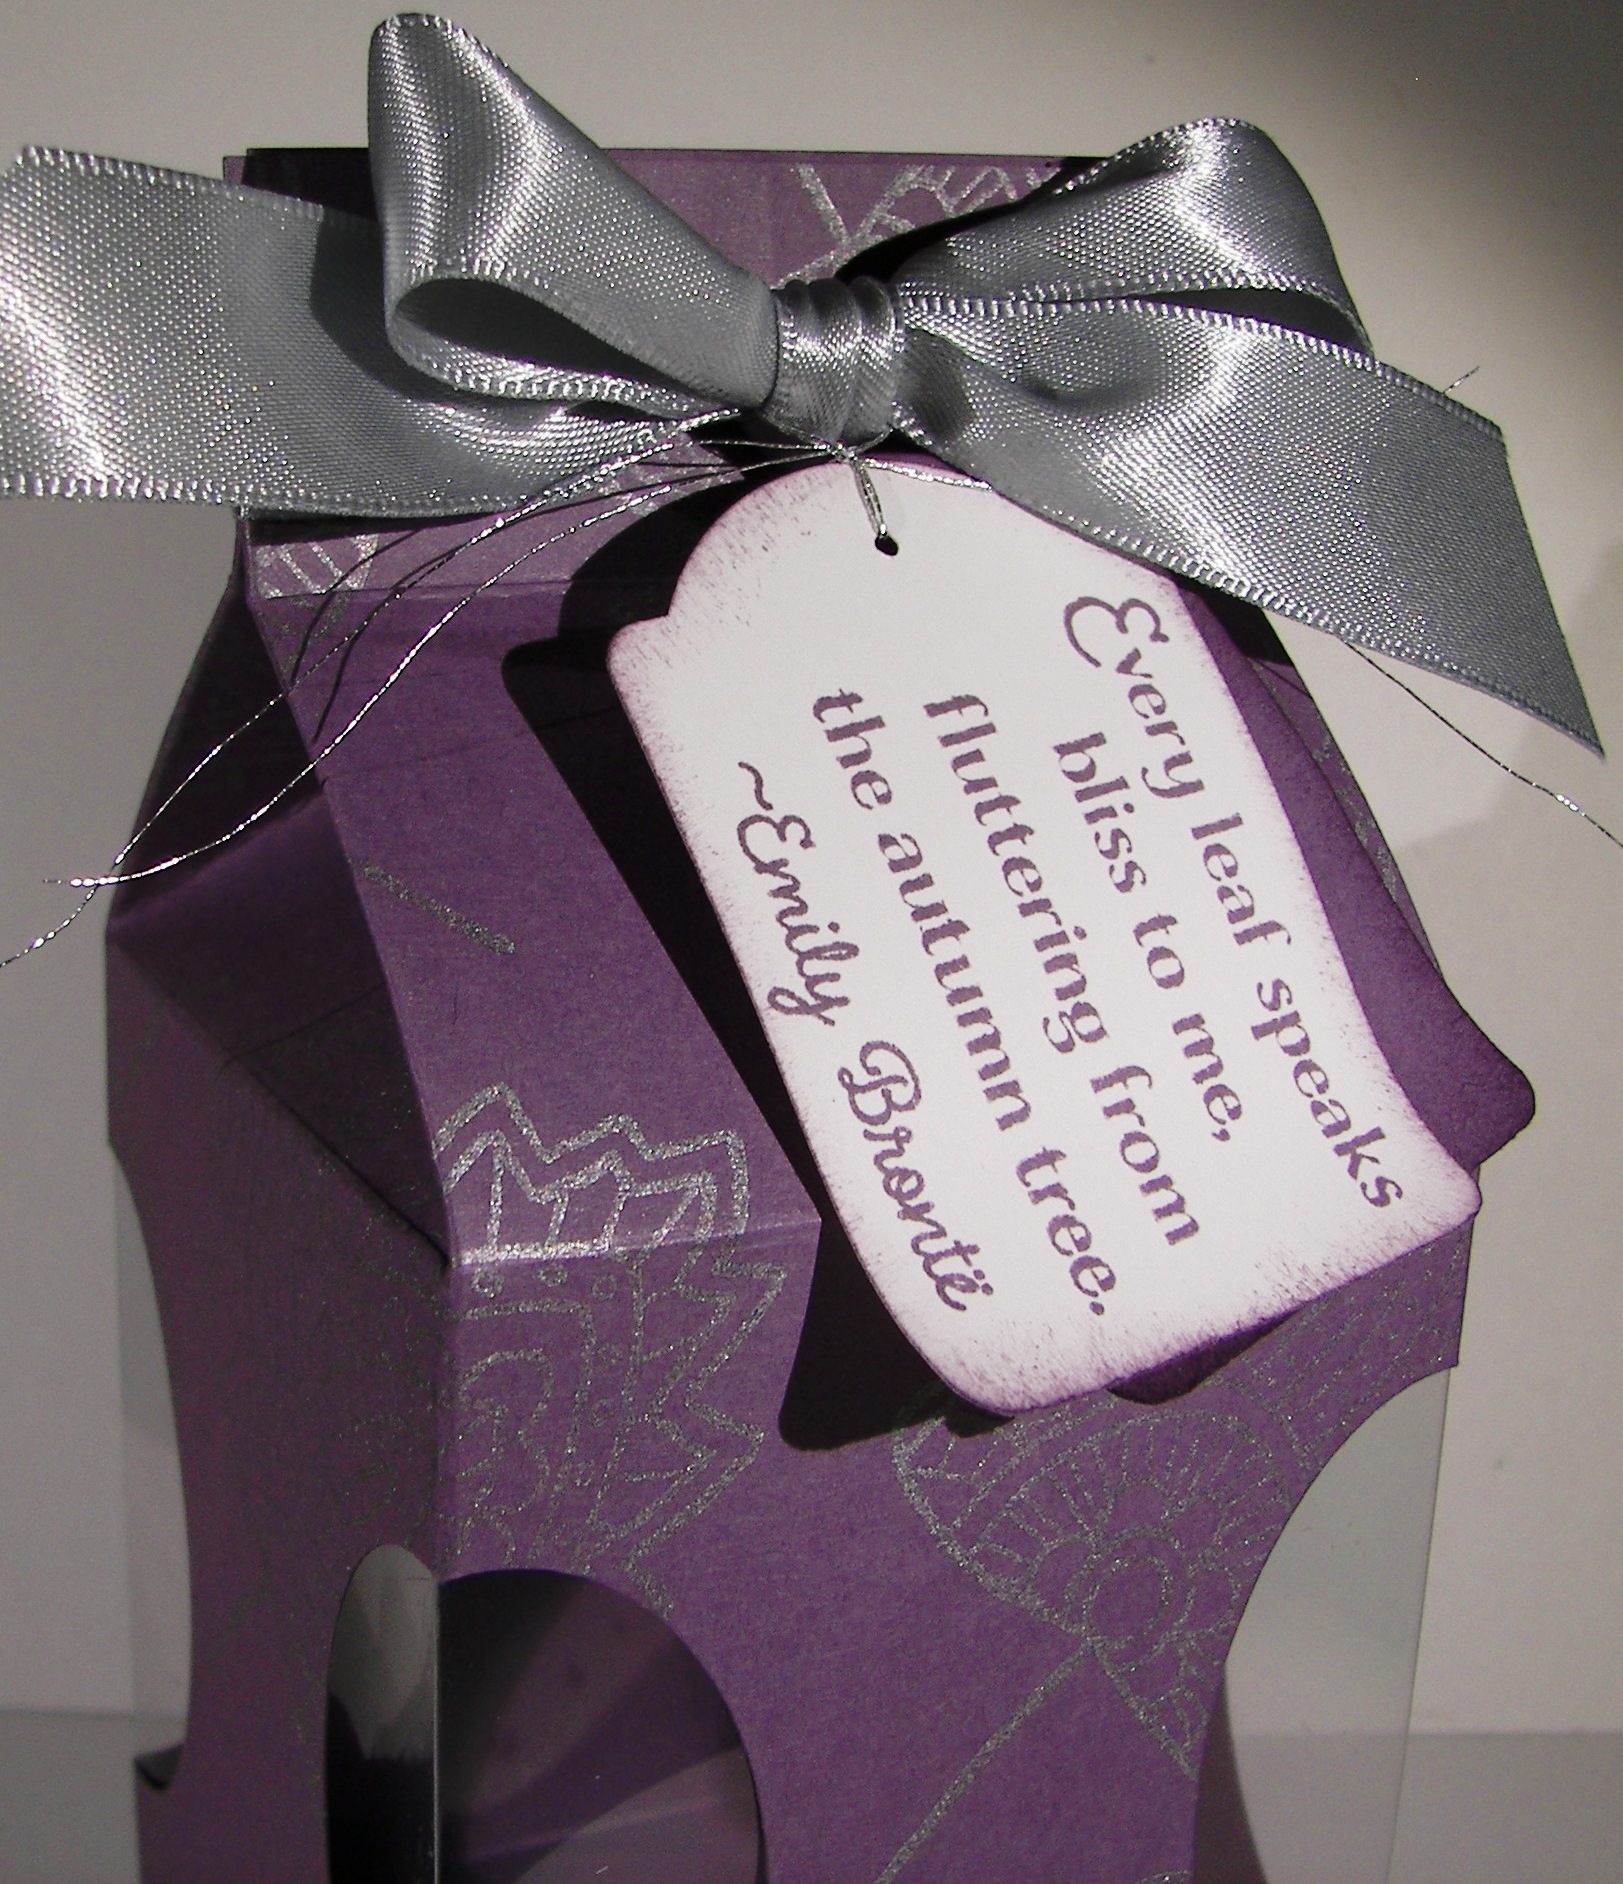
The die cut was not as easy to decide because there are so many wonderful ones to choose from.  I kept it simple though and went for a favorite. The glimmer paper was cut to size and then I did the die cutting from the center, knowing it wouldn’t show, and I could make that paper last longer.  Glimmer paper is such a weakness for me, especially in colors like this. The flourish was glued down with tombo and then the designer paper adhered to the glimmer paper with fast fuse.  Regular adhesive and glimmer paper aren’t friends, it needs something stronger.

3-1-1

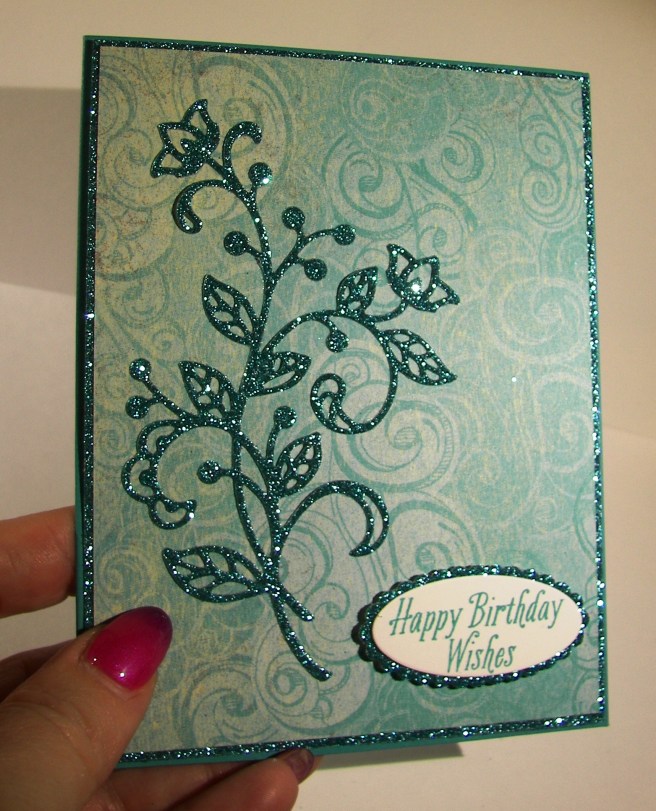
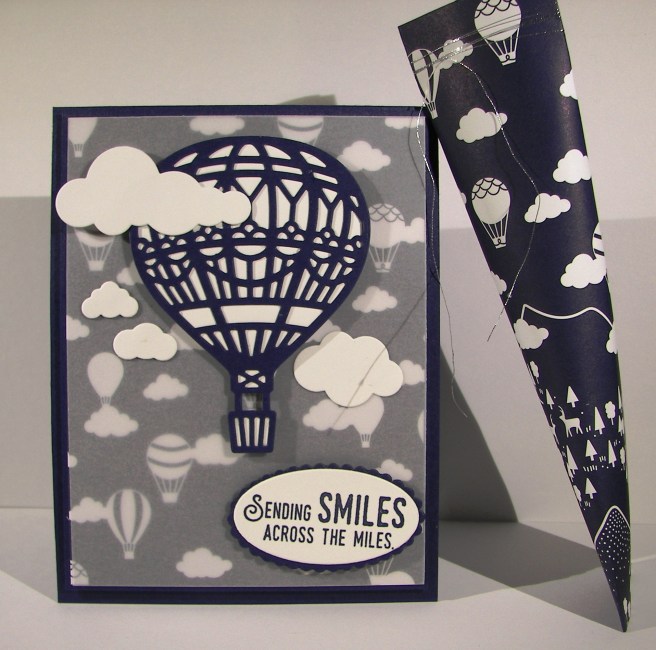
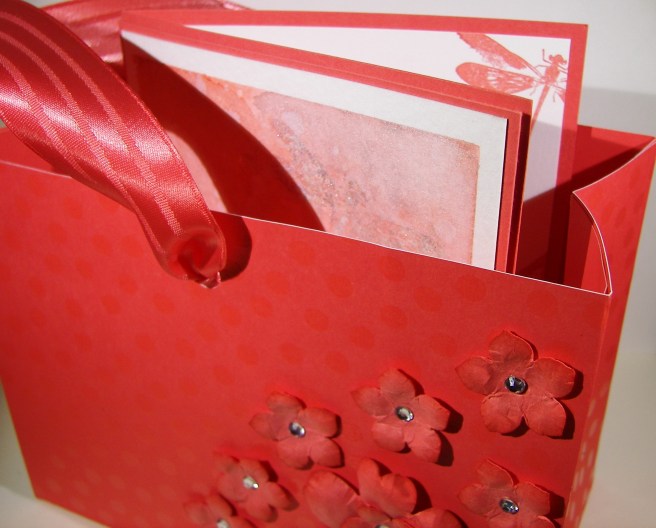
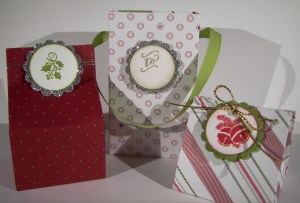
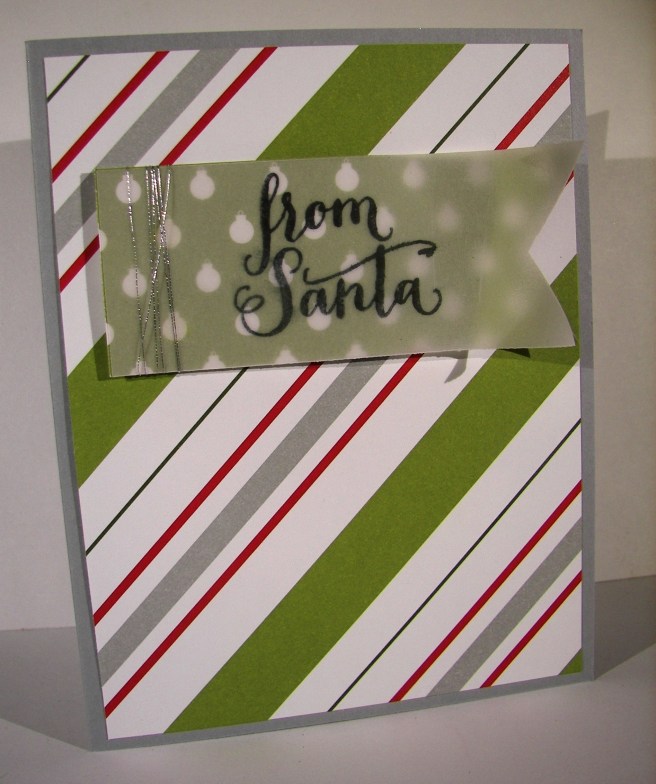
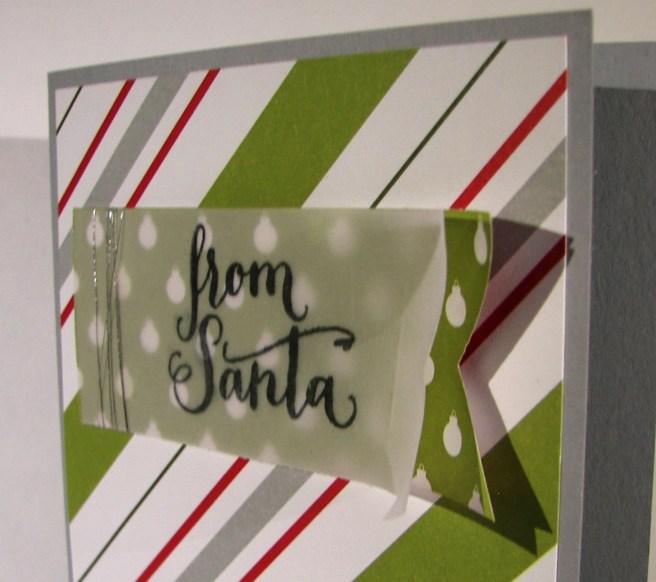
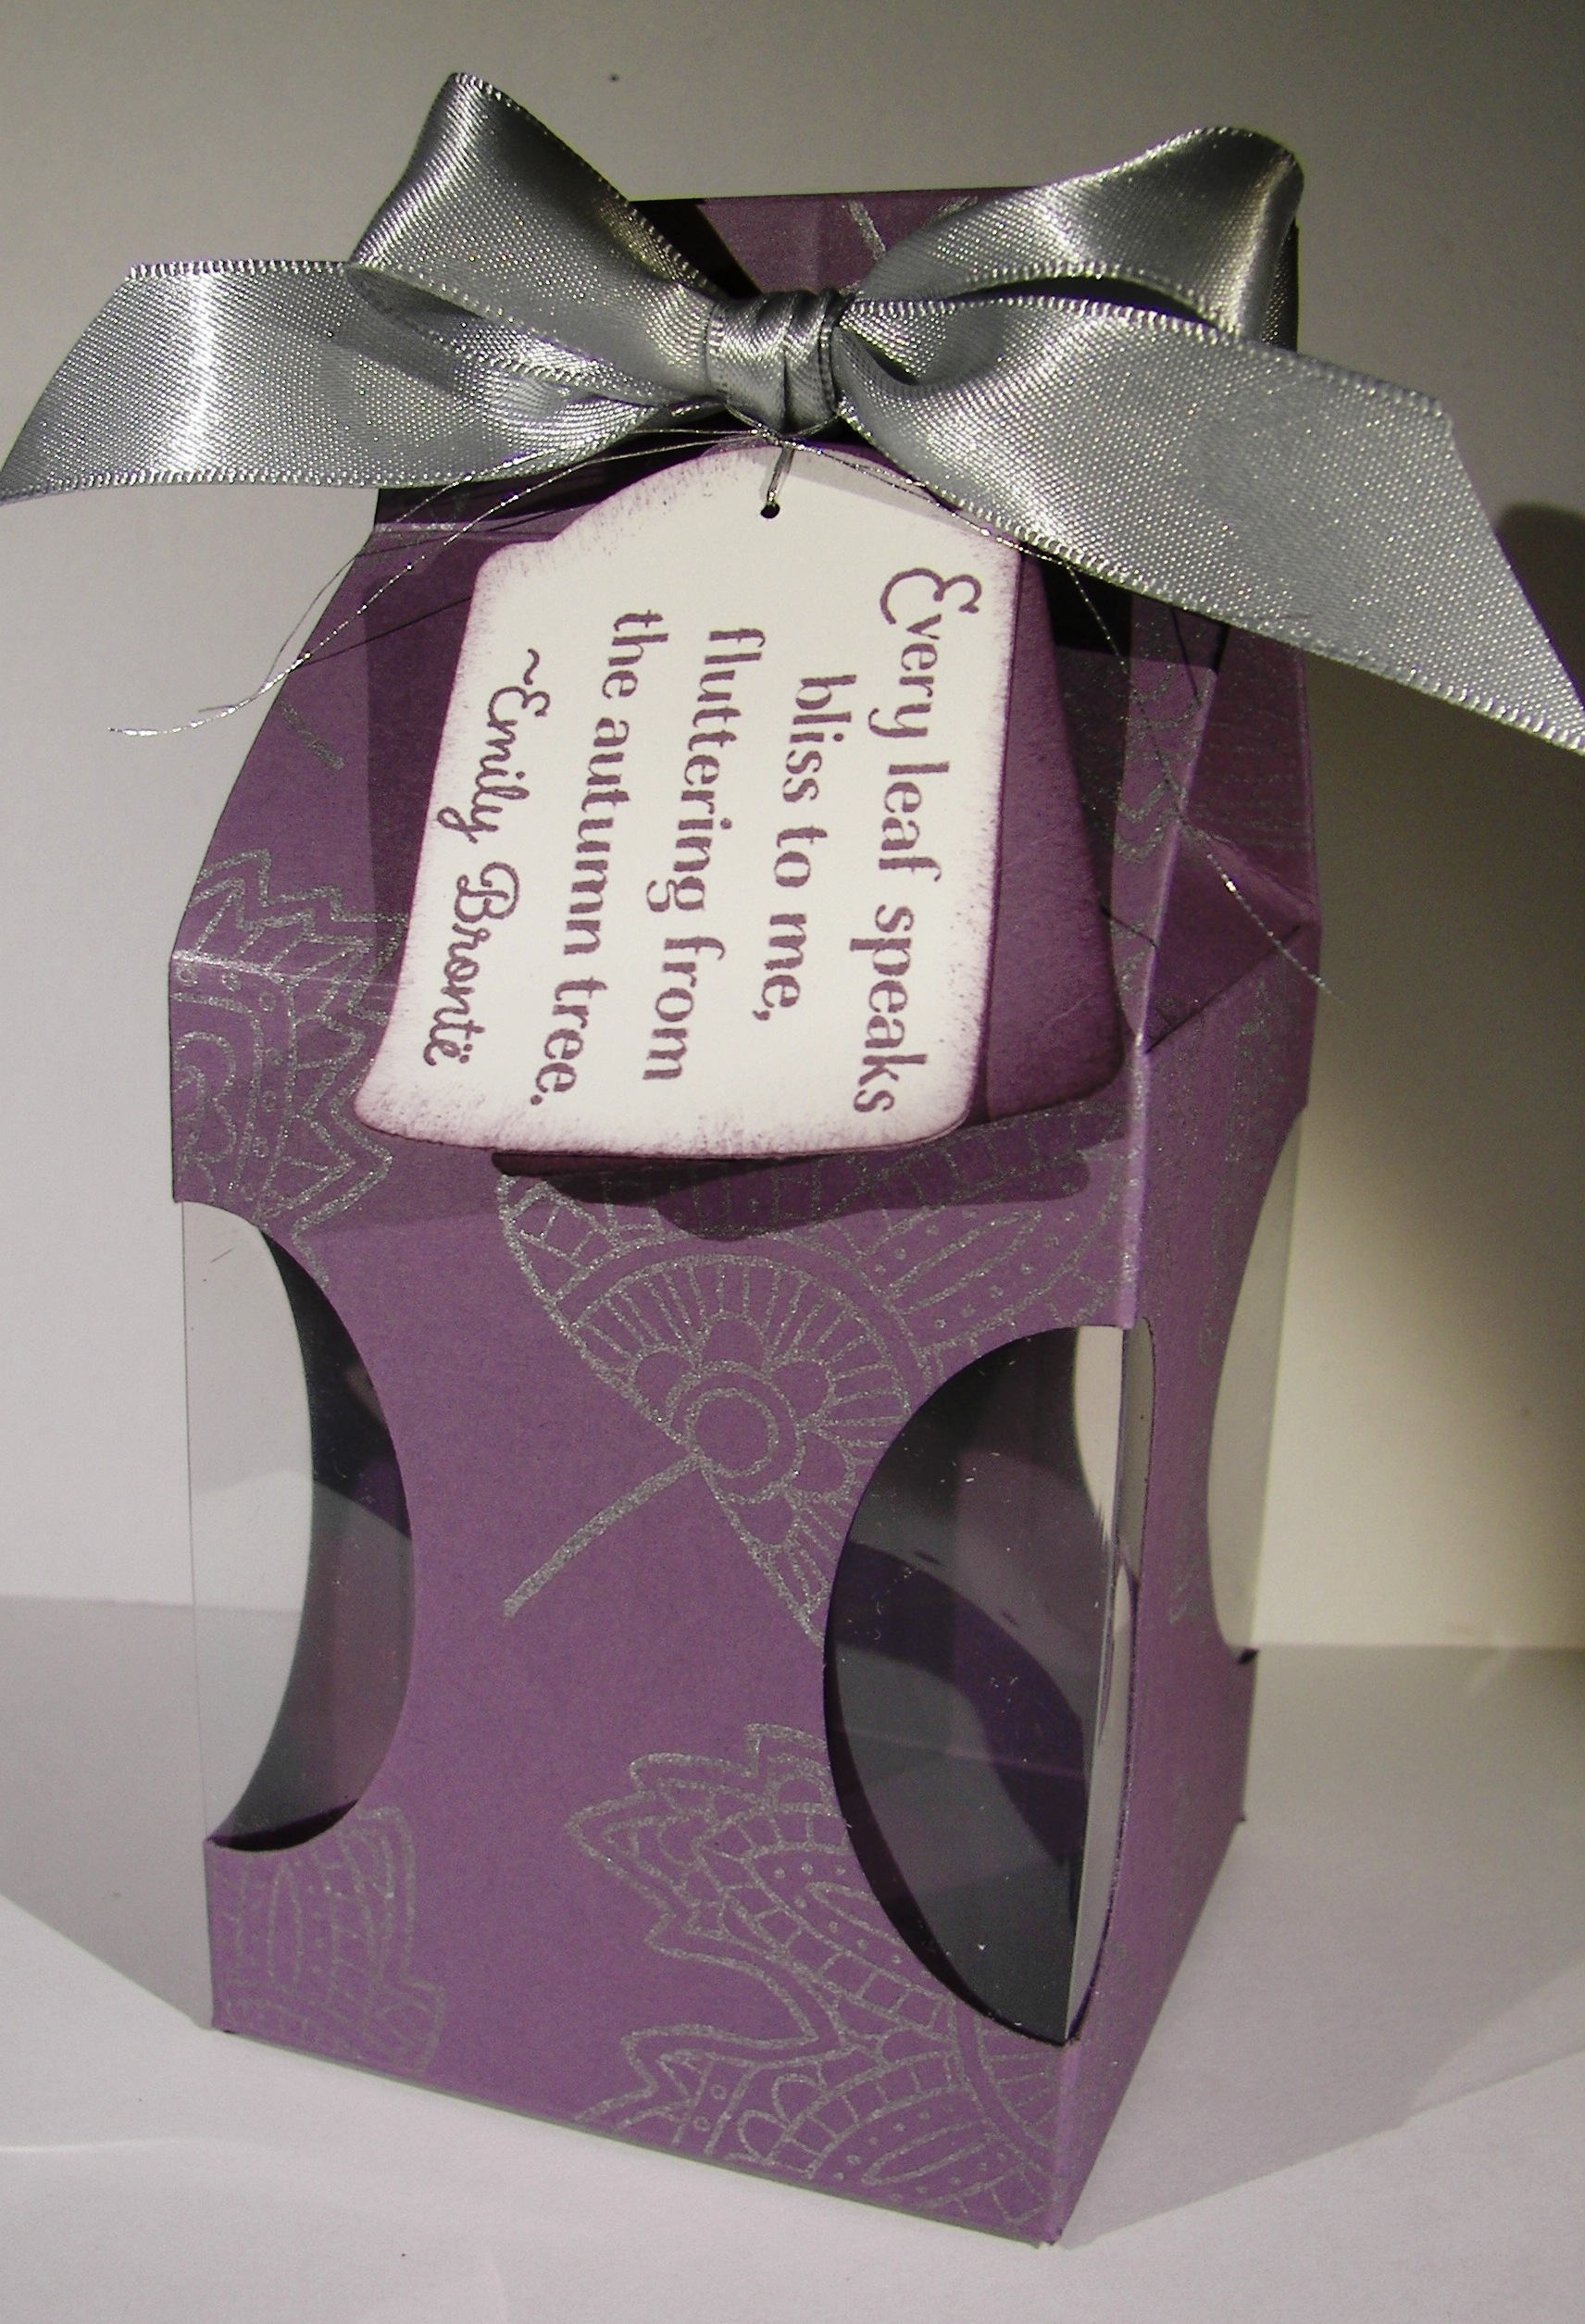
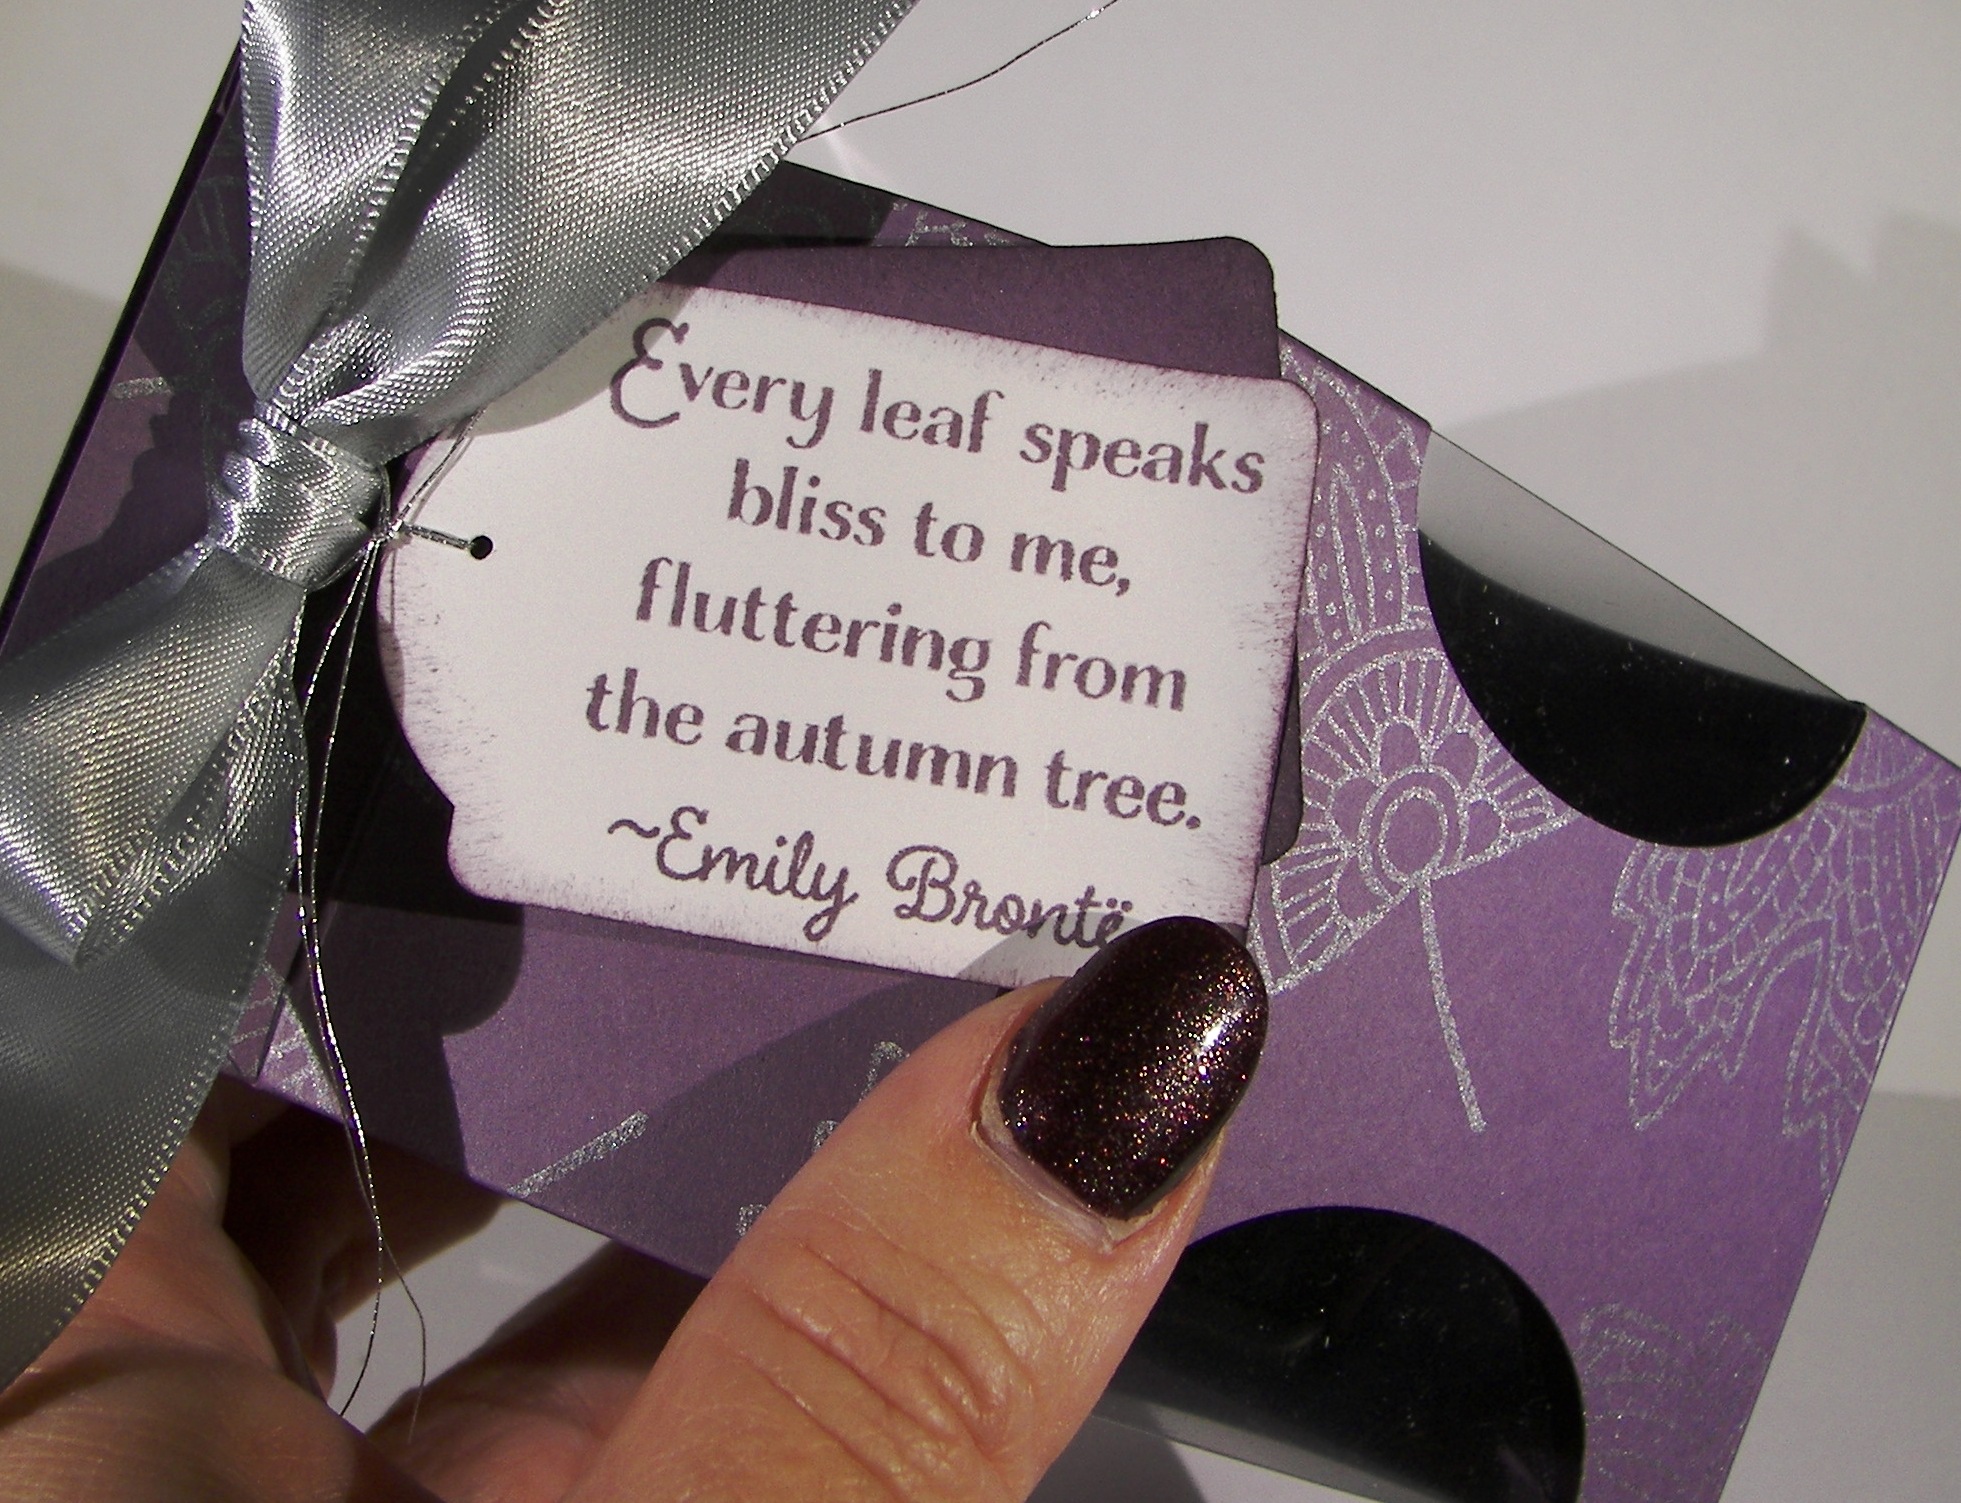
The sentiment was stamped in the same ink color, die cut, layered zippity quick and raised up on dimensionals.  How easy is that? I had a bit of room for another little die cut before I adhered it down, so that had to happen, hence the need for a matching gift box to use that piece. No problem, just get another piece of the same paper and happiness was achieved. What a great way to launch National Craft Month!

Have a creative day!

Moana

Balloon Adventures

This is how things look when I am feeling creative, but not sure just which direction to go. No sentiment, hardly a stamp in sight, just pretty flowing color.  That is really so satisfying. This could be for a birthday, but really any celebration would be a good fit.  Balloons are so happy after all.

2-18

The project began with water color paper being masked to a board and spritzed with water lightly.  The rich razzleberry went down first in the bottom corner pretty heavy.  Pacific point was the blue I chose for the opposite corner.  The center section got crushed curry, but I didn’t blend just yet.  I wanted it to kind of mix with the help of water, not my brush so much.  It was nice, but I did push some of the color around to make the green show up more. I would have like a bit more orange to have mixed, but the green kind of took over and I didn’t want the infamous brown to appear.

The balloon bouquet punch and the balloons inside the balloon pop-up thinlits set match perfectly.  I painted a couple of swatches, punched them out and layered them under the thinlit cut balloons.  A bit of layered fun there.  I wanted to go with velum cardstock, but didn’t feel up to the adhesive hiding game.  The glimmer paper is always pretty though.

2-18-1

I used the metallic thread for the balloon strings and loved it!  It was a bit tricky since it isn’t the easiest stuff to work with.  But how it looked wrapped around the bottom of the balloons was too great to not.  There it is!

Have a creative day!

Moana


Lift Me Up

Sometimes when there are too many choices it is best to keep it simple.  While this card may not look simple, it still gives that feeling with just two colors used.  The background paper comes from a set that is full of vibrant color.  I couldn’t decide, so I chose a more subdued pattern and I love it.

1-19

This little set is going to go to my sweet daughter tucked away in a frozen university town in southeast Idaho, poor little ice cube.  Paper crafting is something we share a great love of, and I know she will be over the moon for this.

The balloon was die cut from night of navy and backed in whisper white.  The balloon can actually be backed in several colors with the framlits available.  There are five sections laid in order across the back, mine being all white.  But if I had chosen, each section could have been a different color and they would match up perfectly, looking amazing.  Next time.

I wanted a bit of separation in tone, so I layered a bit of velum cardstock over the background paper to soften the color a bit.  It totally went along with the cloud kind of feel. I thought it was perfect.  My sentiment also came from the same set and was die cut with the layering oval framelits.  It may be a bit crooked, but I let it stay that way.

1-19-1

I couldn’t resist stamping more from that wonderful set.  It is full of so many wonderful images.  Two hot air balloons, four clouds, a few decorative elements and six sentiments. How great is that!  I had to sneak a little treat bag in to match.  I knew I was sending it in a box with other gifts, so I could make a simple 3-D sour cream container.  I think chocolate for sure.

Have a creative day!

Moana

Hello Baby!

A good friend of mind is expecting her third child soon, a baby girl.  It was a huge surprise but it is finally getting exciting for everyone.  Thought it was about time I made a special card or two just for the occasion.  What is it about pink and sparkles anyhow?

7-11

I haven’t purchased much in the department of this years designer series paper department, nor do I have any current baby themed stamp sets, so I had to get a bit creative.  It may be on the elegant side, but I do like how it turned out.

I made a couple of layers of blushing bride card stock to add to the card base, with the top most layer being embossed for a little texture.  Love it! I then decided to break out the flourish thinlits set and cut a few of the images in glimmer paper.  Again, it was totally working for me.  When it came time for a sentiment, I really had to look.  I found this treasure in the beautiful banner set and thought it to be perfect.  The sentiment was layered on more card stock and both layers were edged in the banner style.  A little wrapping with metallic thread and one huge metal rimmed pearl later and I called this one done.  Yes!

7-11 (1)

Have a creative day!

Moana

Love, Love, Love…

When the new catalog comes out each year I do a quick scan for the super obvious favorites. Here is the first one that was an absolute must have.  To be honest, I focused so much on the adorable jars and lettering I didn’t notice just how huge the stamp set was.  Well, it is amazing.  Talk about options.  I could do a series just using this set and have tons of projects, all looking unique.

6-9

I began by creating a background using marina mist ink on water color paper.  I have been using quite a bit of designer series paper lately and missed making some of my own.  I do feel better now.  After it was all painted and distressed I moved onto the jars.  I could hardly wait.

They were stamped in marina mist on whisper white paper then cut out using the matching framelit pieces.  I do love perfect little images all ready to go.  They were layered a bit, but you can still easily see that they all say love on the front.  I am still in wedding mode and the card reflects this.  I will be hanging dozens of mason jars below several of my trees today that will get candles and create a lovely look.  The couple is already so wonderful, I just want a beautiful evening for them and all of our friends.  Just two days away!

I did a tiny bit of stamping inside.  The small jar was used but stamped off once to give it a lighter look and allow me to write over it if needed.  Then, I stamped with silver encore ink a wrapped string to match the front.  I went back and added large basic rhinestones on the metallic thread and thought it was perfect.

6-9 (1)

Have a creative day!

Moana

Awesomely Artistic with Watermelon Wonder

The weekends seem to get busier all of the time.  I guess that is what happens when you have a child getting married soon.  Errands and then some.  I wouldn’t have it any other way though.  I enjoyed some relaxing time yesterday afternoon finishing this gift set I actually started Friday night.  Talk about being busy.

5-9 (4)

With my love of water color, you would have thought the card came first.  Not this time.  I started with this awesome designer series paper and made an adorable gift bag.  You would think I had tons of gifts to give all of the time with the amount of bags I make, not true though.  I just love to make them.  I do share them with others though, usually as a gift to use for others.  They all find happy homes, I promise.

5-9 (2)

I did try something new with the card though.  The dragonflies were stamped in versamark on the water color paper, not new there.  I used iridescent ice on them, also not new. However, using them together as a resist for water coloring is new.  As color was applied the resist was pretty neat, not as clean as embossing powder, but still holding up.  I decided to add silver ink as well and then it changed even more.  The silver ink clung to the images more than the watermelon wonder ink did.  The look is fantastic, don’t you think? I added a little bit of silver metallic thread and five clear sequins to finish off the look.  Just divine.

5-9 (1)

Have a creative day!

Moana

Bird of Paradise Giftbag

This beautiful box was supposed to be shared yesterday, but that day had too many demands on it.  So, it waited patiently for me to get to it today.  Still just as pretty this morning as yesterday morning.  What pretty paper, right?

5-4

One whole 12 x 12 sheet went into this project.  I wanted to have a tall box, but not my usual shape.  Not too many options, I just wanted to show off the wonderful pattern of the designer series paper.  So I widened out the front and back to 4″ and narrowed in the sides to 1 3/4″.  It worked out nicely.  It won’t hold heavy items, but my daughter had the desire to use it to gift a scarf.  That would work out.

The flowers are cut with the botanical builder framelits using cajun craze.  Too perfect.  The leaves are from the same framelit set with old olive.  Not too tricky, right?  I wrapped silver metallic thread around the top, so that can be slid off to insert a gift and placed back on.  Yet another awesome gift bag ready to go.

5-4 (2)

Have a creative day!

Moana

You Are My Everything

There are days when I really don’t know what I want to make, but that isn’t today and it shows.  When I know who I am creating for it shines through.  The awesome extra free stamp set in this months paper pumpkin kit had the stamps I had to use.  How beautiful are they?  Well, I will be using them excessively I am sure.

4-17

I knew I wanted to make a card for my husband with the two stamps  that share the phrase ‘You Are My Everything’.  It couldn’t be more perfect.  Once I knew that I knew the color pallet I needed and the medium as well.  Blues and water coloring are the perfect combination for him.

The technique of water coloring really doesn’t have a lot of guidelines.  I do start with a wet masked surface.  Then I begin to add and take away color, dry and wet again sprinkle and dab, and color all over again.  It is more of keep going til you get the results you want than a step by step process.  So much fun, really.

Then I stamped the large flower in bermuda bay, once stamped off first, here and there.  I added a fern stamp a few times, full strength not stamped off.  Then finished with the two stamps that make the sentiment.  I did a little echo stamping to coordinate the inside with the card front.  To complete the project I layered the art onto another piece of bermuda bay card stock and wrapped it several times in silver metallic thread.  Then up on dimensionals for a little extra style and sit back to enjoy the view.  I do love this card.  I think it looks like a beautiful batik fabric I would love to own and sew with.

4-17 (1)

Have a creative day.

Moana

Thoughts & Prayers for my Friend

When someone close to you experiences loss it is always painful, more for some than others.  This is a time when I spend an extra amount of time for just the right expressions and feelings.  There are just so many.

3-15

This young man recently lost his twin brother to cancer at the tender age of 15.  He battled very hard, three times  over, but just couldn’t prevail in the end.  I must say though, he never complained or looked unhappy.  Truly inspiring.

3-15 (1)

I spent a lot of time with color and layering for both the outside and the inside of the card.  I really wanted to spend plenty of time.  It helped me gather my thoughts so I could write what I really wanted to say.  It definitely means more to me to have a hand made card for occasions like these.

3-15 (2)

Have a creative day.

Moana

Hey Dude, Get Well

Making a custom card can be fun, difficult and frustrating all at the same time.  Masculine cards are an interesting creature to say the least.  It doesn’t have to be covered in metal, fire or tools to have the masculine touch you are looking for, but flowers will just not work obviously.

3-1

I used some stamps from two different Paper Pumpkin sets to give me the phrase combination I wanted.  How perfect is the word ‘Dude’.  It works equally well for both depending on the recipient, but is fantastic for a masculine theme.

I decided to create a grungy water color look instead of searching through paper, background stamps, or anything else.  That way I had control of the look and feel and could stop when it looked just right.  I spent quite a bit of time adding, sponging away, adding, drying and repeating it all.  Now I love it so much I don’t want to give it away.  It was a special request though, so it will get to be signed by a school staff and delivered this afternoon.  Good thing I have photos, because this one is going to get created again.

3-1 (1)

Have a creative day!

Moana

Remarkable You

It is so nice to have a day off from school and work, but it does put things off more than a bit.  I seem to be having more and more of that as of late, but I do keep trying to get it back in the right gear.  Now I have wedding reception plans to toss into the mix.  Exciting!

2-15

I pulled a few ink colors that I wondered about going together.  Blackberry bliss is such a strong color I hesitate sometimes to put it with others.  This pastel grouping compliments it nicely though.  I don’t think I have watercolored with it yet either.  That was fun for sure.  I used a basic card front made from cold pressed water color paper, masked a quarter inch border off and got to work.  This project was one of the times I just let it happen without too much planning or thought.  I find that less stressful because you don’t have an exact finish in mind, just simple imagery and colors.  Works well for me.

I layered my front on a backgroun of mint macaron with a narrow 1/8″ border, and then placed it again on the card base.  I didn’t do any inside stamping this time.  Just a simple and clean piece of whisper white waiting to be written on.  I think that was all it called for.

2-15 (2)

Have a creative day.

Moana

Dream Without Fear

Last weekend was a great workshop and more often than not, there a one or two people that don’t show.  This leaves behind extra kits that I get to play with.  Sometimes I file the materials back, often I will make them up and make gift sets, and there are times I make something different.  That would be today.

2-6

The card made with this kit was more about the embossing folder and the paper was background only around the edges.  I decided to make it a focal point and just show it off. Truly, this paper pack is so fantastic.  I think I will be getting an extra one just for myself.

The fine tip glue pen is new to me, and I haven’t quite mastered it yet.  I have watched others use it with sequins and decided to try it out.  Not so easy as it looks, but I did get better as it went on.  On the whole, I think it turned out.  With such pretty paper, you don’t notice all of my glue adventures.  I have two more of these kits, I wonder how I will use them up?

2-6 (3)

Have a creative day!

Moana

Make 16 Shine

Turning 16 can be exciting, or overrated, take your pick.  I know a young lady who is excited for lots of reasons, but hesitant as well.  She worries a bit much sometimes.  She loves gray and it is so beautiful on her.  Just like 16 will be.  This card is for her.

2-2

I masked a piece of cold press water color paper and did a wet wash using smokey slate and basic gray.  I just kept adding color until I was happy.  Patience wasn’t on my side, so  the heat gun got to work to dry it.  I wanted a few distress areas so I dripped some water on, let it activate the color, let it run a bit and daubed it up.  Just right.

The new Large Numbers Framelits Dies are so fantastic.  They are huge!  Sparkle was necessary, so silver glimmer paper was the perfect choice.  Before placing the numbers, I wrapped some silver metallic thread several times around the card front for just a touch of ribbon.  I wasn’t some, but not a distraction from the huge 16 just shining there.  The edges of the dimensional sheets fit perfectly behind the numbers so I didn’t have to get all tricky with cutting just the right size.  How great is that!  Of course the card front was attached with a bunch of dimensionals as well.

2-2 (2)

Have a creative day!

Moana

Thoughts & Prayers Raining Down

This is the lovely view I have had all this past week.  It has been so wonderful to enjoy the cool cloudy days filled with light rain.  It makes everything look bright and clean, and the smell is wonderful.

Thoughts & Prayers Raining Down

I stamped my image first and washed the paper with plain water.  I then proceeded to layer on my ink until it was dark on the top and the right layer of light on the bottom.  I continued dabbing my brush along the top pointing down for ink to kind of fall down.  It started to look more and more like rain.  I finished it off with spritzing water, allowing it to dry some and doing it again. The last time I spritzed heavier allowing for some drops to form, and then controlled them down the piece.  It worked wonderfully.  How simple is that?

Thoughts & Prayers Raining Down

Have a creative day.

Moana

Bitty Boxy Holiday Bags

I managed to sneak yet another project out of that paper set.  I still have enough for a couple of cards or a medium sized gift bag.  Dang, what a lot of fun I have had using this paper.  But these tiny little bags certainly do take the cake.  Aren’t they just absolutely adorable?

Bitty Boxy Holiday Bags

My husband was given a large bag of candy as a thank you and he brought it home.  And he opened it.  So that is just dangerous.  I knew I had to come up with several little bags to use them up.  I am getting there.

Bitty Boxy Holiday Bags

Three different styles of box bags to get me going today.  I am partial to a milk carton style to be honest, but the tiny pinch pouch is just so sweet.  I used up three scraps of paper with a touch of glimmer paper to give them some bling.  I don’t know what I love more, the cording or metallic thread, so I had to use them both.

Bitty Boxy Holiday Bags

Have a creative day!

Moana


From Santa

Another wonderful day in Utah.  I sure could get used to this vacation thing.  My girls are fast asleep and looking adorable.  I took a photo of them, but they would not be happy if I shared, so it stays with me.  So cute. However, here is one of the adorable cards from my gift set.

11-26 (1)

This is definitely a clean and strong look with these wonderful stripes.  They are the focus of the card for sure.  So I kept the sentiment simple and stamped on a strip of velum.  I backed it with another piece of paper from the same dsp set, only one set of paper used in this series, and wrapped them together with silver metallic thread.  I just love that thread!  The ends were punched with the triple banner punch and it finished it off quite nicely I must say.

11-26

Have a creative day!

Moana

Lighthearted Leaves Treat Carton

All day long I have tried to get this blog post done.  That gives you a little hint into how my day has been.  Not done yet, but definitely on my way.

Lighthearted Leaves Treat Carton

I had a bag of Lindt truffles on my counter and loved how the bag looked.  I thought that it would be fun to try to make a bag that could hold treats and look elegant too.  I asked my husband for a color choice, I grabbed a ribbon and matching ink and went to work.  Of course I had to use my current favorite stamp set, Lighthearted Leaves.

Lighthearted Leaves Treat Carton

One sheet of 8.5 x 11″ perfect plum cardstock went into this one.  Evenly scored and punched along the sides with the extra-large oval punch to give the windows.  Window sheet was scored along the same measurements and tucked inside.  It was a bit tricky to handle the placement, but with a little patience and plenty of glue dots, I experienced success.  I am so happy with the results.  I am sure to make this one again and again.

Lighthearted Leaves Treat Carton

Have a creative day!

Moana

@love

Not everyone shares the same view of love, but that doesn’t mean it isn’t beautiful to them.  Easy words to say, but not always easy to follow.  Sometimes we just need to look at it from a different perspective.

@love

This card is much larger than my normal projects.  It measures 7 1/4″ x 4 1/4″.  That will definitely require a custom envelope.  Won’t this one be fun to get in the mail though.

@love

I lined my wonderful huge alphabet stamps up on a long block and got to work.  I had planned on a clean background, but liked how my practice stamping looked as I stamped off ink.  There you go.  I added the @ symbol afterwards using silver Encore ink.  Thought it gave it the perfect touch and made it have a bit more meaning, to me at least.  Several strands wrapped around the bottom with my ever favorite metallic thread and this lovely card was all done.

@love

I almost forgot to mention, but I am sure you can see it, I echo stamped the entire phrase inside super light.  You can see it, but there will be no problem writing over it without confusing your message or the image.  Just right.

Have a creative day!

Moana


Dude, Happy Birthday

While chatting with my daughter I asked her for a little inspiration for a project.  She came up with these two stamp sets.  She remembers the Paper Pumpkin stamps much better than I do.  Good to get a reminder or two.

Dude, Happy Birthday

I have to admit, I am really into the Bombs Away Birthday set.  This particular one is my favorite, but they are all pretty awesome.

Dude, Happy Birthday

I was originally going to spritz the designer paper, but I forgot to get a re-inker in tip top taupe.  Ooops!  So I opted to sponge it instead.  The geometric pattern looks pretty darn cool.  A little bit of layering, lifting everything up on dimensionals, touches of silver mini brads and a finish with silver metallic thread and this card is ready to go.

Dude, Happy Birthday

I need to remember to get those paper pumpkin stamp sets out more often.  The kits are so fun to work with when they first come, but I often put the stamps away and then move on.  I think I will have to work on getting them in cases to keep them more visible.

Have a creative day!

Moana

Let It Snow

I know it is only the beginning of  September, but I do love seasonal cards, especially winter scenes and Christmas.  Not to mention that the Stampin’Up! holiday catalog goes live today.  So much fun!

Let It Snow

I have used several new products in today’s project.  New stamp set, new framelit set, new embossing folder and then comes a new card.  How cute is this little snowman?

Let It Snow

I stamped the image where I wanted it along with the sentiment.  Then I embossed the card front.  At first I wanted to have all the snowflakes sky blue and thought to use the brayer.  But I decided to be more selective and yes, I did water color select flakes.  It didn’t take that long, really.  The effect is nice.

Let It Snow

I had an extra ‘snow’ die cut from Saturday’s event project and knew just where to use it.  Actually, that is what started the card out.  I added in a little silver metallic threat and layered it all up on dimensionals.  Just my speed.

Have a creative day!

Moana