“Suite” Treats

People are placed in our lives for a reason.  It is so wonderful to realize those precious moments as they occur.  A simple, sweet thank you speaks volumes.  As does the kindness shown to me time and time again.

5-10 (1)

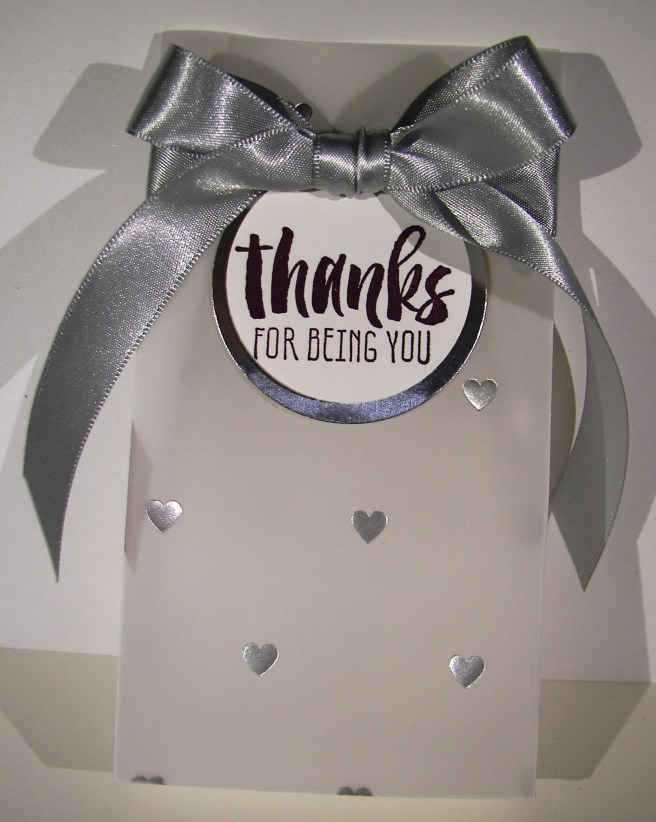
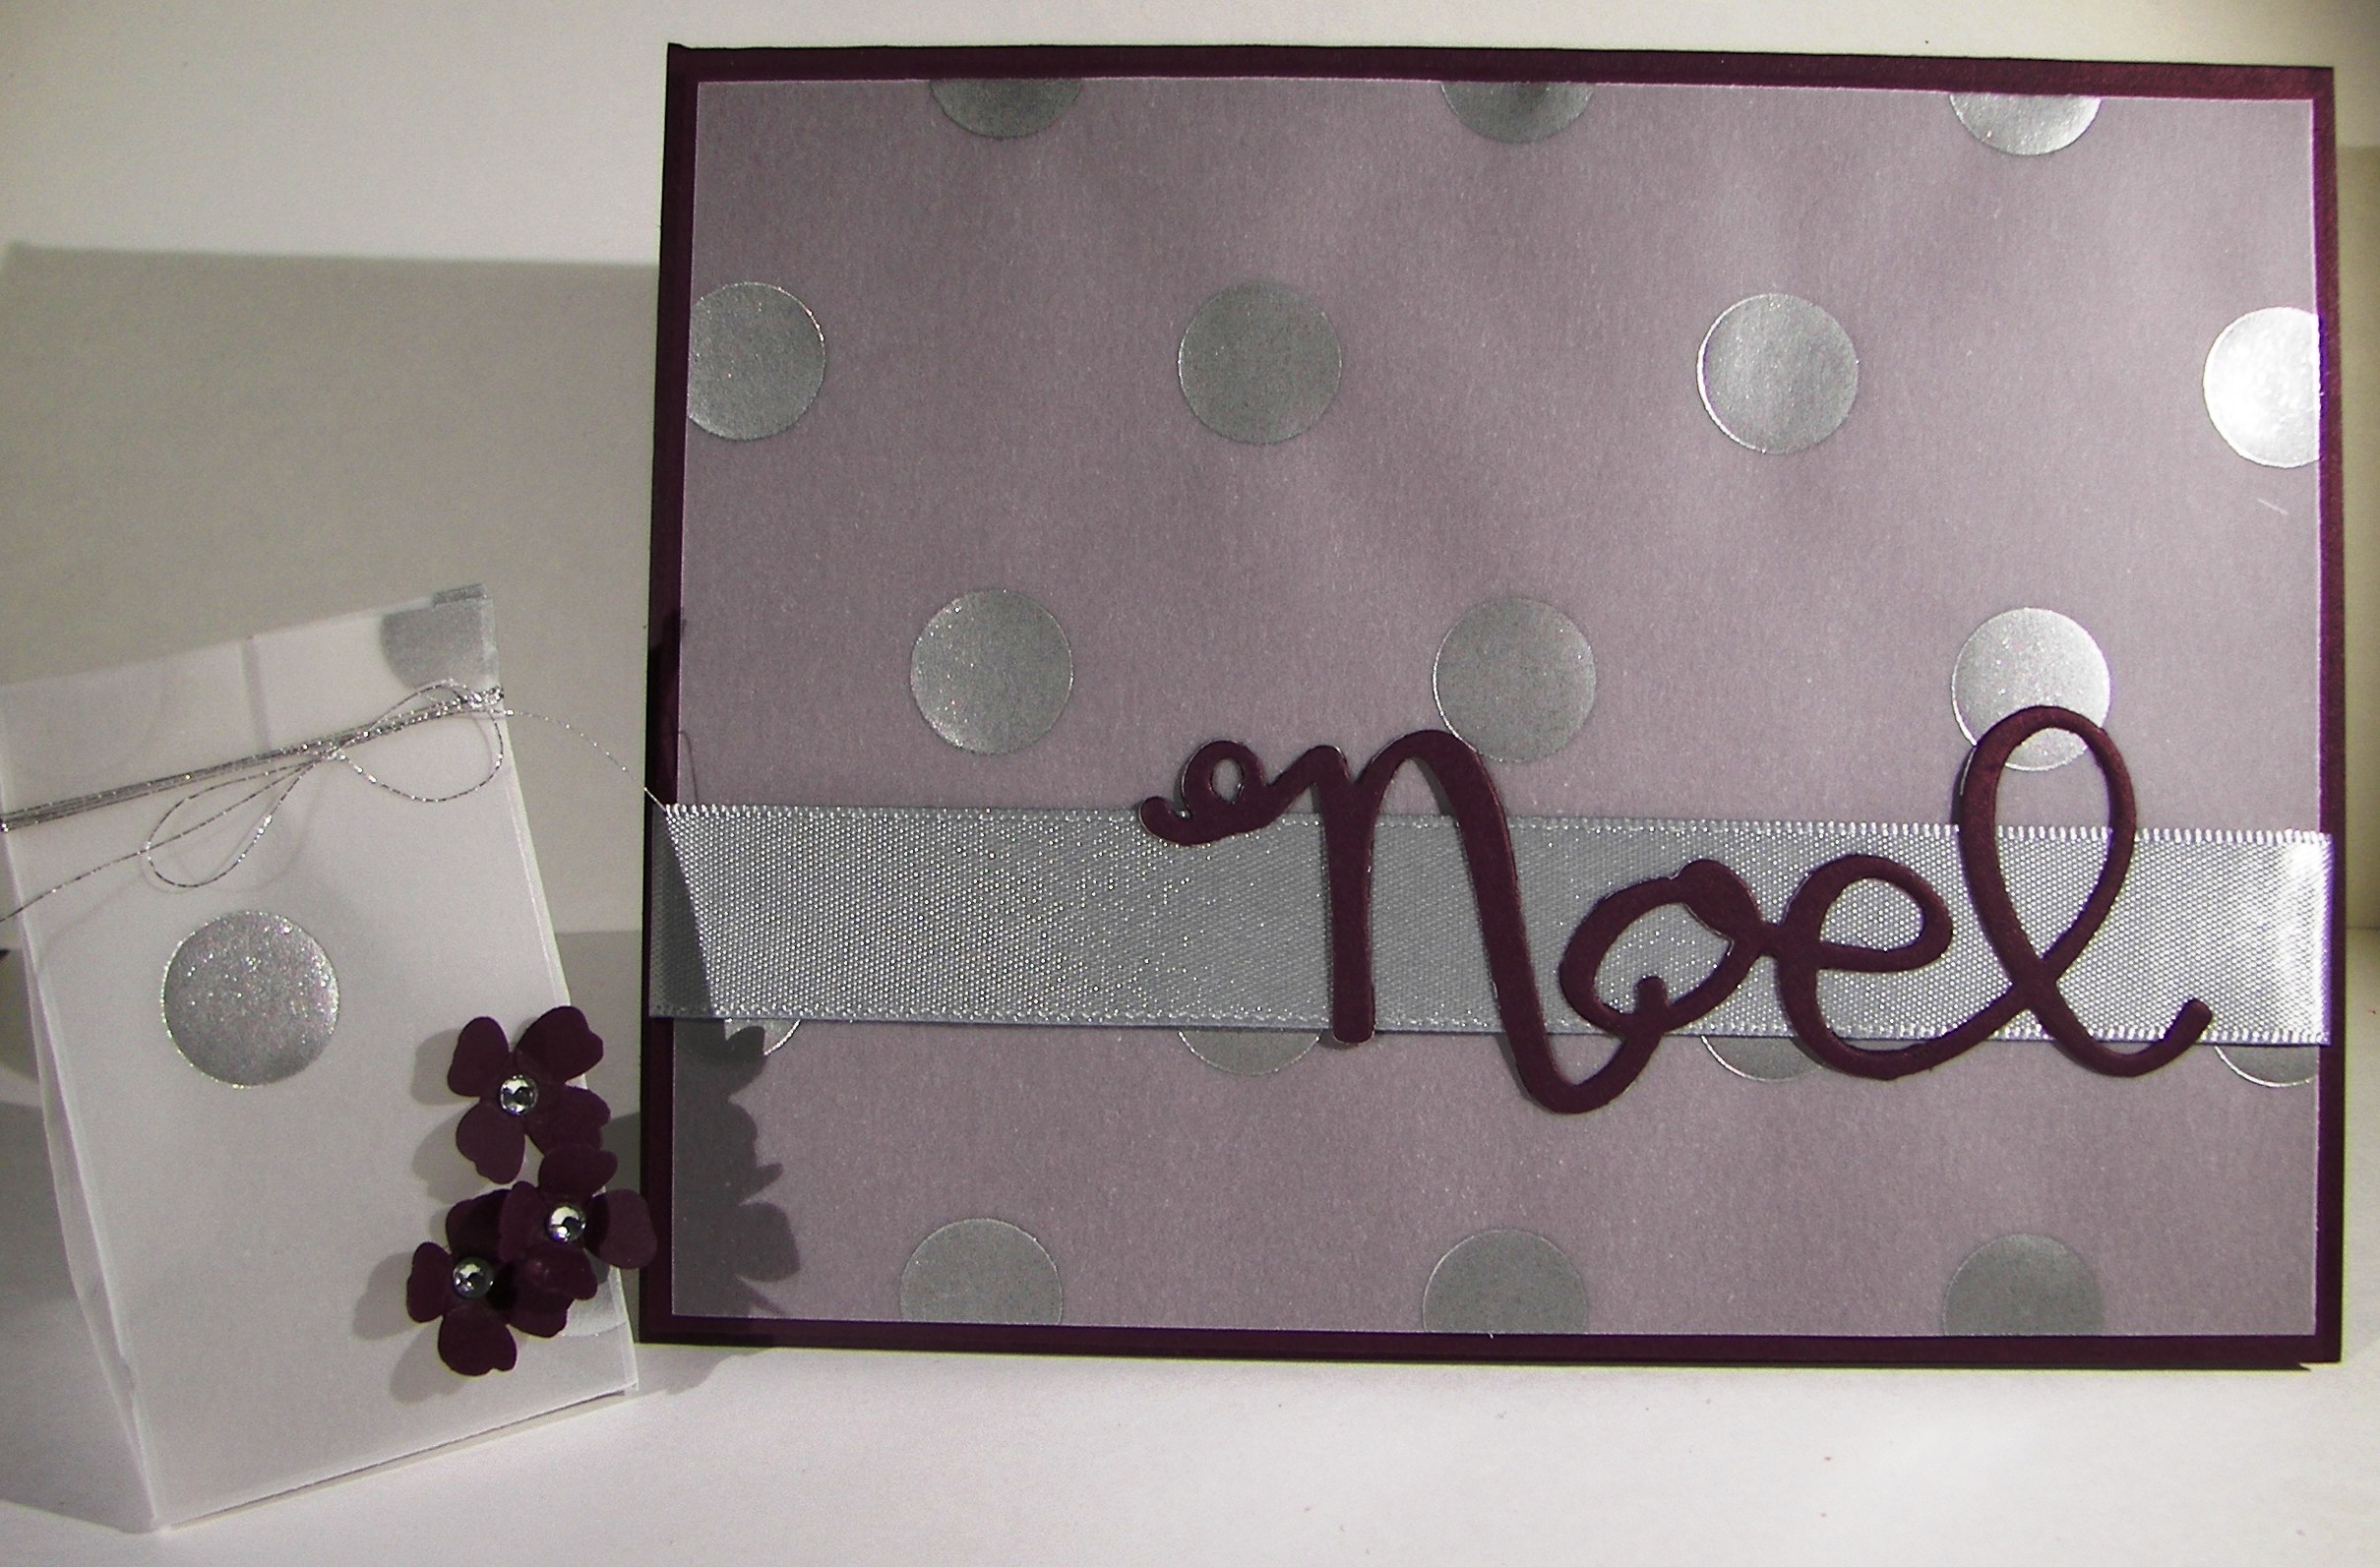
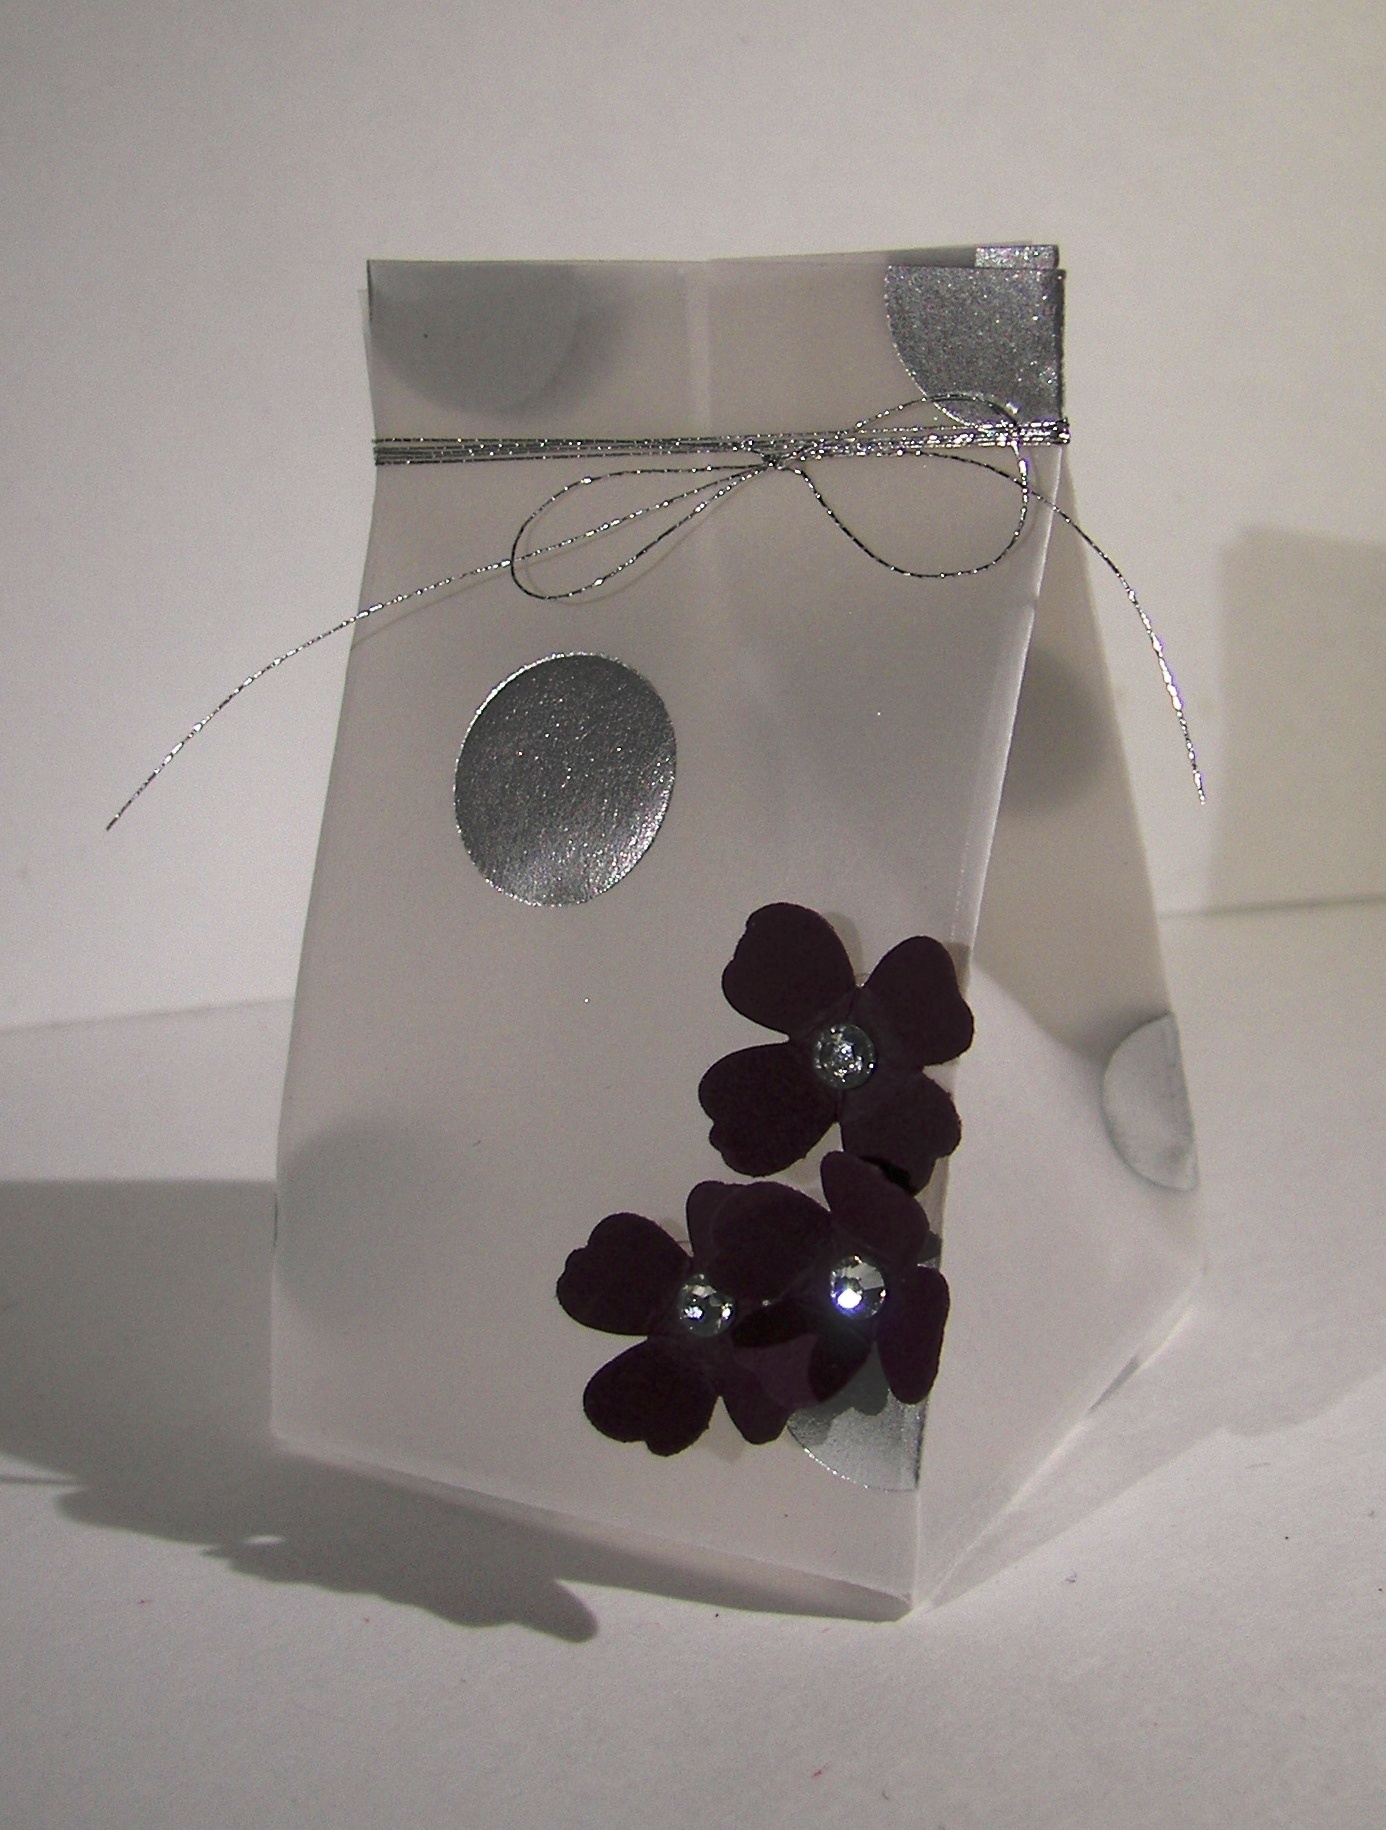
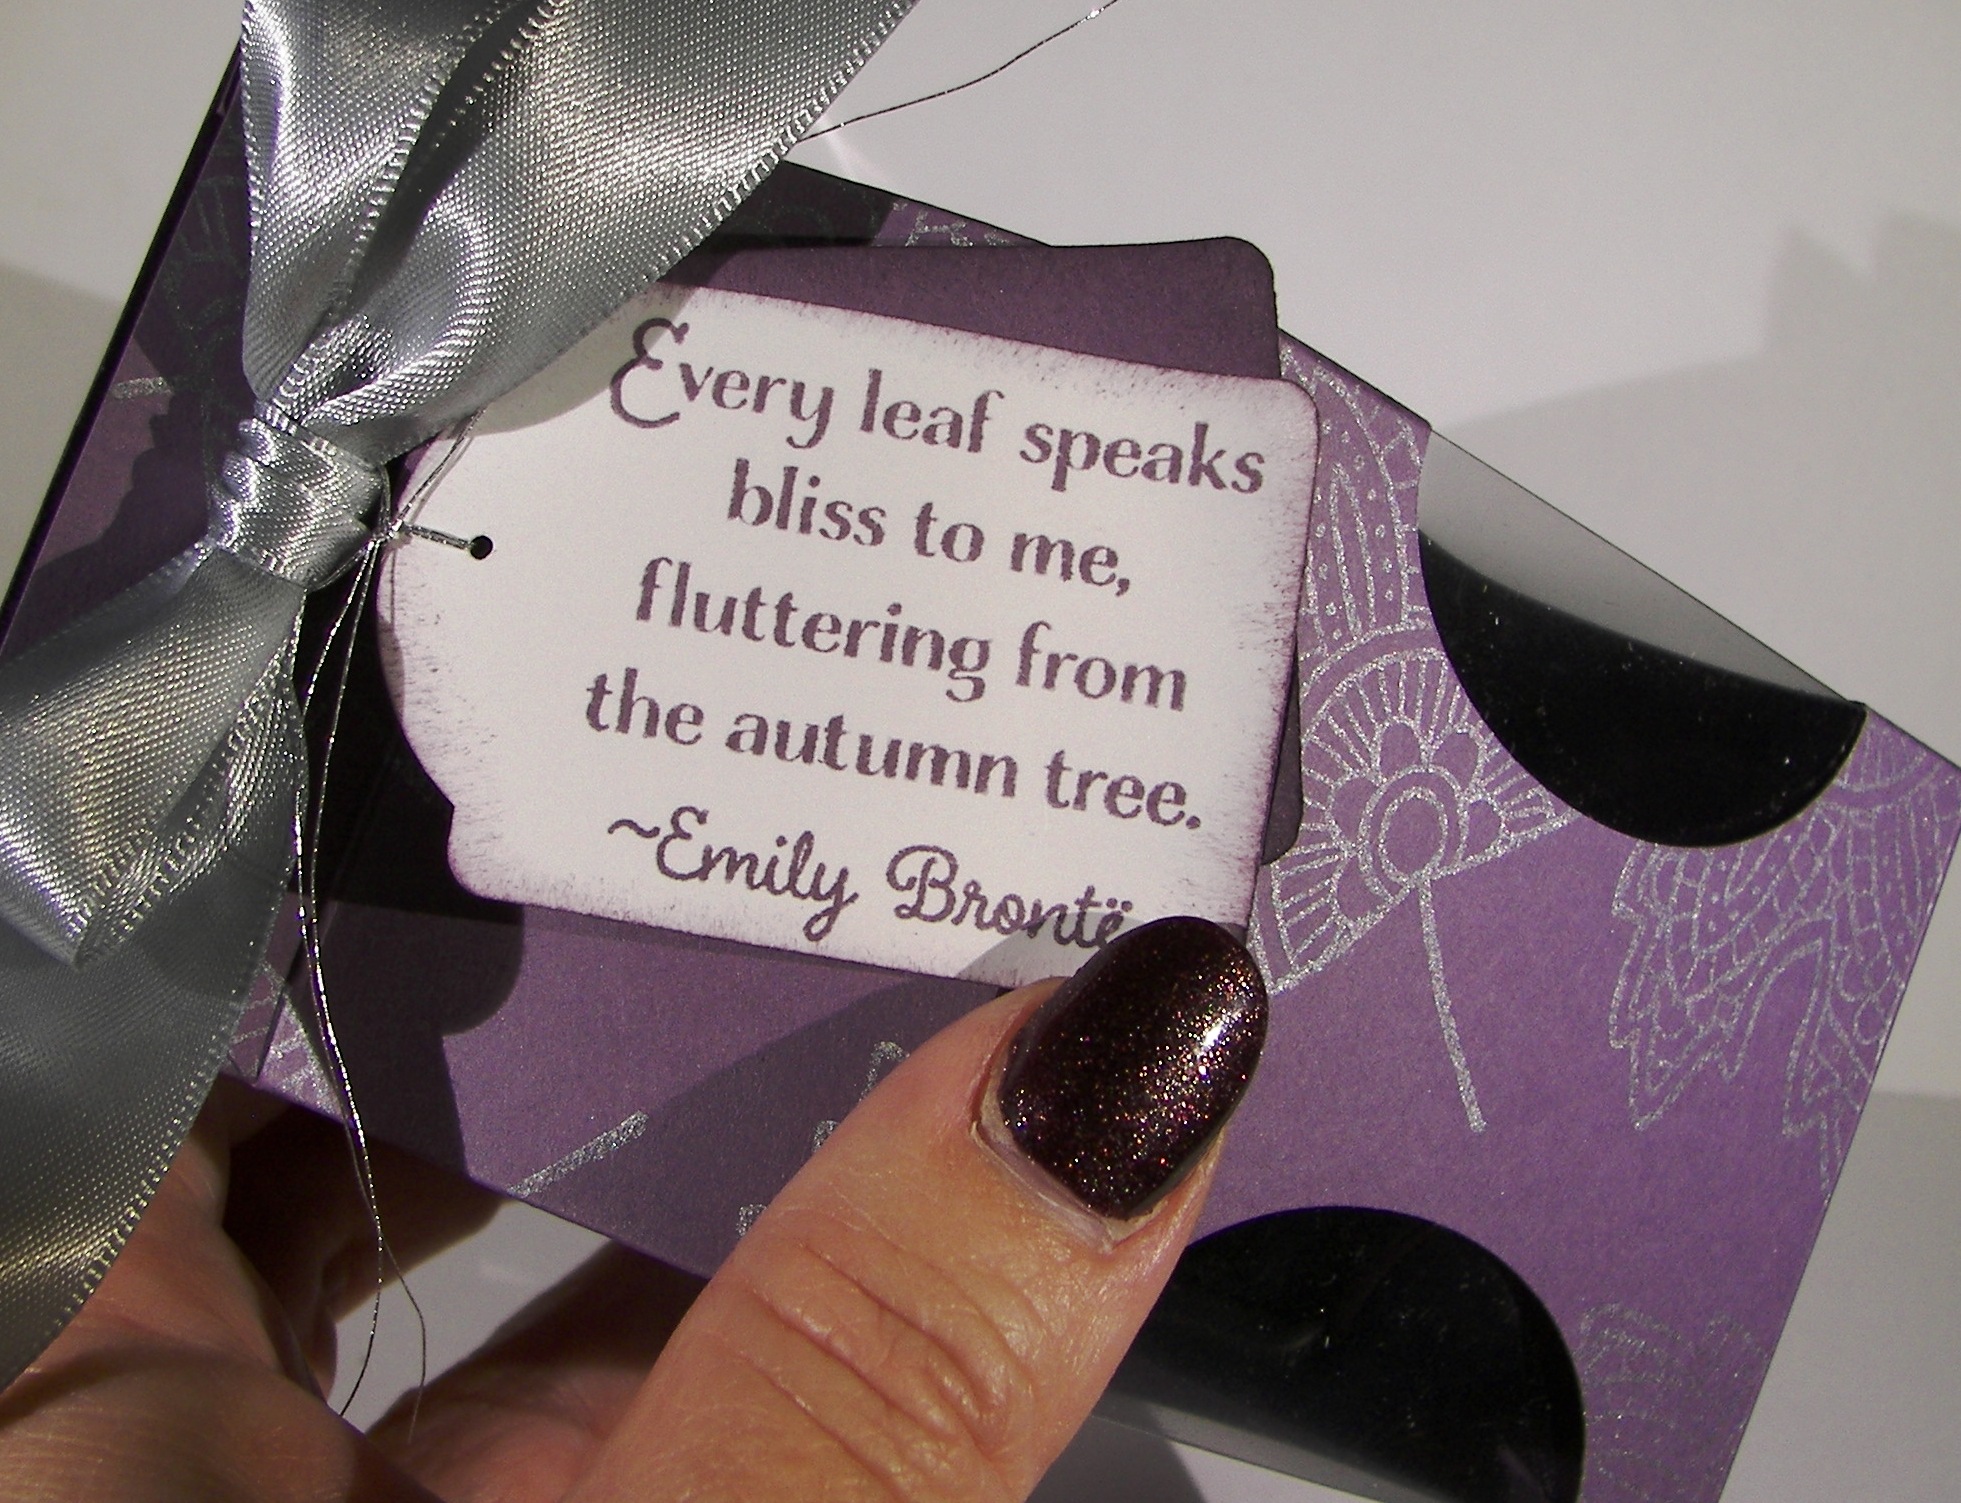
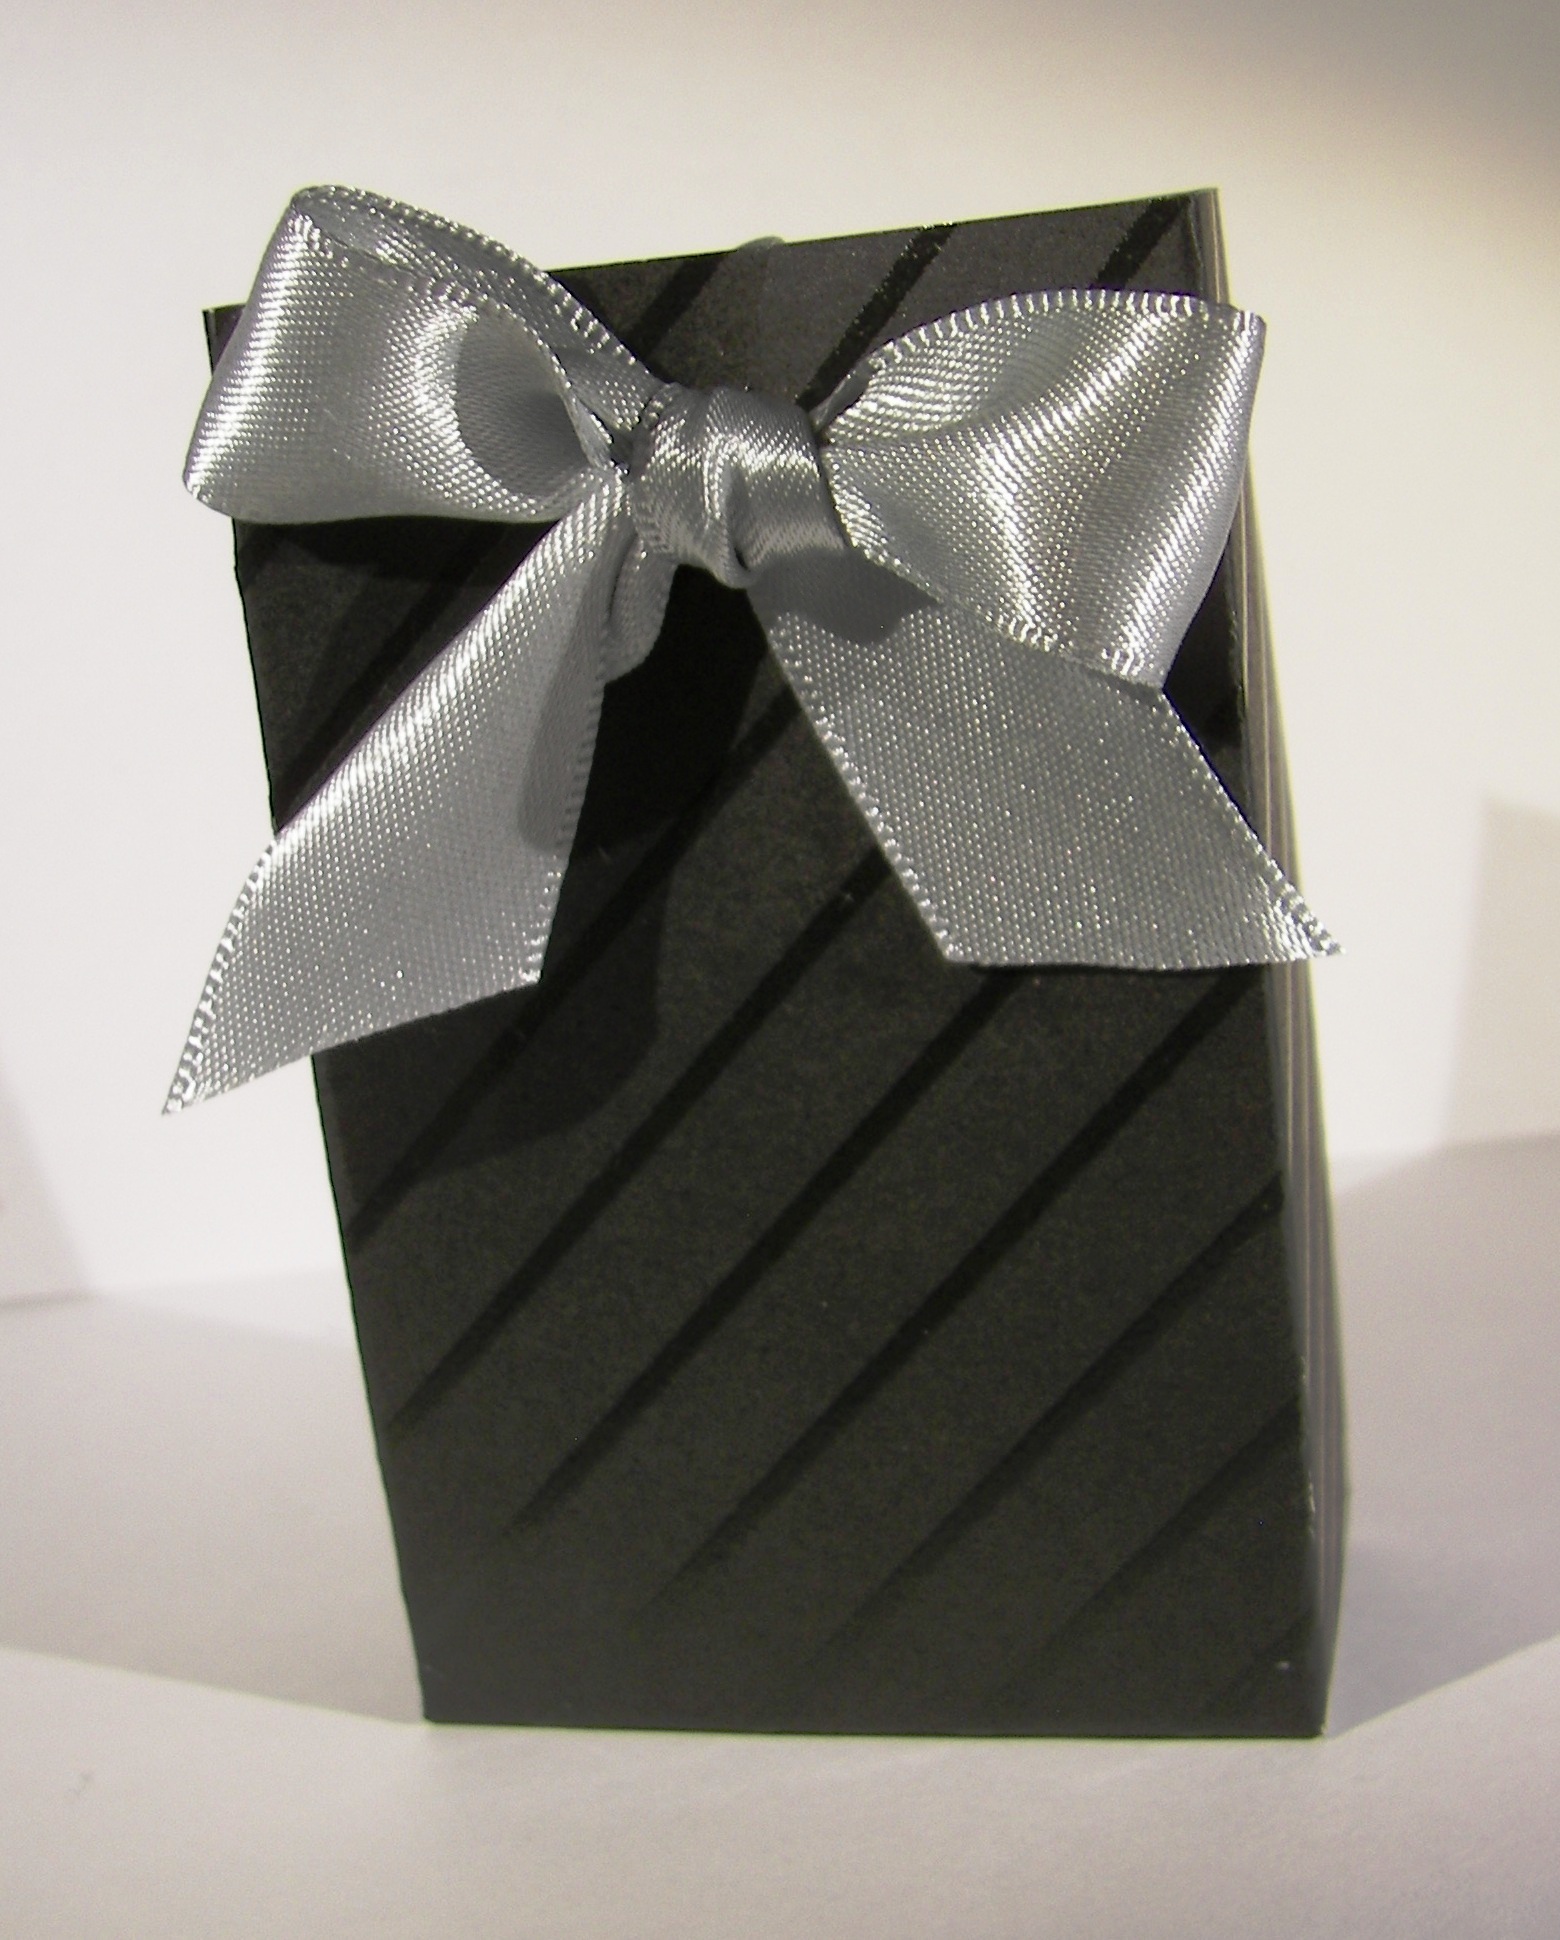
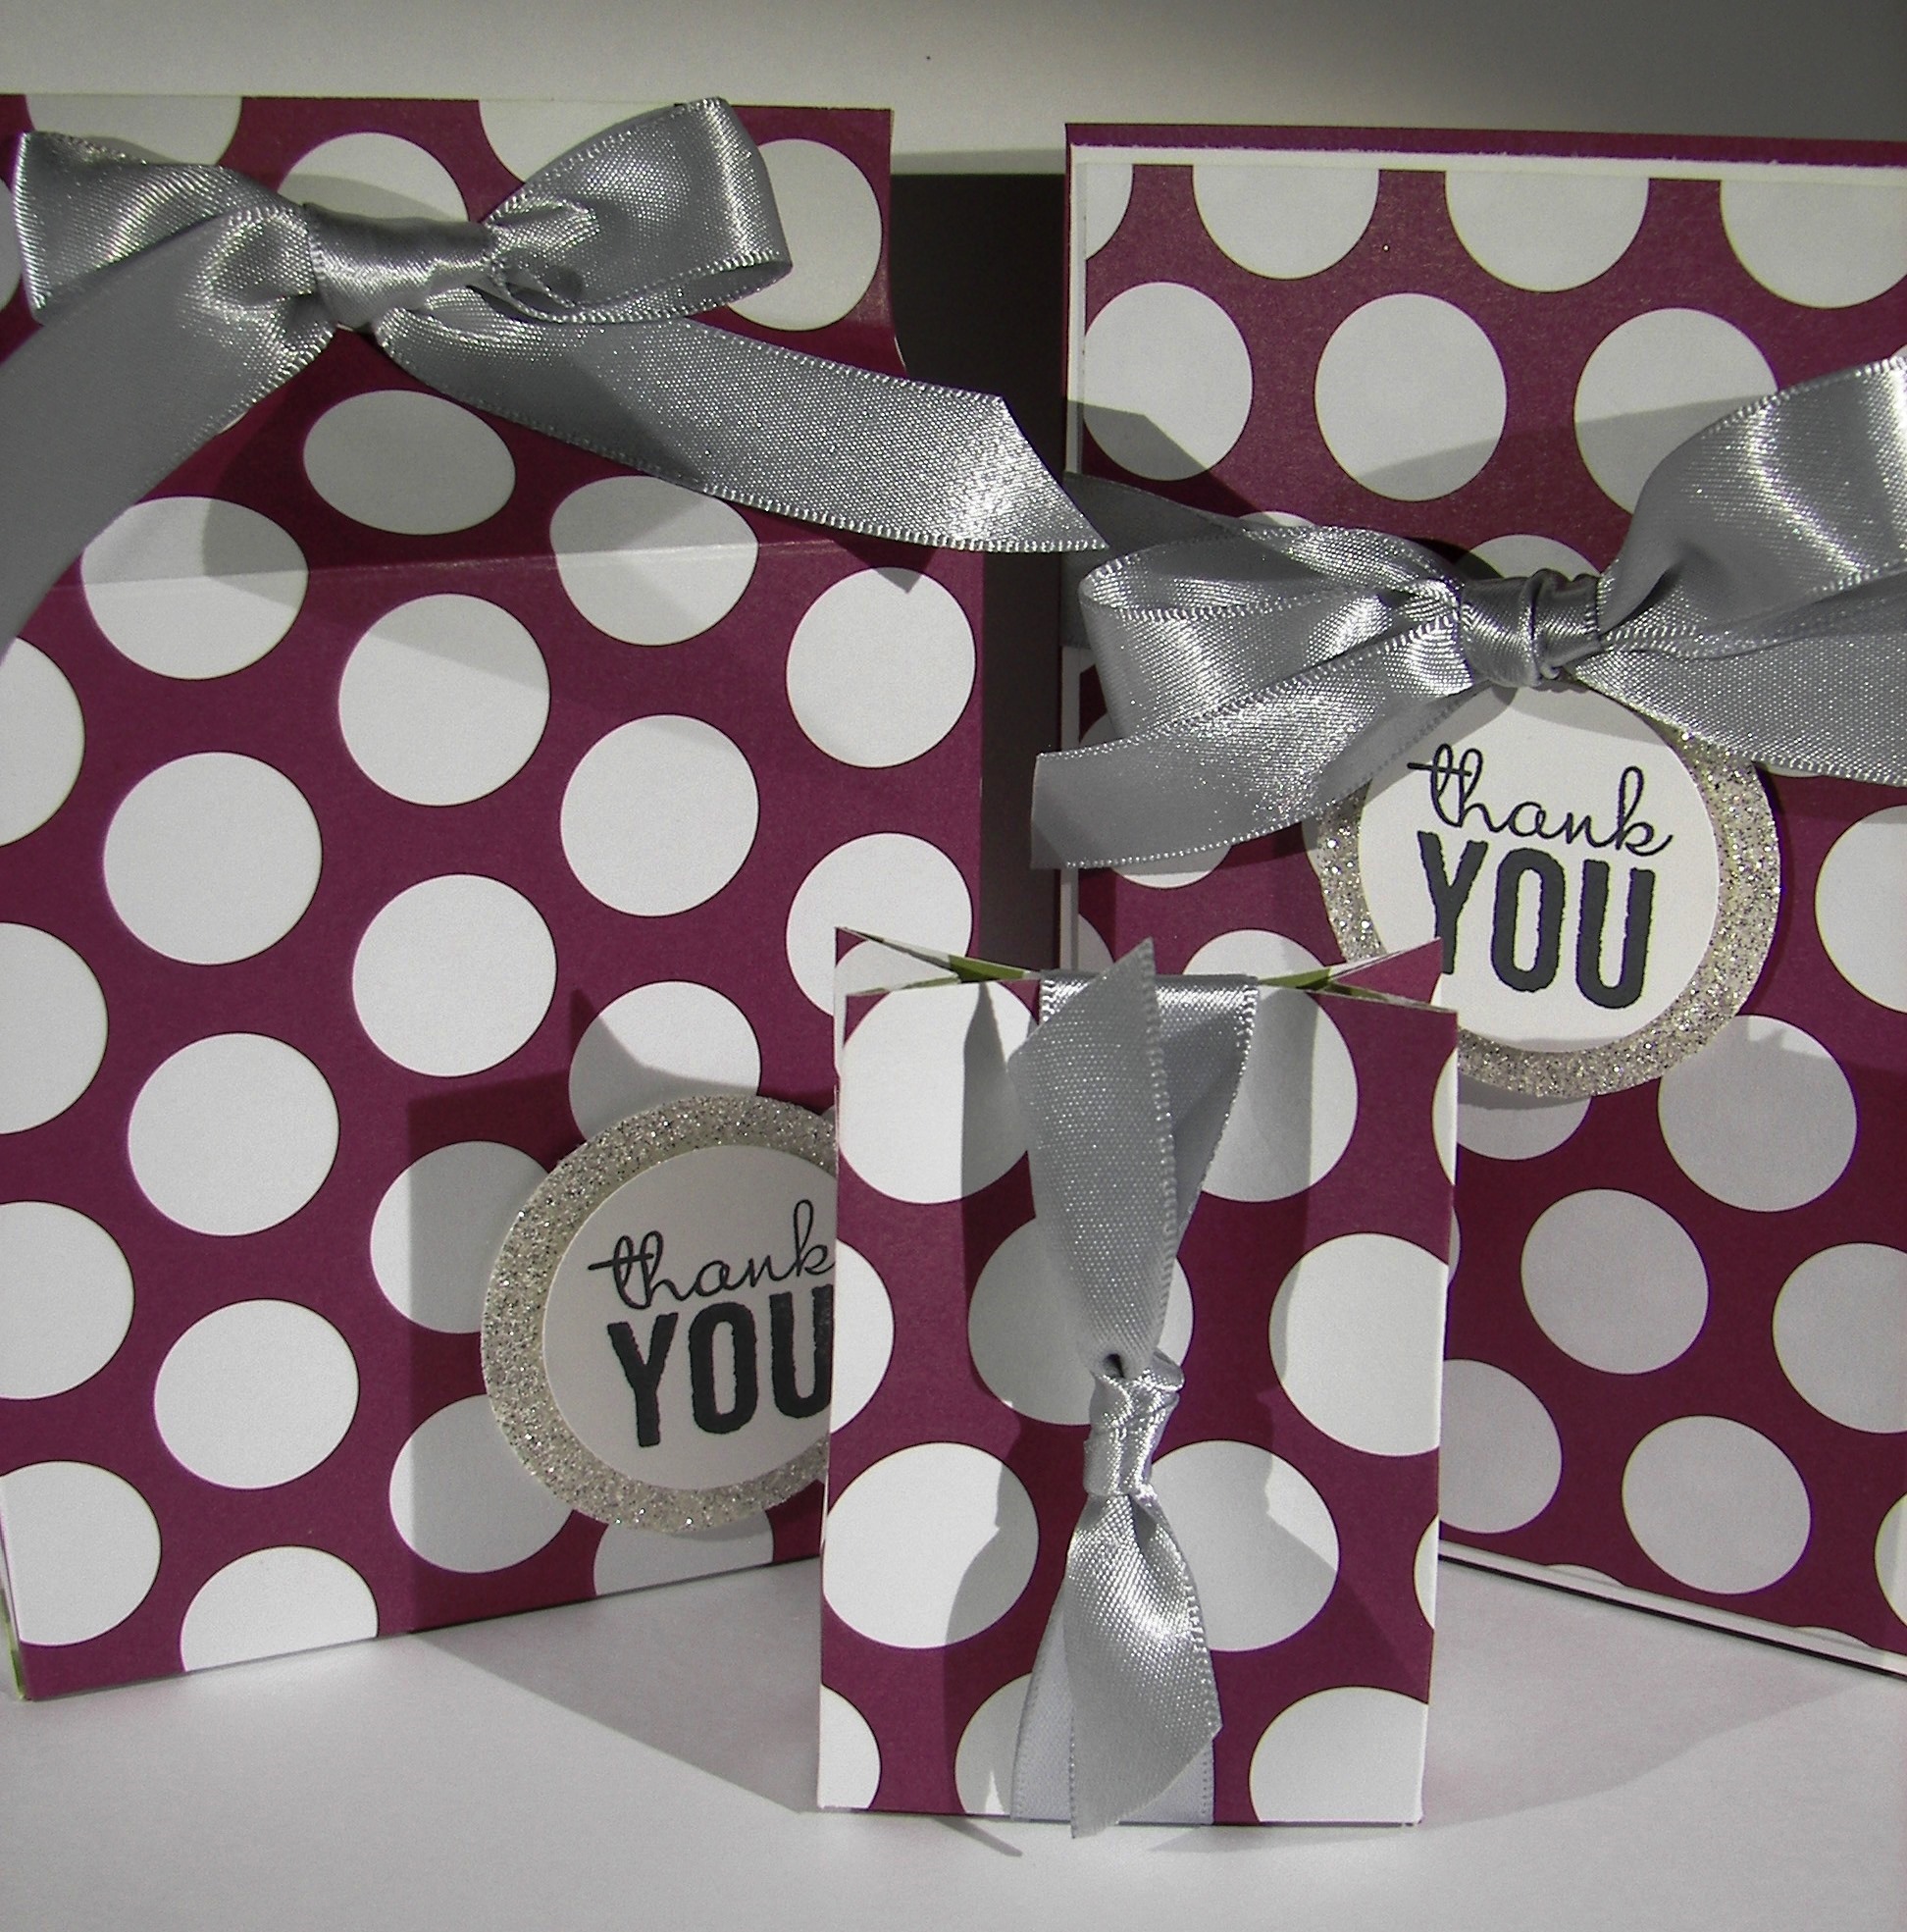
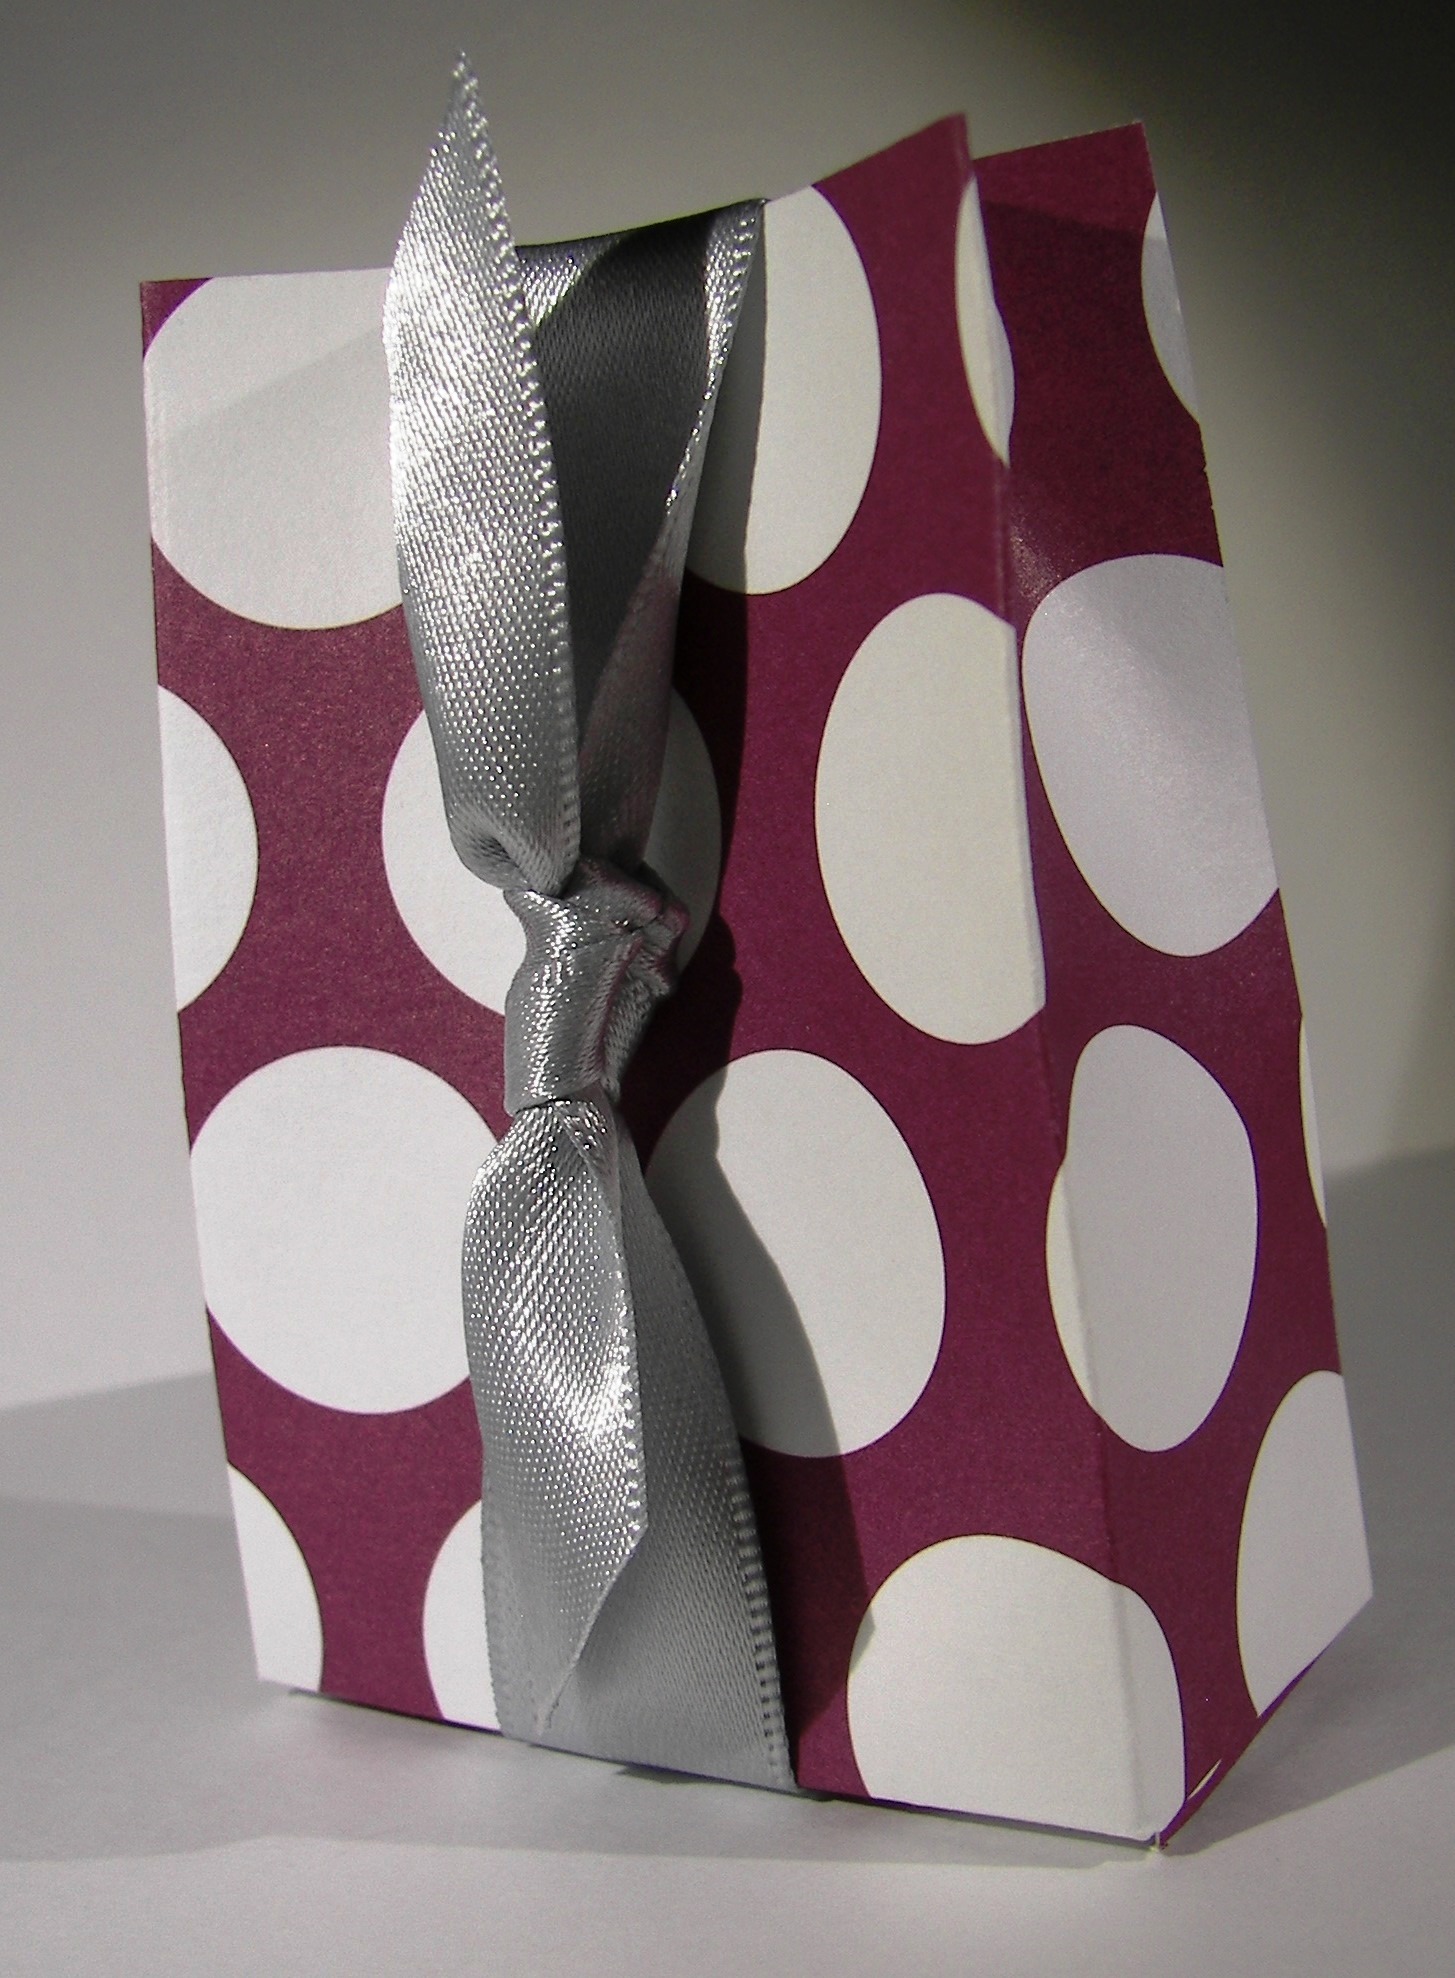
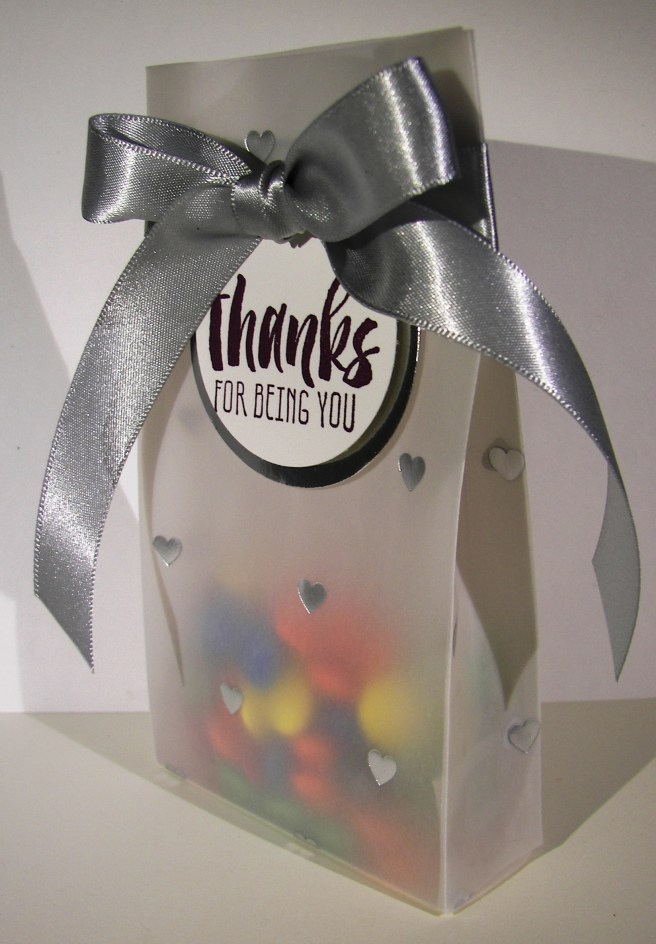
In my desk scrap file I looked for something pretty to make a gift bag for a friend.  I came across this wonderful foil velum.  I scored the long sides 1″ in, on both sides.  The bottom of the bag was scored at 5 1/2″ and 6 1/2″ to give a 1″ margin all around.  Folding, adhering, and then adding a bow all went very easy.  Deciding on a phrase took a moment, but as I have often enough, I turned to the Suite Sayings set and found just what I wanted.  The stamping was done in the soon to be retired blackberry bliss, I sure will miss that color, and then punched with the 1 3/4″ circle punch.  A layer of silver foil was punched with the 2″ circle punch and then layered in place.  The tag is stuck to the bag so the ribbon can be removed easily.  That is important for getting to those treats and even re-gifting the bag.

5-10

Have a creative day!

Moana

Wonderful Wreath Noel Set

I certainly am in the mood for Christmas cards that is for sure.  I am also working towards a goal though.  The other day I blogged about a service project I was involved in.  There turned out to be twenty four advent gifts to share.  I thought it would be appropriate for the young women who had worked so hard on them should write a personal Christmas card to accompany the gift.  So, I need several cards.

Wonderful Wreath Noel Set

I am notorious for a matching gift bag though.  I love putting a treat or two in a little bag and sharing it, so I call this a win.  How simple is this card though?  A simple layering of designer velum on a card front made just smaller than the base, love my 1/8″ narrow borders.  It was accented with a single strip of ribbon that I didn’t even make a bow or knot or anything!  Unheard of really.

Wonderful Wreath Noel Set

The Wonderful Wreath framelit set has this lovely ‘Noel” die in it that was just perfect.  Blackberry bliss is one of those colors that goes in almost any season, but Christmas is a good one most certainly.  Glue dots were hidden behind the silver dots so the adhesive wouldn’t show.  I used tombo on the ‘Noel” and it stayed put quite nicely.  On to the next project!

Wonderful Wreath Noel Set

Have a creative day!

Moana

Lighthearted Leaves Treat Carton

All day long I have tried to get this blog post done.  That gives you a little hint into how my day has been.  Not done yet, but definitely on my way.

Lighthearted Leaves Treat Carton

I had a bag of Lindt truffles on my counter and loved how the bag looked.  I thought that it would be fun to try to make a bag that could hold treats and look elegant too.  I asked my husband for a color choice, I grabbed a ribbon and matching ink and went to work.  Of course I had to use my current favorite stamp set, Lighthearted Leaves.

Lighthearted Leaves Treat Carton

One sheet of 8.5 x 11″ perfect plum cardstock went into this one.  Evenly scored and punched along the sides with the extra-large oval punch to give the windows.  Window sheet was scored along the same measurements and tucked inside.  It was a bit tricky to handle the placement, but with a little patience and plenty of glue dots, I experienced success.  I am so happy with the results.  I am sure to make this one again and again.

Lighthearted Leaves Treat Carton

Have a creative day!

Moana

Color Me Irresistible

Fall events are starting to pile up and that means plan ahead and get it done early.  This isn’t quite early, just one week, but that helps, right?  There is a church youth dance coming up next weekend and we are hosting the pre-dance dinner party.  The theme is black and white, so we are going along with that for the decorations, and yes, party favors.  I think these will do nicely.

Color Me Irresistible

These two are very simple, as should any favor should be, especially if you need to make several quickly.  I started both of them with paper sized at about 4 x 6 1/2.  Simple scoring for the gift bag and a hole punch to thread through the ribbon.  Done and done.

Color Me Irresistible

Can you go wrong with a classic sour cream container?  I think not, especially when you are working with this ever so lovely silver foil velum.  I think silver wrapped candies or white mints would look so pretty inside.  Maybe even both?  Works for me!

Color Me Irresistible

Have a creative day!

Moana

Butterfly Basics

Simple elegance is one of my favorite things in a card.  This color combination surely does lend itself in that direction.  I even think it is neutral enough to be masculine, what do you think?

Butterfly Basics

I used the Butterfly Basics set for this project for the element and sentiment.  I put the fern stamp to work with three different inks.  I started with black stazon, layered with silver encore, and finished up with elegant eggplant.  I continued stamping inside with just the elegant eggplant.

Butterfly Basics

I added some silver satin ribbon to keep those ferns together but kept it in a knot instead of a bow.  The ribbon kind of took over when it was tied in a bow, but just right in a knot.

Butterfly Basics

I kept the boarders narrow and popped the front up on dimensionals.  A nice clean look for an elegant card.  I think I have just the person to send it to.

Have a creative day!

Moana

Flowerpot Painted Petals Trio

Sometimes when you draw a blank, you still come out on top.  I was sure I had crafters block yesterday.  So I sat and read a novel instead.  When I made myself go back and sit down I decided to pull out a sheet of designer series paper and just design a bag and call it good.  As soon as I had this sheet of paper on my desk my brain got busy.  Cool right?

Flowerpot Painted Petals

I hadn’t paired this ribbon with rich razzelberry yet and I wish I would have.  They look great together!  And then a bit of glimmer paper to frame a tiny sentiment and we are off and running.

Flowerpot Painted Petals

I trimmed off a 4″ section from the whole 12 x 12 for a card front.  When I finished the other cut to give me the 4 x 5 1/4″ front I needed I was left with a choice.

Flowerpot Painted Petals

Make a second card, put the remainder back with its set, or make another tiny bag to go along.  The tiny bag won.  What a cute little baby bag.

Flowerpot Painted Petals

This set went together really quickly.  That is what happens when you have great product.  Just a little bit of stamping, some creasing, adhesive here and there and a ribbon on top.  I went to bed with a smile for sure.

Have a creative day!

Moana