Special Reason

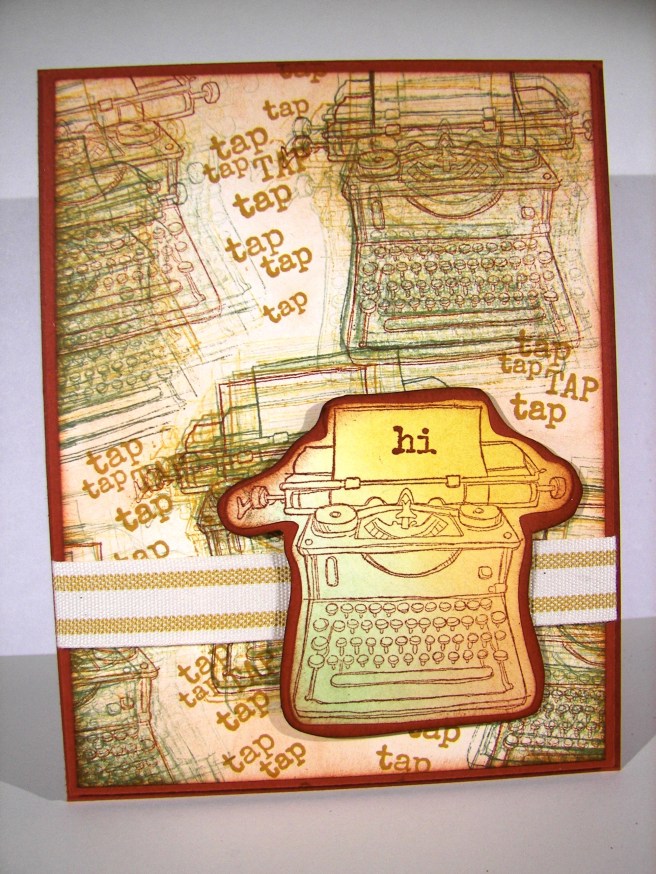
Opening new product is so much fun.  This is a stamp and framelit bundle I bought from the spring Stampin’Up! catalog, and I love it.  I had a tag sitting on my work station trying to inspire me, and I went to this set.  Fresh eyes are hard to come by sometimes.  The tag had some colors that I would not have put together myself, or I thought, because I had made that tag!  Silly me.

2-6

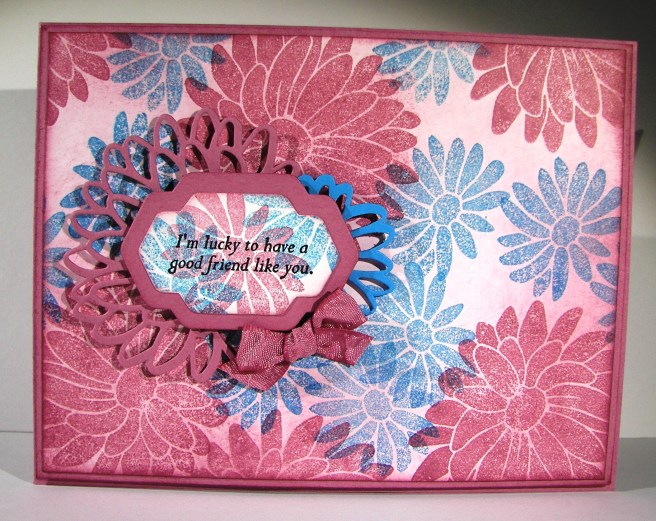
Either way, this is what I came up with.  I stamped my background paper using the two floral images from the Special Reason set and then sponged with sweet sugarplum to fill in the spaces some.  The flowers were stamped off once before hitting the background to soften the colors.

I made a die cut from each of the ink colors in coordinating card stock to become the background for my sentiment.  How lovely.  Instead of wrapping ribbon around the card, which is what I love to do, I only made a sweet little bow from ruched ribbon and attached it with a glue dot.  I wanted the ribbon, but not the distraction it would have caused with too much of it.  A very nice balance.

2-6-1

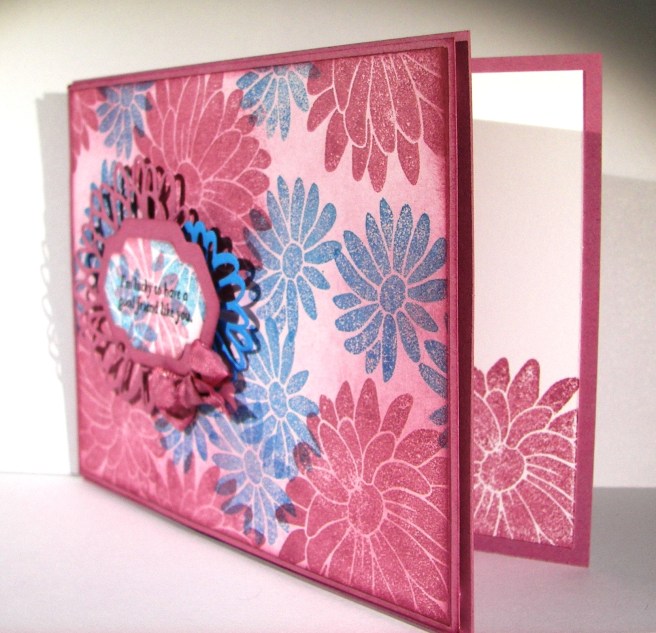
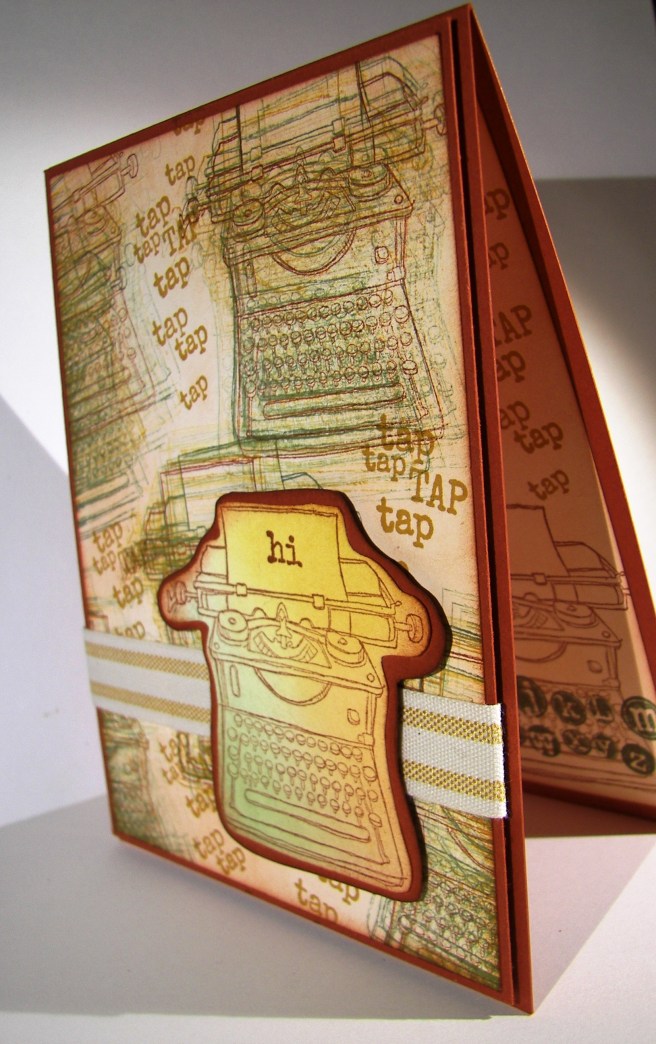
The inside got a little stamping, as always, to finish it off.  I like this project so much, I think it will become the second project for my class on Saturday.  The ladies love to make their own background paper.

Have a creative day!

Moana

City By the Bay

Wouldn’t you love a view of the city like this?  Well, my view is a whole lot more country, but I would one day love to be able to enjoy one like this.  I might have to settle for occasional holiday trips, but it would still be wonderful.

4-30

I put quite a bit of planning into this project.  I had to think backwards in order to keep the layers straight.  I embossed my whisper white piece with elegant dots and used the recessed side to make my ‘wall’.  I inked up my sponge and just pounced in here and there to create this look.  I kept going until it looked more like a textured wall than a piece of embossed paper.  The edges got sponged.

The hearth and home thinlit of the window was used twice.  Once to create the hole in the wall and again to make the window frame.  I glued the white one to the tip top taupe one with tombo liquid glue and nestled it back into place with the card front.  That way it looked raised up without a lot of fuss.

The skyline was created with the calling all heroes set.  It was stamped with black stazon onto water color paper.  The texture of the paper made it look really neat.  I went to work on the water line and then moved up to the sunset.  The windows were colored in with gold wink of stella, even though you can’t tell as much, they do sparkle.  That was centered in the window and got a heavy dose of dimensionals.  I am sure I could have worked it out easier if I had thought a bit more, but sometimes a creative journey takes a few extra turns.

4-30 (1)

Have a creative day!

Moana

Tap Tap Tap into Retirement

Well, it has begun.  The retirement list has been published and I can start getting sad over some of my favorites.  This has been one of them.  I love the images, but really love the little tap tap tap tap stamp.  It is so adorable.  Some stamp sets I just keep because they make me smile, and I love to smile almost as much as making someone else smile.

4-20

This project was created with a few techniques.  I stamped my little typewriter  in cajun craze first, then did a bunch of stamping all around the base image with almost artichoke first and then moved on to delightful dijon.

When that was done I got out my sponge and went at the edges.  I aged the entire background by swirling around and around focusing on the edges to make them darker.  I added a little extra sponging around the edge to really darken it up.  I did the same on the inside, but left the center light for easy writing.

4-20 (2)

I stamped my front piece with cajun craze and then sponged in three different areas to keep the colors blended, but still very separate.  I fussy cut it, layered it to some more card stock, sponged that too and put it up on dimensionals.  I did a single wrap of striped cotton ribbon sticking it down with glue dots on the front and back.  The background piece was placed on another sheet of card stock with a tiny border and then layered it up again on even more dimensionals.  Love those guys, they make me so happy.

I don’t normally show the entire inside of a card, but it turned out so awesome that I had to. I thought it was nice enough it could be a card front all by itself.  Not today, but I gave an extra peek just for fun.

4-20 (1)

Have a creative day!

Moana