Woodland Baby Shower Gift Set

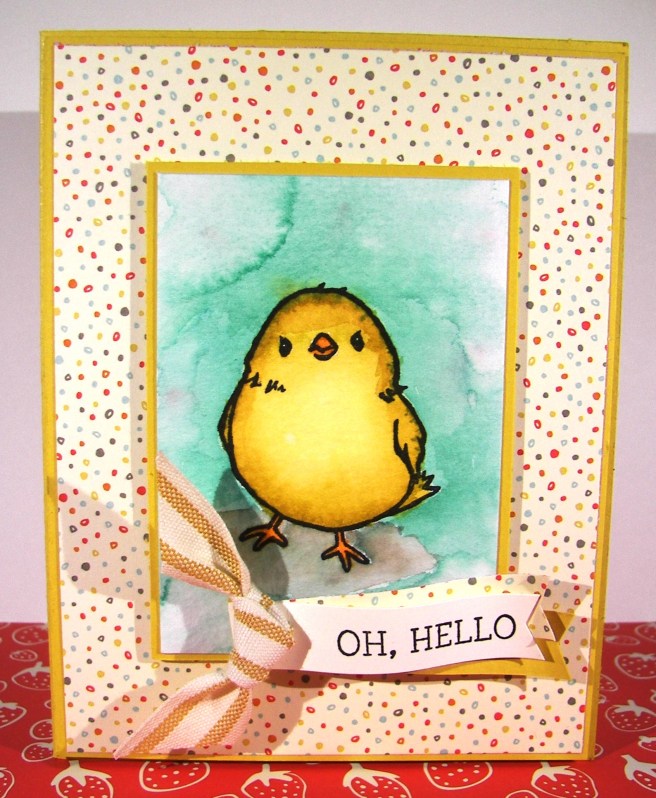
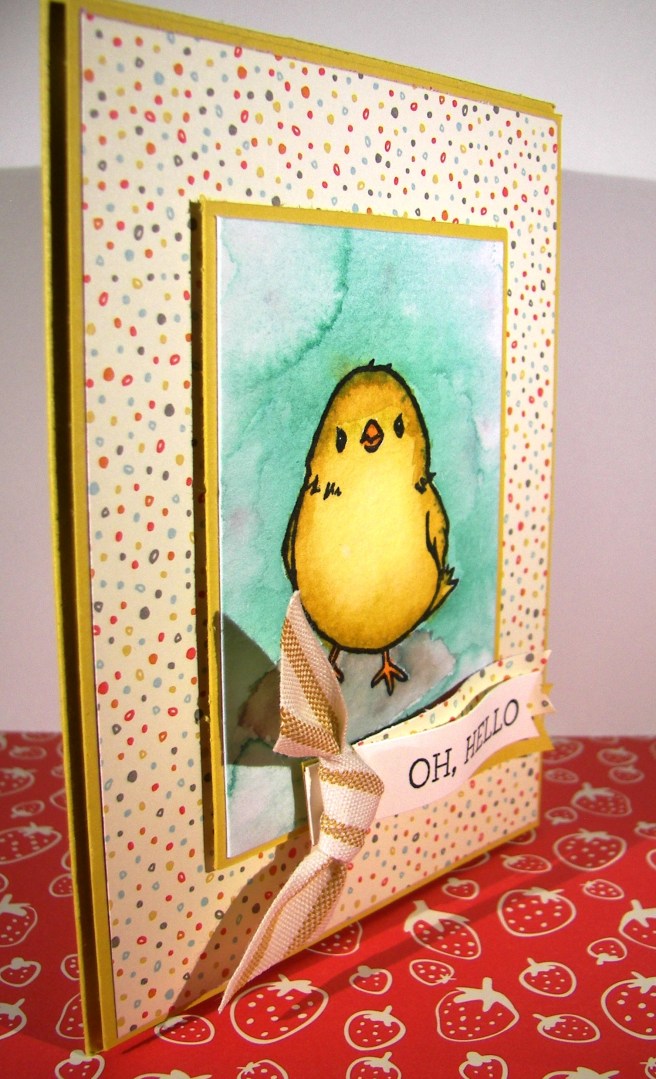
I admit it, I love giving gifts of thank you cards.  Especially when everything goes together so nicely.  This sweet friend was given a woodland themed baby shower and I knew I had just the right paper to fit the bill.  The invitations even had turtles and foxes on them.  Fun work time for me!

4-25 (2)

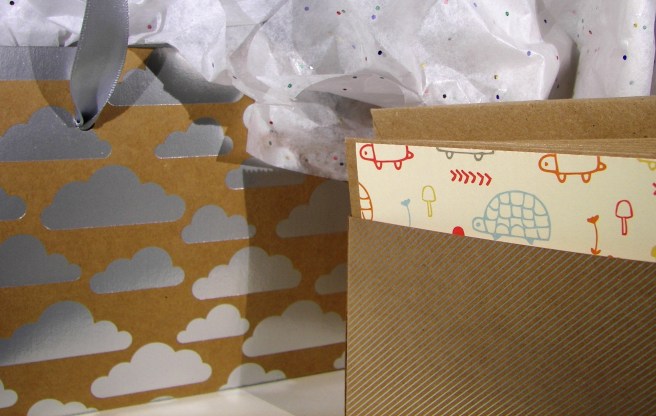
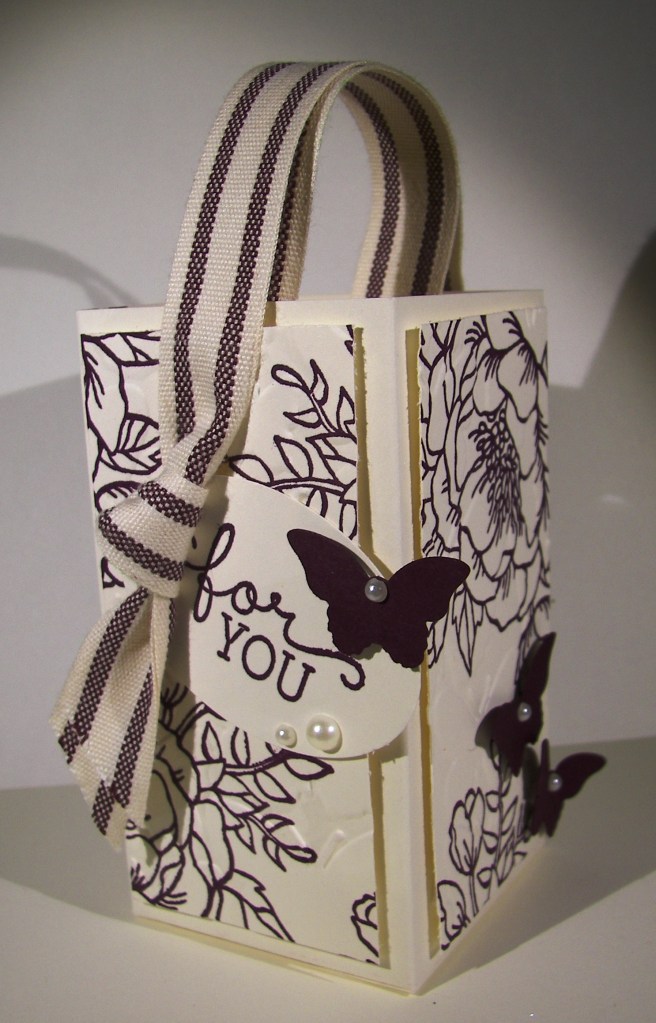
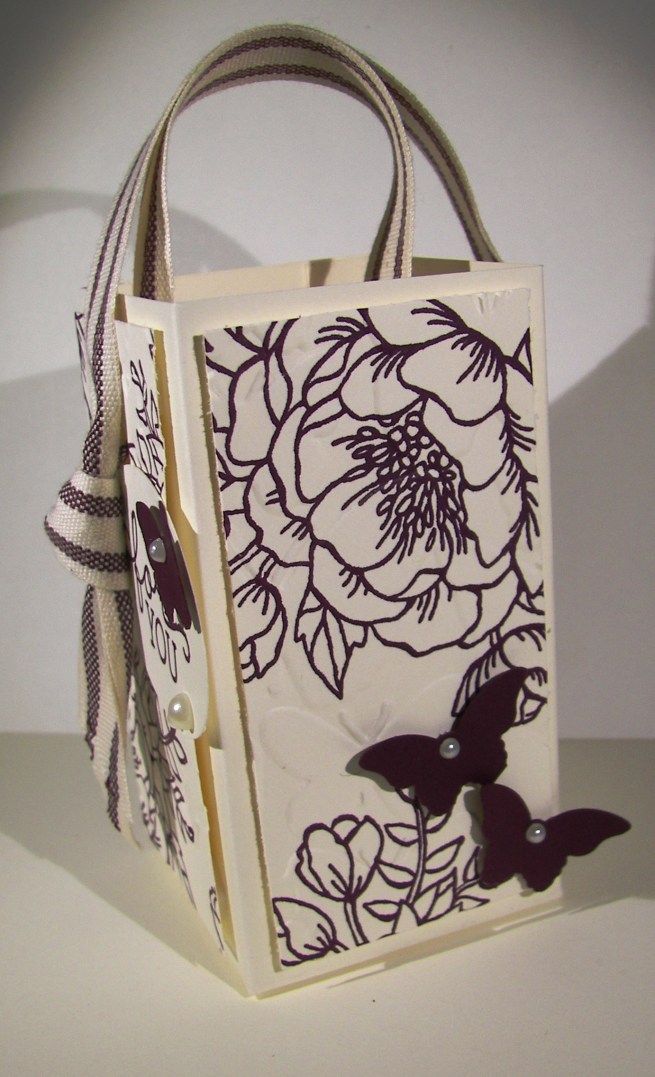
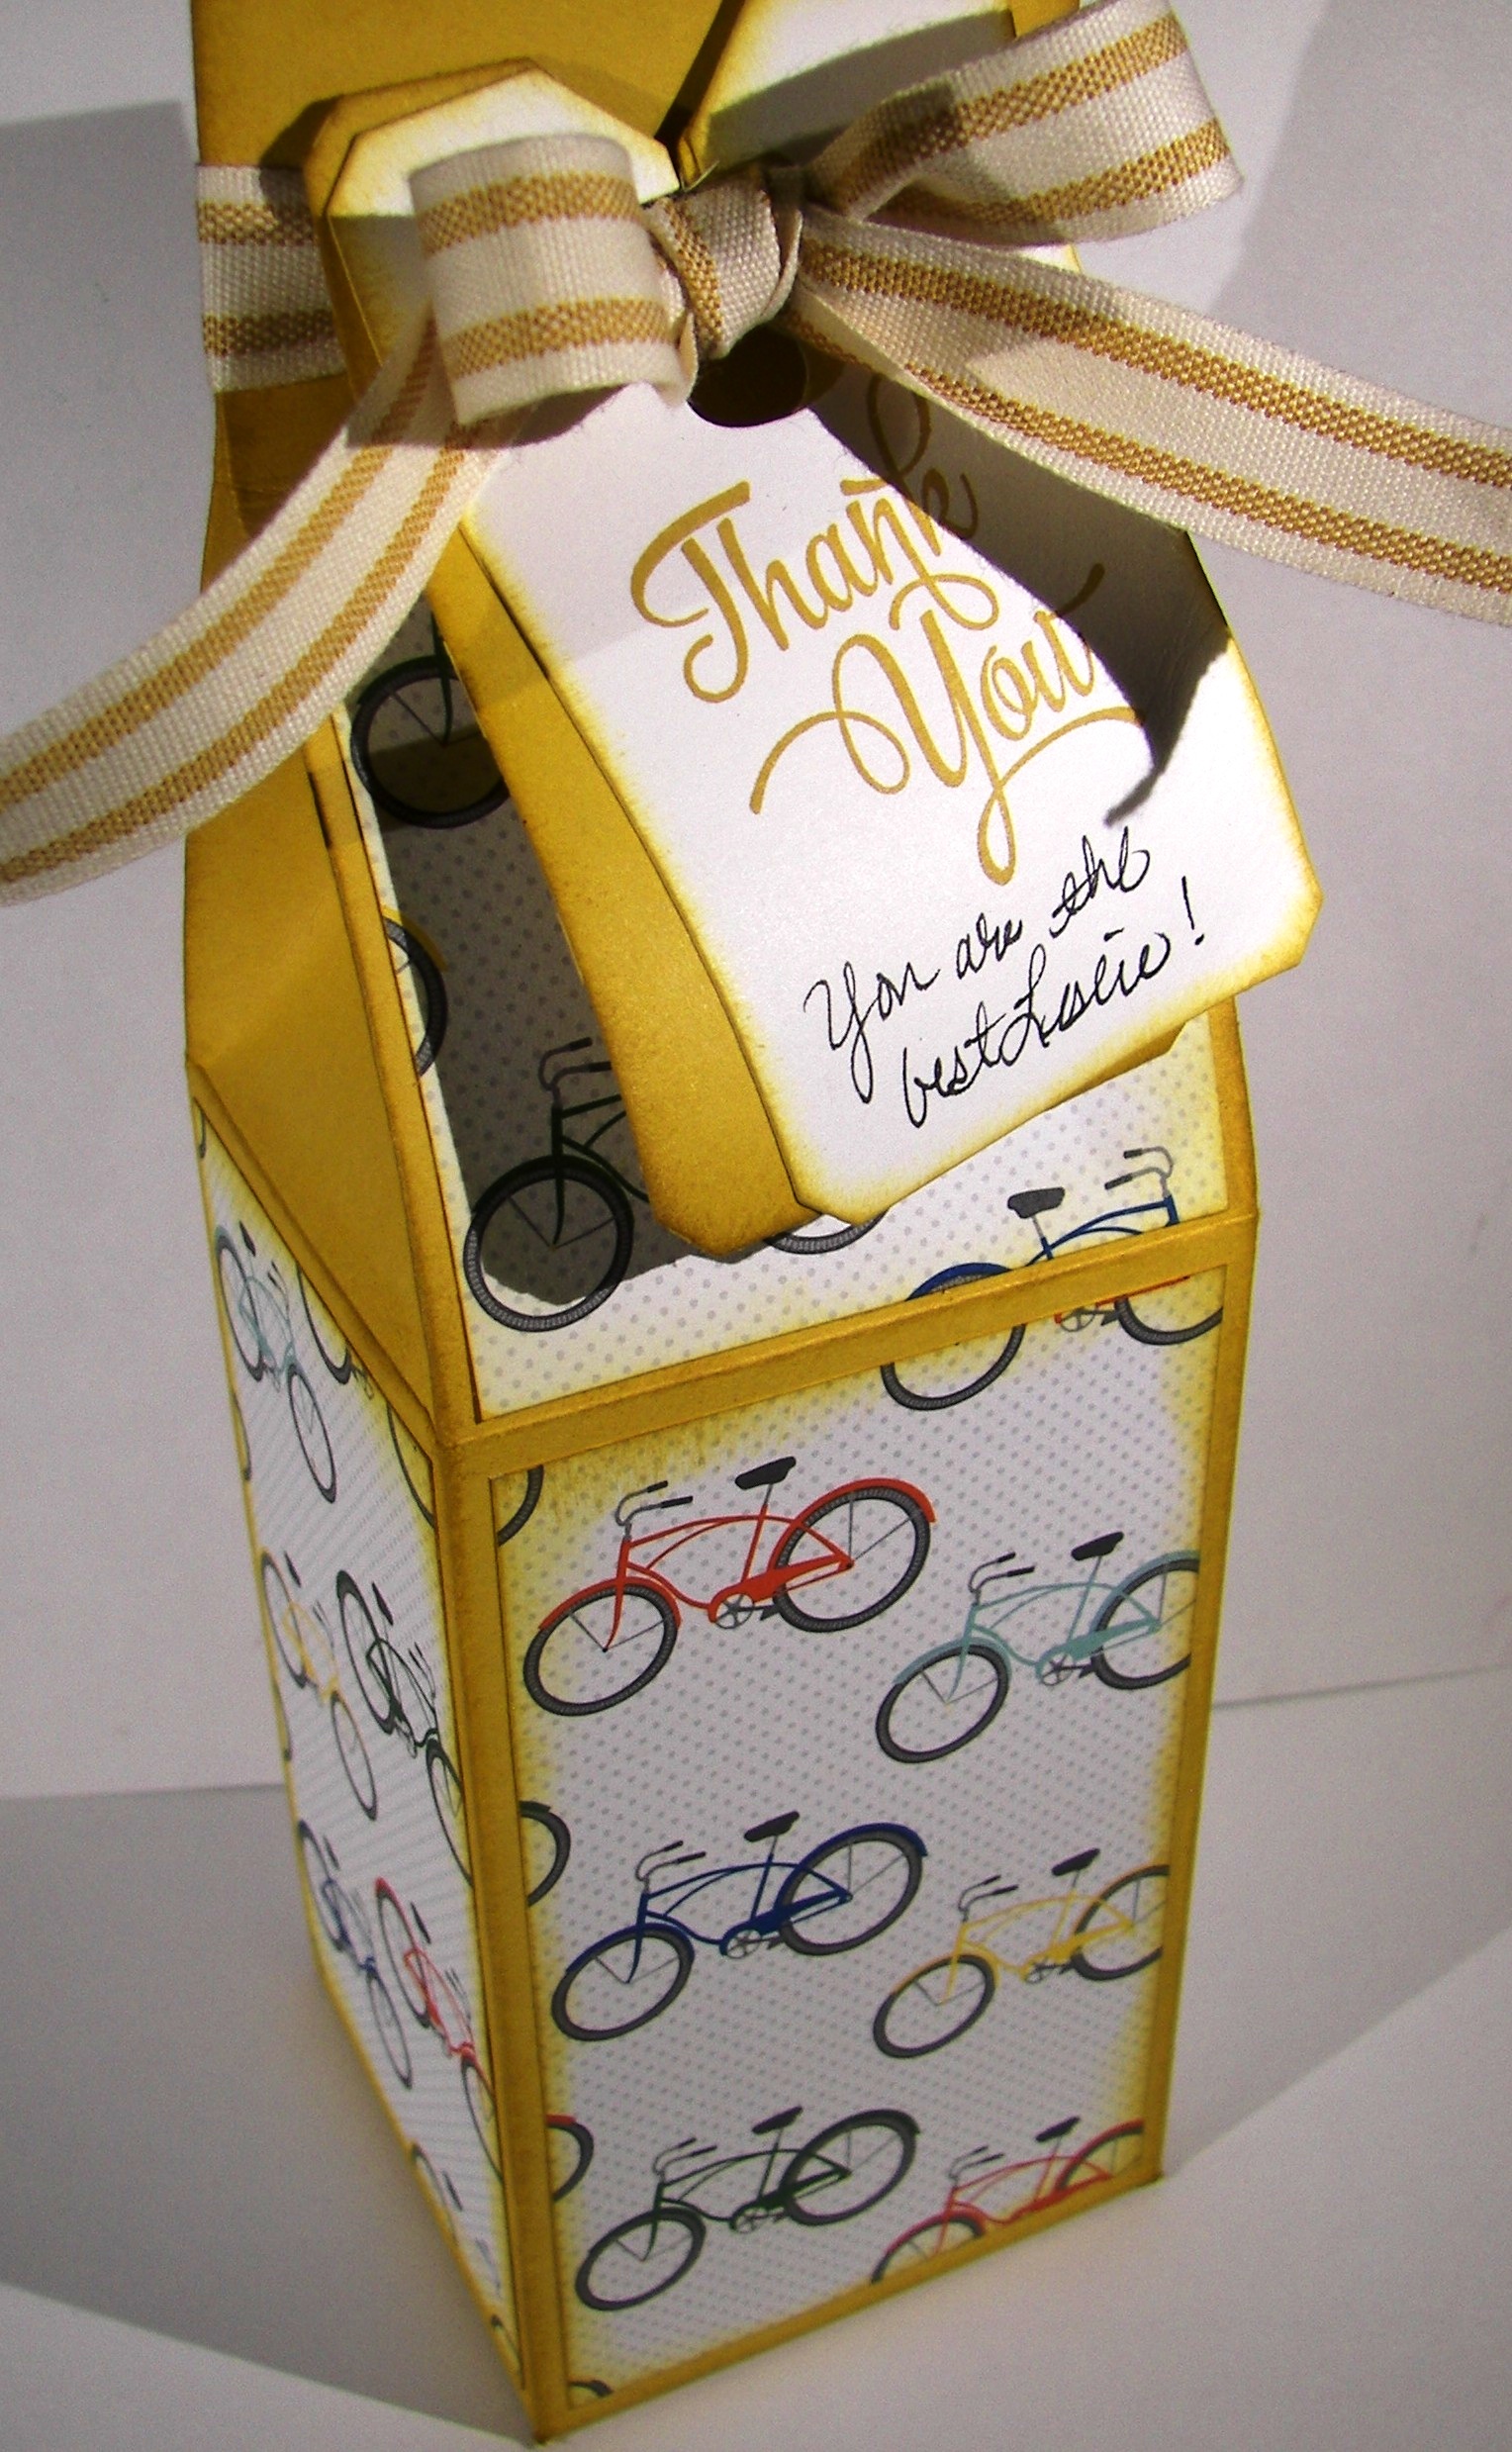
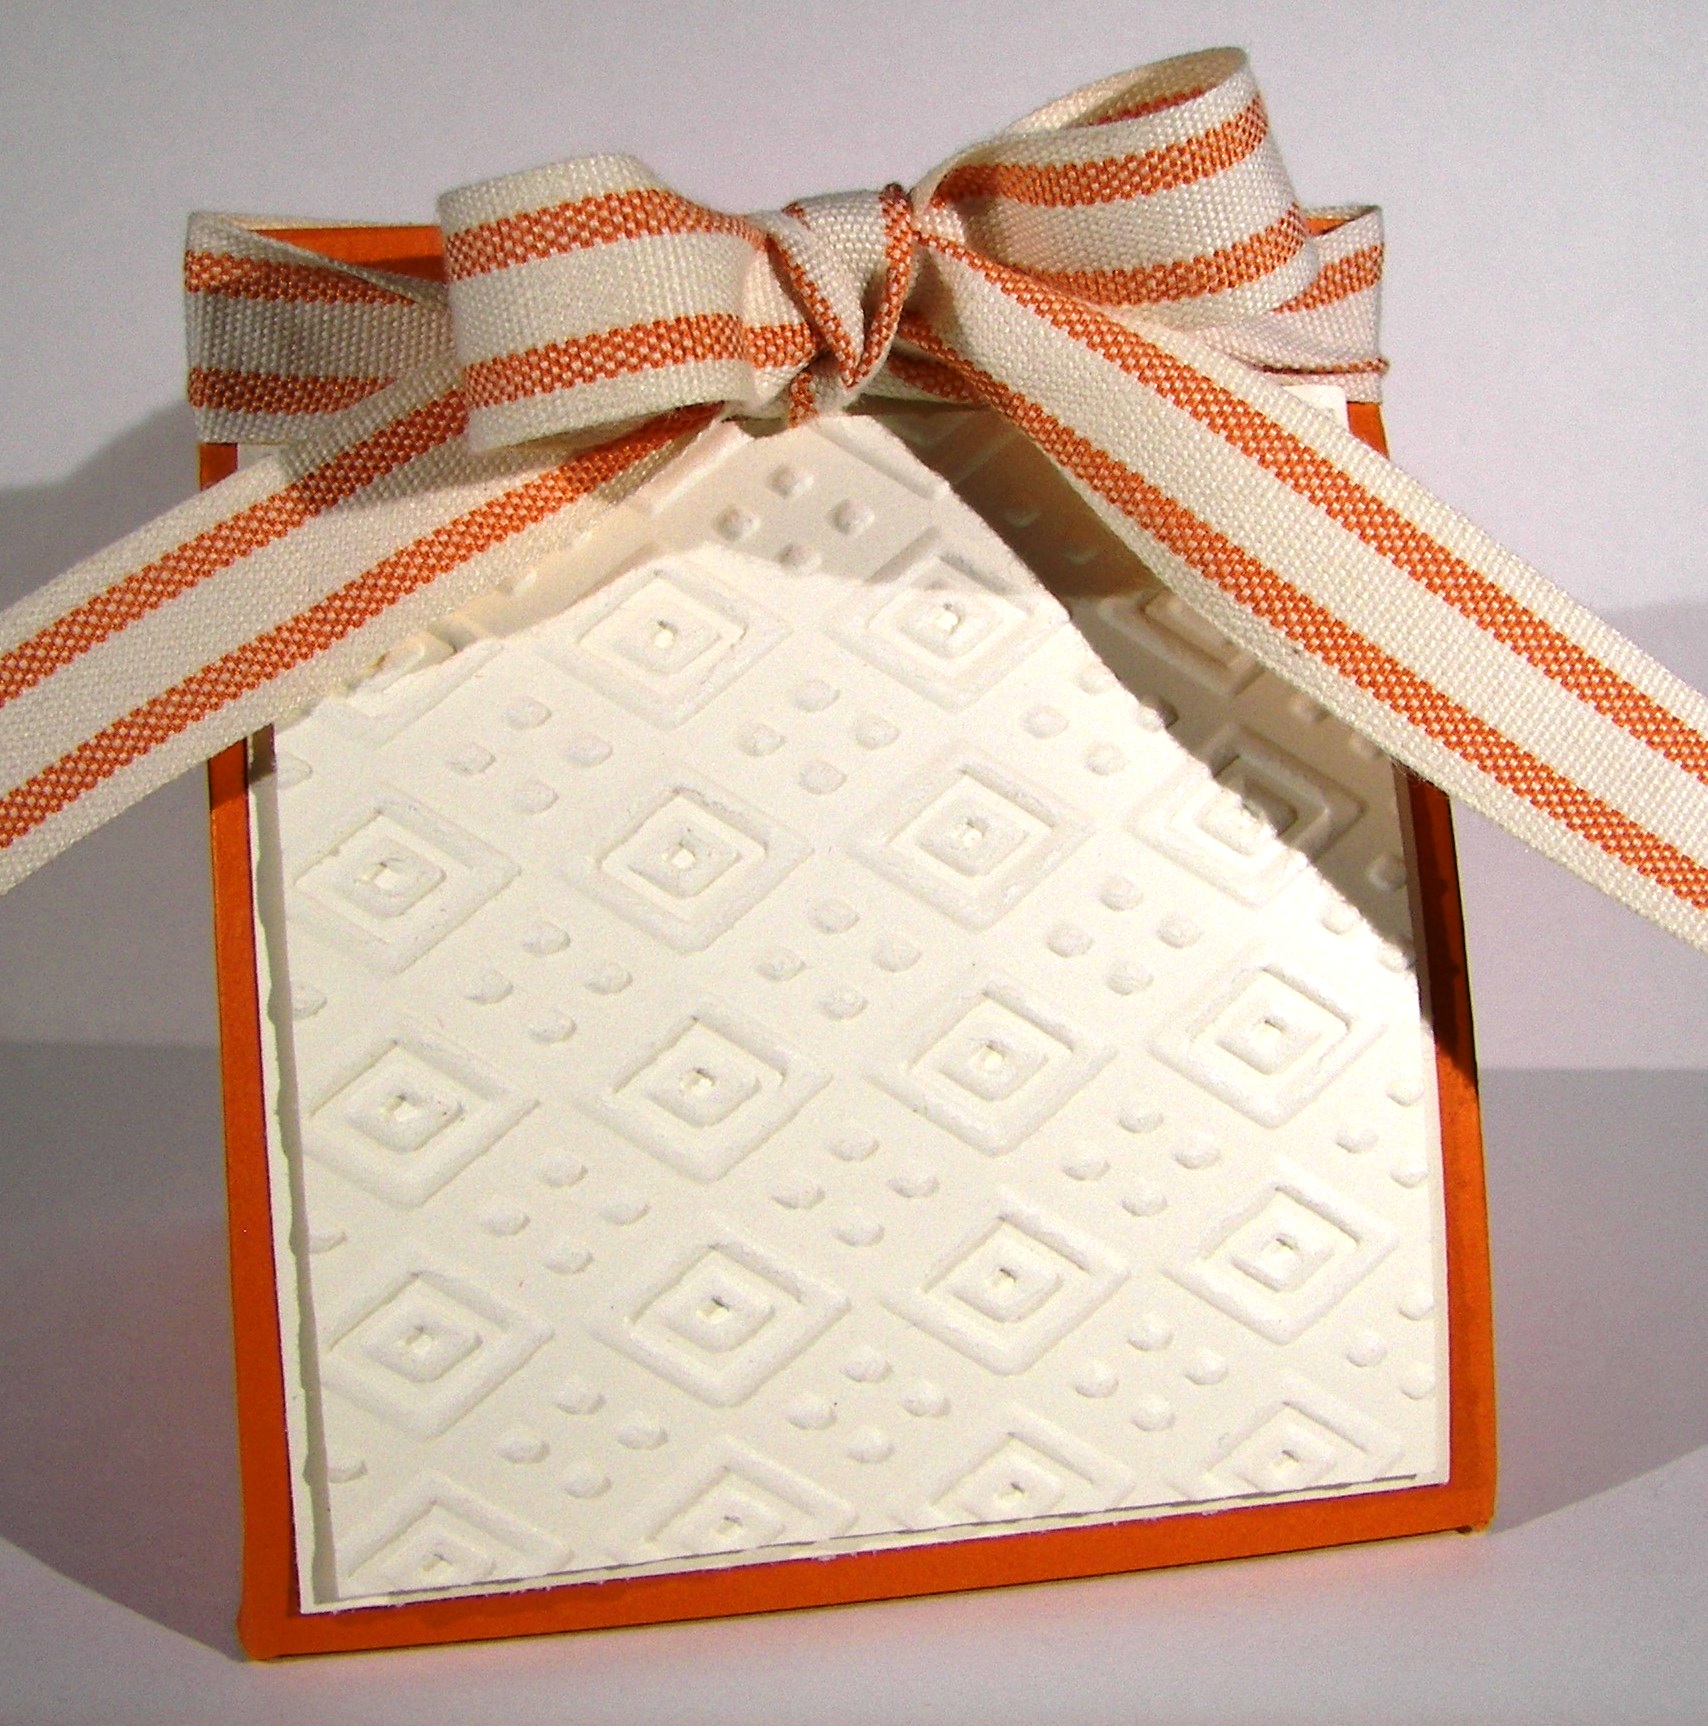
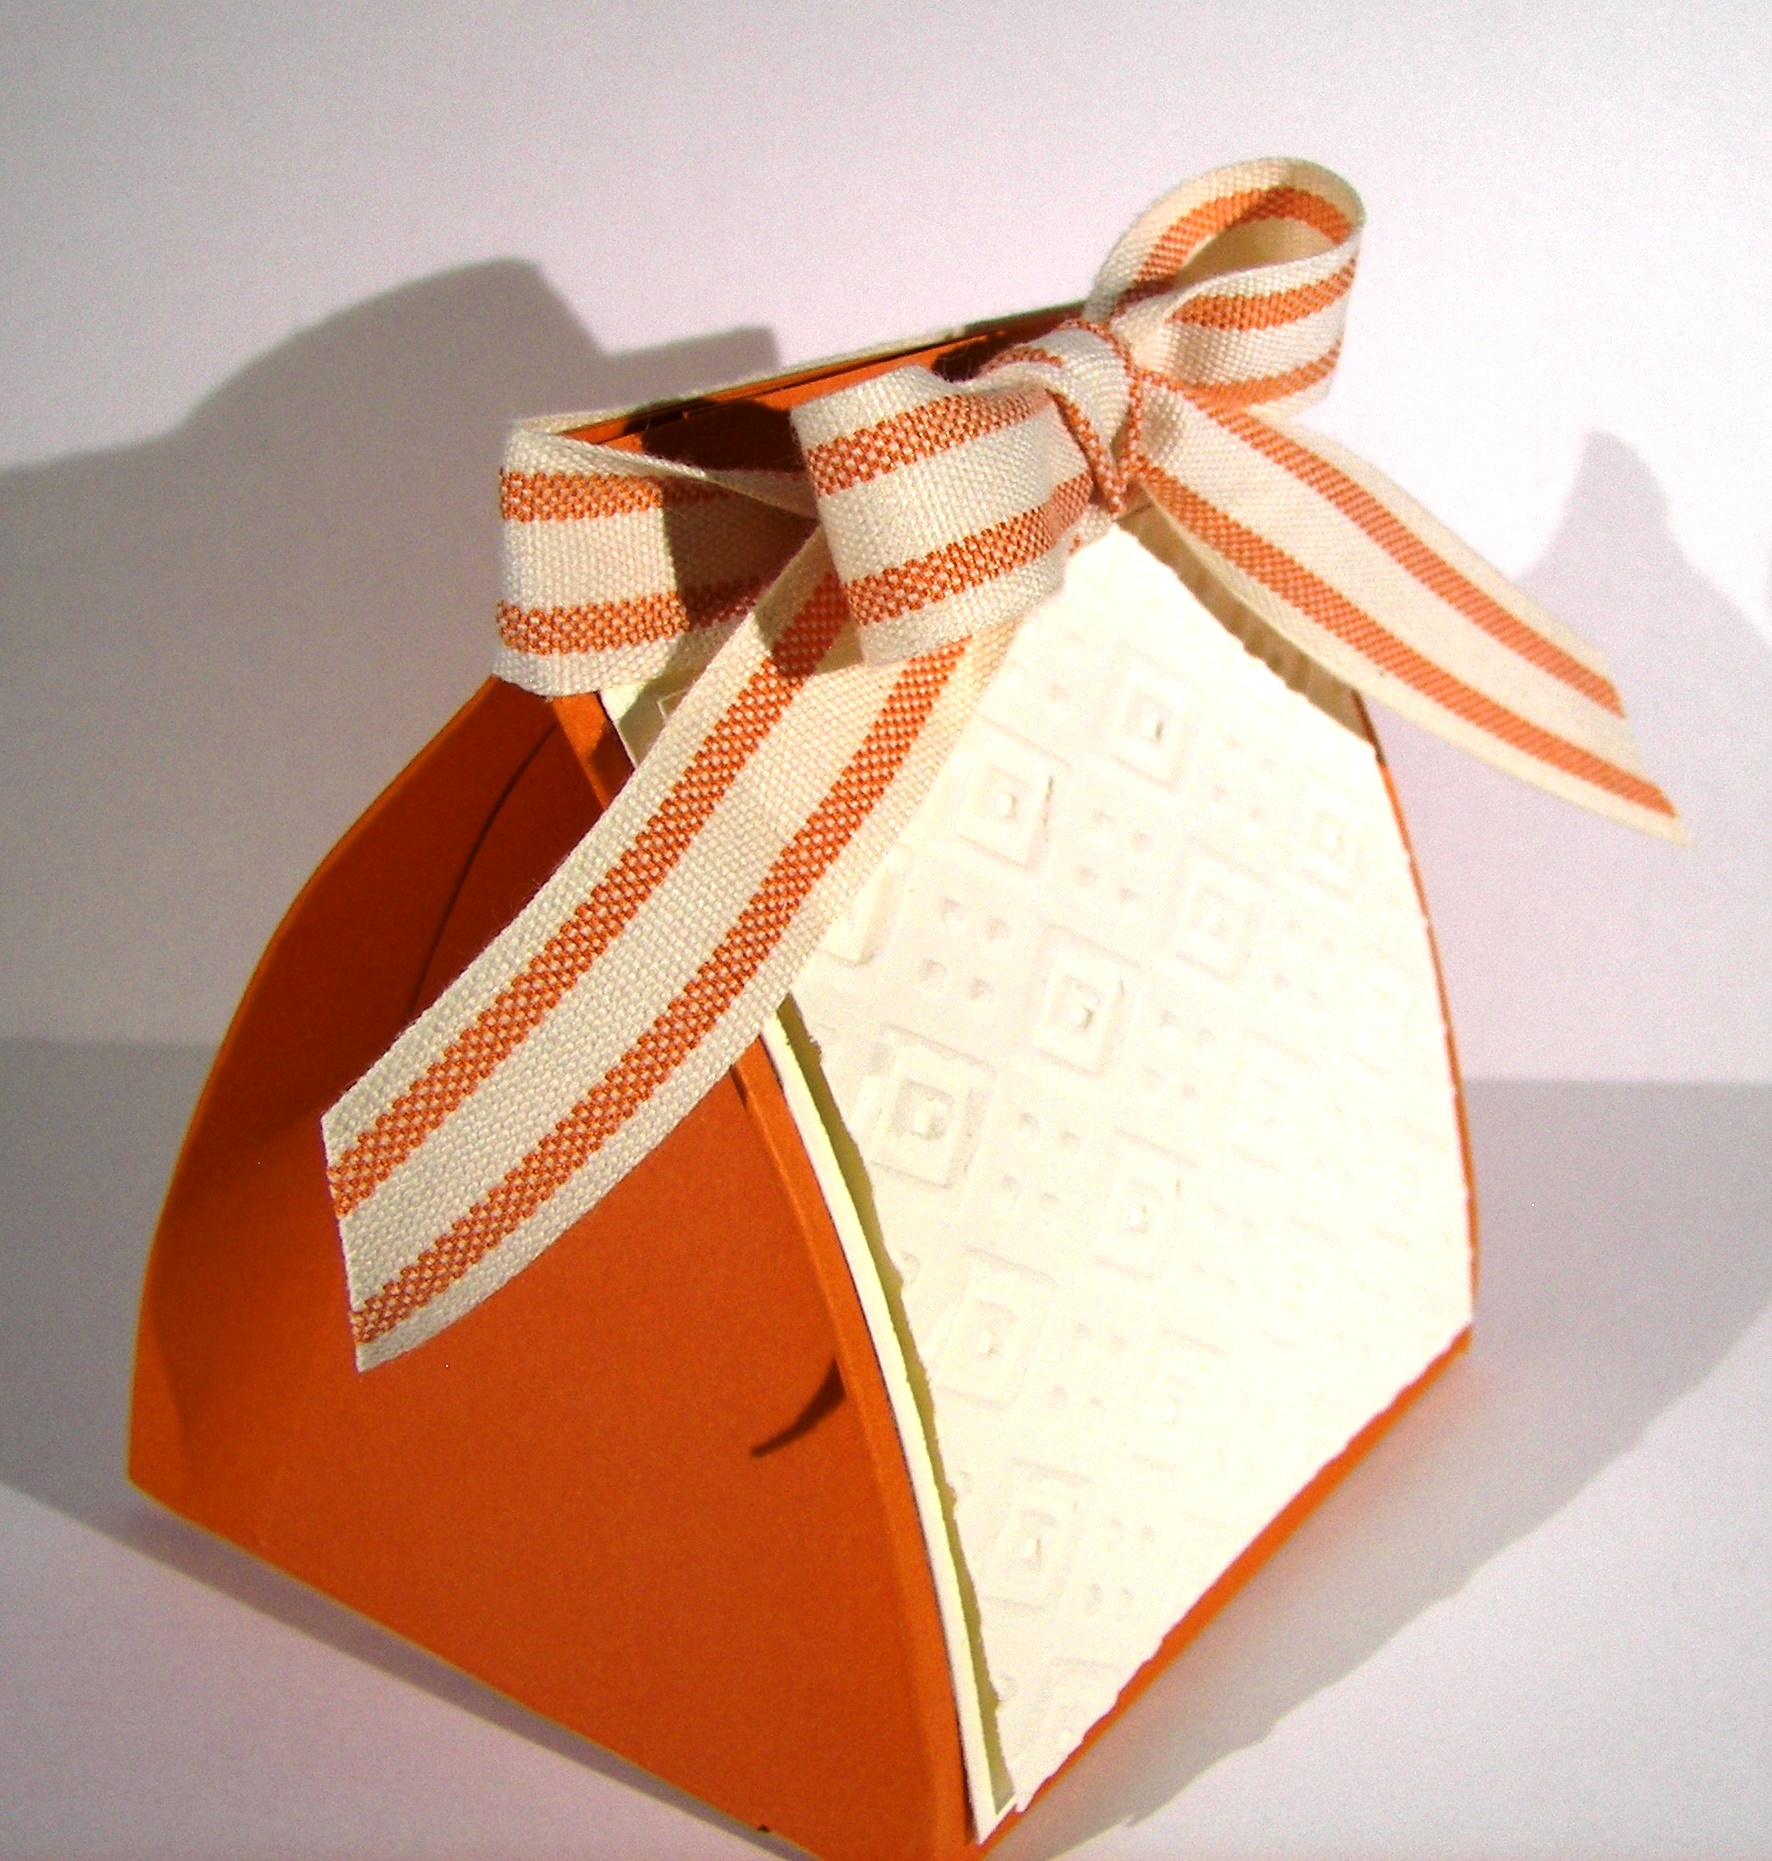
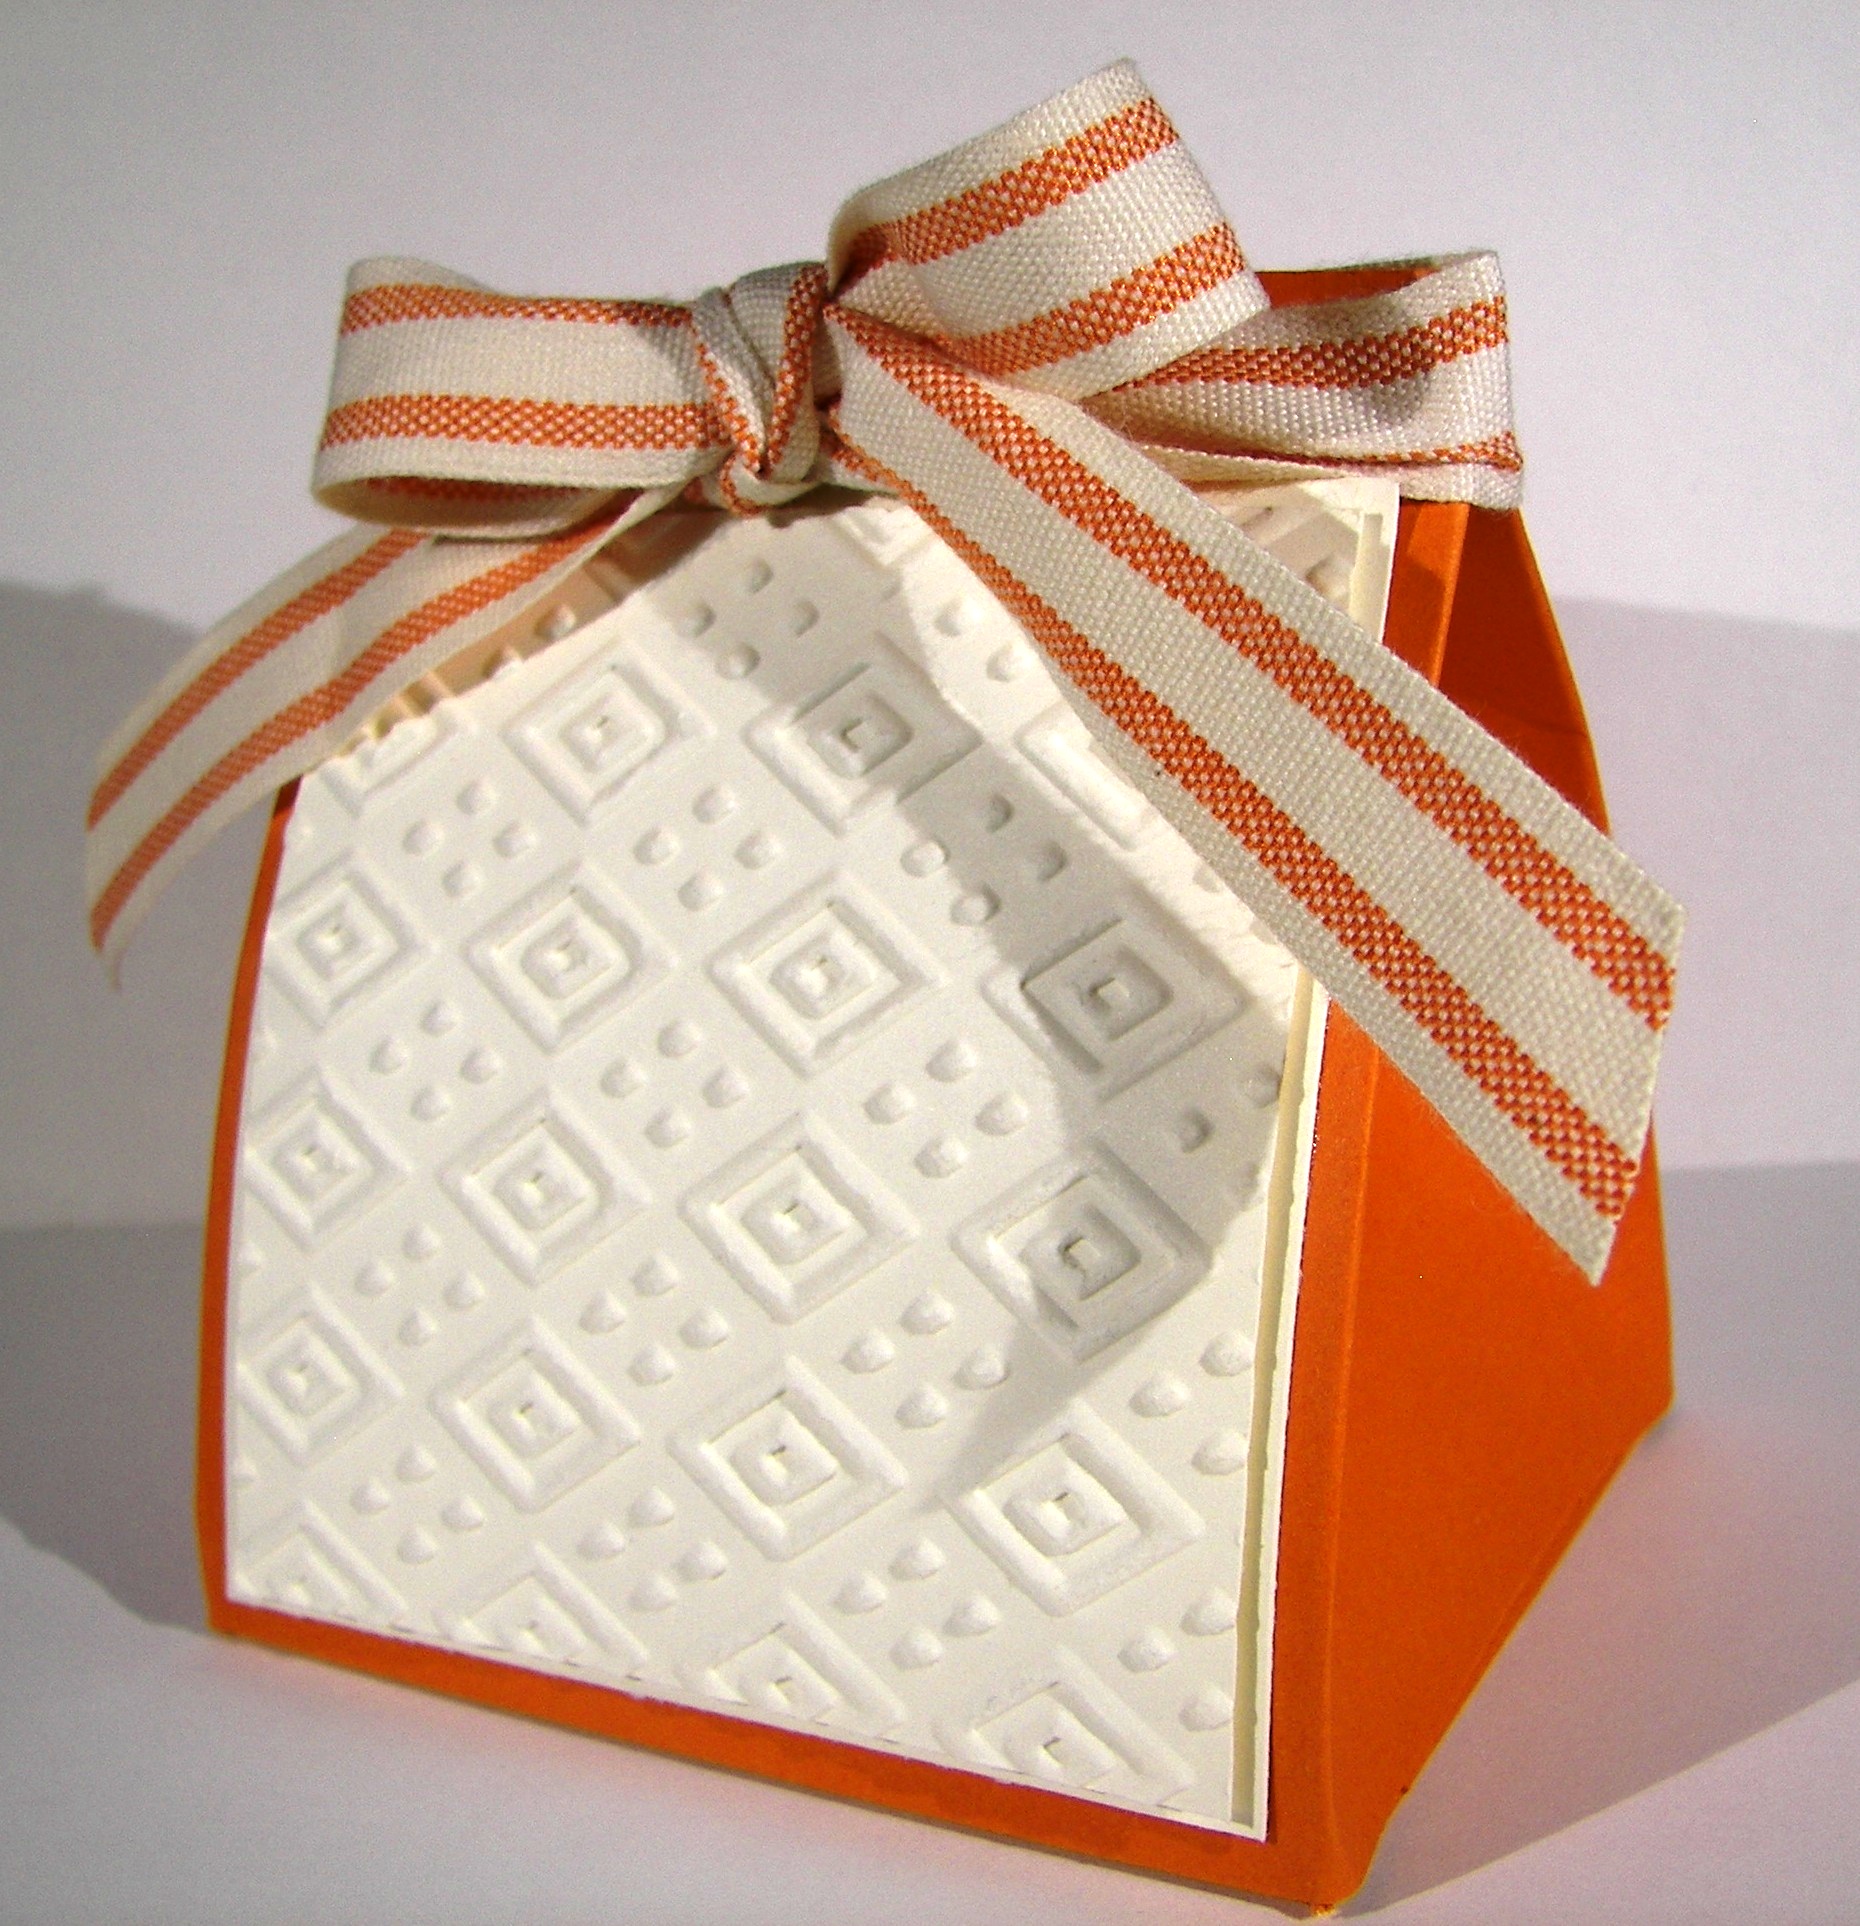
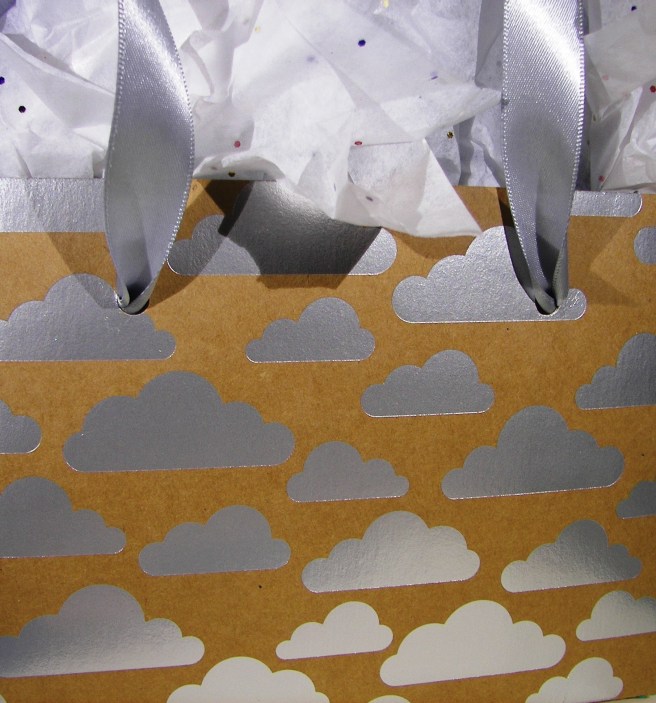
The gift box and gift bag were even fun to make.  I honestly haven’t purchased a gift bag in the longest time.  I love it.  Gifts usually aren’t that large, for the most part.  I just set the gift on my score board, measure some and go for it.  I am usually right on target, the box for the card set was a bit long, but it still worked out.  How about the foil cloud bag though, so adorable right?  I hadn’t paired the silver satin ribbon with it yet, and it looks perfect together.

4-25 (3)

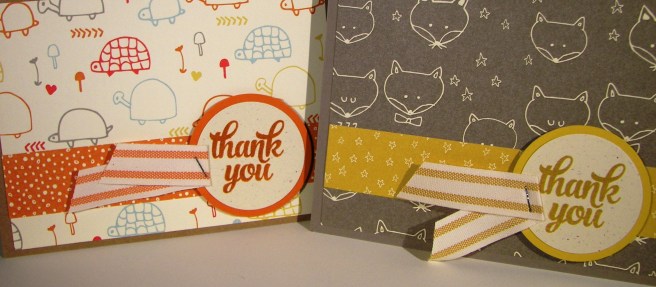
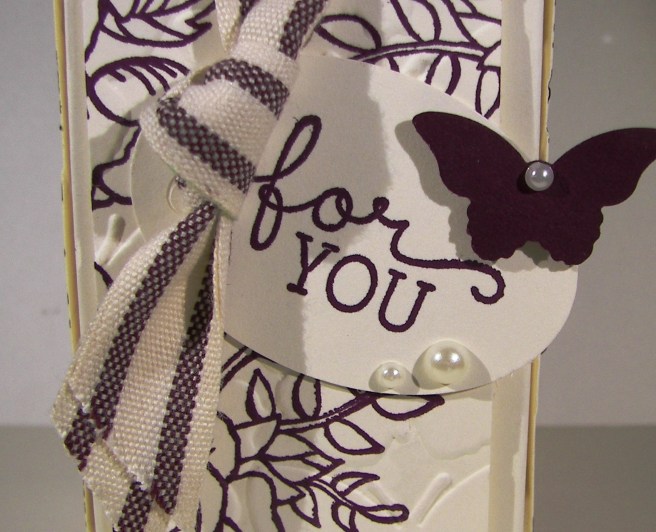
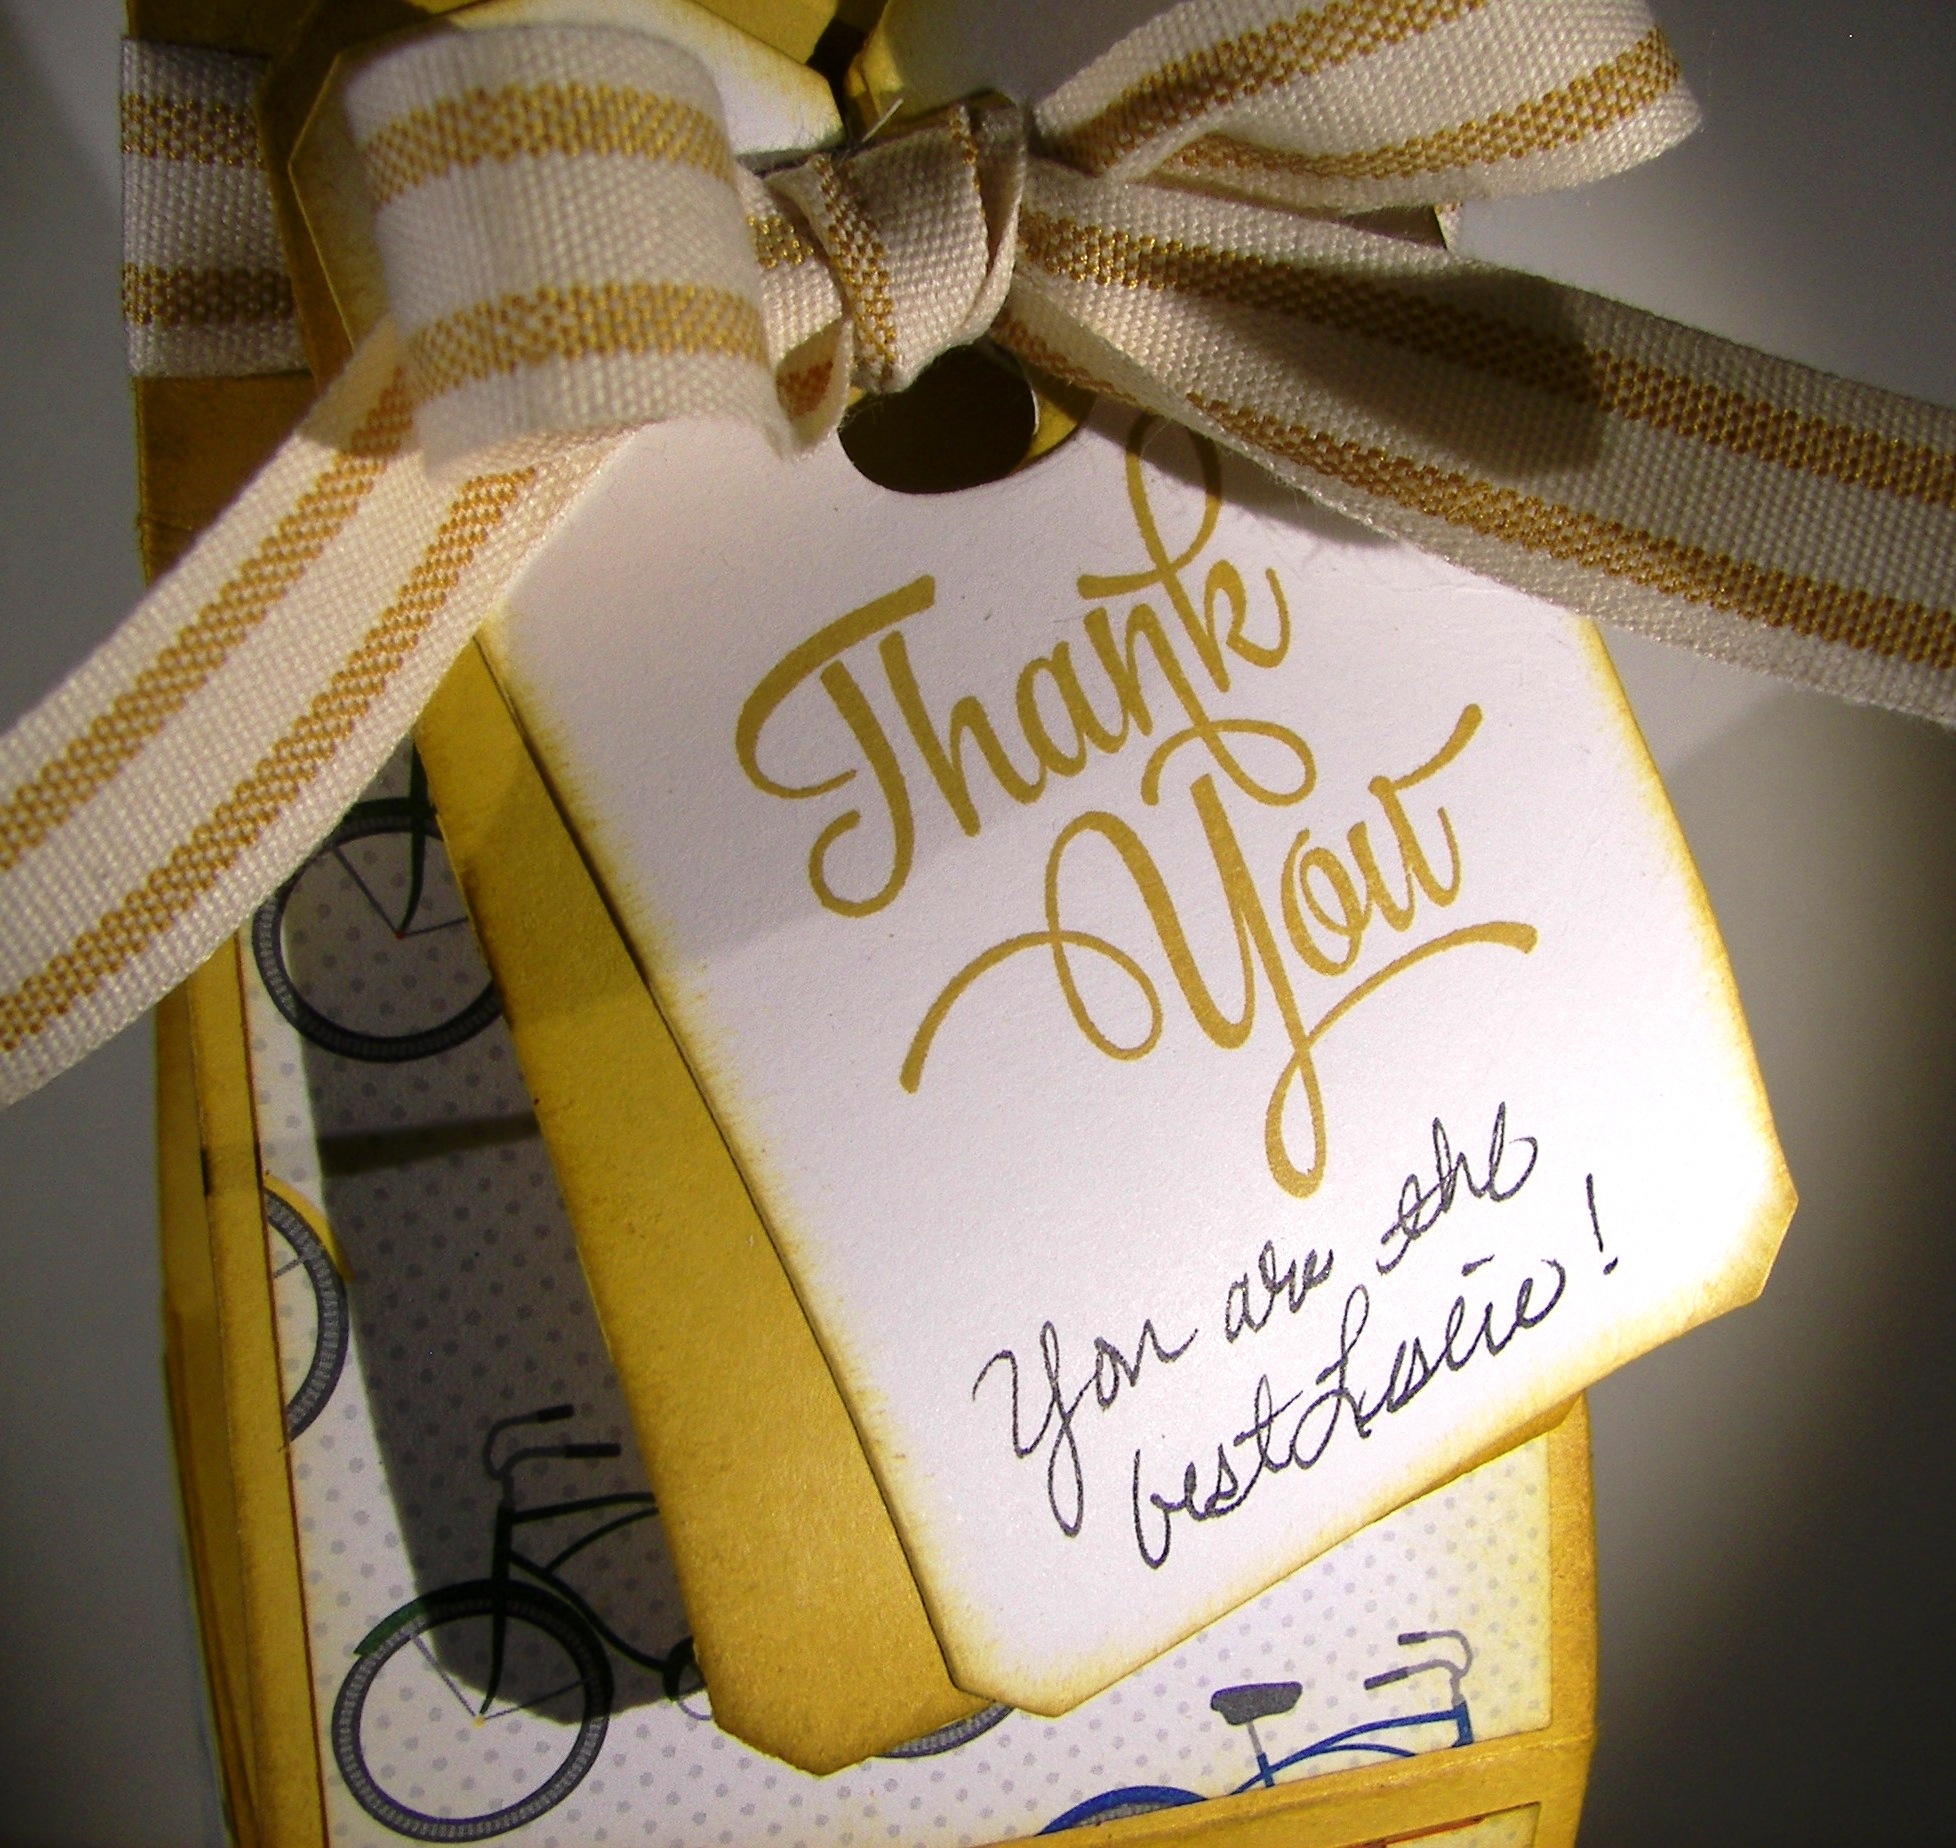
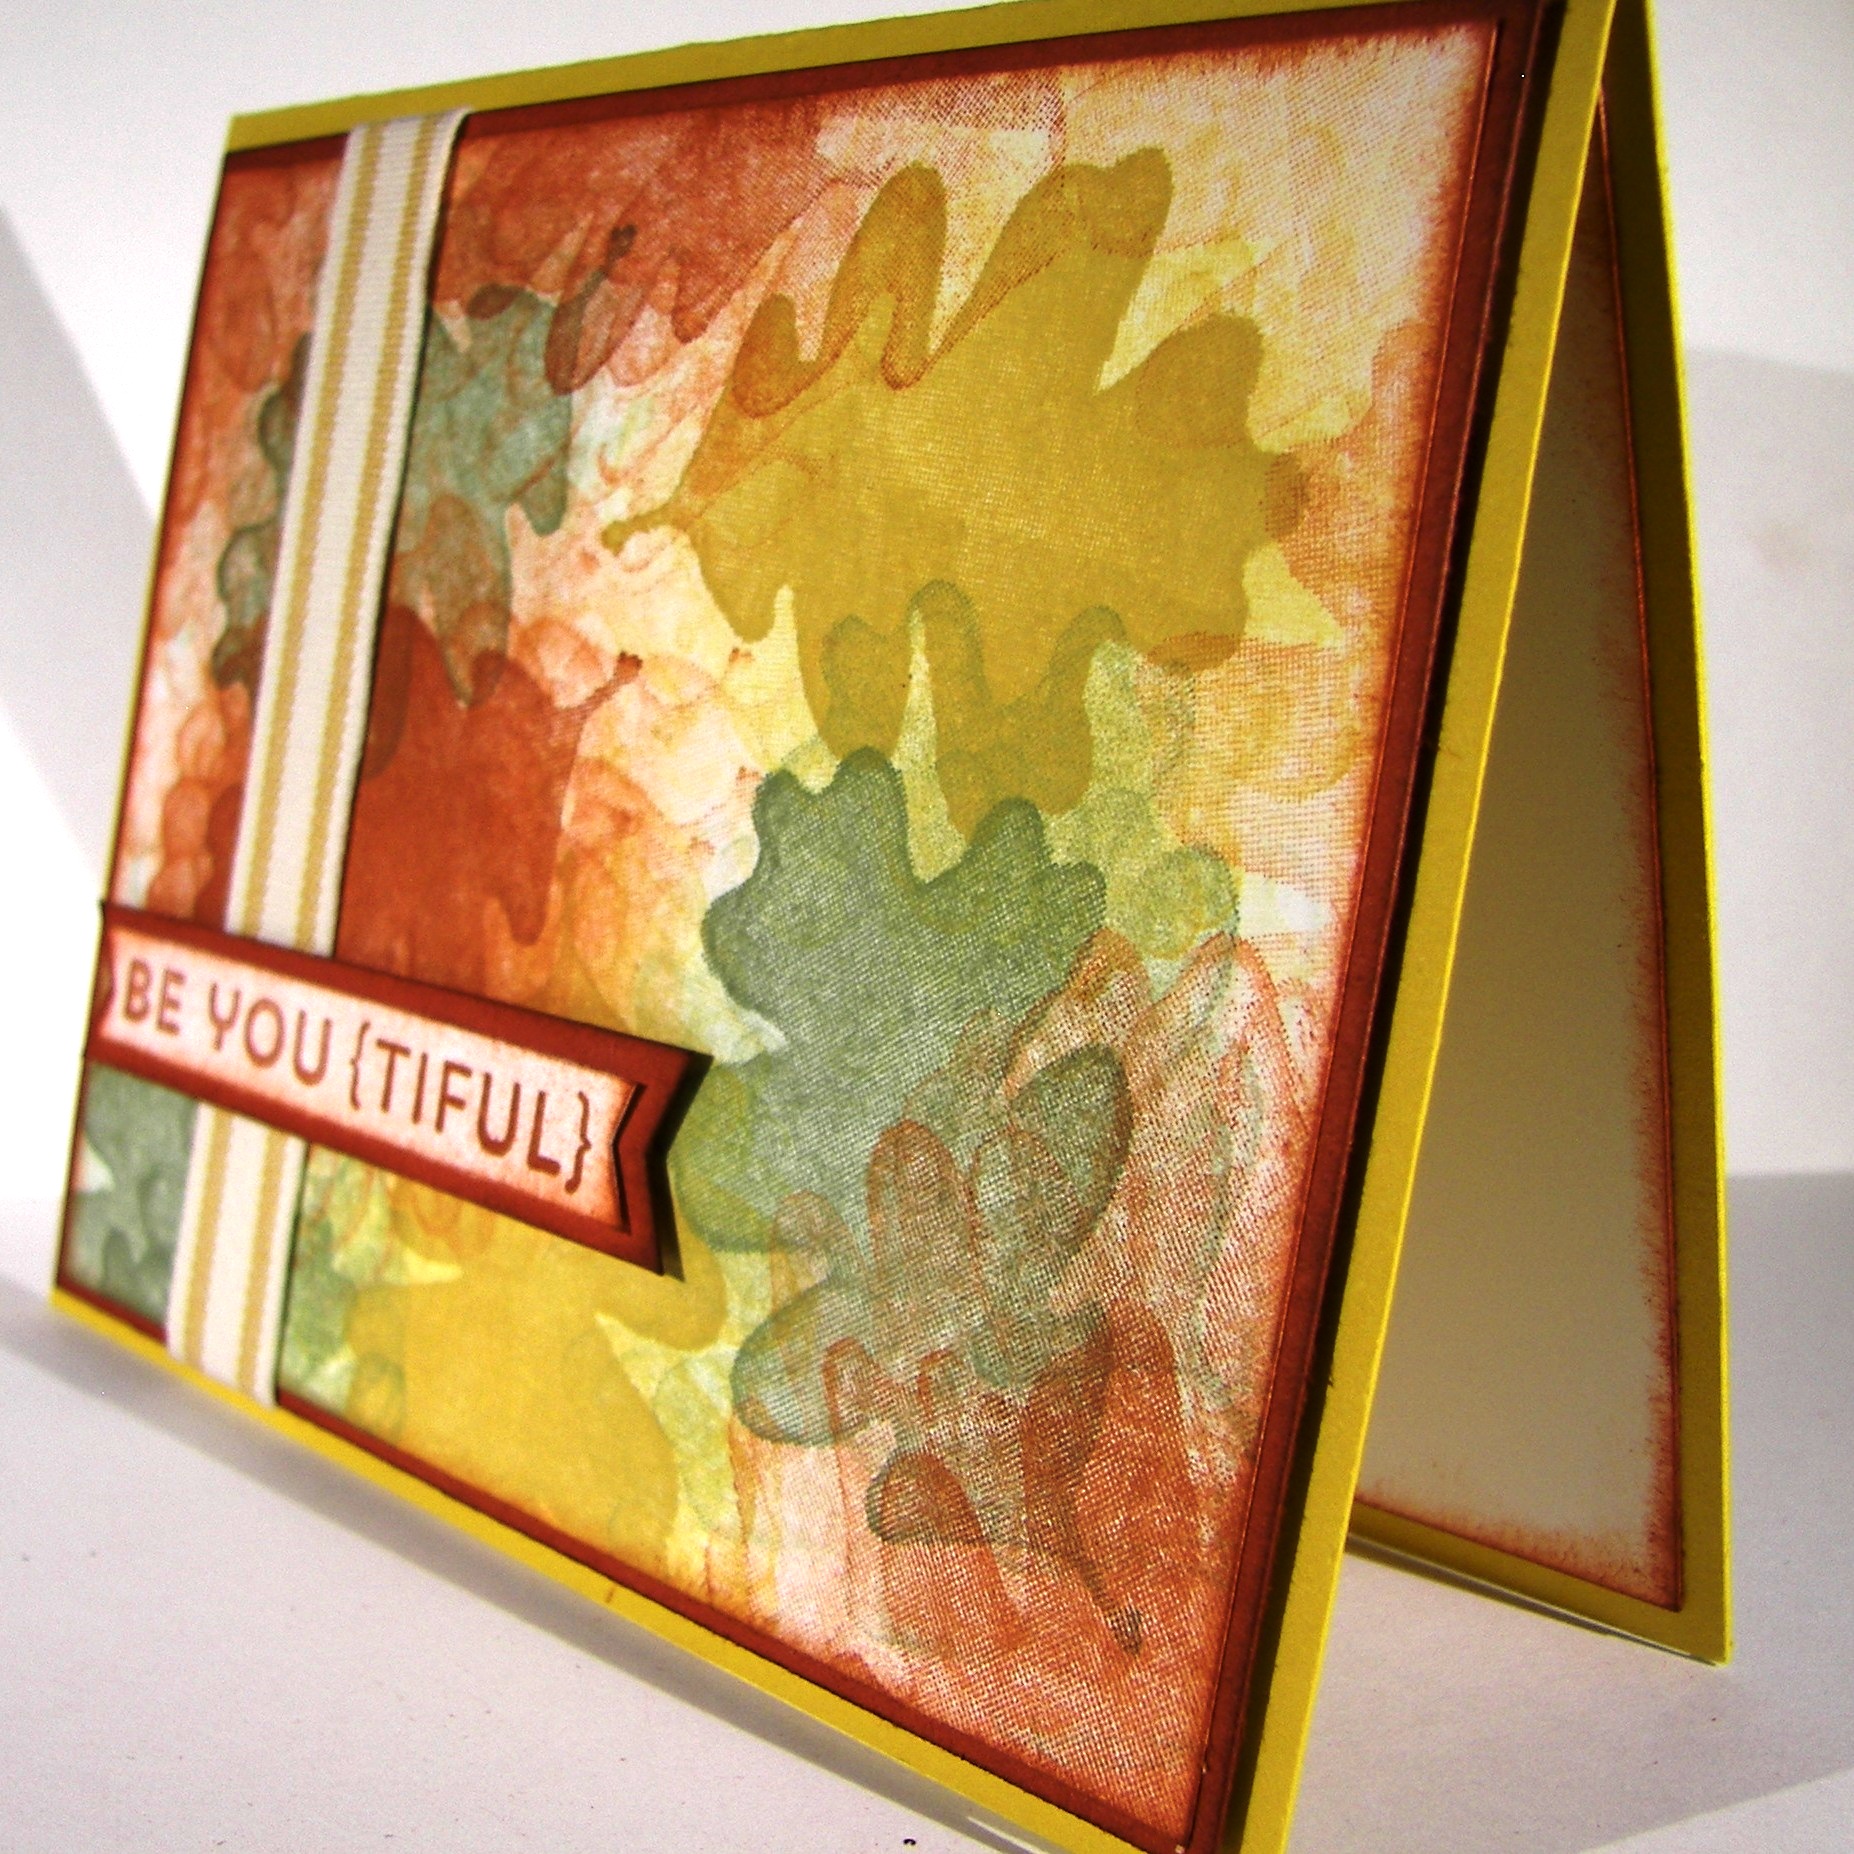
The cards were very assembly line, both sets the same.  The background paper was cut with 1/4″ borders and a contrasting, but still coordinating, strip of designer paper from the same set was placed near the bottom.  A card stock 2″ circle layered with a stamped 1 3/4″ circle on top.  I stapled matching ribbon along the side of the circles for one more tiny layer and a bit of interest.  I do think they turned out adorable.

Inside this most adorable bag are two very silly baby books.  One is called “Toot”.  And yes, it is all about passing gas.  Just too funny to not share.  Both books were 7″ wide and 1″ thick, so that was easy enough to measure.  I scored at 2″ along each side and made the bottom scoring at 5″ and 7″.  This gave me a bag that measured 7 x 5 x 2 and worked out great!

All in all the set came together really fast.  From basic design concept, product choice and complete assembly it took about three hours.  Two gift bags and 24 cards, not too bad if I do say so myself.  I couldn’t attend the shower myself since I was teaching my card workshop, but one of my club ladies was also going and she took it with her.  It worked out great.

4-25 (1)

Have a creative day!

Moana

Tap Tap Tap into Retirement

Well, it has begun.  The retirement list has been published and I can start getting sad over some of my favorites.  This has been one of them.  I love the images, but really love the little tap tap tap tap stamp.  It is so adorable.  Some stamp sets I just keep because they make me smile, and I love to smile almost as much as making someone else smile.

4-20

This project was created with a few techniques.  I stamped my little typewriter  in cajun craze first, then did a bunch of stamping all around the base image with almost artichoke first and then moved on to delightful dijon.

When that was done I got out my sponge and went at the edges.  I aged the entire background by swirling around and around focusing on the edges to make them darker.  I added a little extra sponging around the edge to really darken it up.  I did the same on the inside, but left the center light for easy writing.

4-20 (2)

I stamped my front piece with cajun craze and then sponged in three different areas to keep the colors blended, but still very separate.  I fussy cut it, layered it to some more card stock, sponged that too and put it up on dimensionals.  I did a single wrap of striped cotton ribbon sticking it down with glue dots on the front and back.  The background piece was placed on another sheet of card stock with a tiny border and then layered it up again on even more dimensionals.  Love those guys, they make me so happy.

I don’t normally show the entire inside of a card, but it turned out so awesome that I had to. I thought it was nice enough it could be a card front all by itself.  Not today, but I gave an extra peek just for fun.

4-20 (1)

Have a creative day!

Moana

Birthday Blooms with Blackberry Bliss

And a happy good morning to everyone!  I do love a Friday that is full of promise and enthusiasm.  The only problem is that I usually have my goals too high and get frustrated when I fall short.  Either way, I love Friday and the fun evening often in store.

4-15 (3)

This little thank you is so adorable, yet lovely.  I used a half sheet of very vanilla for the box, scoring at 2″, 4″, 6″, and 8″.  Then turning one quarter turn, portrait now, to score at 2″ for the bottom.  I used a companion piece of very vanilla for the stamped and embossed layers. The piece is cut first at 3 1/2″ so the stamping could be done.  I just used the large floral image to create a pattern.  Then the second cuts came at 1 3/4″ each, needing four of these all together.

4-15 (1)

Before they were attached I embossed them with the fluttering embossing folder.  Such a nice result.  I layered them up with dimensionals and thought about leaving it just the way it was, but continued on with the plan.

I made the tag from the scrap left over from stamping and punched it with the extra-large oval punch.  A added a ribbon handle and attached the tag to the under side of the ribbon tail.  A few butterflies later and a smidge of pearls and I was ready to add my treats.  So much fun, just so much fun.  Now to deliver!

4-15 (2)

Have a creative day!

Moana

Sweet Li’l Things

I haven’t visited my little chickie for a while now and loved saying hello again.  This stamp just says adorable like crazy.  I normally wouldn’t get a stamp set for just one image, but this one was just too perfect to pass up.  Of course it helped that it was a free gift with purchase, so there you go!

2-24

I used the Sweet Li’l Things DSP for the background.  That is how I created the pallet for my water coloring today.  I was a bit distracted chatting on the phone with my daughter while painting, so I didn’t dry as often as I should have, but I decided I could live with the little edge goofs here and there.  Besides, I wasn’t going for a blue ribbon, just a smile or two.

The strawberry patterned paper underneath the card is the other side of the designer paper I used for the background.  I think I will turn that into a matching gift bag when I decide to use the card.  Might not be too soon because I want my lil’ chickie to be on my desk for a while.  I made a tiny triple banner set for the greeting and used the bitty banner punch for the edges.  So easy to make the edges just right.  The paper strips are 1/2″, so they fit right inside the punch.  I twisted them the way I wanted them and gave them a quick staple.  Then I used my bone folder to give them a bit of a curl then added a ribbon knot to finish it off.

Everyone is layered in 1/8″ borders and set up on dimensionals.  This one would definitely require extra postage going through the mail.  But since I plan on using this as a gift set, I didn’t worry one bit about how thick it got.

2-24 (1)

Have a creative day!

Moana

Hello Little Sunshine

It is so wonderful to have stamp sets that speak to you.  I literally would say this phrase over and over to my children when they were little.  Now that they are much older, it still manages to sneak in for a tender moment or two.

Hello Little Sunshine

When I started making the background for the card by just stamping off as I went along, I knew I needed to make a coordinating gift bag.  That little sunshine stamp is so adorable.  I could see myself sneaking it in lots of places.  And to top it off, the Hello stamp set is a free one during Sale-a-bration!  Free is nice, but free and adorable is not a common thing.

Hello Little Sunshine

A tall slender gift bag was in order today.  I was feeling like a different gift option, but of course I could totally see a big yummy candy bar going inside.  How about a fat quarter of fabric instead?  Yes, my quilting friends would totally agree with that one.  Maybe I could find some sunshine paper too?  Or stamp some to match?  A project and a gift, sounds great!

Hello Little Sunshine

Have a creative day!

Moana

Schoolhouse Thank You Gift

People do kind things all of the time and never ask for anything in return.  I am fortunate enough to have people like that in my life.  A school secretary is definitely a wonderful person.  They do more than most people imagine.

Schoolhouse Thank You Gift

As it happens, I have been helped along once again.  So, I wanted to thank her, again.  This lovely box was made to look as school like as possible.  The Schoolhouse DSP had so many patterns to choose from, but I needed a vehicle of sorts, so I went with the bicycles.  I used a whole sheet of 12 x 12 card stock in Hello Honey and a good portion of the dsp to decorate it.  It is filled with large pretzel sticks that have been dipped in white chocolate. So yummy.

Schoolhouse Thank You Gift

I got into the Chalk Talk framelits for this huge tag.  I wanted to have a stamp and a spot for a tiny note.  Just right, don’t you think?  I forget about that set sometimes, but the tag options are really wonderful.  I gave them a bit of a go over with my bone folder for some added texture and clipped it around one of my favorite ribbons.  Gift done!

Schoolhouse Thank You Gift

Have a creative day!

Moana

Sweet Hauntings

I was pretty darn excited to get this stamp set and even more to put it to work.  These bottles, they really make me laugh!  I normally don’t purchase Halloween sets because of the limits of use.  This one, I know I will be having fun with it all year long.

Sweet Hauntings

Picking the color pallet was the easy part, some of my favorites for sure.  I love fall and all of the colors that live there.  Creating my own patterns for background paper is one of my favorite parts.  I would love this in whole sheets.  Hmmmmm, perhaps that will be a fun activity later on.  I stamped each bottle again so they could be fussy cut and layered up.  Those fun little bottles, love them!

 Sweet Hauntings

Lots of sponging on the vanilla paper.  Early espresso gives a great vintage look, which is just what I needed.  I sponged everything, lots, even the ribbon.  It gave it  a great grungy look.  I did echo stamping on the inside as well, can’t get enough of these bottles.  Did you notice the tiny little rhinestones I put on the skull bottle stopper?  Way beyond fun!

Sweet Hauntings

Have a creative day!

Moana

Balloon Bash with a Twist

A tangelo twist that is.  I went to my color buddy yet again this morning and she said orange.  What a great team.  I don’t need much, just a nudge sometimes.

Balloon Bash with a Twist

I had made a version of this card some time ago for a workshop.  I was asked for a birthday card and the design just popped right into my head.  So I guess I cased myself, again.  Well, I do tend to like my designs most of the time, so why not!

Balloon Bash with a Twist

It is a pretty direct layout today.  Everything is done in 1/4″ increments, nothing too tricky.  Dimensionals are definitely put to work, and I gave myself permission to sponge everything.  So liberating.  There is a lot going on, but it is also simple and easy to mail.  Gotta love that!

Balloon Bash with a Twist

Have a creative day!

Moana

Floral Frenzy

After a huge workshop I usually just take a break from my desk, but yesterday was different.  I got back home and found myself drawn into a project that was clean and full of floral punches.  No stamping at all.

Floral Frenzy

I think I just needed to make something in a calm setting away from the frenzy.  It can get a bit wild with too many people, especially with new stampers.  I think it is time to split the group.  We will have to see. 

Floral Frenzy

There isn’t even any ink here at all.  No sponging or a sentiment either.  Very clean and simple, with a ton of flowers, my favorite.  Kind of like my comfort craft.  All this card is about is punches, punches and more punches.  Five different flowers all layered about with basic pearls to finish them off.  I used the striped cotton ribbon because I wanted it to physically stand out as much as the flowers would.  Bows and flowers and now I feel better.

Floral Frenzy

Have a creative day!

Moana

For All Things and Flower Patch

While enjoying a long and lovely visit with my daughter this morning, fall came up.  It is her favorite season of the year.  She is getting excited because where she is attending university fall has begun.  The temperatures, the colors, the smells, she loves it all.  So, together we created this card.  What a fun way to stay connected.

For All Things and Flower Patch

The card is made from a Hello Honey card base, layered with a Cajun Craze framed stamped card front.  I used the leaf stamp from the For All Things set to create the paper.  One full ink stamp and then several others around it until the ink runs out.  I did this using Cajun Craze, Hello Honey and Almost Artichoke.  Such a great trio.

For All Things and Flower Patch

A quick stamp from the Flower Patch set for the sentiment and it was nearly done.  I adhered a strip of the new Striped Cotton Ribbon and layered my sentiment with a bit of color.  The Bitty Banner Punch helped me get the banner edges and it was all done.  Well, I did have to sponge nearly everything of course.

For All Things and Flower Patch

Have a creative day!

Moana

Boho Chic Gift Bag

The UPS man brought this lovely little box yesterday that had some really fun things inside.  One of which was the new striped cotton ribbon.  I held off for a bit, but went for it when they went on sale.

Boho Chic Gift Bag

I wasn’t disappointed, let me tell you.  So, I wanted to make something that really put the ribbon out front.  No stamping today, how odd.  Some embossing though, had to have something.  The boho chic embossing folder is really too cool.

Boho Chic Gift Bag

That was also a new product I wasn’t very sure about.  As you can see, the pattern is great and will be tons of fun.  I haven’t gotten the designer series paper it coordinates with, but I will soon enough.  Can’t have it all, at once that is.

Boho Chic Gift Bag


This is one whole sheet of tangelo twist and two pieces of very vanilla.  With my trusty score board by my side, I can make all kinds of fun boxes and bags.  Such a great go to tool.  Highly recommended.

Have a creative day!

Moana