My Happy Day

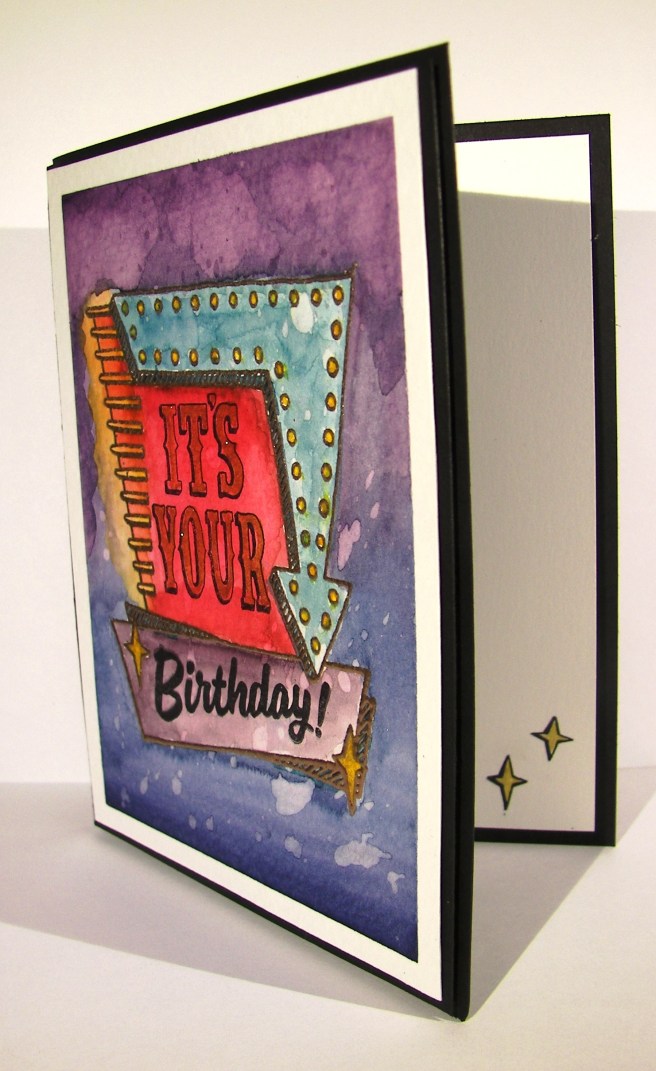
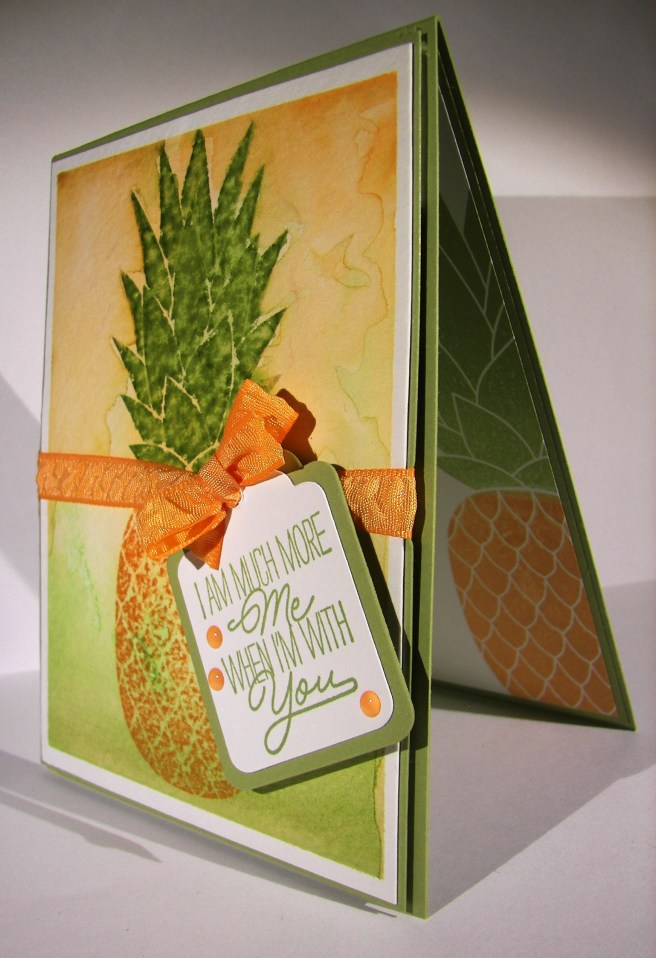
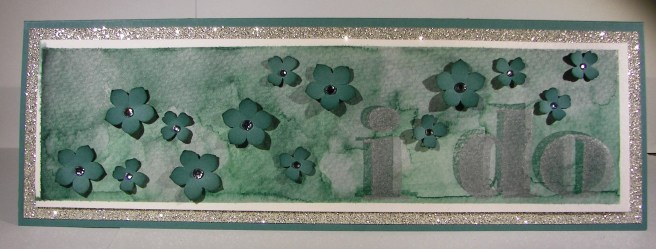
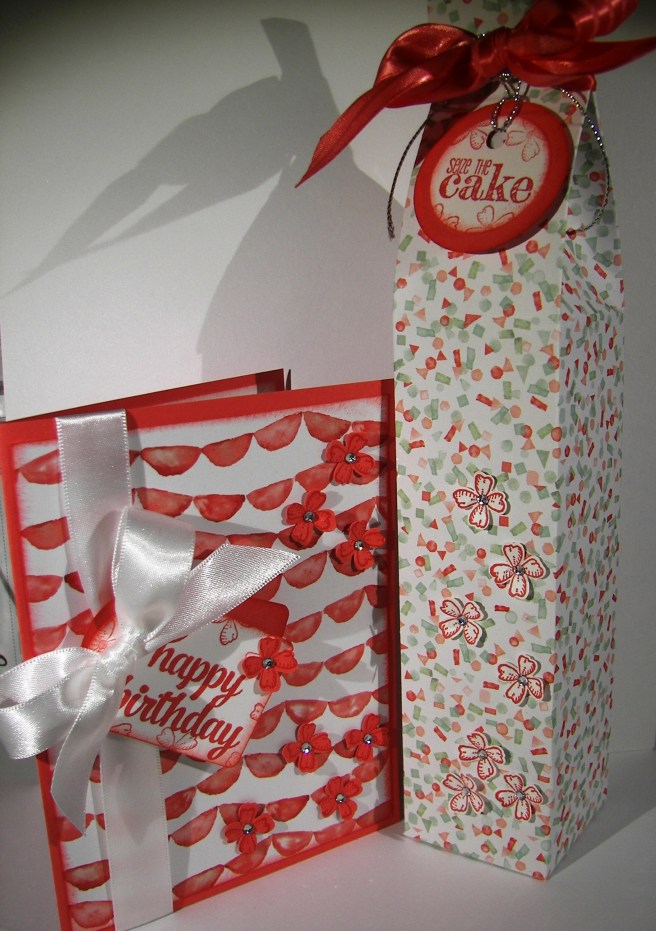
Yesterday was my birthday, and it was most certainly my happy day.  I made this project with that in mind.  Using my favorite go to ideas and things that make me happy.  Water coloring is awesome, both intricate and simple cards, and a myriad of other projects all bring me joy.  However, there is nothing more satisfying than a beautiful crisp gift box or bag.  I love making and sharing these, they really do bring me joy.  So I indulged myself a little bit here.

7-7

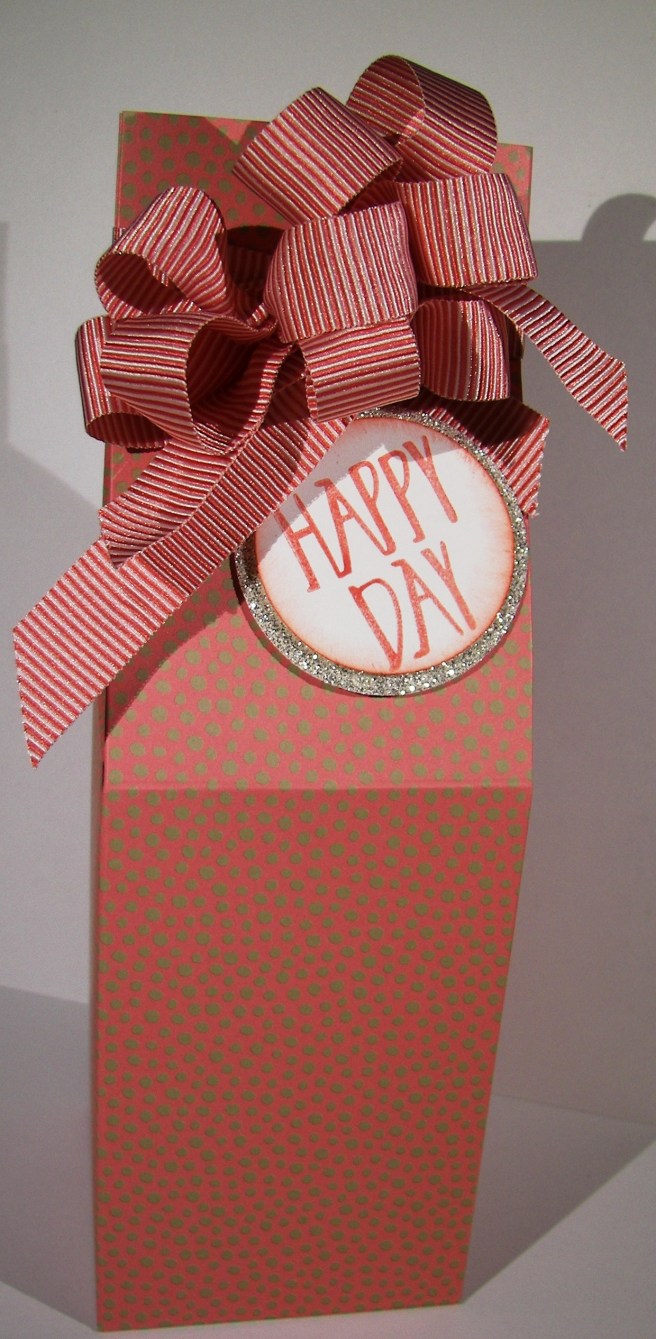
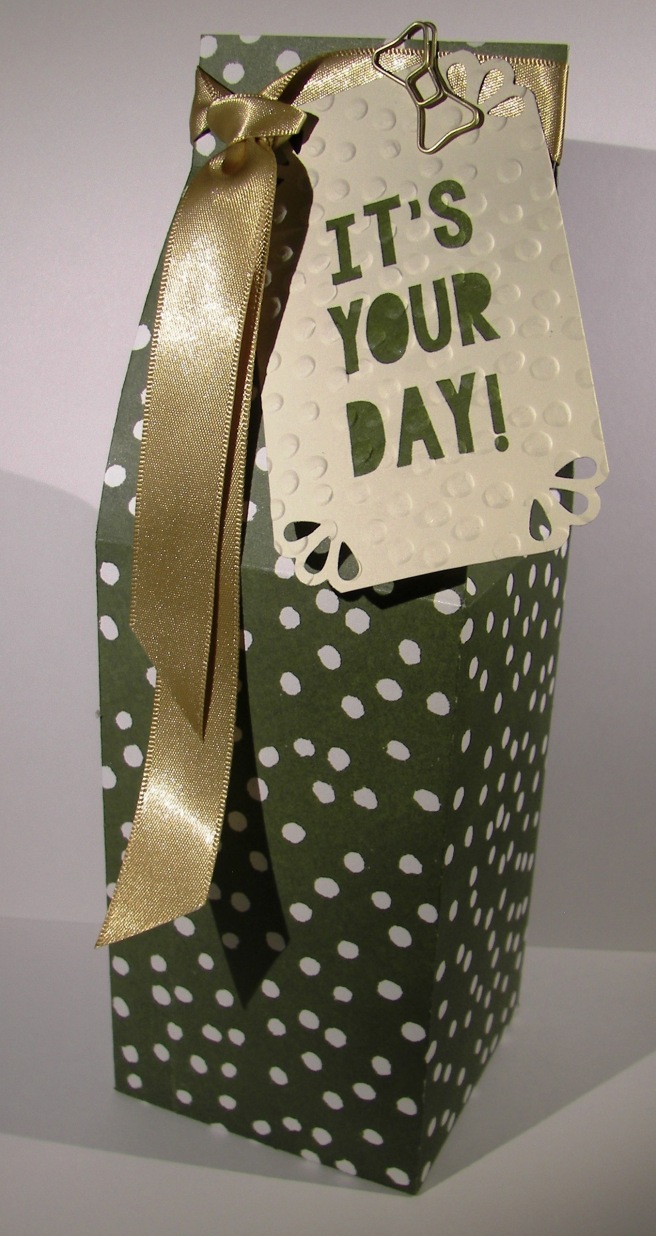
Using an entire piece of designer series paper goes against my “make it last” mentality, but it was my birthday after all.  So I pulled out a piece that I loved and created just what I wanted.  I like to maximize the height so it can hold more of whatever I have in mind.  This one did get a bit of switching around.  The top of the bag needed to have enough space to hold the large ribbon and bow I had in mind, so it ended up losing just a touch of volume, but it was well worth it.

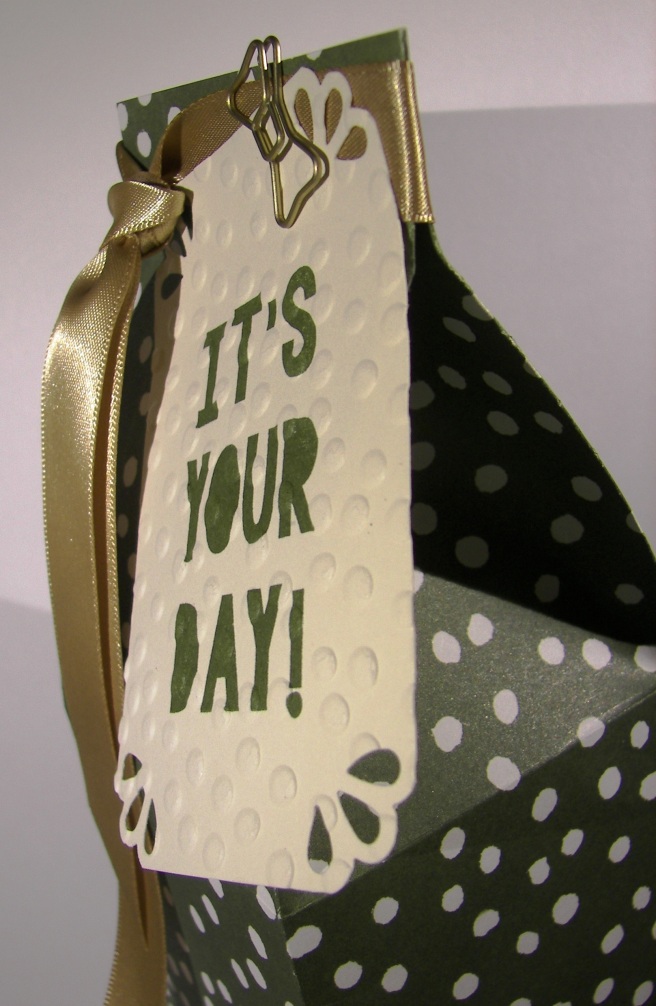
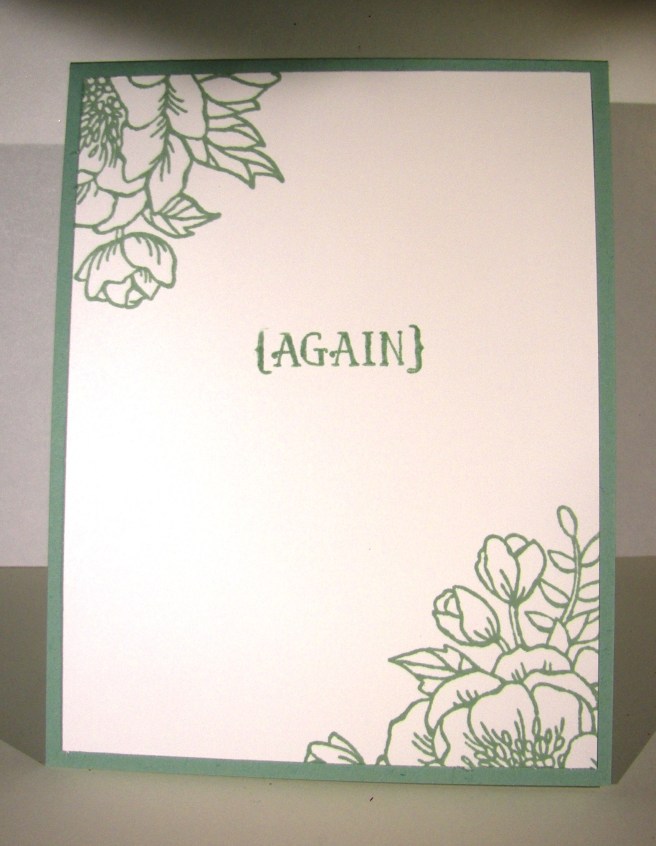
This ribbon though…it is so very nice.  It looks great in a knot, a simple bow, and creates lovely larger bows just like this.  While I may hesitate using my paper, I do not hold back using ribbon.  I love large bows and could put them on everything.  Something I learned from my mother to be certain.  In a workshop situation I wouldn’t go this large, my ladies would just get frustrated trying to make it pretty.  Can’t have that, but since this was for me, I let it slide a bit.  Then of course a simple layered circle tag set, stamped off once and sponged around the edges.

7-7 (1)

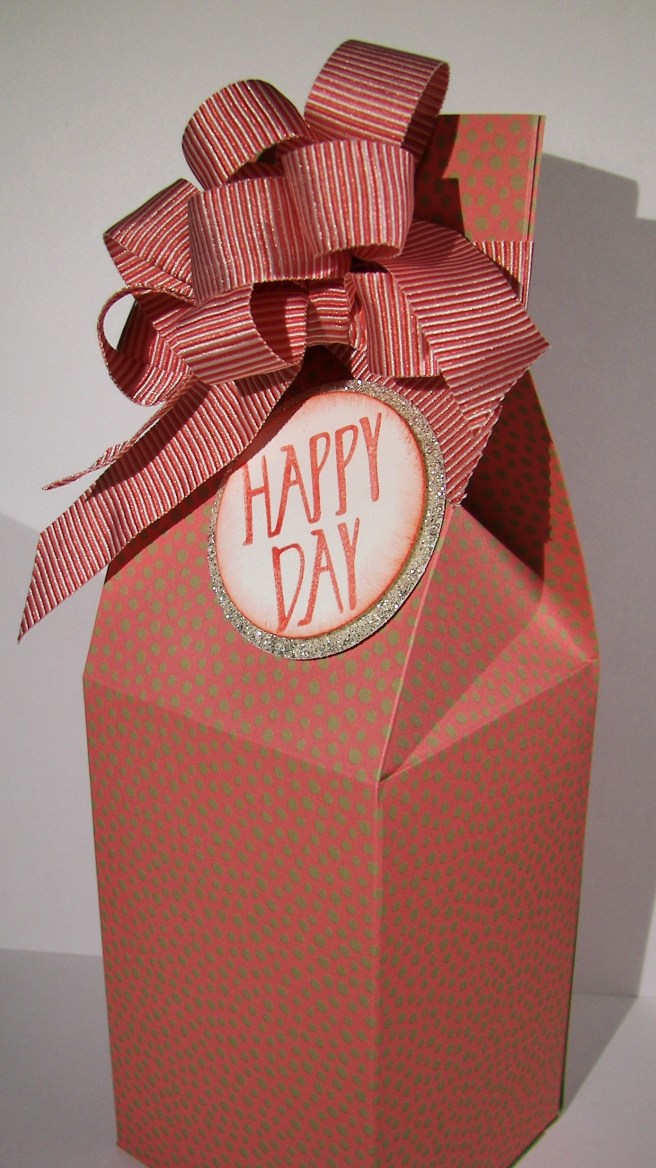
Again, my favorite types of things.  Second only to sharing them that is.  The bow of course can just slide off so the box can be filled easily and used again.  I always try to make my gift bags and boxes that way.  They are too lovely to be used just once.  So, I make sure the recipient knows how easy it is to re-gift them.

Have a creative day!

Moana

Happiest of Birthdays!

Birthday cards for children are so fun to make.  I guess you wouldn’t have to put an age limit on these though, my oldest daughter would think they are just right.  Either way, these two bright and cheery cards will bring smiles to some darling little girls.

7-5 (3)

I used to make two cards at a time to show them differently, but I kind of got away from that.  I have had a request for some birthday cards and though it would serve well to make more than one.  I certainly had fun though.  I used a new stamp set and a couple of older ones that hadn’t come off the shelf for a while.

7-5 (1)

I was struggling a bit with the birthday block letters for a while until I decided to sponge the edges.  Sometimes the oldest techniques are the best.  I also did a bit of stamping off to get the different tones.  All of the shades were done from one ink pad.  The lighter rectangles were stamped off twice and the darker were stamped off once.  The letters were done full strength.  I do like these letters for sure.

7-5 (2)

Have a creative day!

It’s Your Birthday

Do you broadcast your birthday or not?  Well, I think birthdays should always be celebrated, even if you like it small, celebrate.  This is the kind of card that can certainly draw attention and that is totally what I had in mind.

7-1

The stamp set has the marquee image by itself and has different sentiments you can put inside the middle as well as the bottom arrow box.  It doesn’t have to be about a birthday, but that is how I chose to use it for the first time.  I kind of muddled through this project since I only knew I wanted to use embossing powder and a black card base.  Leaves a lot of steps to be followed, even if a bit off.

Most if the projects I have seen with this particular stamp set include stamping the image on different colored card stock papers, cutting the different parts out and then layering them to give a little diversity.  I wasn’t in the mood for that, so I went with my trusty water coloring.  I am not used to coloring around an image so specifically, but it all worked out pretty good in the end.

7-1 (1)

Touches of wink of stella helped make it the rest of the way, even though it is hard to see in the photo here.  Projects always look better in real life rather than photos, but what else can you do, right?

Have a creative day!

Moana

A Special Congratulations

When your daughter gets engaged it is a whole different feeling.  I don’t know how else to explain it, but it just is.  However, planning takes on a whole new level of excitement that is more than difficult to control.  Having two wedding receptions within seven months does slow you down though.  Creativity, don’t fail me now!

6-30 (3)

I finally broke out this bundle to see just what all the chatter is about.  Well, it is really that amazing.  I am going to have a ton of fun working this set.  So many bloggers have really done some amazing work so far, I am going to need to get to work to catch up.  I bet when my daughter sees this she might just get some shifty ideas about wedding invitations. Some things just aren’t fun when you have to make them by the hundreds though.  Perhaps the wedding invite and not the general reception invitation though, definitely manageable.

6-30 (2)

I went with metallic thread as to not distract from the detail of the die cut, but that won’t last long.  I see lots of different types and sizes of ribbon being wonderful here.  It makes me want to change this out right away, but I will leave it.  It matches the copper metallic embossing powder I used on the congratulations sentiment.  Simple and elegant.  Yummy.

6-30 (1)

Have a creative day!

Moana

Well, This Just Stinks

I think sometimes cards can just be funny and that is more than enough.  When I read the sentiment I used I knew I didn’t care what the rest of the stamps were like, I had to have it. Good thing it is really a great set with fun and sincere sentiments.  This phrasing, especially with the intro, is kind of an inside joke.  No pun intended…tee hee…

6-28

The background stamping was pretty darn easy.  I used an element stamp from the Basket for You stamp set and just stamped my way across the card front.  I could have been a bit more careful to keep some of the edges better in line, but my desk is such a mess I just went for it.  Really, my desk hasn’t ever been this bad.  I think it will be top of my to do list tomorrow.  Summertime really gets me out of whack.  As you can tell by this very late blog.

Anyway, then the fun die cut letter had to get done.  I didn’t want those huge letters to take over my funny phrase, even though they are so large.  So, I decided to stamp them lightly in gold.  It kept them not as strong and allowed the rest to really catch your eye.  In order to keep them lined up I arranged them on the card front how I wanted them and laid a piece of painters tape across them, lifted them up, turned them over to put on dimensionals, and then placed them right where I wanted them.  It worked out pretty good.  The tape lifted some of the ink, guess I should have heat set it first.  Oh well, you can hardly notice it.

6-28 (1)

I sponged all around the edges on the front and a touch on the inside panel.  All in all, this little project really makes me laugh.  There are times when life is great and sometimes it just stinks and it is more than okay to say so.  Even better to laugh about it.

Have a creative day!

Moana

I am Much More Me When I’m With You

What do you do with a huge pineapple stamp?  Well, just about anything you want I guess.  I loved it, but probably had more questions than answers.  This is definitely one of those answers.  I asked my daughter to pick out a stamp from my stash of new product and give me a color.  She chose light green and this stamp.  Sometimes you just need a nudge in the right direction to get moving.

6-24

Yesterday, and well into the evening, I spent my time helping a good friend with a wedding photo shoot.  You never know how much you are needed, but judging how tired I am today, it would have been so hard for her without me.  And of course we had an absolute blast.  We work nearly seamlessly together, another plus.  I thought this would suit us nicely.

I went with light water color washing using only two colors.  I wasn’t sure how they would blend in the middle, hoping it wouldn’t make some kind of brown.  It turned out great.  I opted for minimal distressing and one single stamping.  The leaves needed a bit, so I used my aqua painter to blend them a bit, but left the pineapple pattern alone.  I stamped it again on the inside, but more in the corner for more interest.  Good stuff there!

6-24 (1)

The tags & labels framelit set fit perfectly around the sentiment and provided the perfect place for my favorite ribbon.  A few of the new enamel dots found there way as well.  The card front and inside panels were both layered with an additional piece of pear pizzazz card stock and the front was popped up with dimensionals.  There you go!

Have a creative day!

Moana

Your Generosity and Fabulosity

This is another one of last weekends workshop projects.  A very simple but lovely card. There are so many things that I love about it, but especially how they all work together.

6-23

The layering design is all about showing off the designer series paper.  The embossing folder draws attention to it and the sentiment accents it.  In this pack of paper there are several two sided patterned pieces, but two sheets of gold foil designer series paper.  This pattern is one of the two and I love it!

I accented the sentiment with the layered square framelits and some of the awesome new mini striped ribbon.  It might have been a bit over sized, but it is what I wanted so I did it. A touch of echo stamping on the inside to tie it to the designer paper and I was good.  Another great project that will find its way to another fabulous person.

6-23 (1)

Have a creative day!

Moana

Fiesta Like There’s No Manana

Here is one of the projects I made with my club ladies last Saturday.  Such a fun and interesting birthday card.  Plenty of color and who doesn’t just love an adorable llama?  Finally though, a project where I love the brightness of cucumber crush.  It is just one gregarious green there.

6-21 (1)

Framelit cutting made pretty darn quick work of the elements for this project.  A little stamping before and after doing the cutting.  The llama was really fun, but I felt he was a little on the whimsy side to worry about painting and making him look too real.  Besides, his teeth really aren’t accurate, they come from the bottom not the top like a bunny.  Still totally adorable though.  The banners were stamped afterwards though.  Since you can see through the photopolymer stamps there is not a worry to be found.  Fun and easy to do.

Everything was put on tipped one way or the other to add to the silly look.  Nothing about this card says slow down, just have a bunch of fun!  And my club ladies sure did.

6-21 (2)

Have a creative day!

Moana

Happy Father’s Day, a Day Late…

Where have my blog manners gone?  Well, I had workshop on Saturday and one heck of an adventure before going, so couldn’t blog the projects we were going to make.  I will share them this week though, no worries.  Then there was Father’s Day, and these lovely little tuxedo boxes to make, nearly 85 all together.  So, you can see why I haven’t had a minute or two to share some of these goodies.

6-20 (6)

This tiny gift box wasn’t my idea, thank you many people who are also so creative and share online, but I adapted to make it work for me.  They looked so adorable all lined up with treats poking out of the top, but I just didn’t have a moment to photograph them all together before they were given away.  Believe me though, there were many smiles from more than pleased men in my church congregation as they were passed out by the young women I work with.

The box was made with half a sheet of 8 1/2 x 11 black cardstock and measures 1 x 3 4/2 and can hold a lot of little treats.  The tuxedo was assembled and then glued to the box.  All kinds of assembly lines were working with my family being so helpful.  The bow tie was obviously just a bit of ribbon with a knot in it and then trimmed to look kind of right and glued on with a glue dot.  The buttons went on in a bit of a whirlwind, but ended up looking pretty darn adorable.  The boutonniere was made from a retired tiny flower punch, punched twice, and attached together as well as the lapel with a tiny silver brad.  It was a bit extra, but added just the perfect touch.  The lapels and shirt collars were really eyeballed and scored with no real measuring in mind, just trying to make it look right.  I knew I had too many to do to make them too perfectly.

It was a great project that took quite a bit of time, over four days, with plenty of family help, but was worth every moment.  Way to be awesome dads everywhere!

Have a creative day!

Moana

Love, Love, Love…

When the new catalog comes out each year I do a quick scan for the super obvious favorites. Here is the first one that was an absolute must have.  To be honest, I focused so much on the adorable jars and lettering I didn’t notice just how huge the stamp set was.  Well, it is amazing.  Talk about options.  I could do a series just using this set and have tons of projects, all looking unique.

6-9

I began by creating a background using marina mist ink on water color paper.  I have been using quite a bit of designer series paper lately and missed making some of my own.  I do feel better now.  After it was all painted and distressed I moved onto the jars.  I could hardly wait.

They were stamped in marina mist on whisper white paper then cut out using the matching framelit pieces.  I do love perfect little images all ready to go.  They were layered a bit, but you can still easily see that they all say love on the front.  I am still in wedding mode and the card reflects this.  I will be hanging dozens of mason jars below several of my trees today that will get candles and create a lovely look.  The couple is already so wonderful, I just want a beautiful evening for them and all of our friends.  Just two days away!

I did a tiny bit of stamping inside.  The small jar was used but stamped off once to give it a lighter look and allow me to write over it if needed.  Then, I stamped with silver encore ink a wrapped string to match the front.  I went back and added large basic rhinestones on the metallic thread and thought it was perfect.

6-9 (1)

Have a creative day!

Moana

Layering Love with Dapper Denim

When I got done complaining that they were changing out the square framelit set with another one I was pleasantly surprised.  Coordinating scalloped squares, how very thoughtful!  This also helped me not be so sassy about the wonderful scallop circle punches being retired.  There are always adjustments when it comes to new catalogs, products and plenty of favorites retiring.

101_1418

The card front was stamped with the Brushstrokes background stamp using the new dapper denim in-color.  I then spritzed it with water until the ink started to move around, let it sit for a bit, dabbed it with a paper towel and then dried it with my heat tool.  All done!

A quick stamp, but a lovely one, cut out with a new framelit, echoed with some more dapper denim in a scalloped framelit and layered up on dimensionals.  Of course I had to use more of that new wonderful ruched ribbon.  Dangerous stuff there.  I can usually control my ribbon purchasing for me and my club ladies, but I don’t know about this time.

The inside was stamped with a bunch of tiny little anchors to fill opposing corners.  It is also part of the same stamp set, which has several fabulous sentiments to be enjoyed.  I think today is a wonderful stamping day.

101_1419

Have a creative day!

Moana

Perfectly Wrapped in Sweet Sugarplum

I am getting pretty darn excited for the new catalog to go live.  Just a couple of more days now!  This is a tiny peek into what awaits.  I usually wait to get into new product until everyone can order the new product, but I decided not this time.  I am so very excited about this particular new color.  I always enjoy the new in-colors Stampin’Up! brings out, but this one has me hook, line and sinker!

5-30

The card itself is really super simple and in my favorite style.  Creating my own background from pretty stamps is the best.  I used several stamps from the same set, Perfectly Wrapped.  It is actually part of a kit that you can make a ton of different types of gift boxes and bags.  I think it would be so fun to play with at a workshop. One thing at a time.  This set is really going to get a lot of use.

And can I say how wonderful this new ribbon is?  In the catalog I was totally unimpressed. It looked kind of dumpy and I didn’t plan on getting it.  However, when I placed my demonstrator pre-order I gave in and am I glad I did!  It ties bows like a dream and looks so pretty.  Again, you just can’t tell from a catalog what things are like.  Too bad I don’t just have one of everything.  How can you, really now.

5-30 (1)

Have a creative day!

Moana

I Do…

This is one huge, and most wonderful wedding card.  I think it is to the grandest scale I have done so far.  Must be because we are only a week away from our sons big day!  I think that I just might use this one for myself. I will have to think long and hard about what to write…

5-27

This card measures 11 1/4 x 3 3/4″, how about that!  I used a sheet of 12 x 12 to put this one together.  The front is layered with a large piece of dazzling diamond glimmer paper with a special water color panel for the card front.  The lettering was done with the Larger Than Life Alphabet & Number stamp set.  It is, sad to say, retiring.  Along with this beautiful Lost Lagoon color.

I spent quite a bit of time moving ink along this piece.  Painting, distressing, drying, and then repeating all of that until I liked what I saw.  The stamping was simple.  The first layer was done with lost lagoon and then again with silver encore ink.  The result gave a shadow look, but it is still two dimensional and flat as can be.  The flowers aren’t of course, and I love the look.  Kind of like blossoms traveling in the wind.  It will be interesting to try and create an envelope for this one, maybe it is too beautiful to put it in one. Hmmm….

5-27 (1)

Have a creative day!

Moana

Love You

Love, love and love.  It is in the air like crazy and I can’t seem to get enough of looking at it, feeling it, and most of all, sharing it.  What a great thing in life to experience.  Less than two weeks now and my oldest will be married!  How exciting!!!

5-24

Simple layered card today.  I stamped the background paper with the floral heart from the Bloomin’ Love stamp set.  Real quick work there.  I did a tiny love you stamp on a scrap of whisper white and punched it out with the soon to be retired large oval punch.  Sad days there.  I matched it with the scalloped oval punch in bermuda bay.  That was sponged along with the card front and the card inside.  The inside also got a bit of stamping, my favorite. Then the ever so lovely, and larger than life, striped ribbon got to be used once more.  What a fun and huge bow.  Yes, this will need a custom envelope and extra postage, but it is worth it!  What a great project for today!

H5-24 (1)

Have a creative day!

Moana


It’s Your Day!

How about a simple gift box for today?  This one doesn’t feel just about a birthday, but could be to celebrate any special occasion.  I do love to make a project that has several uses.  That way, when you need a quick gift box it is flexible enough to fit the need.

5-19

One whole sheet of designer series paper went into this big box.  Simple scoring, nothing new or creative here.  Actually, kind of my go to measurements.  The tag was a bit more simple, but looked much better after it was embossed.  And with an adorable little bow paper clip to hold it in place, it was finished up just right.  I like how the clip and the ribbon go so well together.  I think I will have my group make a smaller version of this for workshop this weekend.

5-19 (1)

Have a creative day!

Moana

Birthday Bouquet Duo

Another adorable gift set just ready for a fun birthday event.  This is my version of a one sheet wonder.  I enjoy a matching gift set just as much if not more than making several cards from that same sheet.  What can I say, more isn’t always better to me.

5-18

The card is actually quite simple.  Only one piece of designer series paper was used.  A ribbon wrapped around the front and a double tag slid under the bow.  A collection of tiny flowers scattered around and centered with basic rhinestones.  Most of the items were sponged with watermelon wonder, including the inside whisper white piece.

5-18 (1)

This adorable tall bag was made from the large remainder of the designer series paper.  The other side was just as fun for a birthday theme, don’t you think?  It was topped with a huge ribbon which was used to hang the cute birthday tag with silver cording trim.  Bitty flowers were also stamped and punched in whisper white centered with basic rhinestones again. What a great companion to an adorable simple card.

5-18 (2)

Have a creative day!

Moana

City By the Bay

Wouldn’t you love a view of the city like this?  Well, my view is a whole lot more country, but I would one day love to be able to enjoy one like this.  I might have to settle for occasional holiday trips, but it would still be wonderful.

4-30

I put quite a bit of planning into this project.  I had to think backwards in order to keep the layers straight.  I embossed my whisper white piece with elegant dots and used the recessed side to make my ‘wall’.  I inked up my sponge and just pounced in here and there to create this look.  I kept going until it looked more like a textured wall than a piece of embossed paper.  The edges got sponged.

The hearth and home thinlit of the window was used twice.  Once to create the hole in the wall and again to make the window frame.  I glued the white one to the tip top taupe one with tombo liquid glue and nestled it back into place with the card front.  That way it looked raised up without a lot of fuss.

The skyline was created with the calling all heroes set.  It was stamped with black stazon onto water color paper.  The texture of the paper made it look really neat.  I went to work on the water line and then moved up to the sunset.  The windows were colored in with gold wink of stella, even though you can’t tell as much, they do sparkle.  That was centered in the window and got a heavy dose of dimensionals.  I am sure I could have worked it out easier if I had thought a bit more, but sometimes a creative journey takes a few extra turns.

4-30 (1)

Have a creative day!

Moana

English Garden with Rose Wonder

The morning may be trying to run away from me, but I am trying to keep up.  I did get this set made yesterday, but haven’t had the chance to get it shared yet.  Let’s hear it for lunch breaks, everyone needs one.

4-29 (3)

The card was the beginning of this trio, and the paper was the focus.  It is sad to say that this paper is retiring soon, I sure have loved using it.  What can be better than water colored floral paper?  With my kind of projects, not much.  Unless I sit down and paint my own, with paper this pretty I don’t have to.

The designer paper is layered on a piece of blushing bride cardstock and then on a pear pizzazz card base.  Old olive is actually the light green used in this paper, but I wanted a lighter tone and thought it looked nice.  All of the sentiments come from the Rose Wonder stamp set, there are some lovely ones in there.  I stamped, did a banner punch, sponged and then sponged another one to layer underneath.  The strip is 1/2″ wide and was left over when I cut the piece of whisper white for the inside card panel.  I love those little leftover strips, they always come in handy.

4-29 (2)

I made a couple of gift bags with totally different dimensions in mind.  I usually work with tall rectangle shapes, but went with a short clutch concept.  The cardstock version could hold heavier tall items, but the designer series paper needs to keep it light.  I had several ideas of gift items that would fit inside easily inside, lots of chocolate to be honest.  I love sharing a chocolate treat or two, you should give it a try.

4-29 (1)

Have a creative day!

Moana

Happy 29th Birthday {Again}

And the third workshop project has arrived.  Good thing too, since tomorrow is workshop! I often know further in advance what I want to do, but not this time.  I have been doing a lot of detailed water coloring and that doesn’t go well for large group instruction.  Folks need their own tools and materials for that kind of work.  We are doing one water color and that is stressful enough.

4-22

Isn’t this one so adorable?  The paper, matching stamps, and the ease of stamping and die cutting the numbers really make this one fantastic.  It isn’t too difficult to make, but sure brings a smile. Believe it or not, I tried several times to add die cut flowers for a fun layered look, but had to leave them off.  Sometimes that happens.

I took the background dsp and put it through the bigshot  with an oval framelit centered.  I then took that piece and turned it over to fill that same oval hole.  The two sides coordinate so nicely I could resist.  I used the next smaller framelit to make an oval from whisper white.  The numbers were stamped in blushing bride, cut with their coordinating framelits and centered on the oval.  I did raise them up on dimensionals.  Then the sentiment was stamped centered over the top and bottom of the numbers.  The tiny ‘th’ was die cut first, then stamped.  The framelit for that tiny one doesn’t have a window to look through, so I had to.  But with photopolymer stamps you can see exactly where you are placing your image.

I stamped inside with the largest flower from the Birthday Blooms set in each corner using a different portion of the stamp to make it look different.  The center phrase ‘again’ was the last thing added.  How fun is that?

4-22 (1)

Have a creative day!

Moana

Thank You Times 250?

Just what is this about?  While enjoying a crazy holiday in Utah with family I was given a special request.  My beautiful niece is getting married tomorrow and I couldn’t be more excited.  I had originally offered to make her wedding favors for her wedding gift.  She changed her mind on having them, so instead she asked for thank you cards.  Time was short, but I decided to complete them while I was in Utah so she could have them before the wedding.  Well, it was quite the event.  I took these photos on my cell phone just before we headed home, so they are pretty fuzzy.  I just couldn’t not share.

4-8

I put in an order for the materials I would need to make 250 of these simple cards.  I started out strong on my own, but in the last hour I had to enlist the family assembly line.  They are so well trained.  Now she has custom thank you cards, with matching envelopes, in her wedding colors all ready to go.  I think she will have more than enough and will be left with a lovely stash of cards to say thank you along the way.  How fun!

I did learn an interesting thing.  Stampin’Up! ink pads do have limits.  I didn’t think to order re-inkers to go along with the new ink pads for this project.  Silly me.  I got more than half way through the so saffron stamping when I knew I was not going to make it.  My daughters friend was a demonstrator.  We hit the stash, got to looking, almost gave up, then my husband came to the rescue and found it!  Stamping could continue.  Small world. Oh, and I went through five refills of my fast fuse.  I almost didn’t make it there either.

4-8 (2)

Have a creative day!

Moana