Every Heart Needs

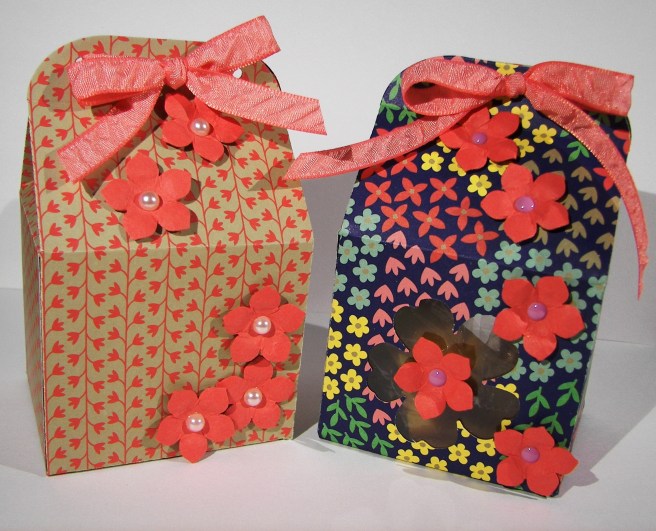
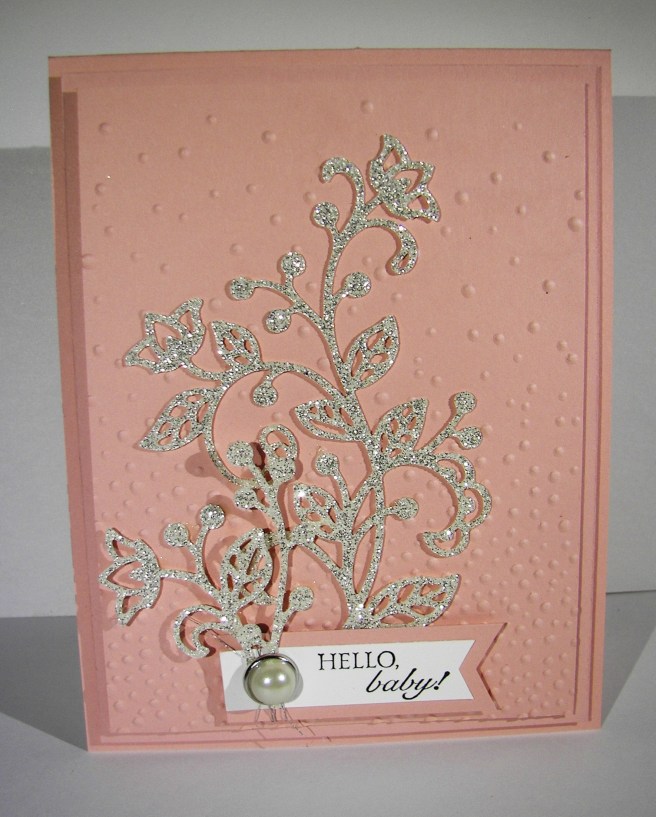
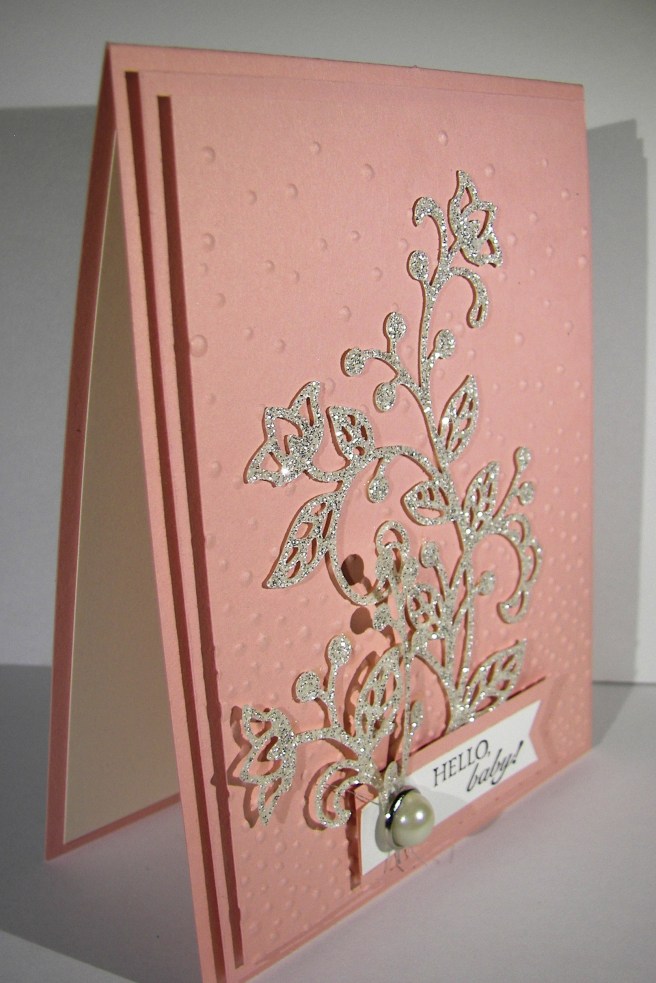
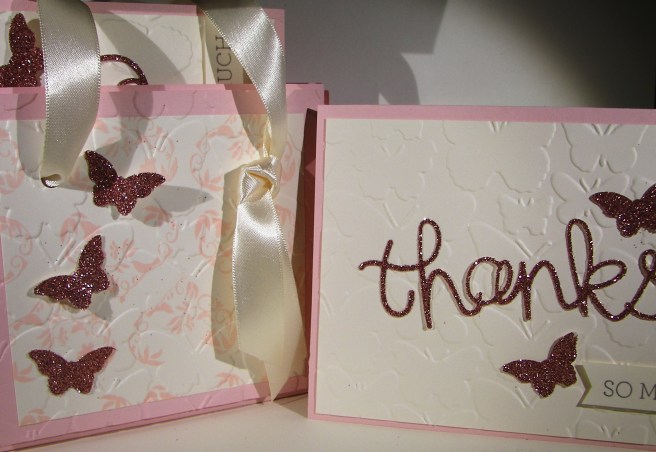
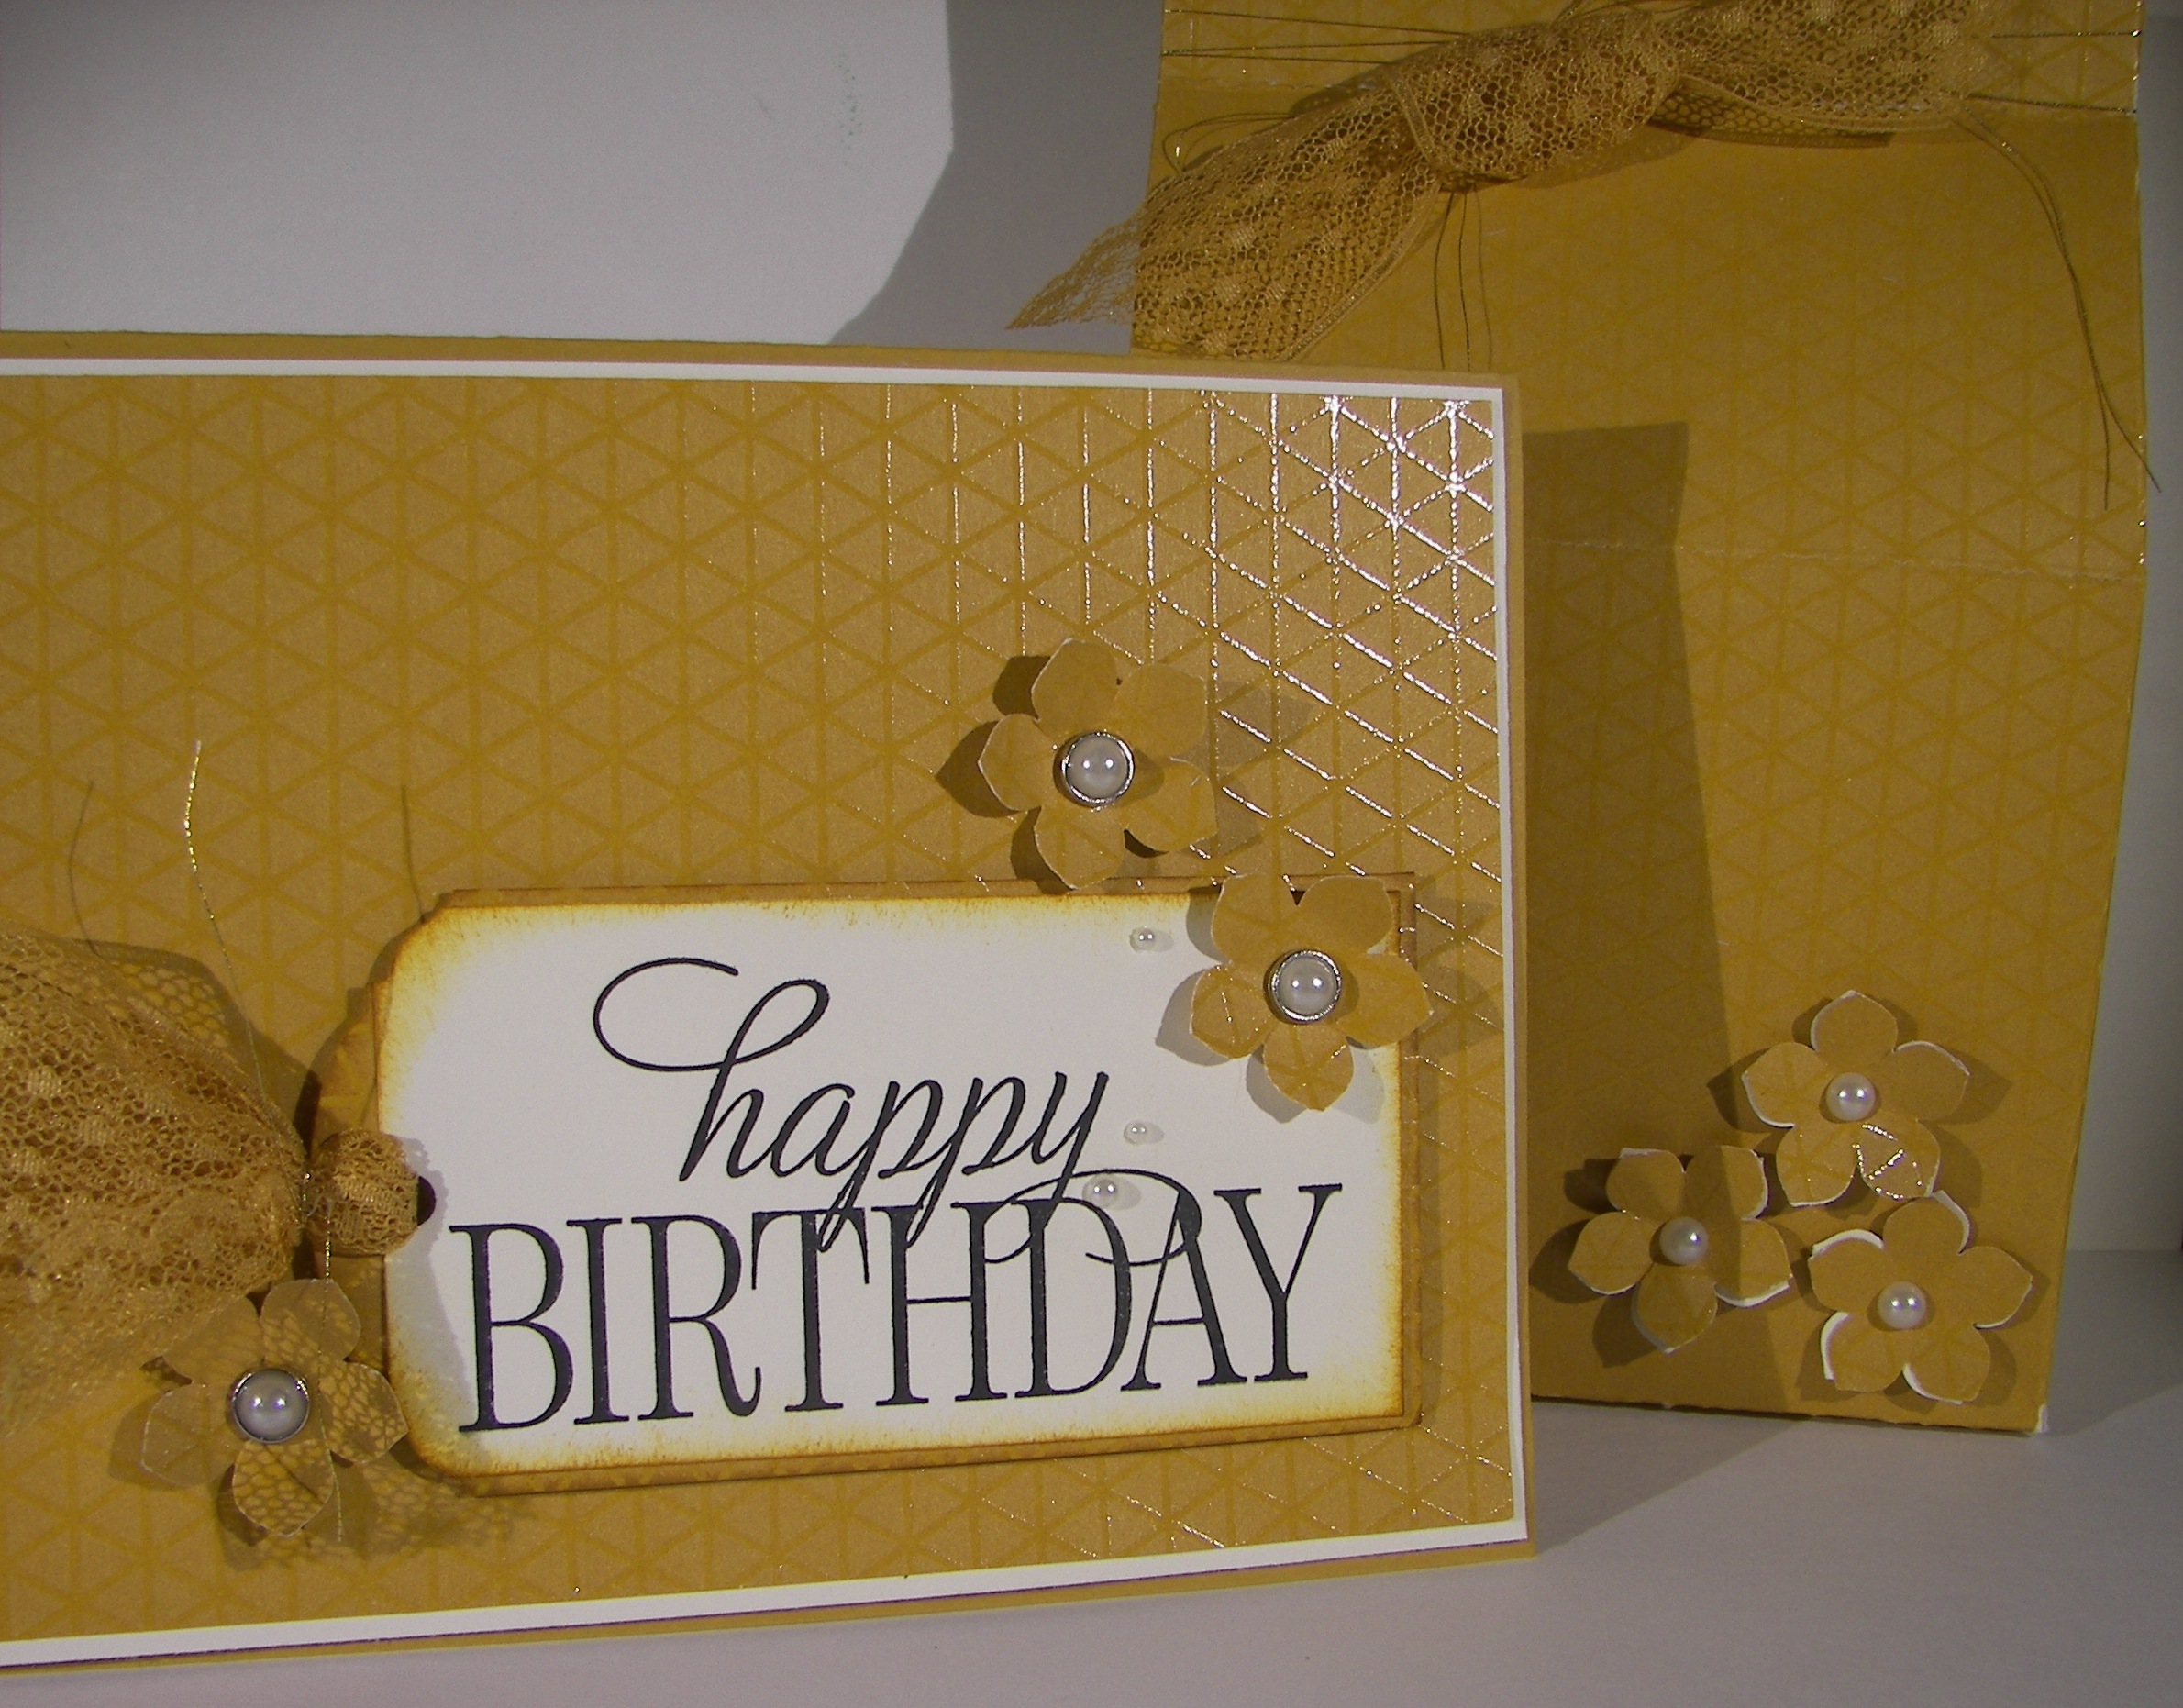
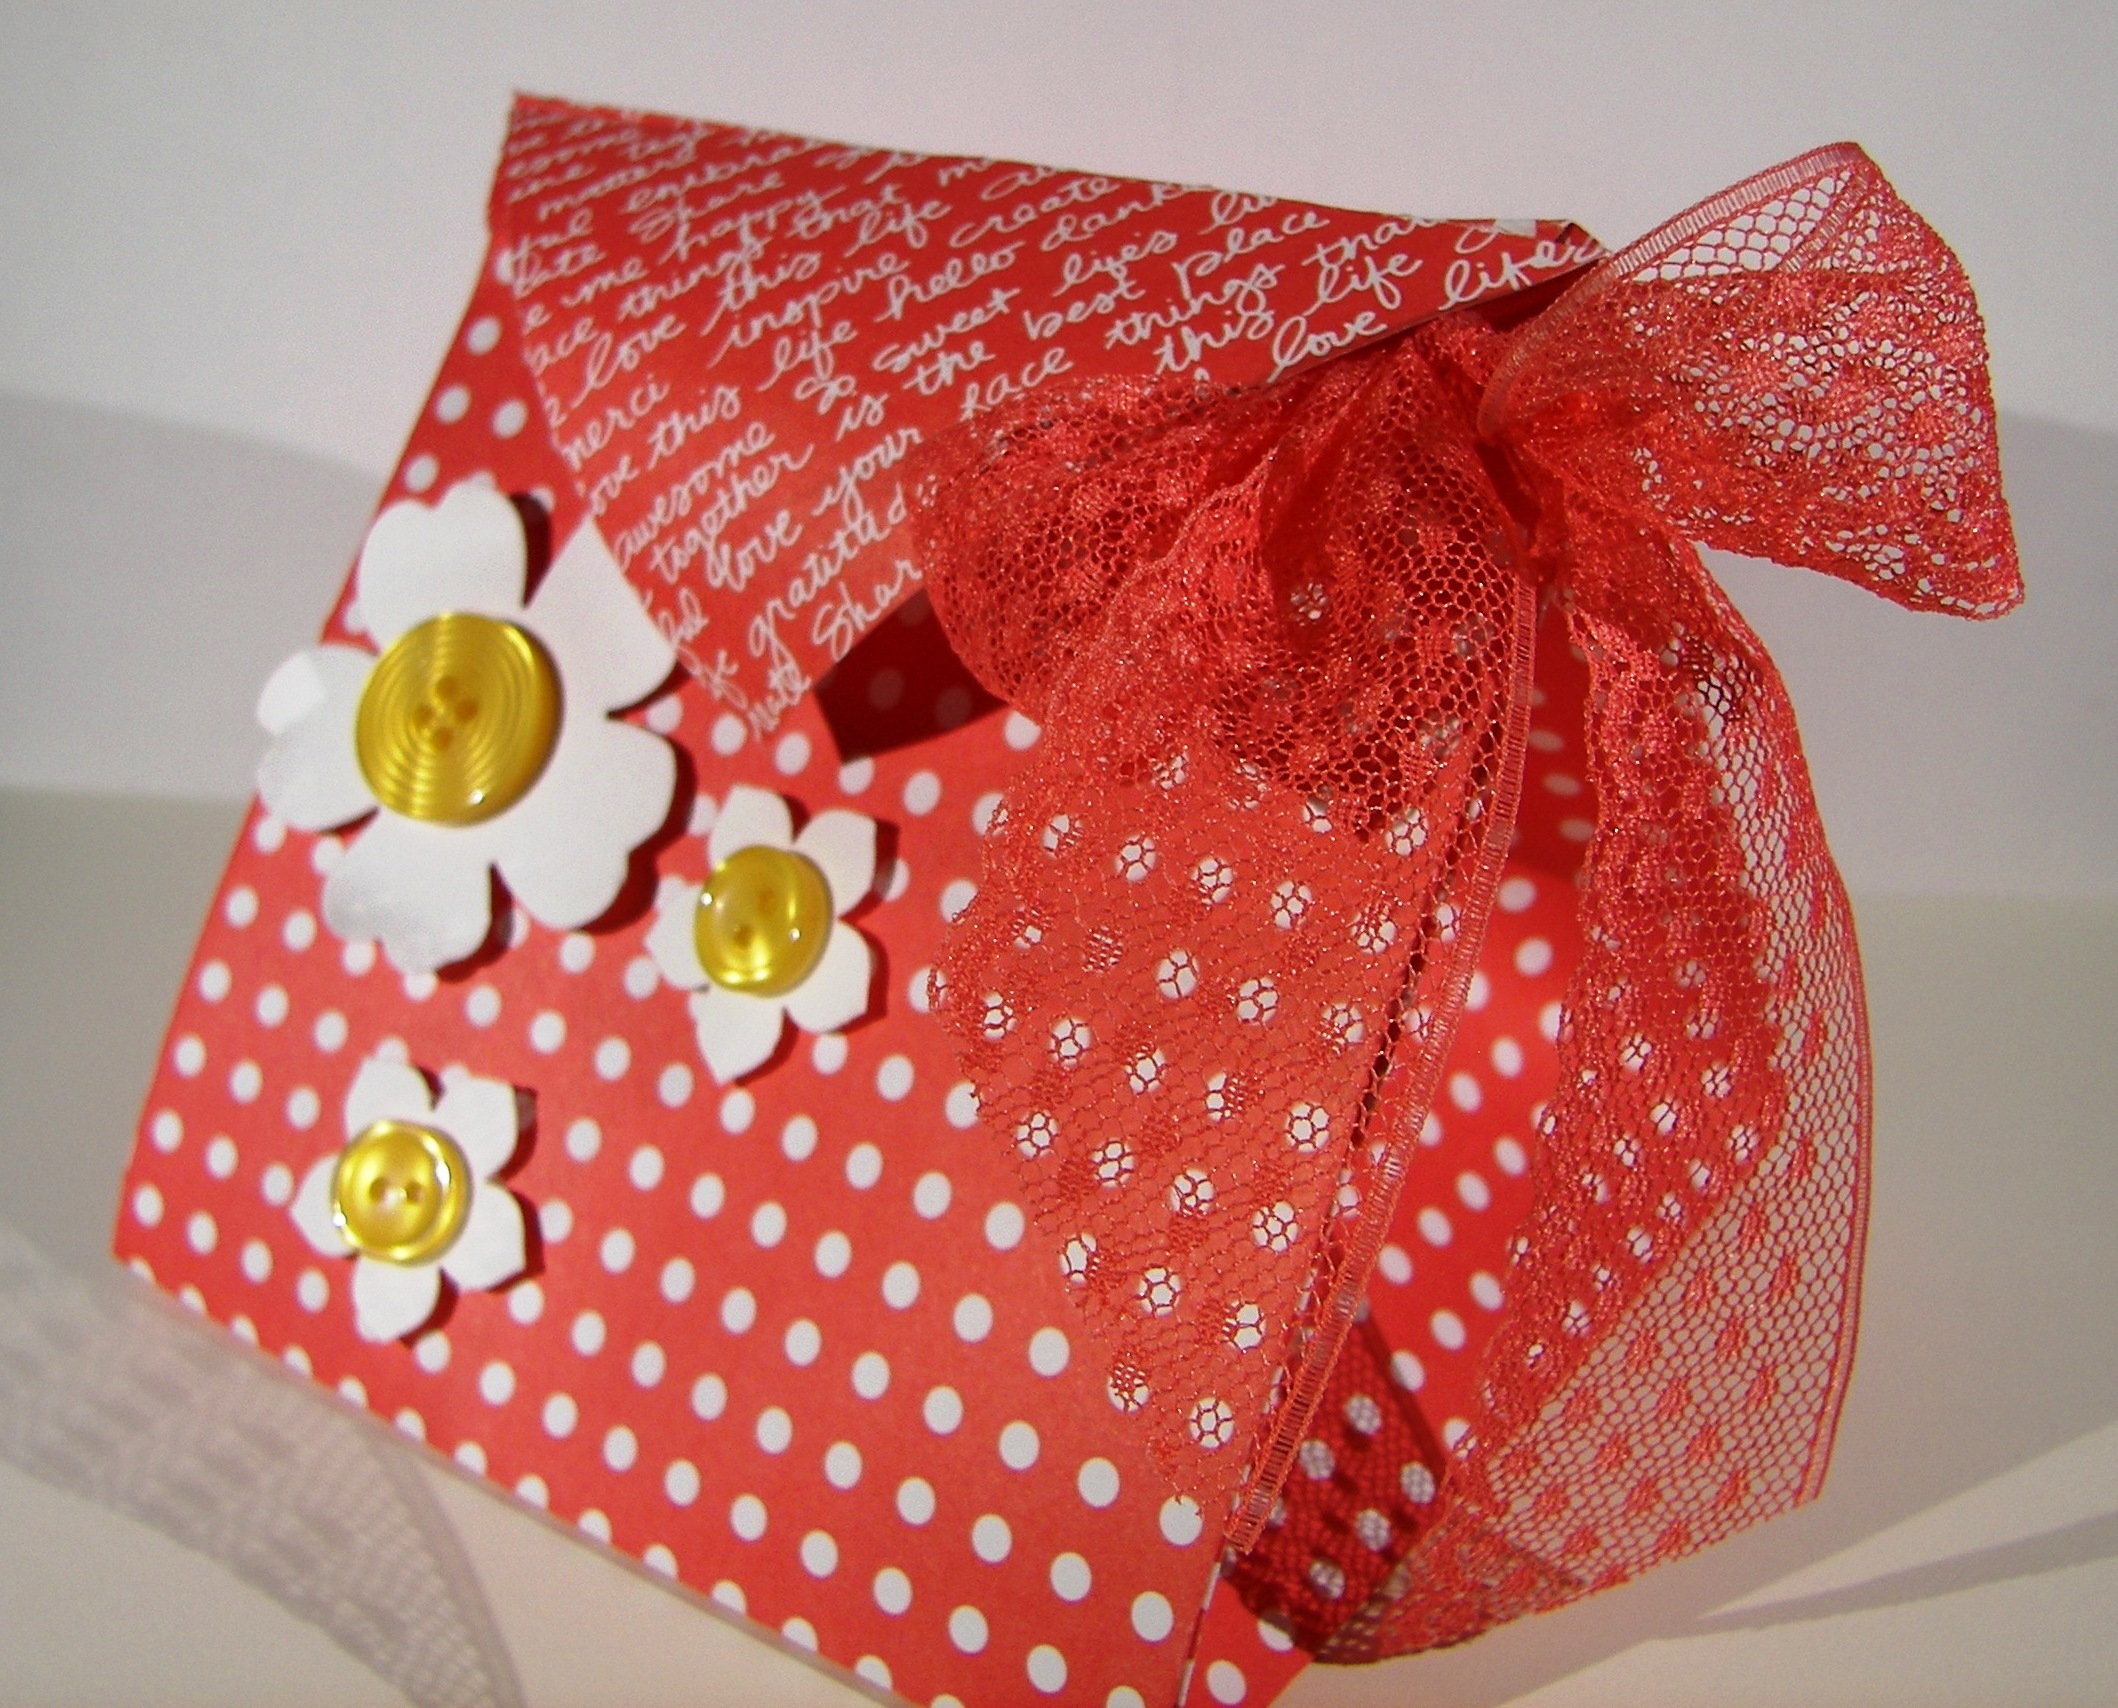
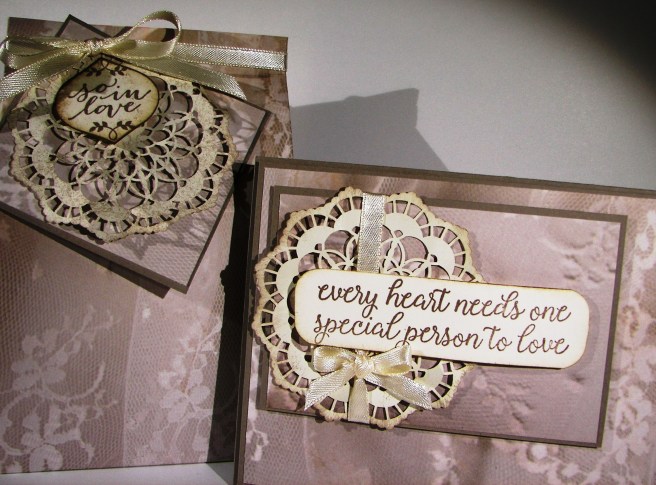
Gift sets are so great! A bit better than this paper series, but not by much.  I usually am not the kind of person that wants realistic photo paper prints, but this set has my attention. The way the lace is folded really looks dimensional here, even if my photos don’t capture it well.  It is lovely.

2-4

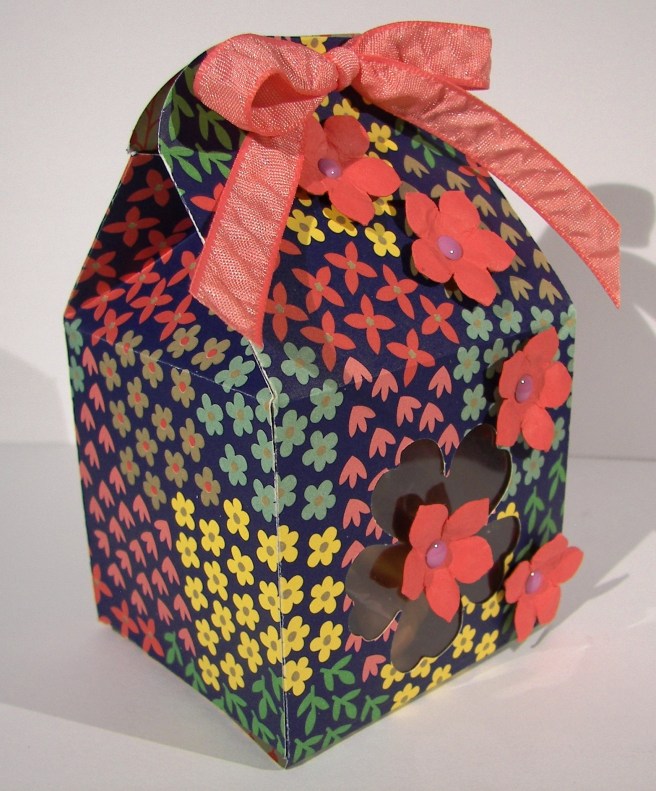
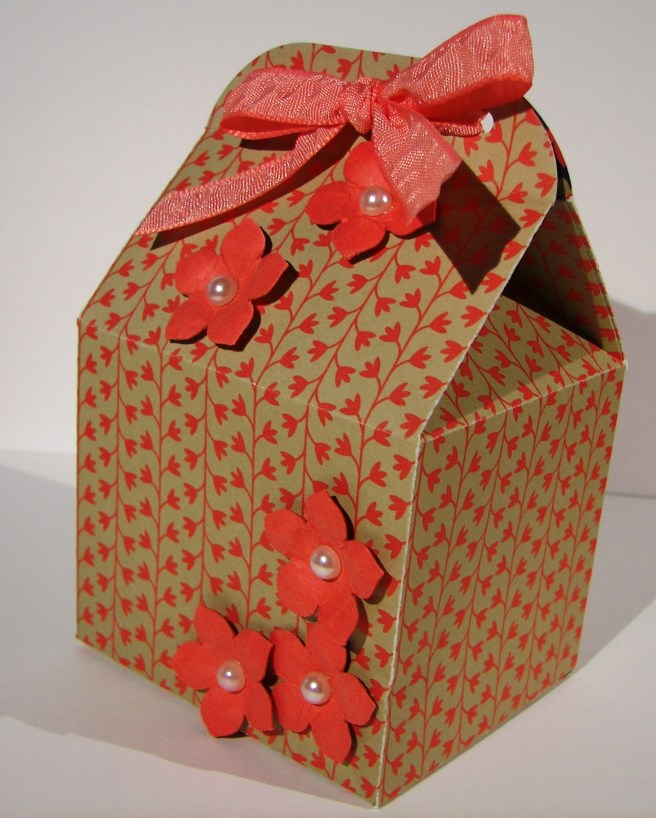
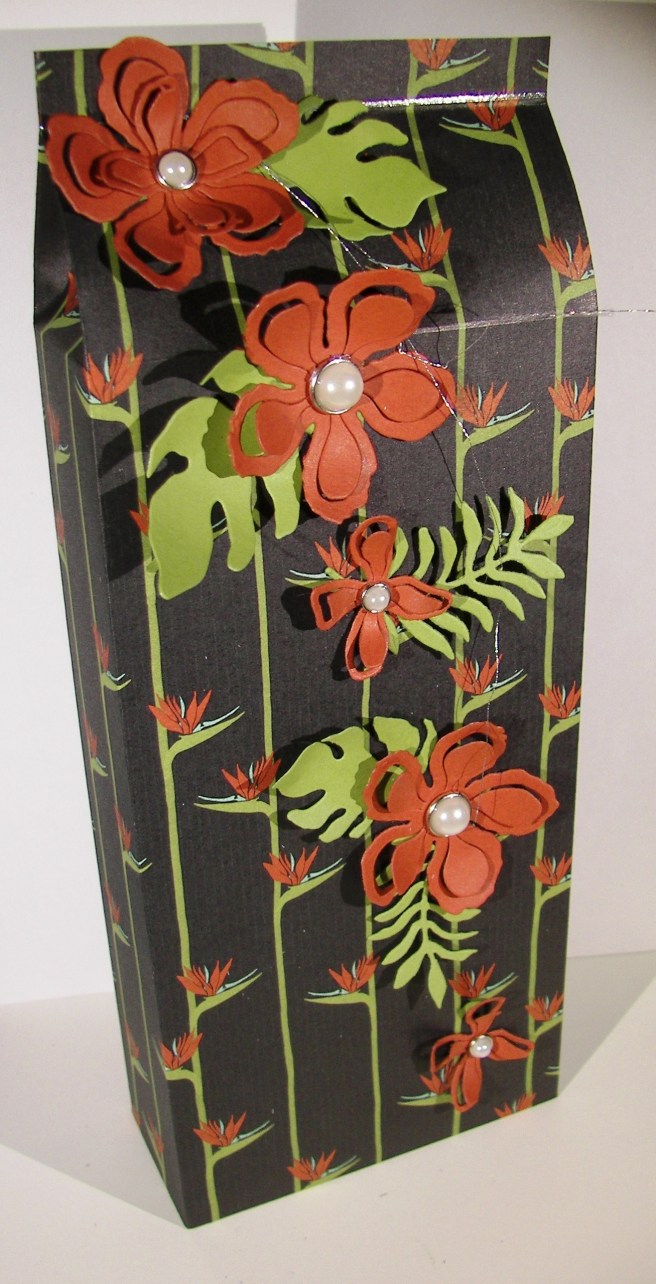
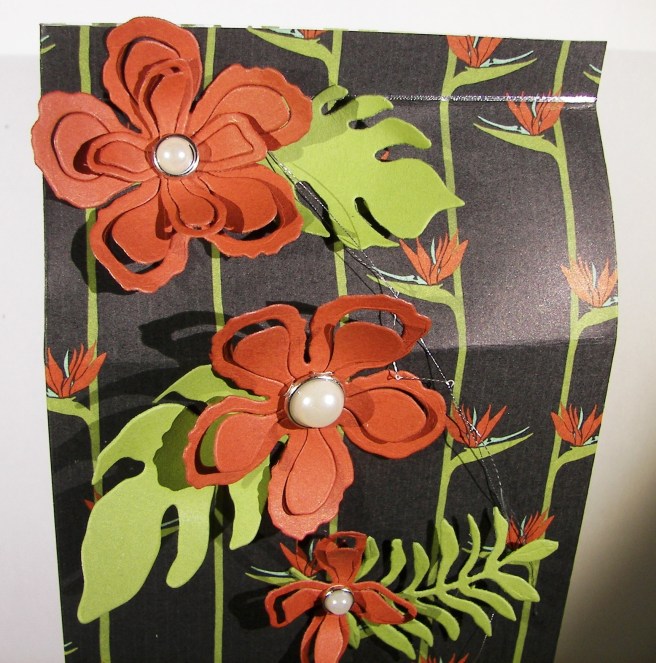
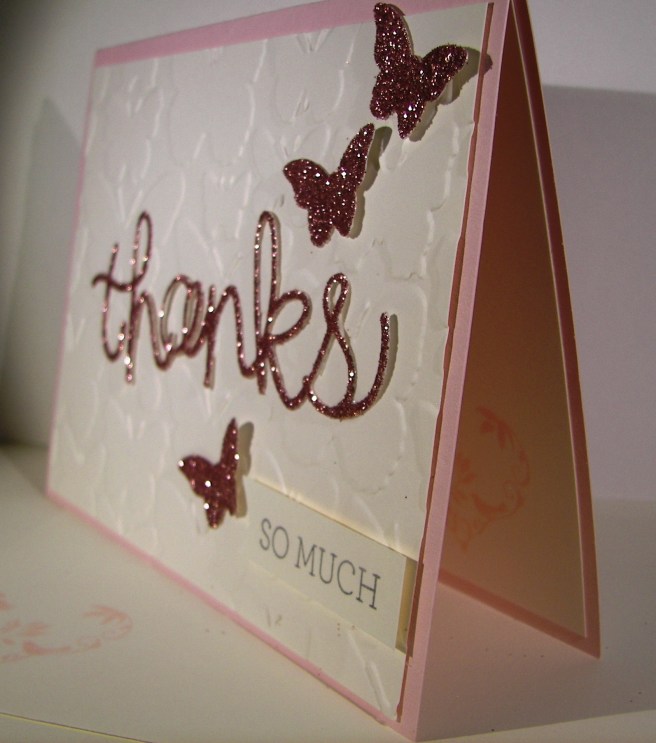
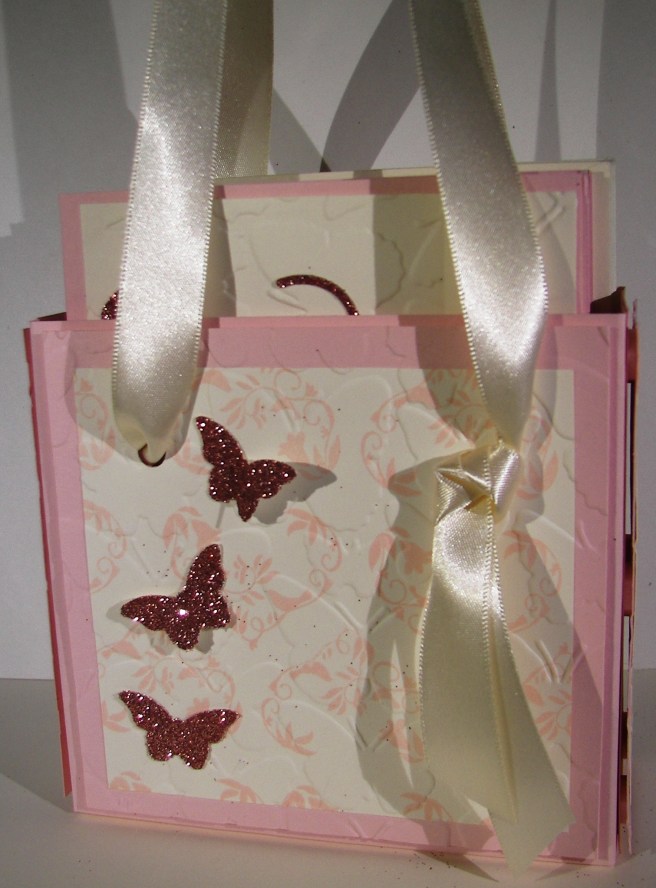
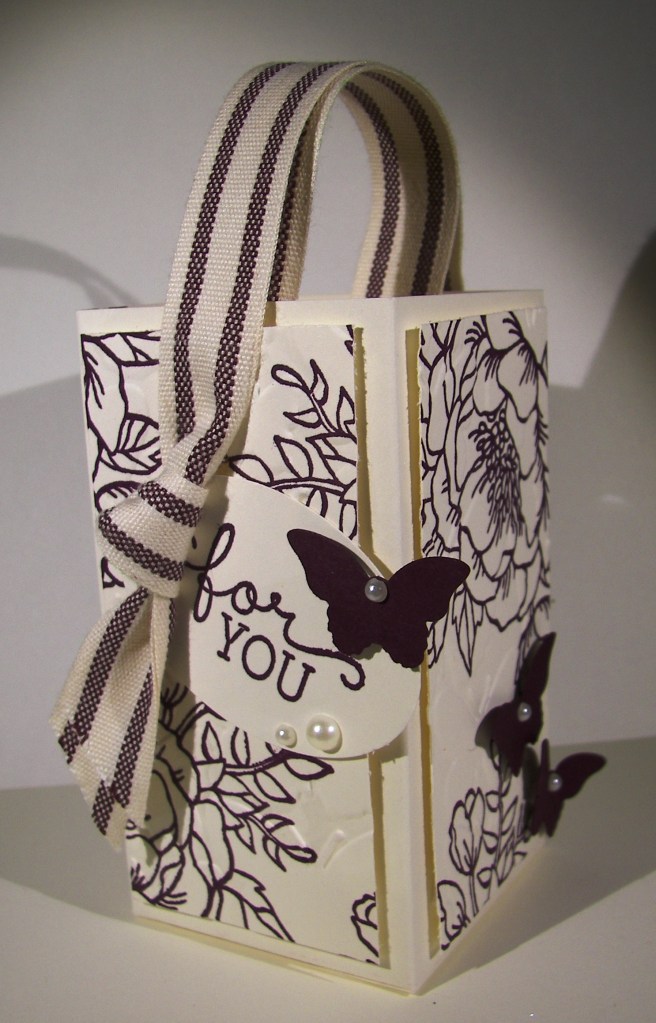
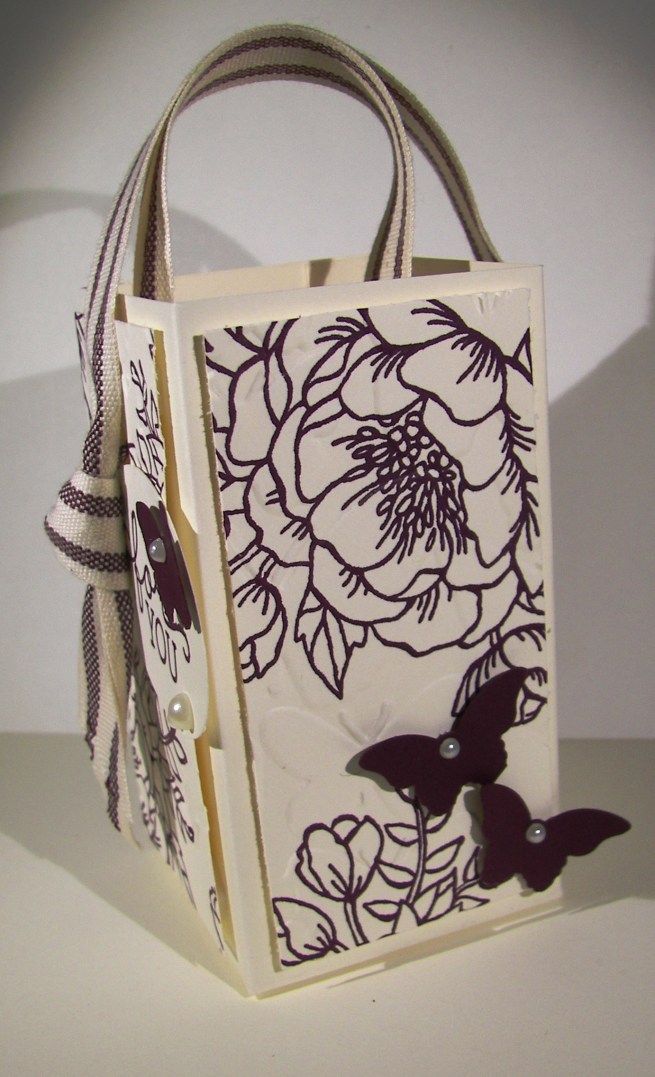
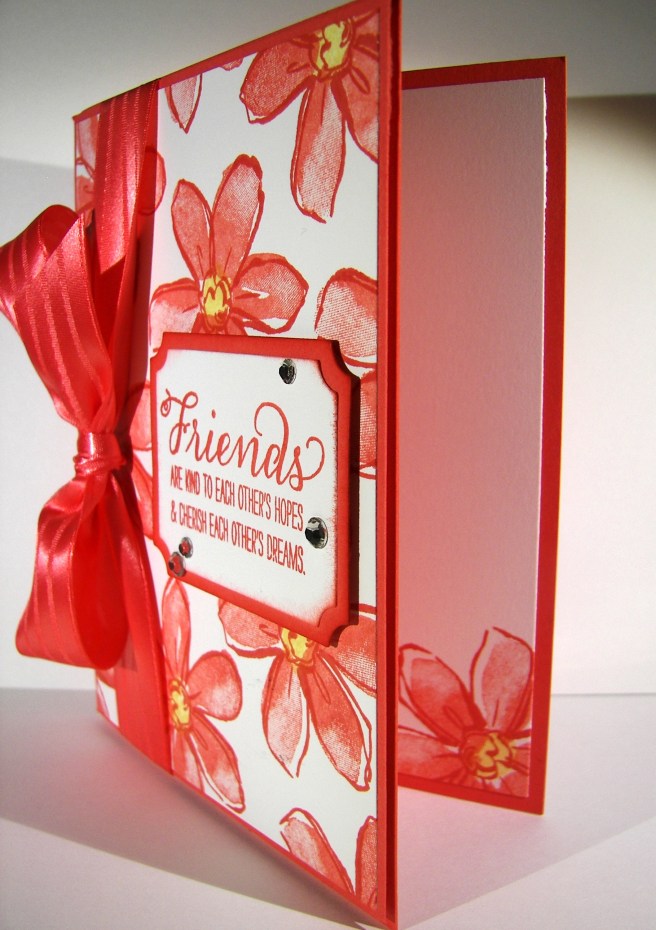
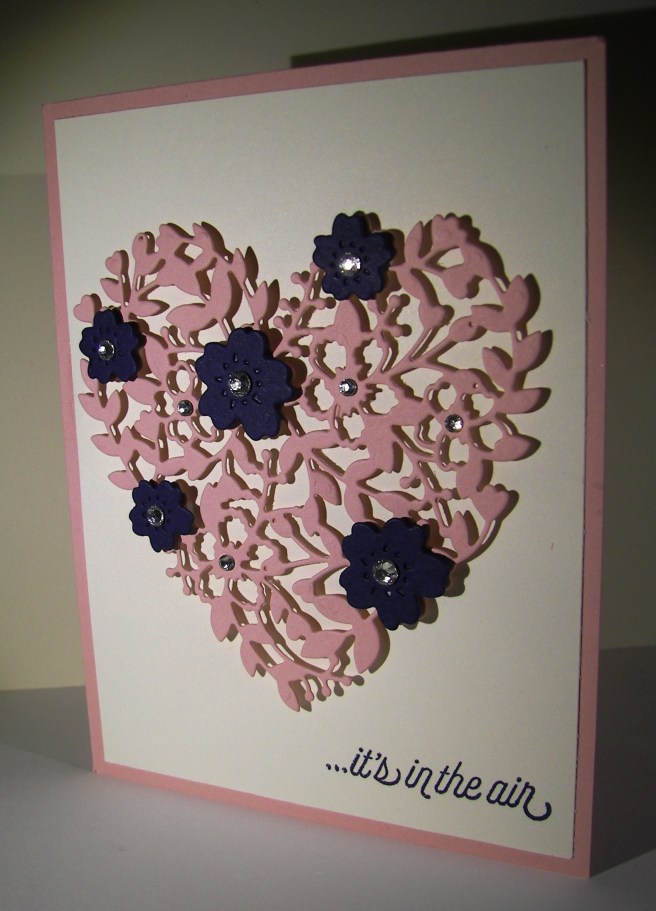
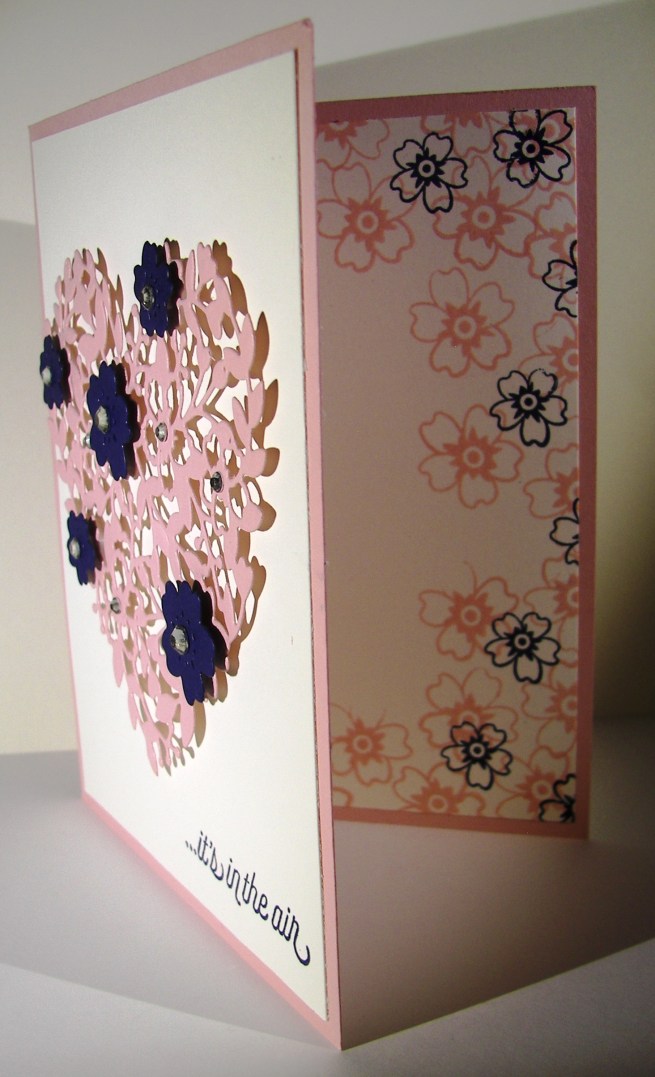
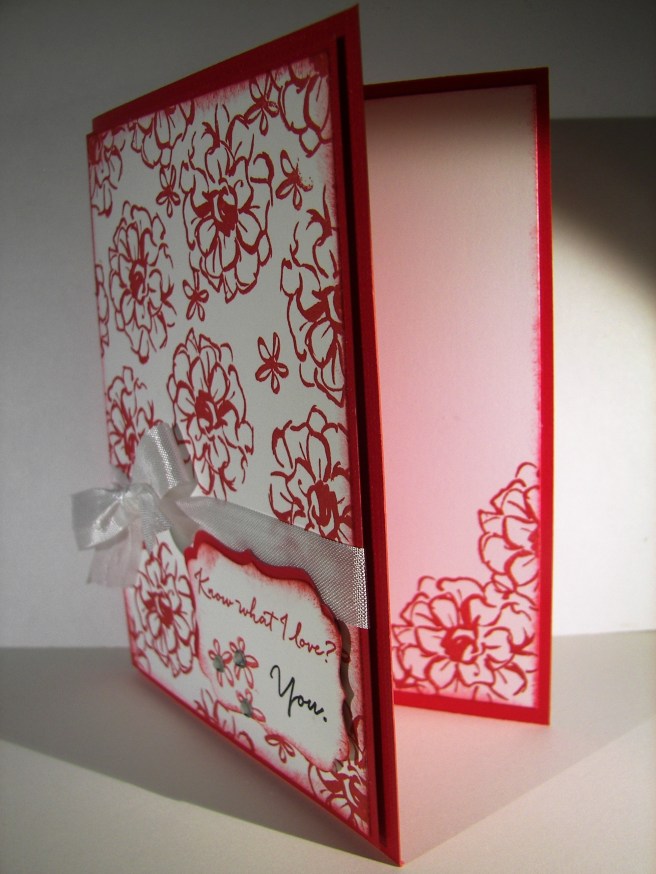
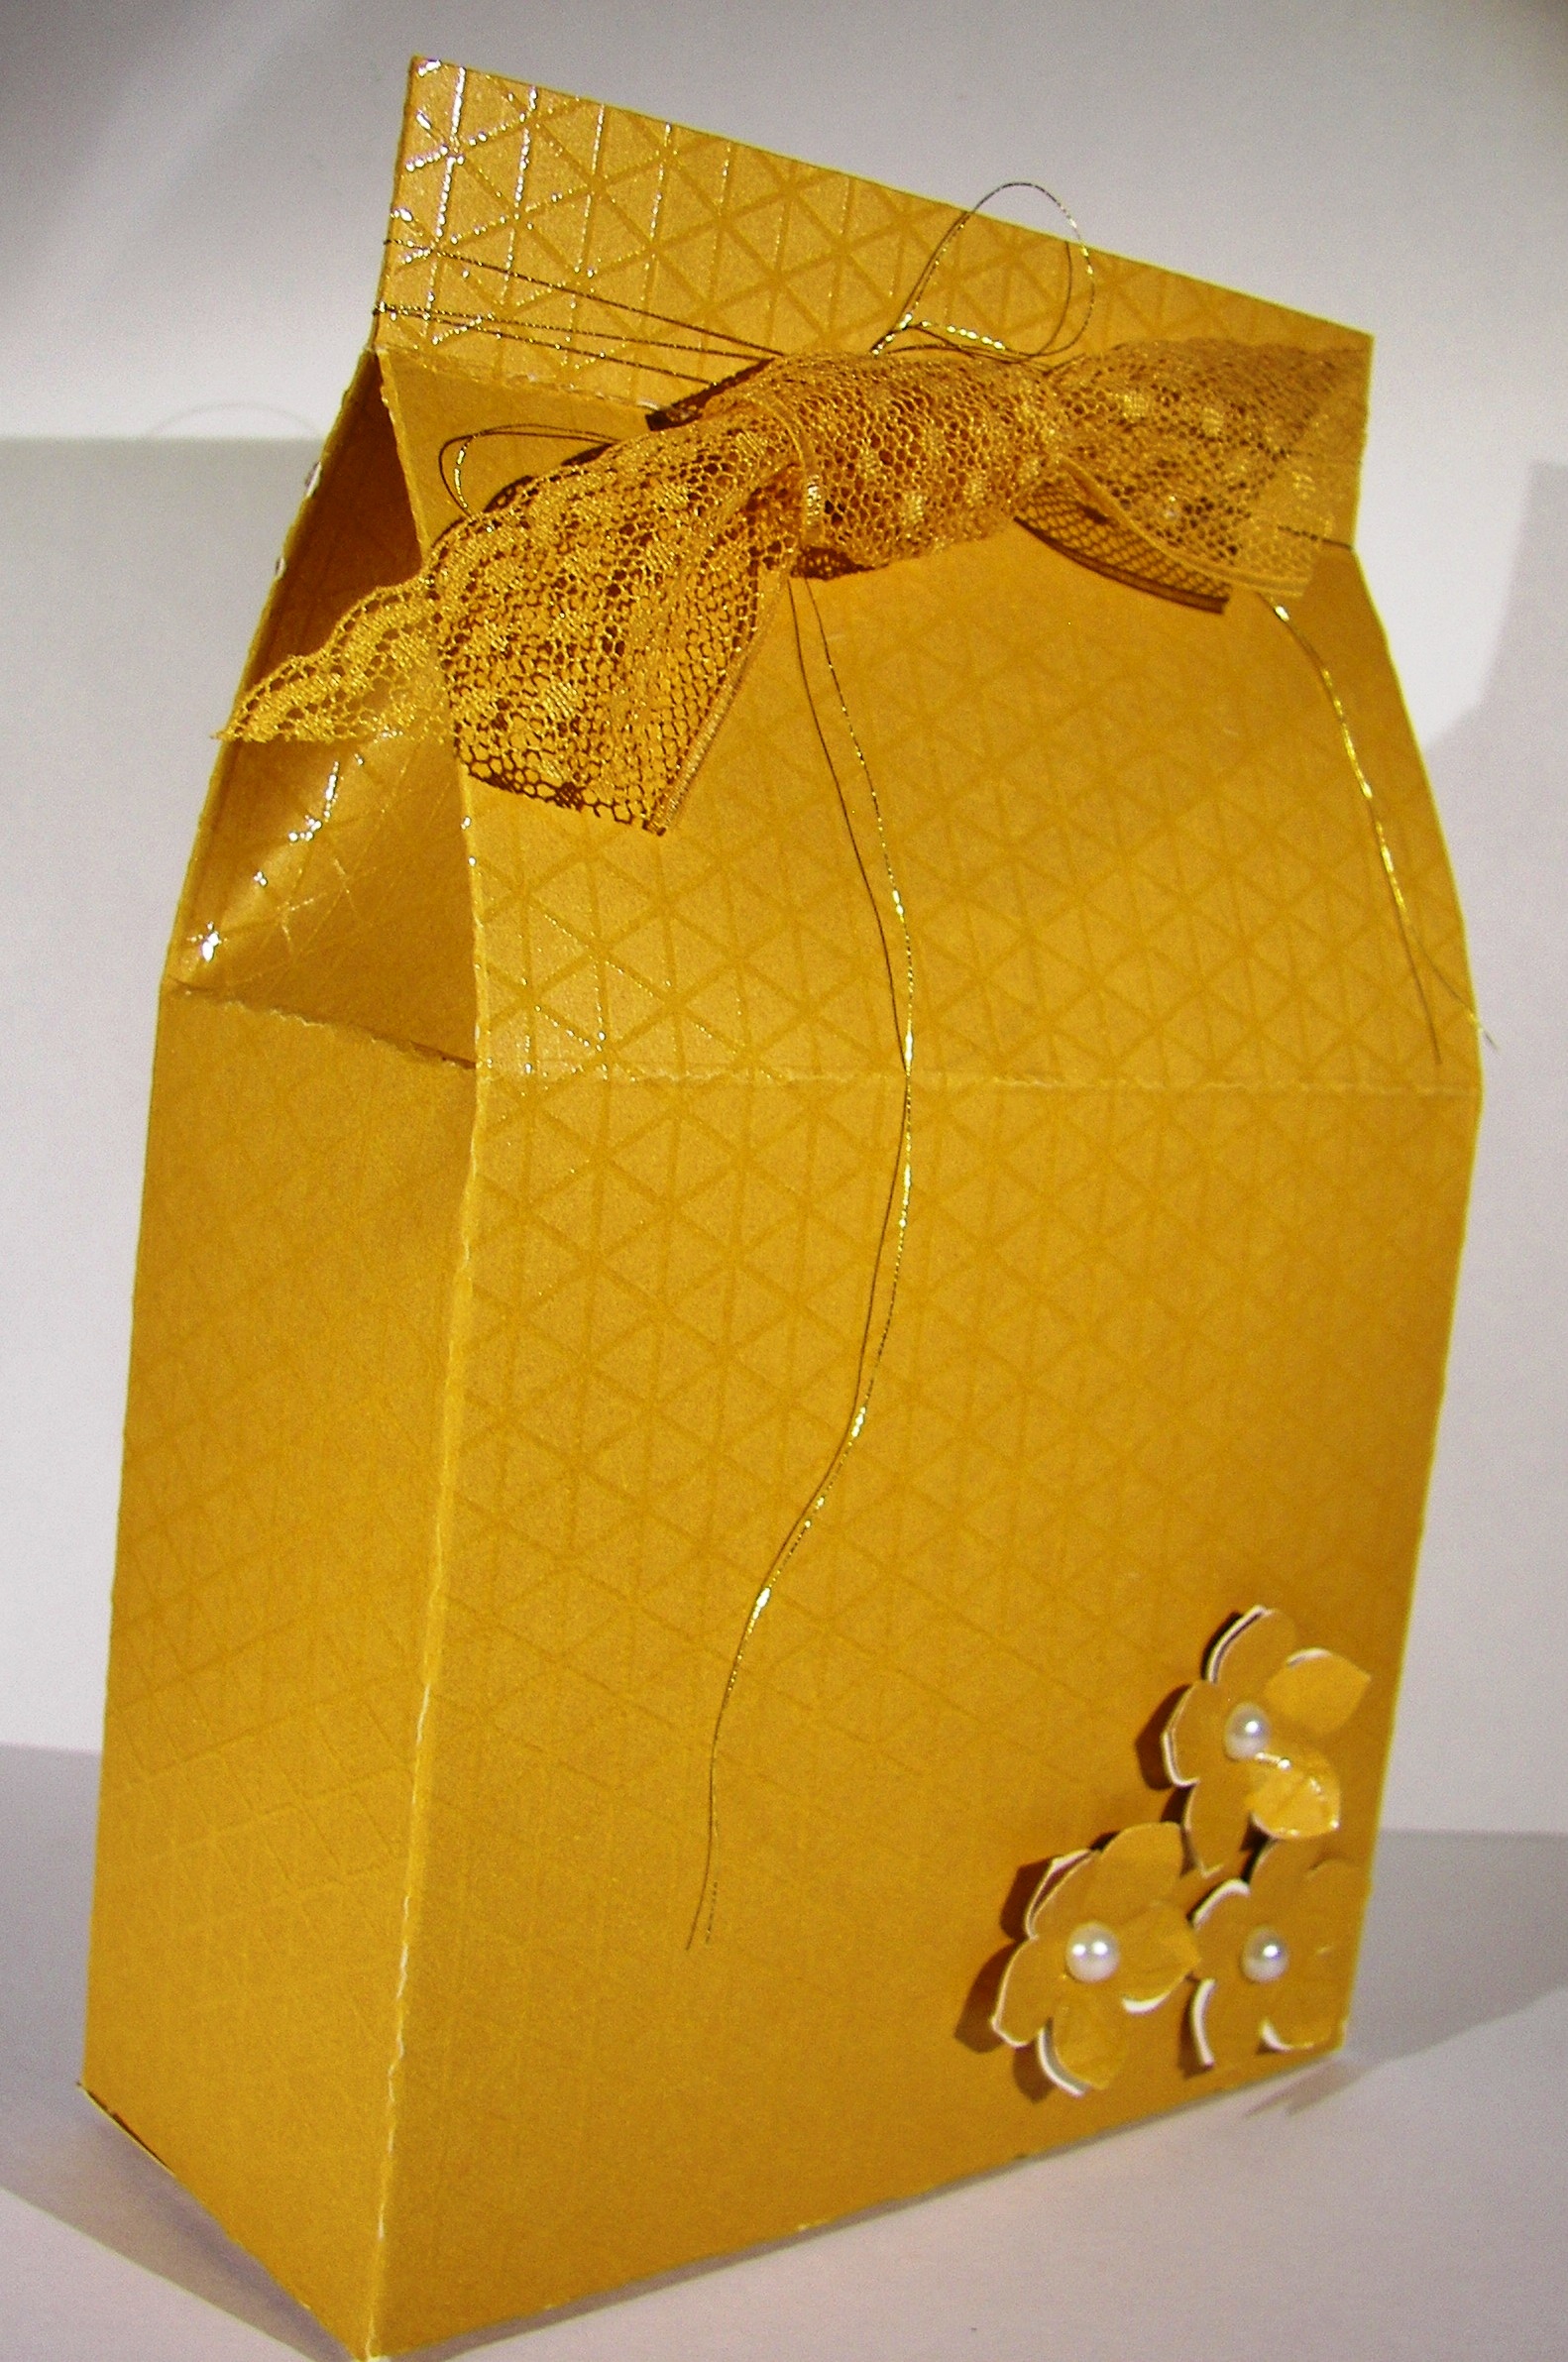
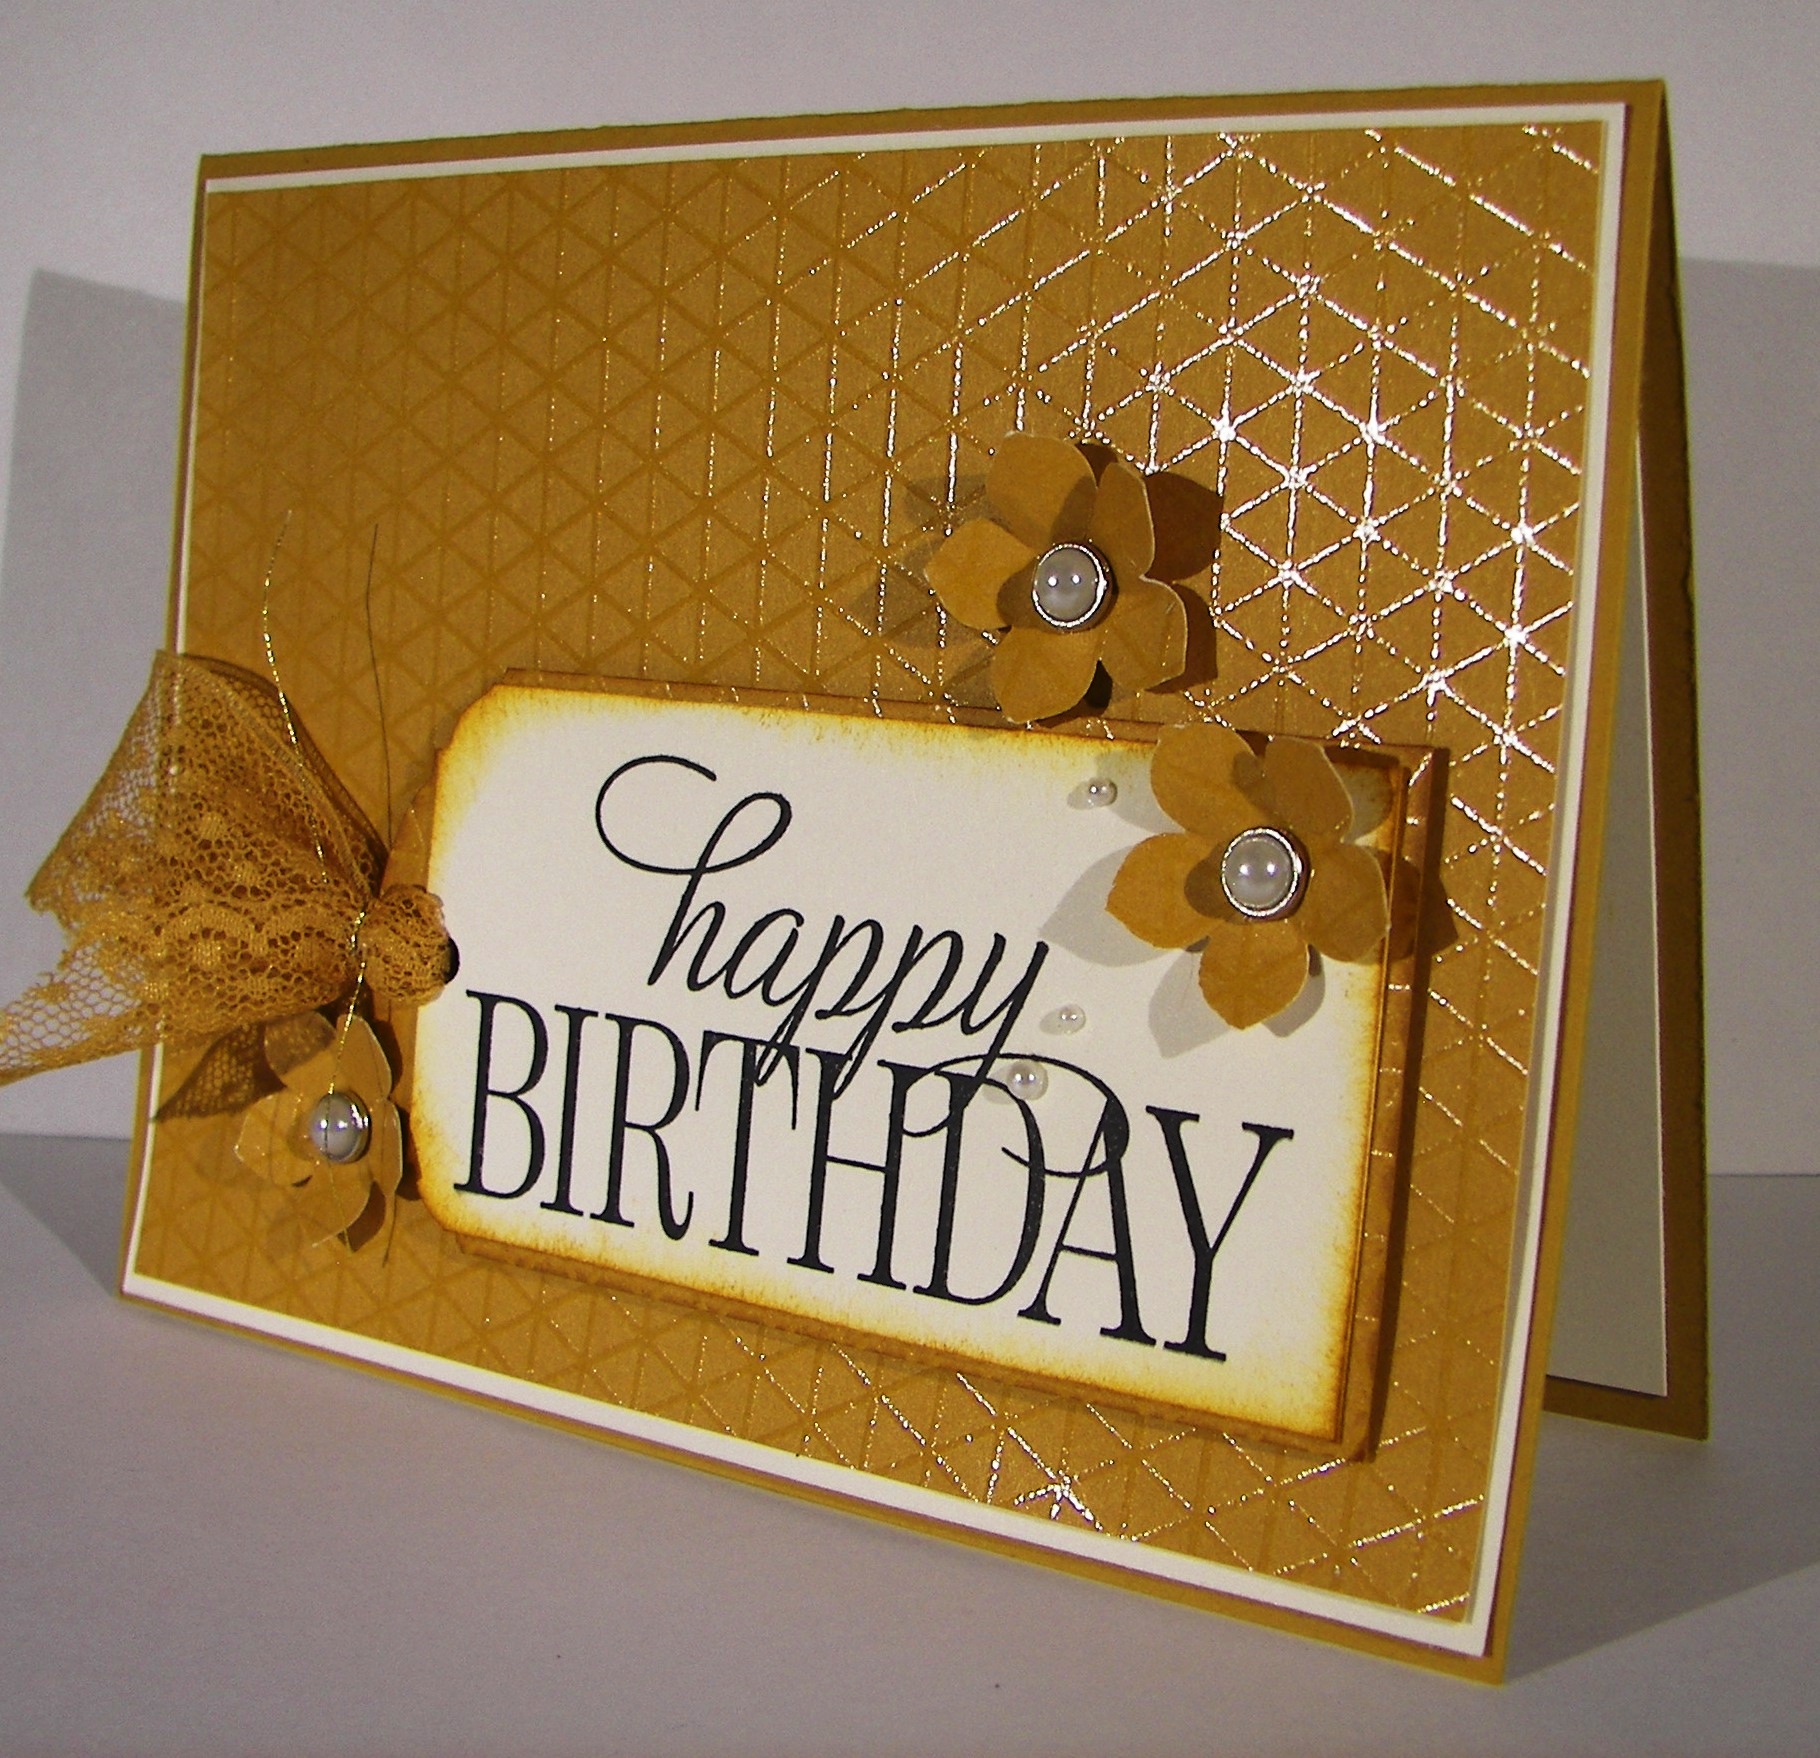
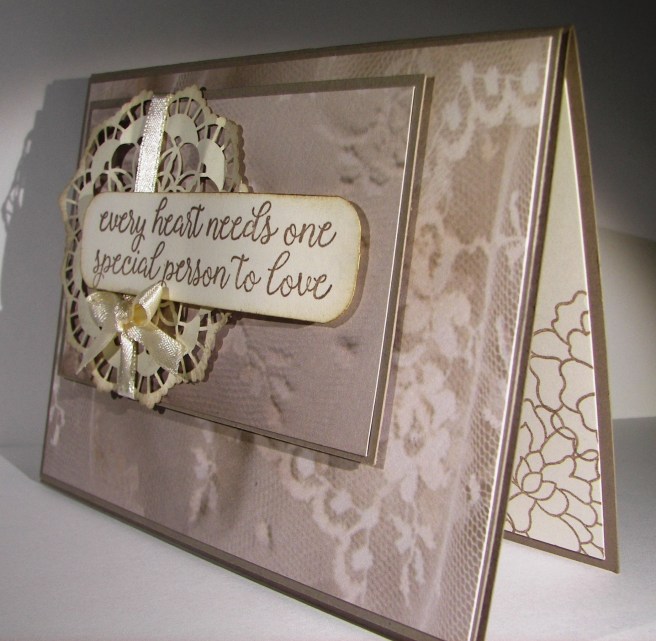
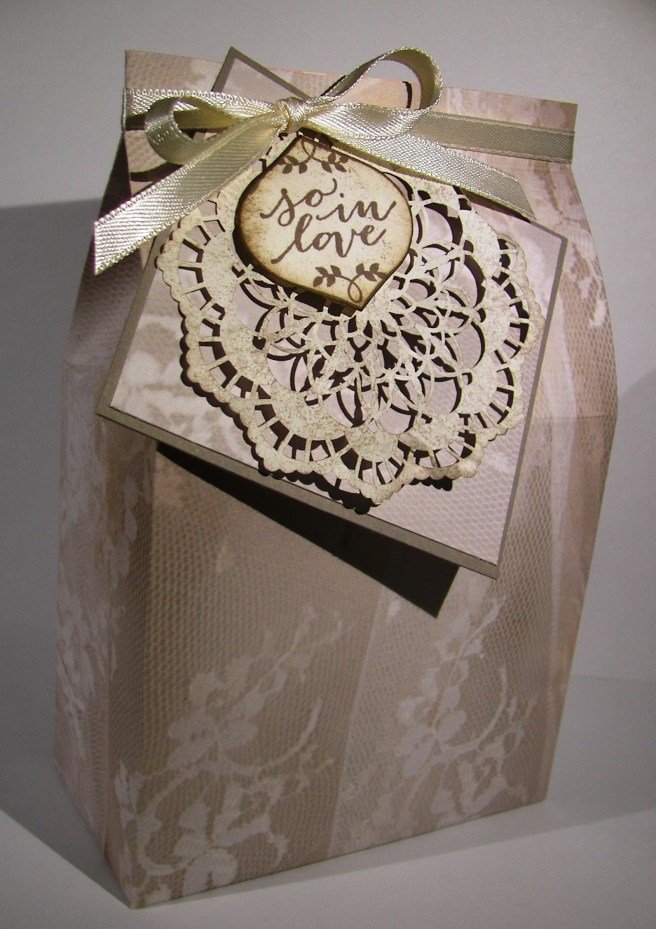
I used one 12 x 12 sheet for this set.  The first cut was to give me a sheet 4 x 12, then a second cut at 5 1/4″ for the card front.  I used the remaining piece to trim out the decorative layers.  The larger section left, measuring at 8 x 12, was scored to create the matching bag. Put that pretty paper to work, otherwise you are left with a bunch of paper that you love and cannot bear to part with.  I know it is hard, but how pretty is this set?

2-4-1

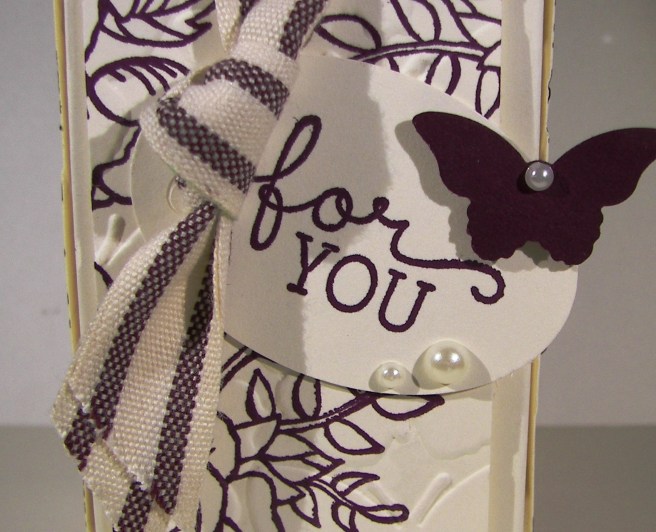
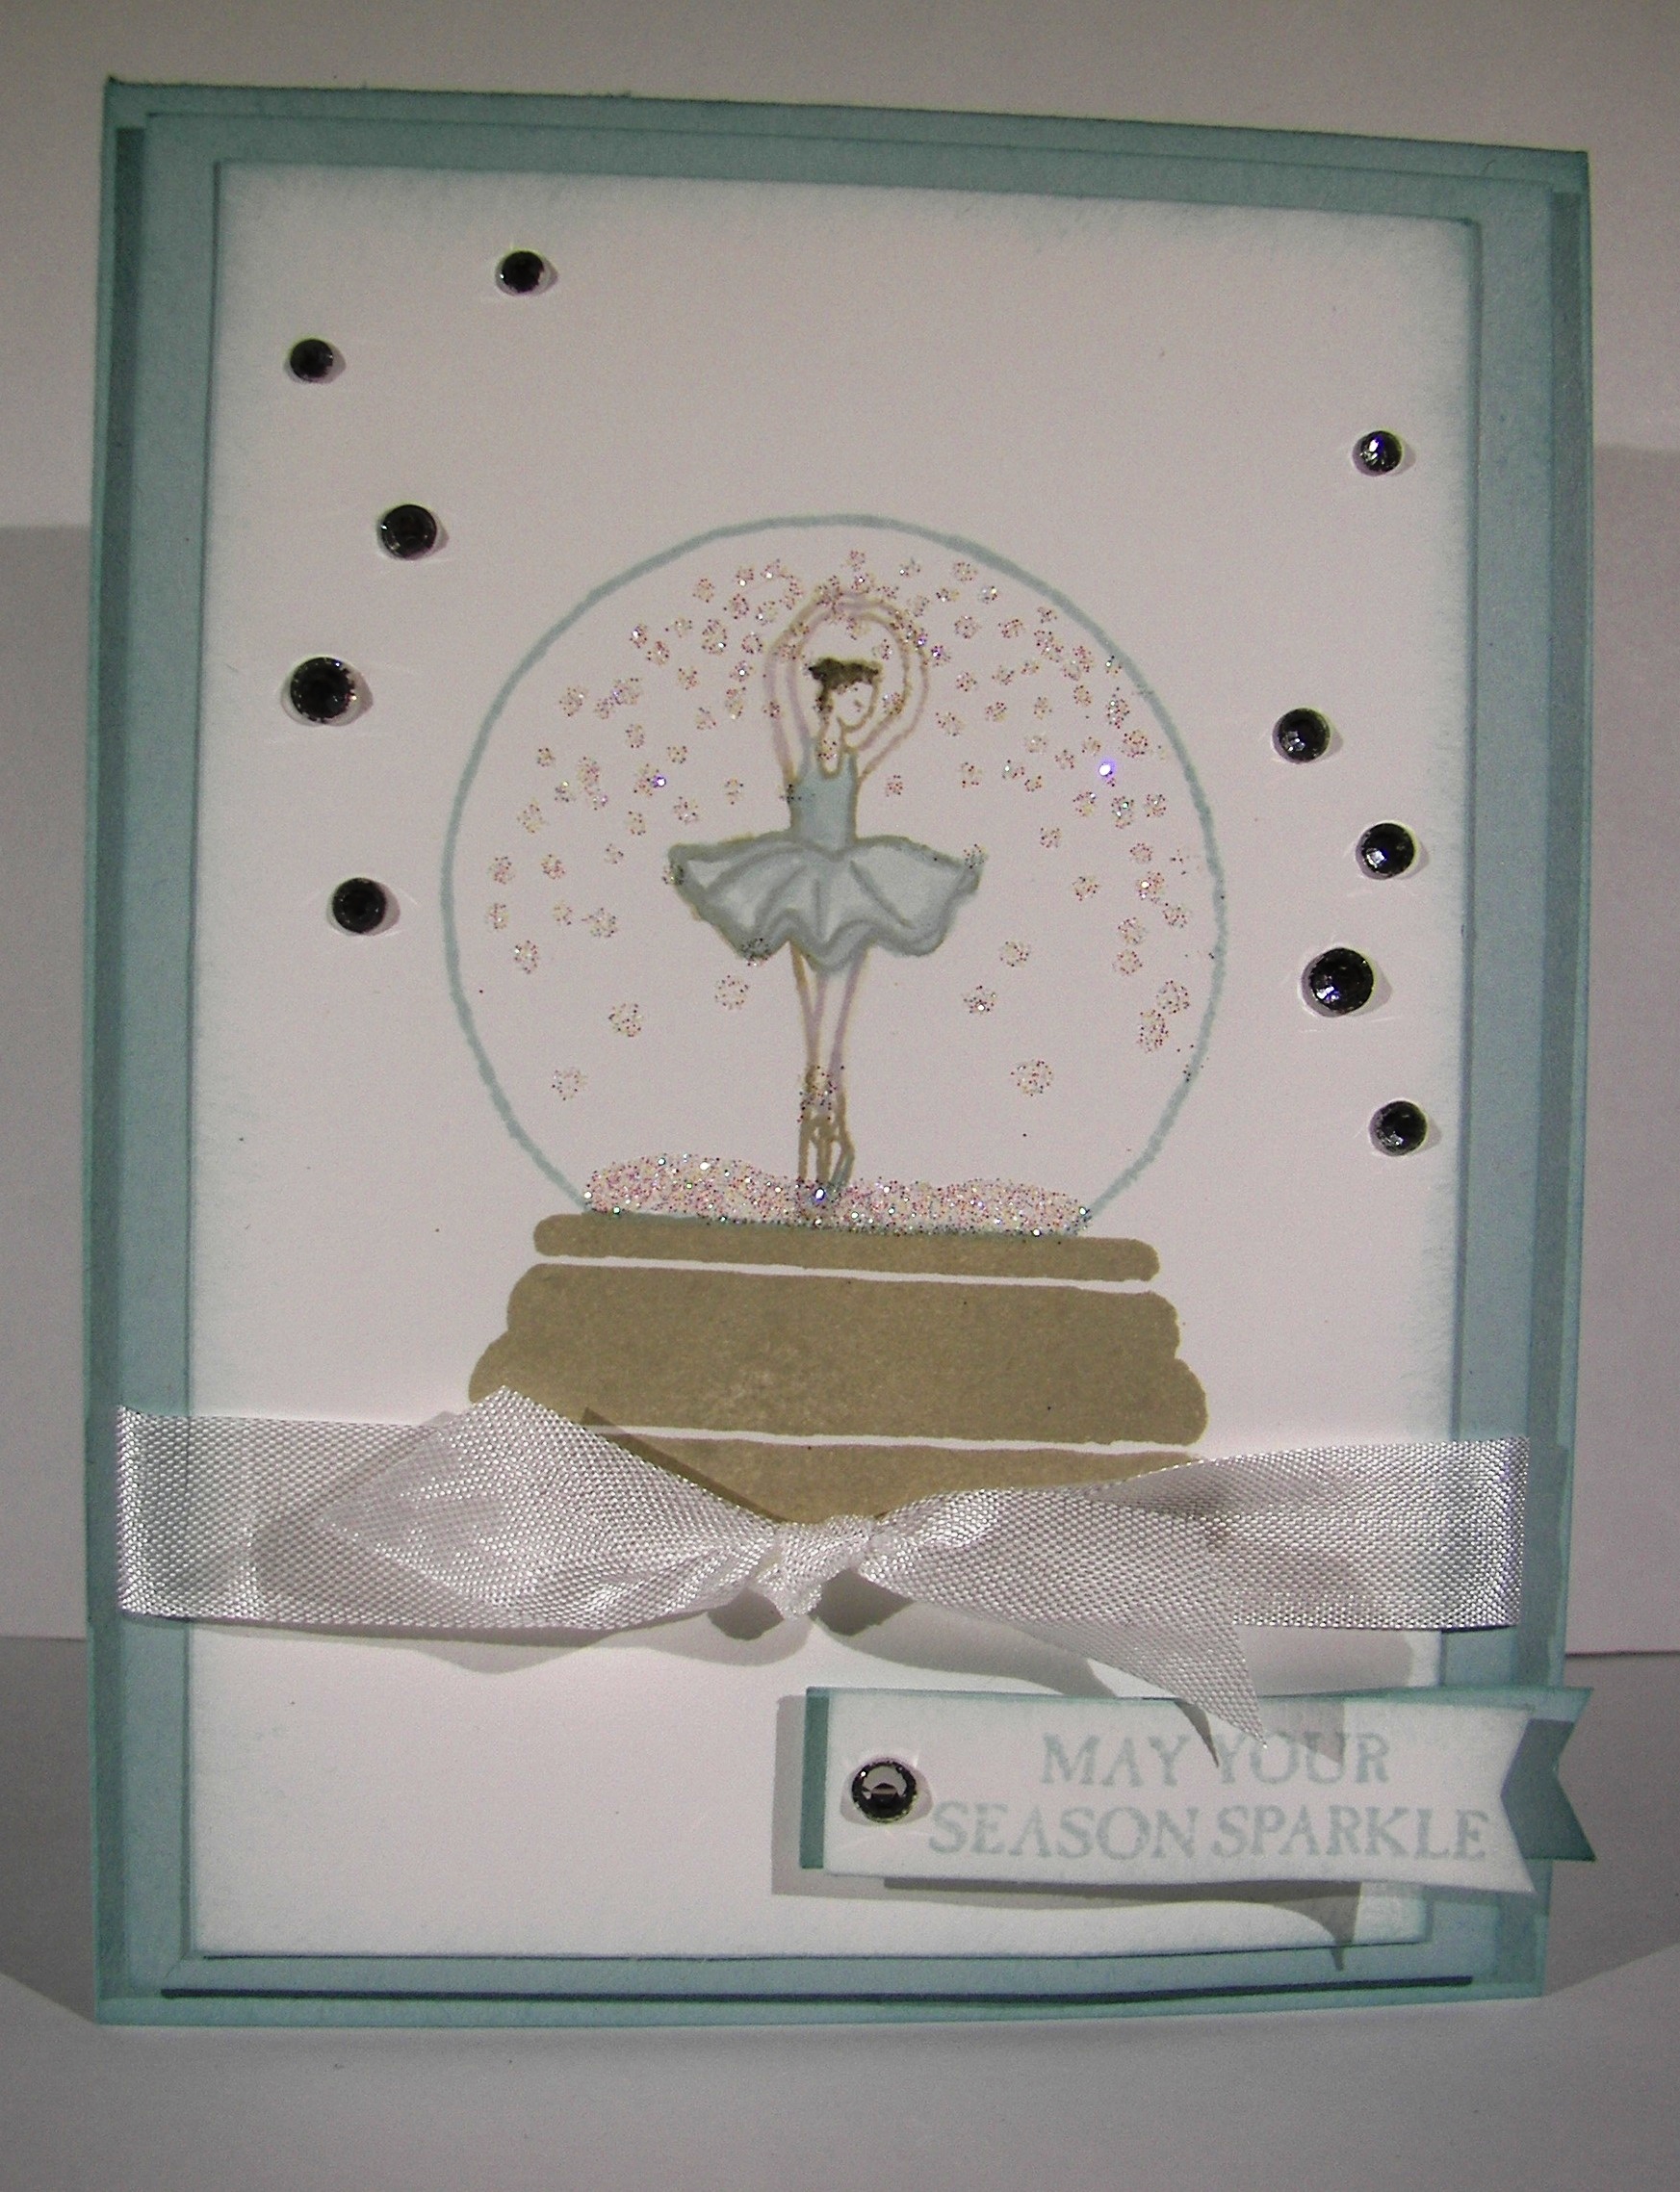
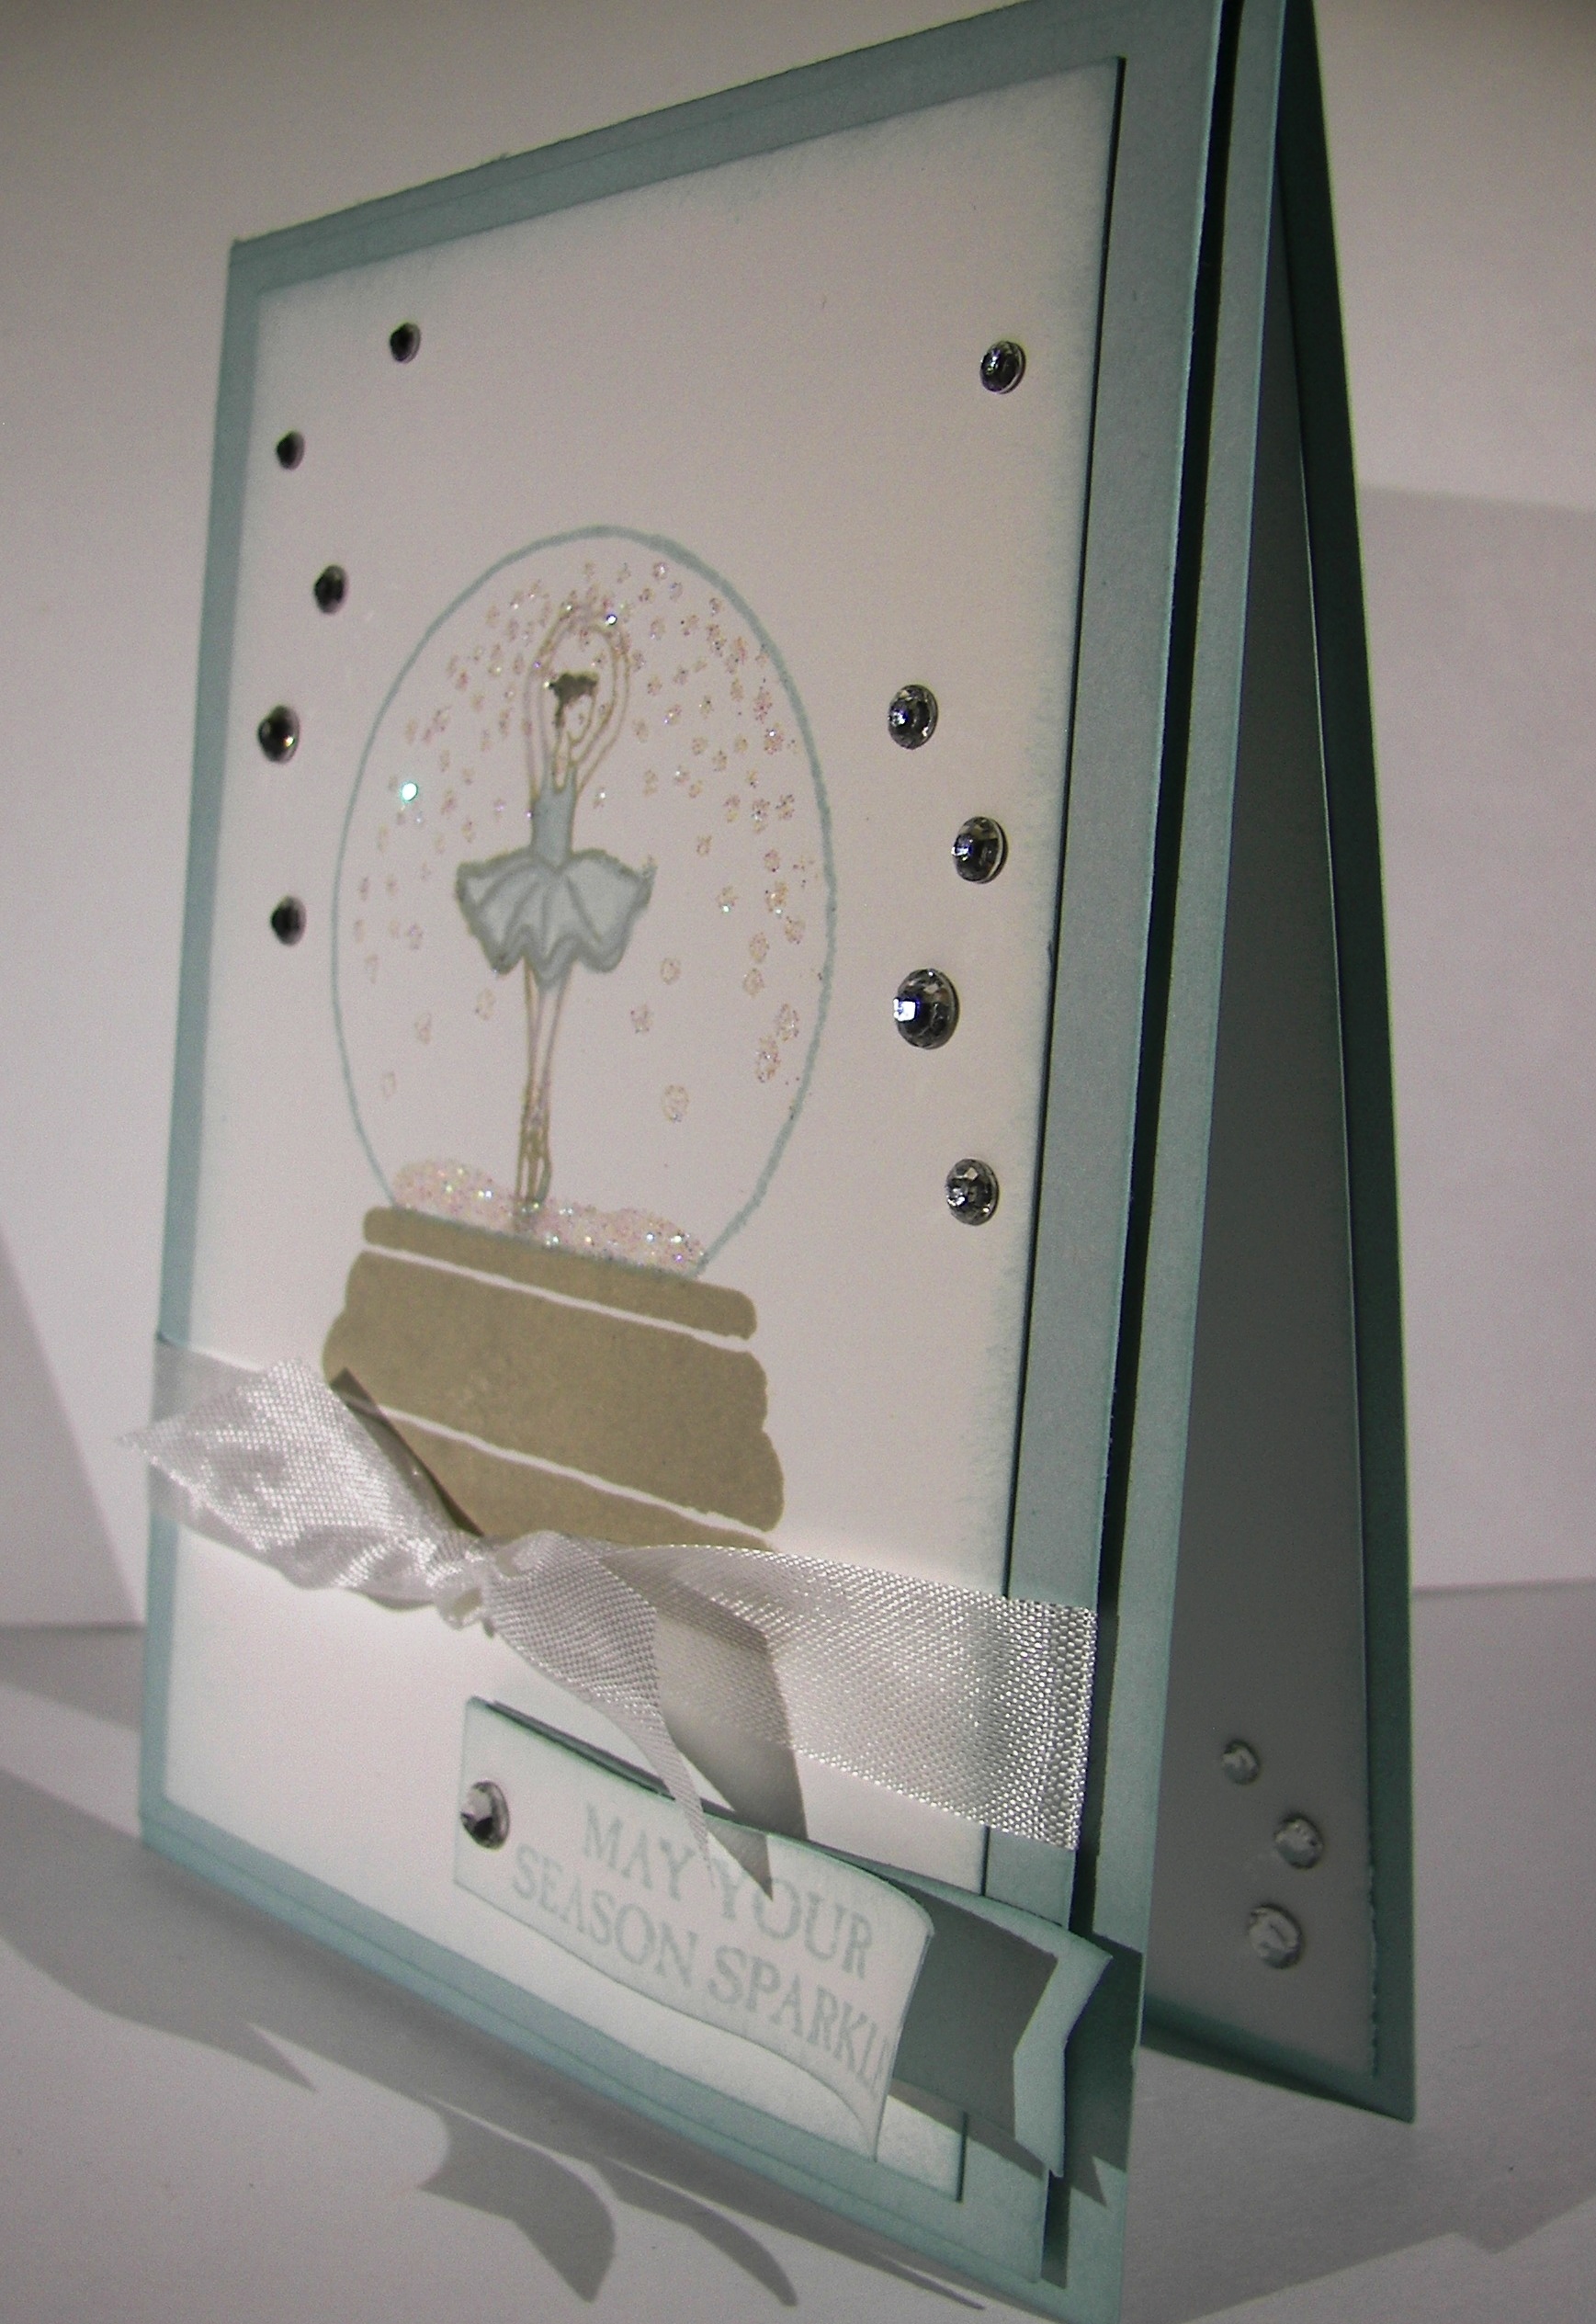
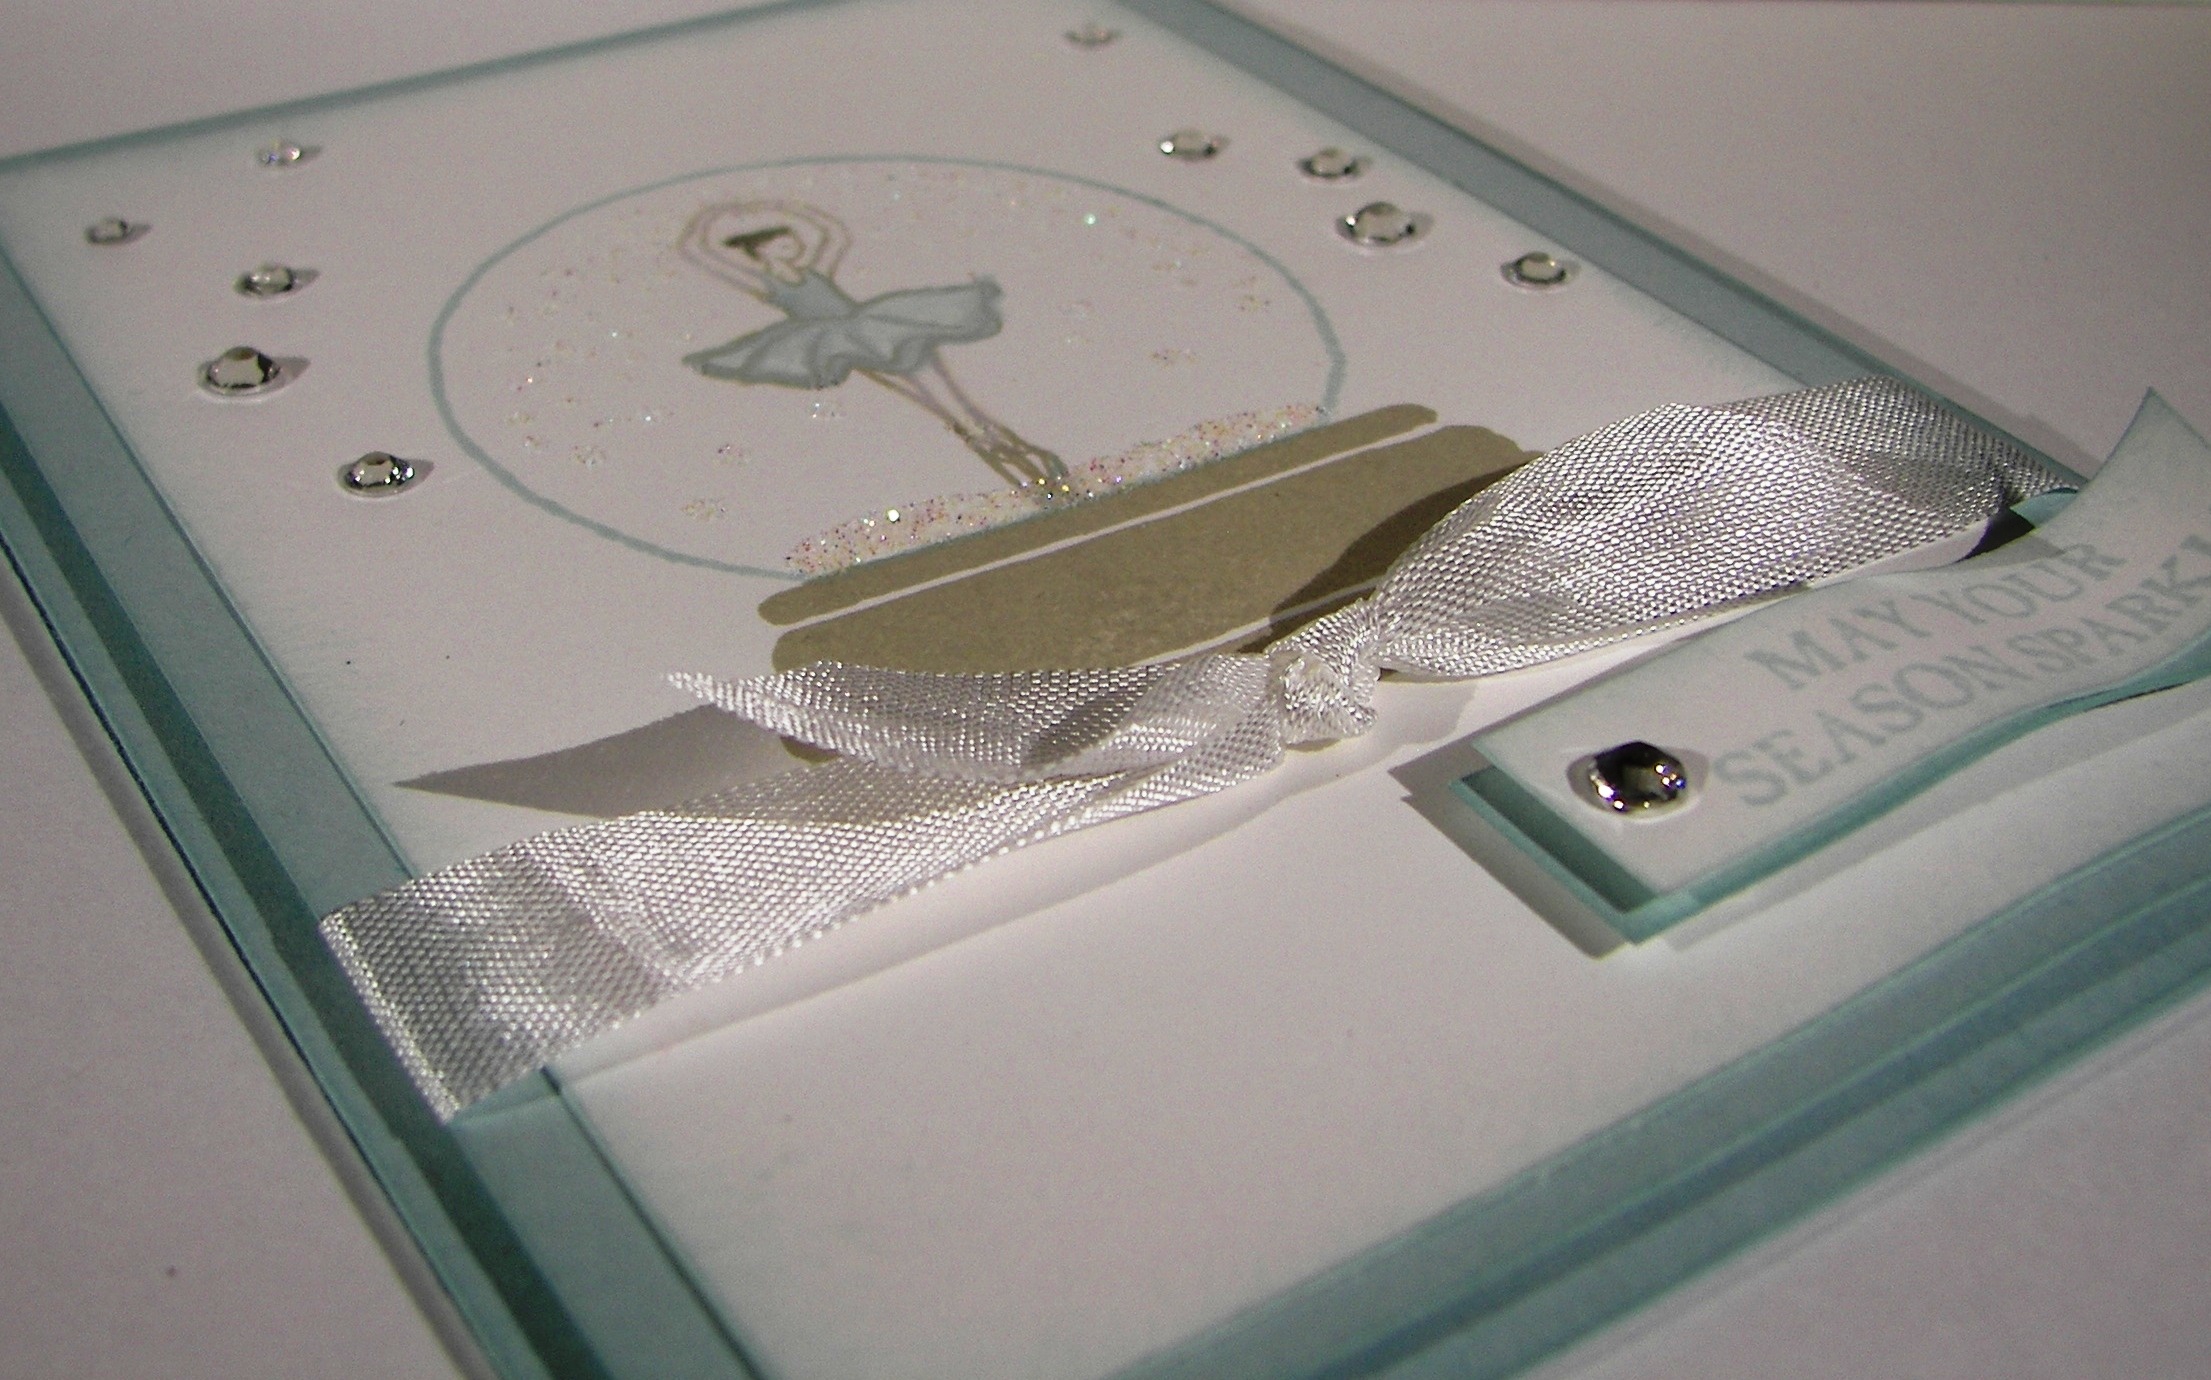
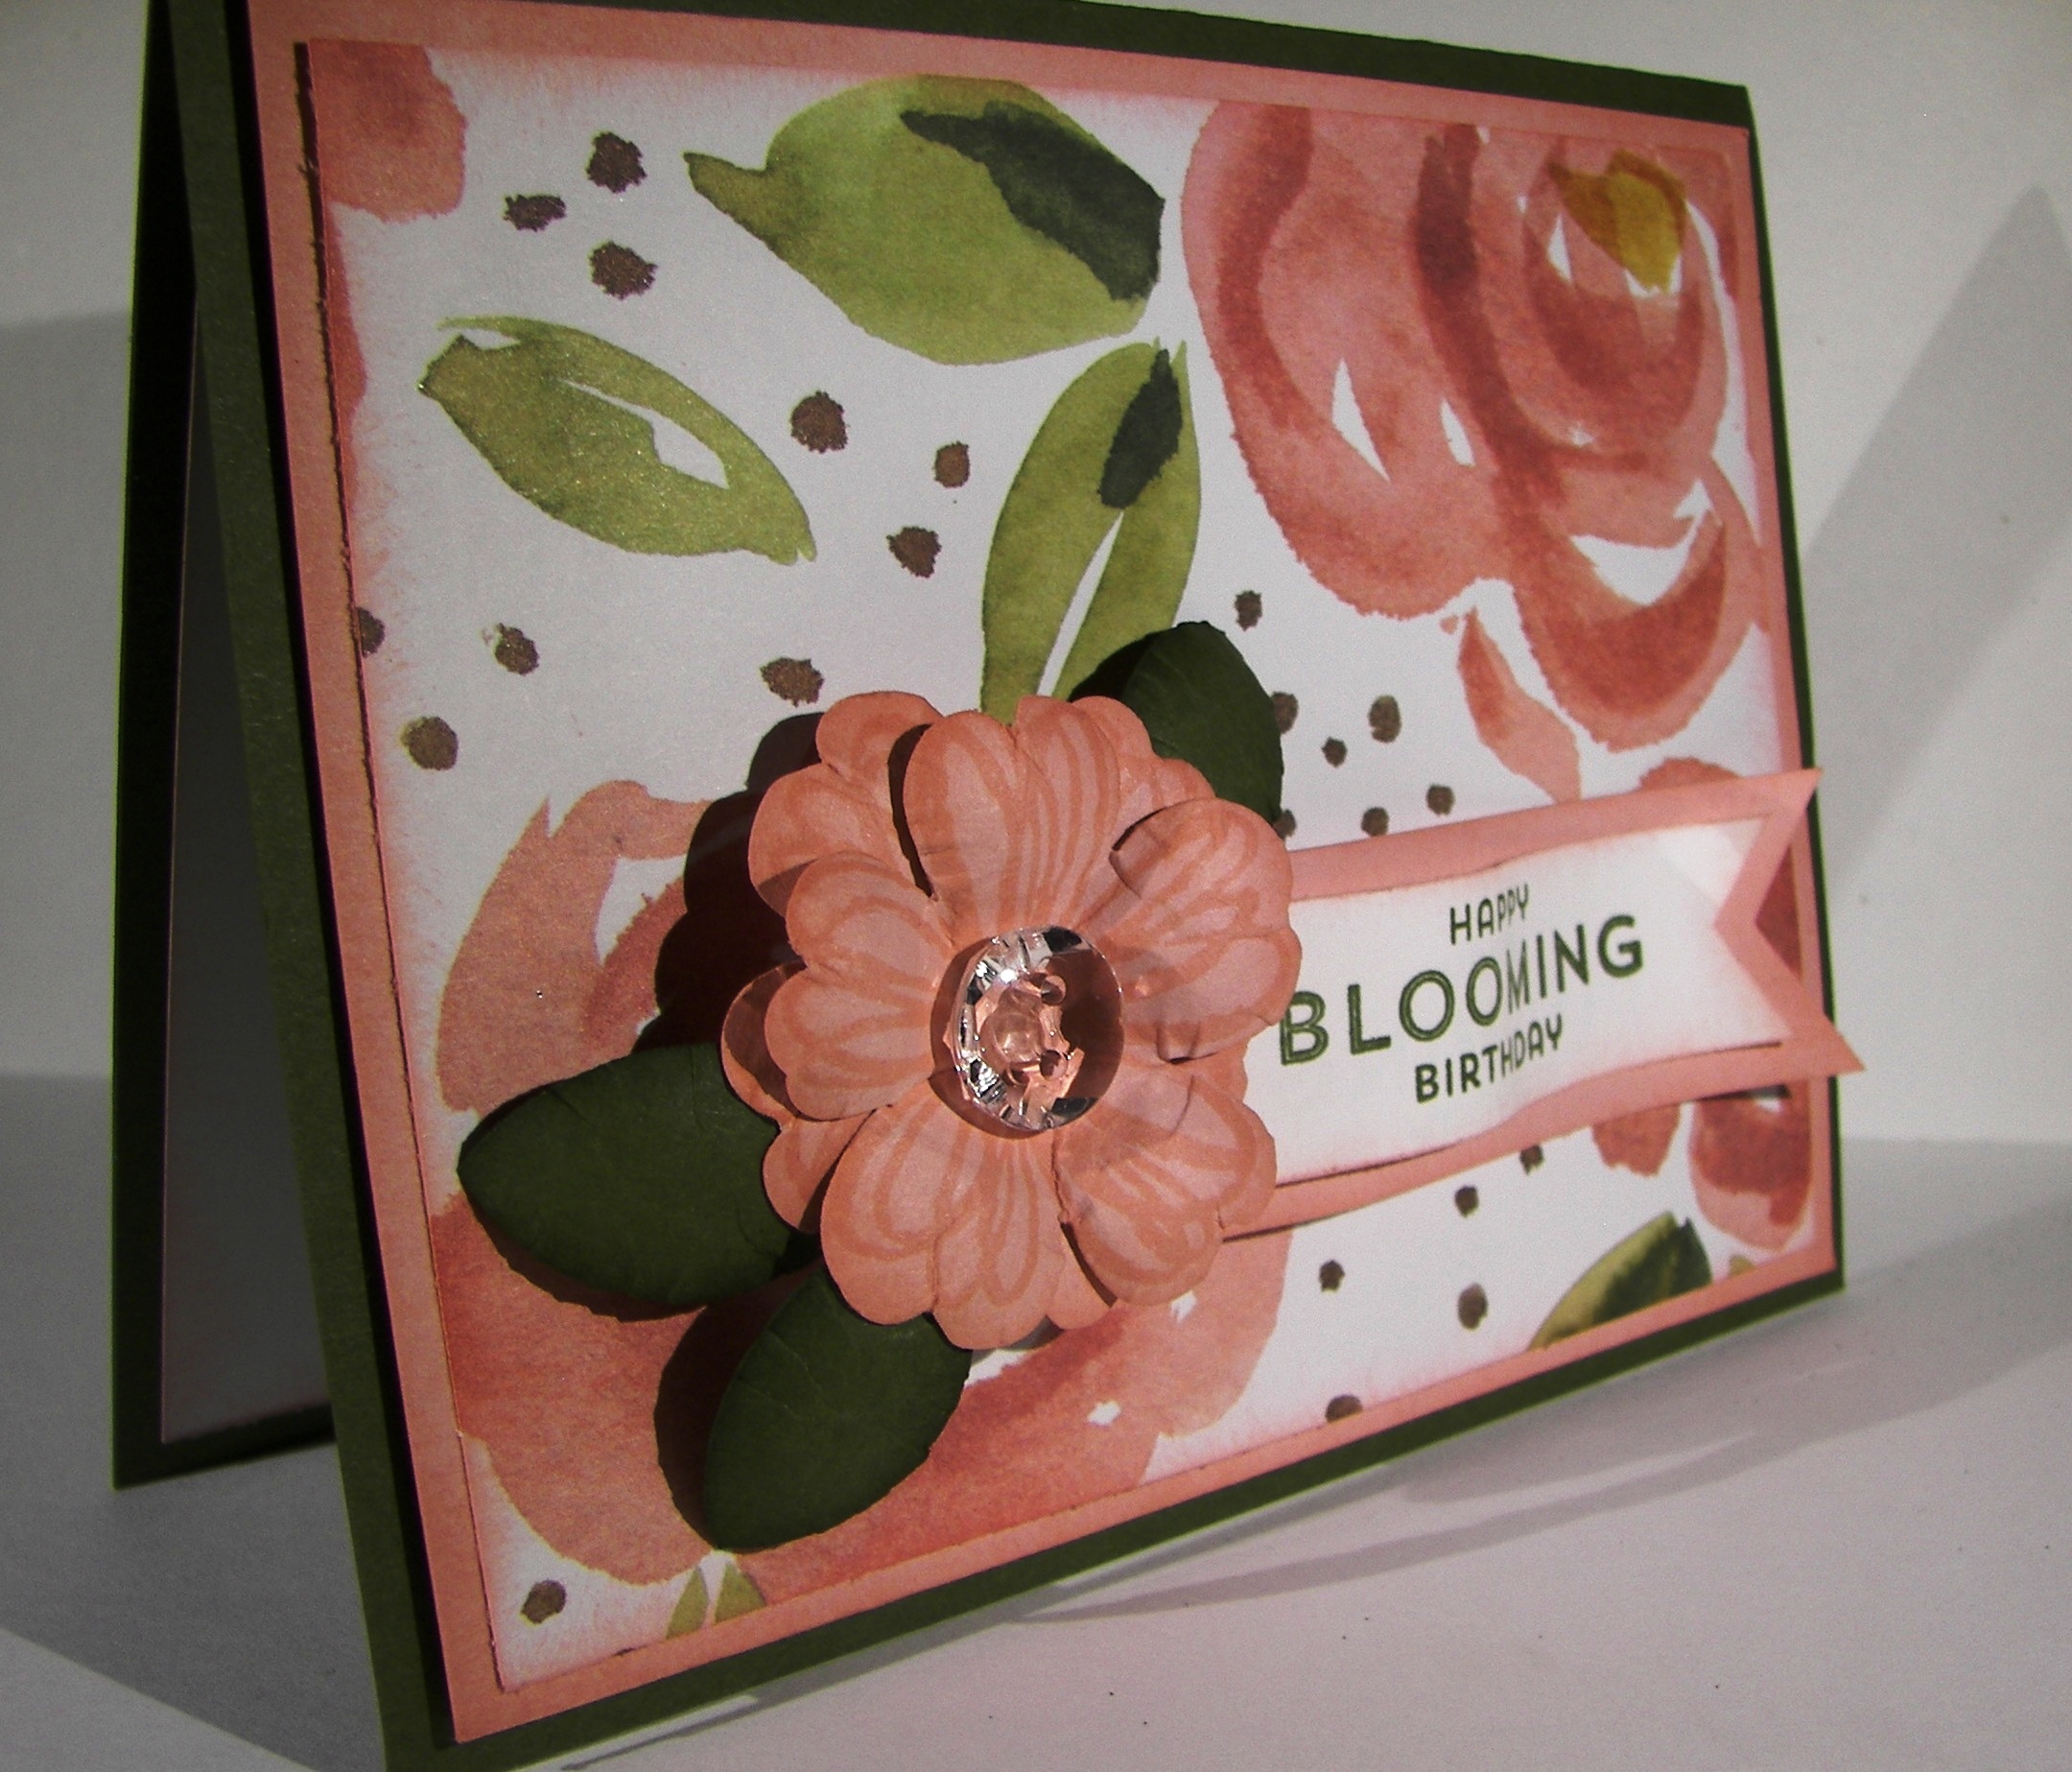
The doilies are so lovely.  They are very vanilla on one side and whisper white on the other. So versatile, and made from paper that can be worked with a bit.  As you can tell, I sponged these two and gave them a proper crinkle.  A doily doesn’t lay flat after all.

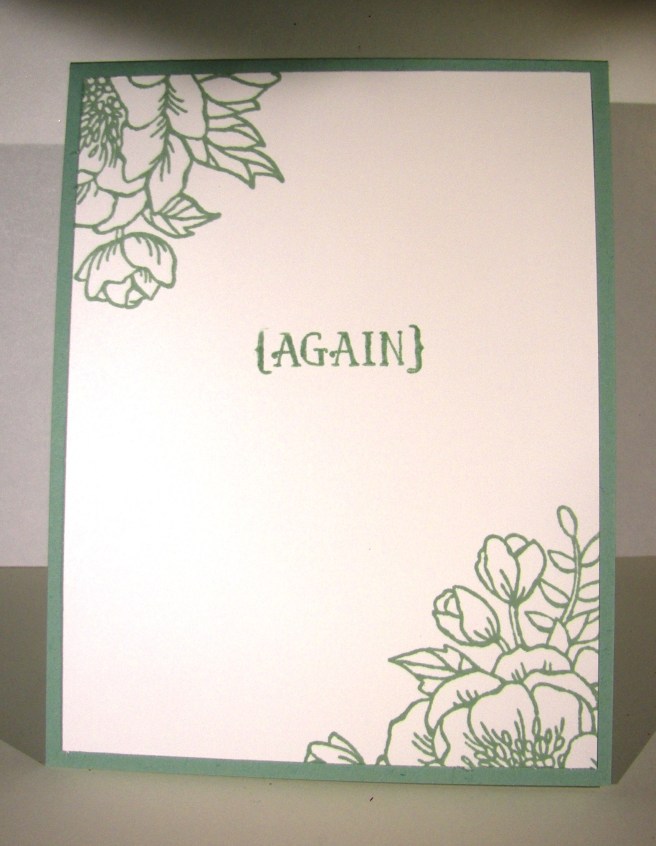
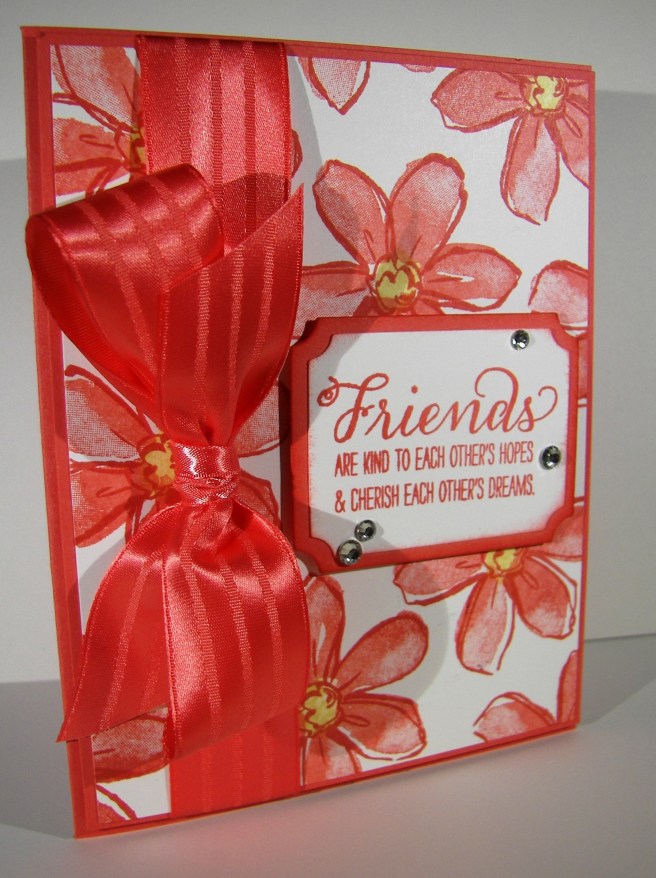
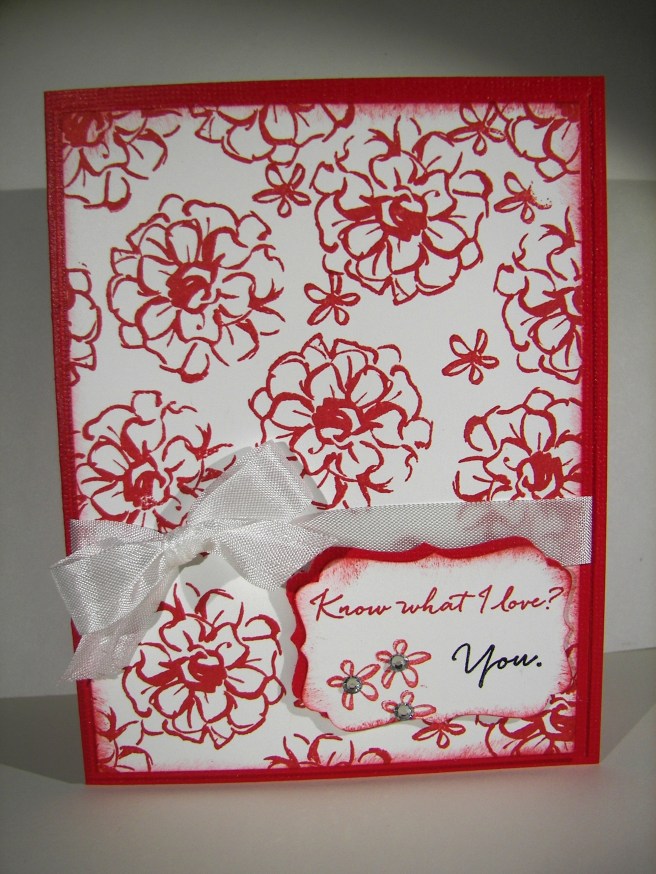
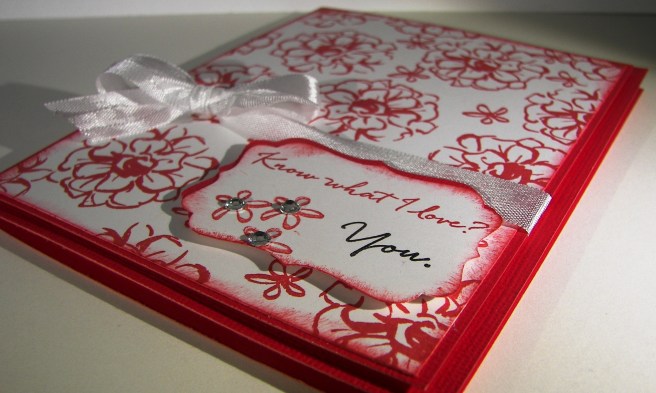
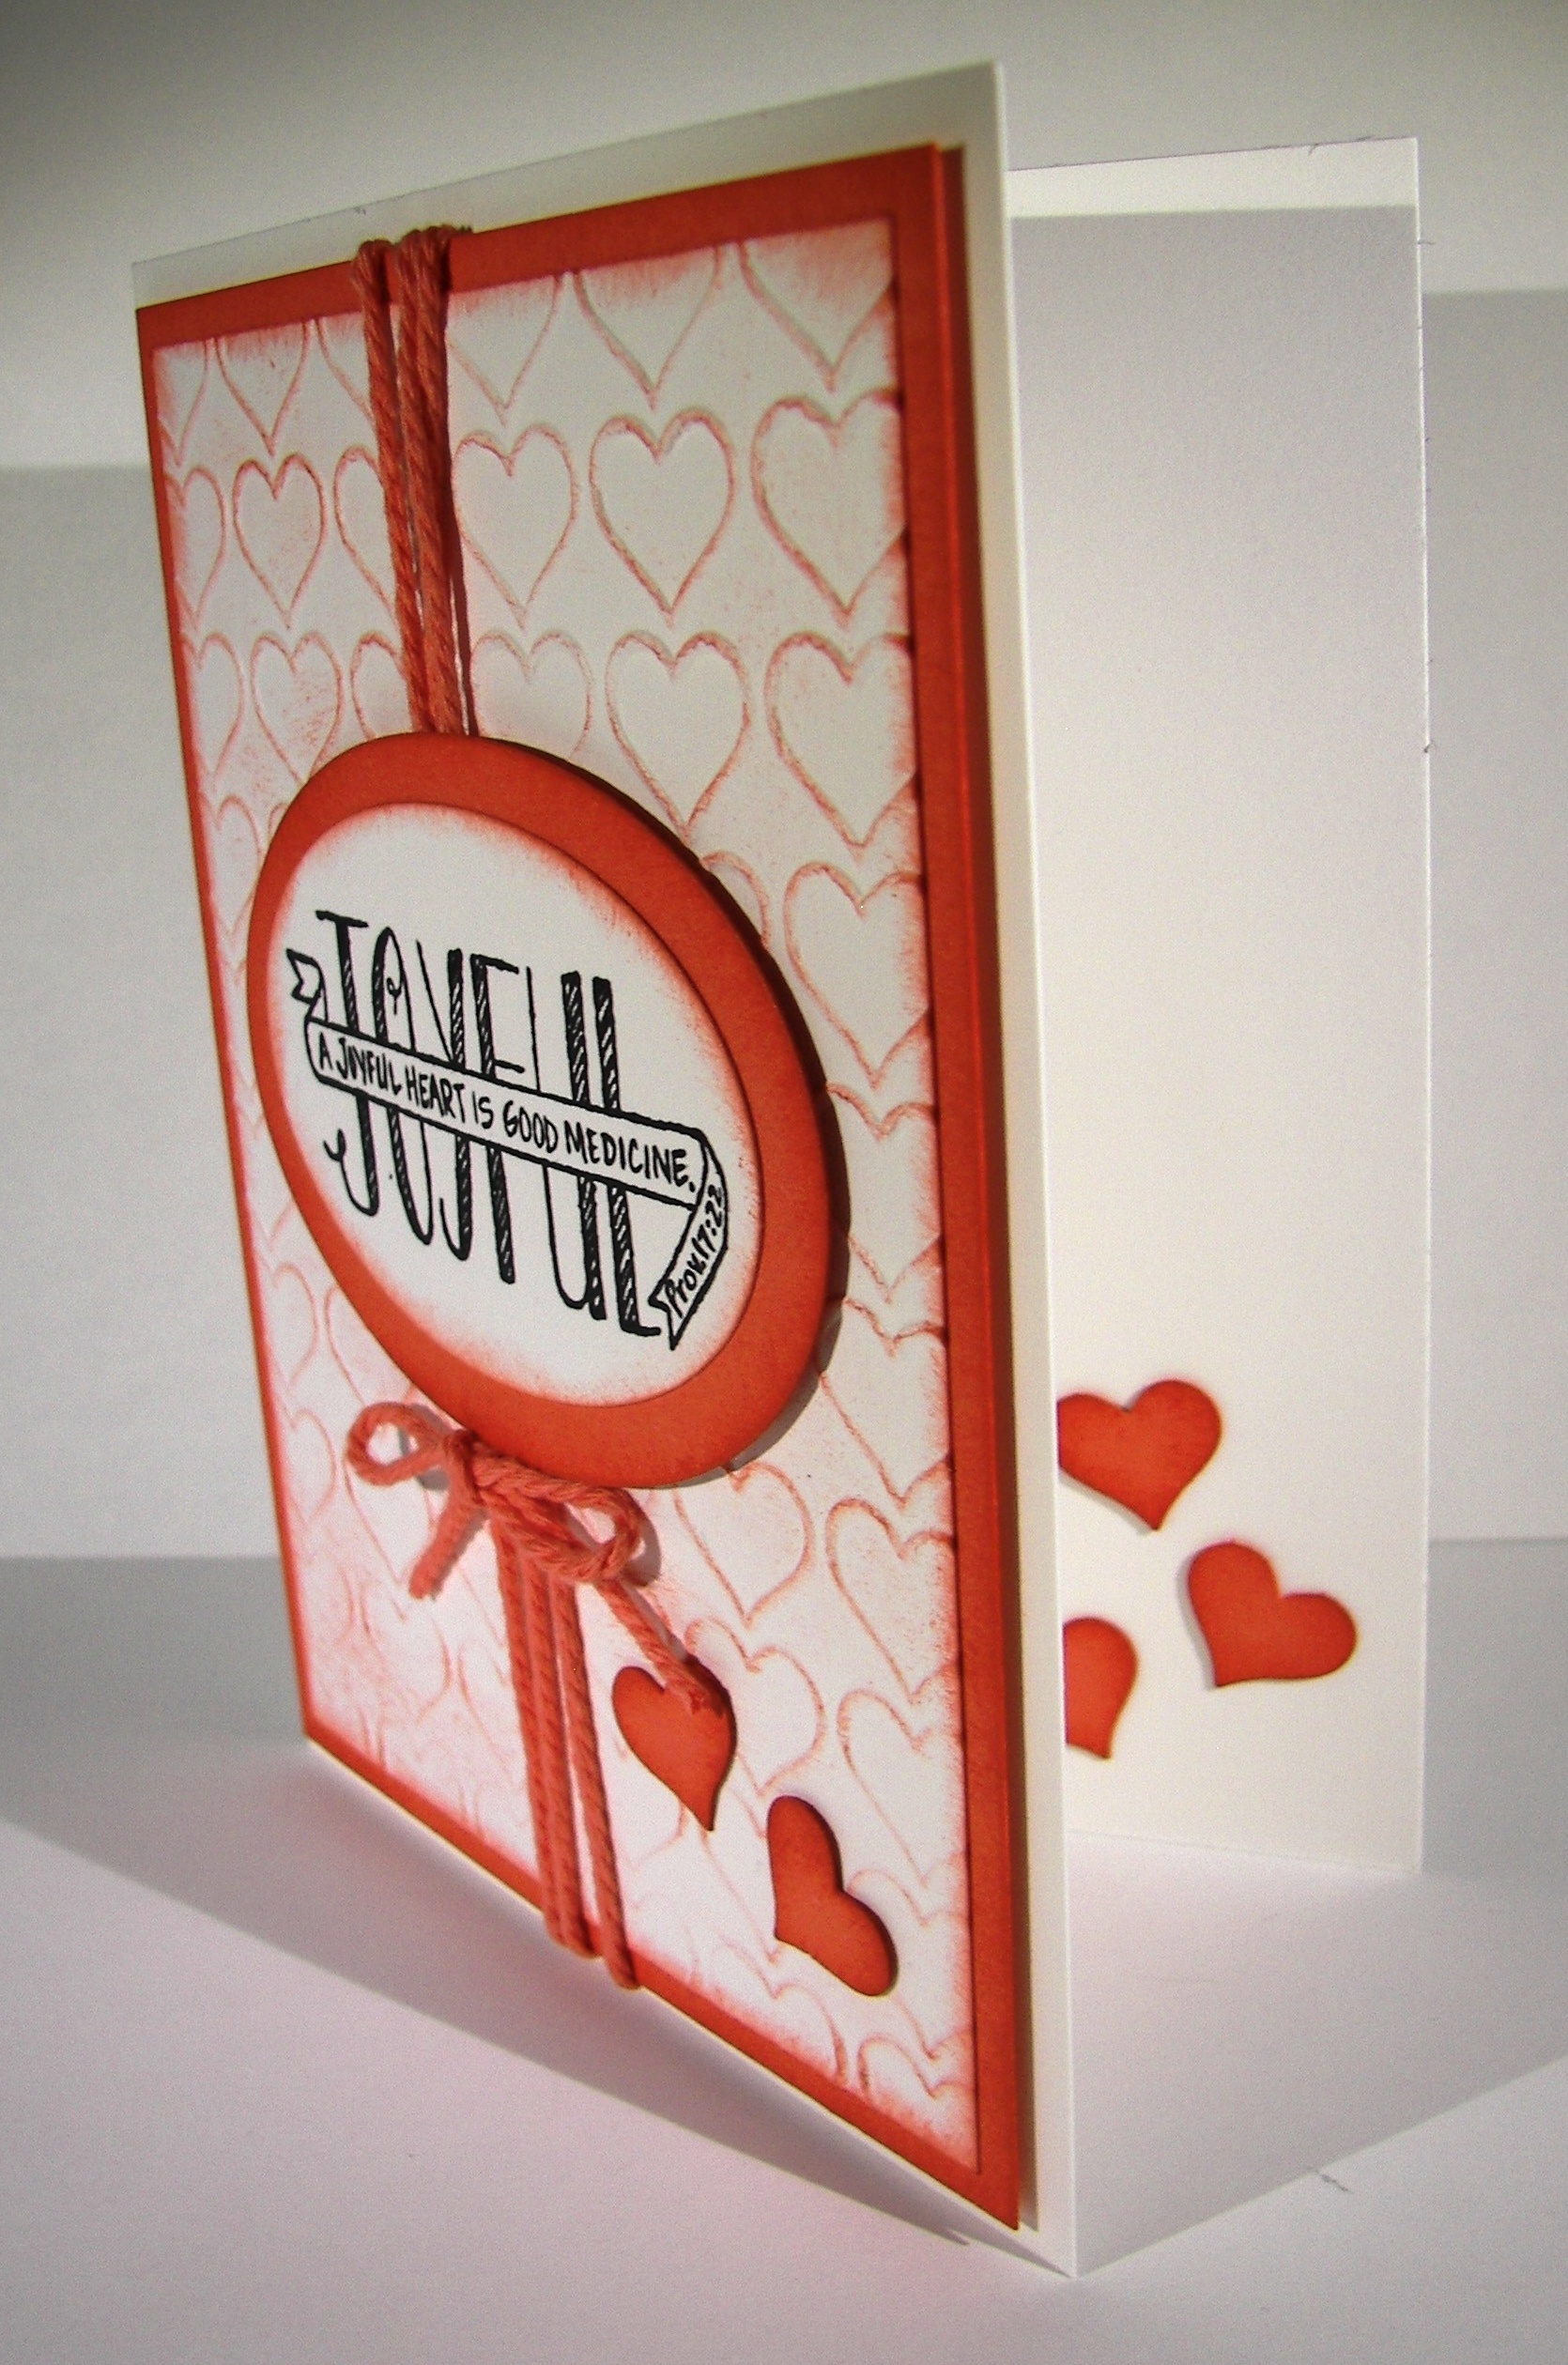
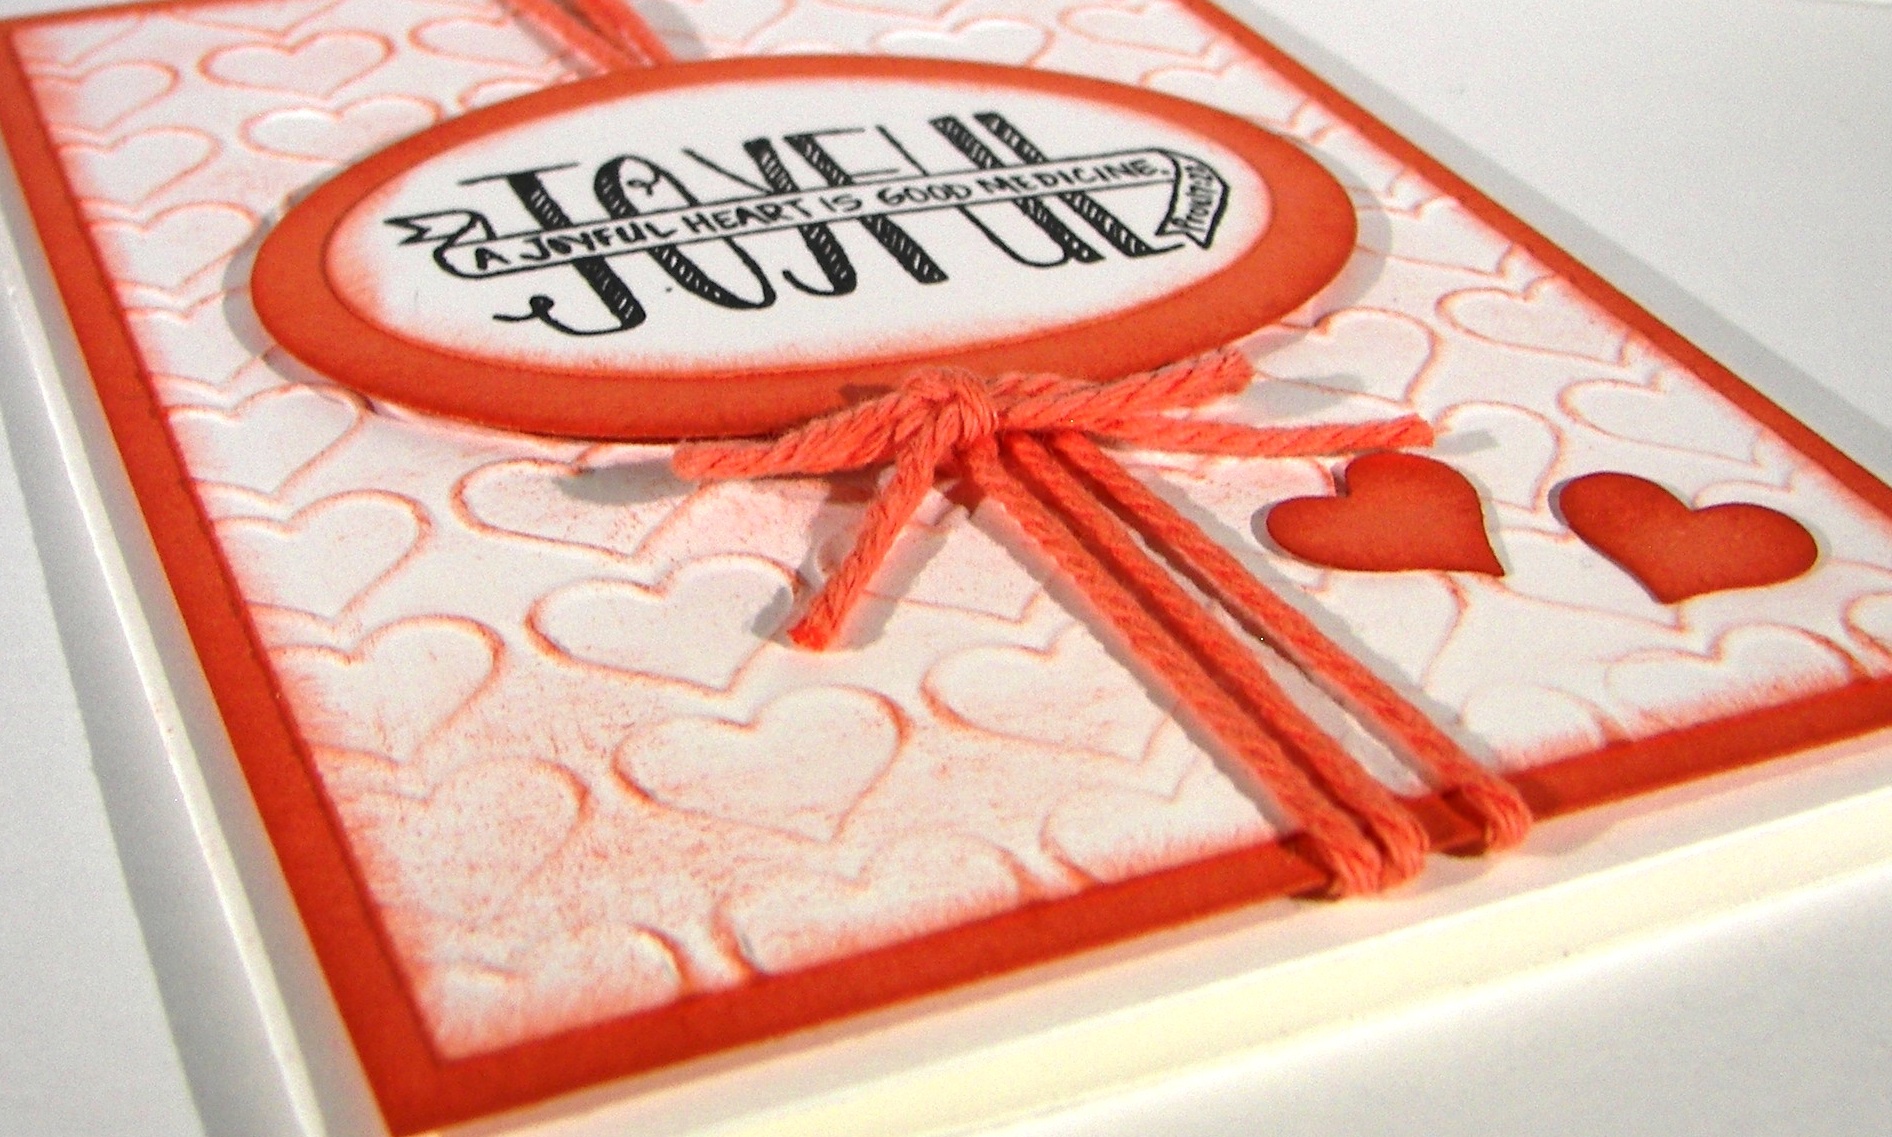
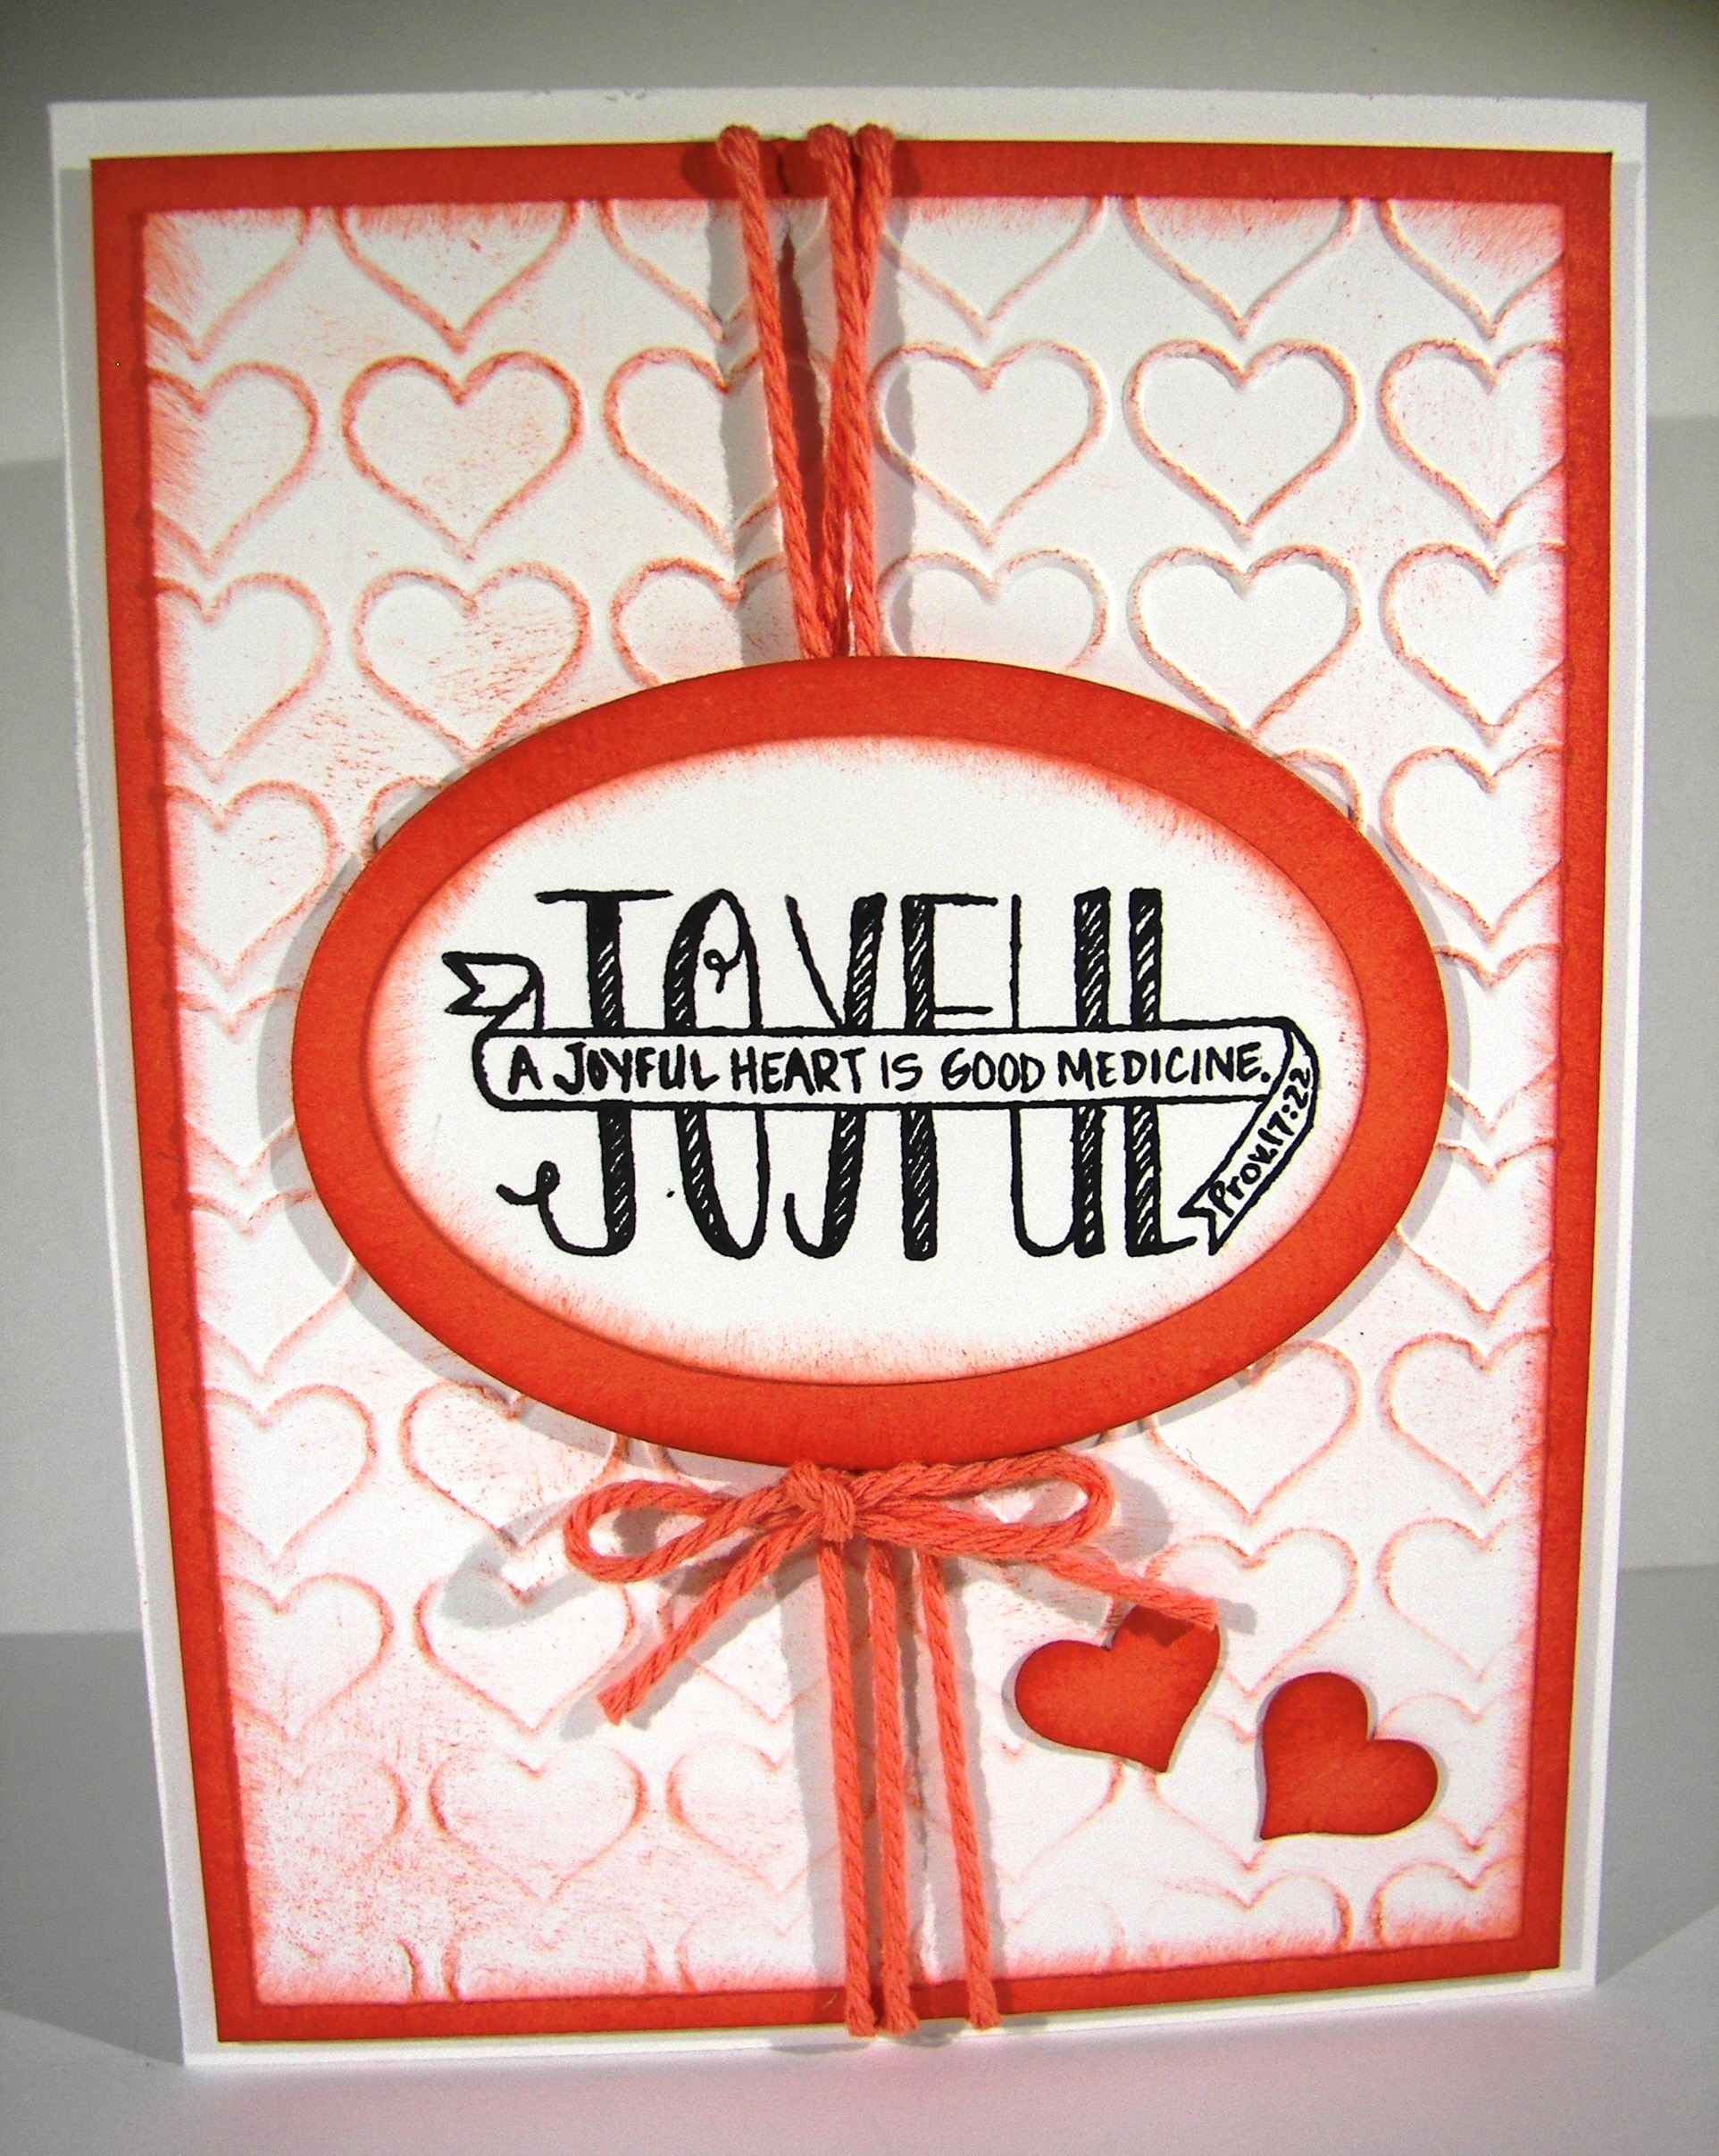
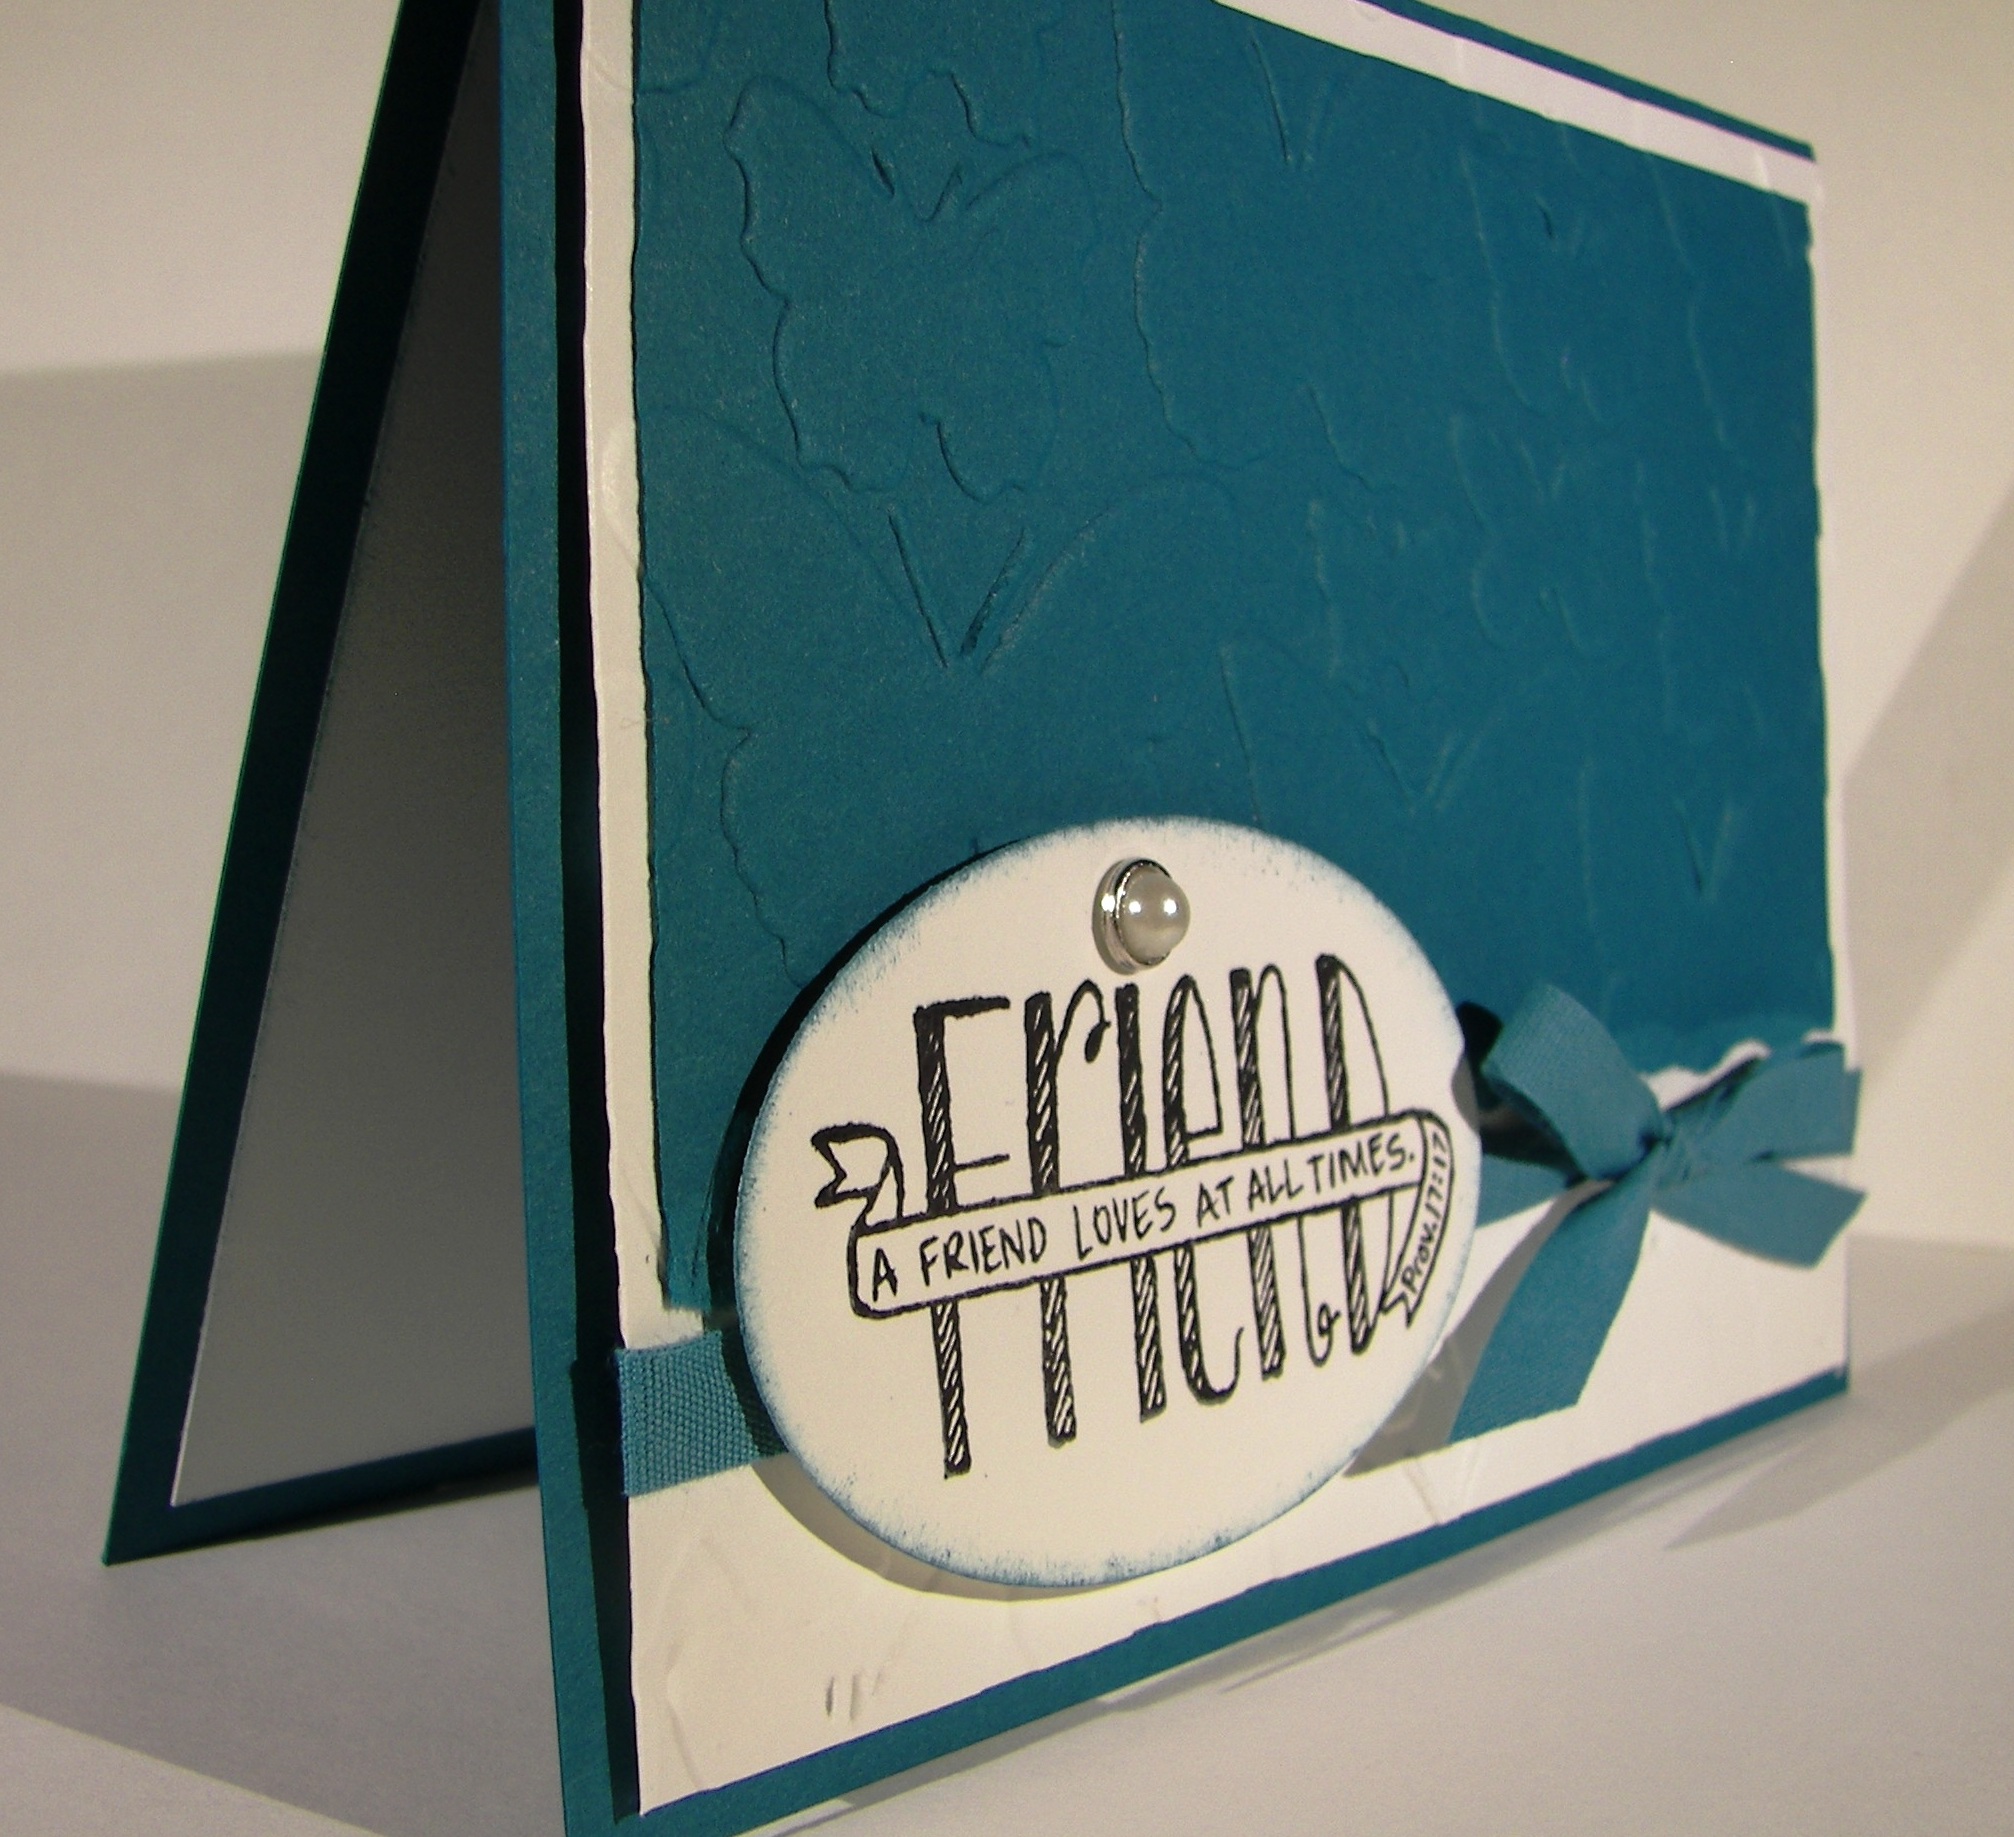
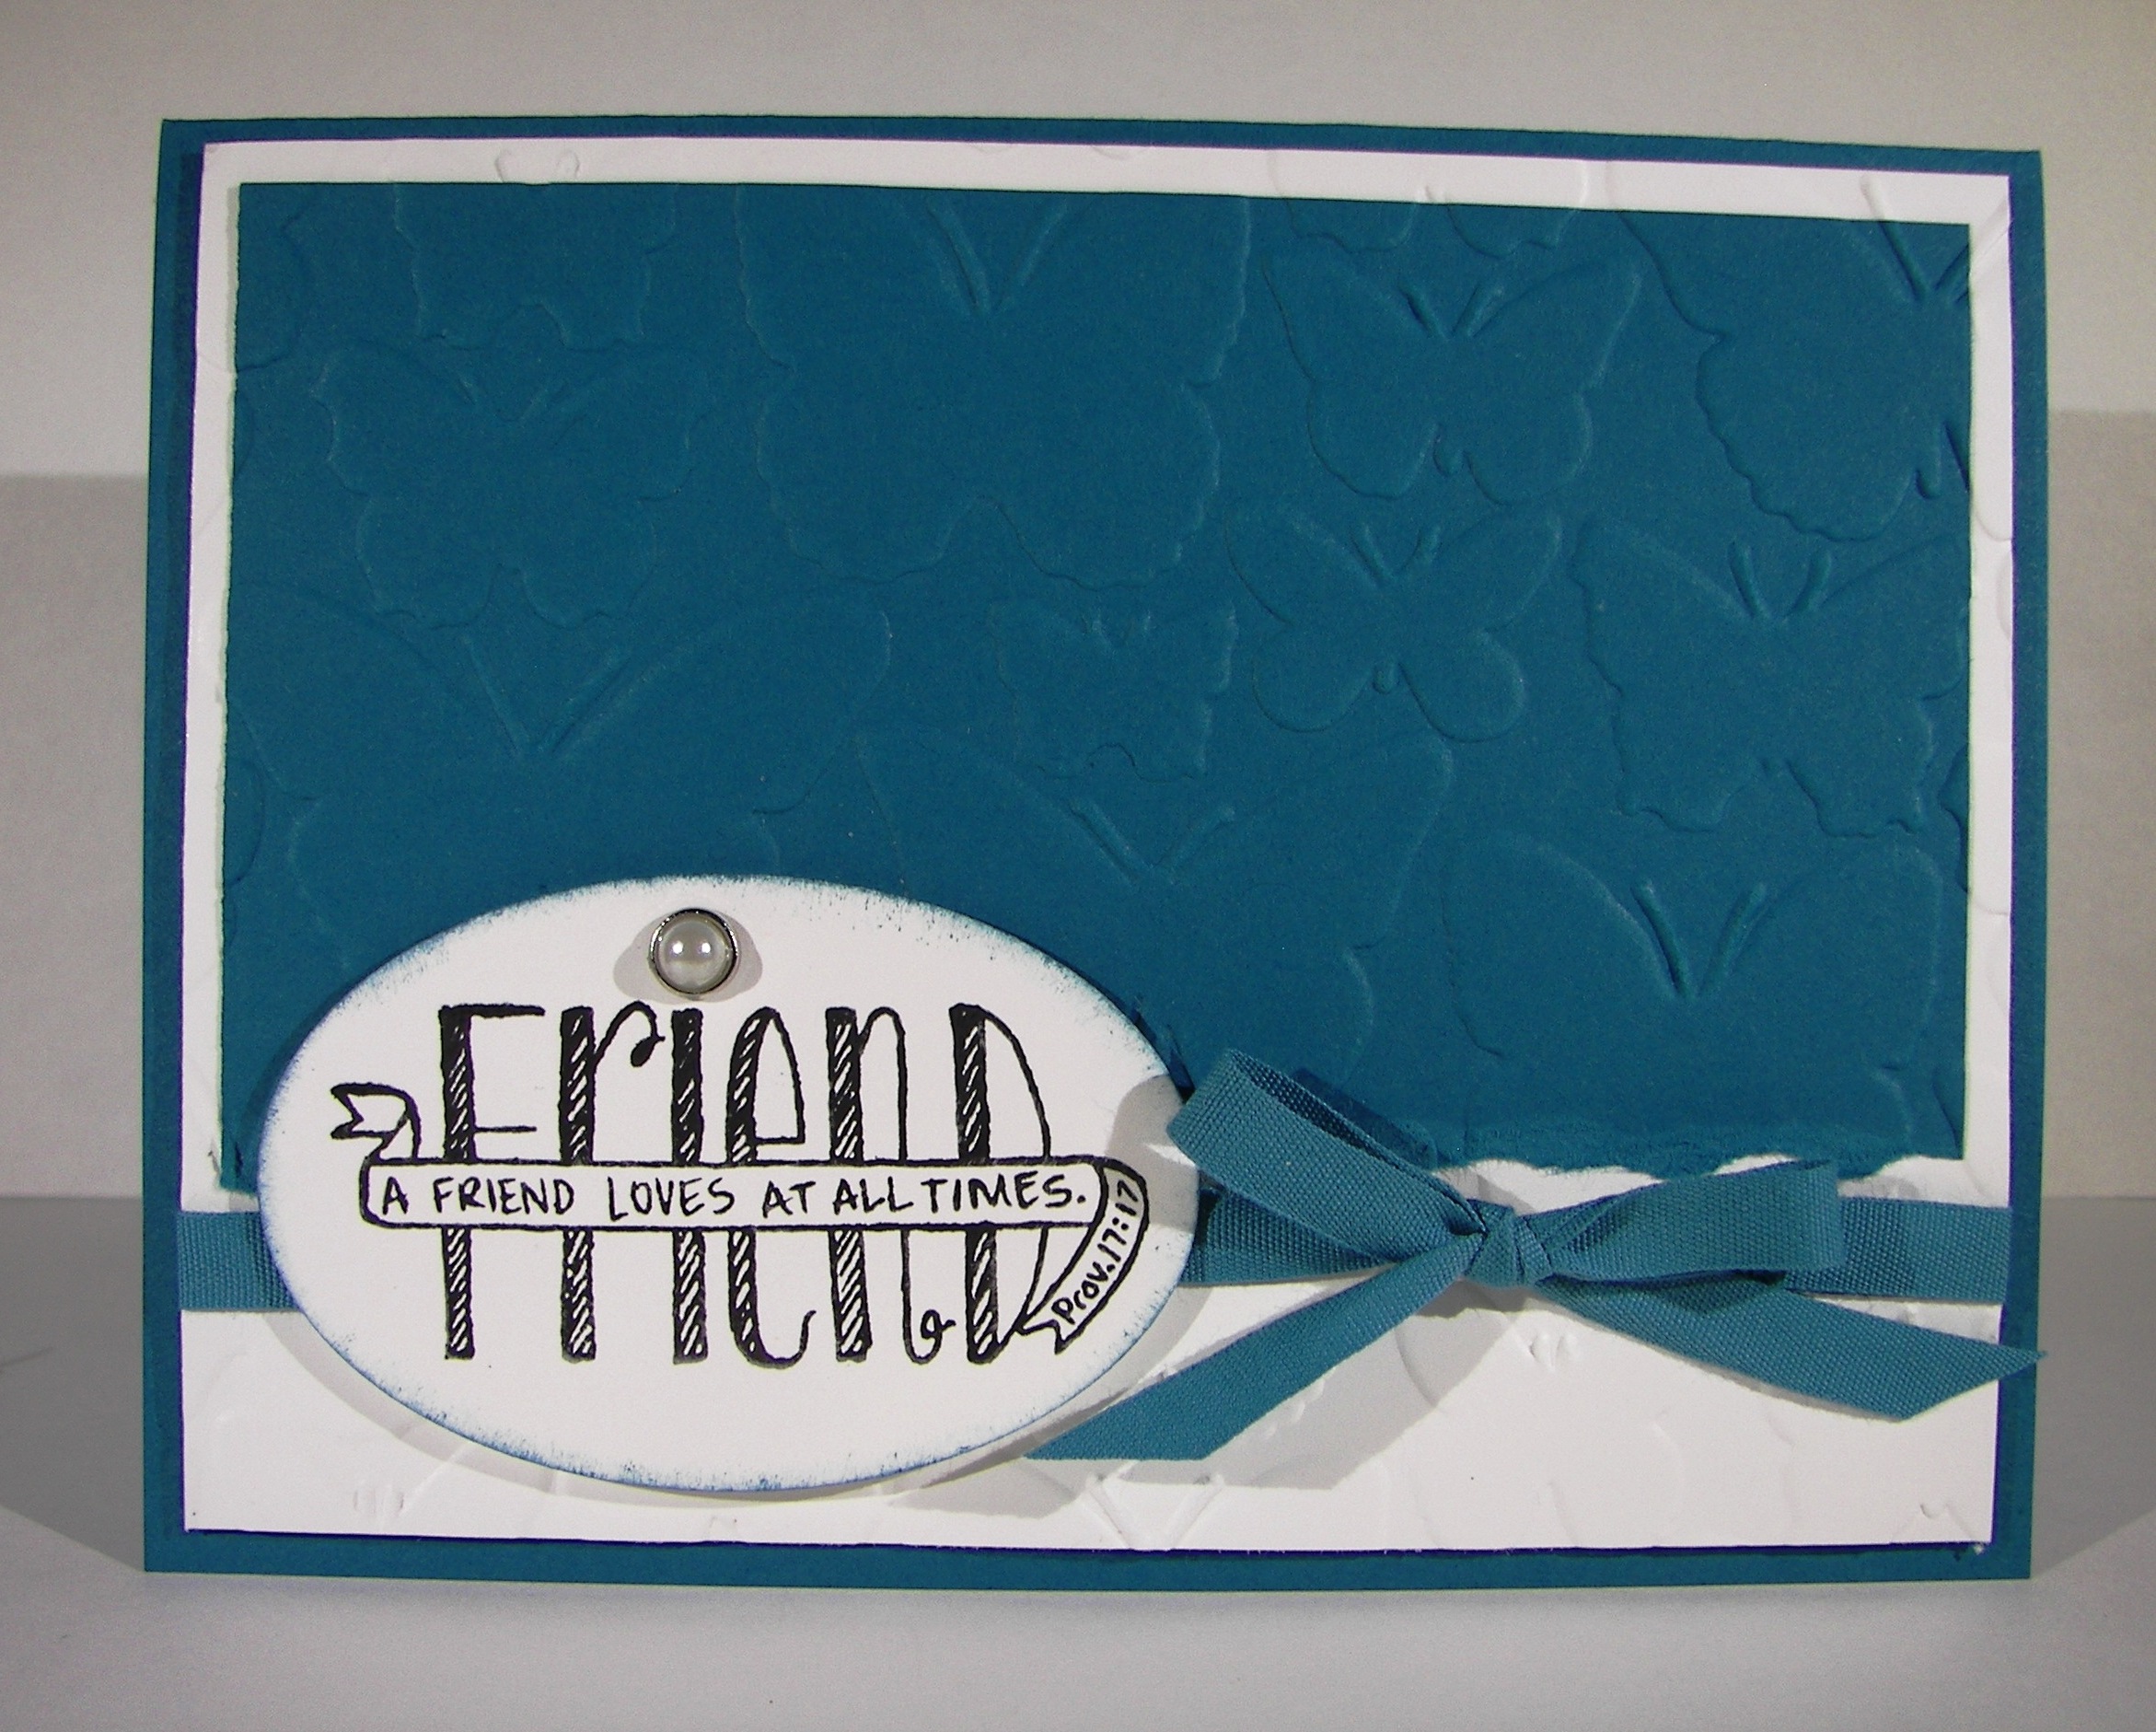
The sentiments came from two different sets and I went against my usual on this one.  I stamped and fussy cut.  I really love a die cut or punch to take care of that, but it had to be done.  Both projects were finished off with this elegant vanilla satin ribbon.  And yes, it is that smooth and delicious to the touch.  I love beautiful ribbon.

2-4-2

Have a creative day!

Moana

Affectionately Yours

One sheet of awesome designer series paper can really do so much.  These bakers boxes are made showing similar embellishments, cut from the same die cue, but just different sides of the paper.  That is one thing I really do like about Stampin’ Up! designer paper.  They are two sided, so even if you might not favor one pattern, odds are you will like the other side. I have not been disappointed over the years, so let’s keep that one going!

7-14

The bakers box thinlits die is so fun.  It also comes with a lot of other dies to add some fun, but I opted to not use them this time around.  I stuck with a floral theme throughout.  It has been a while since I pulled out my lovely little petite petals punch, such pretty little flowers. I like to give them a little texture by ‘coloring’ on them with a large rounded stylus on both sides.  Love that technique so much.

7-14 (1)

This one got two little pansy punch windows put in to show the treats inside.  I added small pieces of window sheet to keep the treats inside, but decided to add a flower to the middle as well.  Cascading flowers down a gift box really make me smile.  I guess that is why I have been doing them for so many years.  Flowers never go out of style.

7-14 (2)

Have a creative day!

Moana

Hello Baby!

A good friend of mind is expecting her third child soon, a baby girl.  It was a huge surprise but it is finally getting exciting for everyone.  Thought it was about time I made a special card or two just for the occasion.  What is it about pink and sparkles anyhow?

7-11

I haven’t purchased much in the department of this years designer series paper department, nor do I have any current baby themed stamp sets, so I had to get a bit creative.  It may be on the elegant side, but I do like how it turned out.

I made a couple of layers of blushing bride card stock to add to the card base, with the top most layer being embossed for a little texture.  Love it! I then decided to break out the flourish thinlits set and cut a few of the images in glimmer paper.  Again, it was totally working for me.  When it came time for a sentiment, I really had to look.  I found this treasure in the beautiful banner set and thought it to be perfect.  The sentiment was layered on more card stock and both layers were edged in the banner style.  A little wrapping with metallic thread and one huge metal rimmed pearl later and I called this one done.  Yes!

7-11 (1)

Have a creative day!

Moana

Bird of Paradise Giftbag

This beautiful box was supposed to be shared yesterday, but that day had too many demands on it.  So, it waited patiently for me to get to it today.  Still just as pretty this morning as yesterday morning.  What pretty paper, right?

5-4

One whole 12 x 12 sheet went into this project.  I wanted to have a tall box, but not my usual shape.  Not too many options, I just wanted to show off the wonderful pattern of the designer series paper.  So I widened out the front and back to 4″ and narrowed in the sides to 1 3/4″.  It worked out nicely.  It won’t hold heavy items, but my daughter had the desire to use it to gift a scarf.  That would work out.

The flowers are cut with the botanical builder framelits using cajun craze.  Too perfect.  The leaves are from the same framelit set with old olive.  Not too tricky, right?  I wrapped silver metallic thread around the top, so that can be slid off to insert a gift and placed back on.  Yet another awesome gift bag ready to go.

5-4 (2)

Have a creative day!

Moana

Happy 29th Birthday {Again}

And the third workshop project has arrived.  Good thing too, since tomorrow is workshop! I often know further in advance what I want to do, but not this time.  I have been doing a lot of detailed water coloring and that doesn’t go well for large group instruction.  Folks need their own tools and materials for that kind of work.  We are doing one water color and that is stressful enough.

4-22

Isn’t this one so adorable?  The paper, matching stamps, and the ease of stamping and die cutting the numbers really make this one fantastic.  It isn’t too difficult to make, but sure brings a smile. Believe it or not, I tried several times to add die cut flowers for a fun layered look, but had to leave them off.  Sometimes that happens.

I took the background dsp and put it through the bigshot  with an oval framelit centered.  I then took that piece and turned it over to fill that same oval hole.  The two sides coordinate so nicely I could resist.  I used the next smaller framelit to make an oval from whisper white.  The numbers were stamped in blushing bride, cut with their coordinating framelits and centered on the oval.  I did raise them up on dimensionals.  Then the sentiment was stamped centered over the top and bottom of the numbers.  The tiny ‘th’ was die cut first, then stamped.  The framelit for that tiny one doesn’t have a window to look through, so I had to.  But with photopolymer stamps you can see exactly where you are placing your image.

I stamped inside with the largest flower from the Birthday Blooms set in each corner using a different portion of the stamp to make it look different.  The center phrase ‘again’ was the last thing added.  How fun is that?

4-22 (1)

Have a creative day!

Moana

Crazy About You at First Sight

Today has started no differently than many other Saturday’s, but I was not going to let another one go by without sharing a project.  I have let my weekends get carried away and it just bugs me that I don’t keep this blog current daily.  Sharing creative projects is my favorite thing and it really keeps me balanced.  So here we go!

101_1302

I get to attend a bridal shower today, how fun right?  Well, I have gotten into giving thank you cards as my bridal shower gift.  I think it is most appropriate, since the bride is going to need plenty of these.  Sometimes though, a special thank you is in order, when someone has really been kind or extra wonderful to you.  That is what these are for.

101_1300

The steps aren’t too complicated, you can really see them from just looking at the project.  I am really bad about tracking how I score my bags and boxes.  I make them different each time because you don’t always need the same size.  I love to say that I don’t have to toss my first attempt too often, almost never.  I do tell my classes that there are never mistakes, just opportunities, so there is always something you can work out.

I embossed my card base and the bag fronts with the same fluttering embossing folder.  The blushing bride glimmer paper is everywhere.  And yes, my desk is very sparkly just now. Good thing I love glitter.  The bag fronts are raised up on dimensionals, but the card fronts are adhered down flat.  I used liquid glue to place the ‘thanks’ phrase in the middle of the card.  The ‘so much’ phrase was stamped on a 1/2″ strip of very vanilla, punched on one end with the bitty banner punch and raised up on dimensionals again.  The bitty butterflies are placed with glue dots.

The card bases and bag base were made with pink pirouette, not blushing bride.  I honestly liked how it looked together rather than blushing bride to match the glimmer paper.  Hard to tell sometimes why I like what I do, but that is how it worked out.  The bag handle was made with a bunch of satin ribbon, so very elegant.  And there you have it.

101_1298

Have a creative day!

Moana

Birthday Blooms with Blackberry Bliss

And a happy good morning to everyone!  I do love a Friday that is full of promise and enthusiasm.  The only problem is that I usually have my goals too high and get frustrated when I fall short.  Either way, I love Friday and the fun evening often in store.

4-15 (3)

This little thank you is so adorable, yet lovely.  I used a half sheet of very vanilla for the box, scoring at 2″, 4″, 6″, and 8″.  Then turning one quarter turn, portrait now, to score at 2″ for the bottom.  I used a companion piece of very vanilla for the stamped and embossed layers. The piece is cut first at 3 1/2″ so the stamping could be done.  I just used the large floral image to create a pattern.  Then the second cuts came at 1 3/4″ each, needing four of these all together.

4-15 (1)

Before they were attached I embossed them with the fluttering embossing folder.  Such a nice result.  I layered them up with dimensionals and thought about leaving it just the way it was, but continued on with the plan.

I made the tag from the scrap left over from stamping and punched it with the extra-large oval punch.  A added a ribbon handle and attached the tag to the under side of the ribbon tail.  A few butterflies later and a smidge of pearls and I was ready to add my treats.  So much fun, just so much fun.  Now to deliver!

4-15 (2)

Have a creative day!

Moana

Garden In Bloom

Taking a few days off is kind of nice, but it was not intended.  Getting ready for a huge workshop can be really exciting, but also very time consuming.  Put that with still working full time and you get a bit of a circus.  Not to mention the adventures of everyday life.  Time to get back on track and have some fun!

2-1 (2)

There is a lot of attention right now with Sale-a-bration and the Spring Occasions catalogs, and they are very exciting to say the least.  However, the annual catalog is so full of beautiful product it is hard to ignore.

I have been waiting to use this stamp set for some now and it was worth the wait.  I took one of the left over kits from Saturday’s workshop and paired it with this lovely set.  There are a ton more stamps in the set, but I focused only on the large flowers.  I think I could get stuck on this set and not repeat myself for some time.  Exciting!

2-1 (1)

The card front is 4 x 5 1/4″ with an 1/8″ background piece of watermelon wonder and then placed on a standard card base.  Not too tricky.  I put the tags & labels framelit set to work for this lovely sentiment.  It is so pretty.  Then I broke out the fabulous ribbon that has been teasing me from the shelf.  I love, love, love big pretty ribbon.  It is just delicious to me.  The ribbon is the only item from the occasions catalog.  I would love it if Stampin’Up! would bring back some huge satin ribbon in next years annual catalog.  I will have to just wait and see.

2-1 (3)

Have a creative day!

Moana

Bloomin’ Love

I do enjoy making something special by request.  It isn’t always easy to start, but once you do, the ideas just begin flowing.  This is my first go at a bridal shower invite.

1-25

The brides colors are a blush pink and navy blue.  My blue looks a bit royal purple here, but it is a deep navy.  How about this lovely framelit die cut?  I thought I might go a bit bonkers trying to get it all detailed out, but I managed.  I am not always the most patient one, but this die requires it.  I had to put it through the big shot back and forth several times to get all of the cuts done.  It was worth the fussing though.  The detail is amazing.

1-25 (1)

I might have gotten a bit carried away on the inside stamping.  I was chatting while I stamped and before I knew it, it had gotten pretty busy.  If this one ends up being the choice, we might have to print the details on velum to be an overlay.  That would be pretty though too.  Love is definitely in the air.

1-25 (2)

Have a creative day!

Moana

Know What I Love?

My youngest is in the throws of re-decorating her room and the colors are so awesome.  I thought I would work with them for a few projects.  She has real red, basic gray, smokey slate, whisper white and basic black.  I used Stampin’Up! color names because that is just how my brain works anymore.  You get the idea.

101_1063

Either way, this card was so quick and fun.  I just used a bit of the stamps available in the Know What I Love stamp set.  We may still be in winter, but I couldn’t wait to start with some spring things.  Rain is so welcome, and flowers won’t be far behind.  How exciting!

101_1064

The card is pretty basic, just a few layers.  I do love it when a stamp sentiment fits inside a punch I already have.  It just makes life easier and definitely more fun.  If I hadn’t been distracted with other projects, this card would have come together in about twenty minutes, including design time.  That is what you get when you have great product to work with, and I definitely do.

101_1065

Have a creative day!

Moana

Bouquet Bigz L Die Meets Thrift Store Skirt

My daughter gave me a challenge.  She took a photo of this wild skirt she saw at the thrift store she works at.  She wanted to see it made into a card.  Well, I took it a different direction.  And yes, the skirt looks this wildy.  How fun!

Bouquet Bigz L Die Meets Thrift Store Skirt

I made flowers using the Bouquet Bigz L Die with real red.  It was actually the maiden voyage of that die cut.  As I looked at it I decided I could spend way too much time playing with it.    I distressed the petals before I put them together.  Even though it adds time in the process, it was worth it.

Bouquet Bigz L Die Meets Thrift Store Skirt

I attached them to a rectangle of black cardstock so I could put the flowers on the ribbon and not the box.  Makes for easy opening and the opportunity to re-use both the box and the flowers.  This box though.  The pattern of this paper is more than fun, don’t you think?  And with a simple wrap of satin ribbon it was done and ready to be used.

Bouquet Bigz L Die Meets Thrift Store Skirt

Have a creative day!

Moana

Sparkly Seasons Ballerina

Doesn’t everyone get enchanted with a pretty snow globe?  This particular stamp set has a few options to make one happen, but this pretty ballerina might be my favorite.  She is so delicate and lovely.

Sparkly Seasons Ballerina

The base is stamped in sahara sand and the globe is in soft sky.  That is also the card base and background color. I stamped her in sahara sand as well to give a hint of skin color without having to make it happen.  I did water color her tutu and slippers though, couldn’t resist that.  Her hair just had a touch of marker coloring.

Sparkly Seasons Ballerina

I stamped the ‘sparkle’ inside the globe with versa mark ink and then covered it with dazzling diamonds.  Loved it.  But I needed more.  So I used the 2-way glue pen to color a layer around the bottom of the globe and used more dazzling diamonds.  I liked that a lot better.  Of course I had to put a bunch of rhinestones around as well.  Sparkle means sparkle.  I even put a few inside.

Sparkly Seasons Ballerina

Have a creative day!

Moana

Elegant Butterfly

Butterflies, butterflies, and more butterflies.  There are a bunch going on here, but one in particular started it all.  You might not realize it, but I played quite a bit with this little butterfly.  Lots of detailing and working it with a stylus.

Elegant Butterflies

Sometimes the attention to detail makes all the difference.  My daughter made a good observation.  She said it would be really pretty if it were glass or something so it could be a necklace charm.  I have to agree, it would be lovely.

Elegant Butterflies

I do rather enjoy working with colors that are so not of the current holiday.  Nothing more entertaining than making a spring card in late fall, or a fun Christmas project in the middle of July.  Something different to expect.

Elegant Butterflies

Have a creative day!

Moana

English Garden with Flower Patch

Can we just not jump right into the next holiday?  That is my theme for today.  I know everyone will be all into Christmas, blowing right by Thanksgiving, but I am going to take a break in between.  So, how about a lovely birthday card?

English Garden with Flower Patch

This paper is so absolutely wonderful.  I would love it in fabric so I could have it all around.  However, I wanted to partner a technique I recently learned with flowers, so I knew the pretty paper wouldn’t be the focus.  Is that even possible?

English Garden with Flower Patch

After stamping and punching out these pansies, I tried the technique out.  I used a very large stylus to just roll around the petals, slowly breaking down the fibers and creating curl.  Oh, you do this on a foam pad so you can squish a lot. It was so fun.  I did the same thing with the little leaves I made.  For those I punched a circle and then used the same punch to punch a section out of both sides giving the leaf shape.  It leaves kind of an apple core looking center behind.  Hope that makes sense.  One day I will get brave and try videos, not there yet though.  Lots of sponging for everything involved and tons of dimensionals.  This is one thick card, extra postage for sure.

English Garden with Flower Patch

Have a creative day!

Moana

Birthday Jar Wishes That Last

It isn’t my usual project to share, but I do make these particularly often.  The idea is lovely and I get to put a lot of retired product to good use.  I do hate to ignore it, so I thought I would share  a way to use it differently.

Birthday Jar Wishes That Last

I bought some of those washi sheets having no idea what I would do with them.  Until this fun series of projects came about.  I work with the young ladies in my church, along with several other ladies, and we come together as a team in a large variety of events from large to small and everything in between.  Of course we celebrate birthdays!  And that is what this is.

Birthday Jar Wishes That Last

I decorate jars and vases with washi paper punches to the mood I am in.  Sometimes I use framelits, or punches, or both.  I have a large collection of last springs sale-a-bration ribbon, so it always goes together.  You know how I love to coordinate as much as possible.  So these jars are created for each young lady or woman in our group.  We all then write inspirational wishes, birthday wishes, and just kind words in general to fill the jar.  Then, the recipient can read them all at once, or read them one at a time, or open them over time when a bad day happens and they need a pick me up.  Something sweet for whenever you want them.  So, try something different with the awesome product you have, either current or retired, it is all wonderful!

Birthday Jar Wishes That Last

Have a creative day!

Moana

Delightful Birthday

It has been a while since I made a matching set like this.  For a while it seemed like I couldn’t get enough of them.  But, you can only use so many, and share so many, and eventually store so many.  I took a break, but found my way back.  So much fun!

Delightful Birthday

One full sheet of the wonderful ‘Color Me Irresistible Specialty DSP’ was used to makey great set. I love that is has white sheets that can be altered to any color or tone, but I also love that it comes in colors and patterns.  The options are great, so diverse.

Delightful Birthday

A pretty gift bag with a lovely matching card has to be one of my favorite things.  I think people feel special when the attention to details are brought together like this.  The assembly was pretty direct, nothing very fancy.  Simple work and lovely results, my favorite.

Delightful Birthday

Have a creative day!

Moana

Banner Blessings Gift Set – Joyful

I get to be out of town this weekend and enjoy some time with my two children away at school. Utah is so pretty this time of the year, the rain is making it even better.

Banner Blessings Gift Set - Joyful

This is the second card in the gift set I made for my daughter. Bright and cheery for sure. The color scheme certainly does go with the word joyful.  I love this stamp set.  Very inspiring and the writing style is awesome.

Banner Blessings Gift Set - Joyful

The card base is the heavy whisper white. Love having something this heavy to work with. I stayed away from white cards, but not any more.  I enjoyed sponging  the front to bring out the heart detail. A couple of hearts punched on the front and inside to coordinate.  Second card in the series is done. Wait til you see the gift box.

Banner Blessings Gift Set - Joyful

Have a creative day!

Moana

Banner Blessings Gift Set – Friend

The morning took off without me, and there was nothing I could do about it.  This has sat at my computer waiting for me to take a lunch.  Well, never happened.  How about a tiny break?  Works for me.

Banner Blessings Gift Set - Friend

This is the first card of a set of four with a coordinating gift box.  It was so fun to make.  I actually made it for a special someone and I can’t wait to deliver it.  Should be tomorrow!

Banner Blessings Gift Set - Friend

I attached the island indigo torn card stock to the thin whisper white before I ran it through the fluttering embossing folder.  Everything got done at once.  The sentiment was stamped in black stazon and sponged a bit with coordinating ink.  I love the cotton ribbon, it makes such cute bows.  The inside stamping is actually negative punching.  I punched a butterfly or two from the white insert and revealed the card base.  Simple and very effective!  So fun.  Those pretty pearl accents.  I could really get used to those.  I had it dot the “i”, even though it wasn’t needed, I wanted to use one and it fit the image.  A bit of dimensionals and this card was done!

Banner Blessings Gift Set - Friend

Have a creative day!

Moana


Dazzling Diamonds Dragonfly

I liked the randomness of picking one single stamp and designing a project around it.  Today was just the beautiful dragonfly from the Awesomely Artistic stamp set.  My favorite image honestly.  I wish I had more.

Dazzling Diamonds Dragonfly

The new DSP pack patterns sure are awesome.  I had a hard time deciding which side to use.  I usually enjoy the patterns, but can see myself making gift sets with all of the different papers here.  Total coordination really makes me very happy, even within a gift set.

Dazzling Diamonds Dragonfly

It isn’t always easy to get decent photos of my work.  The ladies in my club often tell me how much better they look in person.  Isn’t that true of so many things though?  But the dazzling diamond dragonfly here needed to be angled a bit for you to really see it.  I wasn’t sure how happy I would be with it on whisper white, but I love it!

Dazzling Diamonds Dragonfly

Have a creative day!

Moana


Floral Gift Bag

The seasons are all backwards, so why not create a spring themed gift bag!  Seems kind of silly to really feel like fall might have arrived, then summer heat, then what.  Who knows, so I will craft what I like, and I like this.

Floral Gift Bag

One whole sheet of 12 x 12 dsp went into this bag.  The dots are too much cuteness, so they had to be out front.  I wasn’t feeling a particular stamp, so I curled a couple of flaps over to show the writing side.  This paper pack is so adorable.  A bunch of bright and happy paper going on.

Floral Gift Bag

The diagonal scoring plate is what helped this box happen.  I scored on the 3″ marker, on the diagonal, on each corner.  It worked out pretty darn good.  I don’t always feel confident my scoring is accurate when using the diagonal plate, but when putting the bag together, my sides and corners matched up.  Go me!

Floral Gift Bag

A few punches from the heavy whisper white cardstock and regal buttons for centers made the embellishments I wanted.  The bag was sealed, but not sealed, with a stretch of dotted lace trim.  It is stretched around the top, under the front and back flaps, and then tied in a bow.  Just untie it and the bag will flop open.  Easy to use and re-use.  My kind of bag.

Have a creative day!

Moana