Artistically Asian

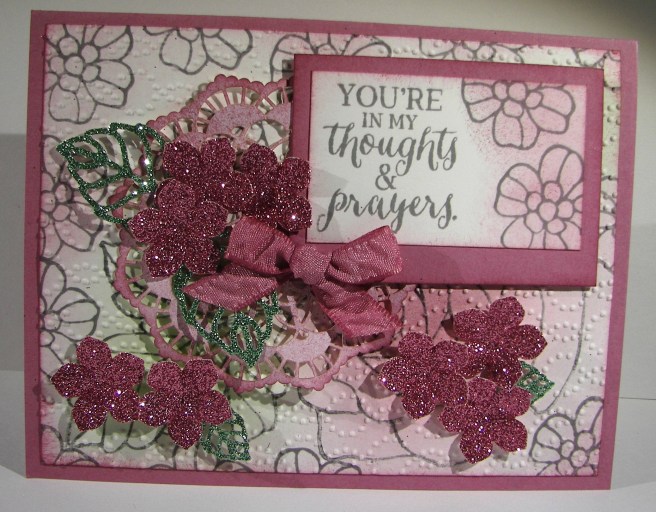
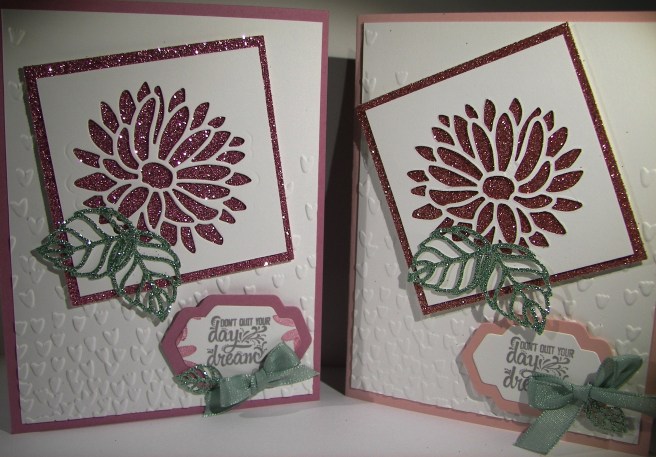
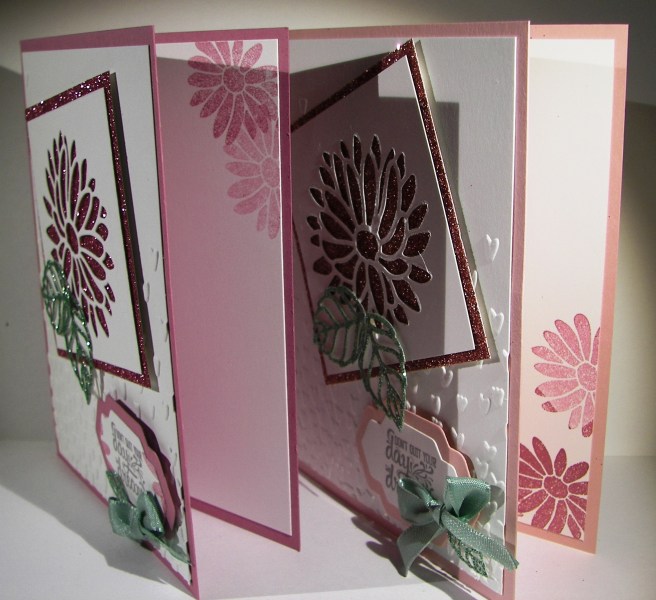
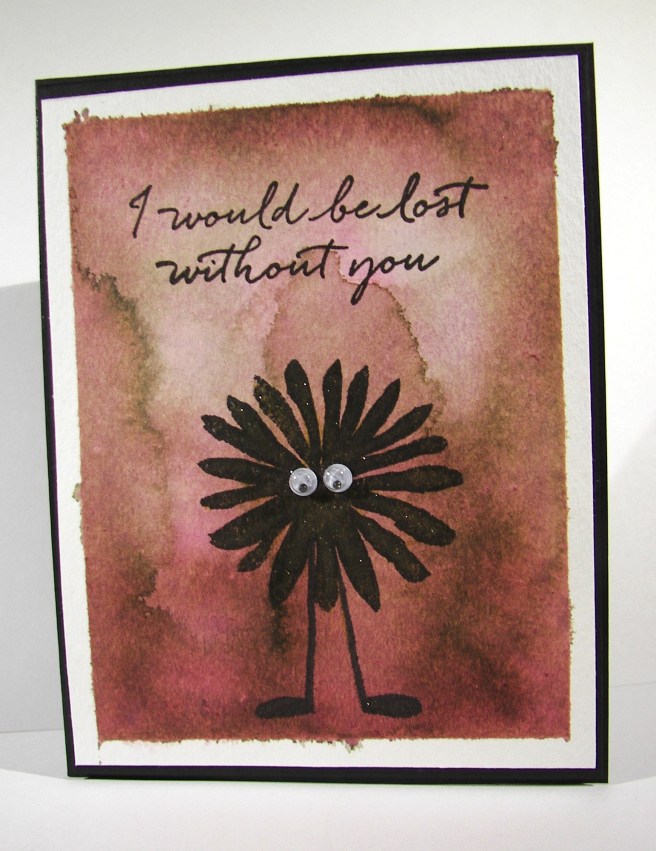
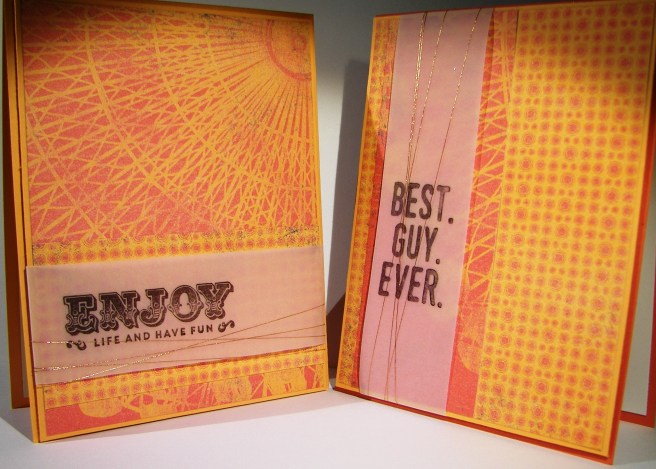
Here we are at day four of this little series and I loved the challenge.   Although the original card was one of my favorites, this one sure does bring a smile to my face.  I have really enjoyed playing with these left over kits.  I might even make a habit of making some every so often just to play with like this.

4-1

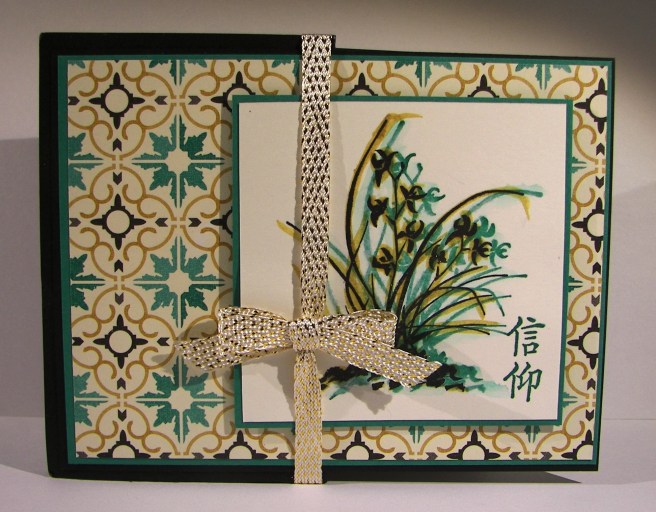
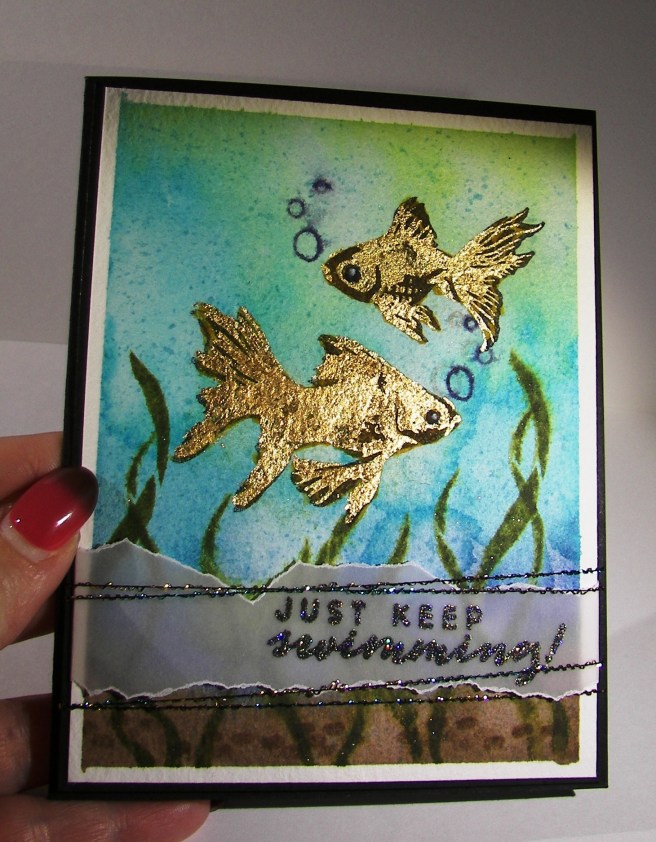
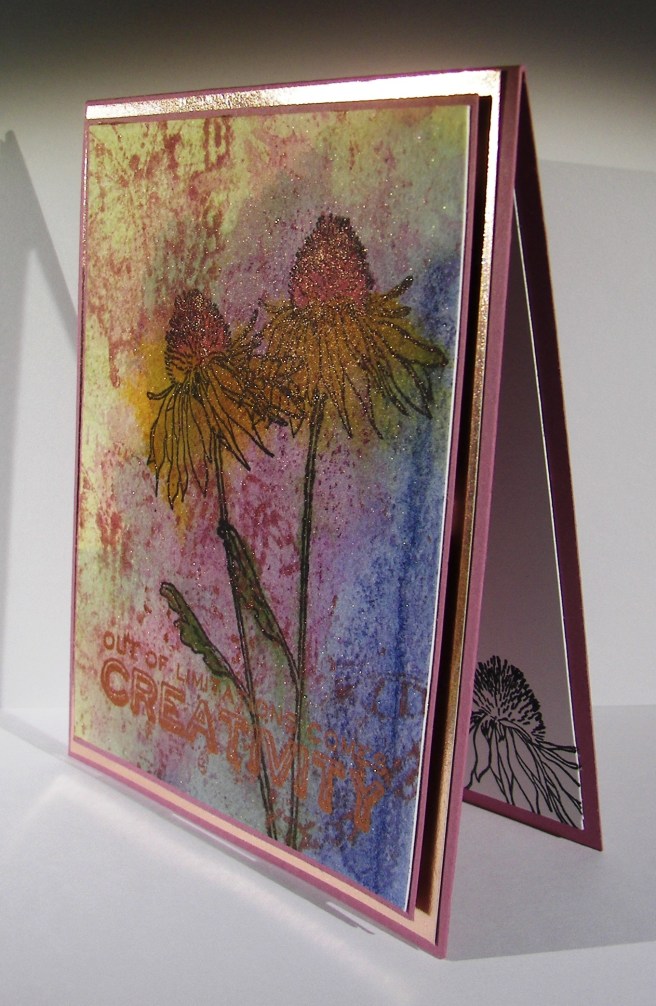
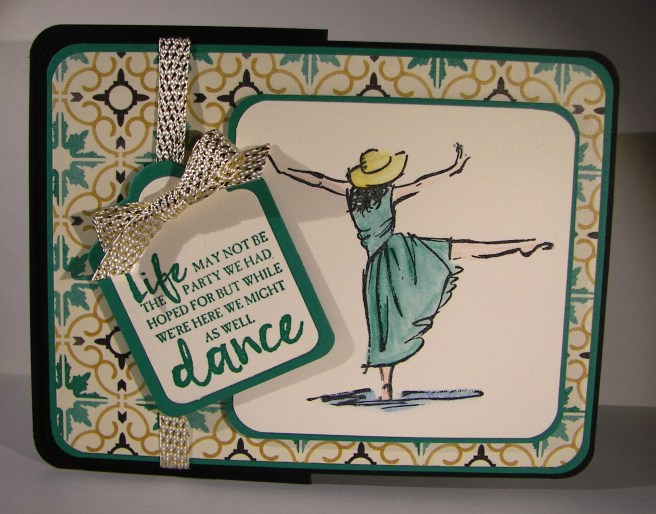
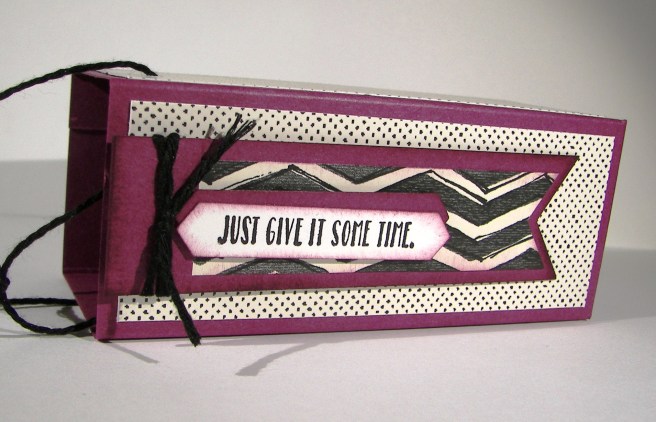
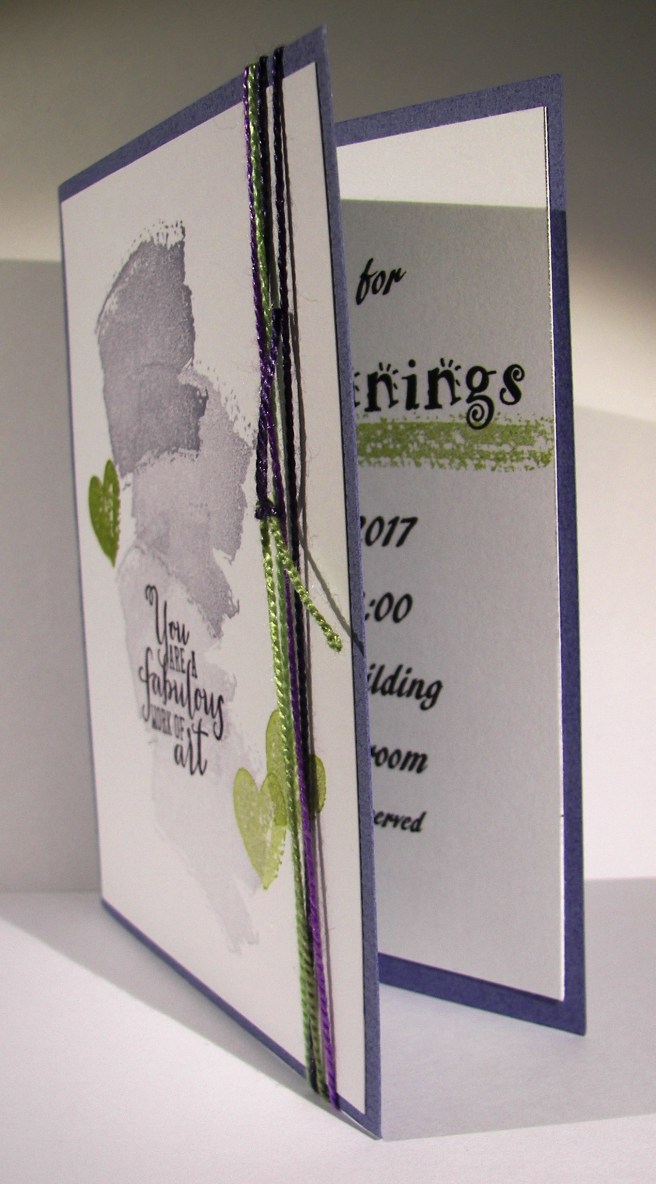
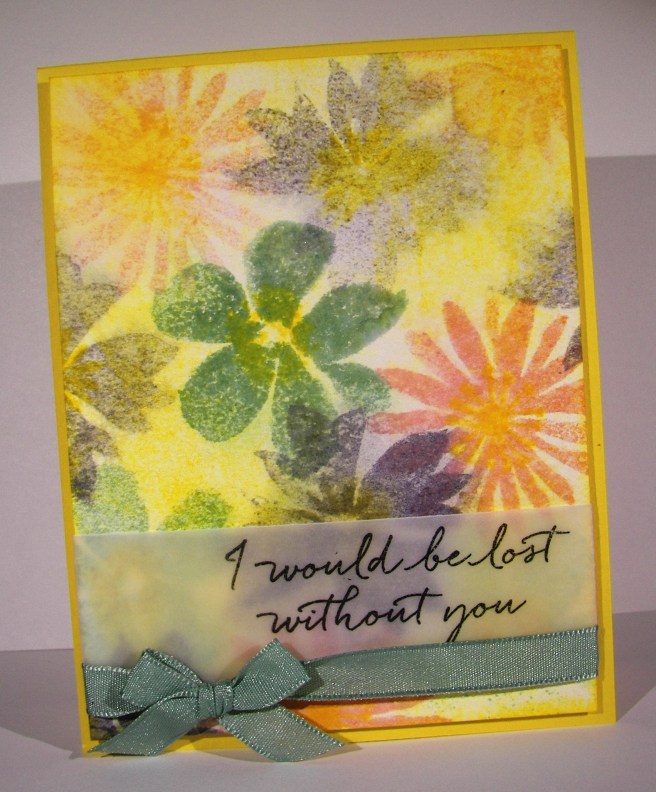
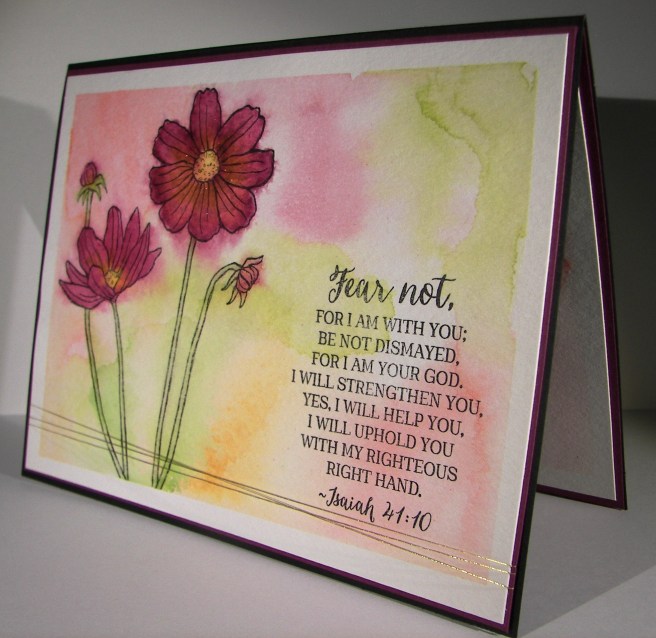
The photo may look like part of the card is missing, but it is actually kind of a z-fold.  I had to modify it some to cover some damaged areas of cardstock.  Not all of the kits come back home from workshop is good working order.  That is okay, no mistakes, only opportunities.

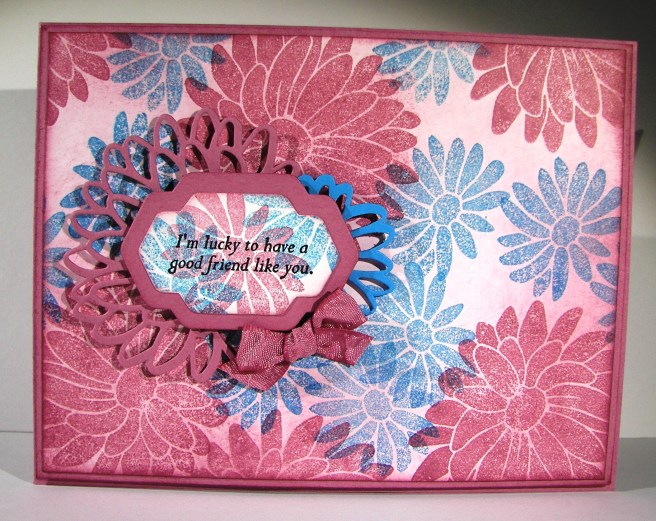
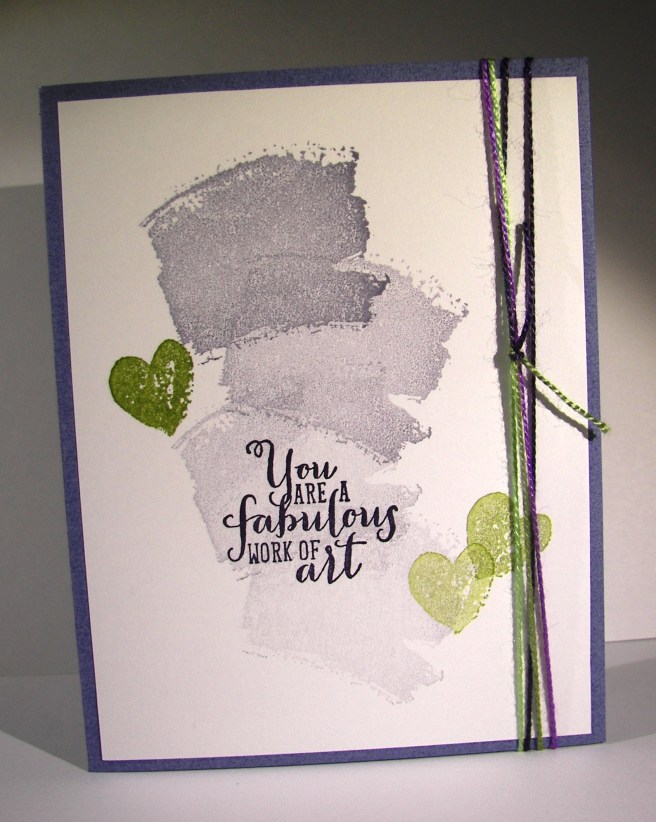
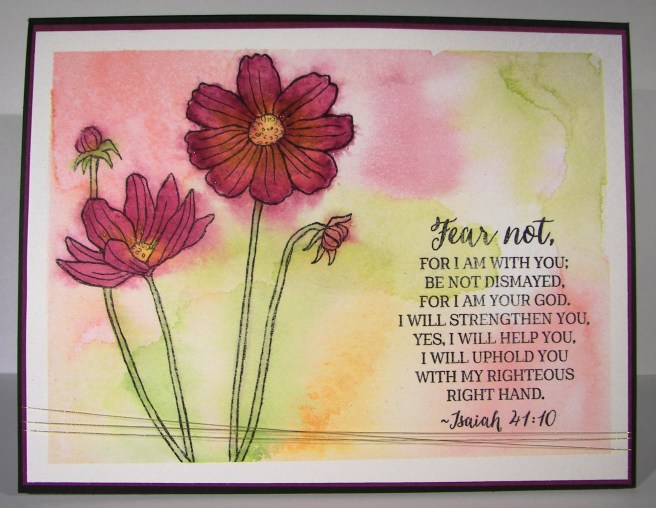
The stamping kind of looks 3-D instead of a shadow.  I should have stamped the second time closer, but I was distracted I guess.  No mistakes though, right?  On I went.  I tried to soften the green image some and connect the two by brushing the area with an aqua brush to push the color around.  It worked for me.  The best part of this is the lovely stamp in the right lower corner.  I believe it is a phrase that talks about having faith in God.  So beautiful, the concept and the stamp.  I would love to be able to write like that.

4-1 (2)

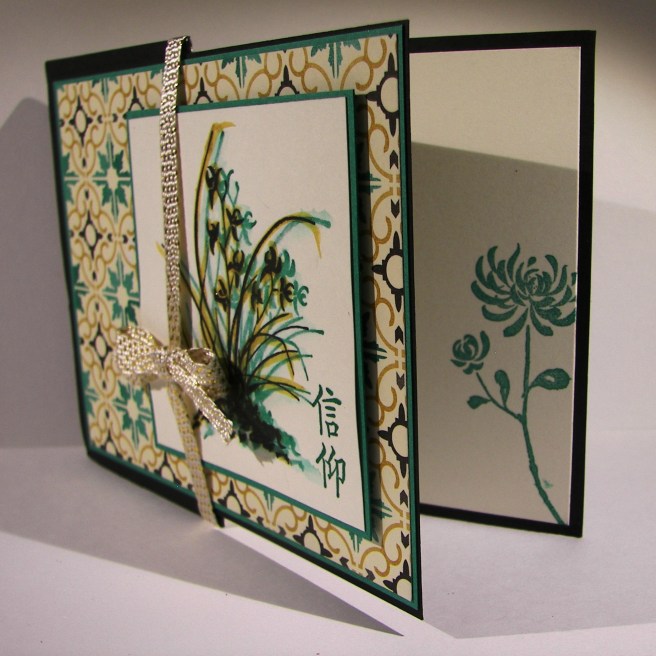
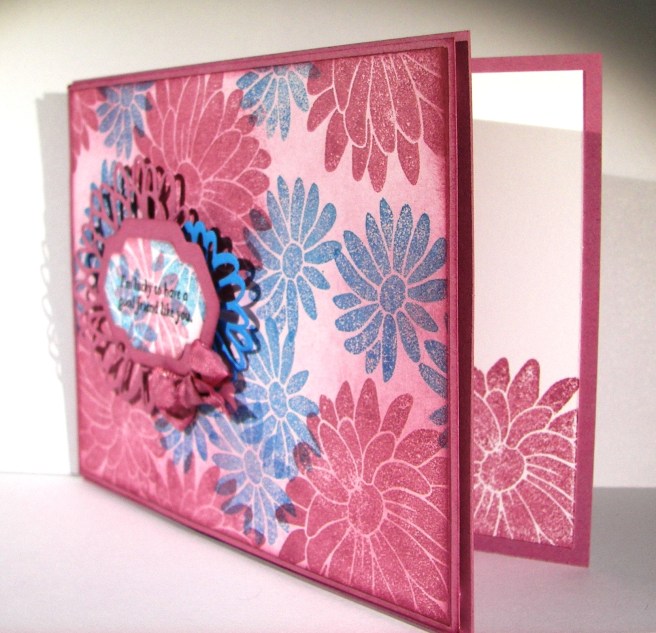
I put the layers together, raised the floral sentiment area up some, and wrapped it in some beautiful from the recent Sale-a-bration catalog.  I hope you got some of that, I have absolutely loved it.  A second floral stamp was placed on the inside to tie it together.  I really do love inside stamping.  I like being able to use more of the stamps in a set and having access to the inside is like another canvas to work with.  Good stuff.

Have a creative day!

Moana

You’re in my Thoughts & Prayers

This is day three of seven projects re-purposing leftover workshop kits.  The only thing this card has in common with the first sample is color and a floral motif.  Wow, I love how it turned out.  When I made this I thought it was lovely, but didn’t have a special someone to give it to. Sad to say that now I do.  I do love having somewhere to express sincere thoughts and feelings. This will be perfect.

3-31

The card front was stamped with the huge image from Rose Wonder.  The small flower image is also from the same set and I used it plenty all around.  I then sponged color lightly over all of the images.  I wanted soft color not exact or even water coloring.  The color almost glows. Then I ran it through the big shot with the elegant dots embossing folder.  The look was stunning.  I nearly left the rest of the decoration off.  It was lovely enough to be a one layer card.  But I kept on and dressed it up some more.

The doily was sponged with sweet sugarplum to match perfectly, love that option.  I crumpled it up some to offer more texture.  I was surprised on how many flowers I got out of that little piece of glimmer paper in the kit.  Careful use of specialty paper sure does make it last.  I staged the doily and sentiment tag before putting down all of those flowers.  There was a nice spot for everything if I do say so myself, and I do.

3-31 (2)

Everything was sponged and sponged some more.  It put everything in a soft focus look which lends itself to a card like this.  I didn’t want any harsh lines.  I don’t always re-create a project, but I can see myself making this one again.

Have a creative day!

Moana

Just Keep Swimming!

I don’t know, these fish look cool, elegant and creepy all at the same time. The color choices have created a neat look, but almost skeletal.  Well, you get the idea, right?

3-28a

To get the water color I simply pulled open my drawer of distress inks and grabbed four colors making sure they were dark to light.  I did a wet on wet water color technique to blend the ink together putting dark at the bottom and going up to the lightest color.  I came back in with a brown for the sandy bottom and stamped the stones in the same color.  Having some sunshine at the top peeking in was a great idea, but with my blue choice I got more of an algae look, but it looks good too.

The fish were stamped in black stazon to allow me to water color all around without ruining the image.  I knew I was going to go back with gold, so I didn’t worry about how dark they looked.  Guess I should have.  The sea weed or plant guys were stamped in green tones all around the fish and spritzed with water to soften the images.  The stamp set also came with these cute little bubbles, for the fishies of course.  So they were stamped in the darkest blue I used for the water.  I also used a splatter image from the Touch of Texture stamp set to give the water some dimension.  Even with all the color it looked kind of flat.

Then it was time for the gold guilding flakes.  The second layer of the fish set was stamped in glue and the flakes were pressed over that.  I let it set for just a moment before I started rubbing around with my finger then a bristle brush to remove the excess.  The gold sure does shine.  Different than embossing, but still exciting.  I tried to glue on some googly eyes, but it made the card look too silly, another time for those.  So I just drew some little dot eyes with a white gel pen.  Maybe a bit too creepy, but I left it.

3-28 (1)

The sentiment was stamped in versafine black ink on velum cardstock.  While it was still moist I sprinkled iridescent ice powder over the top and heated it in place.  So sparkley and pretty.  I had some fun threads that matched and down they went.  A fun, but interestingly elegant card.  I sure had fun making it though.

Have a creative day!

Moana

Out of Limitations Come Creativity

When a couple of friends get together to explore a few techniques, really cool things can happen.  The sentiment reads, Out of Limitations Comes Creativity.  Sometimes the limitations are our own minds, not finding new things to try, or new ways to try the things we already have.  Great example below if I do say so myself.

3-27

We wanted to try a technique Jennifer McGuire recently shared using versamark ink and perfect pearls.  That was a lot of fun.  My beginning samples are fun to look at, and might turn into a project, but might not.  I still have them at my desk, but they led me to this project.  The sentiment was created with this technique.  It was neat though, how the perfect pearls clung to areas of the water color paper that weren’t all the way dry.  A neat accident that really adds to the look.  I also gave distress crayons a go.  Those are pretty darn cool.  I bought a set that came with the stamps I used here as well as a basic technique booklet.  Those techniques were put together and actually turned into this project.

Literally, we sat down with several products, a technique idea, and some great conversation. That was so much fun!  So, maybe I should have a sentiment stamp that says something like, Good Company Sets Free Creativity, or something much more poetic, but you get the idea.  Can’t wait til our next time together. Creative friends are so much fun!

3-27 (1)

Have a creative day!

Moana

Don’t Quit Your Day Dream

Glimmer paper makes everything look better.  How fun!  These projects were part of this last weekends workshop and the ladies really enjoyed making one.  Good thing we worked with the glimmer paper from this years sale-a-bration because it ran out and they would have missed out completely.  So glad I could share a little at least.

3-22

Pretty straightforward cards here.  A few layers, some stamping and a delicate little bow. I helped out the ladies by pre-diecutting their leaves.  Folks get a bit frustrated waiting to die cut or emboss their work, so I try to make it a bit easier.  Maybe one day I will add a second Big Shot, maybe.

The sweet sugarplum glimmer paper may be gone, but the blushing bride is part of the annual catalog, so I can make more of these.  I am thinking about a thank you card gift set and this might just be the thing, with a different sentiment of course.  I think yes.

3-22 (1)

Have a creative day!

Moana

Dream

Blending colors can be just too much fun.  What a great set of vibrant colors here, right? I started with four and ended up with eight.  I literally had to tell myself to stop, before the colors went too far, leaving me with a brown mud card.  This project is so alive, I love it!

3-10

The ink was applied to a lightly wet surface.  I wanted the color to flow, but not all over the place.  I left intentional gaps in between colors to allow for blending, trying not to make too specific a pattern.  My projects often lean toward stripes, and why not, they are great!

The vision for the die cut was different to begin with, but it did not work out as planned.  No problem, I love it in black as well.  It makes the card look a bit more elegant.  My original thought was to die cut a wide section of adhesive tape and brush it with black glitter. The release paper cut fine, but the adhesive did not want to work with all the detail pieces.  I ended up having to totally clean the die of sticky adhesive before I could use it again.  Live and learn I guess.  But I still want to to make that happen somehow.  Maybe just glitter paper next time?

3-10 (1)

I wanted a bit of interest on the colors, so I opted to add a light flower stamp.  The color is a light neutral, sahara sand.  I thought that would not distract too much from the colors and keep the tone well.  It worked nicely.  I added some droplets of water to distress the background somewhat and called it done.  Such a fun card.

Have a creative day!

Moana

Blooms & Wishes Gone Wild

Using a stamp set different than intended can lead to some lovely results.  The main image here is a flower base and the sentiment does come from the same set.  However, when you change it up some, and maybe create a silly creature instead, that same sentiment remains tender, but also very silly.  That kind of sums me up I guess.

3-9

The background took some time, and I nearly tossed it when I was sure it was wrecked. Since I make myself walk away sometimes and return with a new perspective, I kept on. The colors came together nicely and I wish I could repeat it.  Sadly, I think this will be a one of a kind for sure.

The flower creature was stamped in black, leaving plenty of room for those little legs. He got a heavy brushing with gold wink of stella and a couple of google eyes.  I tried a mouth, kind of, but let it go.  It will just have to remain a mystery.

3-9 (1)

The inside got some echo stamping with a smaller flower from the same set and that was all it needed. What an adorable card if I do say so myself, and I do.

Have a creative day!

Moana

You’ve Got This

A simple floral card really speaks to me.  Like so often happens, I had started in a different direction with this project, but it took its own way.  I love how it turned out, but I don’t know if I can make it happen like this again.

2-23

The background stamp came from the same set as the flower and sentiment, You’ve Got This. It is supposed to look a little more water colored, or even just painted.  Well, I believe my water color paper acted a bit more like a resist than intended.  I thought about spritzing it to have the color spread more, but decided to leave it until it was time to color the flower.

The flower and sentiment were both stamped with versamark ink and embossed with copper embossing powder.  With the flower I forgot to use a static resist tool and it was very obvious.  I cleaned it up as well as I could without destroying the image, but it still showed my mess.  The sentiment, I remembered and it is super clean.  I did water color the background of the sentiment, but very lightly.

I painted the flower with sweet sugarplum, blushing bride and old olive.  It turned out really lovely.  The odd messy dots of extra embossing really add to it.  That is what I meant by trying to re-create it somehow.  Accidents aren’t always easy to control a second time.

2-23-1

Either way, it turned out quite lovely.  A sweet inspirational card is wonderful to make, but even better to give away.

Have a creative day!

Moana

We Might as Well Dance

When things get crazy it always helps me to have a creative outlet. I think the theme of my projects this last weeks speaks volumes.  Good thing I have a way to share that really brings me joy as well as peace.  Just yummy.

2-9

This is my kind of card.  Lots of layers, a bit of interest, a touch of water color and a lovely sentiment.  Not to mention wonderful designer series paper as a background. This one has to be a workshop project for sure.  So great!

The layers were simple and all of the corners rounded. I even found tag framelits that would also carry the rounded corner.  The card base was cut normally measuring 4 1/4 x 11″, scored at 5 1/2″.  There is an additional score to fold the front back on itself perfectly in half.  That half folded front became the base for the decorative front to be place.  A little different, but not too much.

The water color pencils don’t come in all of the classic ink colors just yet, but the colors I chose match really well.  I used bermuda bay, daffodil delight, pacific point and calypso coral.  It worked out fantastic.  Light coloring and even lighter water coloring with the aqua painter.

To complete it I wrapped some of this years Sale-a-bration free ribbon.  Metallic ribbon often is a bit stiff and not fun to work with.  Not this, I love how soft and pliable it is. I would love it if this became a regular product carried in the annual catalog.  Fingers crossed!

2-9-1

Truly a wonderful project today.  I couldn’t be more pleased, hope you enjoyed and better yet, try one out for yourself!

Have a creative day!

Moana

Everything Will Be OK

Where did yesterday go?  Well, just about everywhere, and it was a good kind of crazy.  I did create this little duo for yesterday, but really didn’t have time to sit down and share it. Oh well, it will work for today as well.

2-8

I had begun with a totally different card in mind, totally.  It wasn’t working, so here we are. The designer series paper was the only original idea that stayed put, so that became my focus.  The urban underground set is so cool.  I used one side for the card and the other to decorate the matching bag.

The stamp duo is from a free Sale-a-bration set called Designer Tee.  It actually has ten stamps, cool!  The problem came when I decided on the stamps actually.  They were too small to be by themselves and the paper wouldn’t lend my go to floral options.  It took longer for me to get it together.  But it got there!

I love embossing folders, but sometimes I forget myself.  When embossing velum card stock I use a lower tab on my big shot base, but forgot.  It embossed so deep there were some actual tears along part of the pattern.  They got put to work in making the tag look a bit more creative. I will have to remember that.

2-8-1

I also do love to use one half of a sentiment on the card while placing the other on a gift bag. It really makes for a nice gift.

Have a creative day!

Moana

Special Reason

Opening new product is so much fun.  This is a stamp and framelit bundle I bought from the spring Stampin’Up! catalog, and I love it.  I had a tag sitting on my work station trying to inspire me, and I went to this set.  Fresh eyes are hard to come by sometimes.  The tag had some colors that I would not have put together myself, or I thought, because I had made that tag!  Silly me.

2-6

Either way, this is what I came up with.  I stamped my background paper using the two floral images from the Special Reason set and then sponged with sweet sugarplum to fill in the spaces some.  The flowers were stamped off once before hitting the background to soften the colors.

I made a die cut from each of the ink colors in coordinating card stock to become the background for my sentiment.  How lovely.  Instead of wrapping ribbon around the card, which is what I love to do, I only made a sweet little bow from ruched ribbon and attached it with a glue dot.  I wanted the ribbon, but not the distraction it would have caused with too much of it.  A very nice balance.

2-6-1

The inside got a little stamping, as always, to finish it off.  I like this project so much, I think it will become the second project for my class on Saturday.  The ladies love to make their own background paper.

Have a creative day!

Moana

Wishing You Brighter Days to Come

Life isn’t always fun, often more discouraging.  Those around us need a pick me up now and again.  A special someone needs this, along with a red umbrella I think.

2-5

So many people have been stamping and coloring on craft paper giving a really unique look. I wanted to try a different tone.  Chocolate chip cardstock seemed like a challenge enough. And it was, for sure.  Silver encore ink really helped bring some diversity to the layers though. The background piece was embossed with the falling petals folder and hi-lighted with silver ink.  At first I started with just a sponge dauber but wanted more ink to show. The aqua painter did the trick.  I just sponged the ink pad onto the top of the ink lid and used that for the pallet.  Quick brushstrokes along the petals gave plenty of dimension.

I stamped the woman in black stazon then colored her with water color pencils.  I made sure I liked the look of the colors on this dark paper.  The red pencil looked more orange on the paper, so I went with melon mambo.  It definitely looked more red that way.  Her dress was done in white and yellow and brushed again with wink of stella.  That made her dress really pop.  I went back over with the black pencil to define the contour lines better, they got lost in the white.

Plenty of sponging with silver to give the clouded rain look.  I love how it turned out.  The ribbon is actually tip top taupe striped, but it looked great next to the chocolate chip and definitely took on a darker tone.  Wonderful!

2-5-1

I think my card ladies would enjoy trying this card out.  This coming Saturday is workshop, this could end up being the first project.

Have a creative day!

Moana

Suite Sentiments

Mornings don’t always go as planned, and that is okay.  This set of cards was ready to go, but I had to choose to be on time for my carpool, or blog.  Blogging in the afternoon can be good too, just not my favorite.

1-24-2

I wanted to use the cupcakes and carousel dsp stack for the focus on these cards.  The colors are so great.  They make me feel like having sherbet or frozen yogurt.  Yummy.  So I used two pieces of paper, trimmed them to size and used the extra pieces to accent the other.  Great way to use up the paper and get two cards done at once.

Suite Sentiments is an awesome stamp set.  So many great sentiments ready to be used, and all occasions covered too.  I went with a little more groovy ones to go with these odd colors and liked it.  I simply stamped with black stazon on velum cardstock and layered everything together.  All good and pretty darn easy.

1-24-1

Have a creative day!

Moana

You Are a Fabulous Work of Art

This project is actually an invitation, but could easily be a lovely card to share.  In a moment of forgetfulness we found ourselves needing to pump out 25 invitations in an hour.  It took a bit longer than that, but it was managed.  That is how easy this card it.

1-23

I used wisteria wonder stamped four times at an angle, slightly tilting it as I went.  That gave me the simple background I needed for the sentiment.  That was then stamped in elegant eggplant and I loved the look.  I was in a great hurry, but wanted a bit more diversity, so I brought in this variegated crochet thread with colors that would coordinate. This gave me a green to go with, so in came the old olive.  I stamped three hearts and called the front finished.

1-23-1

My husband and daughter worked to get the inside information card while I did the fronts. I wanted to connect them a bit, so I added one more stamp there.  I used the long stripe to stamp under the title of the event.  It was super quick, but worked out wonderfully.

Have a creative day!

Moana

Lift Me Up

Sometimes when there are too many choices it is best to keep it simple.  While this card may not look simple, it still gives that feeling with just two colors used.  The background paper comes from a set that is full of vibrant color.  I couldn’t decide, so I chose a more subdued pattern and I love it.

1-19

This little set is going to go to my sweet daughter tucked away in a frozen university town in southeast Idaho, poor little ice cube.  Paper crafting is something we share a great love of, and I know she will be over the moon for this.

The balloon was die cut from night of navy and backed in whisper white.  The balloon can actually be backed in several colors with the framlits available.  There are five sections laid in order across the back, mine being all white.  But if I had chosen, each section could have been a different color and they would match up perfectly, looking amazing.  Next time.

I wanted a bit of separation in tone, so I layered a bit of velum cardstock over the background paper to soften the color a bit.  It totally went along with the cloud kind of feel. I thought it was perfect.  My sentiment also came from the same set and was die cut with the layering oval framelits.  It may be a bit crooked, but I let it stay that way.

1-19-1

I couldn’t resist stamping more from that wonderful set.  It is full of so many wonderful images.  Two hot air balloons, four clouds, a few decorative elements and six sentiments. How great is that!  I had to sneak a little treat bag in to match.  I knew I was sending it in a box with other gifts, so I could make a simple 3-D sour cream container.  I think chocolate for sure.

Have a creative day!

Moana

Blooms & Wishes

This stamp set sat in the annual catalog and teased me often.  I would try to pass by it saying that I surely did not need yet another floral stamp set.  Well, I broke down and bought it.  So very glad I did.  What a beautiful watercolor piece, right?  Great stamps make all of the difference.

1-15

I chose a few spring colors to work with, focusing on daffodil delight.  With all of the rainy, cloudy days we have had I wanted something bright and cheery. Mission accomplished for sure!  I stamped the large flowers from the set in different colors, stamping off as I went along.  The centers were all daffodil delight and more of an idea than a detailed center.  I sponged more yellow ink all around the flowers filling in most of the white areas before moving on to spritzing with water.  It was just a matter of managing the water spritzing to allow some ink movement, but not blurring too much.  It didn’t take long before I was satisfied.  A quick drying moment or two with my heat tool and it was ready for the sentiment.

That was stamped on a strip of velum cardstock and then wrapped around the bottom of the card front.  I used a lovely mint macaron satin ribbon to accent the bottom and layered it up with dimensionals.  Such a lovely spring card.  Of course I had to stamp a bit inside with a few yellow daisy images and one for the back too.

1-15-1

Have a creative day!

Moana

Fear Not My Friend…

When I am wanting to convey more emotion in a card, I go directly to water coloring.  The softness it creates is perfect.  And with this card, I literally poured my heart into it.

8-20

I wanted more space to work with so I created a larger card than normal.  This one measures 5″ x 6.5″.  Big, but not too big.  I also created my inside writing panel at the same time.  This card wasn’t going to just get a blank insert, or even a nicely stamped one. Besides, I love writing on water color paper, so very satisfying.

I stamped my floral image and sentiment first so I could control the strength of color where they were.  Then I brushed the papers with clean water to allow plenty of color movement. I kept the background light and tried to keep mixing to a minimum.  The colors I choose don’t always blend nicely, but that doesn’t stop me.  I dried, distressed a bit, and dried until I was happy.

I painted the flowers with strong color, allowed them to dry clean.  Then worked them over properly.  This included adding, dobbing, and adding color on the flower petals for a bit.  I centered the flowers with a strong yellow, but kept the color from the edge of the flower center.  Then I hit that area with a water spritzer and watched the flower bloom all over again.  The color moved nicely and then was dobbed some more.  Gold wink of stella was brushed into the petals and blended with water again.  The overall effect was lovely.

A special card for a very special friend.  She is far more brave than I can imagine.

8-20 (1)

Have a creative day!

Moana

Wishing You Brighter Days…

Some days can be filled more struggles than others and it can be difficult to find the bright spots.  Being creative each day certainly does bring a lovely balance into my life.  It allows me to grow, share kindness and even teach a few people along the way.  Very nice indeed.

7-22

I tried a different product.  If I am honest, I have had it on my shelf for some time, but hesitated to use it.  I typically am Stampin’Up! exclusive, but was given a gift from my oldest daughter.  Some Ranger distress inks.  So, they are very lovely to water color with. Luckily I have a few to play with, otherwise I might be tempted to get into those.  They react differently than the inks I work with.

These umbrellas though, how adorable!  I have seen images like these for so long, often with the one umbrella being red.  Flirty flamingo works nicely here as a nice contrast to the black.  I created six black umbrellas and a fancy one for the front.  The basic rhinestones come in a few sizes as well as three strings that are connected by adhesive.  One string was just long enough to travel along the bottom of the umbrella leaving two left over that I placed on the top.  The umbrella framelits have so many fun options to make one creative look after another.  It was kind of tricky to choose, but I managed.

7-22 (1)

I layered these guys around for a while before I committed to their positioning.  The back ones were adhered directly to the water color paper with the front umbrellas being raised up on dimensionals.  What a lovely card to share with someone needing a little lift.

Have a creative day!

Moana

Comfort & Healing to You…

There are so many talented people out there that love to share their projects like I do. Sometimes one will come along that I not only enjoy, but have to give it a try.  This project is a mix of a couple of different ideas with my own twist.  I do love how it turned out.

7-21

One of the projects I studied had the card base smooth, which was lovely, and no extra layers, just the circle tag.  The other had the same layers I used with a different embossing folder, but I didn’t want to use that one.  I decided on the brick wall folder, but thought it still looked a bit plain.  After it got a good sponging and distressing I was much happier.  I even sponged the die cut piece because it just didn’t match the rest.  A healthy dose of basic pearls finished everything off.

7-21 (1)

The inside of a card almost always gets a whisper white or very vanilla piece, but I went with the card front color of so saffron like another example showed.  The color is light enough to be written and stamped on equally well.  A very nice touch.

Have a creative day!

Moana

Fear Not

This was something new for me.  I knew I wanted to have water colored bookmarks, but thought it would be smarter to make one large background piece and then trim it down to the sizes I needed.  Such a large piece of blank paper.  It was a bit overwhelming for some time.  Like the stamp says, fear not.

7-17 (1)

After a while I felt a little more comfortable, but not all the way there.  Distressing such a large piece was kind of confusing.  I stuck with it, dried it and took it to the cutting board. When they were smaller I knew they would be wonderful.  The edges got a gentle sponging along with light stamping from the same set.

Then a quick layering on elegant eggplant cardstock, the main color I painted with, and some new solid bakers twine to coordinate and it was all done.  These will be wonderful to share with the young women I teach.  Love those girls.

7-17 (2)

Have a creative day!

Moana