You’re a Good Egg

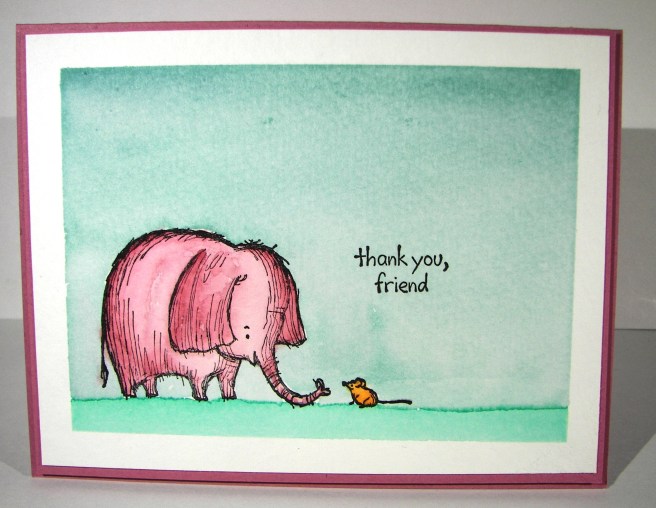
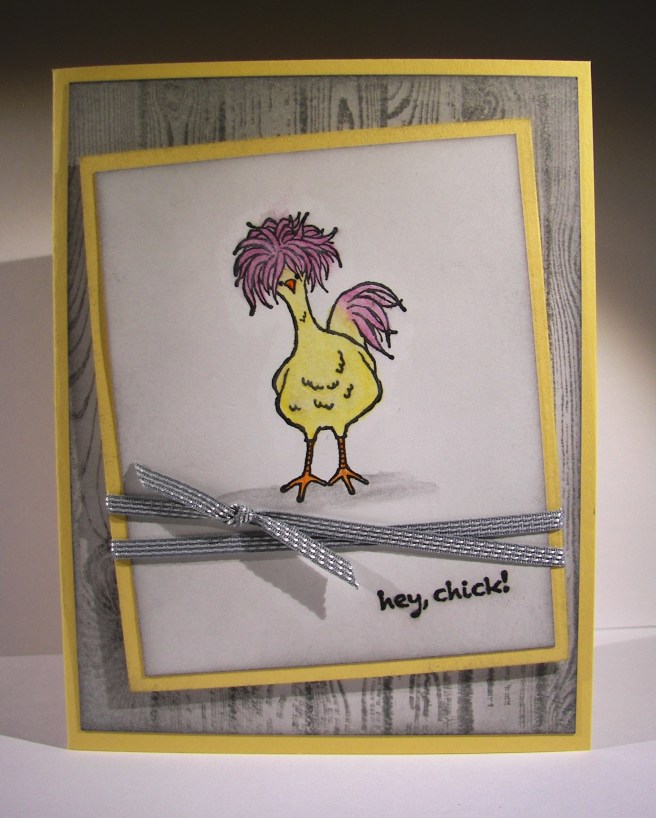
I know Sale-a-bration is over this year, but I had to play again with my favorite chicken stamp.  This guy just makes me giggle, and that is why I create things like this, to make me and others smile.  I do hope you got yourself this stamp set while it was available though.  I usually end up purging a bit after the sale is over since those products aren’t available anymore, but this Hey Chick set is a keeper.  That is why I got it in a wood mount set.

4-3

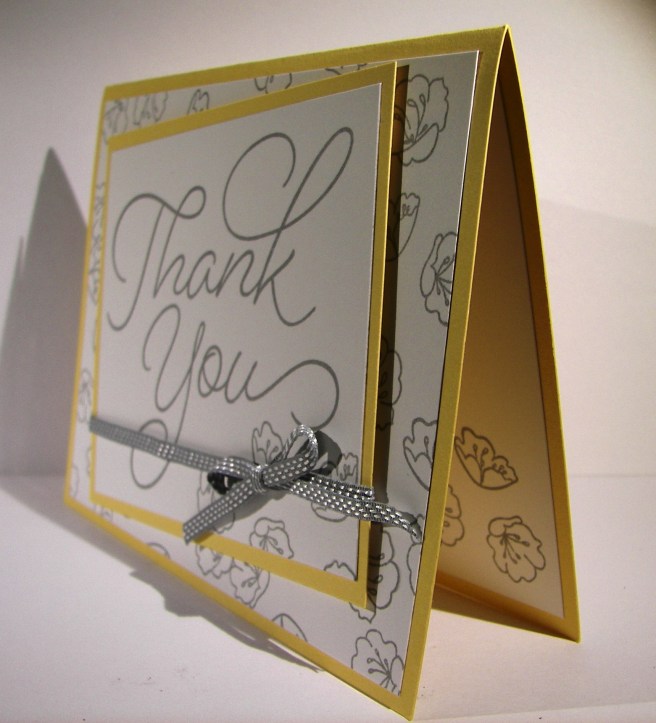
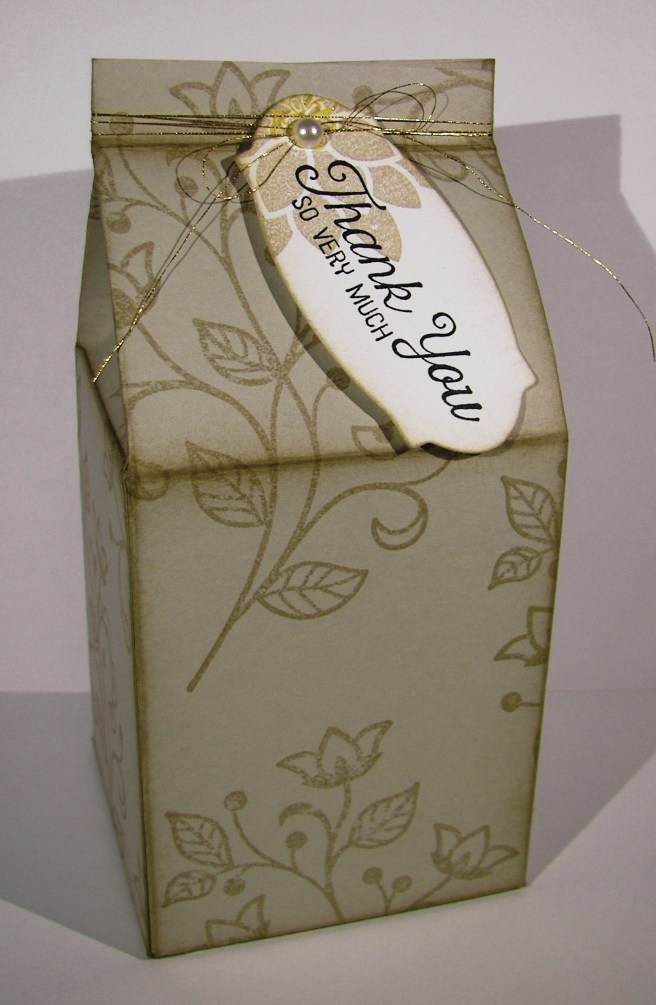
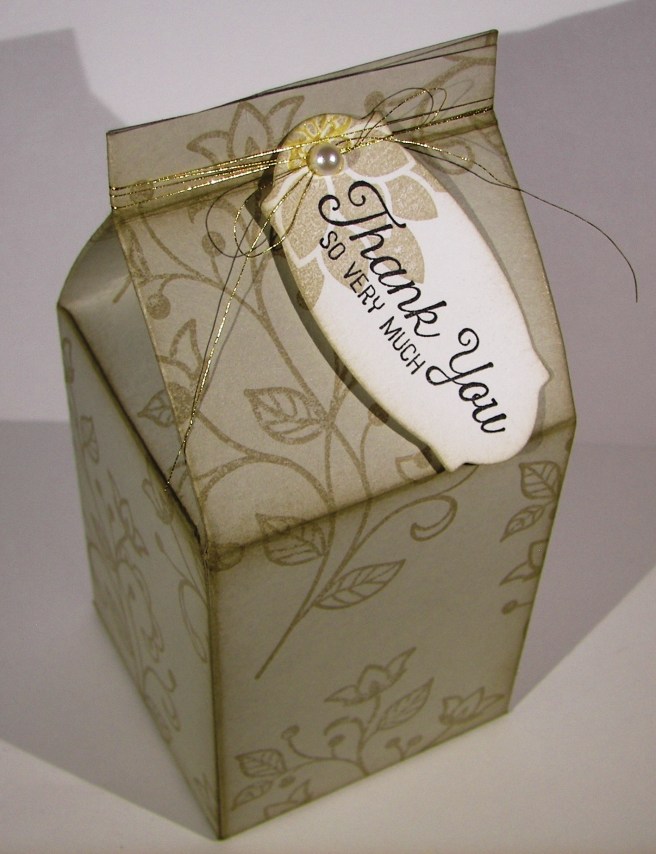
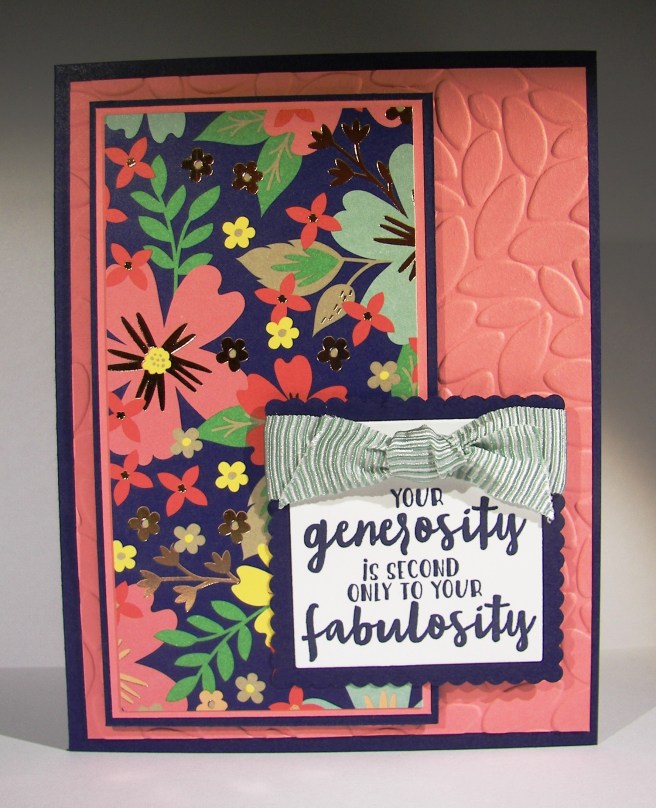
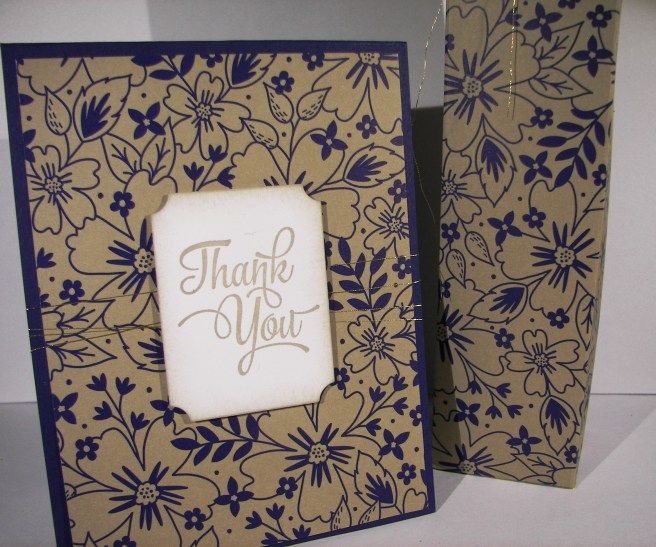
This combination might look familiar since I just did a card with this kit making a floral thank you project.  This is the sixth of seven projects re-using left over workshop kits making them into something totally different.  Mission accomplished here once again.

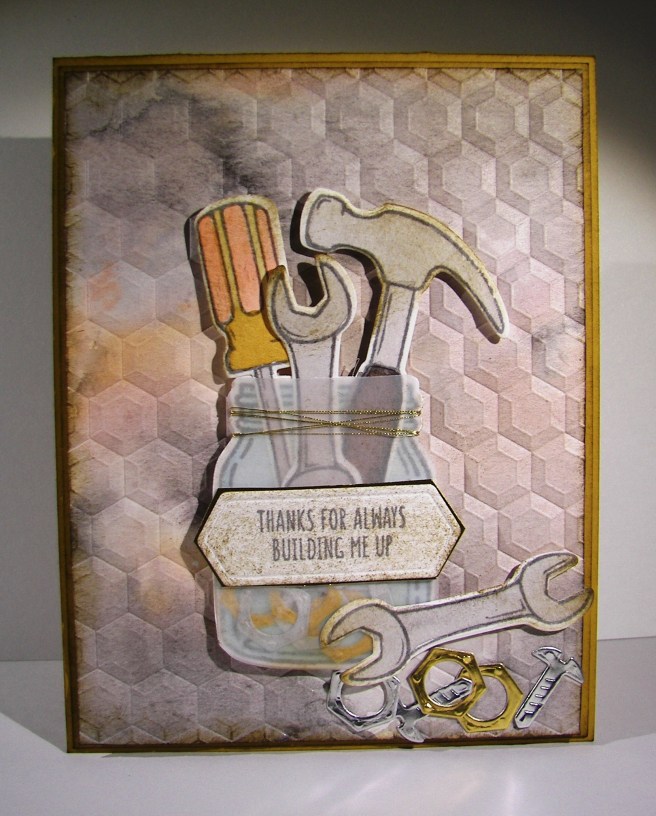
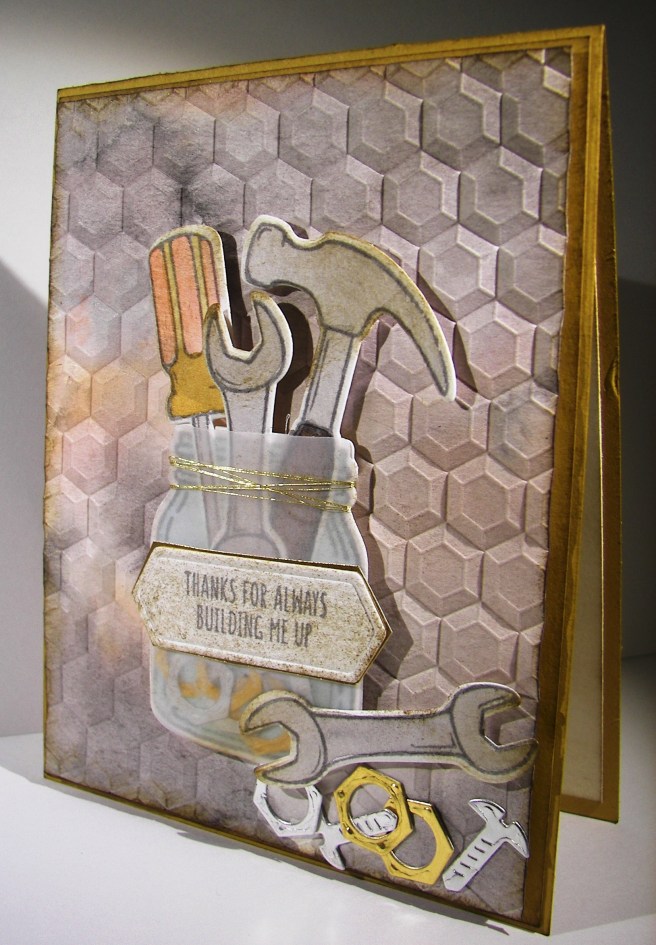
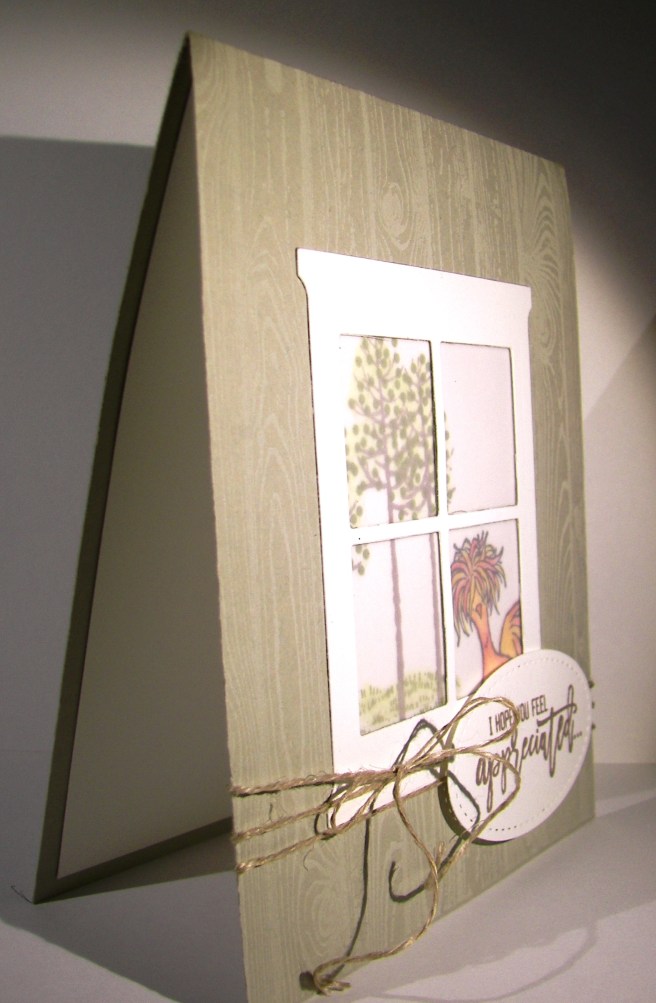
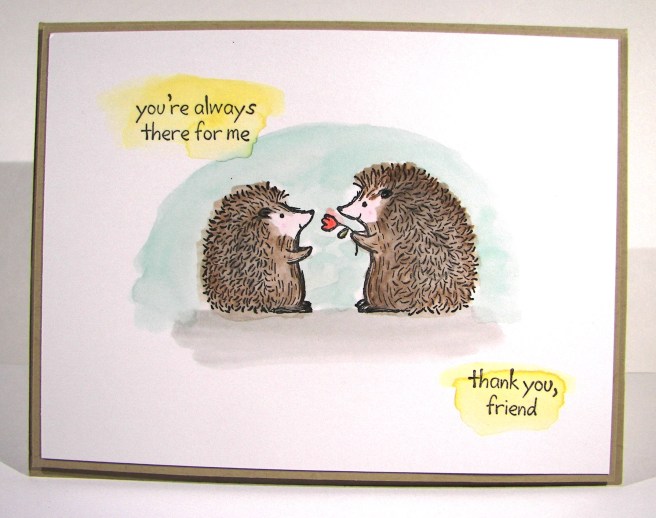
The background was stamped with the Hardwood stamp in smokey slate and sponged heavily.  That is such a classic stamp.  I am sure it will be around for a long time.  The chicken was stamped in the upper center of the card front as to leave room for the ribbon and sentiment below.  Water color pencils came in handy for a quick color job and touched up with an aqua pen to blend the colors in.

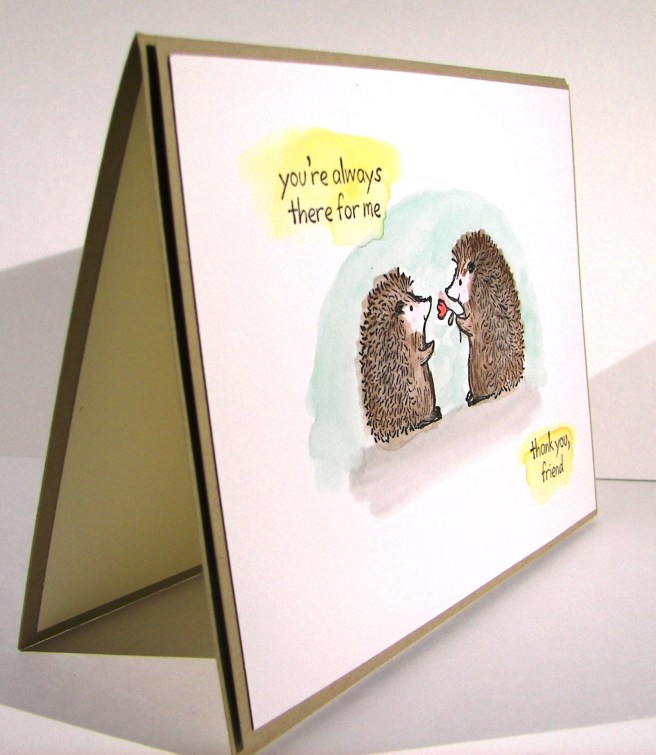
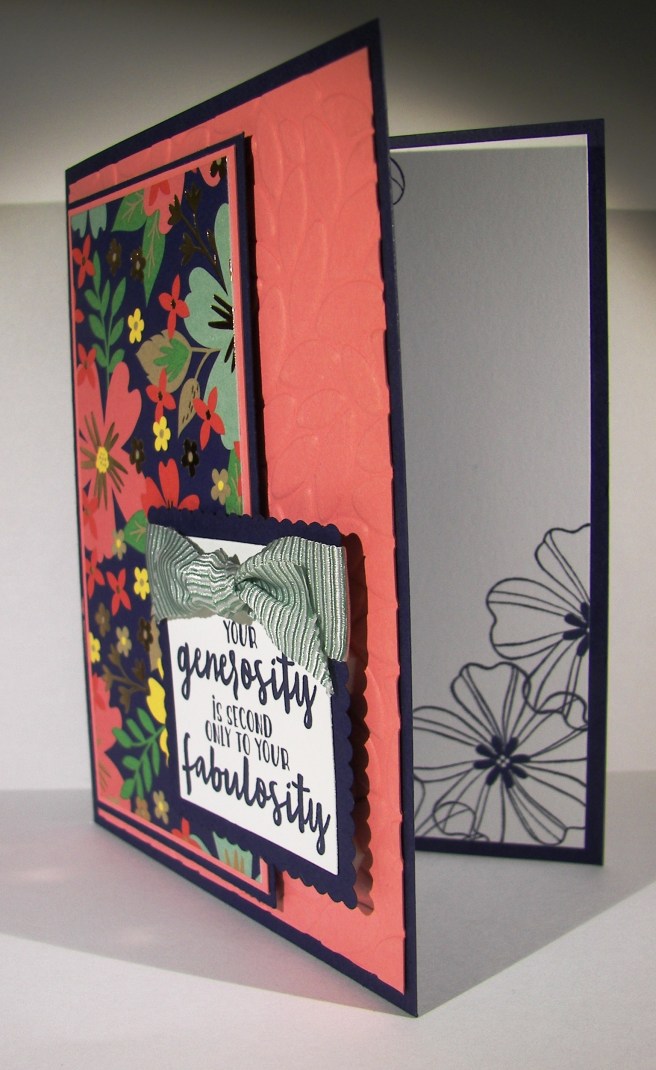
Instead of a bow like the last card, I wrapped it twice around and gave it a little know. It looks great!  To keep with the sponged look of the wood background I sponged the card front equally well.  That also helped to draw additional focus to that awesome chicken, as if he needed help.

4-3 (2)

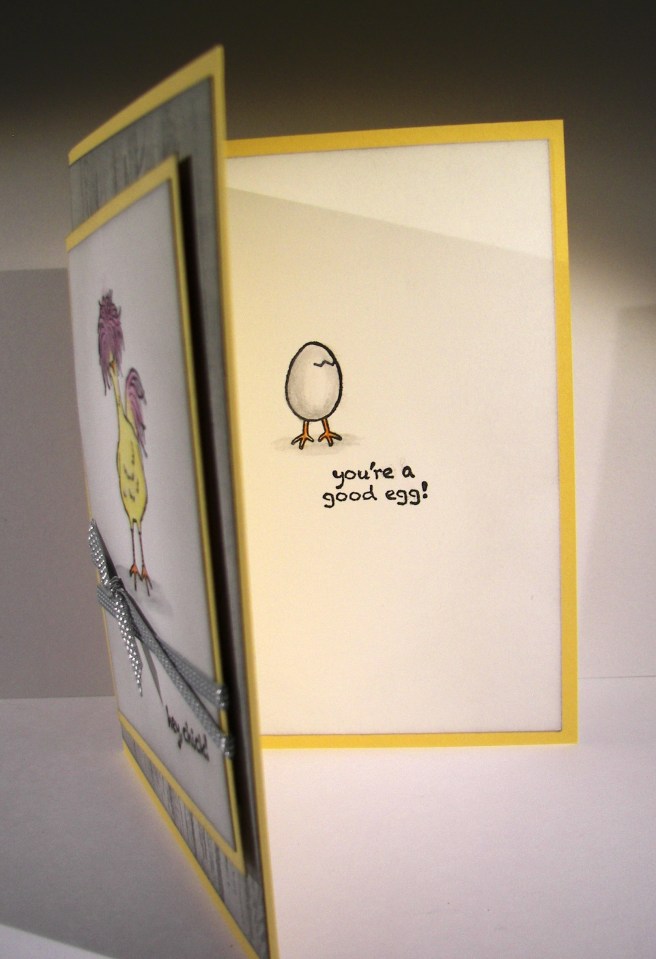
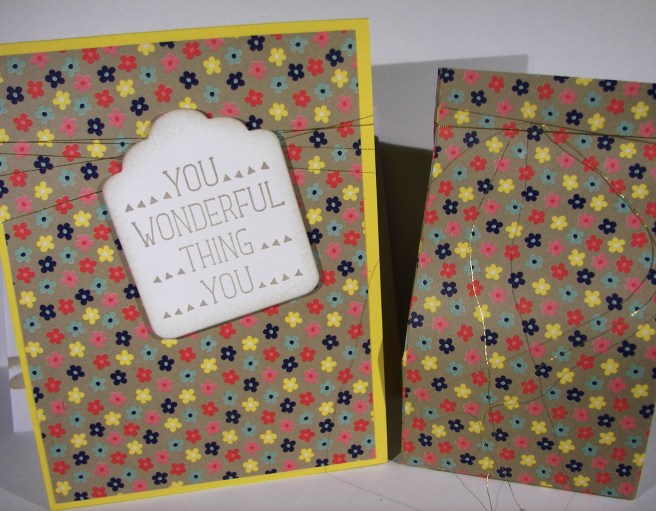
The inside got a little stamp from the same set and a second sentiment.  The cute egg got the same coloring treatment and a touch of sponging around the edges of the paper.  It was a fairly quick project, always faster when the papers are all ready to go.

Have a creative day!

Moana

A Simple Thank You

Sometimes you just need a simple thank you card.  This is just right.  Not too bland, but a quick put together too.  The ladies at my card class this last weekend really liked it, quick and pretty is always welcome.  A project doesn’t always have to be a big production to say what you want.

3-21

I used the three small flowers from the So In Love set to decorate the paper here.  They were placed together on one block for quicker stamping.  It really made quick work of decorating. Each time I added another stamped set of flowers I turned the block a quarter turn.  This gave the flowers a different look without trying to use each blossom one at a time.  I will be using that idea again for sure.

3-21 (1)

Of course I had to add some to the inside to tie the card together.  This delicate ribbon is only a quarter of an inch wide and somehow has room for three rows of stitching.  Isn’t it precious?  That is as decorated as I let myself go here.  I was tempted to water color the flowers and get into some sponging, but I held back.  The result is simple yet perfect.

Have a creative day!

Moana

Hello Glimmer!

Glimmer paper, floral stamps and dies, water coloring, beautiful ribbon, these are several of my favorite things.  Seeing them all together really does make me happy. I needed a special thank you card and this has more than accomplished that.

3-17

I hadn’t had the detailed floral thinlits out for a bit, so that was reason enough.  The sweet sugarplum glimmer paper is where it all started though.  It is such a fun paper pack.  Four 6×6 sheets in three colors, sweet sugarplum, bermuda bay and mint macaron, and the set is free with a $50 purchase.  If you are going to enjoy great product, why not get a bonus at the same time, right?  Since sale-a-bration ends this month, I will have to make sure I get another pack.  So pretty.

The background had a light patterned water color wash in the same ink color and then lightly stamped as well.  I glued the edges of the detailed cut outs to secure them easily. This allowed my ribbon to be tied easily and not look like it was pulling on the paper.  I stamped lightly on the inside as well to coordinate it.

3-17 (1)

The thanks sentiment was cut out four times from inexpensive white cardstock and then glued together one piece at a time. A bit sticky, but worth it. I then added the glimmer paper one to the top and used my trusty tombo glue to place it on the front at a slight angle.  I was temped to add more, but made myself stop.  Details are great, but not if they distract from the simple beauty you started with. My club ladies would love this card, but I think a large group would be too messy, so I will just share the sample for ideas.

Have a creative day!

Moana

Blooms & Wishes Gone Wild

Using a stamp set different than intended can lead to some lovely results.  The main image here is a flower base and the sentiment does come from the same set.  However, when you change it up some, and maybe create a silly creature instead, that same sentiment remains tender, but also very silly.  That kind of sums me up I guess.

3-9

The background took some time, and I nearly tossed it when I was sure it was wrecked. Since I make myself walk away sometimes and return with a new perspective, I kept on. The colors came together nicely and I wish I could repeat it.  Sadly, I think this will be a one of a kind for sure.

The flower creature was stamped in black, leaving plenty of room for those little legs. He got a heavy brushing with gold wink of stella and a couple of google eyes.  I tried a mouth, kind of, but let it go.  It will just have to remain a mystery.

3-9 (1)

The inside got some echo stamping with a smaller flower from the same set and that was all it needed. What an adorable card if I do say so myself, and I do.

Have a creative day!

Moana

Thanks For Always Building Me Up

I love tiny things, also terribly over sized things, but tiny things are my favorite.  Die cutting these tiny tools, painting them, and placing them in a tiny jar really made me giggle. Making a masculine card usually doesn’t elicit giggles, but this one sure did.

2-19

The tools were stamped on water color paper, painted and then die cut.  I tried to keep the tools in color scheme similar to real ones which was really kind of boring.  The screwdriver is my favorite. The tiny screws and nuts are so adorable though.  I used foil paper for those and thought they looked great. They all got a bit of sponging with soft suede to kind of grunge them up a bit.

The background paper got a light water coloring with the same colors I painted the tools with, sponged as well and then I ran it through the big shot using the hexagon dynamic texture embossing folder.  So very cool, love that folder.

The jar was stamped on water color paper and lightly painted with a very light blue.  I then die cut it as well as a piece of velum card stock.  Some of the screws and nuts were glued to the bottom and the tools placed on as well.  I glued the velum jar over the top to make the glass look happen.  I hid some adhesive under the tag, allowed some to show on the screws at the bottom, then reinforced the top wrapping it in gold metallic thread. Good deal!

2-19-1

Have a creative day!

Moana

I Hope You Feel Appreciated

I don’t think I will ever find too many places to stamp this awesome chicken, ever.  There are two other adorable chickens and a little egg too, but this guy rocks!  So here he is peepin’ in a little window to say hello.  Too adorable.

2-3

For a very simple card, I sure did use a lot of different products.  Really though, it went together quite fast.  The card base became a one layer card.  I stamped with white stazon onto the card base using the hardwood stamp.  So cool.  It gave me a subtle woodgrain look that was just right.  I die cut the window out of the card base and again out of whisper white. I glued those two windows together so when I nested them back into the opening, the white one would layer up just ever so slightly.

I backed the window with velum to create the ‘glass’.  I traced the window pane openings on my inside piece of cardstock so I knew where to stamp the trees and chicken.  They got a little ink and a little water color pencil activity and then I glued them in place.  I could have left them on the inside back of the card, but I knew I wanted to cover up the back of the window and have plenty of space to write to my friend.  So I adhered it to the inside top flap of the card and put another blank piece down on the inside back.  Then I had double the space to write and my window stuff all covered up.  Total win!

2-3-1

Have a creative day!

Moana

Thanks For Being You

What a perfect way to say thank you, for just being you.  A great compliment anyone would love to receive, I know I would.  Mixing a project with butterflies and flowers are one of my favorites.  Interesting how even when creating my moods show through.

1-31

I have dipped into the falling in love designer series paper pack so many times since I got it. It really is a lot of fun.  I had put off using this pattern, feeling like I use too many butterflies in my work. When I was a bit fussy though, I went right for it.  The flower stamp and these tiny butterflies and a perfect pairing.

The flower and sentiment come from the Avant-Garden stamp set which is another free one available during this springs Sale-a-bration.  If you are going to buy fun product to work with, you might as well get something free too, right?

1-31-1

There isn’t anything too complicated here today.  Just a little extra layering.  I even refrained from sponging, but looking at it again I think I would have liked it sponged up. I might have to try it again.

Have a creative day!

Moana

Thanks For the Smile

I love using stamps and paper in a way that creates a new vision.  This background paper comes from a lovely set of paper called Falling in Love.  This particular sheet is actually an artistic view of glitter.  When paired with this amazing dragon fly stamp, from Dragonfly Dreams, is looks like a shimmery pond and sunset.  Wonderful.

1-30

The dragonfly was stamped three times on the front and once on the inside.  That is it.  I used basic black archival ink to give this strong, rich look.  Awesome!  The same ink was used on velum cardstock for the sentiment.  I used the triple banner punch to make this layered tag and wrapped it with some of the free ribbon I earned from my last Sale-a-bration purchase.  Love that stuff!  I hid my adhesive on the ribbon.  I used glue dots, small, strong and easy to hide.  And there you go!

1-30-1

Have a creative day!

Moana

Thank You, Friend

Simple and sweet, just like any true friendship worth having.  Sometimes we get so caught up in the day to day demands of life that we set aside those we really care about.  But, since they don’t judge us, and they truly understand, we can get away with it for a time.  That doesn’t mean they don’t hold a special place all of the time.  Good friends are the best!

1-22

This little number was painted with the new water color pencils and an aqua painter.  The hedgehogs I should say.  The bit of background was done using classic inks with the aqua painter as well.  I stamped the guys in the center with the sentiments to the top left and bottom right.  I colored in the hedgehogs first, left them alone and painted the background, and dried the card well before continuing.

They were pretty easy to finish, I didn’t have too many problems.  I did several of these cards for gifts so I got a bit careless.  Good thing water color can be more loose.  They turned out adorable though.  I mounted the card front on a base of crumb cake and layered those on top of a crumb cake card base.  The inside was given two panels, one on the top and bottom of the inside for extra writing space.  Can’t wait to send it!

1-22-1

Have a creative day!

Moana

Thank You Very Much

Holiday weekends offer a lot if you are willing to enjoy.  I love the extra time to sort through all of life’s adventures and endless “to do” lists.  But it is also a time to pace yourself and reflect.  This project offered me that time.

1-16

I started with the idea of more precise painting, but quickly learned that it had other things in mind.  Since I have such a hard time waiting for much of anything, my colors couldn’t stay still.  So I went with it and created a much more fluid and dreamy look.  You can tell from the warp of the side of the paper just how much water went into this project.  I had fun though, and it was truly relaxing.

1-16-1

The sentiment was stamped on very vanilla and cut out using one of the dies from the Bunch of Banners framelits set.  I love the crisp edges of a die cut.  The inside stamp was another image from the same stamp set.  This particular set isn’t available for regular purchase, but at a reduced price when you host a workshop.  Sounds like a win win to me!

Have a creative day!

Moana

Thoughtful Branches Thankyou

This card comes from a limited time stamp and framelit bundle.  There are many options within, all kinds of trees and fun things, but this is why I bought mine.  I love hydrangeas so much.  I am so going to enjoy this set.

8-9

I put a new stamp pad to use.  Stampin’Up! has produced a few ombre pads, this one in particular is rich razzleberry.  I am usually a bit more traditional, wanting more self control over the colors I use.  But this was pretty darn fun.  I like how it turned out and I am glad I bought them.  I wanted the color to bleed some, so I spritzed the flower with water after it was die cut.  It softened the color without compromising the ombre effect.

I painted another piece of water color paper with almost artichoke and used the stem die cut.  I didn’t have to add any color afterwards, it turned out nice.  I knew I would be working in water color paper, so I made both flower parts and the card front from the same paper. That way the ink would react the same and have a uniform look.  The background was done with a light wash in crushed curry.  No distressing, just painting.

I stamped the sentiment directly to the card front and called it good.  I did layer it up on another piece of almost artichoke paper for a bit of interest and to help control curling of the card front.

8-9 (1)

Have a creative day!

Moana

Thank You So Very Much

Everyone says thank you in their own way.  Me, well I like to do favor boxes or cartons.  A little bit of words along with a special treat.  I always want to give something special and to be honest, the budget won’t often allow that.  Hence my love of paper crafting.  I always have more time than money, so my time can show my gratitude.  It isn’t that people expect, I just enjoy doing it.

6-29

This carton was made with a whole sheet of sahara sand card stock.  I pulled out the trusty simply scored scoring tool and it came together in no time.  I actually made this one while having a lovely chat with my mom and dad.  How wonderful summer can be to me.  I did do my stamping first, because it does bother me when the stamping skips over the score lines. I know, not a real big deal, but it bugs me.  So the stamping first with the Flourishing Phrases large floral image.  I stamped and sponged in crumb cake instead of sahara sand to give a more vintage look.  So adorable.

The tag was cut with from the frame from the Rose Garden Thinlits set.  It it so much fun to put such pretty things together.  The smaller floral image was stamped first, the thank you second and then die cut.  Of course the whole project enjoyed lots of sponging.  I wrapped the top of the carton with gold metallic thread, popped a tricky bow through a bitty hole I punched and topped it all with a large basic pearl.  I refrained from putting those all over the box, I made myself keep it more simple.  So there you go!

6-29 (1)

Have a creative day!

Moana

Your Generosity and Fabulosity

This is another one of last weekends workshop projects.  A very simple but lovely card. There are so many things that I love about it, but especially how they all work together.

6-23

The layering design is all about showing off the designer series paper.  The embossing folder draws attention to it and the sentiment accents it.  In this pack of paper there are several two sided patterned pieces, but two sheets of gold foil designer series paper.  This pattern is one of the two and I love it!

I accented the sentiment with the layered square framelits and some of the awesome new mini striped ribbon.  It might have been a bit over sized, but it is what I wanted so I did it. A touch of echo stamping on the inside to tie it to the designer paper and I was good.  Another great project that will find its way to another fabulous person.

6-23 (1)

Have a creative day!

Moana

Thank You, Friend

Did I take a few days off?  Well, not really.  My son recently got married and just last weekend we had a reception in our backyard to celebrate.  I thought I could keep things going, but I just had to get a bit more focused. Family always comes first.  Then you have the lovely friends that support and make everything come together.  I have several such friends and I couldn’t be more grateful.

6-14

Could these two adorable friends be any more wonderful?  They come on one stamp and make the perfect pair.  I decided to put several of the new in-colors to work to show them off.  The elephant is painted in sweet sugarplum, the mouse in peekaboo peach and the ground painted in emerald envy.  The sky background needed something different, so I went with soft sky.  Yup, just what the card needed.  Nothing else was needed, no ribbon, no distressing or anything else.

I mounted the water color on a separate piece of sweet sugarplum cut to provide a narrow 1/8th inch border and then raised up on dimensionals.  This is just the type of card I would love to get, but even more, love to give.

6-14 (1)

Have a creative day!

Moana

You Wonderful Thing You

This is the end of a very fun and simple series.  I hope you have enjoyed seeing so many of the patterns in this designer series paper pack.  There are a few more that I love, and a couple that probably won’t find their way to a project, but that is why it is awesome that paper is two sided.  Something for everyone, right?

6-2

One card base, one layer of dsp, one simple tag stamped and sponged next to a simple gift bag.  Just a touch of metallic thread and there you go!  I have enjoyed the series, but I am ready to get my water colors out and play a little longer.

Have a creative day!

Moana

Thank You for Everything and More

Kind words and a sweet treat.  It doesn’t quite add up to all the gratitude I have been feeling these days, but sometimes that is all you can muster.  Making something yourself means so much more I think.  You should give it a try.

6-3

Clean and simple yet again.  When you want to focus on the lovely sentiment and wonderful paper that is just how it needs to be done.  I did add a layer of mint macaron under the DSP before I attached it to the crumb cake card base.  It gave it a little extra style without becoming a distraction.  So fun!

Have a creative day!

Moana

Thanks Kindly

Here is the official beginning of summer for me.  I do have a wedding reception to host this Saturday, so it isn’t time to head to the lake just yet.  Soon though, soon.

6-4

This series of clean and simple thank you gift sets sure was fun to create.  I enjoyed giving them just as much, and isn’t that why creative people create?  To share with others the joy that comes with creating?  Try your hand at something this simple and realize how rewarding it really can be.

Have a creative day!

Moana

You Are Too Kind.

When you are surrounded by kind people even the simple things are wonderful.  As huge life events come into play it just keeps getting better and better, don’t you think?

6-5

A clean and simple card and gift bag duo can be so rewarding.  This is just as simple as the others in this series and was received with great smiles and even a few giggles.  So rewarding, so very rewarding.

Have a creative day!

Moana

One Tiny Word With One Big Meaning

Today is a day full of gratitude for so many things.  I get to enjoy the experience of my son marrying a wonderful lady.  My heart is more than full.

6-6

Let’s keep this one even more simple, shall we?  I love a simple card that really lets you enjoy the sentiment.  Talk about clean and simple.  The matching gift box is tall and skinny. I filled it up with tiny treats as I shared it.  So much fun!

Have a creative day!

Moana

Thank You…

This has got to be some of the most beautiful paper ever.  The set has an interesting mix, some of which I could do without.  However, the rest more than makes up for that part.  I think that Stampin’Up! does a great job with diverse paper patterns to fill just about everyone’s tastes, especially mine.

6-7

A basic card, one layer of paper to show off, one little tag stamped and sponged.  How about another adorable gift box to match?  Of course it was filled with candy.

Have a creative day!

Moana