Love You Bloomin’ Love

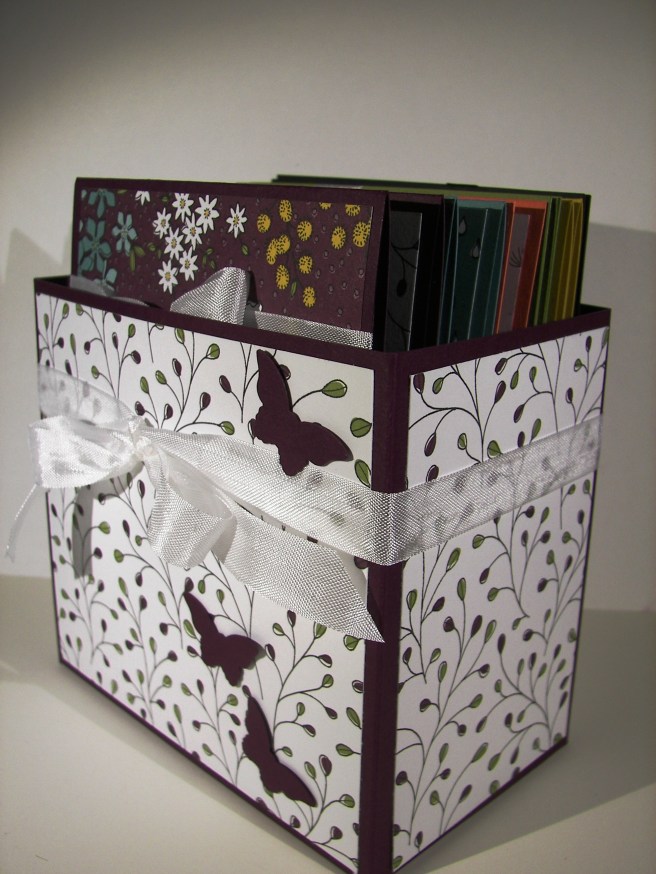
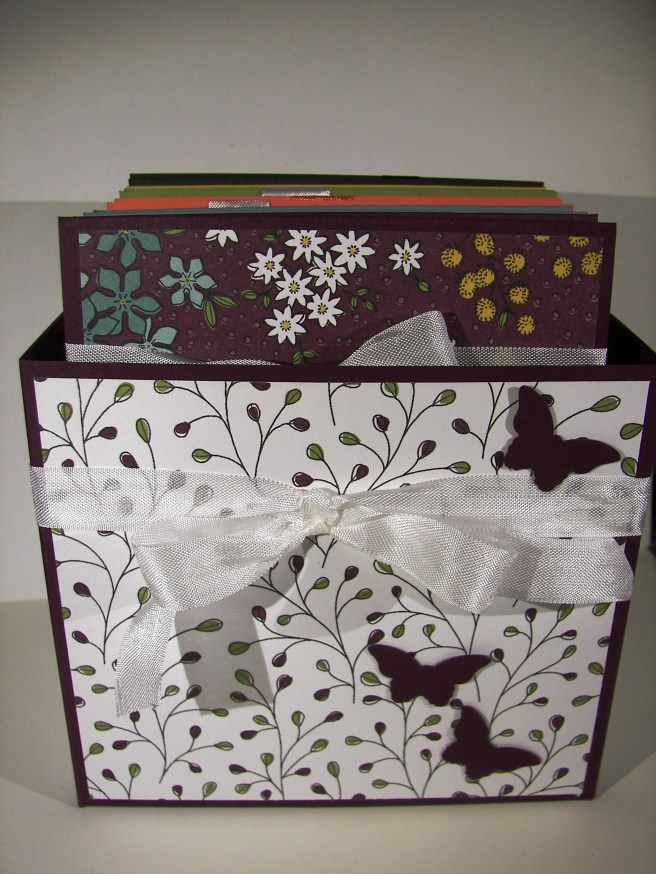
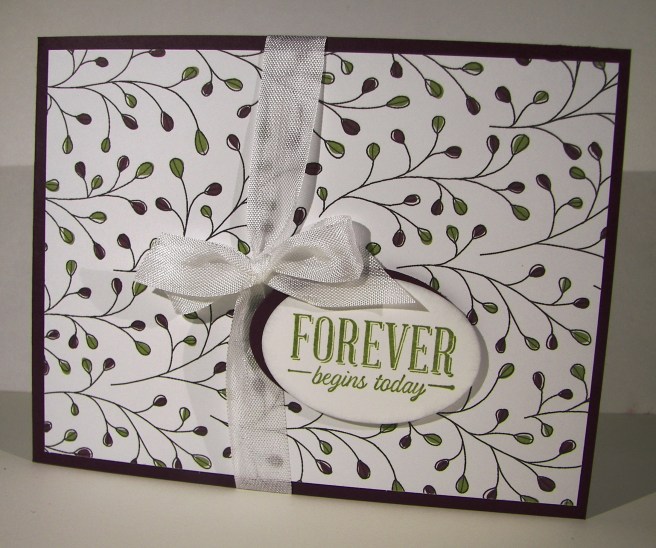
Just when I thought I could sit down and make something new my time got snatched up. It seems to happen that way more often than I would like, but we do what we have to do.  So, I grabbed a leftover kit from last months workshop and turned a card base into a box.  Pretty cool if I do say so myself.

4-11

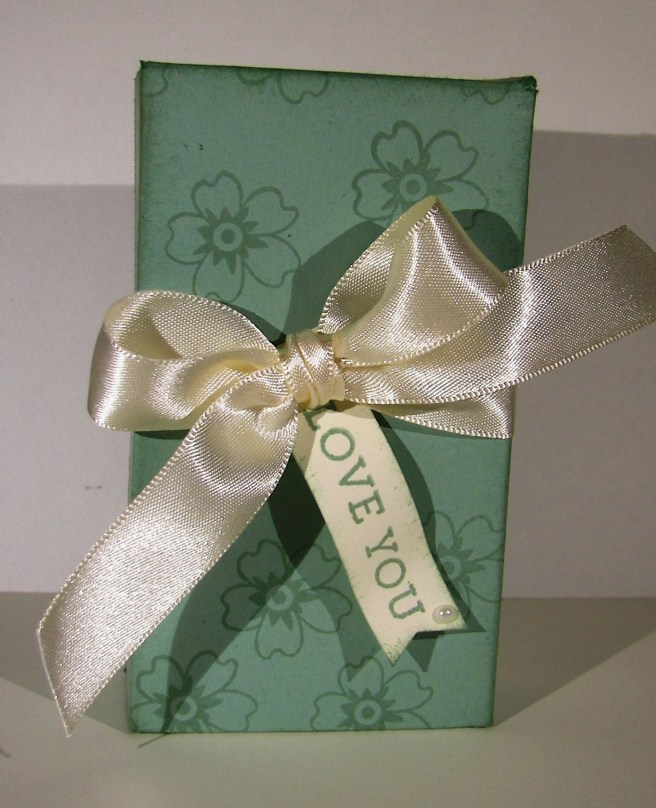
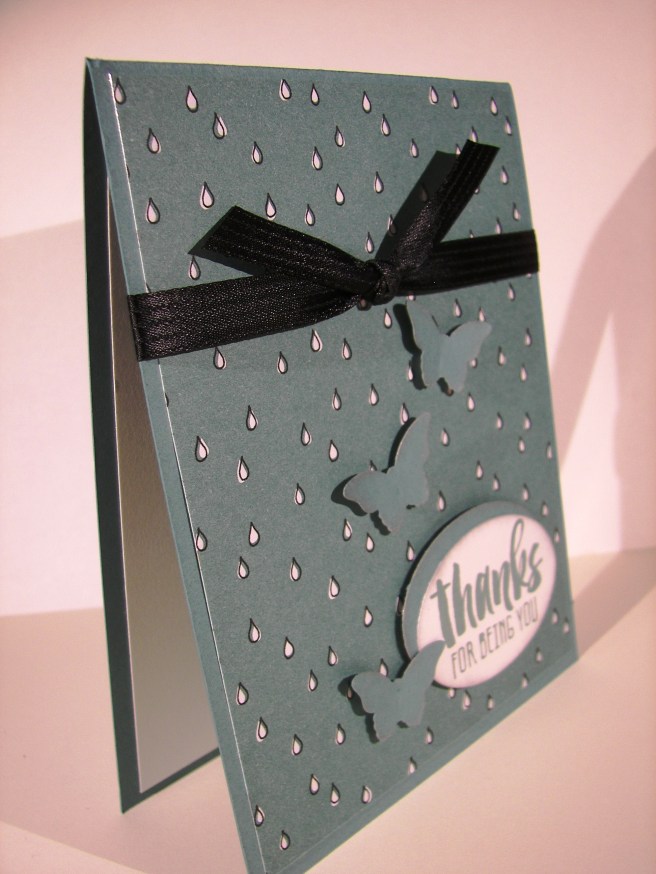
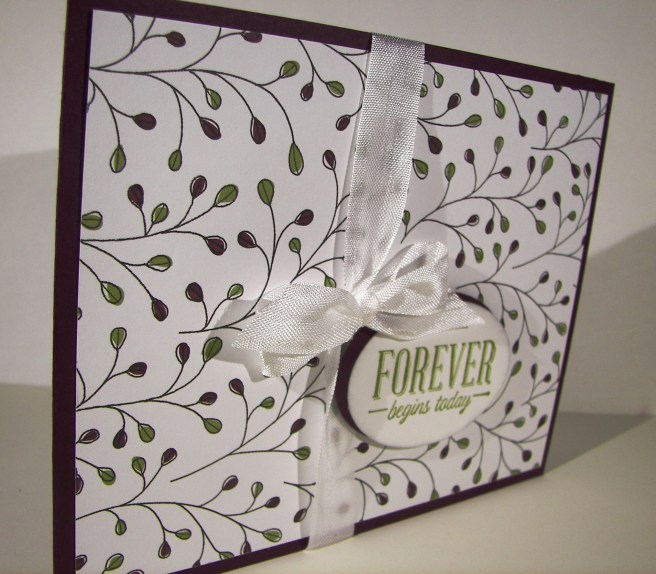
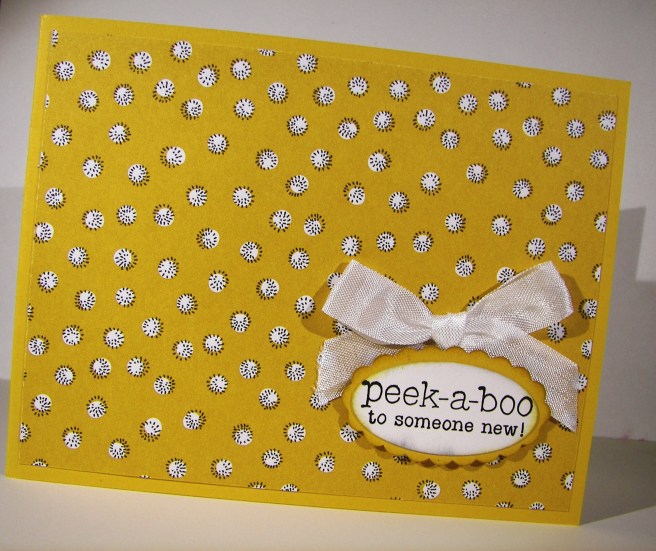
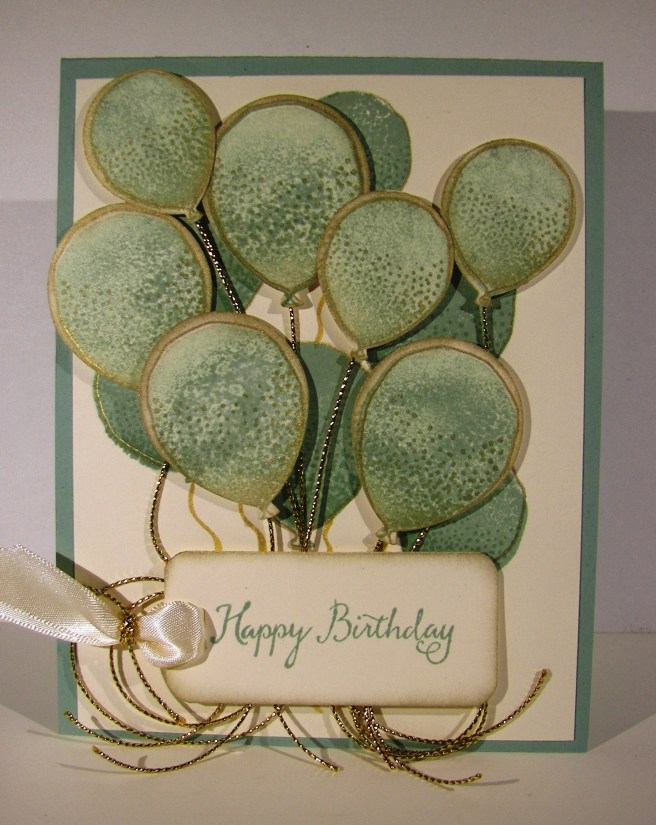
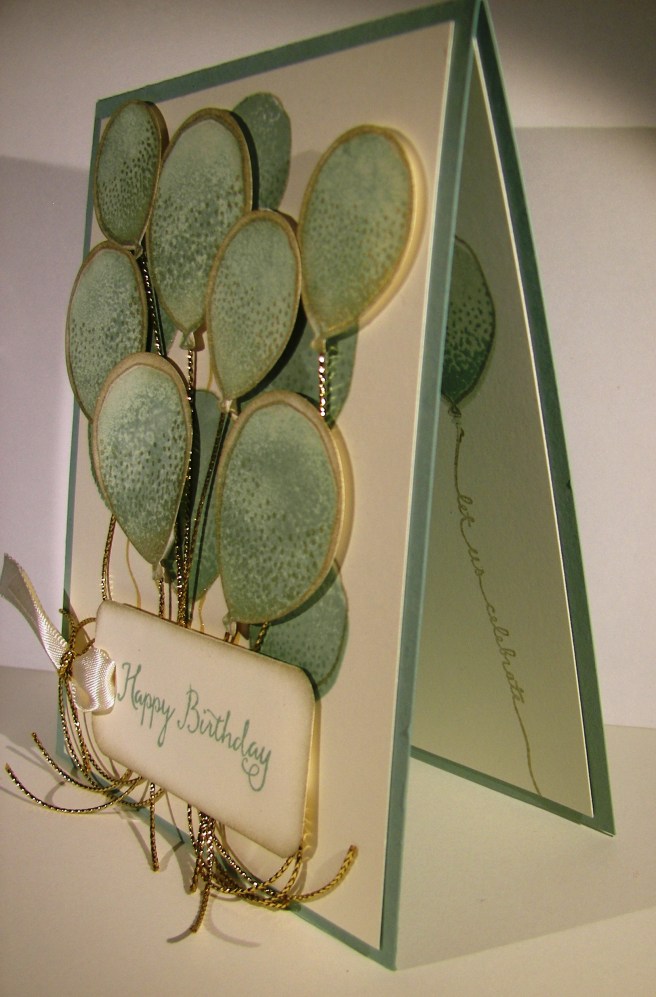
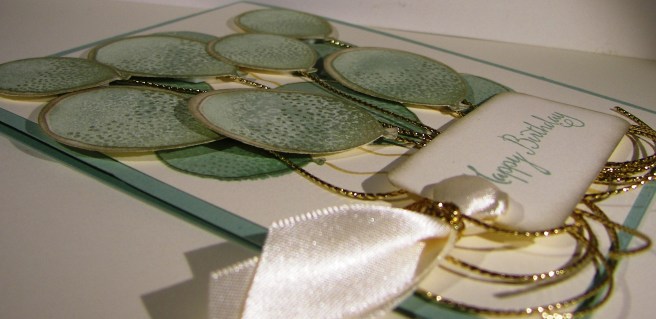
I stamped tone on tone with mint macaron using one of the larger flowers from the Bloomin’ Love set to create the background pattern.  My tag was a tiny piece of very vanilla which measured 1/2″ x 4″.  After I stamped the ‘love you’ sentiment from the same set I punched a banner at the end with the bitty banner punch and sponged around the edges with the same ink.  I curled the banner a bit before I set it in place.

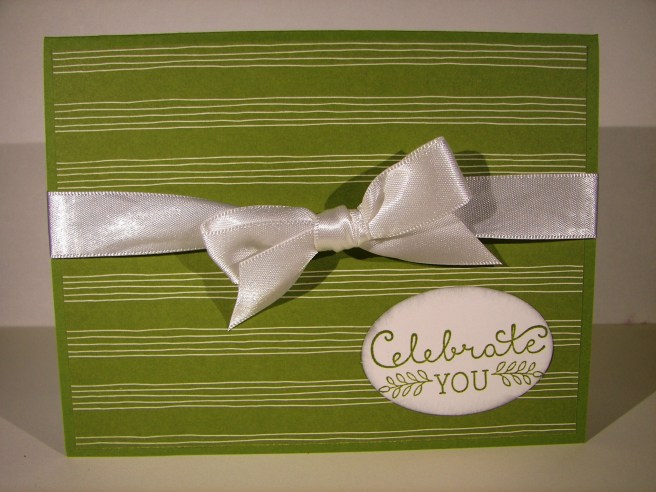
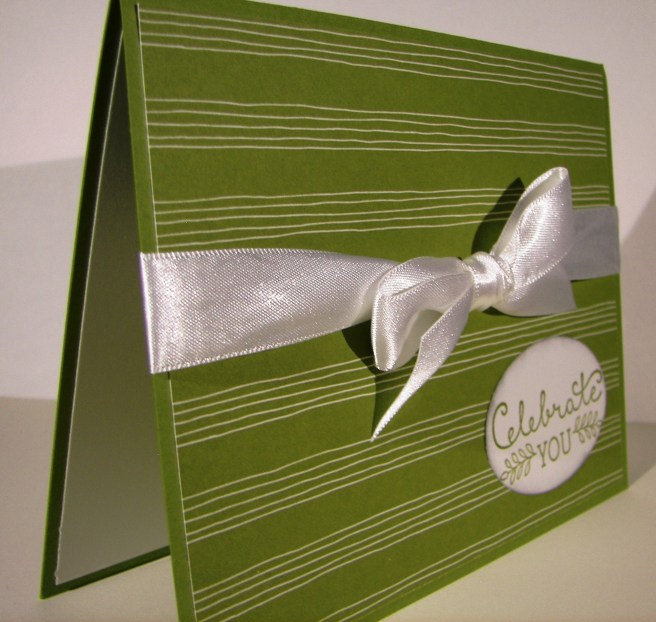
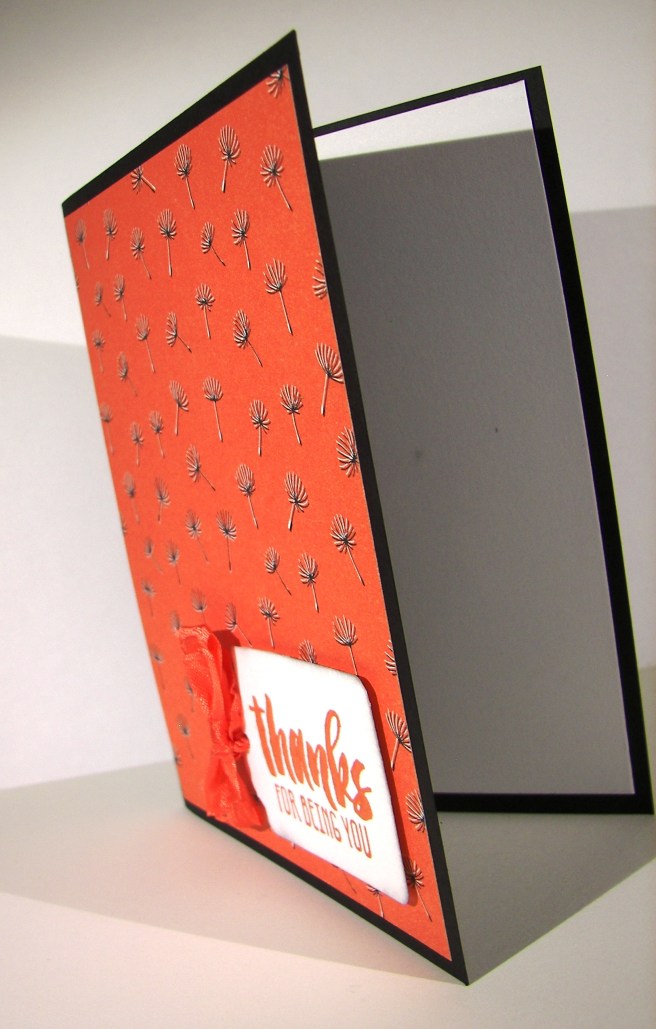
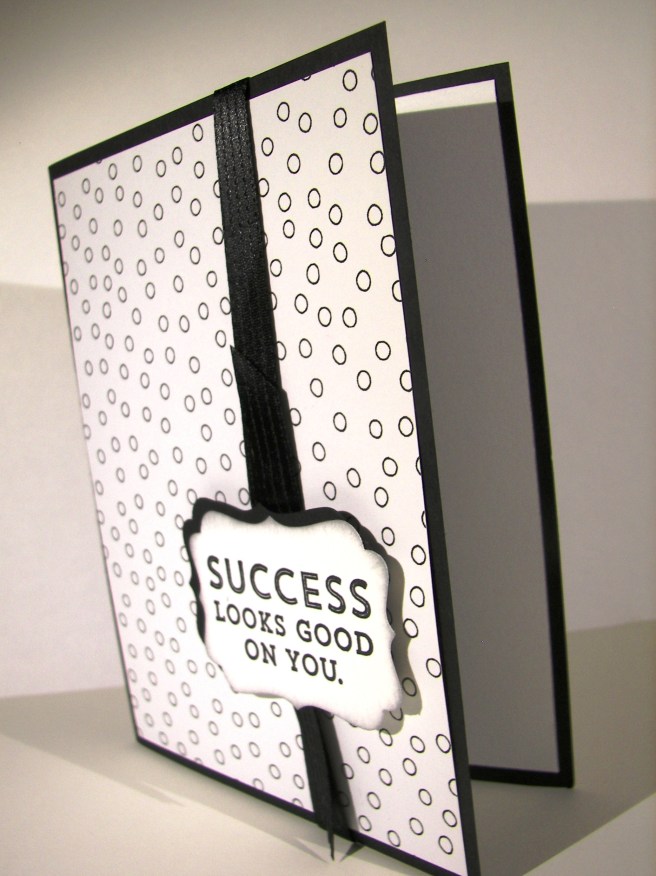
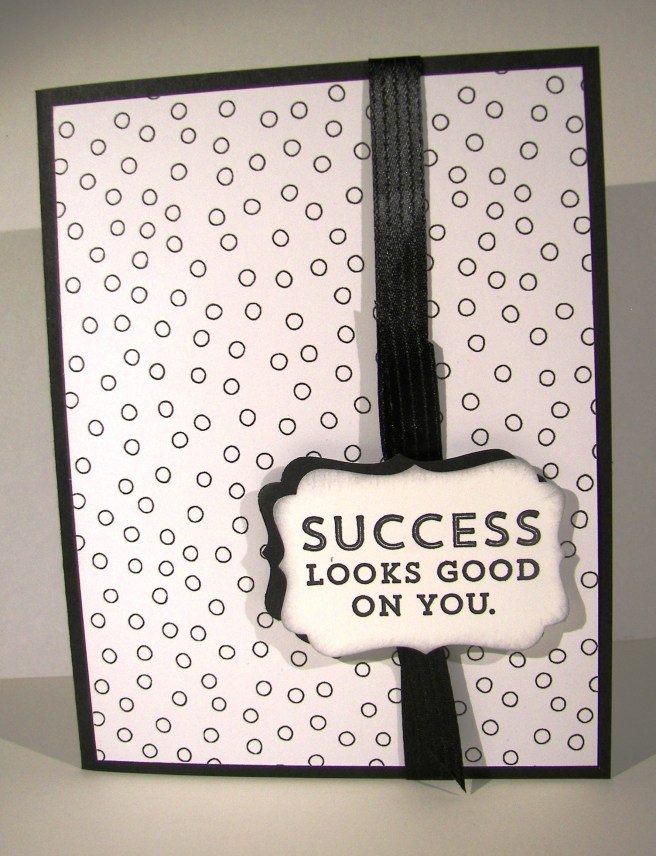
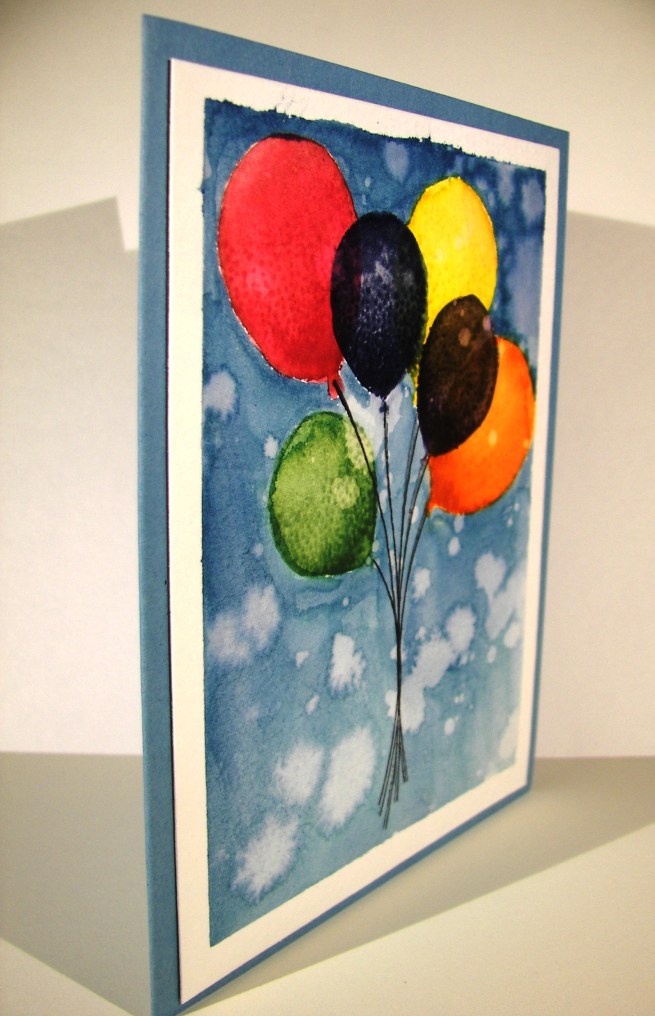
The cardstock was cut at 4 1/4 x 11″.  All ready to be a tall folded card.  I scored along each of the long sides at 1″, turned it one quarter turn and scored at 5″ and 6″.  Those last two scored would become the hinge side of the box.  Scoring, snipping and a bit of gluing later and this little box came together.

4-11 (1)

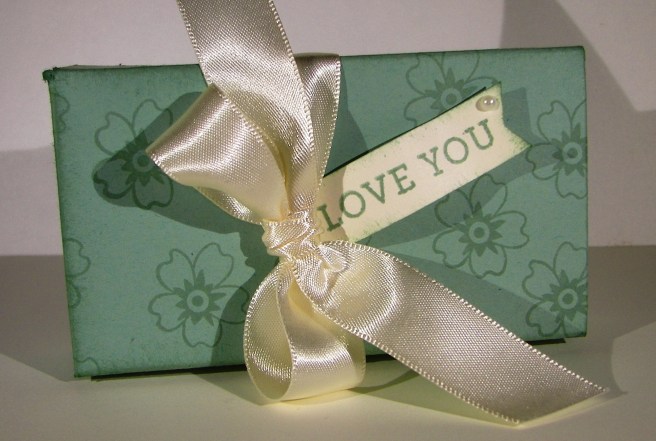
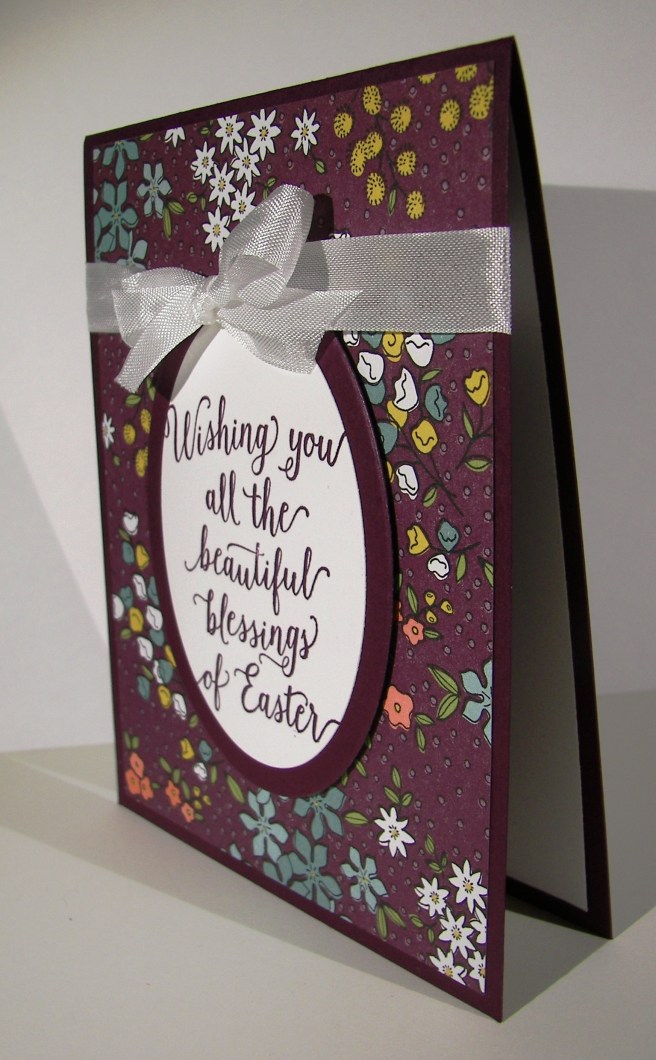
I chose the large satin ribbon for my bow.  That is such a rich ribbon.  I just wrapped it around the short side and tied a pretty bow, leaving the tails a bit longer than normal.  I usually wrap my boxes up more, but wanted to be able to slide the ribbon off easy to fill with treats when the time came.  I also decided to add a tiny basic pearl on the banner, but just one.  How cute is that?

Have a creative day.

Moana

Thank You Times 250?

Just what is this about?  While enjoying a crazy holiday in Utah with family I was given a special request.  My beautiful niece is getting married tomorrow and I couldn’t be more excited.  I had originally offered to make her wedding favors for her wedding gift.  She changed her mind on having them, so instead she asked for thank you cards.  Time was short, but I decided to complete them while I was in Utah so she could have them before the wedding.  Well, it was quite the event.  I took these photos on my cell phone just before we headed home, so they are pretty fuzzy.  I just couldn’t not share.

4-8

I put in an order for the materials I would need to make 250 of these simple cards.  I started out strong on my own, but in the last hour I had to enlist the family assembly line.  They are so well trained.  Now she has custom thank you cards, with matching envelopes, in her wedding colors all ready to go.  I think she will have more than enough and will be left with a lovely stash of cards to say thank you along the way.  How fun!

I did learn an interesting thing.  Stampin’Up! ink pads do have limits.  I didn’t think to order re-inkers to go along with the new ink pads for this project.  Silly me.  I got more than half way through the so saffron stamping when I knew I was not going to make it.  My daughters friend was a demonstrator.  We hit the stash, got to looking, almost gave up, then my husband came to the rescue and found it!  Stamping could continue.  Small world. Oh, and I went through five refills of my fast fuse.  I almost didn’t make it there either.

4-8 (2)

Have a creative day!

Moana

Gift Box for the Gift Set

We all have good days, better and even best days.  Sometimes though, we wonder where the day has gone and just what has gotten done.  That is what this time of the year brings for me.  I did start this post this morning, can’t win them all though.

4-5

The last couple of weeks I have been sharing the cards from this gift set I made for my daughter.  It has room for all one dozen cards plus their envelopes quite nicely.  When she is done, I suggested she could use them for her embossing folders.   How cute is that?

I used a full 12 x 12 sheet  of blackberry bliss to make this box.  Then I added a wonderful print from that wildflower meadow dsp that just finished with Sale-a-bration.  Such a fun time filled with wonderful product.  I am quite excited to get back to work now on something new and exciting.  I wish my desk were a bit more tidy, one thing at a time.

4-5 (1)

Have a creative day!

Moana

Thanks For Being You

Aside from some very hasty photography, and as a result poor images, I do rather like this card.  Even though several of the cards in this series look similar, this one feels different.  I guess that can happen when you include black a little unexpectedly.  The ribbon is nice though, even if it is a bit strong.

4-4 (2)

I hadn’t had the bitty butterfly punch out in quite a while, but it was just what I wanted.  I sponged them in silver ink and thought it looked like the raindrops had given them a bit of a sheen.  I also sponged the tag in the same silver ink.  A favorite touch of mine.

I couldn’t let myself use the other photo I had taken.  Just too rushed for something decent, but I still wanted to share it.  I raised up the sentiment and the butterflies on dimensionals and left it at that.

Have a creative day.

Moana

They Say It’s Your Birthday

Fun, fun and fun. That is what this birthday card says to me.  When you have a fun paper that isn’t just masculine or feminine, you are fortunate.  This card can be for just about anyone, regardless of age too.  I call that a super win!  The series I started is nearly to an end.  I can’t wait to share the cute box I made to hold the whole dozen cards for the gift set.

4-3

The tag was made using the triple banner punch.  Dang, I sure do love that tool.  When it first came out I thought it was a bit excessive, but I gave it a try.  I use it so much.  It makes layered banner tags so easy.  This one was whipped together super fast, layered up on dimensionals, given a tiny ribbon accent and slapped in place.  Honestly, this was one super fast card.  Again, the paper is a win.

4-3 (1)

Have a creative day!

Moana

Forever Begins Today

I don’t think I can get enough of this pretty paper.  I am glad I managed to earn an extra pack of this paper during Sale-a-bration.  This particular pattern was my second favorite, hard to top it though.

4-2

Another sad part about this card is that soon the blackberry bliss I used for the card base will soon retire.  I will so miss using it.  It was really my favorite.  Time to enjoy it as much as possible and get ready for some new colors.  I think I might get a little stash of it built up to enjoy though.

This card is like the others in the series, pretty direct and to the point.  I stamped my sentiment in old olive, punched it with the extra-large oval punch, sponged it with silver encore ink and shadowed it with another punch in blackberry bliss.  I raised them up on dimensionals and put them just to the side of a lovely ribbon tied with seam binding ribbon.  I could use that ribbon on just about everything.  I thought I wouldn’t love anything as much as the chevron ribbon that retired last year, but I sure do!

4-2 (1)

Have a creative day!

Moana

My Heart Smiles Just Thinking of You

It has been a very busy, but very fun, visit to Utah.  We have stayed a week, been snowed on twice, enjoyed the rain, and driven all over to spend more time with our son and his fiance. I would always like more time, but also can’t wait to get home.  Facing the long drive isn’t very inviting though.

4-1

This is a tall card, cut at 4 1/4″ and scored at 5 1/2″.  I like working with cards this way because of how easy it is to add ribbon.  I arranged my tag just under the ribbon to make it look like it was attached.  There wasn’t room on the tag for an actual punch, so I had to make do.  It looks great though, don’t you think?

4-1 (2)

Have a creative day!

Moana

Thanks to You I Grew Up Loved

What a sweet, tender card.  I was thinking of my mother as I put this one together.  She is all about flowers and everything that go along with them.  As I shared this one with her, we shared a few tears.  Having a wonderful mother that helped you grow up loved is more than a blessing, it is an absolute treasure that we both share.

3-31 (2)

This lovely card showcases the dsp almost as much as the sentiment.  It is hard to decide which is the focal point, so I will call it a draw.  I stamped the sentiment on whisper white and punched it with the most narrow portion of the triple banner punch.  I then created a border of calypso coral and repeated the punching  to give a nice quarter inch boarder that tied the entire card front together.  After a lovely bow tied with seam binding ribbon I decided to put the tag on an angle.  It turned out so adorable and yet so simple.  One of my favorite ways to work.

3-31 (1)

Have a creative day!

Moana

You Wonderful Thing You

Yet another adorable card in this series.  I sure have loved sharing this card set, even more so giving it away for someone else to share and enjoy.  The true joy of card making.  What a fun color combination for sure, one of my favorites.

3-30 (1)

The seam binding ribbon I used got a little rumpled in the center of the spool.  However, I decided I liked the look of it and didn’t try to iron it out.  I have bought ribbon before that was ruffled on purpose and liked it that way.  So, instead of getting frustrated at the center of the spool, I just made the best of it and enjoyed the results.

The sentiment was stamped on whisper white and layered with a scalloped circle of calypso coral to coordinate with the card base.  Don’t you just love this paper?  Full of whimsy and cuteness.  The simplicity of the color scheme also keeps this one very clean and simple.

3-30 (2)

Have a creative day!

Moana

Celebrate You

This card series has been so fun to share.  I love the simplicity of the cards themselves, allowing the sentiments to really be the focal point.  Sometimes there is so much, what you are trying to say gets lost.

3-29 (2)

I actually liked this card without the sentiment nearly as well as with it.  The ribbon is so elegant it speaks for itself.  However, I wanted this one.  I have been enjoying sponging the sentiments in silver ink with this series.  I am usually all about the exact coordination, but it is a nice contrast without being a distraction.

3-29 (1)

Have a creative day.

Moana

They Say It’s Your Birthday

How about a simple birthday card!  I think this one could be for just about anyone, don’t you? Keeping projects simple allows for a lot of options, more than you would think.  And how awesome is this balloon bouquet punch?  I am absolutely in love with it.  I hope it carries over.  I am keeping it no matter what.

3-28 (2)

I had to hold myself back to not put strings and all kinds of fun stuff here.  But, that would defeat the purpose of of a clean and simple cards after all.  This way I think it would even work for a masculine card.  Gotta love those!

I punched two large and three small balloons.  The large ones were attached flat to the paper and the smaller ones were raised up on dimensionals.  Of course everything is sponged.  The balloons were sponged in hello honey to coordinate as well as the tag.  I thought the color was too strong on the tag, so I sponged with silver encore ink as well to soften it.  It turned out great.

3-28 (1)

Have a creative day!

Moana


Wishing You all the Beautiful Blessings of Easter

Easter cards don’t have to be all about bunnies and lambs.  An elegant one like this, even in bright colors, is wonderful too.

3-27 (1)

I will definitely miss this beautiful color, blackberry bliss, when it retires this summer.  I do love new colors, but this one just might stay around.  The stamp fits only just inside the oval framelits, which allowed a nice frame and a lovely bow.  No extra embellishments or layering, just a lovely sentiment and strong color.

3-27 (2)

Have a creative day!

Moana

Peek-a-boo to Someone New!

Adorable and adorable.  With a sentiment like this, any project is bound to look adorable. However, the dandelion puffs do help tremendously.  This is the third in a gift series focusing on one set of paper from Sale-a-bration and just one stamp set.  With a few punches and some ribbon I was able to create a dozen cards and a container to hold them. Enjoy them like I have.

3-26 (2)

One piece of paper for the card front, one tag layered with a scalloped background, and a simple bow.  I do think of a new baby with this card, but it could work for other situations I suppose.  There are several ladies in my life who are expecting little ones, so this just might get made a few times over.  Easy and fun to do.

3-26 (1)

Have a creative day!

Moana

Thanks for Being You

Day two in this adorable little series finds me fortunate enough to be in Utah visiting family, family, and more family!  How wonderful is that?  It is  more than fun, especially for me.  So many fun social opportunities.

3-25 (2)

I do love this paper.  The little dandelions dancing in the wind are so cute.  Simple and fun but it will be the perfect thank you for the person who has been so kind.  Giving cards is always so much fun.  This gift set will be fun for my daughter to use.  And use it she will.

3-25 (1)

Have a creative day!

Moana

Success Looks Good On You

Don’t you love it when designer paper has such unexpected patterns?  This awesome paper from Sale-a-bration, which will end soon, has a few patterns that are so fun and different.  You  wouldn’t guess that this dotted pattern comes from a primarily floral set paper.

3-24 (1)

This project is the first of a dozen cards that I made for a gift set to share with my daughter. It is nearly spring break and my family gets to all be together.  She loves to paper craft with me, and actually kept me company through crafting nearly all of these.  So, you get to enjoy a different one each day.  The series will end with the coordinating container I made to store them all in.  It is so pretty.

The card is super simple.  Just one layer of dsp cut to leave a 1/4″ border, one strip of ribbon tied in a knot, and a layered sentiment.  I stamped in black stazon, punched with the decorative label punch, and then sponged with silver encore ink.  I did use a double layer of dimensionals to keep the tag high enough to clear the ribbon knot underneath.  Simple, right?  Sometimes simple is just right.

3-24 (2)

Have a creative day!

Moana

Balloon Bouquet Celebration

I finally got my back ordered balloon bouquet punch and I am totally celebrating!  This punch is just the coolest thing and totally worth the wait.  This will be getting tons of use, just tons.

3-23

I may have gone a bit overboard with the balloons, and the cording, but I love how pretty it is.  One special person will get this card, and I think I know who it is.  Not everyone appreciates how much time can go into a hand made card, but those that do deserve every one they get.

3-23 (1)

I used a leftover kit from Saturday’s workshop to make this project.  I stamped several balloons on the background paper.  To get the tone I wanted I stamped off once before I applied it to the card.  Then on my other paper, that I would be punching, I stamped off twice.  Both sets of balloons were also stamped with the dotted accents in mint macaron and gold encore ink.  I added gold to everything and sponged away.  Too cute!

3-23 (2)

Have a creative day!

Moana

It’s Your Day!

Yesterday was one of my TA’s birthdays.  Boys turning 14 don’t want a lot of fluff, just cut to the good stuff.  I stopped on the way to school and picked up a large chocolate bar and wrapped in this awesome, retired, water color patterned dsp.  He is also an artist, so I knew he would appreciate the water color theme going on.

3-22

It was so easy to assemble.  I placed tear n’ tape along three sides and wrapped the large candy up.  First I wrapped the paper around fairly tight and sealed it like a flat tube.  Then, I just removed the other strips of tape to flat seal the ends.

I took the scraps of my linen thread and wrapped them around and tied a knot.  I just took my hand painted, and stamped of course, gift tag and looped it through one of the extra strands.  Another simple knot and this lovely package was ready to go.  Sorry I didn’t get a photo of the finished product, but I wasn’t sure just what candy I would be able to get. Stores out in the country don’t always have a large selection.  The way the paper was prepared I could have turned it into a large sour cream container styled  box and been just fine as well.  For the win!

3-22 (1)

Have a creative day!

Moana

A Very Special Invitation

I know I used a bunch of retired product, but I still love it too!  The wonderful thing about tools is that you can use them again and again no matter how long you have them.  This stamp set and coordinating embossing folder are retired Christmas product.  I think they are still beautiful and perfectly wonderful for this project.  So there, use the product you have and love!

3-21

These were special handouts for a Sunday church lesson I taught to a group of 14 & 15 year old girls.  They are so dear to my heart, I can’t help myself but make them something special every time I teach.

I embossed my card front after I did my stamping.  The stamp is photopolymer, so exact placement was super easy.  Then I centered my folder just where I wanted it to be.  I traveled through my framelit collection to find one that had the shape to match the background stamp and my sentiment stamp.  Of course it was the last one I looked at.  But it was a perfect fit.  A touch of sponging on the diecut piece and it was done.

I did get the cording out and do a few loops of it behind my card front.  After I had placed my dimensionals behind my diecut, I looped the cording and set it on the exposed sticky side.  I added a couple of glue dots over the top and stuck it down on the card front.  No problems there!  The cording wants to loop because it is stored on a spool.  Even better!]

3-21 (1)

Have a creative day!

Moana

Dear Heart, Sweet Boy

This project was all about giving myself a challenge.  I grabbed a piece of dsp, decided on three colors, picked a stamp set I hadn’t used a long time and went for it.  This was definitely not my usual style, but it felt good.

3-20

The card itself wasn’t too complicated, just one layer for the background.  I stamped my little boys on water color paper with black stazon and opened the ink pads.  Their faces were done with a very diluted wash of pink pirouette with the hair in tip top taupe.  I wanted them to look like the same boy just doing different things.

Each boy face was accented with one color only.  For the darker areas I kept the ink fairly strong.  When I accented I diluted it a bit more and even more for the outlined areas in the background.  I left it simple because I wasn’t really going for perfection, just soft coloring. I punched their faces out with the 1 3/4″ circle punch and a background of black with the 2″ circle punch.  They were arranged on the front and layered with a bit of dimensionals.

The banner was stamped from the same set and a light wash of each color was put on its own section.  Then each end was punched with the bitty banner punch.  I also put that up on dimensionals.  I repeated the pattern of paper inside with more dsp and a smaller piece of very vanilla to write my message on.  Such a sweet card, for a very sweet boy indeed.

3-20 (1)

Have a creative day!

Moana

Balloon Celebration

Experimenting with water coloring has become one of my new favorite things to do.  I am so young in this medium that it is a constant adventure.  I do try not to do it all of the time, but it might just be my favorite.  Hard to put that off.

3-18

I did stamp off the balloons twice before they got to the card front.  I wanted dark color, but still opaque.  It worked nicely.  The second layer stamping was done only stamped off once to make sure it was seen well.  Also a good fit.  I did go over the balloons again with the aqua painter to smooth things out.  A bit of dabbing with a paper towel helped to create better highlight spots.  Fun and fun. I am still waiting for the back-ordered balloon punch, so I had to layer the balloons with just ink.  That is why I had them opaque.  To allow the layering to show the balloons behind, just like it would with a real bouquet of balloons.  I do think this card is good for just about anyone’s birthday, masculine too.  A really great project that was satisfying on so many levels.

3-18 (1)

Have a creative day!

Moana