Thanks For Being You

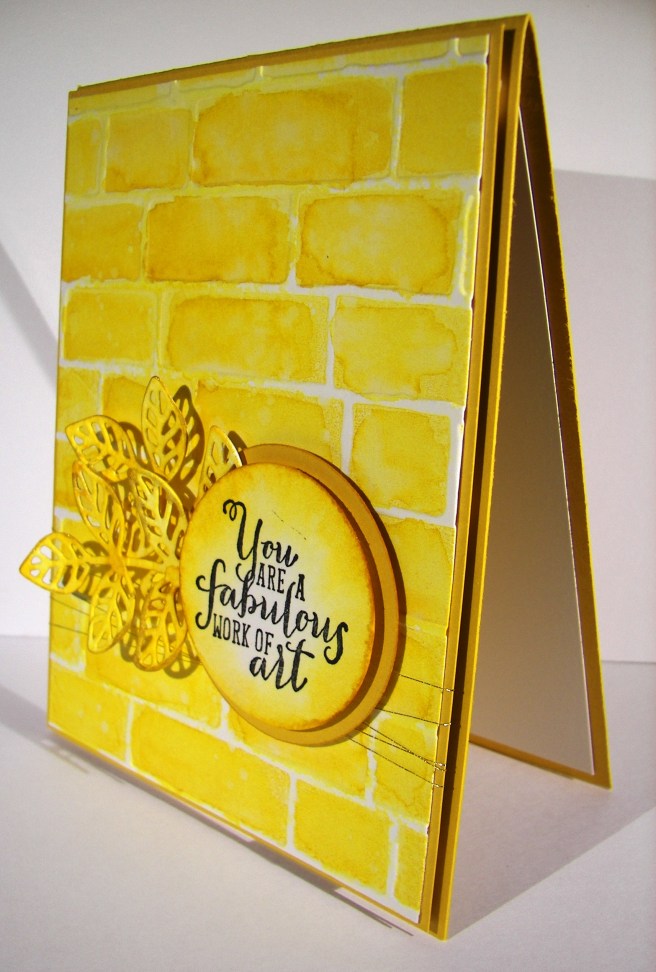
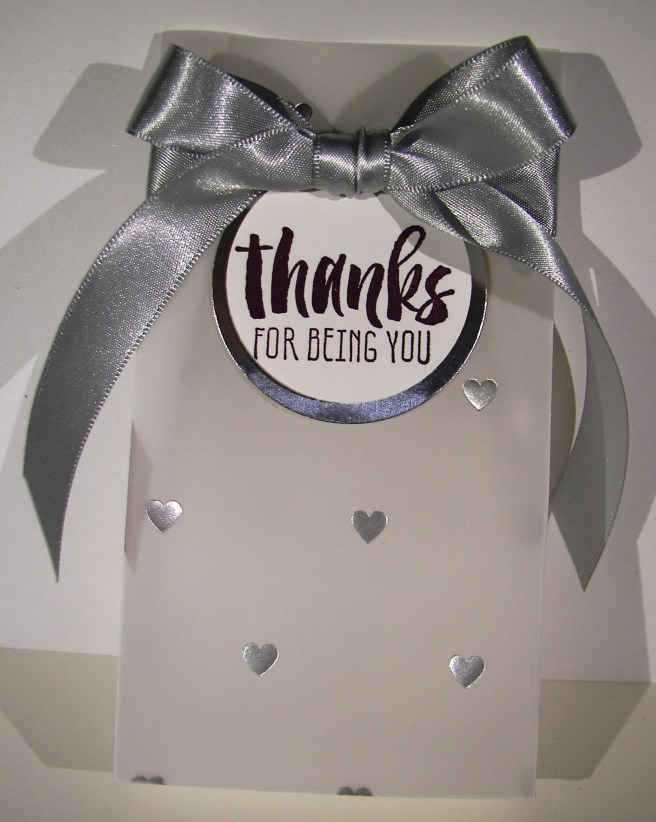
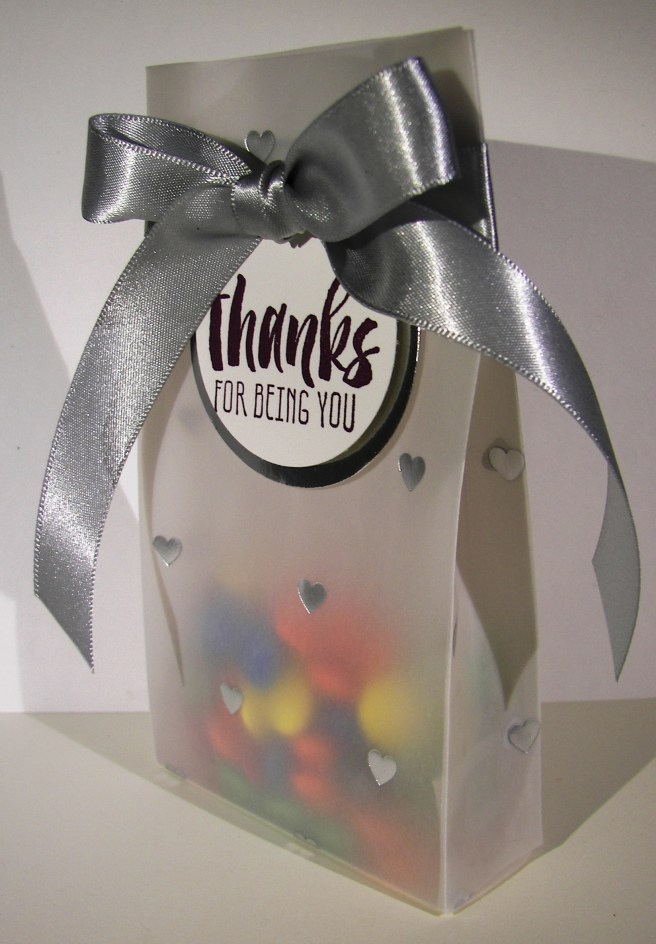
What a perfect way to say thank you, for just being you.  A great compliment anyone would love to receive, I know I would.  Mixing a project with butterflies and flowers are one of my favorites.  Interesting how even when creating my moods show through.

1-31

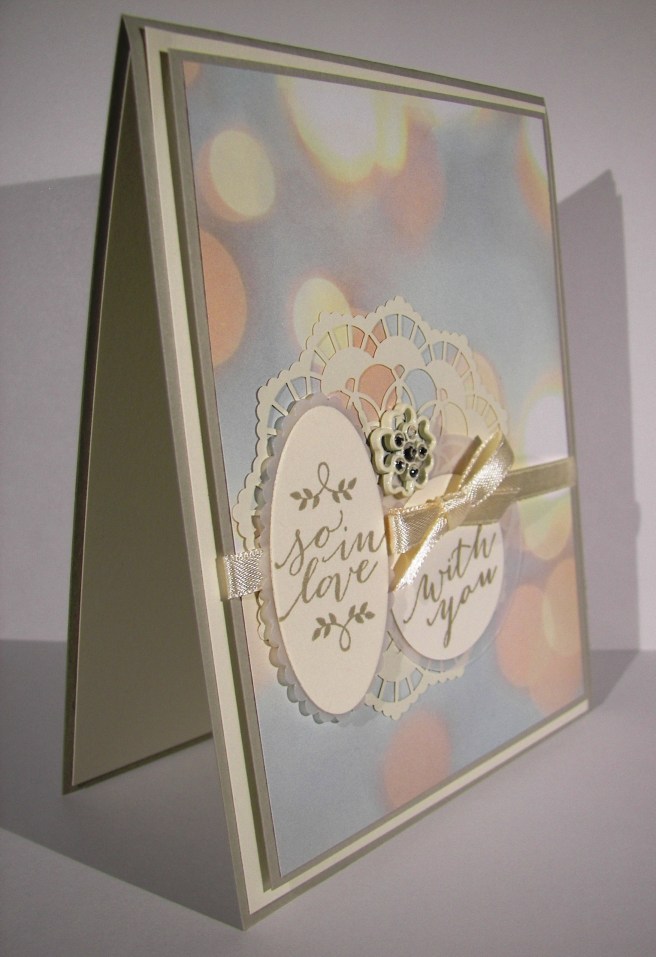
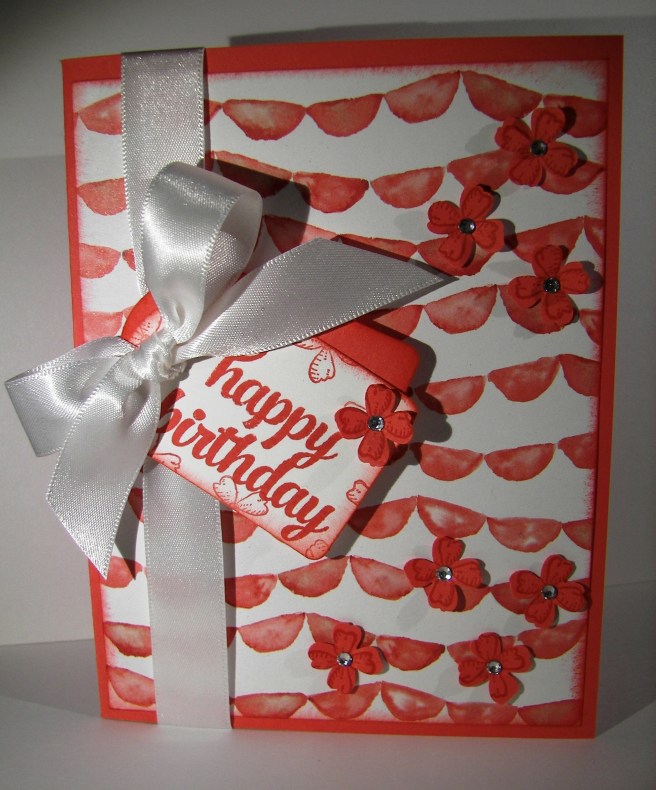
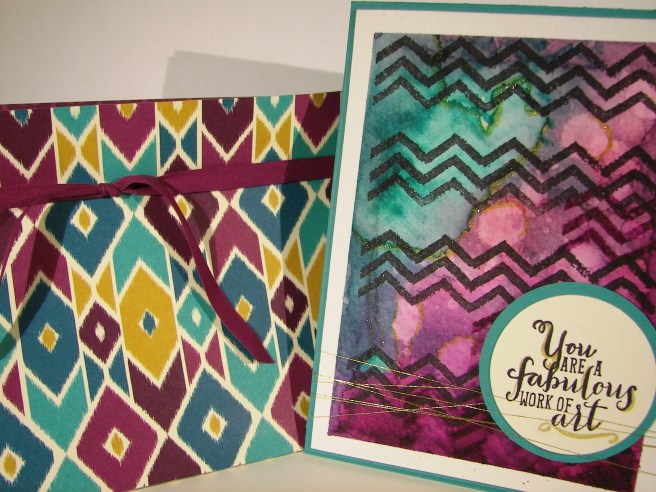
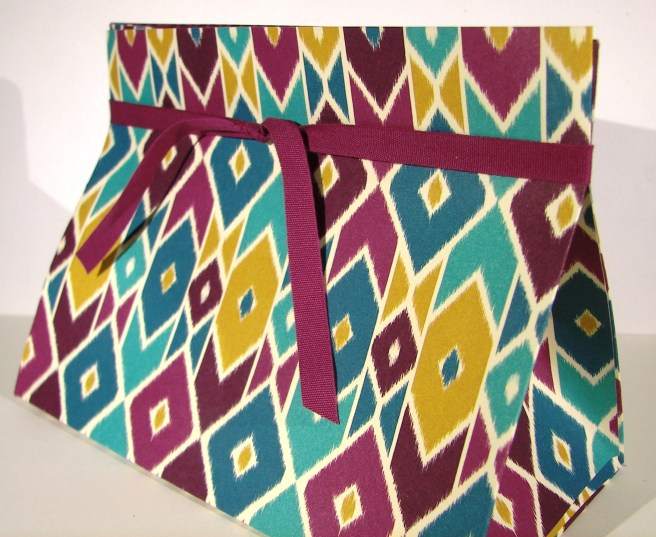
I have dipped into the falling in love designer series paper pack so many times since I got it. It really is a lot of fun.  I had put off using this pattern, feeling like I use too many butterflies in my work. When I was a bit fussy though, I went right for it.  The flower stamp and these tiny butterflies and a perfect pairing.

The flower and sentiment come from the Avant-Garden stamp set which is another free one available during this springs Sale-a-bration.  If you are going to buy fun product to work with, you might as well get something free too, right?

1-31-1

There isn’t anything too complicated here today.  Just a little extra layering.  I even refrained from sponging, but looking at it again I think I would have liked it sponged up. I might have to try it again.

Have a creative day!

Moana

So In Love With You

It isn’t very often I purchase an entire suite of products, but this time I just couldn’t resist. Honestly, I have never purchase a whole set.  There is always an item or two that just don’t suit me, but not this time.  There is also a framelit set that coordinates that is just as beautiful as the rest.  So wonderful.

I made this card for a demonstrator event I was able to attend today.  Which is why I am just sharing this tonight when I managed a few moments to myself.  The rest of the cards I was able to make sure are beautiful.  We all focused on product from the spring catalog and boy did we have fun doing it.

1-14

This card is actually quite simple.  It has a lot of layers, which I love, but no new technique to speak of.  Simple elegance is sometimes all you need.  Each time I think I have the focus of the card it changes.  All of it works so well together, hence a suite of product.  Take a little time and put some of your favorites together, you might just be surprised.

1-14-1

I hope you had a creative day, I sure did!

Moana

Love…

Okay, a little time off is nice, but that wasn’t my intention here.  Life took a busy turn and I am trying to get back on track.  I am out of town trying to enjoy time with my son and his new bride, help my oldest daughter with wedding plans, and manage a little bit of business as well.  I would like to say I am on vacation, but a bit too busy for that.  No fussing, just enjoy the love through it all.

7-28 (2)

This simple card was made from an extra kit from a workshop last weekend.  Simple layers, this is all about those layers.  I wouldn’t have paired this particular embossing folder with items outside of nautical items, but I loved how it looked.  I made a large set of cards to blog ahead with and had the intention of sharing them with my new daughter in love.  She is adorable.  Living in a university town there are plenty of weddings to attend, so that is the job of this particular card.  They actually have three to go to in the next month or so.  Busy.

7-28 (1)

Have a creative day!

Moana

Comfort & Healing to You…

There are so many talented people out there that love to share their projects like I do. Sometimes one will come along that I not only enjoy, but have to give it a try.  This project is a mix of a couple of different ideas with my own twist.  I do love how it turned out.

7-21

One of the projects I studied had the card base smooth, which was lovely, and no extra layers, just the circle tag.  The other had the same layers I used with a different embossing folder, but I didn’t want to use that one.  I decided on the brick wall folder, but thought it still looked a bit plain.  After it got a good sponging and distressing I was much happier.  I even sponged the die cut piece because it just didn’t match the rest.  A healthy dose of basic pearls finished everything off.

7-21 (1)

The inside of a card almost always gets a whisper white or very vanilla piece, but I went with the card front color of so saffron like another example showed.  The color is light enough to be written and stamped on equally well.  A very nice touch.

Have a creative day!

Moana

Yellow Brick Road

I have gotten a bit lost over the past few days over a different series.  It is a re-telling of The Wizard of OZ, very unique perspective.  It is actually a quite twisted tale of what happens after the story we all know.  Working with middle school aged children gives me permission to read young adult fiction and I must be honest, I love it.  This one is no exception.  Hence my yellow brick road card today.  Book three done, but it continues on…darn!

7-19

Either way, how about this fun, bright and cheery card!  Using my brayer to apply ink to the inside of my embossing folder really makes these bricks interesting.  However, I wanted more, so I distressed as well.  First, I gave the freshly inked paper a hearty spritz with water.  That got the ink moving nicely.  I knew I was going to work this over a bit, so I did start out with water color paper, quite necessary.  I added more ink with my aqua painter all around the bricks, sponged off with a tissue to lighten areas, then dripped water all around and dabbed to remove ink too.  Great look here at the end.

I also had a bit of fun with the tag.  I stamped and punched my sentiment on water color paper.  I then liberally rolled the edges and in a bit too in the ink pad.  Then I spritzed it too. That caused the ink to move to the middle, but not all of the way.  So much fun.  The leaf die cuts were smushed in the ink pad too and then spritzed as well.  Everything got the same kind of treatment.  It allowed a different but connected look for all of the elements.  Wheee!

7-19 (1)

Have a creative day!

Moana

My Happy Day

Yesterday was my birthday, and it was most certainly my happy day.  I made this project with that in mind.  Using my favorite go to ideas and things that make me happy.  Water coloring is awesome, both intricate and simple cards, and a myriad of other projects all bring me joy.  However, there is nothing more satisfying than a beautiful crisp gift box or bag.  I love making and sharing these, they really do bring me joy.  So I indulged myself a little bit here.

7-7

Using an entire piece of designer series paper goes against my “make it last” mentality, but it was my birthday after all.  So I pulled out a piece that I loved and created just what I wanted.  I like to maximize the height so it can hold more of whatever I have in mind.  This one did get a bit of switching around.  The top of the bag needed to have enough space to hold the large ribbon and bow I had in mind, so it ended up losing just a touch of volume, but it was well worth it.

This ribbon though…it is so very nice.  It looks great in a knot, a simple bow, and creates lovely larger bows just like this.  While I may hesitate using my paper, I do not hold back using ribbon.  I love large bows and could put them on everything.  Something I learned from my mother to be certain.  In a workshop situation I wouldn’t go this large, my ladies would just get frustrated trying to make it pretty.  Can’t have that, but since this was for me, I let it slide a bit.  Then of course a simple layered circle tag set, stamped off once and sponged around the edges.

7-7 (1)

Again, my favorite types of things.  Second only to sharing them that is.  The bow of course can just slide off so the box can be filled easily and used again.  I always try to make my gift bags and boxes that way.  They are too lovely to be used just once.  So, I make sure the recipient knows how easy it is to re-gift them.

Have a creative day!

Moana

Birthday Bouquet Duo

Another adorable gift set just ready for a fun birthday event.  This is my version of a one sheet wonder.  I enjoy a matching gift set just as much if not more than making several cards from that same sheet.  What can I say, more isn’t always better to me.

5-18

The card is actually quite simple.  Only one piece of designer series paper was used.  A ribbon wrapped around the front and a double tag slid under the bow.  A collection of tiny flowers scattered around and centered with basic rhinestones.  Most of the items were sponged with watermelon wonder, including the inside whisper white piece.

5-18 (1)

This adorable tall bag was made from the large remainder of the designer series paper.  The other side was just as fun for a birthday theme, don’t you think?  It was topped with a huge ribbon which was used to hang the cute birthday tag with silver cording trim.  Bitty flowers were also stamped and punched in whisper white centered with basic rhinestones again. What a great companion to an adorable simple card.

5-18 (2)

Have a creative day!

Moana

Bohemian Work of Art

Rich colors and exciting patterns, that is the theme for today.  In between wedding reception planning I have managed to create this lovely due.  Now I get to add this to the collection of card sets and greeting cards I am donating for a cub scout fundraising event tonight.  I get to share my work and clean out my stash at the same time!  I call that a win.

5-14

The card began with the chevron stamp from the Work of Art set.  I didn’t really pay too close attention, just stamped it four times down a piece of water color paper.  The color pallet came from the bohemian designer series paper set, only leaving out the yellow tone. The focus was on bermuda bay and I started there.  Color was layered, sponged off, added, and distressed a ton until I was satisfied.  Then I did something that was new for me.  I hi-lighted some of the distress areas with my gold wink of stella brush pen.  That was super fun and I had a hard time stopping.

5-14 (1)

The gift bag was made from a whole sheet of designer series paper.  I went for a wide stocky bag instead of my usual tall slender ones.  It is nice to change things up a little bit here and there, don’t you think?  The ribbon I had in rich razzleberry was just long enough to go around the bag top.  I do love using up product that is retiring before it actually retires.  I am not often that lucky.

5-14 (2)

Have a creative day!

Moana

“Suite” Treats

People are placed in our lives for a reason.  It is so wonderful to realize those precious moments as they occur.  A simple, sweet thank you speaks volumes.  As does the kindness shown to me time and time again.

5-10 (1)

In my desk scrap file I looked for something pretty to make a gift bag for a friend.  I came across this wonderful foil velum.  I scored the long sides 1″ in, on both sides.  The bottom of the bag was scored at 5 1/2″ and 6 1/2″ to give a 1″ margin all around.  Folding, adhering, and then adding a bow all went very easy.  Deciding on a phrase took a moment, but as I have often enough, I turned to the Suite Sayings set and found just what I wanted.  The stamping was done in the soon to be retired blackberry bliss, I sure will miss that color, and then punched with the 1 3/4″ circle punch.  A layer of silver foil was punched with the 2″ circle punch and then layered in place.  The tag is stuck to the bag so the ribbon can be removed easily.  That is important for getting to those treats and even re-gifting the bag.

5-10

Have a creative day!

Moana

A Happy Hello

I tell you what, the more I think things should calm down, the more they wind up.  No need to fuss I say, just pick up where you left off and get going.  So, here we go!

4-26 (1)

I thought it would be fun to pull out some paper that I did not know how I would put to use. The School House DSP is definitely in that category.  I don’t have young children, and I don’t work in an elementary school setting anymore.  That is when you look to the other side of the paper.  And what did I discover?  These awesome spots!  They just had to get to work in a huge box to show them off.

I stamped the little fish from the Sea Street set in pool party and my sentiment in pacific point.  The color combination is so fun and happy.  Just what I needed.  I even had an unopened spool of pool party cotton ribbon.  That called for a double bow for a little extra fun.  Then my favorite combo of circle punches and I didn’t even sponge them.  The spots were huge and clean looking, so I stayed with that look.  And there you go!

4-26

Have a creative day!

Moana

Woodland Baby Shower Gift Set

I admit it, I love giving gifts of thank you cards.  Especially when everything goes together so nicely.  This sweet friend was given a woodland themed baby shower and I knew I had just the right paper to fit the bill.  The invitations even had turtles and foxes on them.  Fun work time for me!

4-25 (2)

The gift box and gift bag were even fun to make.  I honestly haven’t purchased a gift bag in the longest time.  I love it.  Gifts usually aren’t that large, for the most part.  I just set the gift on my score board, measure some and go for it.  I am usually right on target, the box for the card set was a bit long, but it still worked out.  How about the foil cloud bag though, so adorable right?  I hadn’t paired the silver satin ribbon with it yet, and it looks perfect together.

4-25 (3)

The cards were very assembly line, both sets the same.  The background paper was cut with 1/4″ borders and a contrasting, but still coordinating, strip of designer paper from the same set was placed near the bottom.  A card stock 2″ circle layered with a stamped 1 3/4″ circle on top.  I stapled matching ribbon along the side of the circles for one more tiny layer and a bit of interest.  I do think they turned out adorable.

Inside this most adorable bag are two very silly baby books.  One is called “Toot”.  And yes, it is all about passing gas.  Just too funny to not share.  Both books were 7″ wide and 1″ thick, so that was easy enough to measure.  I scored at 2″ along each side and made the bottom scoring at 5″ and 7″.  This gave me a bag that measured 7 x 5 x 2 and worked out great!

All in all the set came together really fast.  From basic design concept, product choice and complete assembly it took about three hours.  Two gift bags and 24 cards, not too bad if I do say so myself.  I couldn’t attend the shower myself since I was teaching my card workshop, but one of my club ladies was also going and she took it with her.  It worked out great.

4-25 (1)

Have a creative day!

Moana

My Heart Smiles Just Thinking of You

It has been a very busy, but very fun, visit to Utah.  We have stayed a week, been snowed on twice, enjoyed the rain, and driven all over to spend more time with our son and his fiance. I would always like more time, but also can’t wait to get home.  Facing the long drive isn’t very inviting though.

4-1

This is a tall card, cut at 4 1/4″ and scored at 5 1/2″.  I like working with cards this way because of how easy it is to add ribbon.  I arranged my tag just under the ribbon to make it look like it was attached.  There wasn’t room on the tag for an actual punch, so I had to make do.  It looks great though, don’t you think?

4-1 (2)

Have a creative day!

Moana

Dear Heart, Sweet Boy

This project was all about giving myself a challenge.  I grabbed a piece of dsp, decided on three colors, picked a stamp set I hadn’t used a long time and went for it.  This was definitely not my usual style, but it felt good.

3-20

The card itself wasn’t too complicated, just one layer for the background.  I stamped my little boys on water color paper with black stazon and opened the ink pads.  Their faces were done with a very diluted wash of pink pirouette with the hair in tip top taupe.  I wanted them to look like the same boy just doing different things.

Each boy face was accented with one color only.  For the darker areas I kept the ink fairly strong.  When I accented I diluted it a bit more and even more for the outlined areas in the background.  I left it simple because I wasn’t really going for perfection, just soft coloring. I punched their faces out with the 1 3/4″ circle punch and a background of black with the 2″ circle punch.  They were arranged on the front and layered with a bit of dimensionals.

The banner was stamped from the same set and a light wash of each color was put on its own section.  Then each end was punched with the bitty banner punch.  I also put that up on dimensionals.  I repeated the pattern of paper inside with more dsp and a smaller piece of very vanilla to write my message on.  Such a sweet card, for a very sweet boy indeed.

3-20 (1)

Have a creative day!

Moana

Getting Ready for a St. Patrick’s Day Party!

It has been a busy few days getting ready for a large youth etiquette dinner.  This one won’t be all about the perfect manners, but more like what do you do when things don’t go quite right.  Those tend to have the best memories anyway.

101_1222

The invitations were pretty darn basic, which was great when I needed to make sixty rather quickly.  The dinner menu was just printed on card stock to coordinate with the invitation. The names of the menu items are in a kind of St. Patrick Day code.  All of the items, from the food to the utensils, are going to be a mystery to the kids.  When they are served what they “ordered” they might end up with odd and end food items and maybe a straw or toothpick to eat with.  After a some laughs and efforts at etiquette, they will be sent through to fill their plates properly and do their best.

101_1223

Part of the table decorations will include these adorable favors with rainbow fish crackers in them.  The stamp comes from a long retired stamp set that went with the ever adorable milk carton bigz die.  I could have made those forever.  I still have it, because I don’t think I can part with it.

It should be an evening filled with good friends and even better laughs.  I can’t wait!

101_1221

Have a creative day!

Moana

Hello Perfect Plum

Living in the country has its perks, but sometimes it can be frustrating.  For example, when you live far enough out you are restricted to satellite internet.  It is slower for one thing, but when it is very stormy the weather interferes. Sometimes it stops it all together.  That would be this last weekend.  Bummer.  Let’s catch up.

101_1191

I made this lovely little gift set for a friends daughter.  She had the role of Violet Boreguarde in a children’s musical this last weekend.  Of course the gift bag needed to be filled with gum, because that is what Violet is all about.  That was so much fun!

101_1193

I also dug out one of my old stamp sets from 2004.  I wanted to create the look of bubbles, for the gum of course, and this set came to mind.  I don’t even remember the name of the set.  When you purchase quality it lasts for sure.  This set is twelve years old and worked like a charm.

101_1194

I brought in perfect plum, elegant eggplant and some gold encore ink for this set.  Violet did indeed get a golden ticket after all.  When the scene came for her to change into the large blueberry, she had this inflatable suit that literally made her look so huge and round and most definitely violet in color.  It was a great night.  The grin she made when she looked in the bag was fantastic.

101_1192

Have a creative day!

Moana

You’re a Whole Lot of Lovely

When I was cleaning up my desk I came across several kits left over from workshops that hadn’t been filed away.  Usually I just break down the kits and put the supplies back. This one had the stamping, punching and they were layered together.  So I thought I would make something with them.

2-9

I do not remember what the original kit was at all.  It had two pieces of 6 x 6 paper, ribbon, and the stamped embellishment.  So, I decided to not bother looking it up on my blog and make something new. My go to projects are cards with matching tiny gift bags. Mission accomplished and kit used up.  I still don’t know what the other one was, but I am quite happy with this little number.

2-9 (3)

Have a creative day!

Party Wishes

How about a second workshop to fit into one host party!  Sounds like a great plan to me. Not everyone can make it to one date, so why not have to events and wrap it into one big workshop order.  That is one large bundle of host benefits, let me tell you.

2-5 (2)

This card was kind of custom designed with a twist.  It was with the elements included which came together as its own kind of challenge.  The request was seeing embossing folder work, fun ways to use the chevron punch, paper piecing and birthdays.  I think this one is a win!

The chevron punch really makes this one special.  The initial punching was done twice on a strip of heavy weight card stock to create the spaces.  Secondary punching was done in different colors to create the insert pieces.  Two of each color and what a neat design element, right?  I do love a good challenge and the great feeling when your vision turns into the creation, the way you hoped it would.

How about these tiny balloons inside?  Yes, I could just die of cuteness.  I stamped the string, stamped tone on tone for the balloons and then punched them out.  I stuck them down with a touch of tombo and joy was achieved.  I would love to get this card for my birthday, wouldn’t you?

2-5 (1)

Have a creative day!

Moana

Moonrise Wonderland

This is the kind of thing I get to see all of the time.  The moon isn’t quite that large of course, but you get the idea.  I absolutely love it when you can see so much detail in nature.

10-29

I started with the moon.  The punched image and the negative sheet were both used.  The moon was sponged inside the mask with So Saffron and detailed some with Delightful Dijon.  The beautiful trees from Wonderland were stamped in versamark ink, after a hefty rubbing with the embossing buddy, and then covered in black embossing powder.  I had to be patient with the heat gun to get all of that powder melted, but it is so lovely.

10-29 (1)

I only used a few colors to create the background.  An aqua painter was  used along the bottom with Mossy Meadow to give me a bit of a hill and the ground.  Then Elegant Eggplant and Night of Navy were used to sponge in the sky.  I used the punched circle to mask the moon and it worked so nice.  Instead of using masking paper which is thin, I just used cardstock.  The ink has a hard time getting right up the to edge of the image and gives it a bit of a halo effect.  If yo don’t like it that way and want more exact detail, use something thinner.  This made me very happy.

It was layered up once on another piece of Elegant Eggplant cardstock and given a bit of height with dimensionals all the way around.  The inside cardstock was sponged lightly with more Elegant Eggplant just to tie it together a bit more.  All done!

10-29 (2)

Have a creative day!

Moana

A Whole Lot of Lovely Baker’s Boxes!

I tried to not purchase this particular die cut, but I fell in love with it at a workshop.  I guess that isn’t too different from the ladies I teach in my workshops.  It works for me because I just love this box!

A Whole Lot of Lovely Baker's Boxes!

This adorable box came together so quickly.  The set comes with several other dies to accent or accessorize how you like.  More than enough choices.  I just chose one of my favorite combinations of circle punches with a simple stamp framed with glimmer paper.  How absolutely lovely, right?

A Whole Lot of Lovely Baker's Boxes!

One little glue dot just below the handle was all I needed to keep the top snug to add my favorite dotted lace trim with a big bow.  I moved into my favorite sponging party and did it up right.  Simple yet so adorable.   Hope this little project finds you in a good mood and ready to try your own.

A Whole Lot of Lovely Baker's Boxes!

Have a creative day!

Moana


One Big Meaning Tiny Treats

Welcome back and thank you too!  Going back to work yesterday, after taking a long weekend off, left me thinking I should give a little thank you to my student TA’s.  They are a great bunch and were honestly quite happy with these treats.

One Big Meaning Tiny Treats

I kept things very simple, because I knew they would really just want the candy.  So, I used some adorable retired ribbon, with an effort to keep it neutral.  I have young men and knew they wouldn’t appreciate anything too girlie.  However, I did give them color choices and they picked the ones they liked best.  Three of five kept the little tag in their things.  How cute is that!

One Big Meaning Tiny Treats

What do we gain from this?  First of all, saying thank you is so important.  Secondly, it doesn’t have to be huge and elaborate to be appreciated.  Honestly, these took me maybe ten minutes from start to end, including a quick set of photos.  Having great tools to work with makes all the difference.  Give something like this a try.  This punch combo is fantastic!  The 1 3/4″ circle punch is large enough that lots of sentiments fit inside quite easily.  Add the 2″ circle for a tiny border and it looks so great!

One Big Meaning Tiny Treats

Have a creative day!

Moana