A Perfect Day

It is kind of ironic that I created this card last Thursday evening for Friday’s blog post. Then I entered into a series of hectic, not perfect days at all.  So, here it is five days later.  Today can still be that perfect day though, right?

3-15

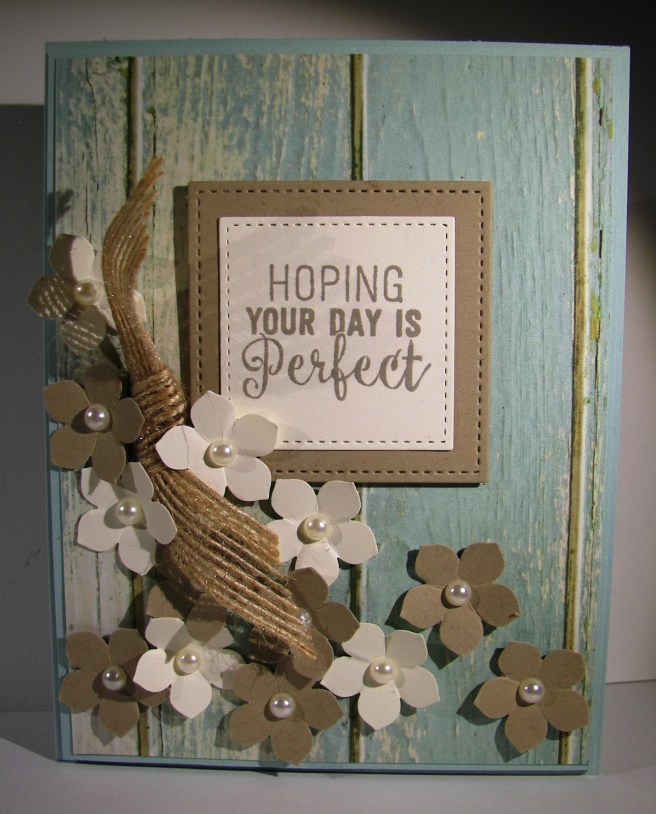
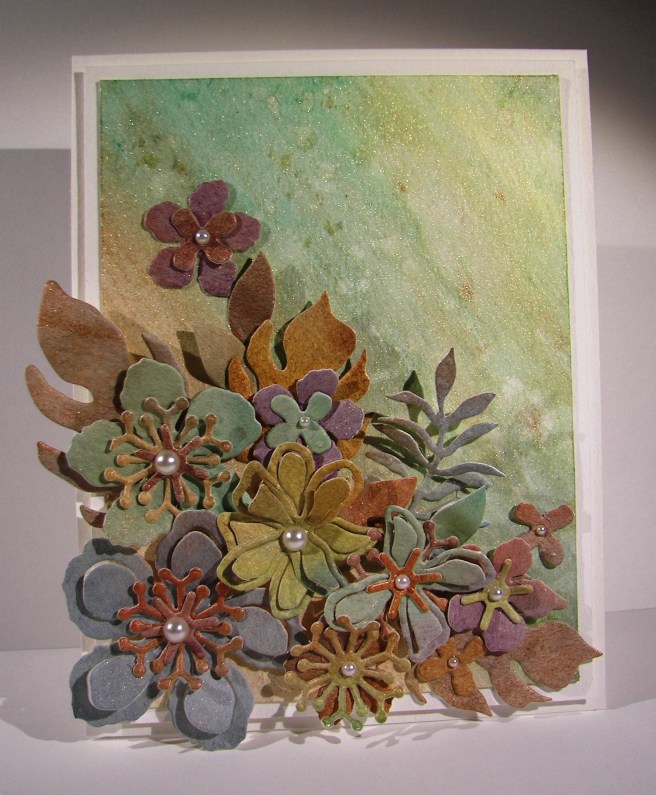
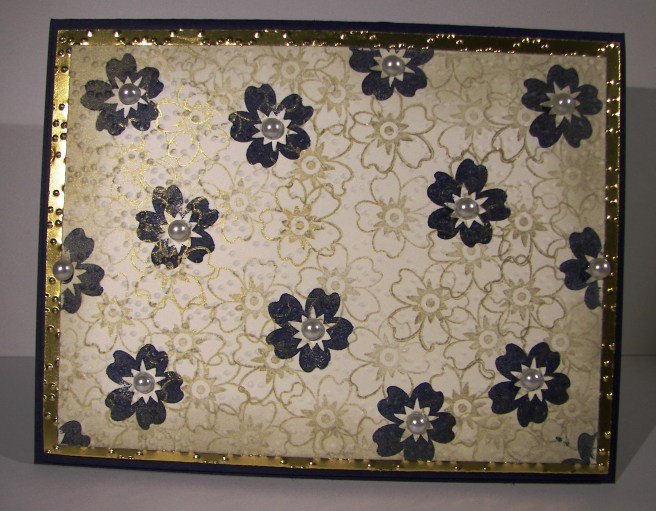
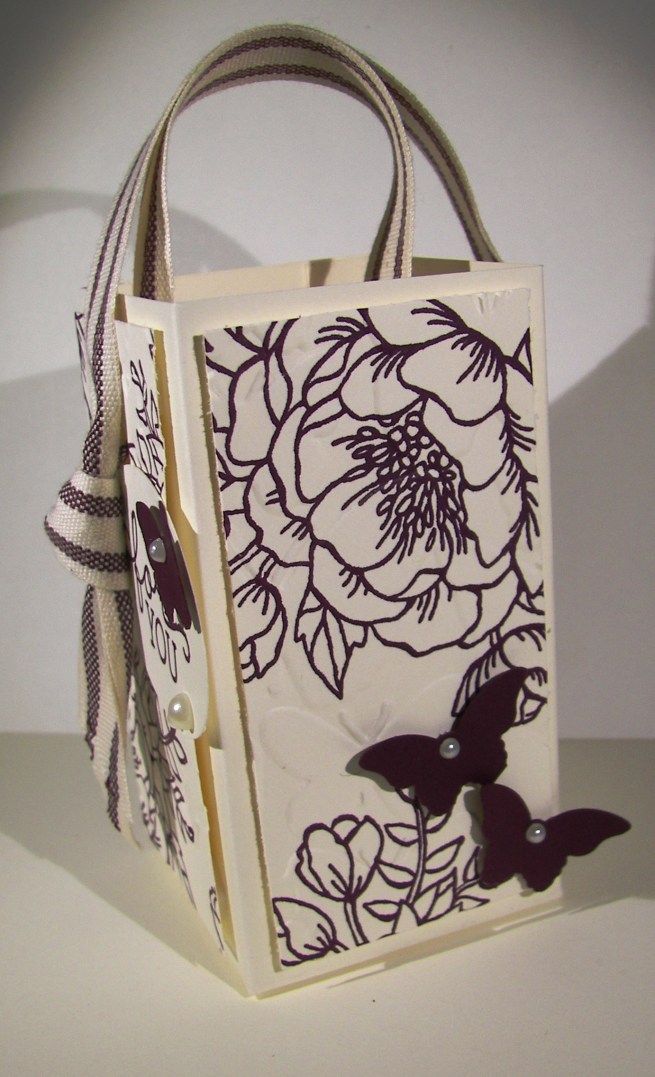
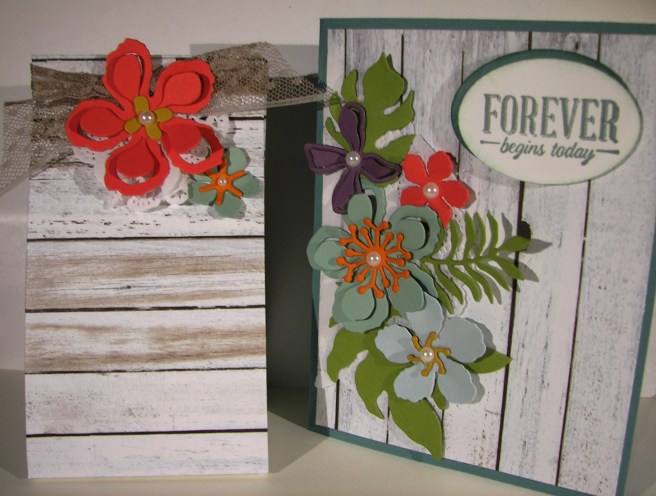
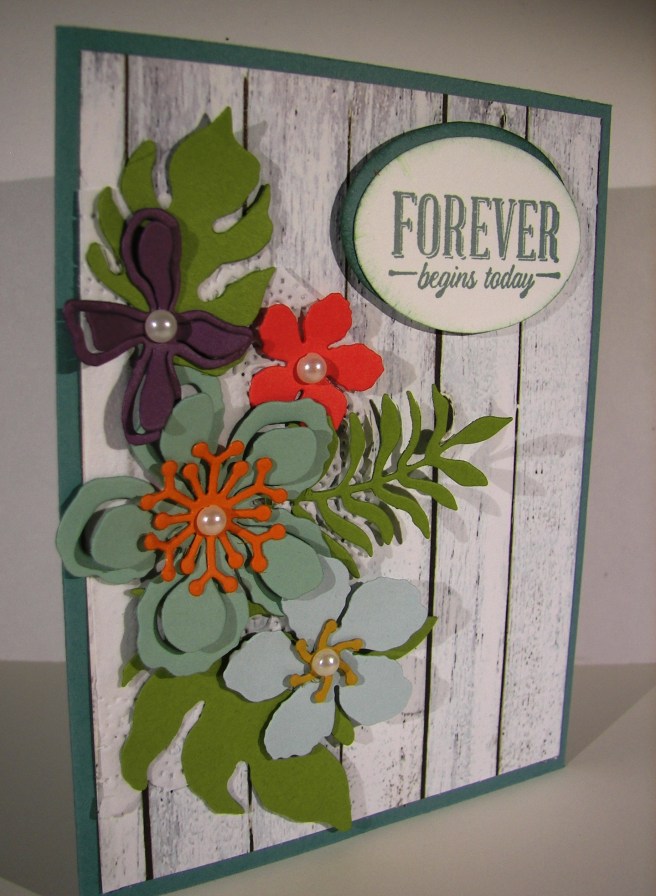
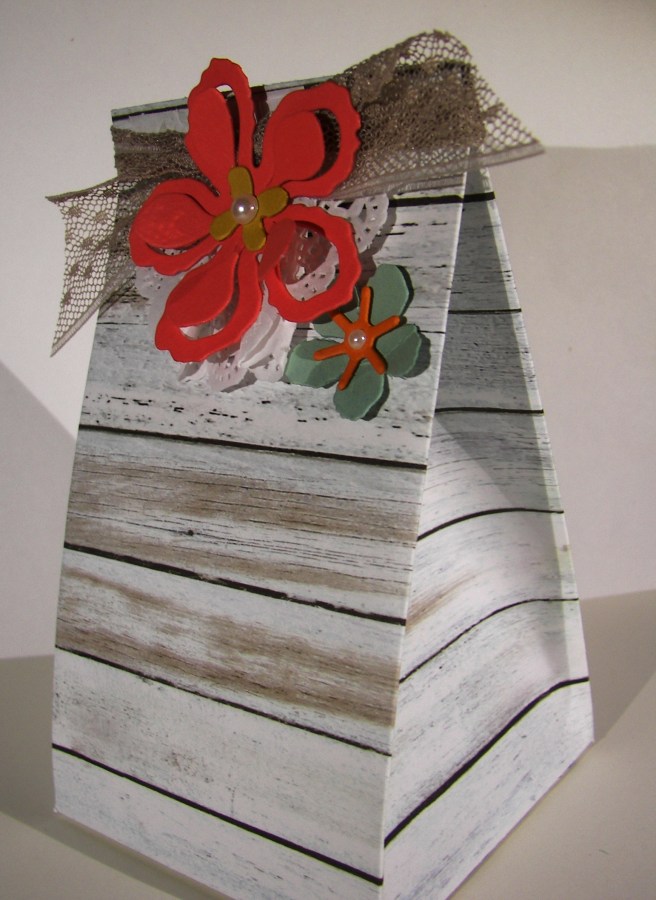
I usually am not into realistic photo paper, but this designer series pack has some really nice pieces in it.  This one especially. It looks really dimensional to me and I know it isn’t. It did create a lovely background though, and is the inspiration behind the card, literally.

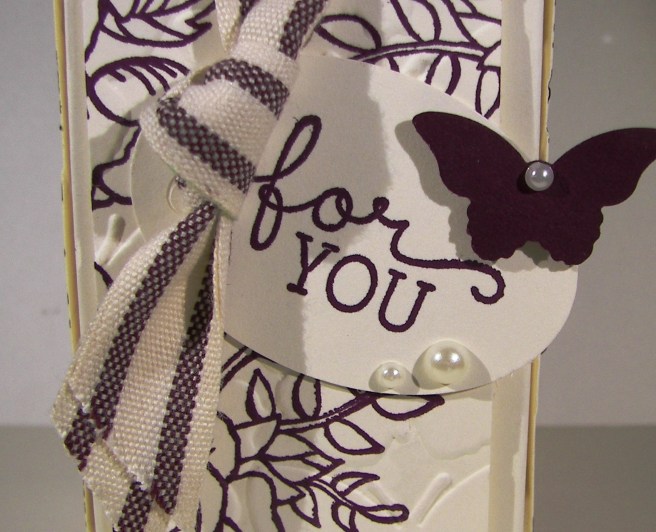
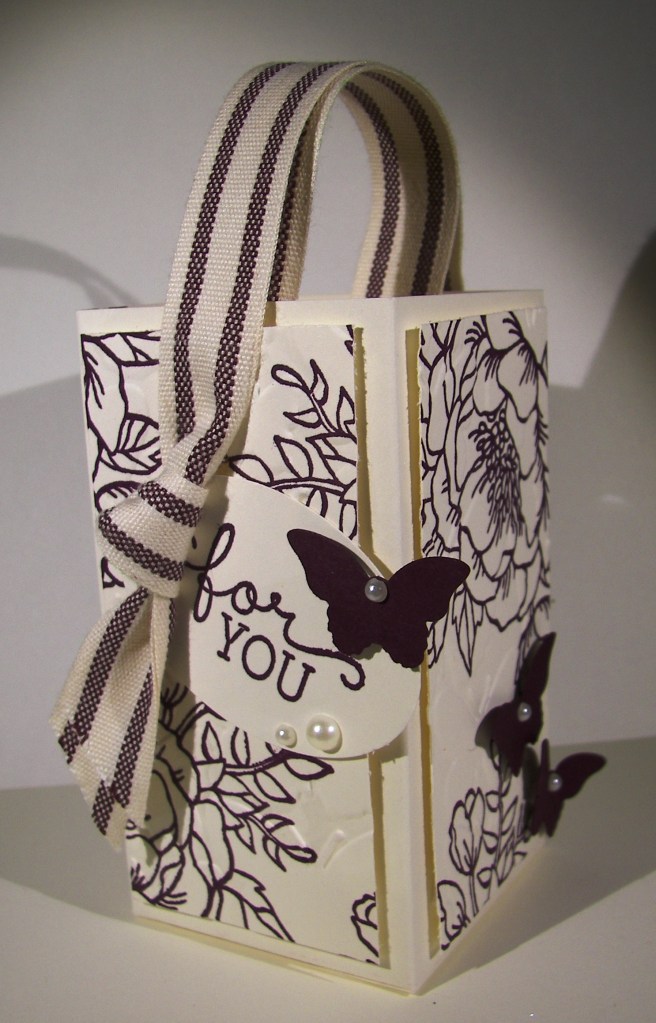
I went with the country feel and scattered flowers all around the sentiment.  That was stamped, die cut and layered up a bit.  Those stitched shapes framelits are cool.  I debated turning the sentiment into a wall hanging with brads and linen thread, but knew I wanted to use burlap ribbon, so I left it alone.

3-15 (1)

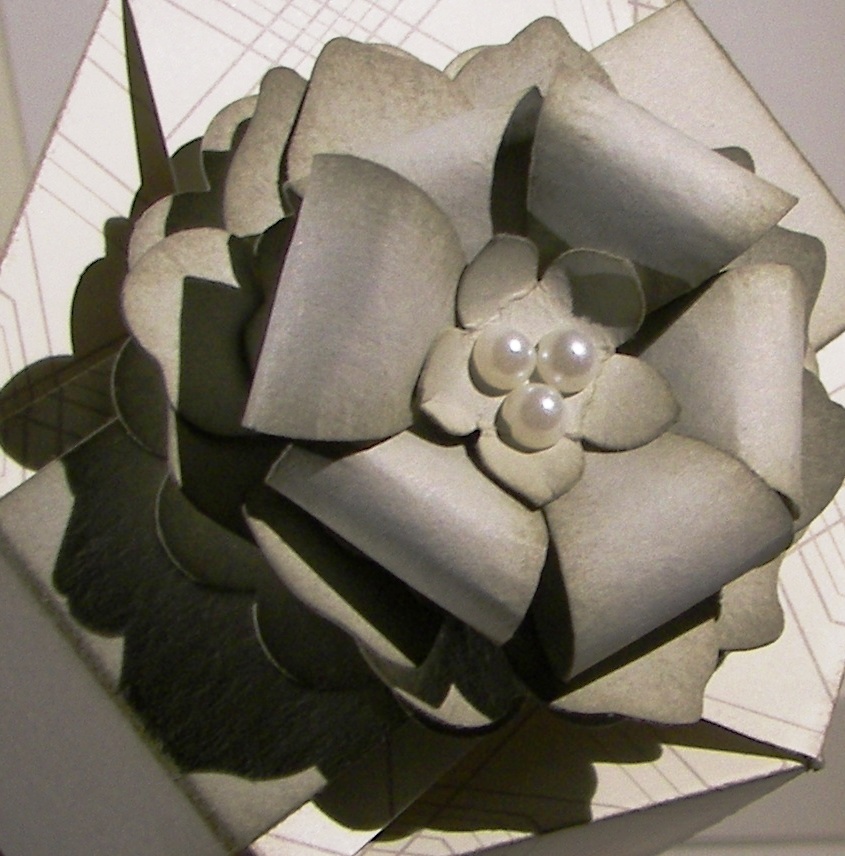
The pearls were so fun to place.  I usually don’t use the largest ones that often, or so many, but this card called for it.  I might have to make an envelope for this one, I don’t think it will fit, or very well.  Works for me!

Have a creative day!

Moana

Elegant Botanicals

I started this lovely project yesterday, but got distracted by a shopping adventure with my mother-in-law and two sister-in-laws.  The weather was terrible, but the company was great, and who doesn’t need a shopping adventure once in a while!  This was waiting for me though, and I couldn’t wait to finish it.

2-21

On Sunday I created some favor handouts for a church lesson I taught and they were so cool. Nothing like this card, but the paper I painted for the die cuts had left overs I knew I could use again.  That is where all of these flowers came from.  Yes, a scrap pile.  You never know what those scraps could turn into.

I created a simple background with three liquid metal colors wet on dry.  They were too stark, so I gave a water wash over the top and was much happier.  I had some accidental splotches happen, so I gave a bunch more to disguise them and called it good.  Then the placement of all of these flowers.  Phew, it took some time.

I first layered the flowers together with different sized floral pieces and began my arrangement.  After I was done I began to adhere them down.  Since they were die cut from water color paper they were more pliable, even kind of molded.  The leaves really looked great with some curling and bending.  Little by little the arrangement came together.  Some pieces were adhered with dimensional foam, some with glue dots and several with tombo liquid glue.  Again, no worries because of the weight of the paper.  So very liberating!

I layered the front on another piece of water color paper and repeated the choice again for the card base itself.  It looks so clean and elegant.  It isn’t always easy to capture the different elements on camera, but this didn’t turn out too bad.  Just look at all of that metallic shine.  It took a bit of time, but was absolutely worth it!

2-21-1

Have a creative day!

Moana

I’m Here For You

Don’t you just love these two?  I am not one to fall for whimsy stamps, especially cutsie animal ones.  But these guys got me.  The whole set is that way and I have used it so much. It is only a host set, so you can’t just buy it, but need to host a workshop to get to it. Totally worth it though.  Who doesn’t love a fun creative workshop though, right?

8-5 (2)

I was actually able to put to use an old workshop kit for this project.  It was a sympathy card with a totally different look, but it worked great for this one too.  I sometimes put leftover workshop kits back into my supplies, but sometimes I just keep those kits separate.  They have come in handy more than once, so I keep a small stash on hand.

Simple stamping and light sponging across the embossed folders was really all there was here.  I did run the linen thread across a bone folder to help get the kinks out and give the ends a curl as well.  I didn’t paint or sponge these two, amazing for me really, but I managed.

8-5 (1)

Have a creative day!

Moana

Happy Birthday

When you have beautiful paper you really don’t need to worry about much else.  This particular specialty designer series paper is exceptionally beautiful.  Truly beautiful.

8-1 (2)

What does that mean for this card?  You don’t really need much else.  I kept the copper theme going along and embossed the outline and happy birthday sentiment.  Then, the coordinating die cut from the rose garden thinlits set made it very easy.  A few loops of copper metallic thread off to the side and this project was done.  So elegant with all of the foil and copper.  It will be enjoyed I am sure.

8-1 (1)

Have a creative day!

Moana

Bloomin’ Night of Navy

Working through a scrap pile can turn into something quite lovely.  This gold foil was left over from a Christmas card kit from nearly three years ago if you can believe that.  It worked well with another kit also left over.  Cleaning up and making a beautiful card, sounds like a win to me.

7-29 (2)

The card front was made with coordinating stamps from the Bloomin’ Love stamp set.  The solid flower was stamped first in night of navy fairly far apart.  That is a lot of dark ink there.  Then, with the outline stamp of the same flower I went all over the place using gold ink.  I knew it would even show up over the navy flowers.  I love the look of layered stamping.

It wasn’t quite enough, so I continued with heavy sponging around the edges until I was satisfied.  The gold foil paper was put through the Big Shot using the elegant dots embossing folder.  A nice touch for sure.  Those two pieces were layered on top of another piece of night of navy and then placed on a navy card base.  The inside got a lighter version of the same treatment and I was nearly done.

I had to put a bunch of large basic pearls in the centers of the flowers, because I couldn’t leave well enough alone.  That ensured this would be a hand delivered card instead of mailed, but it was worth it.  They did have a difficult time sticking to the edge flowers that had already been inked.  But with a little first pressure they stayed put.

7-29 (1)

Have a creative day!

Moana

Comfort & Healing to You…

There are so many talented people out there that love to share their projects like I do. Sometimes one will come along that I not only enjoy, but have to give it a try.  This project is a mix of a couple of different ideas with my own twist.  I do love how it turned out.

7-21

One of the projects I studied had the card base smooth, which was lovely, and no extra layers, just the circle tag.  The other had the same layers I used with a different embossing folder, but I didn’t want to use that one.  I decided on the brick wall folder, but thought it still looked a bit plain.  After it got a good sponging and distressing I was much happier.  I even sponged the die cut piece because it just didn’t match the rest.  A healthy dose of basic pearls finished everything off.

7-21 (1)

The inside of a card almost always gets a whisper white or very vanilla piece, but I went with the card front color of so saffron like another example showed.  The color is light enough to be written and stamped on equally well.  A very nice touch.

Have a creative day!

Moana

Thank You So Very Much

Everyone says thank you in their own way.  Me, well I like to do favor boxes or cartons.  A little bit of words along with a special treat.  I always want to give something special and to be honest, the budget won’t often allow that.  Hence my love of paper crafting.  I always have more time than money, so my time can show my gratitude.  It isn’t that people expect, I just enjoy doing it.

6-29

This carton was made with a whole sheet of sahara sand card stock.  I pulled out the trusty simply scored scoring tool and it came together in no time.  I actually made this one while having a lovely chat with my mom and dad.  How wonderful summer can be to me.  I did do my stamping first, because it does bother me when the stamping skips over the score lines. I know, not a real big deal, but it bugs me.  So the stamping first with the Flourishing Phrases large floral image.  I stamped and sponged in crumb cake instead of sahara sand to give a more vintage look.  So adorable.

The tag was cut with from the frame from the Rose Garden Thinlits set.  It it so much fun to put such pretty things together.  The smaller floral image was stamped first, the thank you second and then die cut.  Of course the whole project enjoyed lots of sponging.  I wrapped the top of the carton with gold metallic thread, popped a tricky bow through a bitty hole I punched and topped it all with a large basic pearl.  I refrained from putting those all over the box, I made myself keep it more simple.  So there you go!

6-29 (1)

Have a creative day!

Moana

Flourishing Phrases

This particular project went through a few different phases.  This is how it started out, all about blue.  I had the ocean on my mind and gave it a try.  I had intended on using a new embossing folder after I water colored, but to be honest, I forgot once I got all this going.

6-25

After I painted with all of the blue inks I have I did some detail work using my gold wink of stella.  I focused on some of the watermarks and edges of color.  The look it creates is really awesome.  It is tricky to know when to stop because it is so much fun.  Mission accomplished here for sure.

6-25 (1)

The next step was to add a special tag.  This one got a bit out of control and went to a busy style that really isn’t my own.  However, I decided to leave it and see how it balanced out with the huge butterfly addition I had in mind.  I water colored large areas of paper to provide both my tag area as well as the butterflies.  It is much easier to paint whole sheets instead of small specific die cuts.

6-25 (2)

When this butterfly combo came along I really began to wonder just what I was up to.  I think that is because I love decorative painted backgrounds so much I rarely cover them up. They are such great all occasion cards, but I pushed forward.  I did edge the butterflies with the wink of stella, which of course you cannot see in these photos.  It is there though, and it looks so pretty.  You can see it better in the lead featured image which is much more close up.  Basic pearls, gold metallic thread with a little more patience and this project was finally finished.  It measures 5 1/2 x 5 1/2 plus the butterfly hanging off the edge.  A custom envelope will definitely be in order here.

Have a creative day!

Moana

God is Love

A quick stroll through my scrap pile kits and I found this treasure.  I swapped out the embossing folder and stamp sets and came up with something wonderful.  Before it was a different nature scene with a sympathy sentiment.  I like this one too.

5-26

The Trust God stamp set has finally reached retirement.  I cannot tell you how many times I have used this particular set.  This, along with yesterday’s Swallowtail, will join the special shelving unit of stay with me stamps.  I couldn’t part with it.  The new catalog has a couple of sets that are very nice, but in my opinion, won’t be replacing this one.

The tree was stamped in the center with early espresso and sponged with crumb cake.  That is the same treatment for the sentiment, which was punched with the also retiring extra large oval punch.  Dang, I am going to miss that one too.   I do enjoy trying new things, especially when it challenges my crafting.  Plenty of dimensionals and a touch of basic pearls finished this card off.

5-26 (1)

Have a creative day!

Moana

Butterfly Garden

Half way through this little adventure I realized the designer series paper wanted me to stick with whisper white and not very vanilla.  Well, the ribbon was on the pearls were in motion, so I stayed the course.  Not too bad, but it did slow me down.

5-17

I left off the sentiment to give it an option or two.  I have also noticed that the camera is really good at picking up little things that my eyes miss.  Darn, I thought those edges were a little more flat.  Not to worry, it looks just fine.

The butterfly thinlits hadn’t been out in a while and I do so love them.  I keep thinking they will tear apart as I put them to work, but they manage to stay together.  I can bend, curl and mush them around in general and the paper stays true.  It is so nice to work with really good product.

5-17 (1)

Have a creative day!

Moana

Remarkable…

This quite simply was round two.  I had this fun idea to emboss this flower with silver powder on black card stock.  Thought that would look pretty cool.  Then, I thought I would water color with a bit of silver encore ink and touch it up with wink of stella.  Can I just say that all went in the trash bin?  True story, not a good combination there.  Next try…better.

5-16

These colors are all I have on my brain lately.  The wedding is three weeks away and the reception I am hosting is four weeks away.  It is hard to find blackberry bliss in the spring out and about. I have managed what I can, and have had to let go of other ideas.  It is going well.  Just like this card duo.

5-16 (1)

Simple stamping and die cutting with oval framelits.  Touches of basic pearls to set it off and wrapped in pretty satin ribbon.  My kind of yummy.  After donating my stash of cards and bags for a fund raiser, this is the first one to begin the rebuilding.  All for a good cause.

5-16 (2)

Have a creative day!

Moana

Bermuda Bay Flourishes

I was wondering how it would look to stamp on water color paper with one of my favorite stamps and then spritz it with some water.  Would I like the effect?  Would it keep enough of the images to be recognizable, or just turn into swirls of color.  It turned out somewhere in between and I like it.

5-2 (2)

I stamped a few times with the largest flourish from the set and then a few more with the smallest one.  Then, I just spritzed about four times and watched the ink swirl a bit then dried it the rest of the way with my heat tool.  I think it will be a fun go to technique for background paper.

The butterfly punches were used to make a bunch of decorative elements for the card front and a couple for the inside.  All of the butterflies were raised up on dimensionals, sponged and curled some with a bone folder.  Pearls were used on all of the butterflies and the smallest pearls were placed all over the card front.  Those tiny details make the difference.

5-2 (1)

Have a creative day!

Moana

Birthday Blooms with Blackberry Bliss

And a happy good morning to everyone!  I do love a Friday that is full of promise and enthusiasm.  The only problem is that I usually have my goals too high and get frustrated when I fall short.  Either way, I love Friday and the fun evening often in store.

4-15 (3)

This little thank you is so adorable, yet lovely.  I used a half sheet of very vanilla for the box, scoring at 2″, 4″, 6″, and 8″.  Then turning one quarter turn, portrait now, to score at 2″ for the bottom.  I used a companion piece of very vanilla for the stamped and embossed layers. The piece is cut first at 3 1/2″ so the stamping could be done.  I just used the large floral image to create a pattern.  Then the second cuts came at 1 3/4″ each, needing four of these all together.

4-15 (1)

Before they were attached I embossed them with the fluttering embossing folder.  Such a nice result.  I layered them up with dimensionals and thought about leaving it just the way it was, but continued on with the plan.

I made the tag from the scrap left over from stamping and punched it with the extra-large oval punch.  A added a ribbon handle and attached the tag to the under side of the ribbon tail.  A few butterflies later and a smidge of pearls and I was ready to add my treats.  So much fun, just so much fun.  Now to deliver!

4-15 (2)

Have a creative day!

Moana

Love You Bloomin’ Love

Just when I thought I could sit down and make something new my time got snatched up. It seems to happen that way more often than I would like, but we do what we have to do.  So, I grabbed a leftover kit from last months workshop and turned a card base into a box.  Pretty cool if I do say so myself.

4-11

I stamped tone on tone with mint macaron using one of the larger flowers from the Bloomin’ Love set to create the background pattern.  My tag was a tiny piece of very vanilla which measured 1/2″ x 4″.  After I stamped the ‘love you’ sentiment from the same set I punched a banner at the end with the bitty banner punch and sponged around the edges with the same ink.  I curled the banner a bit before I set it in place.

The cardstock was cut at 4 1/4 x 11″.  All ready to be a tall folded card.  I scored along each of the long sides at 1″, turned it one quarter turn and scored at 5″ and 6″.  Those last two scored would become the hinge side of the box.  Scoring, snipping and a bit of gluing later and this little box came together.

4-11 (1)

I chose the large satin ribbon for my bow.  That is such a rich ribbon.  I just wrapped it around the short side and tied a pretty bow, leaving the tails a bit longer than normal.  I usually wrap my boxes up more, but wanted to be able to slide the ribbon off easy to fill with treats when the time came.  I also decided to add a tiny basic pearl on the banner, but just one.  How cute is that?

Have a creative day.

Moana

Hello Bohemian DSP!

Guilty as charged.  I have loved this pack of paper and haven’t cut into one single sheet.  For shame, I know.  However, I have sorted that out and made something I quite like.  So much so that I think it will make it into this Saturday’s workshop.  I have a few ladies in particular that enjoy this paper as much as I do.

101_1164

I haven’t done a ‘z’ fold card for some time.  I saw some projects done by a few people I follow and thought I would give it a go.  The card turned out pretty darn good if I do say so myself.  Also, I love how I have been able to showcase so much of this fantastic paper.  The ribbon on the back of the card is also something new, but thought it brought a nice balance the the closed project.

101_1165

Have a creative day!

Moana

Bloomin Hearts Everywhere!

Springtime sure does bring a lot of beauty, especially love.  It is so much fun to hear about new engagements and wedding plans.  There are three this spring and early summer that are pretty darn exciting, one in particular, my son’s.

2-11

I was getting a little misty eyed and created a couple of cards with their wedding colors so I could write them each a personal note of congratulations.  I really had fun just taking my time and enjoying the process.  I did have a brief thought that these could be a lovely wedding invitation front.  Then I thought about having to make 400 or so and quickly decided that would be a lot of time spent that could be better spent otherwise.

2-11 (4)

The detail on this framelit is just so wonderful.  It makes such a pretty piece of art you don’t need anything else on the front.  I did do a little more, but just embellishments. Two varieties of pearls, one with the added framelit flowers, each with a different embossed background, and both finished off with very vanilla satin ribbon.  What an elegant look.

They are very similar, but also uniquely different.  Just like the two people I was thinking about when I made them.  This weekend we are hosting an engagement party for them. It should be so much fun!  I am new to this part of life, but I am definitely up for it.

2-11 (2)

Have a creative day!

Moana

Forever Begins Today

This was for yesterday, however, yesterday was for my family and there wasn’t time to share this with you.  I am sure it was worth the wait though.  Aren’t these flowers just the best thing ever?

1-21

One framelit set gives you all of these pieces, plus a couple more.  And they coordinate with velum, designer series paper just to name a couple. I have been planning this one for a while now, with a very specific goal in mind.  I am fortunate enough to have my son getting engaged and this is how I am going to approach the second reception.  What else could I possibly use for my inspiration piece, right?

1-21 (1)

I do admit that once I cut into a piece of designer series paper for a card front, I look to the remainder of the sheet and immediately think of a bag or box I can make to coordinate.  I have a hard time stopping myself to be honest.  I also have a bit of a problem filing back my scraps of cardstock when I work.  All of these colors were available to me in my stack of put me away papers.  I put them to good use for sure.

1-21 (2)

Have a creative day!

Moana

First Sight

I keep getting drawn into playing with water colors.  Maybe that is just my thing for right now, and I love it.  The effect is just so soft and subtle.  And it isn’t even very tricky.

1-18

I do have a hard time putting embellishments on top of this kind of card front.  So I settled for a short strand of basic pearls and a hint of Wink of Stella.  I drew a few hearts and hi-lighted my stamped flourish to give it a little interest.  You have to turn the card to see it, so it is very subtle.  I didn’t want much to get in the way of the color blending.  When I tried different ribbon options it just was this huge separation that was pretty sad.  Clean and simple does the trick today for sure.

1-18 (1)

Have a creative day!

Moana

Paper Pumpkin Makes Me Smile!

While I was visiting my children and parents during the Thanksgiving break I had a little fun with my November Paper Pumpkin kit.  My mother and I love to craft, differently mind you, but love it still the same.  So we sat down and did half of our kits together.  It was so much fun.

Paper Pumpkin Makes Me Smile!

Yes, this is only half.  The kit came with materials to make ten cards, two different designs.  I just loved them.  I usually don’t share these unless I do something different than the kit suggests, but it was the time spared that was the fun share.  My favorite part of crafting in any form is sharing it.

Paper Pumpkin Makes Me Smile!

And when you have kits as adorable as these, it is easy to share more than you might think.  These will be going to some special people, but not until they get some candy to go with them.  I will blog that part tomorrow.  I am going to turn the other five cards into candy bar wraps for the gift part and give them with these cards.  Fun stuff, right?  See you tomorrow then!

Paper Pumpkin Makes Me Smile!

Have a creative day!

Moana

Timeless Elegance Gift Box…Thing

This morning caught me a bit off guard.  Way too much to do and never enough time.  But as always, things come together in the end and everyone gets their needs met.  This little blog of mine often has to wait its turn, and it never even complains, how nice.

Timeless Elegance Gift Box...Thing

I am not sure what to make of this kind of box thing I came up with.  I wanted to use the dsp, but to be honest, it isn’t sturdy enough for the height I had it have.  But I was determined, so it still happened.  I made up the topper as I went.  Boy, did I use a lot of punches.  So glad I have so many to choose from.  I like how it looks though.

Timeless Elegance Gift Box...Thing

I used a full sheet of the dsp.  The box ended up about 8 1/2″ tall.  The band I made used two strips of paper 1 1/4″ x 10″ and I experimented a bit on the scoring to make it fit.  Only took two times.  I hid those on the bottom.  Lots of sponging all the way around really make it look nice.  I sealed up the bottom with tear n tape and left the top open to put stuff inside.  As I said, it will have to be light because the paper won’t handle much.  The band does give it extra structure though.  Give it a try!

Timeless Elegance Gift Box...Thing

Have a creative day!

Moana