Sending Love and Lots of Hugs!

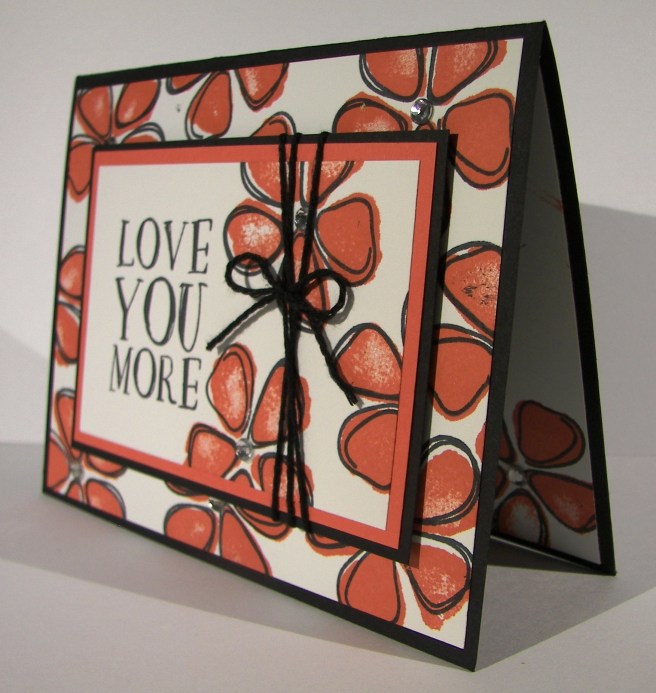
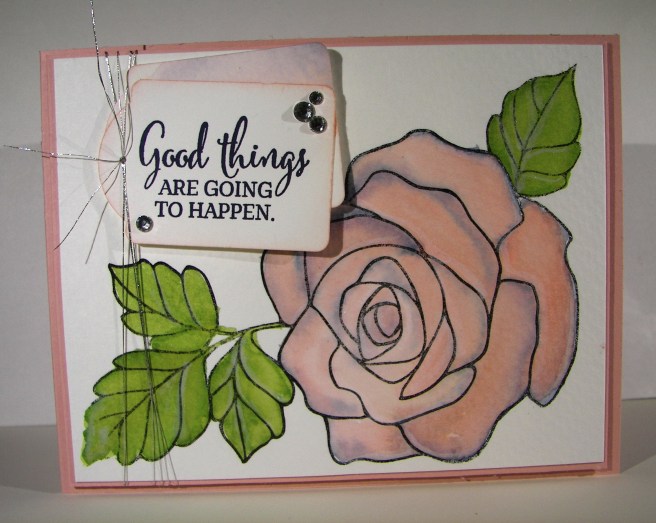
This little trickster made me so cranky last Friday.  I had this vision, I was pretty sure I could make it work, I hated my water coloring but loved the stamping.  I do dislike wasting, so I set it aside and decided to come back to fix it later.  I love the fix, a lot.  I am looking forward to making this kind of fixed mistake again.  With better water coloring of course.

2-28

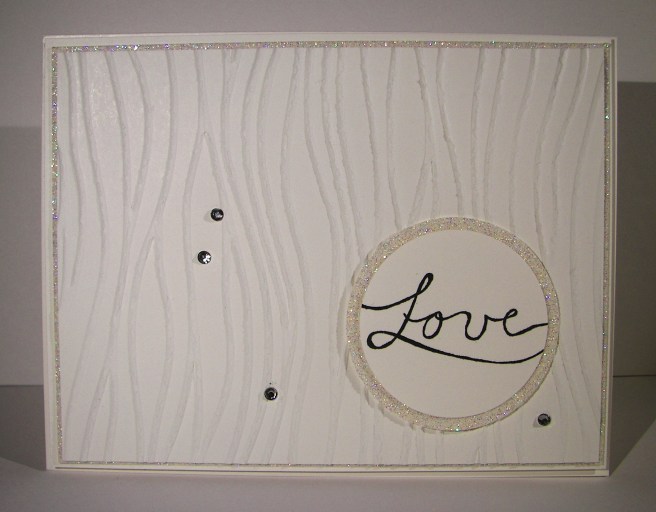
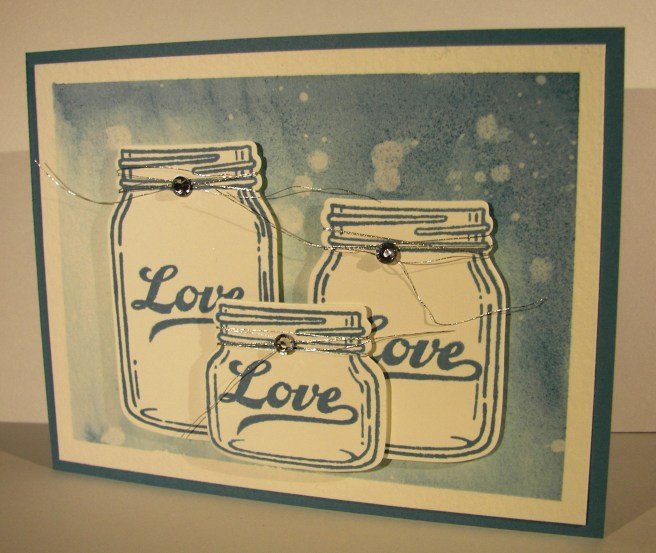
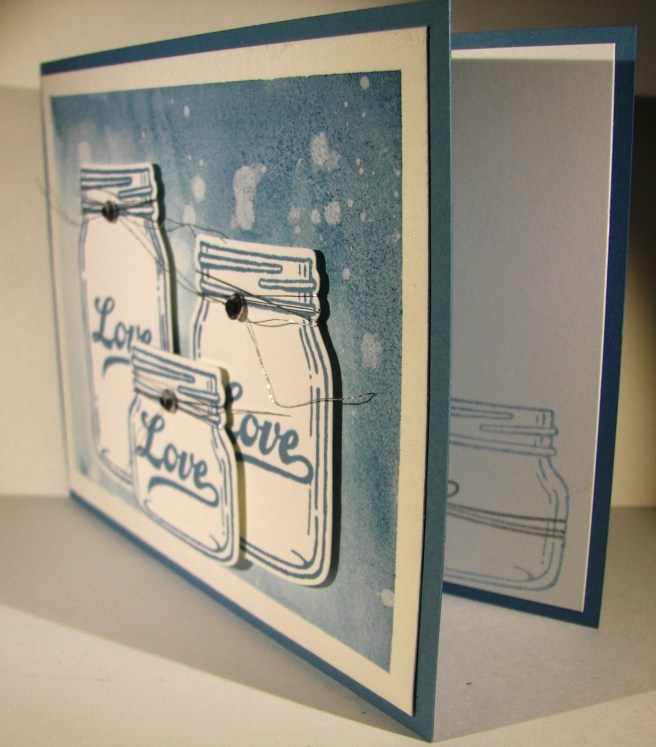
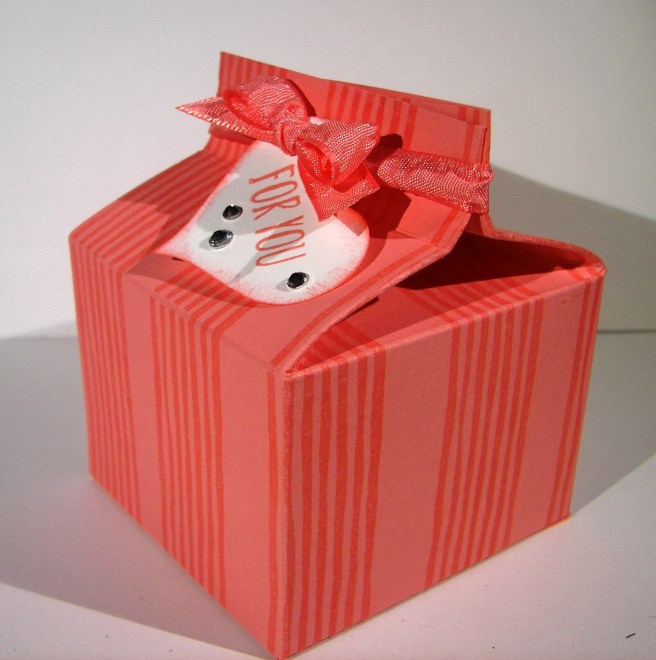
A simple shaker card is what I had in mind.  I stamped these little monsters three times.  I even used my stamp-a-ma-jig for oh so tidy placement.  Then I did what I thought would be a quick water color moment.  It turned out too quick and I thought sloppy.  No problem, put a layer of velum cardstock up on some foam adhesive strips and make a fun shaker card. I was so unhappy with the painting that I just walked away.  I couldn’t see through my error.  Saturday night helped me through though.

I had the thought that the foam strips would look like a white border, and they did kind of, but I didn’t like how that looked. So I ran some glue around the edges, placed some guilding flakes on the glue and brushed them in place.  That covered that problem quite well.  I punched out plenty of hearts using the hearts border punch, adorable of course. Added in some glitter, which really wanted out the corners I might add.

2-28-1

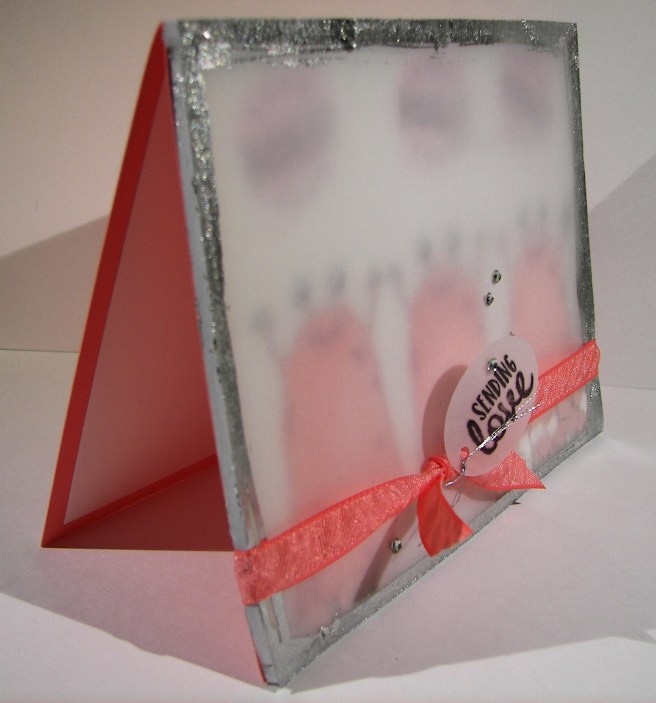
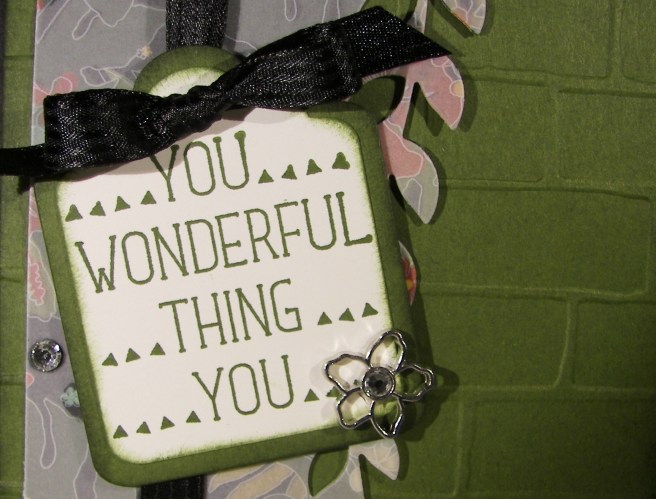
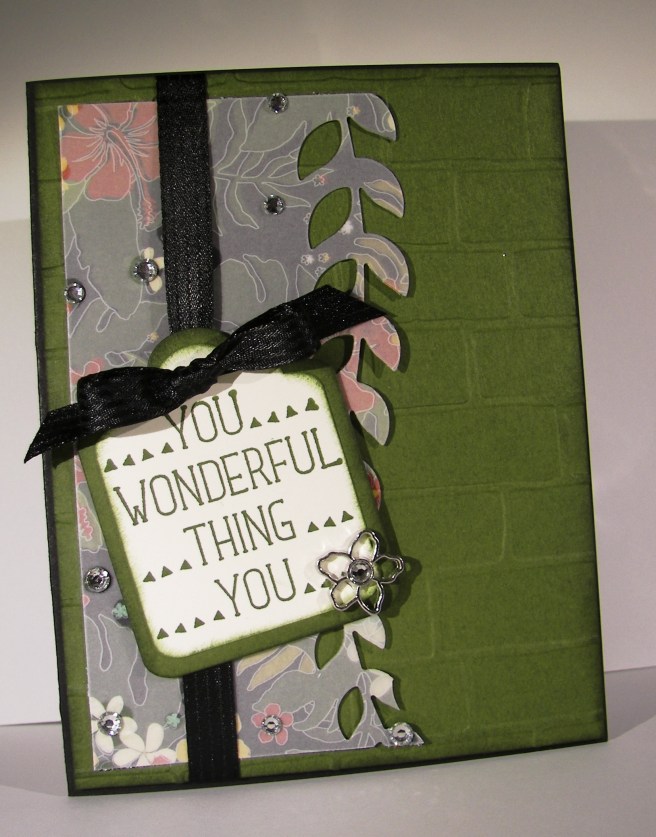
I was going to leave it with the ribbon and be happy, but I wasn’t.  It needed a sentiment, but I was already committed to the velum and didn’t want to hide the opaqued monsters. What to do? I found this adorable tag die in the window box thinlits die set, grabbed a tiny sweet sentiment from the sealed with love stamp set and attached it with some silver metallic thread. Then the basic rhinestones finished it off.  Phew!  Several days of work on that one, that was supposed to be a quick project.  Right.  Either way, now I have a fun way to put all of these products to use and send out the love!

Have a creative day!

Moana

Cloud Nine Birthday

Birthday gift sets really make me smile.  I love everything have a theme and coordinating, very satisfying.  Another workshop project all ready to go.  Should be a large group and this will be the detailed project for sure, not a hard one, but a bit time consuming.

2-10

I have found myself staying away from peekaboo peach because it is so bright.  Almost too bright for my taste.  So, I thought I would take it head on and go for it.  Also, this main pattern of designer paper overwhelmed me like crazy.  Keeping the view controlled really made a difference and I love how it turned out!  Of course it helps to have such a wonderful die cut to focus on.  These balloons are so great.

2-10-3

The matching gift bag used a whole sheet of paper.  I do try to use and not horde fun paper and this is one of the ways to do that.  Just use it!  It is a bit of therapy for my card group too, they aren’t the best about using up their paper either.  We all need a nudge now and again.  The gift bag is simple, letting the balloon accents take front stage.  The ribbon is a nice accent, but really just a closure.  No bow or focus up there, letting it all fall around the balloons and clouds.

2-10-1

While this card requires some patience, I think it is worth it.  I love how the die cuts let me decorate the balloon as I would like.  I simply used portions of the same designer series paper that was more solid to fill those spaces.  That way it really coordinates well. I used tiny dots of tombo glue on the back of the balloon to adhere my pieces.  That way I had some wiggle room to put them just where I wanted.  I also used foam adhesive strips to layer it up.  That way there was an extra bit of adhesive to keep those pieces in place and the balloon got extra lift, more height than dimensions alone offer.  I thought that to be appropriate.  I didn’t plan on using basic rhinestones, but I had a tiny dot of ink in a spot I couldn’t get past, so I covered it up.  Job well done!

Have a creative day!

Moana


Love You More

Smudges and all, I love this card.  Leave it to me to use a stamp set that is filled with two step fruit images to use the flowers instead.  Like I said, I love flowers.  The fruits are great though, and I do plan on making fun projects with them too.  I actually used an old kit from nearly a year ago.  I love putting old kits to use.

8-12

The prior kit had patterned paper in these colors, but has been retired, so I thought I would make my own.  Making background images is so much fun to me.  It takes me back to the roots of my stamping, using quality tools for endless creativity.  This stamp set is made for just that thing.  You will be seeing it a lot I think.

The flowers were stamped first in calypso coral and then outlined with the coordinating stamp.  They match, but don’t have to be exact.  It goes with the artsy look it is designed with.  Works even better for me.  And the sentiment, how perfect is that.  I opted to center the flowers with large basic rhinestones instead of the stamped center.  Either would have been nice, but I wanted sparkle.  A finishing touch of solid bakers twine with a sweet bow. It actually came together pretty quick, it helps to have leftover kits to work with.  That makes me fuss less when I have last minute class cancellations because I know I will put the pre-cut kits to good use eventually.

8-12 (1)

Have a creative day!

Moana

Building With Peekaboo Peach

The last days of summer are waning and I love spending a lazy morning with my youngest. We have had more laughs than tasks done, but I wouldn’t have it any other way.

8-4 (2)

I very much enjoyed giving myself a bit of a challenge with this one.  Working with one color can seem limiting, but can turn out more lovely than you might think.  The tone on tone stamping certainly made a difference and I think it is my favorite part of this card.

The floral die cuts did get put through some distressing with a large tipped stylus and a foam mat.  It helped lift them off the card front without obvious creases.  A simple yet effective technique.  I work the back side of the flower first then turn it over and hit the center.  It curls wonderfully, give it a try.

I hid my adhesive under the flowers and ribbon since it is not an attractive part of using velum card stock.  The inside of the card also got a bit of stamping to tie it together, but that was about it.

8-4 (1)

Have a creative day!

Moana

Love…

Okay, a little time off is nice, but that wasn’t my intention here.  Life took a busy turn and I am trying to get back on track.  I am out of town trying to enjoy time with my son and his new bride, help my oldest daughter with wedding plans, and manage a little bit of business as well.  I would like to say I am on vacation, but a bit too busy for that.  No fussing, just enjoy the love through it all.

7-28 (2)

This simple card was made from an extra kit from a workshop last weekend.  Simple layers, this is all about those layers.  I wouldn’t have paired this particular embossing folder with items outside of nautical items, but I loved how it looked.  I made a large set of cards to blog ahead with and had the intention of sharing them with my new daughter in love.  She is adorable.  Living in a university town there are plenty of weddings to attend, so that is the job of this particular card.  They actually have three to go to in the next month or so.  Busy.

7-28 (1)

Have a creative day!

Moana

Wishing You Brighter Days…

Some days can be filled more struggles than others and it can be difficult to find the bright spots.  Being creative each day certainly does bring a lovely balance into my life.  It allows me to grow, share kindness and even teach a few people along the way.  Very nice indeed.

7-22

I tried a different product.  If I am honest, I have had it on my shelf for some time, but hesitated to use it.  I typically am Stampin’Up! exclusive, but was given a gift from my oldest daughter.  Some Ranger distress inks.  So, they are very lovely to water color with. Luckily I have a few to play with, otherwise I might be tempted to get into those.  They react differently than the inks I work with.

These umbrellas though, how adorable!  I have seen images like these for so long, often with the one umbrella being red.  Flirty flamingo works nicely here as a nice contrast to the black.  I created six black umbrellas and a fancy one for the front.  The basic rhinestones come in a few sizes as well as three strings that are connected by adhesive.  One string was just long enough to travel along the bottom of the umbrella leaving two left over that I placed on the top.  The umbrella framelits have so many fun options to make one creative look after another.  It was kind of tricky to choose, but I managed.

7-22 (1)

I layered these guys around for a while before I committed to their positioning.  The back ones were adhered directly to the water color paper with the front umbrellas being raised up on dimensionals.  What a lovely card to share with someone needing a little lift.

Have a creative day!

Moana

Happy Father’s Day, a Day Late…

Where have my blog manners gone?  Well, I had workshop on Saturday and one heck of an adventure before going, so couldn’t blog the projects we were going to make.  I will share them this week though, no worries.  Then there was Father’s Day, and these lovely little tuxedo boxes to make, nearly 85 all together.  So, you can see why I haven’t had a minute or two to share some of these goodies.

6-20 (6)

This tiny gift box wasn’t my idea, thank you many people who are also so creative and share online, but I adapted to make it work for me.  They looked so adorable all lined up with treats poking out of the top, but I just didn’t have a moment to photograph them all together before they were given away.  Believe me though, there were many smiles from more than pleased men in my church congregation as they were passed out by the young women I work with.

The box was made with half a sheet of 8 1/2 x 11 black cardstock and measures 1 x 3 4/2 and can hold a lot of little treats.  The tuxedo was assembled and then glued to the box.  All kinds of assembly lines were working with my family being so helpful.  The bow tie was obviously just a bit of ribbon with a knot in it and then trimmed to look kind of right and glued on with a glue dot.  The buttons went on in a bit of a whirlwind, but ended up looking pretty darn adorable.  The boutonniere was made from a retired tiny flower punch, punched twice, and attached together as well as the lapel with a tiny silver brad.  It was a bit extra, but added just the perfect touch.  The lapels and shirt collars were really eyeballed and scored with no real measuring in mind, just trying to make it look right.  I knew I had too many to do to make them too perfectly.

It was a great project that took quite a bit of time, over four days, with plenty of family help, but was worth every moment.  Way to be awesome dads everywhere!

Have a creative day!

Moana

Love, Love, Love…

When the new catalog comes out each year I do a quick scan for the super obvious favorites. Here is the first one that was an absolute must have.  To be honest, I focused so much on the adorable jars and lettering I didn’t notice just how huge the stamp set was.  Well, it is amazing.  Talk about options.  I could do a series just using this set and have tons of projects, all looking unique.

6-9

I began by creating a background using marina mist ink on water color paper.  I have been using quite a bit of designer series paper lately and missed making some of my own.  I do feel better now.  After it was all painted and distressed I moved onto the jars.  I could hardly wait.

They were stamped in marina mist on whisper white paper then cut out using the matching framelit pieces.  I do love perfect little images all ready to go.  They were layered a bit, but you can still easily see that they all say love on the front.  I am still in wedding mode and the card reflects this.  I will be hanging dozens of mason jars below several of my trees today that will get candles and create a lovely look.  The couple is already so wonderful, I just want a beautiful evening for them and all of our friends.  Just two days away!

I did a tiny bit of stamping inside.  The small jar was used but stamped off once to give it a lighter look and allow me to write over it if needed.  Then, I stamped with silver encore ink a wrapped string to match the front.  I went back and added large basic rhinestones on the metallic thread and thought it was perfect.

6-9 (1)

Have a creative day!

Moana

Perfectly Wrapped Flirty Flamingo

It couldn’t get any easier than this little number.  Two stamps, one punch and a bit of ribbon and here you go!  It is a tiny little box, but still big enough to hold a small gift or plenty of tiny treats.  How about a yummy truffle?

101_1422

I had punched several banners to make samples bookmarks for my club ladies which left me with an odd piece of cardstock.  Instead of making another tall card, I just made two of those this week, I though I would work out a carton box instead.

The stamping was very simple, tone on tone.  This color is awesome, don’t you think?  I spaced out the stripe stamping to make kind of a pattern.  I didn’t stress out about the exactness of the spaces and it turned out great.  And of course, I had to use some of my new favorite ribbon!  What a fun project!

101_1423

Have a creative day!

Moana

Birthday Bouquet Duo

Another adorable gift set just ready for a fun birthday event.  This is my version of a one sheet wonder.  I enjoy a matching gift set just as much if not more than making several cards from that same sheet.  What can I say, more isn’t always better to me.

5-18

The card is actually quite simple.  Only one piece of designer series paper was used.  A ribbon wrapped around the front and a double tag slid under the bow.  A collection of tiny flowers scattered around and centered with basic rhinestones.  Most of the items were sponged with watermelon wonder, including the inside whisper white piece.

5-18 (1)

This adorable tall bag was made from the large remainder of the designer series paper.  The other side was just as fun for a birthday theme, don’t you think?  It was topped with a huge ribbon which was used to hang the cute birthday tag with silver cording trim.  Bitty flowers were also stamped and punched in whisper white centered with basic rhinestones again. What a great companion to an adorable simple card.

5-18 (2)

Have a creative day!

Moana

Sea Street Pop-Up Party

A super happy birthday would be coming your way with this adorable gift set.  I suppose it might be more inclined towards a child, but I have a great appreciation for cuteness, and this is definitely cute.

5-13

I started out with the idea of this octopus holding eight balloons.  I suppose I should have used the bitty balloon punch, but I stayed with it.  Perhaps I will make it again to see how it would look.  I thought the small balloons would get lost in the fun background paper.

5-13(3)

The inside framelit action really makes a statement.  Even though it is in the middle, there is still plenty of room to write a personal message.  I do love the motion of the popup.  I had a large piece of paper left from the card background and went with a matching gift bag. If you are giving a birthday card, odds are you are giving a gift too.  Making a set is always my favorite thing.  It also helps me be brave and use up my designer series paper.  You can’t hang onto that too long you know.

5-13 (1)

Have a creative day!

Moana

Forever Begins Today

Inspiration came from an unusual place this time.  I was pretty tired after a full day and looked through the events and chatted with my daughter a bit.  She didn’t have much either.  However, we had just gotten our nails done that afternoon and I went with her nail choice.  They were done white with a few pretty jewels tucked around the base of her ring finger nails.  I thought it was lovely.  So, here it went into the card.  This turned into one stunning card fit for any wedding or very special occasion.

3-11 (1)

Of course weddings are on my mind like crazy.  Not only is my son getting married this summer, but my niece, my good friends daughter, and another few to boot.  It is a really busy wedding season for sure.  I will need wonderful cards like this for sure.

3-11 (4)

The layers are very simple.  Just quarter inch two times over with the front layer embossed with the elegant dots embossing folder.  I tucked small basic rhinestones in each of the small ovals and it was wonderful.  Yes, that is a lot of bling, but wedding cards always deserve special attention.  This is the kind of card I could see a bride keeping in her memory book.  So exciting!

I had intended on putting the sentiment on the front of the card, but hated to interrupt the beautiful symmetry going on.  So I tucked in inside because it made it wonderful.  Without that particular sentiment the card could become all occasion, but special occasions for sure.

The sentiment was stamped in silver encore ink.  I wanted a bit more shine so I sprinkled clear embossing powder over the top and set it with my heat tool.  It took it up a notch and made me very happy.  I can see more of these coming together to help celebrate the many wonderful events coming up this year.

3-11 (3)

Have a creative day.

Moana

Botanical Gardens Card Set

How sweet are the colors in this set?  I wanted to make a small set of cards using this wonderful velum as an overlay.  I asked my daughter for a color and she came up with soft sky.  So, I just selected three others from the subtles collection and got to work.

3-2 (3)

The tricky part is attaching the velum without adhesive showing, as always.  However, it didn’t turn out too rough.  The ribbon held most of it together, but I did use a touch of glue in the outer corners.  It was easiest to see on the wisteria wonder card, but even then it was acceptable.  I usually mask my adhesive, but this particular setup didn’t offer good hiding places where I needed them.

I do think I will create a small box to house these in and give it as a gift.  This tiny little stamp that just says “Hi”.  How adorable is that? It comes from the newly available sale-a-bration stamp set Party Pants.  There are so many cute sayings in that one.

3-2

Have a creative day!

Moana

Shine On Birthday Gift

It seems like I have gift bags and boxes on the brain lately.  Nothing to be done about that but enjoy the ride.  This one was a touch different than my usual, but only because I wanted to show both sides of this awesome craft card stock.

101_1173 copy

I created a tall slender gift bag using the entire sheet of paper.  I gave additional score lines along the center of the side panels for a much easier fold when the bag was shut.  The tops of the sides were removed which left me with these pretty top flaps, which when folded over showed the foil patterned side.  So very pretty.  The pack has several prints and the paper is very hearty.  You could really put heavy items in these and they will be quite secure.

I hadn’t had out my trusty petite petals punch for quite some time.  Kind of like a long lost friend.  It sits on its shelf, along with the others, but other toys were getting more use.  When I was at a bit of a loss as to how I wanted to finish off the embellishments, there it was.  Worked like a charm and made me very happy with the results.  Now I will have to make a card to match it instead of the other way around.  Something different for a change is nice.

101_1174 copy

Have a creative day!

Moana

It’s My Party Gift Box

Instead of a large bag, which is what I had planned, I went with a gift box.  I had cut a strip of the dsp for two card fronts and thought to use the remainder of the sheet for the bag now turned box.  I love using a whole sheet up for several projects, especially when I get to make a coordinating set.  Two more cards for this little grouping.

2-19 (3)

I think my scoring tool has to be one of my most used tools.  I do enjoy making gift bags and boxes though, so it is a great fit.  This one is two inches deep and plenty large enough to hold plenty of treats, small gifts, or even some home made soaps.  Sometimes I make a box for a specific gift, but I often go shopping through my stash for one just the right size. When you blog as much as I do, there are always plenty of choices.

2-19 (1)

Have a creative day!

Moana

Everything Botanical

Well, this project started somewhere else, but the results are great.  Sometimes it is hard to see past your ‘opportunity mistakes’, I managed though.  Once I fussy cut designer series paper I am totally committed.

2-8 (3)

The free items you can earn from Sale-a-bration are all unique, but this one caught my eye right away.  A patterned velum paper that not only coordinates, but actually outlines designer series paper, well that is amazing.  I fussed a bit matching it up, but found the exact spot.  I almost did a 6 x 6 card just so I could see the whole pattern line up.  It would have been worth it, it looked so pretty all lined up.  I moved on though.

2-8

My opportunities came from the glue experience.  I thought I could put tiny tiny dots of glue on little flowers and it would look kind of neat, and hide the adhesive at the same time.  Well, my tiny dots were not as tiny as they needed to be.  Several fixes later, it worked out.  Basic rhinestones, a larger sentiment with tag layering, and using one of the many coordinating framelits.  Phew!

I added a touch of inside stamping with a leaf from the coordinating stamp set.  I don’t usually go for a whole suite of product.  This one is different, I loved all of it.  However, it is my favorite color pallet, floral, and it goes together so wonderfully.  I couldn’t resist it.  So I didn’t.

2-8 (1)

Have a creative day!

Moana


Garden In Bloom

Taking a few days off is kind of nice, but it was not intended.  Getting ready for a huge workshop can be really exciting, but also very time consuming.  Put that with still working full time and you get a bit of a circus.  Not to mention the adventures of everyday life.  Time to get back on track and have some fun!

2-1 (2)

There is a lot of attention right now with Sale-a-bration and the Spring Occasions catalogs, and they are very exciting to say the least.  However, the annual catalog is so full of beautiful product it is hard to ignore.

I have been waiting to use this stamp set for some now and it was worth the wait.  I took one of the left over kits from Saturday’s workshop and paired it with this lovely set.  There are a ton more stamps in the set, but I focused only on the large flowers.  I think I could get stuck on this set and not repeat myself for some time.  Exciting!

2-1 (1)

The card front is 4 x 5 1/4″ with an 1/8″ background piece of watermelon wonder and then placed on a standard card base.  Not too tricky.  I put the tags & labels framelit set to work for this lovely sentiment.  It is so pretty.  Then I broke out the fabulous ribbon that has been teasing me from the shelf.  I love, love, love big pretty ribbon.  It is just delicious to me.  The ribbon is the only item from the occasions catalog.  I would love it if Stampin’Up! would bring back some huge satin ribbon in next years annual catalog.  I will have to just wait and see.

2-1 (3)

Have a creative day!

Moana

Flowering Flourishes

I think this will wrap up my adventures with this particular bridal shower invitation sample set.  I think I just might like this one the best.  I like the layers and different inks used with the added layer of embossing.

1-28 (1)

New stamps come out all of the time, but sometimes it is nice to go back to your favorites.  This set, Flowering Flourishes, is definitely one of my go to sets.  The detail is just beautiful and they layer so nicely together.  The simple elegance of it is so striking.  Just a one layer card today, even though the stamping has a bit of extra to it.  I did add a little extra sparkle here and there, sparkle is a must for this soon to be bride.

1-28 (3)

Have a creative day!

Moana

Hooray! for Perfect Pairings

I could probably keep making samples for these bridal shower invitation choices.  Where do you draw the line?  Is three enough?  How about five?  Perhaps four is just right…

1-27

Even though this is still floral, it is has a much stronger navy blue influence.  With the soft seam binding ribbon, the navy doesn’t seem too overpowering.  Not too complicated a card here.  There are 1/8″ simple borders layered with a decorated front.  I started with the navy flower background stamping and then included the pink centers.  How fun is it to have just the colors you want.  The beauty of stamping.

1-27 (2)

Have a creative day!

Moana

Rose Wonder

This was a fun project for sure.  As you have heard me say so much recently, I do love to water color with my stamping.  I wasn’t sure if these two colors would come together in an attractive mix, but they did well.  Having the touches of navy with the blush as a primary is really enjoyable.

1-26

I think I might be making the decisions a bit tricky for these bridal shower invitation choices.  I am not sure which one I like better between the two, guess I will have to come up with another one just for good measure.  I can’t spend too much time playing though, I have workshop coming this weekend.  It is fun to play though.

I stamped this huge wonderful rose on water color paper with stazon ink.  I didn’t goof it up too much, so I went with my first attempt.  I did a trial run with the colors on a scrap of water color paper just to check it out and I liked it.  So, I wet down my stamped image and got to work.  I spent a bit of time trying to be cautious, then I just went for it.  That is why I love to water color, it is pretty darn forgiving.  I even used my trial scrap as a background punch, cool right?  I do try not to waste.

1-26 (1)

Have a creative day!

Moana