Just Keep Swimming!

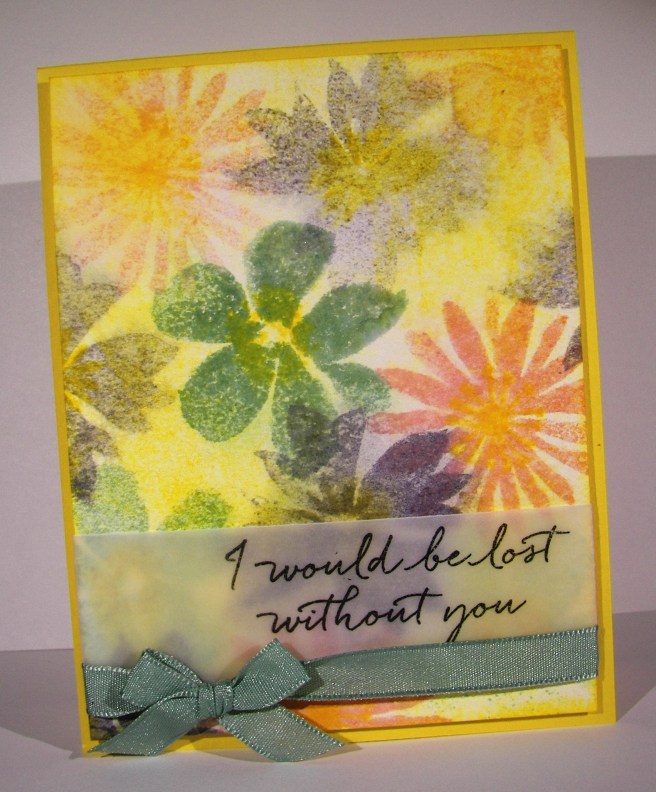
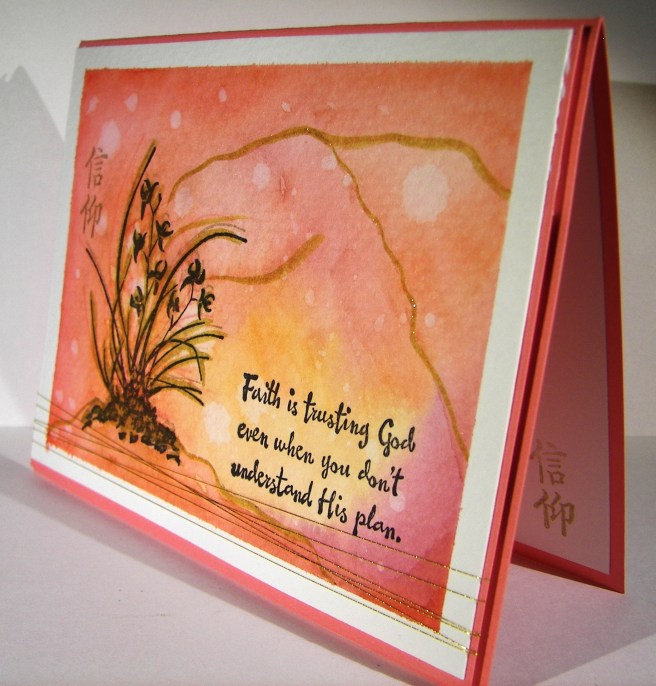
I don’t know, these fish look cool, elegant and creepy all at the same time. The color choices have created a neat look, but almost skeletal.  Well, you get the idea, right?

3-28a

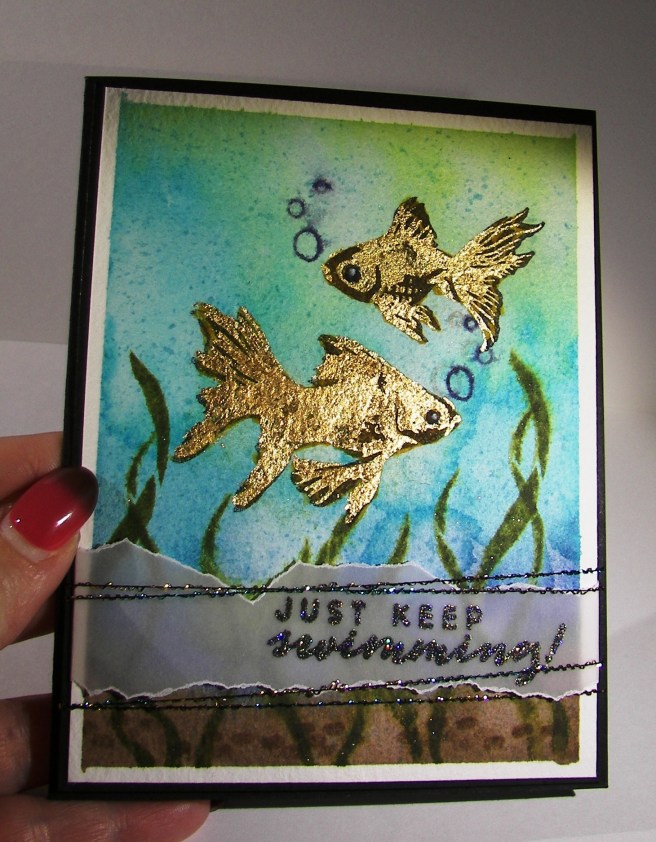
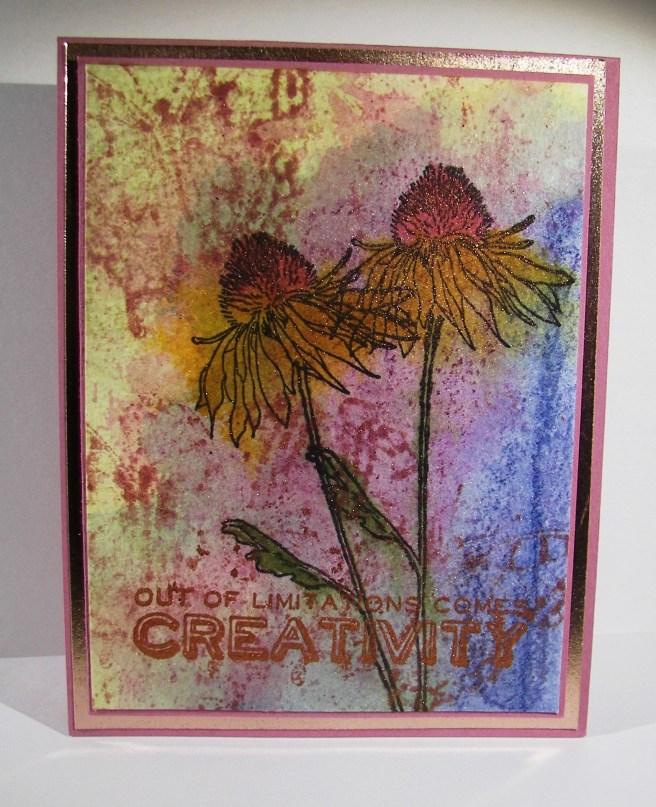
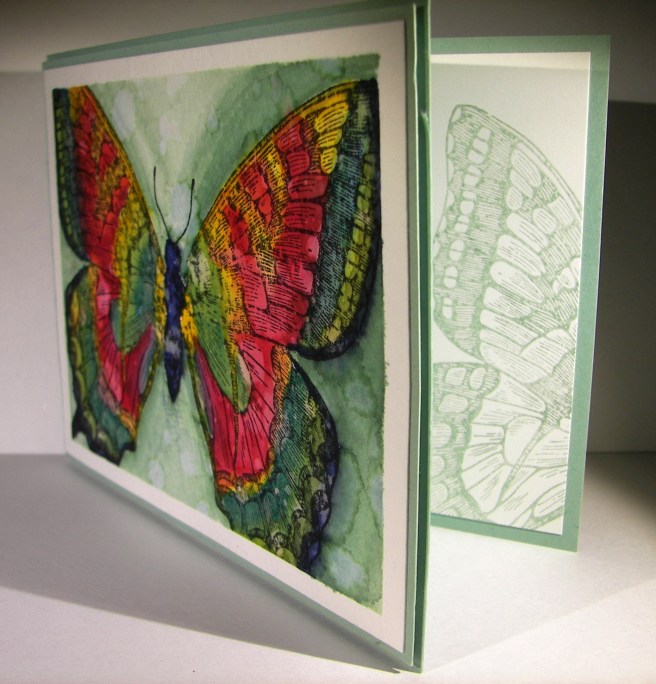
To get the water color I simply pulled open my drawer of distress inks and grabbed four colors making sure they were dark to light.  I did a wet on wet water color technique to blend the ink together putting dark at the bottom and going up to the lightest color.  I came back in with a brown for the sandy bottom and stamped the stones in the same color.  Having some sunshine at the top peeking in was a great idea, but with my blue choice I got more of an algae look, but it looks good too.

The fish were stamped in black stazon to allow me to water color all around without ruining the image.  I knew I was going to go back with gold, so I didn’t worry about how dark they looked.  Guess I should have.  The sea weed or plant guys were stamped in green tones all around the fish and spritzed with water to soften the images.  The stamp set also came with these cute little bubbles, for the fishies of course.  So they were stamped in the darkest blue I used for the water.  I also used a splatter image from the Touch of Texture stamp set to give the water some dimension.  Even with all the color it looked kind of flat.

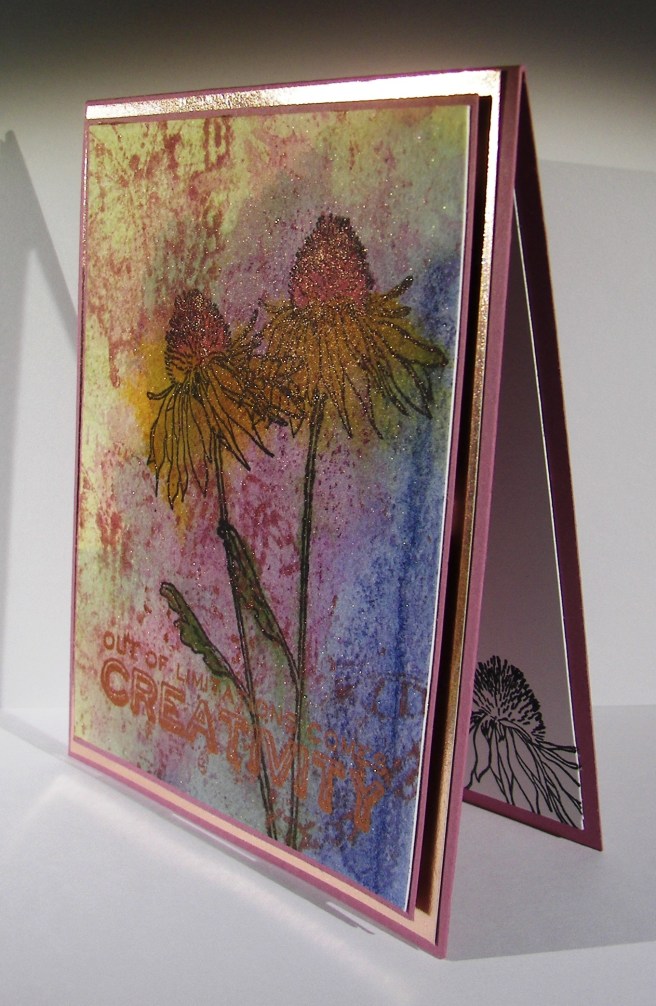
Then it was time for the gold guilding flakes.  The second layer of the fish set was stamped in glue and the flakes were pressed over that.  I let it set for just a moment before I started rubbing around with my finger then a bristle brush to remove the excess.  The gold sure does shine.  Different than embossing, but still exciting.  I tried to glue on some googly eyes, but it made the card look too silly, another time for those.  So I just drew some little dot eyes with a white gel pen.  Maybe a bit too creepy, but I left it.

3-28 (1)

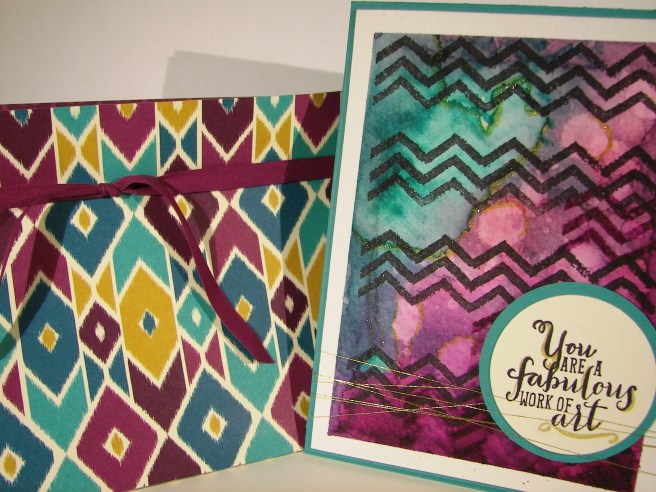
The sentiment was stamped in versafine black ink on velum cardstock.  While it was still moist I sprinkled iridescent ice powder over the top and heated it in place.  So sparkley and pretty.  I had some fun threads that matched and down they went.  A fun, but interestingly elegant card.  I sure had fun making it though.

Have a creative day!

Moana

Out of Limitations Come Creativity

When a couple of friends get together to explore a few techniques, really cool things can happen.  The sentiment reads, Out of Limitations Comes Creativity.  Sometimes the limitations are our own minds, not finding new things to try, or new ways to try the things we already have.  Great example below if I do say so myself.

3-27

We wanted to try a technique Jennifer McGuire recently shared using versamark ink and perfect pearls.  That was a lot of fun.  My beginning samples are fun to look at, and might turn into a project, but might not.  I still have them at my desk, but they led me to this project.  The sentiment was created with this technique.  It was neat though, how the perfect pearls clung to areas of the water color paper that weren’t all the way dry.  A neat accident that really adds to the look.  I also gave distress crayons a go.  Those are pretty darn cool.  I bought a set that came with the stamps I used here as well as a basic technique booklet.  Those techniques were put together and actually turned into this project.

Literally, we sat down with several products, a technique idea, and some great conversation. That was so much fun!  So, maybe I should have a sentiment stamp that says something like, Good Company Sets Free Creativity, or something much more poetic, but you get the idea.  Can’t wait til our next time together. Creative friends are so much fun!

3-27 (1)

Have a creative day!

Moana

Sending Love and Lots of Hugs!

This little trickster made me so cranky last Friday.  I had this vision, I was pretty sure I could make it work, I hated my water coloring but loved the stamping.  I do dislike wasting, so I set it aside and decided to come back to fix it later.  I love the fix, a lot.  I am looking forward to making this kind of fixed mistake again.  With better water coloring of course.

2-28

A simple shaker card is what I had in mind.  I stamped these little monsters three times.  I even used my stamp-a-ma-jig for oh so tidy placement.  Then I did what I thought would be a quick water color moment.  It turned out too quick and I thought sloppy.  No problem, put a layer of velum cardstock up on some foam adhesive strips and make a fun shaker card. I was so unhappy with the painting that I just walked away.  I couldn’t see through my error.  Saturday night helped me through though.

I had the thought that the foam strips would look like a white border, and they did kind of, but I didn’t like how that looked. So I ran some glue around the edges, placed some guilding flakes on the glue and brushed them in place.  That covered that problem quite well.  I punched out plenty of hearts using the hearts border punch, adorable of course. Added in some glitter, which really wanted out the corners I might add.

2-28-1

I was going to leave it with the ribbon and be happy, but I wasn’t.  It needed a sentiment, but I was already committed to the velum and didn’t want to hide the opaqued monsters. What to do? I found this adorable tag die in the window box thinlits die set, grabbed a tiny sweet sentiment from the sealed with love stamp set and attached it with some silver metallic thread. Then the basic rhinestones finished it off.  Phew!  Several days of work on that one, that was supposed to be a quick project.  Right.  Either way, now I have a fun way to put all of these products to use and send out the love!

Have a creative day!

Moana

Tasty Trucks

Let’s taco ’bout how awesome you are!  What a great sentiment to use, right?  This adorable stamp set has many little food options to decorate with, hot dogs, cup cakes, ice cream cones, and pancakes.  They all fit in with this little food truck that can be decorated all kinds of ways.  And no, that is not designer paper, I stamped all those little tacos and gave them some color too.  It didn’t take long, but they are super fun.

2-16

The truck made me giggle a bit, even more than the tacos.  My oldest daughter is all about the puns and today she needed a pick me up.  This is it.  Life isn’t always fun, but cards sure can be.  This one especially.

I stamped everything, followed that up with coloring in water color pencils and blended everything in super quick with an aqua painter.  How fun and easy!  Coloring the truck took longer just because I had some color choices to make, not much else though.  Simple and silly is the theme for today and I couldn’t be more pleased.  I think I will spend some more time at my desk making silly cards.  What a great way to spend the afternoon.

2-16-1

Have a creative day!

Moana

Yummy in My Tummy

What a busy day yesterday!  I started this set early yesterday morning, but couldn’t finish before I had to leave for the day.  So I finished them this morning and shared them together instead of different days.  They come from the same stamp set, and they look adorable together, so why not!

1-26-2

These were stamped in black stazon on water color paper then colored with water color pencils.  After I put the color down I wanted I moved it around with the aqua painter.  That has got to be the easiest way to water color ever, outside of having someone else do it for you. Seriously, it is shockingly easy.

I had to add some hearts around this little green guy.  The clean and simple look really appeals to me, but  I had to have something.  Green hearts seemed to work nicely, but stamped alone they looked to different from the painting.  I went over each stamped heart with the aqua painter and it instantly made it look like I had somehow painted all these perfect hearts.  No way!

1-26-1

Big red just had to be alone.  Seriously, how adorable.  I couldn’t add anything else around him.  Little rosy cheeks and a stamp on his belly.  Giggles and grins all day!  I wanted a little sentiment to go with my green guy, but decided to put my own on.  My marker choice was a bit too stark for my taste, but live and learn, right?

1-26

Have a creative day!

Moana

Suite Sentiments

Mornings don’t always go as planned, and that is okay.  This set of cards was ready to go, but I had to choose to be on time for my carpool, or blog.  Blogging in the afternoon can be good too, just not my favorite.

1-24-2

I wanted to use the cupcakes and carousel dsp stack for the focus on these cards.  The colors are so great.  They make me feel like having sherbet or frozen yogurt.  Yummy.  So I used two pieces of paper, trimmed them to size and used the extra pieces to accent the other.  Great way to use up the paper and get two cards done at once.

Suite Sentiments is an awesome stamp set.  So many great sentiments ready to be used, and all occasions covered too.  I went with a little more groovy ones to go with these odd colors and liked it.  I simply stamped with black stazon on velum cardstock and layered everything together.  All good and pretty darn easy.

1-24-1

Have a creative day!

Moana

Thank You, Friend

Simple and sweet, just like any true friendship worth having.  Sometimes we get so caught up in the day to day demands of life that we set aside those we really care about.  But, since they don’t judge us, and they truly understand, we can get away with it for a time.  That doesn’t mean they don’t hold a special place all of the time.  Good friends are the best!

1-22

This little number was painted with the new water color pencils and an aqua painter.  The hedgehogs I should say.  The bit of background was done using classic inks with the aqua painter as well.  I stamped the guys in the center with the sentiments to the top left and bottom right.  I colored in the hedgehogs first, left them alone and painted the background, and dried the card well before continuing.

They were pretty easy to finish, I didn’t have too many problems.  I did several of these cards for gifts so I got a bit careless.  Good thing water color can be more loose.  They turned out adorable though.  I mounted the card front on a base of crumb cake and layered those on top of a crumb cake card base.  The inside was given two panels, one on the top and bottom of the inside for extra writing space.  Can’t wait to send it!

1-22-1

Have a creative day!

Moana

Blooms & Wishes

This stamp set sat in the annual catalog and teased me often.  I would try to pass by it saying that I surely did not need yet another floral stamp set.  Well, I broke down and bought it.  So very glad I did.  What a beautiful watercolor piece, right?  Great stamps make all of the difference.

1-15

I chose a few spring colors to work with, focusing on daffodil delight.  With all of the rainy, cloudy days we have had I wanted something bright and cheery. Mission accomplished for sure!  I stamped the large flowers from the set in different colors, stamping off as I went along.  The centers were all daffodil delight and more of an idea than a detailed center.  I sponged more yellow ink all around the flowers filling in most of the white areas before moving on to spritzing with water.  It was just a matter of managing the water spritzing to allow some ink movement, but not blurring too much.  It didn’t take long before I was satisfied.  A quick drying moment or two with my heat tool and it was ready for the sentiment.

That was stamped on a strip of velum cardstock and then wrapped around the bottom of the card front.  I used a lovely mint macaron satin ribbon to accent the bottom and layered it up with dimensionals.  Such a lovely spring card.  Of course I had to stamp a bit inside with a few yellow daisy images and one for the back too.

1-15-1

Have a creative day!

Moana

Hello Baby!

A good friend of mind is expecting her third child soon, a baby girl.  It was a huge surprise but it is finally getting exciting for everyone.  Thought it was about time I made a special card or two just for the occasion.  What is it about pink and sparkles anyhow?

7-11

I haven’t purchased much in the department of this years designer series paper department, nor do I have any current baby themed stamp sets, so I had to get a bit creative.  It may be on the elegant side, but I do like how it turned out.

I made a couple of layers of blushing bride card stock to add to the card base, with the top most layer being embossed for a little texture.  Love it! I then decided to break out the flourish thinlits set and cut a few of the images in glimmer paper.  Again, it was totally working for me.  When it came time for a sentiment, I really had to look.  I found this treasure in the beautiful banner set and thought it to be perfect.  The sentiment was layered on more card stock and both layers were edged in the banner style.  A little wrapping with metallic thread and one huge metal rimmed pearl later and I called this one done.  Yes!

7-11 (1)

Have a creative day!

Moana

Happiest of Birthdays!

Birthday cards for children are so fun to make.  I guess you wouldn’t have to put an age limit on these though, my oldest daughter would think they are just right.  Either way, these two bright and cheery cards will bring smiles to some darling little girls.

7-5 (3)

I used to make two cards at a time to show them differently, but I kind of got away from that.  I have had a request for some birthday cards and though it would serve well to make more than one.  I certainly had fun though.  I used a new stamp set and a couple of older ones that hadn’t come off the shelf for a while.

7-5 (1)

I was struggling a bit with the birthday block letters for a while until I decided to sponge the edges.  Sometimes the oldest techniques are the best.  I also did a bit of stamping off to get the different tones.  All of the shades were done from one ink pad.  The lighter rectangles were stamped off twice and the darker were stamped off once.  The letters were done full strength.  I do like these letters for sure.

7-5 (2)

Have a creative day!

A Special Congratulations

When your daughter gets engaged it is a whole different feeling.  I don’t know how else to explain it, but it just is.  However, planning takes on a whole new level of excitement that is more than difficult to control.  Having two wedding receptions within seven months does slow you down though.  Creativity, don’t fail me now!

6-30 (3)

I finally broke out this bundle to see just what all the chatter is about.  Well, it is really that amazing.  I am going to have a ton of fun working this set.  So many bloggers have really done some amazing work so far, I am going to need to get to work to catch up.  I bet when my daughter sees this she might just get some shifty ideas about wedding invitations. Some things just aren’t fun when you have to make them by the hundreds though.  Perhaps the wedding invite and not the general reception invitation though, definitely manageable.

6-30 (2)

I went with metallic thread as to not distract from the detail of the die cut, but that won’t last long.  I see lots of different types and sizes of ribbon being wonderful here.  It makes me want to change this out right away, but I will leave it.  It matches the copper metallic embossing powder I used on the congratulations sentiment.  Simple and elegant.  Yummy.

6-30 (1)

Have a creative day!

Moana

Artistically Asian

New stamps, new stamps, new stamps!  I love having new stamps!  This particular one caught my eye right away on my first browse through this seasons catalog.  I could easily get lost exploring the possibilities, there are so many.

6-17

But, I am totally in the mood for water coloring, so what else would I turn to just now?  I thought some of the new in-colors combined with gold would compliment the Asian feel of the stamp set.  And, I absolutely agree with myself.  Good thing too…

Flirty flamingo is the card base and the main color I painted with.  These colors go so very well together.  I used a lot of water and kept the color light building the intensity but not overdoing it.  Experimenting with this kind of painting is really something you just need to sit down and do it.  I have learned some things that work better for me, and of course there are tons of very talented people online that generously share their techniques to learn from.

I did stamp over the floral image again with both flirty flamingo and gold encore ink.  I wasn’t looking for a particular effect, just more of the image itself.  Then I hit it pretty hard with the gold wink of stella brush pen.  I accented the image quite a bit then followed along some of the water mark lines.  They ended up giving me a bit of a mound for the plant to rest on and maybe an interesting mountain or two in the background?  That wasn’t the intention, but I keep seeing that when I look at it.  Judge for yourself.

6-17 (1)

Have a creative day!

Moana

Thank You, Friend

Did I take a few days off?  Well, not really.  My son recently got married and just last weekend we had a reception in our backyard to celebrate.  I thought I could keep things going, but I just had to get a bit more focused. Family always comes first.  Then you have the lovely friends that support and make everything come together.  I have several such friends and I couldn’t be more grateful.

6-14

Could these two adorable friends be any more wonderful?  They come on one stamp and make the perfect pair.  I decided to put several of the new in-colors to work to show them off.  The elephant is painted in sweet sugarplum, the mouse in peekaboo peach and the ground painted in emerald envy.  The sky background needed something different, so I went with soft sky.  Yup, just what the card needed.  Nothing else was needed, no ribbon, no distressing or anything else.

I mounted the water color on a separate piece of sweet sugarplum cut to provide a narrow 1/8th inch border and then raised up on dimensionals.  This is just the type of card I would love to get, but even more, love to give.

6-14 (1)

Have a creative day!

Moana

Farewell Swallowtail

I have loved this stamp for so long.  It is sad to say that it will retire at the end of this month.  However, there is a stash of stash of retired stamps that I cannot part with.  This is definitely going to join those.  Other retired ones I sell off, but ones that are just too wonderful get to stay out with the current product.  Kind of like a wise old tree.

5-25

The butterfly was stamped on a piece of masked water color paper in black stazon.  The color pallet was different, but intentional.  I picked colors that would create interesting blends with the idea that none of the original painting would  stay to true color.  A lot of blending went on here.  I painted coordinating sections first without blending.  After I added crushed curry I kept with that color and used it to begin blending the edges the color sections.  I just did that until I was happy.

The background was painted in mint macaron, darker to one side trying to create a bit of a shadow.  Distressing had to happen here and boy did it.  I flicked water, dabbed it up, and repeated that process again until I was satisfied.  Then the gold wink of stella pen went to work in a few areas.  Again, hard to see, but it is there.  Use your imagination, where would you have painted light lines of gold glitter?

5-25 (1)

Have a creative day!

Moana

Remarkable…

This quite simply was round two.  I had this fun idea to emboss this flower with silver powder on black card stock.  Thought that would look pretty cool.  Then, I thought I would water color with a bit of silver encore ink and touch it up with wink of stella.  Can I just say that all went in the trash bin?  True story, not a good combination there.  Next try…better.

5-16

These colors are all I have on my brain lately.  The wedding is three weeks away and the reception I am hosting is four weeks away.  It is hard to find blackberry bliss in the spring out and about. I have managed what I can, and have had to let go of other ideas.  It is going well.  Just like this card duo.

5-16 (1)

Simple stamping and die cutting with oval framelits.  Touches of basic pearls to set it off and wrapped in pretty satin ribbon.  My kind of yummy.  After donating my stash of cards and bags for a fund raiser, this is the first one to begin the rebuilding.  All for a good cause.

5-16 (2)

Have a creative day!

Moana

Bohemian Work of Art

Rich colors and exciting patterns, that is the theme for today.  In between wedding reception planning I have managed to create this lovely due.  Now I get to add this to the collection of card sets and greeting cards I am donating for a cub scout fundraising event tonight.  I get to share my work and clean out my stash at the same time!  I call that a win.

5-14

The card began with the chevron stamp from the Work of Art set.  I didn’t really pay too close attention, just stamped it four times down a piece of water color paper.  The color pallet came from the bohemian designer series paper set, only leaving out the yellow tone. The focus was on bermuda bay and I started there.  Color was layered, sponged off, added, and distressed a ton until I was satisfied.  Then I did something that was new for me.  I hi-lighted some of the distress areas with my gold wink of stella brush pen.  That was super fun and I had a hard time stopping.

5-14 (1)

The gift bag was made from a whole sheet of designer series paper.  I went for a wide stocky bag instead of my usual tall slender ones.  It is nice to change things up a little bit here and there, don’t you think?  The ribbon I had in rich razzleberry was just long enough to go around the bag top.  I do love using up product that is retiring before it actually retires.  I am not often that lucky.

5-14 (2)

Have a creative day!

Moana

City By the Bay

Wouldn’t you love a view of the city like this?  Well, my view is a whole lot more country, but I would one day love to be able to enjoy one like this.  I might have to settle for occasional holiday trips, but it would still be wonderful.

4-30

I put quite a bit of planning into this project.  I had to think backwards in order to keep the layers straight.  I embossed my whisper white piece with elegant dots and used the recessed side to make my ‘wall’.  I inked up my sponge and just pounced in here and there to create this look.  I kept going until it looked more like a textured wall than a piece of embossed paper.  The edges got sponged.

The hearth and home thinlit of the window was used twice.  Once to create the hole in the wall and again to make the window frame.  I glued the white one to the tip top taupe one with tombo liquid glue and nestled it back into place with the card front.  That way it looked raised up without a lot of fuss.

The skyline was created with the calling all heroes set.  It was stamped with black stazon onto water color paper.  The texture of the paper made it look really neat.  I went to work on the water line and then moved up to the sunset.  The windows were colored in with gold wink of stella, even though you can’t tell as much, they do sparkle.  That was centered in the window and got a heavy dose of dimensionals.  I am sure I could have worked it out easier if I had thought a bit more, but sometimes a creative journey takes a few extra turns.

4-30 (1)

Have a creative day!

Moana

June Weddings and a Sheltering Tree

Planning a wedding and the receptions to follow can be an exciting time, although very stressful.  Wanting everything to be wonderful, people to be happy, and a general feeling of love in the air.  Sometimes things, or even people, get in the way.  Everyone needs someone to shelter them from stress and frustration.  That is this tree this morning.

4-19 (1)

I am fortunate enough to have a son getting married this June to an absolutely wonderful woman.  It couldn’t be more wonderful.  The way this card looks is how I am attempting to transform my yard.  There will be other things too, really awesome stuff. but this look is all around.  My brain is full of wedding ideas these days.  No escaping it.

I stamped the tree base in black stazon and the leaves in mossy meadow.  The night sky is painted with night of navy.  I also painted the grass in mossy meadow.  I stamped sparkly flowers from the same set in versamark and added white embossing powder.  I added touches of daffodil delight around the ‘flowers’ to give them a bit of a glow.  They will be sparkly lights after all, and candles a plenty.  Wheeee!  There goes the wedding brain again.

I used tombo to glue the painting on another piece of night of navy card stock that has just a 1/8th” border.  Then that combination was layered onto a card base also in night of navy with plenty of dimensionals.  I left any sentiment off as well as additional embellishments. I couldn’t decide on any, so there you have it.

4-19 (2)

Have a creative day!

Moana

You Are My Everything

There are days when I really don’t know what I want to make, but that isn’t today and it shows.  When I know who I am creating for it shines through.  The awesome extra free stamp set in this months paper pumpkin kit had the stamps I had to use.  How beautiful are they?  Well, I will be using them excessively I am sure.

4-17

I knew I wanted to make a card for my husband with the two stamps  that share the phrase ‘You Are My Everything’.  It couldn’t be more perfect.  Once I knew that I knew the color pallet I needed and the medium as well.  Blues and water coloring are the perfect combination for him.

The technique of water coloring really doesn’t have a lot of guidelines.  I do start with a wet masked surface.  Then I begin to add and take away color, dry and wet again sprinkle and dab, and color all over again.  It is more of keep going til you get the results you want than a step by step process.  So much fun, really.

Then I stamped the large flower in bermuda bay, once stamped off first, here and there.  I added a fern stamp a few times, full strength not stamped off.  Then finished with the two stamps that make the sentiment.  I did a little echo stamping to coordinate the inside with the card front.  To complete the project I layered the art onto another piece of bermuda bay card stock and wrapped it several times in silver metallic thread.  Then up on dimensionals for a little extra style and sit back to enjoy the view.  I do love this card.  I think it looks like a beautiful batik fabric I would love to own and sew with.

4-17 (1)

Have a creative day.

Moana

Helping Me Grow

I do love to water color, that much is more than obvious.  Since spring is everywhere I knew I had to do some flowers like the ones I see everywhere.  How about lupin?  Pretty sure I spelled that wrong, but they are the prettiest wildflower, next to the poppy of course, that are growing all around this time of year.  My husband even recognized the flower on the card, and that is saying something.

4-13 (2)

I stamped the large floral image on my masked piece of water color paper in black stazon. The flowers were initially painted in marina mist, letting the ink run lighter as I went up the flower.  After, I added in hi-lights of wisteria wonder in the centers and across some of the petals.  The stems were done in pear pizzazz.  I did a touch more with the gold wink of stella to give it a sparkle.  That was both on the petals and the stems.  I know, it is hard to see in the photo, but it is there.

I painted the background in so saffron, allowing it to be lighter and darker just here and there.  I didn’t have a specific rule in mind, I let it happen.  I then used my aqua painter to drop clean water across the card to make water spots.  I let the drops sit there for several minutes then came back and dabbed them up with paper towels.  That removed ink and left the fun spots behind.

A simple bow across the front finished it off.  I used a piece of very vanilla for the inside.  I decided not to leave it blank and opted for a repeated image of the front.  Instead of black, I used so saffron stamped off and placed it right in the middle just like the front.  The idea is that it is light enough to be written over, kind of like a water mark.  It looks great.

4-13 (1)

Have a creative day.

Moana