Golden Garden in Bloom

Distracted, distracted, distracted.  That would be my theme for the last several days. Sometimes we complain when we get stuck in a run, other times we stress out looking for that comfortable rut.  I think mine was on another planet all together.  Still looking, but getting closer for sure.  This lovely project has waited on my desk for four days to be shared. Worth it though, it is so pretty.

3-7

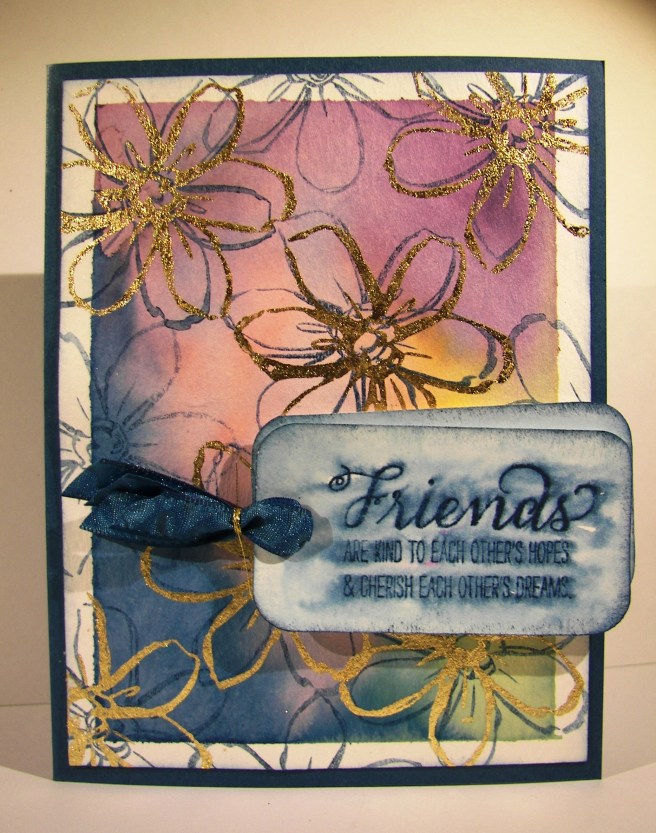
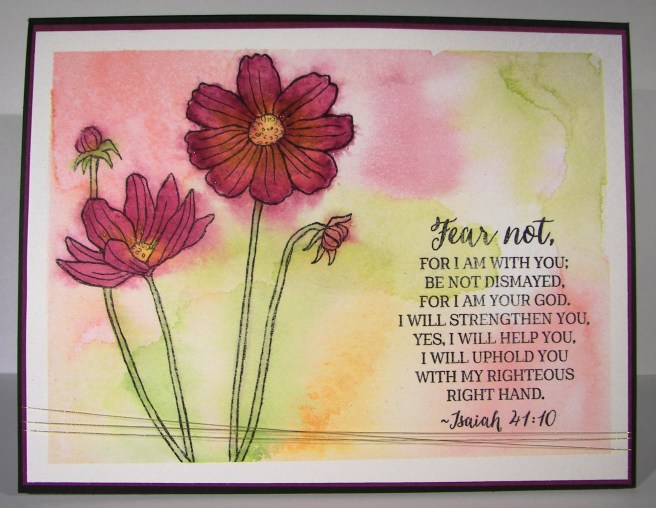
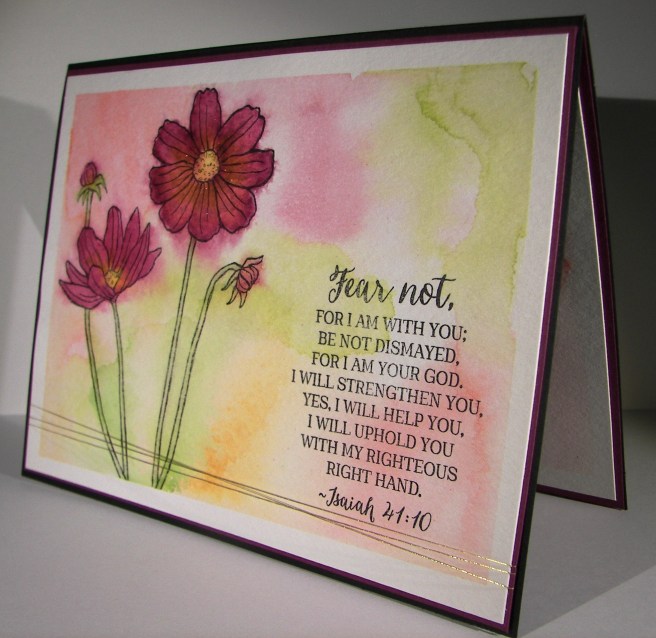
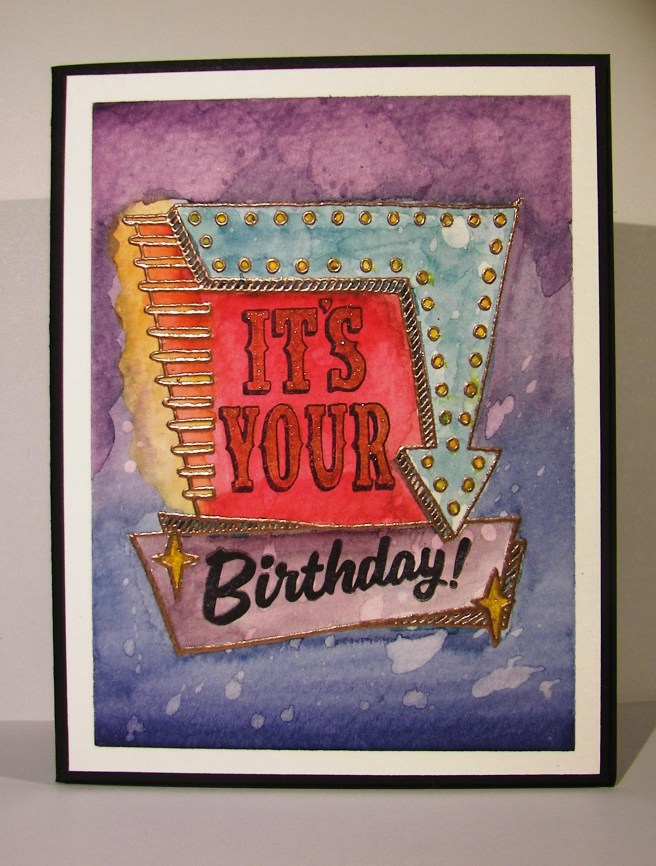
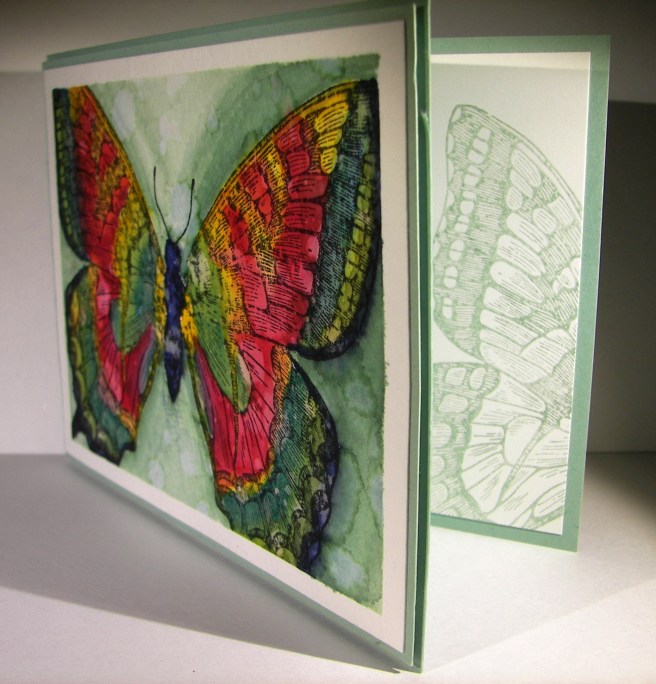
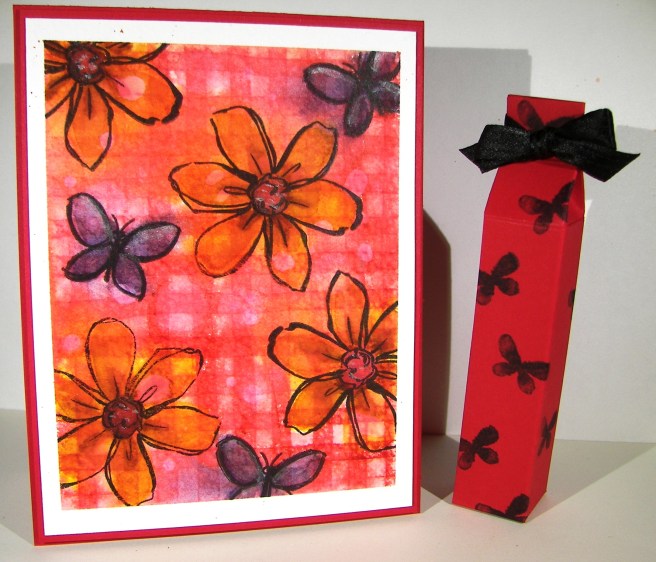
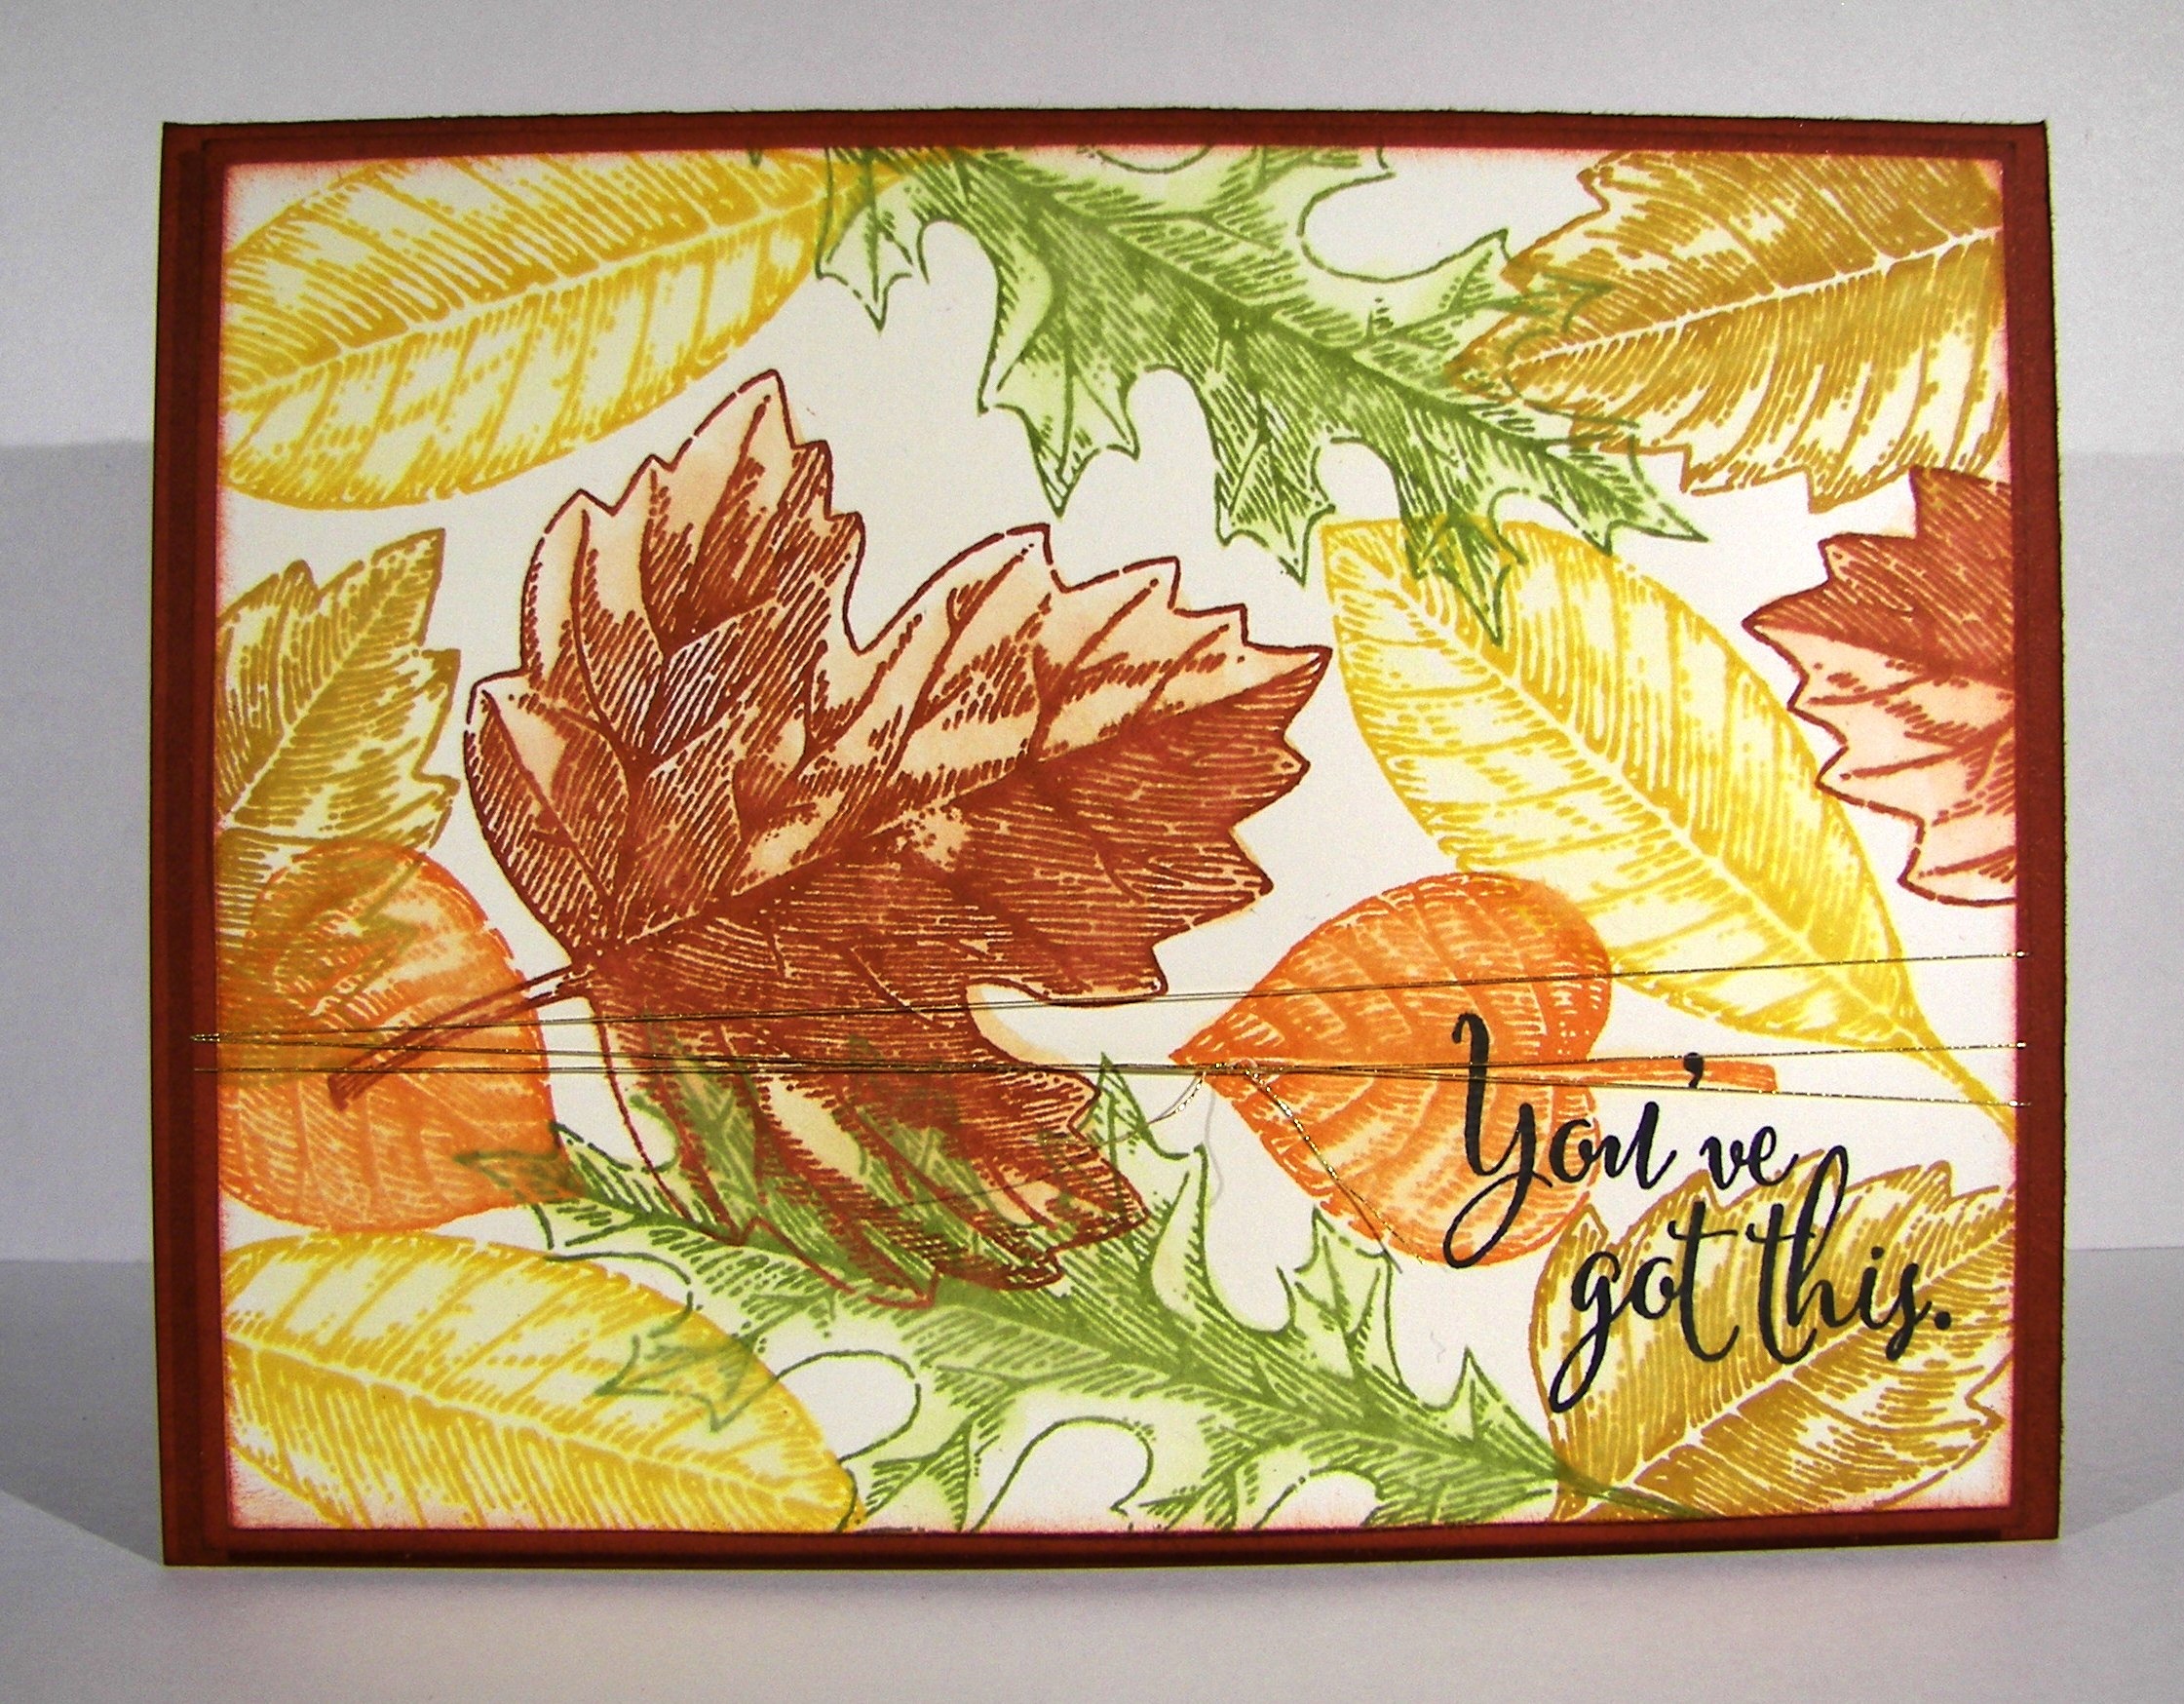
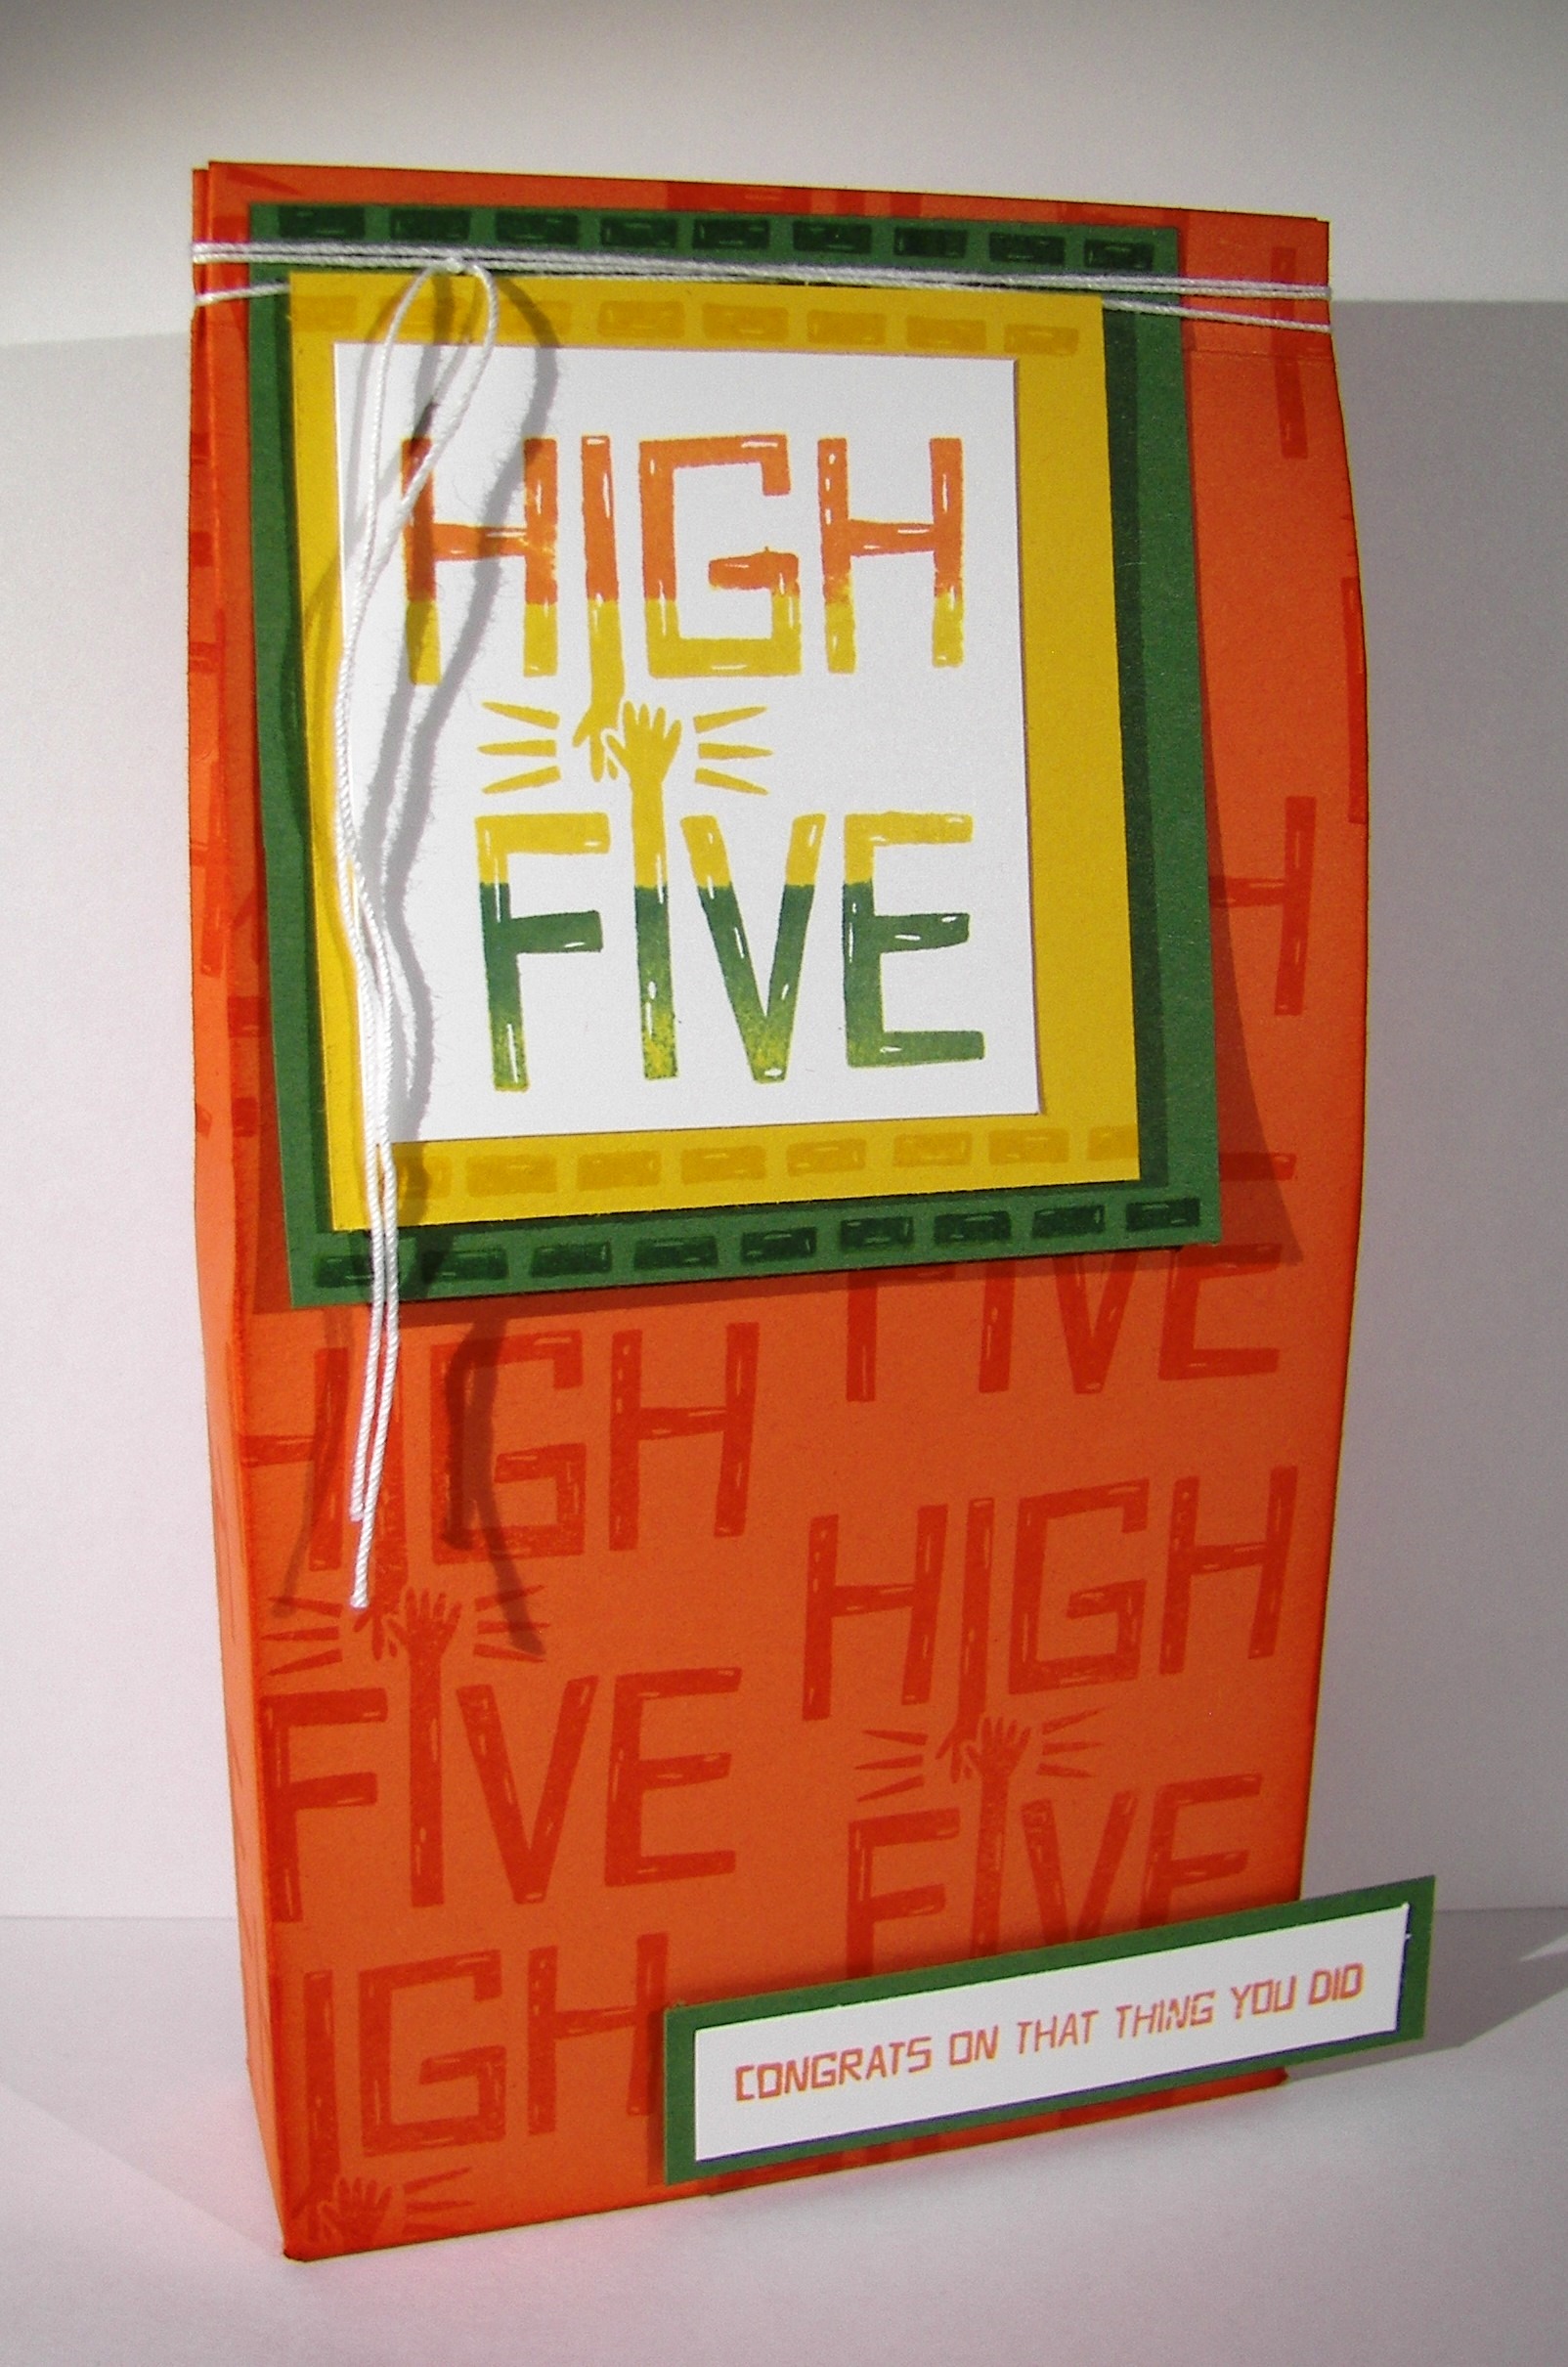
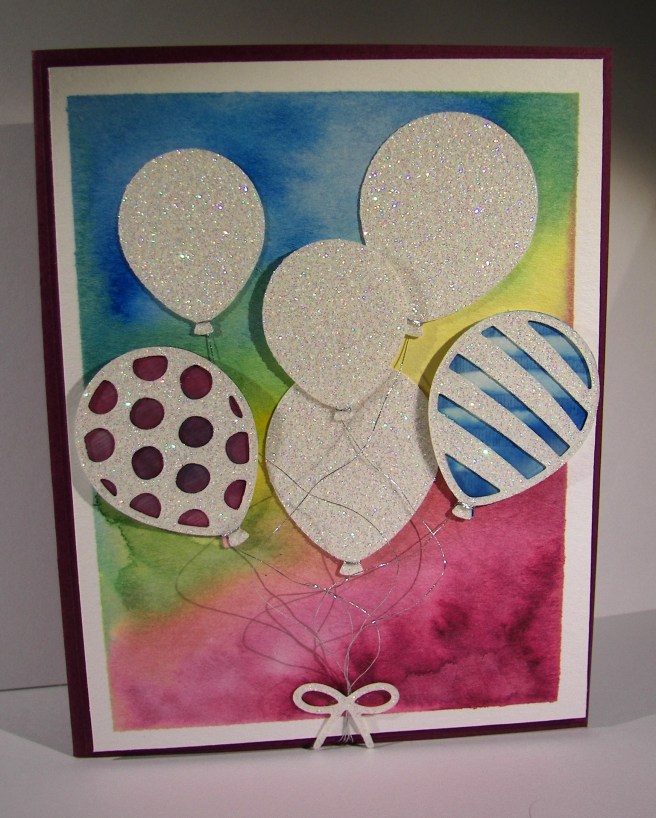
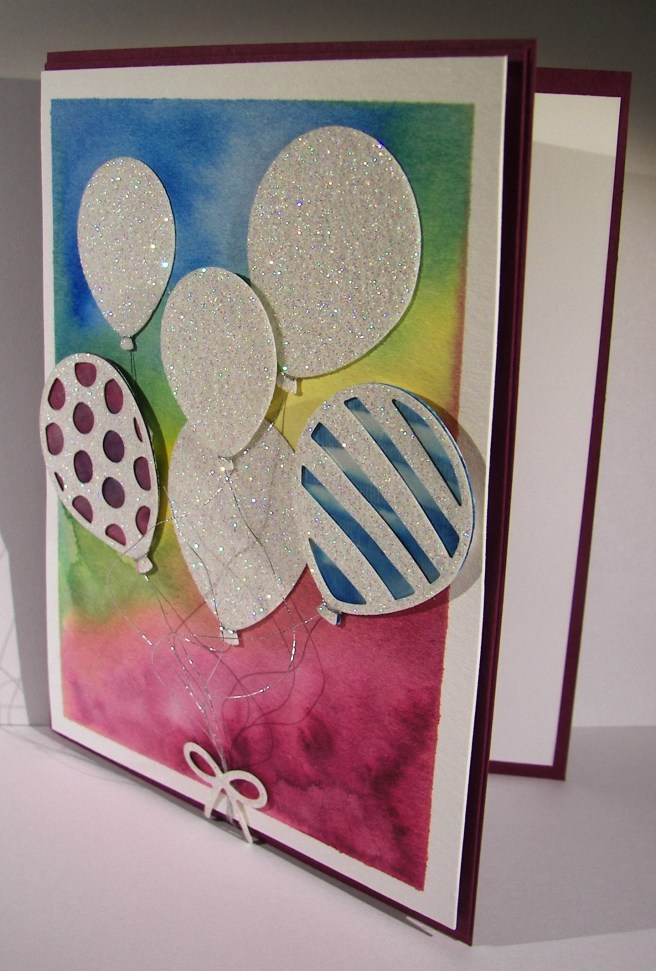
I sat down, picked out five different colors and began a water color background. That has to be one of my favorite activities, just making soft blending colors.  Almost soothing. When it was dried I added the huge floral stamp from the garden in bloom set. Some images were stamped full strength and others stamped off once. I wasn’t quite happy there, so I took it up a notch. I have these awesome guilding flakes that give a really cool embossed look. You brush on glue from a pen, set them on the glue and swirl a stipple brush over that to get rid of the excess.  This time I brushed the glue directly on the stamp, stamped a glue image and then put the flakes on.  It worked out so great!  Can’t wait to do it again.

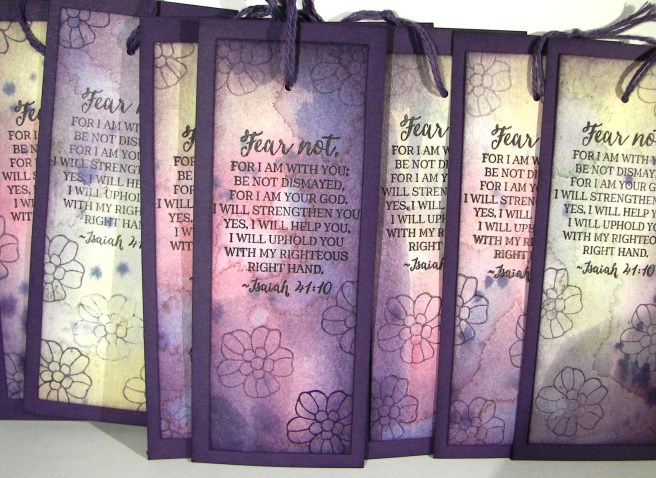
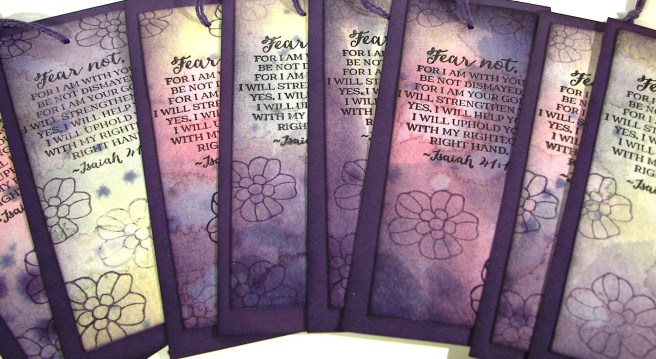
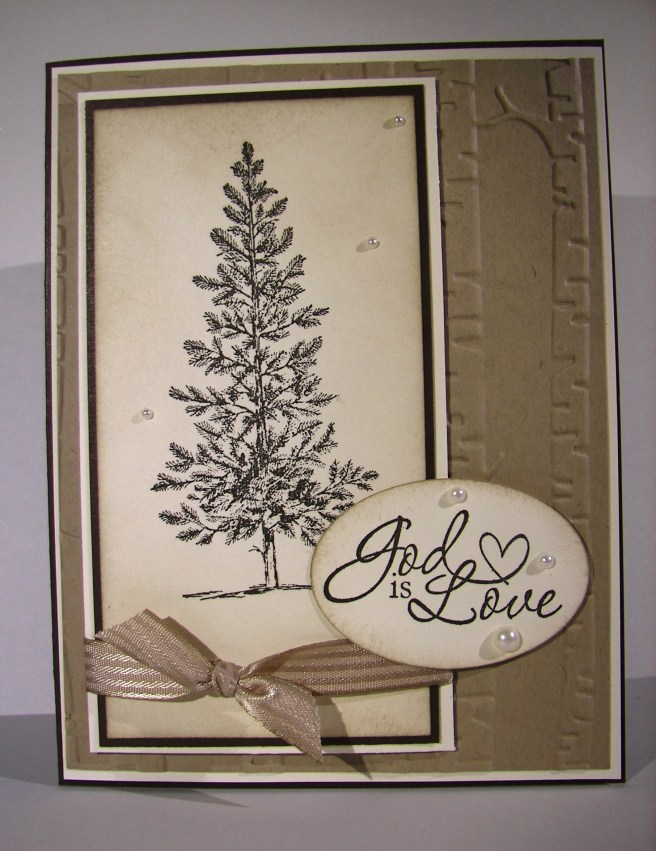
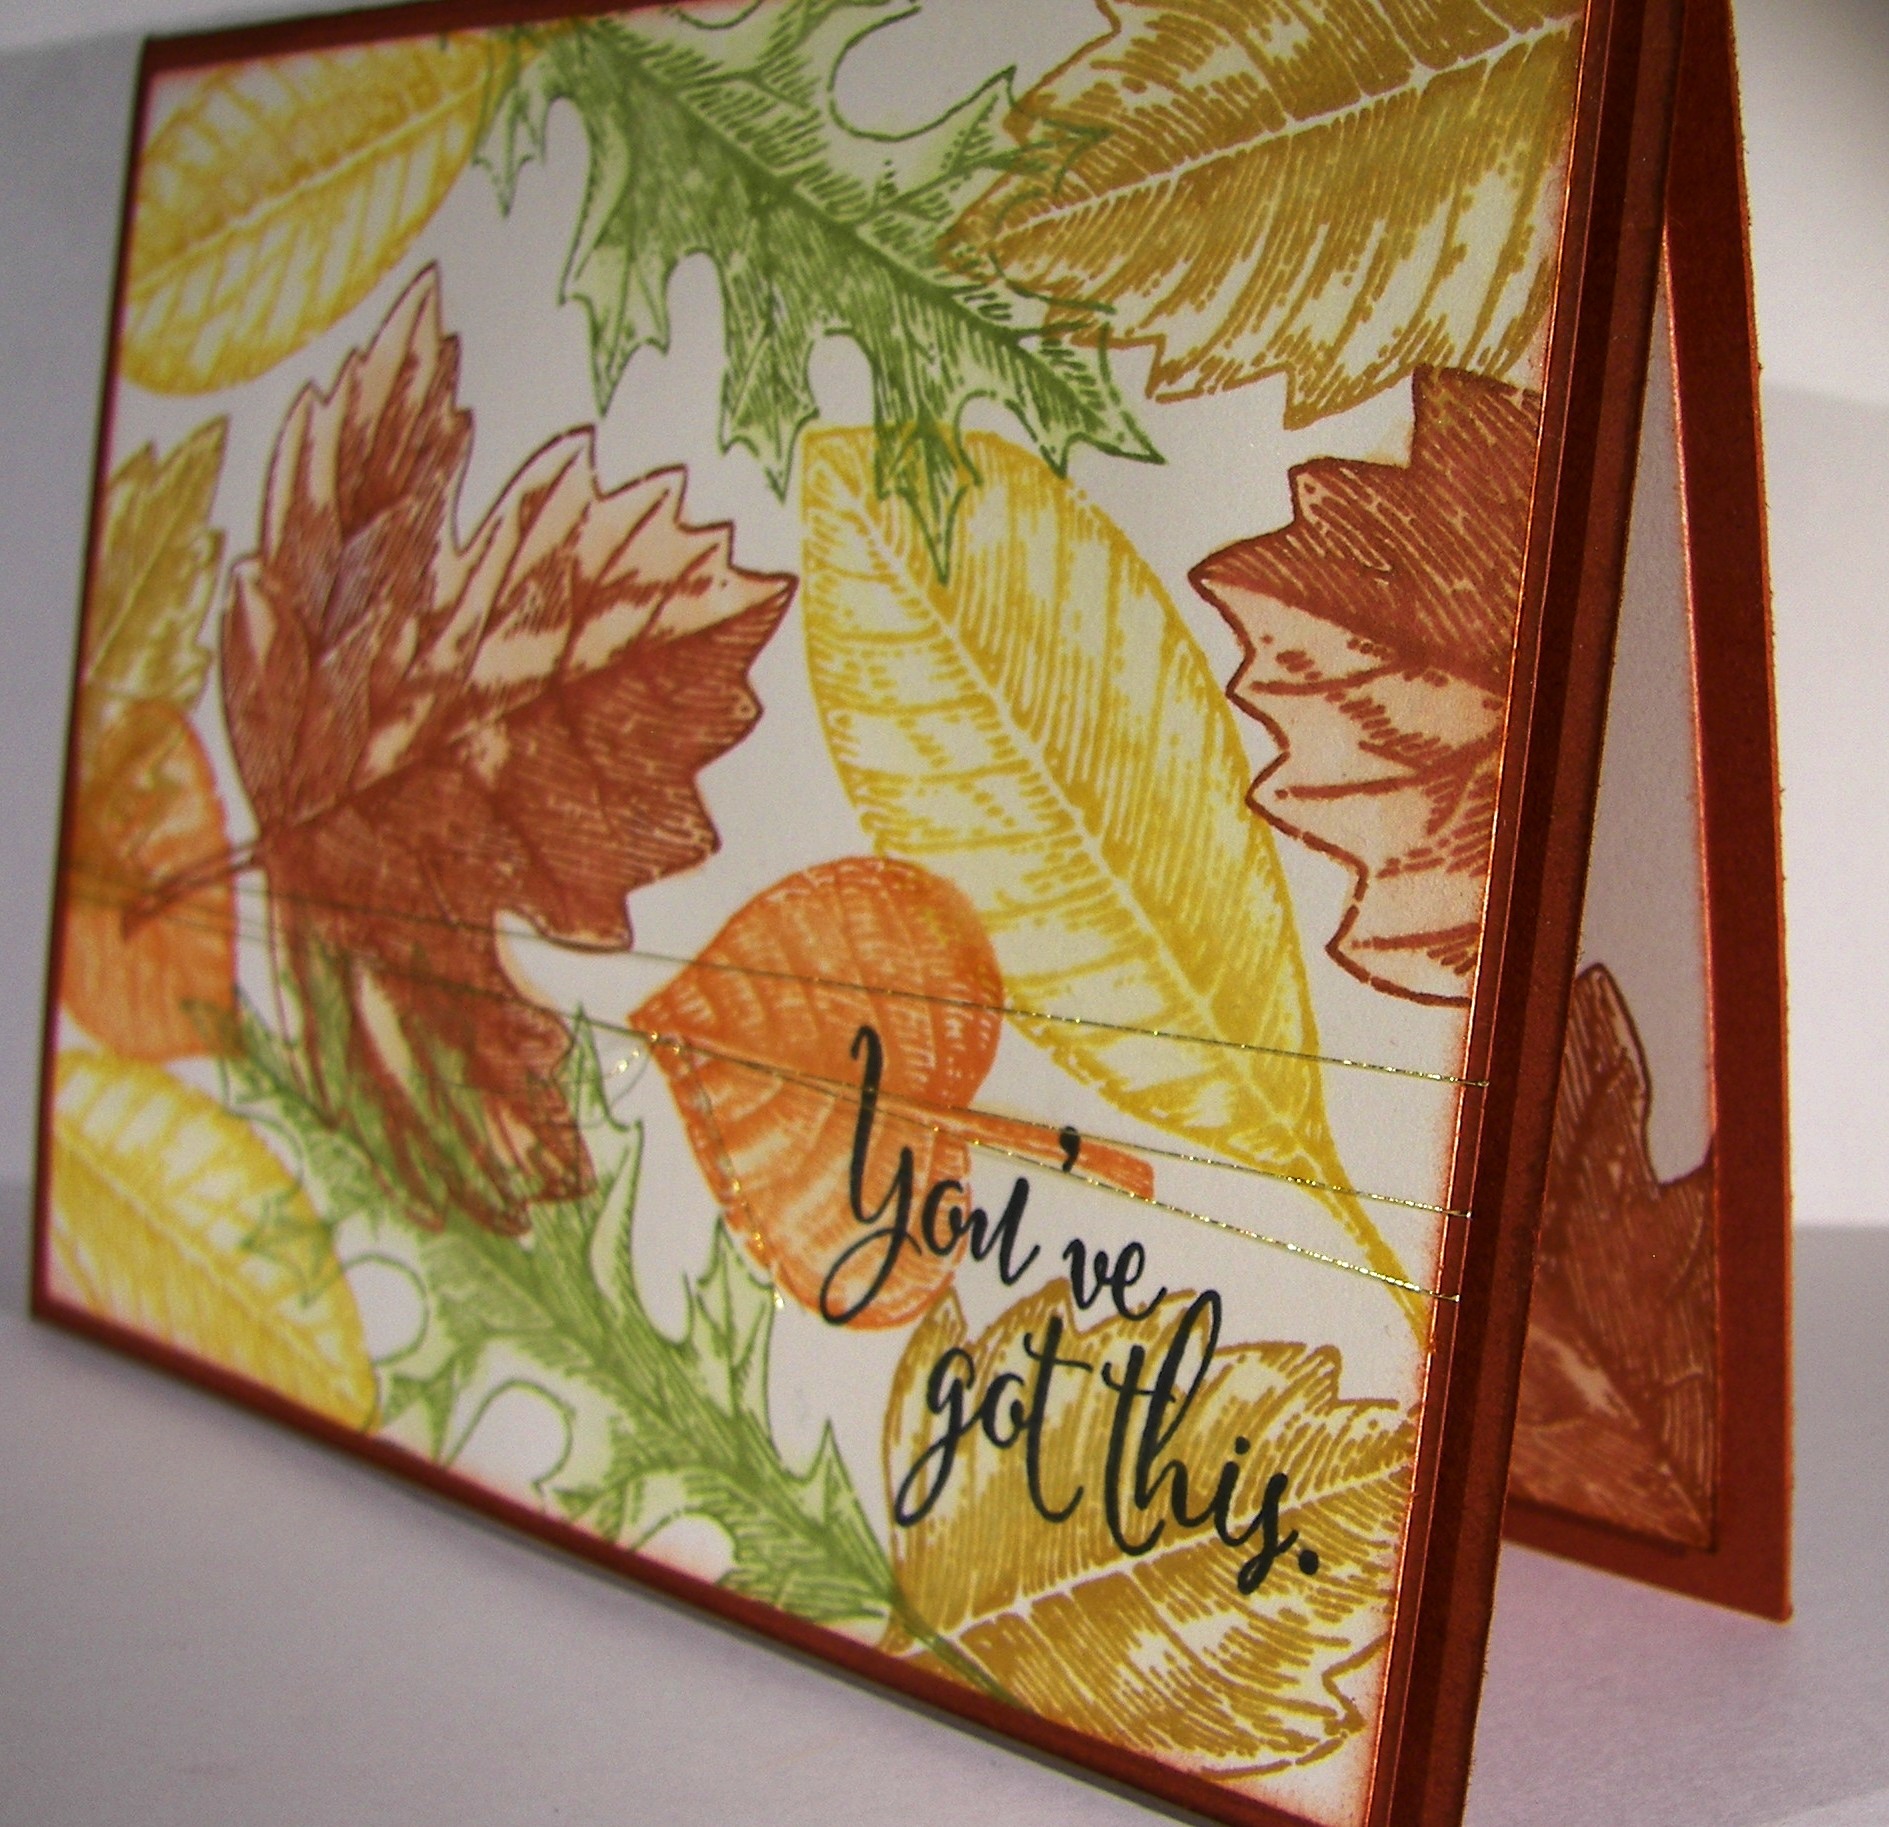
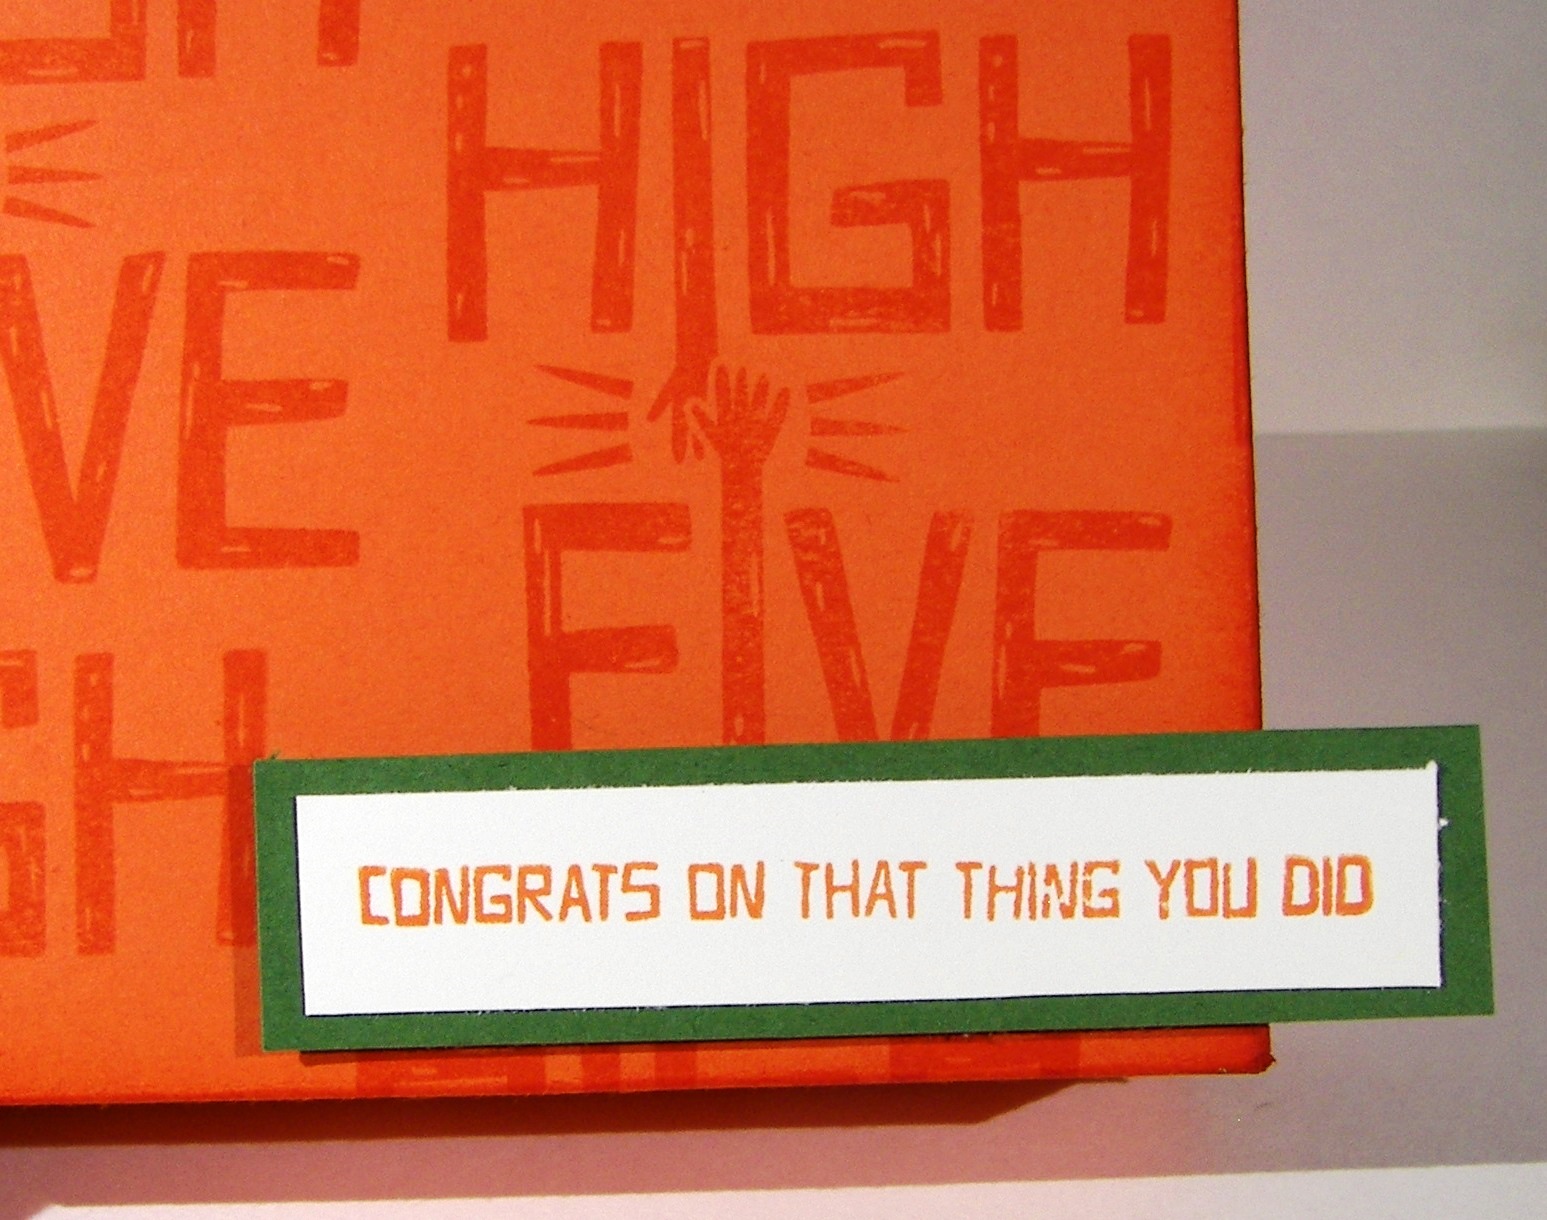
The tag was simply created with water color paper.  I stamped the image, rounded the corners and sponged the edges.  It was a bit stark so I took a light wash of color right over the top.  It blurred the sentiment a bit, but not too much.  A touch of ribbon on the side anchored with metallic thread and I was ready to go.

3-7 (1)

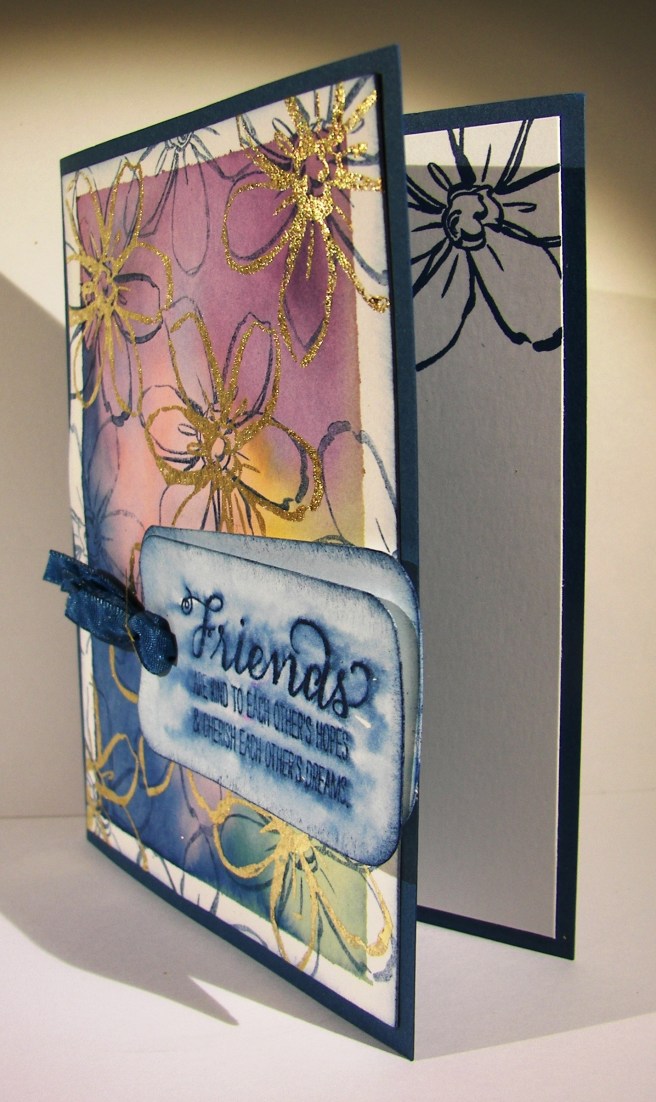
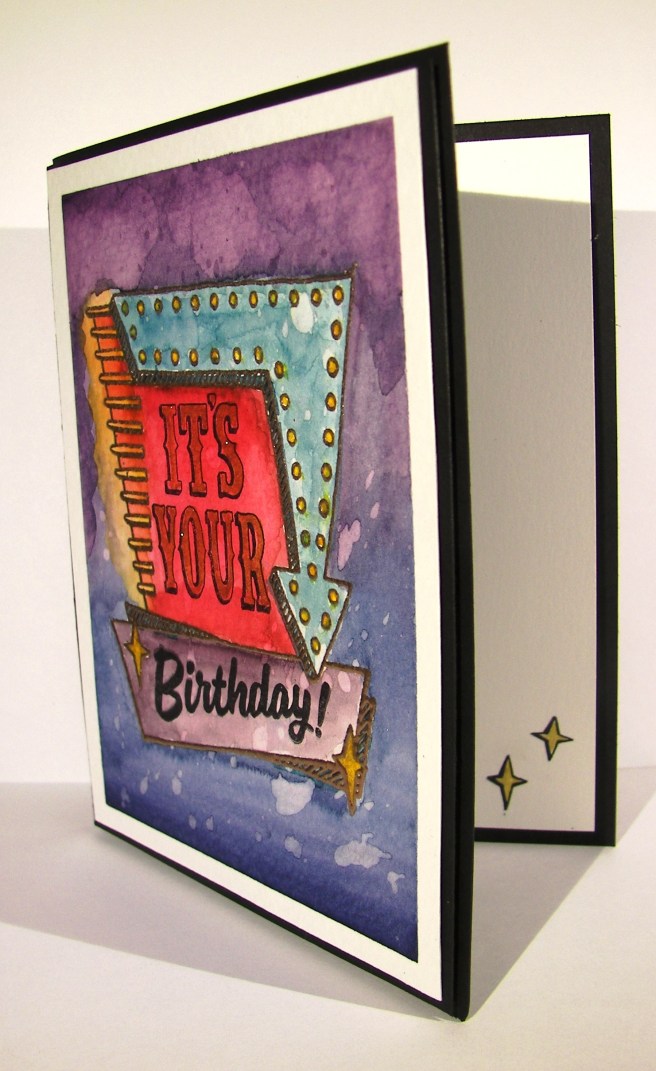
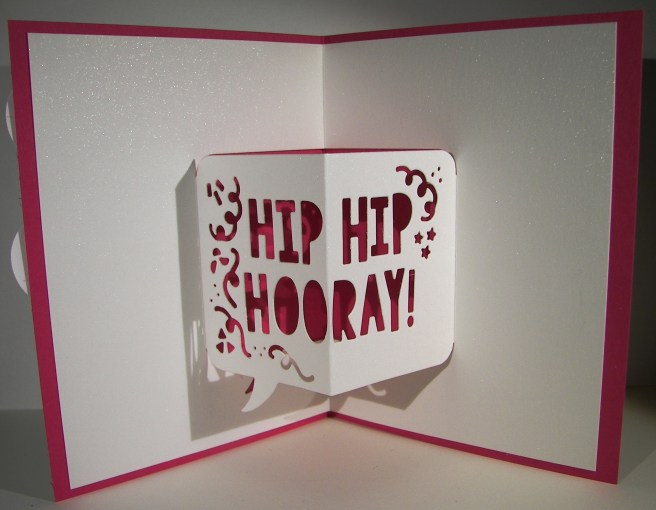
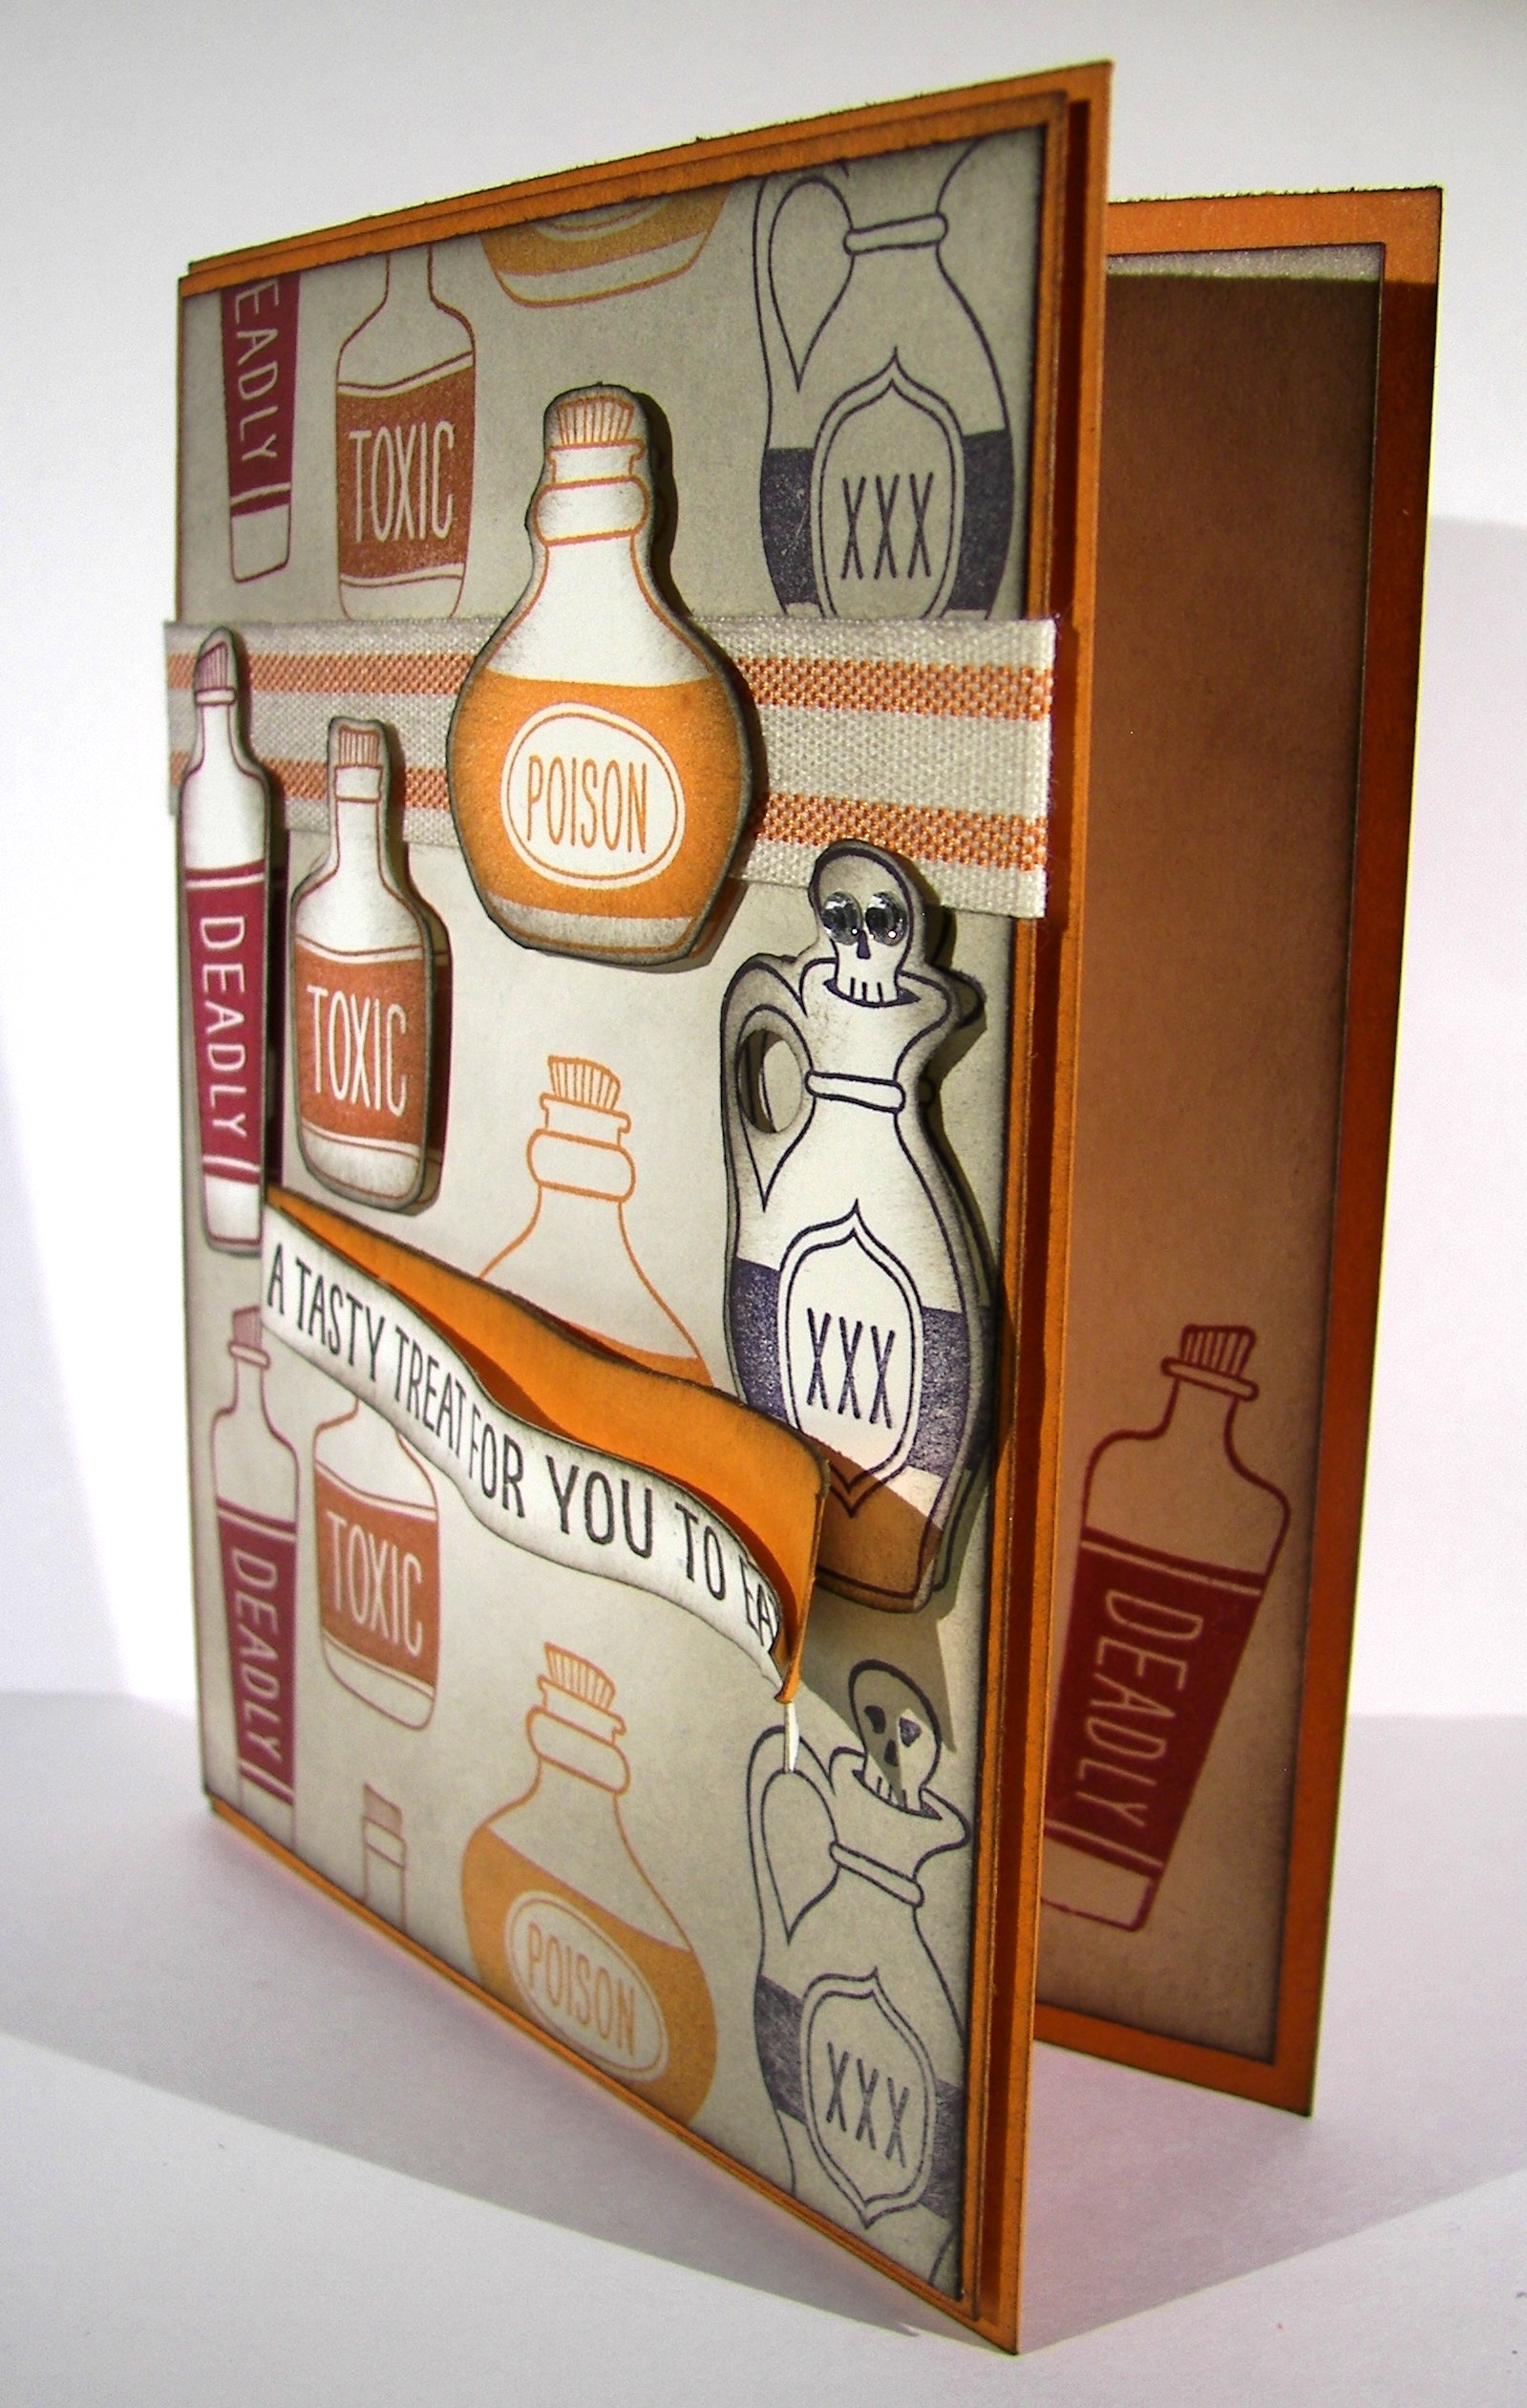
The inside got a bit of echo stamping of course. I nearly always put that in place.  It just ties it all together so nicely.

Have a creative day!

Moana

You’ve Got This

A simple floral card really speaks to me.  Like so often happens, I had started in a different direction with this project, but it took its own way.  I love how it turned out, but I don’t know if I can make it happen like this again.

2-23

The background stamp came from the same set as the flower and sentiment, You’ve Got This. It is supposed to look a little more water colored, or even just painted.  Well, I believe my water color paper acted a bit more like a resist than intended.  I thought about spritzing it to have the color spread more, but decided to leave it until it was time to color the flower.

The flower and sentiment were both stamped with versamark ink and embossed with copper embossing powder.  With the flower I forgot to use a static resist tool and it was very obvious.  I cleaned it up as well as I could without destroying the image, but it still showed my mess.  The sentiment, I remembered and it is super clean.  I did water color the background of the sentiment, but very lightly.

I painted the flower with sweet sugarplum, blushing bride and old olive.  It turned out really lovely.  The odd messy dots of extra embossing really add to it.  That is what I meant by trying to re-create it somehow.  Accidents aren’t always easy to control a second time.

2-23-1

Either way, it turned out quite lovely.  A sweet inspirational card is wonderful to make, but even better to give away.

Have a creative day!

Moana

Balloon Adventures

This is how things look when I am feeling creative, but not sure just which direction to go. No sentiment, hardly a stamp in sight, just pretty flowing color.  That is really so satisfying. This could be for a birthday, but really any celebration would be a good fit.  Balloons are so happy after all.

2-18

The project began with water color paper being masked to a board and spritzed with water lightly.  The rich razzleberry went down first in the bottom corner pretty heavy.  Pacific point was the blue I chose for the opposite corner.  The center section got crushed curry, but I didn’t blend just yet.  I wanted it to kind of mix with the help of water, not my brush so much.  It was nice, but I did push some of the color around to make the green show up more. I would have like a bit more orange to have mixed, but the green kind of took over and I didn’t want the infamous brown to appear.

The balloon bouquet punch and the balloons inside the balloon pop-up thinlits set match perfectly.  I painted a couple of swatches, punched them out and layered them under the thinlit cut balloons.  A bit of layered fun there.  I wanted to go with velum cardstock, but didn’t feel up to the adhesive hiding game.  The glimmer paper is always pretty though.

2-18-1

I used the metallic thread for the balloon strings and loved it!  It was a bit tricky since it isn’t the easiest stuff to work with.  But how it looked wrapped around the bottom of the balloons was too great to not.  There it is!

Have a creative day!

Moana


Avant Garden

My daughter has this cute little app that allows her to ‘grow’ flowers and then ‘send’ them to someone.  I had a lovely bouquet this morning and I thought I would make a card like it. Her flowers actually had orange and yellow together, almost striped like an orchid.  This is what I came up with.  What a fun kind of game, right?

2-15

I used a piece of water color paper to stamp these little flowers.  The set I used is actually a free one with a $50 order during Stampin’Up! Sale-a-bration event.  The flowers went in first, tangerine tango then on to the crushed curry.  The stems were added in next followed by a smattering of leaves.  The stamen were added last using cherry cobbler on the tangerine tango flowers and cajun craze on the crushed curry ones.  I decided to soften the look with a healthy spritzing of water.  It was a slow process because I didn’t want the images to go all wobbly, just soften.  When the paper started to get pretty wet the edges started to blur a bit and I stopped.  This particular paper can hold a lot of water.  So, I had to use my heat tool for a while to get it all dry.  There was a bit of warping, but I liked it.

2-15-1
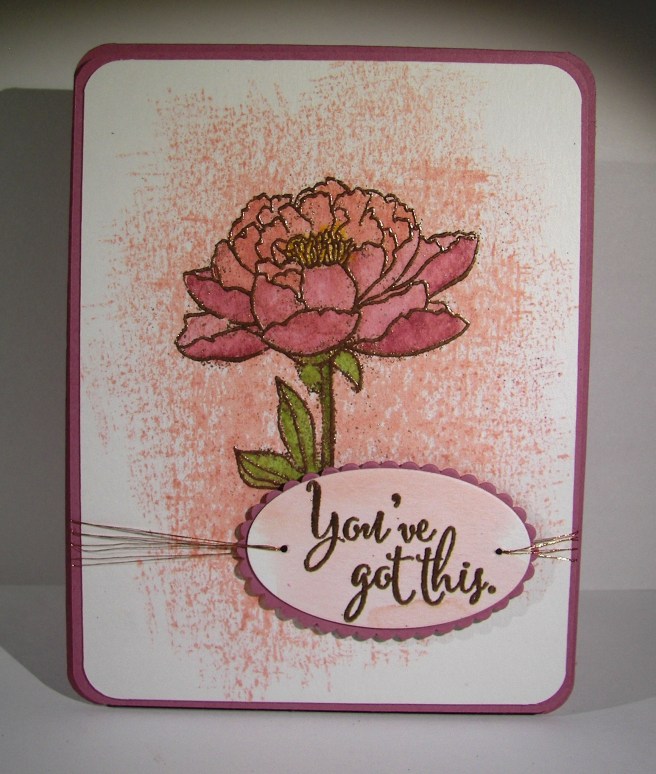
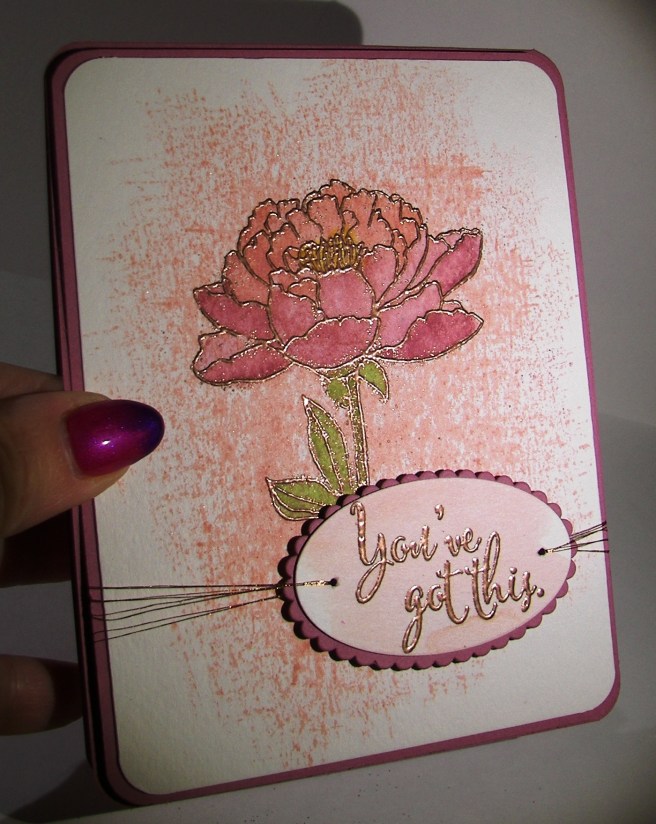
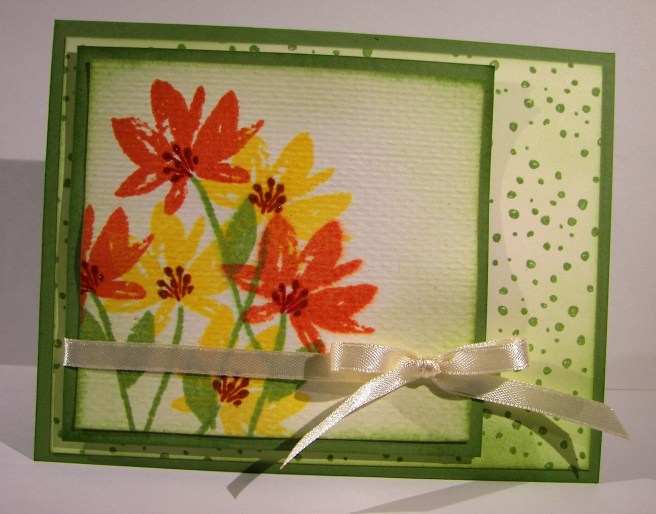
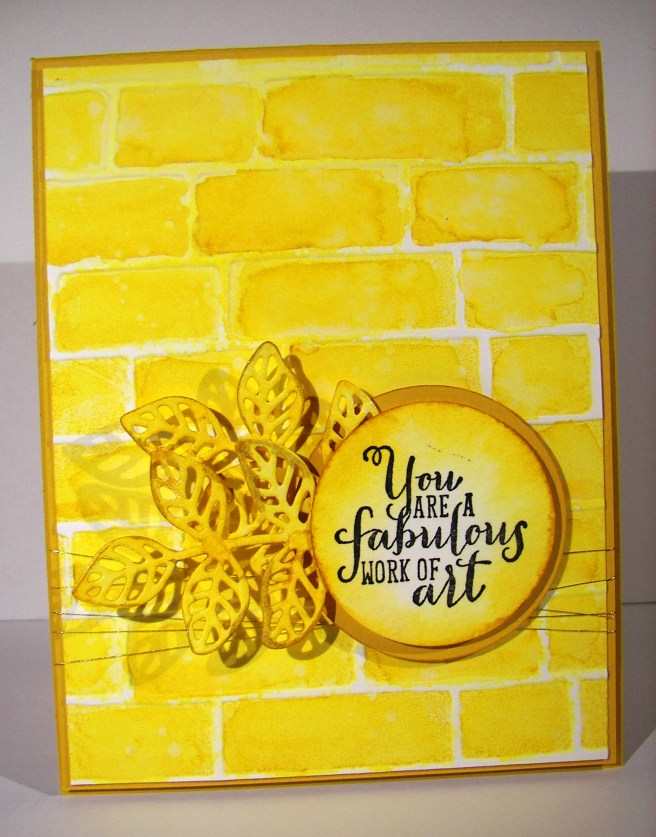
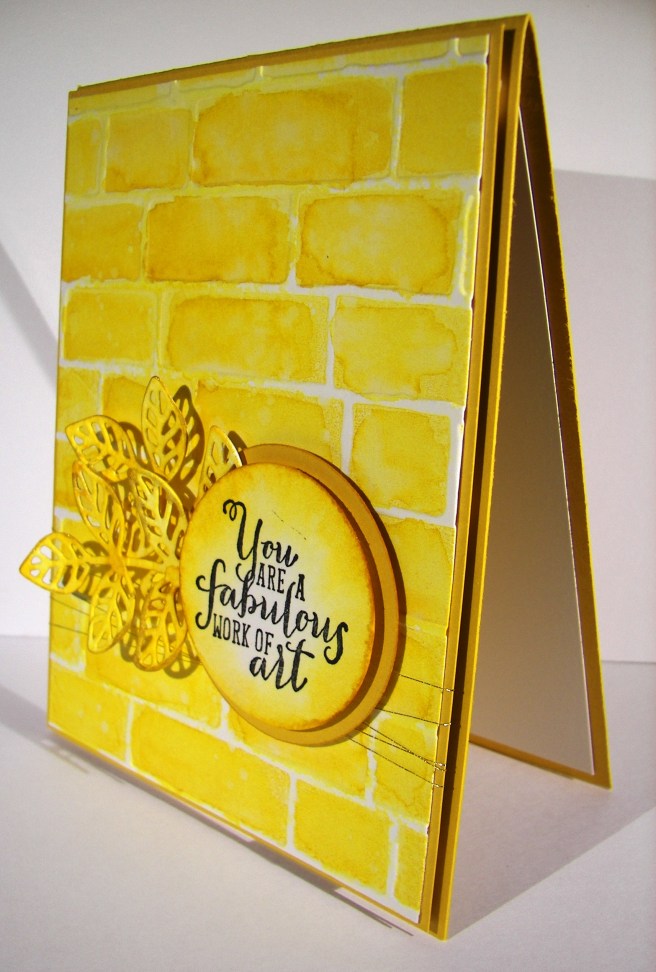
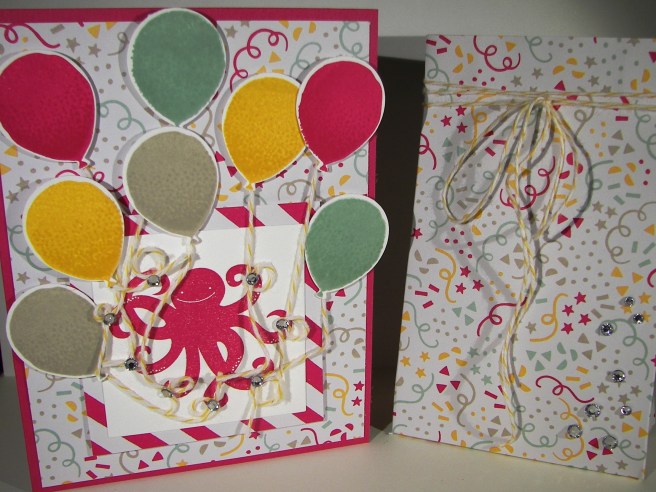
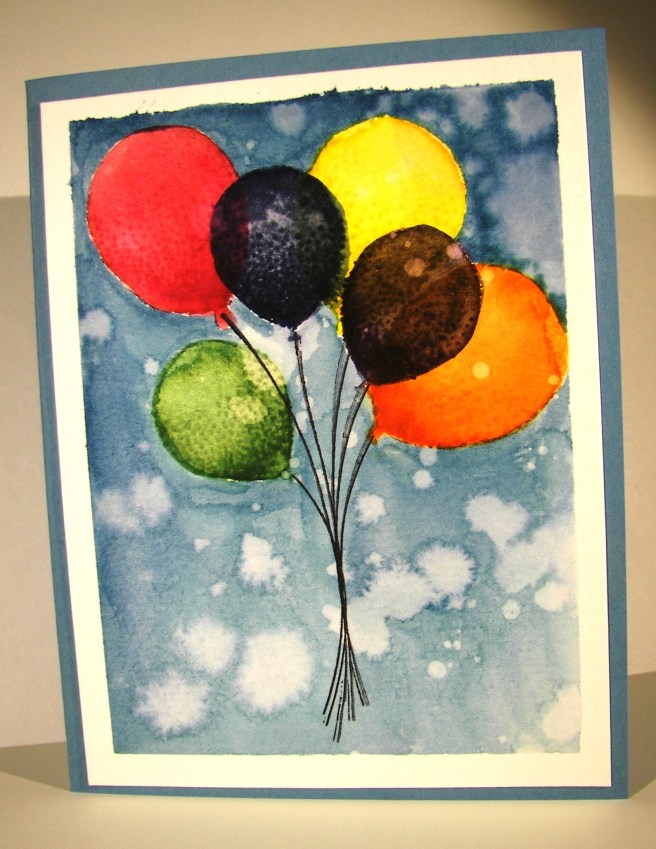
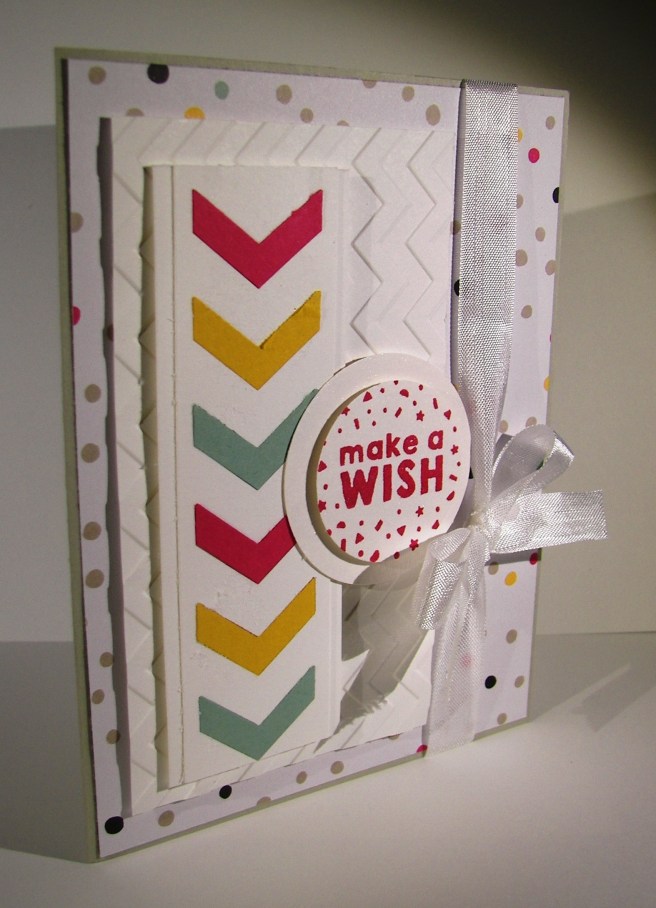
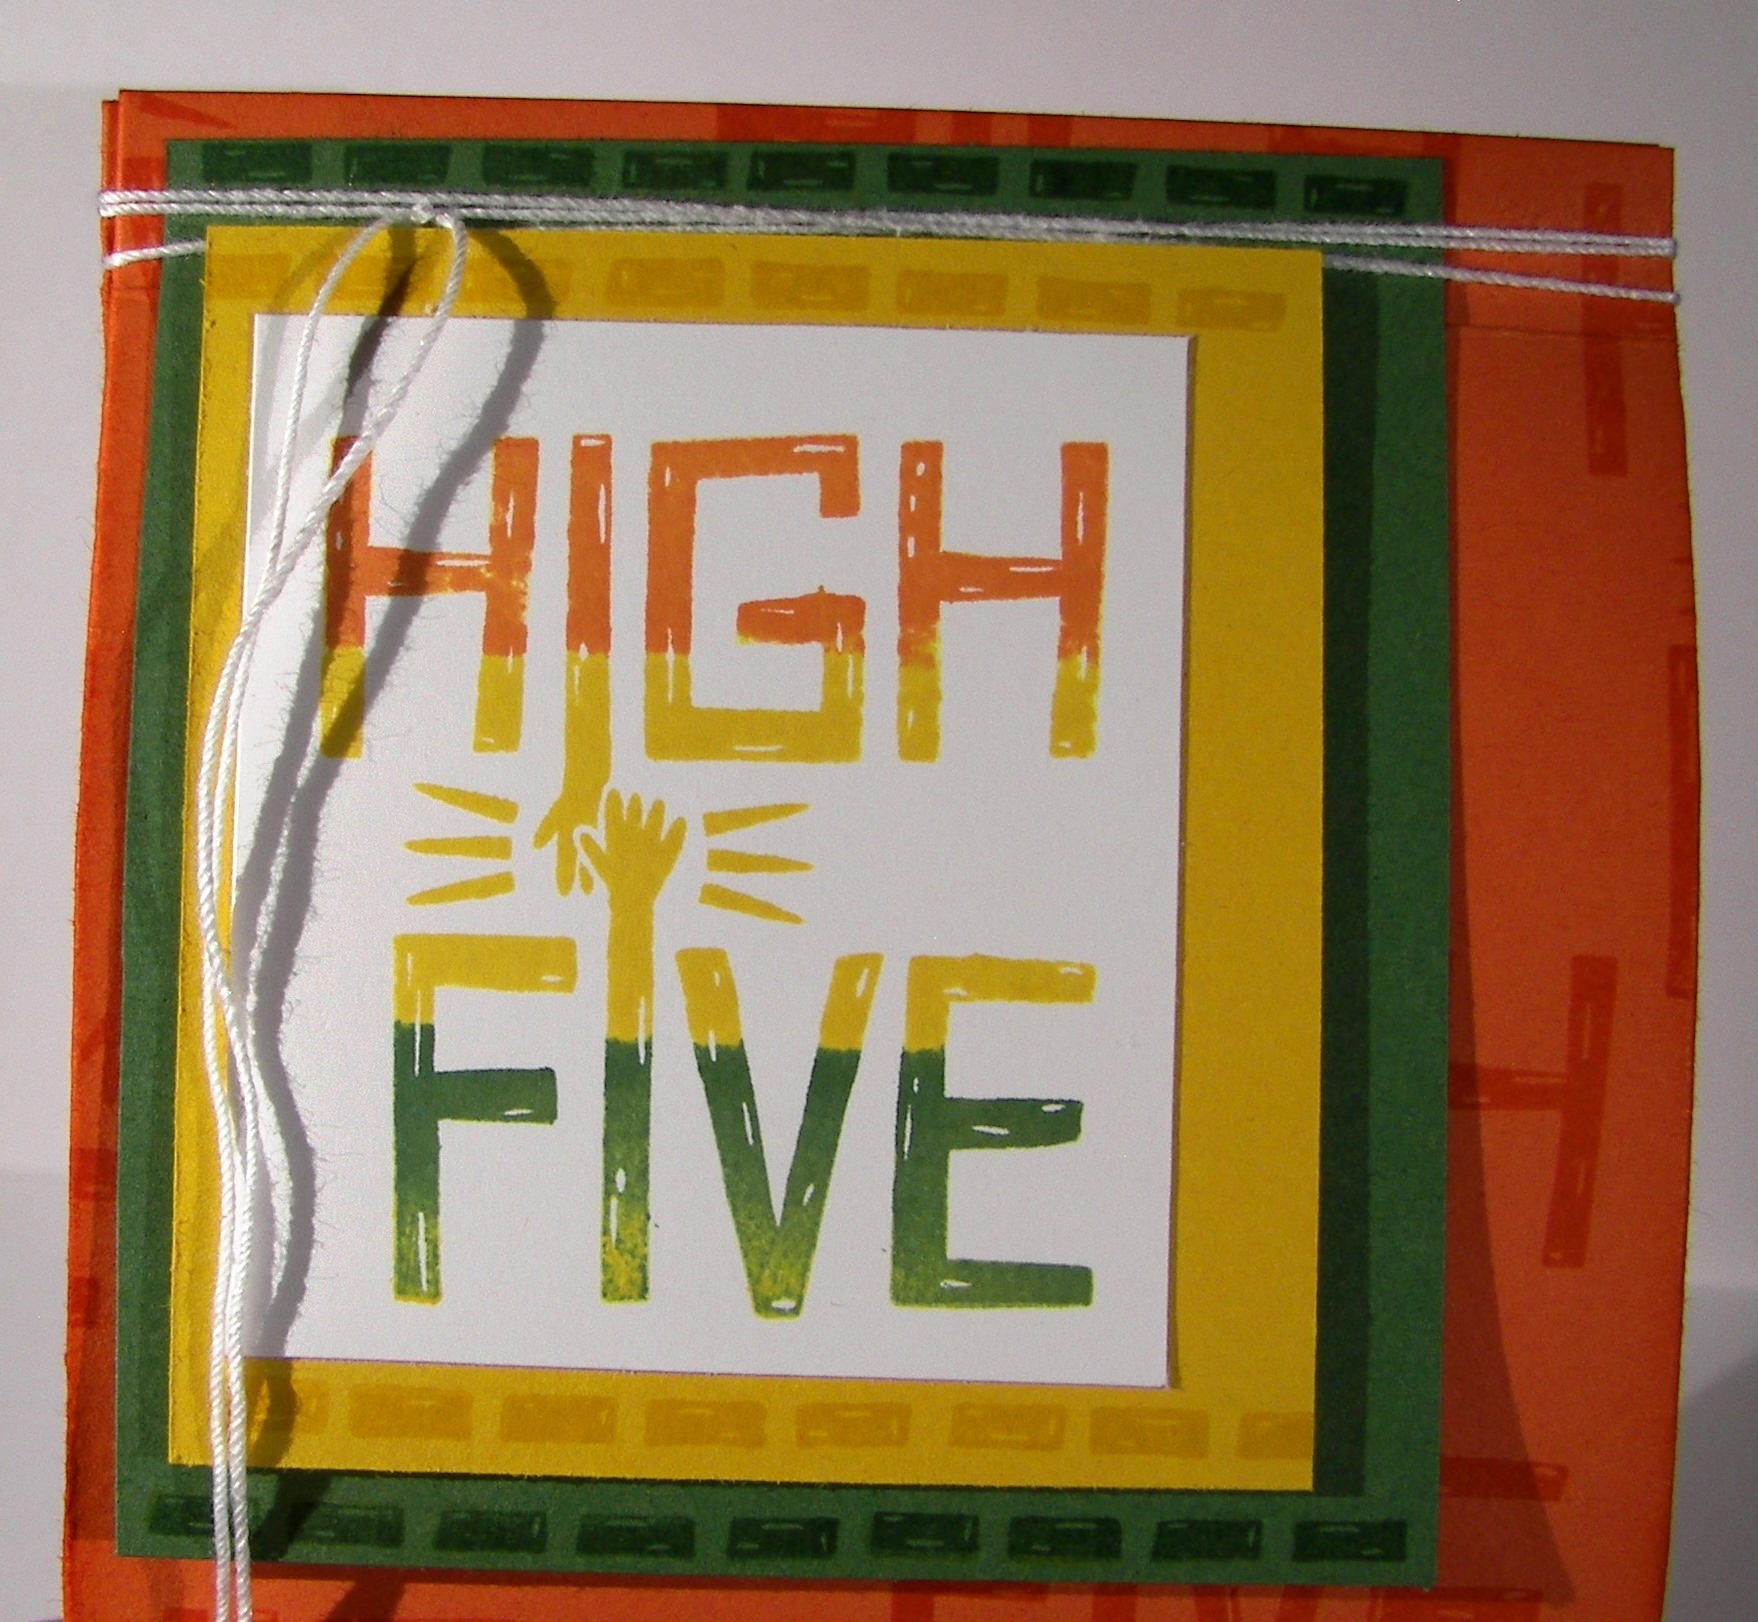
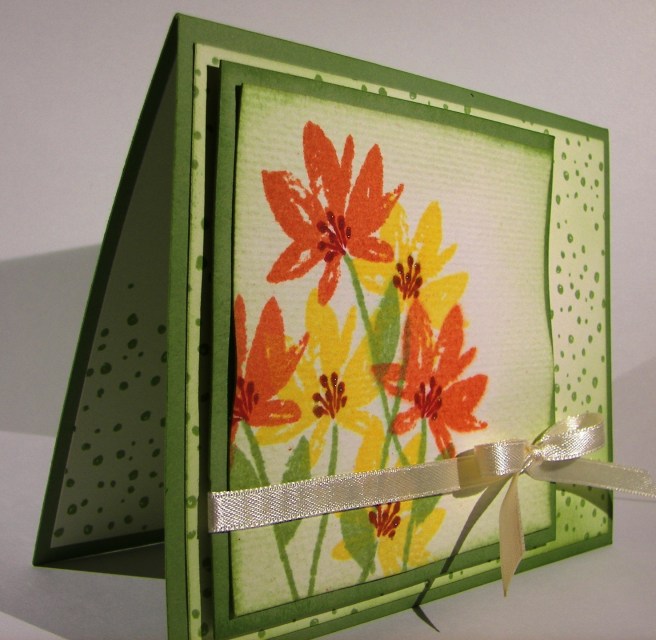
The background, and a bit on the inside, was stamped with the spotted stamp from the same set.  It is random, but has a defined shape to allow filling in the entire space without looking repetitive.  Very nice, very nice indeed.  The front piece was wrapped in some very vanilla satin ribbon and layered up on dimensionals.  The sentiment was left off completely allowing this to be an all occasion card ready to go.
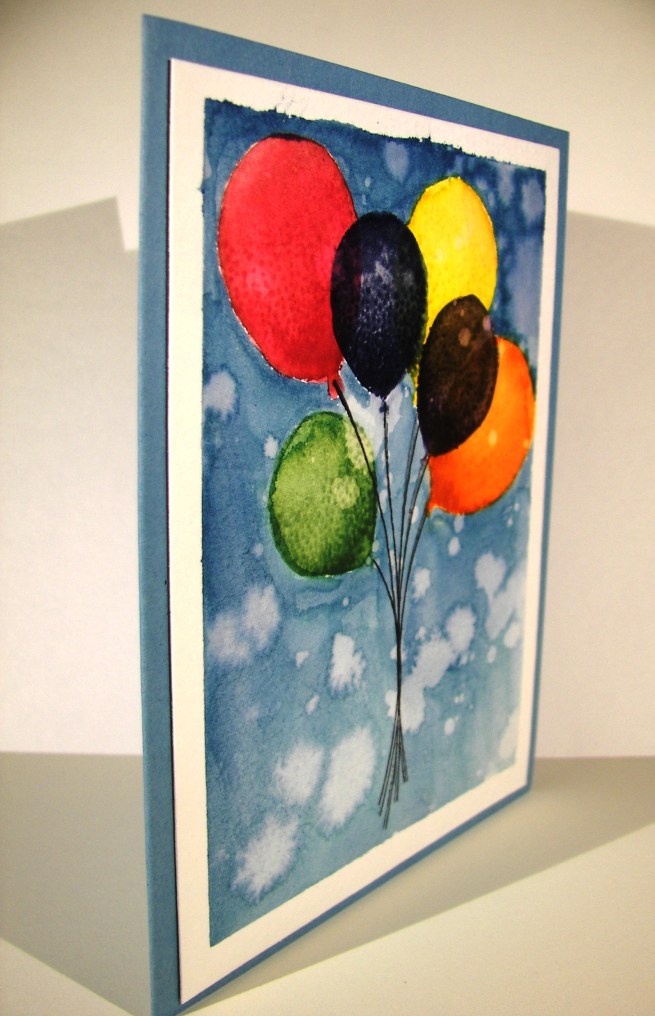
Have a creative day!

Moana

Fear Not My Friend…

When I am wanting to convey more emotion in a card, I go directly to water coloring.  The softness it creates is perfect.  And with this card, I literally poured my heart into it.

8-20

I wanted more space to work with so I created a larger card than normal.  This one measures 5″ x 6.5″.  Big, but not too big.  I also created my inside writing panel at the same time.  This card wasn’t going to just get a blank insert, or even a nicely stamped one. Besides, I love writing on water color paper, so very satisfying.

I stamped my floral image and sentiment first so I could control the strength of color where they were.  Then I brushed the papers with clean water to allow plenty of color movement. I kept the background light and tried to keep mixing to a minimum.  The colors I choose don’t always blend nicely, but that doesn’t stop me.  I dried, distressed a bit, and dried until I was happy.

I painted the flowers with strong color, allowed them to dry clean.  Then worked them over properly.  This included adding, dobbing, and adding color on the flower petals for a bit.  I centered the flowers with a strong yellow, but kept the color from the edge of the flower center.  Then I hit that area with a water spritzer and watched the flower bloom all over again.  The color moved nicely and then was dobbed some more.  Gold wink of stella was brushed into the petals and blended with water again.  The overall effect was lovely.

A special card for a very special friend.  She is far more brave than I can imagine.

8-20 (1)

Have a creative day!

Moana

Thoughtful Branches Thankyou

This card comes from a limited time stamp and framelit bundle.  There are many options within, all kinds of trees and fun things, but this is why I bought mine.  I love hydrangeas so much.  I am so going to enjoy this set.

8-9

I put a new stamp pad to use.  Stampin’Up! has produced a few ombre pads, this one in particular is rich razzleberry.  I am usually a bit more traditional, wanting more self control over the colors I use.  But this was pretty darn fun.  I like how it turned out and I am glad I bought them.  I wanted the color to bleed some, so I spritzed the flower with water after it was die cut.  It softened the color without compromising the ombre effect.

I painted another piece of water color paper with almost artichoke and used the stem die cut.  I didn’t have to add any color afterwards, it turned out nice.  I knew I would be working in water color paper, so I made both flower parts and the card front from the same paper. That way the ink would react the same and have a uniform look.  The background was done with a light wash in crushed curry.  No distressing, just painting.

I stamped the sentiment directly to the card front and called it good.  I did layer it up on another piece of almost artichoke paper for a bit of interest and to help control curling of the card front.

8-9 (1)

Have a creative day!

Moana

Yellow Brick Road

I have gotten a bit lost over the past few days over a different series.  It is a re-telling of The Wizard of OZ, very unique perspective.  It is actually a quite twisted tale of what happens after the story we all know.  Working with middle school aged children gives me permission to read young adult fiction and I must be honest, I love it.  This one is no exception.  Hence my yellow brick road card today.  Book three done, but it continues on…darn!

7-19

Either way, how about this fun, bright and cheery card!  Using my brayer to apply ink to the inside of my embossing folder really makes these bricks interesting.  However, I wanted more, so I distressed as well.  First, I gave the freshly inked paper a hearty spritz with water.  That got the ink moving nicely.  I knew I was going to work this over a bit, so I did start out with water color paper, quite necessary.  I added more ink with my aqua painter all around the bricks, sponged off with a tissue to lighten areas, then dripped water all around and dabbed to remove ink too.  Great look here at the end.

I also had a bit of fun with the tag.  I stamped and punched my sentiment on water color paper.  I then liberally rolled the edges and in a bit too in the ink pad.  Then I spritzed it too. That caused the ink to move to the middle, but not all of the way.  So much fun.  The leaf die cuts were smushed in the ink pad too and then spritzed as well.  Everything got the same kind of treatment.  It allowed a different but connected look for all of the elements.  Wheee!

7-19 (1)

Have a creative day!

Moana

Fear Not

This was something new for me.  I knew I wanted to have water colored bookmarks, but thought it would be smarter to make one large background piece and then trim it down to the sizes I needed.  Such a large piece of blank paper.  It was a bit overwhelming for some time.  Like the stamp says, fear not.

7-17 (1)

After a while I felt a little more comfortable, but not all the way there.  Distressing such a large piece was kind of confusing.  I stuck with it, dried it and took it to the cutting board. When they were smaller I knew they would be wonderful.  The edges got a gentle sponging along with light stamping from the same set.

Then a quick layering on elegant eggplant cardstock, the main color I painted with, and some new solid bakers twine to coordinate and it was all done.  These will be wonderful to share with the young women I teach.  Love those girls.

7-17 (2)

Have a creative day!

Moana

It’s Your Birthday

Do you broadcast your birthday or not?  Well, I think birthdays should always be celebrated, even if you like it small, celebrate.  This is the kind of card that can certainly draw attention and that is totally what I had in mind.

7-1

The stamp set has the marquee image by itself and has different sentiments you can put inside the middle as well as the bottom arrow box.  It doesn’t have to be about a birthday, but that is how I chose to use it for the first time.  I kind of muddled through this project since I only knew I wanted to use embossing powder and a black card base.  Leaves a lot of steps to be followed, even if a bit off.

Most if the projects I have seen with this particular stamp set include stamping the image on different colored card stock papers, cutting the different parts out and then layering them to give a little diversity.  I wasn’t in the mood for that, so I went with my trusty water coloring.  I am not used to coloring around an image so specifically, but it all worked out pretty good in the end.

7-1 (1)

Touches of wink of stella helped make it the rest of the way, even though it is hard to see in the photo here.  Projects always look better in real life rather than photos, but what else can you do, right?

Have a creative day!

Moana

God is Love

A quick stroll through my scrap pile kits and I found this treasure.  I swapped out the embossing folder and stamp sets and came up with something wonderful.  Before it was a different nature scene with a sympathy sentiment.  I like this one too.

5-26

The Trust God stamp set has finally reached retirement.  I cannot tell you how many times I have used this particular set.  This, along with yesterday’s Swallowtail, will join the special shelving unit of stay with me stamps.  I couldn’t part with it.  The new catalog has a couple of sets that are very nice, but in my opinion, won’t be replacing this one.

The tree was stamped in the center with early espresso and sponged with crumb cake.  That is the same treatment for the sentiment, which was punched with the also retiring extra large oval punch.  Dang, I am going to miss that one too.   I do enjoy trying new things, especially when it challenges my crafting.  Plenty of dimensionals and a touch of basic pearls finished this card off.

5-26 (1)

Have a creative day!

Moana

Farewell Swallowtail

I have loved this stamp for so long.  It is sad to say that it will retire at the end of this month.  However, there is a stash of stash of retired stamps that I cannot part with.  This is definitely going to join those.  Other retired ones I sell off, but ones that are just too wonderful get to stay out with the current product.  Kind of like a wise old tree.

5-25

The butterfly was stamped on a piece of masked water color paper in black stazon.  The color pallet was different, but intentional.  I picked colors that would create interesting blends with the idea that none of the original painting would  stay to true color.  A lot of blending went on here.  I painted coordinating sections first without blending.  After I added crushed curry I kept with that color and used it to begin blending the edges the color sections.  I just did that until I was happy.

The background was painted in mint macaron, darker to one side trying to create a bit of a shadow.  Distressing had to happen here and boy did it.  I flicked water, dabbed it up, and repeated that process again until I was satisfied.  Then the gold wink of stella pen went to work in a few areas.  Again, hard to see, but it is there.  Use your imagination, where would you have painted light lines of gold glitter?

5-25 (1)

Have a creative day!

Moana

Sea Street Pop-Up Party

A super happy birthday would be coming your way with this adorable gift set.  I suppose it might be more inclined towards a child, but I have a great appreciation for cuteness, and this is definitely cute.

5-13

I started out with the idea of this octopus holding eight balloons.  I suppose I should have used the bitty balloon punch, but I stayed with it.  Perhaps I will make it again to see how it would look.  I thought the small balloons would get lost in the fun background paper.

5-13(3)

The inside framelit action really makes a statement.  Even though it is in the middle, there is still plenty of room to write a personal message.  I do love the motion of the popup.  I had a large piece of paper left from the card background and went with a matching gift bag. If you are giving a birthday card, odds are you are giving a gift too.  Making a set is always my favorite thing.  It also helps me be brave and use up my designer series paper.  You can’t hang onto that too long you know.

5-13 (1)

Have a creative day!

Moana

Brushstrokes Through a Garden In Bloom

The ‘Brushstrokes’ background stamp finally made its way into my collection and I am wondering why I waited so long.  This project reminds me of a summer picnic.  The red checked table cloth, I think we have all had one at one time or another.

5-12 (1)

I stamped vertically and then horizontally with real red on water color paper.  I did tape it off first to give me the extra border I love so much.  The flowers and butterflies were stamped in black stazon and followed with the second step stamps to fill them in. Additional painting was done to sharpen the color some and touches of silver got in as well.

I used half a sheet of cardstock for the card base and couldn’t leave the other half just sitting there, so I made a tiny box to go along.  The black butterflies were stamped with the same set and I scored each panel measuring 7/8″ and topped it with a baby bow.  Adorable. Now another set can be added to the donation collection for Saturdays scouting fundraiser.

5-12

Have a creative day!

Moana


Balloon Celebration

Experimenting with water coloring has become one of my new favorite things to do.  I am so young in this medium that it is a constant adventure.  I do try not to do it all of the time, but it might just be my favorite.  Hard to put that off.

3-18

I did stamp off the balloons twice before they got to the card front.  I wanted dark color, but still opaque.  It worked nicely.  The second layer stamping was done only stamped off once to make sure it was seen well.  Also a good fit.  I did go over the balloons again with the aqua painter to smooth things out.  A bit of dabbing with a paper towel helped to create better highlight spots.  Fun and fun. I am still waiting for the back-ordered balloon punch, so I had to layer the balloons with just ink.  That is why I had them opaque.  To allow the layering to show the balloons behind, just like it would with a real bouquet of balloons.  I do think this card is good for just about anyone’s birthday, masculine too.  A really great project that was satisfying on so many levels.

3-18 (1)

Have a creative day!

Moana

Celebrate Today

My computer went on a two day holiday, without permission I might add.  This little treasure has been waiting for you to see for three days now.  Oh well, here it is.

101_1155

This pop-up framelit is just the best.  I do love the balloons, but opening and closing this card is just too fun.  Nothing says happy like a traditional birthday card.  You can actually see a bit of the shimmer cardstock below, it really is so sparkly.

Since I have had some computer frustration lately, I am really not in the mood to sit here and explain all of the details in this particular project.  Sorry, but there you go.

101_1156

Have a creative day!

Moana

Party Wishes

How about a second workshop to fit into one host party!  Sounds like a great plan to me. Not everyone can make it to one date, so why not have to events and wrap it into one big workshop order.  That is one large bundle of host benefits, let me tell you.

2-5 (2)

This card was kind of custom designed with a twist.  It was with the elements included which came together as its own kind of challenge.  The request was seeing embossing folder work, fun ways to use the chevron punch, paper piecing and birthdays.  I think this one is a win!

The chevron punch really makes this one special.  The initial punching was done twice on a strip of heavy weight card stock to create the spaces.  Secondary punching was done in different colors to create the insert pieces.  Two of each color and what a neat design element, right?  I do love a good challenge and the great feeling when your vision turns into the creation, the way you hoped it would.

How about these tiny balloons inside?  Yes, I could just die of cuteness.  I stamped the string, stamped tone on tone for the balloons and then punched them out.  I stuck them down with a touch of tombo and joy was achieved.  I would love to get this card for my birthday, wouldn’t you?

2-5 (1)

Have a creative day!

Moana

It’s My Party

What kind of chatter do you need to say anything about a suite that speaks so much for itself?  The paper stack is huge and full of so many great patterns.  Bright, fun and exciting.  Just like any birthday celebration should be.

It's My Party

How about this bitty balloon punch?  It comes in a trio along with a tiny candle and a cupcake.  They are so sweet.  This stamp set is going to get a lot of use for sure.  Birthdays are going to happen, so why not have a diverse stamp set to give plenty of options, right?  I used glue dots under the balloons and bakers twine to keep them in place.  They were just a bit too tiny for dimensionals and I knew the glue dots would hang on to the twine better.

It's My Party

Have a creative day!

Moana

Vintage Leaves, All Through My Yard

The weather has finally changed and I love the color change that follows.  Looking out my window I can see trees with leaves in all of these colors.  Just so lovely this time of year.

Vintage Leaves, All Through My Yard

This stamp set lets you create leaf images that have so much texture and the play of light across them.  How fun and validating is that.  Becoming the artist without knowing how to be.

Vintage Leaves, All Through My Yard

I stamped the leaves in different colors starting from light colors to darkest.  I had started with a different intention, but it didn’t work out.  I stuck with my background as the focal point and just enjoyed water coloring it.  It went together rather quickly.  A few simple layers, very light sponging, and a gentle wrap of gold metallic thread for an accent.  I love this kind of creative fun.

Vintage Leaves, All Through My Yard

Have a creative day!

Moana

Sweet Hauntings

I was pretty darn excited to get this stamp set and even more to put it to work.  These bottles, they really make me laugh!  I normally don’t purchase Halloween sets because of the limits of use.  This one, I know I will be having fun with it all year long.

Sweet Hauntings

Picking the color pallet was the easy part, some of my favorites for sure.  I love fall and all of the colors that live there.  Creating my own patterns for background paper is one of my favorite parts.  I would love this in whole sheets.  Hmmmmm, perhaps that will be a fun activity later on.  I stamped each bottle again so they could be fussy cut and layered up.  Those fun little bottles, love them!

 Sweet Hauntings

Lots of sponging on the vanilla paper.  Early espresso gives a great vintage look, which is just what I needed.  I sponged everything, lots, even the ribbon.  It gave it  a great grungy look.  I did echo stamping on the inside as well, can’t get enough of these bottles.  Did you notice the tiny little rhinestones I put on the skull bottle stopper?  Way beyond fun!

Sweet Hauntings

Have a creative day!

Moana

High Five – That Thing You Did

Yesterday was full of excitement at an adventure park.  I am not so brave, but I do try some because my husband loves them.  I went on my two favorite ones, twice, so I get a big high five!

High Five - That Thing You Did

It may not sound like much, but there are times when I don’t ride anything, so this is improvement.  But, I was pretty darn tired this morning and didn’t feel like creating much.  I was snapchatting my daughter at university and asked her for some help.  These were her color choices.  It was an enthusiastic choice, just like riding a roller coaster.

High Five - That Thing You Did

I used a full sheet of tangerine tango to make this bag.  My scoring measurements were 1 1/4″ and 4″ then repeat to leave a 1/2″ edge.  I scored the bottom at 1 1/4″ to match the sides and did 1/2″ at the top for easy closure.  Quick burnishing and folding put this large bag together.

High Five - That Thing You Did

I stamped the bag tone on tone using the matching tangerine tango ink.  The sentiment was stamped first in crushed curry, then since the other colors were darker and could handle it, I stamped over one edge in garden green and the other edge in tangerine tango.  It gave a really cool look I think.

A fun bag for a fun person I would think.  Now, to figure out just who needs it.

Have a creative day!

Moana