Hello Love

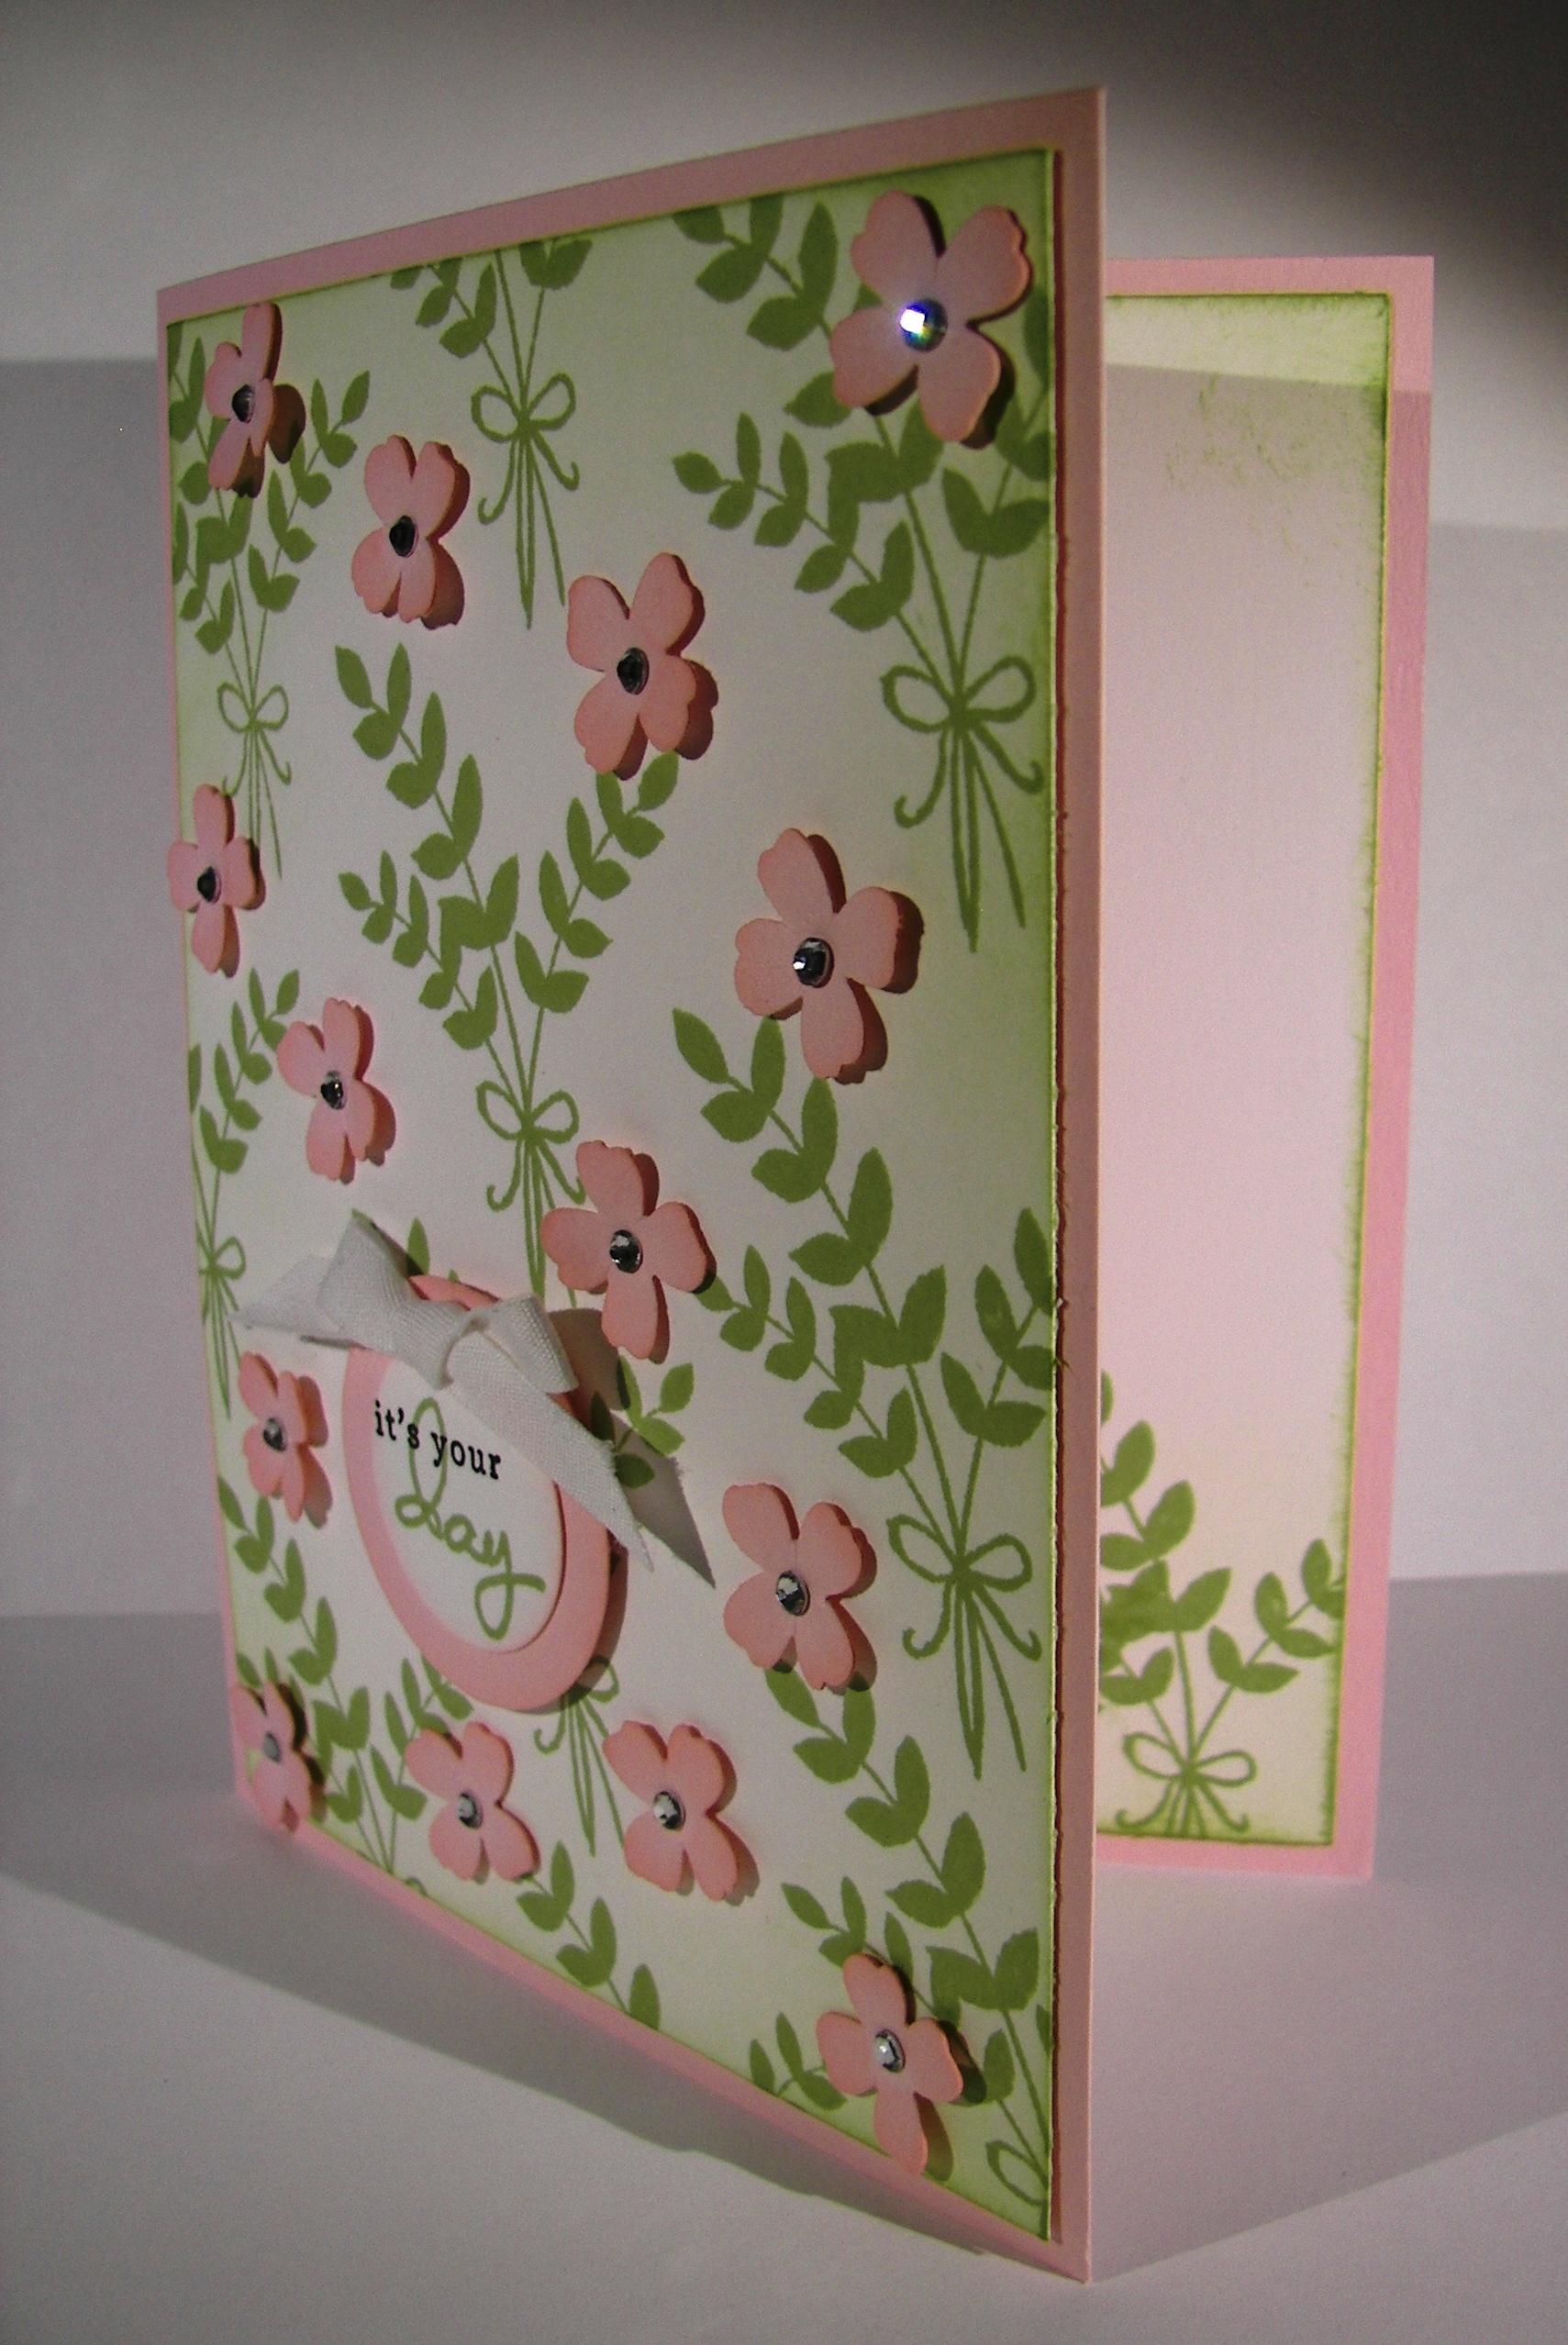
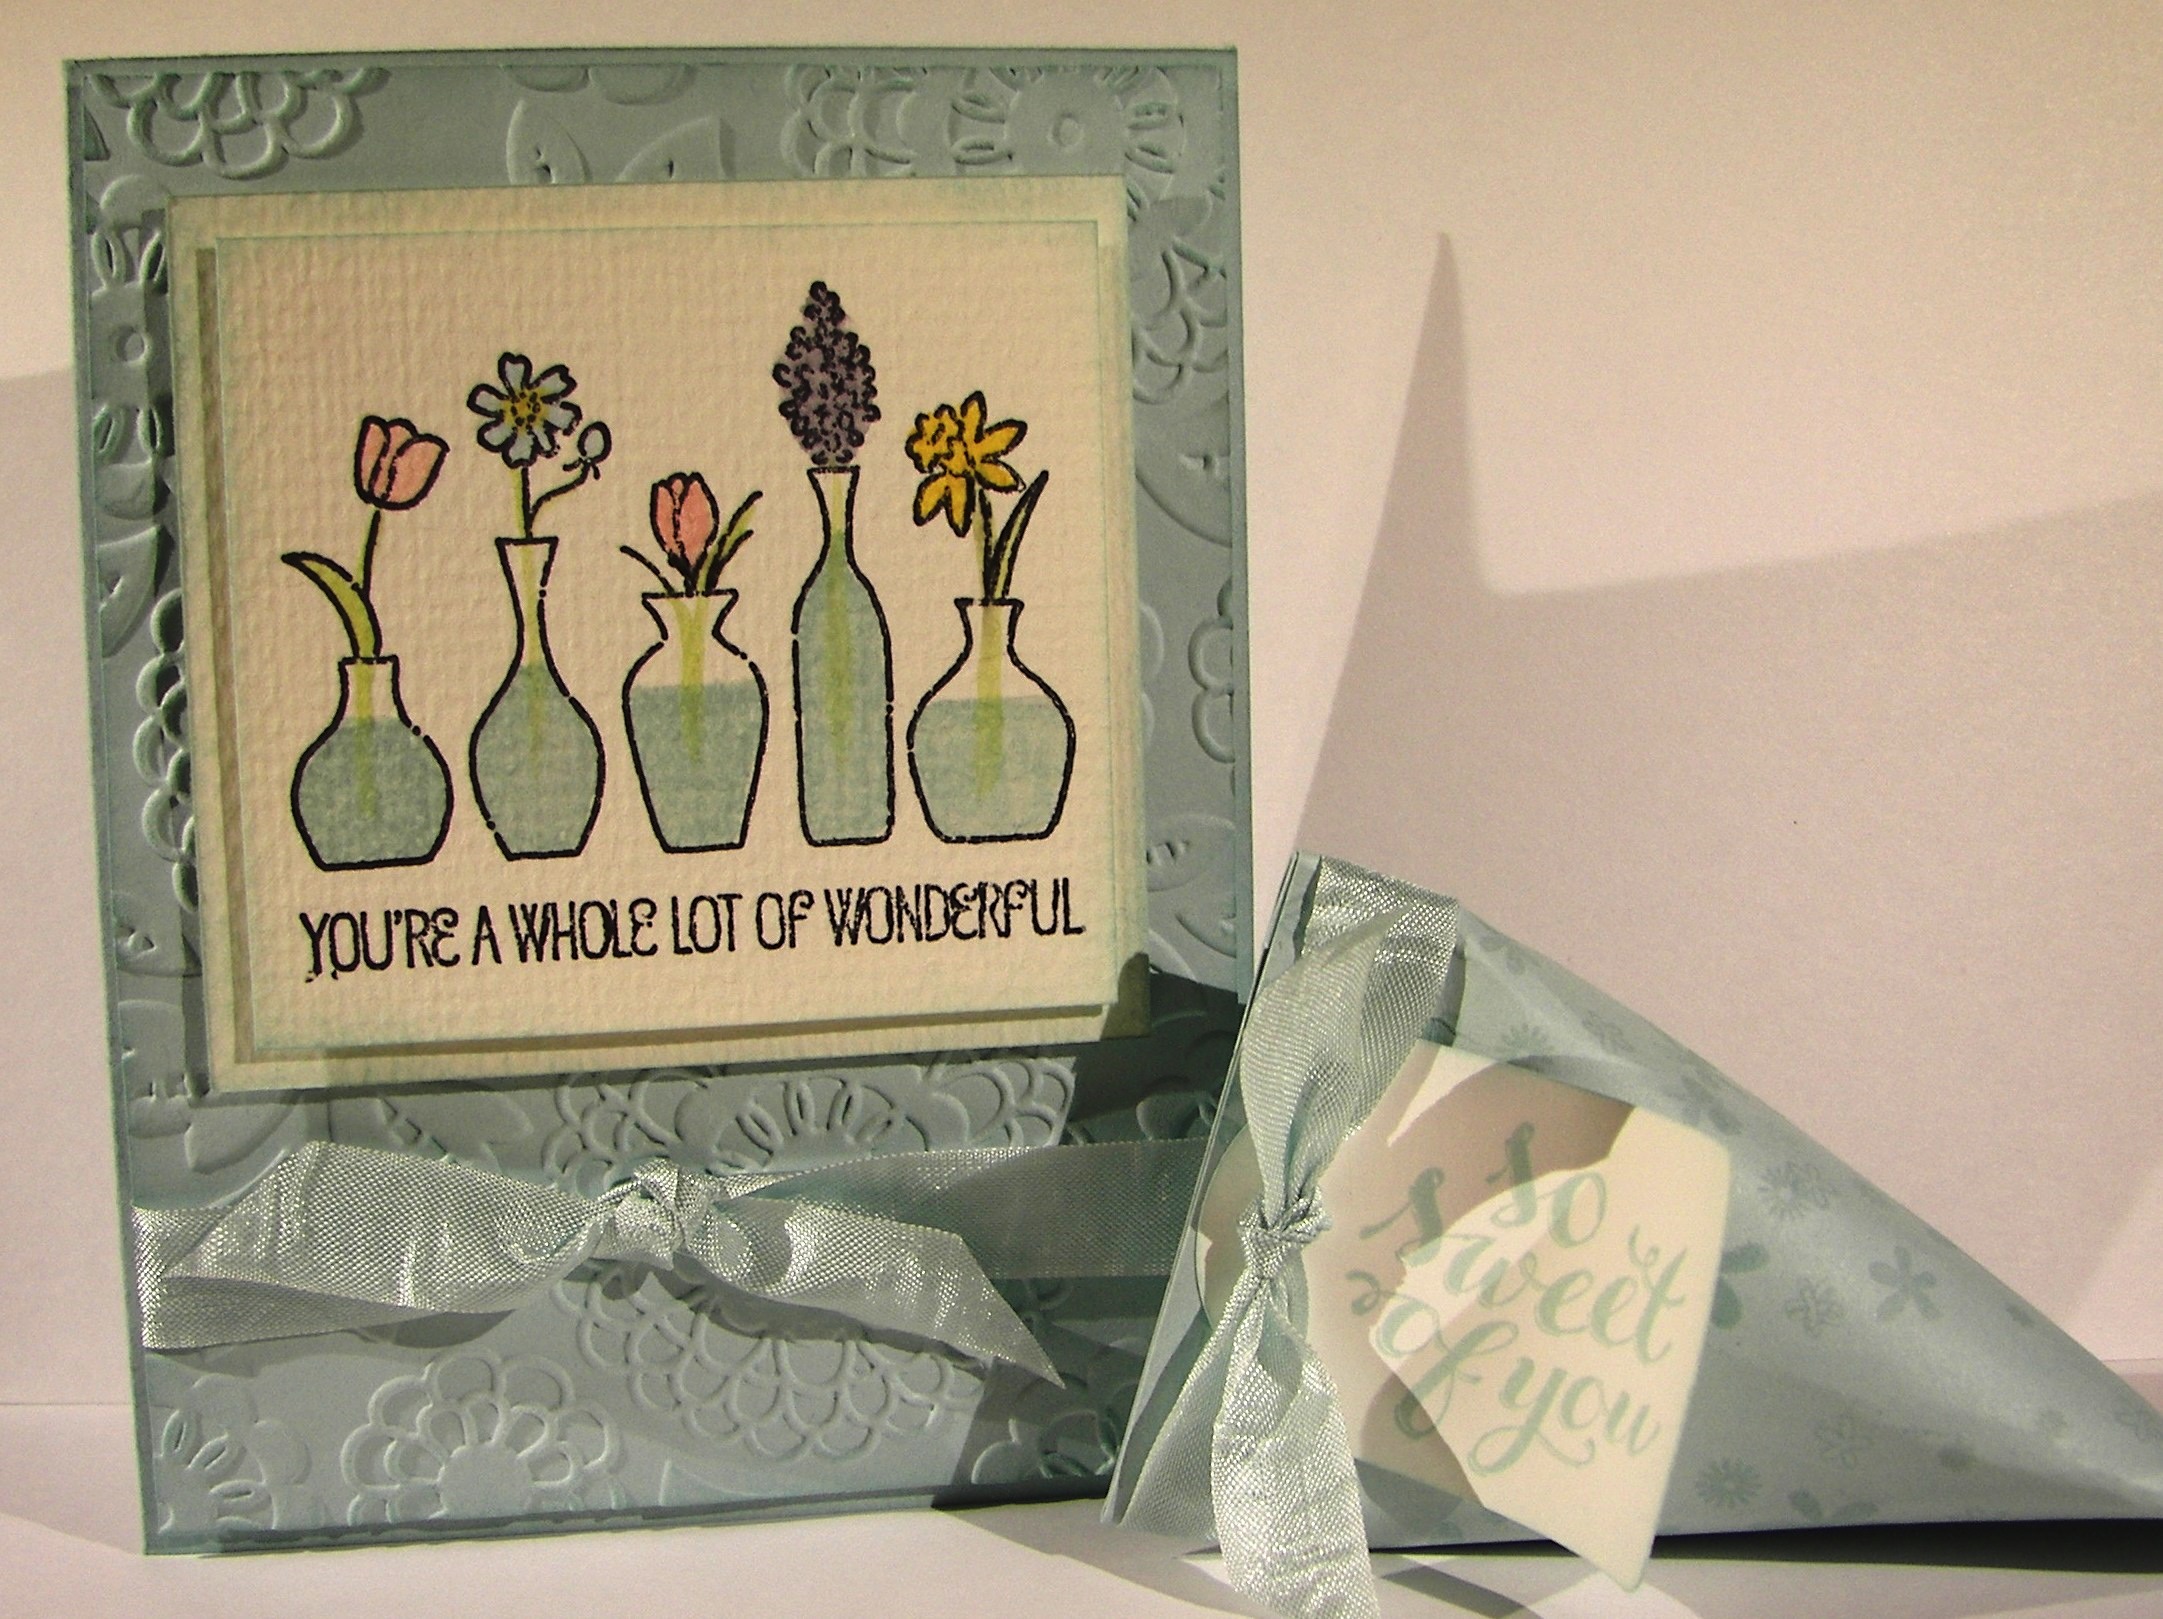
If you know me well, you know I absolutely adore tiny things.  This little number took longer to finish because I was having so much fun playing with the tiny elements.  Seriously, they are so adorable!

1-17

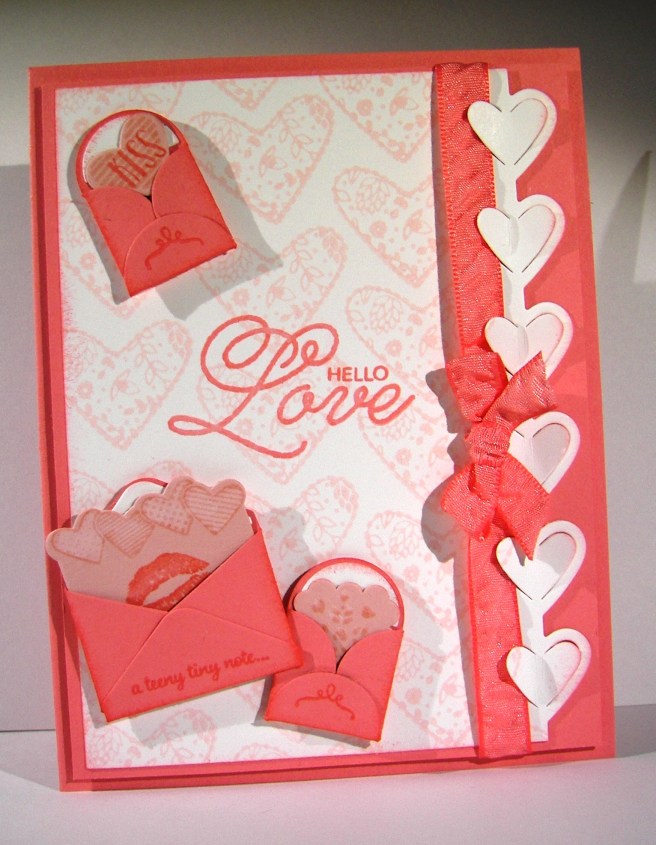
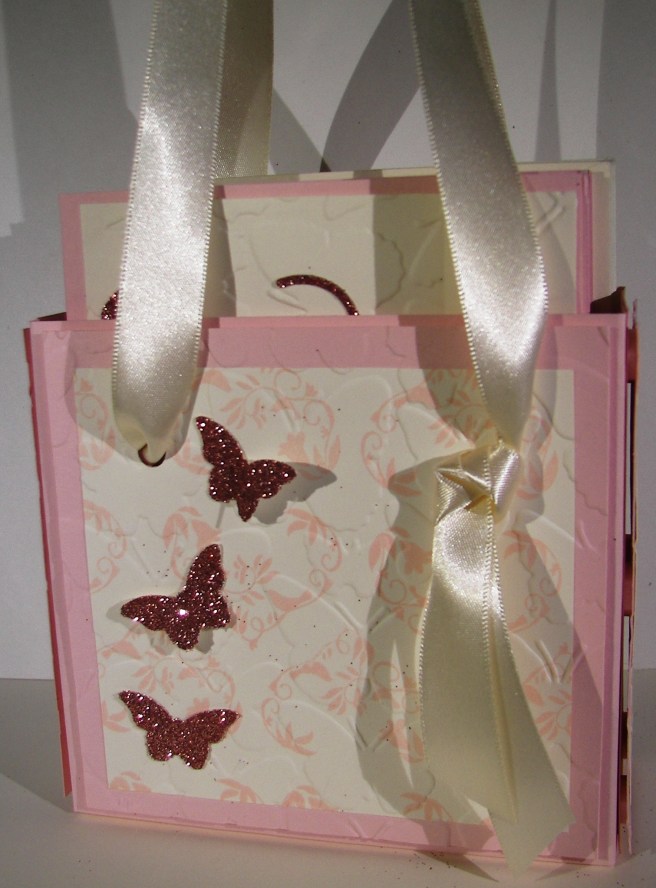
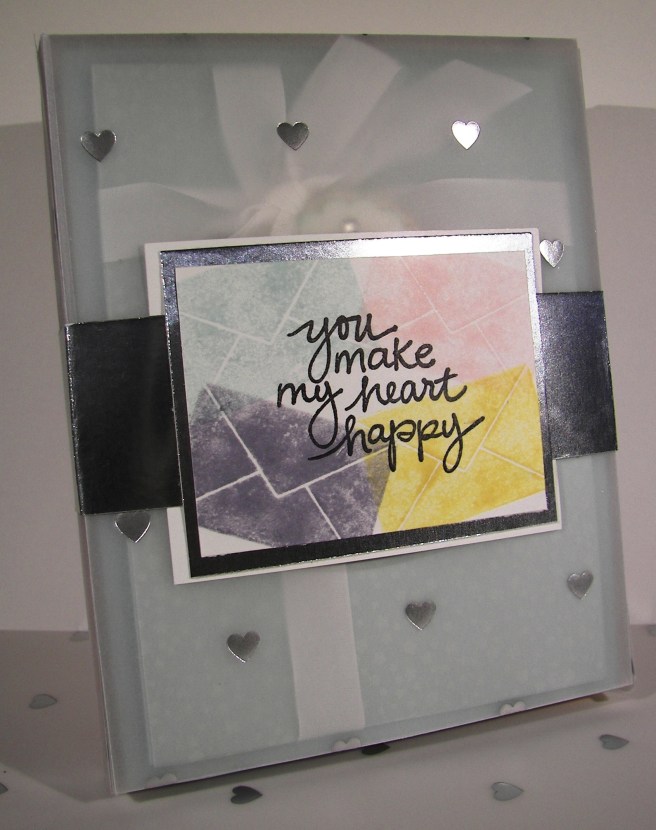
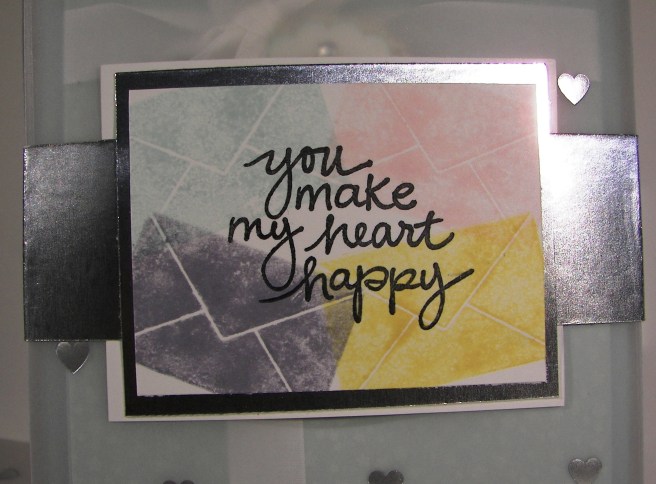
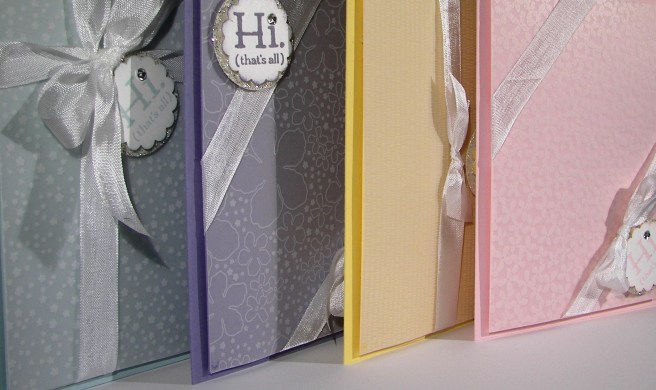
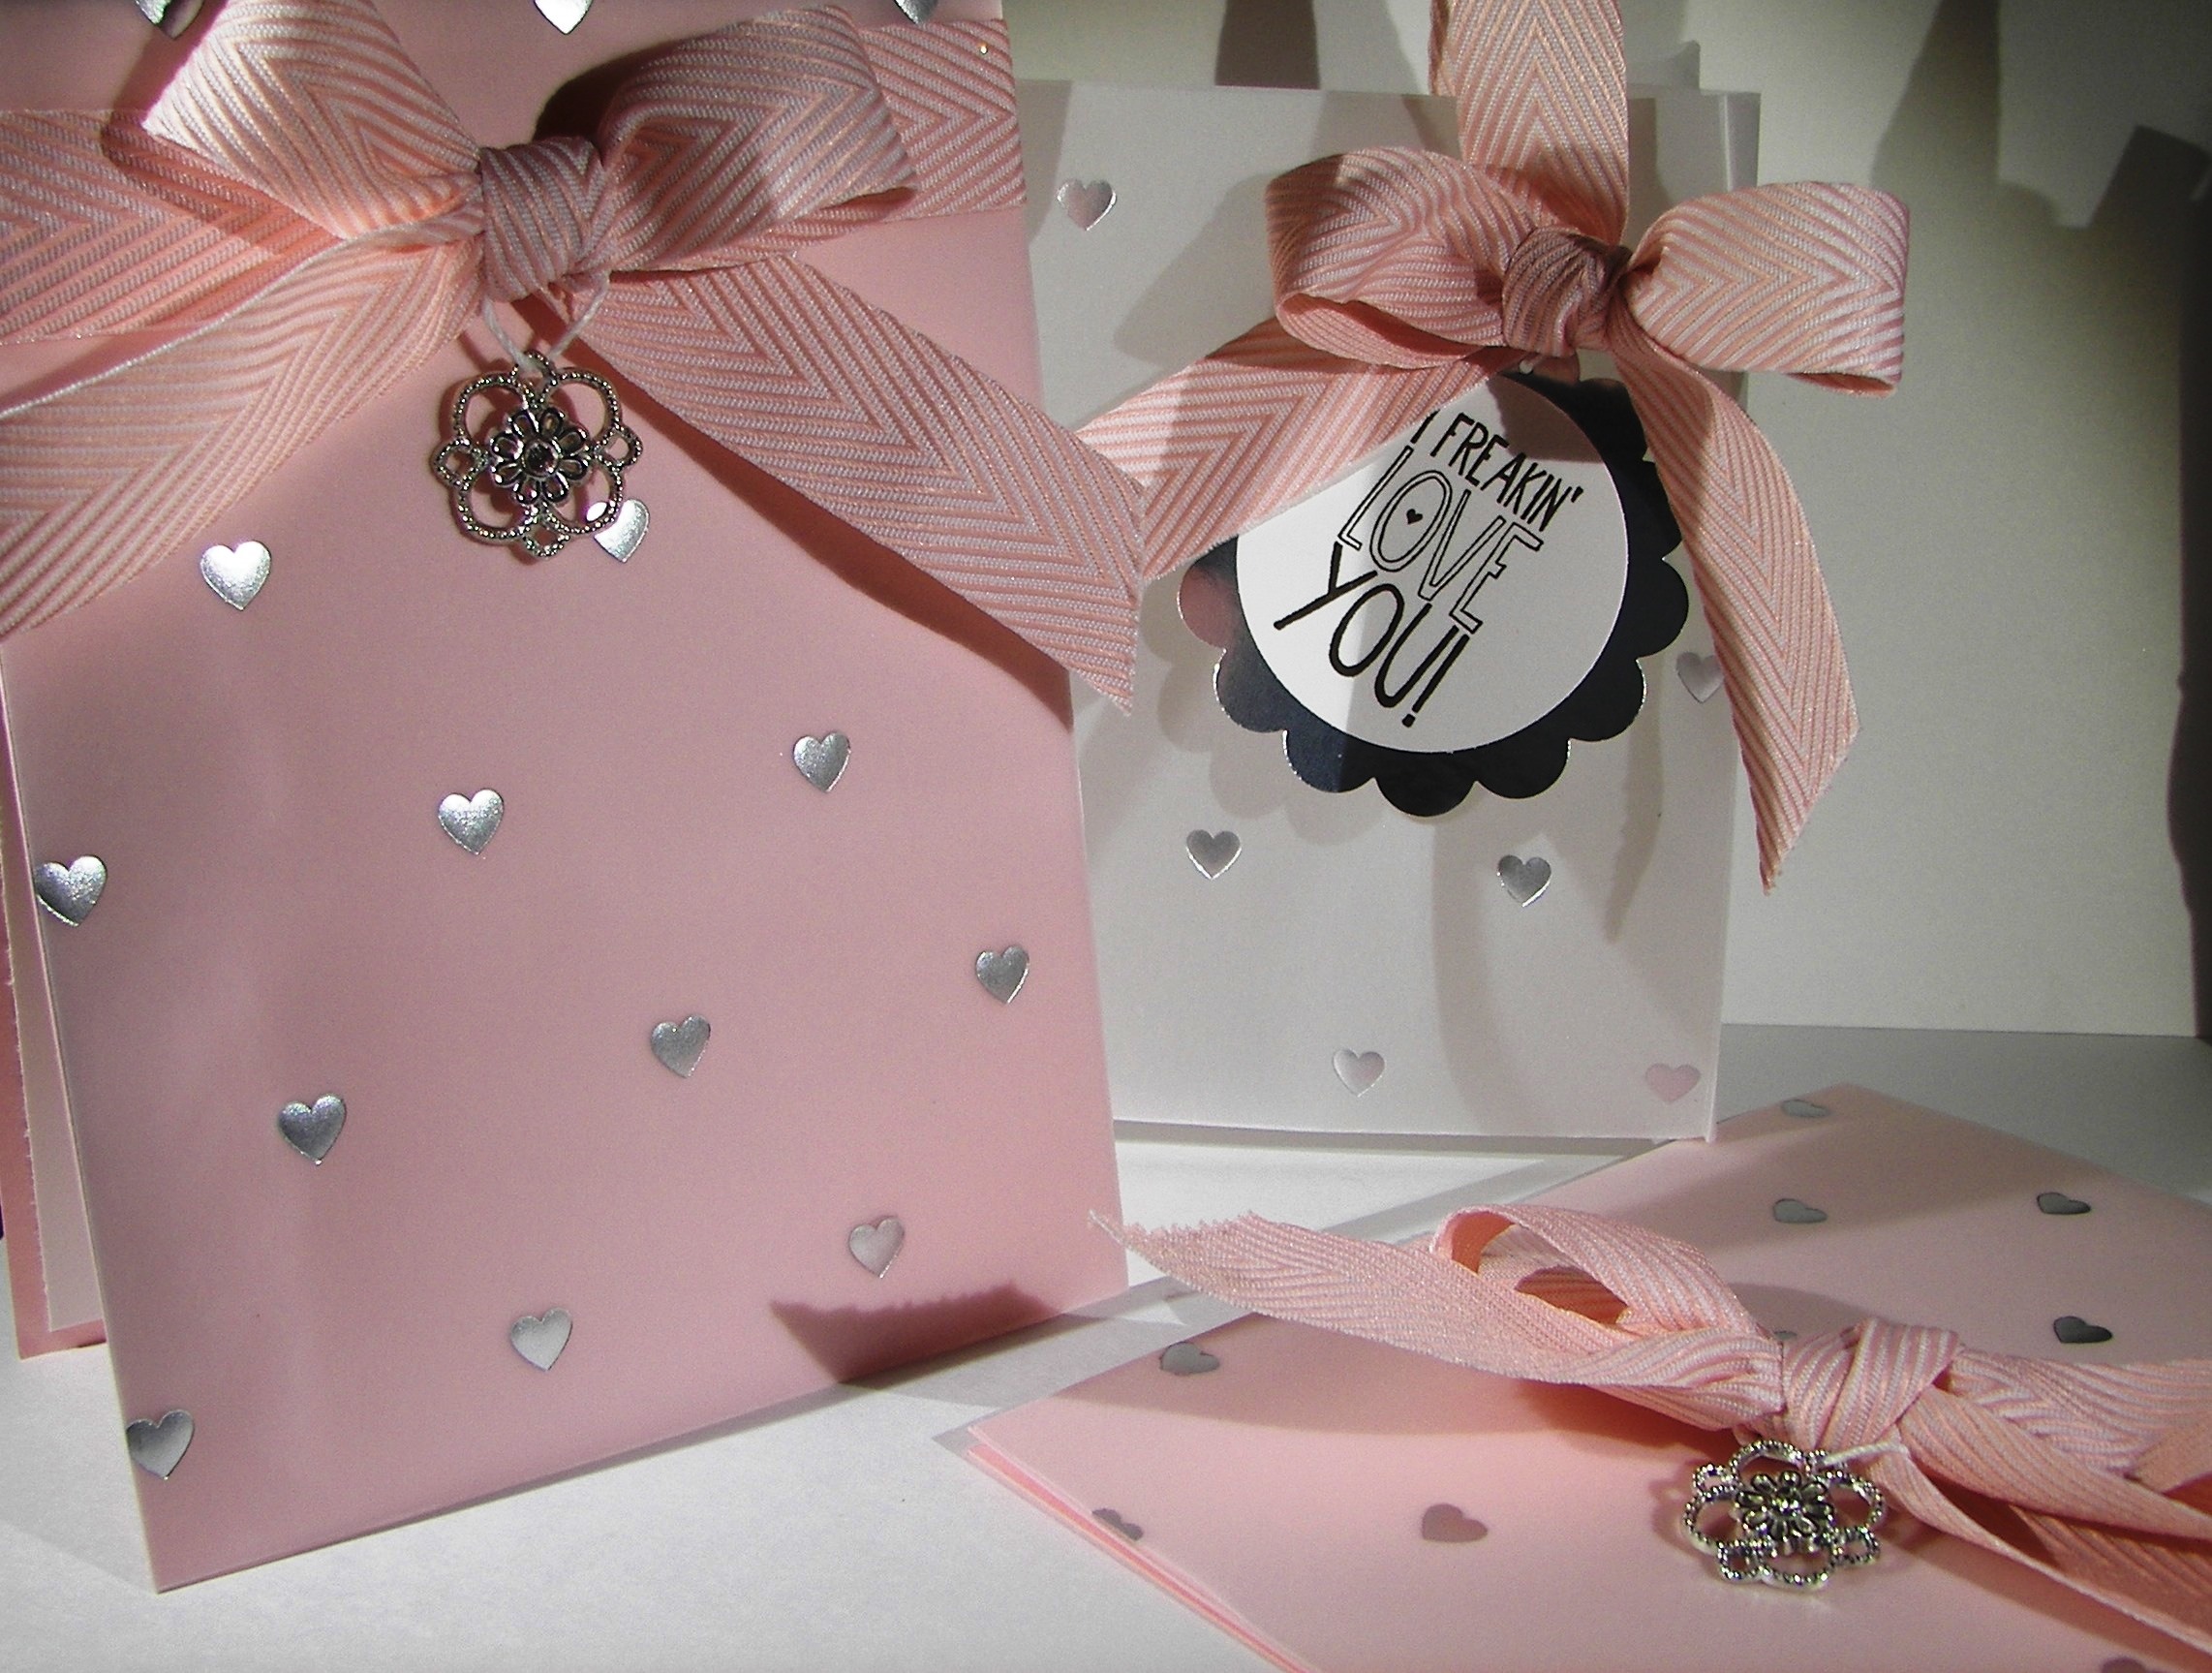
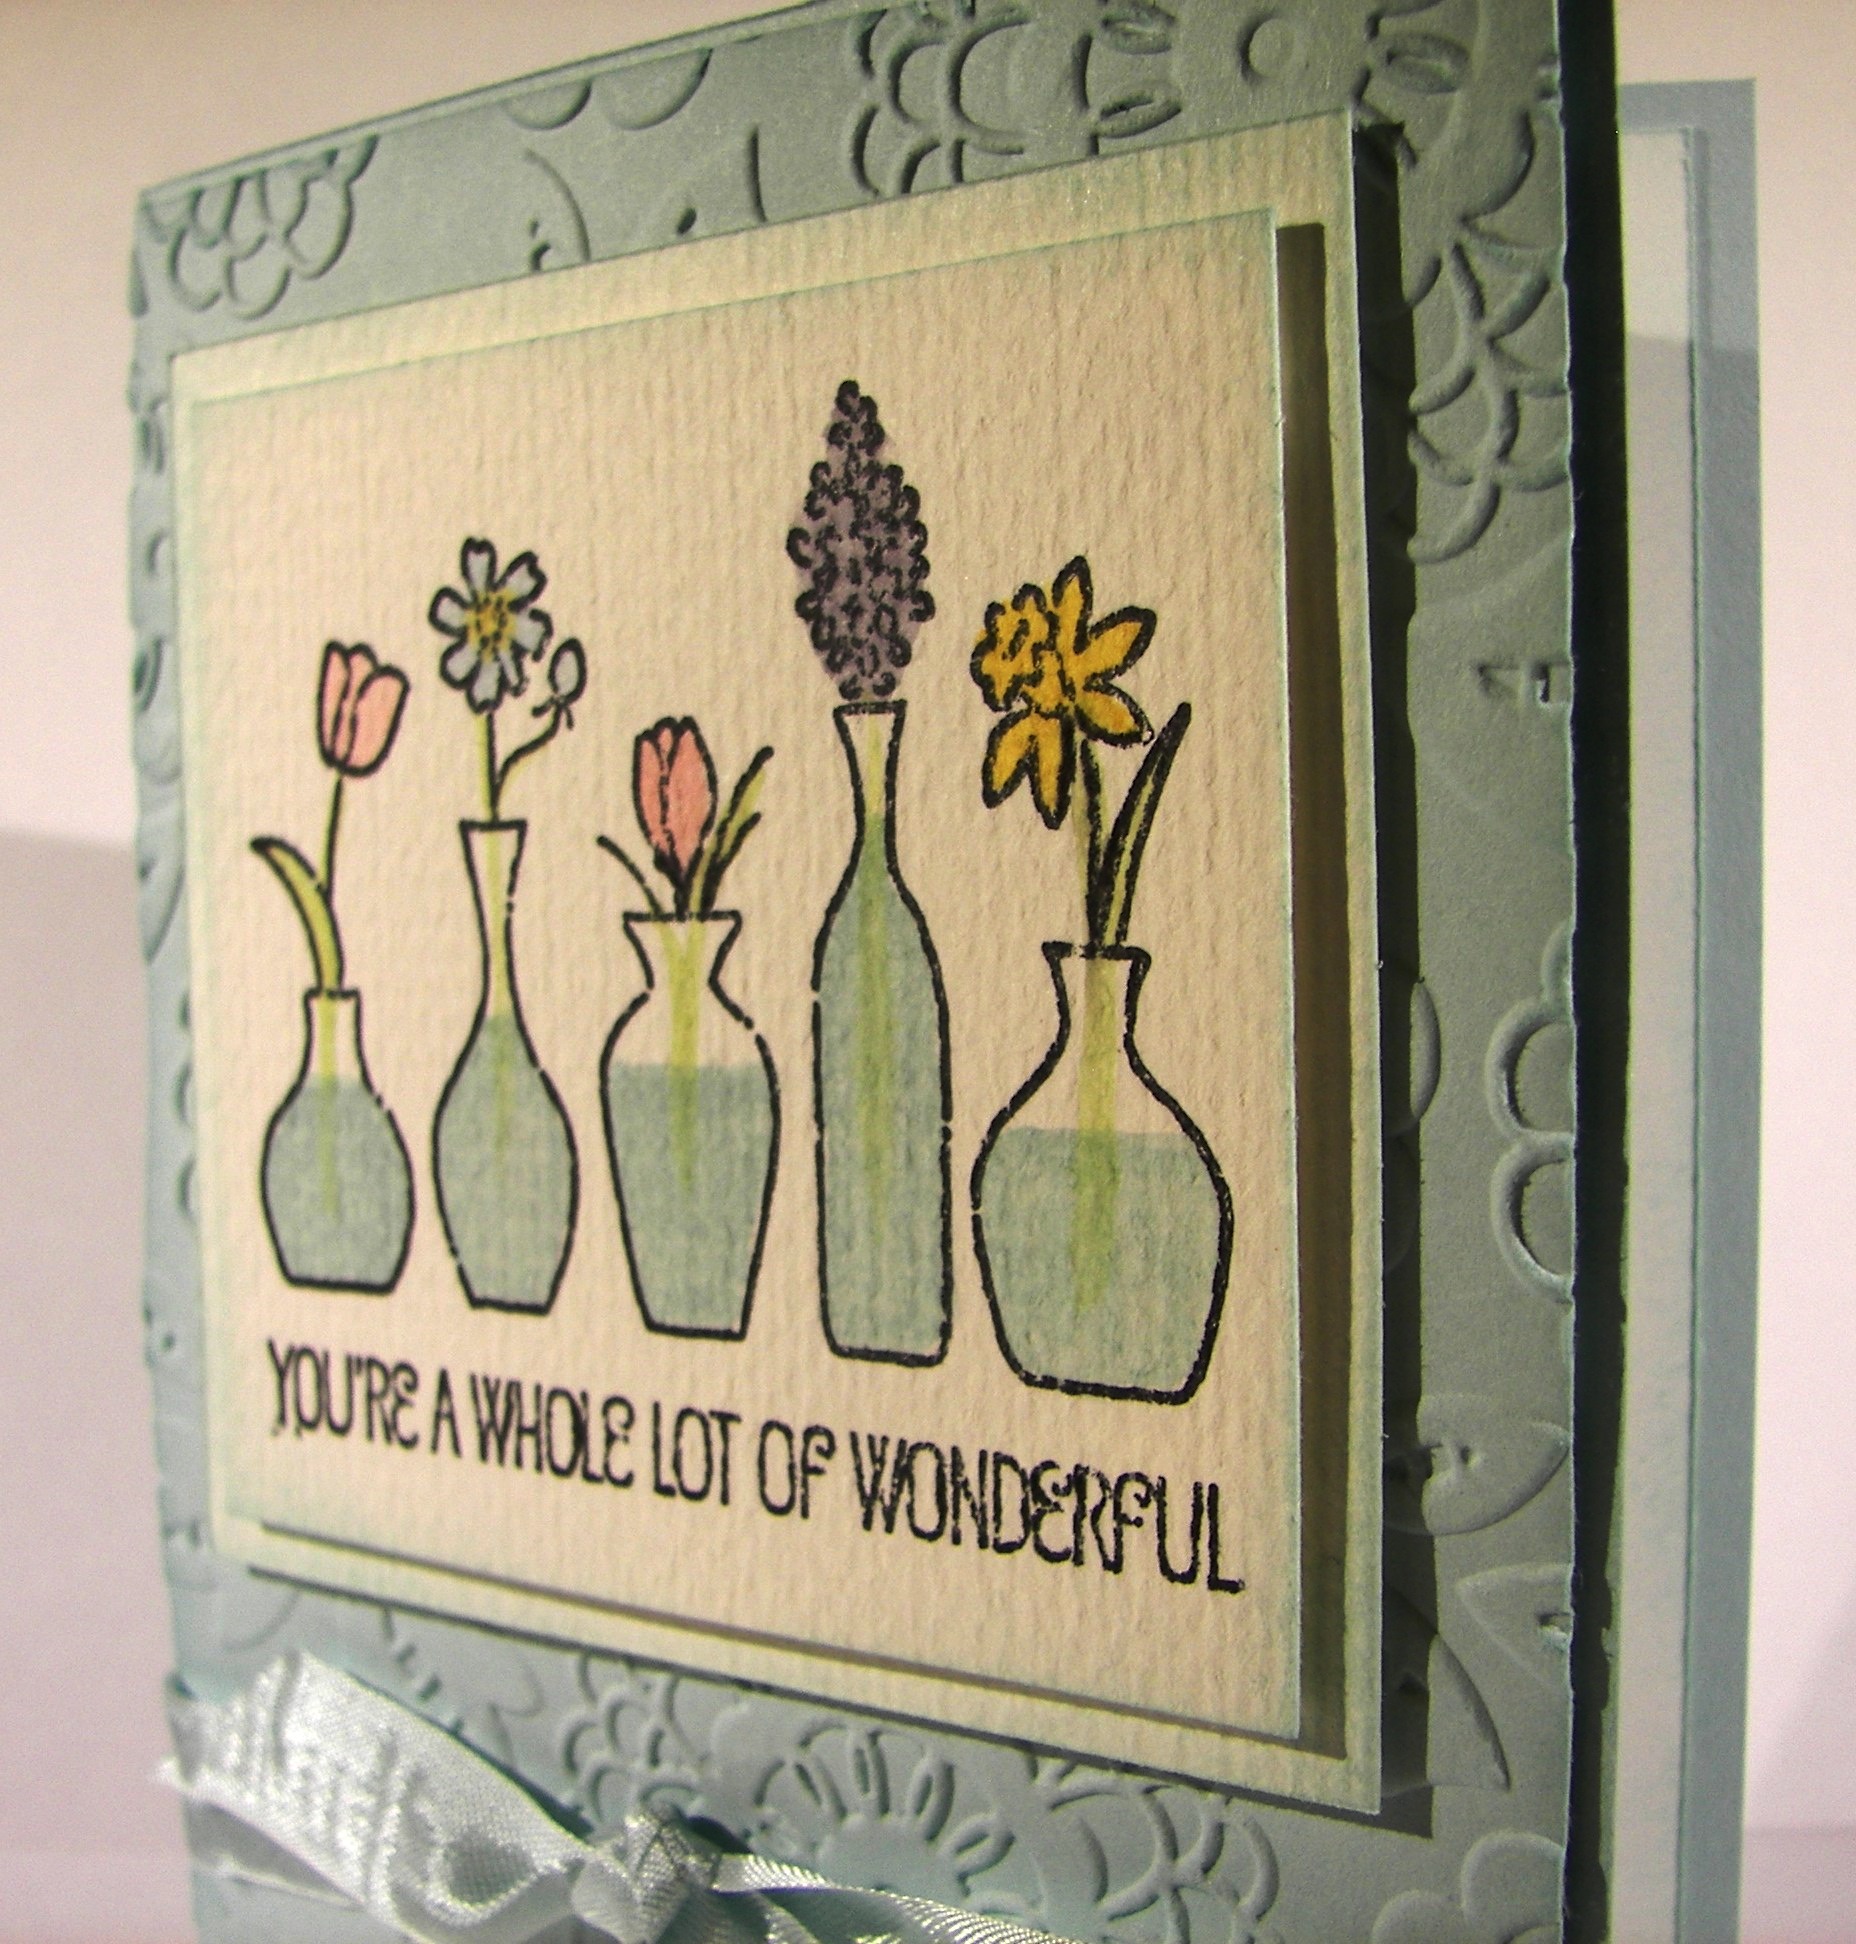
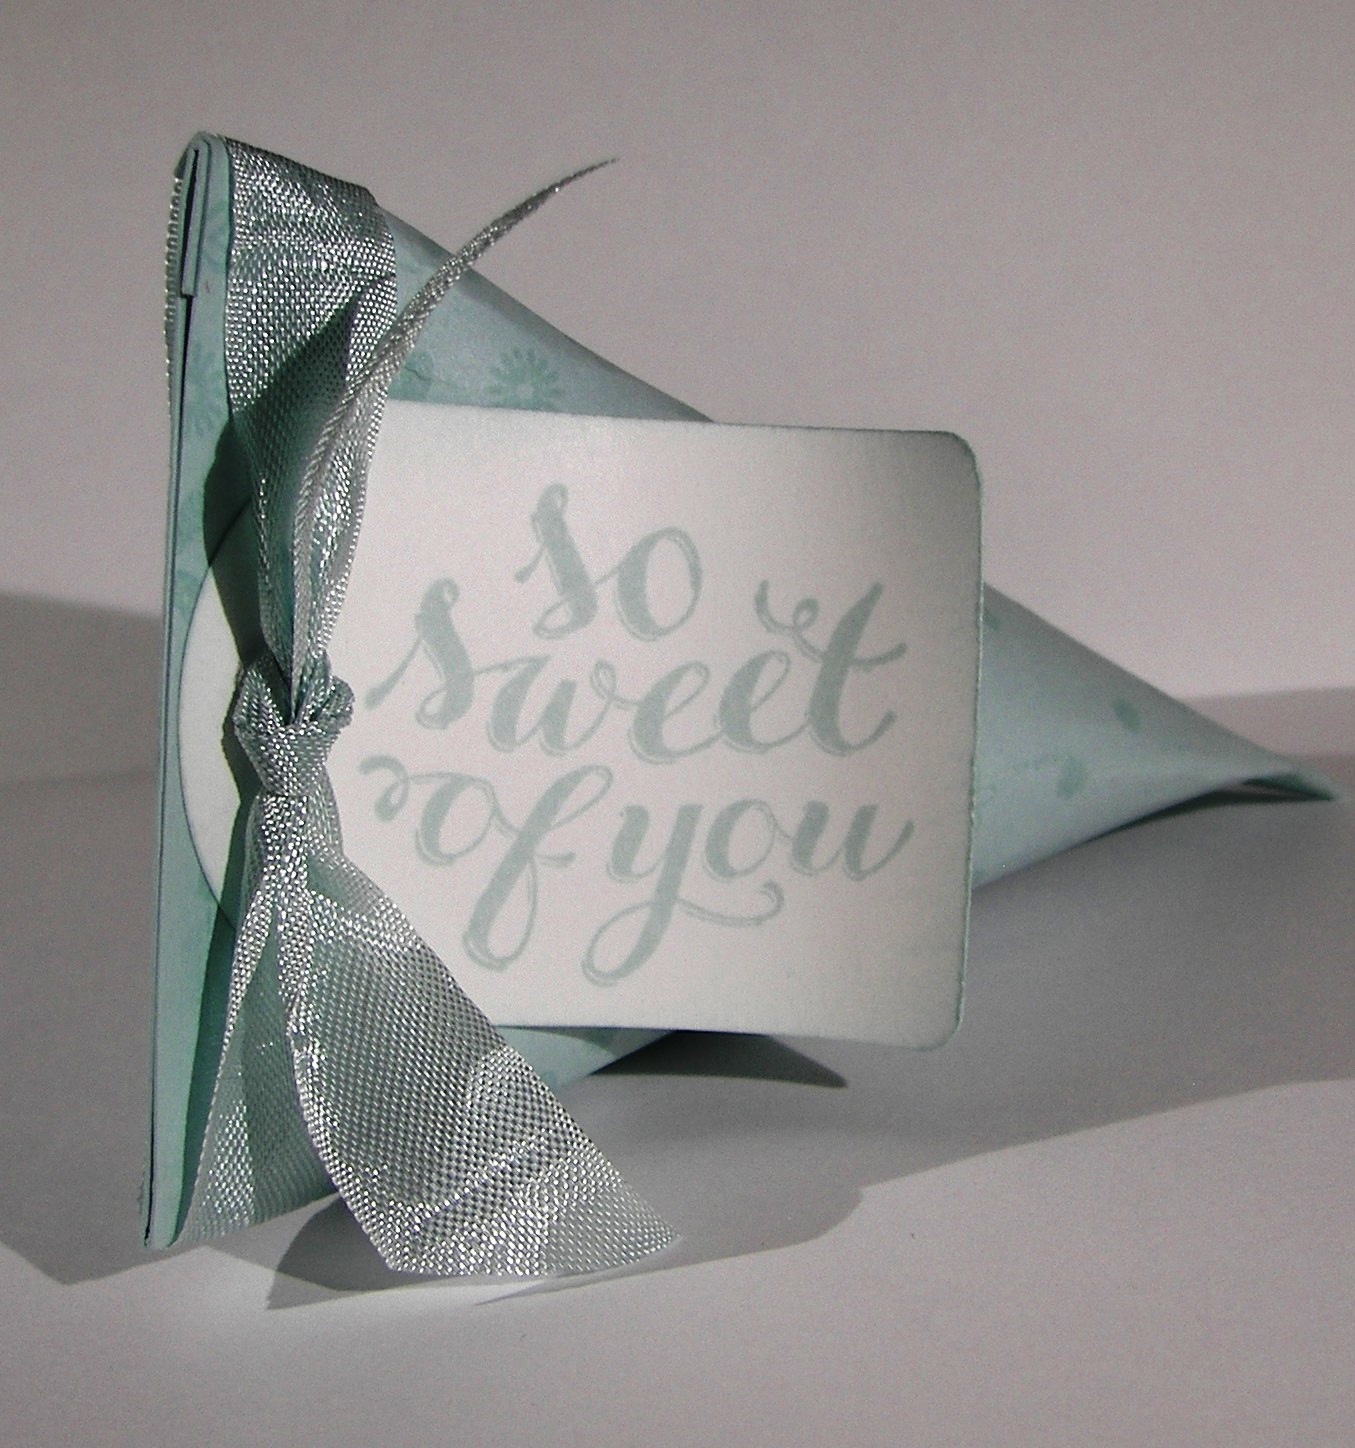
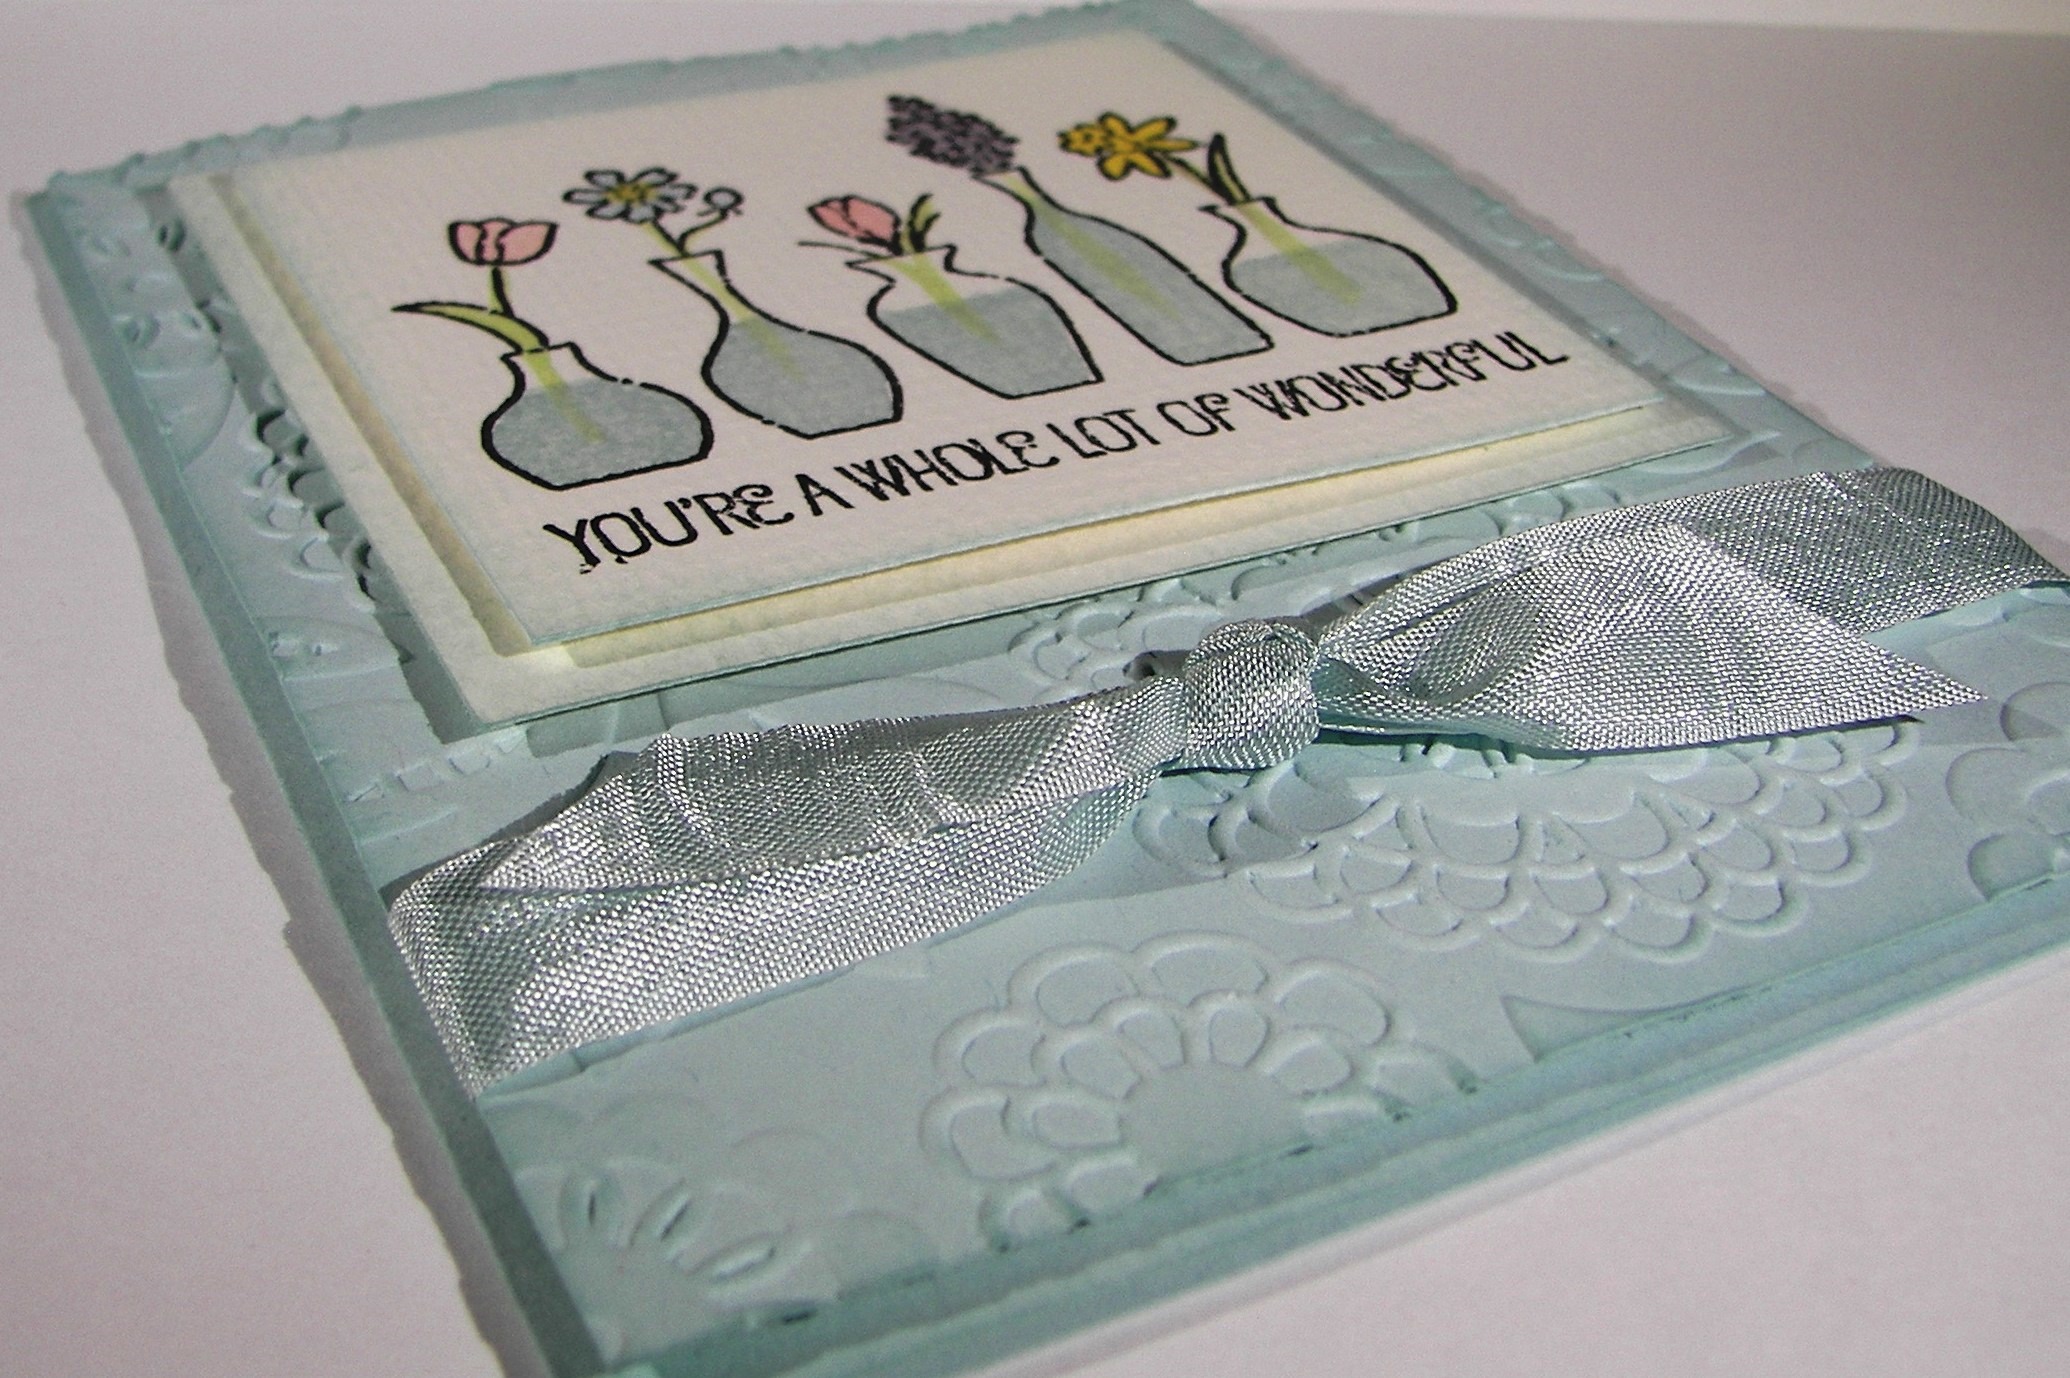
The card base was done in flirty flamingo along with the card front matte, the die cut envelopes and the coordinating ribbon.  The tiny little cards were cut in blushing bride surrounding tiny precious stamps stamped in the same color.  I added a second stamp to two of the tiny cards in flirty flamingo as well as accent stamping and sponging .  The heart stamping on the card front was done in pink pirouette with the main sentiment in flirty flamingo.

I wasn’t sure if this was too much of a card to do for my workshop ladies, but it is was so much fun we just might need to.  I can’t wait!  I almost forgot the edge of the card.  All of the die cutting done on this card came from the same set of framelits.  This edge of dimensional hearts is so fantastic.  It totally works for Valentine’s Day, but I can see wedding cards and then some going on here.

1-17-1

Have a creative day!

Moana

Beautiful Ride for Newlyweds

It may be hard to tell, but there are an absolute ton of colors going on here.  I had a blast working on this set.  When I finally finished I was a bit surprised to see how late it got, but it was worth it for sure.  I love making wedding cards just for special people in your life. This one is no different.

4-21

I worked the colors to create a sunrise look and I think it turned out really nice.  I was having a chocolate craving last night, so I settled for chocolate chip paper.  Not quite delicious, but it still worked out.  That led me to marina mist for the car color. From there everything else just came together.

4-21 (2)

I wanted a gift bag to go along with the card to give the gift card something to go in.  I think I will put a tiny selection of rich chocolates around it, wouldn’t you like to get a treat too? Opening gifts can be exhausting for a newlywed couple, so they deserve a sugar boost along the way.

The details in this set are really busy and probably hard to notice.  I think a project like this should look simple even if you know better.  Not everyone knows how much work goes into a tiny work of art like this, but that doesn’t stop me from sharing them.  Just a few more weeks and this card will find its way to the deserving adorable couple.

4-21 (1)

Have a creative day!

Moana

Crazy About You at First Sight

Today has started no differently than many other Saturday’s, but I was not going to let another one go by without sharing a project.  I have let my weekends get carried away and it just bugs me that I don’t keep this blog current daily.  Sharing creative projects is my favorite thing and it really keeps me balanced.  So here we go!

101_1302

I get to attend a bridal shower today, how fun right?  Well, I have gotten into giving thank you cards as my bridal shower gift.  I think it is most appropriate, since the bride is going to need plenty of these.  Sometimes though, a special thank you is in order, when someone has really been kind or extra wonderful to you.  That is what these are for.

101_1300

The steps aren’t too complicated, you can really see them from just looking at the project.  I am really bad about tracking how I score my bags and boxes.  I make them different each time because you don’t always need the same size.  I love to say that I don’t have to toss my first attempt too often, almost never.  I do tell my classes that there are never mistakes, just opportunities, so there is always something you can work out.

I embossed my card base and the bag fronts with the same fluttering embossing folder.  The blushing bride glimmer paper is everywhere.  And yes, my desk is very sparkly just now. Good thing I love glitter.  The bag fronts are raised up on dimensionals, but the card fronts are adhered down flat.  I used liquid glue to place the ‘thanks’ phrase in the middle of the card.  The ‘so much’ phrase was stamped on a 1/2″ strip of very vanilla, punched on one end with the bitty banner punch and raised up on dimensionals again.  The bitty butterflies are placed with glue dots.

The card bases and bag base were made with pink pirouette, not blushing bride.  I honestly liked how it looked together rather than blushing bride to match the glimmer paper.  Hard to tell sometimes why I like what I do, but that is how it worked out.  The bag handle was made with a bunch of satin ribbon, so very elegant.  And there you have it.

101_1298

Have a creative day!

Moana

Mother’s Day Take Two

Earlier in the year I made a couple of cards with this darling little chick from a sale-a-bration stamp set.  I instantly fell in love.  So did my mother.  I decided she needed to have one of her own and not just a card.

4-12 (1)

A prior paper pumpkin kit had this frame along with pretty little things to make a wonderful decorative gift.  I couldn’t make it for my own mother since she gets the same kits each month and I didn’t want to give her something she already had.  It sat upon the shelf for some time.  Until last night when I needed it, the frame that is.  I also used the wrapping cardstock and ribbon to go around it.  Now I will send it away for an early mother’s day gift.  She will be super excited.

The little chick was stamped in black stazon on a 4 x 4″ sheet of water color paper.  I started pulling ink pads until I had everything painted just like I wanted.  I did use my heat tool a few times along the way to set color when I wanted to layer another.  The yellows I let all blend together without worry.  But I wanted the cheeks to stay pink and tried to keep the beak a little more under control.  The shadow needed to be dried before the background was applied, but that is about it.  After I put a touch of marina mist for blue eyes I used wink of stella to give them some sparkle.  Just a fun little project to make my mom smile.  So fun.

4-12

Have a creative day.

Moana

Dear Heart, Sweet Boy

This project was all about giving myself a challenge.  I grabbed a piece of dsp, decided on three colors, picked a stamp set I hadn’t used a long time and went for it.  This was definitely not my usual style, but it felt good.

3-20

The card itself wasn’t too complicated, just one layer for the background.  I stamped my little boys on water color paper with black stazon and opened the ink pads.  Their faces were done with a very diluted wash of pink pirouette with the hair in tip top taupe.  I wanted them to look like the same boy just doing different things.

Each boy face was accented with one color only.  For the darker areas I kept the ink fairly strong.  When I accented I diluted it a bit more and even more for the outlined areas in the background.  I left it simple because I wasn’t really going for perfection, just soft coloring. I punched their faces out with the 1 3/4″ circle punch and a background of black with the 2″ circle punch.  They were arranged on the front and layered with a bit of dimensionals.

The banner was stamped from the same set and a light wash of each color was put on its own section.  Then each end was punched with the bitty banner punch.  I also put that up on dimensionals.  I repeated the pattern of paper inside with more dsp and a smaller piece of very vanilla to write my message on.  Such a sweet card, for a very sweet boy indeed.

3-20 (1)

Have a creative day!

Moana

Watercolor Wings Just for You

Saturday mornings are usually busy with everything under the sun and then some.  I had the opportunity to chat with my oldest daughter while she got ready for work.  We put each other on speaker phone so we could keep moving along.  This is what I did during our chat.

3-12

With all of the excitement of Sale-a-bration products and the wonderful spring catalog, it is easy to put aside all of the great product in the annual catalog.  This set, Watercolor Wings, has been a favorite since it came out.  I hadn’t had it put to use lately and thought that was long overdue.

I stamped my ink layers onto watercolor paper this time not quite sure how it would all turn out.  The initial stamping was a bit too detailed for the effect I was going for, but I remained patient and kept going.  I moved in with the aqua painter and began blending, but still wasn’t satisfied.  Perhaps because I had stamped off to get the tones I wanted the ink didn’t want to move around too much.

I thought things were a bit stark still so I came in with pear pizzazz for my background. That really helped out a lot.  But the butterflies still weren’t what I wanted.  I got a spritzer out and put more water on.  Which led to dabbing water off, spraying again, and moving along to the heat tool and doing it all over again.  I did finally get a result I liked, but decided to bring out the wink of stella pens, both the clear and gold glitter ones, and put in finishing details.  I think it all worked out, but I wasn’t sure for a while.  Sometimes watercolors can be that way.

3-12 (1)

Have a creative day!

Moana

Lovely Amazing You Gift Set

I got myself back to that little set of cards to make a gift box for them.  I do like how it turned out, but I didn’t choose my paper very wisely.  One of those times where I just went for it, didn’t plan like I should have, but it worked out anyway moments.  Lucky for me…

3-4

The adventure began with a full sheet of this wonderful foil velum.  I was more preoccupied with the score lines for thickness and width for the box.  When I wrapped them around to close the box it ended up just over an inch too short.  Ooooops.  So I decided a belly band was in order.  I needed a bit more stability anyway, so I was good with that.  What to use?  I couldn’t use the rest of the sheet because the hearts would be facing in a different direction and that would bug me.

I got into the foil paper and pulled out one of the remaining scraps.  I am very sparing with the foil paper you know.  There was just enough to get a strip to almost go around.  I then created a layered base to connect the two sides of the band and covered it up with another scrap of foil.  Now, to make the perfect front.

Lovely Amazing You is a stamp set is one of my favorites.  The sentiments are so kind and fun.  The handwriting is also adorable.  I used the little envelope to create the background. The four colors coordinate with the different cards inside.  Nice little connection I thought. Then I chose the sentiment that tied in with the hearts on the foil.  Pretty cool.  I don’t know if I would try to do it again, the velum isn’t the most sturdy gift box choice.

3-4 (1)

Have a creative day.

Moana

Botanical Gardens Card Set

How sweet are the colors in this set?  I wanted to make a small set of cards using this wonderful velum as an overlay.  I asked my daughter for a color and she came up with soft sky.  So, I just selected three others from the subtles collection and got to work.

3-2 (3)

The tricky part is attaching the velum without adhesive showing, as always.  However, it didn’t turn out too rough.  The ribbon held most of it together, but I did use a touch of glue in the outer corners.  It was easiest to see on the wisteria wonder card, but even then it was acceptable.  I usually mask my adhesive, but this particular setup didn’t offer good hiding places where I needed them.

I do think I will create a small box to house these in and give it as a gift.  This tiny little stamp that just says “Hi”.  How adorable is that? It comes from the newly available sale-a-bration stamp set Party Pants.  There are so many cute sayings in that one.

3-2

Have a creative day!

Moana

It’s Your Day

I think I am ready for summer to cool off.  Looks like I am thinking of a spring day here.  My daughter told me this looks like a dress.  Would be a cute one.

It's Your Day

I thought it would be fun to use a stamp in a different way than intended.  This leave bouquet is in a thanksgiving themed set. Also, I hadn’t used pink pirouette for quite some time and decided to put the two together.  At first I wanted to use the flower punches as if they were a flower at the end of each stem.  Well, looking at them they created stripes of flowers.  Not so good.  They looked much better placed randomly.

It's Your Day

I used glue dots to secure them.  I didn’t feel like it, but I did sponge them all.  It made a difference, really.  Plenty of basic rhinestones to go around and I loved the sparkle it gave.

It's Your Day

The sentiment came from the endless birthday wishes set.  I really had ignored this one, but it is so great!  I love, love, love how you can partner the typeset phrases with pretty cursive ones.  A tiny tag with a bow in the middle and it was all done.  Of course I had to echo stamp the inside to match the front though, then it was really done.

Have a creative day!

Moana

Yippee-Skippee in Love!

There are times when how I feel just saturates what I create.  Today’s project set is a perfect example of that.

Yippee-Skippee in Love

Last night I finished a lovely book in a series I had previously enjoyed.  I am a middle school librarian, so I have the perfect excuse to revel in young adult literature.  Who am I kidding, I would read it regardless.  I have always enjoyed reading what my children do and visa versa.

Yippee-Skippee in Love

Love, true love, is an obvious theme here.  Even though the series continues and I have to wait for the next novel, I was left all emotional and girlie and super in love.  Hence, the color choices and such.

Yippee-Skippee in Love

I used a whole sheet of 12 x 12 silver foil velum here.  Two card fronts and a lovely bag.  I poured out the chevron ribbon, because I love it so, and added a few elegant embellishments.  I knew these cards could be for a variety of occasions, so I left the sentiment off the front.  I will stamp the inside with just the right thing when I put them to work.

Yippee-Skippee in Love

I might have to fill the bag with truffles or something lovely and give it to my husband.  That sounds just right.

Have a creative day!

Moana

Blooming With Kindness Trio

This set started with an experiment, had some problems, then turned the corner and gave me something beautiful.  Pretty fun experiment there.

Blooming With Kindness

I started out wanting to use pink pirouette, saraha sand and very vanilla.  The papers looked lovely together, however, the way they looked on the very vanilla compared to whisper white made all the difference.

The pink looked so different on the vanilla that it made it look like my card stock was the wrong color.  That was odd for sure.  But I loved the paper I had created using the huge flower from the blooming with kindness set, so I had to get creative.

Blooming With Kindness

I made other cards using the front and inside bits I had stamped on the very vanilla.  Then I made another background piece on whisper white and the pinks were much more friendly.  And I ended up loving the secondary cards more than my original.  How about that?

Blooming With Kindness

Even though my results went a bit off, I do love the look I made.  I stamped the flower with versamark ink onto the card stock and quickly sprinkled iridescent ice powder on the wet ink.  I heat set it and while it was still tacky I hit it again with the powder and heat set it again.  You can kind of see how shiny and sparkly it is.

Blooming With Kindness

Each card got a different sentiment, and they are all so beautiful.  My daughter is the one that said we had to have the set.  She was so right, my creative buddy.

Remember, there are no mistakes in art, only opportunities.

Have a creative day!

Moana

Hello There Vivid Vases

Good Morning!  Saturdays are busy, so I don’t always get to post first thing.  But it is still technically morning, so it counts.  And what a lovely morning it has been.

Hello There Vivid Vases

I had an itching to water color.  The vivid vases stamp is simple, but gives a lot of opportunity to play.  And play I did.  I actually had out seven different inks if you can image it.  I love color!  Especially when it is subtle like in this project.

Hello There Vivid Vases

I just got my colors out and an aqua painter.  Enough said.  I stamped my image in stazon on water color paper and then got painting.  I used soft sky as my main color because it was the color of the water in my vases.  It turned out so lovely.

Hello There Vivid Vases

I had some extra paper from the sheet I cut into, so I turned it into a matching sour cream treat container.  Just right for sure.

Hello There Vivid Vases

I also got to showcase the lovely lace embossing folder.  Isn’t it so beautiful?  I finished off both projects with coordinating seam binding ribbon.  I love that stuff.  I think I actually have all of the colors.  That is unusual for me, I am more selective than that.

Have a super creative day!

Moana