Love, Love, Love…

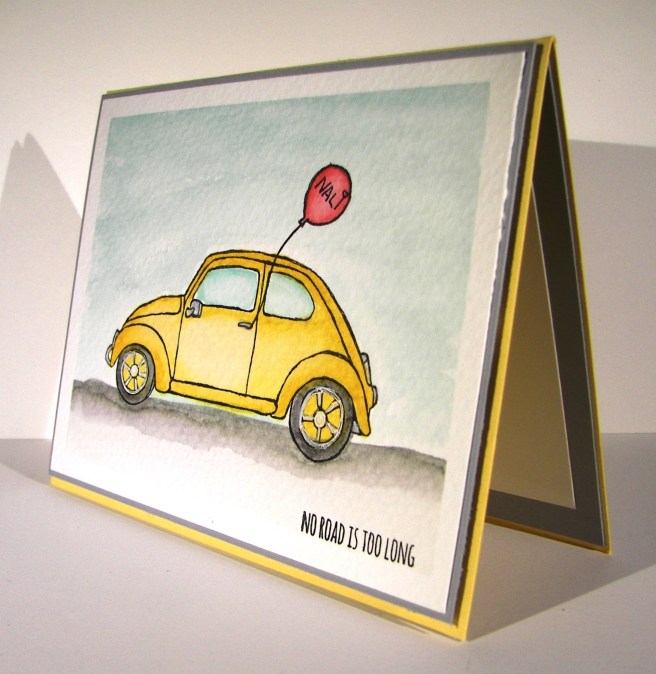
When the new catalog comes out each year I do a quick scan for the super obvious favorites. Here is the first one that was an absolute must have.  To be honest, I focused so much on the adorable jars and lettering I didn’t notice just how huge the stamp set was.  Well, it is amazing.  Talk about options.  I could do a series just using this set and have tons of projects, all looking unique.

6-9

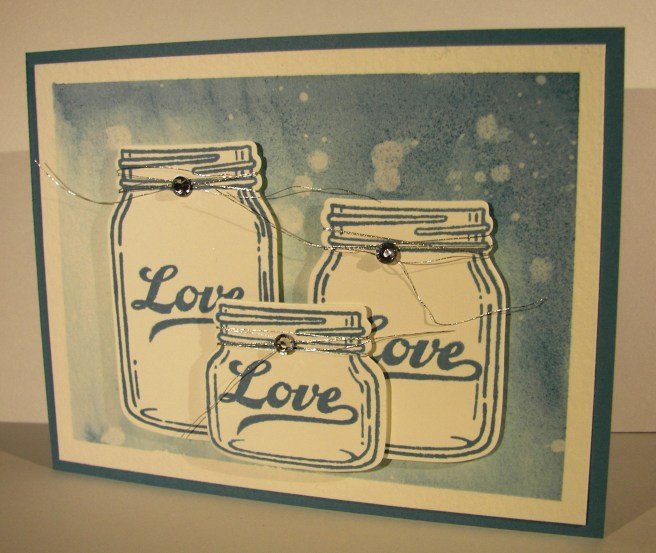
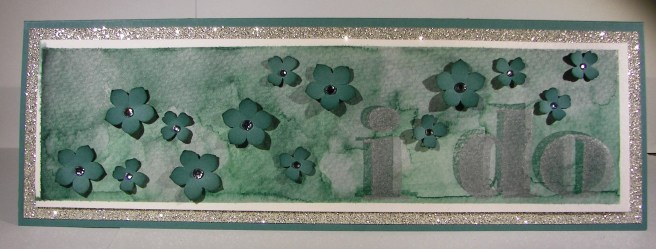
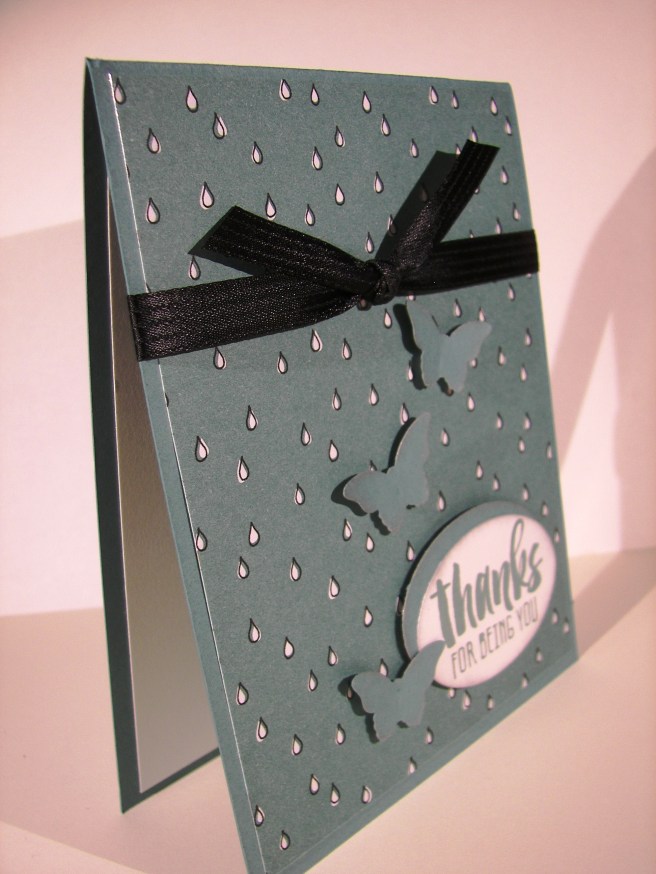
I began by creating a background using marina mist ink on water color paper.  I have been using quite a bit of designer series paper lately and missed making some of my own.  I do feel better now.  After it was all painted and distressed I moved onto the jars.  I could hardly wait.

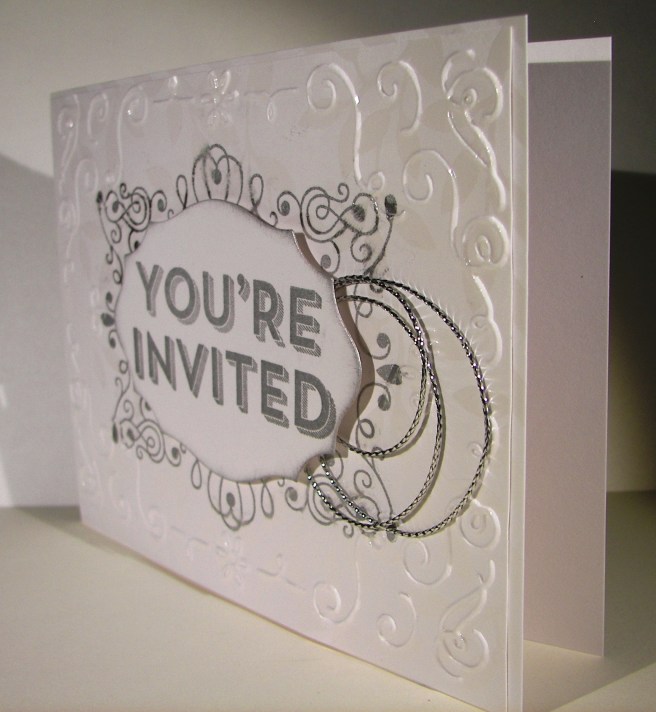
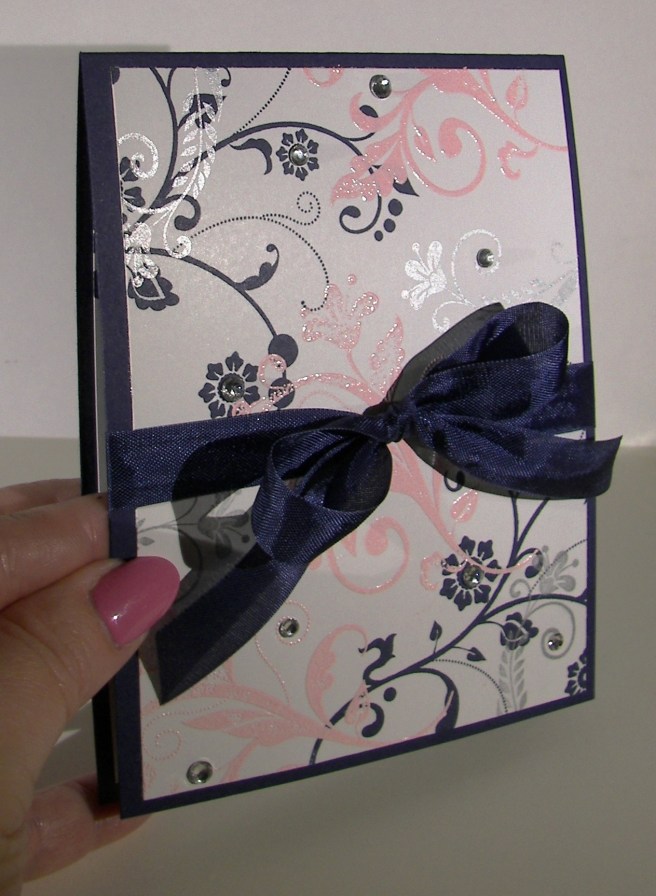
They were stamped in marina mist on whisper white paper then cut out using the matching framelit pieces.  I do love perfect little images all ready to go.  They were layered a bit, but you can still easily see that they all say love on the front.  I am still in wedding mode and the card reflects this.  I will be hanging dozens of mason jars below several of my trees today that will get candles and create a lovely look.  The couple is already so wonderful, I just want a beautiful evening for them and all of our friends.  Just two days away!

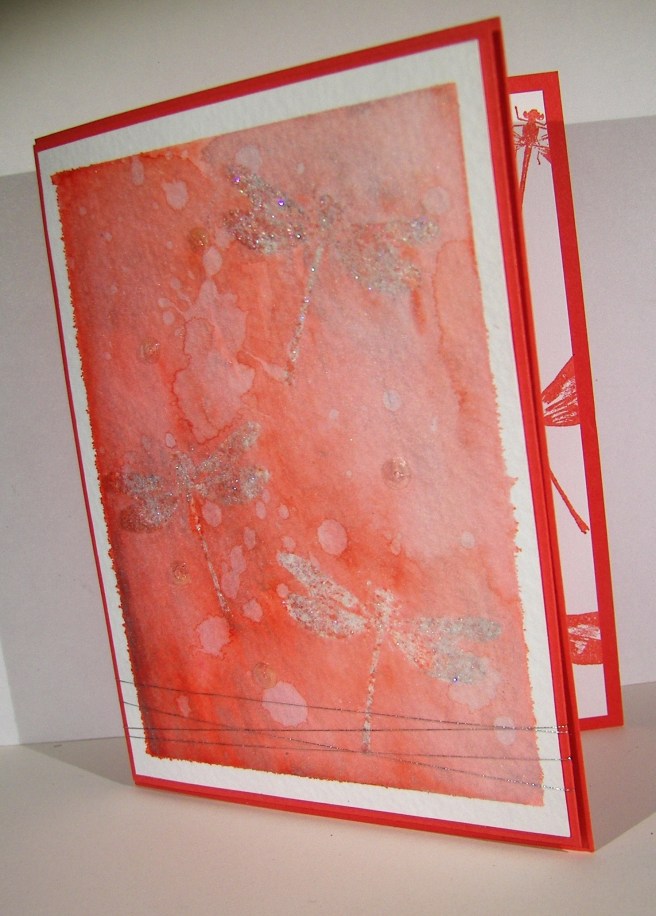
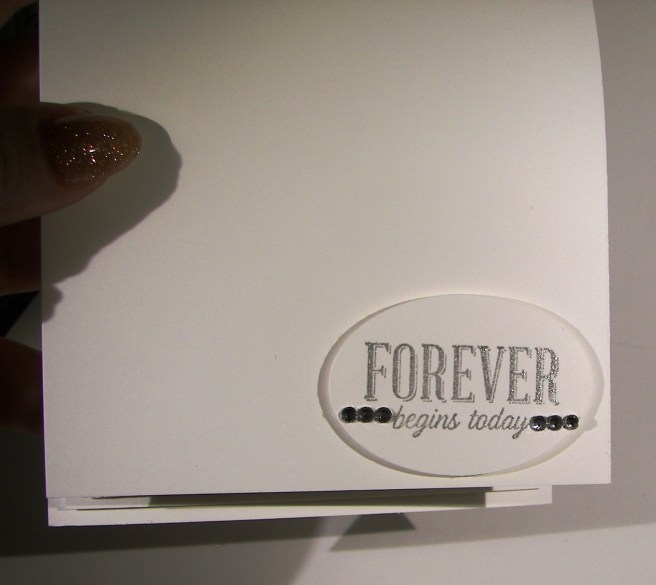
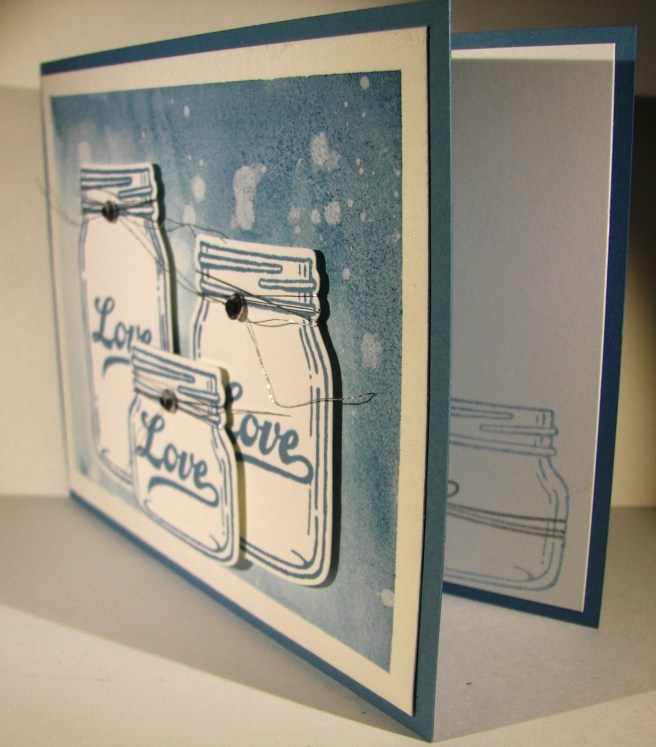
I did a tiny bit of stamping inside.  The small jar was used but stamped off once to give it a lighter look and allow me to write over it if needed.  Then, I stamped with silver encore ink a wrapped string to match the front.  I went back and added large basic rhinestones on the metallic thread and thought it was perfect.

6-9 (1)

Have a creative day!

Moana

I Do…

This is one huge, and most wonderful wedding card.  I think it is to the grandest scale I have done so far.  Must be because we are only a week away from our sons big day!  I think that I just might use this one for myself. I will have to think long and hard about what to write…

5-27

This card measures 11 1/4 x 3 3/4″, how about that!  I used a sheet of 12 x 12 to put this one together.  The front is layered with a large piece of dazzling diamond glimmer paper with a special water color panel for the card front.  The lettering was done with the Larger Than Life Alphabet & Number stamp set.  It is, sad to say, retiring.  Along with this beautiful Lost Lagoon color.

I spent quite a bit of time moving ink along this piece.  Painting, distressing, drying, and then repeating all of that until I liked what I saw.  The stamping was simple.  The first layer was done with lost lagoon and then again with silver encore ink.  The result gave a shadow look, but it is still two dimensional and flat as can be.  The flowers aren’t of course, and I love the look.  Kind of like blossoms traveling in the wind.  It will be interesting to try and create an envelope for this one, maybe it is too beautiful to put it in one. Hmmm….

5-27 (1)

Have a creative day!

Moana

Awesomely Artistic with Watermelon Wonder

The weekends seem to get busier all of the time.  I guess that is what happens when you have a child getting married soon.  Errands and then some.  I wouldn’t have it any other way though.  I enjoyed some relaxing time yesterday afternoon finishing this gift set I actually started Friday night.  Talk about being busy.

5-9 (4)

With my love of water color, you would have thought the card came first.  Not this time.  I started with this awesome designer series paper and made an adorable gift bag.  You would think I had tons of gifts to give all of the time with the amount of bags I make, not true though.  I just love to make them.  I do share them with others though, usually as a gift to use for others.  They all find happy homes, I promise.

5-9 (2)

I did try something new with the card though.  The dragonflies were stamped in versamark on the water color paper, not new there.  I used iridescent ice on them, also not new. However, using them together as a resist for water coloring is new.  As color was applied the resist was pretty neat, not as clean as embossing powder, but still holding up.  I decided to add silver ink as well and then it changed even more.  The silver ink clung to the images more than the watermelon wonder ink did.  The look is fantastic, don’t you think? I added a little bit of silver metallic thread and five clear sequins to finish off the look.  Just divine.

5-9 (1)

Have a creative day!

Moana

Thanks For Being You

Aside from some very hasty photography, and as a result poor images, I do rather like this card.  Even though several of the cards in this series look similar, this one feels different.  I guess that can happen when you include black a little unexpectedly.  The ribbon is nice though, even if it is a bit strong.

4-4 (2)

I hadn’t had the bitty butterfly punch out in quite a while, but it was just what I wanted.  I sponged them in silver ink and thought it looked like the raindrops had given them a bit of a sheen.  I also sponged the tag in the same silver ink.  A favorite touch of mine.

I couldn’t let myself use the other photo I had taken.  Just too rushed for something decent, but I still wanted to share it.  I raised up the sentiment and the butterflies on dimensionals and left it at that.

Have a creative day.

Moana

Forever Begins Today

I don’t think I can get enough of this pretty paper.  I am glad I managed to earn an extra pack of this paper during Sale-a-bration.  This particular pattern was my second favorite, hard to top it though.

4-2

Another sad part about this card is that soon the blackberry bliss I used for the card base will soon retire.  I will so miss using it.  It was really my favorite.  Time to enjoy it as much as possible and get ready for some new colors.  I think I might get a little stash of it built up to enjoy though.

This card is like the others in the series, pretty direct and to the point.  I stamped my sentiment in old olive, punched it with the extra-large oval punch, sponged it with silver encore ink and shadowed it with another punch in blackberry bliss.  I raised them up on dimensionals and put them just to the side of a lovely ribbon tied with seam binding ribbon.  I could use that ribbon on just about everything.  I thought I wouldn’t love anything as much as the chevron ribbon that retired last year, but I sure do!

4-2 (1)

Have a creative day!

Moana

Celebrate You

This card series has been so fun to share.  I love the simplicity of the cards themselves, allowing the sentiments to really be the focal point.  Sometimes there is so much, what you are trying to say gets lost.

3-29 (2)

I actually liked this card without the sentiment nearly as well as with it.  The ribbon is so elegant it speaks for itself.  However, I wanted this one.  I have been enjoying sponging the sentiments in silver ink with this series.  I am usually all about the exact coordination, but it is a nice contrast without being a distraction.

3-29 (1)

Have a creative day.

Moana

They Say It’s Your Birthday

How about a simple birthday card!  I think this one could be for just about anyone, don’t you? Keeping projects simple allows for a lot of options, more than you would think.  And how awesome is this balloon bouquet punch?  I am absolutely in love with it.  I hope it carries over.  I am keeping it no matter what.

3-28 (2)

I had to hold myself back to not put strings and all kinds of fun stuff here.  But, that would defeat the purpose of of a clean and simple cards after all.  This way I think it would even work for a masculine card.  Gotta love those!

I punched two large and three small balloons.  The large ones were attached flat to the paper and the smaller ones were raised up on dimensionals.  Of course everything is sponged.  The balloons were sponged in hello honey to coordinate as well as the tag.  I thought the color was too strong on the tag, so I sponged with silver encore ink as well to soften it.  It turned out great.

3-28 (1)

Have a creative day!

Moana


Success Looks Good On You

Don’t you love it when designer paper has such unexpected patterns?  This awesome paper from Sale-a-bration, which will end soon, has a few patterns that are so fun and different.  You  wouldn’t guess that this dotted pattern comes from a primarily floral set paper.

3-24 (1)

This project is the first of a dozen cards that I made for a gift set to share with my daughter. It is nearly spring break and my family gets to all be together.  She loves to paper craft with me, and actually kept me company through crafting nearly all of these.  So, you get to enjoy a different one each day.  The series will end with the coordinating container I made to store them all in.  It is so pretty.

The card is super simple.  Just one layer of dsp cut to leave a 1/4″ border, one strip of ribbon tied in a knot, and a layered sentiment.  I stamped in black stazon, punched with the decorative label punch, and then sponged with silver encore ink.  I did use a double layer of dimensionals to keep the tag high enough to clear the ribbon knot underneath.  Simple, right?  Sometimes simple is just right.

3-24 (2)

Have a creative day!

Moana

A Very Special Invitation

I know I used a bunch of retired product, but I still love it too!  The wonderful thing about tools is that you can use them again and again no matter how long you have them.  This stamp set and coordinating embossing folder are retired Christmas product.  I think they are still beautiful and perfectly wonderful for this project.  So there, use the product you have and love!

3-21

These were special handouts for a Sunday church lesson I taught to a group of 14 & 15 year old girls.  They are so dear to my heart, I can’t help myself but make them something special every time I teach.

I embossed my card front after I did my stamping.  The stamp is photopolymer, so exact placement was super easy.  Then I centered my folder just where I wanted it to be.  I traveled through my framelit collection to find one that had the shape to match the background stamp and my sentiment stamp.  Of course it was the last one I looked at.  But it was a perfect fit.  A touch of sponging on the diecut piece and it was done.

I did get the cording out and do a few loops of it behind my card front.  After I had placed my dimensionals behind my diecut, I looped the cording and set it on the exposed sticky side.  I added a couple of glue dots over the top and stuck it down on the card front.  No problems there!  The cording wants to loop because it is stored on a spool.  Even better!]

3-21 (1)

Have a creative day!

Moana

Forever Begins Today

Inspiration came from an unusual place this time.  I was pretty tired after a full day and looked through the events and chatted with my daughter a bit.  She didn’t have much either.  However, we had just gotten our nails done that afternoon and I went with her nail choice.  They were done white with a few pretty jewels tucked around the base of her ring finger nails.  I thought it was lovely.  So, here it went into the card.  This turned into one stunning card fit for any wedding or very special occasion.

3-11 (1)

Of course weddings are on my mind like crazy.  Not only is my son getting married this summer, but my niece, my good friends daughter, and another few to boot.  It is a really busy wedding season for sure.  I will need wonderful cards like this for sure.

3-11 (4)

The layers are very simple.  Just quarter inch two times over with the front layer embossed with the elegant dots embossing folder.  I tucked small basic rhinestones in each of the small ovals and it was wonderful.  Yes, that is a lot of bling, but wedding cards always deserve special attention.  This is the kind of card I could see a bride keeping in her memory book.  So exciting!

I had intended on putting the sentiment on the front of the card, but hated to interrupt the beautiful symmetry going on.  So I tucked in inside because it made it wonderful.  Without that particular sentiment the card could become all occasion, but special occasions for sure.

The sentiment was stamped in silver encore ink.  I wanted a bit more shine so I sprinkled clear embossing powder over the top and set it with my heat tool.  It took it up a notch and made me very happy.  I can see more of these coming together to help celebrate the many wonderful events coming up this year.

3-11 (3)

Have a creative day.

Moana

Beautiful Ride for My Nali Bug

This card has been in the planning part of my brain since the spring catalog came out.  I waited to get the set because I thought it would be one more for me than anything else.  I just might turn out to be wrong on that one, but we will see.  I made this one for my oldest daughter, Denali.  Some of my pet names for her are Nali, Bug, and the coziest is My Nali Bug.  That is just what this card is, My Nali Bug.  I shared it with her before this blog went live and she was so cute about it.  How fun is that!

3-10

I simply stamped the car in the lower portion of my water color paper and got the ink out.  I had originally thought to write her name on the car door, but changed to the balloon last minute.  I think I could get lost in this stamp.  How many creative ways have you seen one of these cars painted in the years they have been driving on the roads?  My brain is thinking of ways to make them on this little guy too.  So much fun and never enough time.

Simple layering of my two focal colors, and this card was done.  I enhanced the layering inside the card to give it a bit more color, but that is really it.  I added some wink of stella to the windows and the silver ink areas of the car.  I touched up the rims with a white gel pen.  It wasn’t perfect, but the surface wasn’t ideal for that pen.  The texture of cold press water color paper is my favorite, so there will be some concessions here and there.  Good enough.

3-10 (1)

Have a creative day!

Moana

Flowering Flourishes

I think this will wrap up my adventures with this particular bridal shower invitation sample set.  I think I just might like this one the best.  I like the layers and different inks used with the added layer of embossing.

1-28 (1)

New stamps come out all of the time, but sometimes it is nice to go back to your favorites.  This set, Flowering Flourishes, is definitely one of my go to sets.  The detail is just beautiful and they layer so nicely together.  The simple elegance of it is so striking.  Just a one layer card today, even though the stamping has a bit of extra to it.  I did add a little extra sparkle here and there, sparkle is a must for this soon to be bride.

1-28 (3)

Have a creative day!

Moana

Celebrate Forever

The other day I asked my husband and youngest daughter to draw me a doodle that I could use for a card front.  I make cards all of the time and rarely hesitate to get to work.  This was different though.

1-16

I don’t have stamps, or papers, or materials that go with his style of art.  It presented a challenge to be sure.  If I had been thinking ahead I would have had him draw on water color paper.  You work with what you are given, right?  It is easy for me to focus on all of the problem areas, but I think it will work nicely.  And it is an original, one of a kind.

1-16 (1)

I used two different sentiments to create this combo.  I masked off half of each phrase and got just what I wanted.  I think I have gotten a bit spoiled to have just the right tools for nearly everything I do.  When I had to trouble shoot I got pretty darn frustrated.  Plenty of learning opportunities today.  I hope you get brave and try something different, even if it is a bit overwhelming.

1-16 (2)

Have a creative day!

Moana

Joy, Plain and Simple

As we have been showered with much needed rain here in Northern California, all I feel is joy and gratitude.  We have a long way to go, but every little bit helps.  I thought I would put my feelings into a card.

12-10

The Color Me Irresistible  Specialty DSP is so much fun to work with.  It was actually my inspiration.  I knew it had a raindrop pattern and the project just went from there.  I sponged with a dauber in silver encore ink all over in tiny swirls to give a cloudy gray look.  Turned out fantastic I must say.

12-10 (1)

The flowers were punched with the pansy punch hovering over the large dots in the silver fancy foil designer velum, using the dots as the flower center.  Nice idea, right?  I used a bone folder to curl the petals of the velum and decided I needed more flowers.  Basic gray became the flower background color and I punched another six of those.  I distressed those with a large stylus to give them dimension and lift.  Layered with dimensionals and glue dots, the side border came together.

A single stamp from the Your Presents set put the focus just right.  It was framed with a smokey slate oval and both were sponged with more silver ink.  The “i” was dotted with a metal rimmed pearl and a tiny ribbon was wrapped around.  Add one more awesome card to the mix.  A very rewarding project to make and enjoy.

12-10 (3)

Have a creative day!

Moana

Glittering Holidays

After nearly a two week run of a clean and simple holiday gift set I have been more than ready to make something fabulous.  That is exactly what I did, if that sounds a bit showy, well, just look at it!  I have been planning it all week.

Glittering Holidays

I really just had the flowers in mind and knew they should go on top of a box.  So, to get my brain going, I picked some paper, ink and a stamp and got to work.  The paper alone was just lovely.  I stamped in a way to further elongate the tall box I had in mind.  I really wanted it to be about the flowers.  I did have to use my hot glue gun to keep these guys in order.  After they were assembled I attached them to each other.  The ribbon is threaded between them to hold them on top, so they are not attached otherwise and can be used again.

Glittering Holidays

The box is just scored every two inches for the side measurements and the same for the top and bottom.  Simple there for sure.  I closed the bottom, but just folded the top in place.  I am so going to use this for a wonderful gift, so I needed to get back inside.  Not just for a blog post, nope.

Glittering Holidays

My husband actually designed the card for me.  We chatted while he drove to work and he did a great job with the stamp choices I must say.  I stamped in silver ink and heat embossed in clear to give it an extra shine.  So pretty.  I added flowers with metal rimmed pearls in the centers and added a thin ribbon to finish it off.  The ribbon also helped tie the gift box in as a set.

Glittering Holidays

Have a creative day!

Moana

Elegant Butterfly

Butterflies, butterflies, and more butterflies.  There are a bunch going on here, but one in particular started it all.  You might not realize it, but I played quite a bit with this little butterfly.  Lots of detailing and working it with a stylus.

Elegant Butterflies

Sometimes the attention to detail makes all the difference.  My daughter made a good observation.  She said it would be really pretty if it were glass or something so it could be a necklace charm.  I have to agree, it would be lovely.

Elegant Butterflies

I do rather enjoy working with colors that are so not of the current holiday.  Nothing more entertaining than making a spring card in late fall, or a fun Christmas project in the middle of July.  Something different to expect.

Elegant Butterflies

Have a creative day!

Moana

Game On Dear Heart

I absolutely love, love, love making my own paper with unique stamps.  Most of the time my friends can’t even place which stamp set it came from.  I have overlooked several stamps myself.  Example, look at this cute little fish!

Game On Dear Heart

Sometimes we feel like we don’t fit in, but I feel like that is a beautiful thing.  I made this card with that theme in mind.  He is stamped in melon mambo, water colored a bit, and water colored again with silver encore ink.  Everything is lightly sponged and there are plenty of dimensionals here.

Game On Dear Heart

The sentiment was stamped on a little scrap, punched with the bitty banner punch on one end, and given a bit of ribbon on the other.  How easy is it to just staple some ribbon on.  Some cards need just that, a little different look.  And of course this is layered up as well.  Did you see the little fish repeated inside?

Game On Dear Heart

Have a creative day!

Moana

I’m So Grateful For You

After yet another awesome summer concert I am super exhausted!  So I asked my daughter this morning what color she thought this flower would be.  She talked about purple, orange or yellow.  I thought about tropical, but went with elegant eggplant.

I'm So Grateful For You

It is hard to tell, but there is silver ink painted over the purple.  Of course I had to get out my trusty aqua painter for all three ink colors I used.  Totally love that thing!

I'm So Grateful For You

There was a heavy amount of sponging as well.  I loved the sentiment, but it was the second half of the front sentiment and it was basically a dangling participle.  So, I just didn’t ink up the ‘and’ and the beginning.  Perfect!

I'm So Grateful For You

I may have been half asleep for this project, but it turned out really wonderful.  It is great when I get to sit back and be impressed with myself.  A job well done.

Have a creative day!

Moana

Butterfly Basics

Simple elegance is one of my favorite things in a card.  This color combination surely does lend itself in that direction.  I even think it is neutral enough to be masculine, what do you think?

Butterfly Basics

I used the Butterfly Basics set for this project for the element and sentiment.  I put the fern stamp to work with three different inks.  I started with black stazon, layered with silver encore, and finished up with elegant eggplant.  I continued stamping inside with just the elegant eggplant.

Butterfly Basics

I added some silver satin ribbon to keep those ferns together but kept it in a knot instead of a bow.  The ribbon kind of took over when it was tied in a bow, but just right in a knot.

Butterfly Basics

I kept the boarders narrow and popped the front up on dimensionals.  A nice clean look for an elegant card.  I think I have just the person to send it to.

Have a creative day!

Moana