@love

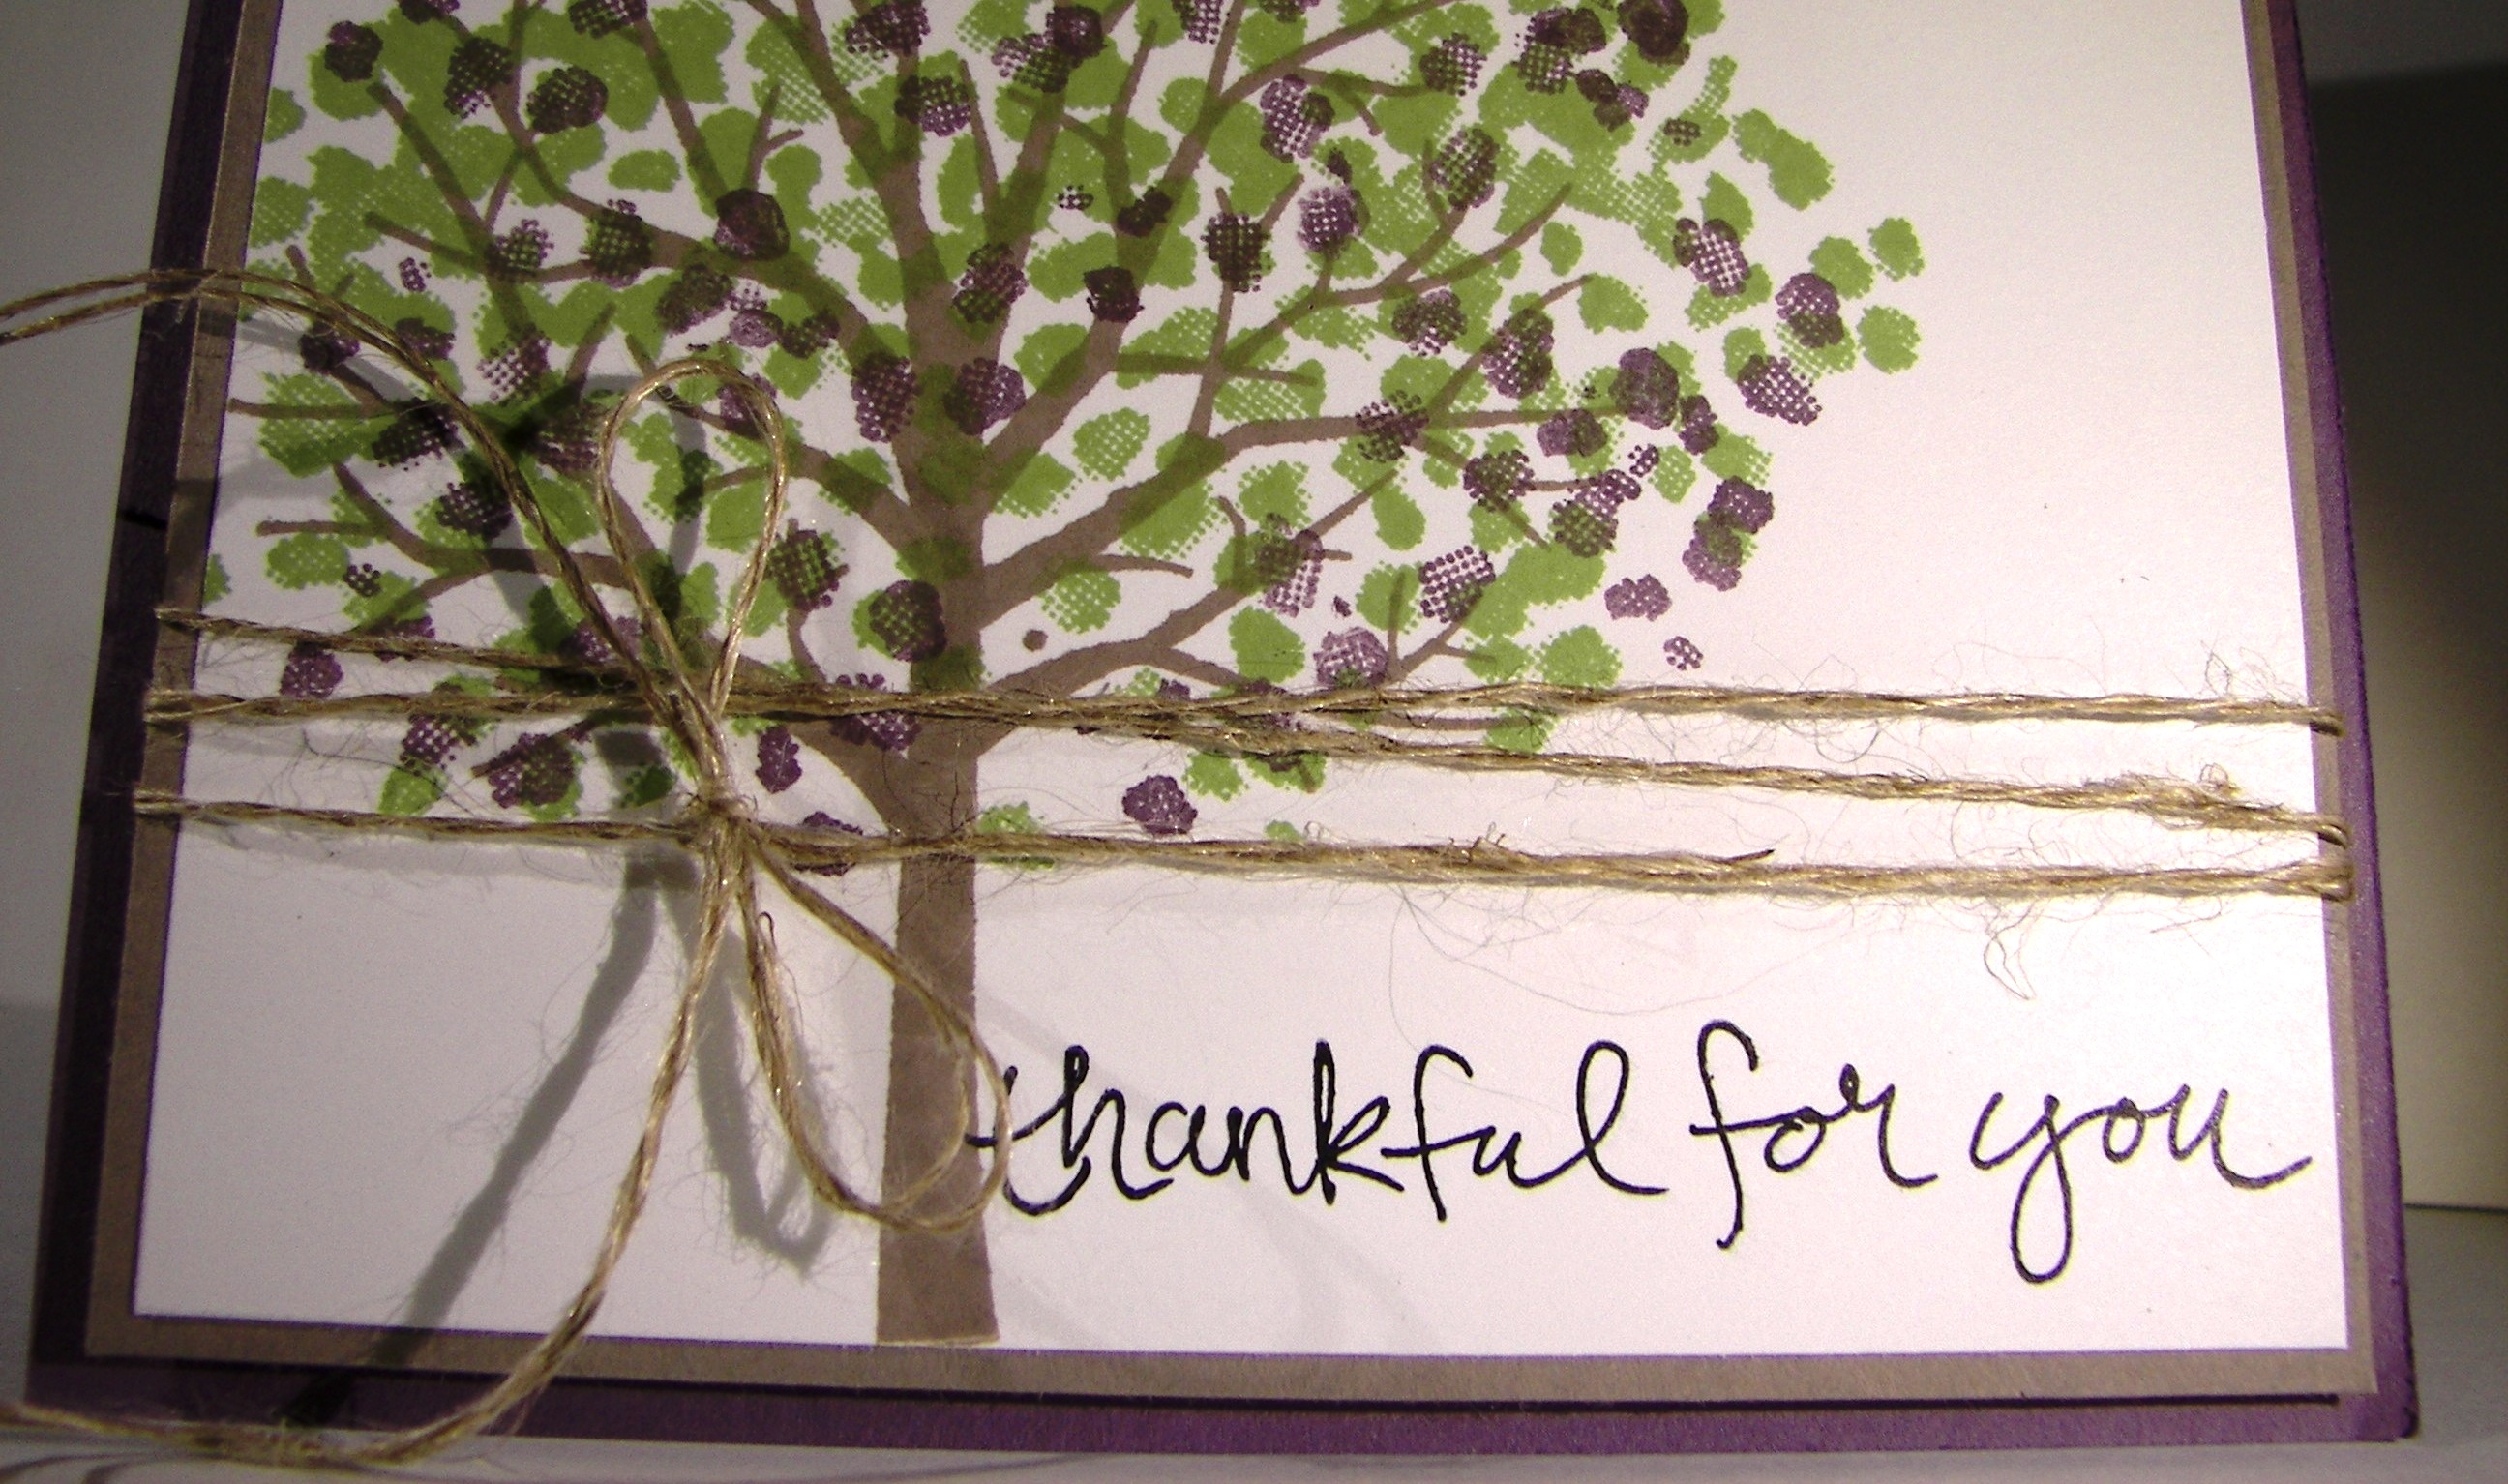
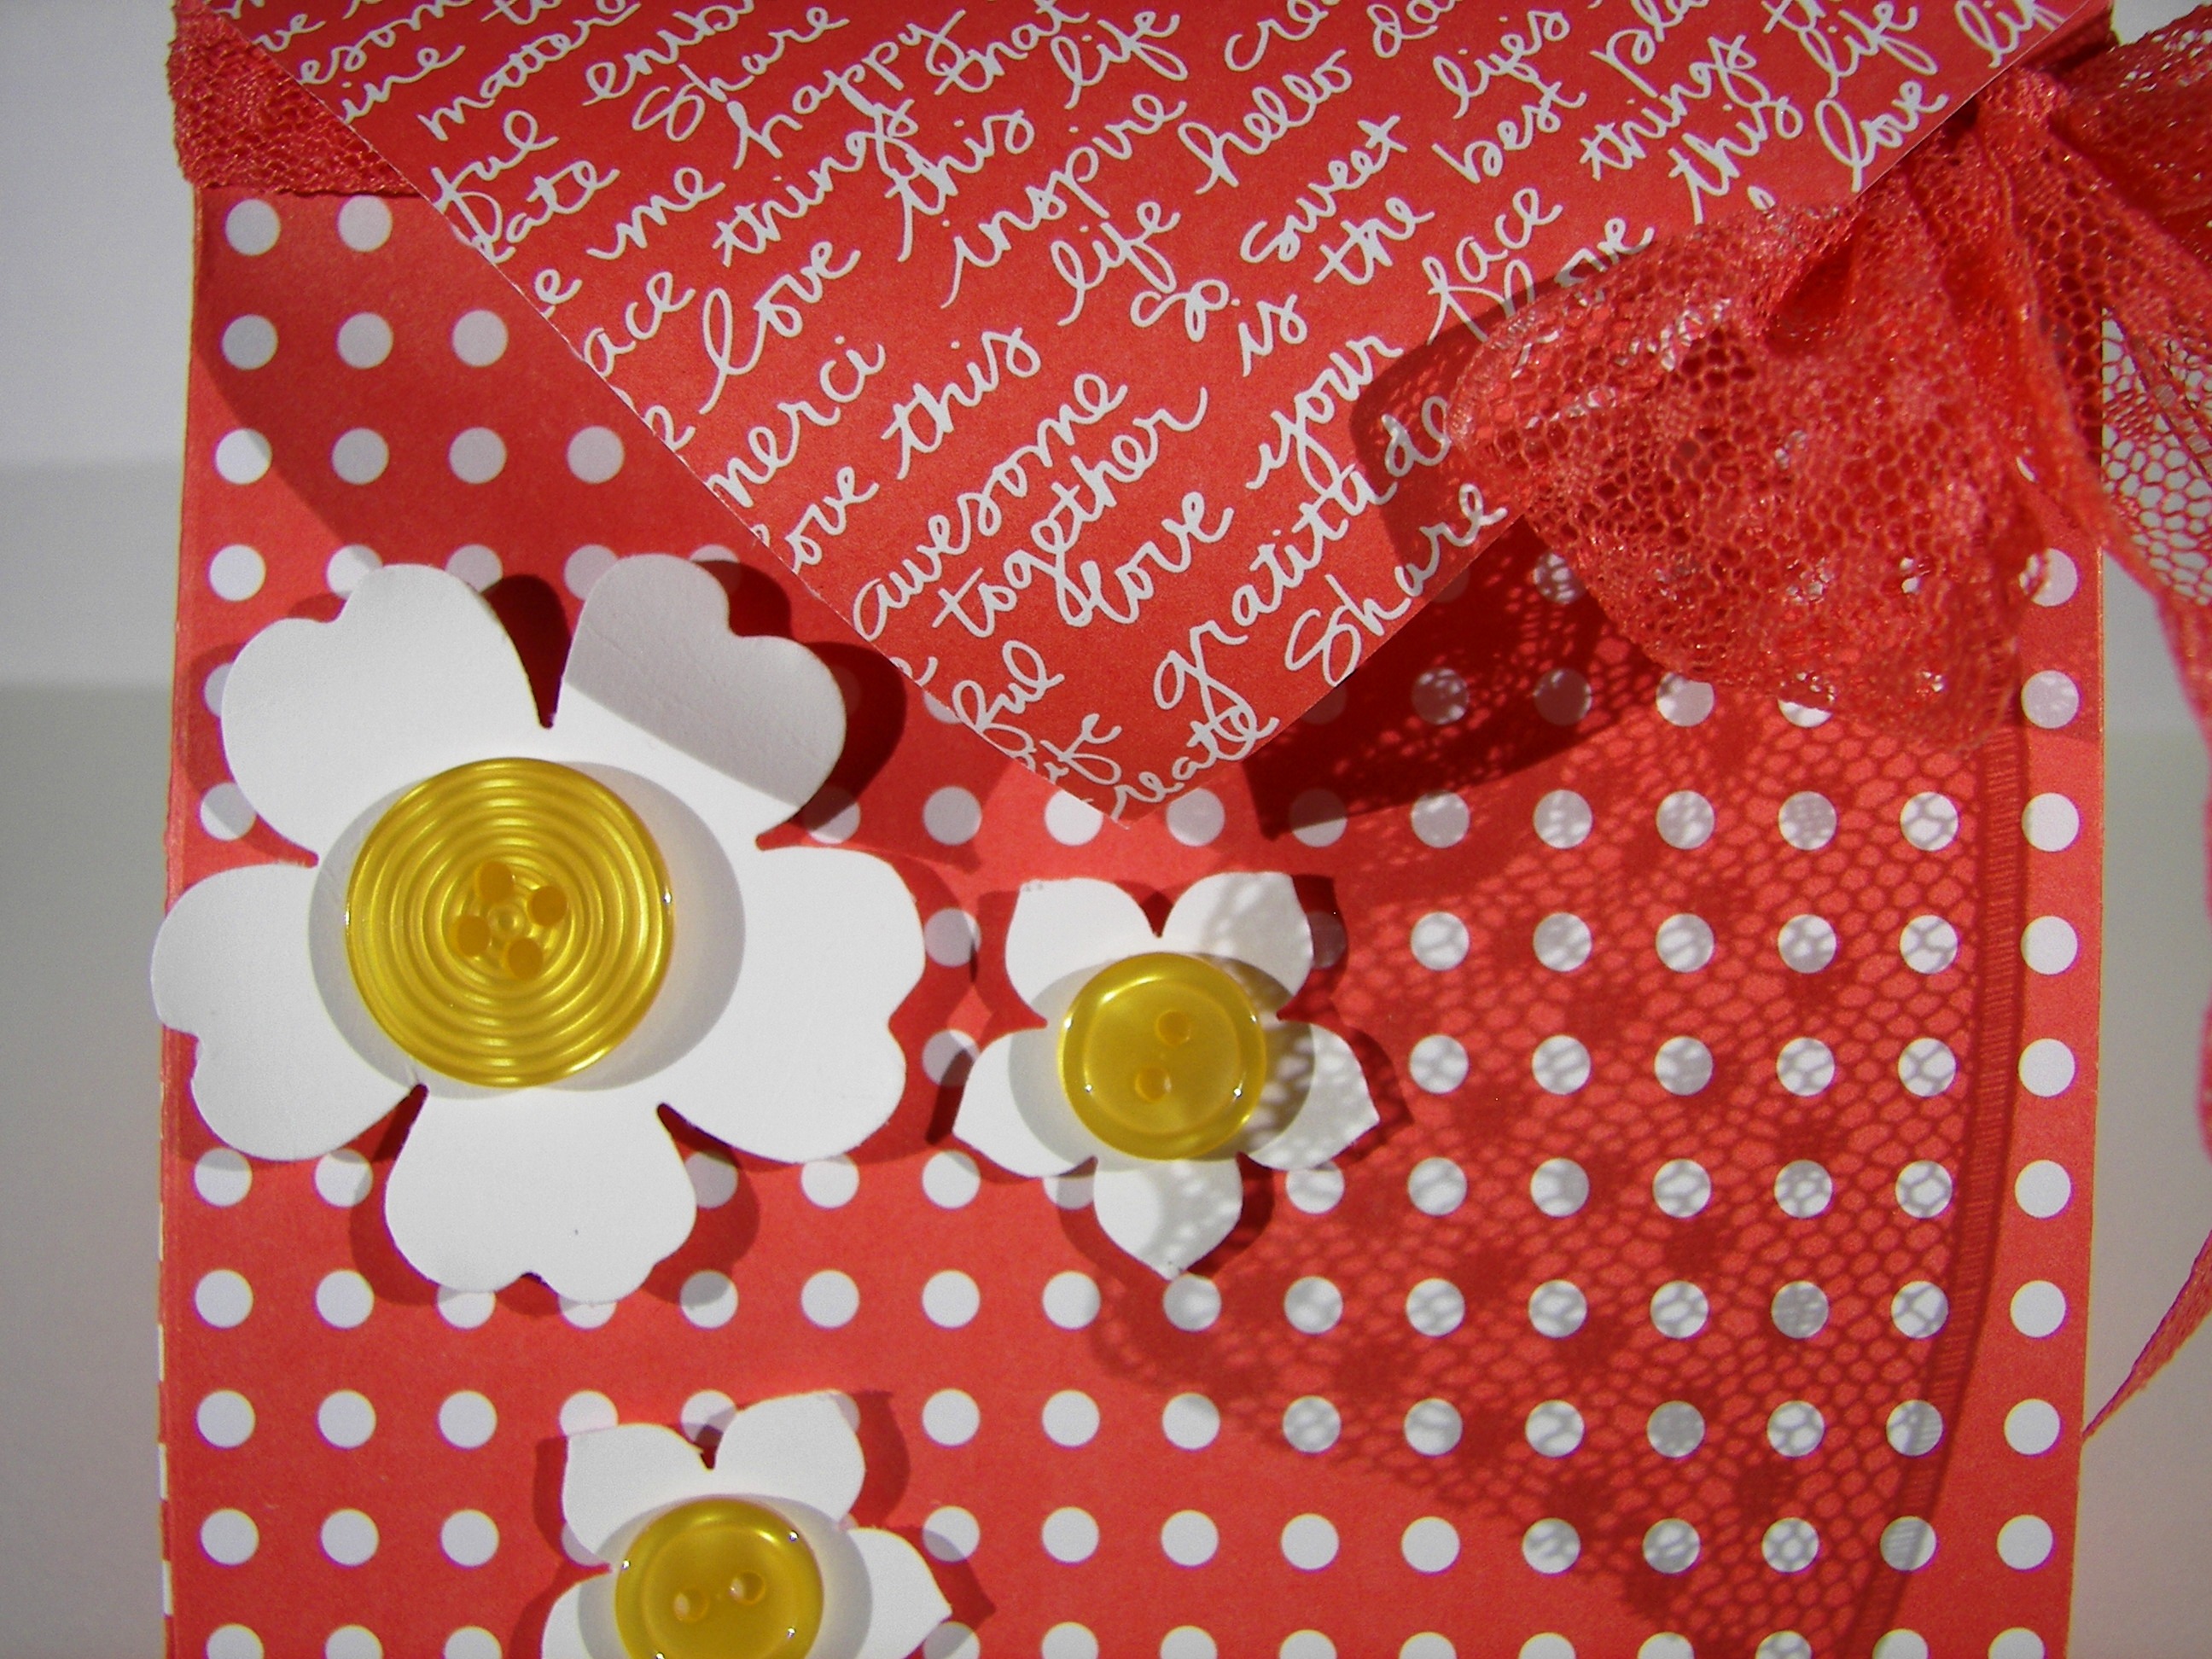
Not everyone shares the same view of love, but that doesn’t mean it isn’t beautiful to them.  Easy words to say, but not always easy to follow.  Sometimes we just need to look at it from a different perspective.

@love

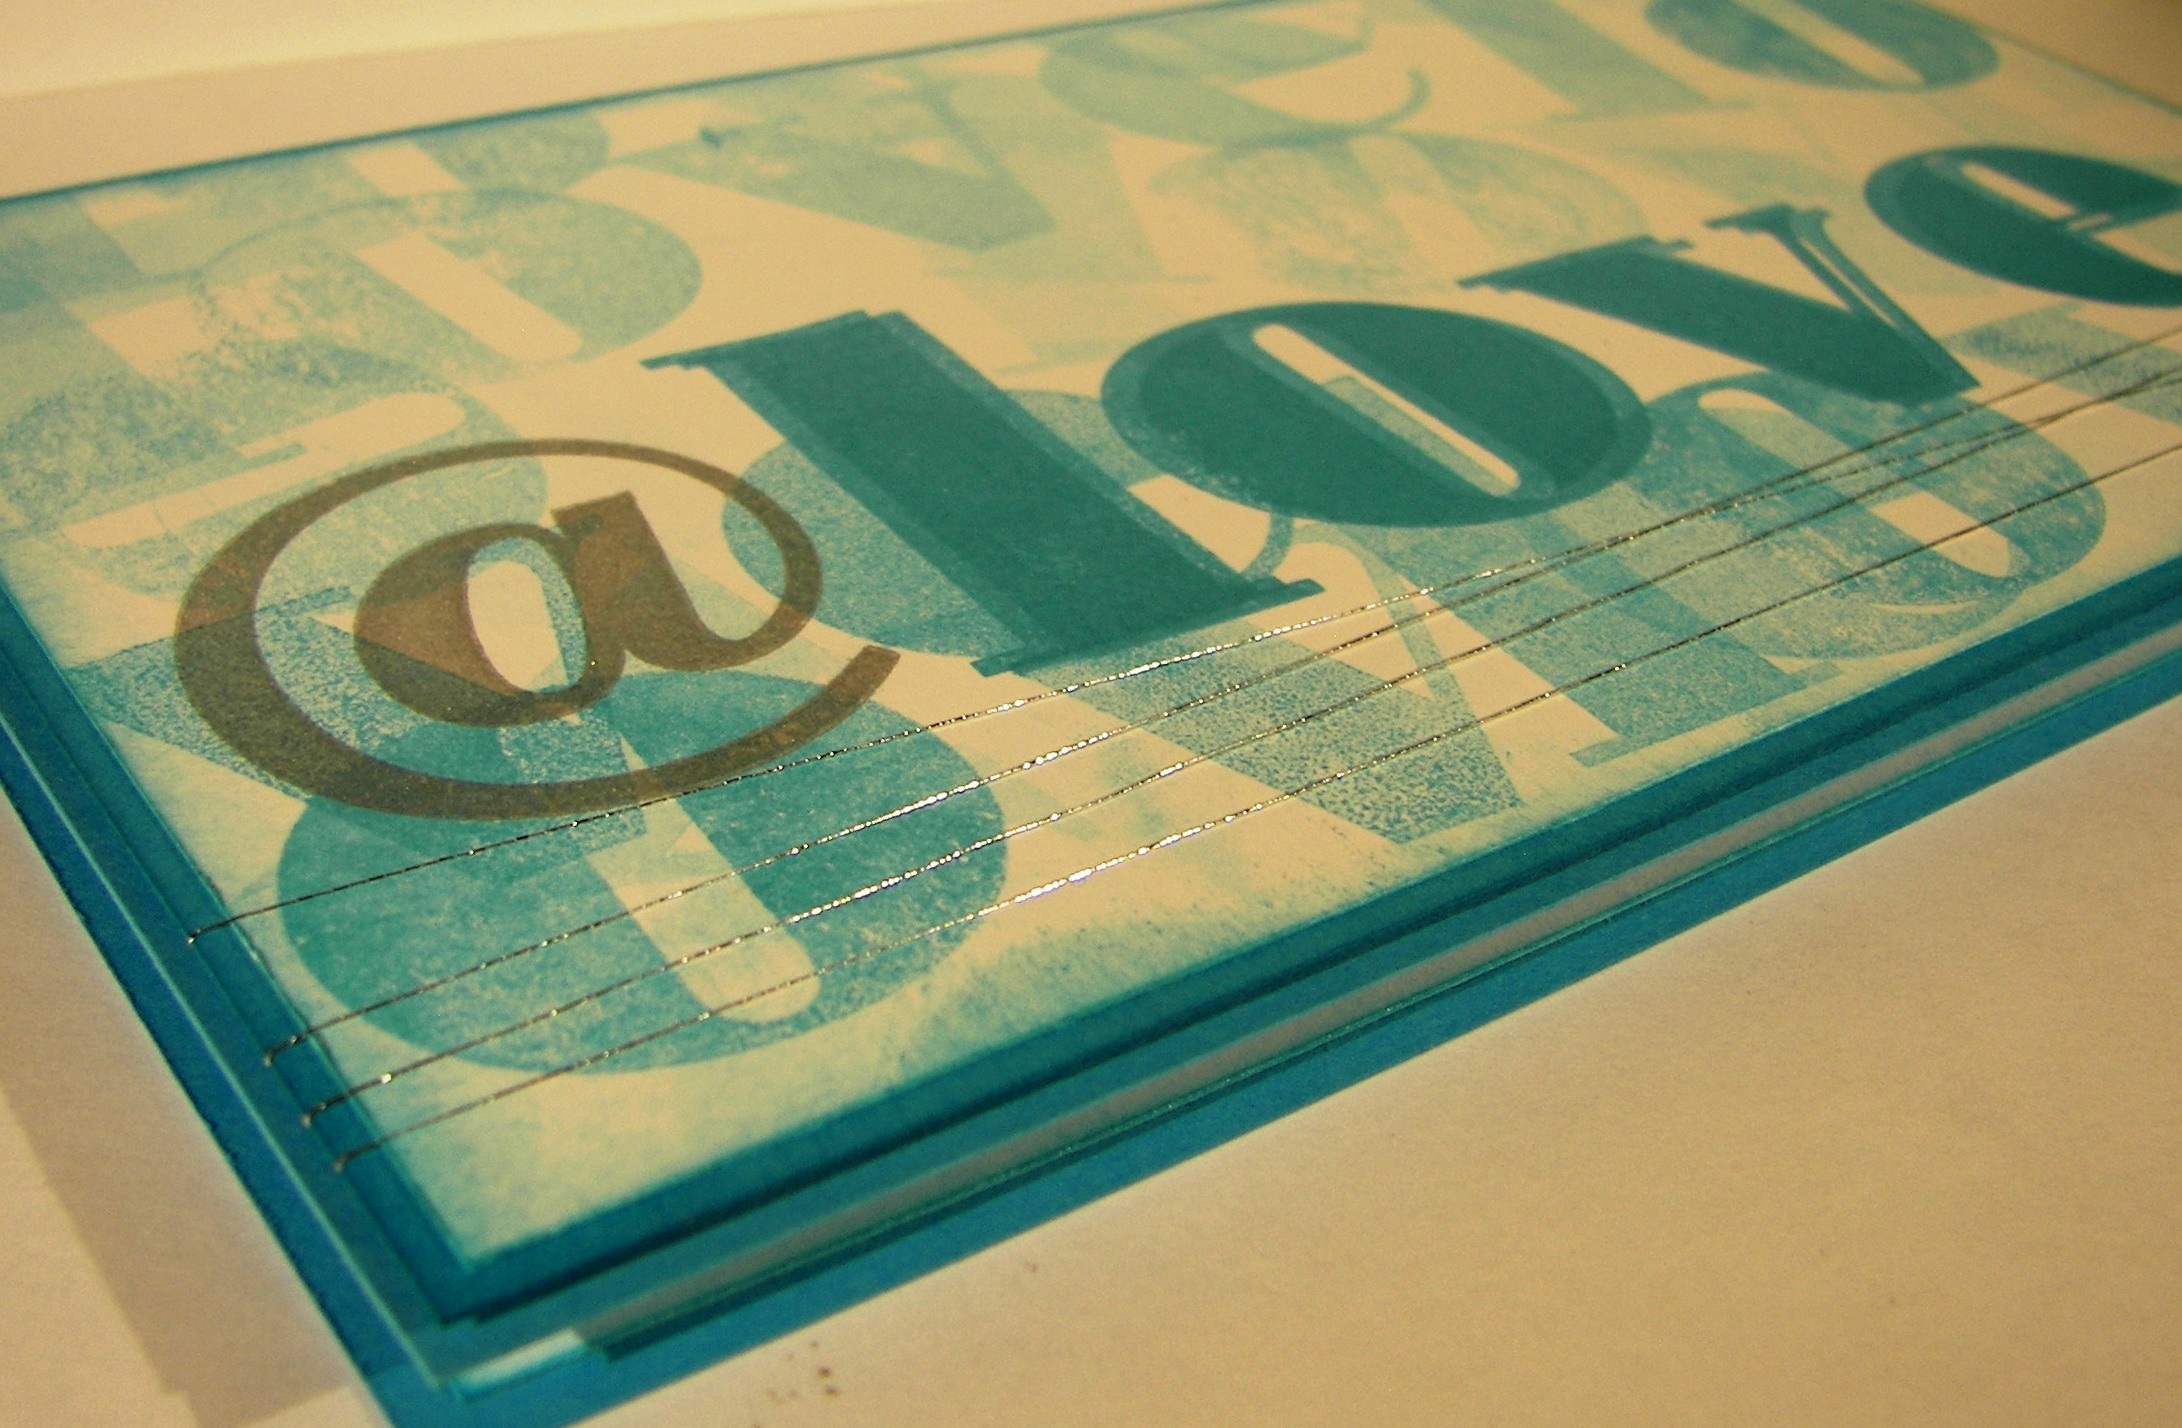
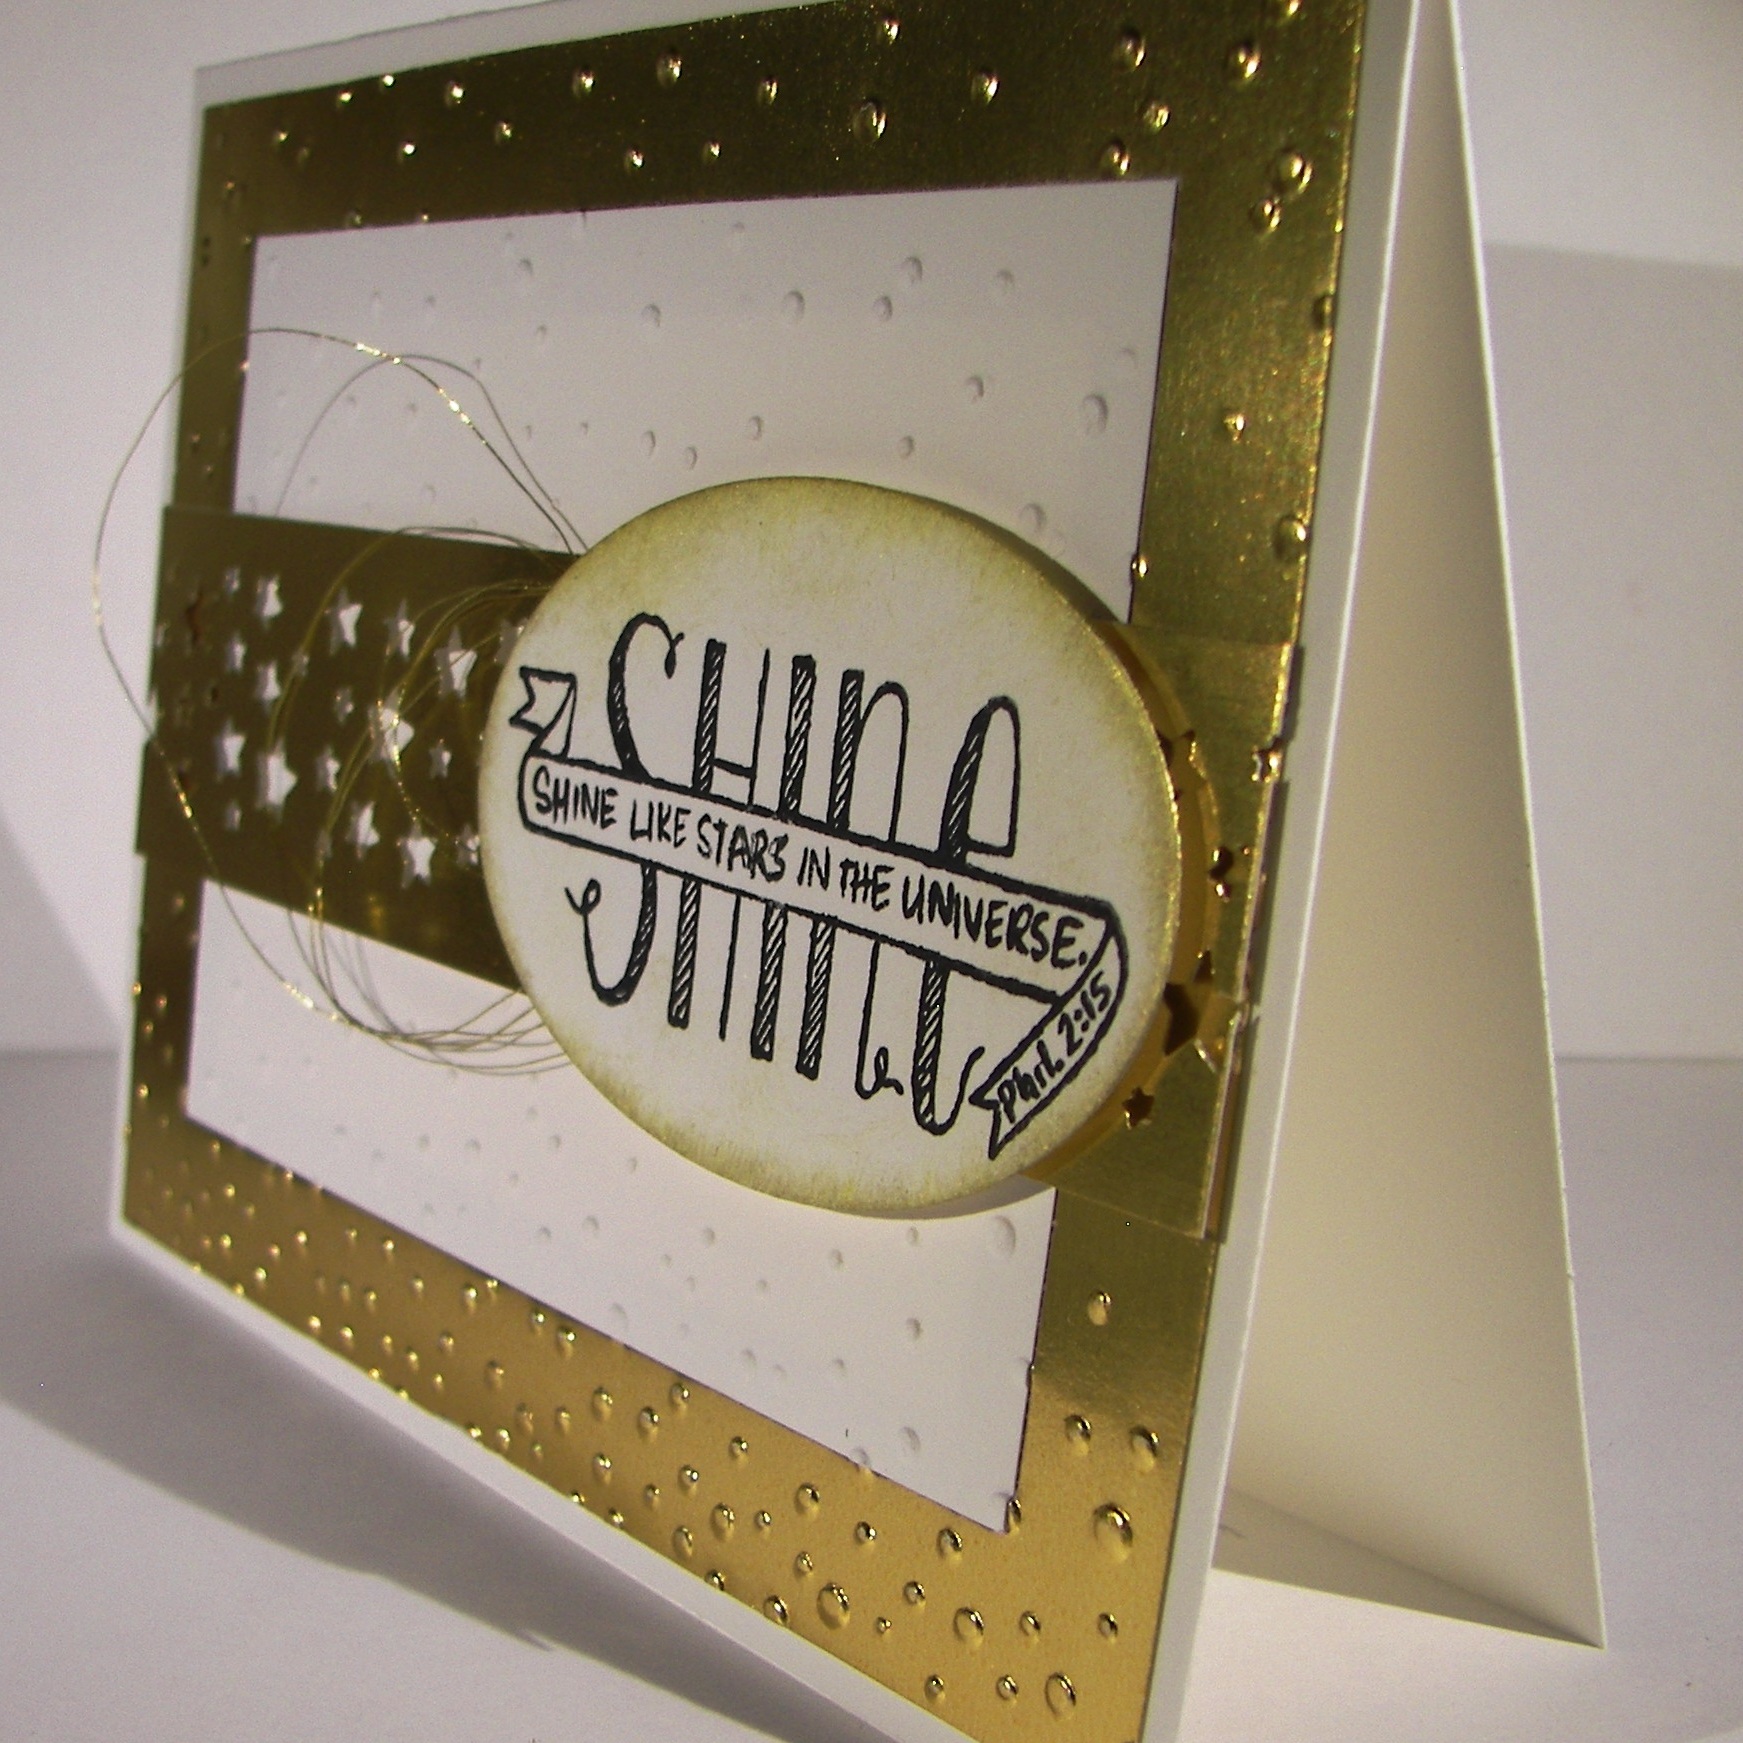
This card is much larger than my normal projects.  It measures 7 1/4″ x 4 1/4″.  That will definitely require a custom envelope.  Won’t this one be fun to get in the mail though.

@love

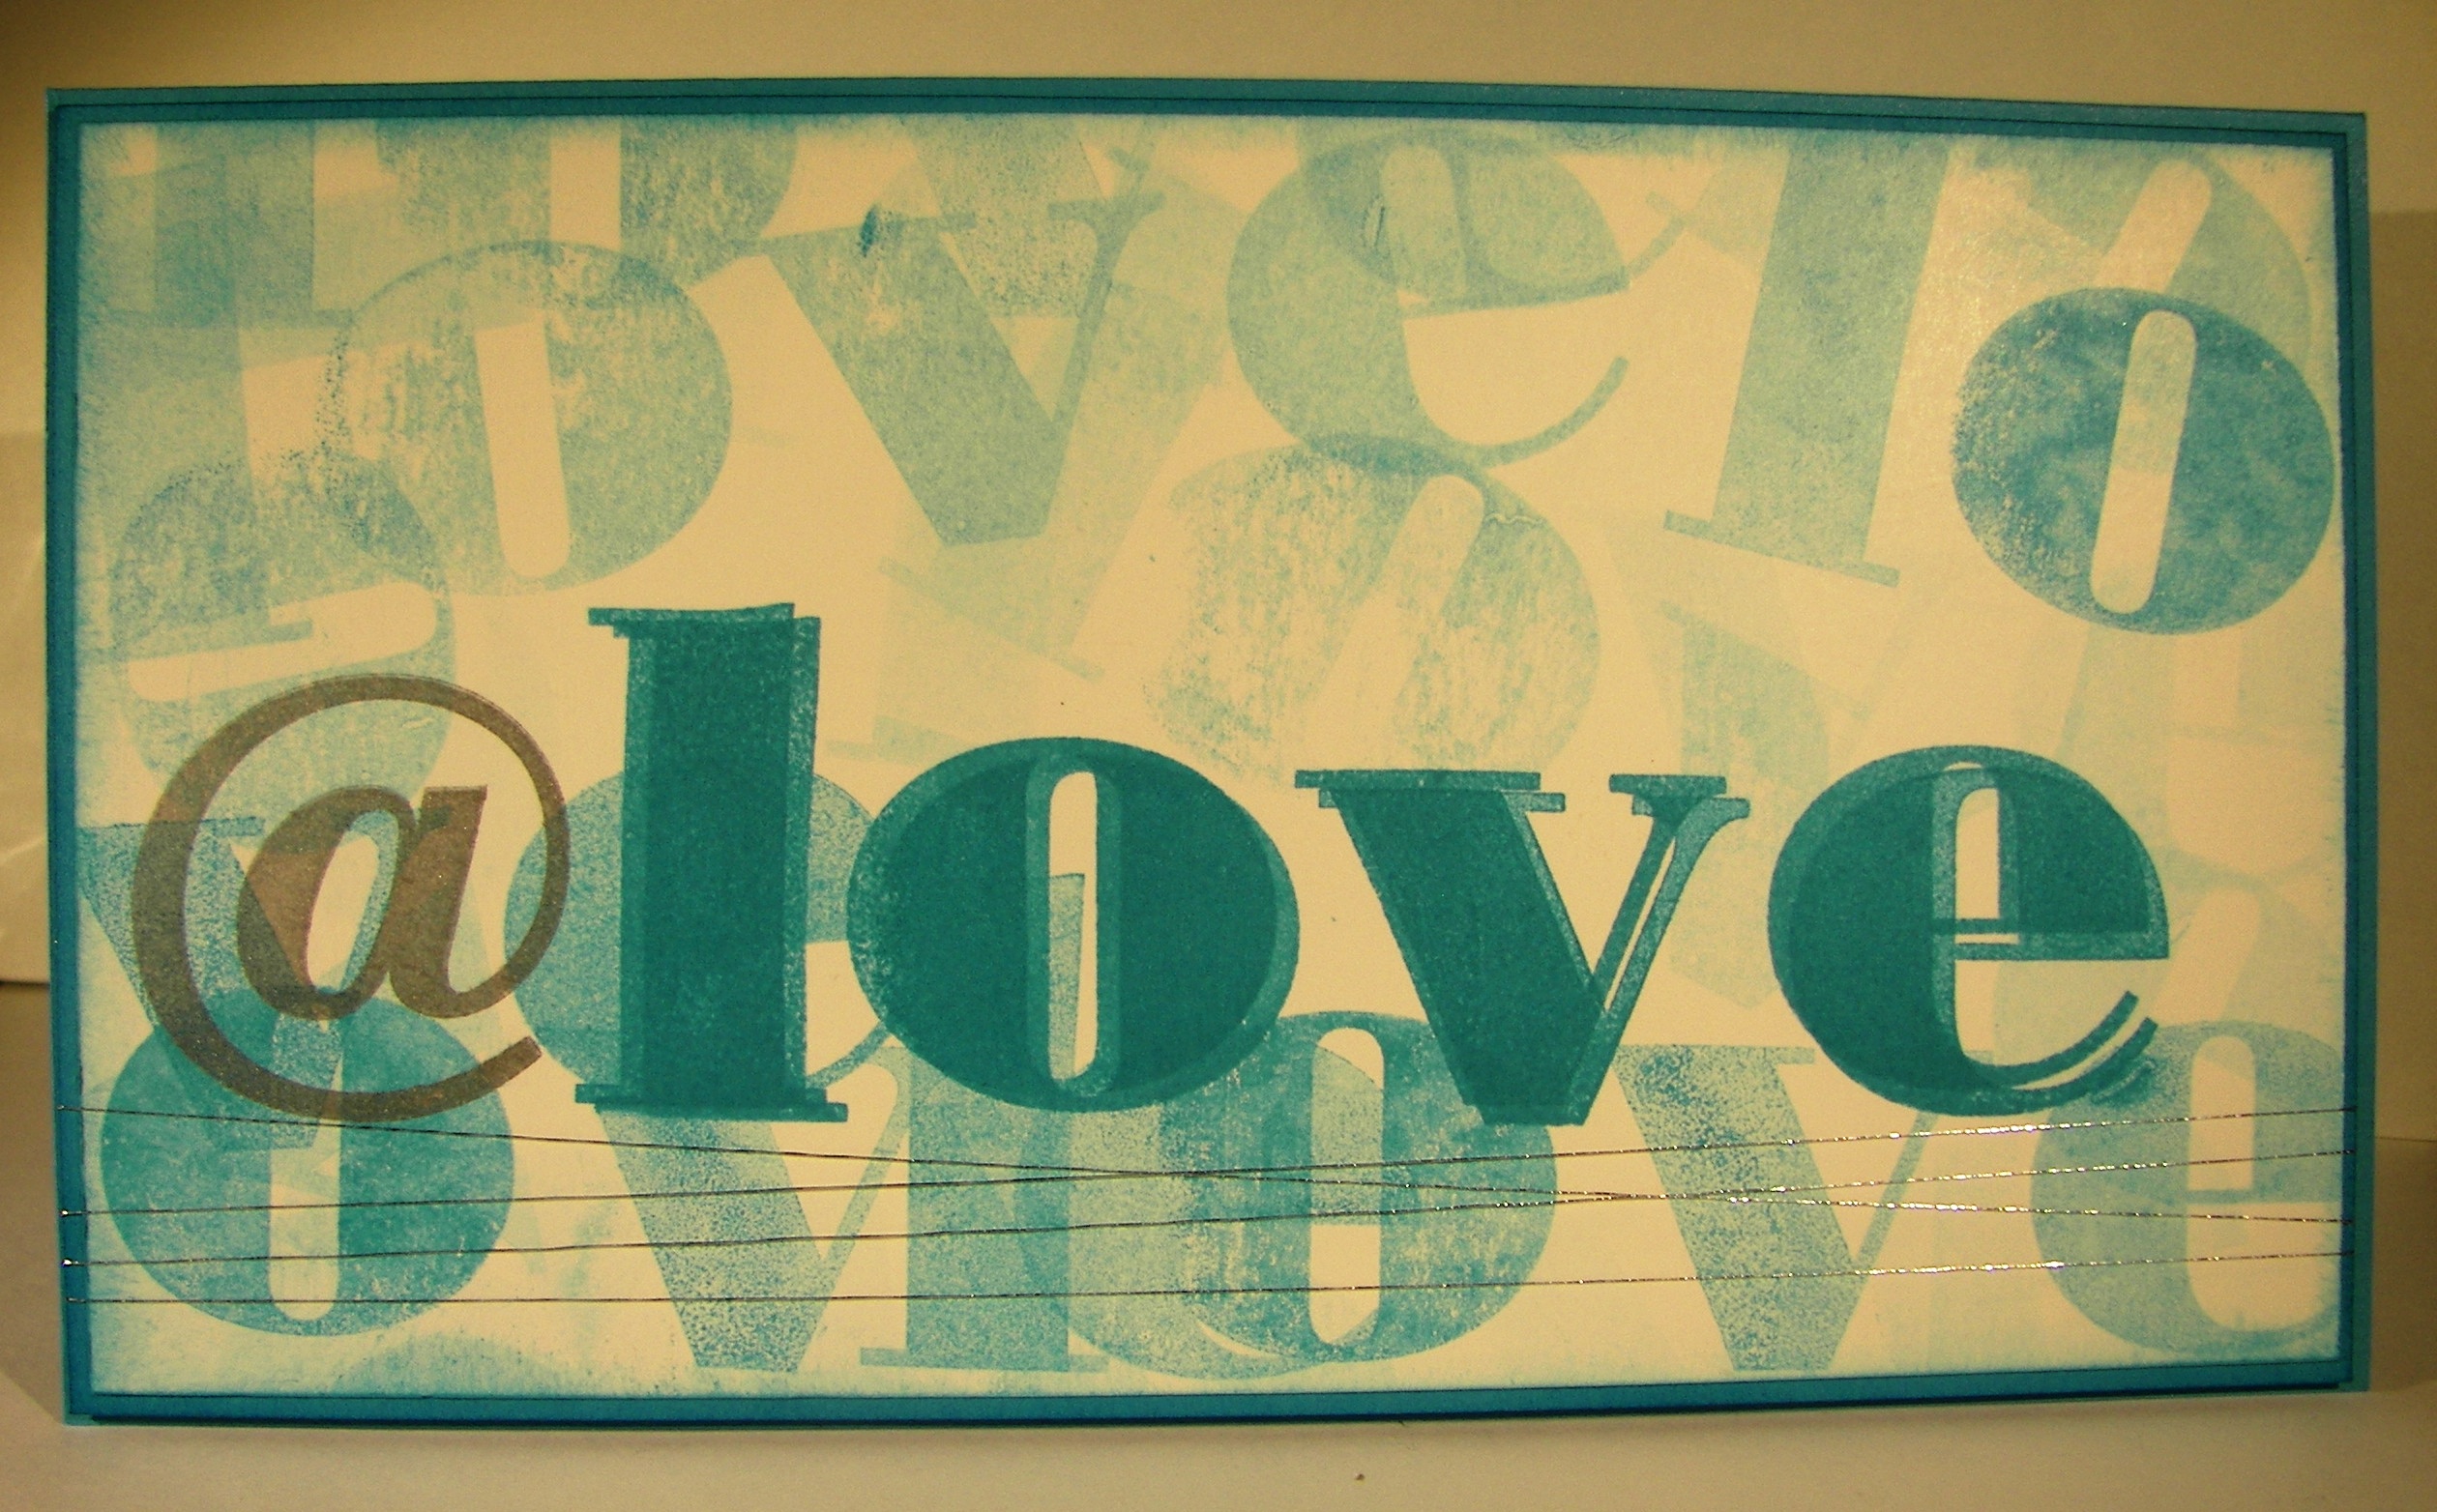
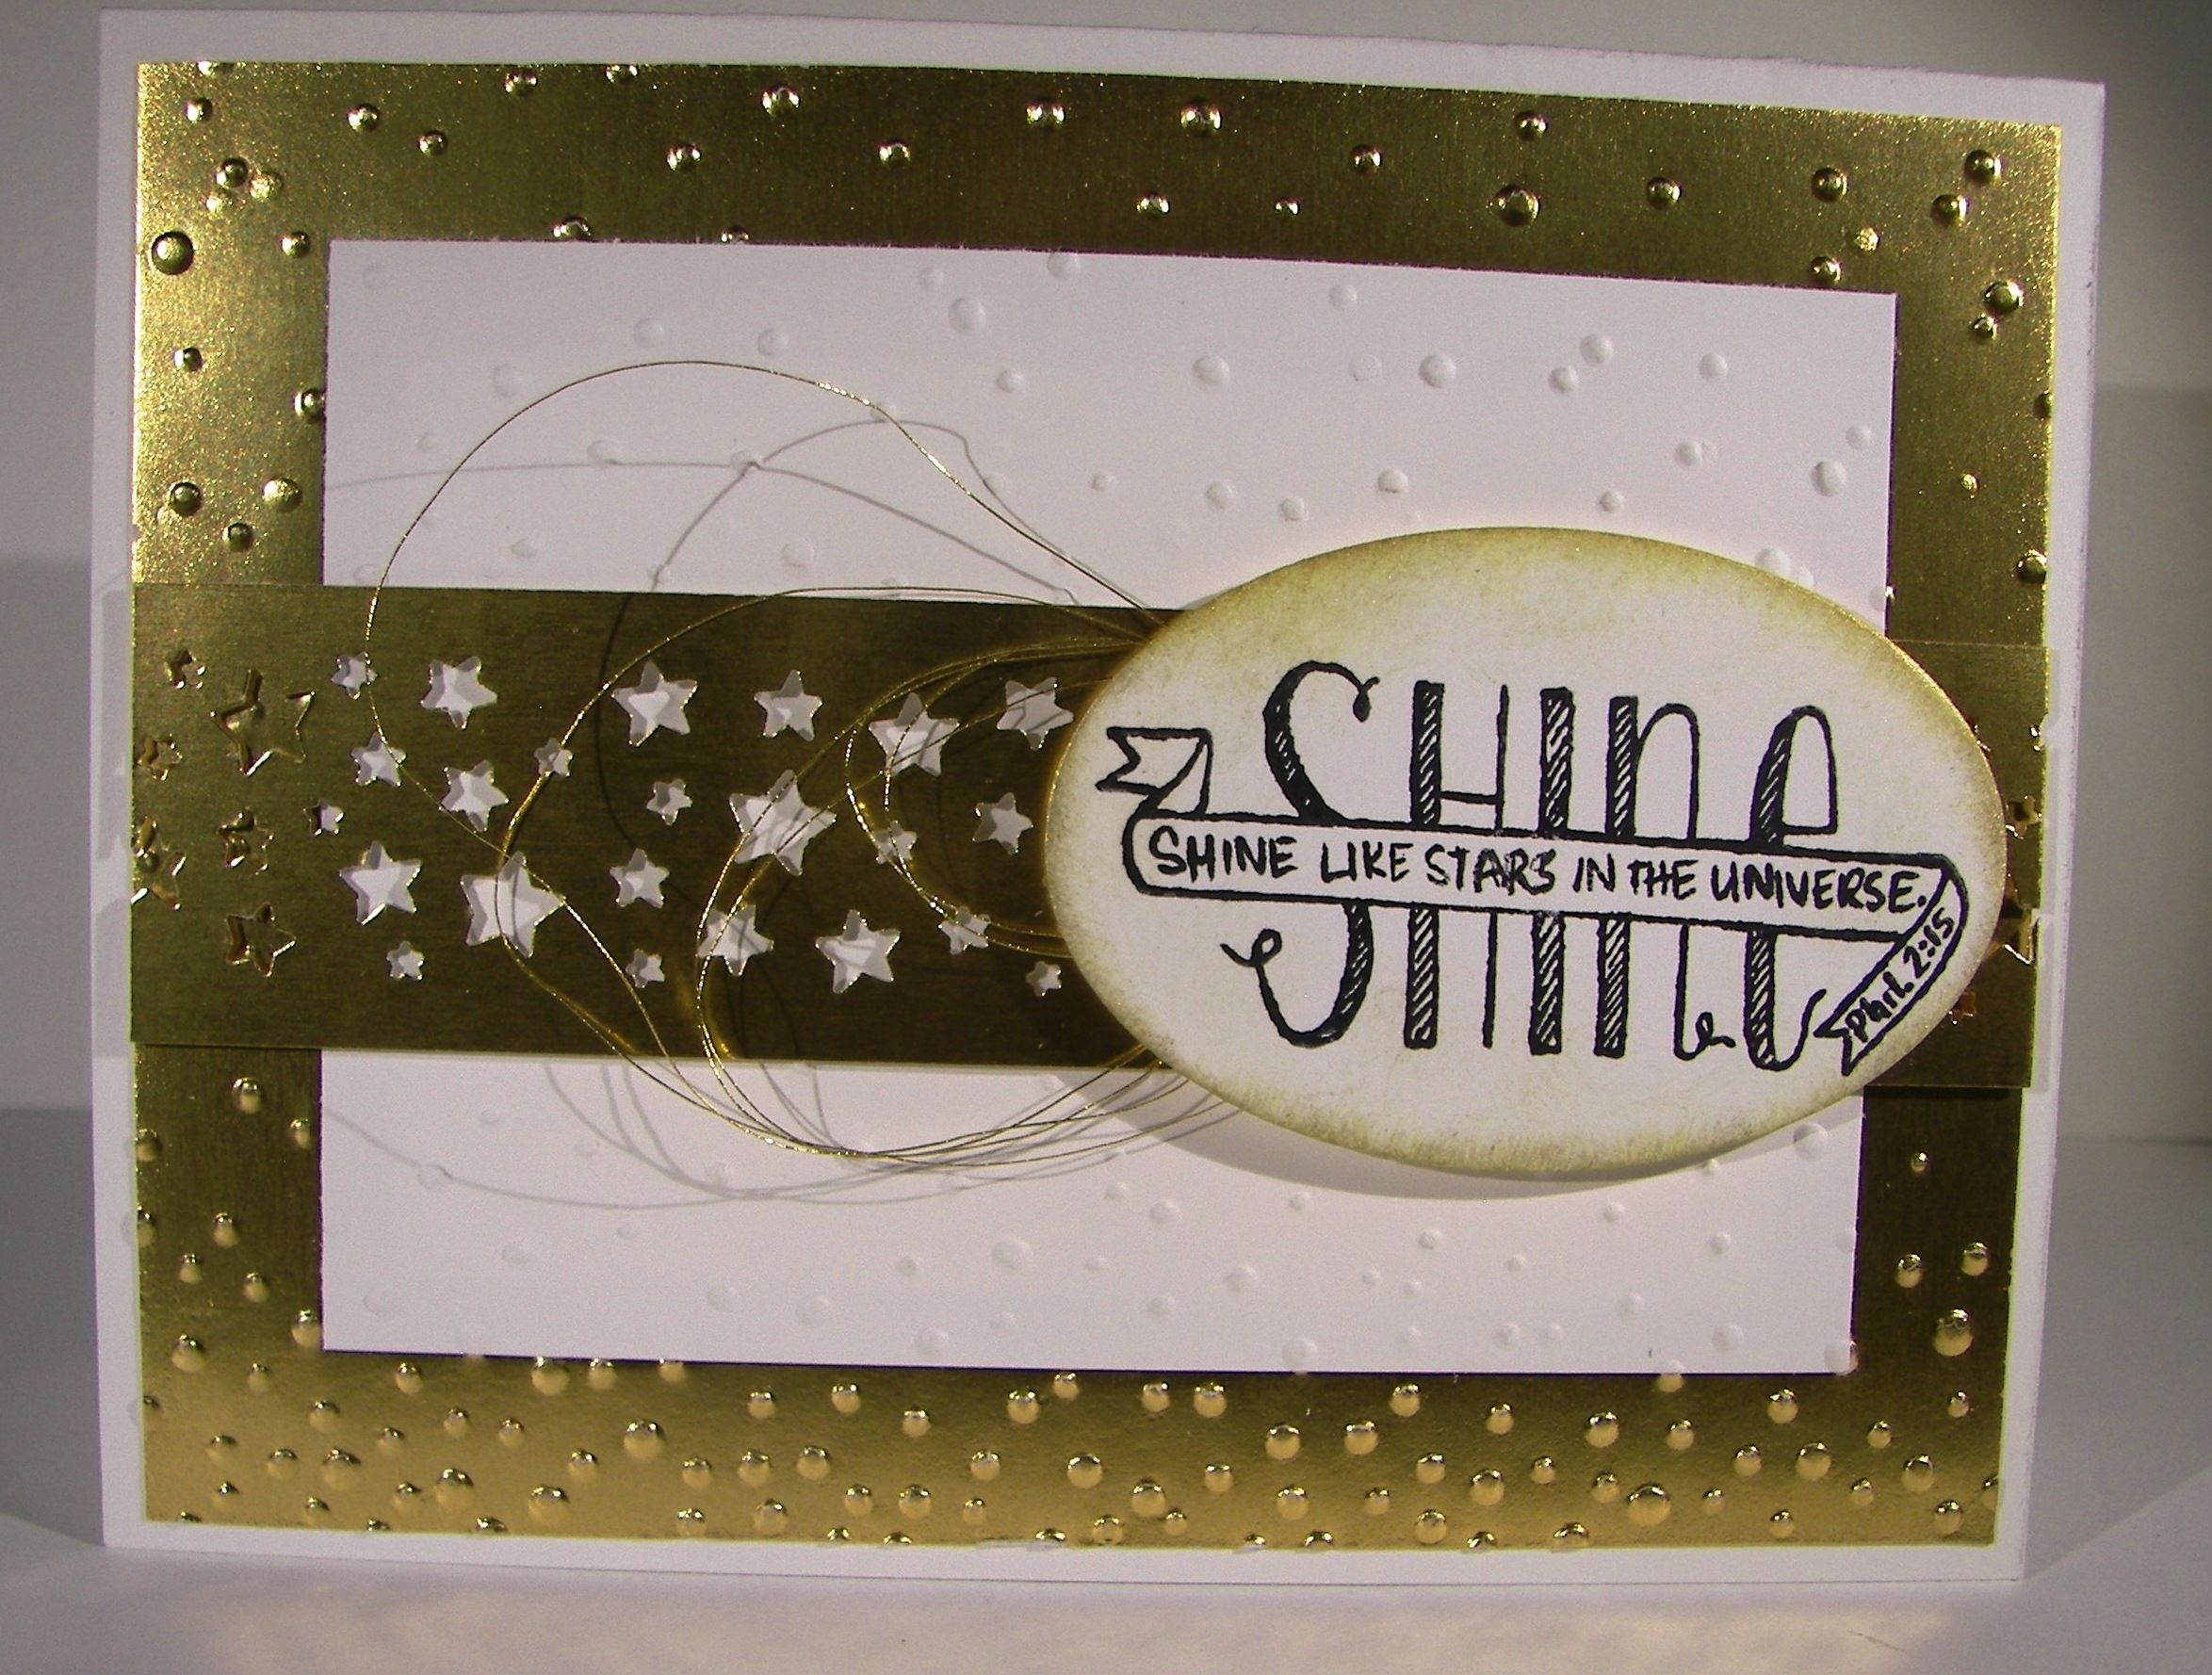
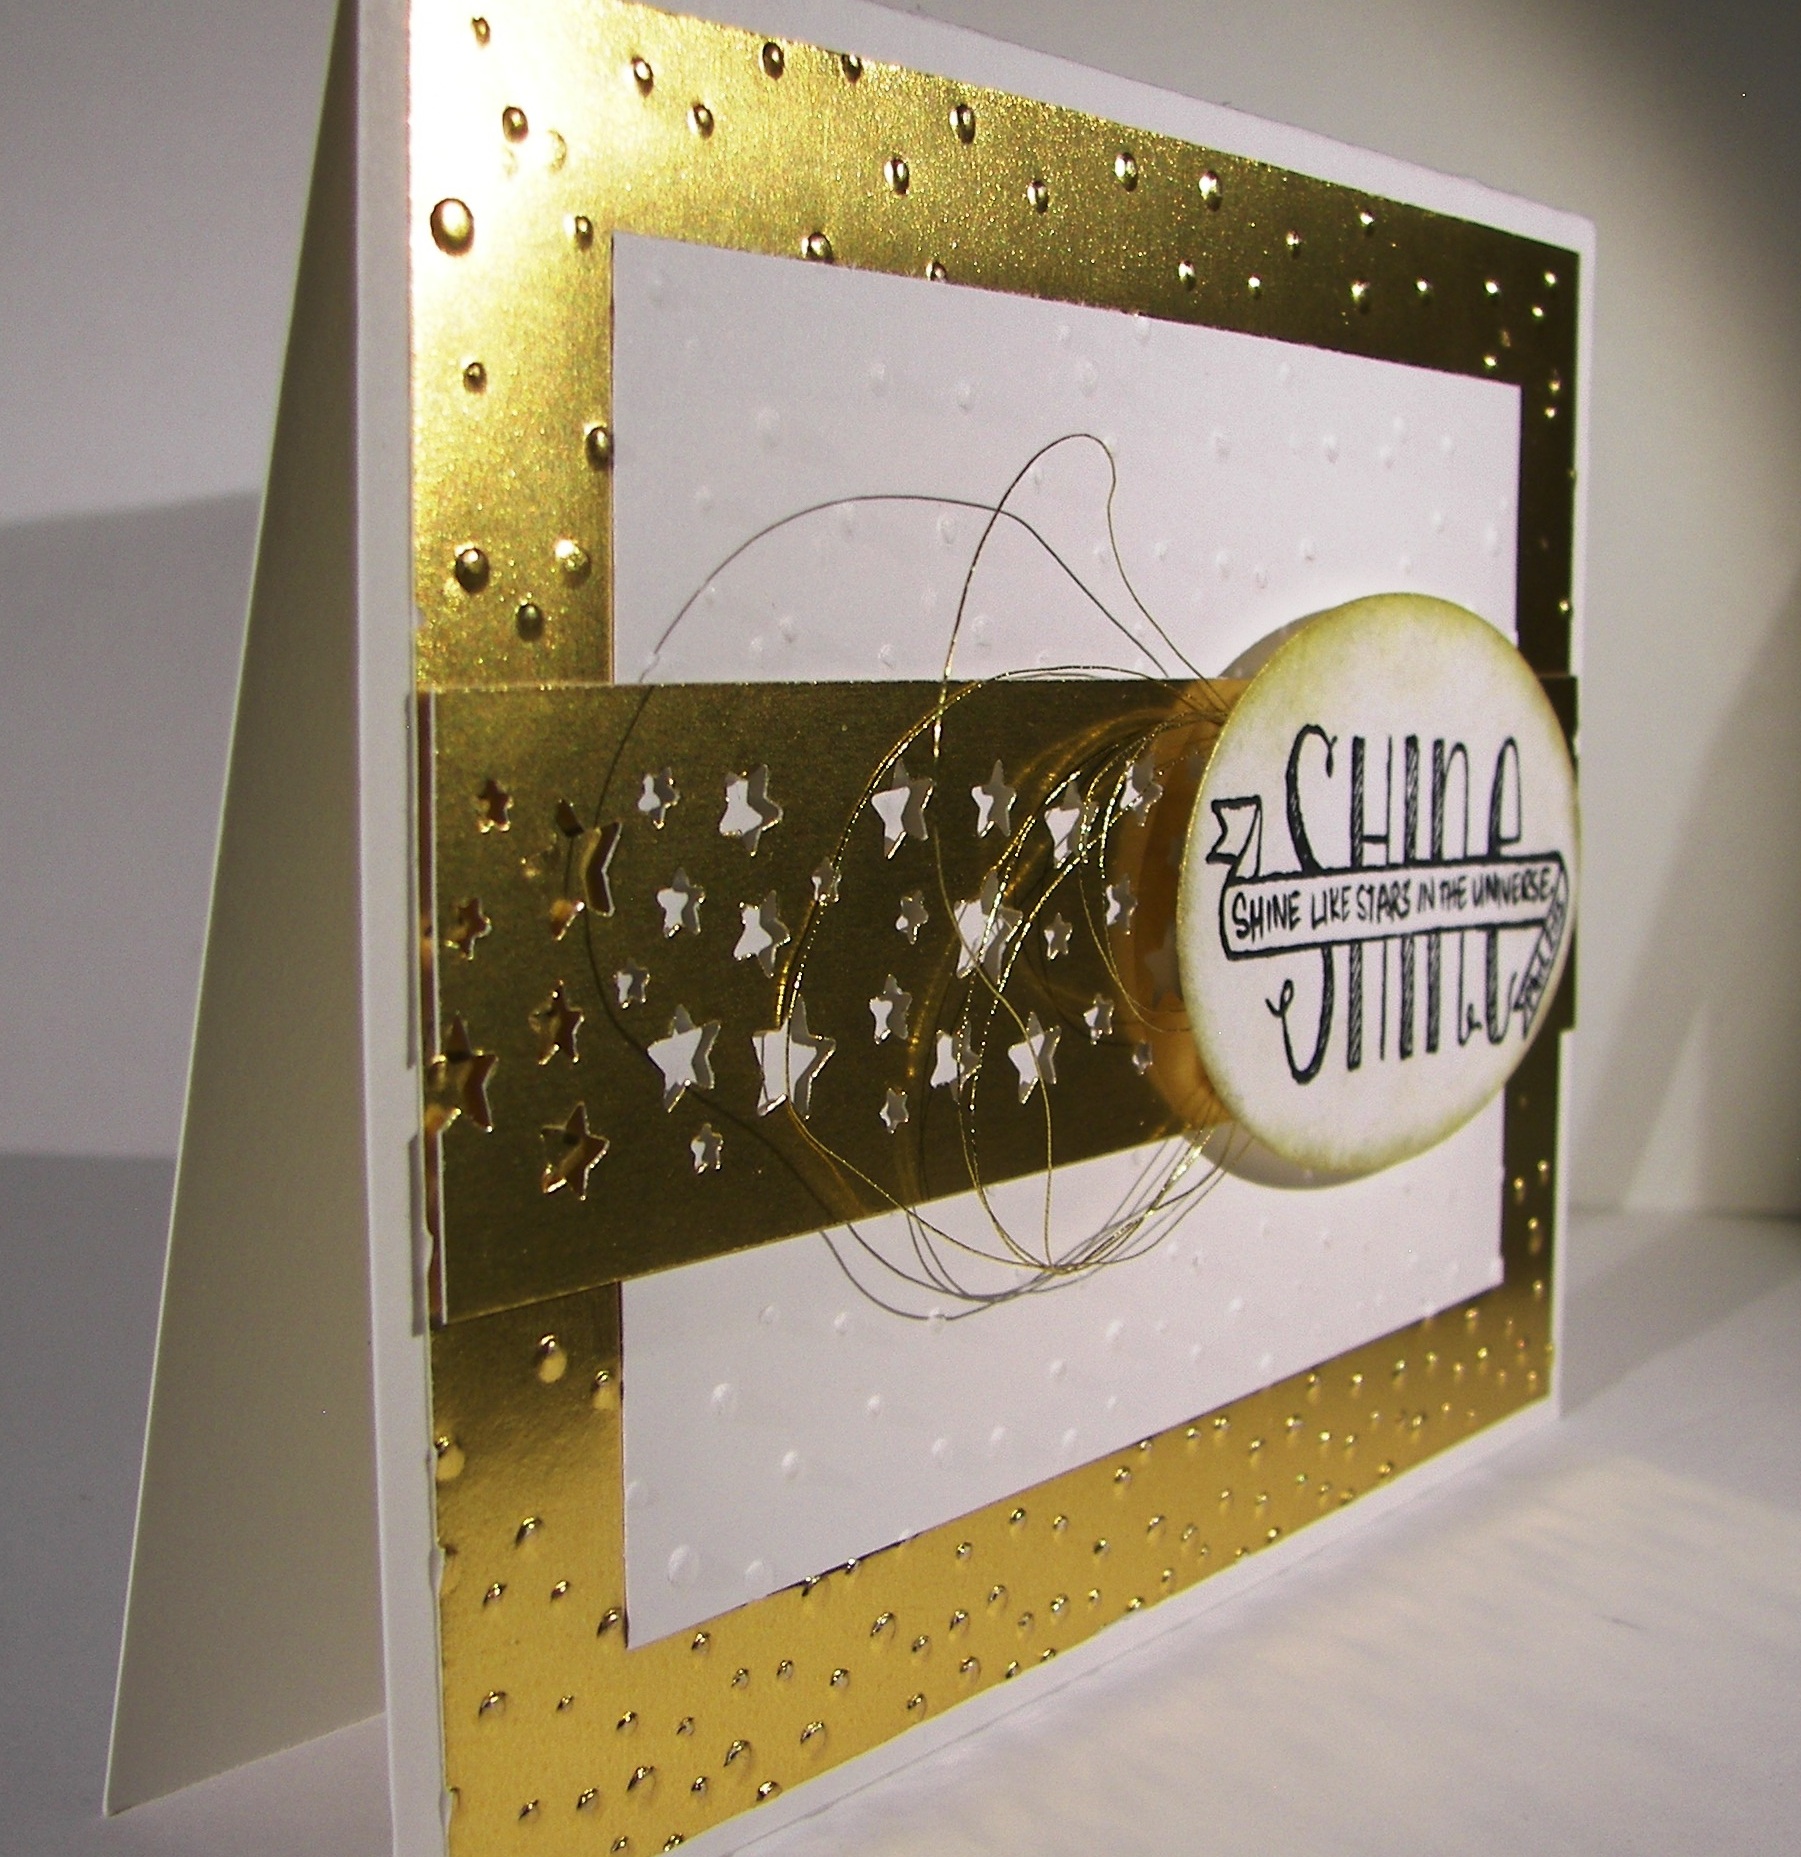
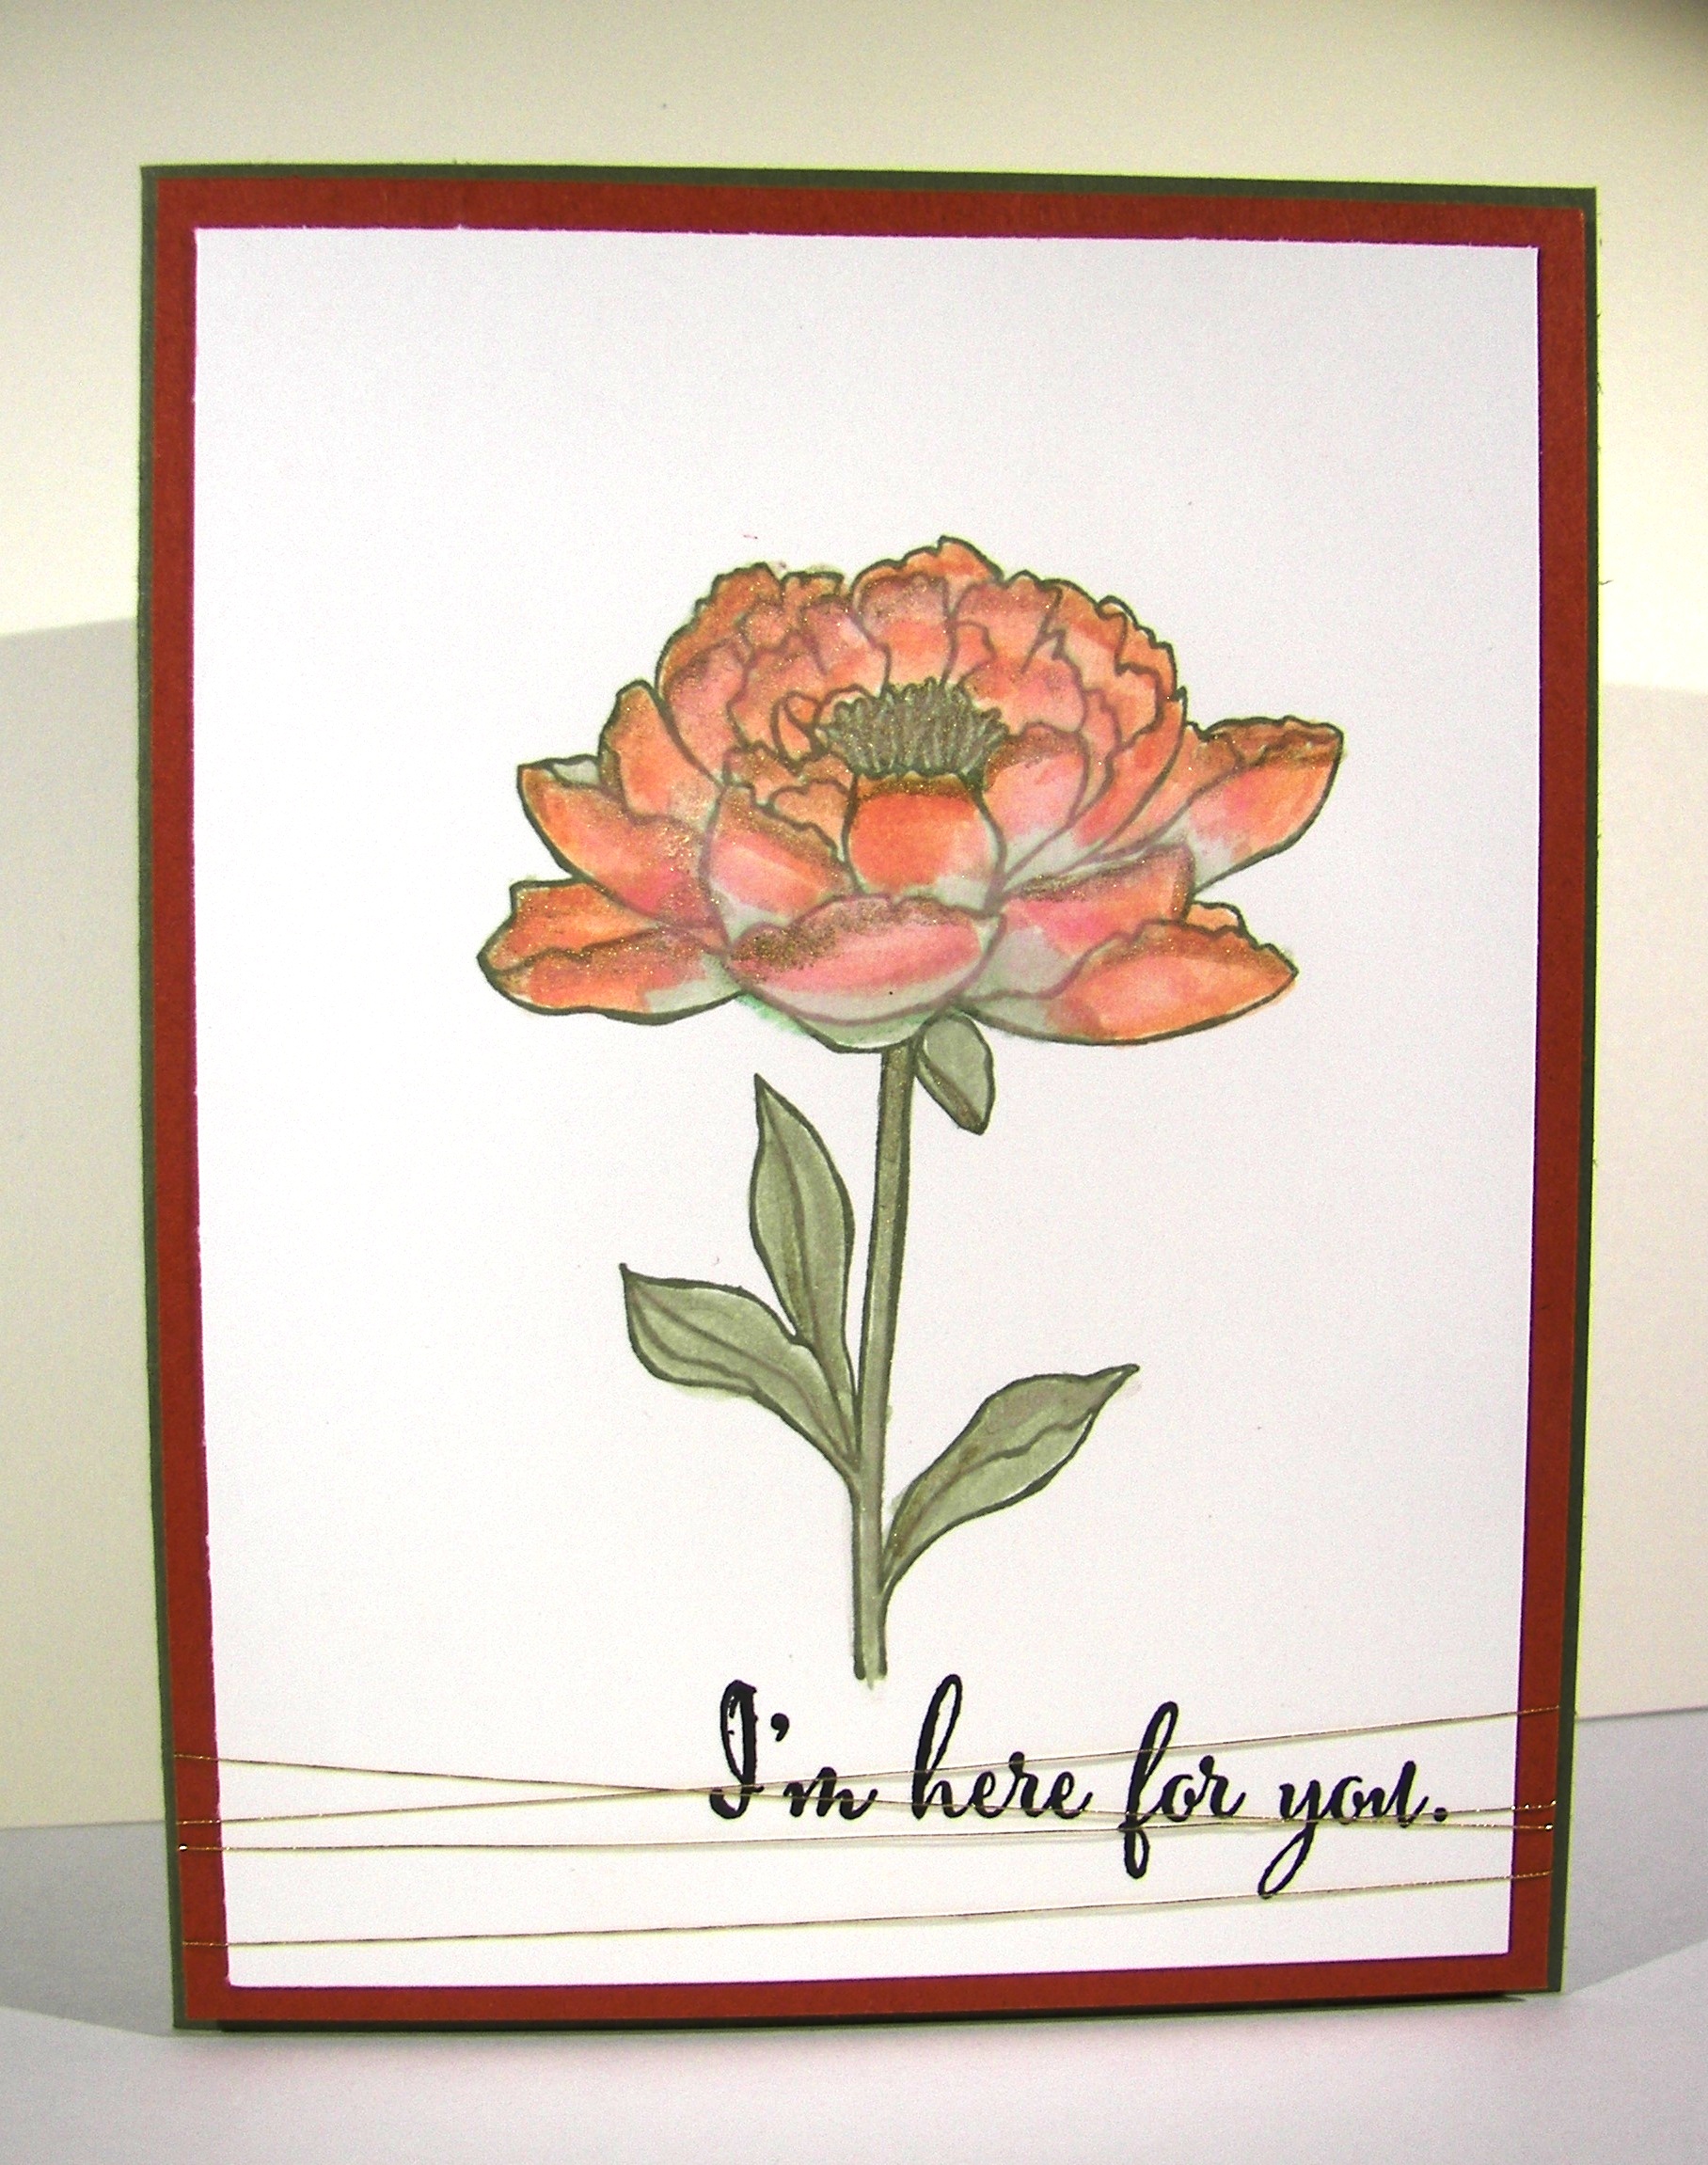
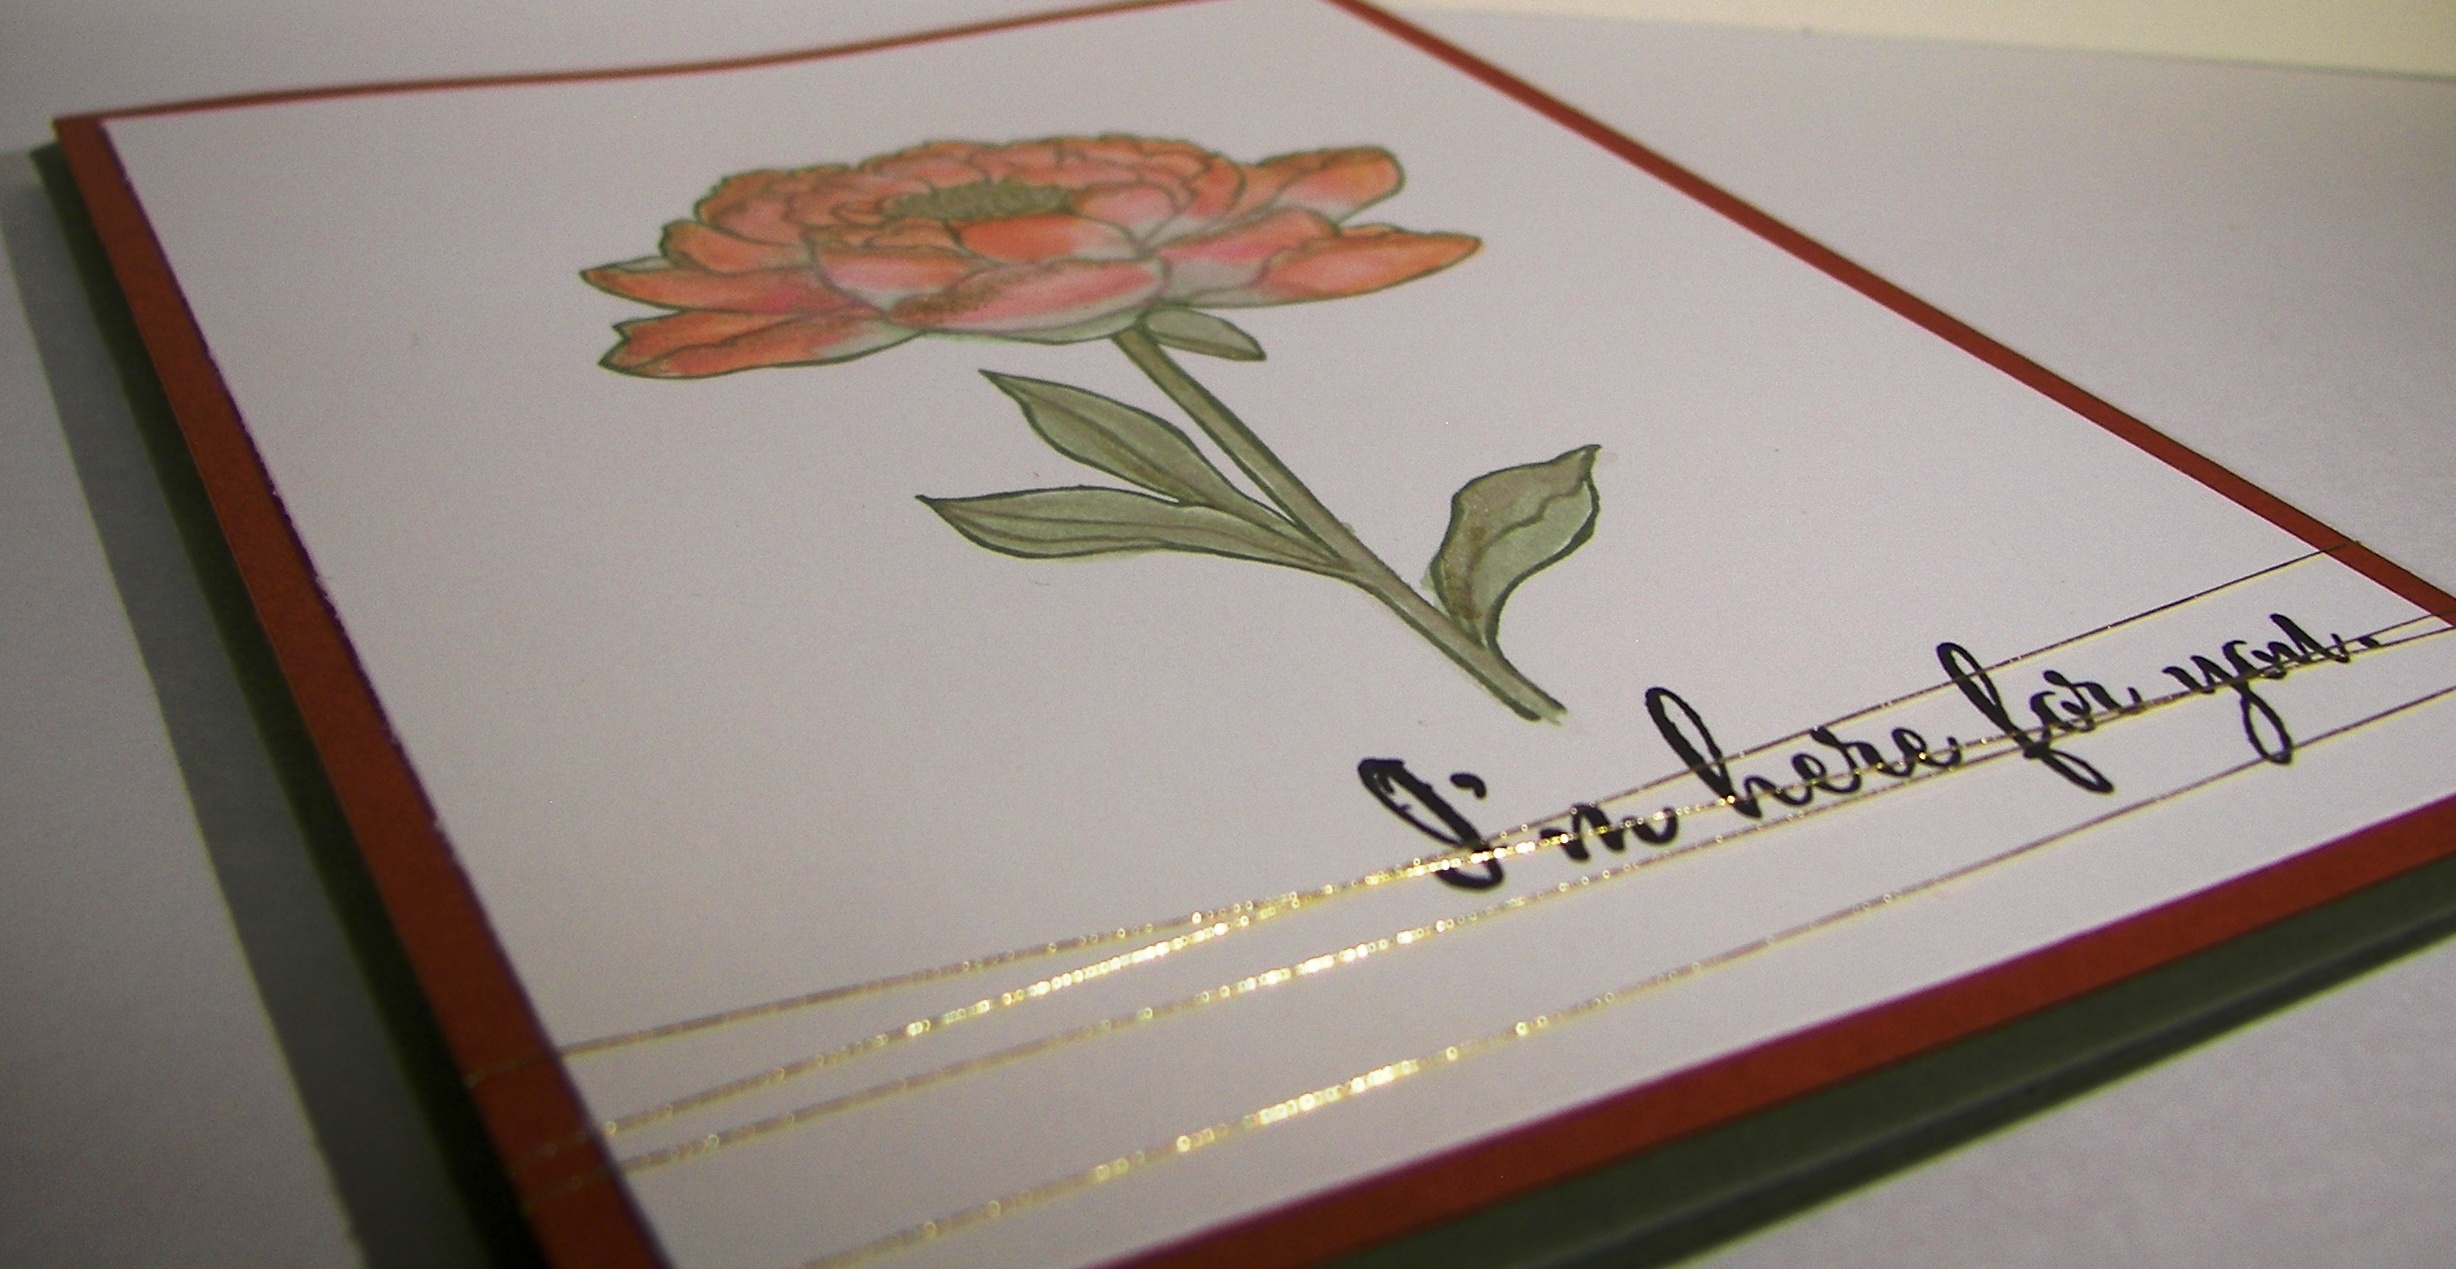
I lined my wonderful huge alphabet stamps up on a long block and got to work.  I had planned on a clean background, but liked how my practice stamping looked as I stamped off ink.  There you go.  I added the @ symbol afterwards using silver Encore ink.  Thought it gave it the perfect touch and made it have a bit more meaning, to me at least.  Several strands wrapped around the bottom with my ever favorite metallic thread and this lovely card was all done.

@love

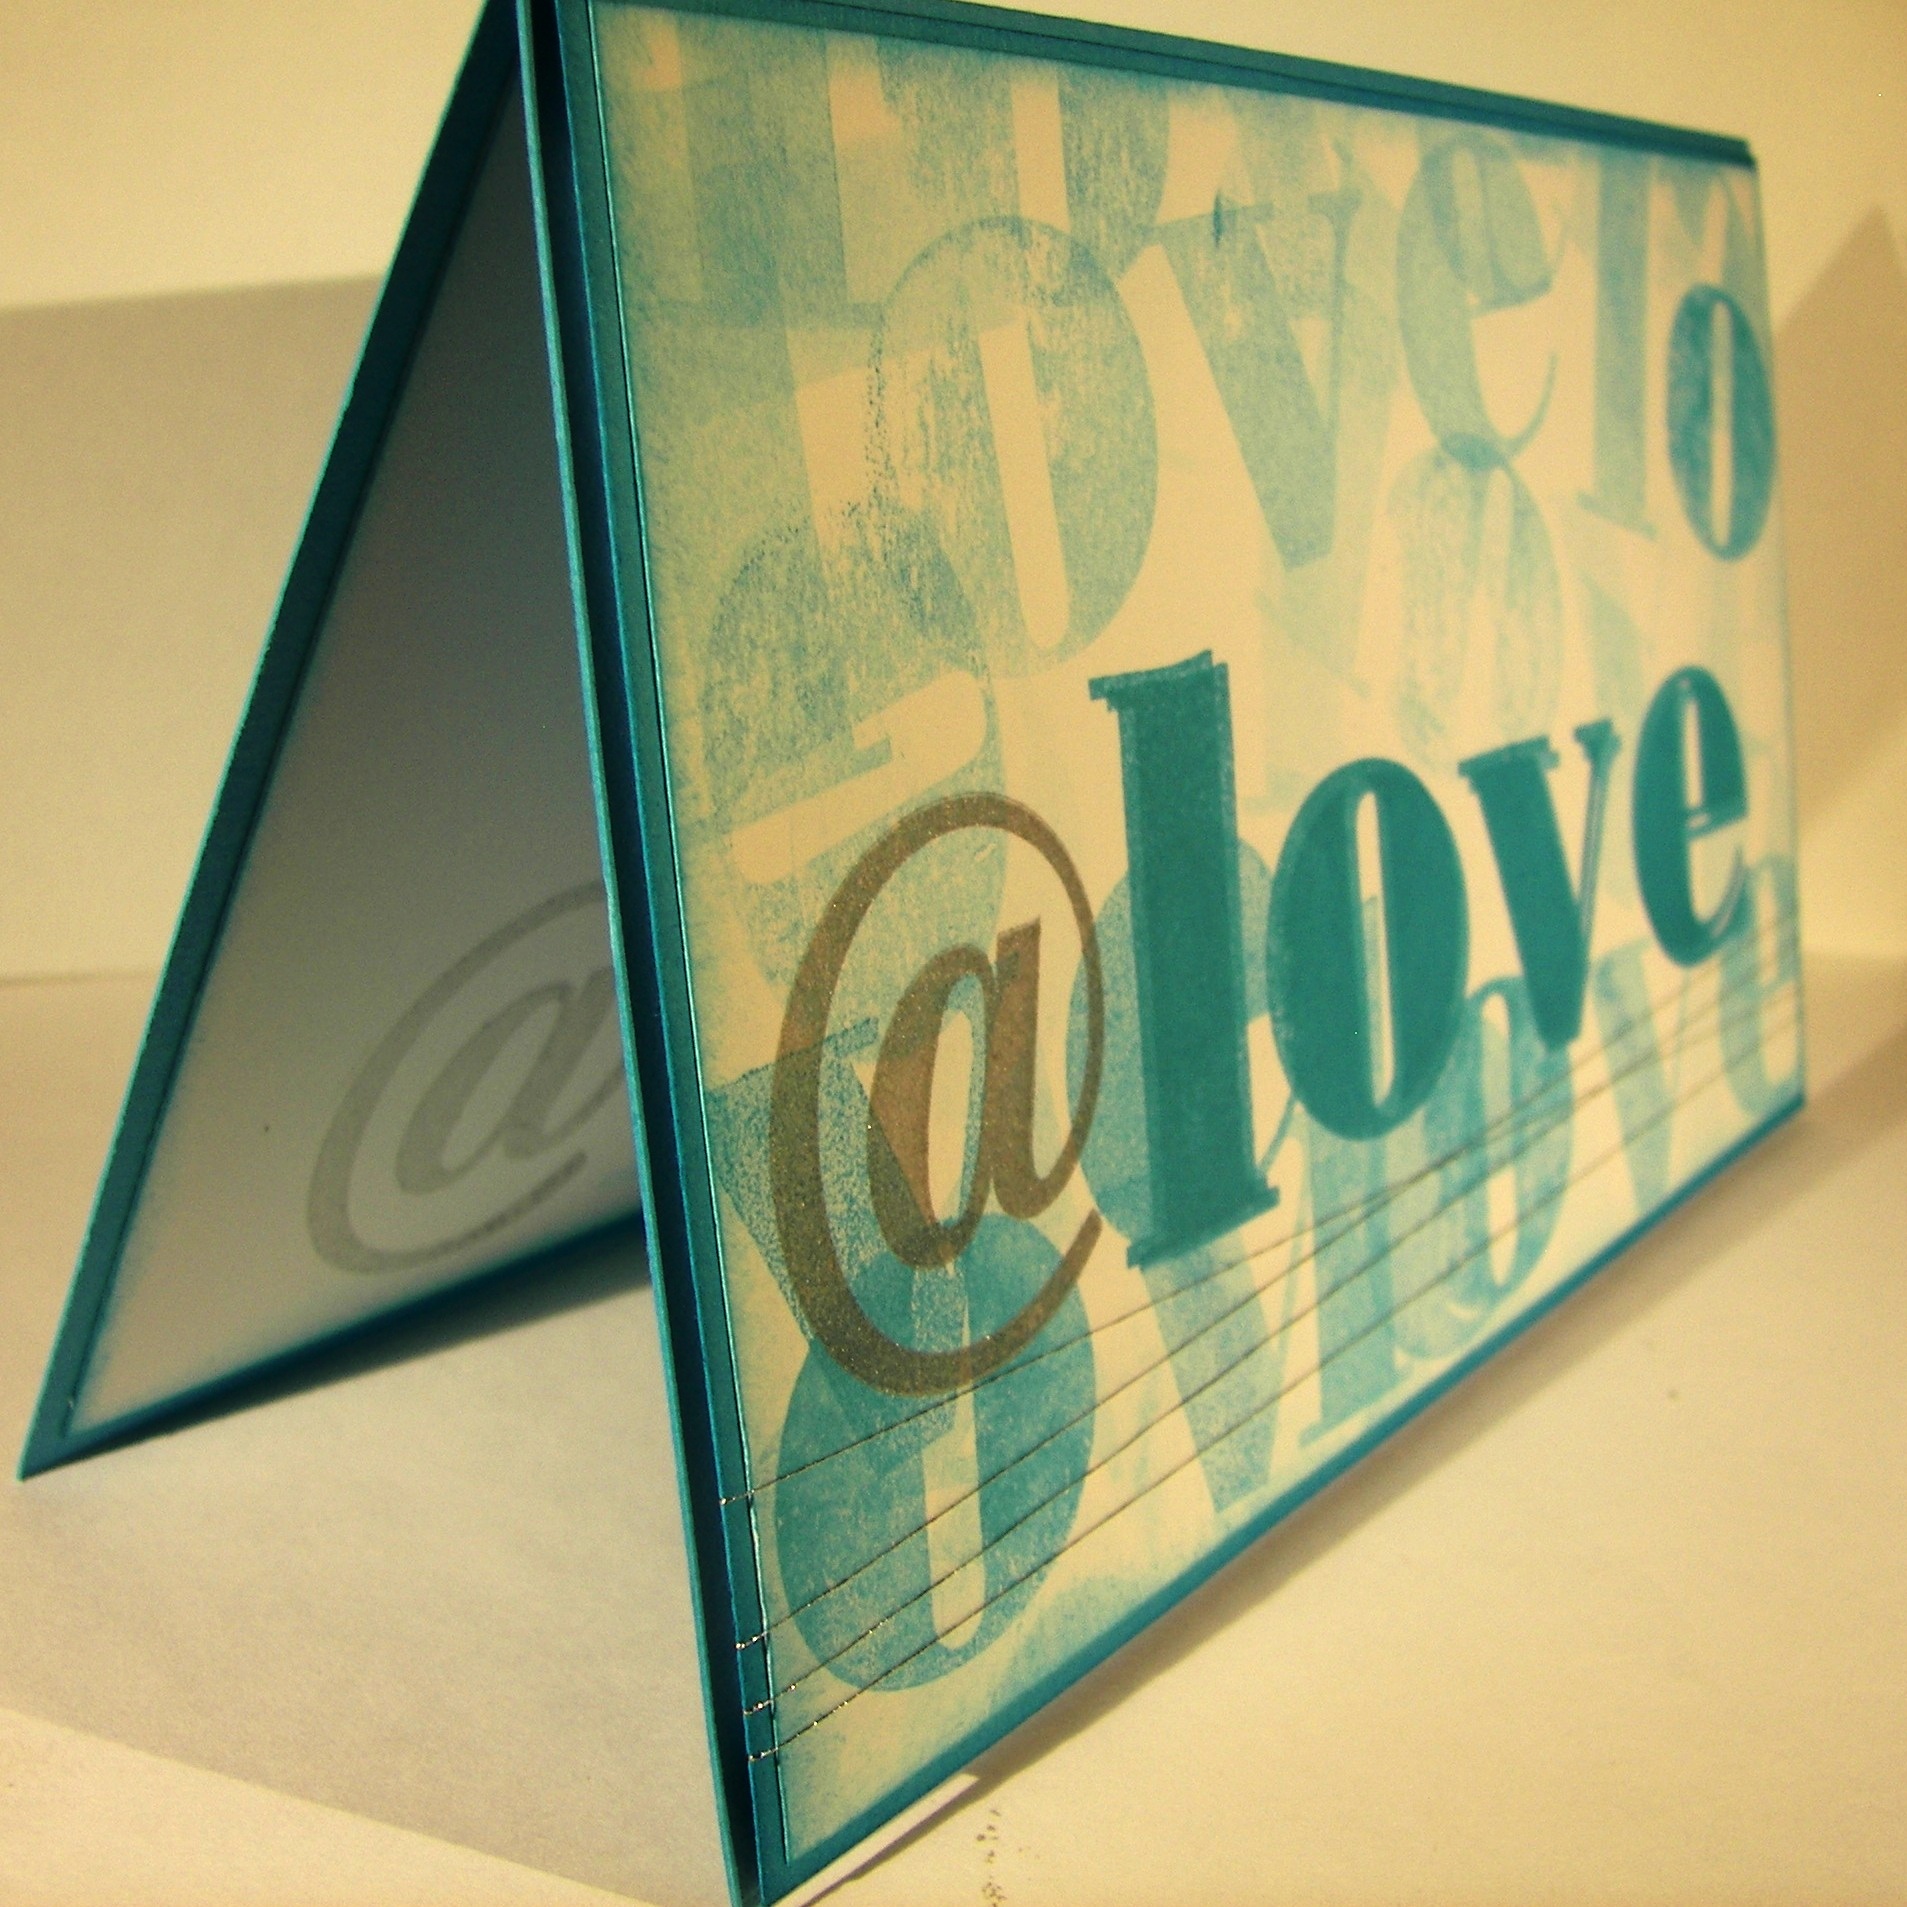
I almost forgot to mention, but I am sure you can see it, I echo stamped the entire phrase inside super light.  You can see it, but there will be no problem writing over it without confusing your message or the image.  Just right.

Have a creative day!

Moana


Christmas Lighthearted Leaves

What a crazy morning!  However, slow and steady wins the race, right?  Like I said earlier in the week, I planned on casing myself from another project that looked like Christmas to me.  Here it is, my ‘Believe’ card.

10-19

As I stamped these leaves last time I kept thinking about mistletoe.  Of course, by the time I got done painting all the leaves green, I kept thinking of seaweed.  So now I want to do an ocean project.  What a great stamp set, right?

10-19 (1)

I painted the ‘berries’ real read and went with cucumber crush for my green.  It is such a fun, bright green.  When I trimmed my cardstock down I was left with a few narrow strips and decided to put them to work.  I thought about using some quilling techniques, but kept it simple instead.  I did decorate one of the leaf images with rhinestones for a little bling and loved how it turned out.  So, just like all of the other retailers out there, I have made some Christmas happen before Halloween.  It was fun though, definitely fun.

10-19 (2)

Have a creative day!

Moana

Grateful Gifts

When you are trying to wind down from a way to crazy day, what do you do to relax?  Well, today I went straight to my desk and worked a day ahead.  This is going to be one ridiculous weekend and I need to get as much out of the way as possible.  Of course I do the fun things first.

Grateful Gifts

The new designer series paper pack is so much fun.  Here is one sheet, showing both sides of it.  I cut one strip 4″ wide and it gave me the card front and the paper for the tiny gift bag.  Yup, 4″ x 12″ is all it took.

Grateful Gifts

I do think that this dotted lace trim has become my favorite ribbon.  I am definitely a girl who loves a bargain, but even if it is a bit pricier, I love it every time I use it, with no regrets.  I can’t always say that about embellishments.  I used both the negative and positive die cuts, one for each project.  Once more, I am totally happy with this set.  I might be on a bit of a gift set kick again.  Hmmm…

Grateful Gifts

Have a creative day!

Moana

Thanks and Giving

People all around us are kind and give, often more than we have asked for.  I love those people.  They inspire me.  To be creative, and more importantly, to say thank you right back.

Thanks and Giving

A full sheet of bermuda bay card stock went into this tall and lovely gift bag.  The scoring was done vertically at 2″, 4″, 6″, and 8″.  A quick twist horizontally for one more score at 2″ to make the bottom of the bag.  Two hole punches on opposite sides and the ribbon was squished in.  A very tight fit, it didn’t even need to be knotted off or adhered.

 Thanks and Giving

A leftover card front was scored in half to make this tiny card.  Just big enough to echo the stamp used on the bag both on the card front and inside.  The sentiment comes from the same lighthearted leaves set and works perfectly.  Plenty of sponging and this lovely project was all done.  All I need is something wonderful to put inside.  I just need to decide who needs it.

Thanks and Giving

Have a creative day!

Moana

Lighthearted Leaves

I fell in love with this stamp set from the moment I saw it.  The images from Lighthearted Leaves are absolutely wonderful.  Artsy enough to get your attention, but not so simple as to be boring.  Such a nice balance.  I think I will case myself and make a Christmas version of this project.  I see mistletoe.

Lighthearted Leaves

I can also see an ocean theme.  The leaves kind of remind me of sea kelp and could be holding little fishies somewhere.  I do love an optional stamp set.

 Lighthearted Leaves

The layering is simple here.  Narrow borders help to not distract from the thin lines of the designs.  All around, I am very happy with how this turned out.  using the tags & labels framelits also make me happy. Subtle touches of color to accent the sentiment without taking over.  Just enough room to have a simple bit of ribbon and one little rhinestone in the center.  How perfect is that.  What more do you need than to ‘believe’?

Lighthearted Leaves

Have a creative day!

Moana

Sheltering Tree

Who doesn’t love the look of the beginning of fall?  The leaves are just starting to turn in my yard.  Some bright, some darker, and then there are those lovely dark ones that look almost burgundy.  Those would be my favorite.

Sheltering Tree

The tree is stamped in tip top taupe, the leaves in pear pizzazz and the turning leaves in perfect plum.  The card base is also in perfect plum with a slight framing in tip top taupe.  Very clean look for sure.  A few wraps with some linen thread and it was nearly done.

Sheltering Tree

I did a little echo stamping inside the card with the accent leaf color, just a bit in opposite corners.  I like to have enough there to connect to the front, but not so much that it interferes with the writing room.  It is still a card after all.  The front is popped up on dimensionals and that is all there is to it.  the outer dimensions are 4 1/4 x 4 1/4, a little different for me.  I am not prone to square cards, but I was working with my scrap pile, and that is what I had at ready.

Sheltering Tree

Have a creative day!

Moana

One Big Meaning Tiny Treats

Welcome back and thank you too!  Going back to work yesterday, after taking a long weekend off, left me thinking I should give a little thank you to my student TA’s.  They are a great bunch and were honestly quite happy with these treats.

One Big Meaning Tiny Treats

I kept things very simple, because I knew they would really just want the candy.  So, I used some adorable retired ribbon, with an effort to keep it neutral.  I have young men and knew they wouldn’t appreciate anything too girlie.  However, I did give them color choices and they picked the ones they liked best.  Three of five kept the little tag in their things.  How cute is that!

One Big Meaning Tiny Treats

What do we gain from this?  First of all, saying thank you is so important.  Secondly, it doesn’t have to be huge and elaborate to be appreciated.  Honestly, these took me maybe ten minutes from start to end, including a quick set of photos.  Having great tools to work with makes all the difference.  Give something like this a try.  This punch combo is fantastic!  The 1 3/4″ circle punch is large enough that lots of sentiments fit inside quite easily.  Add the 2″ circle for a tiny border and it looks so great!

One Big Meaning Tiny Treats

Have a creative day!

Moana

All About Sugar Fry Box

It is so nice to be home, even though I miss my college kids.  After falling asleep at a ridiculously early hour last night, I woke up full of energy and enthusiasm.  Maybe that is why I migrated to a fun treat box!  I do have some thank you’s to give out today.  I have five student TA’s at school that I know kept things just as I like them for my return from a four day weekend.  They are awesome!

All About Sugar Fry Box

So is this adorable fry box die.  As soon as it hit the catalog last year I had to have it.  Along with its hamburger box friend.  They just make me giggle.  And to have a coordinating stamp set makes it even better!  I love sharing treats and kindness, but when it looks as cute as this, I like it even better.

All About Sugar Fry Box

A half sheet of card is all it takes to make this guy, plus a little scrap.  I used cucumber crush, because it is just a super happy color.  The sentiment was stamped on whisper white, fussy cut, layered on some more cucumber crush, fussy cut again, and sponged like crazy.  Two mini silver brads finish off the front so nicely.  And with some yummy treats all tucked into a bag, tied off with the lovely dotted lace trim, this little gift is ready to go.  I did sponge the entire box to keep everybody coordinated.  Love my sponging!

All About Sugar Fry Box

Have a creative day!

Moana

Banner Blessings Gift Set -Shine

This is card four, the last of the set.  The gift box is so lovely.  I can’t wait to show you.  But this card was saved for last because it is my favorite one.  So pretty and such a beautiful sentiment.

Banner Blessings Gift Set -Shine

I used the falling snow embossing folder to give me a starry background.  Since it was more sparse on the top, because it was to show snow not stars, I put it through again turned around and ran it through half way and ran it back out.  That gave a lovely balance I think.

Banner Blessings Gift Set -Shine

The star border punch doesn’t get to come off my shelf much, but this was the perfect job for it.  Stars stars and more stars.  The heavens are full of them and I wanted the card to do so as well.  Mission accomplished.  The card base is made from the heavy weight whisper white.  Sometimes I cannot get enough of this stuff.  I accented the sentiment with a hefty twisting of metallic gold thread. I decided it made my sentiment look kind of like a shooting star or a comet.  I love feeling creative.

Banner Blessings Gift Set - Shine

Have a creative day!

Moana

Banner Blessings Gift Set – Thanks

Another wonderful day with many adventures ahead.  I feel so blessed and grateful to be able to spend time here with my children.  How fortunate I am to have a husband that allows me to do so.

Banner Blessings Gift Set - Thanks

This lovely card came together pretty darn quick. A few simple layers with my favorite sponging left it nearly done.  I wanted to use the trim without covering up the beautiful embossing from my favorite embossing folder.  I think everyone should have this one. It is so great to have a tool like this that can be used in so many ways.  So I just attached a simple knot of trim instead of a card front wrap.

Banner Blessings Gift Set - Thanks

I chose the pattern of the DSP with the tiny flowers.  It went better with the nature look of the trees.   A touch of dimensional a went with the sentiment layer only.  Simple to make and easy to mail.  Sounds like a win to me.

Banner Blessings Gift Set - Thanks

Have a creative day!

Moana

Banner Blessings Gift Set – Joyful

I get to be out of town this weekend and enjoy some time with my two children away at school. Utah is so pretty this time of the year, the rain is making it even better.

Banner Blessings Gift Set - Joyful

This is the second card in the gift set I made for my daughter. Bright and cheery for sure. The color scheme certainly does go with the word joyful.  I love this stamp set.  Very inspiring and the writing style is awesome.

Banner Blessings Gift Set - Joyful

The card base is the heavy whisper white. Love having something this heavy to work with. I stayed away from white cards, but not any more.  I enjoyed sponging  the front to bring out the heart detail. A couple of hearts punched on the front and inside to coordinate.  Second card in the series is done. Wait til you see the gift box.

Banner Blessings Gift Set - Joyful

Have a creative day!

Moana

Banner Blessings Gift Set – Friend

The morning took off without me, and there was nothing I could do about it.  This has sat at my computer waiting for me to take a lunch.  Well, never happened.  How about a tiny break?  Works for me.

Banner Blessings Gift Set - Friend

This is the first card of a set of four with a coordinating gift box.  It was so fun to make.  I actually made it for a special someone and I can’t wait to deliver it.  Should be tomorrow!

Banner Blessings Gift Set - Friend

I attached the island indigo torn card stock to the thin whisper white before I ran it through the fluttering embossing folder.  Everything got done at once.  The sentiment was stamped in black stazon and sponged a bit with coordinating ink.  I love the cotton ribbon, it makes such cute bows.  The inside stamping is actually negative punching.  I punched a butterfly or two from the white insert and revealed the card base.  Simple and very effective!  So fun.  Those pretty pearl accents.  I could really get used to those.  I had it dot the “i”, even though it wasn’t needed, I wanted to use one and it fit the image.  A bit of dimensionals and this card was done!

Banner Blessings Gift Set - Friend

Have a creative day!

Moana


Dazzling Diamonds Dragonfly

I liked the randomness of picking one single stamp and designing a project around it.  Today was just the beautiful dragonfly from the Awesomely Artistic stamp set.  My favorite image honestly.  I wish I had more.

Dazzling Diamonds Dragonfly

The new DSP pack patterns sure are awesome.  I had a hard time deciding which side to use.  I usually enjoy the patterns, but can see myself making gift sets with all of the different papers here.  Total coordination really makes me very happy, even within a gift set.

Dazzling Diamonds Dragonfly

It isn’t always easy to get decent photos of my work.  The ladies in my club often tell me how much better they look in person.  Isn’t that true of so many things though?  But the dazzling diamond dragonfly here needed to be angled a bit for you to really see it.  I wasn’t sure how happy I would be with it on whisper white, but I love it!

Dazzling Diamonds Dragonfly

Have a creative day!

Moana


Gather Sunshine

It started with one stamp, ‘gather’, from the Seasonal Snapshot 2015 set.  I love it, just love it.  Then I began rooting around for word stamps or images that would go with it.

Gather Sunshine

I pulled out Crazy About You, because it has all of those phrases and word sets.  There it was, sunshine.  I immediately went to the Kinda Eclectic set because of the beautiful sunburst in it.  Great combo going on for sure.

Gather Sunshine

I wanted more than one yellow tone going on, so I have three.  The sunburst and the card base are So Saffron.  The base of ‘gather’ was done in Daffodil Delight and layered over in Hello Honey.  Sunshine was stamped in stazon and the inks were put away.  The paper layering is simple with a double layer of smooth whisper white put up on dimensionals.  No ribbon, nothing else, just clean and simple.  Not my usual style, but I rather like it.

Gather Sunshine

Have a creative day!

Moana

You’ve Got This

Sometimes simple words are all you have, and sometimes that is all you need.  That is just how I feel this morning.

You've Got This

I took my time painting this lovely flower with a few of my favorite inks.  I stamped the flower in almost artichoke and did light water coloring to get the base down.  I added cajun craze but kept it light the first time through.  Adding more water helped to do a little blending, but I didn’t want too much of that.  I like that two colors together can create a third unexpected surprise.  In person, you can see the blended areas have nearly a cherry cobbler tone.  Cool, right?  I thought so too.

You've Got This

The entire image was accented in gold encore ink, still using the aqua painter.  That really creates a fun look and is surprisingly easy to control.  One simple sentiment in black stazon ink with a little gold metallic thread and this simple card was done.  Well, I did have to stamp inside as well.  I stamped off twice before I placed the stamp on the inside paper.  Nice and light.  And look, absolutely no sponging!  Crazy.

You've Got This

Have a creative day!

Moana

Game On Dear Heart

I absolutely love, love, love making my own paper with unique stamps.  Most of the time my friends can’t even place which stamp set it came from.  I have overlooked several stamps myself.  Example, look at this cute little fish!

Game On Dear Heart

Sometimes we feel like we don’t fit in, but I feel like that is a beautiful thing.  I made this card with that theme in mind.  He is stamped in melon mambo, water colored a bit, and water colored again with silver encore ink.  Everything is lightly sponged and there are plenty of dimensionals here.

Game On Dear Heart

The sentiment was stamped on a little scrap, punched with the bitty banner punch on one end, and given a bit of ribbon on the other.  How easy is it to just staple some ribbon on.  Some cards need just that, a little different look.  And of course this is layered up as well.  Did you see the little fish repeated inside?

Game On Dear Heart

Have a creative day!

Moana

Floral Gift Bag

The seasons are all backwards, so why not create a spring themed gift bag!  Seems kind of silly to really feel like fall might have arrived, then summer heat, then what.  Who knows, so I will craft what I like, and I like this.

Floral Gift Bag

One whole sheet of 12 x 12 dsp went into this bag.  The dots are too much cuteness, so they had to be out front.  I wasn’t feeling a particular stamp, so I curled a couple of flaps over to show the writing side.  This paper pack is so adorable.  A bunch of bright and happy paper going on.

Floral Gift Bag

The diagonal scoring plate is what helped this box happen.  I scored on the 3″ marker, on the diagonal, on each corner.  It worked out pretty darn good.  I don’t always feel confident my scoring is accurate when using the diagonal plate, but when putting the bag together, my sides and corners matched up.  Go me!

Floral Gift Bag

A few punches from the heavy whisper white cardstock and regal buttons for centers made the embellishments I wanted.  The bag was sealed, but not sealed, with a stretch of dotted lace trim.  It is stretched around the top, under the front and back flaps, and then tied in a bow.  Just untie it and the bag will flop open.  Easy to use and re-use.  My kind of bag.

Have a creative day!

Moana

Vintage Leaves

What happens to some mornings, I really don’t know.  Just when you think you might get a break here or there, it just doesn’t happen.  But I made it here, finally.

Vintage Leaves

I have taken my time in using this new set, Vintage Leaves, but am totally ready to go now.  I only used one leaf today.  I wanted to focus on color as much as detail and thought if I had too may patterns and colors it might get lost.  Rich Razzelberry was my focus, and this was totally what I wanted it to look like.

  Vintage Leaves

I stamped several of the same leaf in black Stazon and left space for just one rich razzelberry one.  So simple.  I used a second stamp set, For All Things, for the sentiment.  It was layered flat with a banner of coordinating cardstock.  I touched it up with a strand of cotton ribbon and called it good.  I really did love how this turned out.

Vintage LEaves

Have a creative day!

Moana

I Cased Myself! Eeeek!

I have the pleasure of hosting a card workshop for my club this weekend and decided I would use yesterday’s project as one of our projects.  I do like to give them choices and encourage a bit more creativity, so I cased myself to give them another choice.  Too fun I must say.

I Cased Myself!  Eeeek!

Same kind of layout as yesterday, but I made my background paper instead of using designer series paper.  Choices, like I said.  And I love to encourage people to use their stamps differently.  This qualifies for sure.

I Cased Myself!  Eeeek!

I used the pumpkin face from the seasonal stamp set Sparkly Seasons.  That is one diverse set, absolutely love it!  I stamped the faces alternate directions using black stazon first.  Then I went back over them to create a shadow/3D look.  It turned out fun.  I will use that technique again for sure.

I Cased Myself!  Eeeek!

When I put the eyes on I placed them over the pumpkin eyes and got a mouth out of it.  So cute.  Then I had the eyes turned to face the word eek and the card was done.  I did use the same pumpkin face for a bit of echo stamping inside.  Just right if you ask me.

Have a creative day!

Moana

Larger Than Life Boo

Halloween doesn’t have to always be about scary things.  Sometimes it can give you the feel of the holiday and be totally adorable at the same time.  Kind of like a few sweet children all dressed up singing “Trick-or-Treat” at your door.  Just too cute.

Larger Than Life Boo

The project began with a sheet of the Go Wild DSP stack.  I knew I wanted to sponge it up with a faded look so I looked for patterns that had more white than black.  This pattern was perfect.  I swirled and swirled until it looked the way I wanted and then sponged around the edges some more.  No layering, just adhered it straight to the card base.

Larger Than Life Boo

These Larger Than Life Alphabet & Numbers stamps really make me happy.  The only thing that would make me happier is having coordinating framelits.  But, that is not the case.  You guessed it, I actually did fussy cutting, twice!  Once for the letters and once again when I layered them up on more paper.  Where is my brain?  It had to be done, so I suffered.  My least favorite crafty task next to cleaning up.

Larger Than Life Boo

I touch of Dotted Lace Trim added such a soft touch.  Left the bow off and just did a simple knot.  I made some little eyes using the 1/2″ circle punch, punched circles using the 1/4″ circle hand held punch, and centered them with the largest size of basic rhinestones.  I sponged those pumpkin pie eyes and raised them up on dimensionals.  I also raised up my word ‘boo’ with dimensionals, but used a double stack on the center ‘o’ to make it stand out even more.  End result, adorable Halloween card, just adorable.

Have a creative day!

Moana