Layering Love

Summer is here and it seems like love is everywhere.  How fun is that!  I wanted to capture some of that carefree spirit that summer can bring and had a fun time giving it a try.

6-16

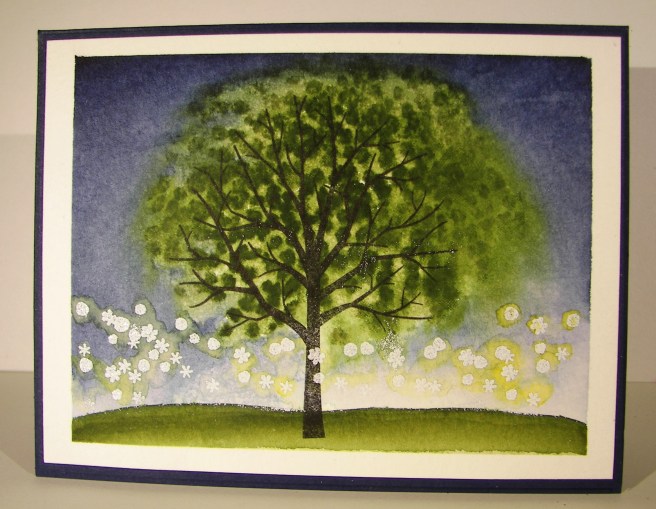
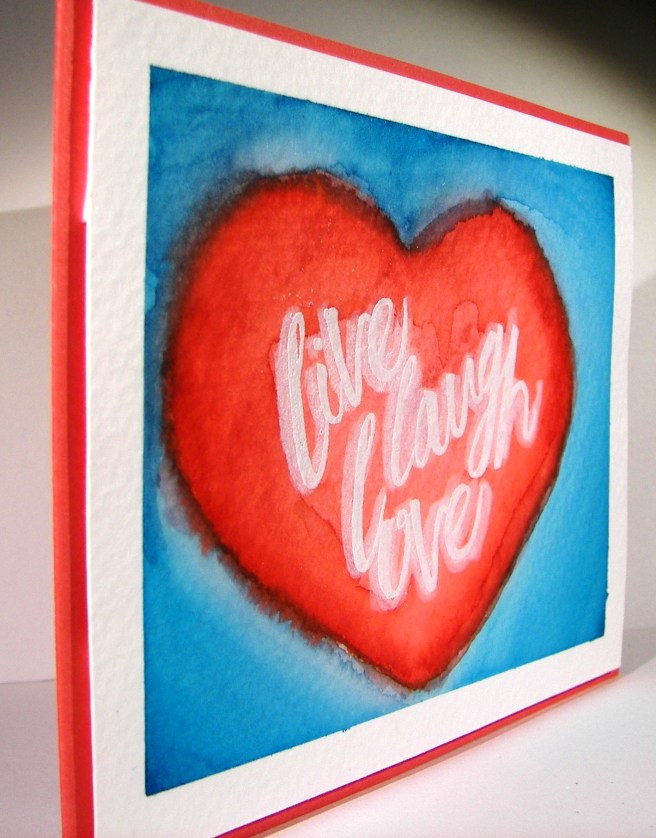
I must admit, I have been enjoying my water coloring quite a bit, but it is still my favorite medium right now.  I thought I might use a die cut on this image and layer it, but I forgot about that until I started typing.  I was wondering why I left the image off center like that.  I then remembered my original plan.  Well, I am okay with how it turned out.

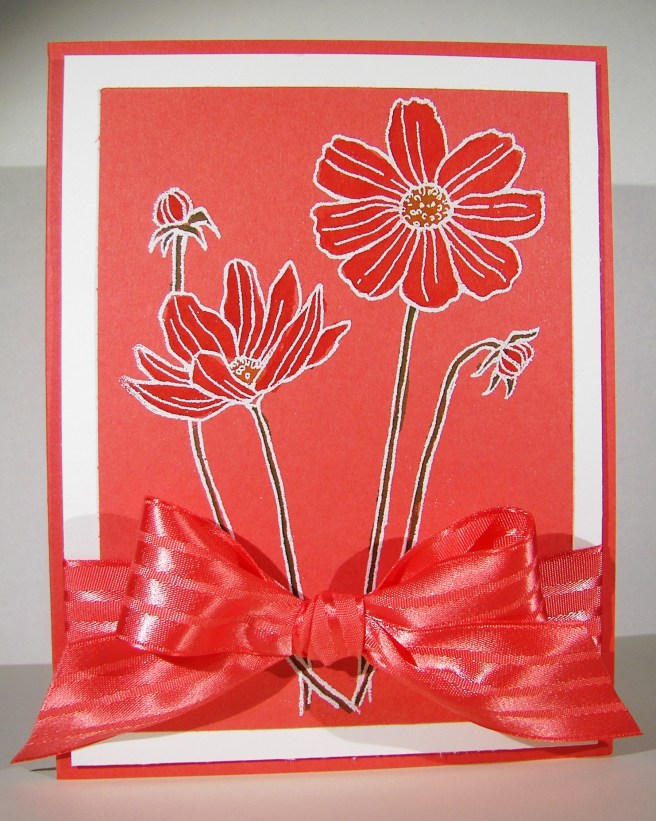
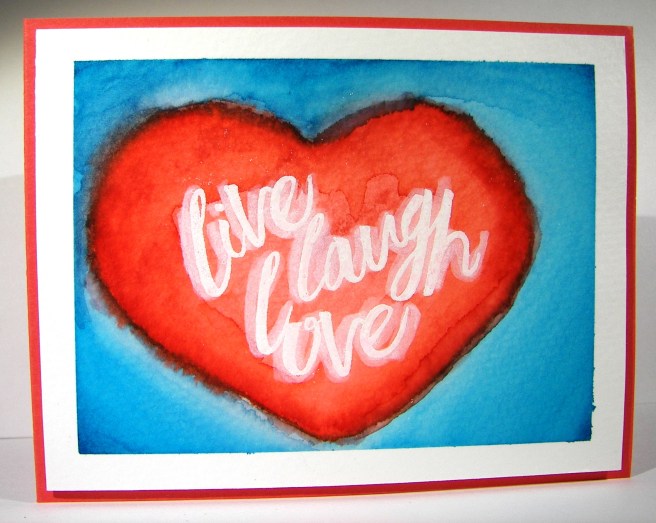
It began with stamping the sentiment in versamark ink and then embossing with white embossing powder.  The next step was to create some kind of heart over and around the words.  When that was done I stared at it for a while trying to decide on a background color. My oldest daughter suggested tempting turquoise since it felt like summer.  That went with my plans, so I went for it.  I kept the color the strongest in the corners and painted towards the heart.  I was trying to create a lighter area around the heart to make it look like it was floating a bit.  That worked pretty good.  Wish I could make a more balanced heart, guess that is why I love die cuts and punches so much.  They correct my work some…

In the end I was happy with the result.  I went ahead and did a touch of blending along the edge of the heart and the blue background.  This provided a bit of a border and gave some cool layering effects.  I went back around the lettering with a wink of stella brush which gave a bit of shadow, but also made the image appear almost blurred.  Interesting, but I still went with it.  I left it a single layer on the card base of watermelon wonder and there you go.

6-16 (1)

Have a creative day!

Moana

June Weddings and a Sheltering Tree

Planning a wedding and the receptions to follow can be an exciting time, although very stressful.  Wanting everything to be wonderful, people to be happy, and a general feeling of love in the air.  Sometimes things, or even people, get in the way.  Everyone needs someone to shelter them from stress and frustration.  That is this tree this morning.

4-19 (1)

I am fortunate enough to have a son getting married this June to an absolutely wonderful woman.  It couldn’t be more wonderful.  The way this card looks is how I am attempting to transform my yard.  There will be other things too, really awesome stuff. but this look is all around.  My brain is full of wedding ideas these days.  No escaping it.

I stamped the tree base in black stazon and the leaves in mossy meadow.  The night sky is painted with night of navy.  I also painted the grass in mossy meadow.  I stamped sparkly flowers from the same set in versamark and added white embossing powder.  I added touches of daffodil delight around the ‘flowers’ to give them a bit of a glow.  They will be sparkly lights after all, and candles a plenty.  Wheeee!  There goes the wedding brain again.

I used tombo to glue the painting on another piece of night of navy card stock that has just a 1/8th” border.  Then that combination was layered onto a card base also in night of navy with plenty of dimensionals.  I left any sentiment off as well as additional embellishments. I couldn’t decide on any, so there you have it.

4-19 (2)

Have a creative day!

Moana

Floral Tone on Tone

Pretty, pretty, and just so pretty.  That is what comes to mind here.  My husband thought it looked a little tropical with the white outline, I am really loving this card.  While driving back from an ice cream run last night the idea came to me.  There is no inspiration connection here, just a great idea.

4-14

The image was stamped in versa mark ink on watermelon wonder cardstock instead of white or water color paper.  Different for me, but it worked out well.  I embossed with white embossing powder and water colored in the flowers.  Pretty easy and such a nice effect.  I layered it in white to bring out the outline and wrapped it in some of the most beautiful ribbon I have.  Yummy!

4-14 (1)

Have a creative day!

Moana

Believe Bookmark with Lighthearted Leaves

Welcome to my Sunday morning.  When I have the opportunity to teach a church lesson I always feel blessed.  Teaching often gives more to the teacher than to the student.  Maybe not at a school setting, but church, for sure.

Believe Bookmark with Lighthearted Leaves

I do my best thinking while I am crafting, so I almost always have some kind of handout that relates to the lesson.  It also allows me to think of who I am teaching individually, and to make sure I am taking into consideration who they are and how they feel.  Such a wonderful time.

Believe Bookmark with Lighthearted Leaves

I definitely dipped into my retired product stash for these bookmarks.  The cardstock and ink are hello honey, current, but the other color is summer starfruit.  What a great color to work with.  I thought they went well together, so I got to use some of my retired dsp stash and retired ribbon too!  Win for all.  I think people often overlook the fact that it is okay to stamp on patterned paper, as long as the pattern is small.  That was the case for this pattern for sure.  It came together so quickly.  Once the design was clear  in my mind, about five minutes, another thirty-five and I was all done.  Yup, I churned out a dozen of these in less than an hour.  Again, a win for all.

Believe Bookmark with Lighthearted Leaves

Have a creative day!

Moana

Floral Gift Box

When my daughter came home this week for her university break she brought this little birdhouse box with her.  My mother had given it to her to deliver to me to try and create a version of it.

Floral Gift Box

I don’t have a diecut that would do this, so I had to think it out a little bit.  Although I had several frustrations, I ended up with something cute.

Floral Gift Box

I started out with a piece of paper 7″ x 8.5″.  I scored along the 8.5″ side at 2, 4, 6, and 8″ leaving an edge of a half inch.  I turned it one quarter around and scored it at 2″.  This became the bottom.  Along the top, with the long scores going up, I proceeded to cut with my trimmer, not scissors.  I cut along the score lines down to 2.5″ on all score lines.  This gave the top flaps.  Two of them were punched with the scallop tag topper and the other two were trimmed down a bit.  My design became a bit flawed and I had to improvise a bit.

Floral Gift Box

I stamped the paper with versamark ink and applied white embossing powder to give me the cute little flowers you see.  They turned out so pretty.  The rest of the box assembly was pretty basic.  I know I don’t give a lot of detail, I get impatient.  I am working on it.

Have a creative day.

Moana