Talk About Wow!

This was one fun experiment session!  I sat down with a few items and literally ended up with this trio of awesome cards.  This is exactly why you should give yourself challenges every so often.  You can come up with amazing ideas.

3-23

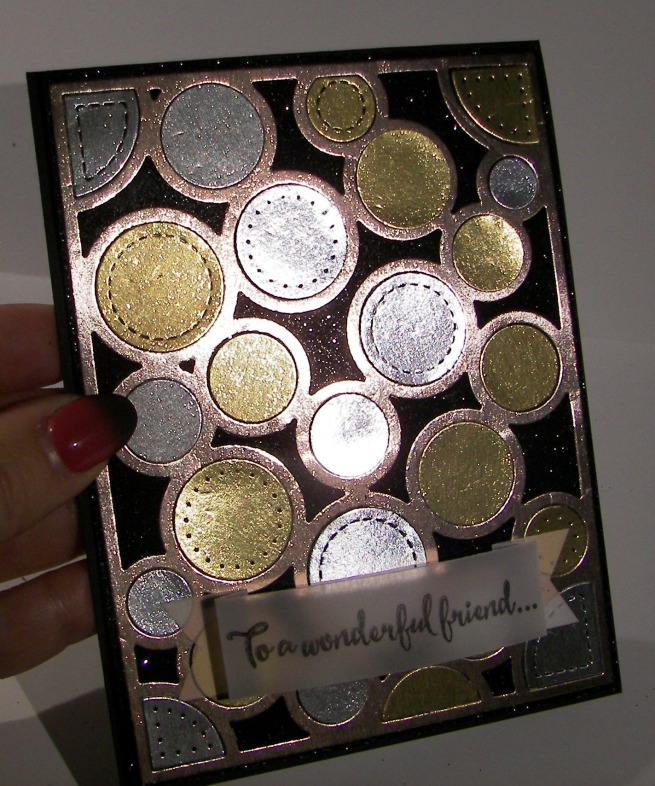
I had this die cut in mind with black glitter, that is where it started.  I have this huge roll of very wide tear n tape that gave me a large stick surface to work with.  I covered my card front with two and a half strips of this tape, trimmed it to the right size and set down my die cut piece.  I created three die cut pieces from three different tones of metallic paper. That gave me lots of different circle pieces to work with.

The first card had to be all about the glitter.  When the silver die cut went down I was left with all this open space just waiting for the glitter to fill it up.  I sprinkles and rubbed until the spots were filled.  When I poured the glitter back into the jar it was still full, I thought I would have used up more than than.  Go figure!
3-23 (1)

Then I moved onto filling in the die cut piece with the circles from the other colors.  That was fun and a bit tricky to get them right.  With the in between spaces, other than the circles, I filled in with more black glitter and rubbed it all in.  That took care of the second one quite nicely.

3-23 (2)

This last one didn’t get any glitter.  I used tombo glue to place the die cut as well as the circle inset pieces.  I wanted a bit of umph so I ran it through the Big Shot with a cool embossing folder.  Great choice.  I just grinned at the card front for such a long time.  The photos are okay, but these are super awesome in person.  You really have to try this.

This trio sat at my desk for a few days because I didn’t know how to finish them off.  I knew that embellishments were out of the question and a sentiment choice had to be simple, elegant and subtle.  Talk about pressure.  I got that sorted out with some velum cardstock and sentiments from the Dragonfly Dreams stamp set.  All good, all good.

Please get out some different product, watch a few inspiration videos and try something new.  You might create something amazing.

Have a creative day!

Moana

Make a Wish

This last weekend was my card workshop and this was one of the projects we made.  Some of my ladies get intimidated easily, so I do try to keep it fun and simple.  This one fit the bill quite nicely.

3-20

The card base and ink are bermuda bay, even the glimmer paper that is hi-lighting the candles.  That glimmer paper has been super fun to work with, I will be sad to see it go away at the end of sale-a-bration this month. I will probably get one more pack with my order this month.  Maybe it will be put into the new catalog this summer?  One can only hope.

3-20 (1)

I die cut the candle framelit three times along the strip of very vanilla and adhered a strip of glimmer paper and daffodil delight paper underneath.  Such a nice accent.  That little set was then added to another strip of bermuda bay for the top layer.  The sentiment was direct enough, stamp and punch, my favorite.

The background piece is from a great paper stack.  I must have used half of it so far.  That is unusual for me, I don’t always love so many of the patterns.  Yes for sure this time around. I gave the ladies several choices for their cards and they all looked so different depending on the background piece.  Fun stuff there!  The inside earned a stamping of ‘Happy Birthday’ from the coordinating stamp set, window shopping, because I didn’t like it on the front.  It was a distraction. Can’t have that!

Have a creative day!

Moana

Sending Love and Lots of Hugs!

This little trickster made me so cranky last Friday.  I had this vision, I was pretty sure I could make it work, I hated my water coloring but loved the stamping.  I do dislike wasting, so I set it aside and decided to come back to fix it later.  I love the fix, a lot.  I am looking forward to making this kind of fixed mistake again.  With better water coloring of course.

2-28

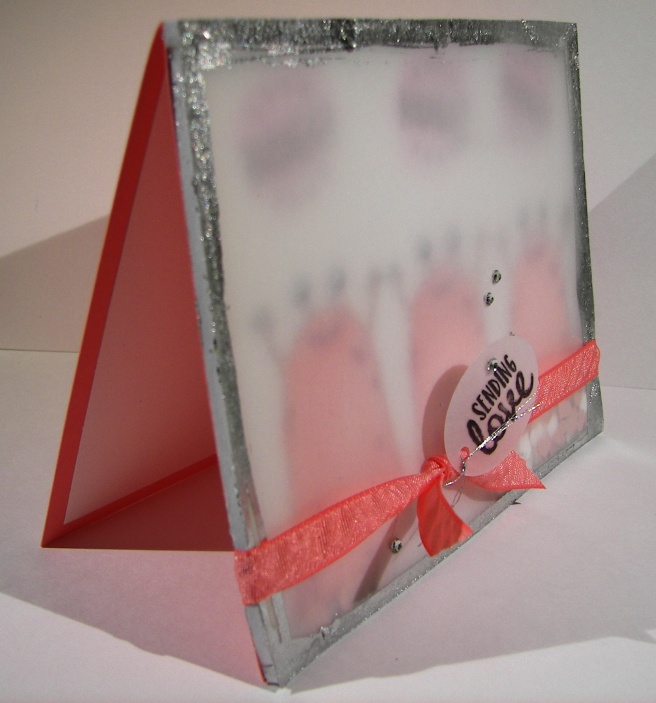
A simple shaker card is what I had in mind.  I stamped these little monsters three times.  I even used my stamp-a-ma-jig for oh so tidy placement.  Then I did what I thought would be a quick water color moment.  It turned out too quick and I thought sloppy.  No problem, put a layer of velum cardstock up on some foam adhesive strips and make a fun shaker card. I was so unhappy with the painting that I just walked away.  I couldn’t see through my error.  Saturday night helped me through though.

I had the thought that the foam strips would look like a white border, and they did kind of, but I didn’t like how that looked. So I ran some glue around the edges, placed some guilding flakes on the glue and brushed them in place.  That covered that problem quite well.  I punched out plenty of hearts using the hearts border punch, adorable of course. Added in some glitter, which really wanted out the corners I might add.

2-28-1

I was going to leave it with the ribbon and be happy, but I wasn’t.  It needed a sentiment, but I was already committed to the velum and didn’t want to hide the opaqued monsters. What to do? I found this adorable tag die in the window box thinlits die set, grabbed a tiny sweet sentiment from the sealed with love stamp set and attached it with some silver metallic thread. Then the basic rhinestones finished it off.  Phew!  Several days of work on that one, that was supposed to be a quick project.  Right.  Either way, now I have a fun way to put all of these products to use and send out the love!

Have a creative day!

Moana

Window Box

Each time I sat down to work on something I got frustrated, hated it and walked away.  I made myself go back and fix those projects, but not until this one made me happy first. It was a bit of a chore putting it together, but isn’t it lovely?

2-27

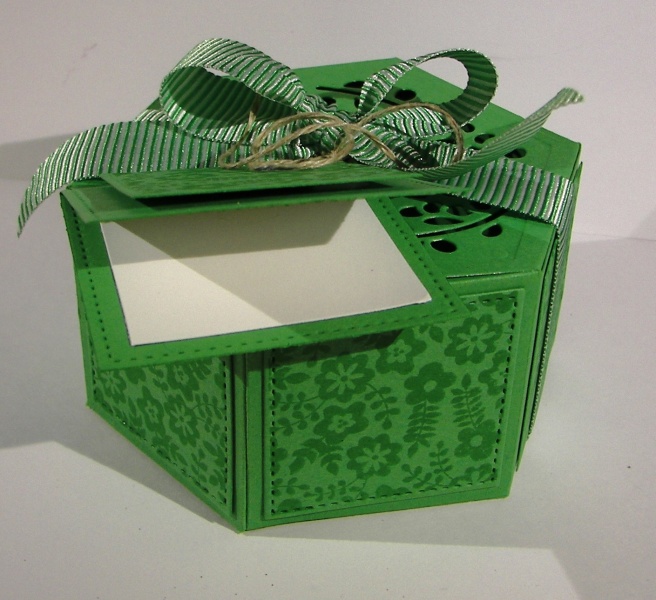
The thinlits dies that make this box are so fun.  After I fussed around a bit with the fold lines and flaps to glue in place I stopped getting cranky.  You need to do the large die cut piece twice, once for each side of the box, and then however you are going to decorate it. I made a floral top, but could have done the same for all six sides, and the bottom too I guess. I went with just the top this time and made stamped panels for the sides. The stitched shapes framelits had a square the perfect size!  I thought that was great.  I used a larger one to make a card base as well.

This ribbon is so fun to work with.  It has been fun having it, but as with this lovely green color, it will retire this summer.  So I need to enjoy it while I have it.  I punched a small hole in the card corner and attached it to the ribbon instead of tucking it under the bow.  I didn’t want to cover much of that floral top after all.  This way the ribbon will slide off and allow me easy access to fill the box with a present or maybe even some treats.

2-27-1

Have a creative day!

Moana