Beautiful Ride for Newlyweds

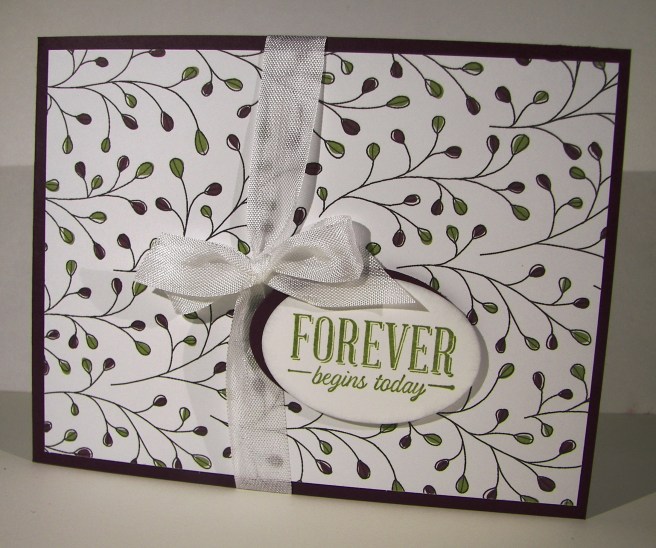
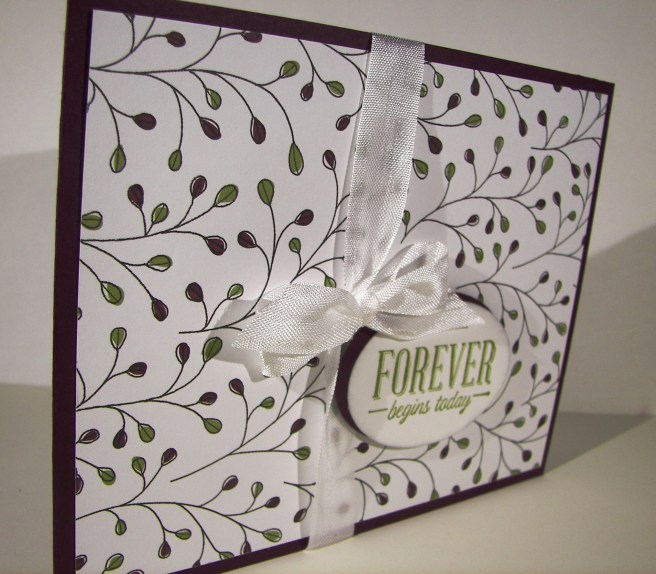
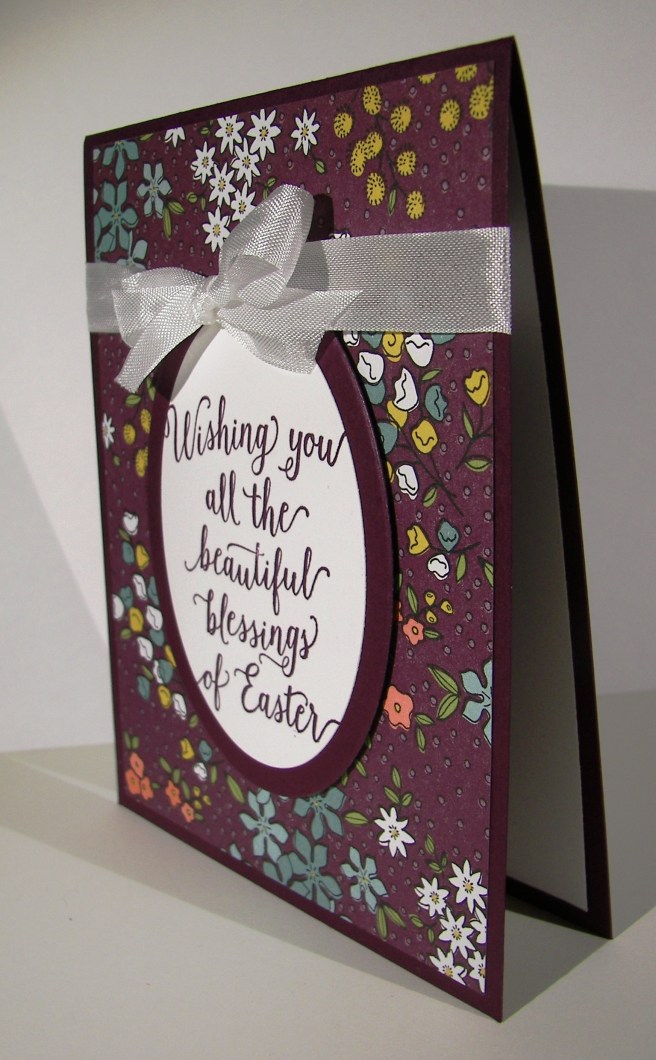
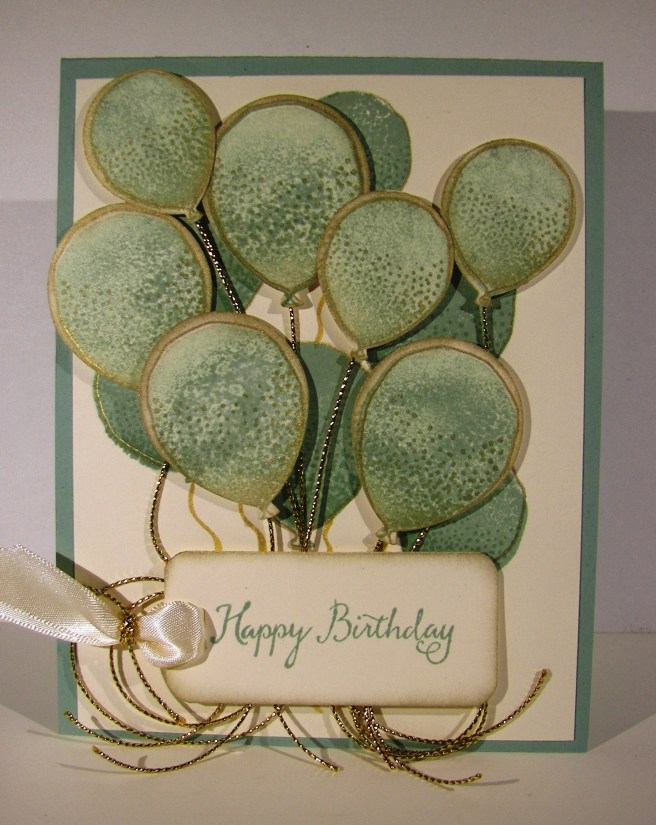
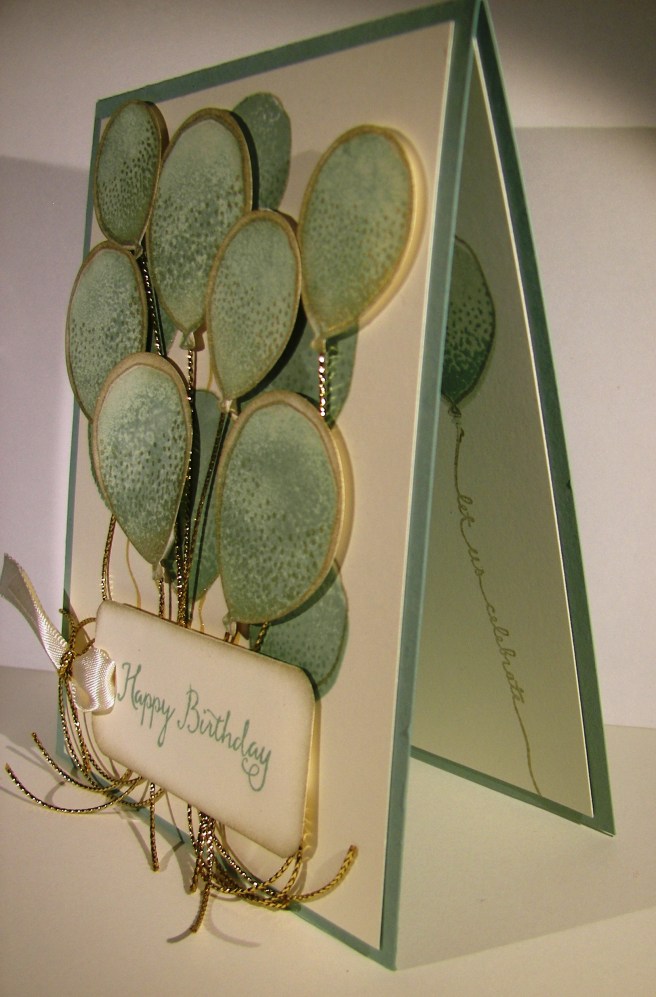
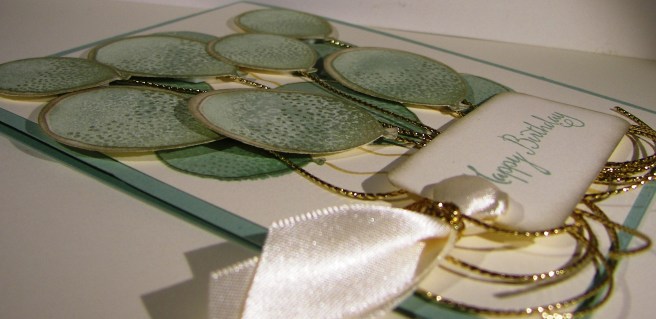
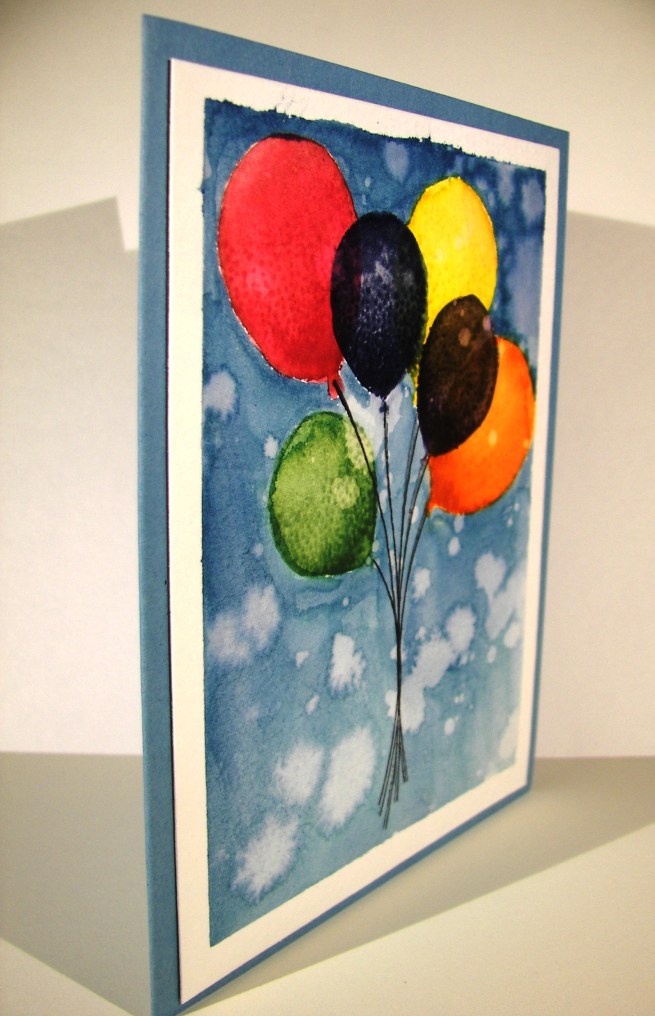
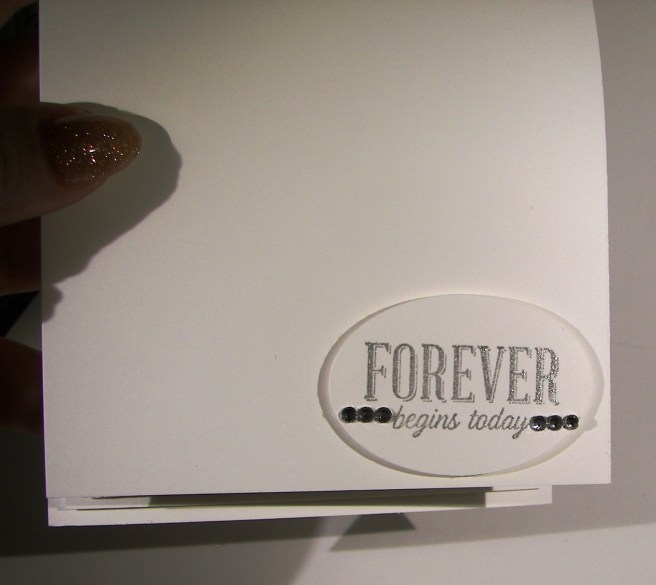
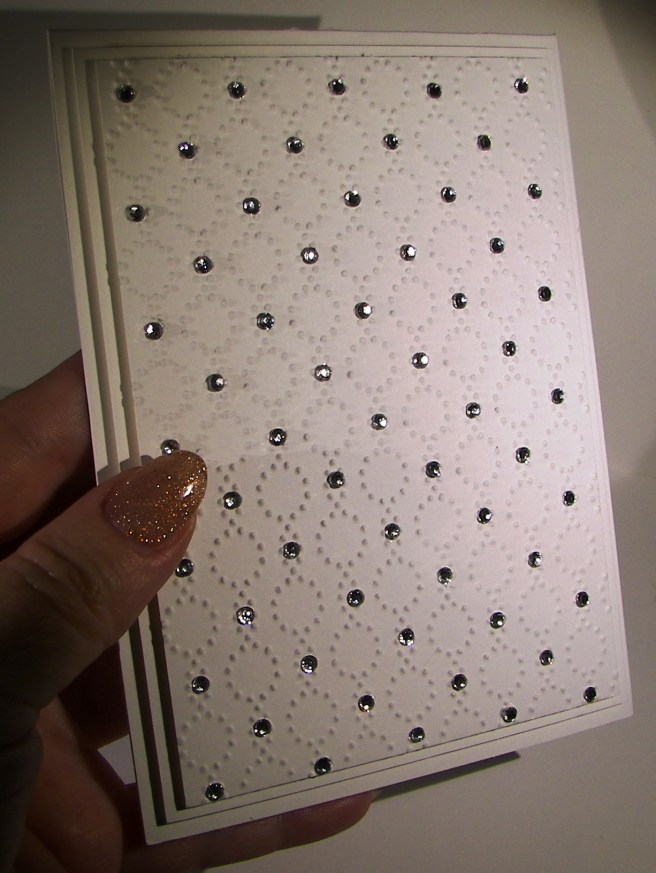
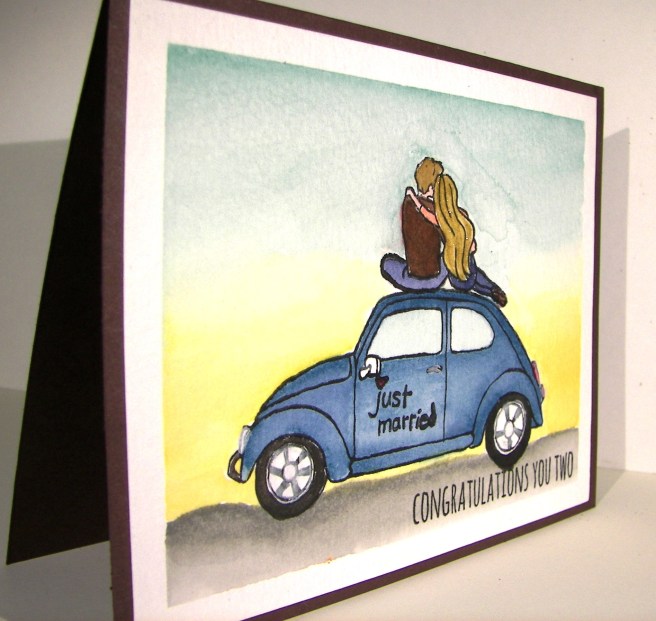
It may be hard to tell, but there are an absolute ton of colors going on here.  I had a blast working on this set.  When I finally finished I was a bit surprised to see how late it got, but it was worth it for sure.  I love making wedding cards just for special people in your life. This one is no different.

4-21

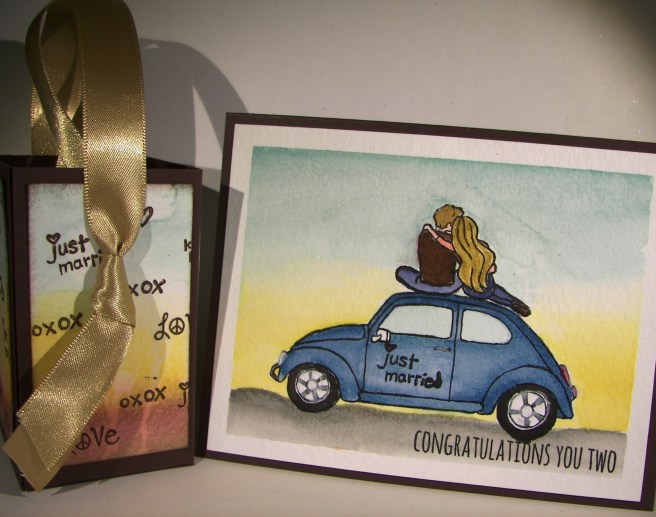
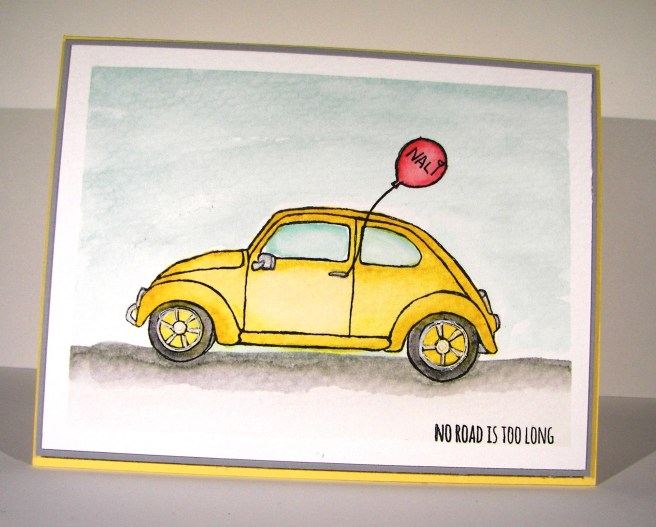
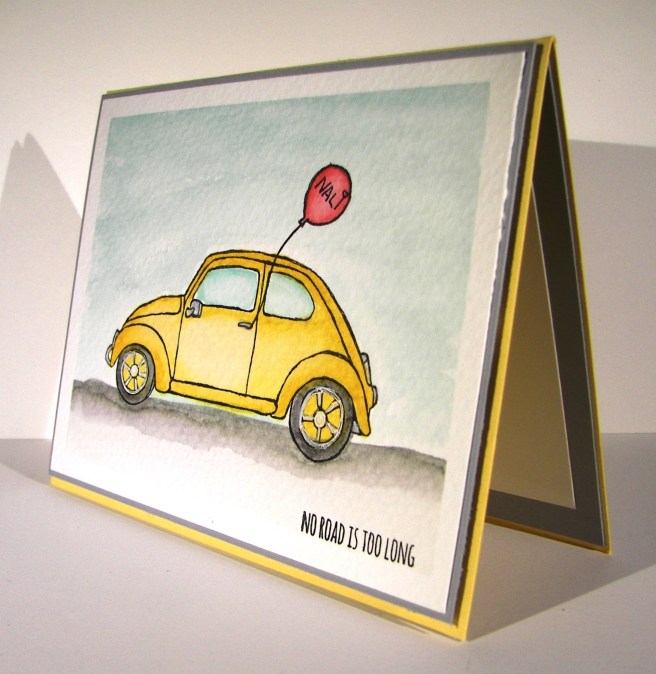
I worked the colors to create a sunrise look and I think it turned out really nice.  I was having a chocolate craving last night, so I settled for chocolate chip paper.  Not quite delicious, but it still worked out.  That led me to marina mist for the car color. From there everything else just came together.

4-21 (2)

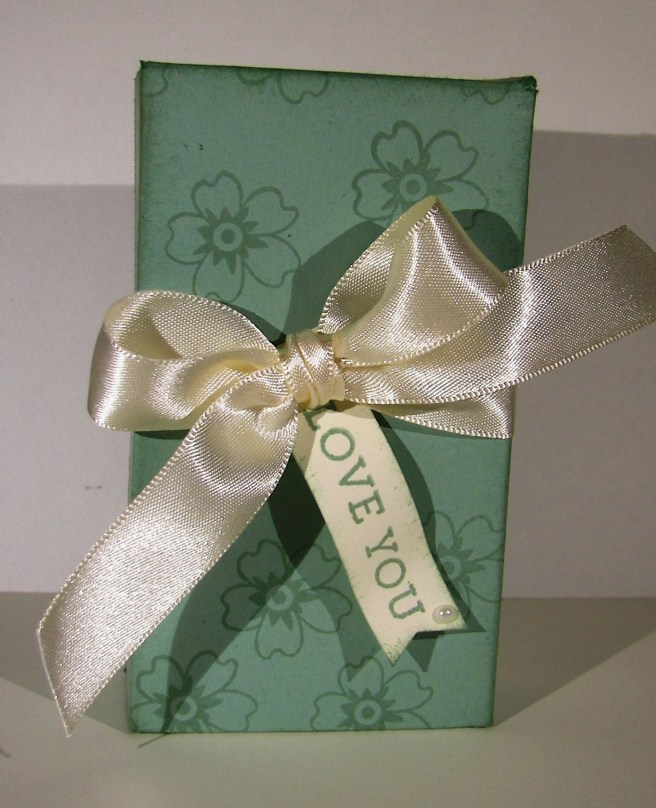
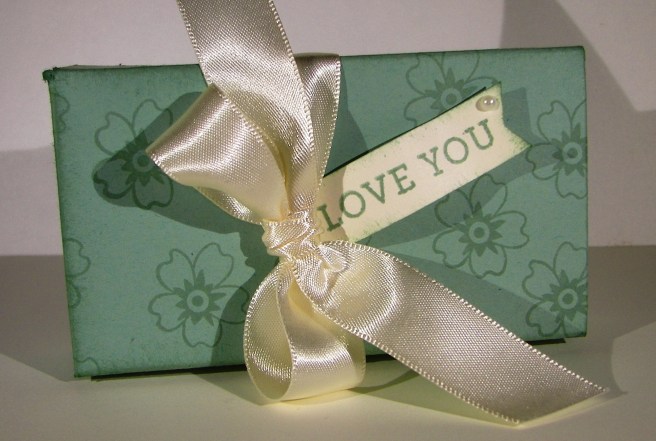
I wanted a gift bag to go along with the card to give the gift card something to go in.  I think I will put a tiny selection of rich chocolates around it, wouldn’t you like to get a treat too? Opening gifts can be exhausting for a newlywed couple, so they deserve a sugar boost along the way.

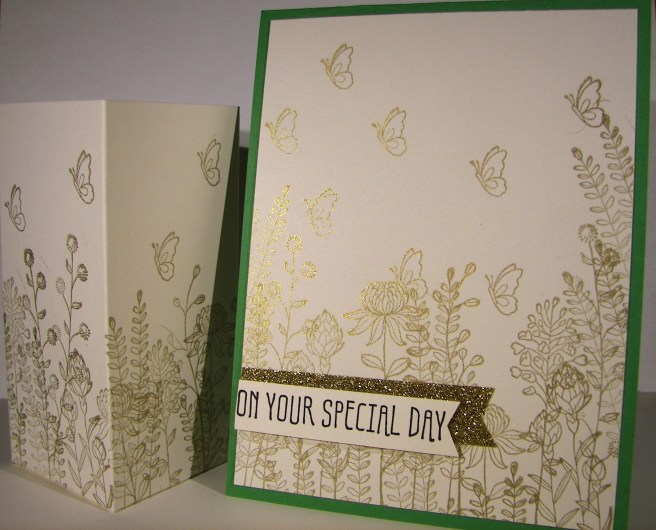
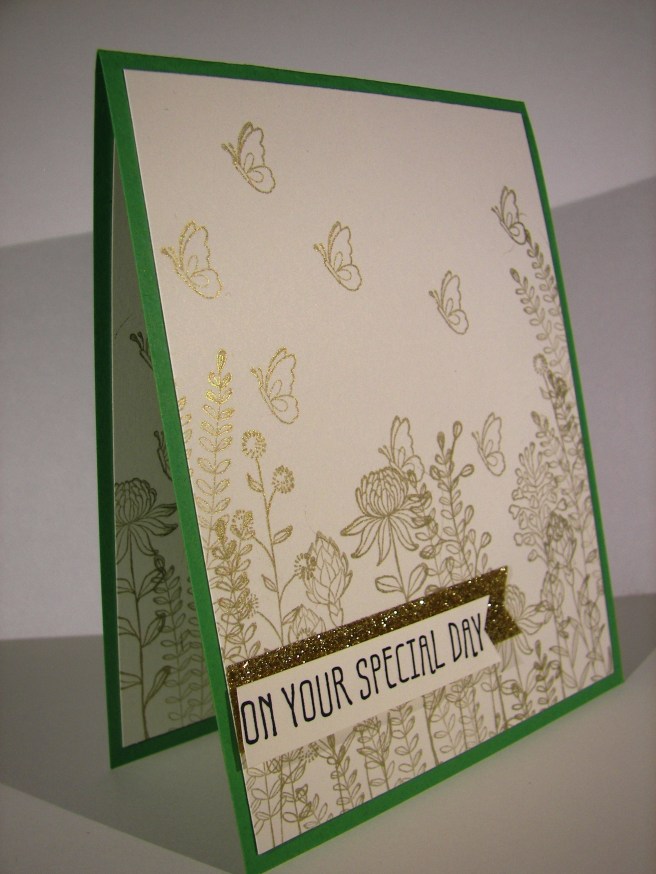
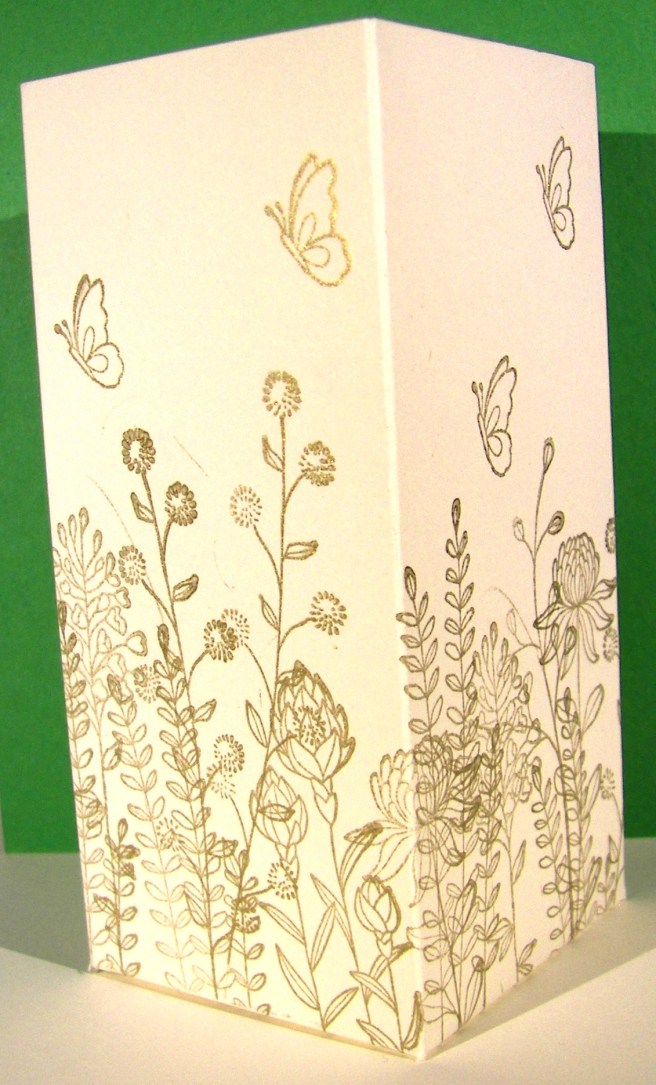
The details in this set are really busy and probably hard to notice.  I think a project like this should look simple even if you know better.  Not everyone knows how much work goes into a tiny work of art like this, but that doesn’t stop me from sharing them.  Just a few more weeks and this card will find its way to the deserving adorable couple.

4-21 (1)

Have a creative day!

Moana

Love You Bloomin’ Love

Just when I thought I could sit down and make something new my time got snatched up. It seems to happen that way more often than I would like, but we do what we have to do.  So, I grabbed a leftover kit from last months workshop and turned a card base into a box.  Pretty cool if I do say so myself.

4-11

I stamped tone on tone with mint macaron using one of the larger flowers from the Bloomin’ Love set to create the background pattern.  My tag was a tiny piece of very vanilla which measured 1/2″ x 4″.  After I stamped the ‘love you’ sentiment from the same set I punched a banner at the end with the bitty banner punch and sponged around the edges with the same ink.  I curled the banner a bit before I set it in place.

The cardstock was cut at 4 1/4 x 11″.  All ready to be a tall folded card.  I scored along each of the long sides at 1″, turned it one quarter turn and scored at 5″ and 6″.  Those last two scored would become the hinge side of the box.  Scoring, snipping and a bit of gluing later and this little box came together.

4-11 (1)

I chose the large satin ribbon for my bow.  That is such a rich ribbon.  I just wrapped it around the short side and tied a pretty bow, leaving the tails a bit longer than normal.  I usually wrap my boxes up more, but wanted to be able to slide the ribbon off easy to fill with treats when the time came.  I also decided to add a tiny basic pearl on the banner, but just one.  How cute is that?

Have a creative day.

Moana

They Say It’s Your Birthday

Fun, fun and fun. That is what this birthday card says to me.  When you have a fun paper that isn’t just masculine or feminine, you are fortunate.  This card can be for just about anyone, regardless of age too.  I call that a super win!  The series I started is nearly to an end.  I can’t wait to share the cute box I made to hold the whole dozen cards for the gift set.

4-3

The tag was made using the triple banner punch.  Dang, I sure do love that tool.  When it first came out I thought it was a bit excessive, but I gave it a try.  I use it so much.  It makes layered banner tags so easy.  This one was whipped together super fast, layered up on dimensionals, given a tiny ribbon accent and slapped in place.  Honestly, this was one super fast card.  Again, the paper is a win.

4-3 (1)

Have a creative day!

Moana

Forever Begins Today

I don’t think I can get enough of this pretty paper.  I am glad I managed to earn an extra pack of this paper during Sale-a-bration.  This particular pattern was my second favorite, hard to top it though.

4-2

Another sad part about this card is that soon the blackberry bliss I used for the card base will soon retire.  I will so miss using it.  It was really my favorite.  Time to enjoy it as much as possible and get ready for some new colors.  I think I might get a little stash of it built up to enjoy though.

This card is like the others in the series, pretty direct and to the point.  I stamped my sentiment in old olive, punched it with the extra-large oval punch, sponged it with silver encore ink and shadowed it with another punch in blackberry bliss.  I raised them up on dimensionals and put them just to the side of a lovely ribbon tied with seam binding ribbon.  I could use that ribbon on just about everything.  I thought I wouldn’t love anything as much as the chevron ribbon that retired last year, but I sure do!

4-2 (1)

Have a creative day!

Moana

Celebrate You

This card series has been so fun to share.  I love the simplicity of the cards themselves, allowing the sentiments to really be the focal point.  Sometimes there is so much, what you are trying to say gets lost.

3-29 (2)

I actually liked this card without the sentiment nearly as well as with it.  The ribbon is so elegant it speaks for itself.  However, I wanted this one.  I have been enjoying sponging the sentiments in silver ink with this series.  I am usually all about the exact coordination, but it is a nice contrast without being a distraction.

3-29 (1)

Have a creative day.

Moana

They Say It’s Your Birthday

How about a simple birthday card!  I think this one could be for just about anyone, don’t you? Keeping projects simple allows for a lot of options, more than you would think.  And how awesome is this balloon bouquet punch?  I am absolutely in love with it.  I hope it carries over.  I am keeping it no matter what.

3-28 (2)

I had to hold myself back to not put strings and all kinds of fun stuff here.  But, that would defeat the purpose of of a clean and simple cards after all.  This way I think it would even work for a masculine card.  Gotta love those!

I punched two large and three small balloons.  The large ones were attached flat to the paper and the smaller ones were raised up on dimensionals.  Of course everything is sponged.  The balloons were sponged in hello honey to coordinate as well as the tag.  I thought the color was too strong on the tag, so I sponged with silver encore ink as well to soften it.  It turned out great.

3-28 (1)

Have a creative day!

Moana


Wishing You all the Beautiful Blessings of Easter

Easter cards don’t have to be all about bunnies and lambs.  An elegant one like this, even in bright colors, is wonderful too.

3-27 (1)

I will definitely miss this beautiful color, blackberry bliss, when it retires this summer.  I do love new colors, but this one just might stay around.  The stamp fits only just inside the oval framelits, which allowed a nice frame and a lovely bow.  No extra embellishments or layering, just a lovely sentiment and strong color.

3-27 (2)

Have a creative day!

Moana

Peek-a-boo to Someone New!

Adorable and adorable.  With a sentiment like this, any project is bound to look adorable. However, the dandelion puffs do help tremendously.  This is the third in a gift series focusing on one set of paper from Sale-a-bration and just one stamp set.  With a few punches and some ribbon I was able to create a dozen cards and a container to hold them. Enjoy them like I have.

3-26 (2)

One piece of paper for the card front, one tag layered with a scalloped background, and a simple bow.  I do think of a new baby with this card, but it could work for other situations I suppose.  There are several ladies in my life who are expecting little ones, so this just might get made a few times over.  Easy and fun to do.

3-26 (1)

Have a creative day!

Moana

Success Looks Good On You

Don’t you love it when designer paper has such unexpected patterns?  This awesome paper from Sale-a-bration, which will end soon, has a few patterns that are so fun and different.  You  wouldn’t guess that this dotted pattern comes from a primarily floral set paper.

3-24 (1)

This project is the first of a dozen cards that I made for a gift set to share with my daughter. It is nearly spring break and my family gets to all be together.  She loves to paper craft with me, and actually kept me company through crafting nearly all of these.  So, you get to enjoy a different one each day.  The series will end with the coordinating container I made to store them all in.  It is so pretty.

The card is super simple.  Just one layer of dsp cut to leave a 1/4″ border, one strip of ribbon tied in a knot, and a layered sentiment.  I stamped in black stazon, punched with the decorative label punch, and then sponged with silver encore ink.  I did use a double layer of dimensionals to keep the tag high enough to clear the ribbon knot underneath.  Simple, right?  Sometimes simple is just right.

3-24 (2)

Have a creative day!

Moana

Balloon Bouquet Celebration

I finally got my back ordered balloon bouquet punch and I am totally celebrating!  This punch is just the coolest thing and totally worth the wait.  This will be getting tons of use, just tons.

3-23

I may have gone a bit overboard with the balloons, and the cording, but I love how pretty it is.  One special person will get this card, and I think I know who it is.  Not everyone appreciates how much time can go into a hand made card, but those that do deserve every one they get.

3-23 (1)

I used a leftover kit from Saturday’s workshop to make this project.  I stamped several balloons on the background paper.  To get the tone I wanted I stamped off once before I applied it to the card.  Then on my other paper, that I would be punching, I stamped off twice.  Both sets of balloons were also stamped with the dotted accents in mint macaron and gold encore ink.  I added gold to everything and sponged away.  Too cute!

3-23 (2)

Have a creative day!

Moana

It’s Your Day!

Yesterday was one of my TA’s birthdays.  Boys turning 14 don’t want a lot of fluff, just cut to the good stuff.  I stopped on the way to school and picked up a large chocolate bar and wrapped in this awesome, retired, water color patterned dsp.  He is also an artist, so I knew he would appreciate the water color theme going on.

3-22

It was so easy to assemble.  I placed tear n’ tape along three sides and wrapped the large candy up.  First I wrapped the paper around fairly tight and sealed it like a flat tube.  Then, I just removed the other strips of tape to flat seal the ends.

I took the scraps of my linen thread and wrapped them around and tied a knot.  I just took my hand painted, and stamped of course, gift tag and looped it through one of the extra strands.  Another simple knot and this lovely package was ready to go.  Sorry I didn’t get a photo of the finished product, but I wasn’t sure just what candy I would be able to get. Stores out in the country don’t always have a large selection.  The way the paper was prepared I could have turned it into a large sour cream container styled  box and been just fine as well.  For the win!

3-22 (1)

Have a creative day!

Moana

A Very Special Invitation

I know I used a bunch of retired product, but I still love it too!  The wonderful thing about tools is that you can use them again and again no matter how long you have them.  This stamp set and coordinating embossing folder are retired Christmas product.  I think they are still beautiful and perfectly wonderful for this project.  So there, use the product you have and love!

3-21

These were special handouts for a Sunday church lesson I taught to a group of 14 & 15 year old girls.  They are so dear to my heart, I can’t help myself but make them something special every time I teach.

I embossed my card front after I did my stamping.  The stamp is photopolymer, so exact placement was super easy.  Then I centered my folder just where I wanted it to be.  I traveled through my framelit collection to find one that had the shape to match the background stamp and my sentiment stamp.  Of course it was the last one I looked at.  But it was a perfect fit.  A touch of sponging on the diecut piece and it was done.

I did get the cording out and do a few loops of it behind my card front.  After I had placed my dimensionals behind my diecut, I looped the cording and set it on the exposed sticky side.  I added a couple of glue dots over the top and stuck it down on the card front.  No problems there!  The cording wants to loop because it is stored on a spool.  Even better!]

3-21 (1)

Have a creative day!

Moana

Balloon Celebration

Experimenting with water coloring has become one of my new favorite things to do.  I am so young in this medium that it is a constant adventure.  I do try not to do it all of the time, but it might just be my favorite.  Hard to put that off.

3-18

I did stamp off the balloons twice before they got to the card front.  I wanted dark color, but still opaque.  It worked nicely.  The second layer stamping was done only stamped off once to make sure it was seen well.  Also a good fit.  I did go over the balloons again with the aqua painter to smooth things out.  A bit of dabbing with a paper towel helped to create better highlight spots.  Fun and fun. I am still waiting for the back-ordered balloon punch, so I had to layer the balloons with just ink.  That is why I had them opaque.  To allow the layering to show the balloons behind, just like it would with a real bouquet of balloons.  I do think this card is good for just about anyone’s birthday, masculine too.  A really great project that was satisfying on so many levels.

3-18 (1)

Have a creative day!

Moana

Flowering Fields with Botanicals for You

I did start out with a St. Patrick’s Day card set in mind.  Hence the green and gold. However, it quickly changed into something more elegant and much more useful.  I do know several people that truly do love to celebrate this holiday and this would work wonderfully for them as well.  What fun, right?

101_1224

This Flowering Fields stamp set will be gone soon.  I do love the fun free products available during Sale-a-bration, but always are sad to see them go.  I do know that there are always new things on the horizon that I will love equally well, but I do have my favorites that stick around year after year.

101_1225

I ended up using a full sheet of very vanilla, part for the card front and inside, and used the rest to make a gift bag.  I prefer to have paper used up with as little waste as possible.  I even used the snipping left from cutting the front and inside to be my sentiment tag.  Very little waste today indeed.

This glitter tape is so much fun.  I admit I have stashed it a bit too long, I thought I had learned my lesson.  Guess not.  So, I broke it out and put it to work.  Just a little bit does so much.  And it is so tidy, no glitter messes to be found.  A win for everyone for sure. I do think I will use some tape to close the bag when it gets filled with a treat or two.  Yeah!

101_1226

Have a creative day!

Moana

Getting Ready for a St. Patrick’s Day Party!

It has been a busy few days getting ready for a large youth etiquette dinner.  This one won’t be all about the perfect manners, but more like what do you do when things don’t go quite right.  Those tend to have the best memories anyway.

101_1222

The invitations were pretty darn basic, which was great when I needed to make sixty rather quickly.  The dinner menu was just printed on card stock to coordinate with the invitation. The names of the menu items are in a kind of St. Patrick Day code.  All of the items, from the food to the utensils, are going to be a mystery to the kids.  When they are served what they “ordered” they might end up with odd and end food items and maybe a straw or toothpick to eat with.  After a some laughs and efforts at etiquette, they will be sent through to fill their plates properly and do their best.

101_1223

Part of the table decorations will include these adorable favors with rainbow fish crackers in them.  The stamp comes from a long retired stamp set that went with the ever adorable milk carton bigz die.  I could have made those forever.  I still have it, because I don’t think I can part with it.

It should be an evening filled with good friends and even better laughs.  I can’t wait!

101_1221

Have a creative day!

Moana

Watercolor Wings Just for You

Saturday mornings are usually busy with everything under the sun and then some.  I had the opportunity to chat with my oldest daughter while she got ready for work.  We put each other on speaker phone so we could keep moving along.  This is what I did during our chat.

3-12

With all of the excitement of Sale-a-bration products and the wonderful spring catalog, it is easy to put aside all of the great product in the annual catalog.  This set, Watercolor Wings, has been a favorite since it came out.  I hadn’t had it put to use lately and thought that was long overdue.

I stamped my ink layers onto watercolor paper this time not quite sure how it would all turn out.  The initial stamping was a bit too detailed for the effect I was going for, but I remained patient and kept going.  I moved in with the aqua painter and began blending, but still wasn’t satisfied.  Perhaps because I had stamped off to get the tones I wanted the ink didn’t want to move around too much.

I thought things were a bit stark still so I came in with pear pizzazz for my background. That really helped out a lot.  But the butterflies still weren’t what I wanted.  I got a spritzer out and put more water on.  Which led to dabbing water off, spraying again, and moving along to the heat tool and doing it all over again.  I did finally get a result I liked, but decided to bring out the wink of stella pens, both the clear and gold glitter ones, and put in finishing details.  I think it all worked out, but I wasn’t sure for a while.  Sometimes watercolors can be that way.

3-12 (1)

Have a creative day!

Moana

Forever Begins Today

Inspiration came from an unusual place this time.  I was pretty tired after a full day and looked through the events and chatted with my daughter a bit.  She didn’t have much either.  However, we had just gotten our nails done that afternoon and I went with her nail choice.  They were done white with a few pretty jewels tucked around the base of her ring finger nails.  I thought it was lovely.  So, here it went into the card.  This turned into one stunning card fit for any wedding or very special occasion.

3-11 (1)

Of course weddings are on my mind like crazy.  Not only is my son getting married this summer, but my niece, my good friends daughter, and another few to boot.  It is a really busy wedding season for sure.  I will need wonderful cards like this for sure.

3-11 (4)

The layers are very simple.  Just quarter inch two times over with the front layer embossed with the elegant dots embossing folder.  I tucked small basic rhinestones in each of the small ovals and it was wonderful.  Yes, that is a lot of bling, but wedding cards always deserve special attention.  This is the kind of card I could see a bride keeping in her memory book.  So exciting!

I had intended on putting the sentiment on the front of the card, but hated to interrupt the beautiful symmetry going on.  So I tucked in inside because it made it wonderful.  Without that particular sentiment the card could become all occasion, but special occasions for sure.

The sentiment was stamped in silver encore ink.  I wanted a bit more shine so I sprinkled clear embossing powder over the top and set it with my heat tool.  It took it up a notch and made me very happy.  I can see more of these coming together to help celebrate the many wonderful events coming up this year.

3-11 (3)

Have a creative day.

Moana

Beautiful Ride for My Nali Bug

This card has been in the planning part of my brain since the spring catalog came out.  I waited to get the set because I thought it would be one more for me than anything else.  I just might turn out to be wrong on that one, but we will see.  I made this one for my oldest daughter, Denali.  Some of my pet names for her are Nali, Bug, and the coziest is My Nali Bug.  That is just what this card is, My Nali Bug.  I shared it with her before this blog went live and she was so cute about it.  How fun is that!

3-10

I simply stamped the car in the lower portion of my water color paper and got the ink out.  I had originally thought to write her name on the car door, but changed to the balloon last minute.  I think I could get lost in this stamp.  How many creative ways have you seen one of these cars painted in the years they have been driving on the roads?  My brain is thinking of ways to make them on this little guy too.  So much fun and never enough time.

Simple layering of my two focal colors, and this card was done.  I enhanced the layering inside the card to give it a bit more color, but that is really it.  I added some wink of stella to the windows and the silver ink areas of the car.  I touched up the rims with a white gel pen.  It wasn’t perfect, but the surface wasn’t ideal for that pen.  The texture of cold press water color paper is my favorite, so there will be some concessions here and there.  Good enough.

3-10 (1)

Have a creative day!

Moana

Hello and Bonjour!

Can  Sale-a-bration be any more fun?  How about getting another free stamp set just so you can have it in french?  I saw another awesome demonstrator, Mary Fish, use this set with the bonjour stamp and I knew I wanted it as well.  Isn’t that just how we work?  Well, it was worth it.  I love it!

3-9 (3)

The dsp I am using here is also from a free Sale-a-bration set.  Most of the patterns are floral, hence the wildflower fields title, but not all of them.  These simple stripes are adorable.  I thought I would create two color choices and a gift bag that could go with either one.  It worked out great.

3-9 (1)

I thought for sure the bonjour card would be my favorite, but the birthday boy is also very adorable.  I think the party hat stamp really made it.  You can never have enough birthday cards, especially when I get to share most of them with my mother-in-law.  She is so good about remembering literally everyone’s birthdays.  And she loves sending out special ones much more than a store bought card.  Who wouldn’t?

3-9 (2)

Have a creative day!

Moana

Hello Perfect Plum

Living in the country has its perks, but sometimes it can be frustrating.  For example, when you live far enough out you are restricted to satellite internet.  It is slower for one thing, but when it is very stormy the weather interferes. Sometimes it stops it all together.  That would be this last weekend.  Bummer.  Let’s catch up.

101_1191

I made this lovely little gift set for a friends daughter.  She had the role of Violet Boreguarde in a children’s musical this last weekend.  Of course the gift bag needed to be filled with gum, because that is what Violet is all about.  That was so much fun!

101_1193

I also dug out one of my old stamp sets from 2004.  I wanted to create the look of bubbles, for the gum of course, and this set came to mind.  I don’t even remember the name of the set.  When you purchase quality it lasts for sure.  This set is twelve years old and worked like a charm.

101_1194

I brought in perfect plum, elegant eggplant and some gold encore ink for this set.  Violet did indeed get a golden ticket after all.  When the scene came for her to change into the large blueberry, she had this inflatable suit that literally made her look so huge and round and most definitely violet in color.  It was a great night.  The grin she made when she looked in the bag was fantastic.

101_1192

Have a creative day!

Moana