Nailed It!

How about a tiny tool kit for a gift bag?  These tool framelits are so fantastic, they really just make me giggle. This set is a little more elegant than others, but I still found myself playing with them before I put them in place.  I realized this photo makes it look like it could be a card, but it is a gift bag made from half a sheet of cardstock.  The tools were die cut from a piece of water color paper that had been painted with several ink colors and some liquid metal colors as well.  Love that look!

3-2

I tried to keep the whole hexagon theme going on here and it turned out nice. The paper is so great it speaks for itself.  What a great set of paper, really.  This piece is foiled and heavier than the others.  After I die cut the large hexagon piece, using a die from the same set, I embossed it for another layer of dimension.  The sentiment background was cut from another piece from the same set.  The classic label punch worked pretty great for the actual sentiment and kind of nestled as well.

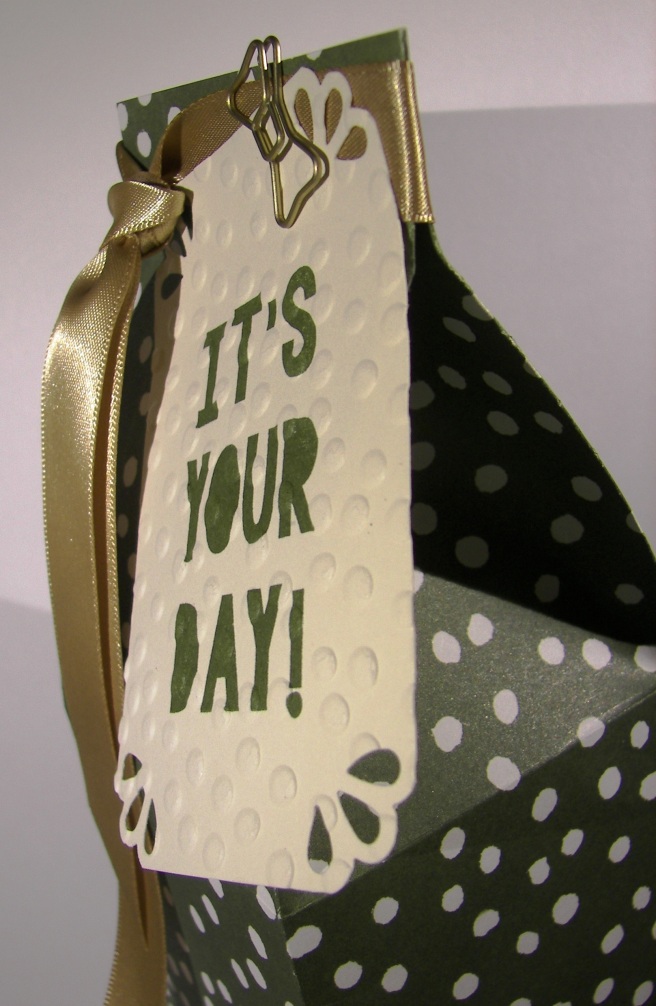
A bit of ribbon for the handle was all it took.  I was trying to give it the look of a bucket handle.  Not sure if that happened, but it looked pretty good. The large hexagon was placed before the tools, raised up on a couple of dimensionals.  Then I just started wedging the tools in place and squished some tombo glue underneath to keep them in place.  Fun!

Have a creative day!

Moana

Flourish Wishes

Such a perfect combination here. Nearly all of my favorite things combined into one project. The only thing missing would be some water coloring, but with paper this beautiful I don’t feel like there is anything lacking here. Even better, this took almost no time at all.

3-1

I just received an order that had this glimmer paper in it, one of the new free items during Sale-a-bration right now, and I couldn’t wait to enjoy it.  It comes in three colors, but the bermuda bay tone was on top so it was literally that simple. I knew there was the same color included in the cupcakes and carousel dsp stack and that became step two, pick a pattern. I probably spent the longest just deciding which one to choose.

The die cut was not as easy to decide because there are so many wonderful ones to choose from.  I kept it simple though and went for a favorite. The glimmer paper was cut to size and then I did the die cutting from the center, knowing it wouldn’t show, and I could make that paper last longer.  Glimmer paper is such a weakness for me, especially in colors like this. The flourish was glued down with tombo and then the designer paper adhered to the glimmer paper with fast fuse.  Regular adhesive and glimmer paper aren’t friends, it needs something stronger.

3-1-1

The sentiment was stamped in the same ink color, die cut, layered zippity quick and raised up on dimensionals.  How easy is that? I had a bit of room for another little die cut before I adhered it down, so that had to happen, hence the need for a matching gift box to use that piece. No problem, just get another piece of the same paper and happiness was achieved. What a great way to launch National Craft Month!

Have a creative day!

Moana

Window Box

Each time I sat down to work on something I got frustrated, hated it and walked away.  I made myself go back and fix those projects, but not until this one made me happy first. It was a bit of a chore putting it together, but isn’t it lovely?

2-27

The thinlits dies that make this box are so fun.  After I fussed around a bit with the fold lines and flaps to glue in place I stopped getting cranky.  You need to do the large die cut piece twice, once for each side of the box, and then however you are going to decorate it. I made a floral top, but could have done the same for all six sides, and the bottom too I guess. I went with just the top this time and made stamped panels for the sides. The stitched shapes framelits had a square the perfect size!  I thought that was great.  I used a larger one to make a card base as well.

This ribbon is so fun to work with.  It has been fun having it, but as with this lovely green color, it will retire this summer.  So I need to enjoy it while I have it.  I punched a small hole in the card corner and attached it to the ribbon instead of tucking it under the bow.  I didn’t want to cover much of that floral top after all.  This way the ribbon will slide off and allow me easy access to fill the box with a present or maybe even some treats.

2-27-1

Have a creative day!

Moana

Every Heart Needs

Gift sets are so great! A bit better than this paper series, but not by much.  I usually am not the kind of person that wants realistic photo paper prints, but this set has my attention. The way the lace is folded really looks dimensional here, even if my photos don’t capture it well.  It is lovely.

2-4

I used one 12 x 12 sheet for this set.  The first cut was to give me a sheet 4 x 12, then a second cut at 5 1/4″ for the card front.  I used the remaining piece to trim out the decorative layers.  The larger section left, measuring at 8 x 12, was scored to create the matching bag. Put that pretty paper to work, otherwise you are left with a bunch of paper that you love and cannot bear to part with.  I know it is hard, but how pretty is this set?

2-4-1

The doilies are so lovely.  They are very vanilla on one side and whisper white on the other. So versatile, and made from paper that can be worked with a bit.  As you can tell, I sponged these two and gave them a proper crinkle.  A doily doesn’t lay flat after all.

The sentiments came from two different sets and I went against my usual on this one.  I stamped and fussy cut.  I really love a die cut or punch to take care of that, but it had to be done.  Both projects were finished off with this elegant vanilla satin ribbon.  And yes, it is that smooth and delicious to the touch.  I love beautiful ribbon.

2-4-2

Have a creative day!

Moana

Fiesta Like There’s No Manana

I haven’t made a card and bag set for a while, but today called for it.  A special birthday for a special someone.  When a birthday isn’t looked forward to what do you do?  Find an adorable llama stamp set and put it to work.  Mission accomplished.

2-2

This bag was made in a particular size for a special gift.  It only needed one piece of cardstock, but I fiddled with the measurements until it was just the right size.  There are two bars of home made soap inside and they fit perfectly.  It also had to be made from card stock instead of designer series paper, which might have been a bit more festive, but I needed it to be stronger for the weight of the soap.

2-2-1

I mixed my coloring a bit here to put color to the llama image. He was stamped on the heavy weight whisper white card stock so I could have a smooth stamp and water color a bit too.  The stamping was done in black stazon, accented in emerald envy with the rope and blanket.  I colored some with the water color pencils and brushed the color around.

Where did that little hat come from?  I dug into the No Bones About It set, the ones with the dinosaurs and so funny sentiments, and there it was.  The perfect size for the perfect llama. And now he is ready to party, as much as a llama can.  How adorable, right?

2-2-2

Have a creative day!

Moana

You’re So Fancy

Did I take a day off yesterday?  Well, yes I did.  My daughter and I had a serious movie fest to take care of, and it was fantastic.  My baby is almost 16 and I need to make the most of these fun times together.  Besides, who doesn’t love a Lord of the Rings Fest? (We already had started with a Hobbit Fest earlier on… tee hee!)

8-11

This simple little gift bag turned out better than I thought.  The bold stack the paper comes from is taking a while to grow on me.  So I thought I would make a bag that would show a small amount of pattern at a time.  Well, instead of being pleased how it balanced out, I decided this brick pattern is all right!  Good thing there are four pages of each pattern so I can go back and try my hand at something else.

Lots of treats will fill this little number up, or maybe even a nail polish or two.  It would be a fun thing to find in a lunch box for back to school too.  Wow, that is just next week.  Okay, here we go!

Have a creative day!

Moana

Oh Happy Day

There is a certain someone getting close to having a baby girl and this just about sums it up. It is truly a happy day and I can’t wait.  And with the heat we have been having I am sure she is more than excited.

8-6

The very fun and exciting playful palette designer series paper stack almost overwhelmed me. The colors and patterns are so busy, almost too busy for me.  I started out with the most subtle one in the stack.  I can’t imagine some of these patterns in a 12 x 12, good thing this is contained to a 6 x 6 stack.  There will be a lot of fun card and gift bag sets I think. Smaller than my regular by far, which makes it much more manageable.

I punched several balloons from plain card stock, but wanted a different look too.  With my aqua painter I covered a section of water color paper with wide light swipes of coordinating ink.  I did sponge all of them as well. The stamp set, Thoughtful Banners, has tons of sayings that fit inside the banner stamp.  There is a coordinating punch for the banners, so that makes me very happy.  I did my stamping, but trimmed it right to the stamp so I could punch another one from card stock and have a tiny border all the way around.

8-6 (2)

The solid bakers twine really makes me happy.  I had longer strings attached to each balloon and trimmed them after they were squished into place with glue dots.  With the extra hanging off the card I tied one simple knot and used it as the embellishment for the gift card sized gift bag.  I do hate wasting product.  It turned out great!

Have a creative day!

Moana

Fear Not

This was something new for me.  I knew I wanted to have water colored bookmarks, but thought it would be smarter to make one large background piece and then trim it down to the sizes I needed.  Such a large piece of blank paper.  It was a bit overwhelming for some time.  Like the stamp says, fear not.

7-17 (1)

After a while I felt a little more comfortable, but not all the way there.  Distressing such a large piece was kind of confusing.  I stuck with it, dried it and took it to the cutting board. When they were smaller I knew they would be wonderful.  The edges got a gentle sponging along with light stamping from the same set.

Then a quick layering on elegant eggplant cardstock, the main color I painted with, and some new solid bakers twine to coordinate and it was all done.  These will be wonderful to share with the young women I teach.  Love those girls.

7-17 (2)

Have a creative day!

Moana

Weather Together with Love

This is what I had in mind this morning, thinking of my recently married son and my soon to be married daughter.  Love is definitely in the air.  Then I read the news.  Seems like love is needed elsewhere today, and so much of it.

7-15

It doesn’t take a lot to show someone you care about them and sometimes it is the little things that mean the most.  Little treat boxes, little hearts, and a little love.  This kind of thing really brings me joy.  Something wonderful from something a simple as a piece of paper.  Yup, just one piece of paper.

7-15 (1)

The card was made with a half sheet, the front with one quarter and the box with the last quarter.  Hearts were stamped like crazy using the stamp from the weather together set. The word ‘Love’ also came from the same set.  I know I could have written it myself, but I don’t trust my writing all of the time and I wanted it embossed to really stand out.  After all, isn’t love the most important thing of all?

7-15 (2)

Have a creative day!

Moana

Affectionately Yours

One sheet of awesome designer series paper can really do so much.  These bakers boxes are made showing similar embellishments, cut from the same die cue, but just different sides of the paper.  That is one thing I really do like about Stampin’ Up! designer paper.  They are two sided, so even if you might not favor one pattern, odds are you will like the other side. I have not been disappointed over the years, so let’s keep that one going!

7-14

The bakers box thinlits die is so fun.  It also comes with a lot of other dies to add some fun, but I opted to not use them this time around.  I stuck with a floral theme throughout.  It has been a while since I pulled out my lovely little petite petals punch, such pretty little flowers. I like to give them a little texture by ‘coloring’ on them with a large rounded stylus on both sides.  Love that technique so much.

7-14 (1)

This one got two little pansy punch windows put in to show the treats inside.  I added small pieces of window sheet to keep the treats inside, but decided to add a flower to the middle as well.  Cascading flowers down a gift box really make me smile.  I guess that is why I have been doing them for so many years.  Flowers never go out of style.

7-14 (2)

Have a creative day!

Moana

My Happy Day

Yesterday was my birthday, and it was most certainly my happy day.  I made this project with that in mind.  Using my favorite go to ideas and things that make me happy.  Water coloring is awesome, both intricate and simple cards, and a myriad of other projects all bring me joy.  However, there is nothing more satisfying than a beautiful crisp gift box or bag.  I love making and sharing these, they really do bring me joy.  So I indulged myself a little bit here.

7-7

Using an entire piece of designer series paper goes against my “make it last” mentality, but it was my birthday after all.  So I pulled out a piece that I loved and created just what I wanted.  I like to maximize the height so it can hold more of whatever I have in mind.  This one did get a bit of switching around.  The top of the bag needed to have enough space to hold the large ribbon and bow I had in mind, so it ended up losing just a touch of volume, but it was well worth it.

This ribbon though…it is so very nice.  It looks great in a knot, a simple bow, and creates lovely larger bows just like this.  While I may hesitate using my paper, I do not hold back using ribbon.  I love large bows and could put them on everything.  Something I learned from my mother to be certain.  In a workshop situation I wouldn’t go this large, my ladies would just get frustrated trying to make it pretty.  Can’t have that, but since this was for me, I let it slide a bit.  Then of course a simple layered circle tag set, stamped off once and sponged around the edges.

7-7 (1)

Again, my favorite types of things.  Second only to sharing them that is.  The bow of course can just slide off so the box can be filled easily and used again.  I always try to make my gift bags and boxes that way.  They are too lovely to be used just once.  So, I make sure the recipient knows how easy it is to re-gift them.

Have a creative day!

Moana

Thank You So Very Much

Everyone says thank you in their own way.  Me, well I like to do favor boxes or cartons.  A little bit of words along with a special treat.  I always want to give something special and to be honest, the budget won’t often allow that.  Hence my love of paper crafting.  I always have more time than money, so my time can show my gratitude.  It isn’t that people expect, I just enjoy doing it.

6-29

This carton was made with a whole sheet of sahara sand card stock.  I pulled out the trusty simply scored scoring tool and it came together in no time.  I actually made this one while having a lovely chat with my mom and dad.  How wonderful summer can be to me.  I did do my stamping first, because it does bother me when the stamping skips over the score lines. I know, not a real big deal, but it bugs me.  So the stamping first with the Flourishing Phrases large floral image.  I stamped and sponged in crumb cake instead of sahara sand to give a more vintage look.  So adorable.

The tag was cut with from the frame from the Rose Garden Thinlits set.  It it so much fun to put such pretty things together.  The smaller floral image was stamped first, the thank you second and then die cut.  Of course the whole project enjoyed lots of sponging.  I wrapped the top of the carton with gold metallic thread, popped a tricky bow through a bitty hole I punched and topped it all with a large basic pearl.  I refrained from putting those all over the box, I made myself keep it more simple.  So there you go!

6-29 (1)

Have a creative day!

Moana

Wedding Favors?

What kind of summer has been going on here?  Well…I guess it has been about weddings. We just finished enjoying our son’s wedding and both receptions.  So much fun and truly a joy throughout the entire process.  Much easier to say that now that it is through.  Guess who is looking at wedding favor possibilities?  My oldest daughter.  Wow, two weddings in one year?  Okay…I guess…

6-27 (2)

Not much to talk about here to be honest.  I have used a die cut I got from a thrift store and I don’t even know who makes it.  But it is totally adorable.  I don’t even know if I can fit an entire fortune cookie in it, but we are going to try.  The ribbon is current in this years catalog and I love it.  I might go with the other mint macaron ribbon though, a bit smaller scale, easier to work with and a touch less expensive.  The paper I have here is a retired paper from last year.  I will have to use regular card stock or find another paper that is close to the color she loves.  Shouldn’t be too hard though.  I would rather use designer paper instead of card stock so it can be patterned and avoid stamping, mass stamping actually.  I would never avoid stamping.

6-27 (1)

Either way, you can get a tiny glimpse into the adventures ahead.  It should be more than wonderful.

Have a creative day!

Moana

Happy Father’s Day, a Day Late…

Where have my blog manners gone?  Well, I had workshop on Saturday and one heck of an adventure before going, so couldn’t blog the projects we were going to make.  I will share them this week though, no worries.  Then there was Father’s Day, and these lovely little tuxedo boxes to make, nearly 85 all together.  So, you can see why I haven’t had a minute or two to share some of these goodies.

6-20 (6)

This tiny gift box wasn’t my idea, thank you many people who are also so creative and share online, but I adapted to make it work for me.  They looked so adorable all lined up with treats poking out of the top, but I just didn’t have a moment to photograph them all together before they were given away.  Believe me though, there were many smiles from more than pleased men in my church congregation as they were passed out by the young women I work with.

The box was made with half a sheet of 8 1/2 x 11 black cardstock and measures 1 x 3 4/2 and can hold a lot of little treats.  The tuxedo was assembled and then glued to the box.  All kinds of assembly lines were working with my family being so helpful.  The bow tie was obviously just a bit of ribbon with a knot in it and then trimmed to look kind of right and glued on with a glue dot.  The buttons went on in a bit of a whirlwind, but ended up looking pretty darn adorable.  The boutonniere was made from a retired tiny flower punch, punched twice, and attached together as well as the lapel with a tiny silver brad.  It was a bit extra, but added just the perfect touch.  The lapels and shirt collars were really eyeballed and scored with no real measuring in mind, just trying to make it look right.  I knew I had too many to do to make them too perfectly.

It was a great project that took quite a bit of time, over four days, with plenty of family help, but was worth every moment.  Way to be awesome dads everywhere!

Have a creative day!

Moana

You Wonderful Thing You

This is the end of a very fun and simple series.  I hope you have enjoyed seeing so many of the patterns in this designer series paper pack.  There are a few more that I love, and a couple that probably won’t find their way to a project, but that is why it is awesome that paper is two sided.  Something for everyone, right?

6-2

One card base, one layer of dsp, one simple tag stamped and sponged next to a simple gift bag.  Just a touch of metallic thread and there you go!  I have enjoyed the series, but I am ready to get my water colors out and play a little longer.

Have a creative day!

Moana

Thank You for Everything and More

Kind words and a sweet treat.  It doesn’t quite add up to all the gratitude I have been feeling these days, but sometimes that is all you can muster.  Making something yourself means so much more I think.  You should give it a try.

6-3

Clean and simple yet again.  When you want to focus on the lovely sentiment and wonderful paper that is just how it needs to be done.  I did add a layer of mint macaron under the DSP before I attached it to the crumb cake card base.  It gave it a little extra style without becoming a distraction.  So fun!

Have a creative day!

Moana

Thanks Kindly

Here is the official beginning of summer for me.  I do have a wedding reception to host this Saturday, so it isn’t time to head to the lake just yet.  Soon though, soon.

6-4

This series of clean and simple thank you gift sets sure was fun to create.  I enjoyed giving them just as much, and isn’t that why creative people create?  To share with others the joy that comes with creating?  Try your hand at something this simple and realize how rewarding it really can be.

Have a creative day!

Moana

You Are Too Kind.

When you are surrounded by kind people even the simple things are wonderful.  As huge life events come into play it just keeps getting better and better, don’t you think?

6-5

A clean and simple card and gift bag duo can be so rewarding.  This is just as simple as the others in this series and was received with great smiles and even a few giggles.  So rewarding, so very rewarding.

Have a creative day!

Moana

One Tiny Word With One Big Meaning

Today is a day full of gratitude for so many things.  I get to enjoy the experience of my son marrying a wonderful lady.  My heart is more than full.

6-6

Let’s keep this one even more simple, shall we?  I love a simple card that really lets you enjoy the sentiment.  Talk about clean and simple.  The matching gift box is tall and skinny. I filled it up with tiny treats as I shared it.  So much fun!

Have a creative day!

Moana

It’s Your Day!

How about a simple gift box for today?  This one doesn’t feel just about a birthday, but could be to celebrate any special occasion.  I do love to make a project that has several uses.  That way, when you need a quick gift box it is flexible enough to fit the need.

5-19

One whole sheet of designer series paper went into this big box.  Simple scoring, nothing new or creative here.  Actually, kind of my go to measurements.  The tag was a bit more simple, but looked much better after it was embossed.  And with an adorable little bow paper clip to hold it in place, it was finished up just right.  I like how the clip and the ribbon go so well together.  I think I will have my group make a smaller version of this for workshop this weekend.

5-19 (1)

Have a creative day!

Moana