Happy Birthday

When you have beautiful paper you really don’t need to worry about much else.  This particular specialty designer series paper is exceptionally beautiful.  Truly beautiful.

8-1 (2)

What does that mean for this card?  You don’t really need much else.  I kept the copper theme going along and embossed the outline and happy birthday sentiment.  Then, the coordinating die cut from the rose garden thinlits set made it very easy.  A few loops of copper metallic thread off to the side and this project was done.  So elegant with all of the foil and copper.  It will be enjoyed I am sure.

8-1 (1)

Have a creative day!

Moana

Delightful Garden in Bloom

This project is a companion to yesterdays post.  Both card fronts were made with the same combination of distress inks, just in different sequences.  This one was actually done first which is why the colors are more distinct.  I certainly am enjoying this kind of painting.

7-31 (2)

As I placed the water color paper into the smeared and spritzed inks I made sure to allow white spaces to remain.  I had to make myself stop adding color before some of that effect was lost.  I can’t wait to try it some more.

When I finished drying the piece it felt like something more was needed to tie it together. I found a great stamp from the Garden in Bloom set and did some random stamping. The ink was too dark full strength, so these flowers were stamped off once before being applied. Then a fun ribbon for a bit of interest to finish the front.  A little echo stamping was applied to the inside and the card was done.

7-31 (1)

Have a creative day!

Moana

Bloomin’ Night of Navy

Working through a scrap pile can turn into something quite lovely.  This gold foil was left over from a Christmas card kit from nearly three years ago if you can believe that.  It worked well with another kit also left over.  Cleaning up and making a beautiful card, sounds like a win to me.

7-29 (2)

The card front was made with coordinating stamps from the Bloomin’ Love stamp set.  The solid flower was stamped first in night of navy fairly far apart.  That is a lot of dark ink there.  Then, with the outline stamp of the same flower I went all over the place using gold ink.  I knew it would even show up over the navy flowers.  I love the look of layered stamping.

It wasn’t quite enough, so I continued with heavy sponging around the edges until I was satisfied.  The gold foil paper was put through the Big Shot using the elegant dots embossing folder.  A nice touch for sure.  Those two pieces were layered on top of another piece of night of navy and then placed on a navy card base.  The inside got a lighter version of the same treatment and I was nearly done.

I had to put a bunch of large basic pearls in the centers of the flowers, because I couldn’t leave well enough alone.  That ensured this would be a hand delivered card instead of mailed, but it was worth it.  They did have a difficult time sticking to the edge flowers that had already been inked.  But with a little first pressure they stayed put.

7-29 (1)

Have a creative day!

Moana

Affectionately Yours

One sheet of awesome designer series paper can really do so much.  These bakers boxes are made showing similar embellishments, cut from the same die cue, but just different sides of the paper.  That is one thing I really do like about Stampin’ Up! designer paper.  They are two sided, so even if you might not favor one pattern, odds are you will like the other side. I have not been disappointed over the years, so let’s keep that one going!

7-14

The bakers box thinlits die is so fun.  It also comes with a lot of other dies to add some fun, but I opted to not use them this time around.  I stuck with a floral theme throughout.  It has been a while since I pulled out my lovely little petite petals punch, such pretty little flowers. I like to give them a little texture by ‘coloring’ on them with a large rounded stylus on both sides.  Love that technique so much.

7-14 (1)

This one got two little pansy punch windows put in to show the treats inside.  I added small pieces of window sheet to keep the treats inside, but decided to add a flower to the middle as well.  Cascading flowers down a gift box really make me smile.  I guess that is why I have been doing them for so many years.  Flowers never go out of style.

7-14 (2)

Have a creative day!

Moana

A Special Congratulations

When your daughter gets engaged it is a whole different feeling.  I don’t know how else to explain it, but it just is.  However, planning takes on a whole new level of excitement that is more than difficult to control.  Having two wedding receptions within seven months does slow you down though.  Creativity, don’t fail me now!

6-30 (3)

I finally broke out this bundle to see just what all the chatter is about.  Well, it is really that amazing.  I am going to have a ton of fun working this set.  So many bloggers have really done some amazing work so far, I am going to need to get to work to catch up.  I bet when my daughter sees this she might just get some shifty ideas about wedding invitations. Some things just aren’t fun when you have to make them by the hundreds though.  Perhaps the wedding invite and not the general reception invitation though, definitely manageable.

6-30 (2)

I went with metallic thread as to not distract from the detail of the die cut, but that won’t last long.  I see lots of different types and sizes of ribbon being wonderful here.  It makes me want to change this out right away, but I will leave it.  It matches the copper metallic embossing powder I used on the congratulations sentiment.  Simple and elegant.  Yummy.

6-30 (1)

Have a creative day!

Moana

Thank You So Very Much

Everyone says thank you in their own way.  Me, well I like to do favor boxes or cartons.  A little bit of words along with a special treat.  I always want to give something special and to be honest, the budget won’t often allow that.  Hence my love of paper crafting.  I always have more time than money, so my time can show my gratitude.  It isn’t that people expect, I just enjoy doing it.

6-29

This carton was made with a whole sheet of sahara sand card stock.  I pulled out the trusty simply scored scoring tool and it came together in no time.  I actually made this one while having a lovely chat with my mom and dad.  How wonderful summer can be to me.  I did do my stamping first, because it does bother me when the stamping skips over the score lines. I know, not a real big deal, but it bugs me.  So the stamping first with the Flourishing Phrases large floral image.  I stamped and sponged in crumb cake instead of sahara sand to give a more vintage look.  So adorable.

The tag was cut with from the frame from the Rose Garden Thinlits set.  It it so much fun to put such pretty things together.  The smaller floral image was stamped first, the thank you second and then die cut.  Of course the whole project enjoyed lots of sponging.  I wrapped the top of the carton with gold metallic thread, popped a tricky bow through a bitty hole I punched and topped it all with a large basic pearl.  I refrained from putting those all over the box, I made myself keep it more simple.  So there you go!

6-29 (1)

Have a creative day!

Moana

Your Generosity and Fabulosity

This is another one of last weekends workshop projects.  A very simple but lovely card. There are so many things that I love about it, but especially how they all work together.

6-23

The layering design is all about showing off the designer series paper.  The embossing folder draws attention to it and the sentiment accents it.  In this pack of paper there are several two sided patterned pieces, but two sheets of gold foil designer series paper.  This pattern is one of the two and I love it!

I accented the sentiment with the layered square framelits and some of the awesome new mini striped ribbon.  It might have been a bit over sized, but it is what I wanted so I did it. A touch of echo stamping on the inside to tie it to the designer paper and I was good.  Another great project that will find its way to another fabulous person.

6-23 (1)

Have a creative day!

Moana

Perfectly Wrapped in Sweet Sugarplum

I am getting pretty darn excited for the new catalog to go live.  Just a couple of more days now!  This is a tiny peek into what awaits.  I usually wait to get into new product until everyone can order the new product, but I decided not this time.  I am so very excited about this particular new color.  I always enjoy the new in-colors Stampin’Up! brings out, but this one has me hook, line and sinker!

5-30

The card itself is really super simple and in my favorite style.  Creating my own background from pretty stamps is the best.  I used several stamps from the same set, Perfectly Wrapped.  It is actually part of a kit that you can make a ton of different types of gift boxes and bags.  I think it would be so fun to play with at a workshop. One thing at a time.  This set is really going to get a lot of use.

And can I say how wonderful this new ribbon is?  In the catalog I was totally unimpressed. It looked kind of dumpy and I didn’t plan on getting it.  However, when I placed my demonstrator pre-order I gave in and am I glad I did!  It ties bows like a dream and looks so pretty.  Again, you just can’t tell from a catalog what things are like.  Too bad I don’t just have one of everything.  How can you, really now.

5-30 (1)

Have a creative day!

Moana

I Do…

This is one huge, and most wonderful wedding card.  I think it is to the grandest scale I have done so far.  Must be because we are only a week away from our sons big day!  I think that I just might use this one for myself. I will have to think long and hard about what to write…

5-27

This card measures 11 1/4 x 3 3/4″, how about that!  I used a sheet of 12 x 12 to put this one together.  The front is layered with a large piece of dazzling diamond glimmer paper with a special water color panel for the card front.  The lettering was done with the Larger Than Life Alphabet & Number stamp set.  It is, sad to say, retiring.  Along with this beautiful Lost Lagoon color.

I spent quite a bit of time moving ink along this piece.  Painting, distressing, drying, and then repeating all of that until I liked what I saw.  The stamping was simple.  The first layer was done with lost lagoon and then again with silver encore ink.  The result gave a shadow look, but it is still two dimensional and flat as can be.  The flowers aren’t of course, and I love the look.  Kind of like blossoms traveling in the wind.  It will be interesting to try and create an envelope for this one, maybe it is too beautiful to put it in one. Hmmm….

5-27 (1)

Have a creative day!

Moana

Love You

Love, love and love.  It is in the air like crazy and I can’t seem to get enough of looking at it, feeling it, and most of all, sharing it.  What a great thing in life to experience.  Less than two weeks now and my oldest will be married!  How exciting!!!

5-24

Simple layered card today.  I stamped the background paper with the floral heart from the Bloomin’ Love stamp set.  Real quick work there.  I did a tiny love you stamp on a scrap of whisper white and punched it out with the soon to be retired large oval punch.  Sad days there.  I matched it with the scalloped oval punch in bermuda bay.  That was sponged along with the card front and the card inside.  The inside also got a bit of stamping, my favorite. Then the ever so lovely, and larger than life, striped ribbon got to be used once more.  What a fun and huge bow.  Yes, this will need a custom envelope and extra postage, but it is worth it!  What a great project for today!

H5-24 (1)

Have a creative day!

Moana


Remarkable…

This quite simply was round two.  I had this fun idea to emboss this flower with silver powder on black card stock.  Thought that would look pretty cool.  Then, I thought I would water color with a bit of silver encore ink and touch it up with wink of stella.  Can I just say that all went in the trash bin?  True story, not a good combination there.  Next try…better.

5-16

These colors are all I have on my brain lately.  The wedding is three weeks away and the reception I am hosting is four weeks away.  It is hard to find blackberry bliss in the spring out and about. I have managed what I can, and have had to let go of other ideas.  It is going well.  Just like this card duo.

5-16 (1)

Simple stamping and die cutting with oval framelits.  Touches of basic pearls to set it off and wrapped in pretty satin ribbon.  My kind of yummy.  After donating my stash of cards and bags for a fund raiser, this is the first one to begin the rebuilding.  All for a good cause.

5-16 (2)

Have a creative day!

Moana

Brushstrokes Through a Garden In Bloom

The ‘Brushstrokes’ background stamp finally made its way into my collection and I am wondering why I waited so long.  This project reminds me of a summer picnic.  The red checked table cloth, I think we have all had one at one time or another.

5-12 (1)

I stamped vertically and then horizontally with real red on water color paper.  I did tape it off first to give me the extra border I love so much.  The flowers and butterflies were stamped in black stazon and followed with the second step stamps to fill them in. Additional painting was done to sharpen the color some and touches of silver got in as well.

I used half a sheet of cardstock for the card base and couldn’t leave the other half just sitting there, so I made a tiny box to go along.  The black butterflies were stamped with the same set and I scored each panel measuring 7/8″ and topped it with a baby bow.  Adorable. Now another set can be added to the donation collection for Saturdays scouting fundraiser.

5-12

Have a creative day!

Moana


Awesomely Artistic with Watermelon Wonder

The weekends seem to get busier all of the time.  I guess that is what happens when you have a child getting married soon.  Errands and then some.  I wouldn’t have it any other way though.  I enjoyed some relaxing time yesterday afternoon finishing this gift set I actually started Friday night.  Talk about being busy.

5-9 (4)

With my love of water color, you would have thought the card came first.  Not this time.  I started with this awesome designer series paper and made an adorable gift bag.  You would think I had tons of gifts to give all of the time with the amount of bags I make, not true though.  I just love to make them.  I do share them with others though, usually as a gift to use for others.  They all find happy homes, I promise.

5-9 (2)

I did try something new with the card though.  The dragonflies were stamped in versamark on the water color paper, not new there.  I used iridescent ice on them, also not new. However, using them together as a resist for water coloring is new.  As color was applied the resist was pretty neat, not as clean as embossing powder, but still holding up.  I decided to add silver ink as well and then it changed even more.  The silver ink clung to the images more than the watermelon wonder ink did.  The look is fantastic, don’t you think? I added a little bit of silver metallic thread and five clear sequins to finish off the look.  Just divine.

5-9 (1)

Have a creative day!

Moana

Corner Garden Bliss

As another catalog year comes to a close I have to be brave and say goodbye to the things that I have loved so much.  This card has so much of that in it.  The stamp, and three of the colors.  A very sad farewell indeed.

5-5

I masked a piece of water color paper and stamped the floral image in black stazon ink.  I have loved this stamp so much.  I do think it will stay with me even when it isn’t available to purchase.  The only color I wanted for the flower petals was blackberry bliss.  So, that meant some had more color than others and they all got special treatment to make them look unique but coordinated.

Before I painted the leafs and stems I applied the soft sky background.  I knew that mossy meadow would cover easily and I still wanted to allow it to blend out a bit.  It worked like a charm.  The flower centers were painted in hello honey and allowed to blend out a bit into the flower.  After the painting was done I  just stared at it wondering how I wanted to distress it.  I didn’t want splatters or spots, but didn’t want to leave it either.

I decided to use a spritzer and water.  Several sprays later I started to like what I was seeing. I did some sponging with a paper towel to lift off some color, then a neat thing happened. I took my damp, inky paper towel and sponged from the bottom to the top which brought a very light amount of blackberry bliss with it.  It looked pretty great so I went with it.  I bet I couldn’t recreate it though, but I will most certainly try.

5-5 (1)

Have a creative day!

Moana

Bird of Paradise Giftbag

This beautiful box was supposed to be shared yesterday, but that day had too many demands on it.  So, it waited patiently for me to get to it today.  Still just as pretty this morning as yesterday morning.  What pretty paper, right?

5-4

One whole 12 x 12 sheet went into this project.  I wanted to have a tall box, but not my usual shape.  Not too many options, I just wanted to show off the wonderful pattern of the designer series paper.  So I widened out the front and back to 4″ and narrowed in the sides to 1 3/4″.  It worked out nicely.  It won’t hold heavy items, but my daughter had the desire to use it to gift a scarf.  That would work out.

The flowers are cut with the botanical builder framelits using cajun craze.  Too perfect.  The leaves are from the same framelit set with old olive.  Not too tricky, right?  I wrapped silver metallic thread around the top, so that can be slid off to insert a gift and placed back on.  Yet another awesome gift bag ready to go.

5-4 (2)

Have a creative day!

Moana

English Garden with Rose Wonder

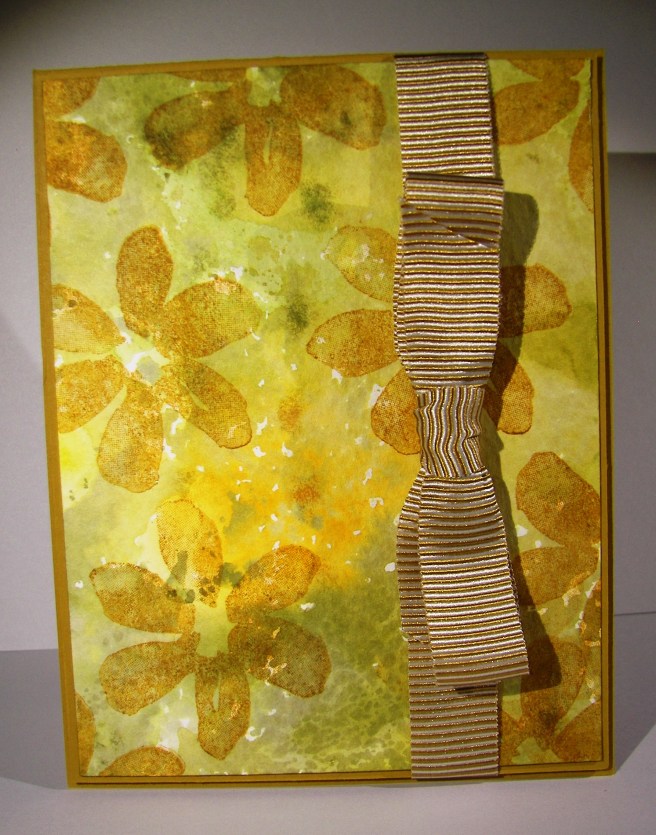
The morning may be trying to run away from me, but I am trying to keep up.  I did get this set made yesterday, but haven’t had the chance to get it shared yet.  Let’s hear it for lunch breaks, everyone needs one.

4-29 (3)

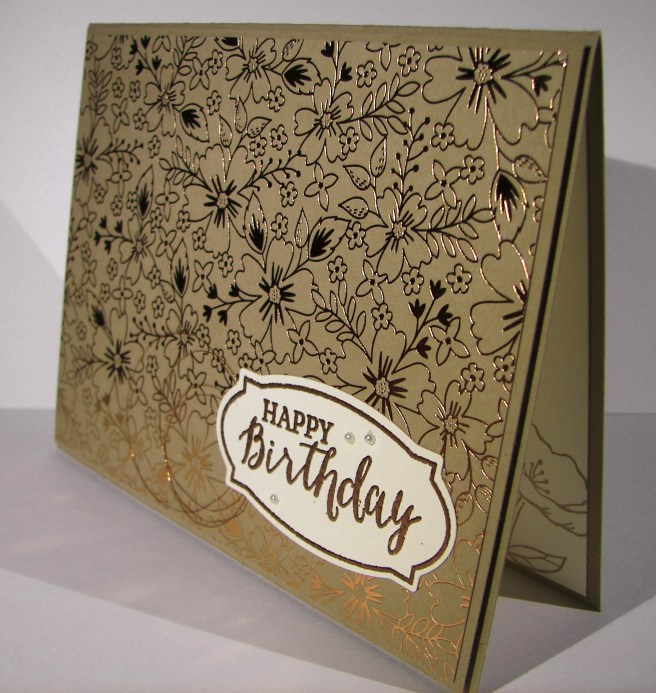
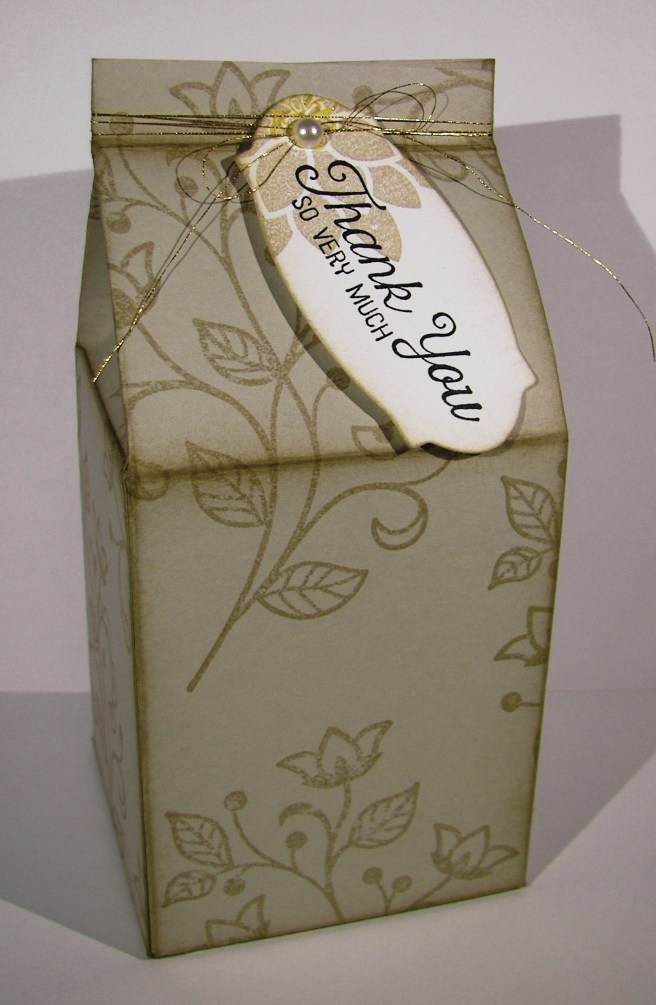
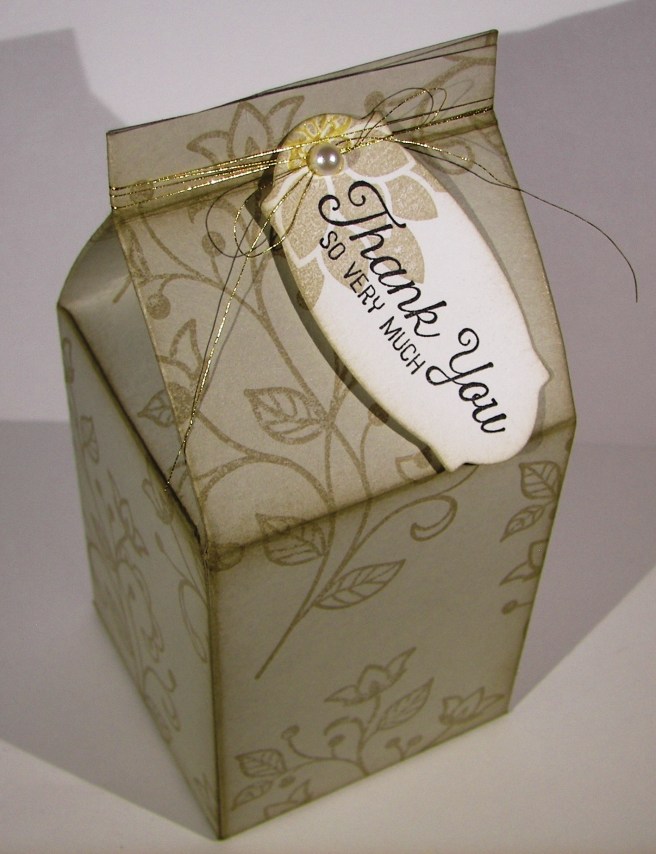
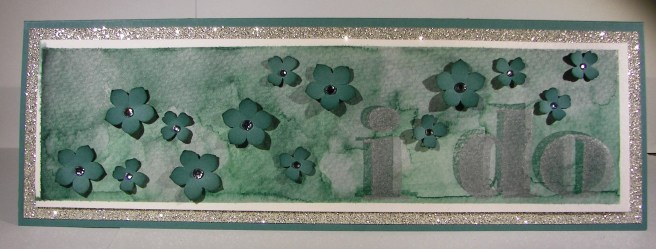
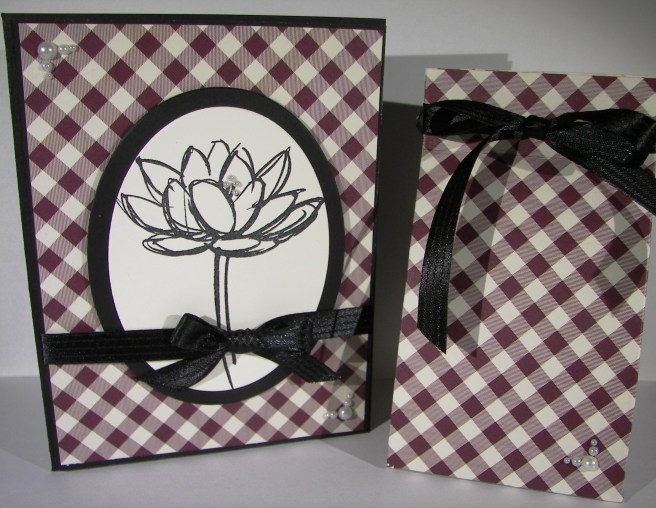
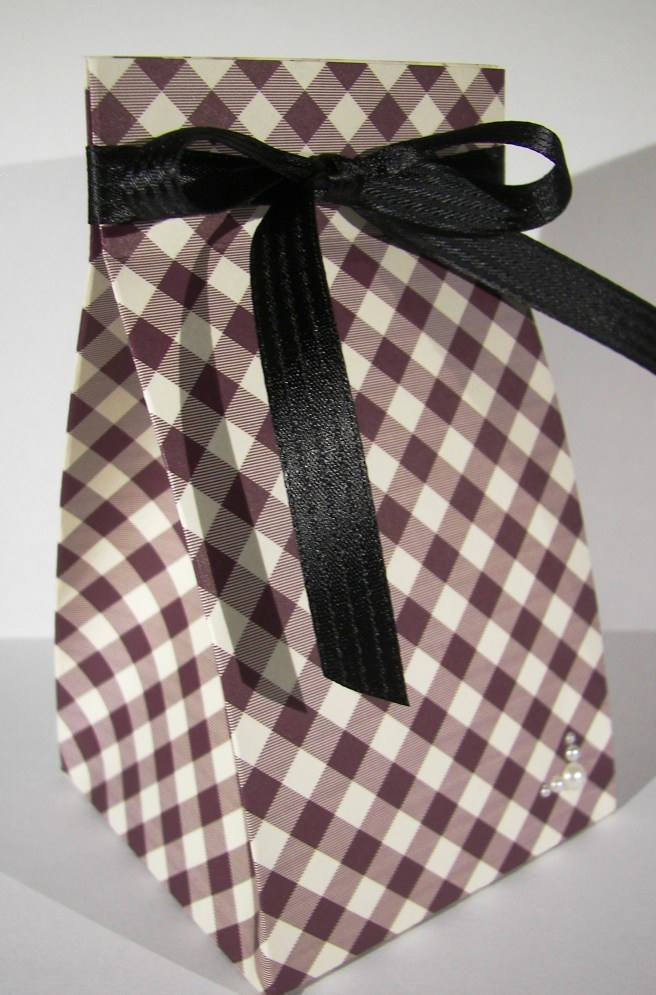
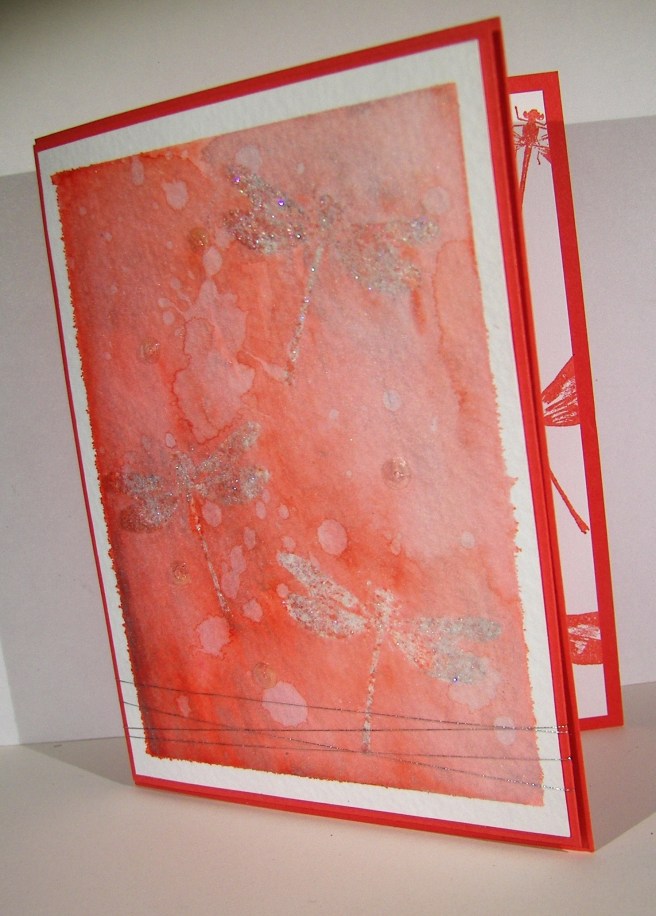
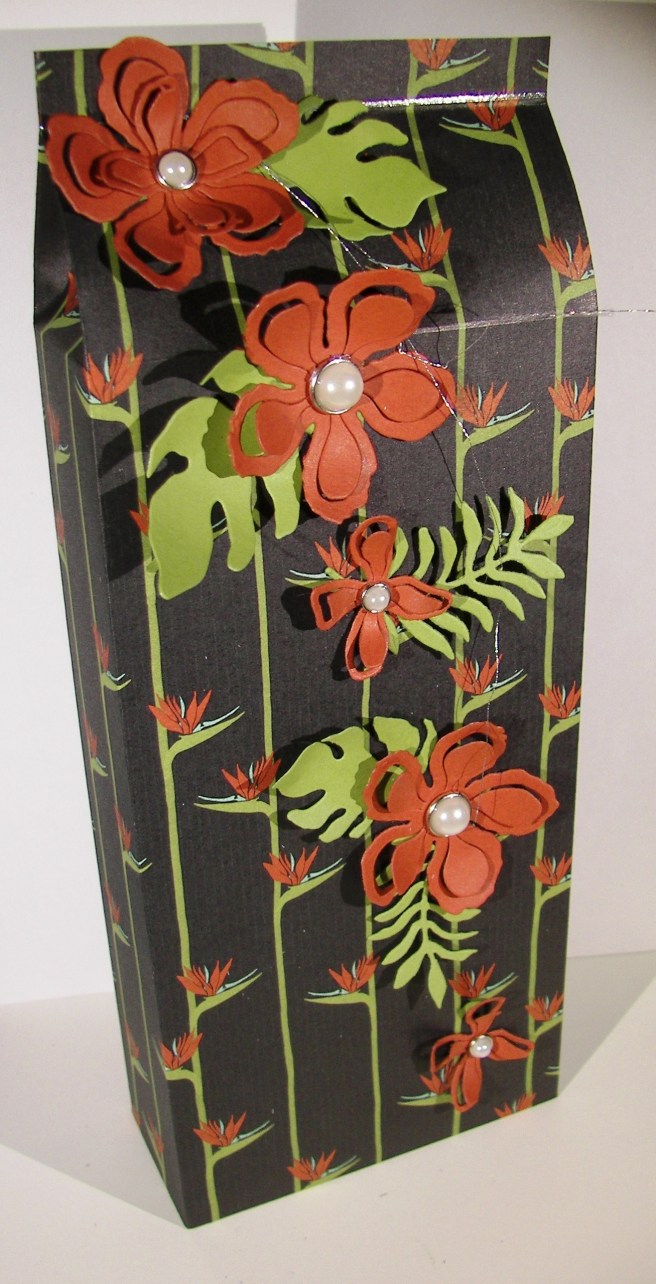
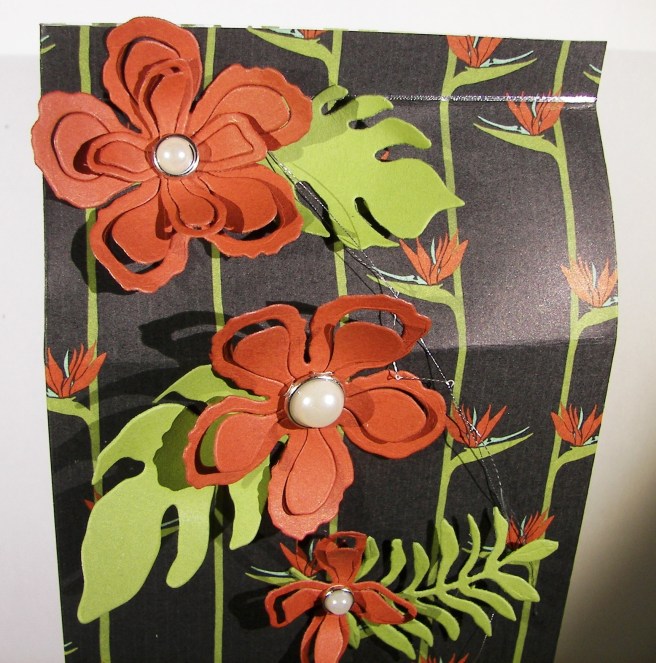
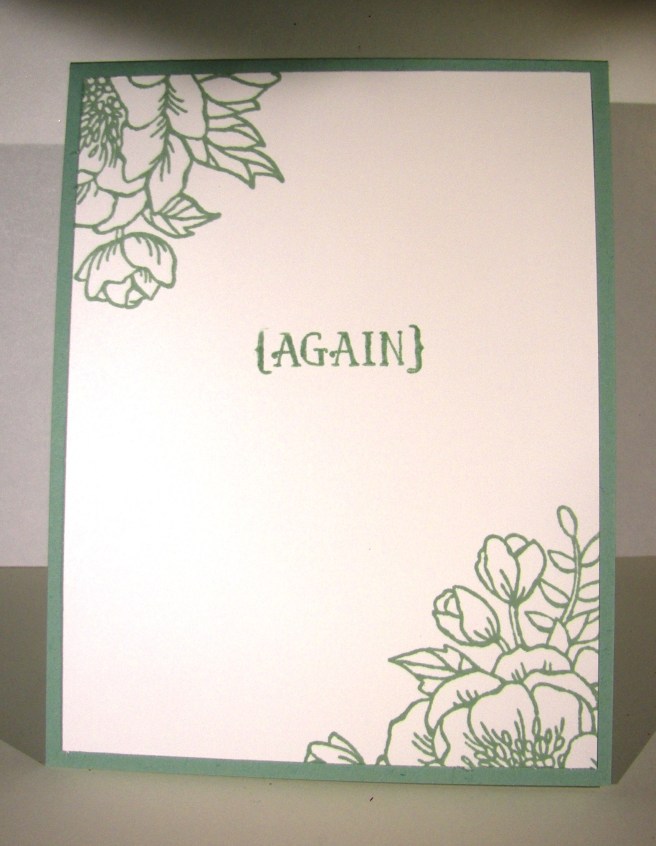
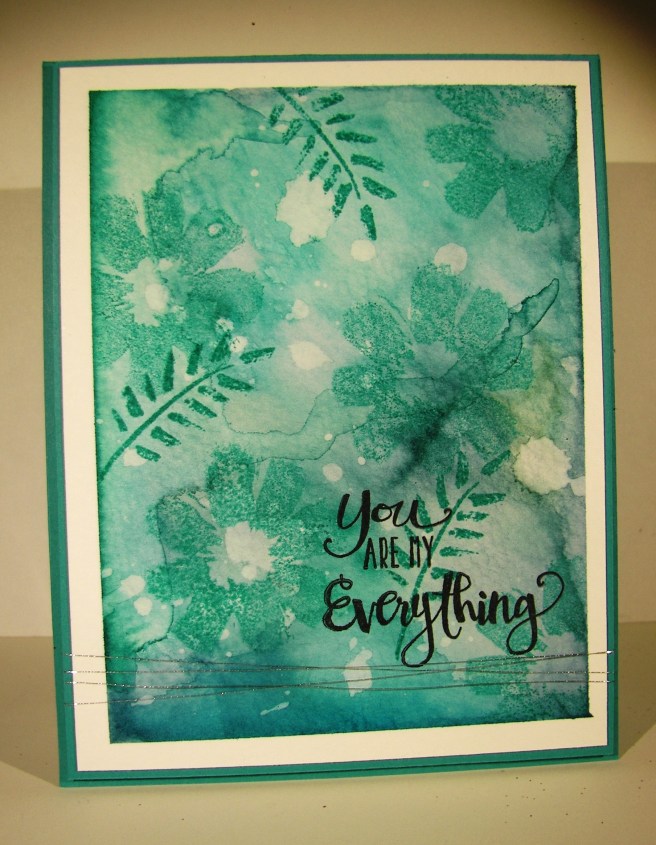
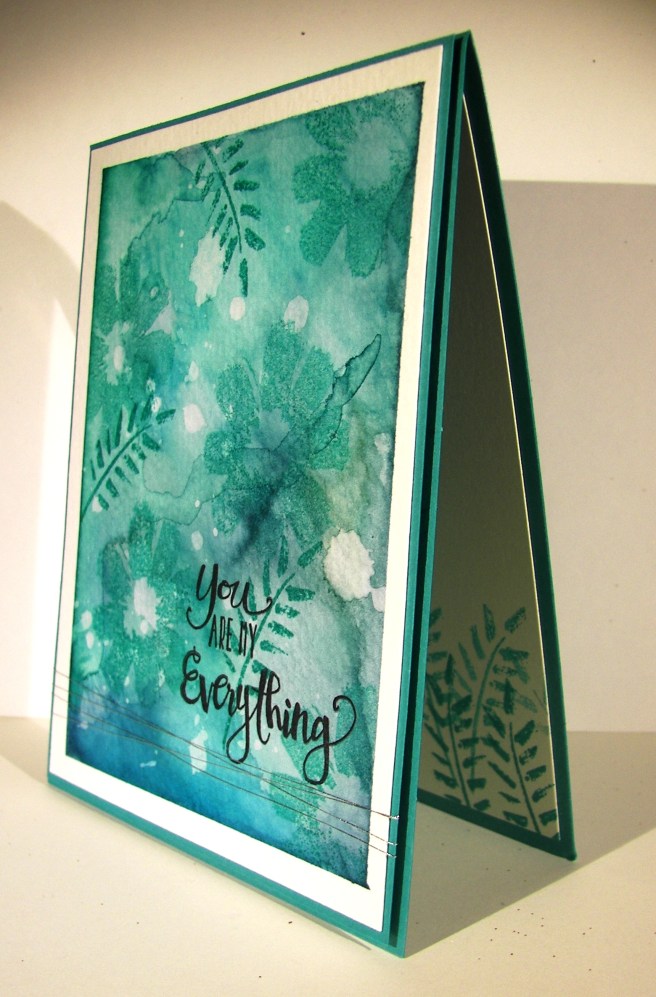
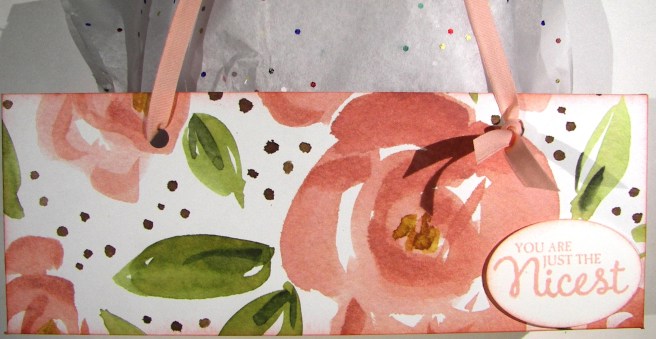
The card was the beginning of this trio, and the paper was the focus.  It is sad to say that this paper is retiring soon, I sure have loved using it.  What can be better than water colored floral paper?  With my kind of projects, not much.  Unless I sit down and paint my own, with paper this pretty I don’t have to.

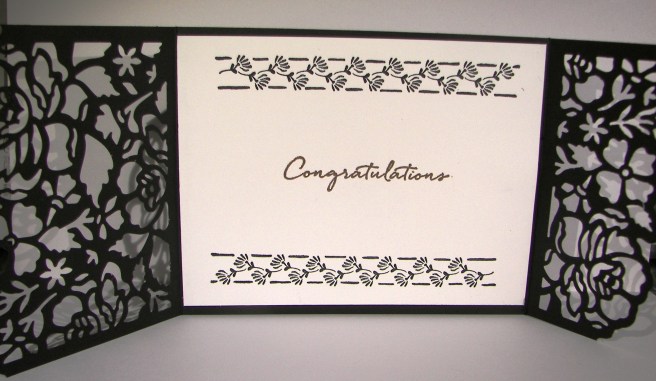
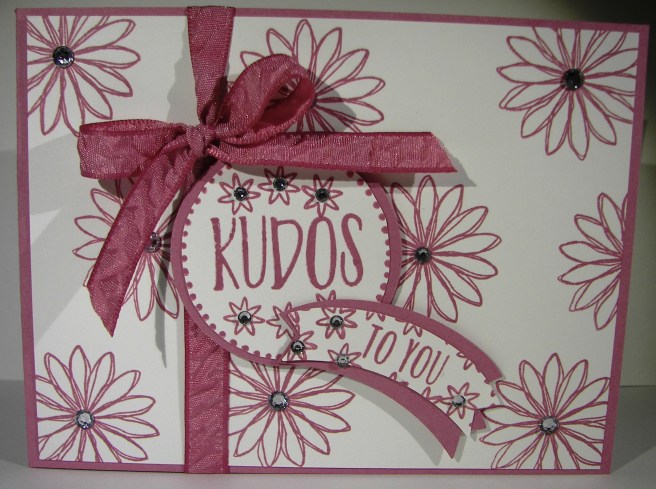
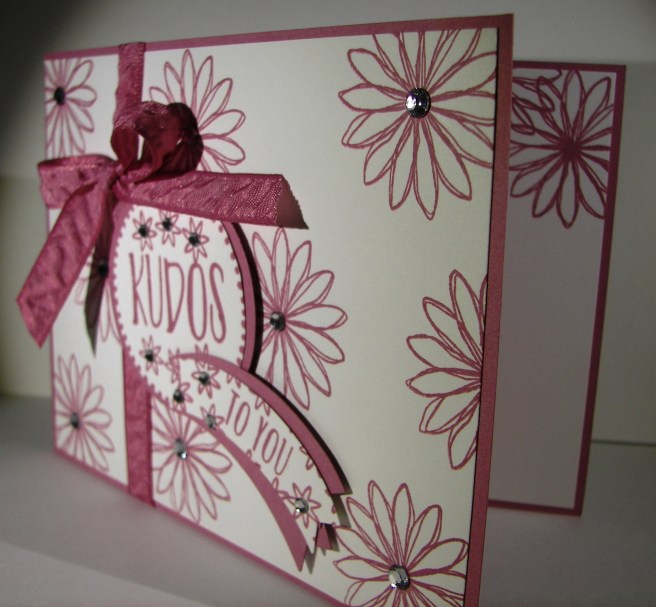
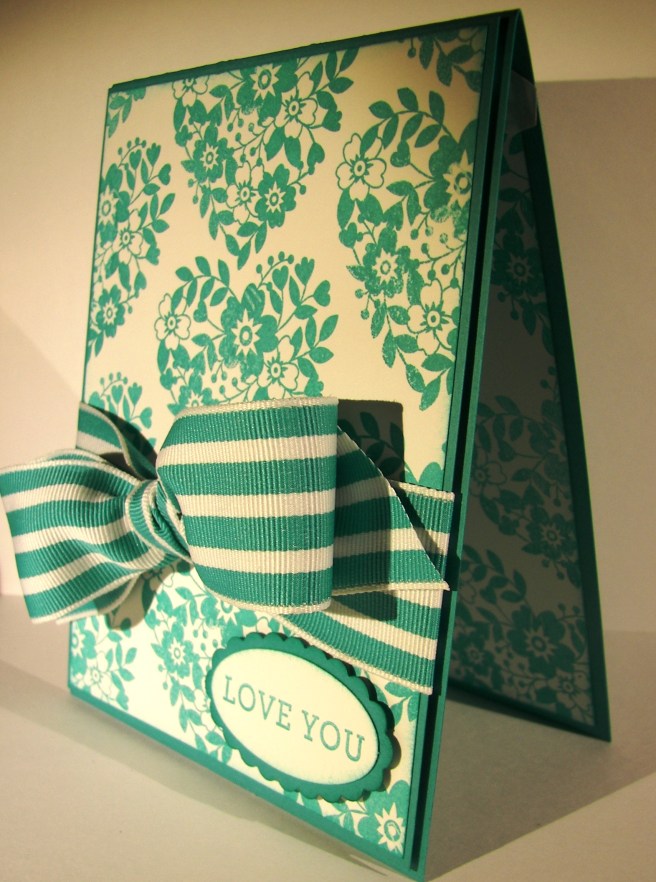
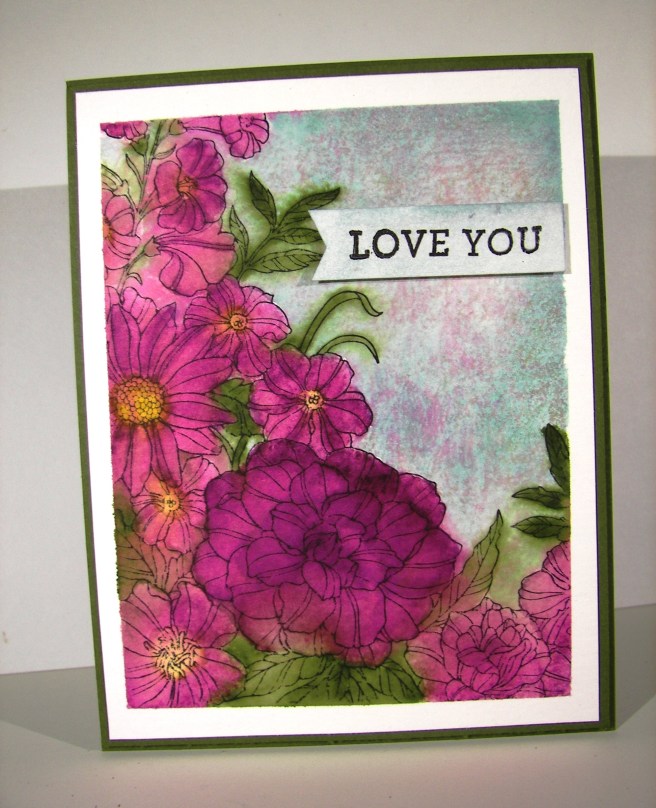
The designer paper is layered on a piece of blushing bride cardstock and then on a pear pizzazz card base.  Old olive is actually the light green used in this paper, but I wanted a lighter tone and thought it looked nice.  All of the sentiments come from the Rose Wonder stamp set, there are some lovely ones in there.  I stamped, did a banner punch, sponged and then sponged another one to layer underneath.  The strip is 1/2″ wide and was left over when I cut the piece of whisper white for the inside card panel.  I love those little leftover strips, they always come in handy.

4-29 (2)

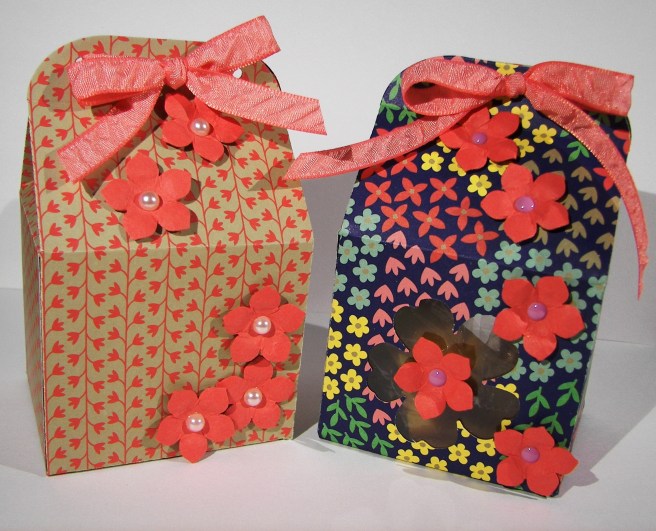
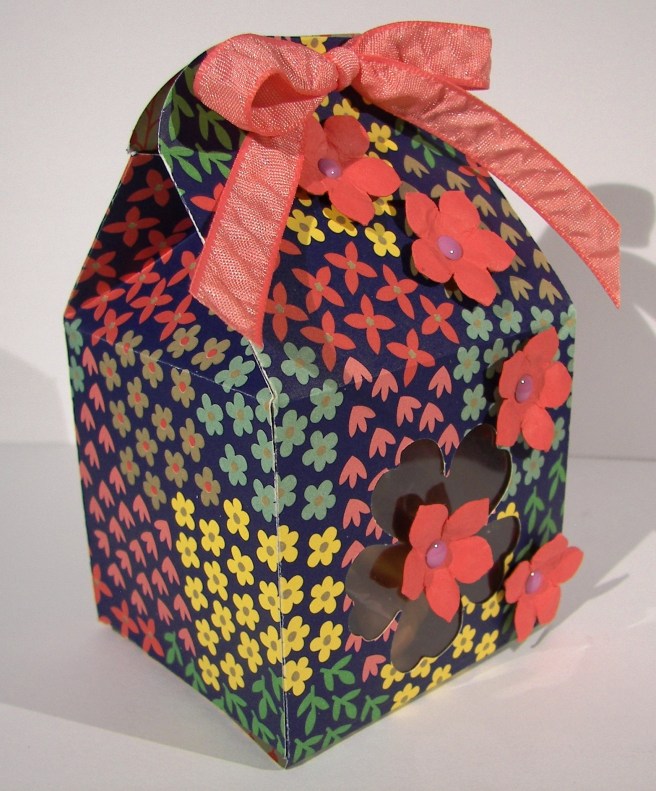
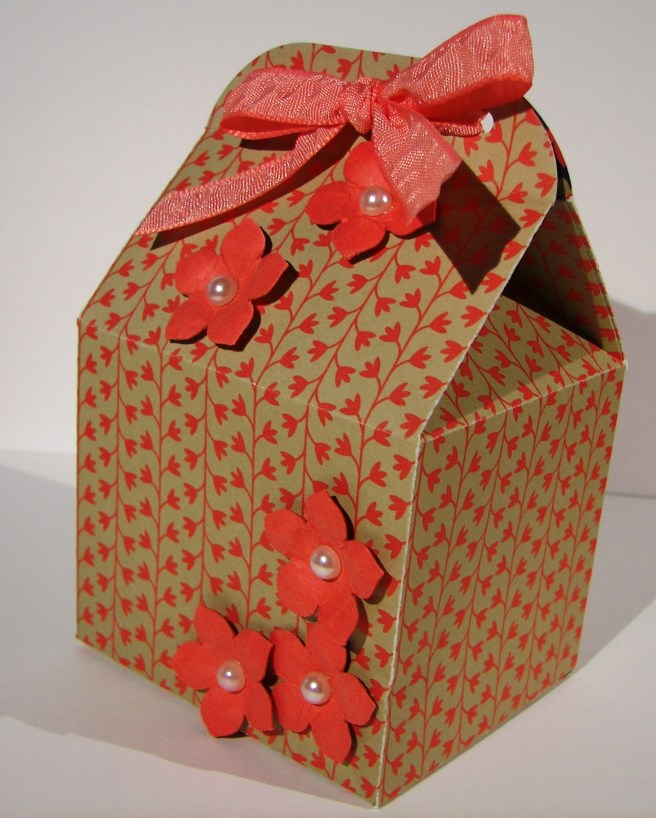
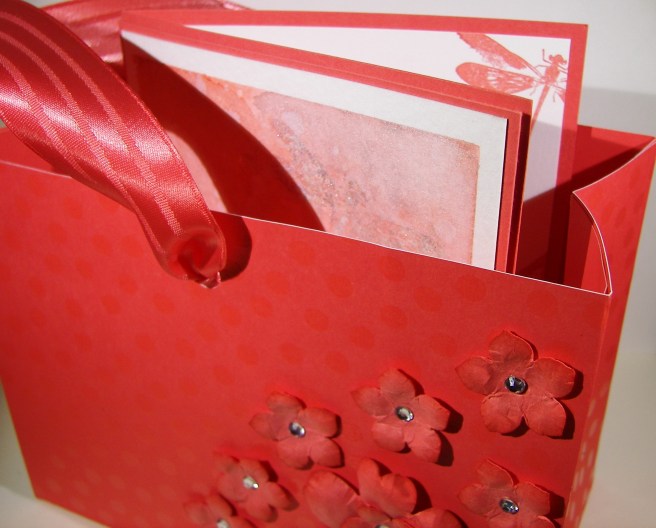
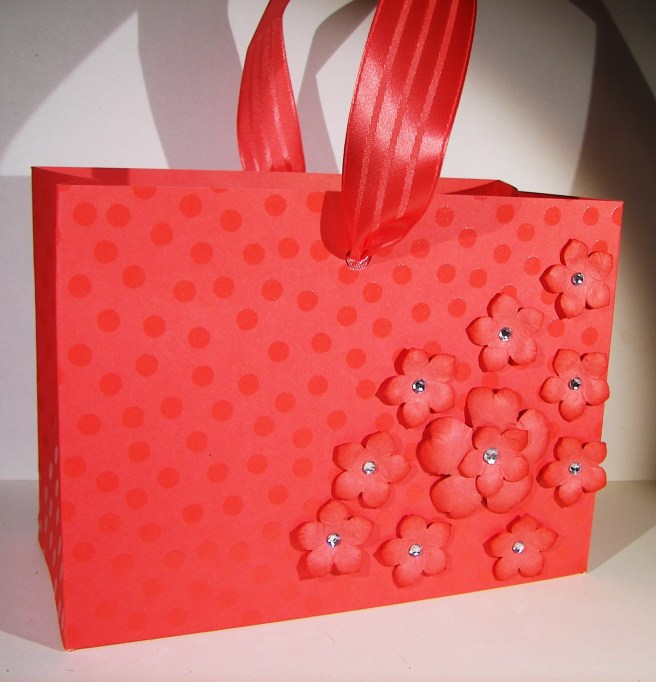
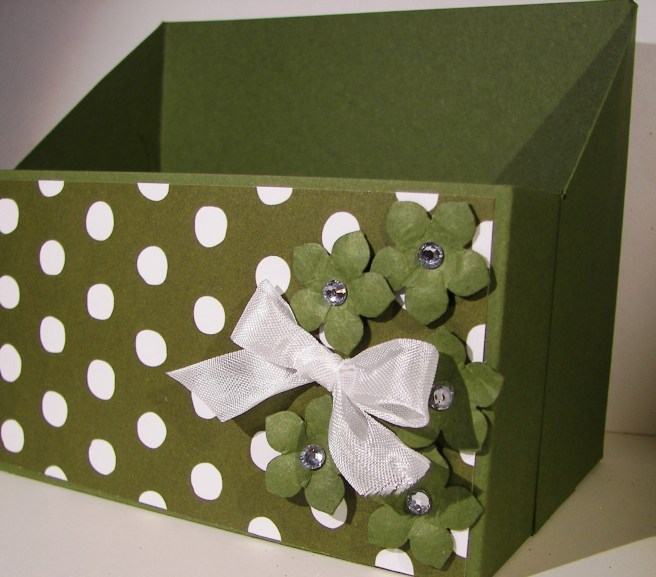
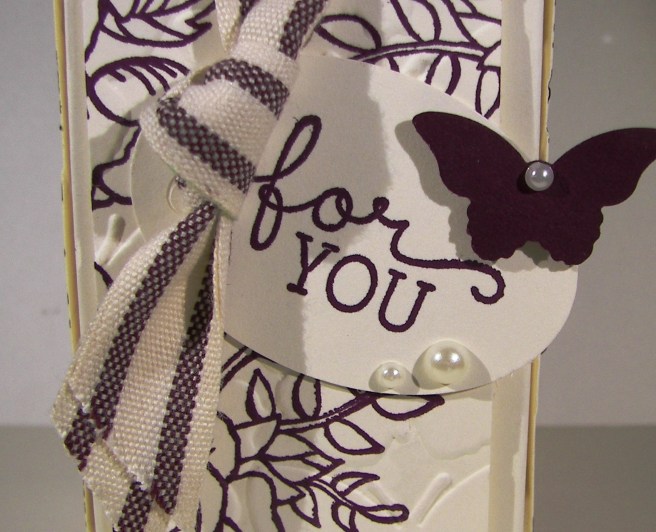
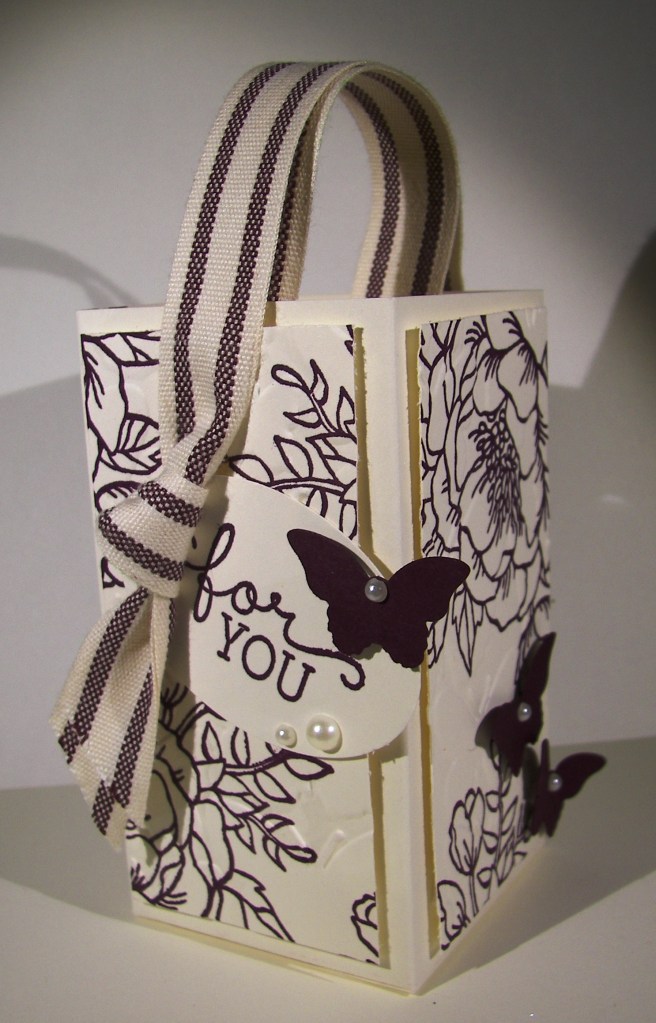
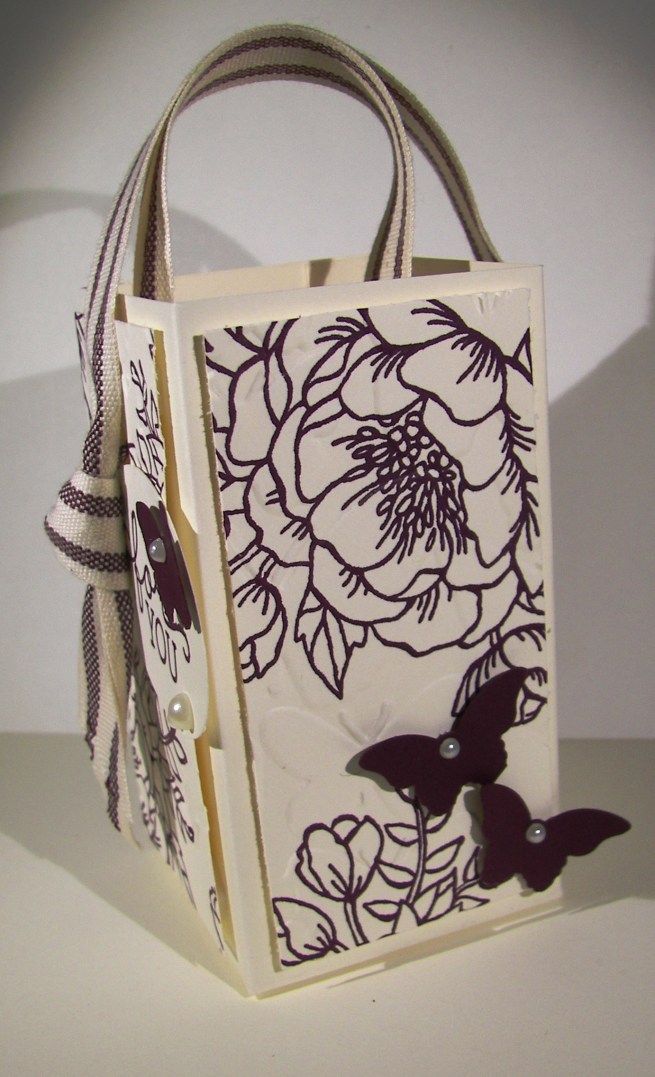
I made a couple of gift bags with totally different dimensions in mind.  I usually work with tall rectangle shapes, but went with a short clutch concept.  The cardstock version could hold heavier tall items, but the designer series paper needs to keep it light.  I had several ideas of gift items that would fit inside easily inside, lots of chocolate to be honest.  I love sharing a chocolate treat or two, you should give it a try.

4-29 (1)

Have a creative day!

Moana

Happy 29th Birthday {Again}

And the third workshop project has arrived.  Good thing too, since tomorrow is workshop! I often know further in advance what I want to do, but not this time.  I have been doing a lot of detailed water coloring and that doesn’t go well for large group instruction.  Folks need their own tools and materials for that kind of work.  We are doing one water color and that is stressful enough.

4-22

Isn’t this one so adorable?  The paper, matching stamps, and the ease of stamping and die cutting the numbers really make this one fantastic.  It isn’t too difficult to make, but sure brings a smile. Believe it or not, I tried several times to add die cut flowers for a fun layered look, but had to leave them off.  Sometimes that happens.

I took the background dsp and put it through the bigshot  with an oval framelit centered.  I then took that piece and turned it over to fill that same oval hole.  The two sides coordinate so nicely I could resist.  I used the next smaller framelit to make an oval from whisper white.  The numbers were stamped in blushing bride, cut with their coordinating framelits and centered on the oval.  I did raise them up on dimensionals.  Then the sentiment was stamped centered over the top and bottom of the numbers.  The tiny ‘th’ was die cut first, then stamped.  The framelit for that tiny one doesn’t have a window to look through, so I had to.  But with photopolymer stamps you can see exactly where you are placing your image.

I stamped inside with the largest flower from the Birthday Blooms set in each corner using a different portion of the stamp to make it look different.  The center phrase ‘again’ was the last thing added.  How fun is that?

4-22 (1)

Have a creative day!

Moana

A Little Organization Please?

Sitting down to have a little fun and make something pretty can be cut short if you aren’t organized.  This can often happen when I get a little extra filing built up.  What does a crafter need to file?  More than you might think.  What I get built up is extra kits from workshops.  I used to just break them back down and file the unused paper back.  But I have found that it is a great way to make a quick card if you have materials all cut and ready to go.

4-18 (2)

I don’t have to make the exact project, but the cutting is done.  All there is to do is pick a fun stamp or two and maybe a punch and it is ready.  For a busy mom on the go, the constant go, a quick creative burst is always needed.  So this morning I put this little number together and cleared up those kits.  Feels really good and looks adorable.  I love being able to make just what I need.

4-18

Have a creative day!

Moana

You Are My Everything

There are days when I really don’t know what I want to make, but that isn’t today and it shows.  When I know who I am creating for it shines through.  The awesome extra free stamp set in this months paper pumpkin kit had the stamps I had to use.  How beautiful are they?  Well, I will be using them excessively I am sure.

4-17

I knew I wanted to make a card for my husband with the two stamps  that share the phrase ‘You Are My Everything’.  It couldn’t be more perfect.  Once I knew that I knew the color pallet I needed and the medium as well.  Blues and water coloring are the perfect combination for him.

The technique of water coloring really doesn’t have a lot of guidelines.  I do start with a wet masked surface.  Then I begin to add and take away color, dry and wet again sprinkle and dab, and color all over again.  It is more of keep going til you get the results you want than a step by step process.  So much fun, really.

Then I stamped the large flower in bermuda bay, once stamped off first, here and there.  I added a fern stamp a few times, full strength not stamped off.  Then finished with the two stamps that make the sentiment.  I did a little echo stamping to coordinate the inside with the card front.  To complete the project I layered the art onto another piece of bermuda bay card stock and wrapped it several times in silver metallic thread.  Then up on dimensionals for a little extra style and sit back to enjoy the view.  I do love this card.  I think it looks like a beautiful batik fabric I would love to own and sew with.

4-17 (1)

Have a creative day.

Moana

Birthday Blooms with Blackberry Bliss

And a happy good morning to everyone!  I do love a Friday that is full of promise and enthusiasm.  The only problem is that I usually have my goals too high and get frustrated when I fall short.  Either way, I love Friday and the fun evening often in store.

4-15 (3)

This little thank you is so adorable, yet lovely.  I used a half sheet of very vanilla for the box, scoring at 2″, 4″, 6″, and 8″.  Then turning one quarter turn, portrait now, to score at 2″ for the bottom.  I used a companion piece of very vanilla for the stamped and embossed layers. The piece is cut first at 3 1/2″ so the stamping could be done.  I just used the large floral image to create a pattern.  Then the second cuts came at 1 3/4″ each, needing four of these all together.

4-15 (1)

Before they were attached I embossed them with the fluttering embossing folder.  Such a nice result.  I layered them up with dimensionals and thought about leaving it just the way it was, but continued on with the plan.

I made the tag from the scrap left over from stamping and punched it with the extra-large oval punch.  A added a ribbon handle and attached the tag to the under side of the ribbon tail.  A few butterflies later and a smidge of pearls and I was ready to add my treats.  So much fun, just so much fun.  Now to deliver!

4-15 (2)

Have a creative day!

Moana