Inspired First Sight

I have a thing for unique mugs and my oldest daughter gets me.  She found this little treasure and couldn’t resist.  It reminded me of simple water coloring, so I thought I would create a card around it.

Inspired First Sight

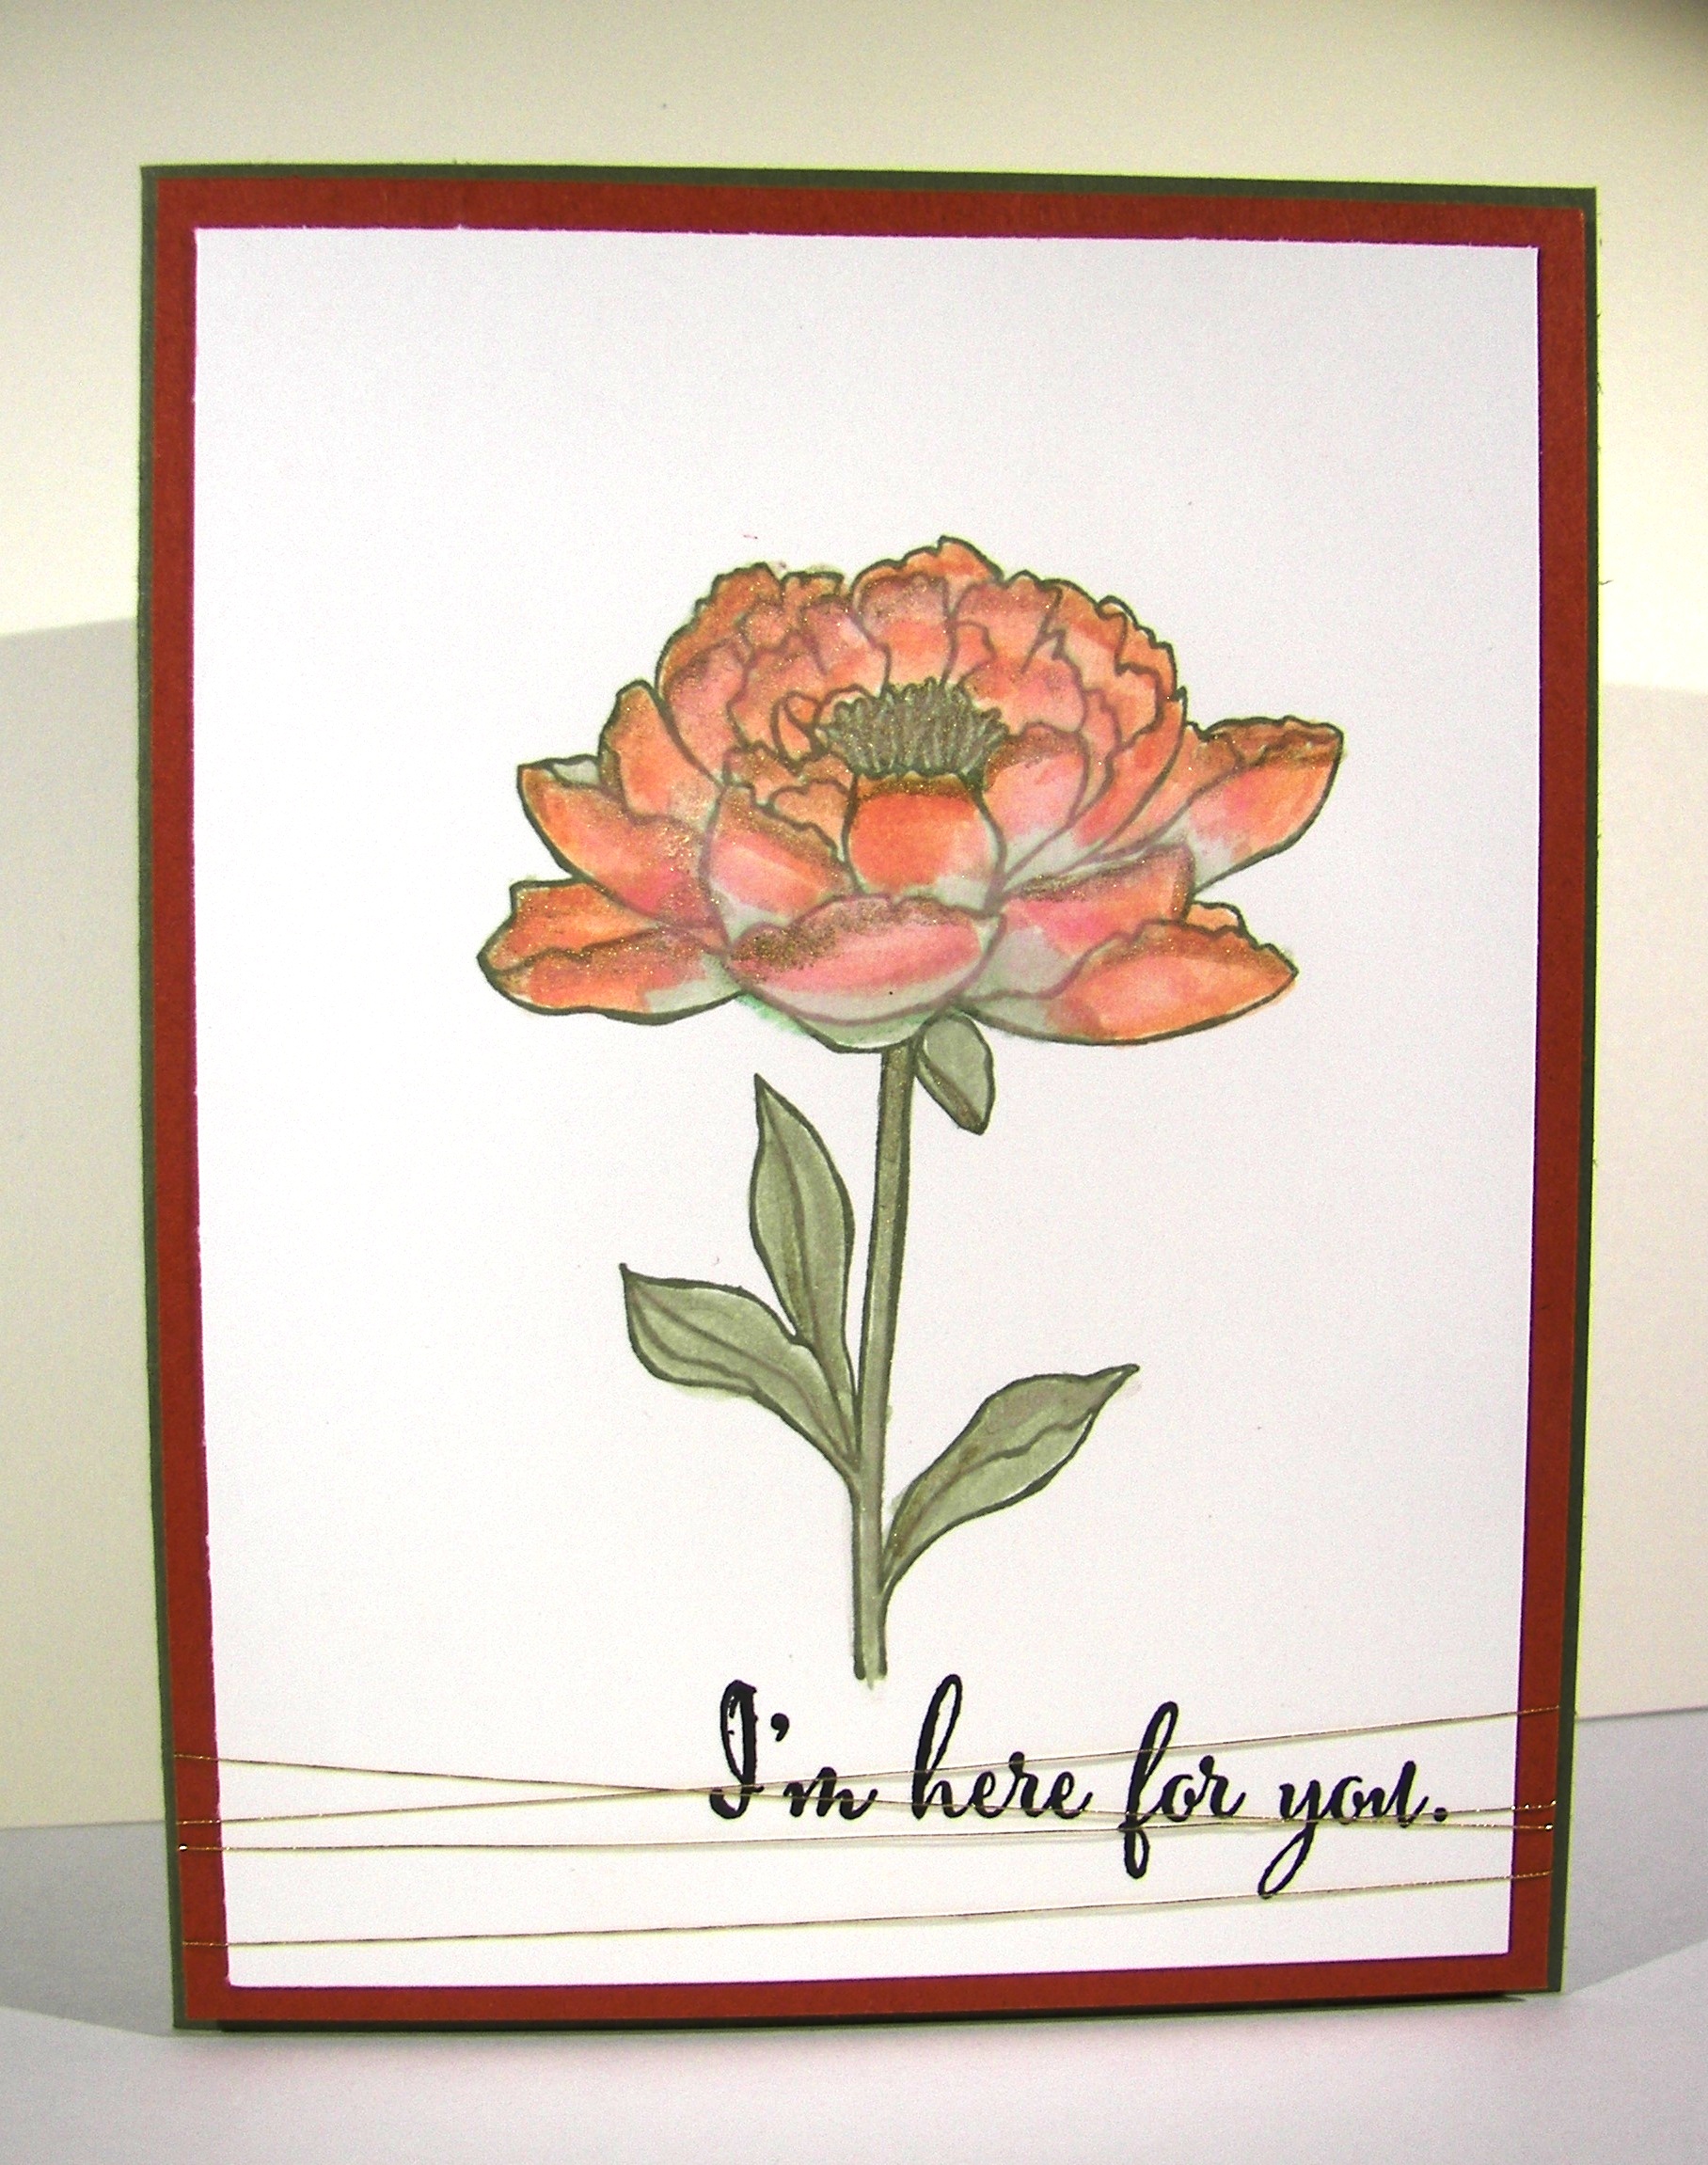
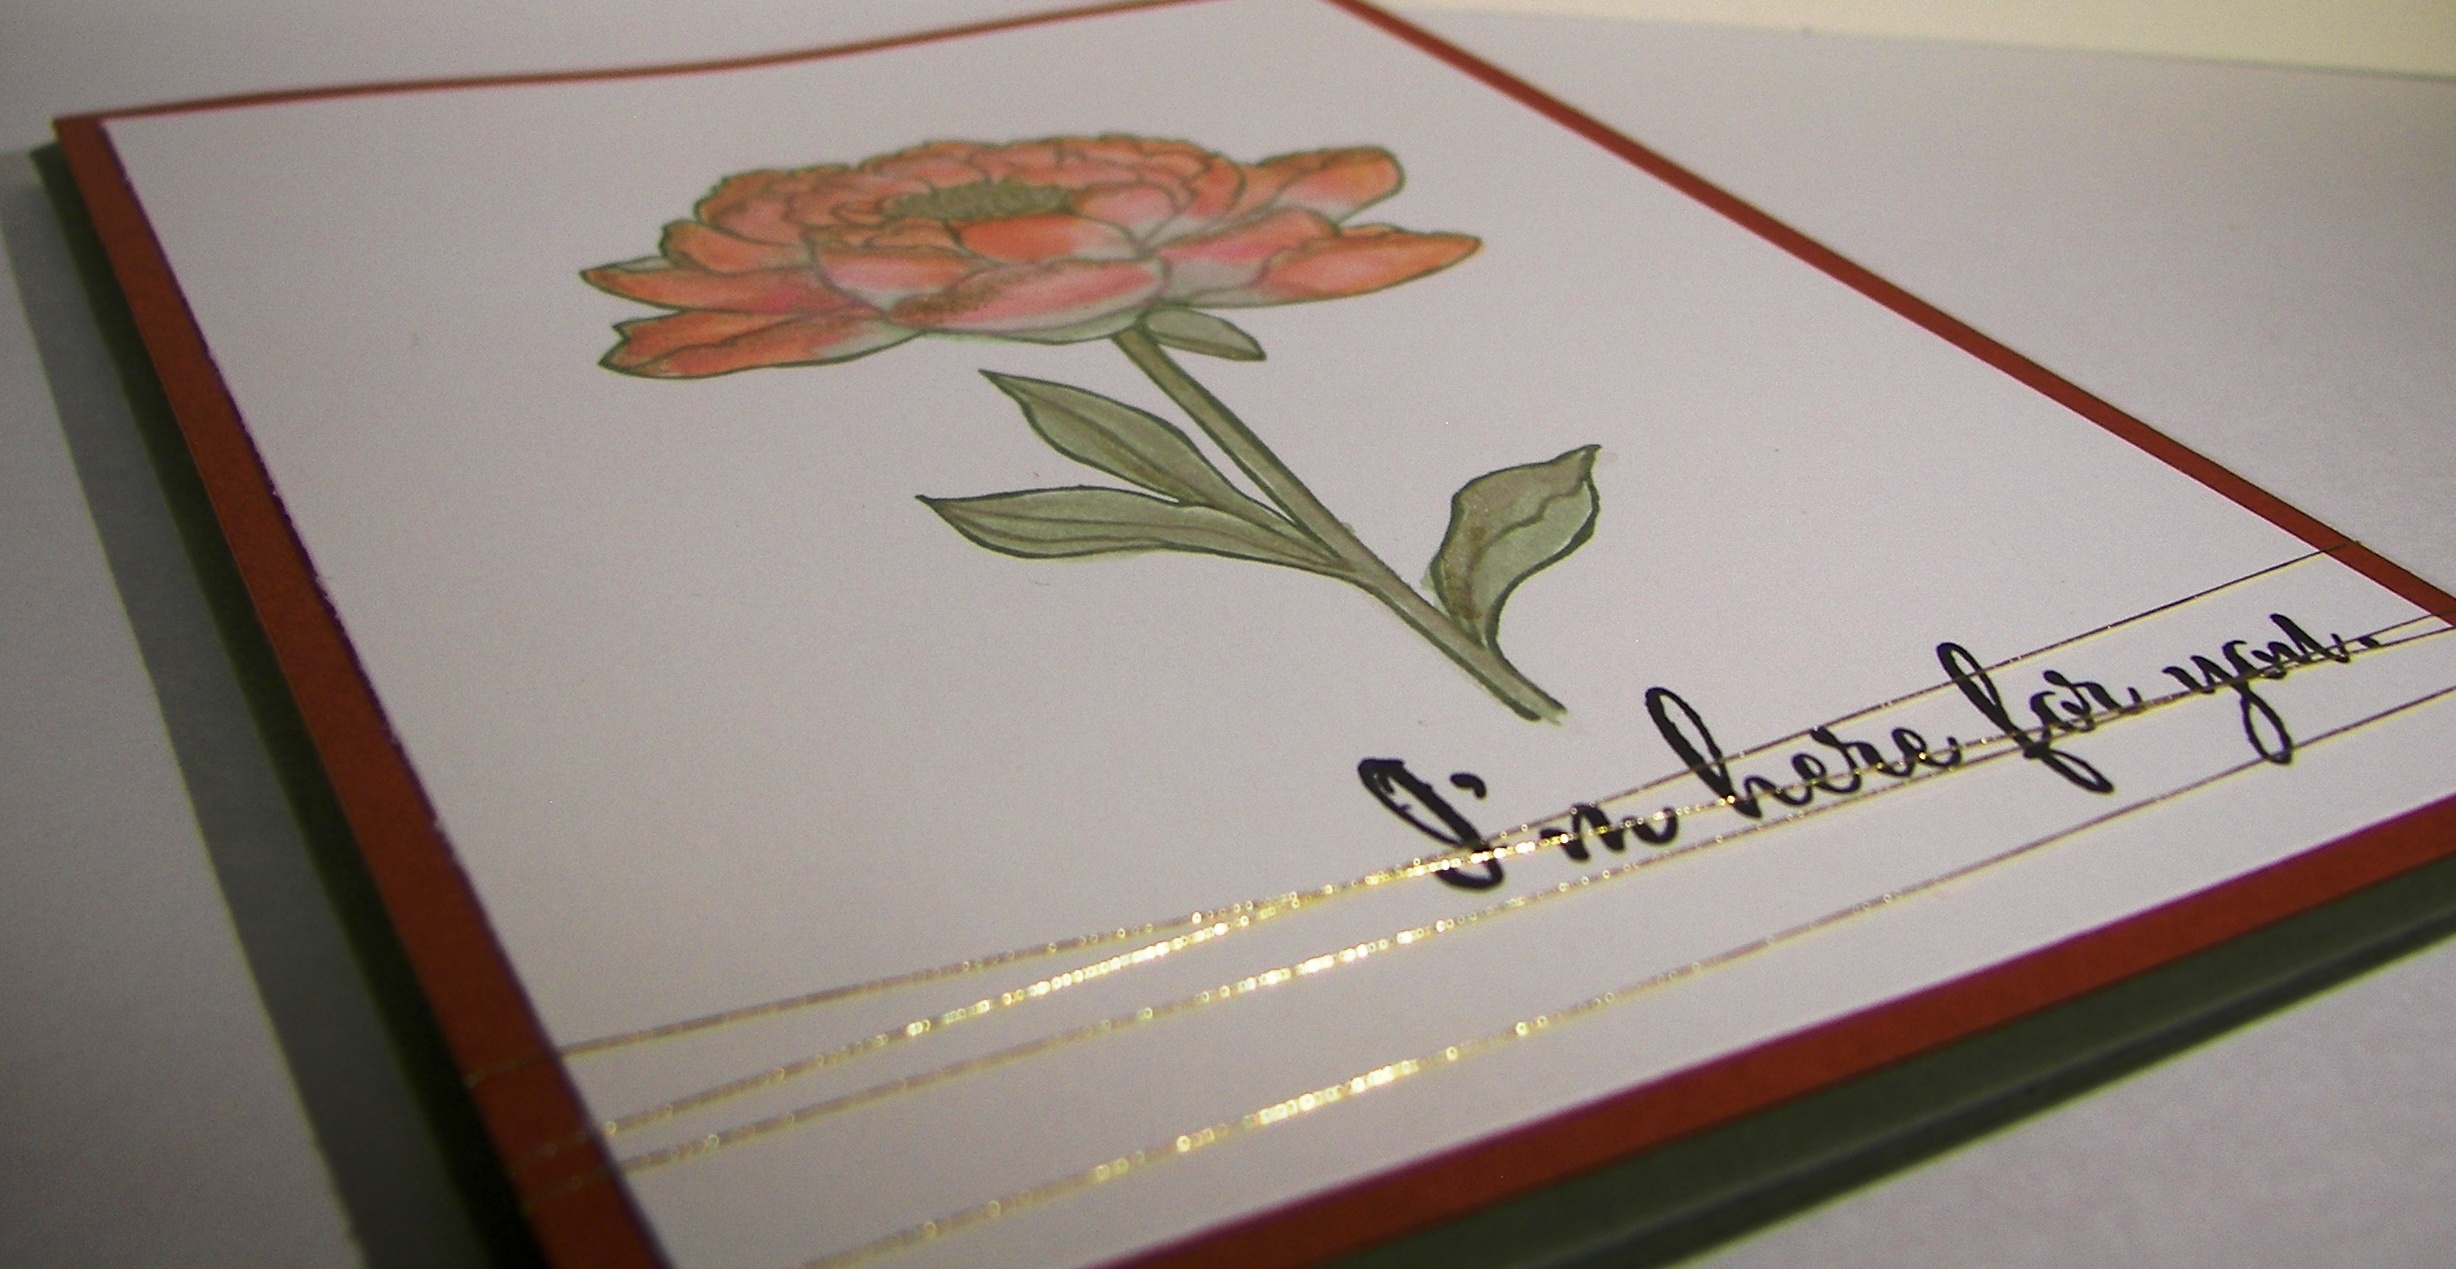
Of course it had to be water color somehow to go with the simple brush strokes on the mug.  I matted a card base with painters tape to leave me a clean 1/4″ border and brushed the whole surface with plenty of water.  I then dabbed my aqua painter in the ink colors to coordinate with the mug and created a very soft background.  When I was satisfied I went looking for the perfect stamps.

Inspired First Sight

One of the new sets in the spring catalog caught my eye.  It is called First Sight and has more than one use.  It isn’t all about Valentine’s Day, or Mother’s Day but really has several uses.  For me, that is when a set gets purchased.  Having a stamp for just one use better be pretty darn amazing to get into my collection.  And as of today, the catalog is live so you can have the stamp set too.  How fun!

Inspired First Sight

Have a creative day!

Moana

Service With a Smile

What is all this about?  Well, yesterday I shared a great lesson with young women from my church and we talked about staying strong and serving others, to sum it up.

Service With a Smile

I challenged them to think of others when they are feeling down, and to look for those who are struggling.  Little gifts of kindness mean so very much. They were to take as many gift bags as they wanted and share their kindness with others.

There were so many, I cleaned out the entire gift bag and box blog drawers.  Wow, I am so excited for all of the kindness these wonderful girls are going to share!

Have a creative day!

Moana

Schoolhouse Thank You Gift

People do kind things all of the time and never ask for anything in return.  I am fortunate enough to have people like that in my life.  A school secretary is definitely a wonderful person.  They do more than most people imagine.

Schoolhouse Thank You Gift

As it happens, I have been helped along once again.  So, I wanted to thank her, again.  This lovely box was made to look as school like as possible.  The Schoolhouse DSP had so many patterns to choose from, but I needed a vehicle of sorts, so I went with the bicycles.  I used a whole sheet of 12 x 12 card stock in Hello Honey and a good portion of the dsp to decorate it.  It is filled with large pretzel sticks that have been dipped in white chocolate. So yummy.

Schoolhouse Thank You Gift

I got into the Chalk Talk framelits for this huge tag.  I wanted to have a stamp and a spot for a tiny note.  Just right, don’t you think?  I forget about that set sometimes, but the tag options are really wonderful.  I gave them a bit of a go over with my bone folder for some added texture and clipped it around one of my favorite ribbons.  Gift done!

Schoolhouse Thank You Gift

Have a creative day!

Moana

Vintage Leaves, All Through My Yard

The weather has finally changed and I love the color change that follows.  Looking out my window I can see trees with leaves in all of these colors.  Just so lovely this time of year.

Vintage Leaves, All Through My Yard

This stamp set lets you create leaf images that have so much texture and the play of light across them.  How fun and validating is that.  Becoming the artist without knowing how to be.

Vintage Leaves, All Through My Yard

I stamped the leaves in different colors starting from light colors to darkest.  I had started with a different intention, but it didn’t work out.  I stuck with my background as the focal point and just enjoyed water coloring it.  It went together rather quickly.  A few simple layers, very light sponging, and a gentle wrap of gold metallic thread for an accent.  I love this kind of creative fun.

Vintage Leaves, All Through My Yard

Have a creative day!

Moana

Lighthearted Leaves Treat Carton

All day long I have tried to get this blog post done.  That gives you a little hint into how my day has been.  Not done yet, but definitely on my way.

Lighthearted Leaves Treat Carton

I had a bag of Lindt truffles on my counter and loved how the bag looked.  I thought that it would be fun to try to make a bag that could hold treats and look elegant too.  I asked my husband for a color choice, I grabbed a ribbon and matching ink and went to work.  Of course I had to use my current favorite stamp set, Lighthearted Leaves.

Lighthearted Leaves Treat Carton

One sheet of 8.5 x 11″ perfect plum cardstock went into this one.  Evenly scored and punched along the sides with the extra-large oval punch to give the windows.  Window sheet was scored along the same measurements and tucked inside.  It was a bit tricky to handle the placement, but with a little patience and plenty of glue dots, I experienced success.  I am so happy with the results.  I am sure to make this one again and again.

Lighthearted Leaves Treat Carton

Have a creative day!

Moana

Neutral Toned If the Broom Fits

I know today is Halloween, but I was just feeling a bit mellow about it.  Could that be a result of being with students all day that were super costumed out and completely mental about it?  Or maybe because I went back to take yearbook pictures that evening during the carnival and dance?  Sounds about right.  Let’s just settle down a bit, but still enjoy the holiday.

Neutral Toned If the Broom Fits

This stamp is just too funny.  I think that I have shown myself that even though there is definitely a Halloween theme with the stamp, it doesn’t have to be used that way, and that always makes me happy.

Neutral Toned If the Broom Fits

Instead of focusing on the holiday, I went with a focus on the brooms themselves.  This included giving the background a run through with the woodgrain embossing folder, wooden handles on the broom.  Also, I did  a little piercing around the brooms themselves so I could thread some of the ever so lovely linen thread around the bristles and give it some dimension.  I think that looks pretty darn cool.  All kinds of dimension going on here.  What a great card!

Neutral Toned If the Broom Fits

Have a creative day!

Moana

Sweet Hauntings

I was pretty darn excited to get this stamp set and even more to put it to work.  These bottles, they really make me laugh!  I normally don’t purchase Halloween sets because of the limits of use.  This one, I know I will be having fun with it all year long.

Sweet Hauntings

Picking the color pallet was the easy part, some of my favorites for sure.  I love fall and all of the colors that live there.  Creating my own patterns for background paper is one of my favorite parts.  I would love this in whole sheets.  Hmmmmm, perhaps that will be a fun activity later on.  I stamped each bottle again so they could be fussy cut and layered up.  Those fun little bottles, love them!

 Sweet Hauntings

Lots of sponging on the vanilla paper.  Early espresso gives a great vintage look, which is just what I needed.  I sponged everything, lots, even the ribbon.  It gave it  a great grungy look.  I did echo stamping on the inside as well, can’t get enough of these bottles.  Did you notice the tiny little rhinestones I put on the skull bottle stopper?  Way beyond fun!

Sweet Hauntings

Have a creative day!

Moana

A Whole Lot of Lovely Baker’s Boxes!

I tried to not purchase this particular die cut, but I fell in love with it at a workshop.  I guess that isn’t too different from the ladies I teach in my workshops.  It works for me because I just love this box!

A Whole Lot of Lovely Baker's Boxes!

This adorable box came together so quickly.  The set comes with several other dies to accent or accessorize how you like.  More than enough choices.  I just chose one of my favorite combinations of circle punches with a simple stamp framed with glimmer paper.  How absolutely lovely, right?

A Whole Lot of Lovely Baker's Boxes!

One little glue dot just below the handle was all I needed to keep the top snug to add my favorite dotted lace trim with a big bow.  I moved into my favorite sponging party and did it up right.  Simple yet so adorable.   Hope this little project finds you in a good mood and ready to try your own.

A Whole Lot of Lovely Baker's Boxes!

Have a creative day!

Moana


Birthday Jar Wishes That Last

It isn’t my usual project to share, but I do make these particularly often.  The idea is lovely and I get to put a lot of retired product to good use.  I do hate to ignore it, so I thought I would share  a way to use it differently.

Birthday Jar Wishes That Last

I bought some of those washi sheets having no idea what I would do with them.  Until this fun series of projects came about.  I work with the young ladies in my church, along with several other ladies, and we come together as a team in a large variety of events from large to small and everything in between.  Of course we celebrate birthdays!  And that is what this is.

Birthday Jar Wishes That Last

I decorate jars and vases with washi paper punches to the mood I am in.  Sometimes I use framelits, or punches, or both.  I have a large collection of last springs sale-a-bration ribbon, so it always goes together.  You know how I love to coordinate as much as possible.  So these jars are created for each young lady or woman in our group.  We all then write inspirational wishes, birthday wishes, and just kind words in general to fill the jar.  Then, the recipient can read them all at once, or read them one at a time, or open them over time when a bad day happens and they need a pick me up.  Something sweet for whenever you want them.  So, try something different with the awesome product you have, either current or retired, it is all wonderful!

Birthday Jar Wishes That Last

Have a creative day!

Moana

Banner Blessings Gift Set -Shine

This is card four, the last of the set.  The gift box is so lovely.  I can’t wait to show you.  But this card was saved for last because it is my favorite one.  So pretty and such a beautiful sentiment.

Banner Blessings Gift Set -Shine

I used the falling snow embossing folder to give me a starry background.  Since it was more sparse on the top, because it was to show snow not stars, I put it through again turned around and ran it through half way and ran it back out.  That gave a lovely balance I think.

Banner Blessings Gift Set -Shine

The star border punch doesn’t get to come off my shelf much, but this was the perfect job for it.  Stars stars and more stars.  The heavens are full of them and I wanted the card to do so as well.  Mission accomplished.  The card base is made from the heavy weight whisper white.  Sometimes I cannot get enough of this stuff.  I accented the sentiment with a hefty twisting of metallic gold thread. I decided it made my sentiment look kind of like a shooting star or a comet.  I love feeling creative.

Banner Blessings Gift Set - Shine

Have a creative day!

Moana

Banner Blessings Gift Set – Friend

The morning took off without me, and there was nothing I could do about it.  This has sat at my computer waiting for me to take a lunch.  Well, never happened.  How about a tiny break?  Works for me.

Banner Blessings Gift Set - Friend

This is the first card of a set of four with a coordinating gift box.  It was so fun to make.  I actually made it for a special someone and I can’t wait to deliver it.  Should be tomorrow!

Banner Blessings Gift Set - Friend

I attached the island indigo torn card stock to the thin whisper white before I ran it through the fluttering embossing folder.  Everything got done at once.  The sentiment was stamped in black stazon and sponged a bit with coordinating ink.  I love the cotton ribbon, it makes such cute bows.  The inside stamping is actually negative punching.  I punched a butterfly or two from the white insert and revealed the card base.  Simple and very effective!  So fun.  Those pretty pearl accents.  I could really get used to those.  I had it dot the “i”, even though it wasn’t needed, I wanted to use one and it fit the image.  A bit of dimensionals and this card was done!

Banner Blessings Gift Set - Friend

Have a creative day!

Moana


You’ve Got This

Sometimes simple words are all you have, and sometimes that is all you need.  That is just how I feel this morning.

You've Got This

I took my time painting this lovely flower with a few of my favorite inks.  I stamped the flower in almost artichoke and did light water coloring to get the base down.  I added cajun craze but kept it light the first time through.  Adding more water helped to do a little blending, but I didn’t want too much of that.  I like that two colors together can create a third unexpected surprise.  In person, you can see the blended areas have nearly a cherry cobbler tone.  Cool, right?  I thought so too.

You've Got This

The entire image was accented in gold encore ink, still using the aqua painter.  That really creates a fun look and is surprisingly easy to control.  One simple sentiment in black stazon ink with a little gold metallic thread and this simple card was done.  Well, I did have to stamp inside as well.  I stamped off twice before I placed the stamp on the inside paper.  Nice and light.  And look, absolutely no sponging!  Crazy.

You've Got This

Have a creative day!

Moana

Game On Dear Heart

I absolutely love, love, love making my own paper with unique stamps.  Most of the time my friends can’t even place which stamp set it came from.  I have overlooked several stamps myself.  Example, look at this cute little fish!

Game On Dear Heart

Sometimes we feel like we don’t fit in, but I feel like that is a beautiful thing.  I made this card with that theme in mind.  He is stamped in melon mambo, water colored a bit, and water colored again with silver encore ink.  Everything is lightly sponged and there are plenty of dimensionals here.

Game On Dear Heart

The sentiment was stamped on a little scrap, punched with the bitty banner punch on one end, and given a bit of ribbon on the other.  How easy is it to just staple some ribbon on.  Some cards need just that, a little different look.  And of course this is layered up as well.  Did you see the little fish repeated inside?

Game On Dear Heart

Have a creative day!

Moana

Lovely Amazing You

While sitting next to my youngest daughter, trying to keep her awake to finish homework, I thought I would complete my project for the next day.  Good idea, right?  I pulled two stamp sets I hadn’t used in a while and asked her for a color idea.  She said dark blue, so I went with Night of Navy.  The card began.

Lovely Amazing You

She wasn’t having the best of evenings and her older sister came to the rescue, even though she is out of state attending university.  I do think that technology can interfere with real personal relationships, but this was perfect.  The infamous ‘snapchat’ was just the thing.  The sad faces turned to happy and then on to absolutely silly.  And that is how I chose my sentiment.  Thank you my sweet daughter for being the best big sister ever.

Lovely Amazing You

The brayer was still out from workshop so I let it give me my background on the large polka dot embossing folder.  Kind of artsy looking, even if I didn’t keep it perfectly clean.  I then decided to do a lot of sponging to disguise some of that, can’t hide it all, and also sponged lightly all over the paper.  Nice.

Lovely Amazing You

The little notebook sheet was created with a stamp from the Tap Tap Tap set, offset on some Night of Navy cardstock, raised up on dimensionals and embellished with basic rhinestones.  I even used the 1/16″ hand held punch and punched actual holes over the stamped ones.  Pretty cute.  I finished off the project with a bow of seam binding ribbon and decided I loved it!

Have a creative day!

Moana

Journal Inspired Butterfly Basics

My husband bought this pretty journal and I immediately took it to my desk to stare it down.  I just knew there was a card in there somehow.  Well, after sharing swaps for nearly two weeks my creative bug was on high alert.  I sat down last night and gave myself some time to go at it.  And I did.

Journal Inspired Butterfly Basics

Isn’t is uncanny how close the colors are?  I guess that is why I migrated to it.  I have other off market stamps that might have gotten closer to the tree, but I really wanted to get my brain in gear for workshop this weekend.  I couldn’t be happier with the end result.

Journal Inspired Butterfly Basics

The borders are a narrow 1/8″, my favorite.  I bravely opened up my new elegant dots embossing folder and rubbed Stazon all over one side and then ran it through the  big shot.  I loved the result, and most of the ink came off.

Journal Inspired Butterfly Basics

I used lots of butterfly framelits and layered everybody up.  The smaller one has two black die cuts over the delightful dijon layer.  Light sponging made everything look a little grungy and tied it together.  There is a little stamping inside, as well as more sponging.  I used plenty of glue dots to hold the butterflies together and layered like crazy with dimensionals.  So fun!

Have a creative day!

Moana

Thank You For Strong Girls

I do so love a pretty little carton to give someone, especially when it is full of their favorite treat.  I was thinking about my girls this morning, and how strong and amazing they are, and this treasure came to life.

Thank You For Strong Girls

I am so grateful for my daughters who remain strong through adversity.  When a woman can stand up for herself, and truly value herself, it is something worth celebrating for sure.

Thank You For Strong Girls

I took a full sheet of this wonderful Color Me Irresistible Specialty DSP, cut off two inches from one side and began to score.  Each side measures 2 7/8″, so you need to start from one side, measure that distance and score each time.  This will leave you with 1/2″ on the edge that will allow you to adhere the box.  The bottom score line also measures at 2 7/8″.  I scored the top at 1/2″ and then at 3″.  Although I am not the best at directions, it does come together pretty easily.

Thank You For Strong Girls

I stamped Thank You from the One Big Meaning set.  It fit perfectly within the 1 3/4″ circle punch.  I punched a 2″ circle from the Dazzeling Diamond paper and layered them with dimensionals.  A lovely bow made from the Dotted Lace Trim finishes it off.  I did do a bit of sponging on all of the edges.  I love a sponged edge.

Have a creative day!

Moana

If the Broom Fits

I love halloween!  Well, all of the fun decorations and cuteness that can go along with it.  Orange is also my favorite color, so that makes sense too.  You would think that I make lots of halloween cards from the collection I have to work with, but, not so much.  Same goes for Christmas though.  I am a stamper, and I love stamps!

If the Broom Fits

So, the irony of today’s card is that today is my 25th wedding anniversary.  I don’t think this particularly applies to me directly, but the phrasing of it surely does make me laugh.  Well, giggle actually.  I do have someone I can give it to.  I don’t know if she would laugh or not, but I think she will.

If the Broom Fits

It was a very simple card to create.  One big stamp cut out with the largest smooth oval framleit.  I sponged the edges up and added it to the scalloped layer I cut out with the largest framelit from the same set.   It nearly didn’t fit on the card front.  I did do background stamping on the card base and sponged the edges as well.  A lovely little ribbon between layers to tie in the early espresso ink and it was nearly done.

If the Broom Fits

I managed to use the edge of the stamp to sneak one broom on the inside.  This lovely stamp is another image available in the coming catalog that goes live on September 1st.  Fun little sneak peeks!

Have a creative day!

Moana

Hello You

How do you decide what to work with?  Today, I went with my skirt as inspiration.  While I am not wearing black and white zebra stripes with butterflies, the colors are right on.  I could hold it on display and coordinate so nicely.  I love how it turned out.

Hello You

I have to admit, this is the first time I have used my file tab edgelits and I have had them for a long time.  I wanted to use them, just in a different way.  The paper helps out a lot here, and I like them vertical instead of horizontal the way a file folder would normally look.  Mission accomplished.

Hello You

In order to coordinate the inside with the outside, I took the small butterfly stamp from Kinda Eclectic and stamped away.  It makes me so happy to have the inside match the front.    The card actually is quite simple, with patterned paper like this you do have to have some limits, just some.

Hello You


Have a creative day!

Moana

Ray of Sunshine and Pretty Petals

How about another one of those crazy mornings, that absolutely ran away from me.  To be honest, I was helping out everyone else and didn’t get my own goodies done.  Everything came together and worked out so, no worries!

Ray of Sunshine and Pretty Petals

Is this designer paper adorable or what!  This particular print reminded me of a recently retired stamp that has the most beautiful poppies in it.  I do love it when everything goes together so nicely.

Ray of Sunshine and Pretty Petals

A simple layering of designer paper, with coordinating paper and a length of ribbon to bring it all together.  I did a double layer of tags and squeezed in this sunshine sentiment keeping everything in calypso coral.  Love that color.  Six pretty little flowers all sponged and centered with basic rhinestones and I am in love with this card.

Ray of Sunshine and Pretty Petals


Have a creative day!

Moana

You Always Do For Others…

The people in our lives that give endlessly, they are so awesome!  They deserve much more than something like this, but always appreciate it.  Someone has to something nice for them, right?

You Always Do For Others...

My school secretary is just that person.  She even keeps the little containers I make her gifts in.  She has a cute little collection.  This one is a bit larger than others I have given her, but she deserves it!  The beginning of school is always so hectic.

You Always Do For Others...

One whole sheet of rich razzelberry for this gift bag.  Doesn’t it look lovely?  I didn’t have a project in mind, so I just reached to my paper files with my eyes closed, pulled the first file and there it was.  I then turned to my punches and grabbed the first one I focused on.  That would be the confetti hearts border punch.  The rest just fell into place.

You Always Do For Others...


I did my favorite sponging and opted not to layer the base.  Sometimes my fronts tend to curl a bit at the edges when I layer cardstock on cardstock with gift bags.  So, after I punched and sponged I used tombo liquid multipurpose glue to get to the edges well to make sure it stayed down nicely.  Perfect job.

A little matching cotton ribbon, subtle but still there, and the gift bag was done! Now I have the pleasure of getting the perfect treats and a gift to go inside.  That will be a fun little activity for sure.  Sea salt chocolates and maybe a lovely lotion.  Sounds nice.

Have a creative day!

Moana