For the New Two

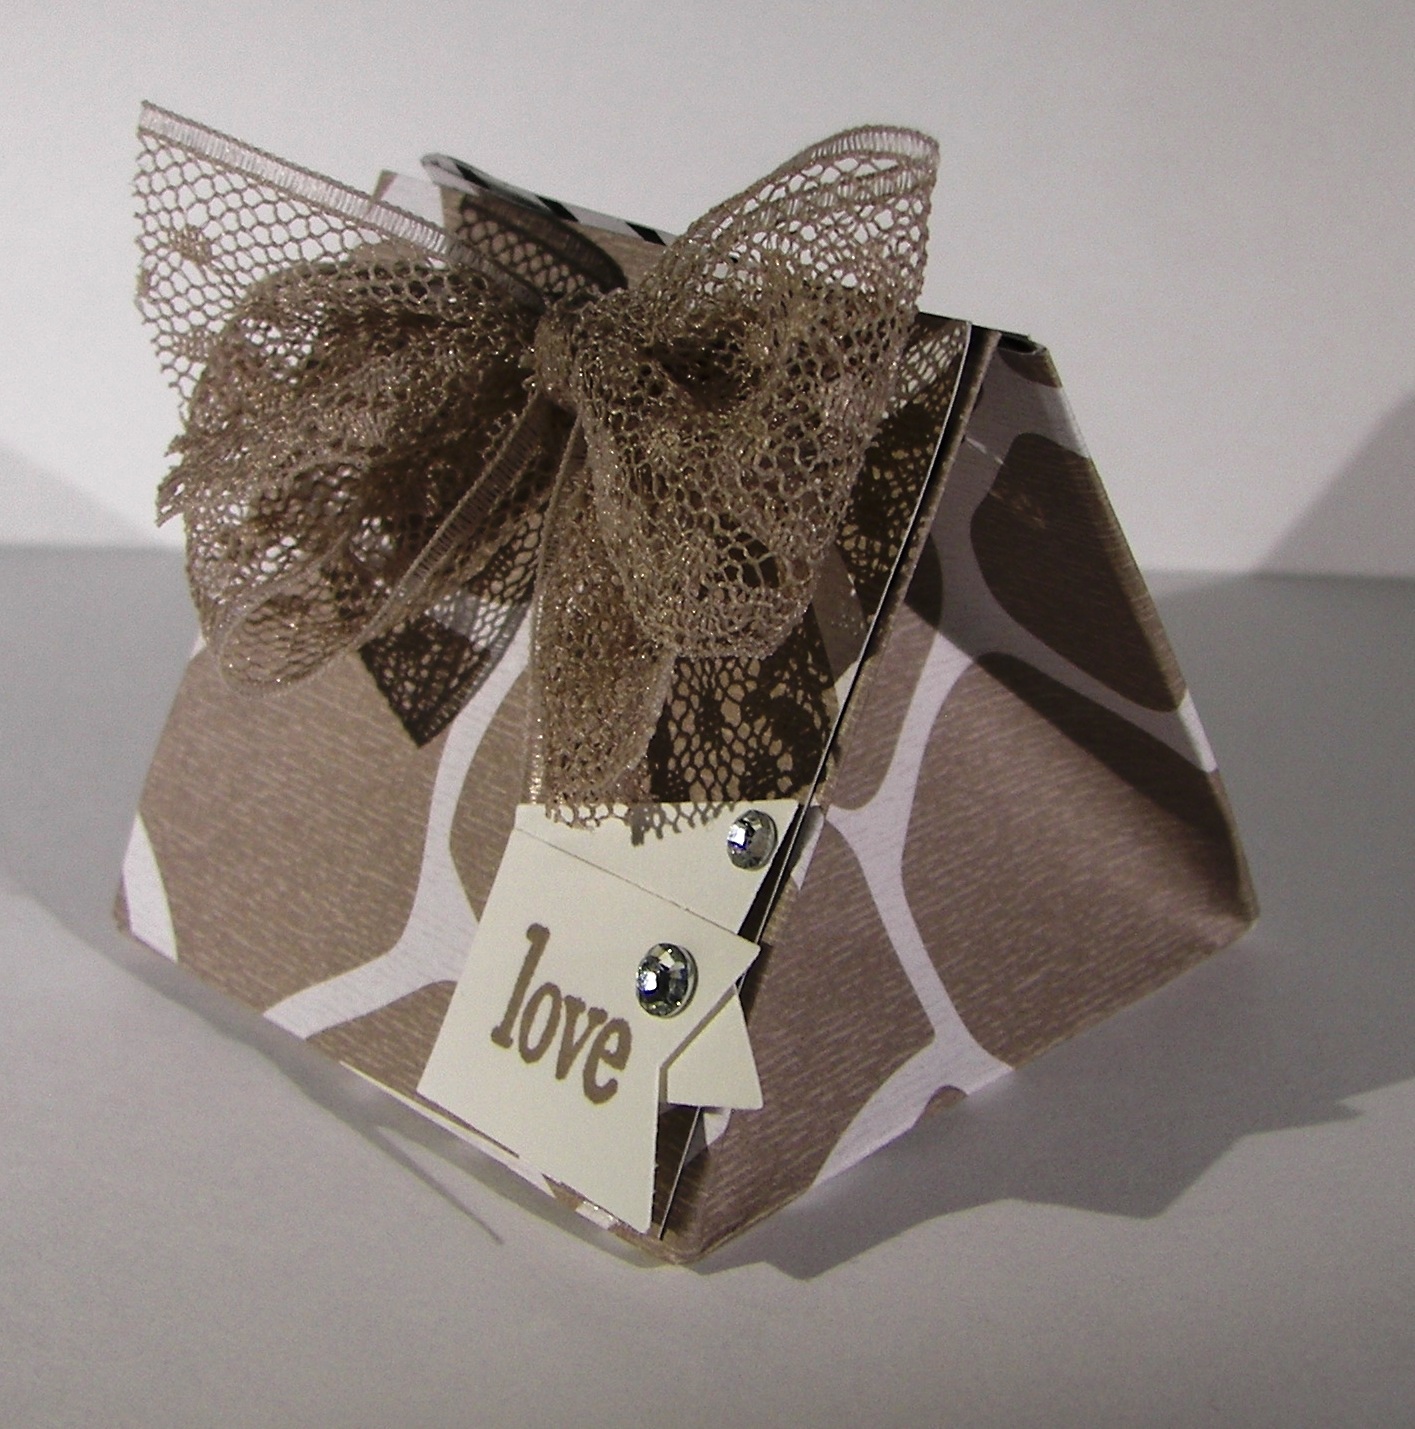
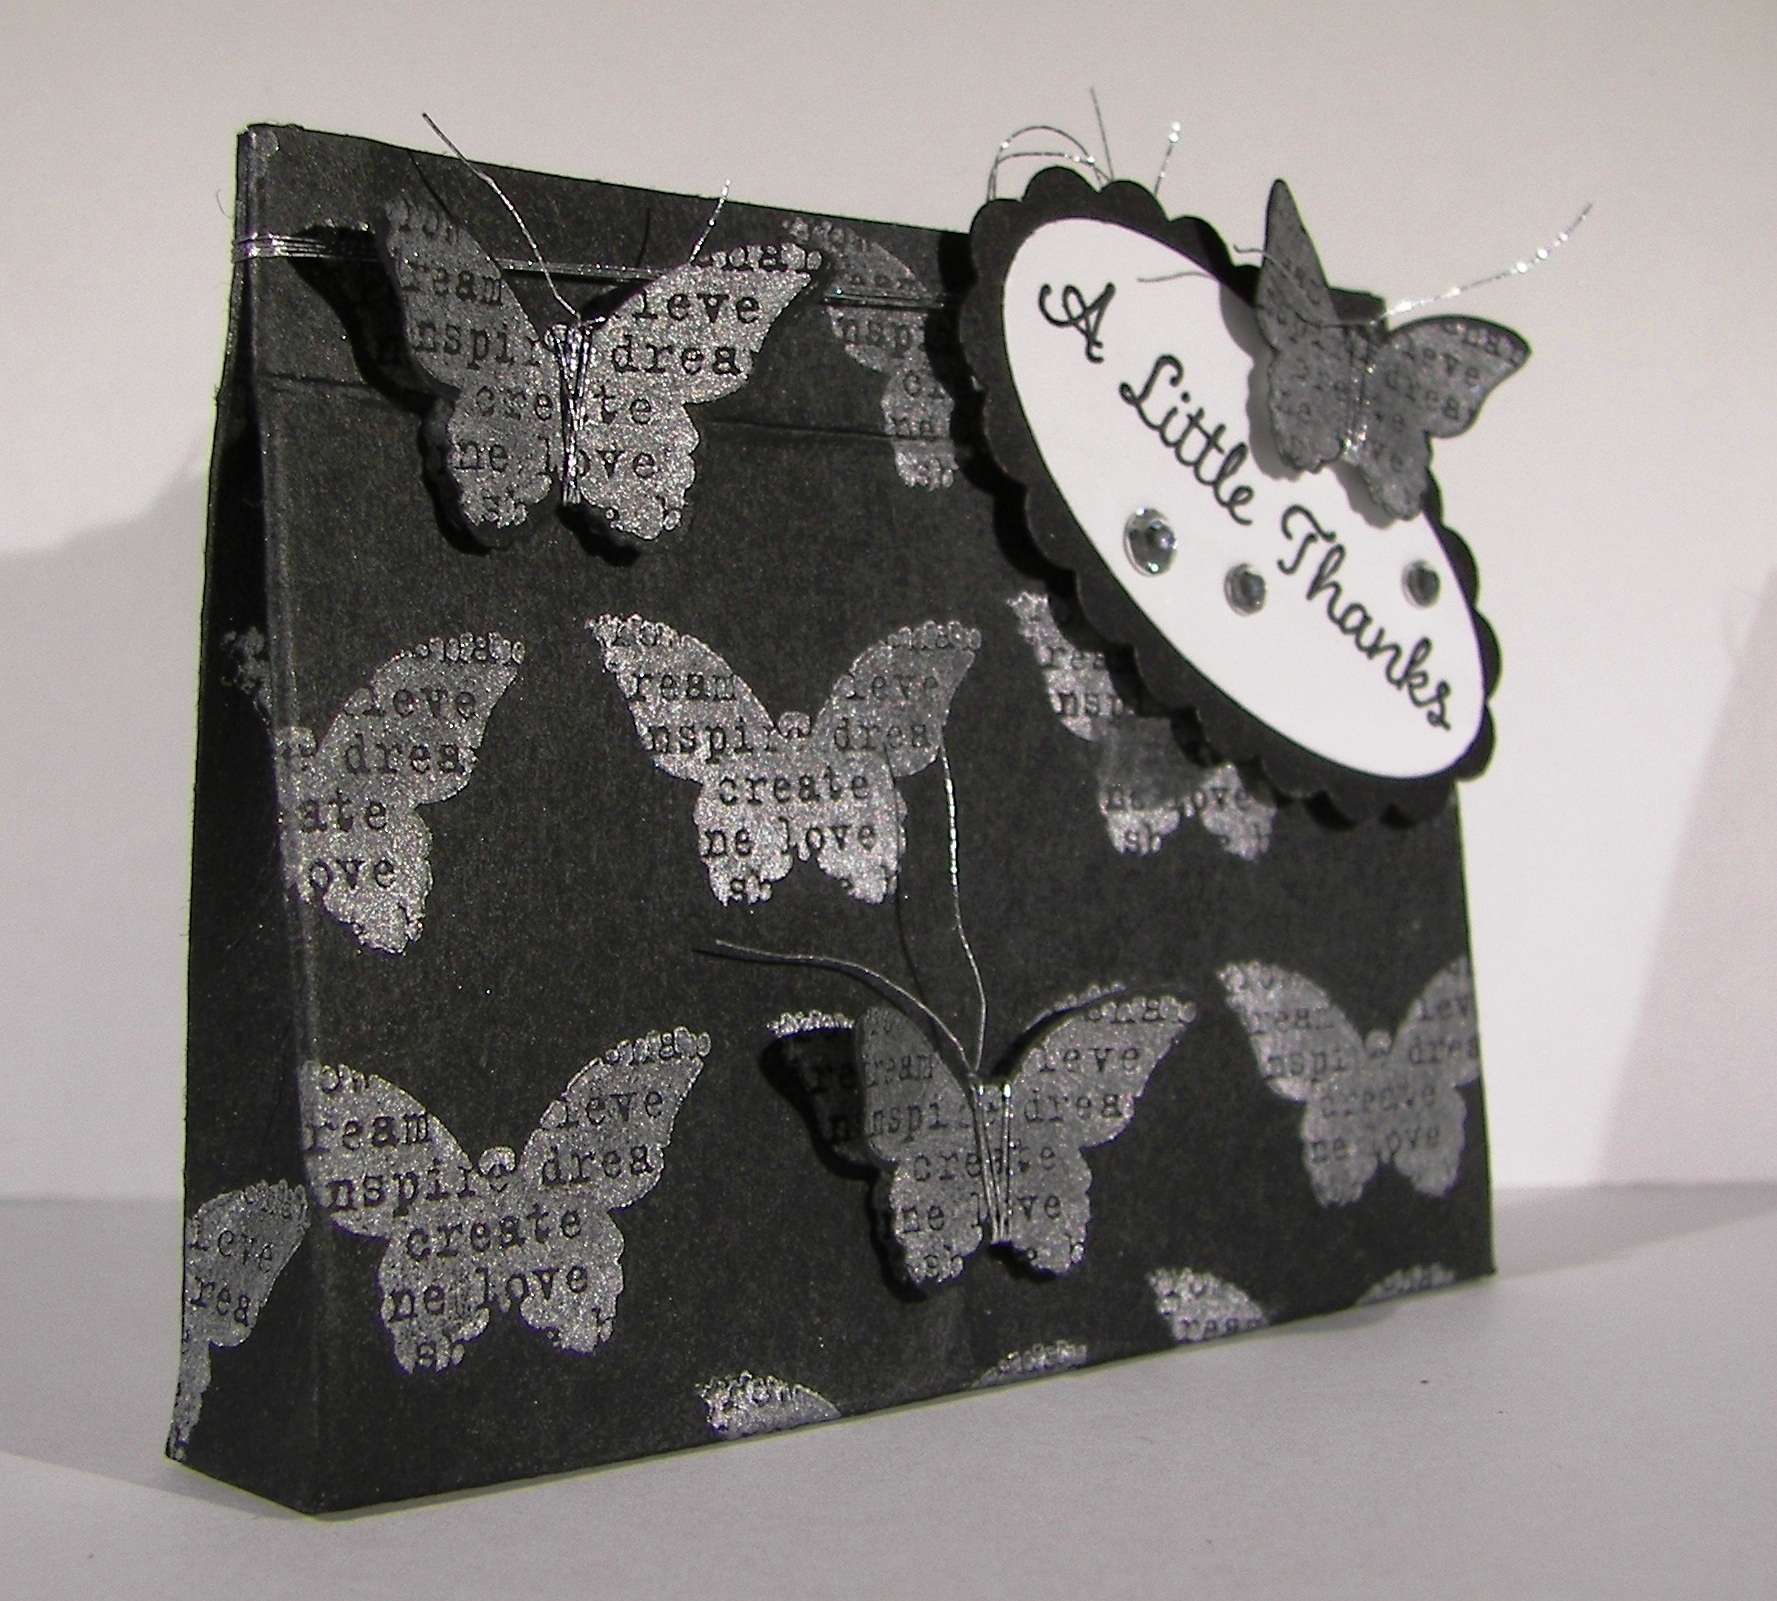
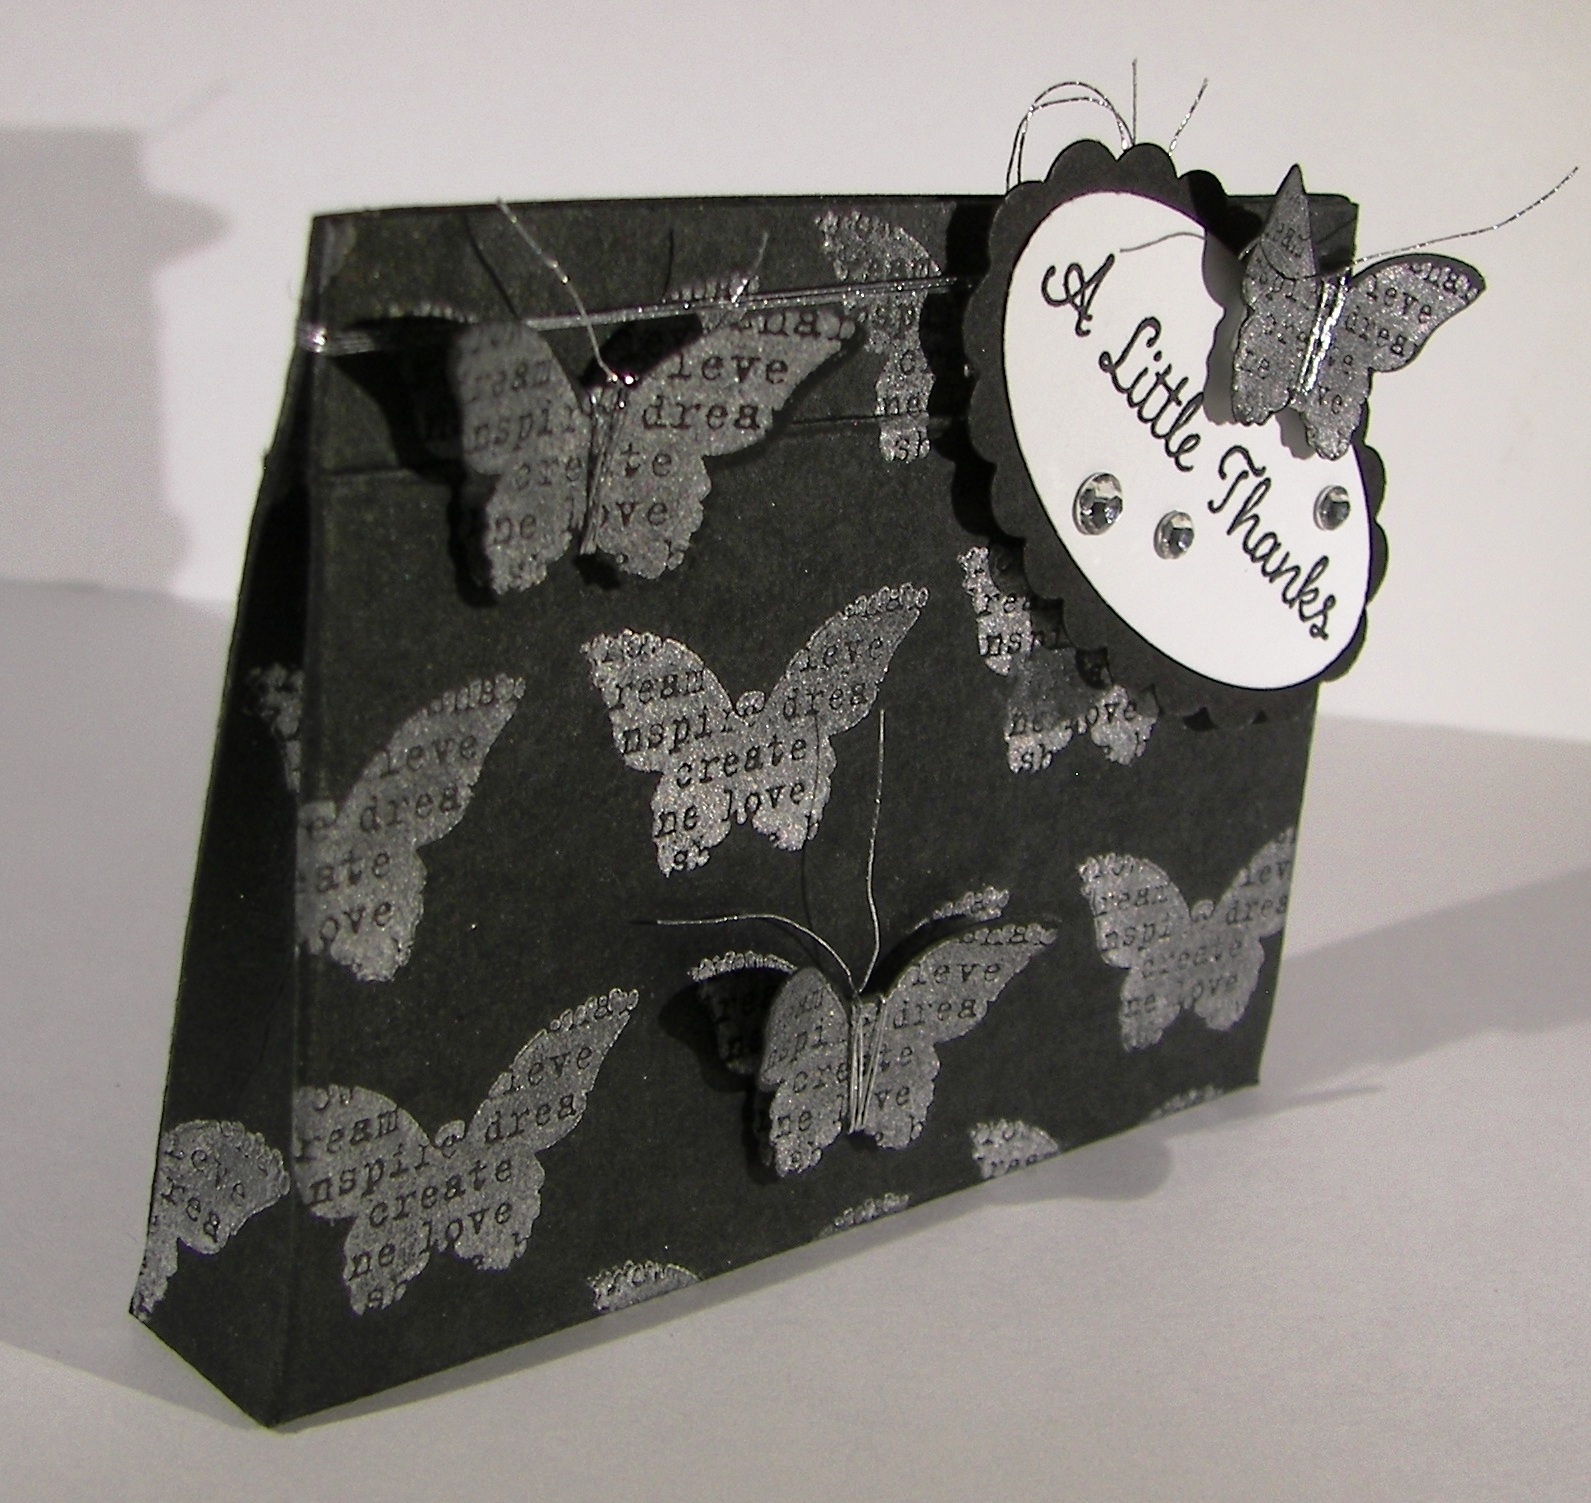
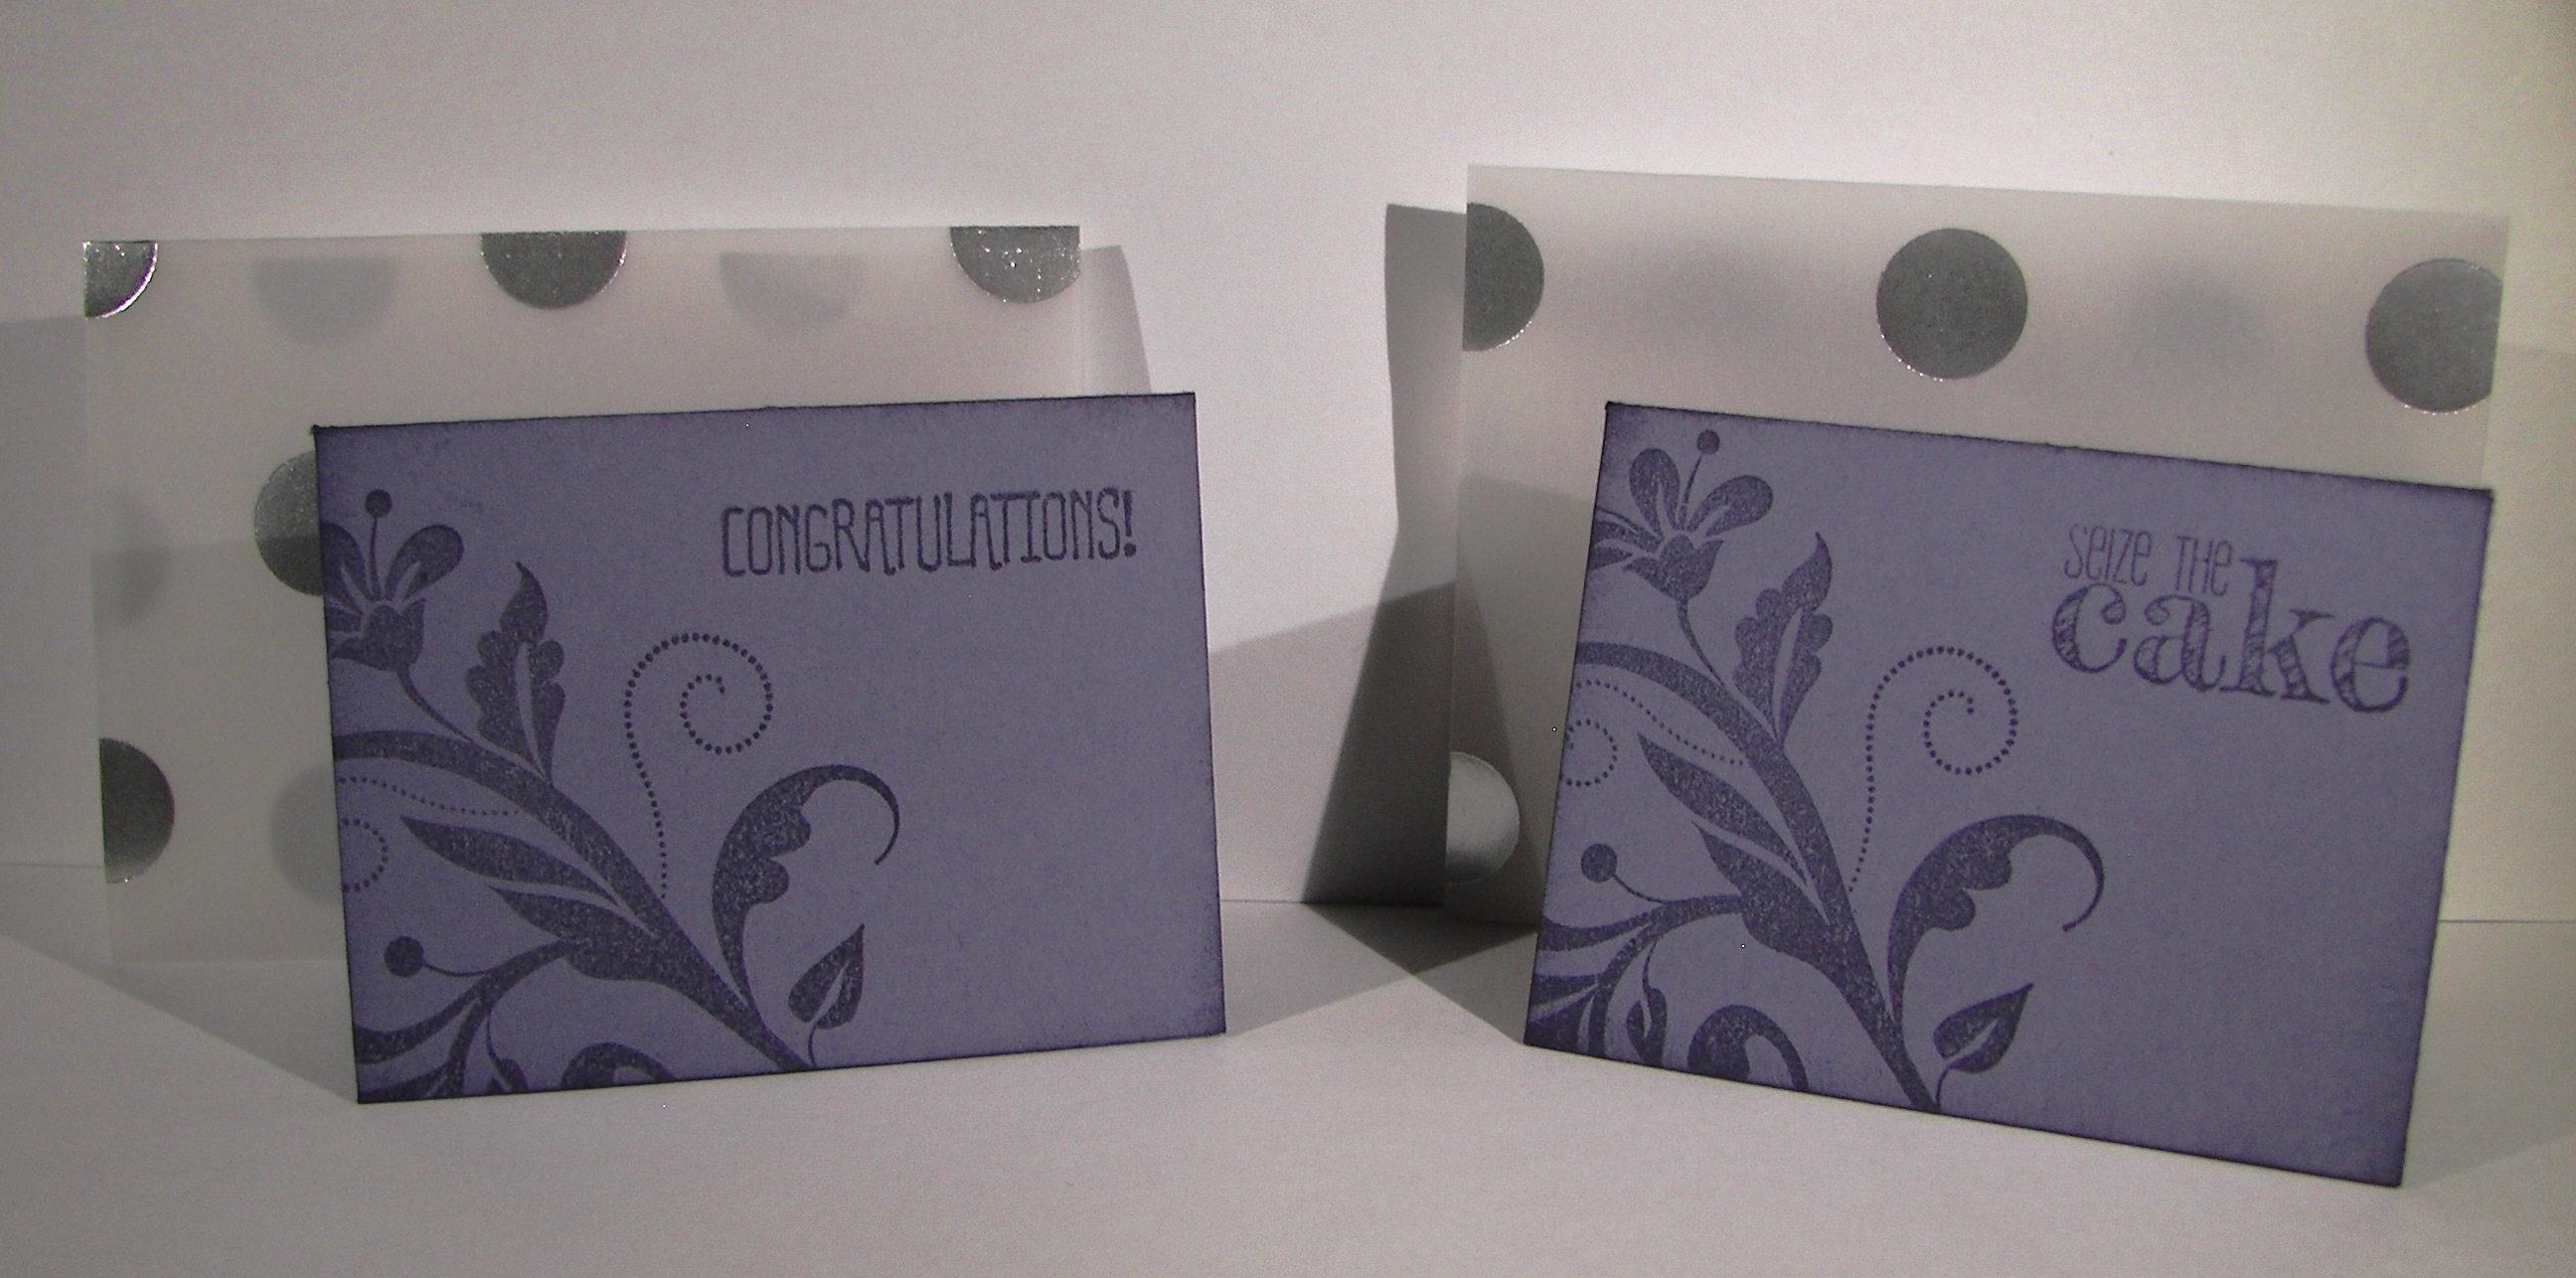
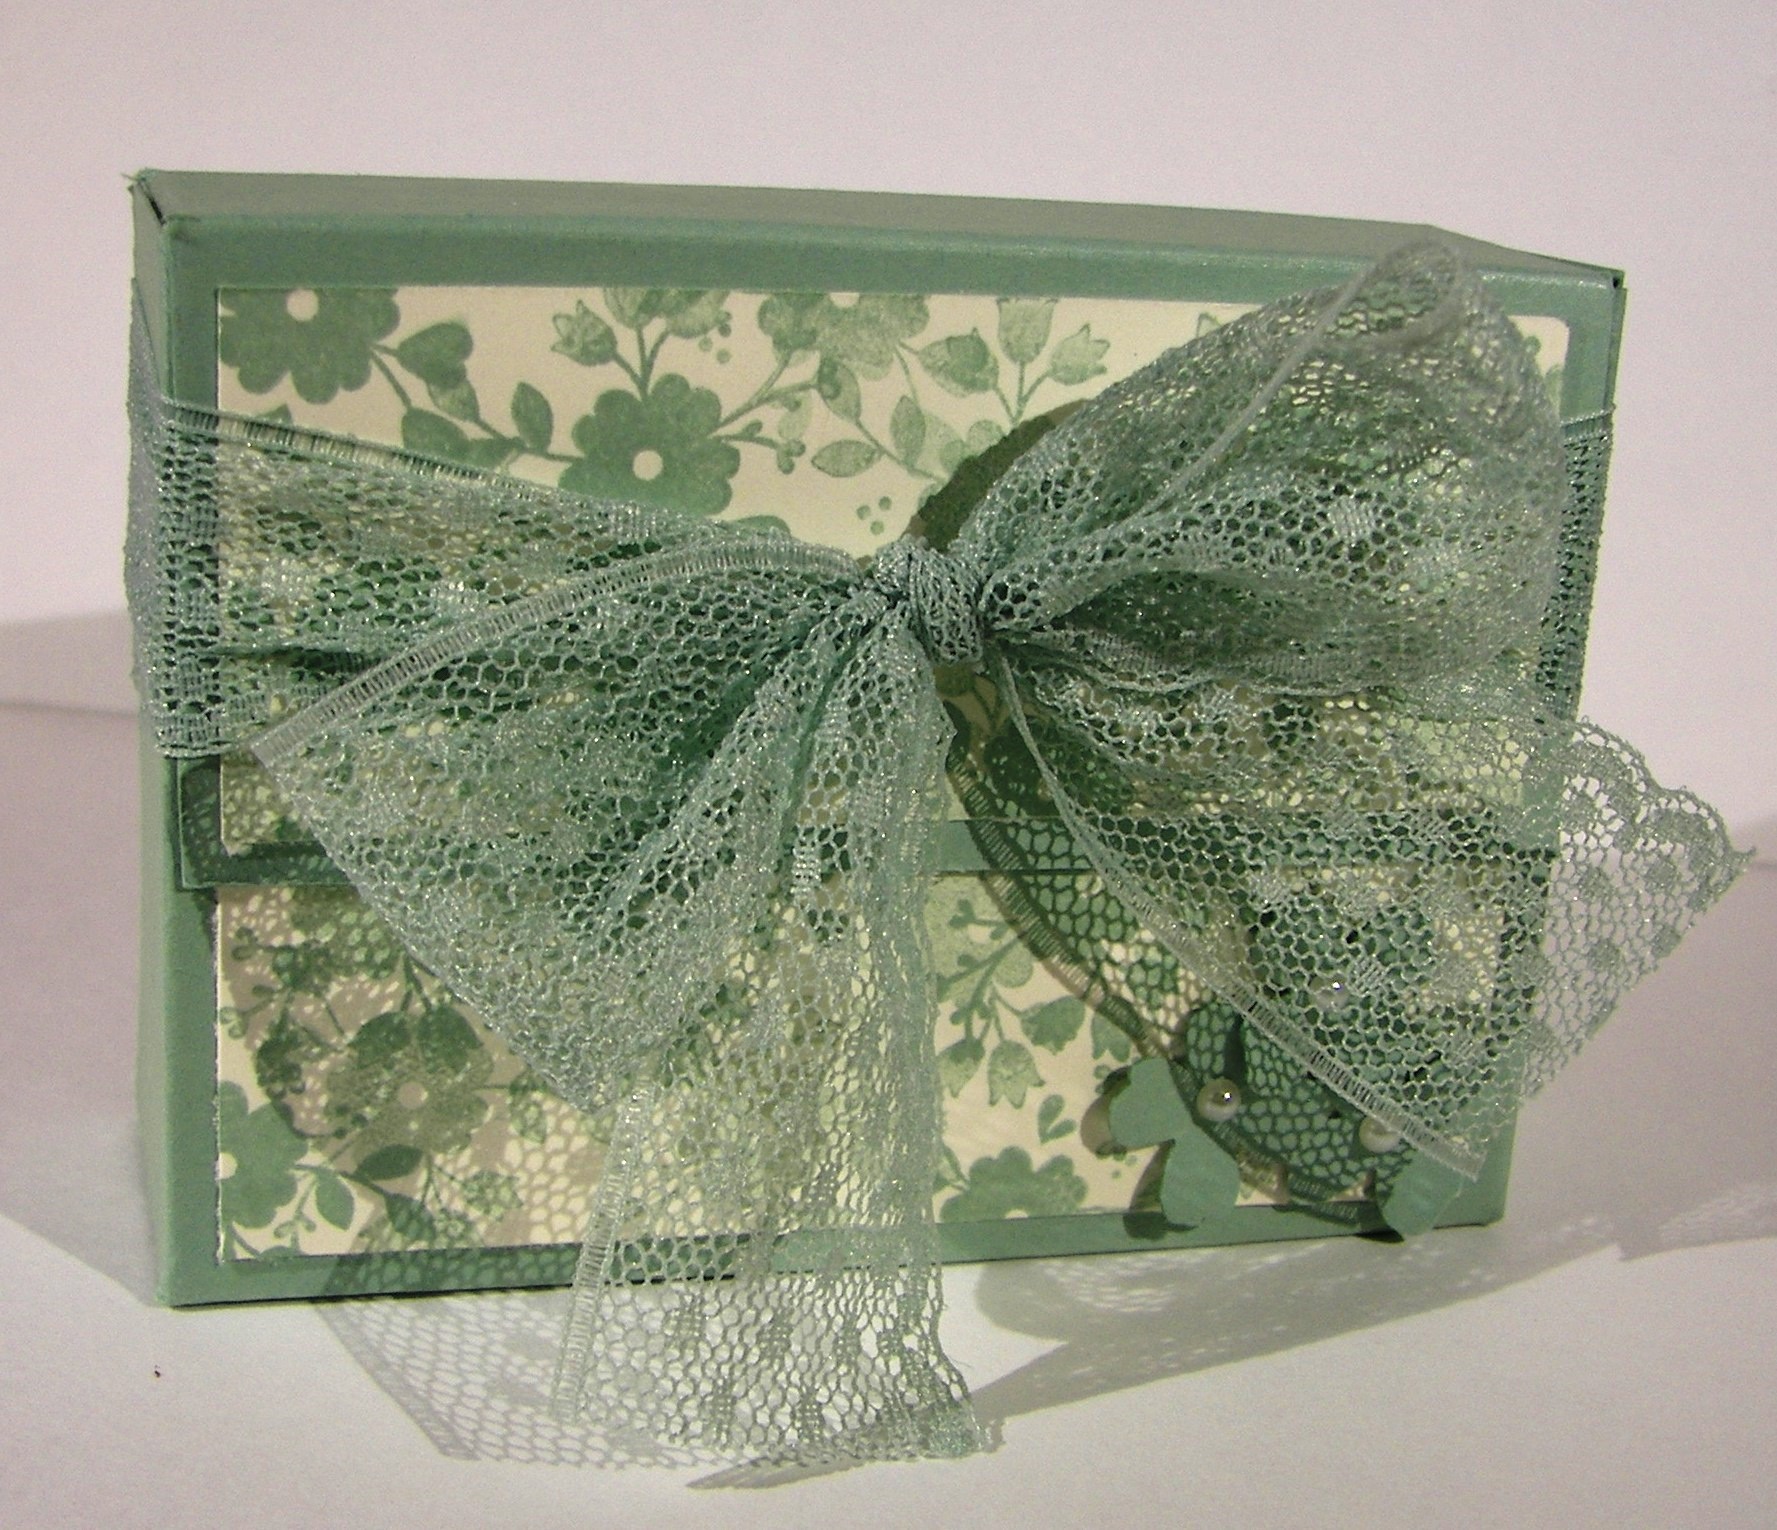
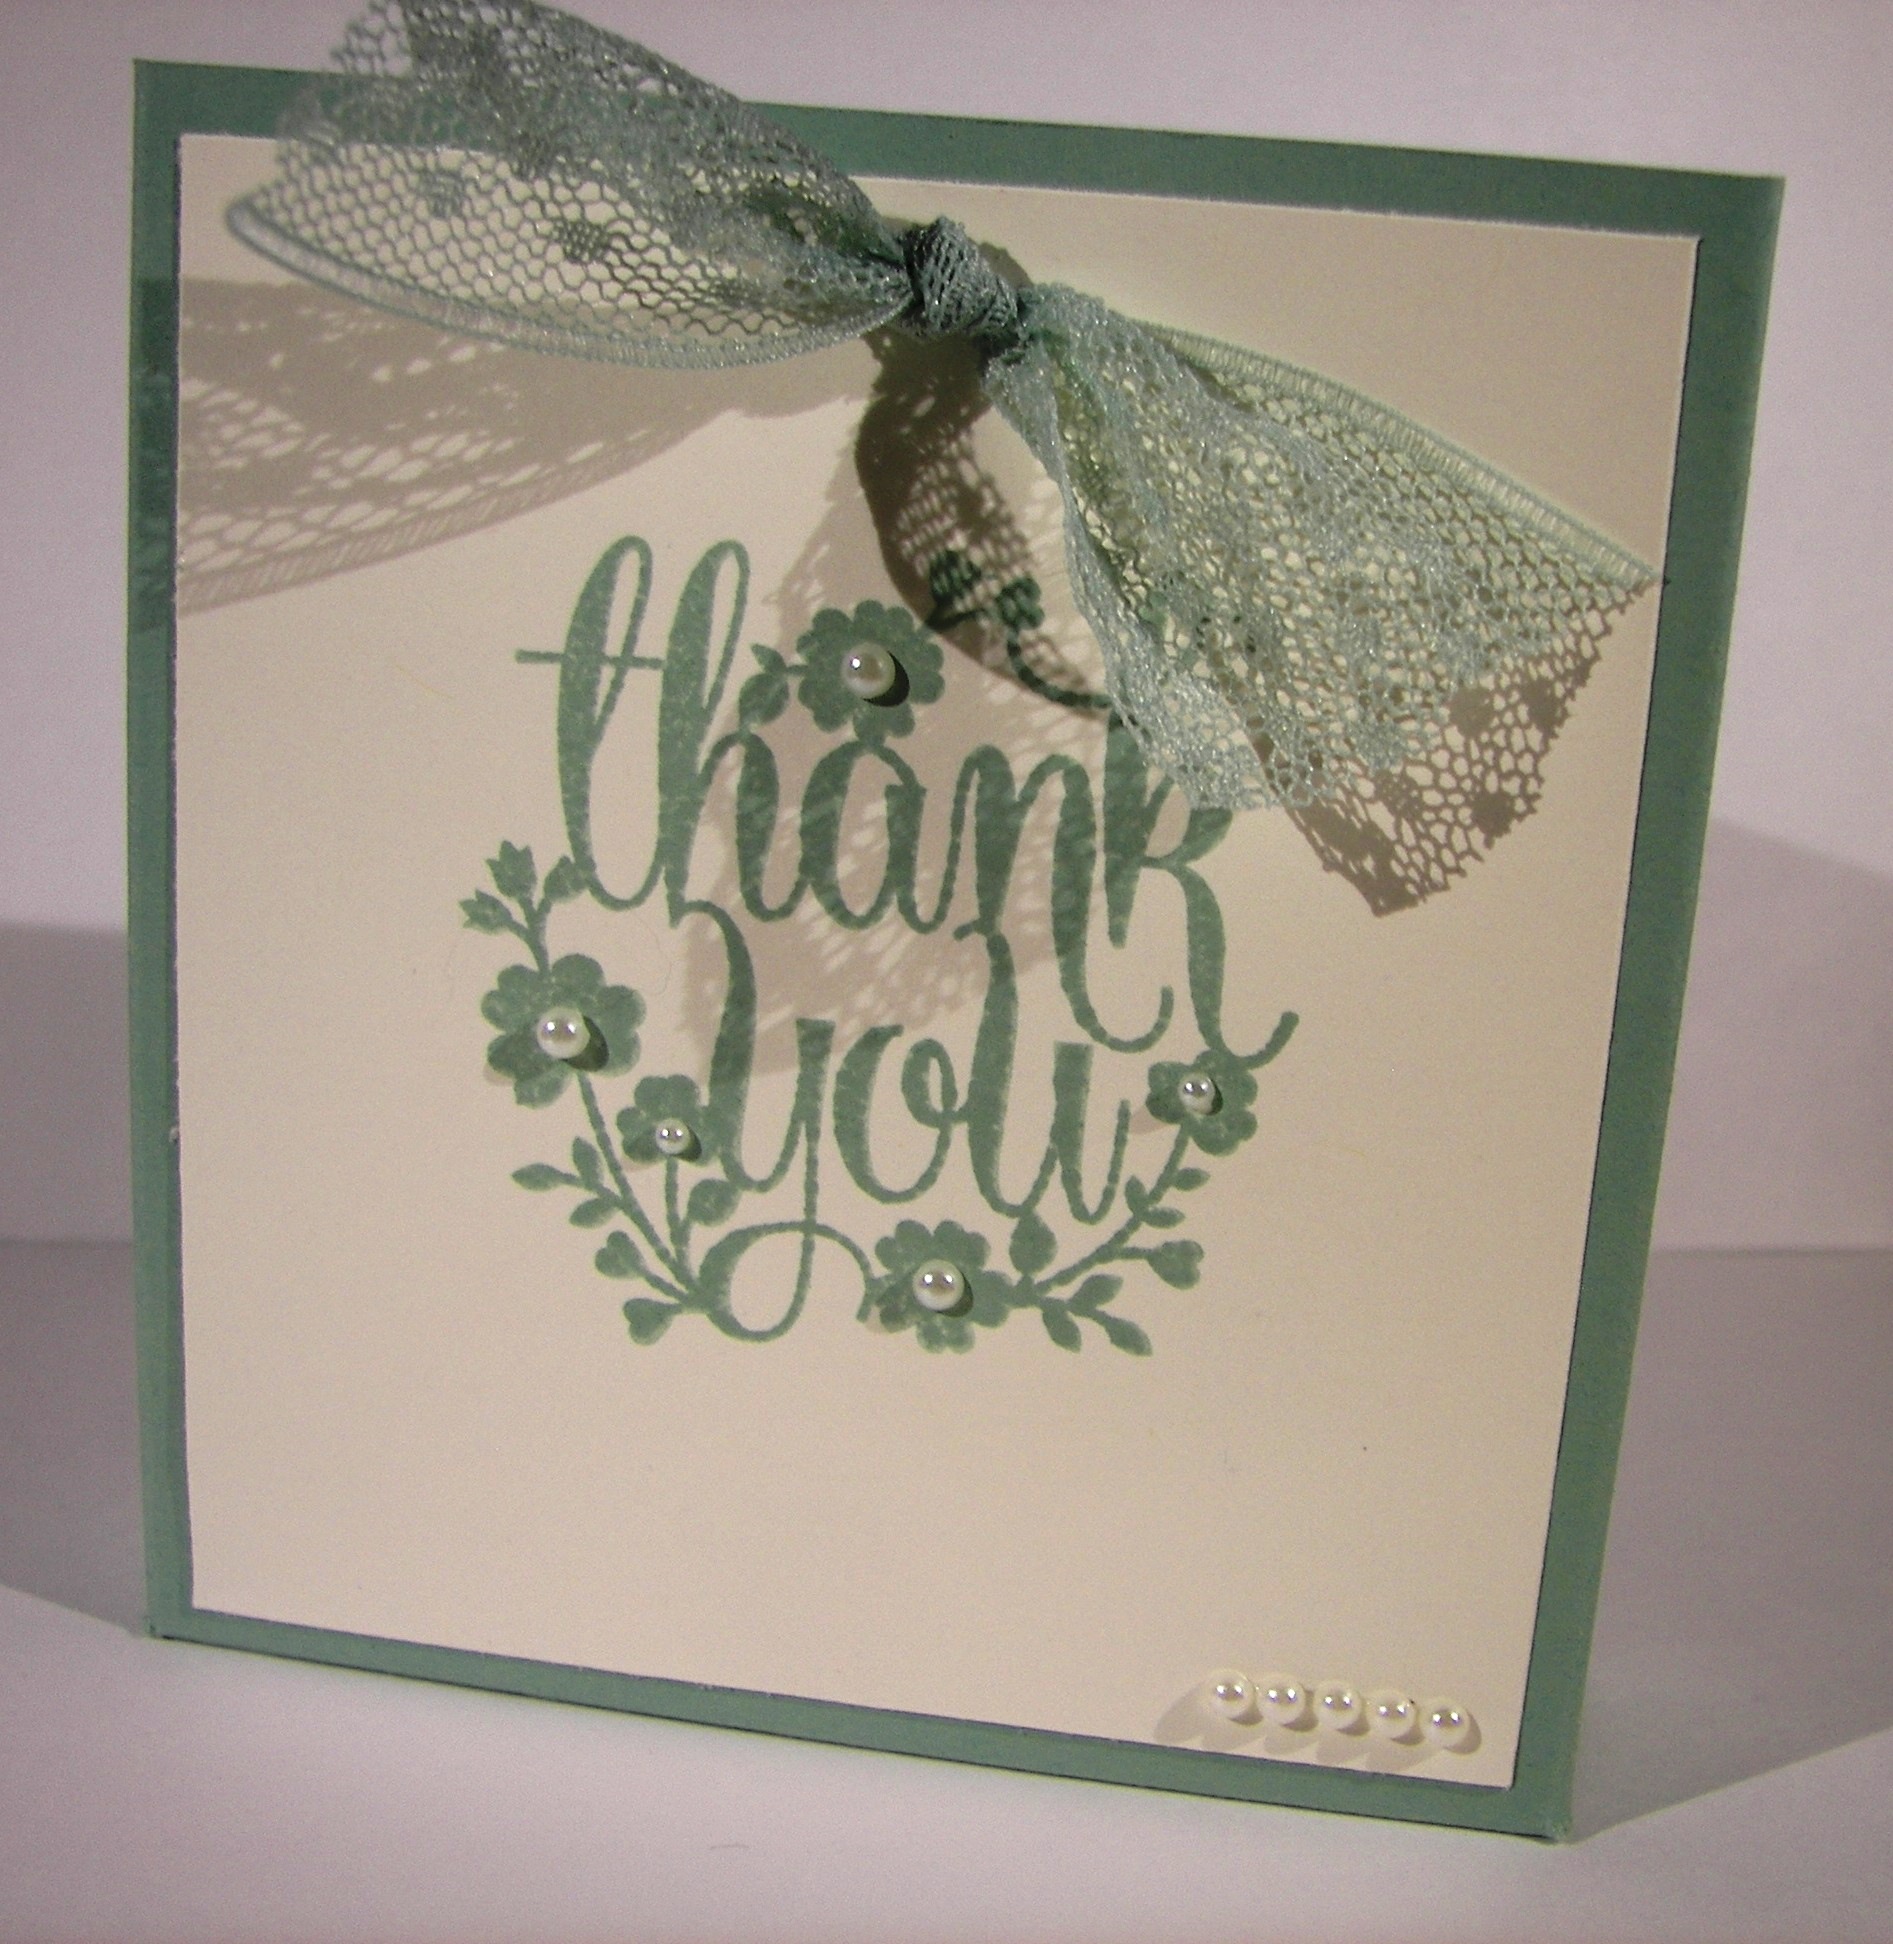
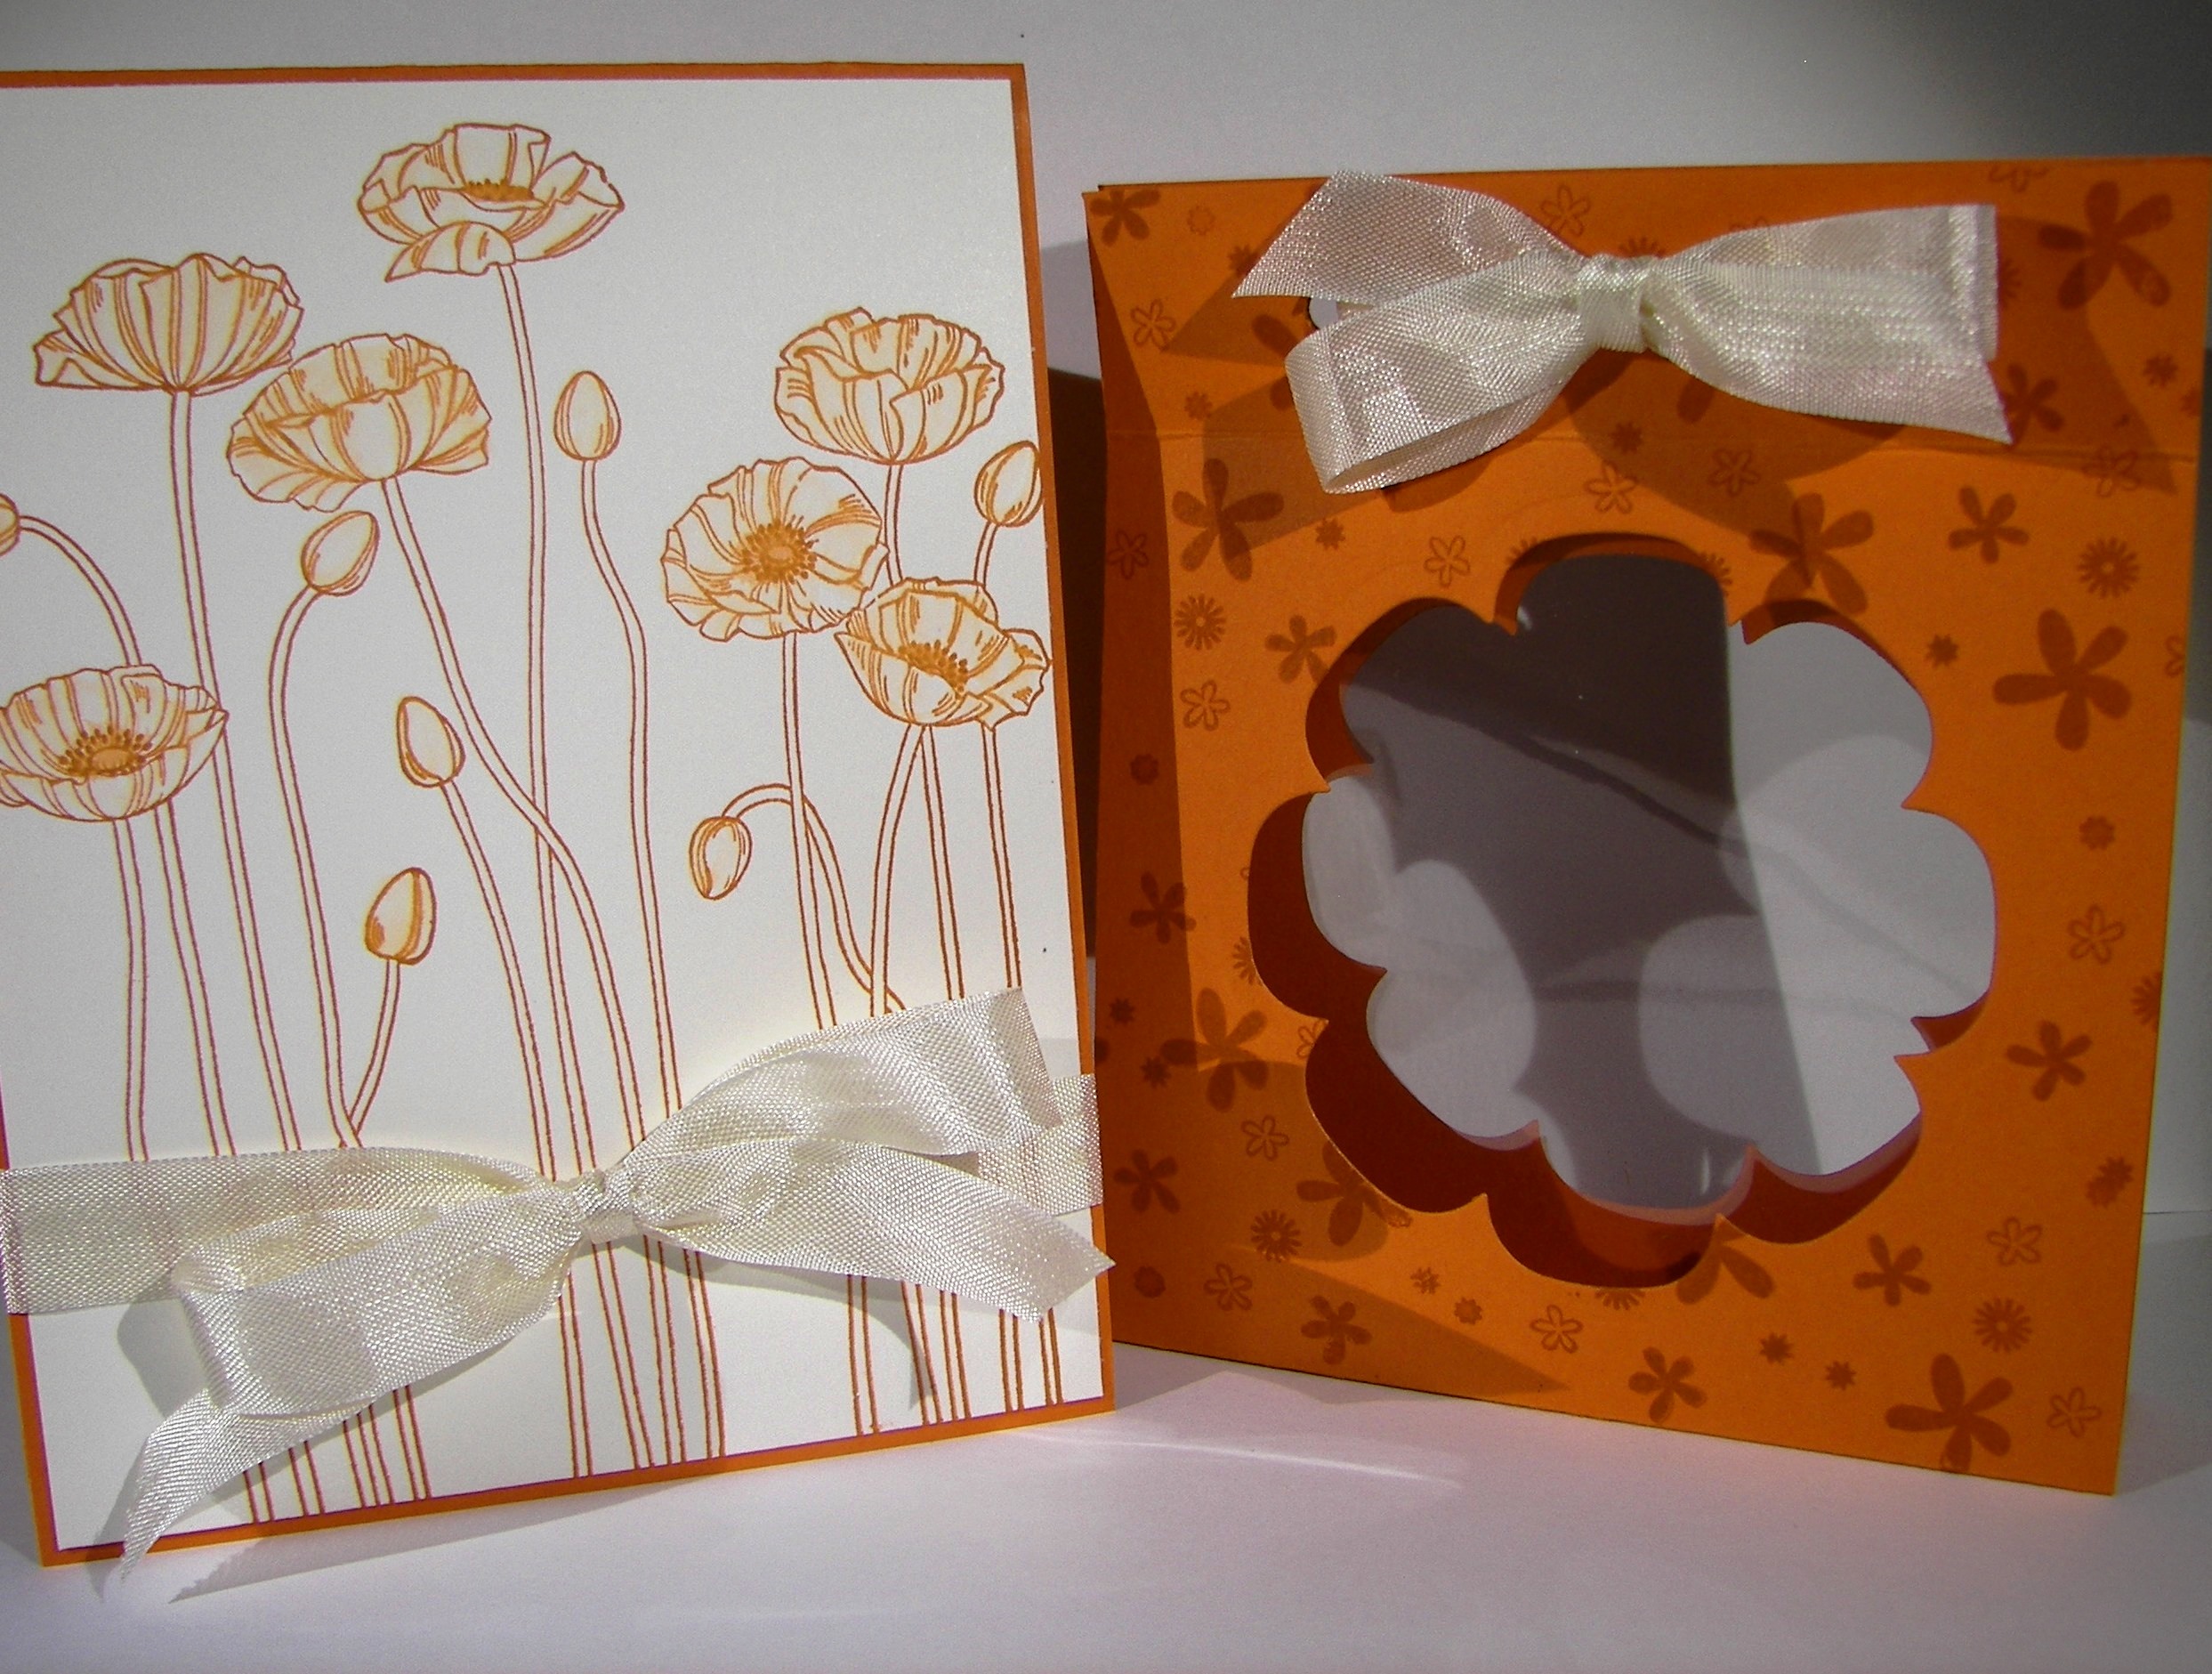
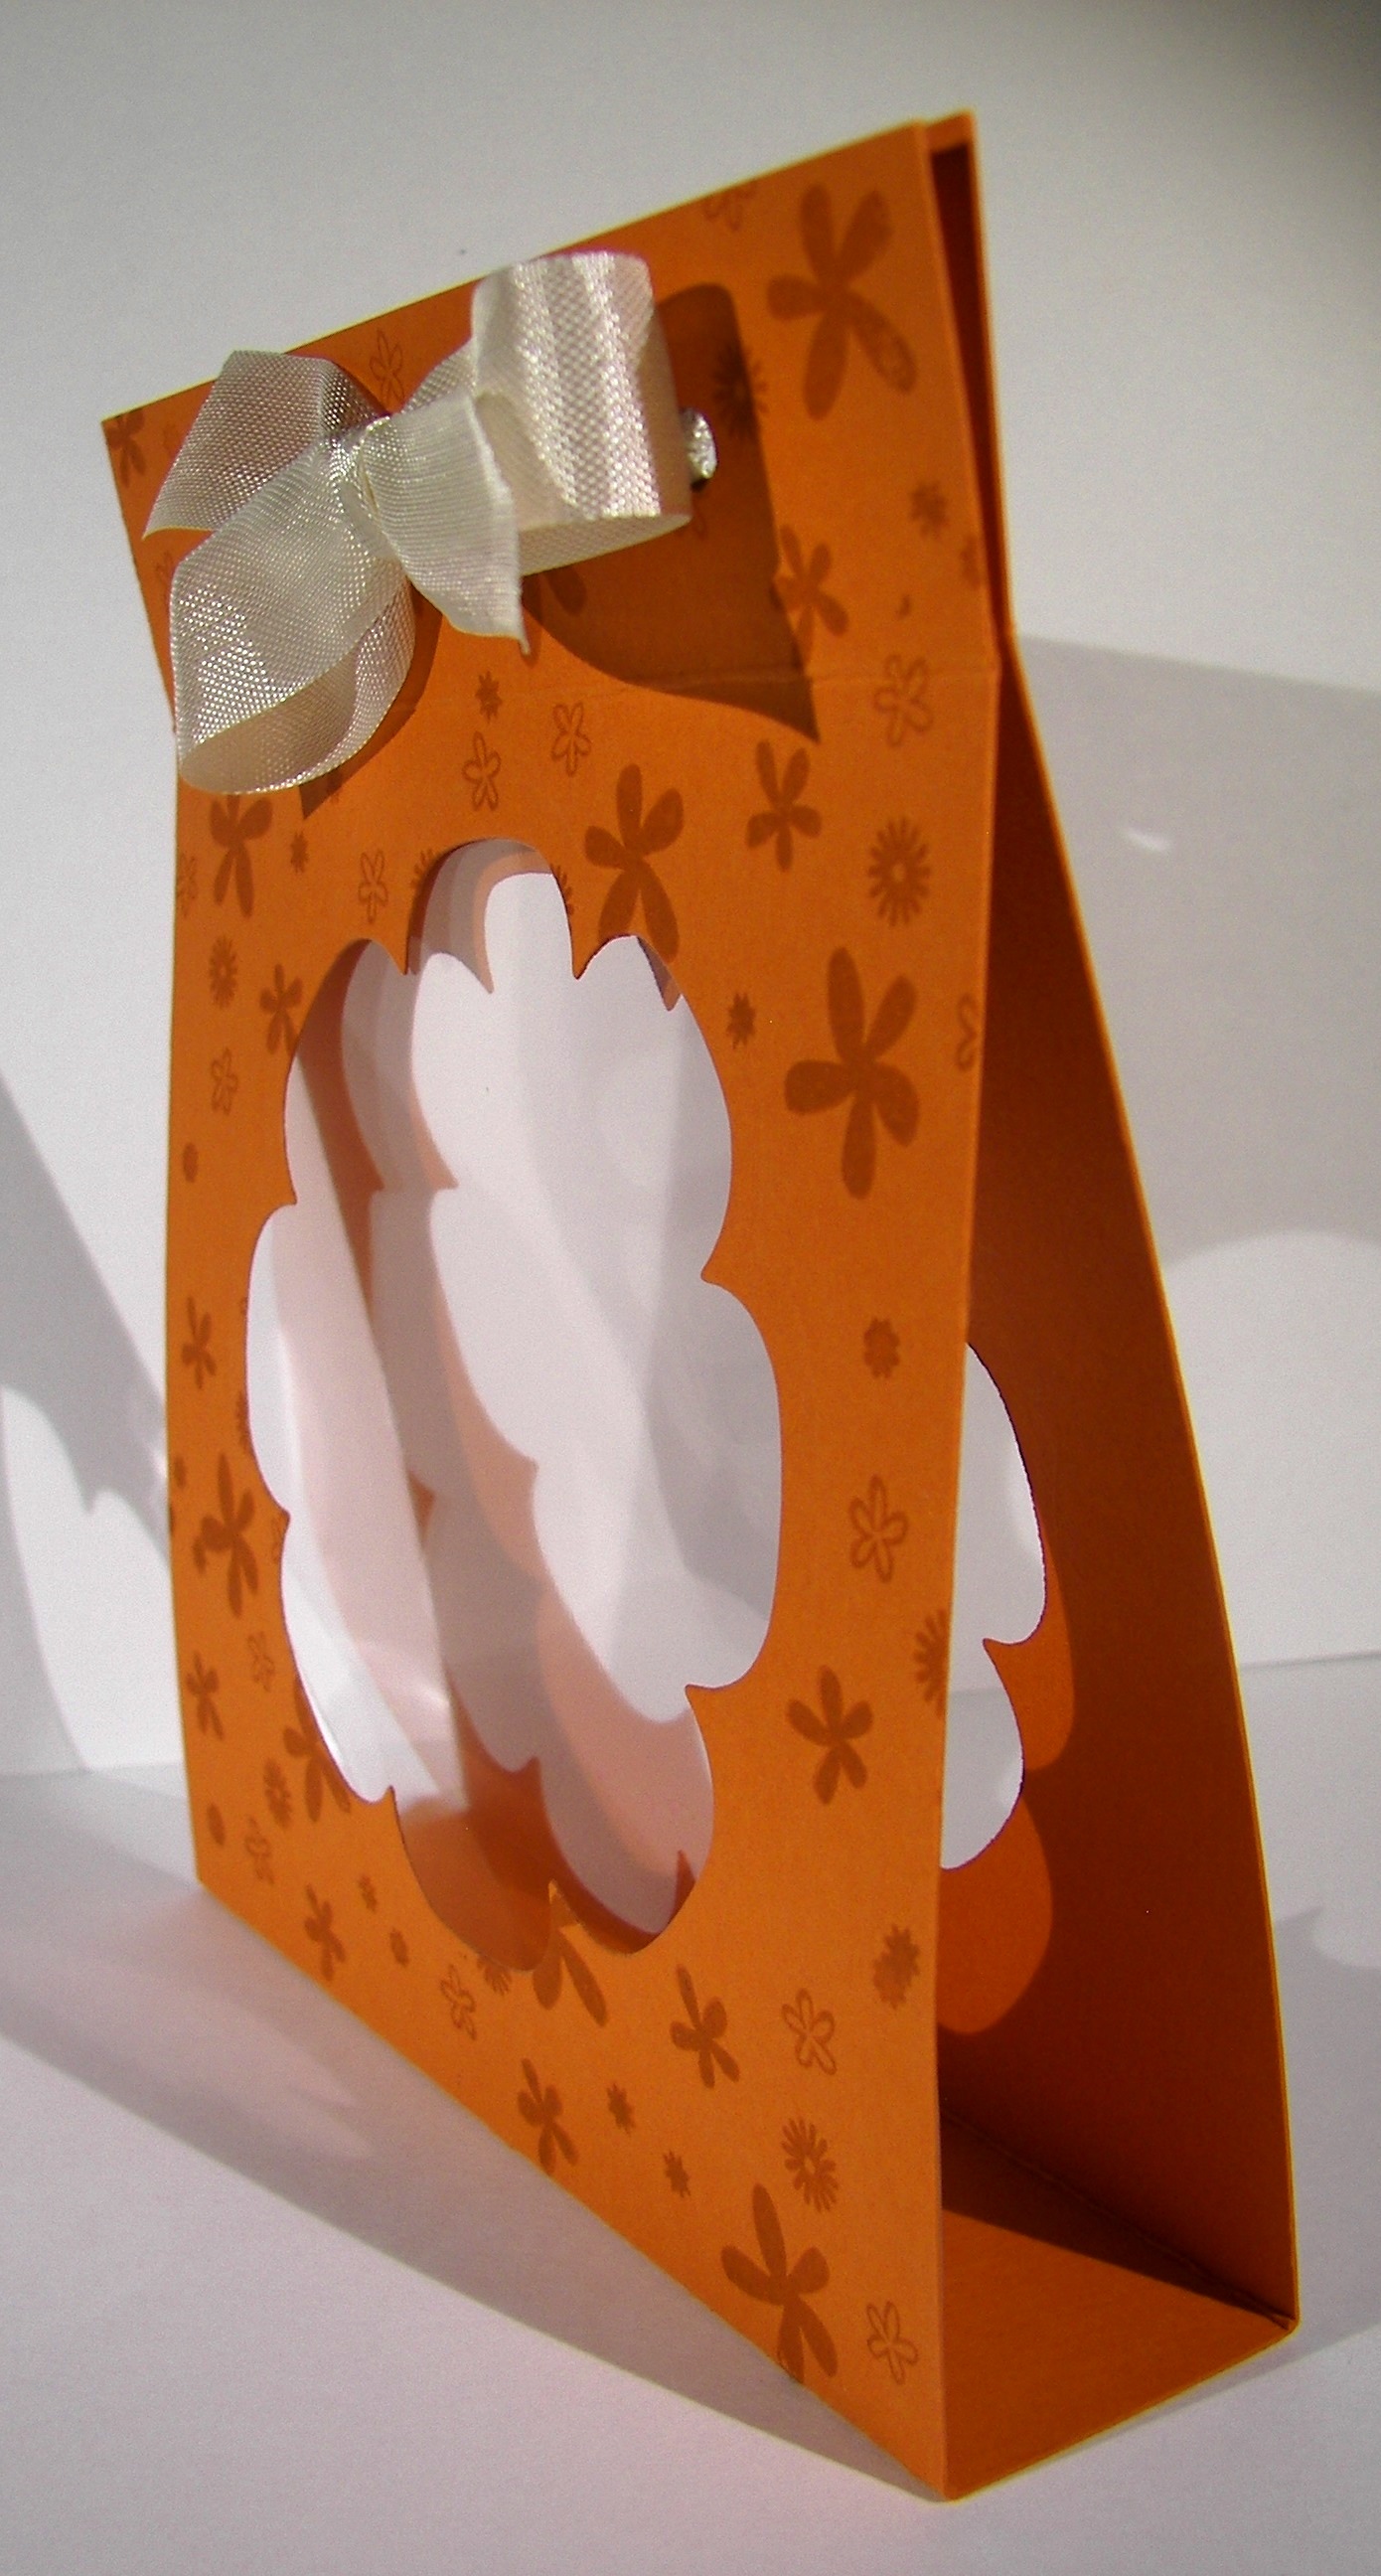
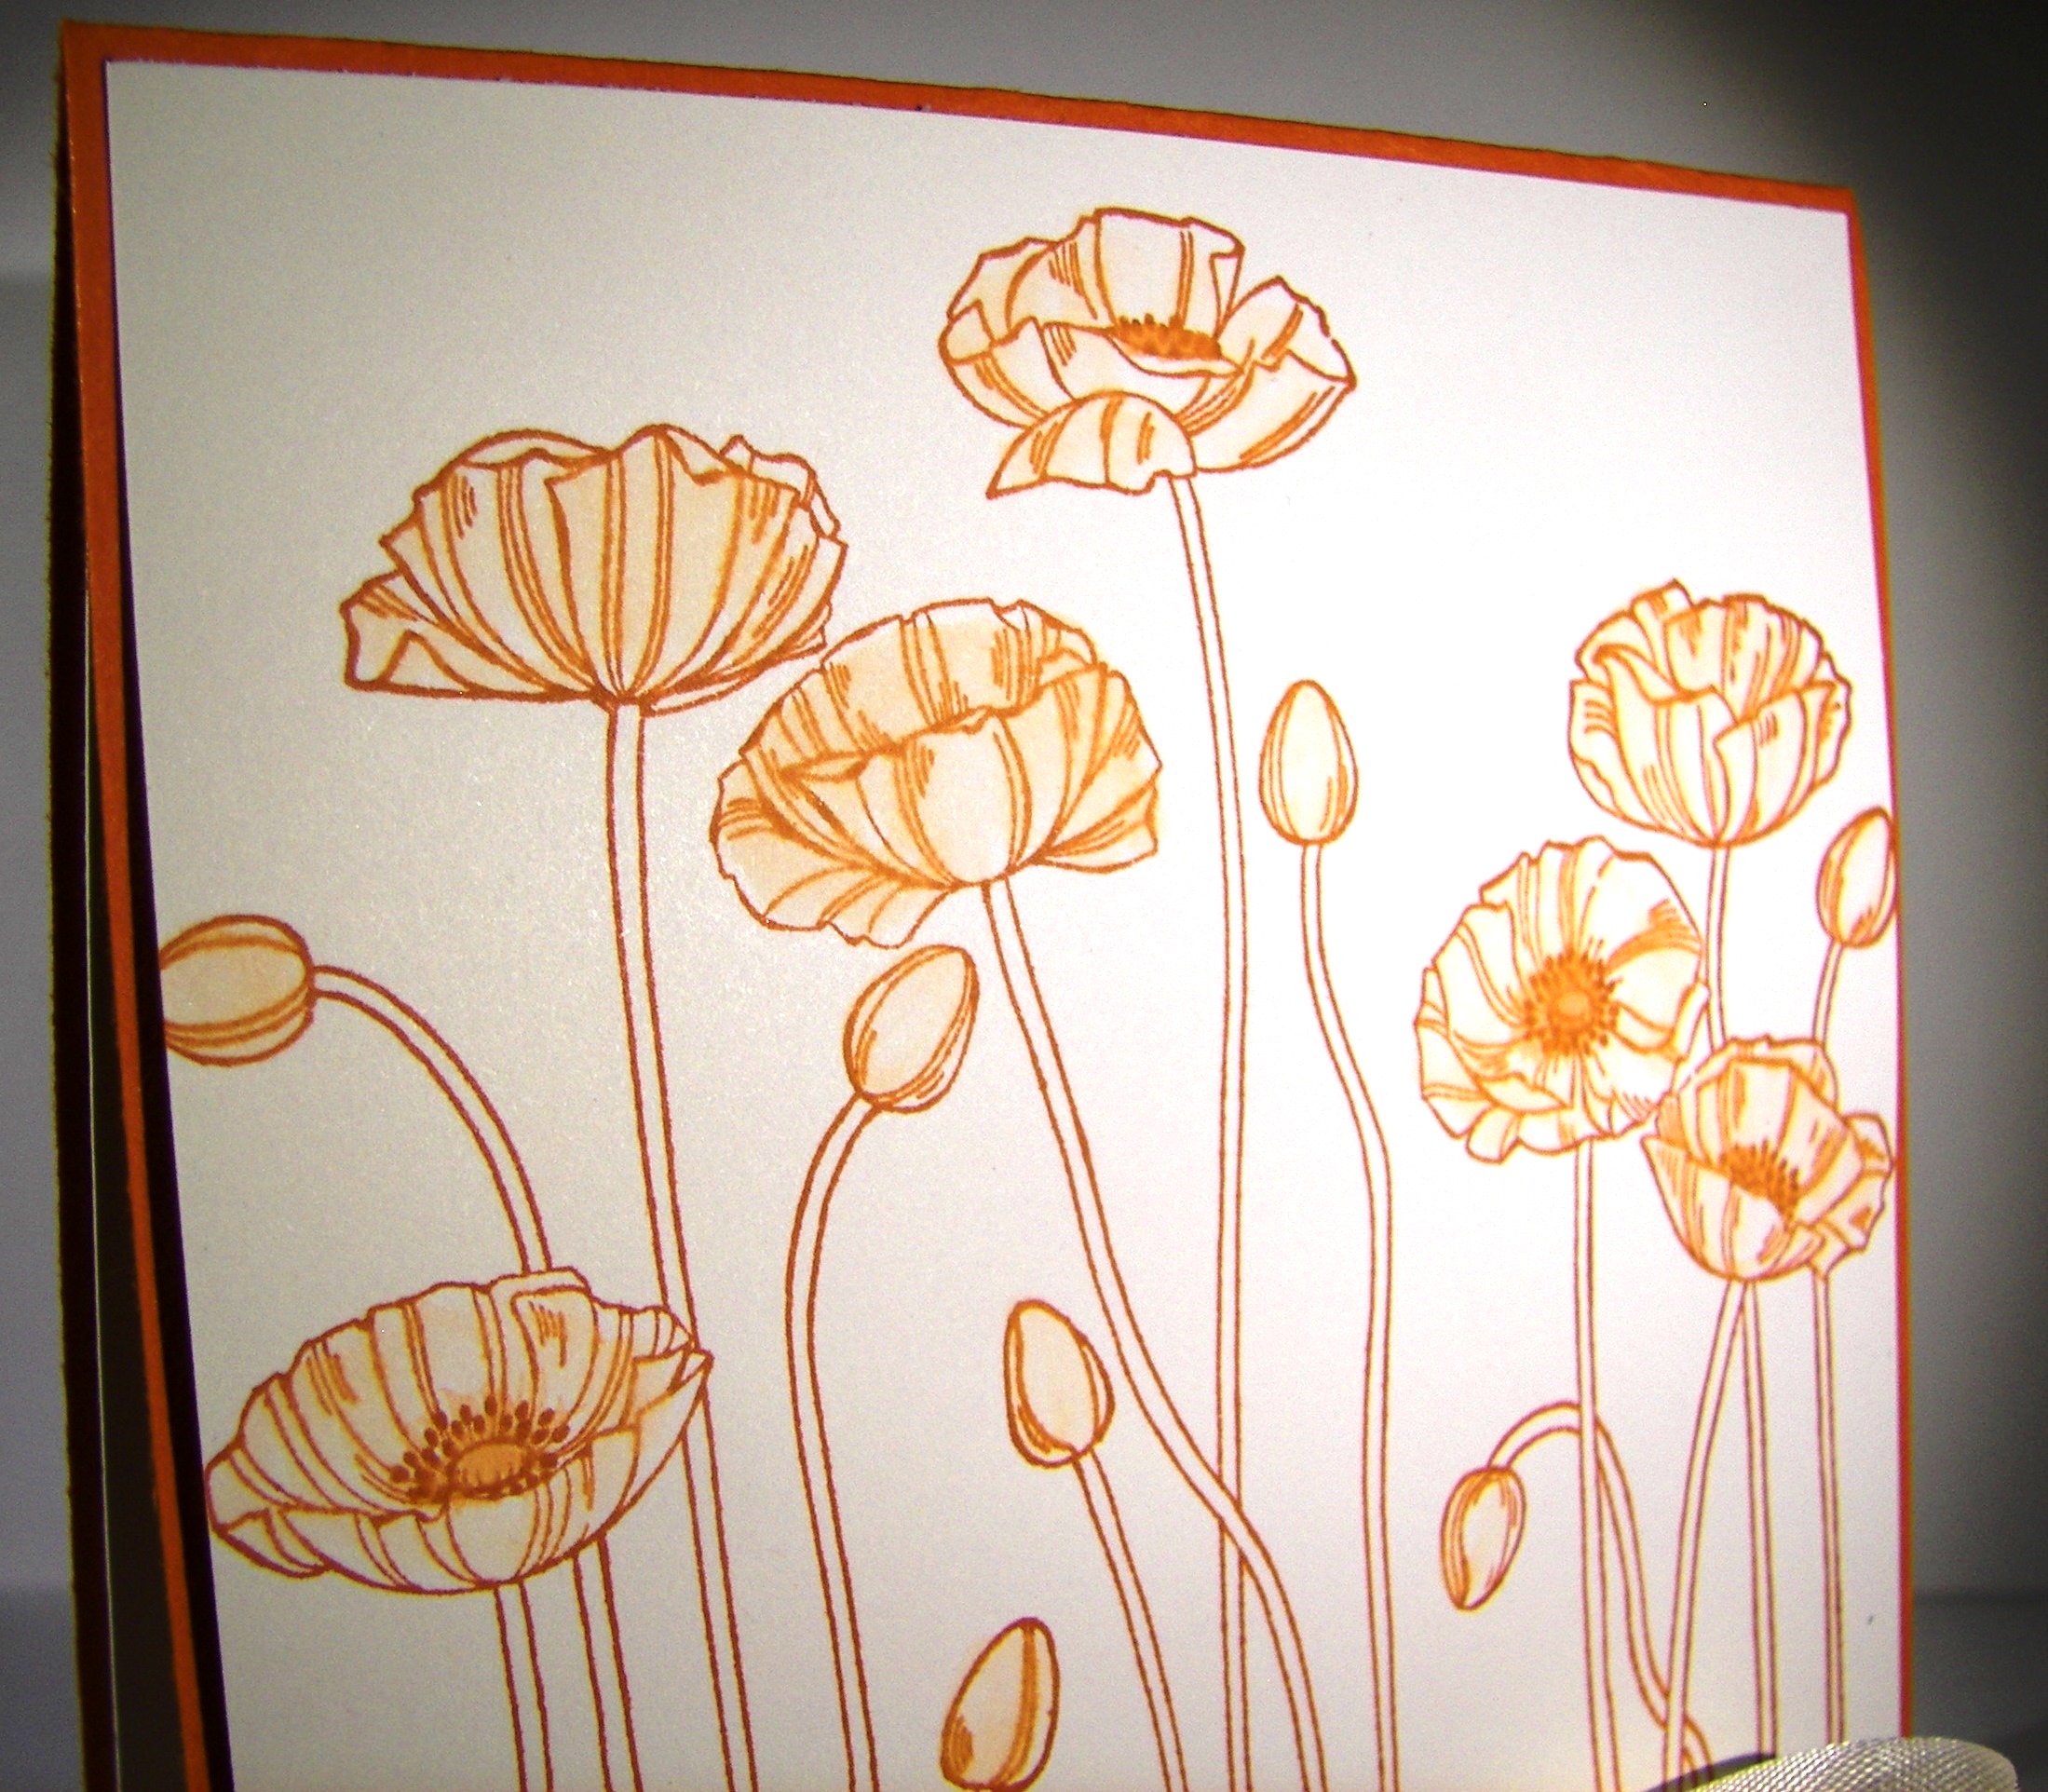
Does this conjure images of a wedding couple or what?  I do have another idea though.  Honestly, I went with brighter colors for that other idea.

For the New Two

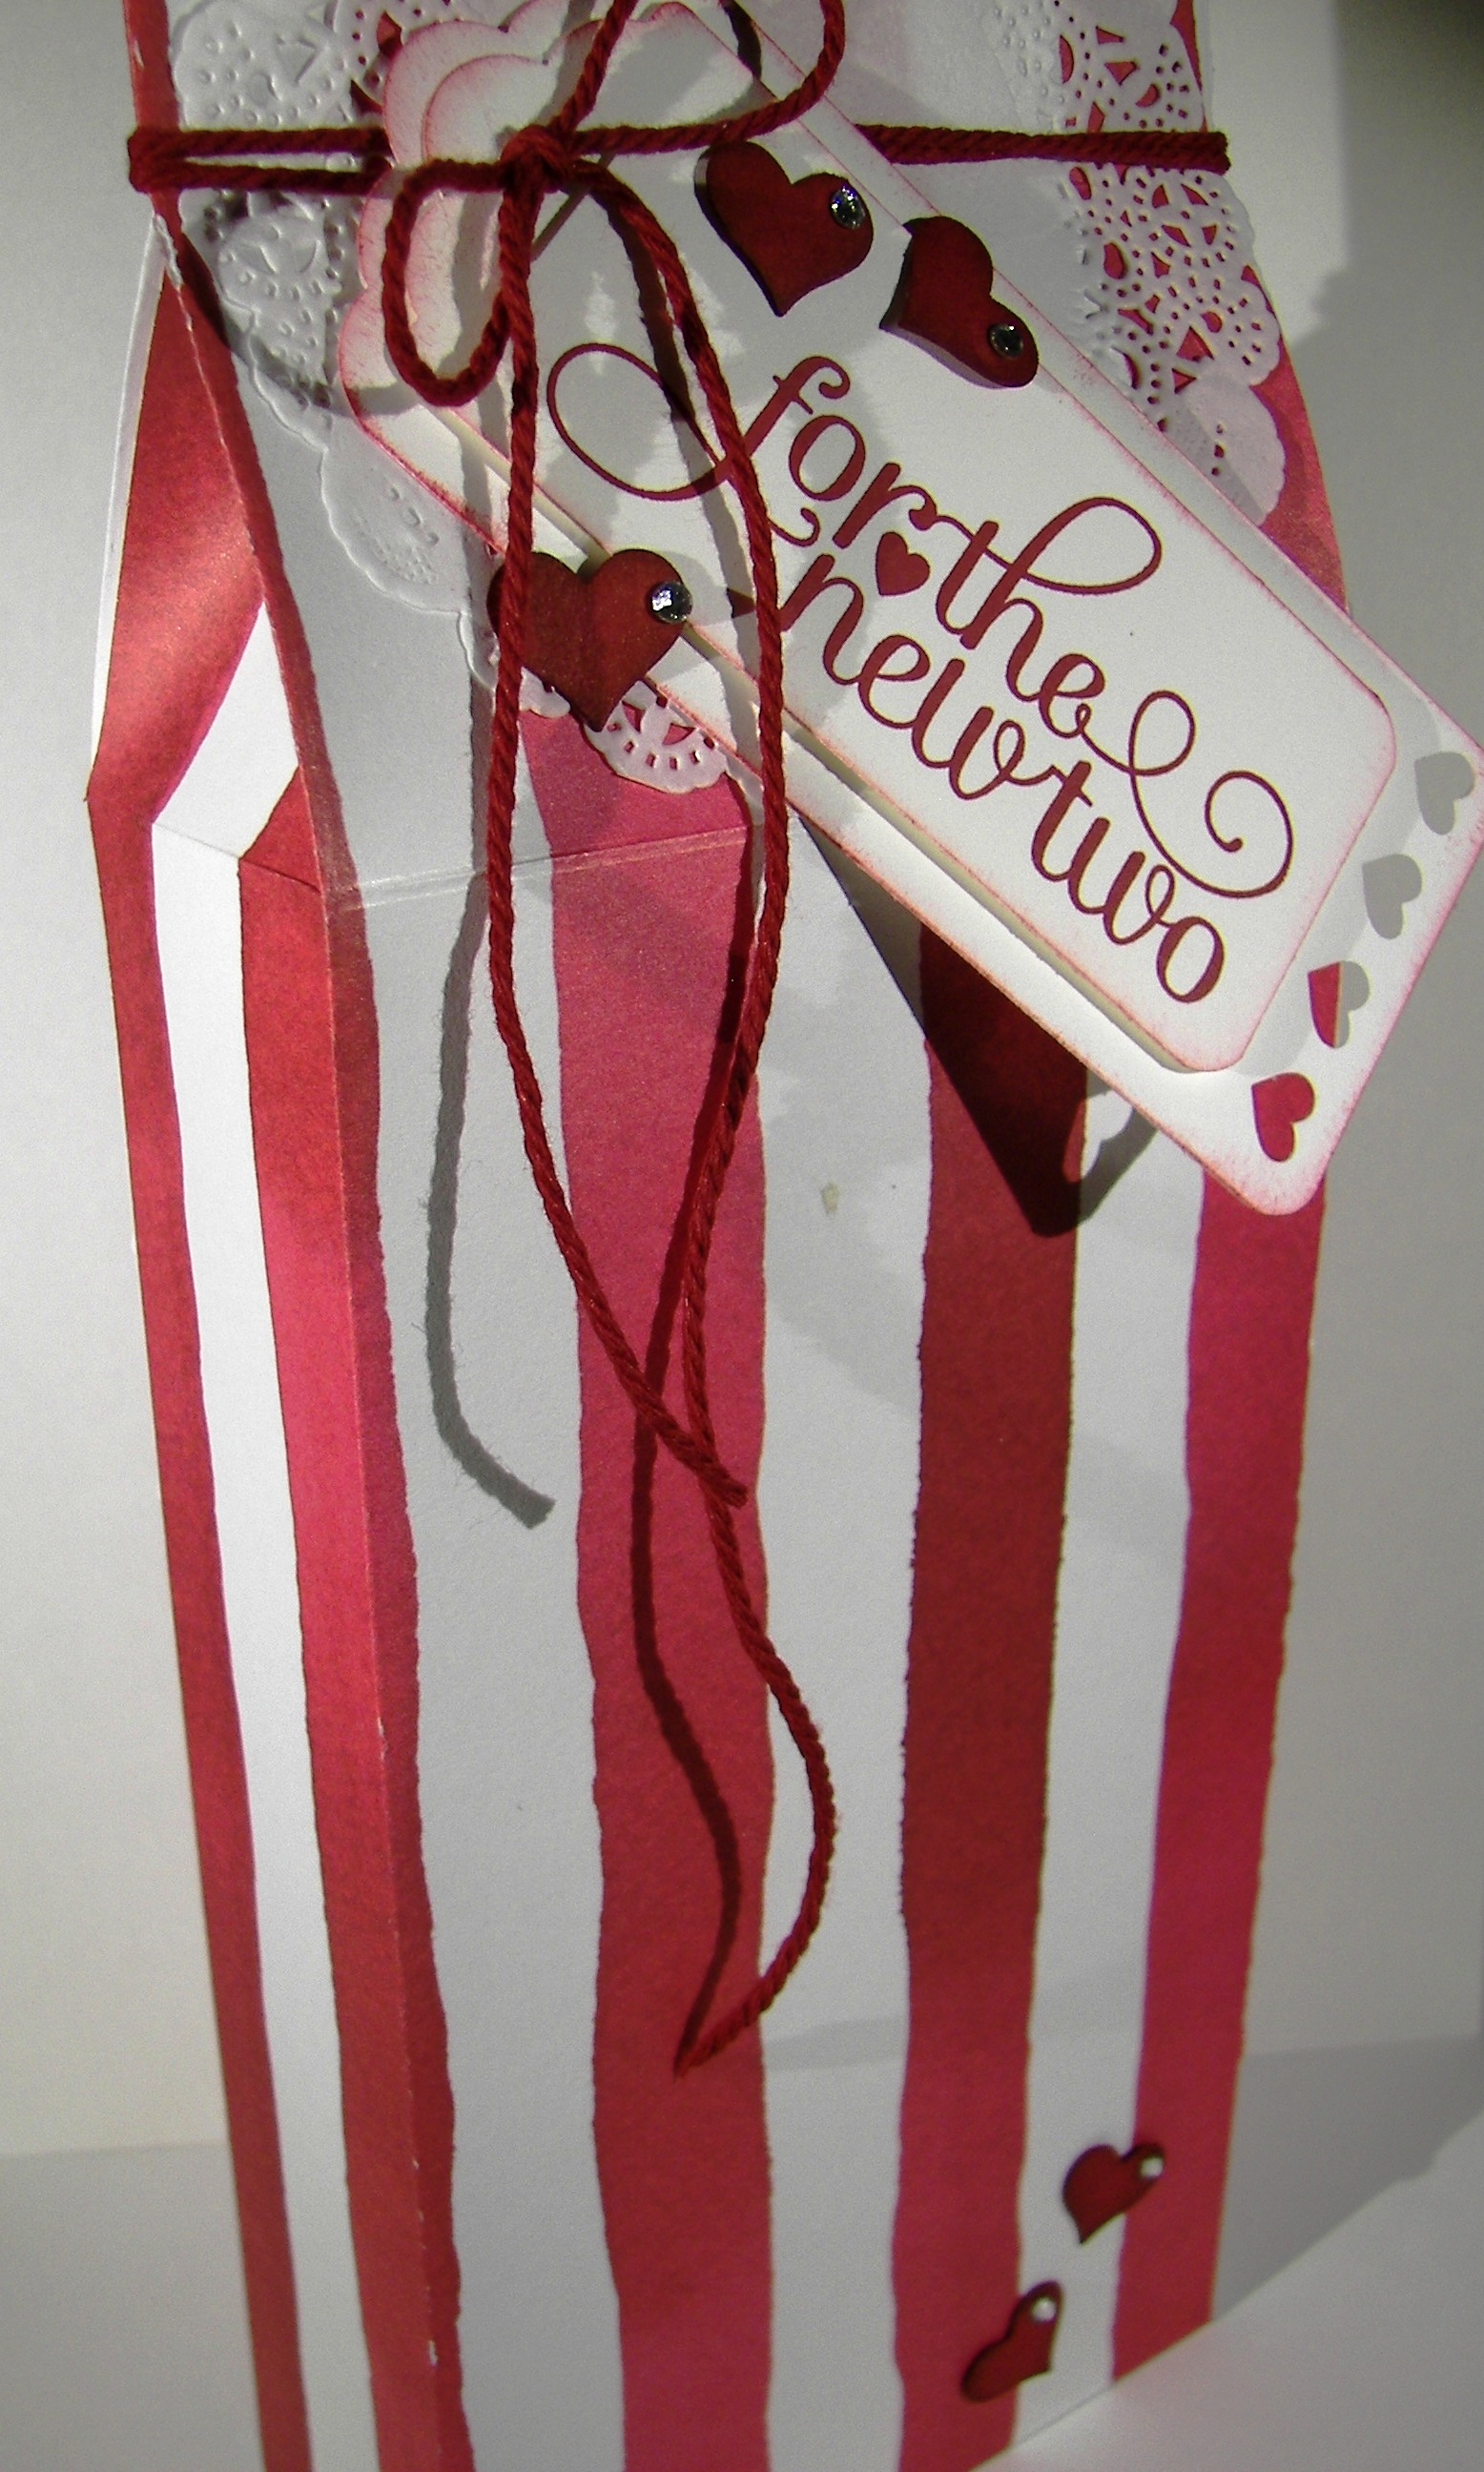
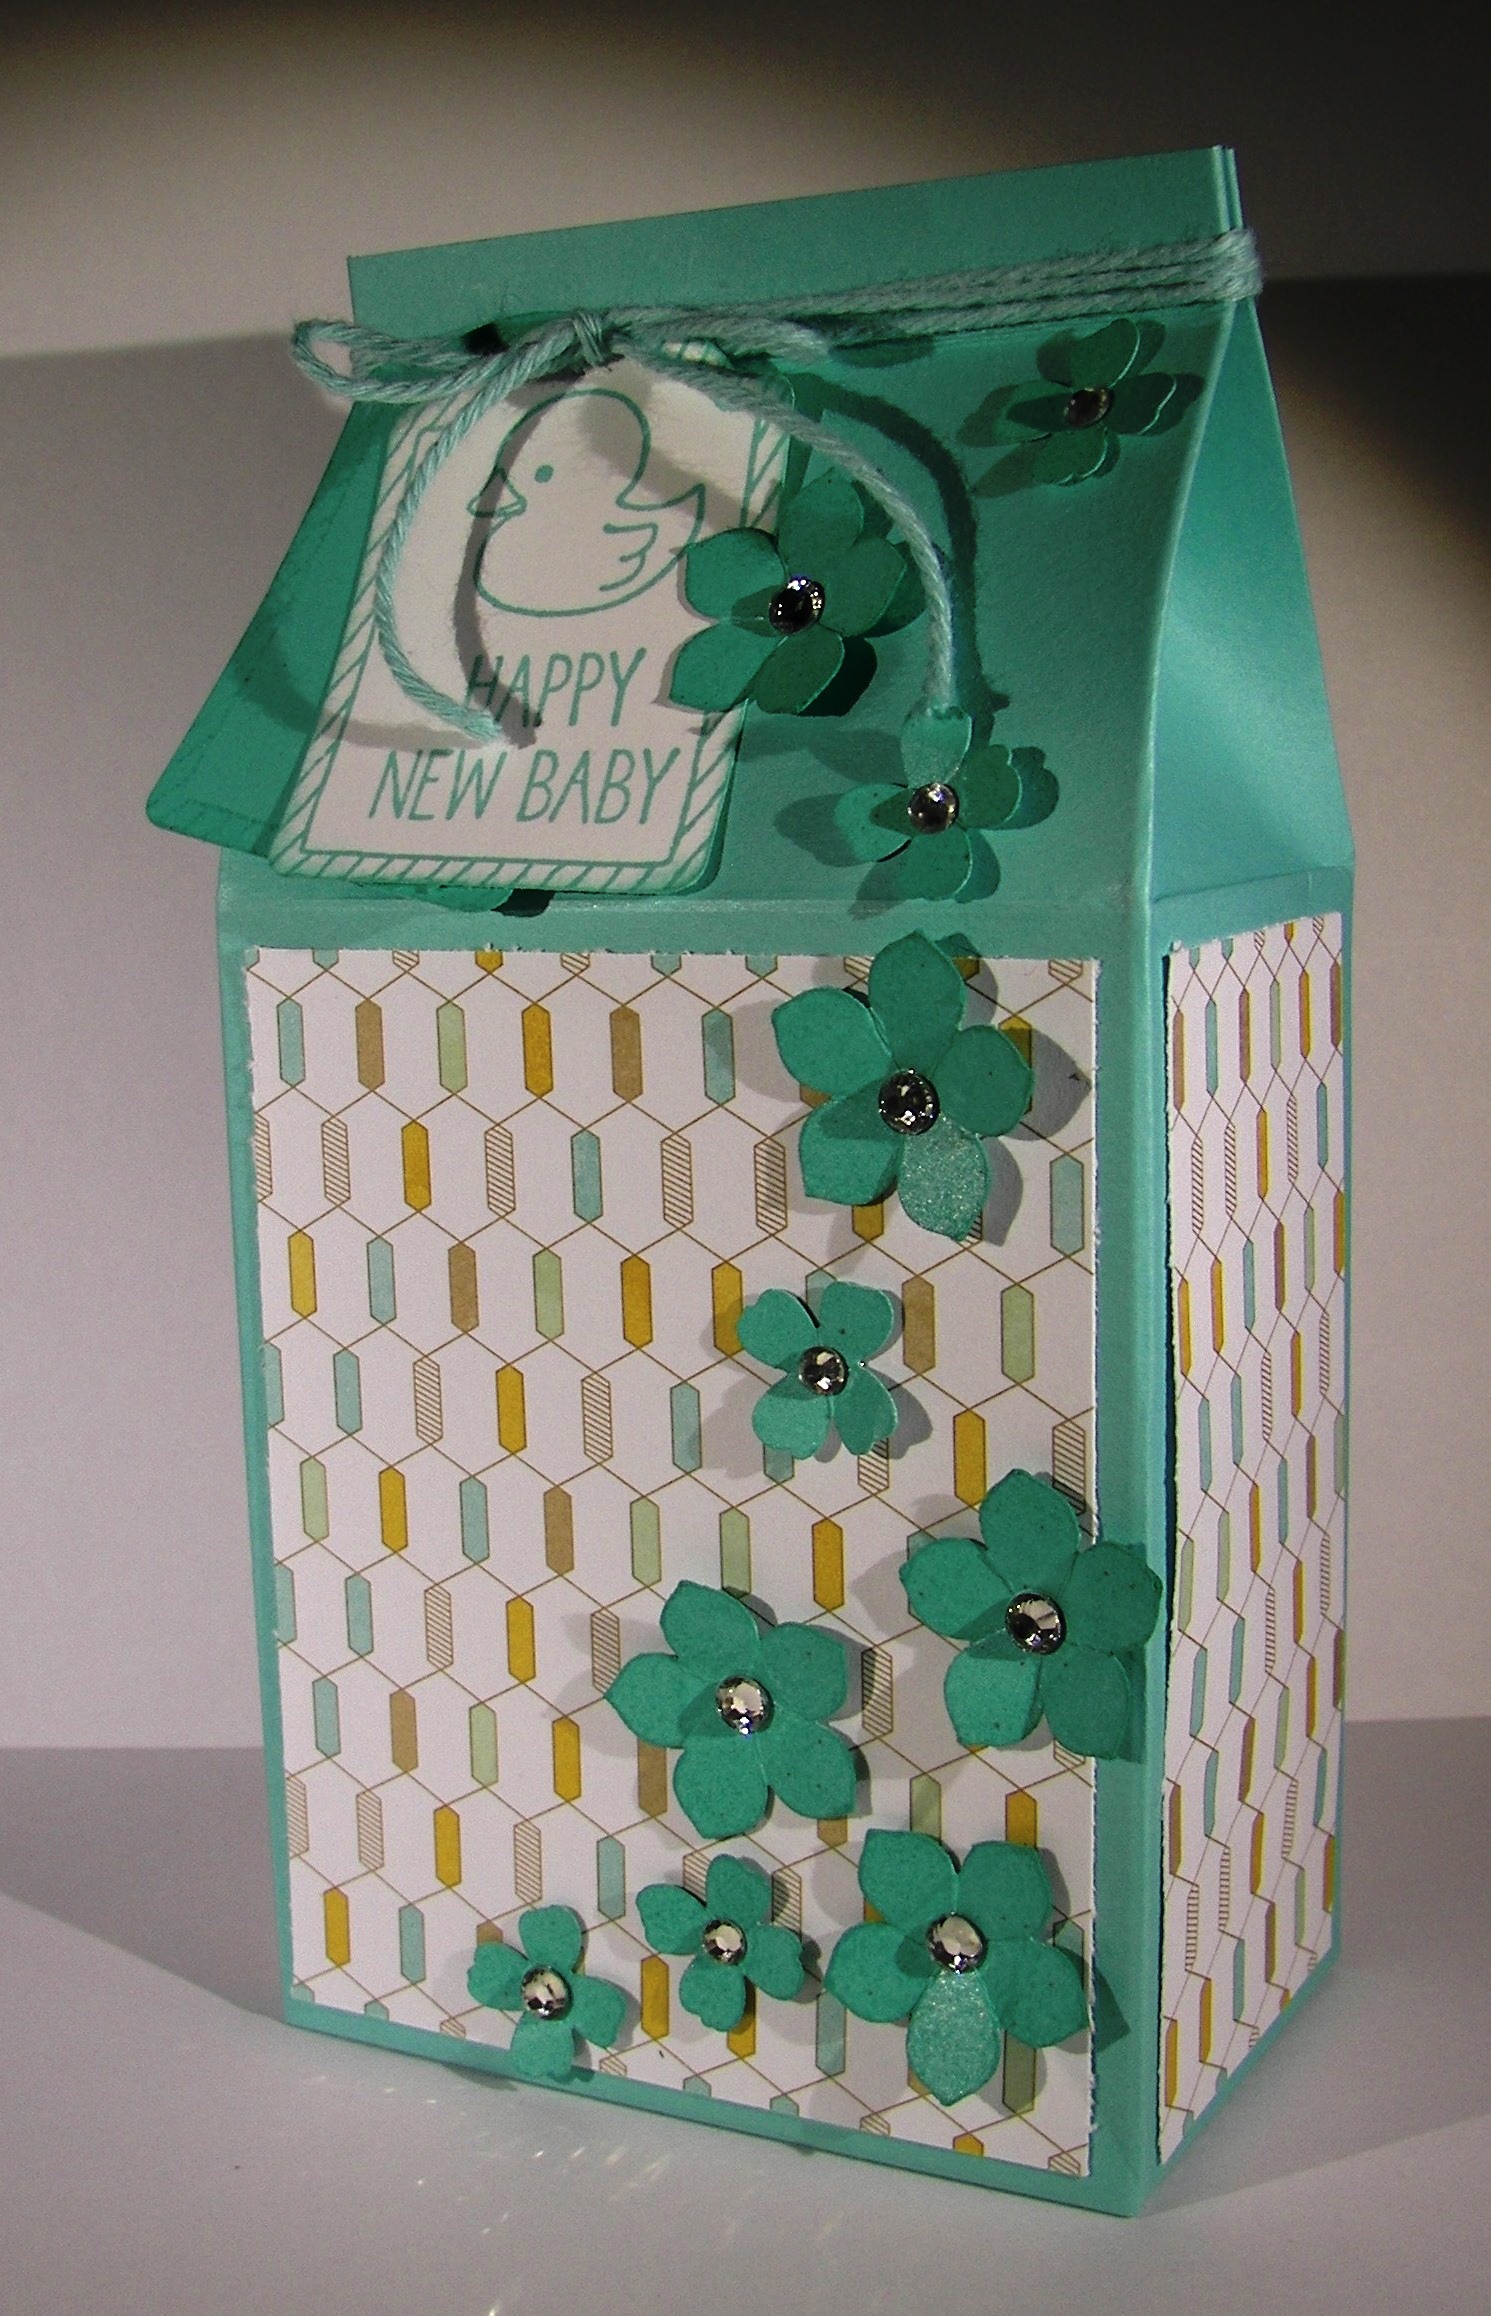
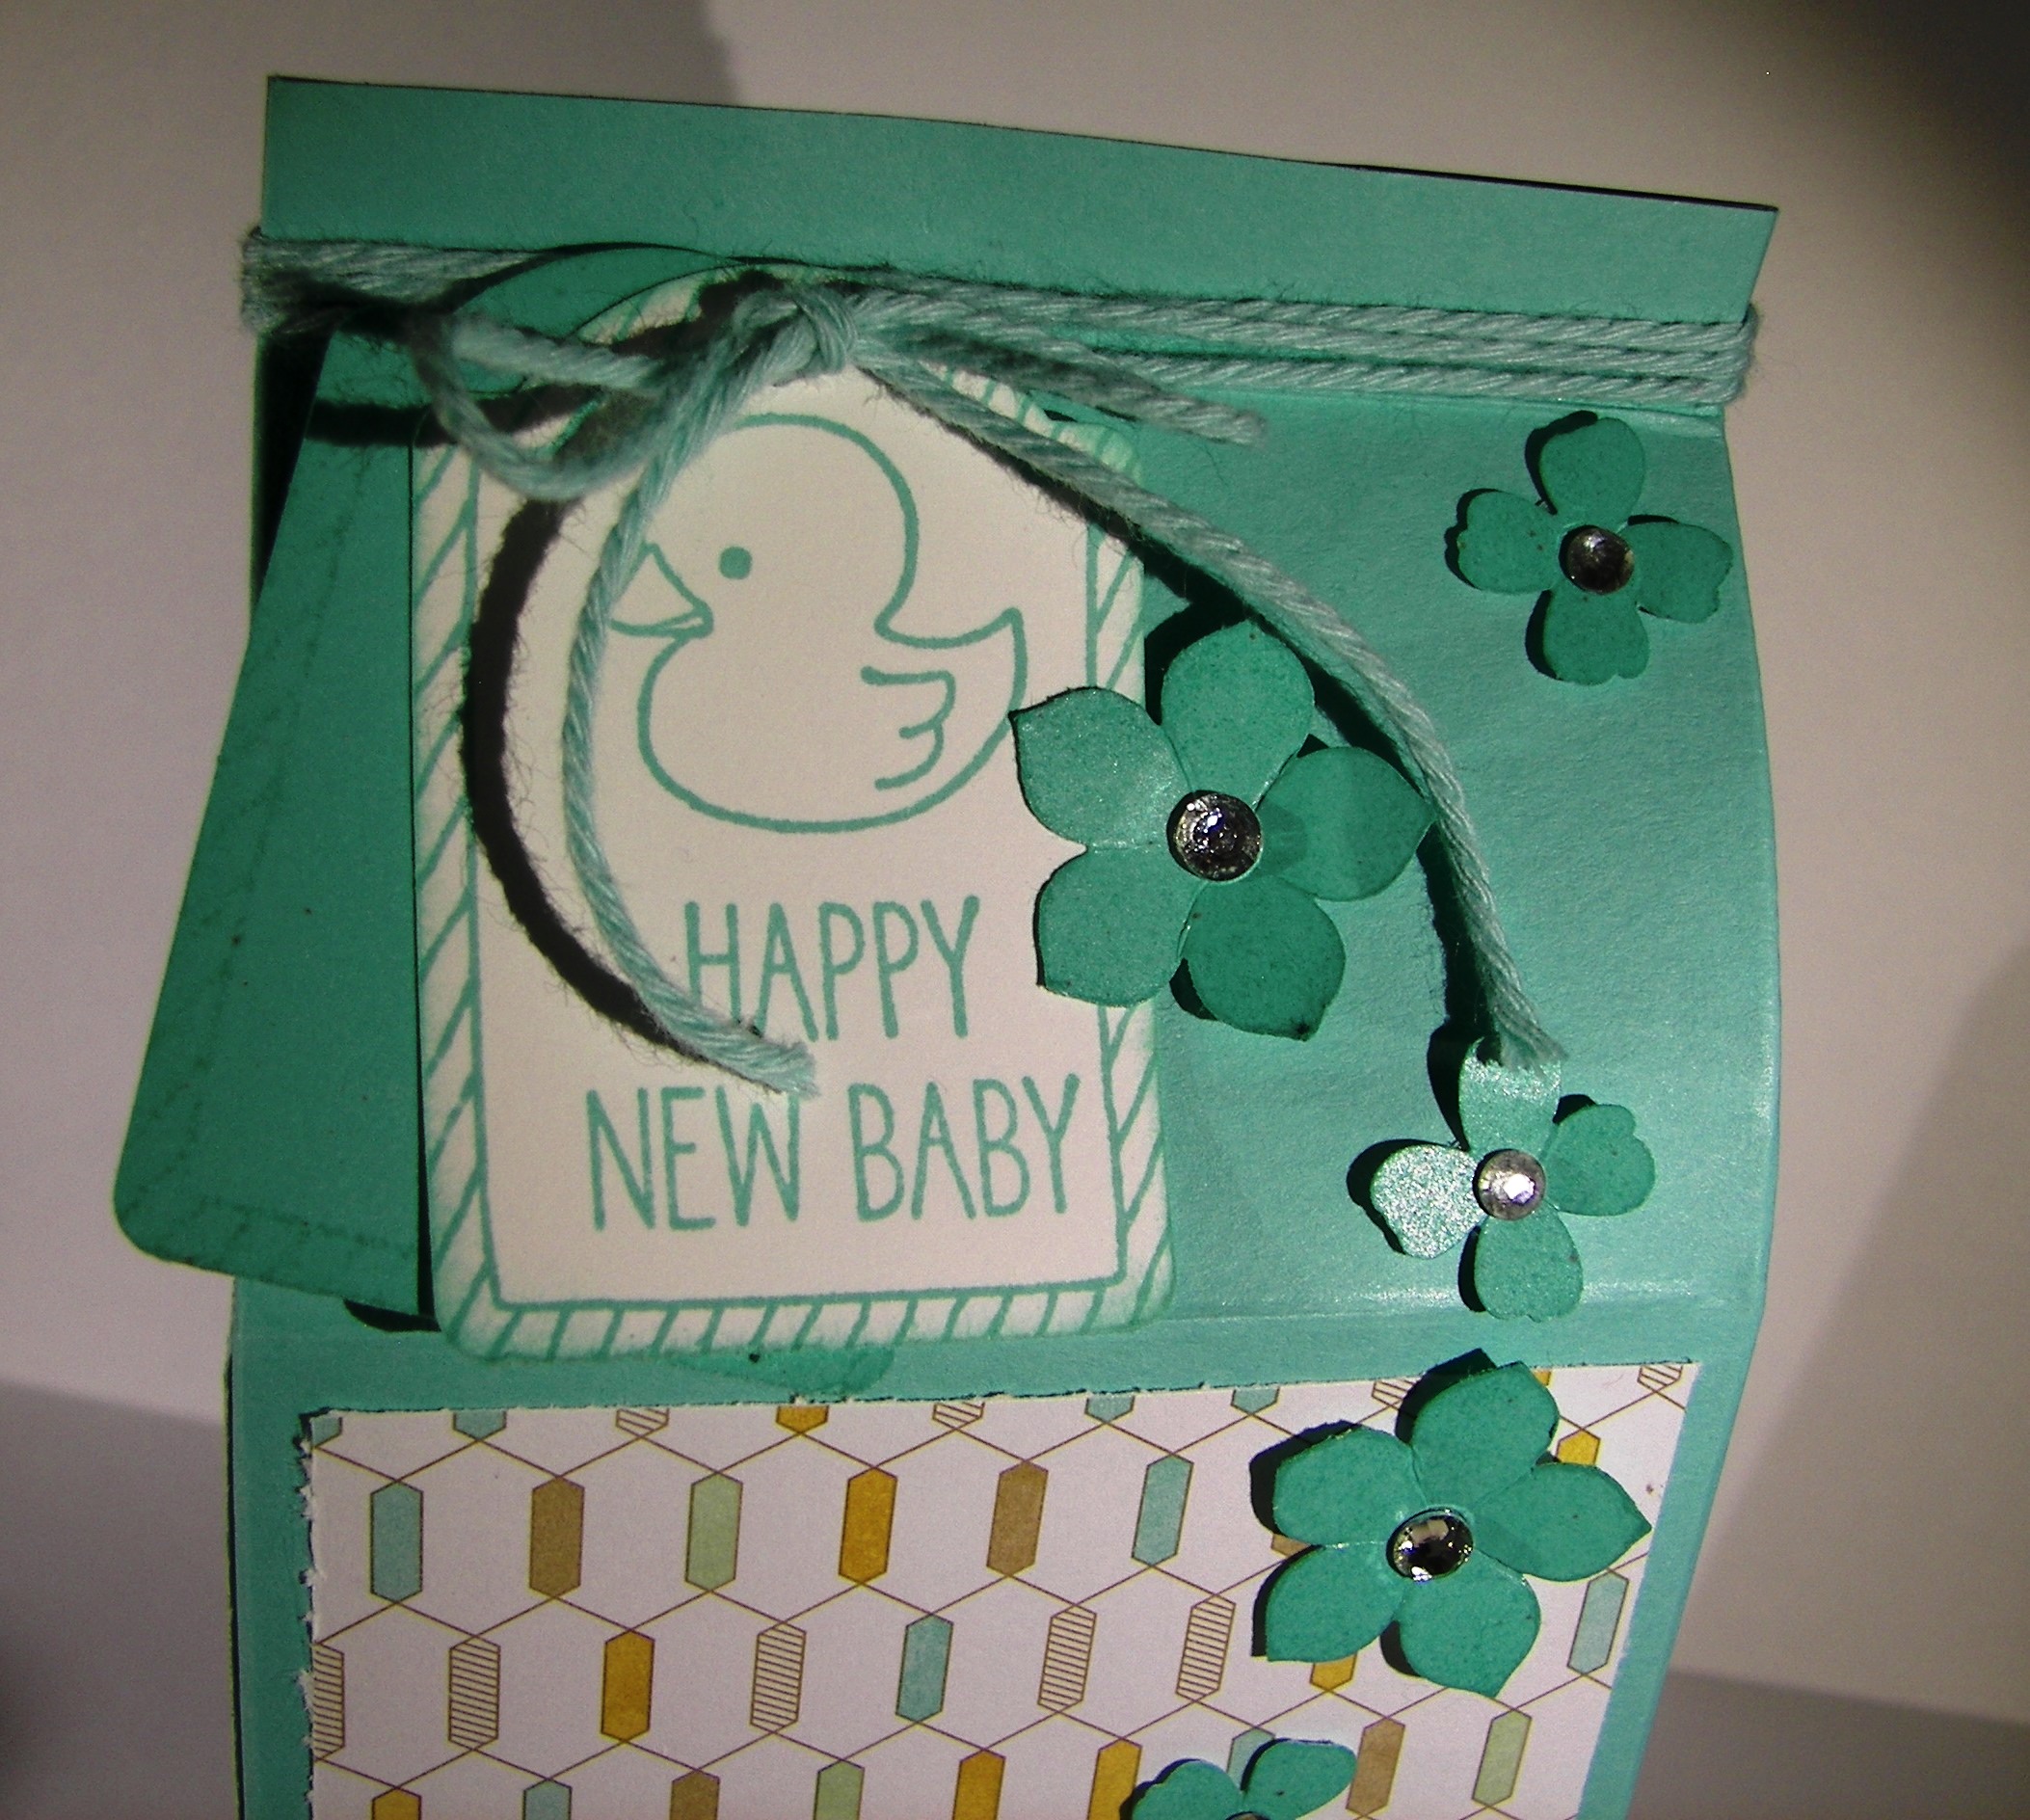
We often associate two as a couple, as in a relationship couple.  Friends of mine are currently working as nannies for a set of twins.  So, how about congratulating a couple on the birth of their twins?  Get it?  For the new two?

For the New Two

Well,  I thought it was very clever indeed.  There are plenty of gift ideas for baby boys and girls, but how about those twins?  It will take longer for triplets and such, but I am sure there is a way.

 For the New Two


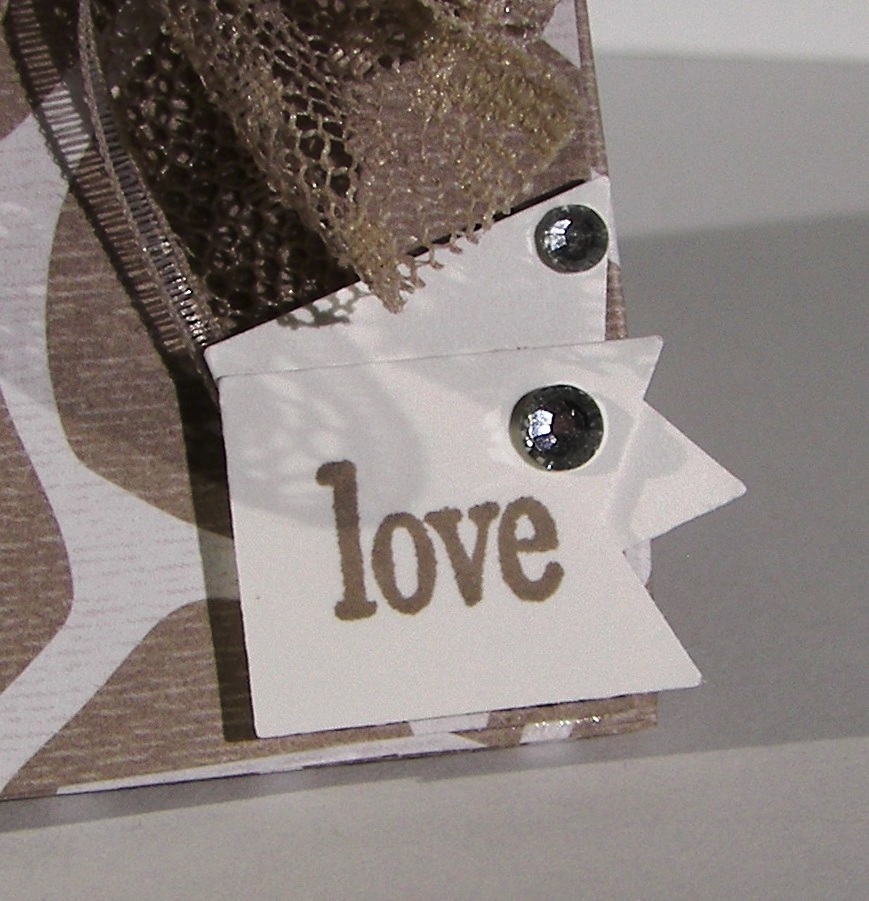
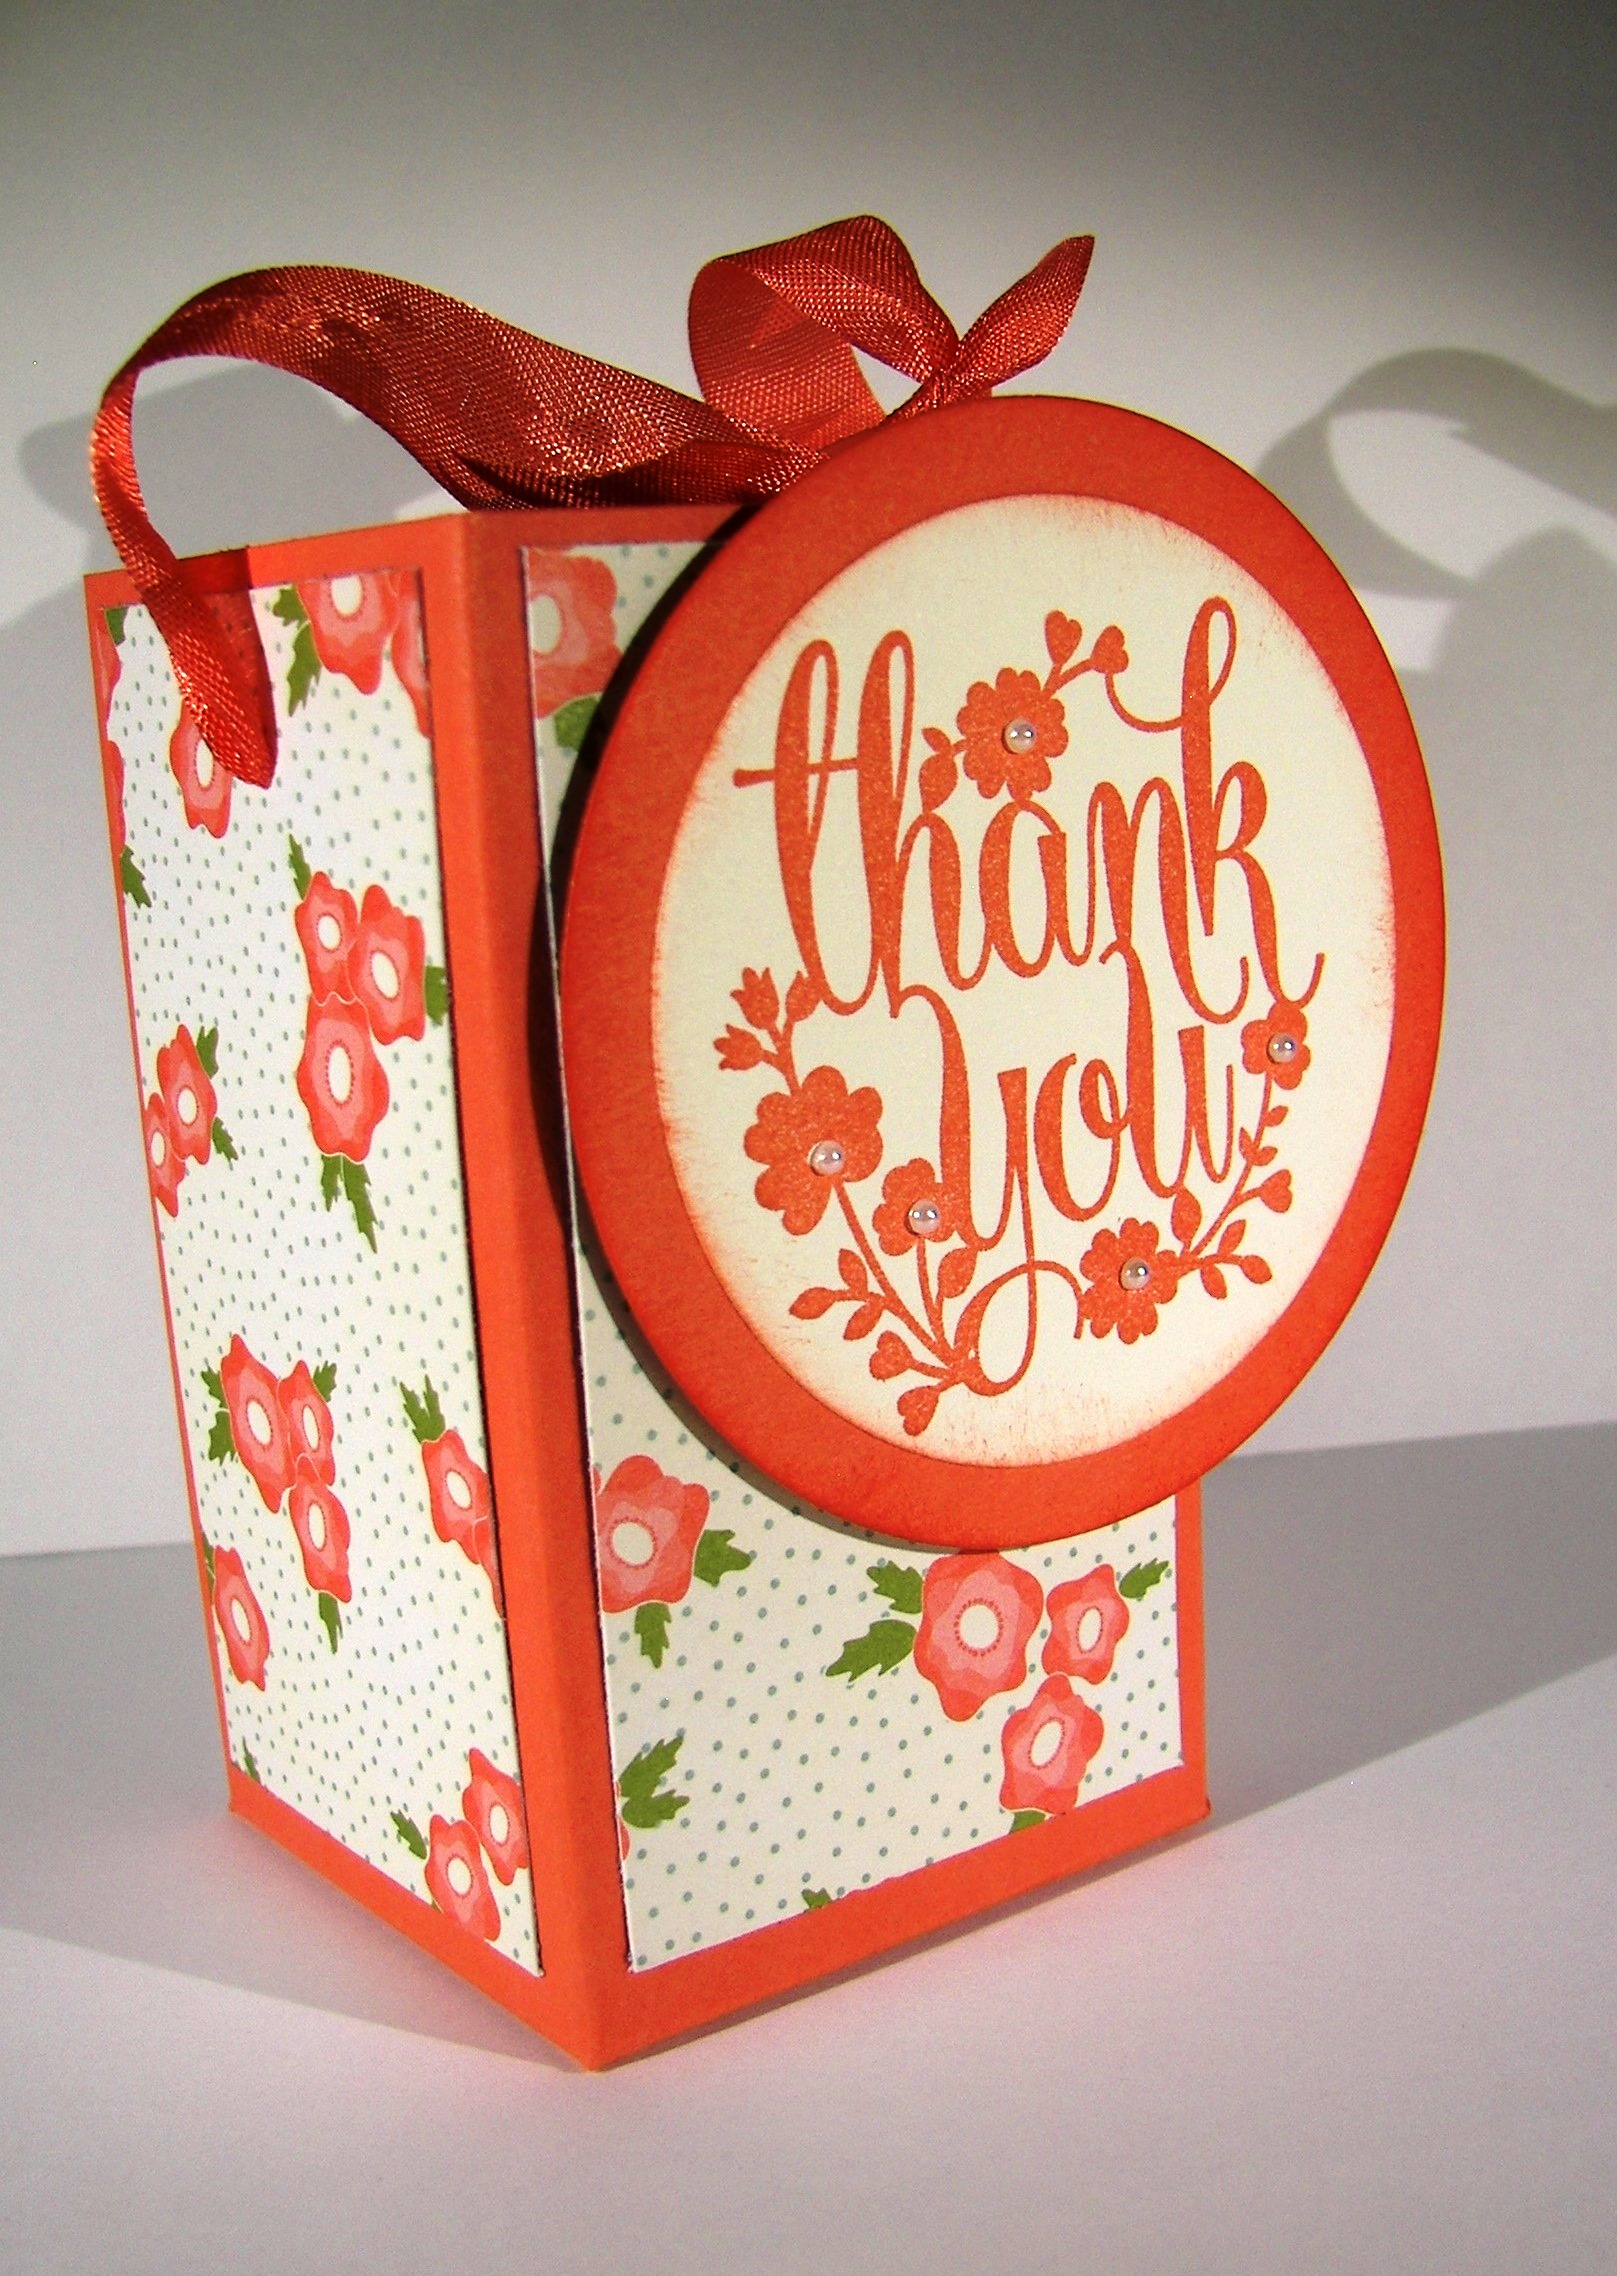
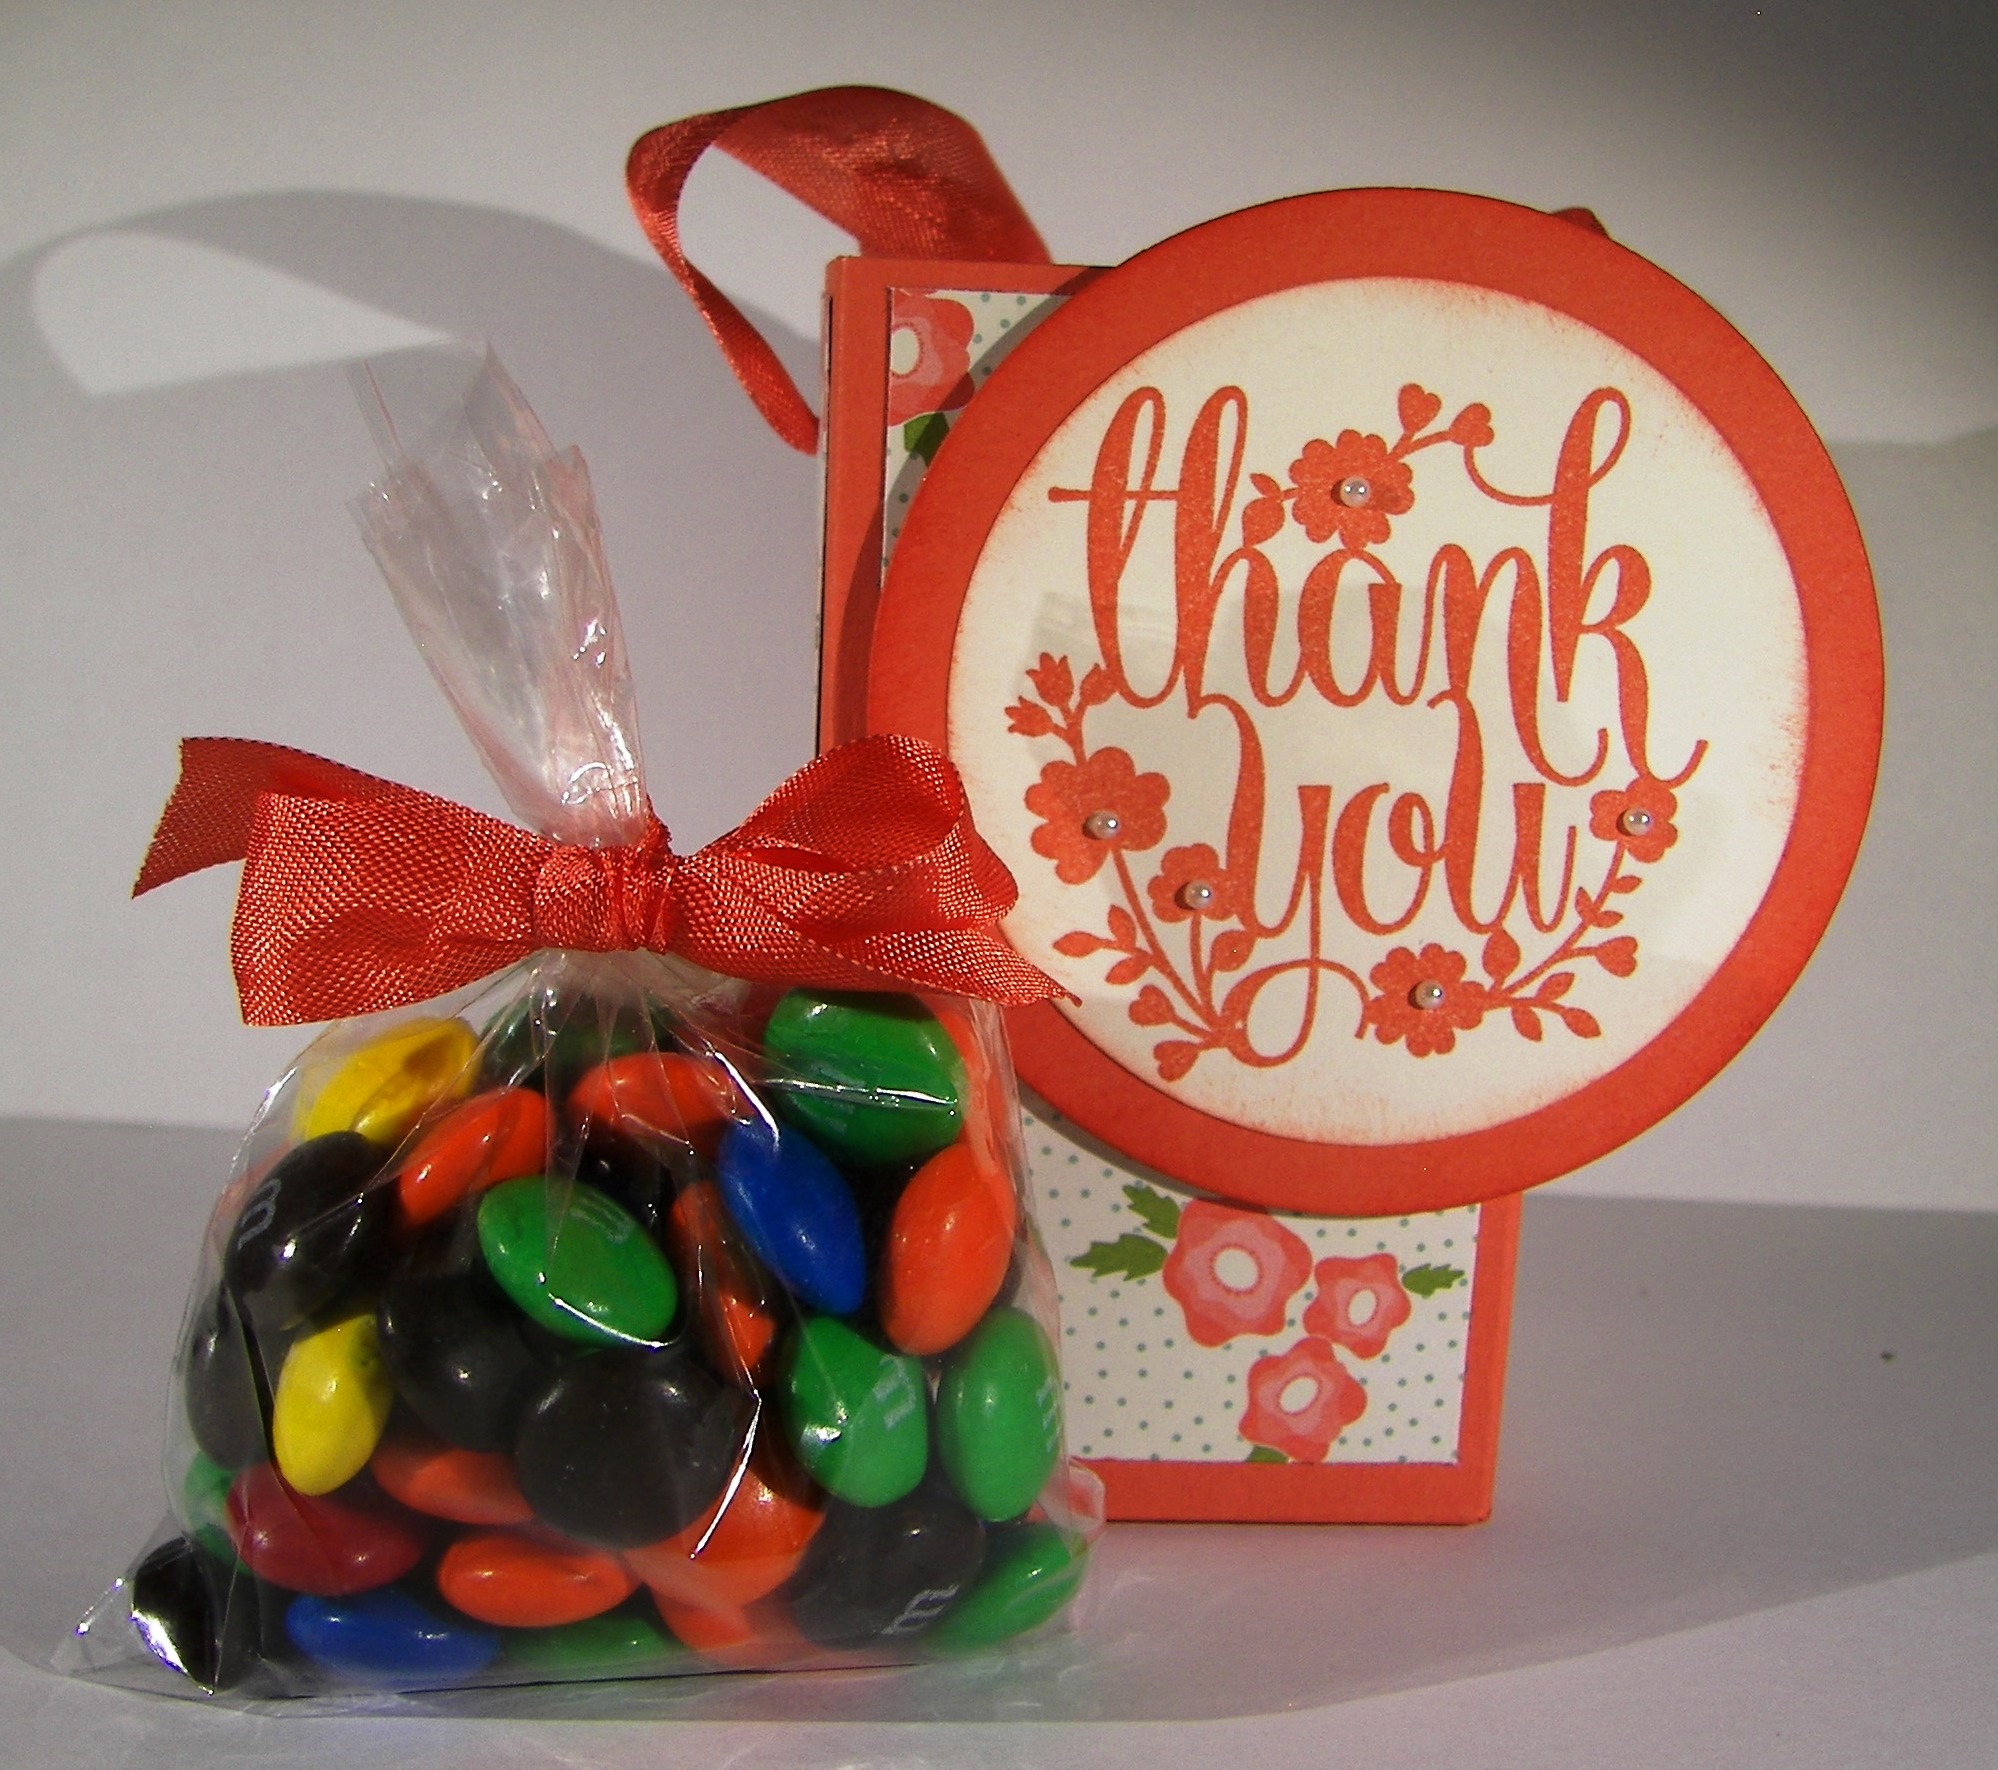
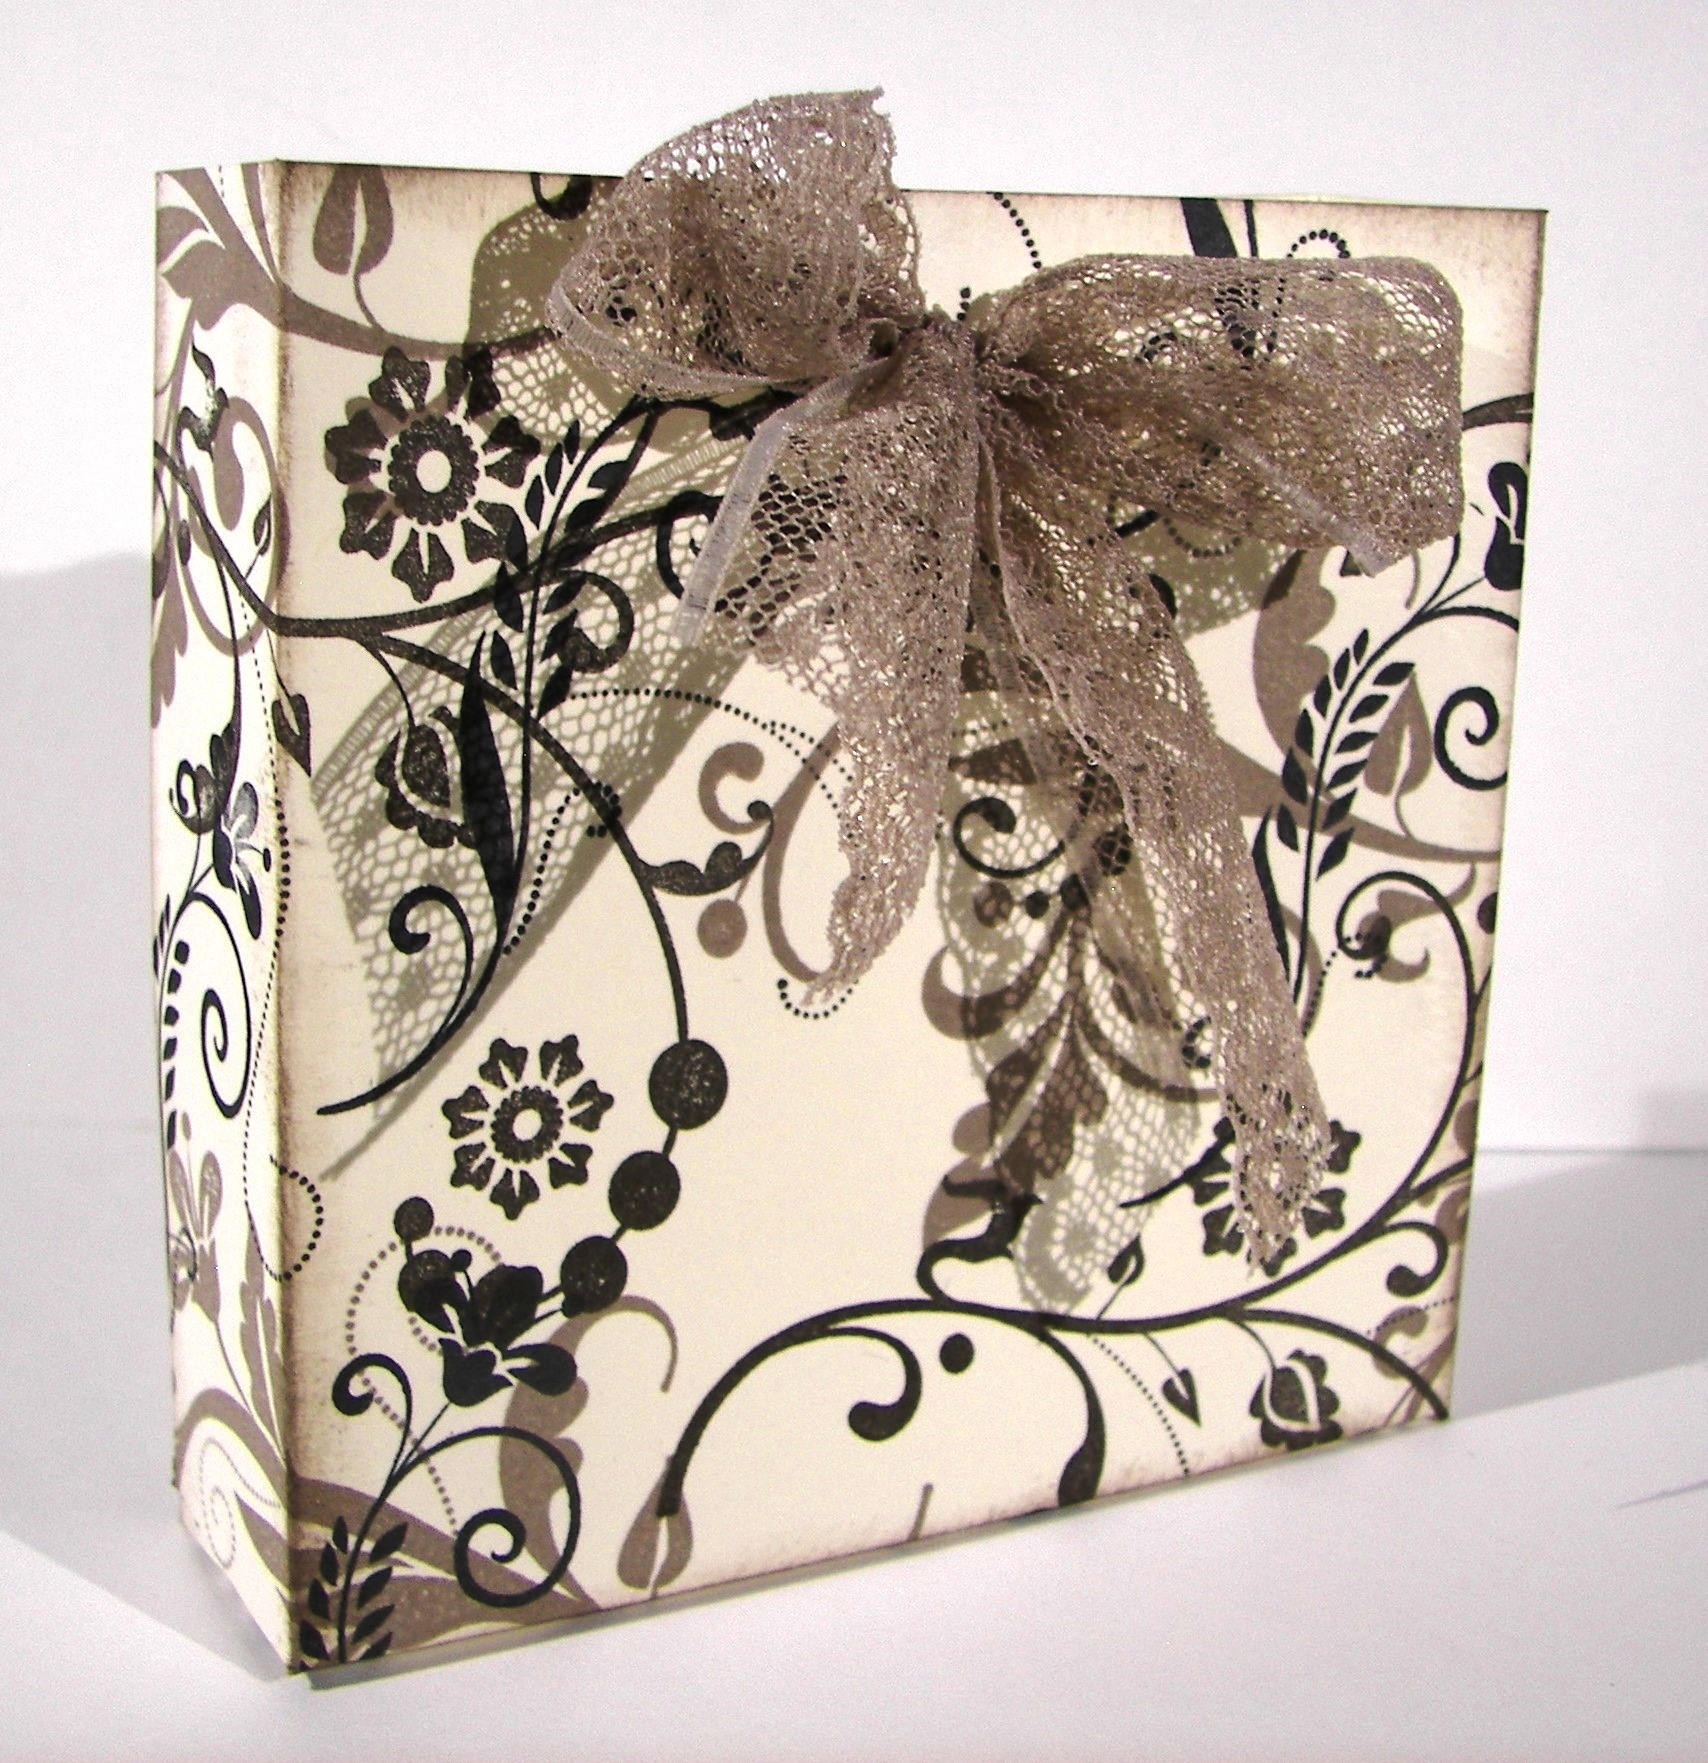
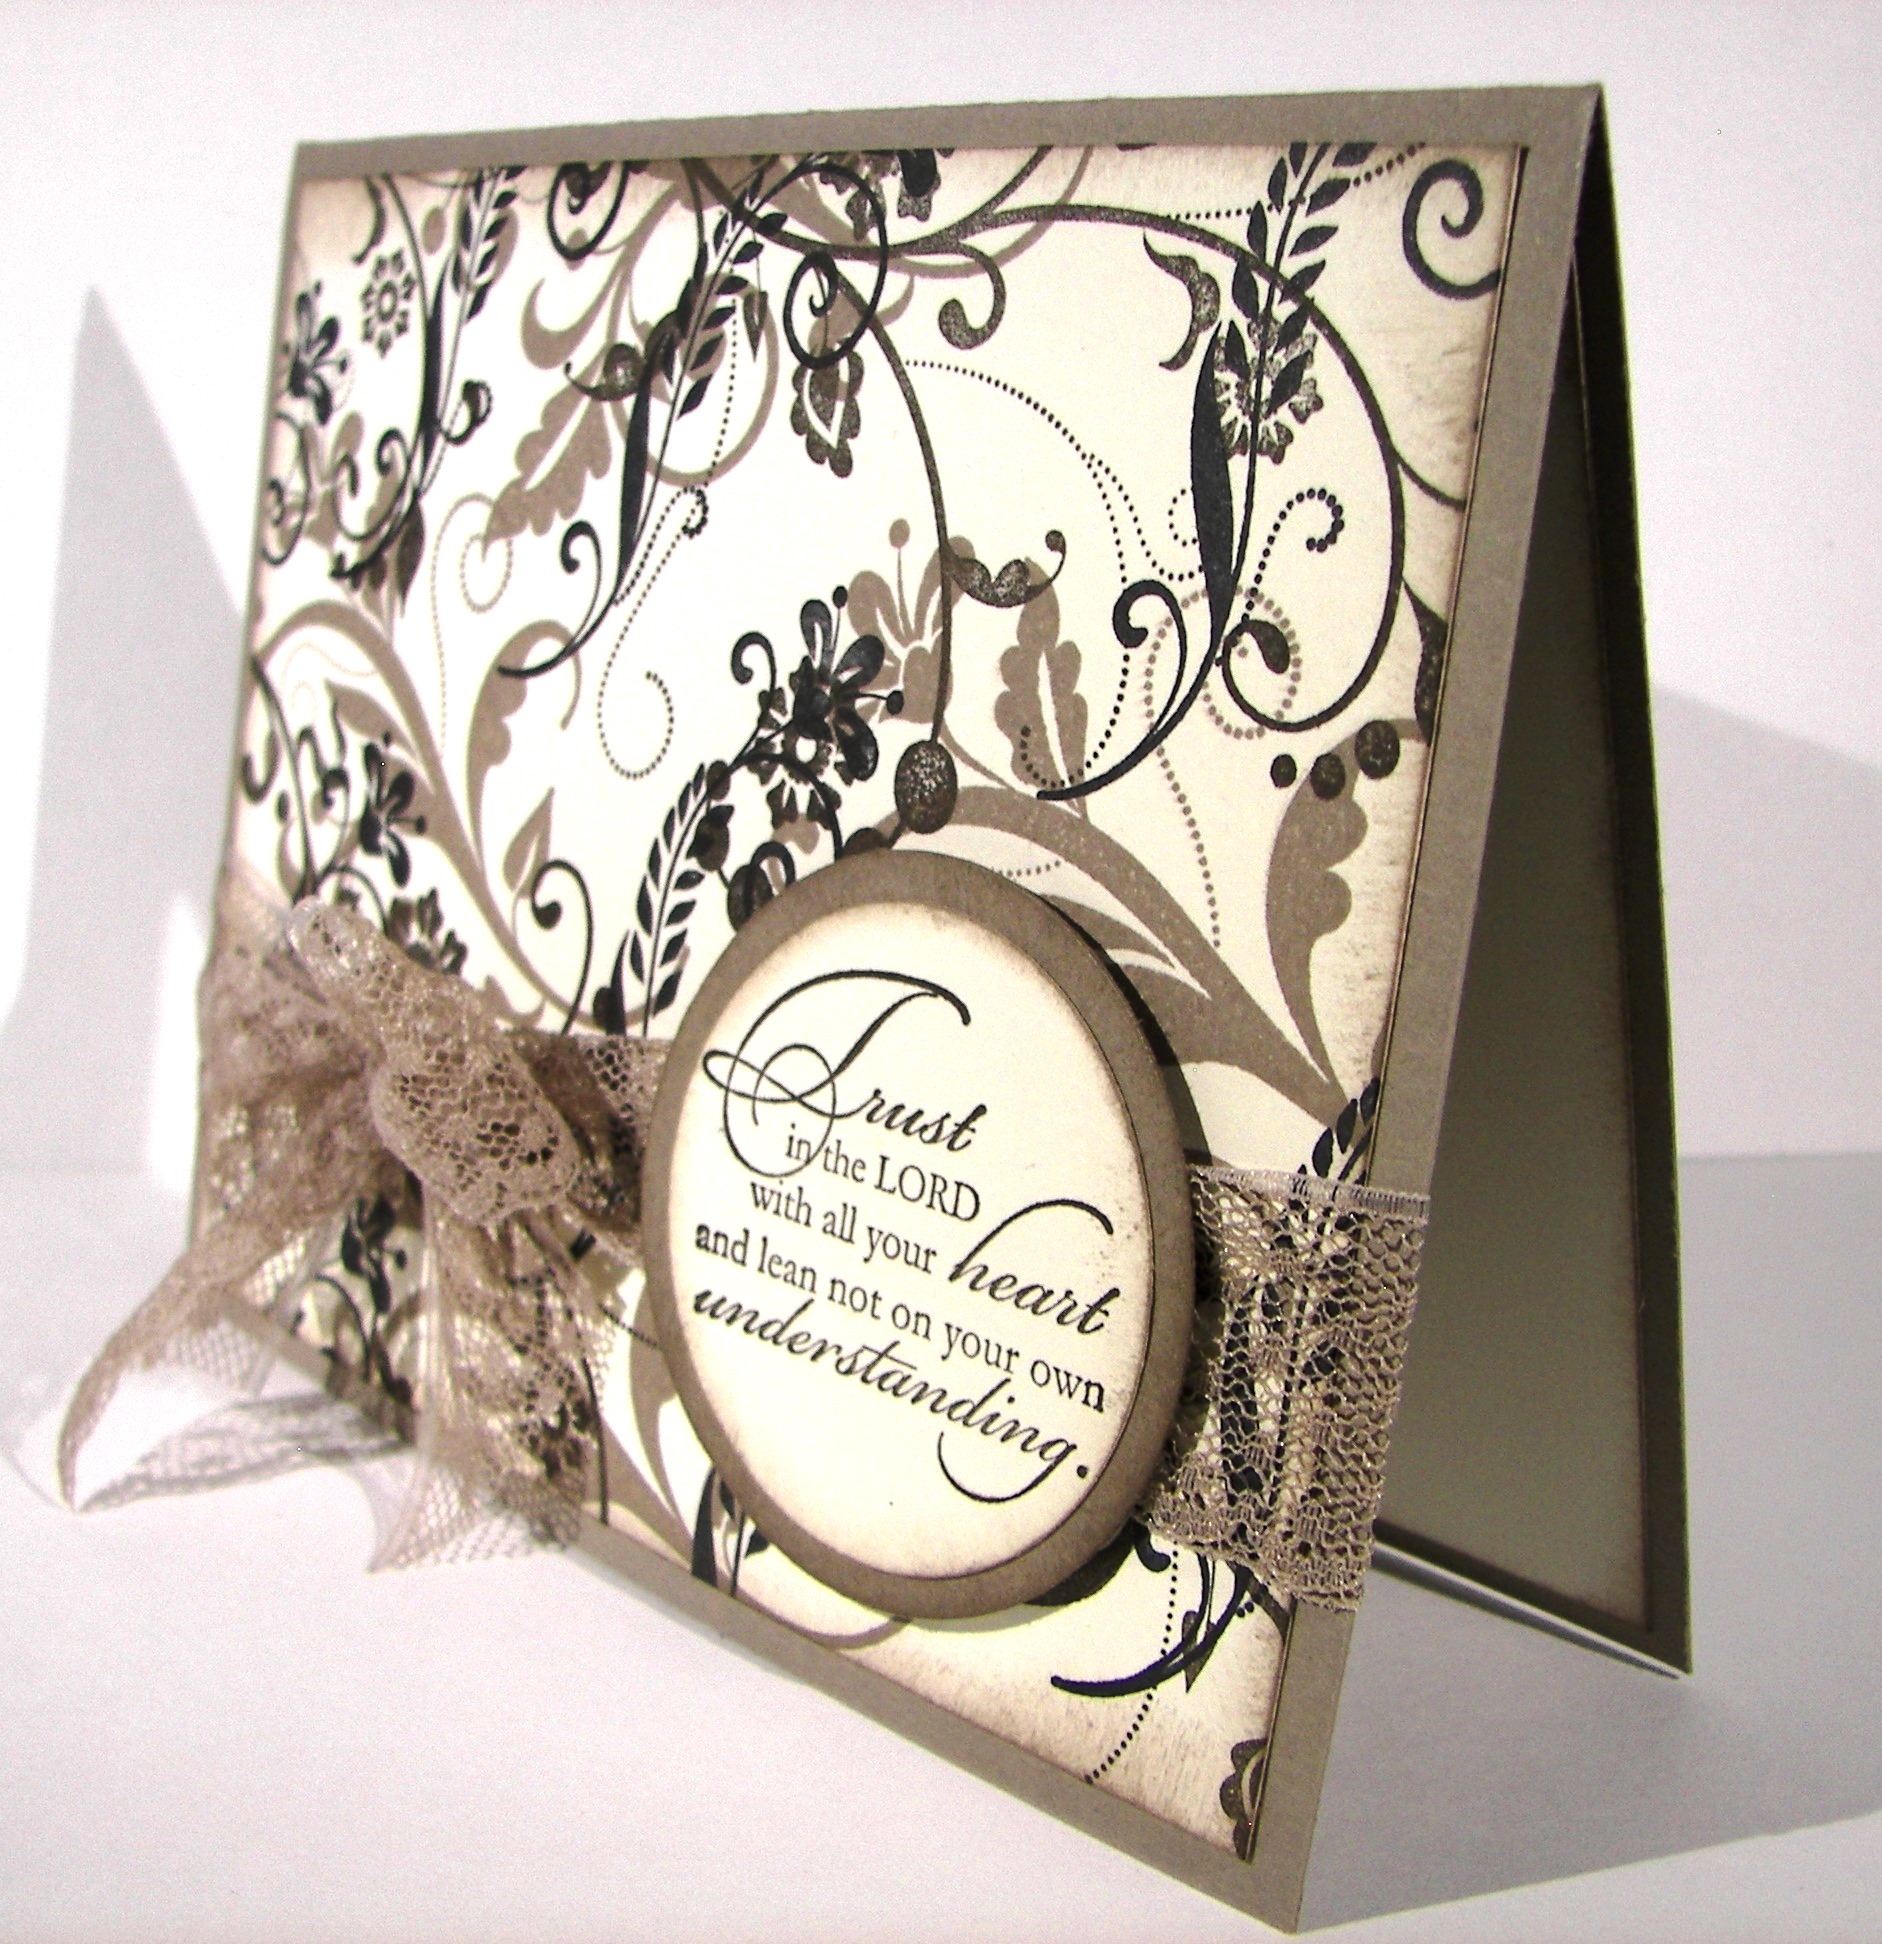
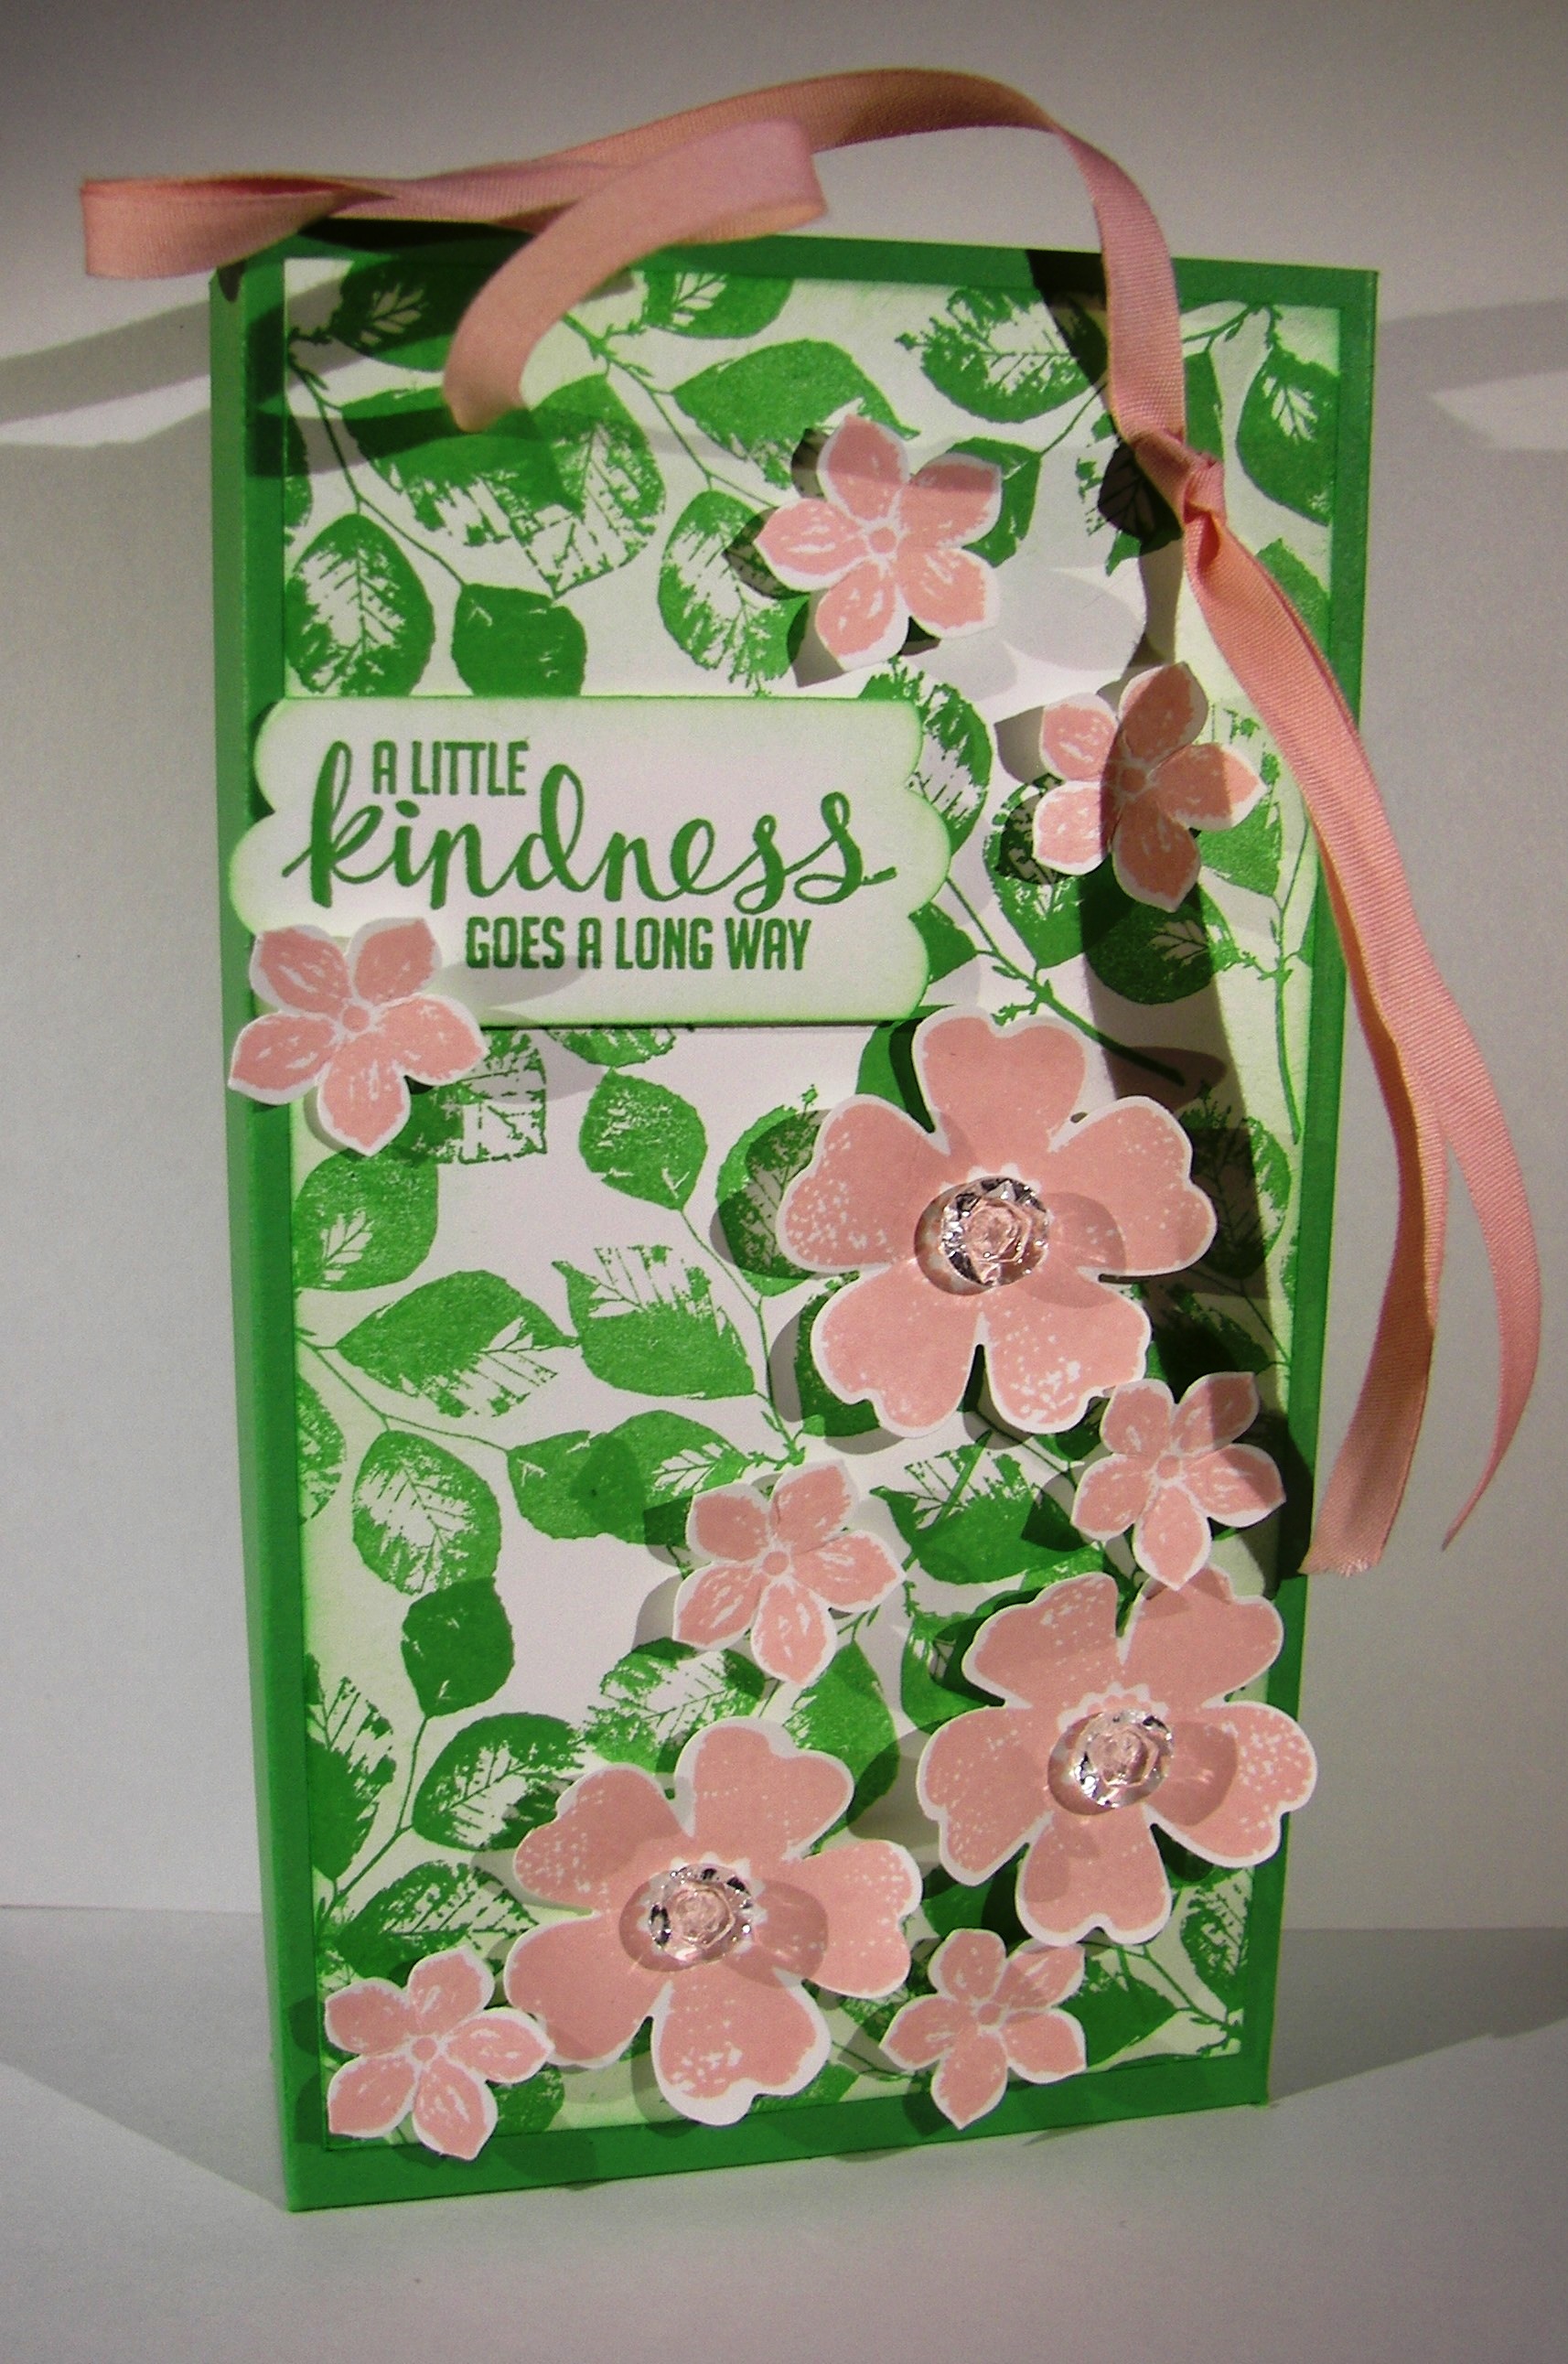
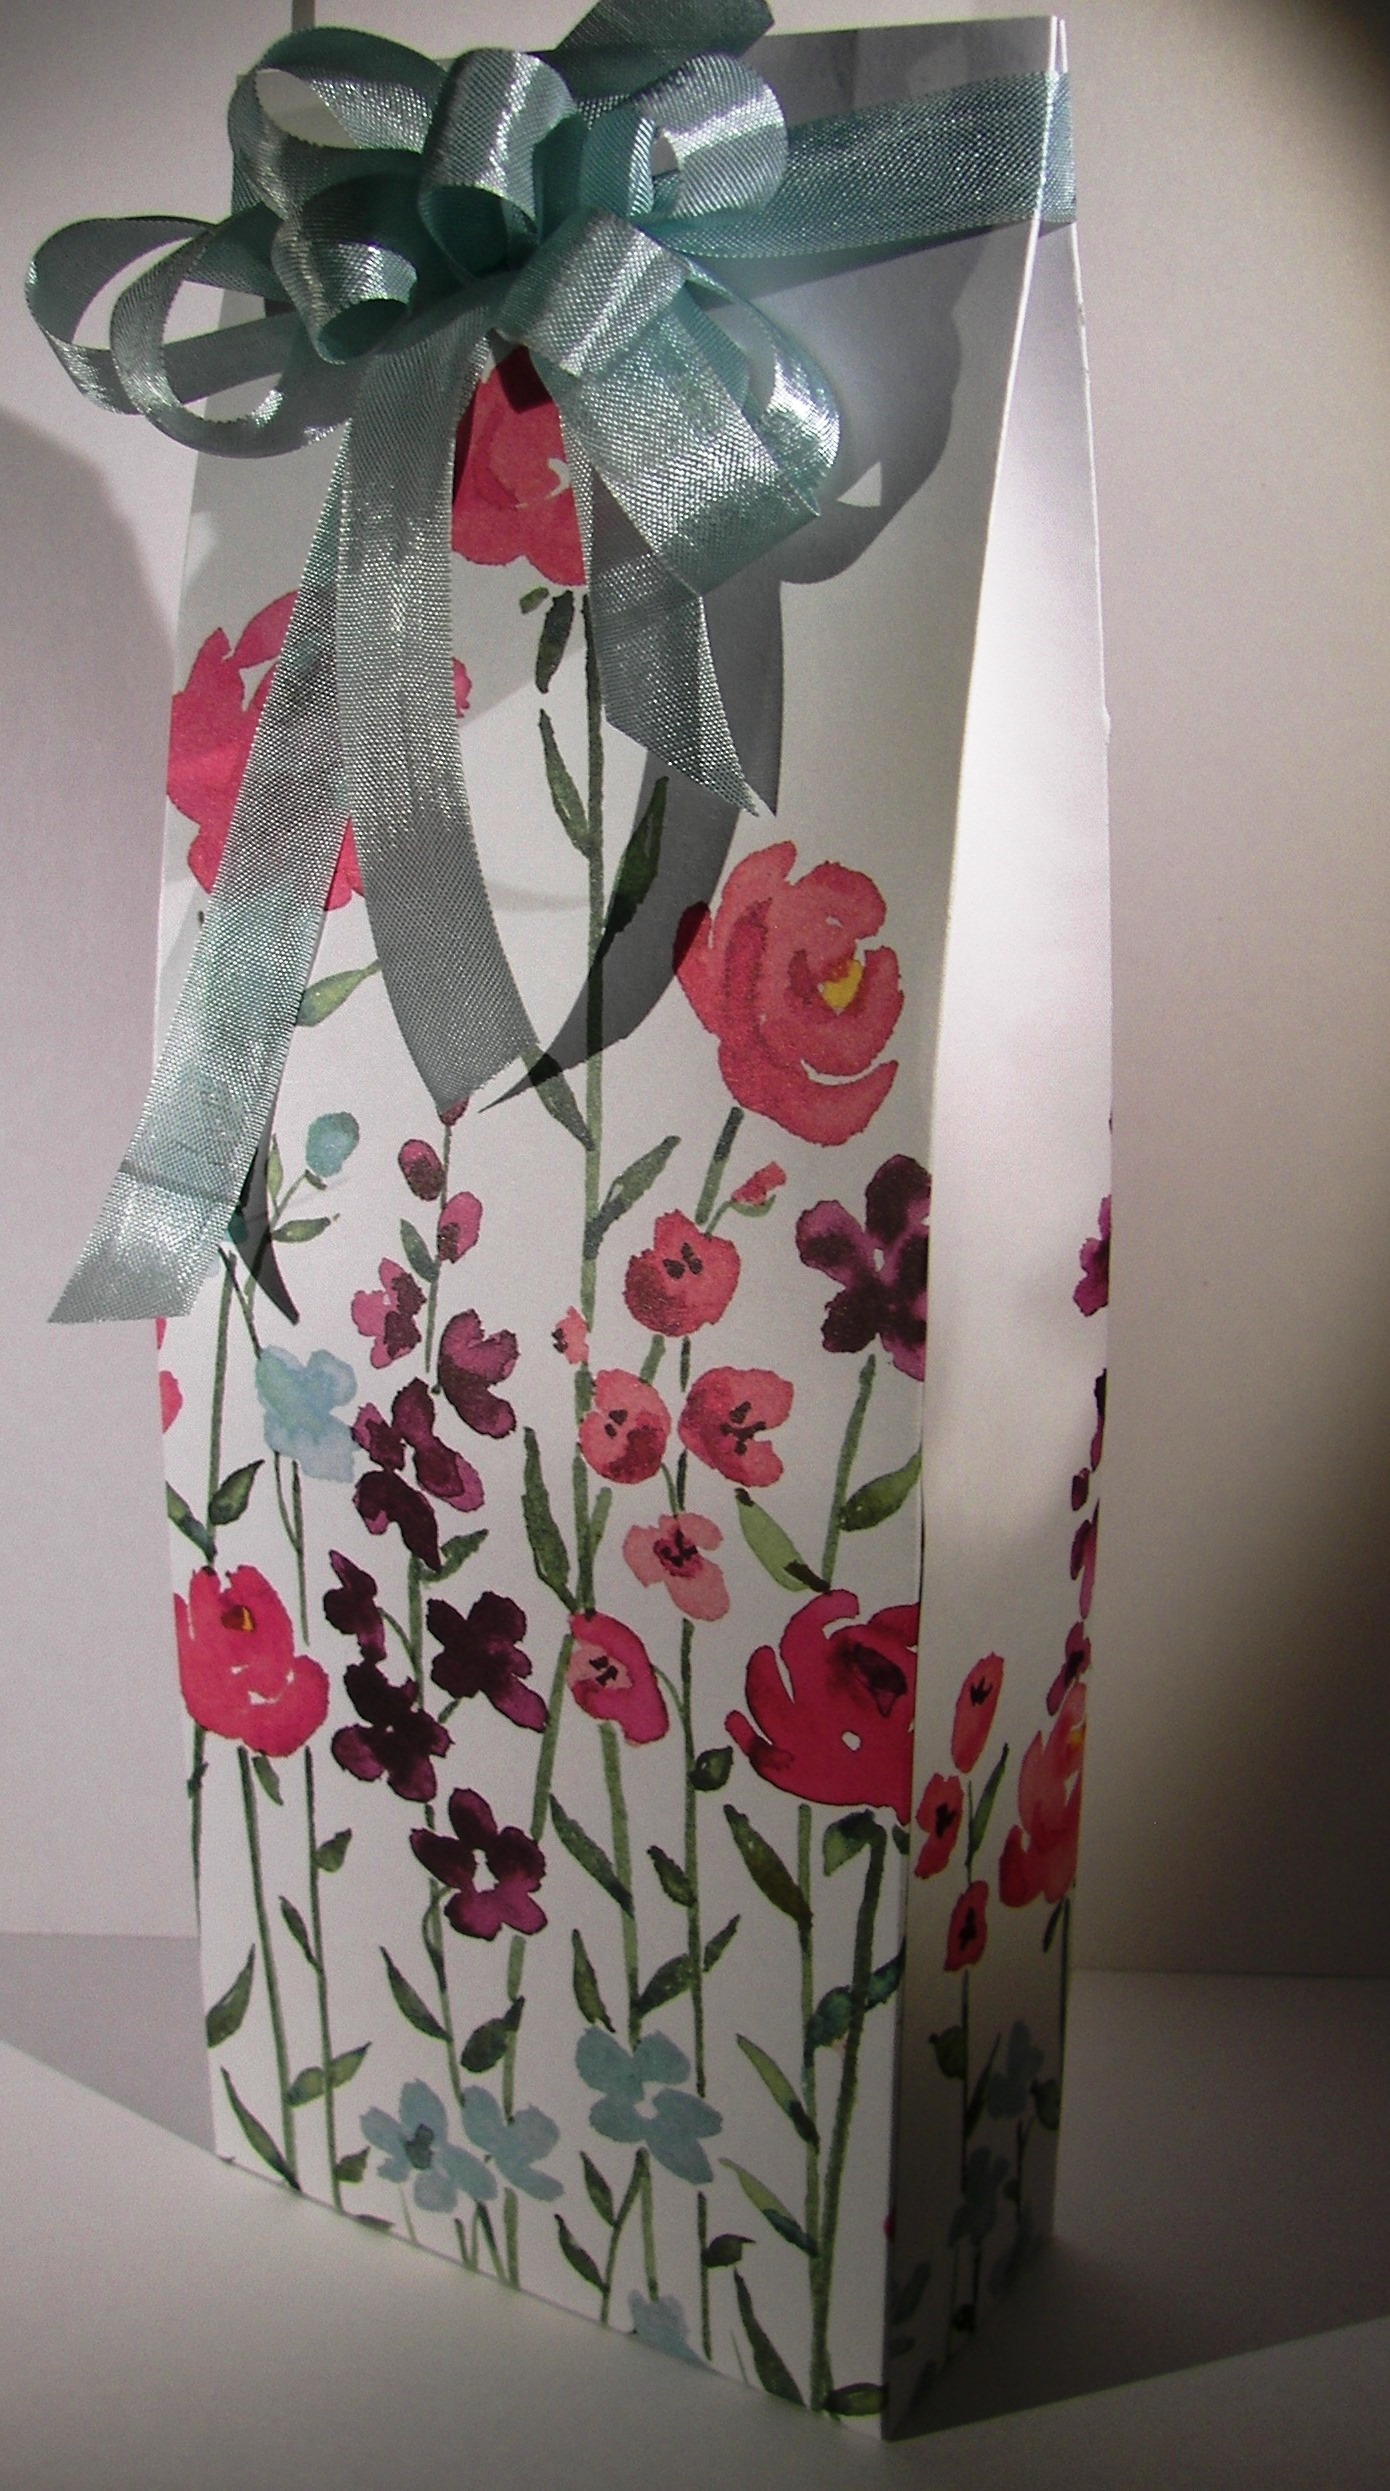
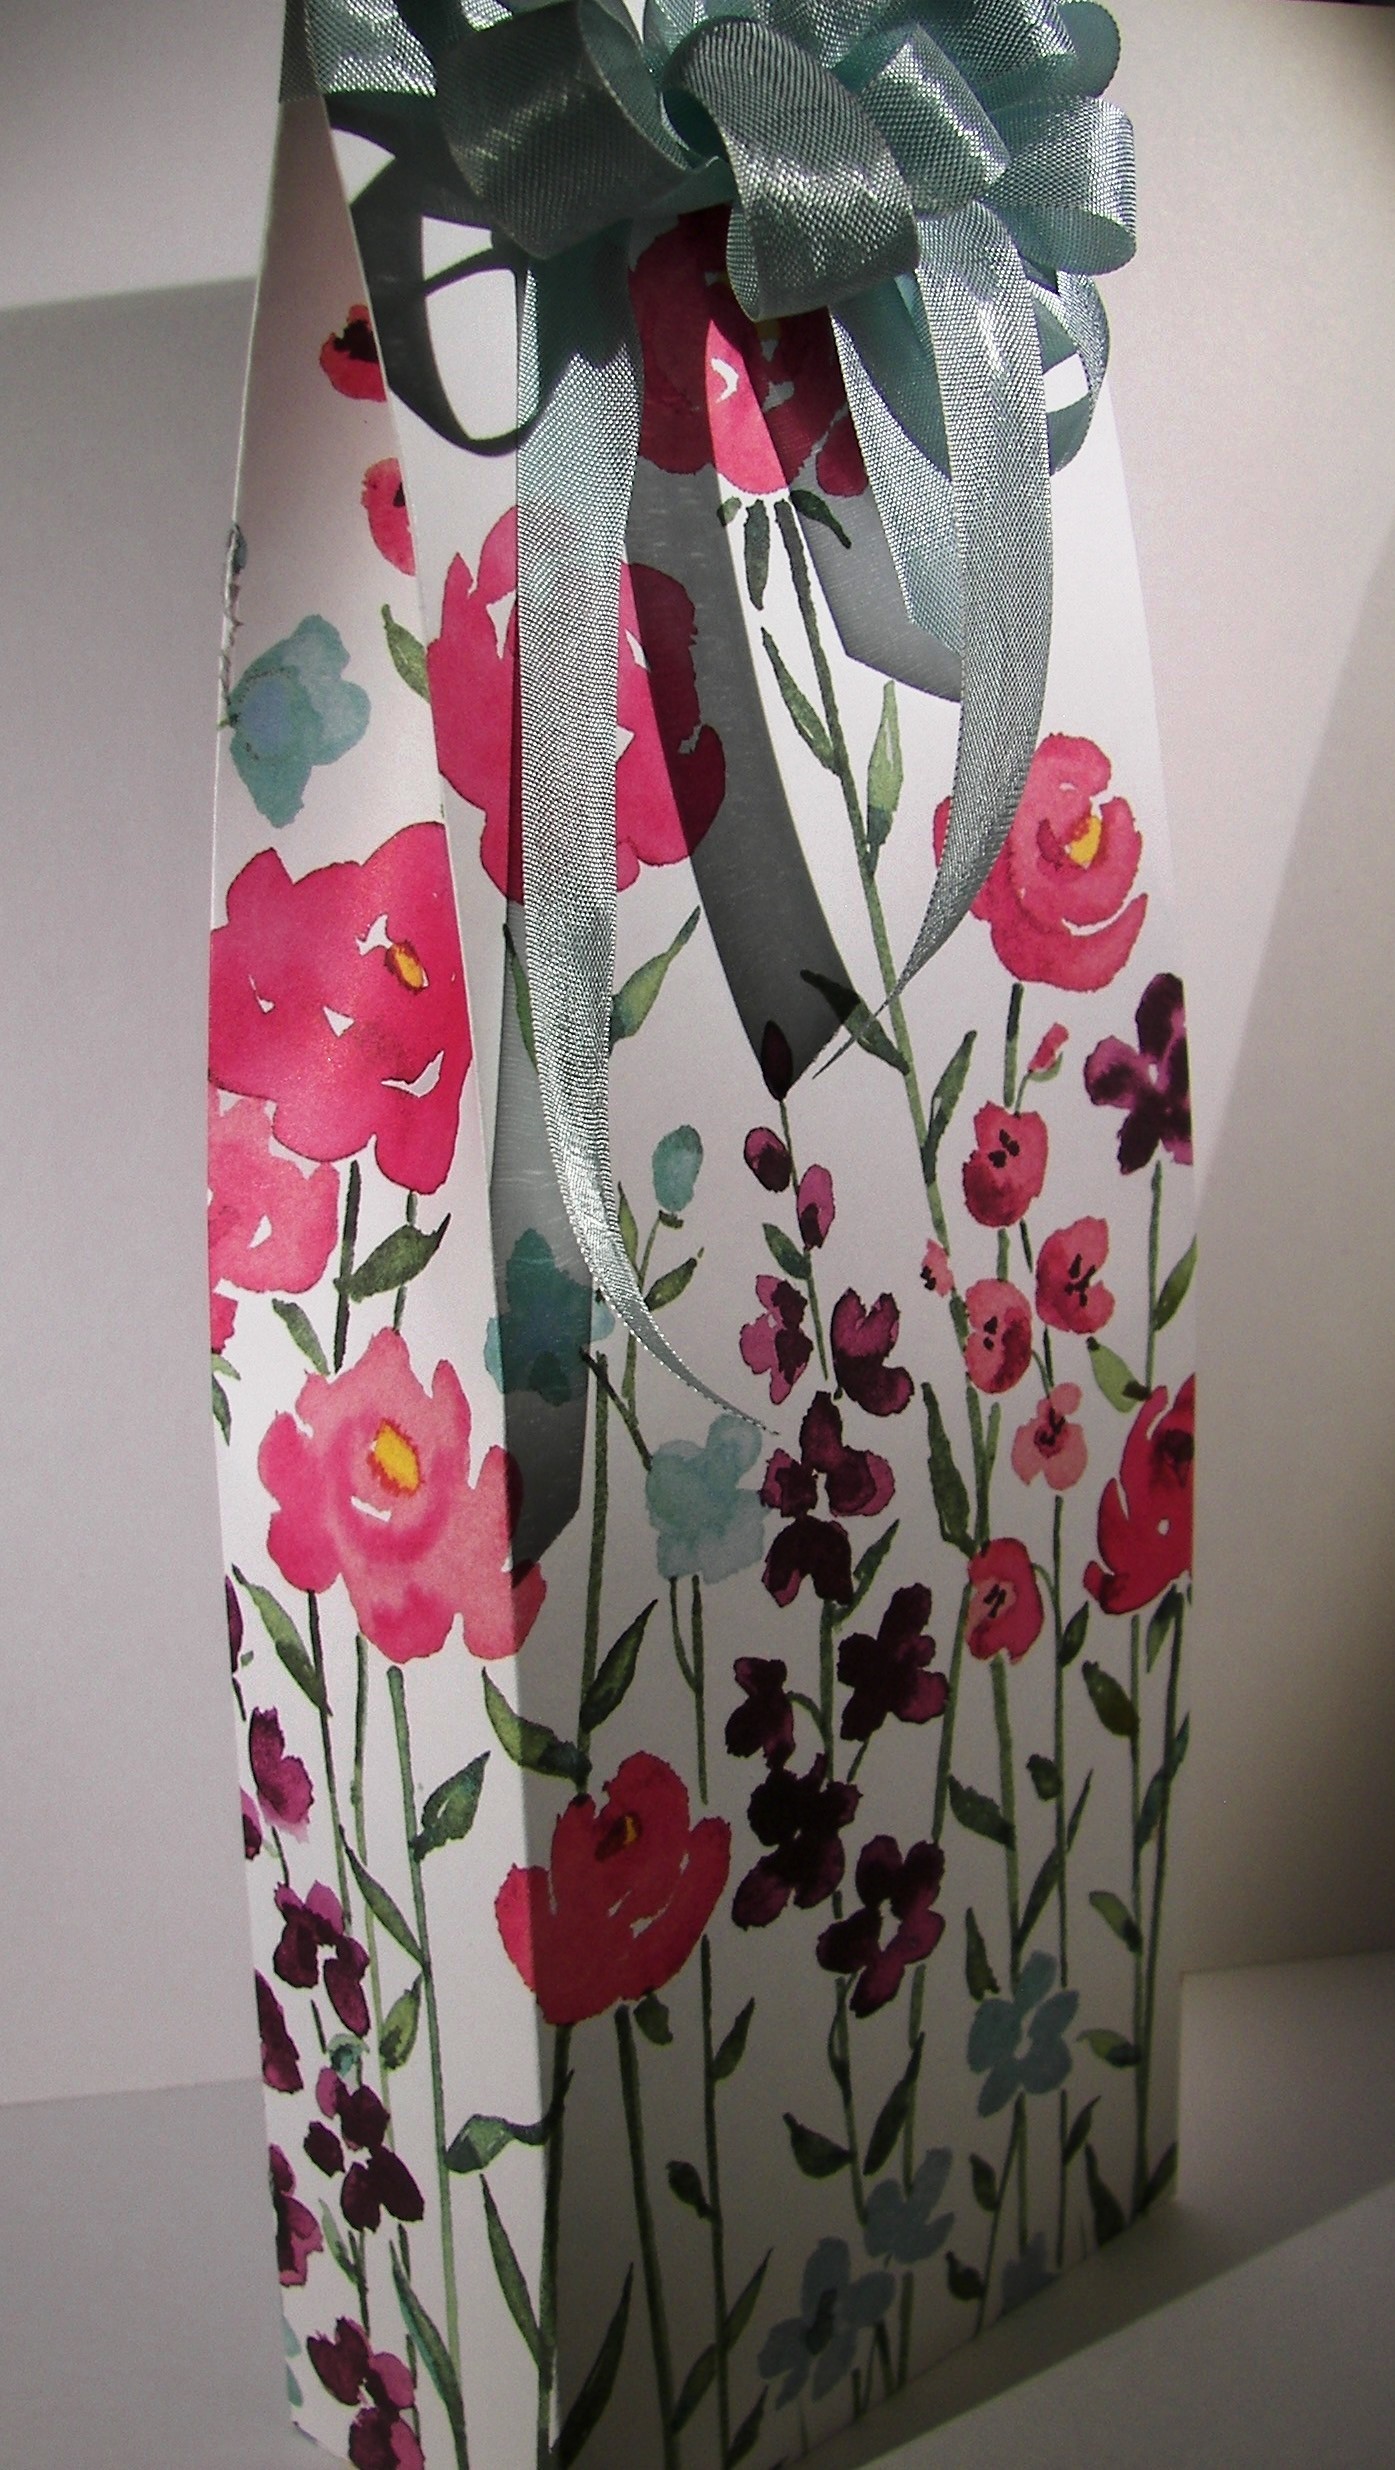
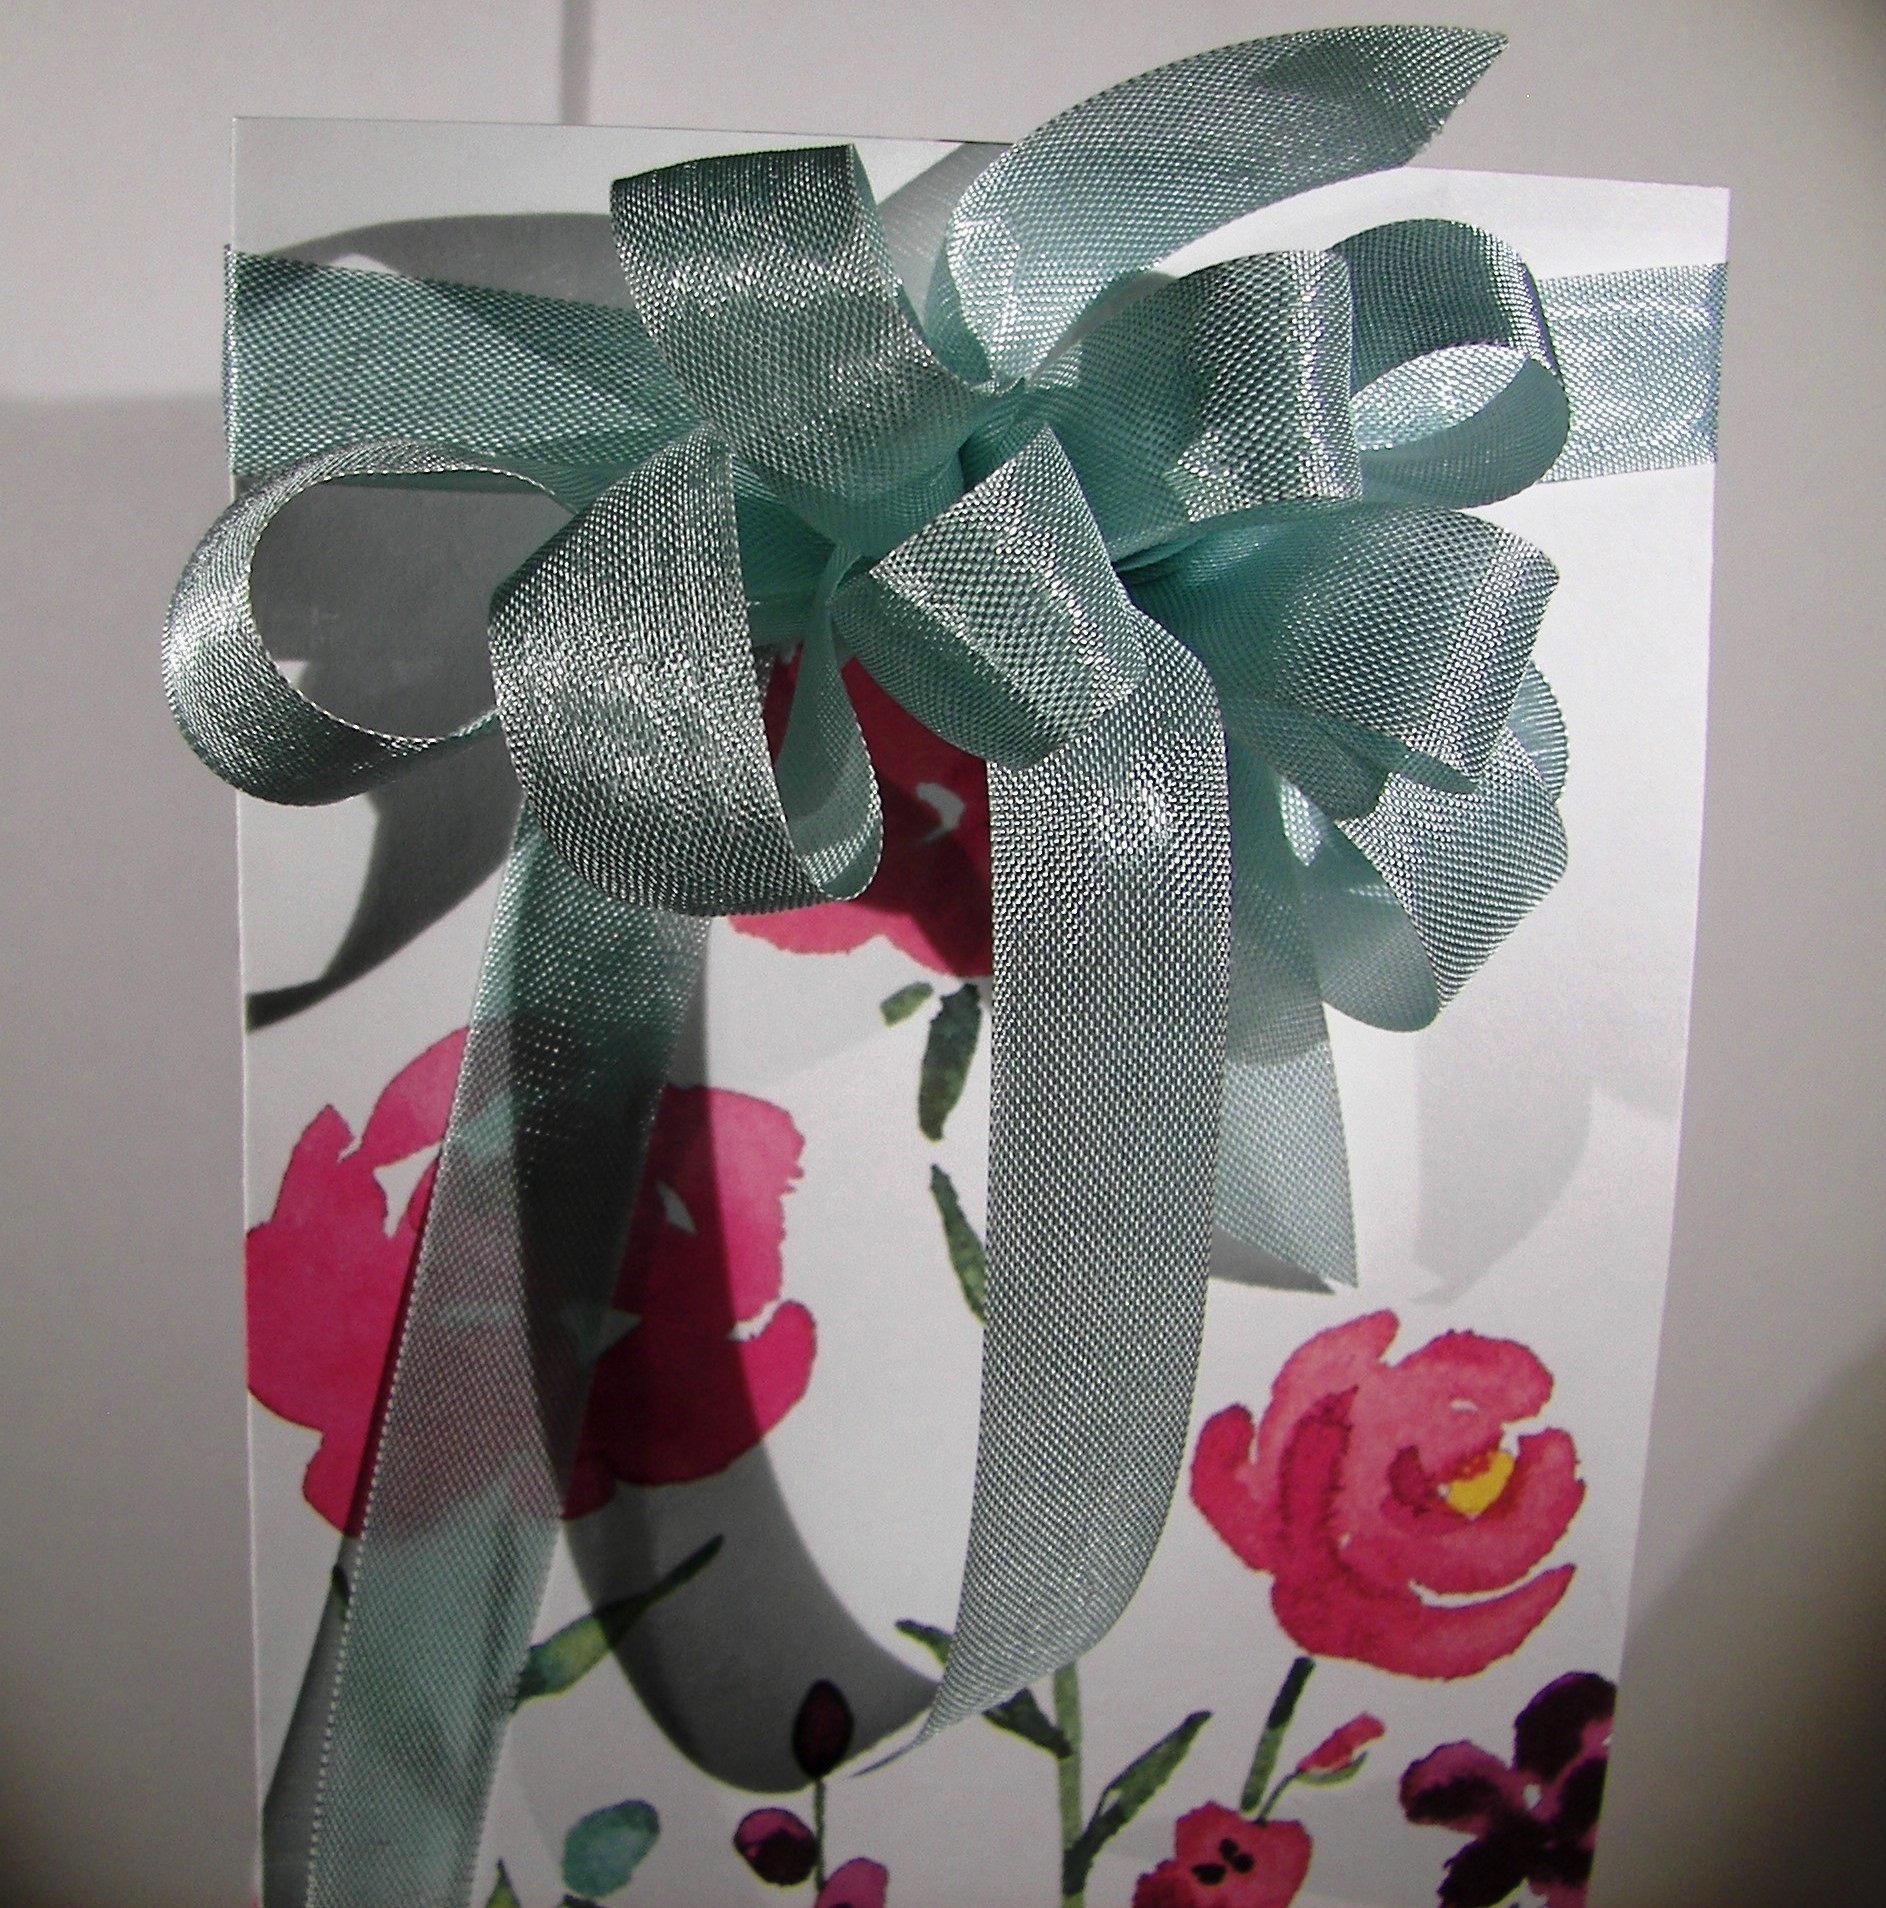
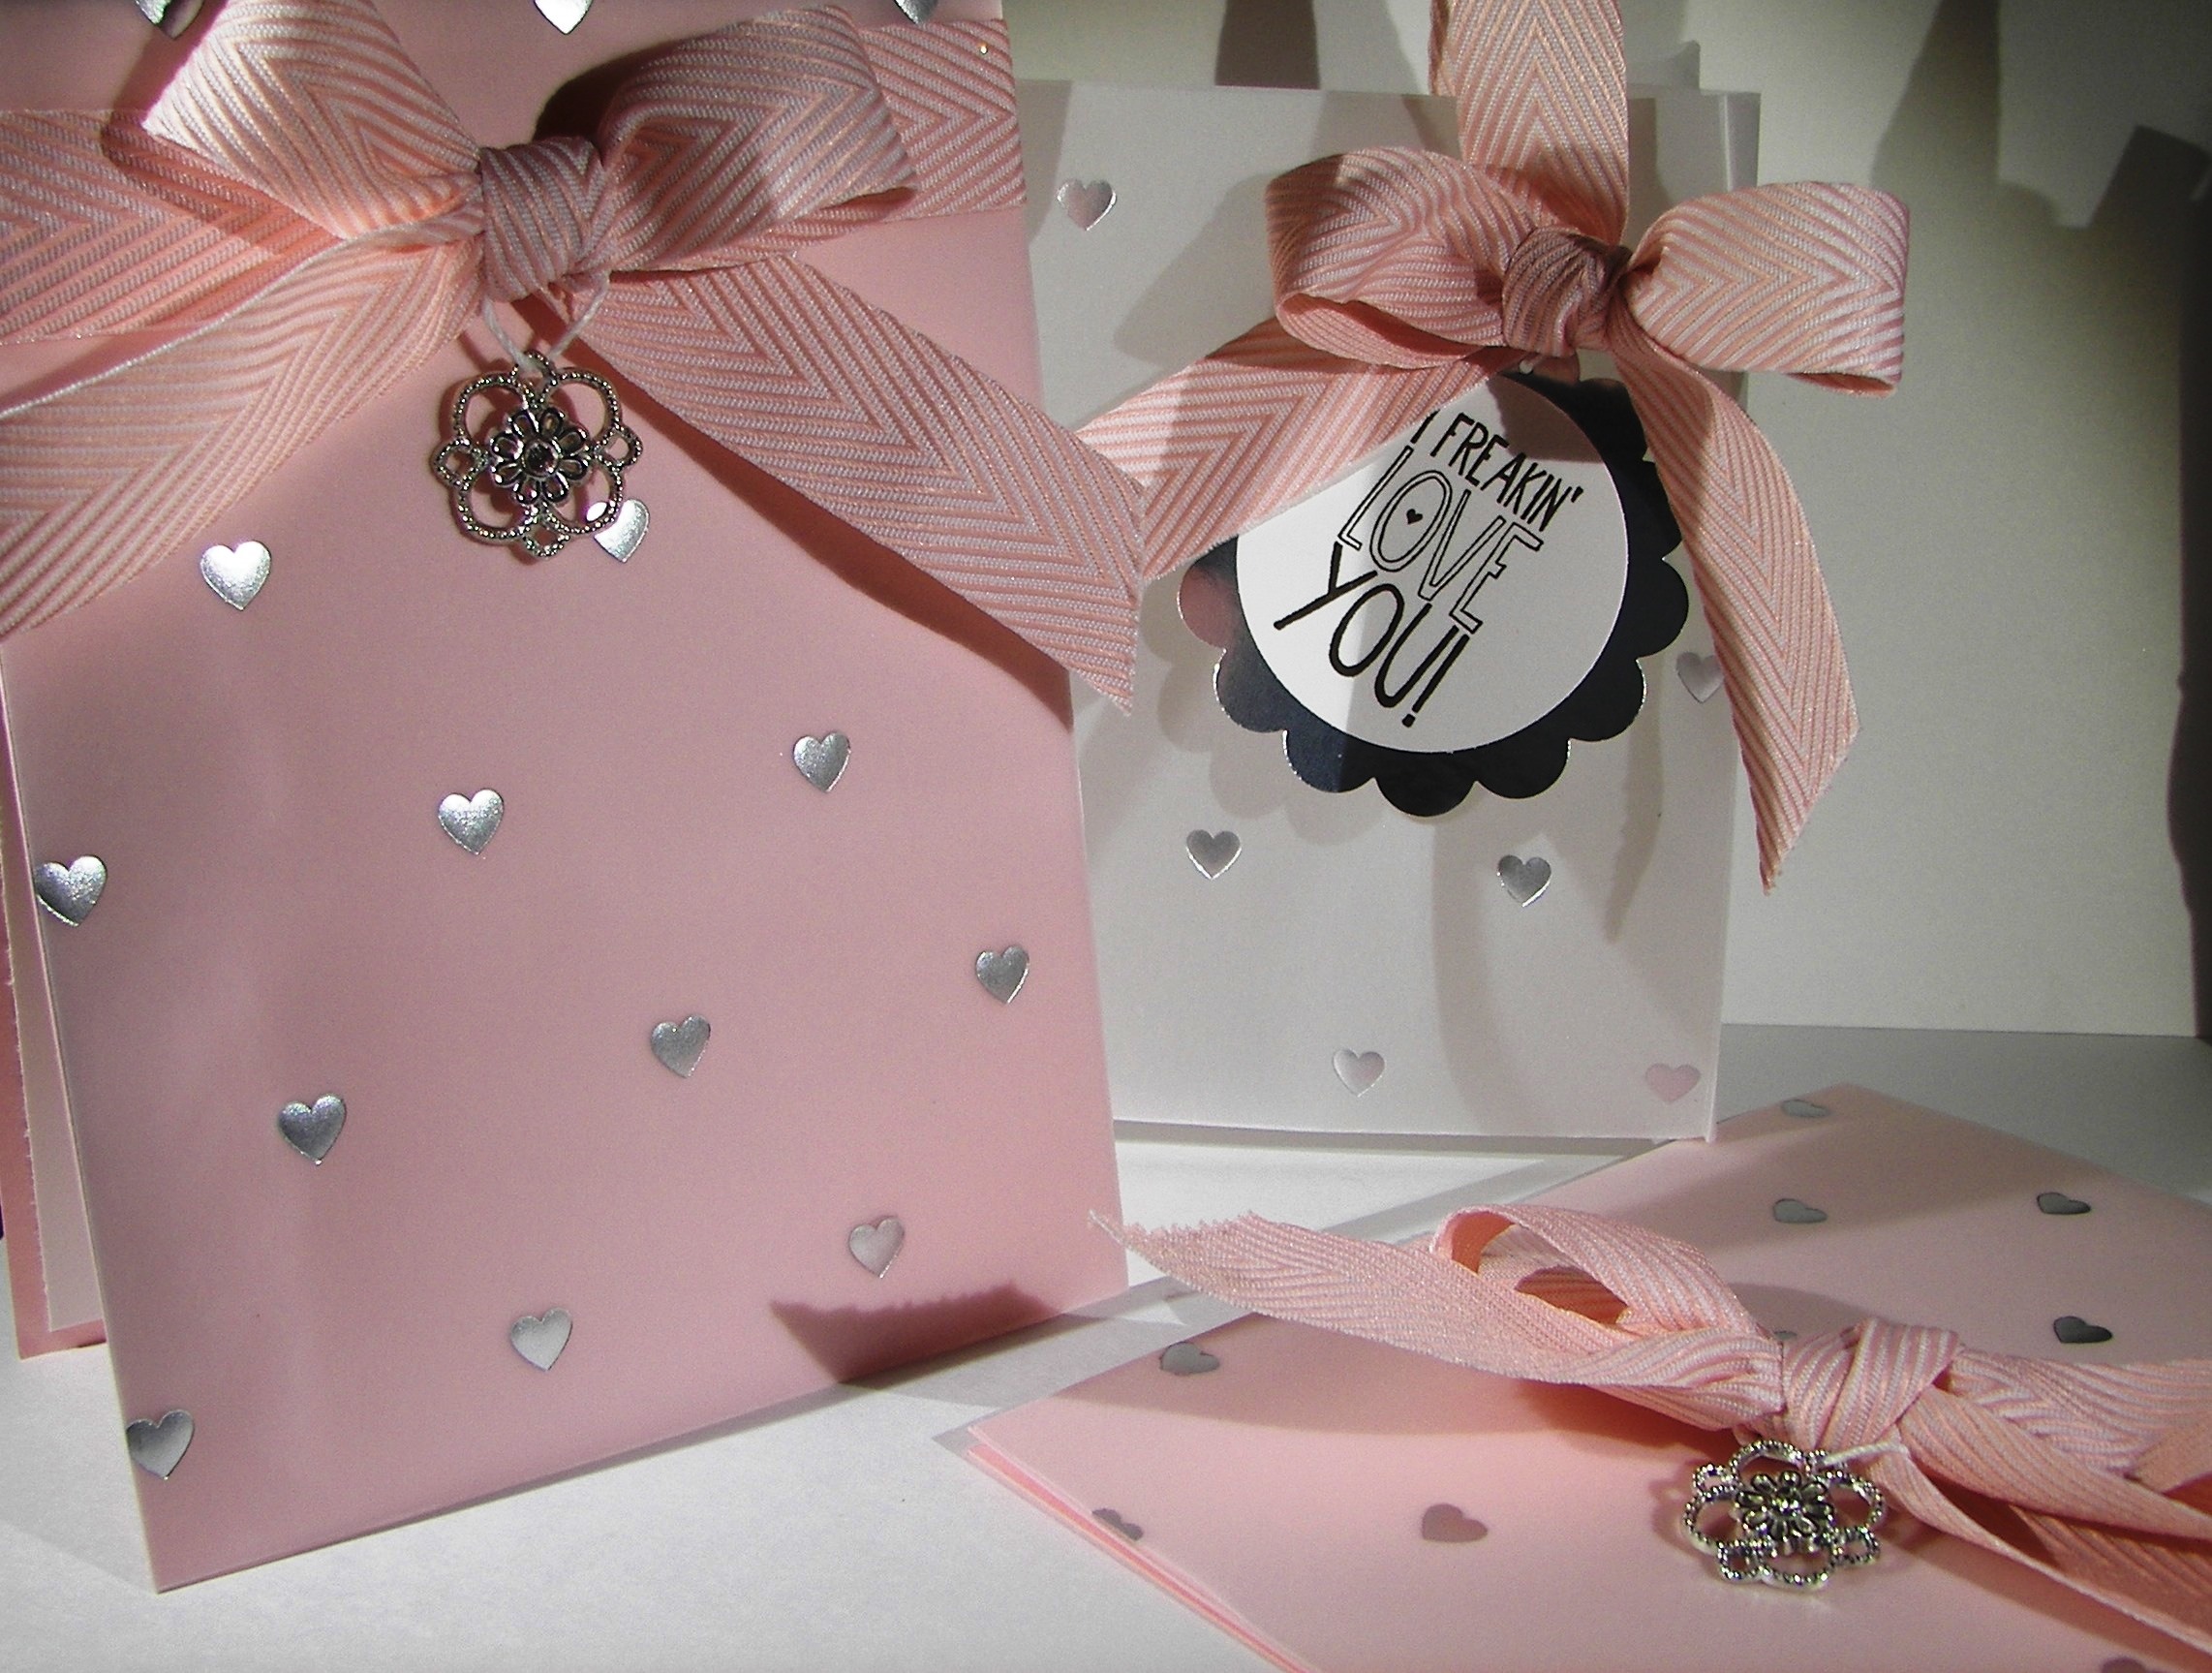
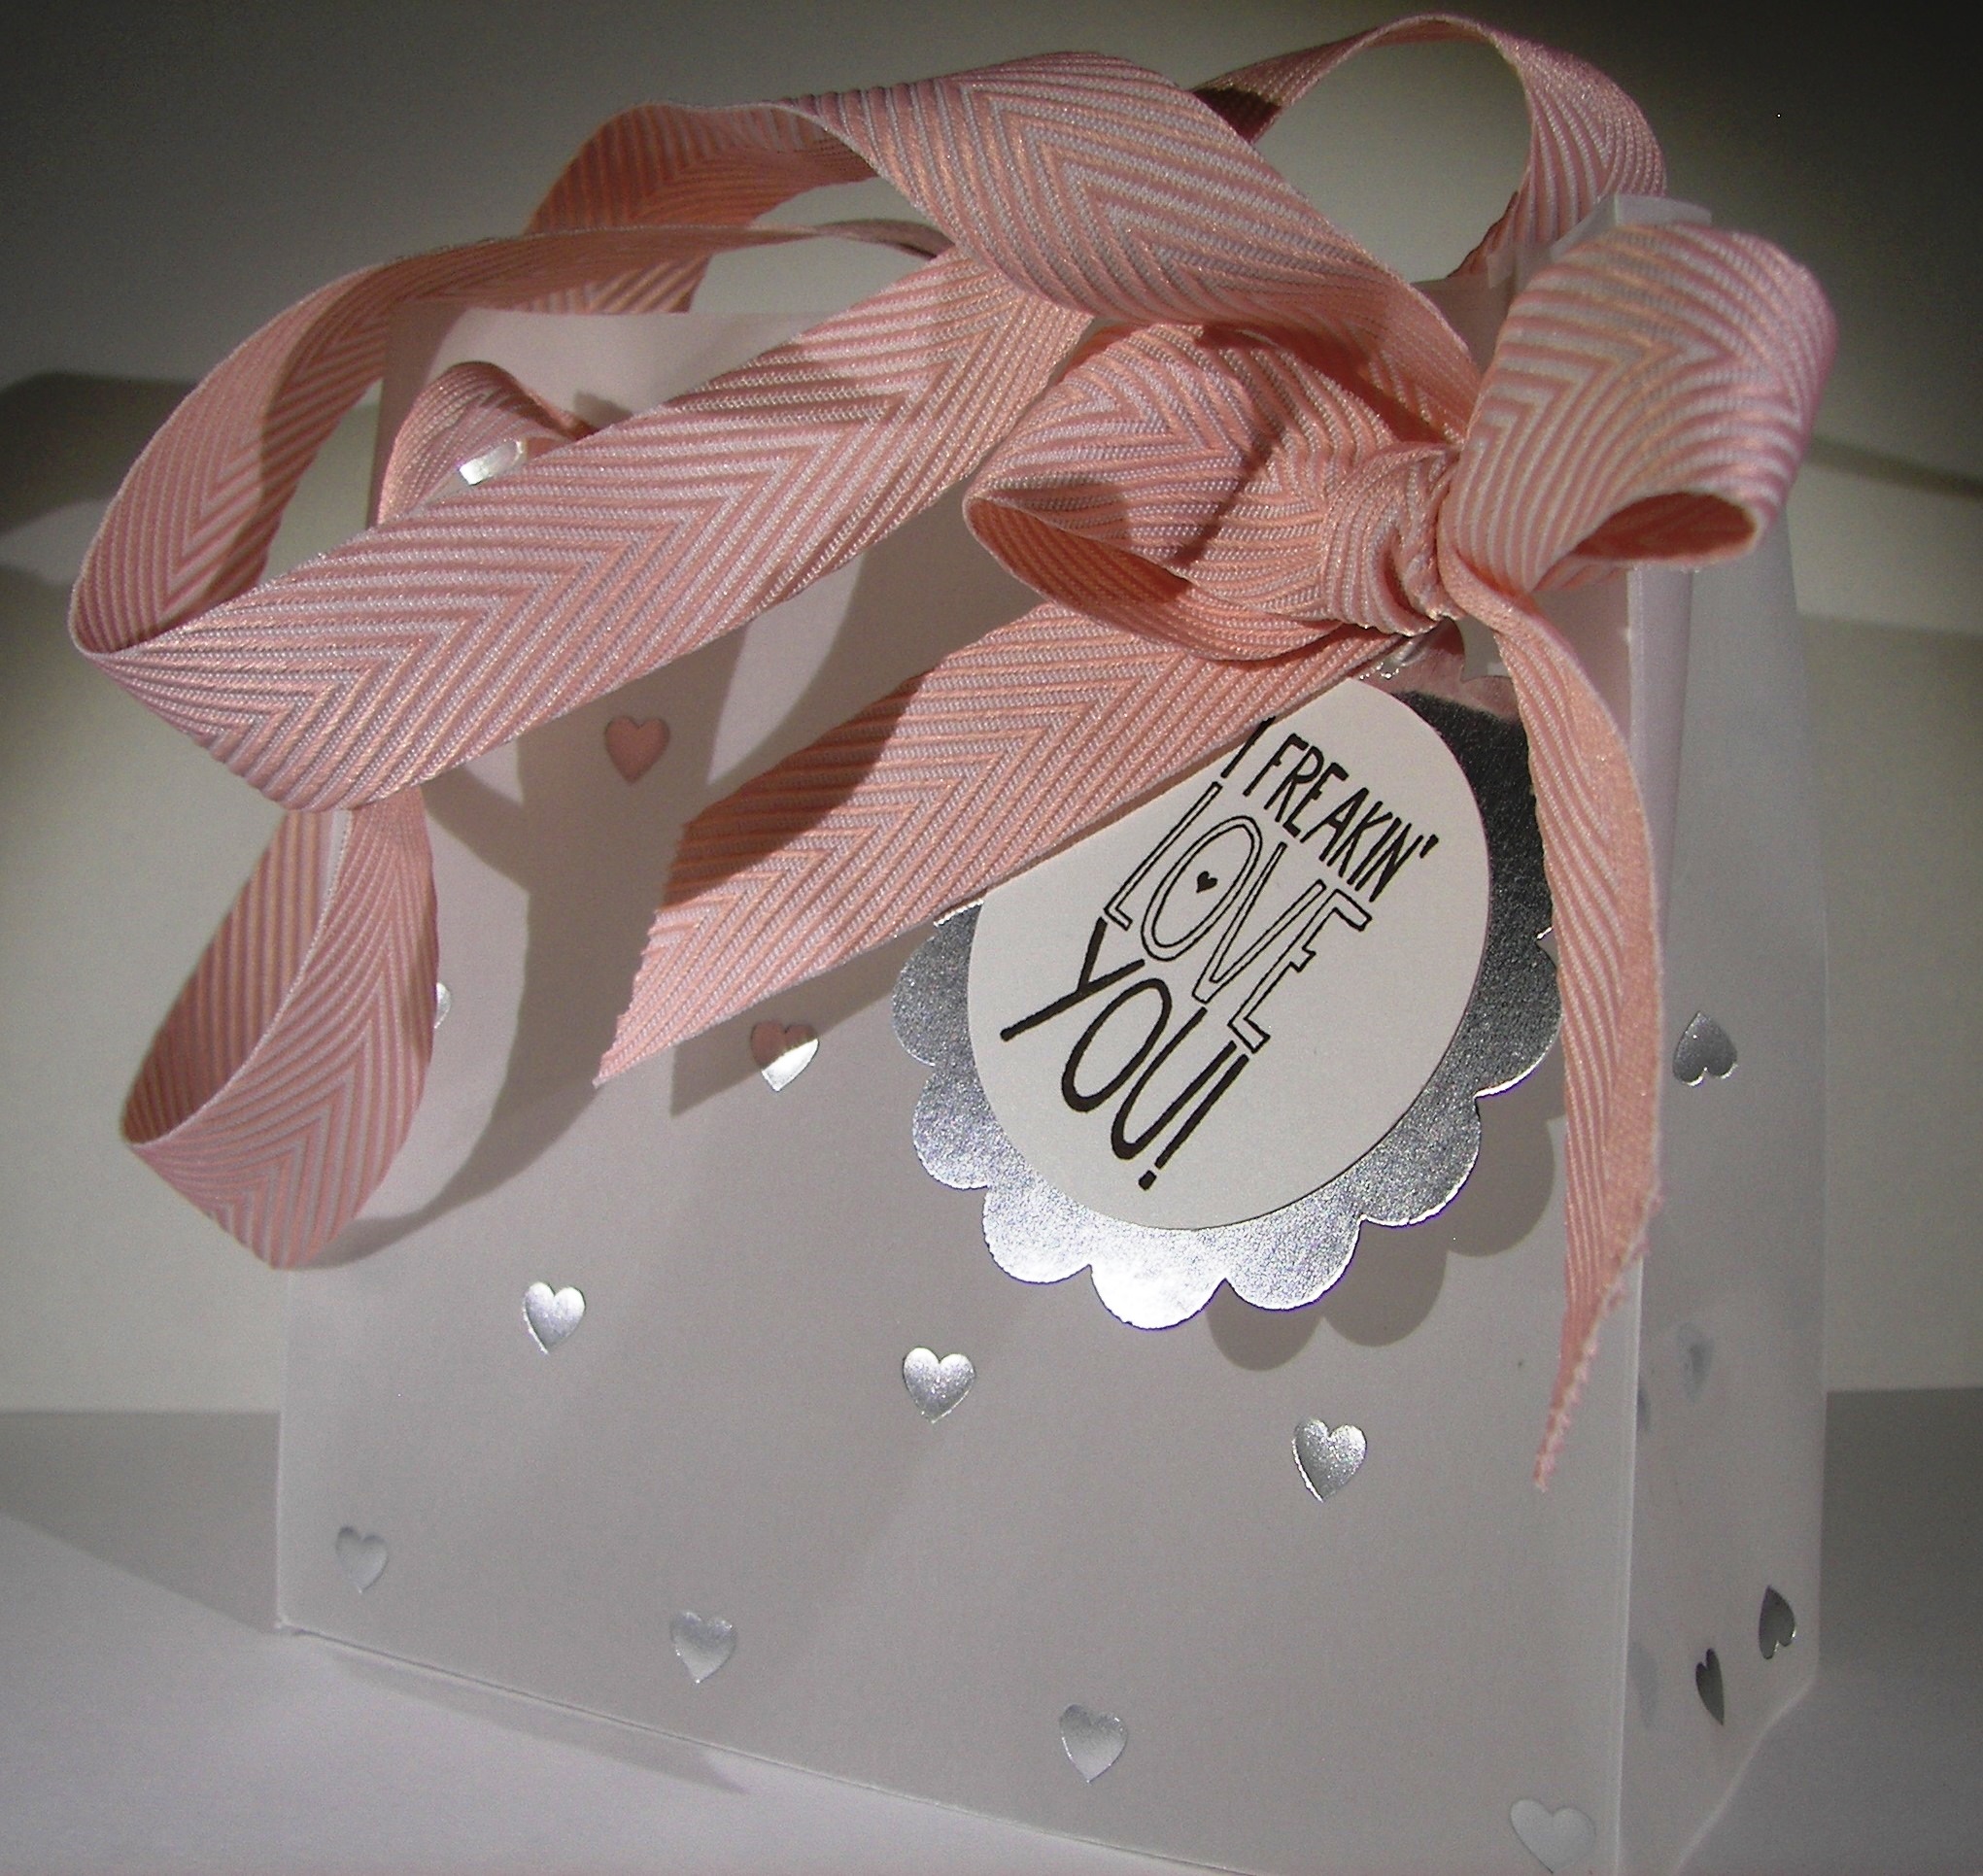
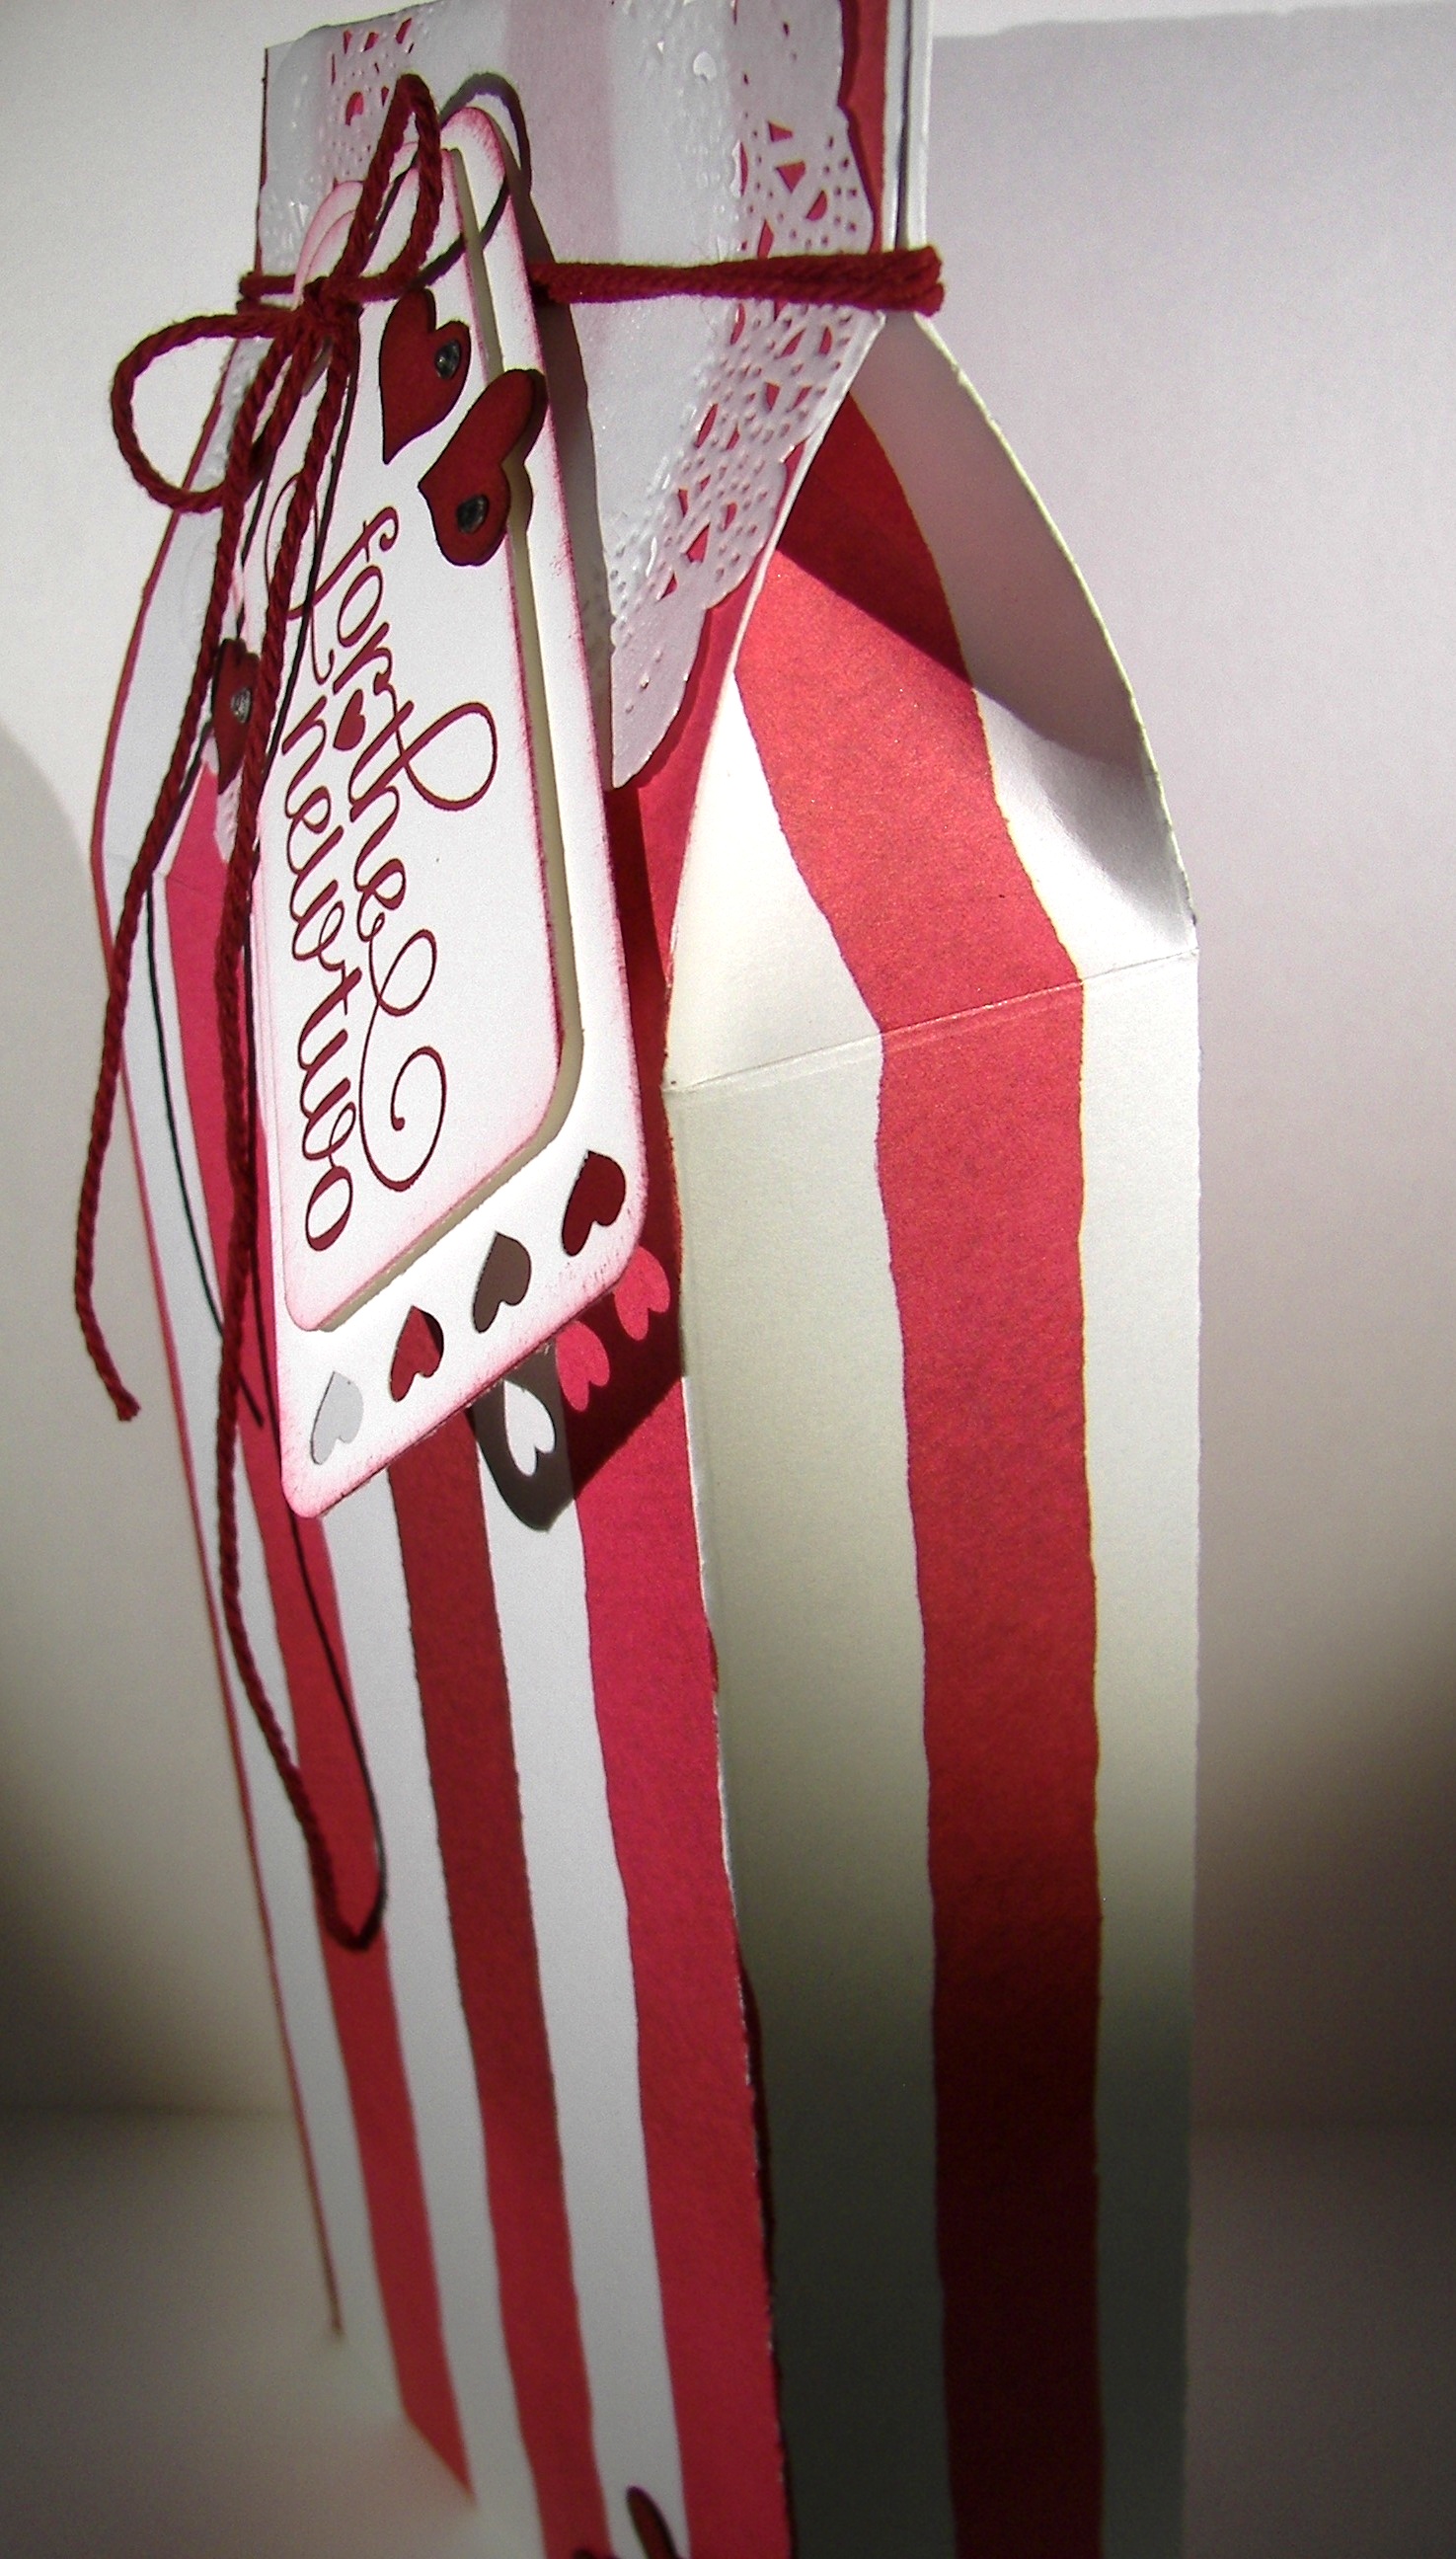
This is made from a whole sheet of english garden dsp and isn’t it glorious?  I paired it with the thick backers twine and went cherry cobbler all the way.  A handful of punched and sponged hearts were the perfect embellishment.  A small doily helped to close it off.  The stamp is of course from the wedding set, For the New Two.  I layered the tags using the scalloped tag topper punch, happens to be on sale this week oddly enough, and the hearts border punch as well.  Quite the gift bag if I do say so myself, and I do.

Have a creative day!

Moana

Love

How would you suggest I celebrate my 200th blog post?  Some would perhaps do a give away, a special sale, or something else full of excitement.  I just might be a little different.  How about showing something simple, something that I love.

Love

How about just saying that I have loved my journey so far, and am looking forward to continuing.  I do love being creative, love sharing it with others, and love the joy that comes from helping others find they are creative and talented too.  There, love.

 Love

This cute little bag?  How about using a 6×6 piece of paper, like this Go Wild DSP stack, scoring it at 2″ on all four sides, quick snip on both score lines on opposite sides, and watch it come together.  A little hole punching for the ribbon, which I do love the dotted lace trim too much, and a sweet bow.

Love

One tiny stamp with one tiny tag layered on another tiny tag.  Two little basic rhinestones and it is all finished.  I do love a simple project that shares more than just pretty product that is fun to work with, it shows you care about someone enough to do something special.  That is what I love.

Have a creative day!

Moana

A Little Thanks

What to do with a spool of silver metallic thread?  Make butterfly antennae of course.  This tiny, oh so tiny, tiny little bag is also closed with the same thread.A Little Thanks

This bag is sized just right to hold a gift card and you could squeeze in a flat chocolate or two.  How perfect a thank you is that?  I do love giving gift cards to people and having them tucked inside something as adorable as this makes it even better.

8-7

I started out with a piece of cardstock measuring 4 1/4 x 5 1/2, yup, that tiny.  I stamped half way down with my little butterflies, flipped it around and went down the other way.  I did that so if you turn the bag around, my butterflies aren’t upside down.  Clever, right?  Thought so too.

8-7 (2)

My score lines were all about the 1/2″ mark.  Just a tiny little bag here, so cute.  Can you tell I love tiny things?  Well, I do!  And this bag is all done and ready to get that special gift card for some lucky friend.

Have a creative day!

Moana

Boho Chic Gift Bag

The UPS man brought this lovely little box yesterday that had some really fun things inside.  One of which was the new striped cotton ribbon.  I held off for a bit, but went for it when they went on sale.

Boho Chic Gift Bag

I wasn’t disappointed, let me tell you.  So, I wanted to make something that really put the ribbon out front.  No stamping today, how odd.  Some embossing though, had to have something.  The boho chic embossing folder is really too cool.

Boho Chic Gift Bag

That was also a new product I wasn’t very sure about.  As you can see, the pattern is great and will be tons of fun.  I haven’t gotten the designer series paper it coordinates with, but I will soon enough.  Can’t have it all, at once that is.

Boho Chic Gift Bag


This is one whole sheet of tangelo twist and two pieces of very vanilla.  With my trusty score board by my side, I can make all kinds of fun boxes and bags.  Such a great go to tool.  Highly recommended.

Have a creative day!

Moana

Tiny Thank You

Spending the morning with my husband took first place today.  So, blogging had to happen later on in the morning.  Works great for me, during the summer that is.

Tiny Thank You

I didn’t know where to start this morning, so I turned to my scrap pile.  You know, those extra bits of paper that are too big to toss and haven’t filed back into the paper files.  Well, there was this piece of bermuda bay measuring 5×6 that was calling to me.  I did the math and ended up using my scoreboard to make this cute little carton.  Simple division is a beautiful thing, did I just say that?  Yup!

Tiny Thank You

This carton is big enough to fill with plenty of treats or even a nail polish or two.  Sometimes it is fun to say thank you in a different way.  I do have a weakness for cute little boxes and bags.

Tiny Thank You

How about the washi tape though!  I did all of my scores first and then got the tape out.  I put it down on an angle leaving about 3/4″ between pieces.  I didn’t measure, just eyeballed it.  From a distance it looks like striped paper with blue stripes over the top.  Fun look.

Banner punches went to work on the adorable sentiment tag.  Using bakers twine was the only thing tiny enough to work well.  All in all, I do love this little guy. Now, who to share it with…

Have a creative day!

Moana

A Whole Lot of Lovely

Afternoons are good for blogging too.  Especially when you put your family first in the morning.  I do love a good routine, but sometimes you need to be flexible.

A Whole Lot of Lovely

I do try to say thank you right away, but sometimes you need a bit more.  Just like this little treat bag.  It is tiny, but is the right touch to emphasize the thank you.  I loved giving it away this morning at church.

A Whole Lot of Lovely

The new paper stacks are so fun.  This lovely floral pattern is one of many in the pack.  I do love floral paper, probably too much.  Either way, I thought the flowers on the paper matched the flowers in the hostess stamp set A Whole Lot of Lovely.  They look so nice together.

A Whole Lot of Lovely

Some stamping, a little bit of pearls, and plenty of ribbon and off we go!  Take the time to make a special thank you, it feels great to give it away!

Have a creative day!

Moana

High Five – That Thing You Did

Yesterday was full of excitement at an adventure park.  I am not so brave, but I do try some because my husband loves them.  I went on my two favorite ones, twice, so I get a big high five!

High Five - That Thing You Did

It may not sound like much, but there are times when I don’t ride anything, so this is improvement.  But, I was pretty darn tired this morning and didn’t feel like creating much.  I was snapchatting my daughter at university and asked her for some help.  These were her color choices.  It was an enthusiastic choice, just like riding a roller coaster.

High Five - That Thing You Did

I used a full sheet of tangerine tango to make this bag.  My scoring measurements were 1 1/4″ and 4″ then repeat to leave a 1/2″ edge.  I scored the bottom at 1 1/4″ to match the sides and did 1/2″ at the top for easy closure.  Quick burnishing and folding put this large bag together.

High Five - That Thing You Did

I stamped the bag tone on tone using the matching tangerine tango ink.  The sentiment was stamped first in crushed curry, then since the other colors were darker and could handle it, I stamped over one edge in garden green and the other edge in tangerine tango.  It gave a really cool look I think.

A fun bag for a fun person I would think.  Now, to figure out just who needs it.

Have a creative day!

Moana

The Little Moments

I got it into my head to open this paper, do a sponge ombre look, and call it good.  I loved this type of paper from the Sale-a-bration bonus catalog and couldn’t wait for Stampin’Up! to make more.  They sure did.  But I had a surprise when I opened the pack up.

The Little Moments

There were six white sheets and six colored ones.  I looked into the catalog to see what was up, and sure enough, there the colored ones are too.  I thought they were just examples of how it could look all inked up.  I did not pay attention very well.  Fun for me though!

The Little Moments

The resist pattern looks like raindrops to me, guess that is what it actually is.  Marina mist seemed to be the appropriate color choice, so I sponged away to make an ombre look.  I love how striking the raindrops are, yummy.

I took a sentiment from the watercolor wings stamp set and punched it out with the note tag punch and layered it up.  Pretty simple overall.  I started out with a 6×6 piece of paper, sponged it, scored it and stuck it together.  If I was brave enough to video you would have witnessed an epic ribbon battle.  No one was injured in the making of that bow, but it was close.

Have a creative day!

Moana

Just For You Treat Bag Card

I started this project out completely different than it ended up.  Who doesn’t like an adventure now and again, right?

Just For You Treat Bag Card

The mini treat bag thinlits were out waiting to get to work.  I wanted to use he heart framelit and coordinating stamp.  After I pulled the paper and matching seam binding ribbon, it switched around on me.  Not a problem,

Just For You Treat Bag Card

Then I didn’t have a treat to put inside so I could give it away.  How can you give away a treat bag with no treats?  You can’t, that wouldn’t be any fun.  So I thought, does it have to hold a treat?  Why not make it an envelope and put a card to write on inside.

Just For You Treat Bag Card

Worked like a champ!  Now I have another choice with how I use this set.  Not everyone wants a treat, but something sweet to read is also yummy.  This little number will also fit inside one of our standard envelopes for mailing.  How cool is that!

A quick note on the stamp.  I stamped the image once and used the coordinating framelit.  It cut off the cool dashed boarder that I liked so well.  So I stamped it again, fussy cut it out, not my favorite activity, and layered it on dimensionals.  After I sponged everything of course.  Thought you might like that little detail.

Have a creative day!

Moana

Trust God

So much has happened during the last week, even as I write in advance for this blog, I know my heart is both heavy and full at the same time.

Trust God

Taking yet another child to university is so exciting, but reminds me of how little time we actually have with these children and how soon they grow up and leave home.  Luckily, I still have a few more years with my youngest.

Trust God

Then partnering that event with a demanding and fulfilling pioneer trek has surely put me over the edge.  But in a good way.  Even though it was surely to be physically and emotionally difficult, I have complete faith that I loved it and will treasure it always.

Trust God

I created this set knowing how I would be feeling, and knew there would be a lot on my mind.  The flowering flourishes has been one of my favorite stamp sets for a very long time.  The results it gives are always different and very beautiful.  This color combination is soft yet ornate at the same time.  I wasn’t sure about layering the stamps over each other, but these colors allowed it.  I hope you have enjoyed it as I did.

Have a beautiful, and very creative day.

Moana

Kinda Eclectic with a Ray of Sunshine

This burst of sunshine should be posting while I am in Utah getting my Denali all settled at university.  She is a huge burst of sunshine in my life, so it suits the day perfectly.

Kinda Eclectic with a Ray of Sunshine

I have used the sunburst stamp from the Kinda Eclectic set in so many projects.  It is why I bought the set, but the rest of it is just as beautiful.  I am so glad that it carried over to the new catalog.  I wasn’t ready to say goodbye just yet.

Kinda Eclectic with a Ray of Sunshine

I loved using the super smooth whisper white card stock to make a matching bag.  It folds rather crisp, but is easier to manipulate that the other card.  And of course I love the stamp.  This set is done in hello honey and it works so well.  I even got out an embossing folder to give it a little extra.

Kinda Eclectic with a Ray of Sunshine

A simple card that is all about the saying and a few bright touches to bring it full circle.  Perhaps this one will find its way to someone in need of a pick me up.  Sounds about right!

Have a creative day!

Moana

Crazy About You

A simple gift set that is truly all occasion.  You never know when you will need a ready to go set at the last minute.  It would be nice to remember all of our events all of the time, but that doesn’t always happen.  Or when someone is wonderful and you just want to say thank you in a special way.

Crazy About You

That is what this set is for.  I used the scalloped flower from the Crazy About You set to make the background for the card and matching bag.  I did a simple overlay of velum and scattered large rhinestones in the center of the flowers.  So simple, yet so pretty.

 Crazy About You

I added a touch of linen thread and used my bone folder to help it curl just a little.  It also takes the kinks out, but I do love a bit of curl.  I stamped a couple on scrap and punched them out with the 1 3/4″ scalloped circle punch and accented the front and the inside of the card.

Crazy About You

Well, this project was a quick make and has lots of possible uses.  Try one out for yourself!

Have a creative day!

Moana

Cucumber Crush Party

Getting back into the groove can be a bit slow at first.  I also gave myself a challenge this morning by making cucumber crush my main color.  We haven’t become friends just yet, so I thought we needed some together time.  I helped it find a friend in blushing bride, and I like how it worked out.

Cucumber Crush Party

I used a full sheet to make this pretty gift bag.  I stamped the background paper with the fun leaf from the Kinda Eclectic set.  Loved it.  I used it full strength some, but mostly stamped it off once first.  I like how different this color looks at different strengths.

Cucumber Crush Party

I sometimes stop myself from using flowers, because I feel like I really get them everywhere.  I just love flowers!  So, I didn’t hold back at all here.  I usually stamp off blushing bride, but it needed to be strong to work with this fun green.  The combo is full of life.  I think a yellow would have paired nicely, but I had to stop somewhere.

Cucumber Crush Party

These pretty clear faceted buttons are so fun to use.  It helped me finish up this gift bag nicely.  Sometimes I go overboard on bling, but not today.  I wasn’t sure when I started this project, but I love how it ended up.

Have a creative day!

Moana

Something to Say with Flowering Flourishes

I honestly sat down to my very messy desk and couldn’t think of what to do.  There are many reasons to stay organized, and that is one of them.  I looked to my paper for inspiration, as I usually do when I get stumped.  But I haven’t purchased any of the new paper yet, so that threw me another loop.  I really had to look for a little extra creativity, so I kept looking.  The foil velum carried over and I had some of that.  For the win!

Something to Say with Flowering Flourishes

I started out with the idea of making a purse style gift bag, but thought it was looking to be too bulky and wide.  So, I cut it in half and went for two of these little beauties.  I stamped my wisteria wonder card stock with the medium stamp from flowering flourishes to go under the velum.  I love the soft layering it gives.

Something to Say with Flowering Flourishes

I used a whole 12 x 12 sheet of velum to start with.  When I trimmed it to match the 8.5 x 11 I had a nice strip left over.  I cut that in two and made two mini envelopes for the tiny gift cards.  The cards are large enough for a tiny note and also house a gift card.  Nice, right?

Something to Say with Flowering Flourishes

I plan on putting a couple of gourmet cookies in a cellophane bag to tuck inside the gift bags.  It should make a lovely set.

Have a creative day!

Moana

Thank You for Mint Macaron

Isn’t this lovely minty color so pretty?  This is the third of the five new In-Colors for Stampin’Up! and I am already having so much fun with them.  I wasn’t quite ready to let go of coastal cabana or some of the others, but this helps me feel better.

Thank You for Mint Macaron

I hadn’t made a bag or box for a bit, so I thought I would do both.  I am still using the same stamp set, A Whole Lot of Lovely, three days in a row.  That just goes to show how versatile this set is.

Thank You for Mint Macaron

Of course I got the new colors, but I also had to get all of the new lace trims as well.  I am quickly getting attached to them.  They are a little more subtle and opaque on my projects.  More of an accent than a focus.

Thank You for Mint Macaron

I left this bag rather simple.  I wanted to just see the stamped image and focus on that.  It really is pretty.  I know I will be using this one like crazy.  Speaking of crazy, that is what is in store for my day, so I had better get on it!

Have a creative day!

Moana

Lullaby Gift Carton

It has been a while since I have scattered flowers across a project like this.  But sometimes, you just really want to.  I like trying an unlikely pairing and seeing how it turns out.  Especially when it works!

Lullaby Gift Carton

I started with the paper, thought of the cute baby tag idea and decided it needed flowers.  Even though we traditionally put boys with blue and not flowers so much, doesn’t mean we have to stick to it.

Lullaby Gift Carton

It would be easy enough to swap out the tag for something else though.  I do like a versatile project, don’t you?

Lullaby Gift Carton

Each day brings me new opportunities to stretch my mind and try to challenge myself without too much frustration. Quite the interesting balance sometimes.

Have a creative day!

Moana

Pleasant Poppies Gift Set

As poppies are in bloom, my attention was drawn once again to my favorite background stamp.  I am sad to see it retire, I truly am.  Retiring or not, this one is a keeper that I will use for years to come.

Pleasant Poppies Gift Set

With that said, this post is a good news bad news.  Yes, my precious poppies will retire, but the wonderful Perpetual Calendar stamp set carried over!  The little flowers I stamped all around my gift bag are one of many adorable little stamps in that set.  It is so versatile.  I think it has been the most heavily used stamp set from the spring catalog.  Interesting…

Pleasant Poppies Gift Set

You cannot tell from the photo, but there is a little cellophane bag inside.  I made the floral windows on both sides to show the “treats”, but there aren’t any to show.  Literally, I don’t keep candy at my home.  You will just have to use your imagination.

Pleasant Poppies Gift Set

I stamped the poppies on a very vanilla card front using tangelo twist.  I then used my aqua painter to get a bit of ink to the centers of the flowers that showed them.  I cleaned my brush of ink and just used water on the rest.  I simply brushed over the stamped flowers to move bits of the ink around.  It gives a very subtle look, but it is just right.  I could have brought in another color for the stems, but I wanted this monochromatic.  A simple bow of very vanilla seam binding ribbon, sadly retiring, finishes off both projects.

Have a creative day!

Moana

Glorious Painted Blooms

When I sat down to create something for today’s blog I was stumped.  I had been reading for a while and had a hard time getting focused.  What I usually do when that happens is go to my designer series paper and pick something that catches my eye and work from there.

Glorious Painted Blooms

What I discovered tucked between to organizers of paper was an unopened set of the Painted Blooms designer series paper.  Oh. My. Goodness.  I felt like a little kid.  I have loved this set so much and have used a ton of it.

Glorious Painted Blooms

Since it will be retiring with the spring catalog, I got really bold.  I opened it up and took out my favorite pattern.  The first pack I had I treasured this pattern and had the hardest time cutting in up.  So, I just went for it.  I used one whole sheet and made a beautiful gift bag to showcase it.  It was quite liberating.  Good thing there is two of each pattern in a package.  I can still treasure the last one.  Maybe I will do like others have and frame it.

Glorious Painted Blooms

I didn’t want to cover up one bit of it with a tag or any stamping.  So, I went a little crazy with the seam binding ribbon.  How perfect is this gift bag!

Have a creative day!

Moana

Yippee-Skippee in Love!

There are times when how I feel just saturates what I create.  Today’s project set is a perfect example of that.

Yippee-Skippee in Love

Last night I finished a lovely book in a series I had previously enjoyed.  I am a middle school librarian, so I have the perfect excuse to revel in young adult literature.  Who am I kidding, I would read it regardless.  I have always enjoyed reading what my children do and visa versa.

Yippee-Skippee in Love

Love, true love, is an obvious theme here.  Even though the series continues and I have to wait for the next novel, I was left all emotional and girlie and super in love.  Hence, the color choices and such.

Yippee-Skippee in Love

I used a whole sheet of 12 x 12 silver foil velum here.  Two card fronts and a lovely bag.  I poured out the chevron ribbon, because I love it so, and added a few elegant embellishments.  I knew these cards could be for a variety of occasions, so I left the sentiment off the front.  I will stamp the inside with just the right thing when I put them to work.

Yippee-Skippee in Love

I might have to fill the bag with truffles or something lovely and give it to my husband.  That sounds just right.

Have a creative day!

Moana

Flowerpot Painted Petals Trio

Sometimes when you draw a blank, you still come out on top.  I was sure I had crafters block yesterday.  So I sat and read a novel instead.  When I made myself go back and sit down I decided to pull out a sheet of designer series paper and just design a bag and call it good.  As soon as I had this sheet of paper on my desk my brain got busy.  Cool right?

Flowerpot Painted Petals

I hadn’t paired this ribbon with rich razzelberry yet and I wish I would have.  They look great together!  And then a bit of glimmer paper to frame a tiny sentiment and we are off and running.

Flowerpot Painted Petals

I trimmed off a 4″ section from the whole 12 x 12 for a card front.  When I finished the other cut to give me the 4 x 5 1/4″ front I needed I was left with a choice.

Flowerpot Painted Petals

Make a second card, put the remainder back with its set, or make another tiny bag to go along.  The tiny bag won.  What a cute little baby bag.

Flowerpot Painted Petals

This set went together really quickly.  That is what happens when you have great product.  Just a little bit of stamping, some creasing, adhesive here and there and a ribbon on top.  I went to bed with a smile for sure.

Have a creative day!

Moana