One Butterfly Too Many? I Think Not…

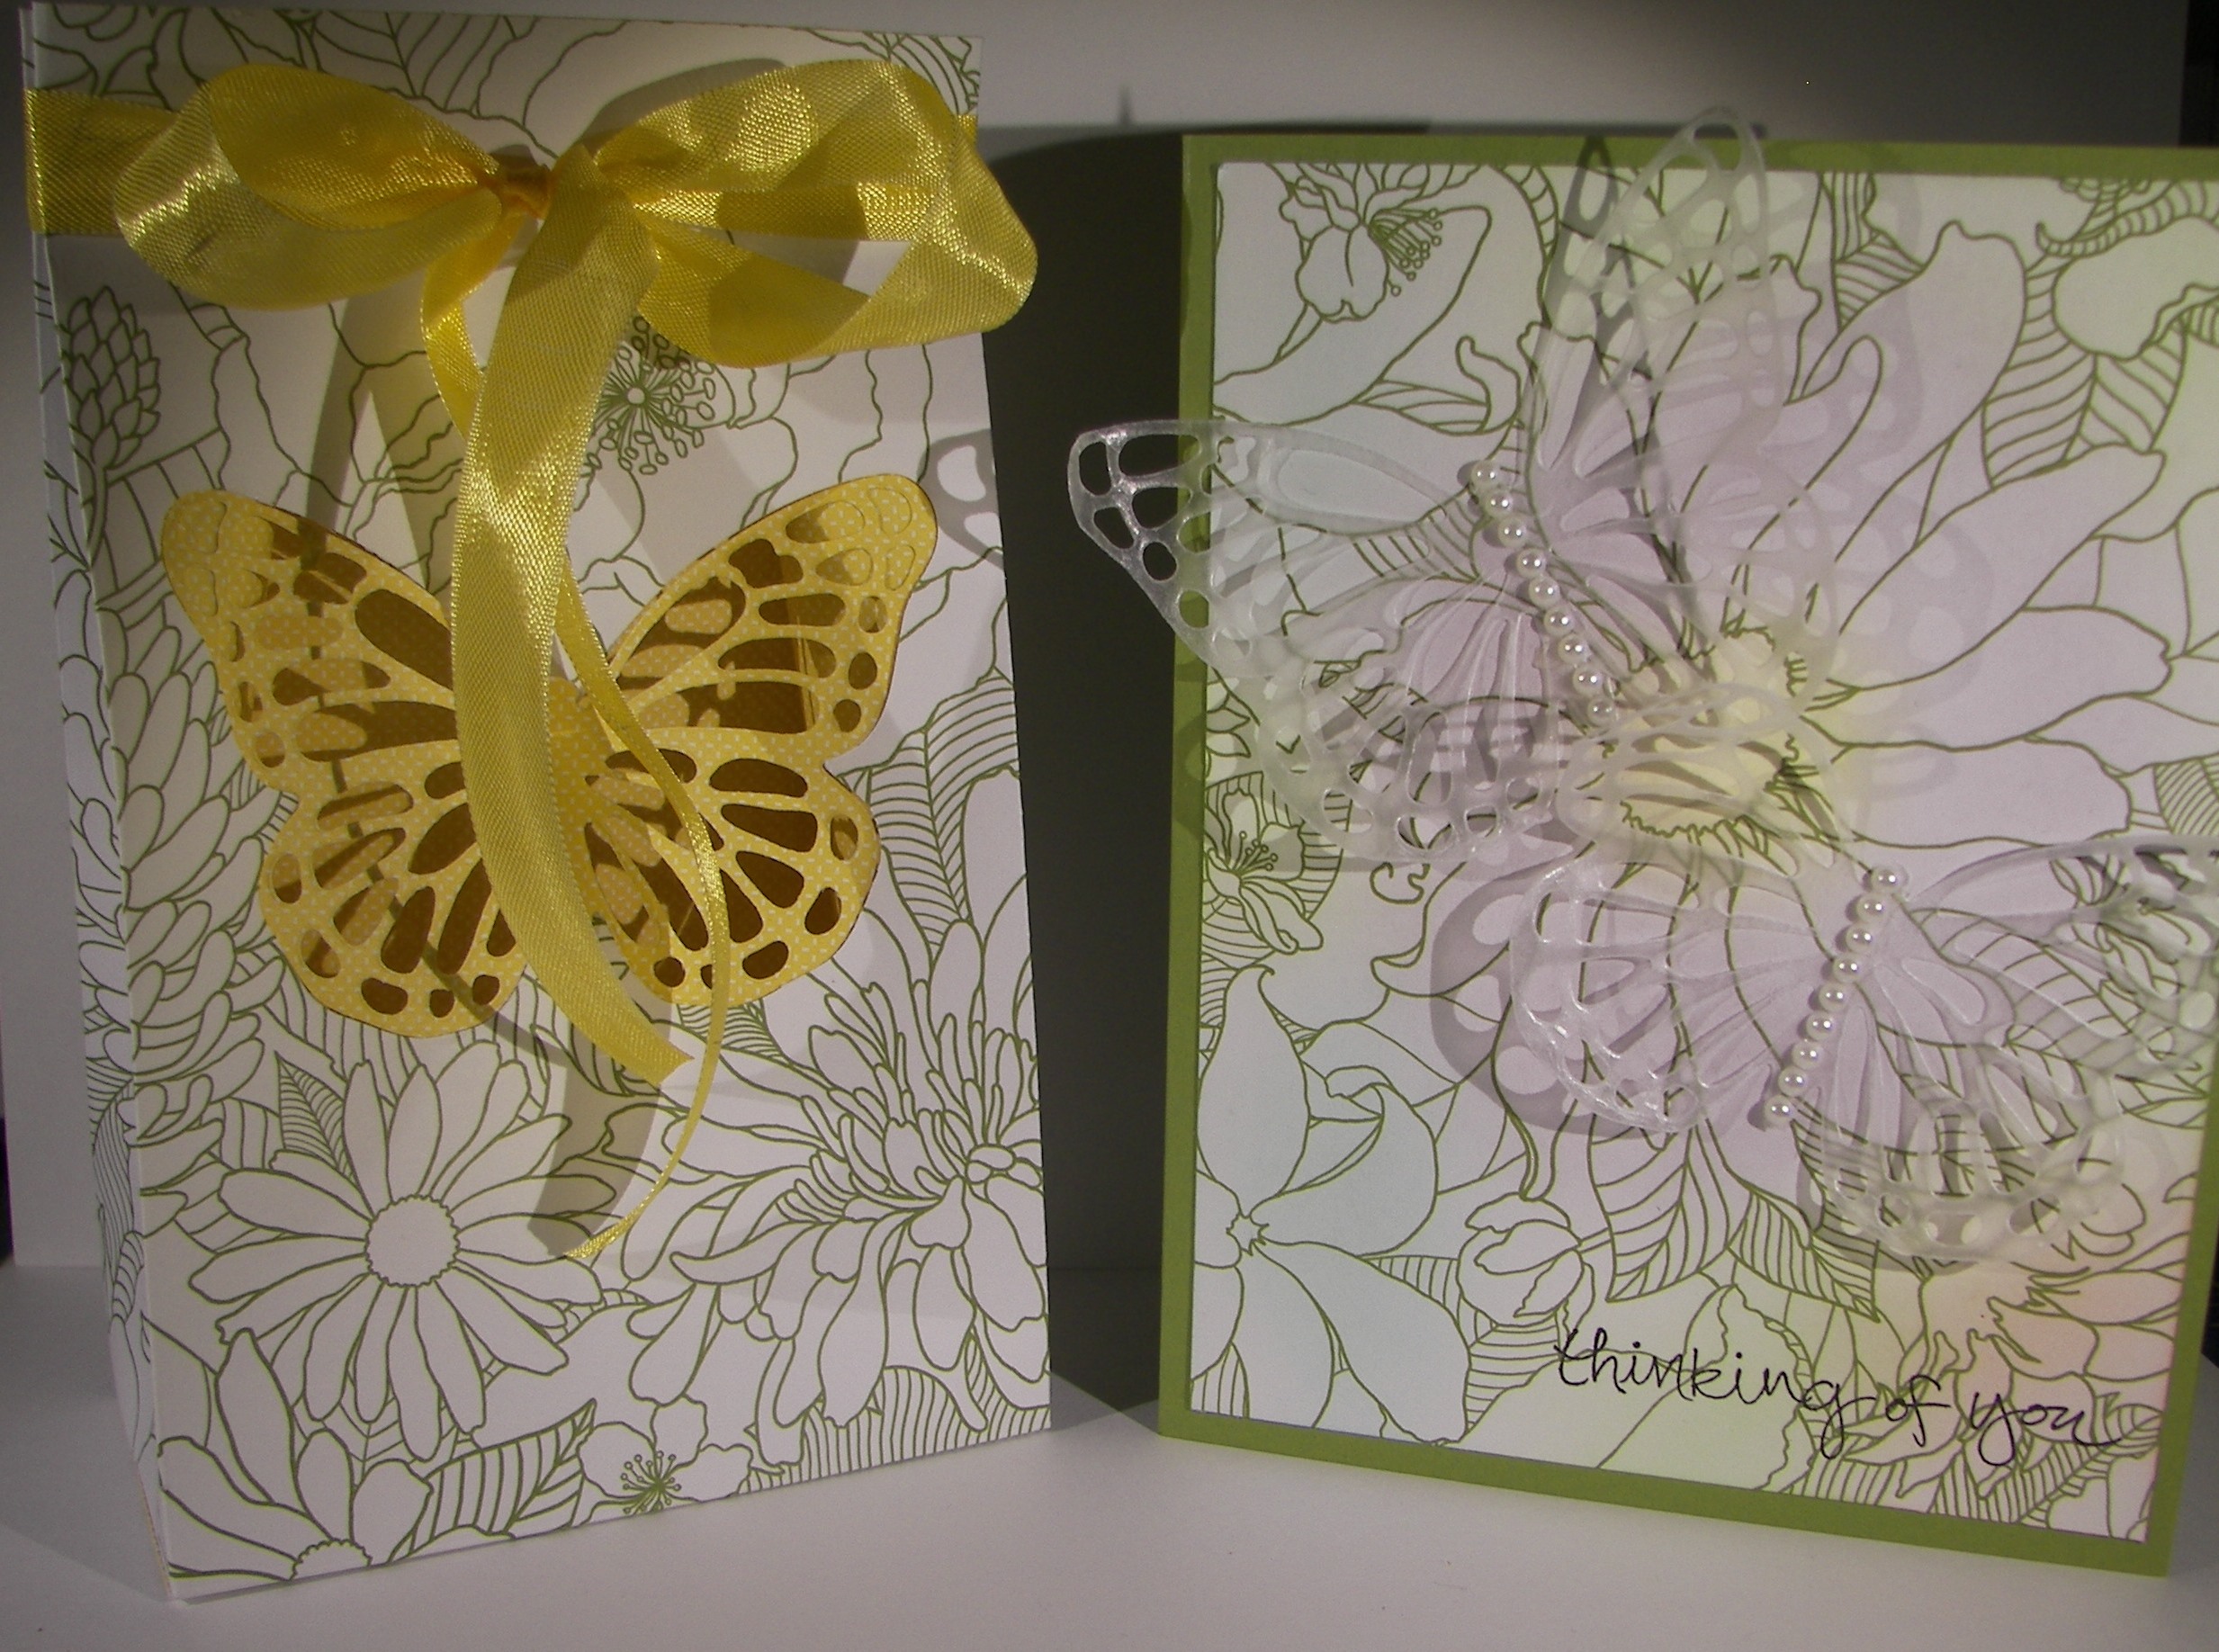
It was time to gather the butterflies, and I didn’t even use them all!  There is another punch and framelit and other stamps as well.  Clearly I love these!  Can you blame me?  They are so beautiful.  I am getting excited for a new stamp set that is on its way.  It has a dragonfly in it and those are my favorite.

One Butterfly Too Many?  I Think Not...

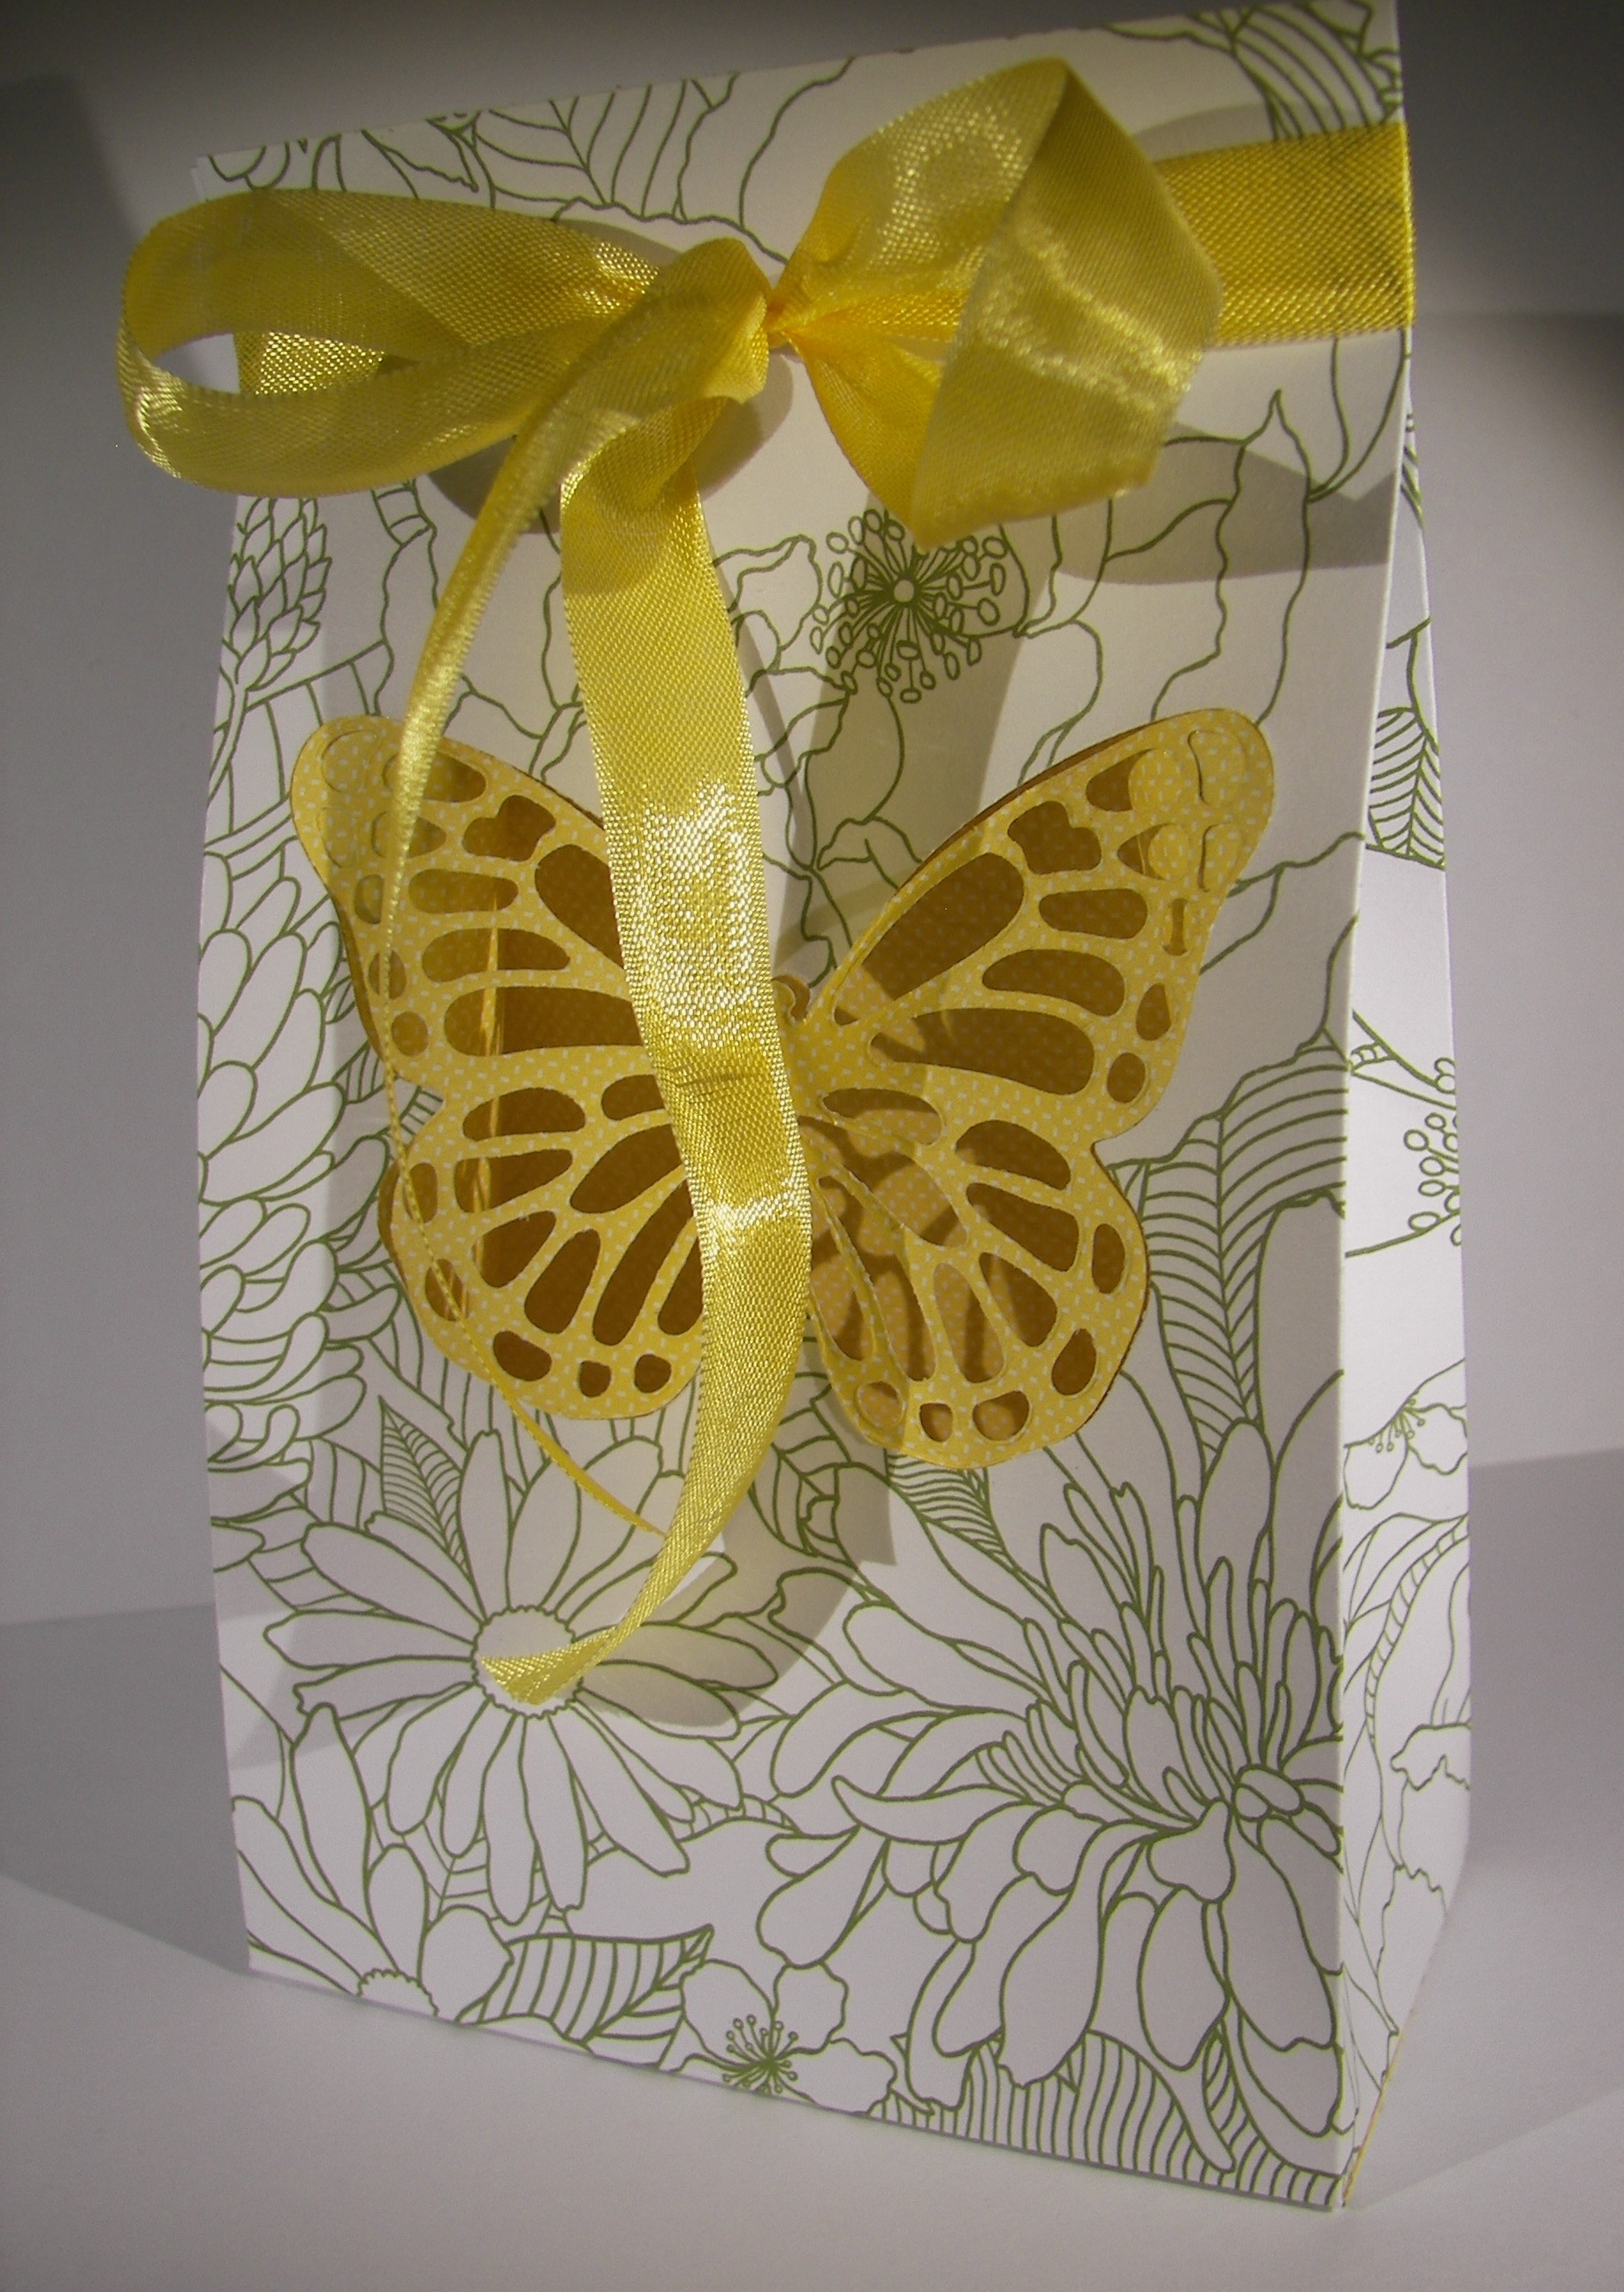
It is hard to match this combination though.  I wonder how many butterflies I have seen so far on my pioneer trek.  I might be too tired this morning to notice.  But today I get to come home.  This yellow is the accent color in my skirt and matching apron I made for this trek.  What an event it must have been.  I will have to tell you more later.

One Butterfly Too Many?  I Think Not...

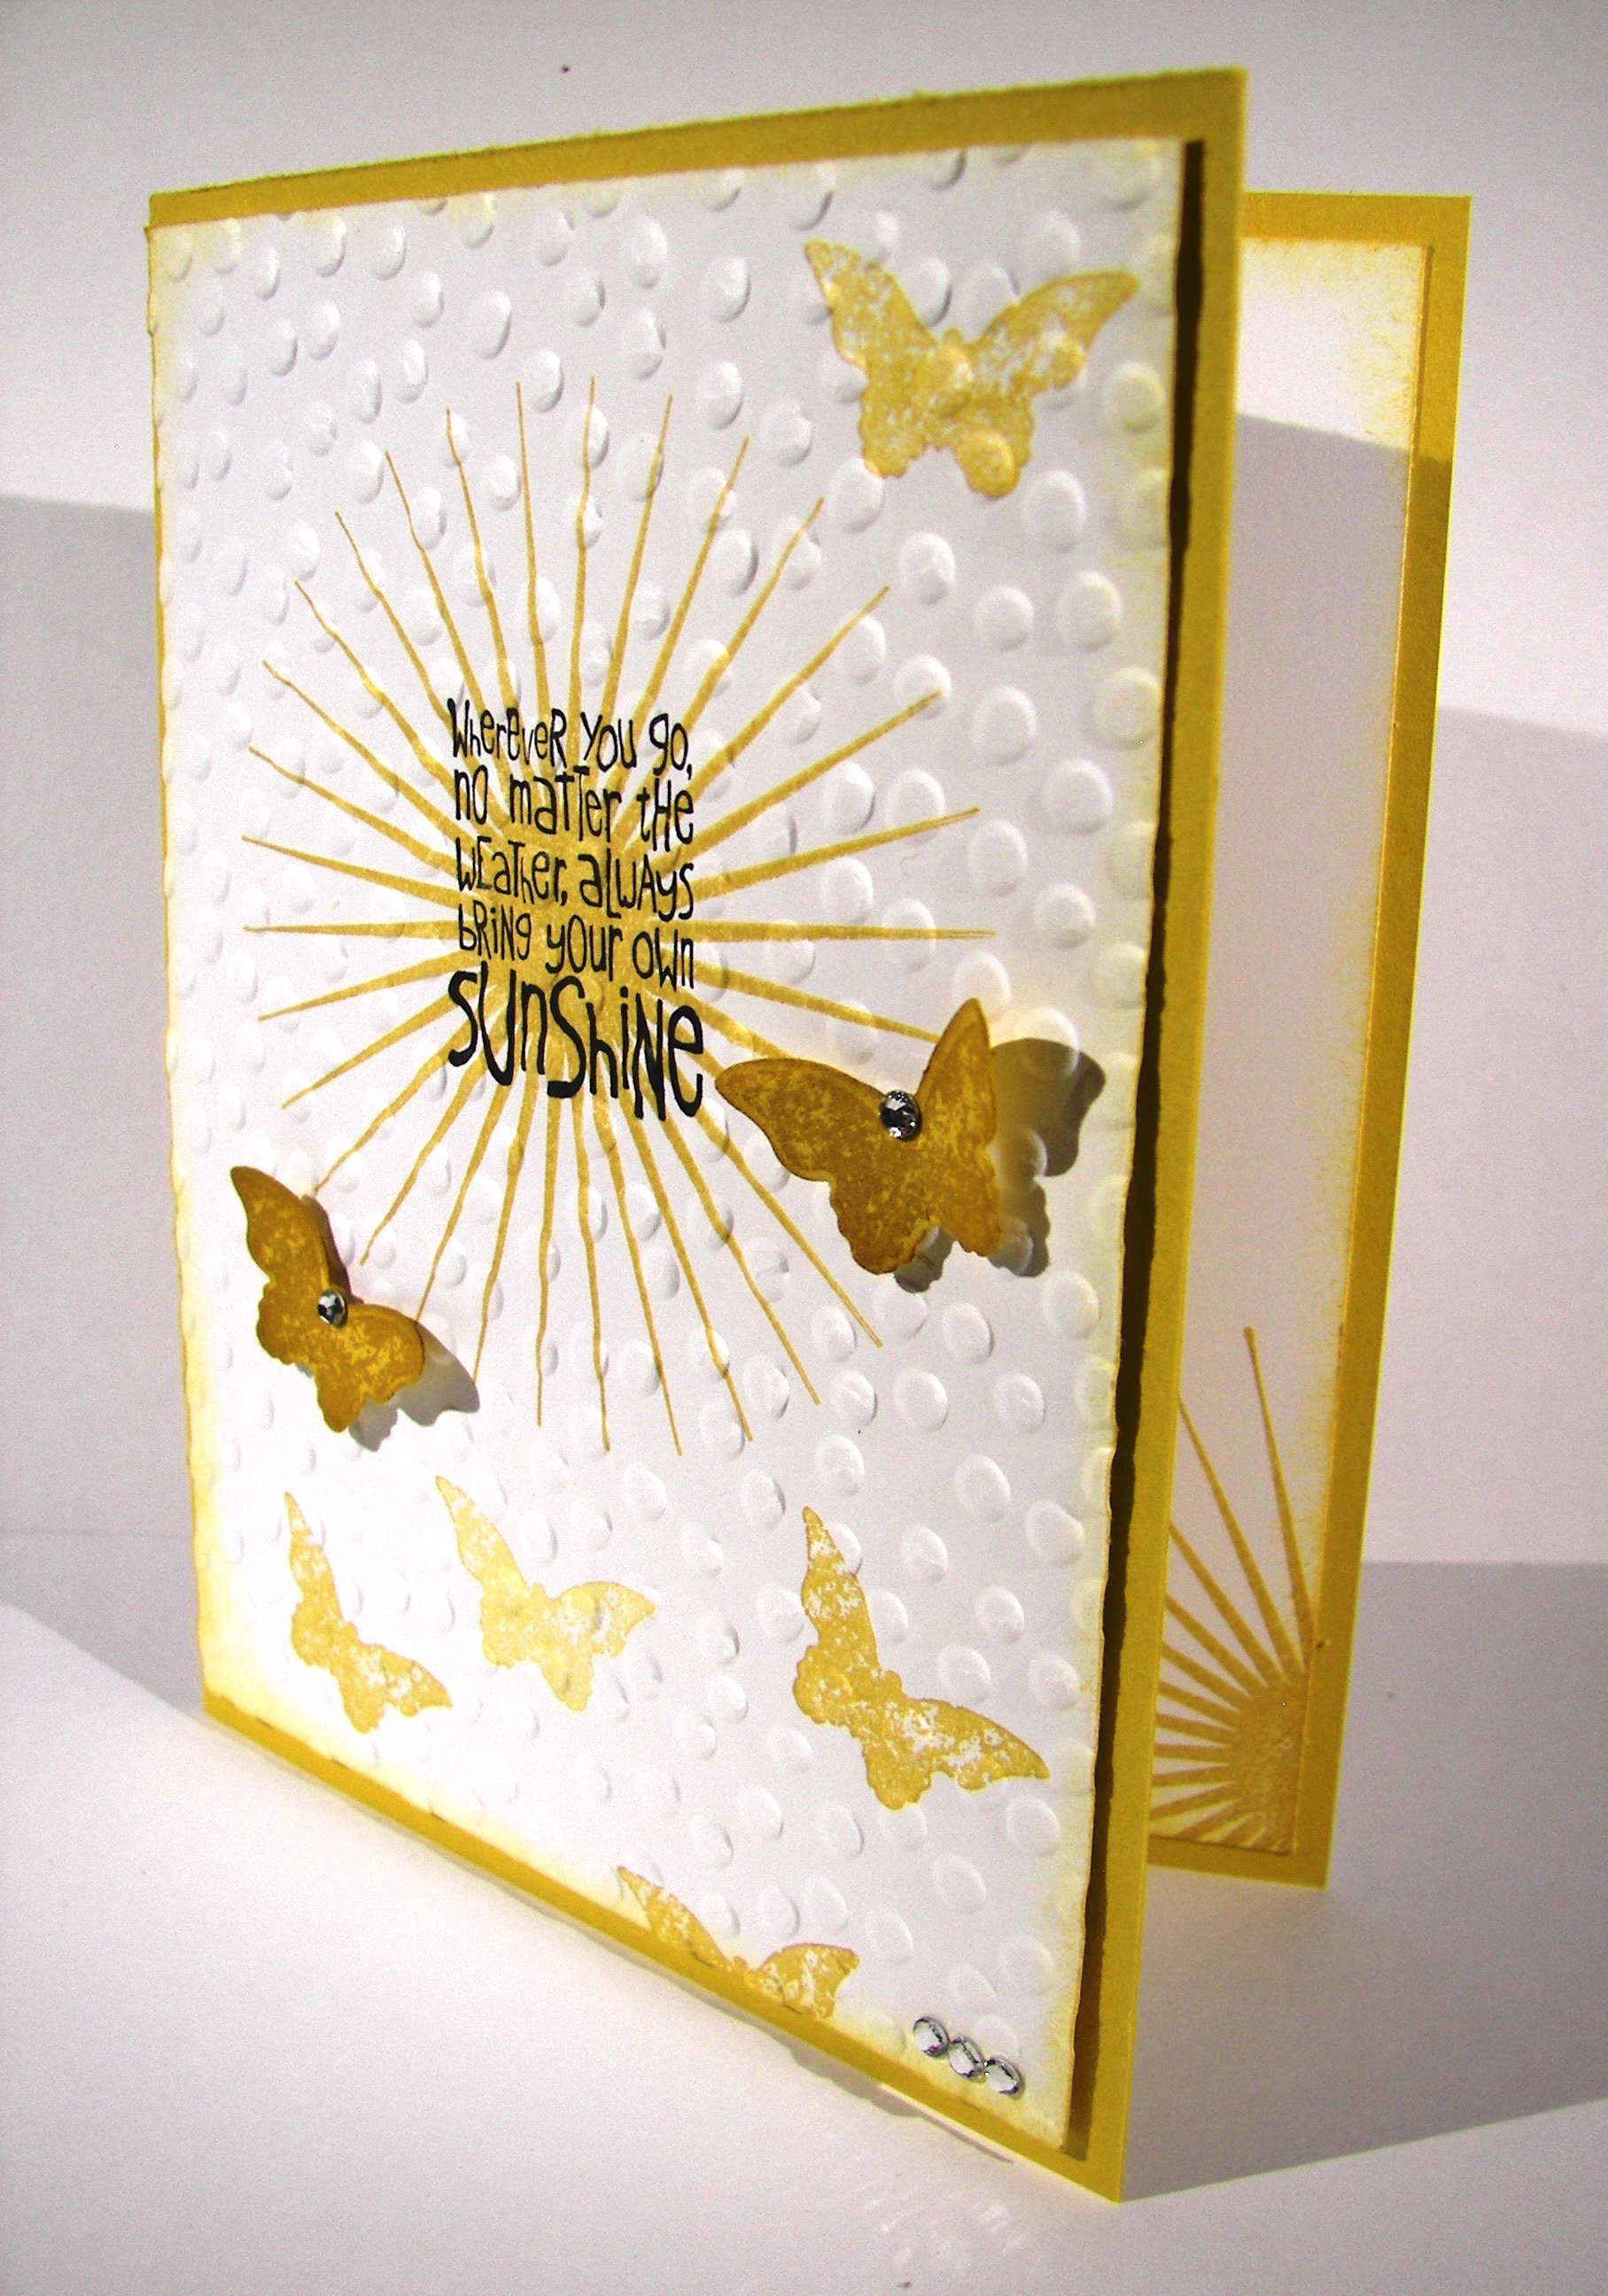
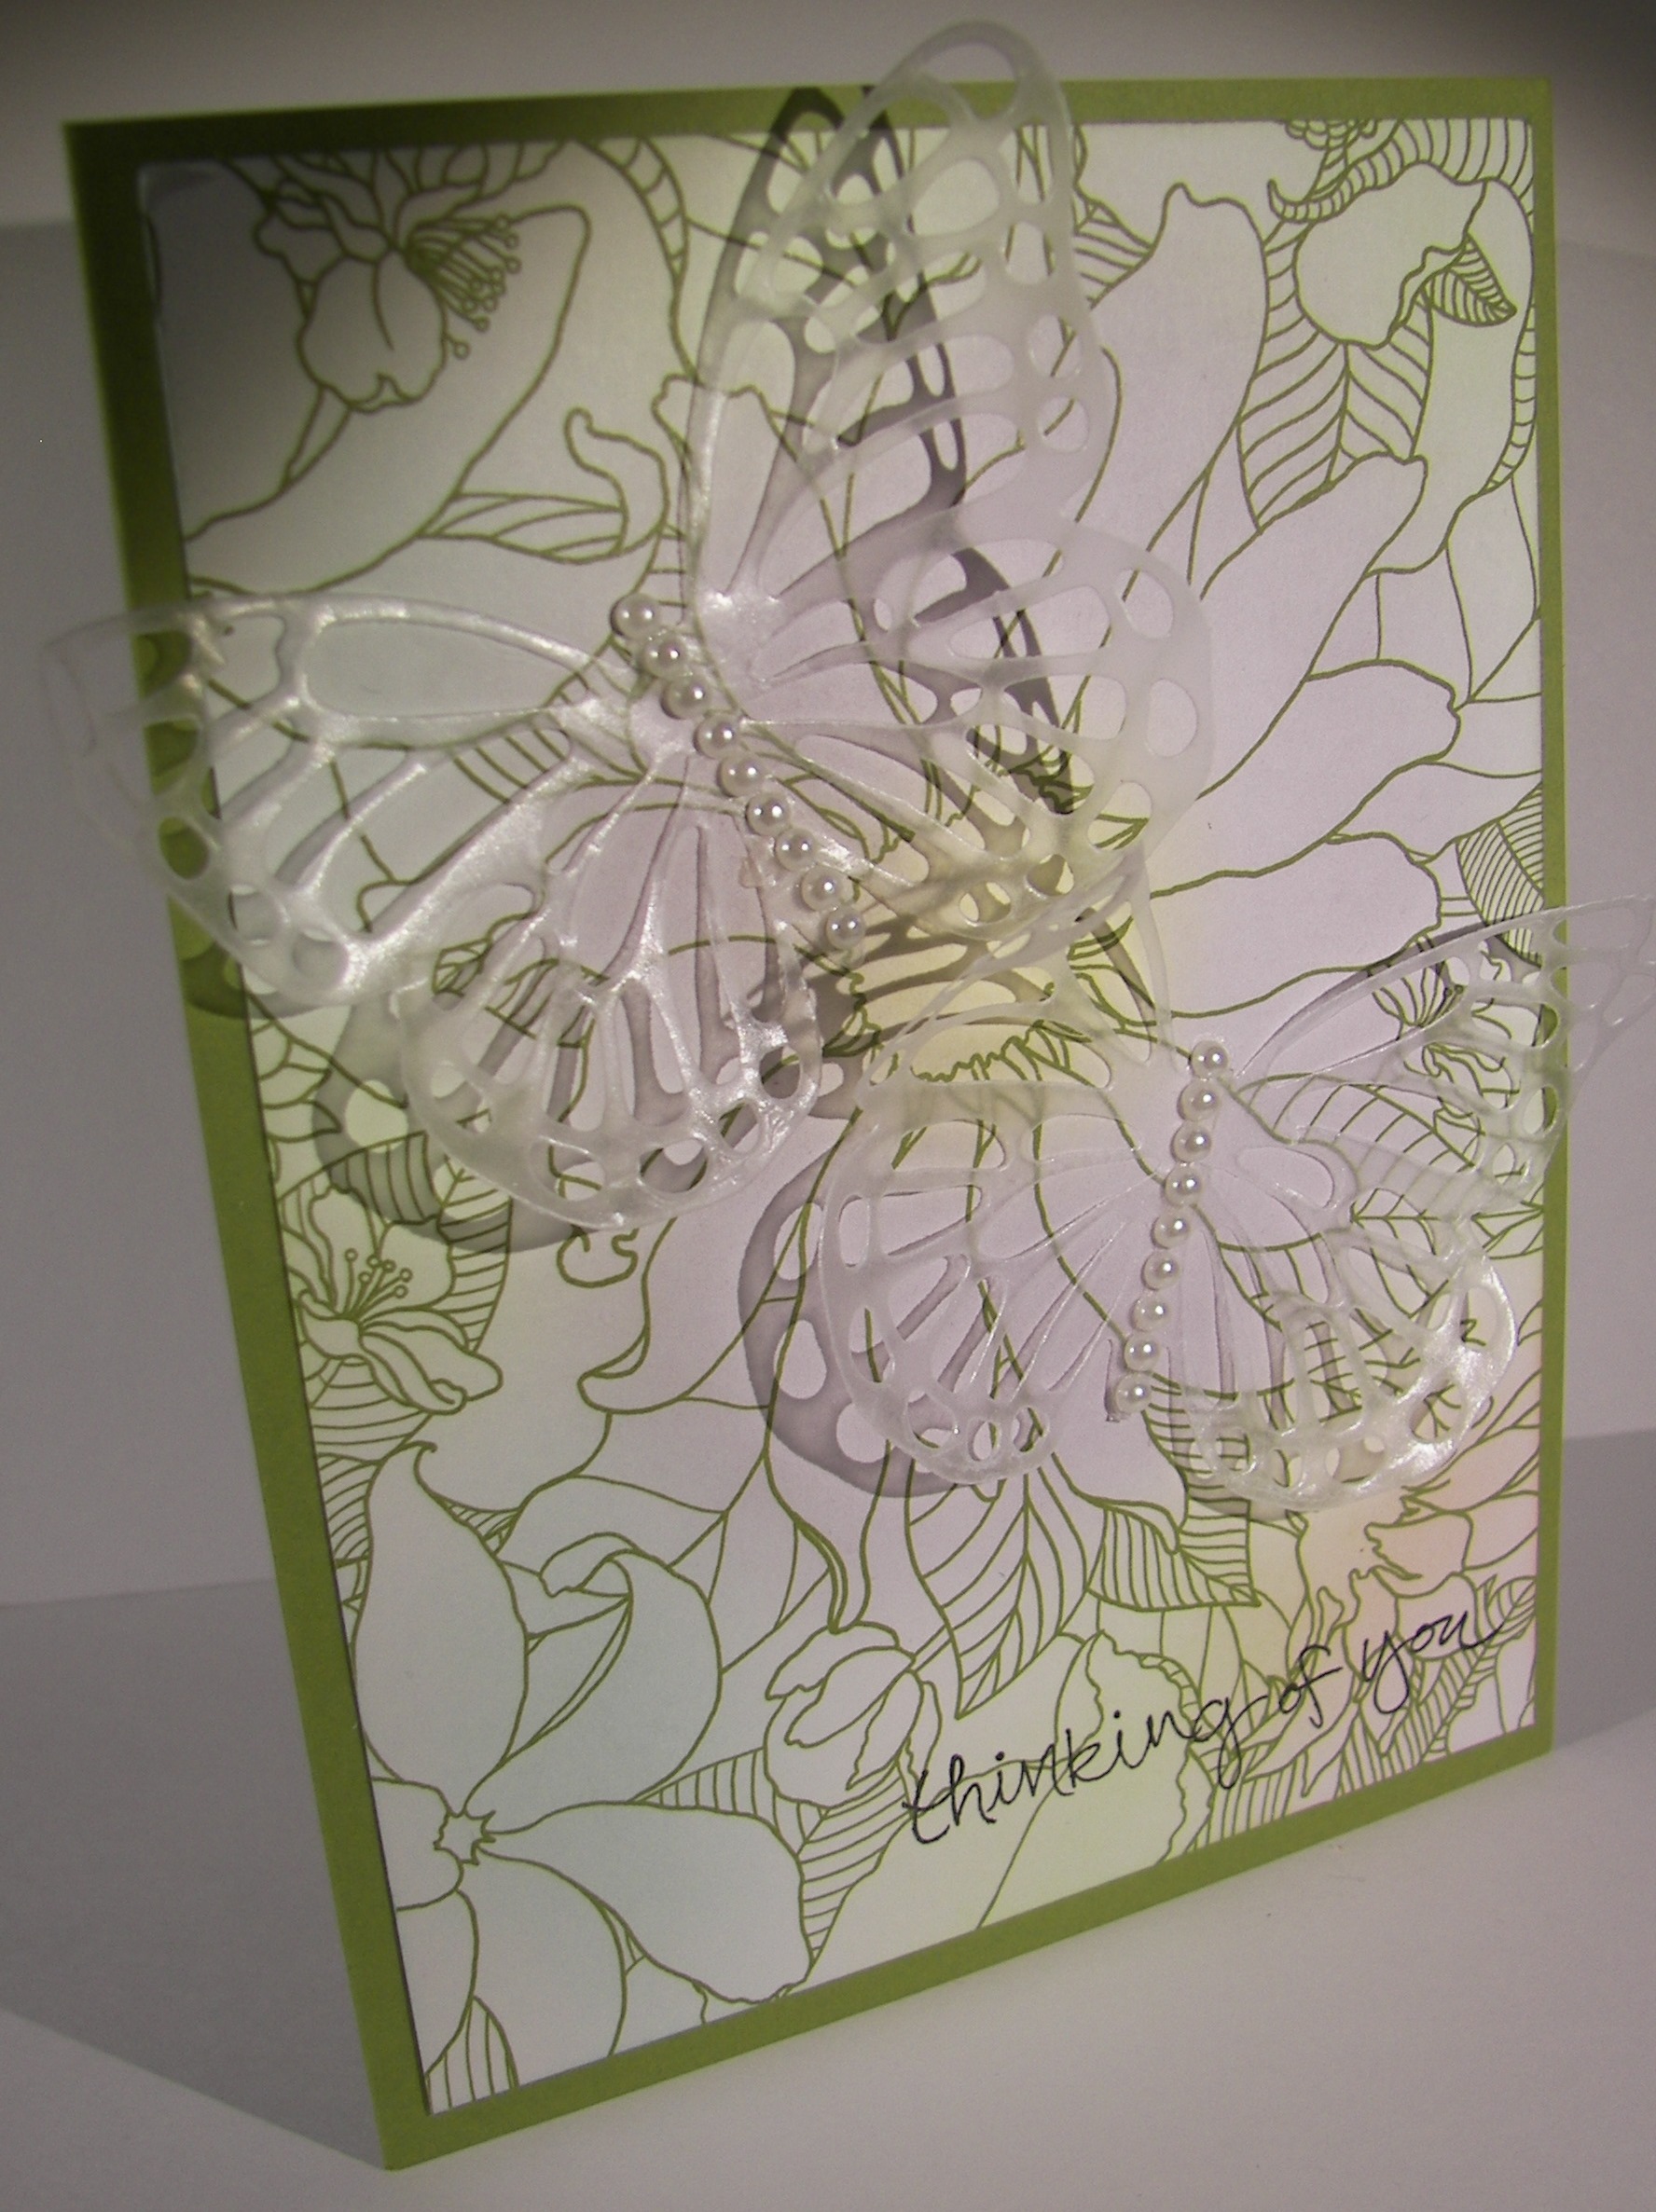
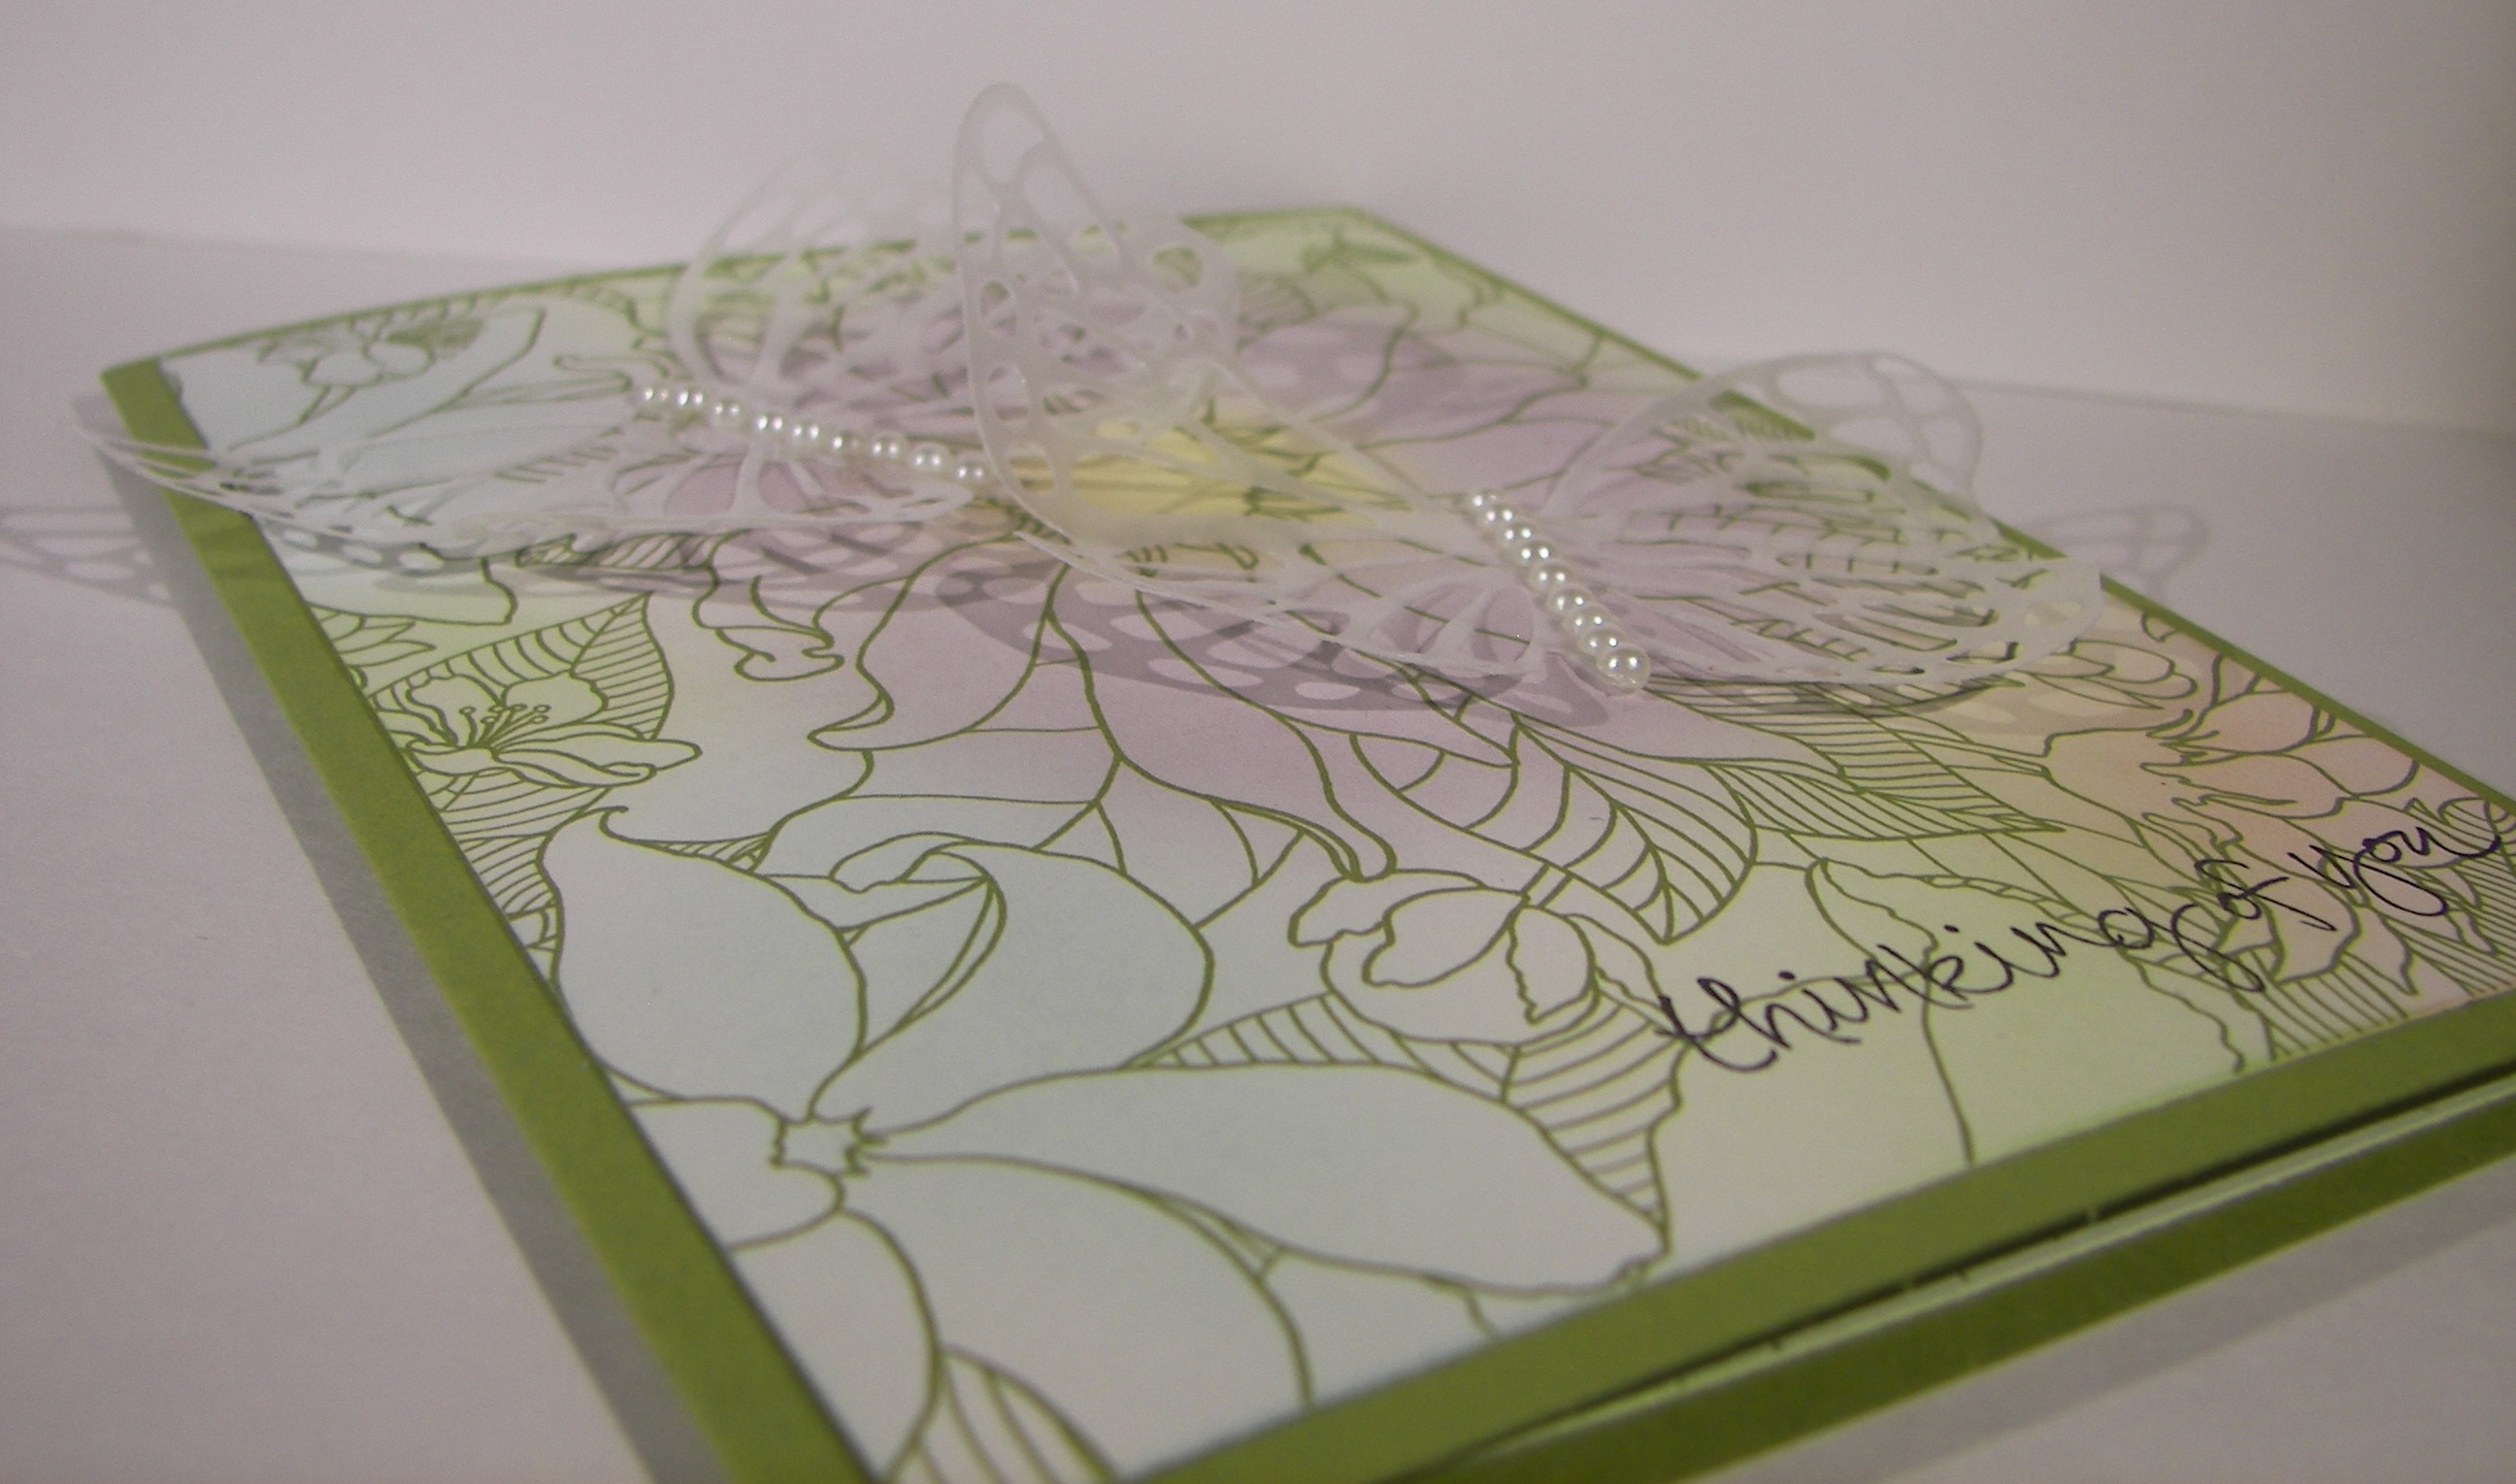
I layered up this beautiful butterflies after I sponged their edges pretty heavily.  I wanted them to be one color, but have a subtle difference as well.  It worked nicely,  I also used the tiny butterfly stamp from the perpetual birthday calendar set to create a flock of them flying up the side and across the top.  That was really fun.  With some heavy sponging that look was complete.

One Butterfly Too Many?  I Think Not...

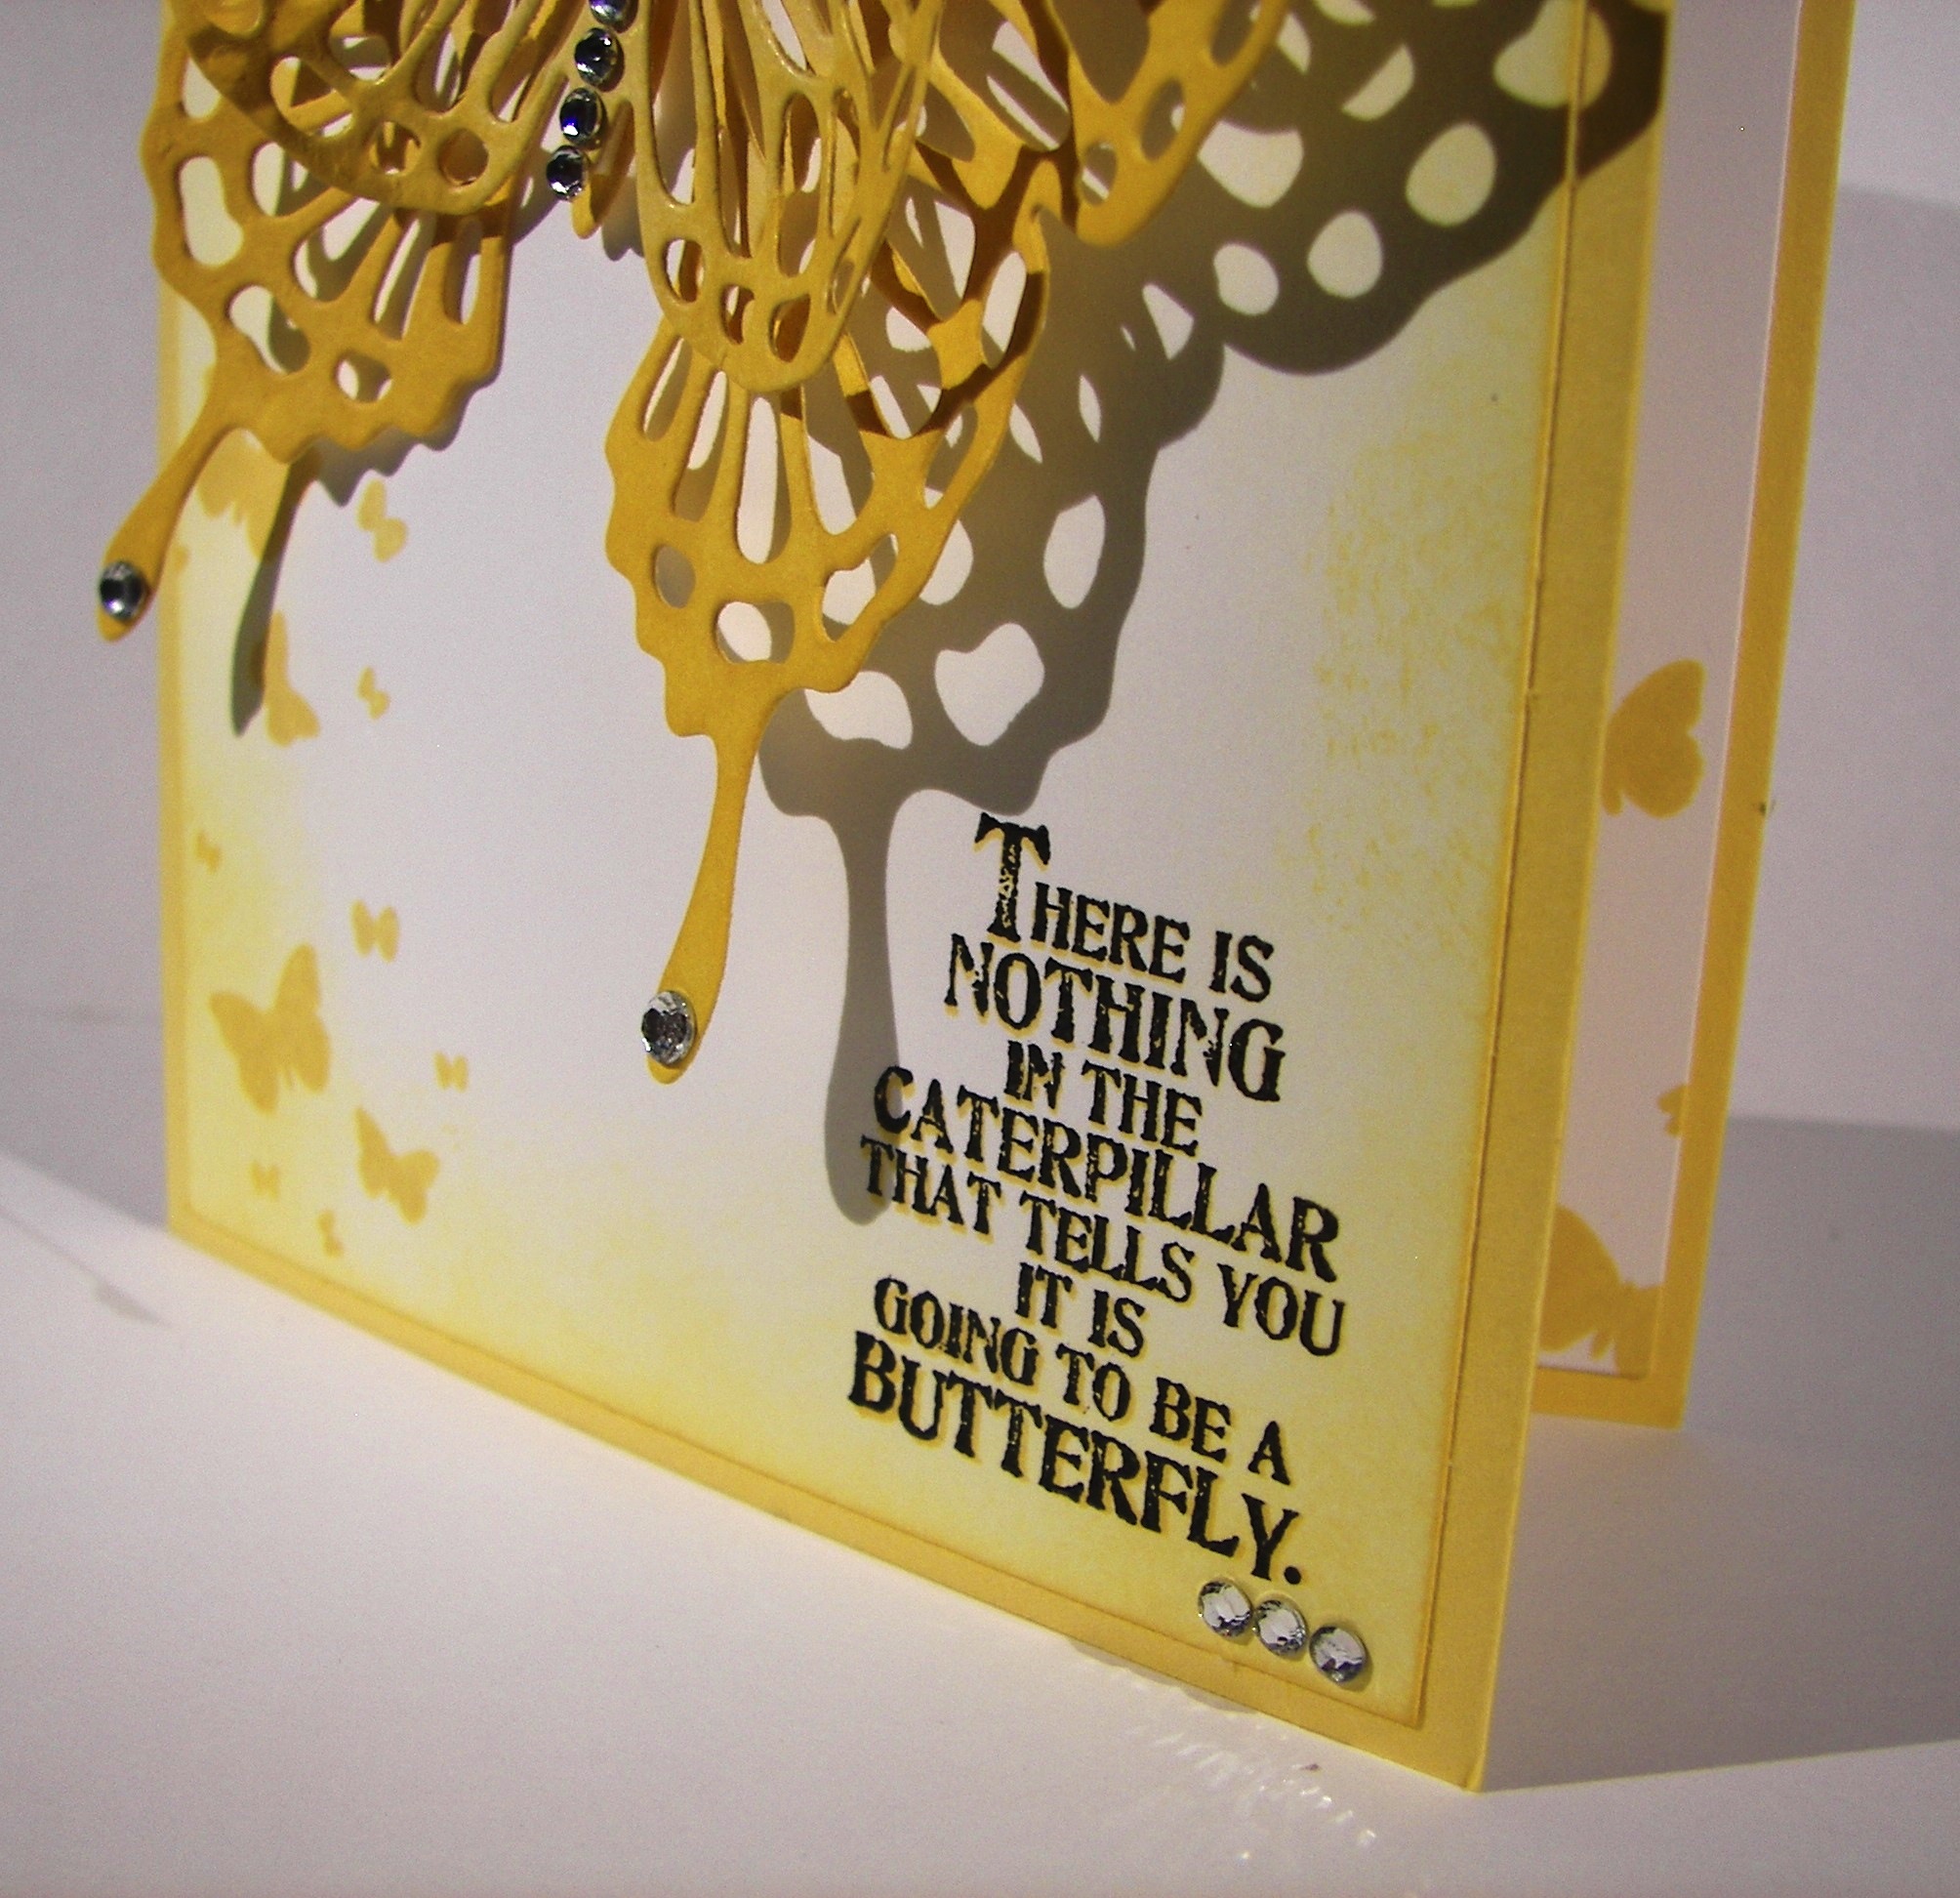
I didn’t know if I wanted to stamp my sentiment with so saffron or black.  I started with so saffron, decided it wasn’t bold enough, and offset a second stamping in black.  It worked out really well.  The photopolymer stamps really make things like that super easy.  I repeated some of those stamps on the inside and then blinged up the butterflies properly.  They do look grand, do they not?

Have a creative day!

Moana

Flower Patch Beauty

My husband was given a thank you note that inspired this simple creation.  I usually like more, but this couldn’t be more perfect.  The subtle layering of the flower, the gentle stem, and the touch of glitter come together to make this stunner.

Flower Patch Beauty

I did a narrow border with an additional layer of watermelon wonder and popped that combo up on dimensionals.  I thought about adding some of that lovely dotted lace trim, but didn’t want to interfere with the glitter or the stem.  Really, it turned out so nice.

Flower Patch Beauty

So, here it sits, in its simple glory.  I love this color and I love it even more in this beautiful card.  Maybe I should send this note back to the friend that inspired it.  They certainly are wonderful.

Flower Patch Beauty


Look for inspiration in every day life, it is there waiting for you.

Have a creative day!

Moana

Kinda Eclectic with a Ray of Sunshine

This burst of sunshine should be posting while I am in Utah getting my Denali all settled at university.  She is a huge burst of sunshine in my life, so it suits the day perfectly.

Kinda Eclectic with a Ray of Sunshine

I have used the sunburst stamp from the Kinda Eclectic set in so many projects.  It is why I bought the set, but the rest of it is just as beautiful.  I am so glad that it carried over to the new catalog.  I wasn’t ready to say goodbye just yet.

Kinda Eclectic with a Ray of Sunshine

I loved using the super smooth whisper white card stock to make a matching bag.  It folds rather crisp, but is easier to manipulate that the other card.  And of course I love the stamp.  This set is done in hello honey and it works so well.  I even got out an embossing folder to give it a little extra.

Kinda Eclectic with a Ray of Sunshine

A simple card that is all about the saying and a few bright touches to bring it full circle.  Perhaps this one will find its way to someone in need of a pick me up.  Sounds about right!

Have a creative day!

Moana

Happy Birthday My Friend

Making my own background paper is one of my favorite things to do.  Part of it comes from not having all of the new paper, and the other more important part is customizing it to exactly how I want my project to feel.  I loved these tiny little flowers, so that is what I went with.

Happy Birthday My Friend

I didn’t have patience to use my stamp-a-majig, so I just did my best.  It didn’t turn out too bad and the secondary pattern looks great.  Hexagons can look a little more strict by their shape, but using the floral one gave it a much softer look.  And of course I love a layered tag.  Go ornate tag topper punch!  I love a great set of tools.

Happy Birthday My Friend

I have some work to get done today for use.  I will be gone all next week between taking my daughter to university and participating in a pioneer trek.  I will blog ahead like I did during girls camp, that seemed to work out just fine.  I think July will be a little more kind to my schedule, I hope.

Have a creative day!

Moana

Wondrous Wreath and My Plum Trees…

I was out looking at my plum trees last night and decided I wanted to bring those colors into a project.  My photos aren’t the best, you can hardly even see the mossy meadow layer in-between the two others, but it is there.  I so need a new camera.

Wondrous Wreath and My Plum Trees...

Either way, I still love how it turned out.  I stamped off once on my first layer of leaves.  So when I added the second layer of leaves with the second stamp I left it full strength.  Lovely contrast if I do say so myself.  I did the berries in rich razzelberry to match of course.  I continued those little guys on the inside, and they are so cute.  I can see me using the berry stamp to make a background paper.

Wondrous Wreath and My Plum Trees...

I know my wording is a bit slanted, but I was tired.  The heat has been so bad lately that by the time I get to settle down to work, I am so warm and tired that I don’t have the patience I should.

Wondrous Wreath and My Plum Trees...

My brain is so all over the place.  Just too many things to get done and not enough time.  Summer break may be here, but I have yet to really enjoy any of it.  July will be better, supposedly.

Have a creative day!

Moana

Banner Blessings with Beautiful Bunch

I so enjoyed getting the silver ink out yesterday that I went back for more.  I really love working with metallic inks.  I hadn’t water colored with them before, but I thought I would give it a go.

Banner Blessings with Beautiful Bunch

The idea came from my daughters art final.  She pained this  beautiful water color and brought in gold.  It looks much more dramatic on her project, but hey, it is a start, right?  I liked how it turned out.

Banner Blessings with Beautiful Bunch

I wanted to use a stamp from my collection that would suggest a star, to match the sentiment, without being a star.  I ended up going with the flower centers from the Beautiful Bunch set.  I tried a different one first, but it looked more like paint splats or bad graphics from an old Star Trek episode.  I settled with the one you see here.  I do love making my own background paper.

Banner Blessings with Beautiful Bunch

I repeated the stamping on the edges of the card base and of course had to stamp on the inside opposite corners of my insert.  I even did one on the back bottom center, just to make Donna happy.  I love how the gold ink looks on blackberry bliss.  I see another project with those two coming along soon.

I used my aqua painter and the gold ink to highlight the scripture reference.  I stamped ink on a clear block and used that as my pallet.  It worked like a charm!

Have a creative day!

Moana

Cucumber Crush Party

Getting back into the groove can be a bit slow at first.  I also gave myself a challenge this morning by making cucumber crush my main color.  We haven’t become friends just yet, so I thought we needed some together time.  I helped it find a friend in blushing bride, and I like how it worked out.

Cucumber Crush Party

I used a full sheet to make this pretty gift bag.  I stamped the background paper with the fun leaf from the Kinda Eclectic set.  Loved it.  I used it full strength some, but mostly stamped it off once first.  I like how different this color looks at different strengths.

Cucumber Crush Party

I sometimes stop myself from using flowers, because I feel like I really get them everywhere.  I just love flowers!  So, I didn’t hold back at all here.  I usually stamp off blushing bride, but it needed to be strong to work with this fun green.  The combo is full of life.  I think a yellow would have paired nicely, but I had to stop somewhere.

Cucumber Crush Party

These pretty clear faceted buttons are so fun to use.  It helped me finish up this gift bag nicely.  Sometimes I go overboard on bling, but not today.  I wasn’t sure when I started this project, but I love how it ended up.

Have a creative day!

Moana

Camp Bountiful in a Card

Spending a week with a wonderful group of ladies working together to serve the most beautiful girls, communing with nature and worshiping God, it is obvious why I created the card I did.

Camp Bountiful in a Card

Lovely as a Tree will remain one of my long time favorites, always.  Being surrounded by nature and removed from technology and distractions brings solace like no other.

Camp Bountiful in a Card

The girls, that huge group of lovely girls, worked together, learned together, laughed together, and cried together.  It was such a wonderful experience and I hope I get the opportunity to serve again next summer.

Camp Bountiful in a Card

It wont be easy to get back into the routine of life, but there isn’t a choice.  But, I can choose to keep myself in tune with the things I learned and felt.  I will continue to serve those I love.

Have a creative day!

Moana

Guy Greetings and Father’s Day Too!

Card workshop is today and even though I am totally exhausted, I know I will have a great time.  This is one of the projects we will be making.  It is getting close to Father’s Day, so of course we had to make something to celebrate that wonderful holiday.

Guy Greetings and Father's Day Too!

Can you see the learning opportunity in this first photo?  I was chatting it up with my own father and wasn’t paying close attention.  I know my stamping is a bit wonky, but I neglected to use my stampin’ pierce mat with the one on the left.  Of course my image wasn’t as clear and even a bit void in the center.  Yes well, it didn’t click on that second attempt.  The one before is hiding behind that one.  I tried to re-stamp it, but even with the photopolymer being so very clear, the image was too detailed for me to line up perfectly.  It gave it a nauseating 3-D look that had to go.  We all learn, right?  Use that mat for best results with photopolymer.

Guy Greetings and Father's Day Too!

Some of my ladies like to have choices as they work, so this should work nicely.  The stamp set it so huge that not only do they have choices, they just might be overwhelmed.

Guy Greetings and Father's Day Too!

I have used just a touch of seam binding ribbon to add some color, just a little bit. A nice masculine card is definitely something to have on hand, and this fits the bill.  I am so glad this stamp set carried over because it is the best for making all kinds of manly cards.  Love it!

Have a creative day!

Moana

Big News with Perpetual Birthday Calendar

I must be one of the few Stampin’Up! demonstrators not showing new product today.  It is the first day with the new annual catalog.  Well, I have a different perspective sometimes.  I get just as excited for the stamp sets I already have that carry over to the new catalog.  So, there you have it.

Big News with Perpetual Birthday Calendar

The first is Big News.  It has these fun sentiments designed around exciting news and events.  They are written like we talk in a quirky way.  It makes it kind of fun.  The second is Perpetual Birthday Calendar.  I sure have gotten a lot of use out of this set.  An easy background maker if you ask me.  It really gets a lot of use.

Big News with Perpetual Birthday Calendar

I am also happy that the cotton ribbon, which was new last catalog, stayed with us.  It really makes such a pretty accent.  I must say, this bow is nearly perfect.  I kept this card pretty simple, but sometimes that is all I want.

Big News with Perpetual Birthday Calendar

I did a small pre-order earlier in the month to get the new colors that I have already shared with you.  I also got a couple of host sets, and they will be so fun.  Now I will let myself get into the new catalog and get a few stamp sets.  Isn’t that fun?  I thought so.  You should check it out.

Have a creative day!

Moana

Thank You for Mint Macaron

Isn’t this lovely minty color so pretty?  This is the third of the five new In-Colors for Stampin’Up! and I am already having so much fun with them.  I wasn’t quite ready to let go of coastal cabana or some of the others, but this helps me feel better.

Thank You for Mint Macaron

I hadn’t made a bag or box for a bit, so I thought I would do both.  I am still using the same stamp set, A Whole Lot of Lovely, three days in a row.  That just goes to show how versatile this set is.

Thank You for Mint Macaron

Of course I got the new colors, but I also had to get all of the new lace trims as well.  I am quickly getting attached to them.  They are a little more subtle and opaque on my projects.  More of an accent than a focus.

Thank You for Mint Macaron

I left this bag rather simple.  I wanted to just see the stamped image and focus on that.  It really is pretty.  I know I will be using this one like crazy.  Speaking of crazy, that is what is in store for my day, so I had better get on it!

Have a creative day!

Moana

A Whole Lot of Lovely

How about a sneak peek at some new product coming out next week!  I have been waiting to play with some of the new products, but have made myself wait until it was closer to being released.  The background stamp is a returning favorite, but the rest is all new!

A Whole Lot of Lovely

Let’s start with the color.  It is called Tip Top Taupe and I love it!  It is darker than Sahara Sand and lighter than Crumb Cake.  I think it is so pretty.  Wait until you see the other four new In Colors.  I will do one a day to show all five.  How fun!

A Whole Lot of Lovely

The stamps shown are two of the four in one of the new host sets coming out. I love it when they make a stamp that fits a punch just right.  How perfectly does this pretty sentiment fit inside the 2″ circle punch, right?  Just the perfect nudge of white boarder around the image, yummy.  And then of course just a little inside stamping to coordinate.  I really went at the sponging today and gave it an almost vintage look.  I wanted to put this new color to the test.  It has passed with flying colors.

Take a look at the new ribbon though.  It is called Dotted Lace Trim and it comes in the new five colors.  It is actually quite soft and just a bit stretchy.  I can see myself using this often, good thing I get a discount.

Have a creative day!

Moana

Flowerpot Painted Petals Trio

Sometimes when you draw a blank, you still come out on top.  I was sure I had crafters block yesterday.  So I sat and read a novel instead.  When I made myself go back and sit down I decided to pull out a sheet of designer series paper and just design a bag and call it good.  As soon as I had this sheet of paper on my desk my brain got busy.  Cool right?

Flowerpot Painted Petals

I hadn’t paired this ribbon with rich razzelberry yet and I wish I would have.  They look great together!  And then a bit of glimmer paper to frame a tiny sentiment and we are off and running.

Flowerpot Painted Petals

I trimmed off a 4″ section from the whole 12 x 12 for a card front.  When I finished the other cut to give me the 4 x 5 1/4″ front I needed I was left with a choice.

Flowerpot Painted Petals

Make a second card, put the remainder back with its set, or make another tiny bag to go along.  The tiny bag won.  What a cute little baby bag.

Flowerpot Painted Petals

This set went together really quickly.  That is what happens when you have great product.  Just a little bit of stamping, some creasing, adhesive here and there and a ribbon on top.  I went to bed with a smile for sure.

Have a creative day!

Moana

Hello There Farewell

I have been trying to stay focused on this years catalog and finish it through, but the new product keeps on sneaking into my thoughts.  I thought this would be a fitting solution to all that is going on.

Hello There Farewell

I like to make samples using the new in-colors for the season and send them along with the new catalog to my club ladies.  They love getting to see, and touch, some of the new product along with the catalog.

Hello There Farewell

Last year I made a card in this format using tangelo twist as one of the five samples included.  I thought it fitting to make another with a companion gift bag, since I love that these days, with an in-color that is retiring.  Farewell to strawberry slush, and your four other friends.  I have loved using you!

Hello There Farewell

I have begun planning my new samples with the wonderful new in-colors.  I also got to pre-purchase some of the new host sets, perks of being a demonstrator, and they are lovely!  They will make some great gifts for my ladies.

Have a creative day!

Moana

Park Lane Duo

I started this set yesterday morning, got stumped, fussed last night, and finally fixed it this morning.  I kept trying to put the yellow butterfly on the card front.  Yes, the one I inlaid back into the gift bag I cut it from.  Strange how things come together better when you give your creativity a break to refocus.

Park Lane Duo

I colored the paper with my ink sponges.  I didn’t want a lot of exact color, just subtle hints.  So I just used the sponges with leftover ink already on them.  It did the job just right.  Of course my photos make it hard to see, but I love the effect.

Park Lane Duo

When you use delicate die cuts it helps tremendously to sandwich wax paper in between the layers.  The paper just pops out then.  I decided to use the wax paper ones as well.  I didn’t want to cover up the coloring and the yellow butterfly just took over.

Park Lane Duo

After I swapped things around I fell in love.  I attached my wax paper butterflies with some folded glue dots and then ran a string of basic pearls down the body.  It gave such a delicate finish.

Park Lane Duo

One quick stamp from the Sheltering Tree set and the card was done.  No ribbon, no other extras, just some light color and transparent butterflies.  Since they are so thin, the move when the card does.  Beautiful.

Get out there and have a creative day!

Moana

Huge Thank You Part 2

Here is the other half of the project.  You saw a bit of color at the front and probably suspected more cards.  How many?  How about ten?  Yup, I did the entire brights collection.  I knew this stamp and card idea would look wonderful no matter what color I used.  I wonder if I should do the other color sets?

Huge Thank You

All ten cards fit nicely inside this container that coordinates with both the gift set and the main card.  It also allows the large card to be on display without being in the way.  What a perfect way to brighten up your desk, right?

Huge Thank You

What card set would be complete without matching envelopes?  It just finishes everything off.  I only goofed one envelope with the stamp in the wrong corner.  It is hard to get everything right all of the time.  I can deal with that.

Huge Thank You

Now it is turned over to my daughter for nice signatures and gift giving.  It always feels good to say thank you, especially when it looks as beautiful as it feels.

Have a creative day!

Moana

A Huge Thank You

When a lot of people need to say thank you, you need a huge card.  This one measures 5.5 x 8.5, totally huge.  It has signing panels on both sides, plenty of room for everyone.

5-10 (2)

I had the opportunity to be a driver for my oldest daughters small business class field trip to Silicon Valley.  There was a lot of prep work, a hectic schedule, and highway time galore.  I thought it appropriate that the students thank their teacher for all of her hard work.

5-10 (3)

To make it a little better, I made a little something extra that I will share with you tomorrow.  You can see the top of them poking out of the holder.  It should sit nicely on her desk either at home or school.

5-10 (1)

My Denali will get the students to sign during the morning and give it to her during class.  It should be a nice thank you from all of us.  Sometimes we need to help others to be grateful.  Let’s call this an additional learning opportunity for the students.

I will share photos of the gift portion of the thank you tomorrow.  So festive and fun.

Have a creative day!

Moana

Happy Heart Mini Treat Bag

Could this treat bag be any cuter?  I don’t know, maybe.  I did buy some chocolate to put inside, but forgot to take a photo with them included.  Ooops, but it will still get in there.  I am actually going to give it away today.

Happy Heart Mini Treat Bag

I used the framelit set to cut out the bag bits.  While I was working the big shot I went ahead and cut out the ‘for you’ sentiment from the same paper, calypso coral. I did some sponging, but knew I needed something more for the bag front.

Happy Heart Mini Treat Bag

I used the heart framelit from the same set on some of the coordinating washi sheets.  I had planned on sticking it directly to the paper, but the embossing changed that plan.  I left it on  the white background paper it came on and liked it.  I did punch a few hearts with the bitty heart punch and stuck them on.  But not til I had embossed the bag front with the happy heart folder.  Those little hearts fit in pretty darn good.  I used my stylus to help tuck them in just right.  Before I did, I used my brayer and inked over the embossed hearts to make them pop a bit.  I got a little messy, so I went with that and sponged a bunch to help balance it out.

Happy Heart Mini Treat Bag

I used the row of dots framelit, also in the same set, to make some sewing punches for my ribbon.  It wraps around the back, but laces in the front.  I put it in a bow and tied my tag on.  I did stick the tag with a dimensional to help it stay just right.  Now, to get the chocolate in and give it to my friend.  Should be fun!

Have a creative day!

Moana

Sassy Salutations with Flowering Flourishes

Let’s just say that my camera doesn’t always do me the best favors.  It is pushing ten years of heavy use, guess that is to be expected.  You get the idea though.

Sassy Salutations meets Flowering Flourishes

I was stumped for an idea, so I asked my youngest daughter for a little help.  All I asked her for was a color, something to get me started.  She said red, but not a love card.  I took her challenge and had fun with it.

Sassy Salutations meets Flowering Flourishes

I don’t normally work in red, but I do like the results.  I used two cut and ready card bases, retiring sad to say, for this set.  One for the card and the other for the box.  You could also make these from just one sheet.

Sassy Salutations meets Flowering Flourishes

I stamped on the velum with stazon and let it dry for a bit while I did the red stamping.  I hid my adhesive under the stamping and my embellishments.  Aren’t these just beautiful?  When they went on sale I broke down and bought a couple of containers.  So glad I did.  They are also retiring.

Sassy Salutations meets Flowering Flourishes

Even though my camera didn’t help out too much today, I think you get the idea.  Give yourself a challenge and see what happens.  You might be pleasantly surprised.

Have a creative day!

Moana

Ray of Sunshine CASE

What happened to yesterday?  Well, it was absolutely all over the place!  It started out with finishing up this batch of handouts for a church youth lesson, 32 of them to be exact.  I had to enlist some family help to get them done in time.  They really looked beautiful all splayed out on the dining table.

Ray of Sunshine

We were off to church and it was so lovely.  My lesson went really well, because I have a great group of young ladies that I get to work with.  I made sure to share the extras before I came home, no need to add to the large stack of blog projects.  We went up the hill to have dinner with my husbands parents, spending much needed time there.  Only to return home to remember a church girls camp meeting that I had indeed completely forgot.  What a busy day.

Ray of Sunshine

I did CASE myself on this one.  But I needed a sunrise background to match the phrase which went perfectly with the theme of my lesson.  Inking up all of those backgrounds can give your hand a bit of a cramp.  But since I was all over the place I didn’t have a chance to share them with you.

Ray of Sunshine

So, I missed a day, sorry about that.  It should be a bit more calm today, I hope.  Let’s hope work is reasonable.  Oh, and I get to pre-order today in the new Stampin’Up! catalog!  It doesn’t go live for another month, but that is a perk of being a demonstrator!

Have a creative day!

Moana