Woodland Scene

The awesome techniques used in making this card certainly aren’t new, but I finally got around to trying it myself.  I have always wanted to, and last weekend I had the perfect opportunity.  Interestingly enough, I spend enough time preparing to teach others, I often neglect teaching myself.  Thank you YouTube!  And of course all of those terribly creative crafters who share their videos.

101_1826

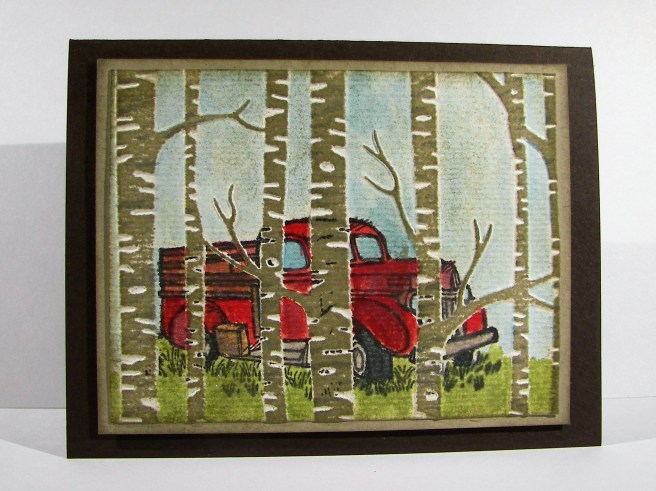
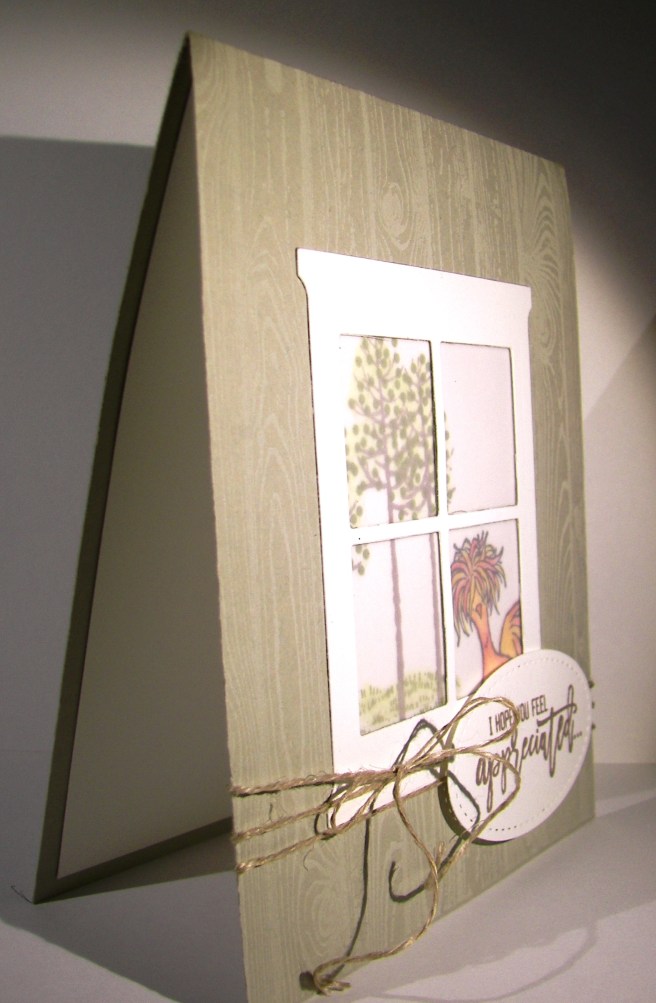
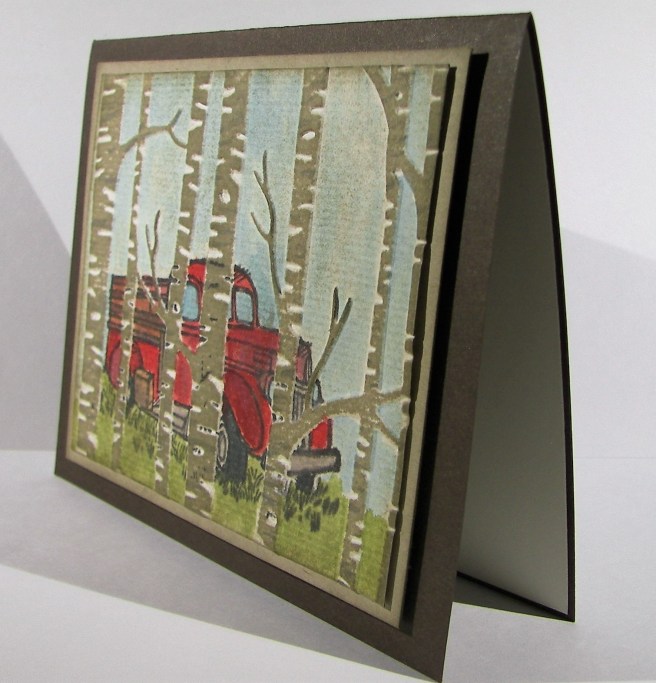
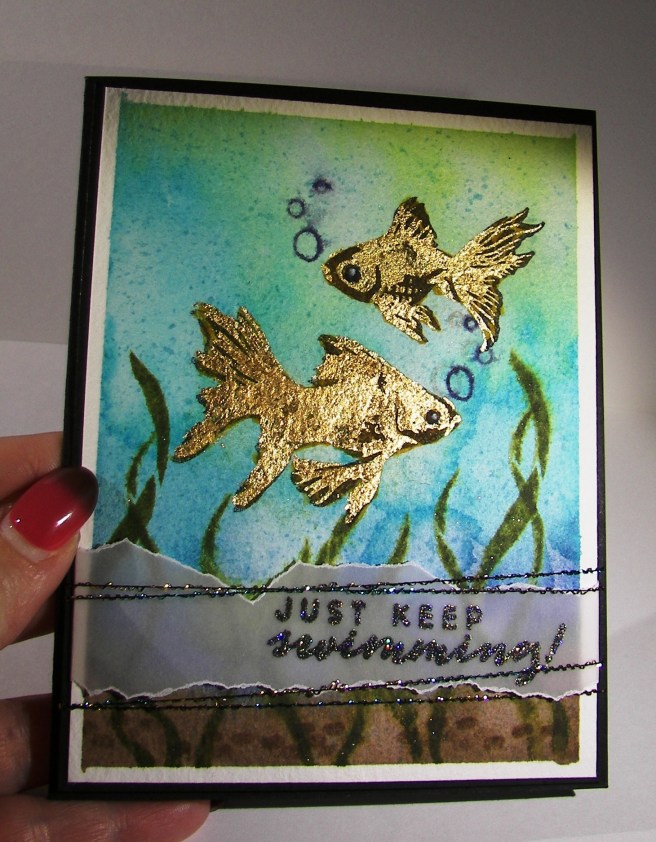
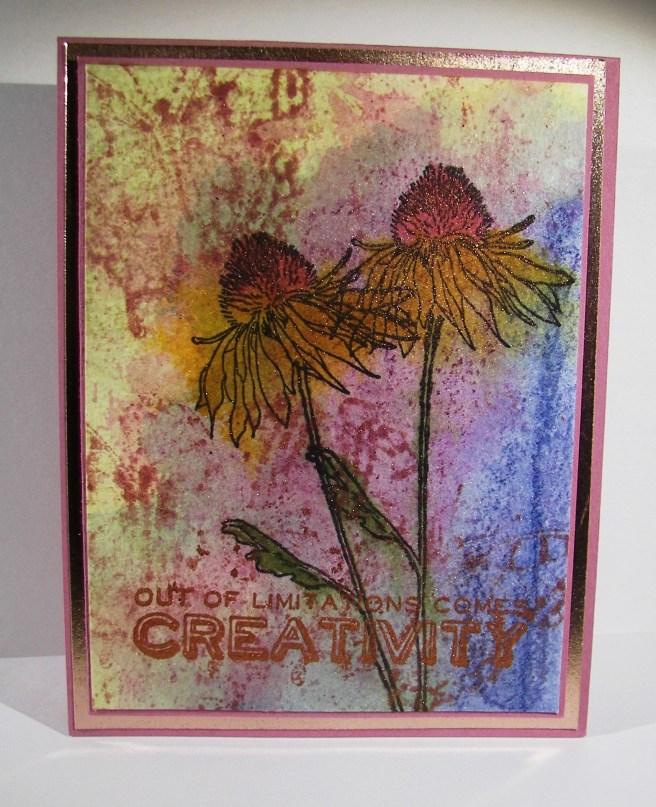
This project didn’t take too long to create in its basic form, but I did spend a good amount of time water coloring it.  The truck stamp was stamped with versafine ink on the recessed side of the embossing folder.  Then the paper was placed and those pieces were run through the big shot machine.  This gave me the embossed trees and the stamped truck. A brayer was inked up with crumb cake and gently rolled over the embossed trees. That is how they became colored so tidily.

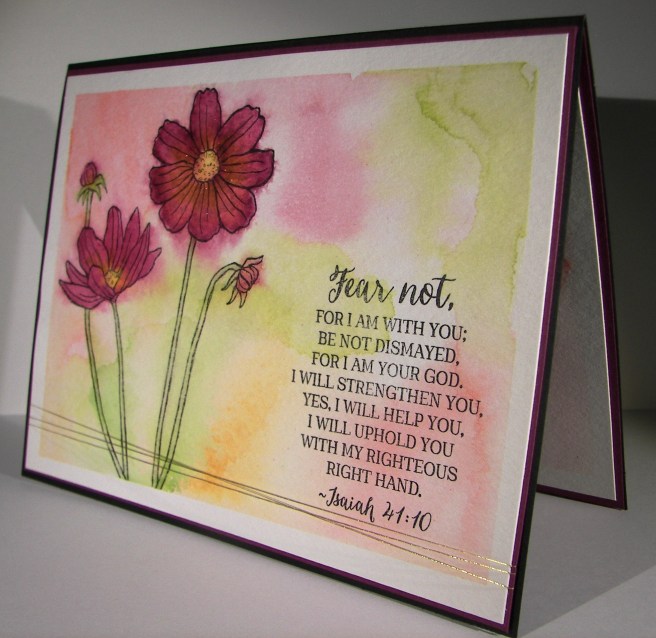
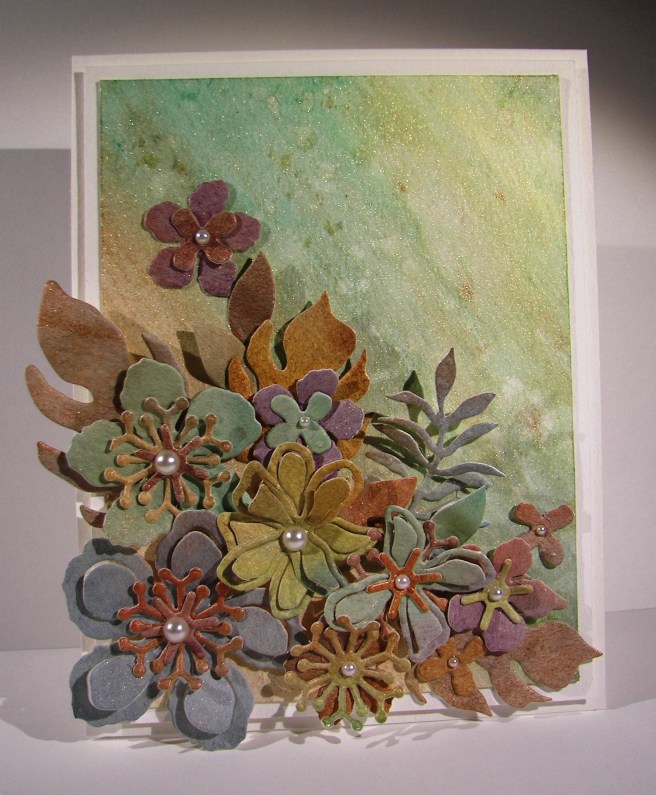
After that, it all came down to painting.  Some parts went quickly, like the sky and grass, but I took my time on the truck.  I went over areas several times to get the tones I liked and fix the creative moments I might not have wanted to happen.  When I finished the painting it looked a bit too crisp for the setting, so I sponged over all the the card front and then heavily around the edges.  That worked.

101_1827

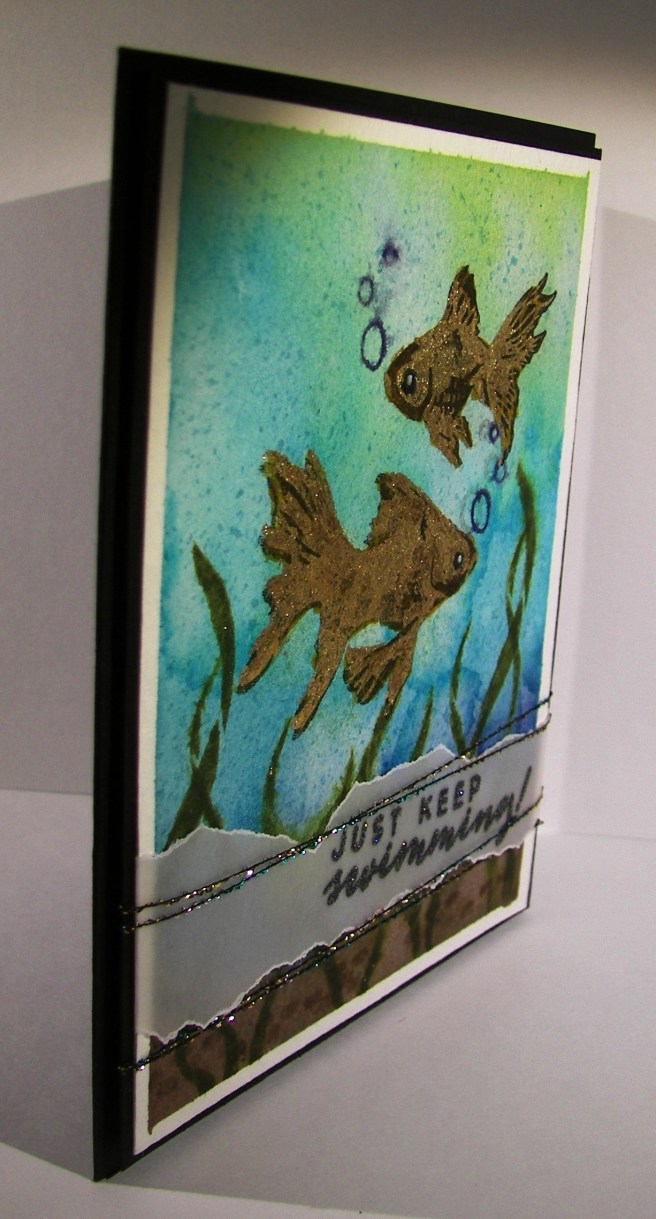
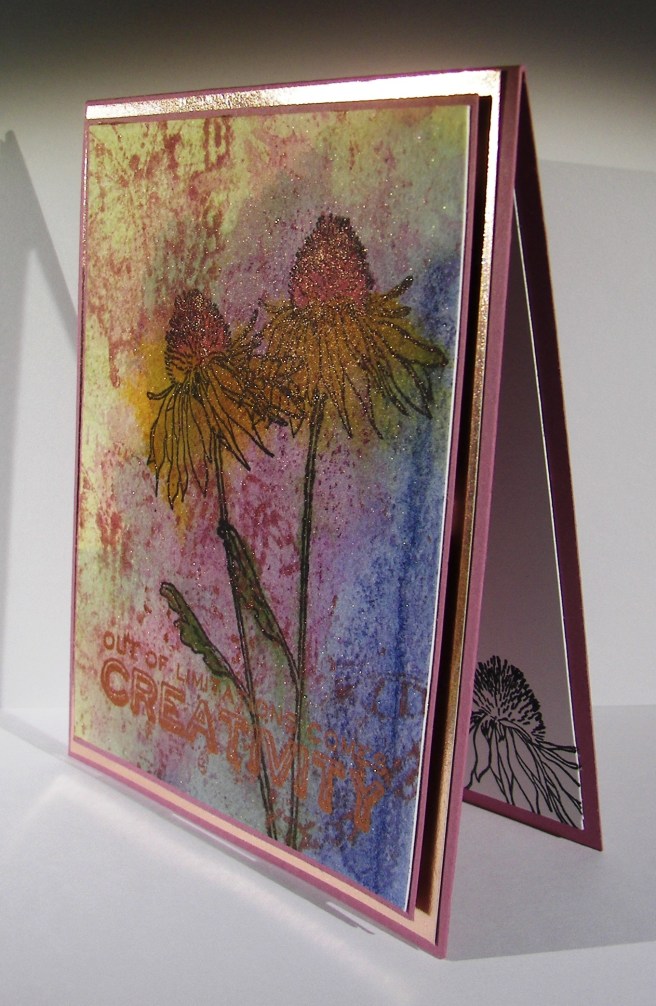
I did make a tag with the stitched framelits that says happy birthday.  I just couldn’t bring myself to place it on the front.  I didn’t want to cover up any of the picture.  It ended up being placed inside.  It isn’t like me to have a layered sentiment inside of a card, but today ended up being that day.

Have a creative day!

Moana

You’re a Good Egg

I know Sale-a-bration is over this year, but I had to play again with my favorite chicken stamp.  This guy just makes me giggle, and that is why I create things like this, to make me and others smile.  I do hope you got yourself this stamp set while it was available though.  I usually end up purging a bit after the sale is over since those products aren’t available anymore, but this Hey Chick set is a keeper.  That is why I got it in a wood mount set.

4-3

This combination might look familiar since I just did a card with this kit making a floral thank you project.  This is the sixth of seven projects re-using left over workshop kits making them into something totally different.  Mission accomplished here once again.

The background was stamped with the Hardwood stamp in smokey slate and sponged heavily.  That is such a classic stamp.  I am sure it will be around for a long time.  The chicken was stamped in the upper center of the card front as to leave room for the ribbon and sentiment below.  Water color pencils came in handy for a quick color job and touched up with an aqua pen to blend the colors in.

Instead of a bow like the last card, I wrapped it twice around and gave it a little know. It looks great!  To keep with the sponged look of the wood background I sponged the card front equally well.  That also helped to draw additional focus to that awesome chicken, as if he needed help.

4-3 (2)

The inside got a little stamp from the same set and a second sentiment.  The cute egg got the same coloring treatment and a touch of sponging around the edges of the paper.  It was a fairly quick project, always faster when the papers are all ready to go.

Have a creative day!

Moana

Love You More

You know when you plan, prepare and get all ready?  And then suddenly everything gets in the way and it seems your work was in vain?  That was this morning.  However, I am trying to get it sorted out and keep my commitment to myself and have fun doing it.  How do you do that? Just keep smiling and pushing forward.  Twelve hours later, here is the blog project I had all ready.  Technology isn’t always my friend, but I want it to be.

3-29

I gave myself a challenge to create seven projects from my leftover workshop project kits.  The goal is to use the materials provided and make it look different than the original.  This one was hard to reinvent because of the designer series paper.  Kind of had to stick to the pear thing, but I still managed a bit of a twist.  The stamping is definitely different as well as this fun and funky burlap ribbon.  I like it, but it is kind of hard to work with.

3-29 (2)

This project was relatively simple, and even more lovely.   Creating something new out of something old can be very rewarding.  Cleaning up my desk has actually been kind of fun. Enjoy the next several days as I share more of my tidying up.

Hope you had a creative day!  Mind was more frustrating than creative, but still satisfying.

Moana

Just Keep Swimming!

I don’t know, these fish look cool, elegant and creepy all at the same time. The color choices have created a neat look, but almost skeletal.  Well, you get the idea, right?

3-28a

To get the water color I simply pulled open my drawer of distress inks and grabbed four colors making sure they were dark to light.  I did a wet on wet water color technique to blend the ink together putting dark at the bottom and going up to the lightest color.  I came back in with a brown for the sandy bottom and stamped the stones in the same color.  Having some sunshine at the top peeking in was a great idea, but with my blue choice I got more of an algae look, but it looks good too.

The fish were stamped in black stazon to allow me to water color all around without ruining the image.  I knew I was going to go back with gold, so I didn’t worry about how dark they looked.  Guess I should have.  The sea weed or plant guys were stamped in green tones all around the fish and spritzed with water to soften the images.  The stamp set also came with these cute little bubbles, for the fishies of course.  So they were stamped in the darkest blue I used for the water.  I also used a splatter image from the Touch of Texture stamp set to give the water some dimension.  Even with all the color it looked kind of flat.

Then it was time for the gold guilding flakes.  The second layer of the fish set was stamped in glue and the flakes were pressed over that.  I let it set for just a moment before I started rubbing around with my finger then a bristle brush to remove the excess.  The gold sure does shine.  Different than embossing, but still exciting.  I tried to glue on some googly eyes, but it made the card look too silly, another time for those.  So I just drew some little dot eyes with a white gel pen.  Maybe a bit too creepy, but I left it.

3-28 (1)

The sentiment was stamped in versafine black ink on velum cardstock.  While it was still moist I sprinkled iridescent ice powder over the top and heated it in place.  So sparkley and pretty.  I had some fun threads that matched and down they went.  A fun, but interestingly elegant card.  I sure had fun making it though.

Have a creative day!

Moana

Out of Limitations Come Creativity

When a couple of friends get together to explore a few techniques, really cool things can happen.  The sentiment reads, Out of Limitations Comes Creativity.  Sometimes the limitations are our own minds, not finding new things to try, or new ways to try the things we already have.  Great example below if I do say so myself.

3-27

We wanted to try a technique Jennifer McGuire recently shared using versamark ink and perfect pearls.  That was a lot of fun.  My beginning samples are fun to look at, and might turn into a project, but might not.  I still have them at my desk, but they led me to this project.  The sentiment was created with this technique.  It was neat though, how the perfect pearls clung to areas of the water color paper that weren’t all the way dry.  A neat accident that really adds to the look.  I also gave distress crayons a go.  Those are pretty darn cool.  I bought a set that came with the stamps I used here as well as a basic technique booklet.  Those techniques were put together and actually turned into this project.

Literally, we sat down with several products, a technique idea, and some great conversation. That was so much fun!  So, maybe I should have a sentiment stamp that says something like, Good Company Sets Free Creativity, or something much more poetic, but you get the idea.  Can’t wait til our next time together. Creative friends are so much fun!

3-27 (1)

Have a creative day!

Moana

Golden Garden in Bloom

Distracted, distracted, distracted.  That would be my theme for the last several days. Sometimes we complain when we get stuck in a run, other times we stress out looking for that comfortable rut.  I think mine was on another planet all together.  Still looking, but getting closer for sure.  This lovely project has waited on my desk for four days to be shared. Worth it though, it is so pretty.

3-7

I sat down, picked out five different colors and began a water color background. That has to be one of my favorite activities, just making soft blending colors.  Almost soothing. When it was dried I added the huge floral stamp from the garden in bloom set. Some images were stamped full strength and others stamped off once. I wasn’t quite happy there, so I took it up a notch. I have these awesome guilding flakes that give a really cool embossed look. You brush on glue from a pen, set them on the glue and swirl a stipple brush over that to get rid of the excess.  This time I brushed the glue directly on the stamp, stamped a glue image and then put the flakes on.  It worked out so great!  Can’t wait to do it again.

The tag was simply created with water color paper.  I stamped the image, rounded the corners and sponged the edges.  It was a bit stark so I took a light wash of color right over the top.  It blurred the sentiment a bit, but not too much.  A touch of ribbon on the side anchored with metallic thread and I was ready to go.

3-7 (1)

The inside got a bit of echo stamping of course. I nearly always put that in place.  It just ties it all together so nicely.

Have a creative day!

Moana

Elegant Botanicals

I started this lovely project yesterday, but got distracted by a shopping adventure with my mother-in-law and two sister-in-laws.  The weather was terrible, but the company was great, and who doesn’t need a shopping adventure once in a while!  This was waiting for me though, and I couldn’t wait to finish it.

2-21

On Sunday I created some favor handouts for a church lesson I taught and they were so cool. Nothing like this card, but the paper I painted for the die cuts had left overs I knew I could use again.  That is where all of these flowers came from.  Yes, a scrap pile.  You never know what those scraps could turn into.

I created a simple background with three liquid metal colors wet on dry.  They were too stark, so I gave a water wash over the top and was much happier.  I had some accidental splotches happen, so I gave a bunch more to disguise them and called it good.  Then the placement of all of these flowers.  Phew, it took some time.

I first layered the flowers together with different sized floral pieces and began my arrangement.  After I was done I began to adhere them down.  Since they were die cut from water color paper they were more pliable, even kind of molded.  The leaves really looked great with some curling and bending.  Little by little the arrangement came together.  Some pieces were adhered with dimensional foam, some with glue dots and several with tombo liquid glue.  Again, no worries because of the weight of the paper.  So very liberating!

I layered the front on another piece of water color paper and repeated the choice again for the card base itself.  It looks so clean and elegant.  It isn’t always easy to capture the different elements on camera, but this didn’t turn out too bad.  Just look at all of that metallic shine.  It took a bit of time, but was absolutely worth it!

2-21-1

Have a creative day!

Moana

Avant Garden

My daughter has this cute little app that allows her to ‘grow’ flowers and then ‘send’ them to someone.  I had a lovely bouquet this morning and I thought I would make a card like it. Her flowers actually had orange and yellow together, almost striped like an orchid.  This is what I came up with.  What a fun kind of game, right?

2-15

I used a piece of water color paper to stamp these little flowers.  The set I used is actually a free one with a $50 order during Stampin’Up! Sale-a-bration event.  The flowers went in first, tangerine tango then on to the crushed curry.  The stems were added in next followed by a smattering of leaves.  The stamen were added last using cherry cobbler on the tangerine tango flowers and cajun craze on the crushed curry ones.  I decided to soften the look with a healthy spritzing of water.  It was a slow process because I didn’t want the images to go all wobbly, just soften.  When the paper started to get pretty wet the edges started to blur a bit and I stopped.  This particular paper can hold a lot of water.  So, I had to use my heat tool for a while to get it all dry.  There was a bit of warping, but I liked it.

2-15-1
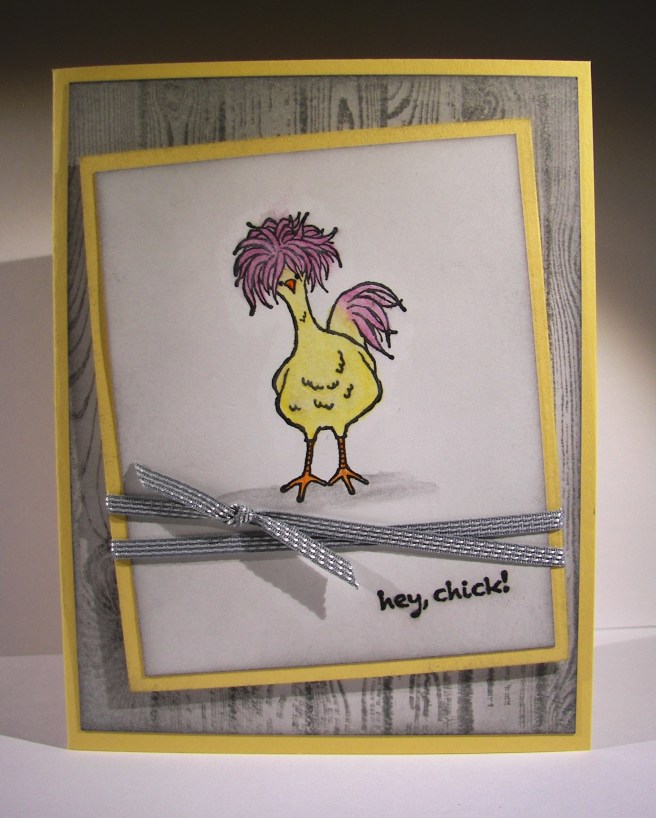
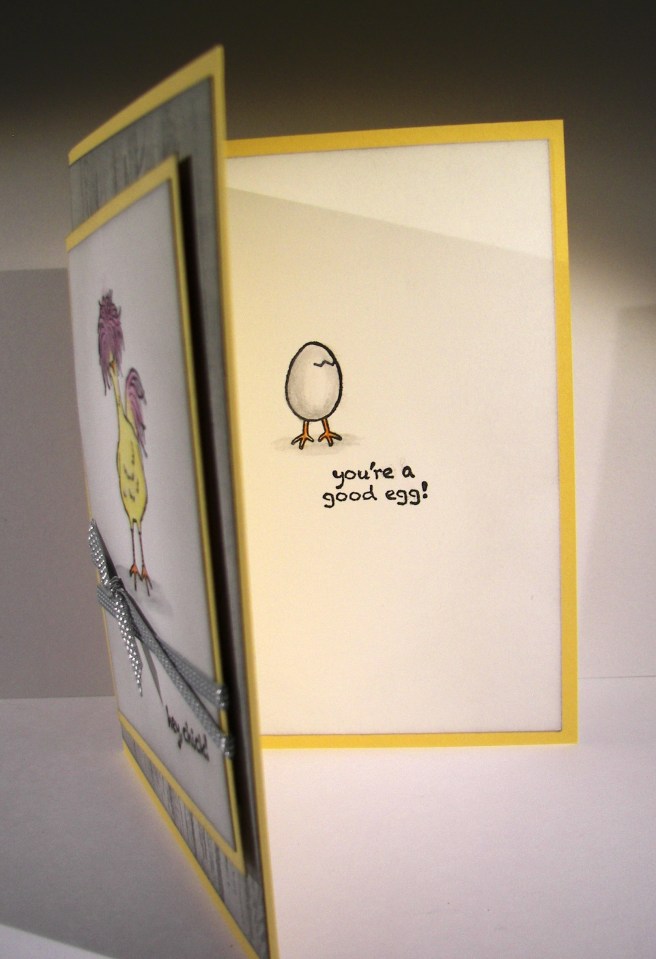
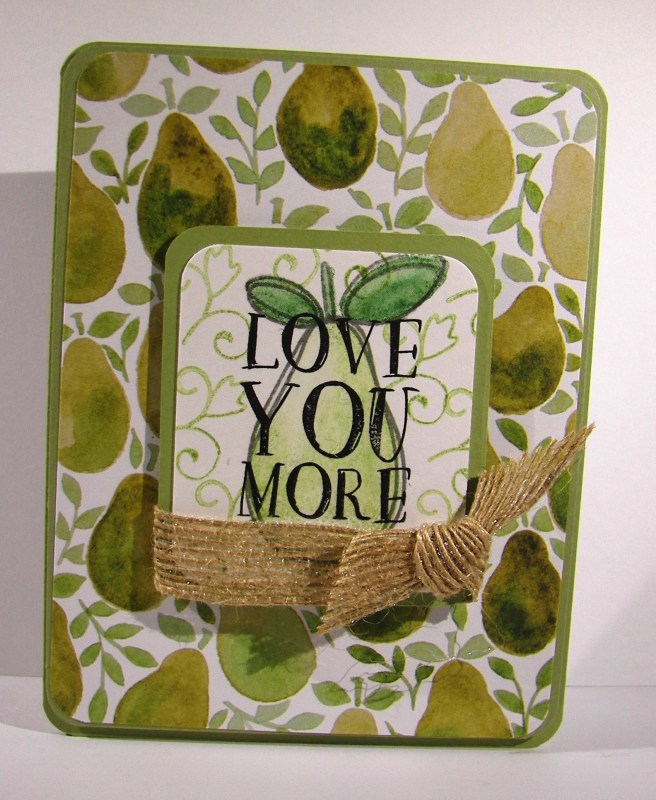
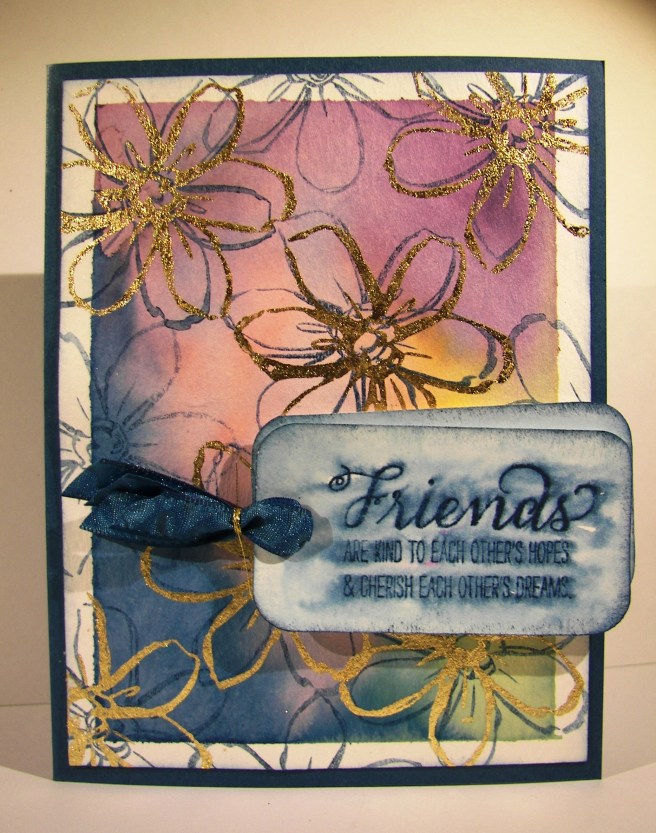
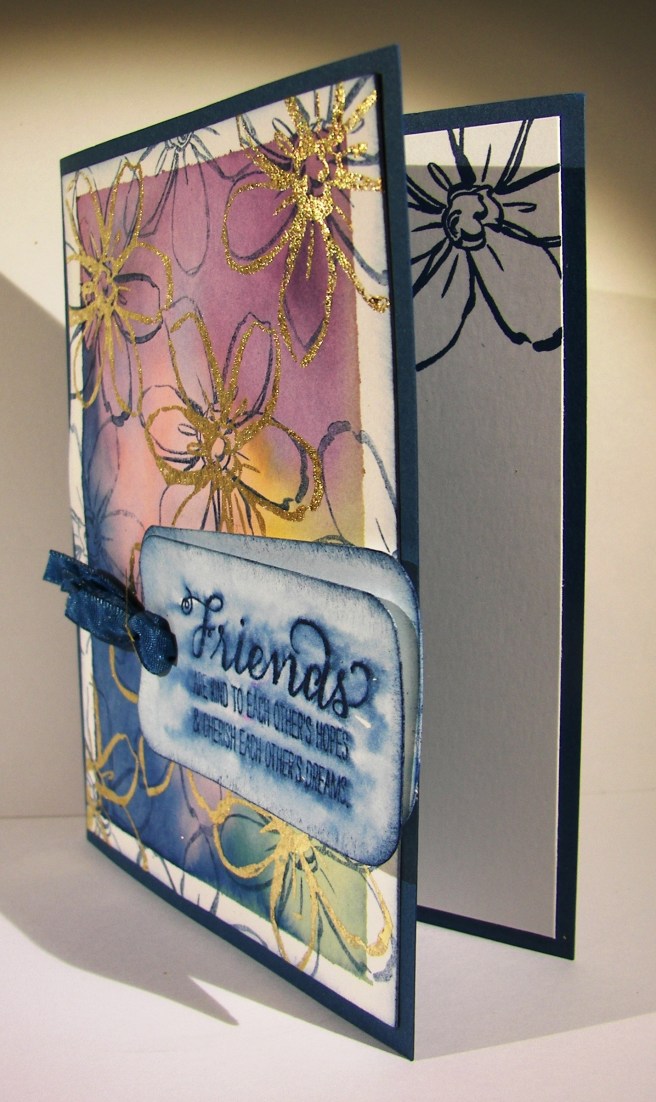
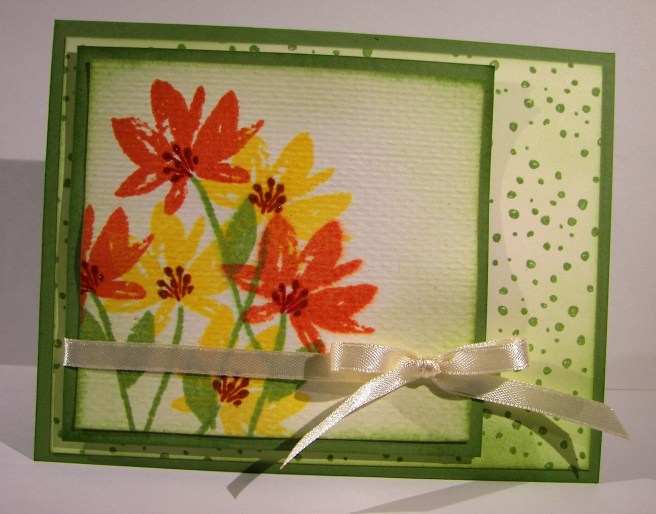
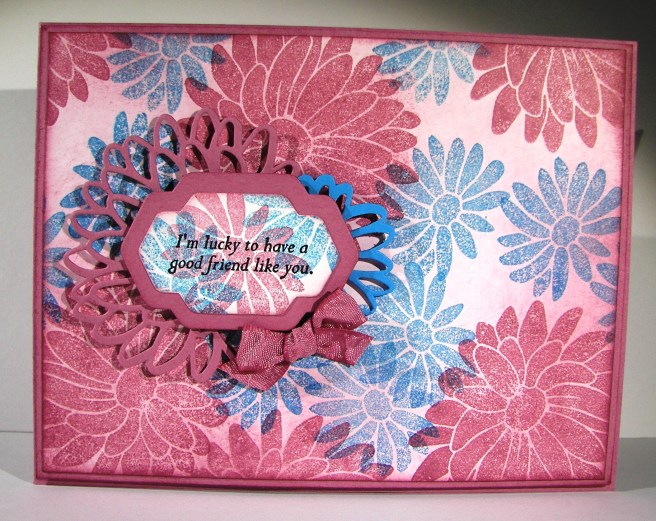
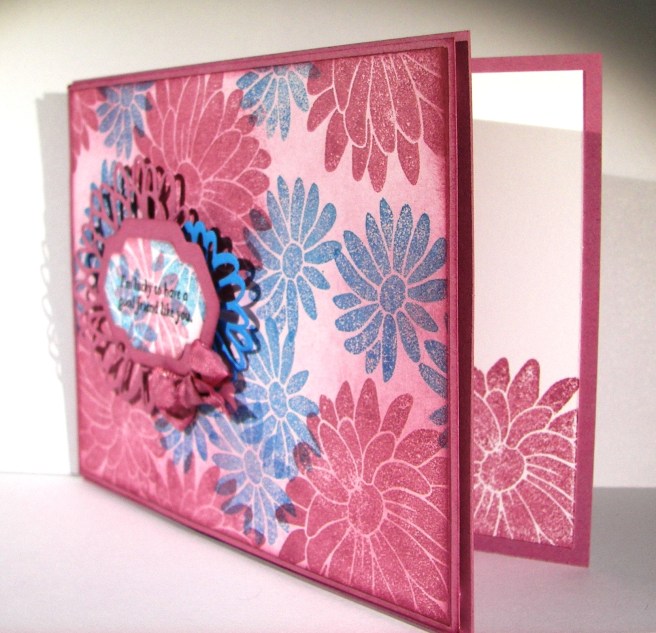
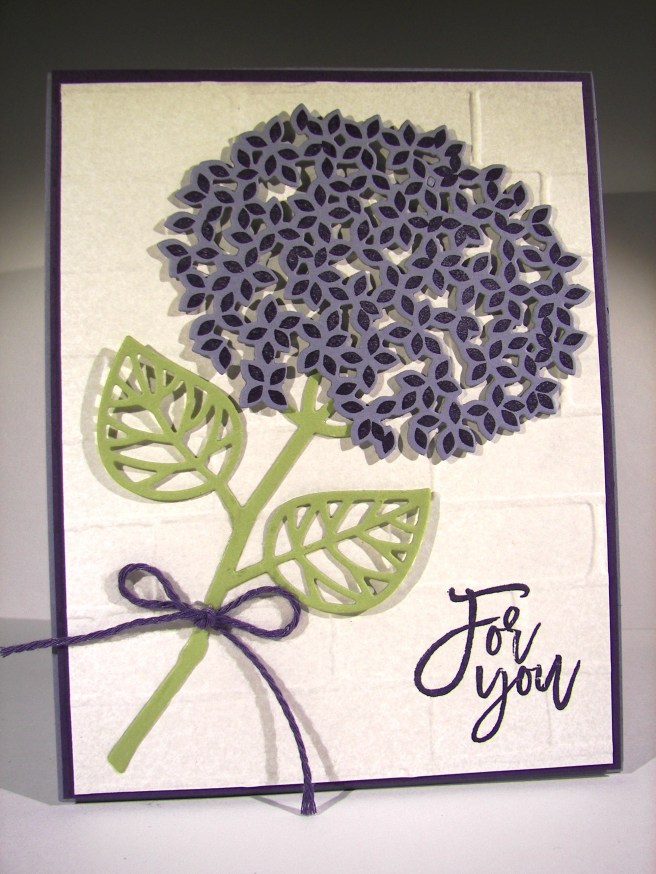
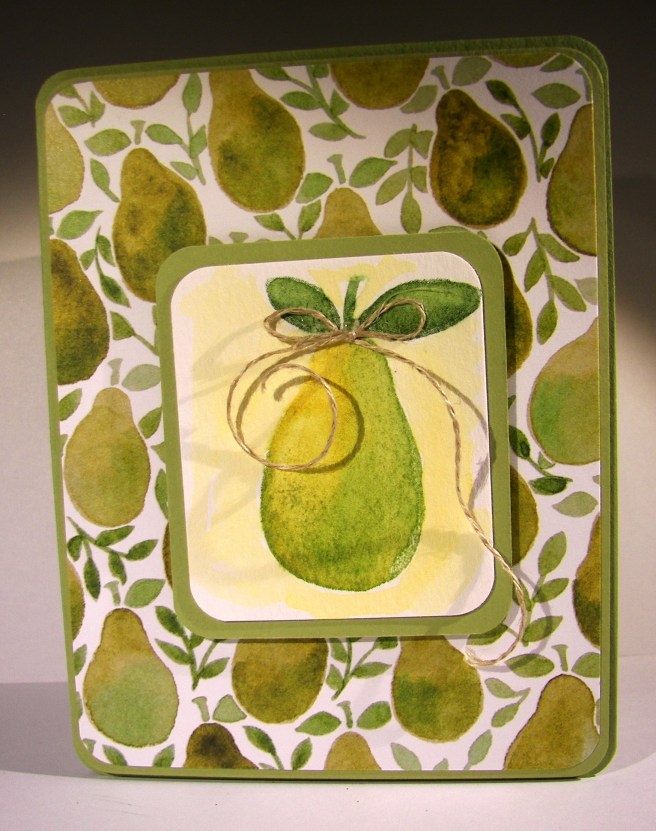
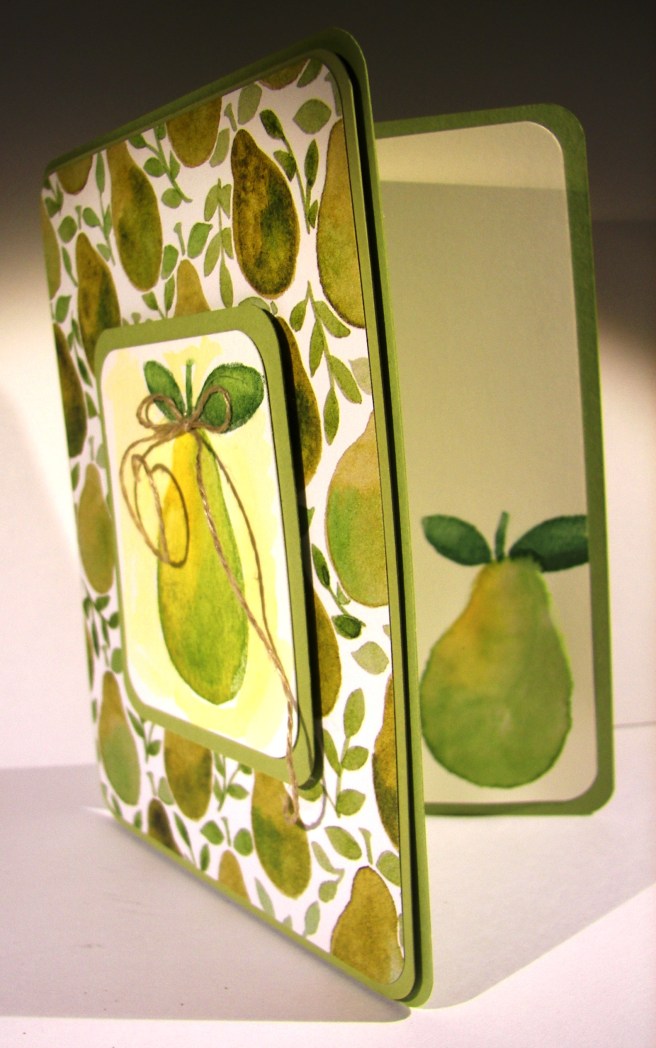
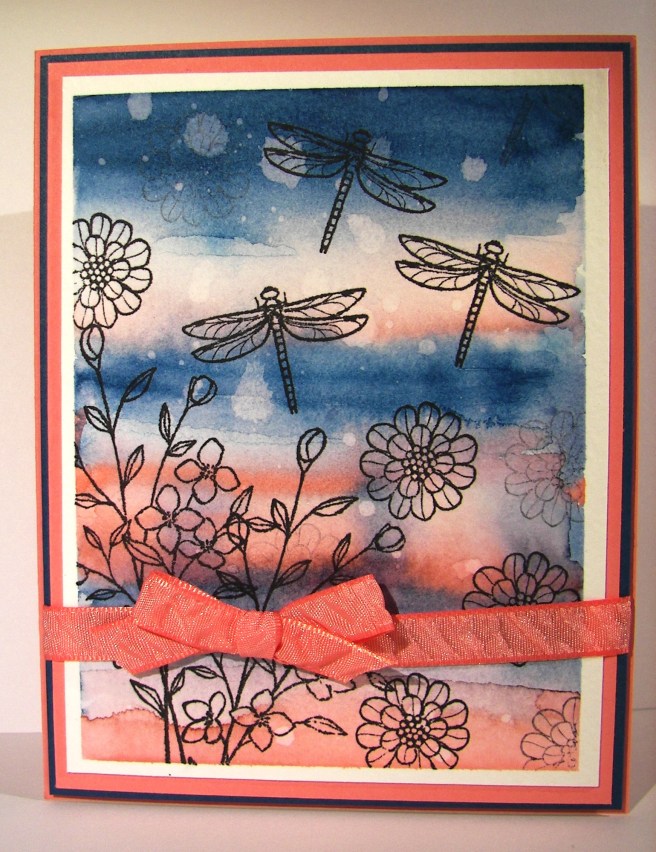
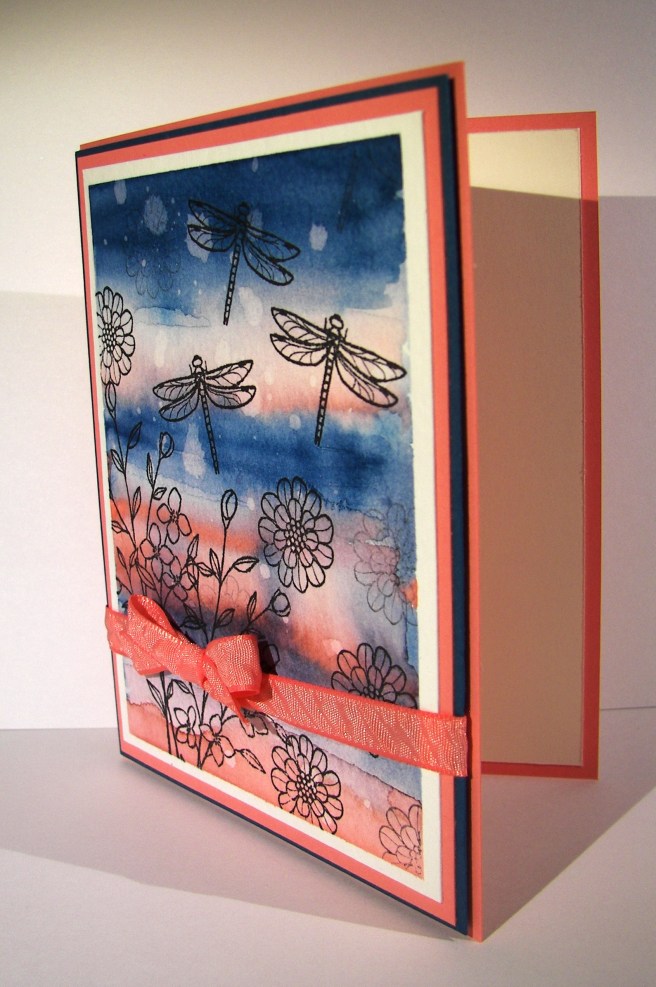
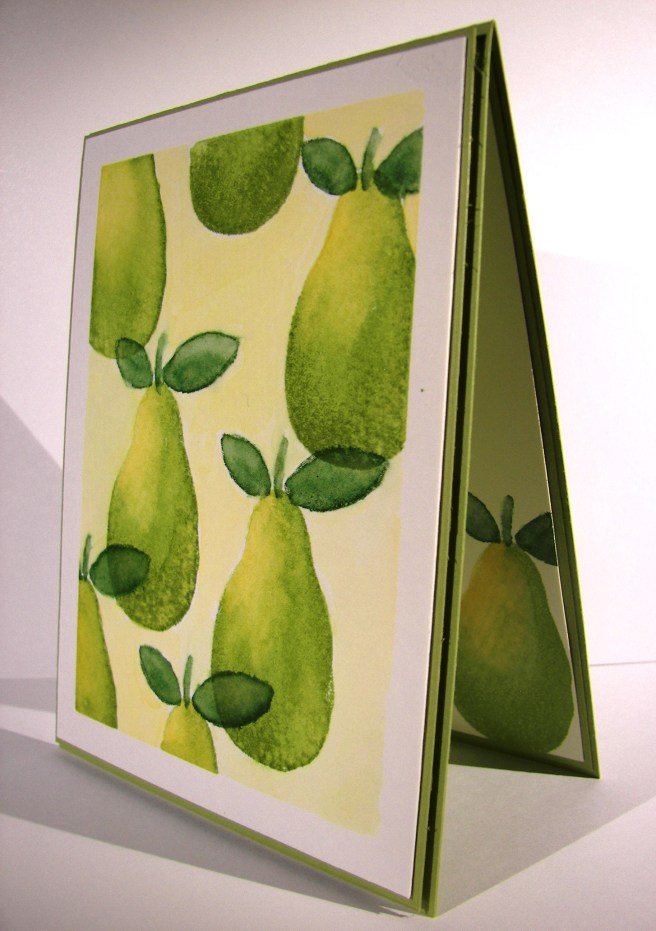
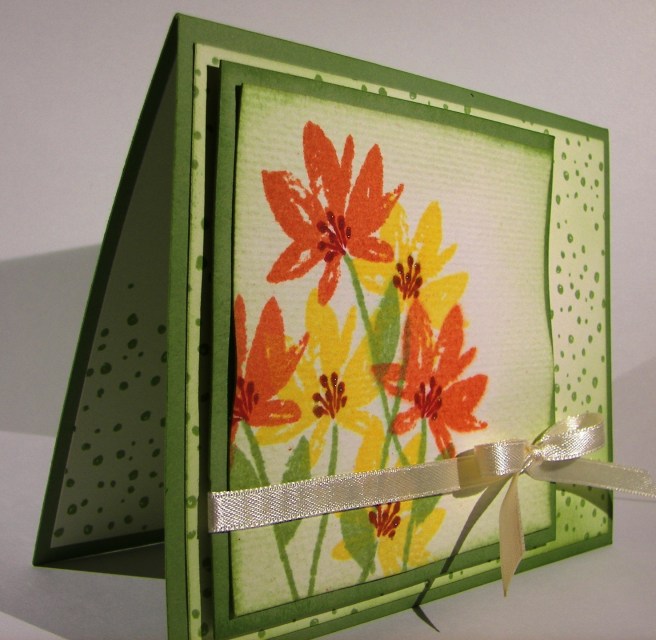
The background, and a bit on the inside, was stamped with the spotted stamp from the same set.  It is random, but has a defined shape to allow filling in the entire space without looking repetitive.  Very nice, very nice indeed.  The front piece was wrapped in some very vanilla satin ribbon and layered up on dimensionals.  The sentiment was left off completely allowing this to be an all occasion card ready to go.
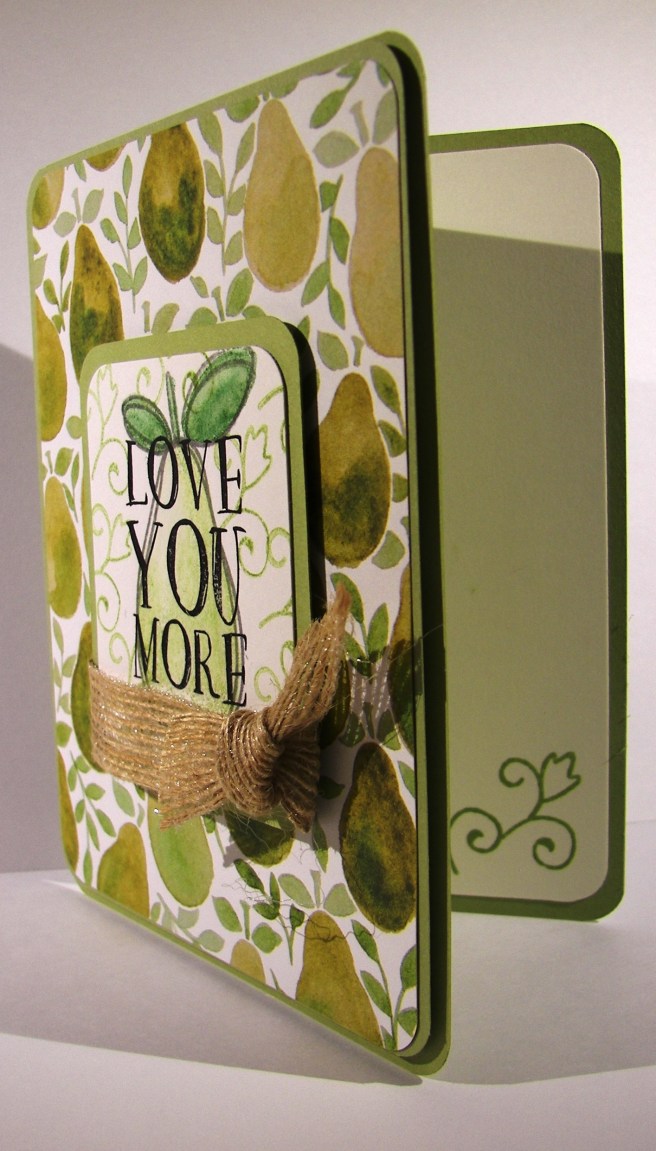
Have a creative day!

Moana

Special Reason

Opening new product is so much fun.  This is a stamp and framelit bundle I bought from the spring Stampin’Up! catalog, and I love it.  I had a tag sitting on my work station trying to inspire me, and I went to this set.  Fresh eyes are hard to come by sometimes.  The tag had some colors that I would not have put together myself, or I thought, because I had made that tag!  Silly me.

2-6

Either way, this is what I came up with.  I stamped my background paper using the two floral images from the Special Reason set and then sponged with sweet sugarplum to fill in the spaces some.  The flowers were stamped off once before hitting the background to soften the colors.

I made a die cut from each of the ink colors in coordinating card stock to become the background for my sentiment.  How lovely.  Instead of wrapping ribbon around the card, which is what I love to do, I only made a sweet little bow from ruched ribbon and attached it with a glue dot.  I wanted the ribbon, but not the distraction it would have caused with too much of it.  A very nice balance.

2-6-1

The inside got a little stamping, as always, to finish it off.  I like this project so much, I think it will become the second project for my class on Saturday.  The ladies love to make their own background paper.

Have a creative day!

Moana

I Hope You Feel Appreciated

I don’t think I will ever find too many places to stamp this awesome chicken, ever.  There are two other adorable chickens and a little egg too, but this guy rocks!  So here he is peepin’ in a little window to say hello.  Too adorable.

2-3

For a very simple card, I sure did use a lot of different products.  Really though, it went together quite fast.  The card base became a one layer card.  I stamped with white stazon onto the card base using the hardwood stamp.  So cool.  It gave me a subtle woodgrain look that was just right.  I die cut the window out of the card base and again out of whisper white. I glued those two windows together so when I nested them back into the opening, the white one would layer up just ever so slightly.

I backed the window with velum to create the ‘glass’.  I traced the window pane openings on my inside piece of cardstock so I knew where to stamp the trees and chicken.  They got a little ink and a little water color pencil activity and then I glued them in place.  I could have left them on the inside back of the card, but I knew I wanted to cover up the back of the window and have plenty of space to write to my friend.  So I adhered it to the inside top flap of the card and put another blank piece down on the inside back.  Then I had double the space to write and my window stuff all covered up.  Total win!

2-3-1

Have a creative day!

Moana

Thank You Very Much

Holiday weekends offer a lot if you are willing to enjoy.  I love the extra time to sort through all of life’s adventures and endless “to do” lists.  But it is also a time to pace yourself and reflect.  This project offered me that time.

1-16

I started with the idea of more precise painting, but quickly learned that it had other things in mind.  Since I have such a hard time waiting for much of anything, my colors couldn’t stay still.  So I went with it and created a much more fluid and dreamy look.  You can tell from the warp of the side of the paper just how much water went into this project.  I had fun though, and it was truly relaxing.

1-16-1

The sentiment was stamped on very vanilla and cut out using one of the dies from the Bunch of Banners framelits set.  I love the crisp edges of a die cut.  The inside stamp was another image from the same stamp set.  This particular set isn’t available for regular purchase, but at a reduced price when you host a workshop.  Sounds like a win win to me!

Have a creative day!

Moana

Blooms & Wishes

This stamp set sat in the annual catalog and teased me often.  I would try to pass by it saying that I surely did not need yet another floral stamp set.  Well, I broke down and bought it.  So very glad I did.  What a beautiful watercolor piece, right?  Great stamps make all of the difference.

1-15

I chose a few spring colors to work with, focusing on daffodil delight.  With all of the rainy, cloudy days we have had I wanted something bright and cheery. Mission accomplished for sure!  I stamped the large flowers from the set in different colors, stamping off as I went along.  The centers were all daffodil delight and more of an idea than a detailed center.  I sponged more yellow ink all around the flowers filling in most of the white areas before moving on to spritzing with water.  It was just a matter of managing the water spritzing to allow some ink movement, but not blurring too much.  It didn’t take long before I was satisfied.  A quick drying moment or two with my heat tool and it was ready for the sentiment.

That was stamped on a strip of velum cardstock and then wrapped around the bottom of the card front.  I used a lovely mint macaron satin ribbon to accent the bottom and layered it up with dimensionals.  Such a lovely spring card.  Of course I had to stamp a bit inside with a few yellow daisy images and one for the back too.

1-15-1

Have a creative day!

Moana

For You

This was the third project we created at workshop last weekend.  I know this stamp and framelit set are about a whole lot more, but as yet I still haven’t gotten past the hydrangea. I think with fall and the holiday seasons coming I will enjoy more of the trees, but not yet.

8-26

I used the heavy weight whisper white card stock for the background.  I handles the deep impressions of the embossing folders much better.  Also, I had plans for spritzing some color and that would have made some warping sadness otherwise.  It isn’t easy to see, but there is a light tan speckling going on there.  Such an easy technique to employ.

I stamped on wisteria wonder with elegant eggplant for the different tones and accented with more elegant eggplant.  The ink, thick bakers twine, and border piece were all done in elegant eggplant.  It is a dark color, so I kept it under control.  I didn’t sponge anything, that was a challenge to be honest.  The die cutting was simple and then layered in place. The stamping was done last. It did give a bit of a crease line in the sentiment, but worth it.  I worried if I stamped and then spritzed the wording would bleed and I wanted it crisp.  Done.

8-26 (1)

Have a creative day!

Moana

Fruit Stand Delight

This project is a different take from a prior card I made.  The first one was a full water color card front, stamped and water colored.  This one uses the coordinating designer series paper with a single pear stamped and water colored.  I like the difference, and so did my card workshop ladies.  They are the best!

8-24

I added an extra layer, but the process was the same.  A single pear stamp in pear pizzazz, and water color the lighter areas of the image with daffodil delight and blend it together. The leafs and stem were done in garden green and blended a bit too.  The background was a light wash of daffodil delight.  Then, top the pear with a tiny bow of linen thread with a glue dot and grin at your work.  What a fun way to spend time with friends, making cards like this.

8-24 (1)

Have a creative day!

Moana

Fear Not My Friend…

When I am wanting to convey more emotion in a card, I go directly to water coloring.  The softness it creates is perfect.  And with this card, I literally poured my heart into it.

8-20

I wanted more space to work with so I created a larger card than normal.  This one measures 5″ x 6.5″.  Big, but not too big.  I also created my inside writing panel at the same time.  This card wasn’t going to just get a blank insert, or even a nicely stamped one. Besides, I love writing on water color paper, so very satisfying.

I stamped my floral image and sentiment first so I could control the strength of color where they were.  Then I brushed the papers with clean water to allow plenty of color movement. I kept the background light and tried to keep mixing to a minimum.  The colors I choose don’t always blend nicely, but that doesn’t stop me.  I dried, distressed a bit, and dried until I was happy.

I painted the flowers with strong color, allowed them to dry clean.  Then worked them over properly.  This included adding, dobbing, and adding color on the flower petals for a bit.  I centered the flowers with a strong yellow, but kept the color from the edge of the flower center.  Then I hit that area with a water spritzer and watched the flower bloom all over again.  The color moved nicely and then was dobbed some more.  Gold wink of stella was brushed into the petals and blended with water again.  The overall effect was lovely.

A special card for a very special friend.  She is far more brave than I can imagine.

8-20 (1)

Have a creative day!

Moana

Touches of Texture

Where has the time gone?  Always rushing away, but I managed to sneak a few extra minutes to play with some water coloring.  During the summer I thought nothing of spending a good hour or so creating a project.  Well…maybe that will have to be a weekend thing now that school is back in session and schedules have changed.  It still felt good, even if it was a quick one.

8-19

I masked my paper around the edges and applied a wash of clean water.  From there I just started to make stripes.  First with the blue and then the pink.  However, I applied the blue in stripes tipping the project so the ink could flow down a bit.  Then I flipped it around and applied the pink, also tipping the project, this time so the pink could flow into the blue. There was hardly any blending on my part.

The stamps were all from the same set, Touch of Texture.  That is a big set.  Definitely wants time to sit down and really play with the layering options.  I stuck with basic black with a little stamping off too.  Then I distressed with water droplets and called it.  I wasn’t sure if I wanted it to be done or not, but the clock said yes.  So there it is!

8-19 (1)

Have a creative day!

Moana

Fresh Fruit

The same stamp set as yesterday, but fruit as promised.  I went much lighter in tone and worked with water coloring for a softer look.  Maybe this is my guilt for not picking pears that are ready to go, but I would rather just enjoy the art of it instead.  I do have pears to pick though…

8-13

This particular stamp set recreates the look of water coloring so nicely.  I started with a base image of the pear in pear pizzazz of course.  The light area is left blank, all ready to receive another color.  I painted in some so saffron and then blended into the green.  It was really fun.  The stem and leaf stamp is one and was stamped in garden green.  I also went over that image lightly with a wet brush to blend again.

I thought about leaving the background blank, but decided it looked unfinished.  I kept with the so saffron, just diluted it a bunch more.  I didn’t worry about being too perfect around the edges, but since I was working wet on dry I didn’t have too many problems.  There you have it!  I even made a pretty pear on the inside of the card.  I think I should go pick pears, put them in a basket and give them to someone along with this card.  Maybe tonight when it cools off some.

8-13 (1)

Have a creative day!

Moana

Thoughtful Branches Thankyou

This card comes from a limited time stamp and framelit bundle.  There are many options within, all kinds of trees and fun things, but this is why I bought mine.  I love hydrangeas so much.  I am so going to enjoy this set.

8-9

I put a new stamp pad to use.  Stampin’Up! has produced a few ombre pads, this one in particular is rich razzleberry.  I am usually a bit more traditional, wanting more self control over the colors I use.  But this was pretty darn fun.  I like how it turned out and I am glad I bought them.  I wanted the color to bleed some, so I spritzed the flower with water after it was die cut.  It softened the color without compromising the ombre effect.

I painted another piece of water color paper with almost artichoke and used the stem die cut.  I didn’t have to add any color afterwards, it turned out nice.  I knew I would be working in water color paper, so I made both flower parts and the card front from the same paper. That way the ink would react the same and have a uniform look.  The background was done with a light wash in crushed curry.  No distressing, just painting.

I stamped the sentiment directly to the card front and called it good.  I did layer it up on another piece of almost artichoke paper for a bit of interest and to help control curling of the card front.

8-9 (1)

Have a creative day!

Moana

I’m Here For You

Don’t you just love these two?  I am not one to fall for whimsy stamps, especially cutsie animal ones.  But these guys got me.  The whole set is that way and I have used it so much. It is only a host set, so you can’t just buy it, but need to host a workshop to get to it. Totally worth it though.  Who doesn’t love a fun creative workshop though, right?

8-5 (2)

I was actually able to put to use an old workshop kit for this project.  It was a sympathy card with a totally different look, but it worked great for this one too.  I sometimes put leftover workshop kits back into my supplies, but sometimes I just keep those kits separate.  They have come in handy more than once, so I keep a small stash on hand.

Simple stamping and light sponging across the embossed folders was really all there was here.  I did run the linen thread across a bone folder to help get the kinks out and give the ends a curl as well.  I didn’t paint or sponge these two, amazing for me really, but I managed.

8-5 (1)

Have a creative day!

Moana

Delightful Garden in Bloom

This project is a companion to yesterdays post.  Both card fronts were made with the same combination of distress inks, just in different sequences.  This one was actually done first which is why the colors are more distinct.  I certainly am enjoying this kind of painting.

7-31 (2)

As I placed the water color paper into the smeared and spritzed inks I made sure to allow white spaces to remain.  I had to make myself stop adding color before some of that effect was lost.  I can’t wait to try it some more.

When I finished drying the piece it felt like something more was needed to tie it together. I found a great stamp from the Garden in Bloom set and did some random stamping. The ink was too dark full strength, so these flowers were stamped off once before being applied. Then a fun ribbon for a bit of interest to finish the front.  A little echo stamping was applied to the inside and the card was done.

7-31 (1)

Have a creative day!

Moana