Avant Garden

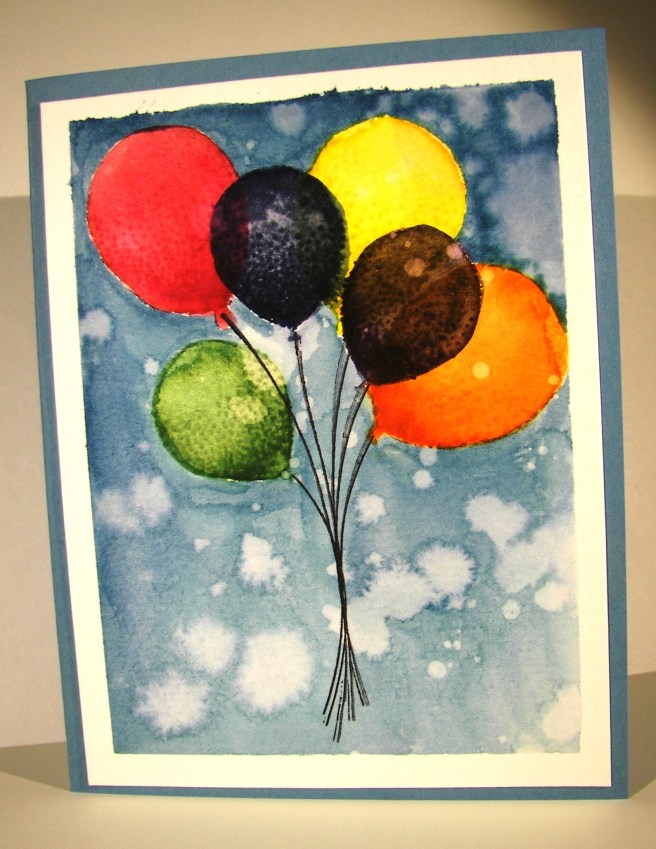
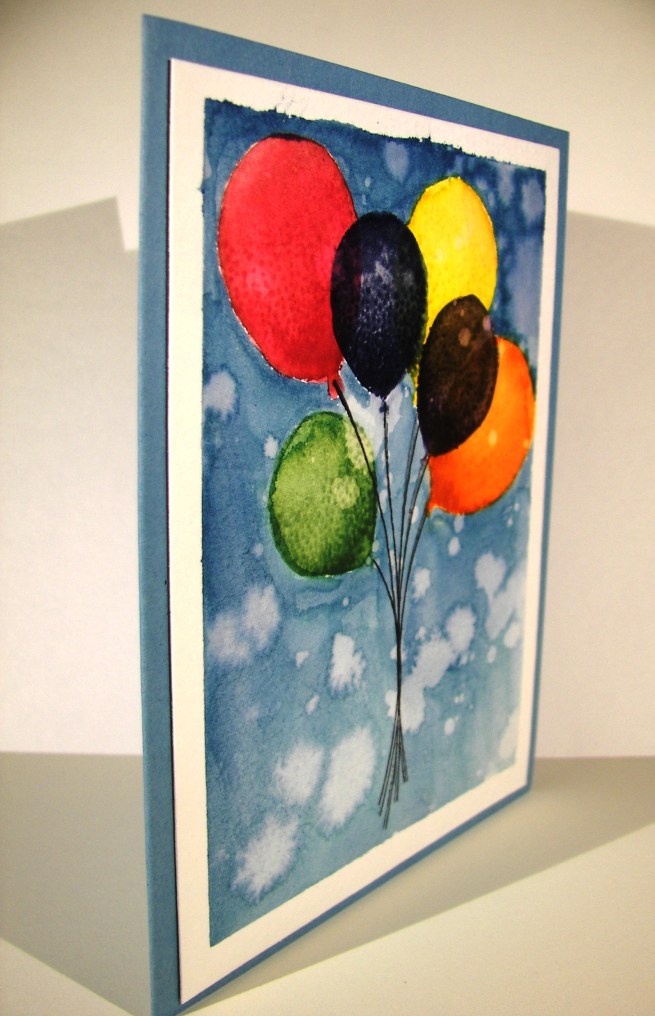
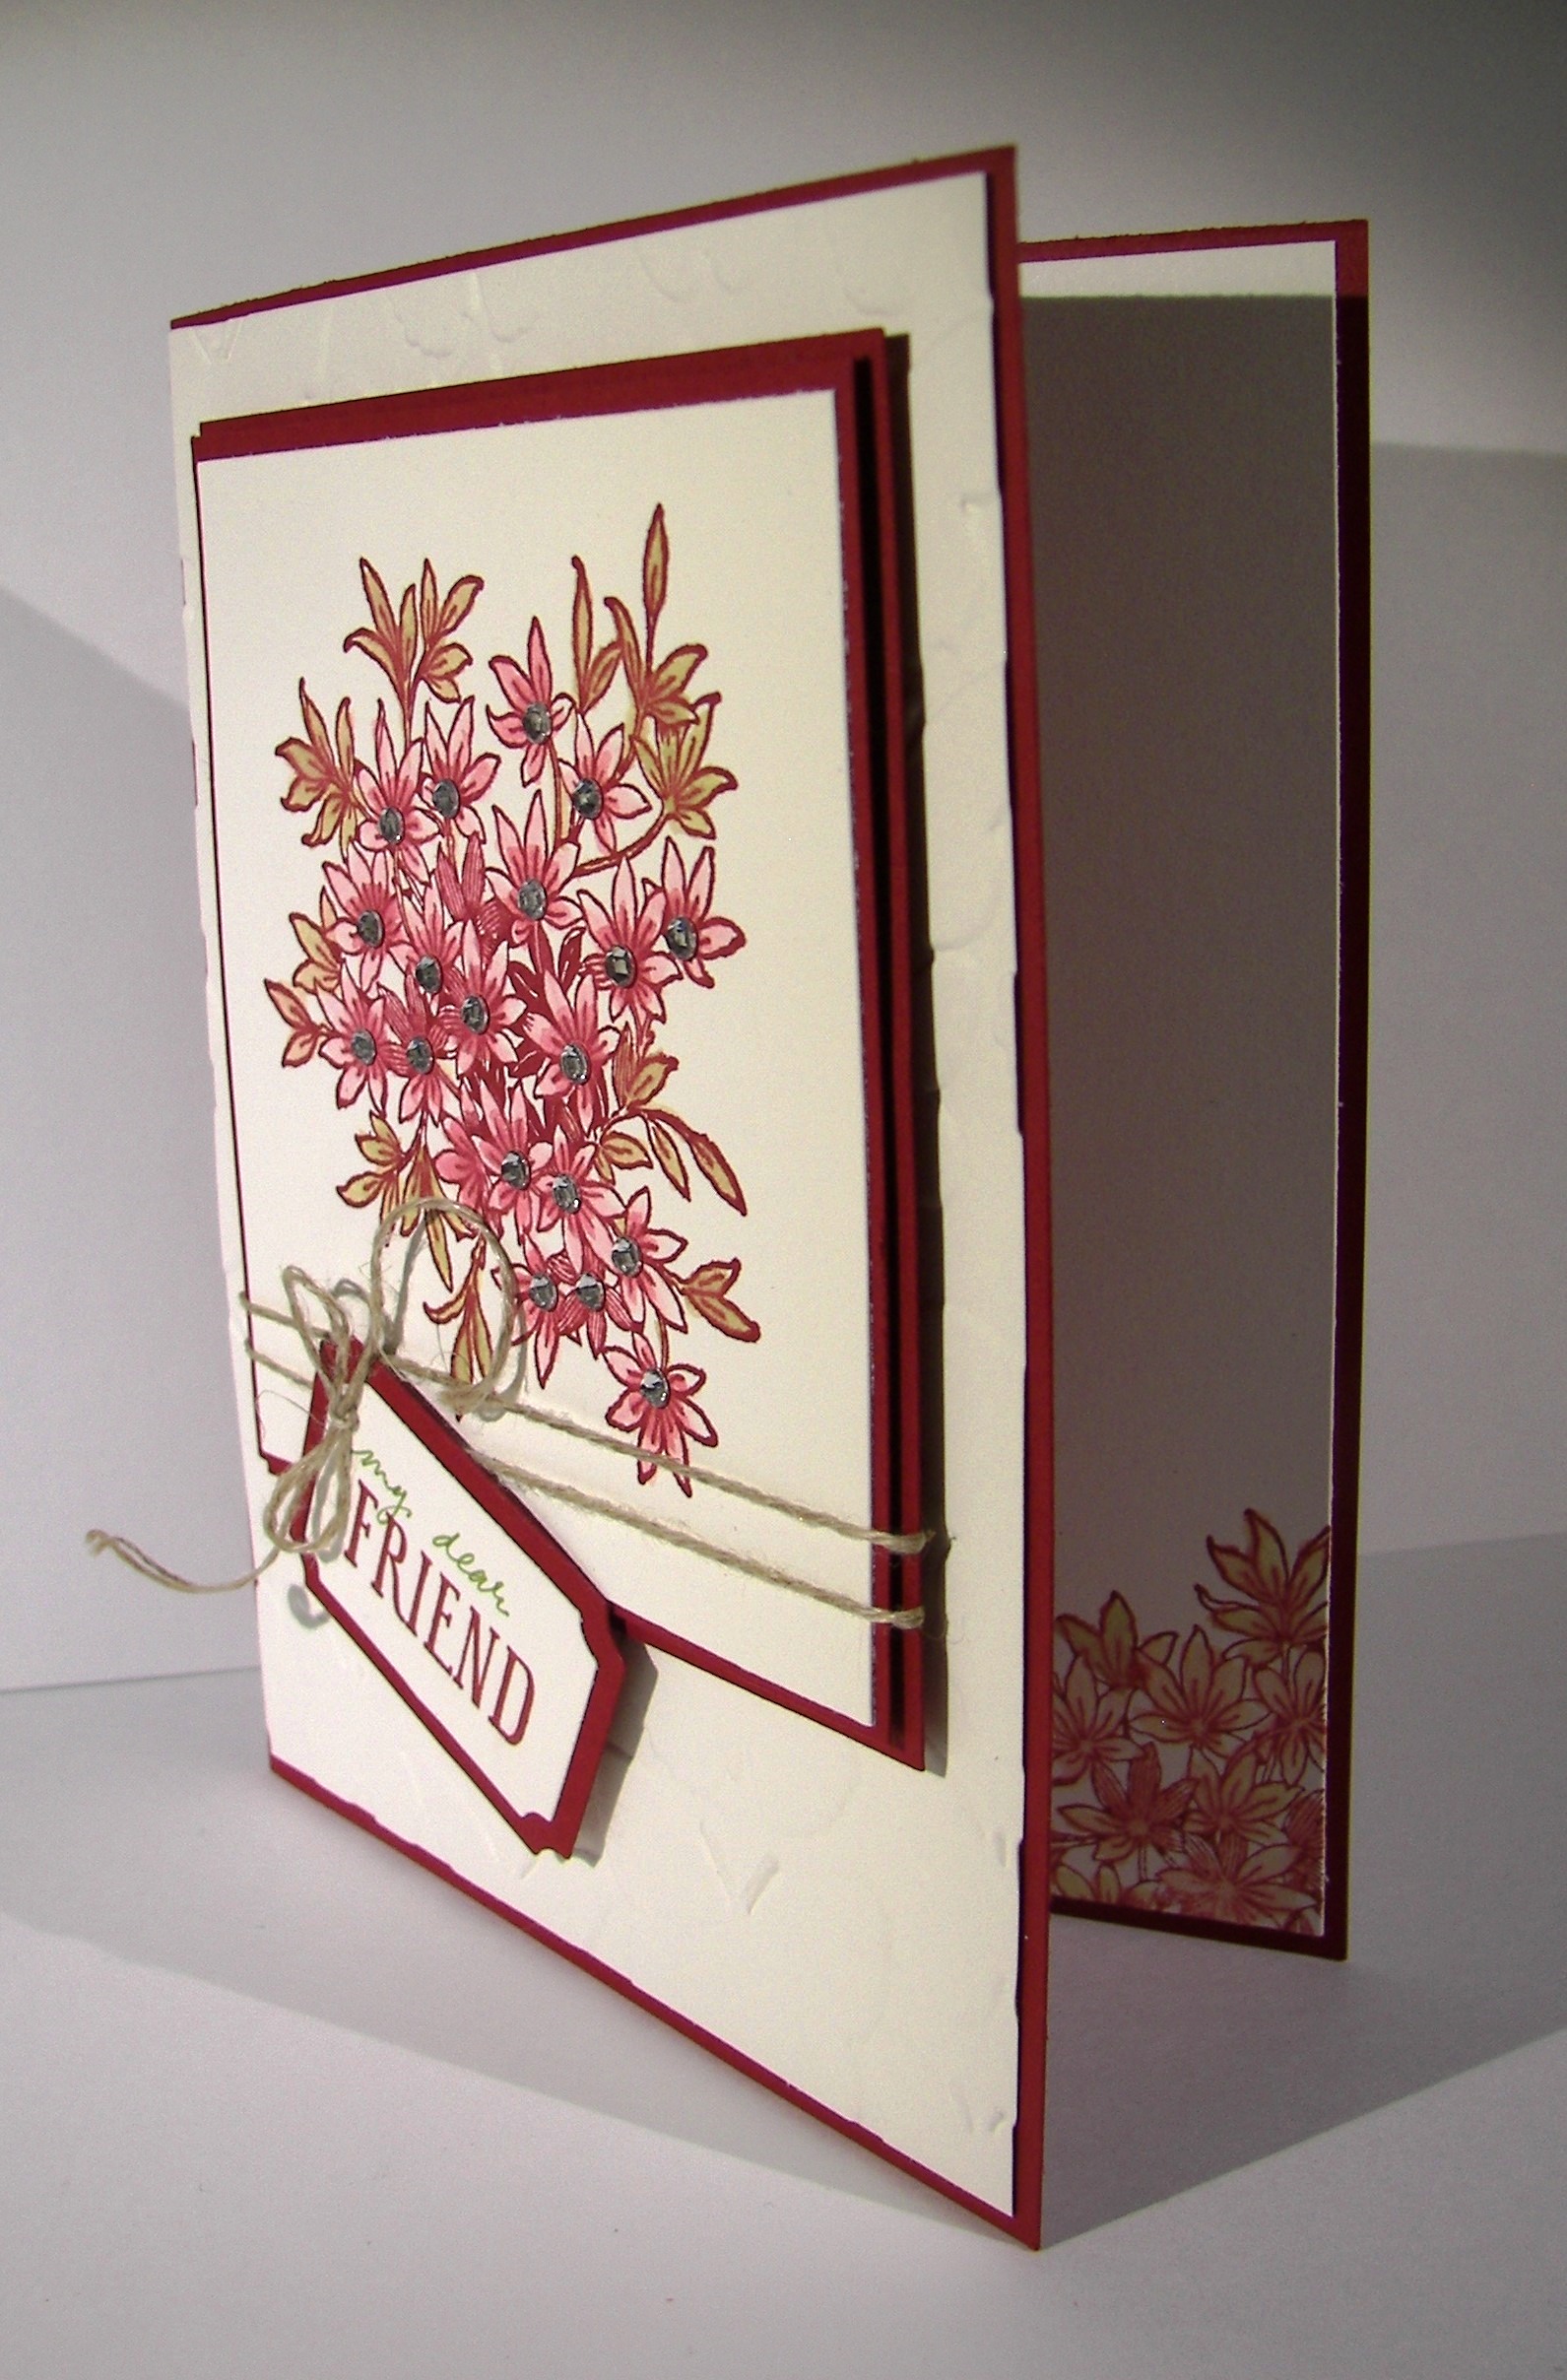
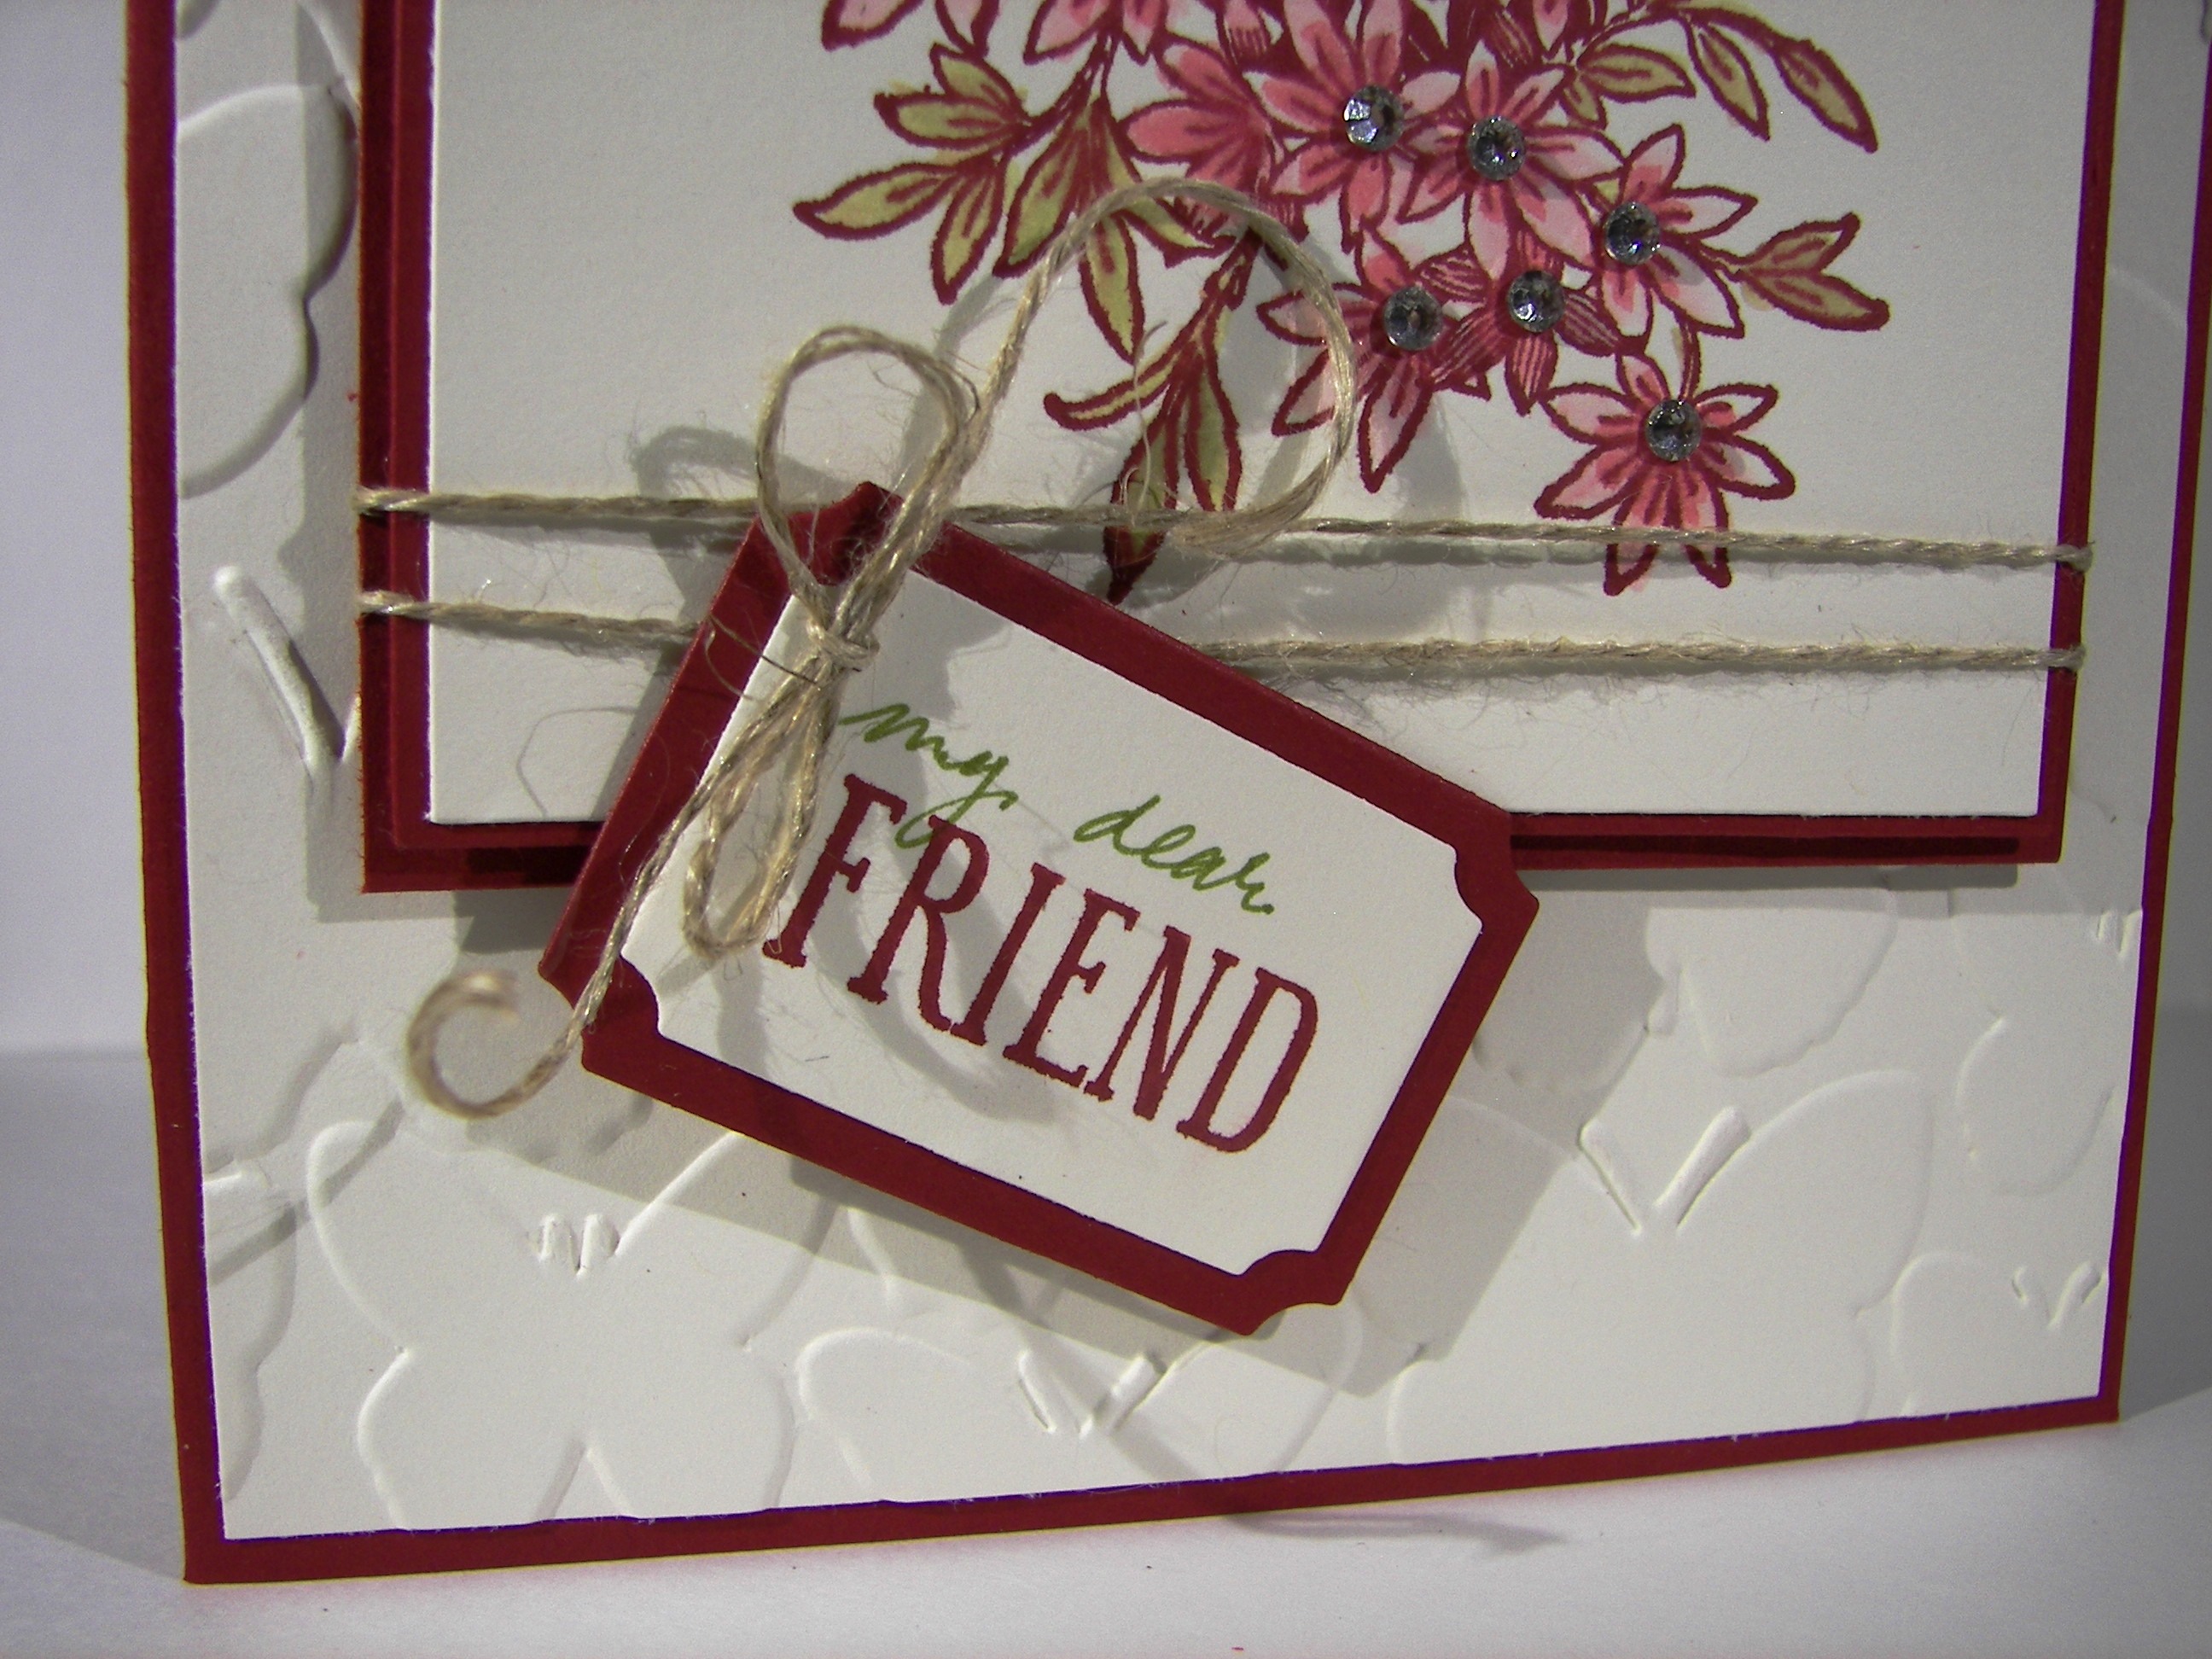
My daughter has this cute little app that allows her to ‘grow’ flowers and then ‘send’ them to someone.  I had a lovely bouquet this morning and I thought I would make a card like it. Her flowers actually had orange and yellow together, almost striped like an orchid.  This is what I came up with.  What a fun kind of game, right?

2-15

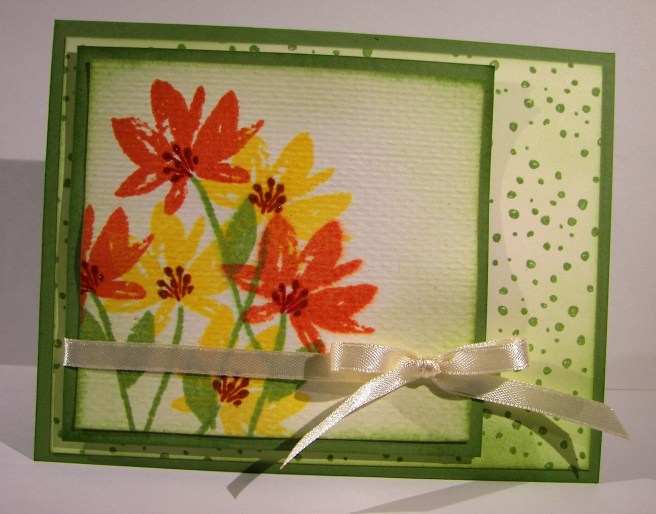
I used a piece of water color paper to stamp these little flowers.  The set I used is actually a free one with a $50 order during Stampin’Up! Sale-a-bration event.  The flowers went in first, tangerine tango then on to the crushed curry.  The stems were added in next followed by a smattering of leaves.  The stamen were added last using cherry cobbler on the tangerine tango flowers and cajun craze on the crushed curry ones.  I decided to soften the look with a healthy spritzing of water.  It was a slow process because I didn’t want the images to go all wobbly, just soften.  When the paper started to get pretty wet the edges started to blur a bit and I stopped.  This particular paper can hold a lot of water.  So, I had to use my heat tool for a while to get it all dry.  There was a bit of warping, but I liked it.

2-15-1
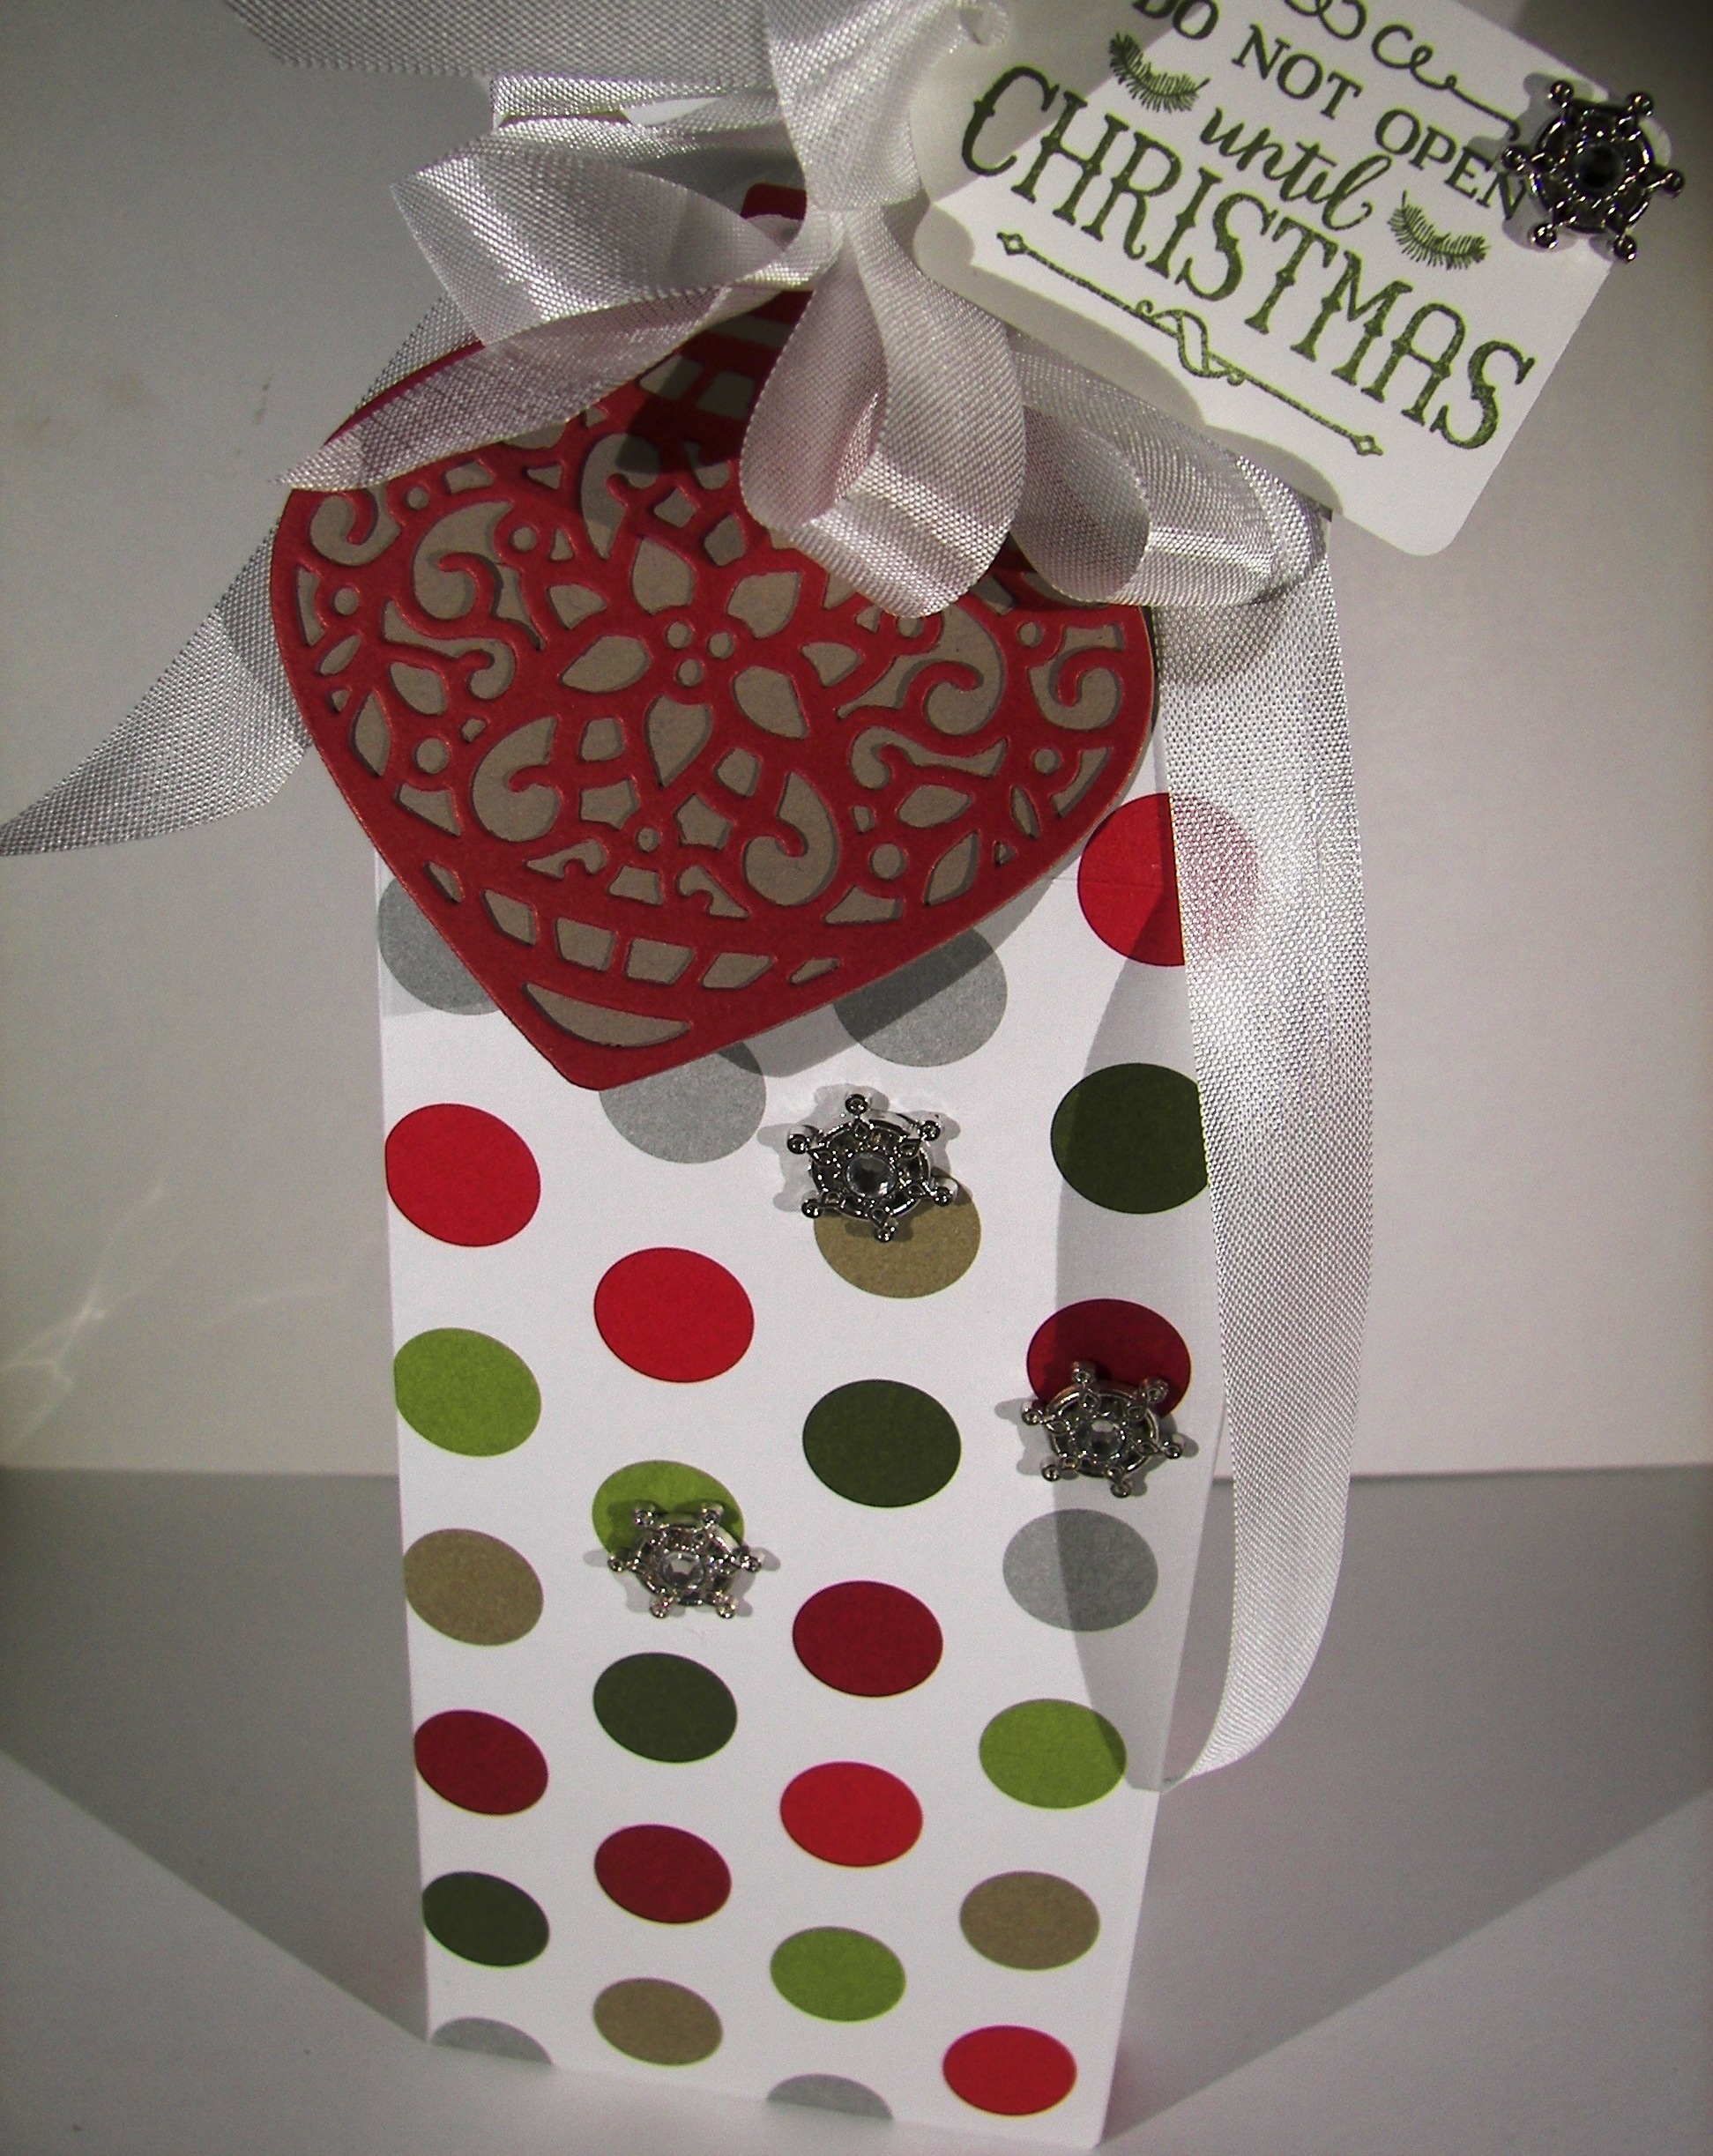
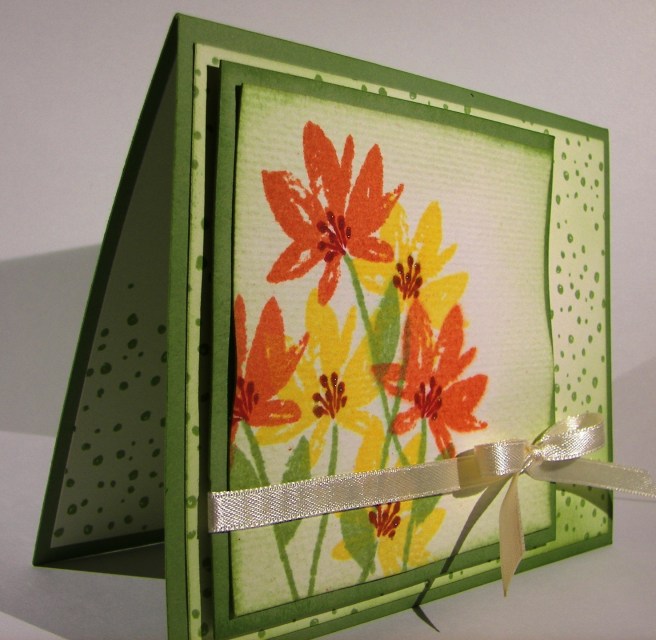
The background, and a bit on the inside, was stamped with the spotted stamp from the same set.  It is random, but has a defined shape to allow filling in the entire space without looking repetitive.  Very nice, very nice indeed.  The front piece was wrapped in some very vanilla satin ribbon and layered up on dimensionals.  The sentiment was left off completely allowing this to be an all occasion card ready to go.

Have a creative day!

Moana

Country Basics

This particular project really made me slow down and think.  My usual haphazard color selection just didn’t work out, as you can tell from the huge collection of colors I have listed. This might be the most color I have used on one project.  It ended up kind of cool in the end, but not sure what it will end up serving as.

7-18

One single stamp was the beginning, just the guitar.  The rest of the images were at the end and quite an afterthought to be honest.  I painted the guitar with cajun craze and the color adventure began.  I had thought it would have been fun to sew metallic thread in the guitar string area, but when I spent so much time on the painting I really wanted to walk away. Maybe next time.

Even though it can be a bit frustrating, it is also quite relaxing to work like this.  It also helps a lot with patience.  I know that if I just stick with it, eventually it will come together. Then, the next project doesn’t seem so daunting, because look at what I managed to pull out of the trash bin!

7-18 (1)

I left it clean of sentiment and all other embellishments.  The images speak for themselves and that guitar, I love that guitar.

Have a creative day!

Moana

Weather Together with Love

This is what I had in mind this morning, thinking of my recently married son and my soon to be married daughter.  Love is definitely in the air.  Then I read the news.  Seems like love is needed elsewhere today, and so much of it.

7-15

It doesn’t take a lot to show someone you care about them and sometimes it is the little things that mean the most.  Little treat boxes, little hearts, and a little love.  This kind of thing really brings me joy.  Something wonderful from something a simple as a piece of paper.  Yup, just one piece of paper.

7-15 (1)

The card was made with a half sheet, the front with one quarter and the box with the last quarter.  Hearts were stamped like crazy using the stamp from the weather together set. The word ‘Love’ also came from the same set.  I know I could have written it myself, but I don’t trust my writing all of the time and I wanted it embossed to really stand out.  After all, isn’t love the most important thing of all?

7-15 (2)

Have a creative day!

Moana

Country Livin’ Rocks!

Living in the country has its perks, and wouldn’t this be just one of them?  I unfortunately do not have an adorable old truck like this, but it sure would be wonderful!  I will have to settle for the stamp and my imagination.

7-2

This image was stamped with black stazon ink on water color paper and then adorned with a whole bunch of ink colors.  I started with a pallet of six colors, but it didn’t stay there.  I ended up with ten, but it called for it.  That doesn’t include the colors that emerged from simple blending and colors flowing together.  This kind of work is my favorite.  No real rules, just lots of distressing.

The perfect companion to the card is the new copper metallic thread.  It almost reminded me of barbed wire or old fence wire.  I like a little of embellishment, but don’t want any distractions when I water color.  The thread works for me.  There was a touch of stamping on the inside panel.  The splat image from the perpetual calendar set with cherry cobbler stamped off once.  Yummy!   I do think it would be interesting to try and paint this stamp with flames and metallic chrome.  I will have to see on that.

7-2 (1)

Have a creative day!

Moana

Happy Father’s Day, a Day Late…

Where have my blog manners gone?  Well, I had workshop on Saturday and one heck of an adventure before going, so couldn’t blog the projects we were going to make.  I will share them this week though, no worries.  Then there was Father’s Day, and these lovely little tuxedo boxes to make, nearly 85 all together.  So, you can see why I haven’t had a minute or two to share some of these goodies.

6-20 (6)

This tiny gift box wasn’t my idea, thank you many people who are also so creative and share online, but I adapted to make it work for me.  They looked so adorable all lined up with treats poking out of the top, but I just didn’t have a moment to photograph them all together before they were given away.  Believe me though, there were many smiles from more than pleased men in my church congregation as they were passed out by the young women I work with.

The box was made with half a sheet of 8 1/2 x 11 black cardstock and measures 1 x 3 4/2 and can hold a lot of little treats.  The tuxedo was assembled and then glued to the box.  All kinds of assembly lines were working with my family being so helpful.  The bow tie was obviously just a bit of ribbon with a knot in it and then trimmed to look kind of right and glued on with a glue dot.  The buttons went on in a bit of a whirlwind, but ended up looking pretty darn adorable.  The boutonniere was made from a retired tiny flower punch, punched twice, and attached together as well as the lapel with a tiny silver brad.  It was a bit extra, but added just the perfect touch.  The lapels and shirt collars were really eyeballed and scored with no real measuring in mind, just trying to make it look right.  I knew I had too many to do to make them too perfectly.

It was a great project that took quite a bit of time, over four days, with plenty of family help, but was worth every moment.  Way to be awesome dads everywhere!

Have a creative day!

Moana

Brushstrokes Through a Garden In Bloom

The ‘Brushstrokes’ background stamp finally made its way into my collection and I am wondering why I waited so long.  This project reminds me of a summer picnic.  The red checked table cloth, I think we have all had one at one time or another.

5-12 (1)

I stamped vertically and then horizontally with real red on water color paper.  I did tape it off first to give me the extra border I love so much.  The flowers and butterflies were stamped in black stazon and followed with the second step stamps to fill them in. Additional painting was done to sharpen the color some and touches of silver got in as well.

I used half a sheet of cardstock for the card base and couldn’t leave the other half just sitting there, so I made a tiny box to go along.  The black butterflies were stamped with the same set and I scored each panel measuring 7/8″ and topped it with a baby bow.  Adorable. Now another set can be added to the donation collection for Saturdays scouting fundraiser.

5-12

Have a creative day!

Moana


City By the Bay

Wouldn’t you love a view of the city like this?  Well, my view is a whole lot more country, but I would one day love to be able to enjoy one like this.  I might have to settle for occasional holiday trips, but it would still be wonderful.

4-30

I put quite a bit of planning into this project.  I had to think backwards in order to keep the layers straight.  I embossed my whisper white piece with elegant dots and used the recessed side to make my ‘wall’.  I inked up my sponge and just pounced in here and there to create this look.  I kept going until it looked more like a textured wall than a piece of embossed paper.  The edges got sponged.

The hearth and home thinlit of the window was used twice.  Once to create the hole in the wall and again to make the window frame.  I glued the white one to the tip top taupe one with tombo liquid glue and nestled it back into place with the card front.  That way it looked raised up without a lot of fuss.

The skyline was created with the calling all heroes set.  It was stamped with black stazon onto water color paper.  The texture of the paper made it look really neat.  I went to work on the water line and then moved up to the sunset.  The windows were colored in with gold wink of stella, even though you can’t tell as much, they do sparkle.  That was centered in the window and got a heavy dose of dimensionals.  I am sure I could have worked it out easier if I had thought a bit more, but sometimes a creative journey takes a few extra turns.

4-30 (1)

Have a creative day!

Moana

Balloon Celebration

Experimenting with water coloring has become one of my new favorite things to do.  I am so young in this medium that it is a constant adventure.  I do try not to do it all of the time, but it might just be my favorite.  Hard to put that off.

3-18

I did stamp off the balloons twice before they got to the card front.  I wanted dark color, but still opaque.  It worked nicely.  The second layer stamping was done only stamped off once to make sure it was seen well.  Also a good fit.  I did go over the balloons again with the aqua painter to smooth things out.  A bit of dabbing with a paper towel helped to create better highlight spots.  Fun and fun. I am still waiting for the back-ordered balloon punch, so I had to layer the balloons with just ink.  That is why I had them opaque.  To allow the layering to show the balloons behind, just like it would with a real bouquet of balloons.  I do think this card is good for just about anyone’s birthday, masculine too.  A really great project that was satisfying on so many levels.

3-18 (1)

Have a creative day!

Moana

Merry Christmas from the Jacobson Family!

Yes, we are just about this odd.  Last year during the holiday season we spent a fun day at Six Flags and had this drawn.  It is of course larger, and I had grander plans.

Merry Christmas from the Jacobson Family!

However, when it came time to plan out the card for this year I thought this would be so much fun.  Totally different that the usual, but that is just how we are.

So, you shouldn’t be hanging around this blog, you should be with your family and friends.  That is where I am.  But, I did think it would be fun to share a different look for a Christmas card.

Merry Christmas from the Jacobson Family!

Have a Merry Christmas!

Moana

Paper Pumpkin Makes Me Smile!

While I was visiting my children and parents during the Thanksgiving break I had a little fun with my November Paper Pumpkin kit.  My mother and I love to craft, differently mind you, but love it still the same.  So we sat down and did half of our kits together.  It was so much fun.

Paper Pumpkin Makes Me Smile!

Yes, this is only half.  The kit came with materials to make ten cards, two different designs.  I just loved them.  I usually don’t share these unless I do something different than the kit suggests, but it was the time spared that was the fun share.  My favorite part of crafting in any form is sharing it.

Paper Pumpkin Makes Me Smile!

And when you have kits as adorable as these, it is easy to share more than you might think.  These will be going to some special people, but not until they get some candy to go with them.  I will blog that part tomorrow.  I am going to turn the other five cards into candy bar wraps for the gift part and give them with these cards.  Fun stuff, right?  See you tomorrow then!

Paper Pumpkin Makes Me Smile!

Have a creative day!

Moana

Oh What Fun

Adorable, adorable, adorable.  There is only one more to share in the set after this one, but I do love this one especially.

Oh What Fun

Some time ago I came up with a little way to attach a tag in my twine and thought it would work well with this card.  Yes, it worked out great!  A bit of a threading thingy, but definitely not tricky.  Just looks neat.  I did have to use a dimensional to keep it straight across the card though.

The triple banner punch came in handy to make the tag super easy.  I am not one to have success with a square punch to make the banner end, so I think they made it for folks just like me.  Thanks for the frustration reliever.  Light sponging went into this one to finish it off.  Simple and sweet and easy to make.  Give it a try!

Oh What Fun

Have a creative day!

Moana

Merry Wishes

Red, red, red, I love holiday red.  Plenty of that going on here for sure!  More of a rustic look with the crumb cake card base and chunky twine combo.  How fun is that?

Merry Wishes

I used the last of my snowflake embellishments on this card.  Sad but happy.  I have loved putting them on everything, but will miss their sparkle.  I did just get a box of Stampin’Up! product yesterday though, with two packs of metal rimmed pearls.  They will keep me going just fine.  Not to mention the beautiful ribbons that I got on a steal of a deal with the holiday sales.  So much ribbon to play with.  All about that satin ribbon these days.

I also got a new die cut that makes all kinds of flower parts.  Not just the lay flat those are so pretty kinds, but roll and layer and make 3-D looking ones.  And a bunch of glimmer paper.  I see sparkly flowers in my immediate future.  Can’t wait to get off work today!

Merry Wishes

Have a creative day!

Moana

Hearth & Home Thinlits Fun

After a full day of workshop excitement, I finally have a few minutes to share the third project we did.  This one just about did my ladies in, but they managed though most of it.  I didn’t have to help too much really.

Hearth & Home Thinlits Fun

The base of this candle holder is made with old olive from one sheet of cardstock.  Two card bases with 1/2″ cut off from one side and 1/2″ score on the other with a score in the middle.  With two of these joined together, the box frame was made.  Four panels of heavy whisper white cardstock were put through the Bigshot in the Brick Wall embossing folder that had been brayered with old olive ink.  It gave the perfect mix of a soft brick wall that coordinates nicely with the base.

Hearth & Home Thinlits Fun

Cherry cobbler was used to create the window frames.  The Hearth & Home Thinlits set is simple, but what a great look right?  The window frame is a great focal point that I chose to back with velum to allow an opaque look in.  I had provided fun battery operated candles that fit nicely inside.  When they flickered it made it look like there was a very colorful set of Christmas lights going on inside.  So pretty.  A couple of buttons, some twine with a simple saying set the front panel apart from the others.  Along with a few little shrubs made from mossy meadow paper punched with a scalloped circle punch.  Really, a cute project all in all, even if it was a bit of work.

Hearth & Home Thinlits Fun

Hope your day was creative, mine sure was!

Moana

Oh What Fun Gift Box

I actually started out with a different stamp set and a card in mind.  But I just wasn’t feeling it, so I changed gears.  I do really love what ended up in its place.  I love a pretty holiday box like crazy!

Oh What Fun Gift Box

I used a whole 12 x 12 from the Merry Moment DSP pack.  Of course I migrated to the huge dots.  I love all kinds of dots.  And I couldn’t stay away from these beautiful ornament framelits.  They are so wonderful.  I think that these will be all over my Christmas gifts this year.

Oh What Fun Gift Box

The Oh, What Fun stamp set is so full of fantastic sayings to make any holiday crafting one step better for sure.  They will make gift giving and card making quick and easy without looking that way.  Just yummy.  Oh, and these little embellishments are so adorable!  With twenty in a box they will find there way just about everywhere.

Oh What Fun Gift Box

Have a creative day!

Moana

Sweet Hauntings

I was pretty darn excited to get this stamp set and even more to put it to work.  These bottles, they really make me laugh!  I normally don’t purchase Halloween sets because of the limits of use.  This one, I know I will be having fun with it all year long.

Sweet Hauntings

Picking the color pallet was the easy part, some of my favorites for sure.  I love fall and all of the colors that live there.  Creating my own patterns for background paper is one of my favorite parts.  I would love this in whole sheets.  Hmmmmm, perhaps that will be a fun activity later on.  I stamped each bottle again so they could be fussy cut and layered up.  Those fun little bottles, love them!

 Sweet Hauntings

Lots of sponging on the vanilla paper.  Early espresso gives a great vintage look, which is just what I needed.  I sponged everything, lots, even the ribbon.  It gave it  a great grungy look.  I did echo stamping on the inside as well, can’t get enough of these bottles.  Did you notice the tiny little rhinestones I put on the skull bottle stopper?  Way beyond fun!

Sweet Hauntings

Have a creative day!

Moana

Thankful Swaps

I have been out of town this last weekend and it is nice to be home for lots of reasons.  I did love my trip, seeing my daughter and son at university is just fantastic!  Something about your own space though, just feels cozy.

Thankfuln Swaps

I also discovered that I am not the best blogger on my iPad.  They were pretty basic, but I managed.  I was honestly just too tired yesterday and had tons more standing in line waiting to be tended.  Day survived.

Thankfuln Swaps

There were several fall themed swaps I wanted to share as well.  I had recently ordered this stamp and framelit set but haven’t gotten to play with it just yet.  So it was nice to play at the demonstrator workshop event.  Working through someone else’s vision is different, but entertaining.

Thankfuln Swaps

While it is fun to share these swaps, I am getting anxious to dig back into my supplies and create.  Especially with some of the new treasures.

Have a creative day!

Moana

For the New Two

Does this conjure images of a wedding couple or what?  I do have another idea though.  Honestly, I went with brighter colors for that other idea.

For the New Two

We often associate two as a couple, as in a relationship couple.  Friends of mine are currently working as nannies for a set of twins.  So, how about congratulating a couple on the birth of their twins?  Get it?  For the new two?

For the New Two

Well,  I thought it was very clever indeed.  There are plenty of gift ideas for baby boys and girls, but how about those twins?  It will take longer for triplets and such, but I am sure there is a way.

 For the New Two


This is made from a whole sheet of english garden dsp and isn’t it glorious?  I paired it with the thick backers twine and went cherry cobbler all the way.  A handful of punched and sponged hearts were the perfect embellishment.  A small doily helped to close it off.  The stamp is of course from the wedding set, For the New Two.  I layered the tags using the scalloped tag topper punch, happens to be on sale this week oddly enough, and the hearts border punch as well.  Quite the gift bag if I do say so myself, and I do.

Have a creative day!

Moana

My Dear Friend

I focused on one image for today’s project.  It initially reminded me of a Japanese maple tree as it starts to change colors.  They are so vibrant.  As I started to paint them I noticed the flowers and the leaves looking different.  I thought it was more of a shrub.  Put your glasses on, right?

My Dear Friend

I put the aqua painter to work here.  I stamped the image in cherry cobbler and brought the color in with just water.  Then I added in old olive and mixed the colors, just as the leaves would be looking.  I decided I wanted the flowers to stand out more, so I darkened the centers to bring out the detail.  I can’t believe I didn’t notice the flowers the first time.

My Dear Friend

Talk about being generous with the basic rhinestones, but I wanted all of the centers to sparkle.  Such a pretty look.  Is it over the top?  Well, if it is for a dear friend, you want it special.  The friend stamp seemed a bit lonely, so I wrote in above it using an old olive stampin’ write marker.  First try even, not bad.

My Dear Friend

There are so many new products used today.  The framelits, the embossing folder, the stamp, and they work together great!  I even got all nostalgic thinking about an old friend that I just don’t get to see anymore.  Guess I know where this one is going!

Have a creative day!

Moana

Part 2 with Gift Cards as Promised

These little cards are just so cute.  And yes, all eight of them do fit nicely in yesterdays box project.  It was hard not to share them together, but I managed.

Part 2 with Gift Cards

I thought the cards were perfectly sized to write a tiny note and put in a gift card.  This would be a great stash to have on hand.  The cards were made simply with 1/4 of a page of card stock and then scored in half.  That way I was able to make all of the card fronts from one sheet of whisper white.

Part 2 with Gift Cards

I stamped the whole page and then chopped it into eight pieces.  How easy is that?  It was super easy,no questions.

Part 2 with Gift Cards

Now, you need to go try something fun like this.  Have a creative day!

Moana

Flower Shop Gift Box Part 1

How about a big gift box for a change.  I had to control myself and keep the cards separate from this post.  You can see them tomorrow.  Eight fit inside.  Curious?  Check it out tomorrow.

Flower Shop and Sassy Salutations Gift Box

I used one sheet of 8.8 x 11″ cherry cobbler card stock for this box.  Just some basic scoring, one tiny punch for a notch and a few snips.  Then, the box is there.

Flower Shop and Sassy Salutations Gift Box

I made a top with another layer of cherry cobbler, giving an 1/8″ border, with a stamped whisper white sheet also cut with another 1/8″ border.  Simple stamping and some sponging.  I had planned on putting flowers on top, but it was just too much.

Flower Shop and Sassy Salutations Gift Box

So here we are, a nice simple box.  It measures 6.5 x 4 x 1.  Plenty of room for the cards I made to go inside, or something else fun and exciting for sure.

Have a creative day!

Moana