Yummy in My Tummy

What a busy day yesterday!  I started this set early yesterday morning, but couldn’t finish before I had to leave for the day.  So I finished them this morning and shared them together instead of different days.  They come from the same stamp set, and they look adorable together, so why not!

1-26-2

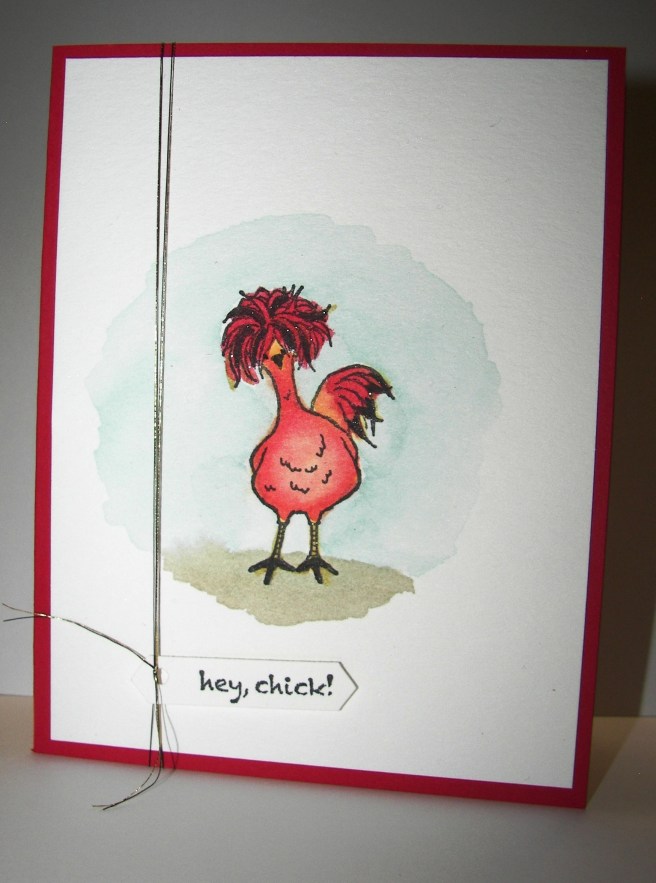
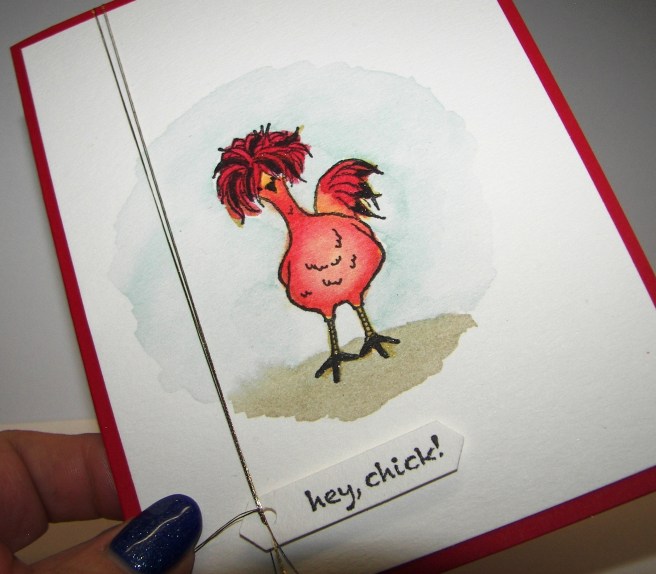
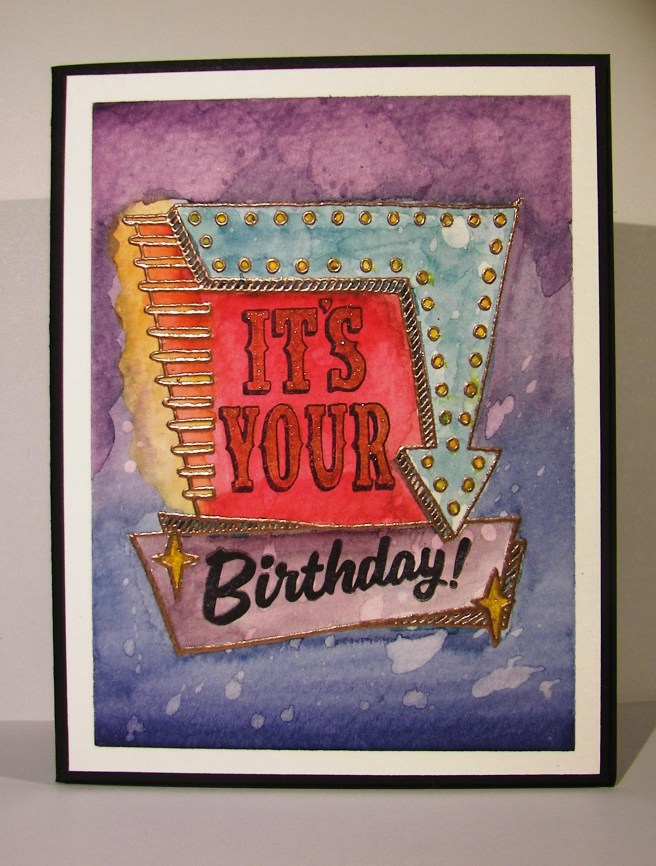
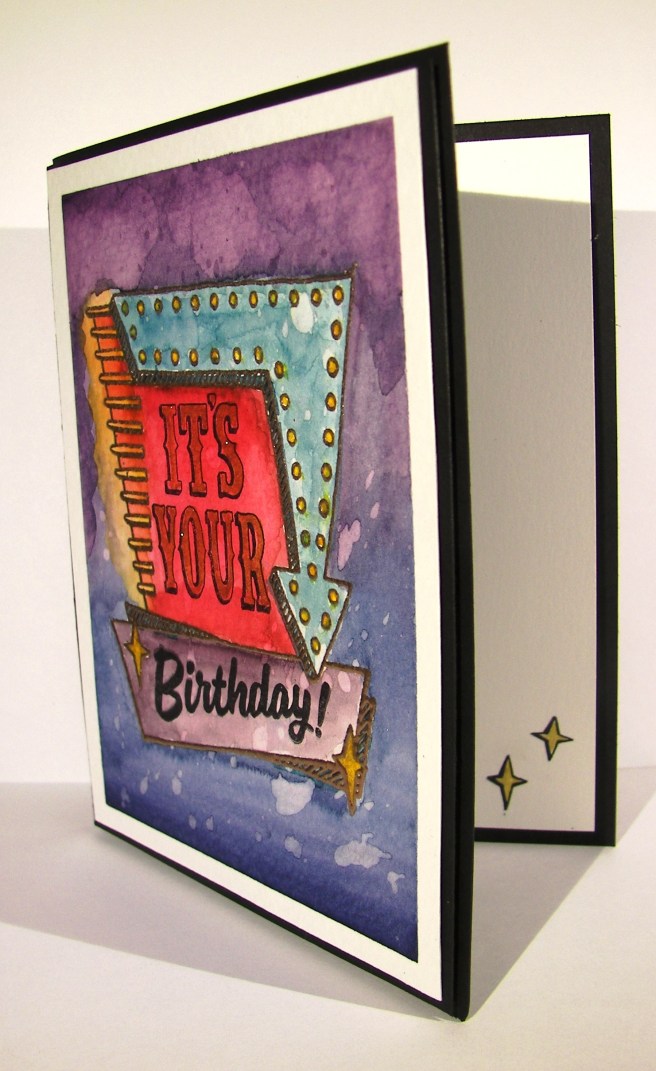
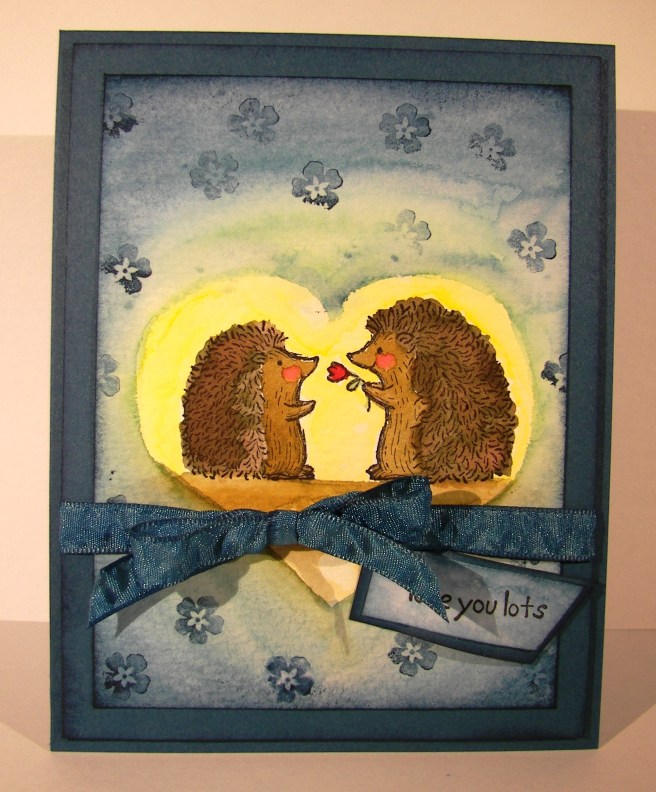
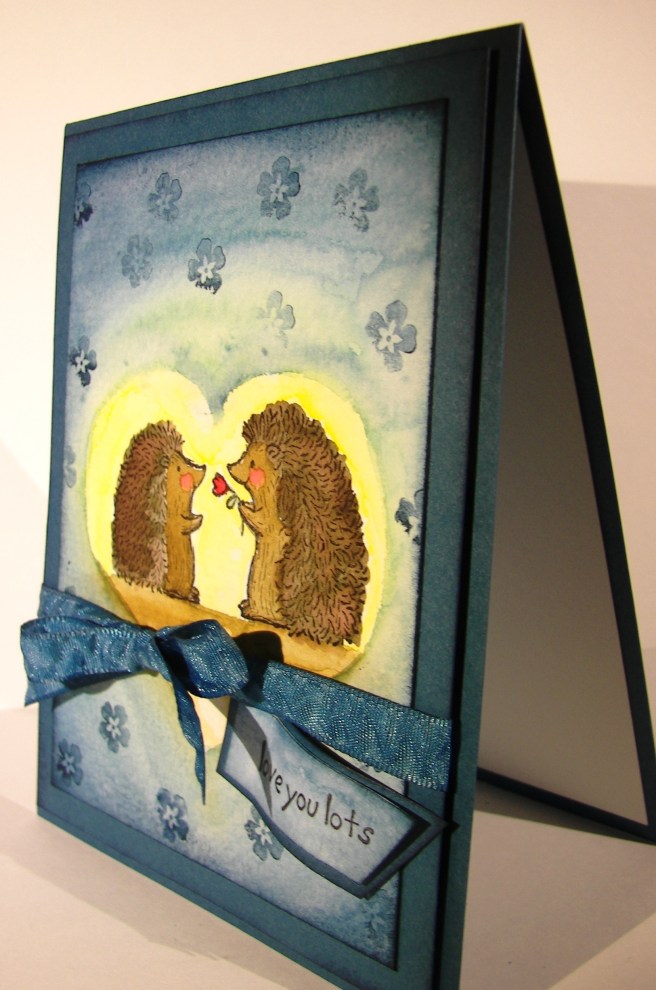
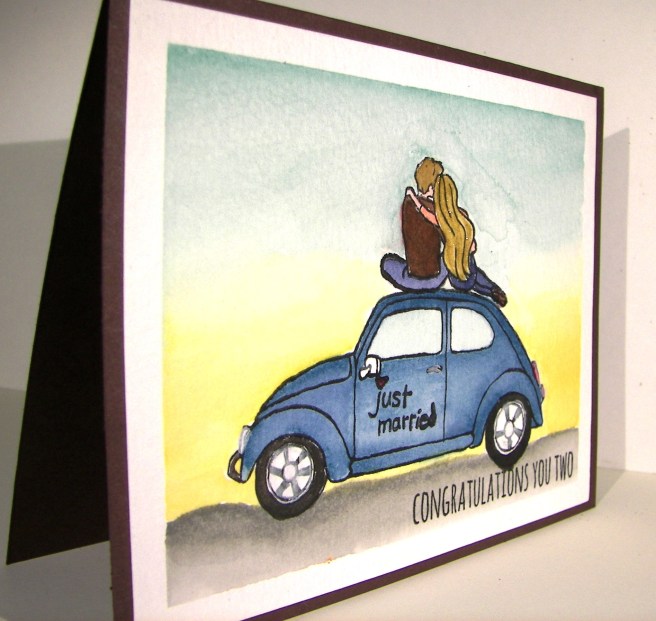
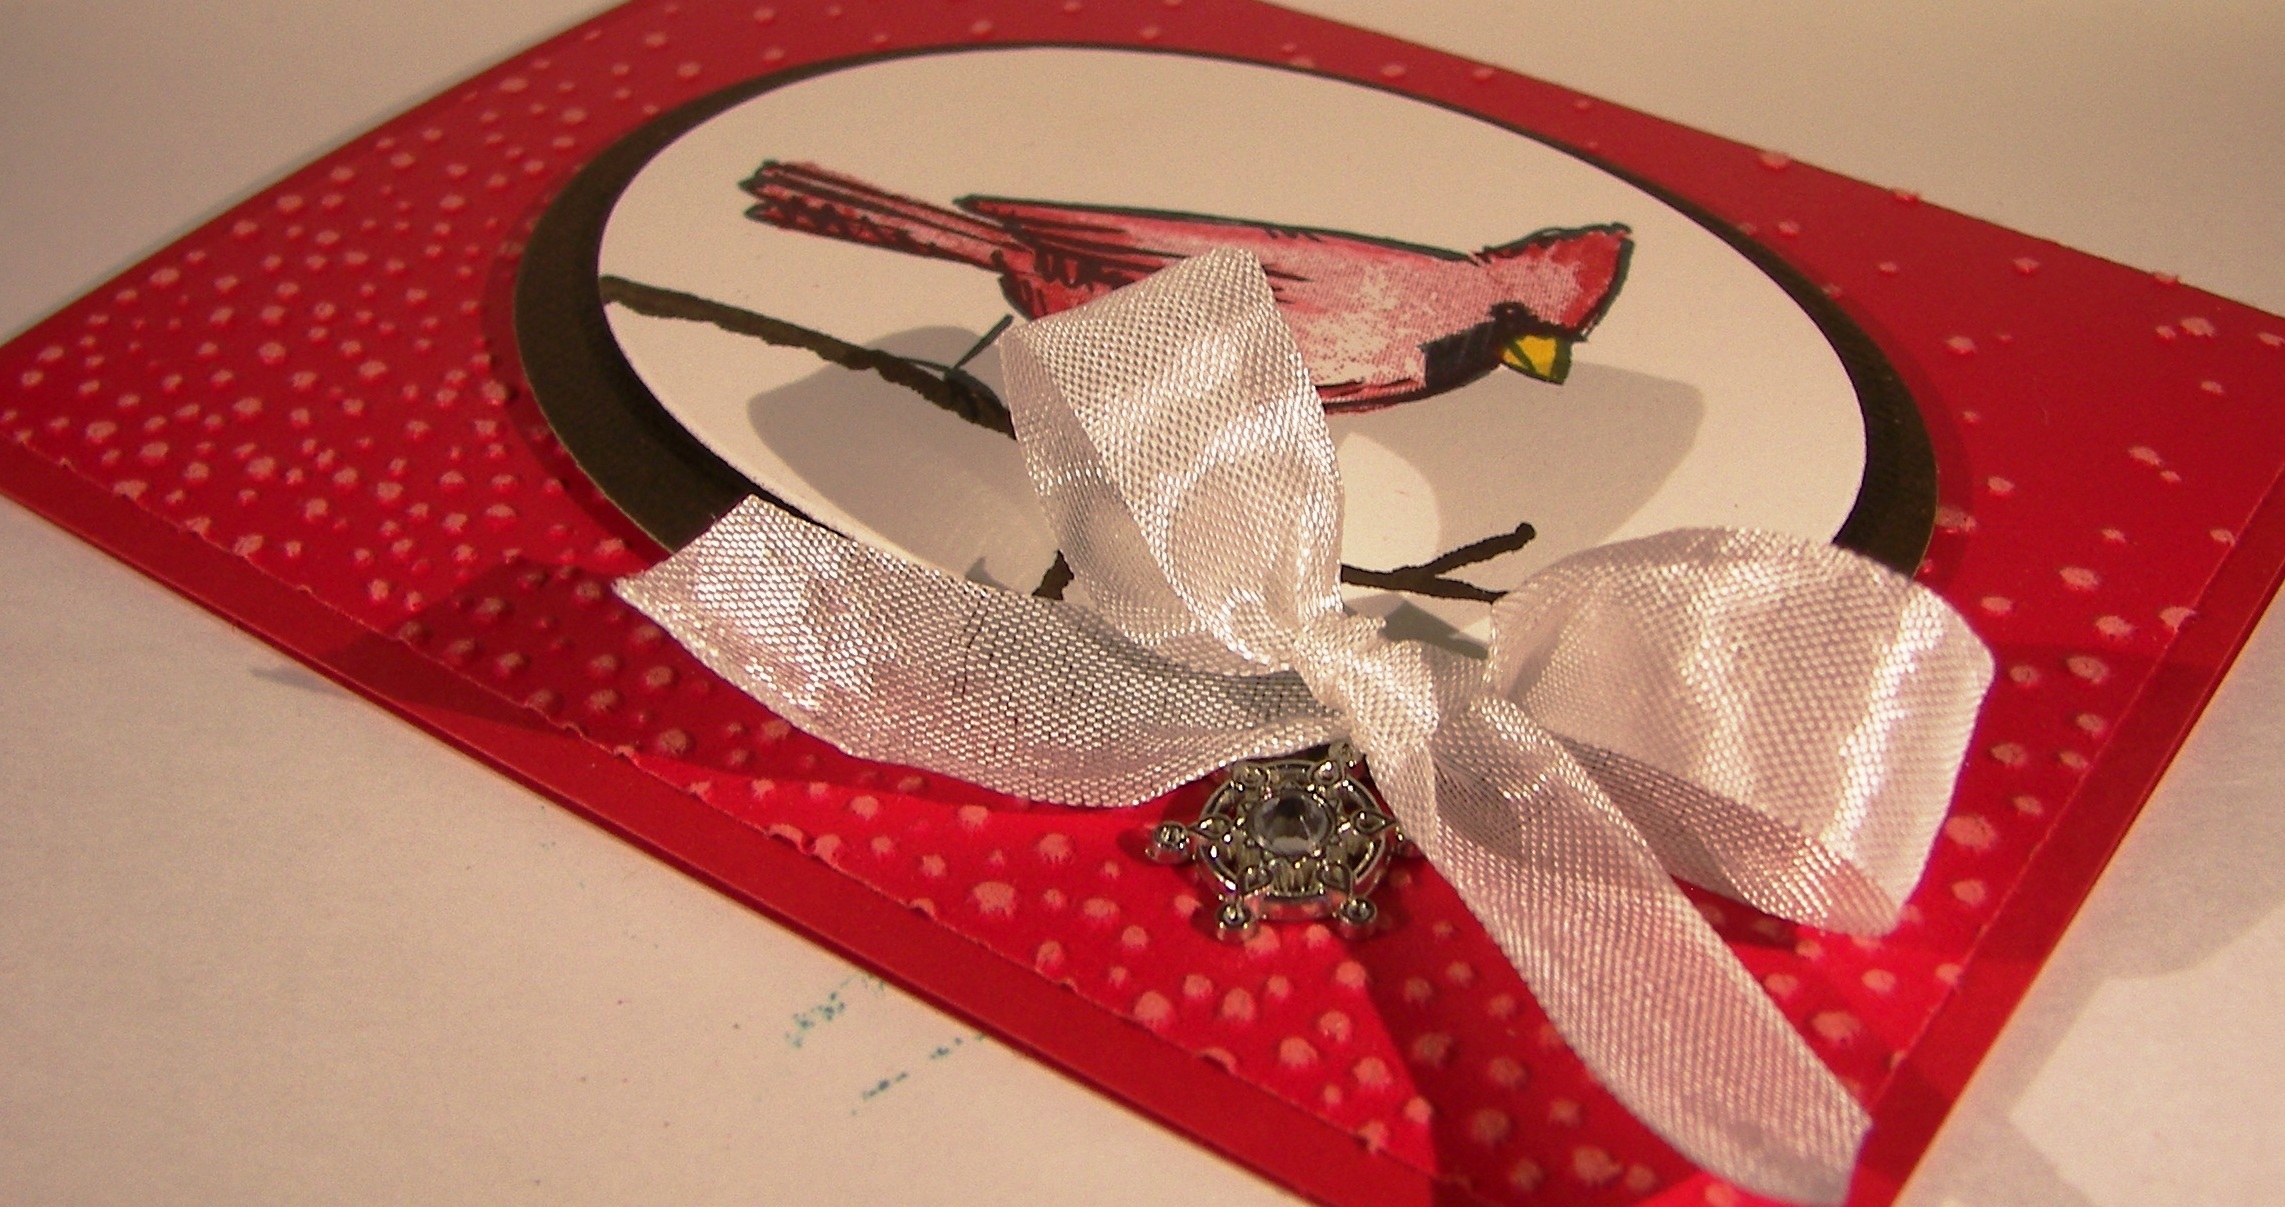
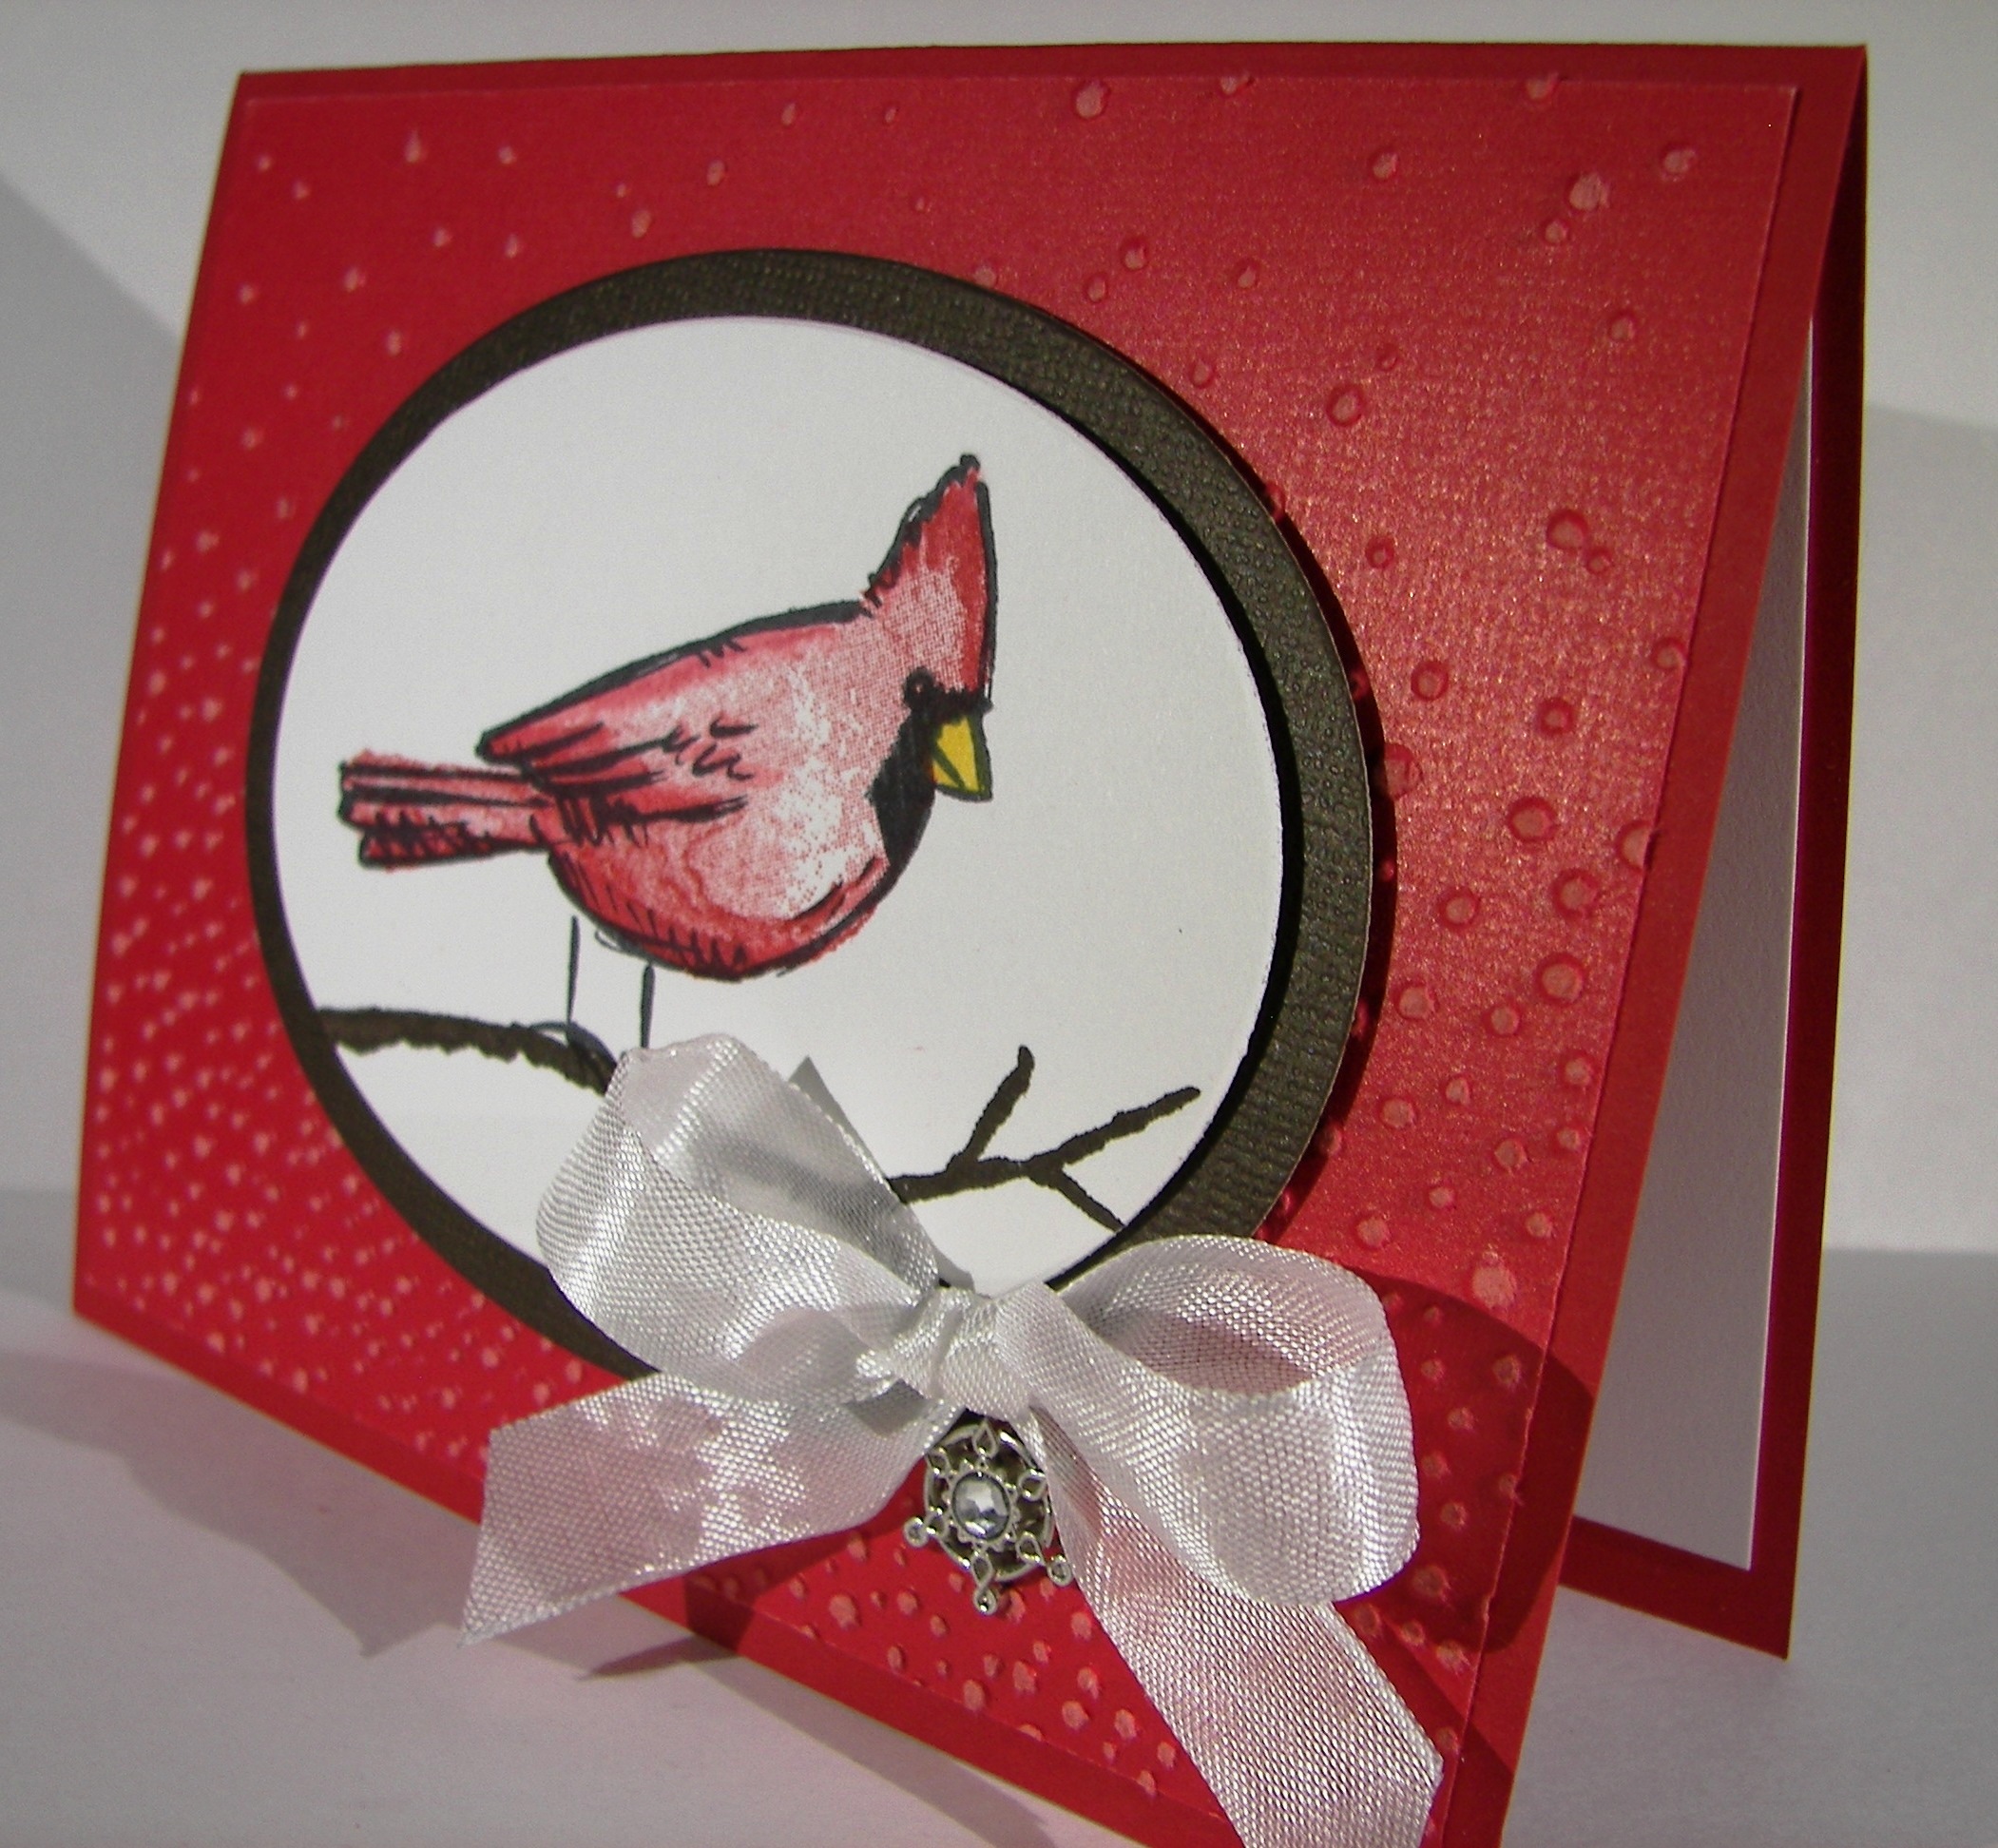
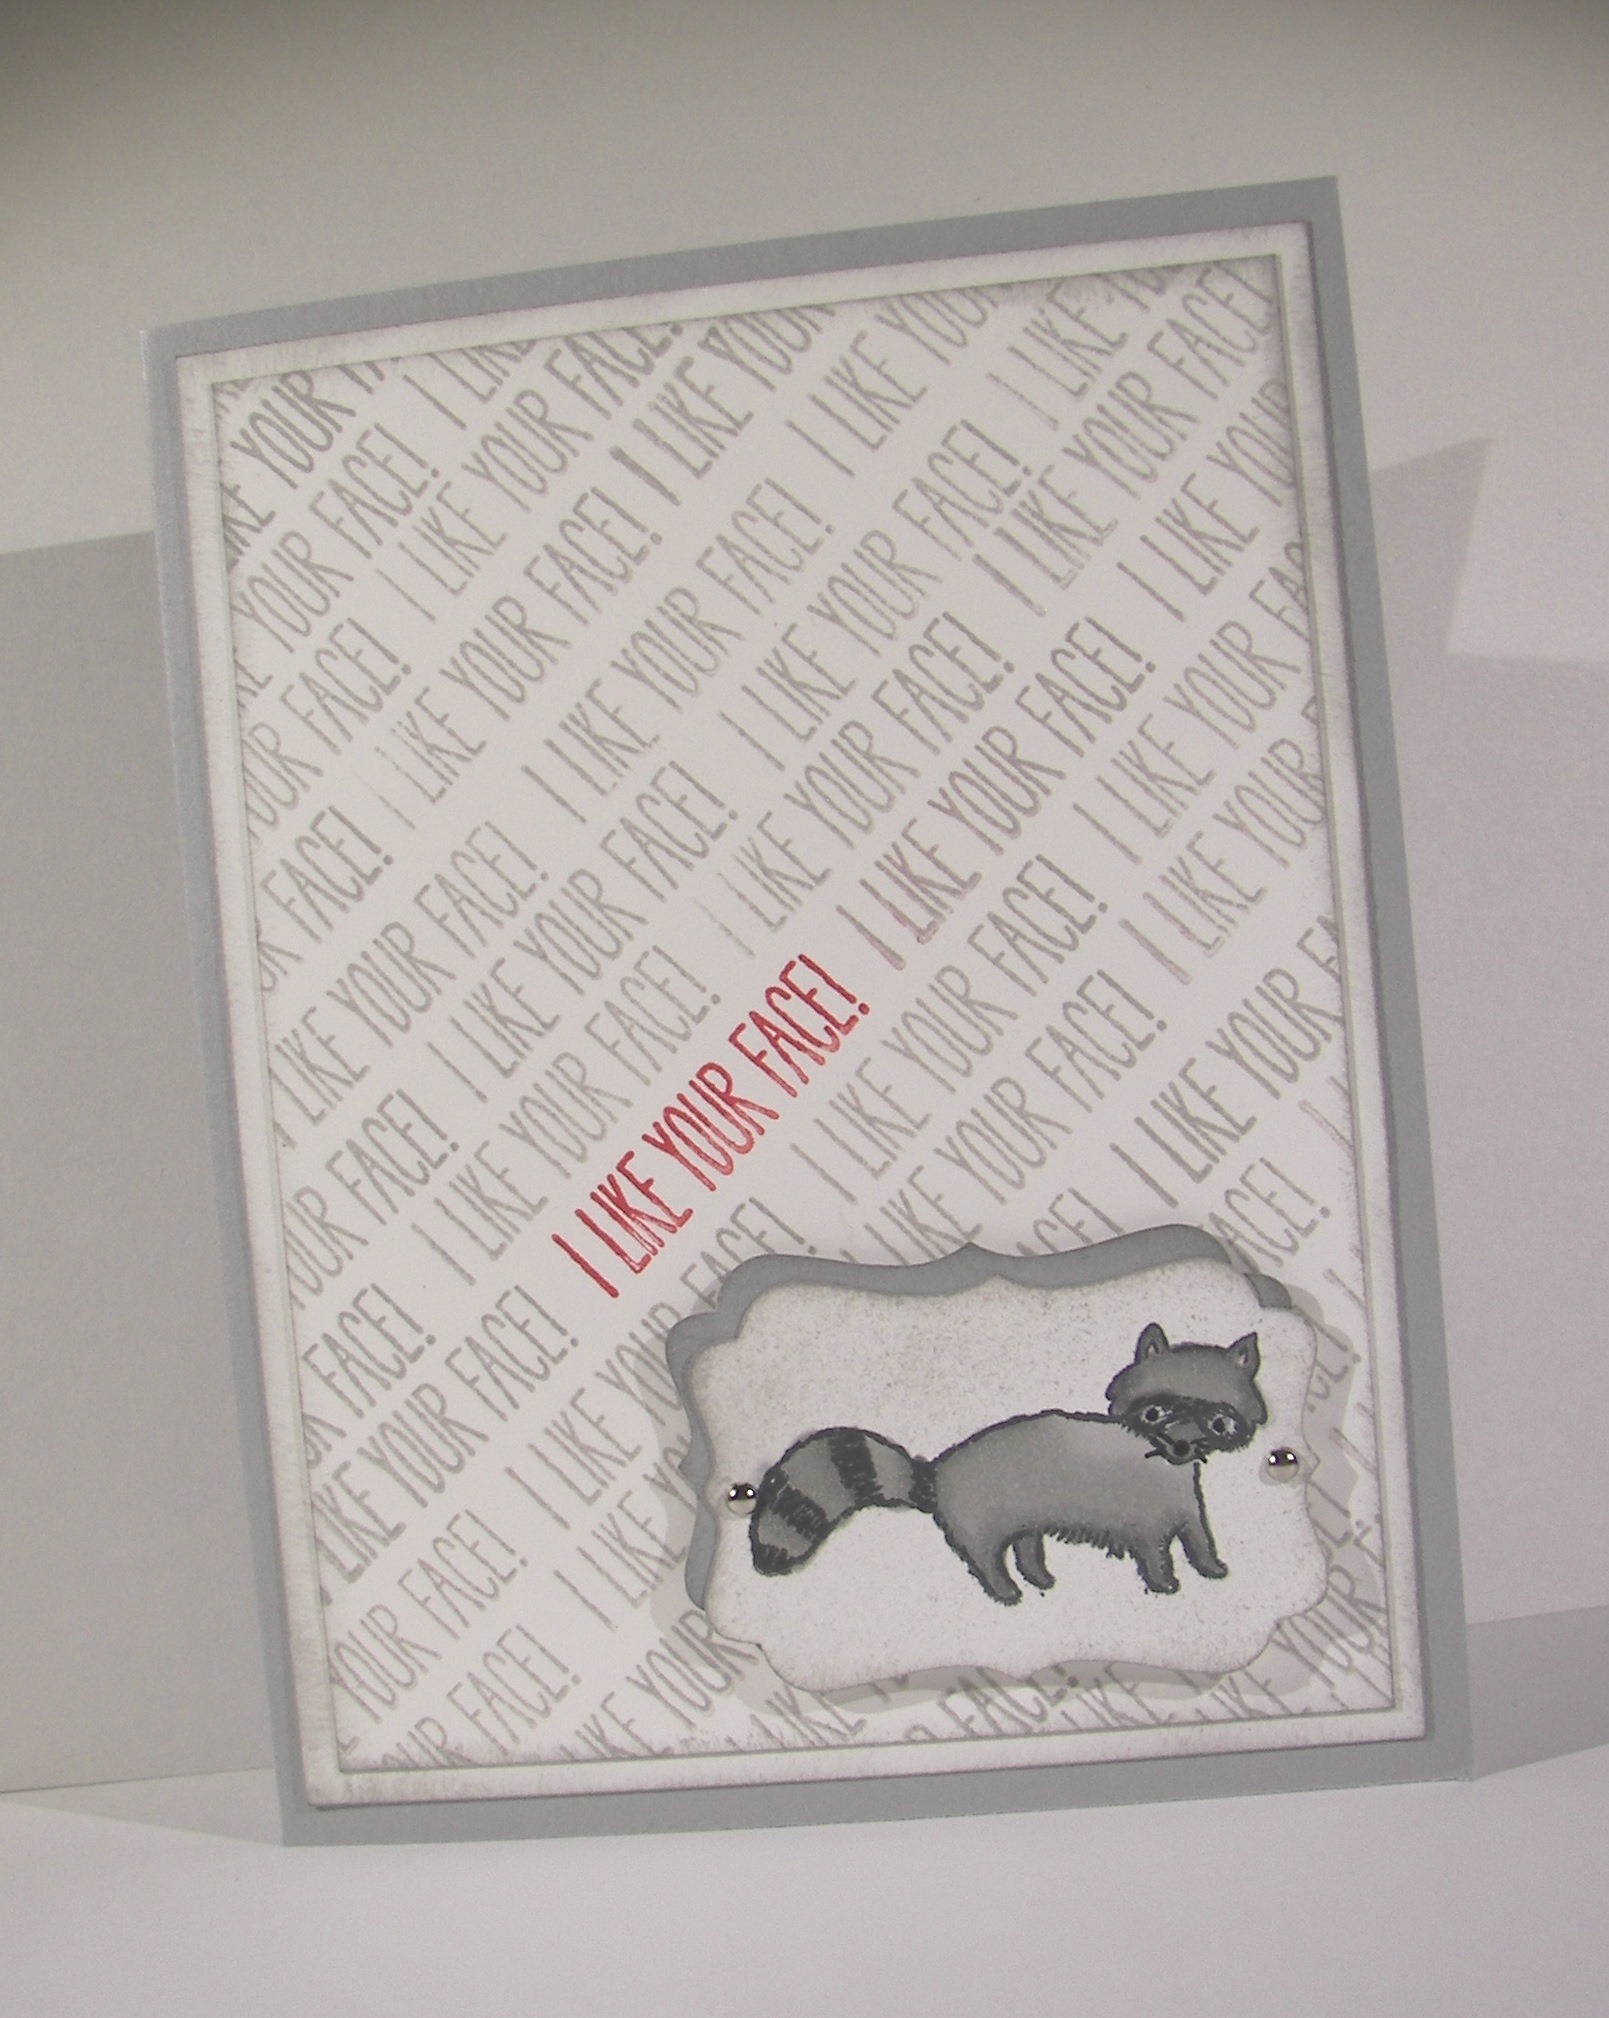
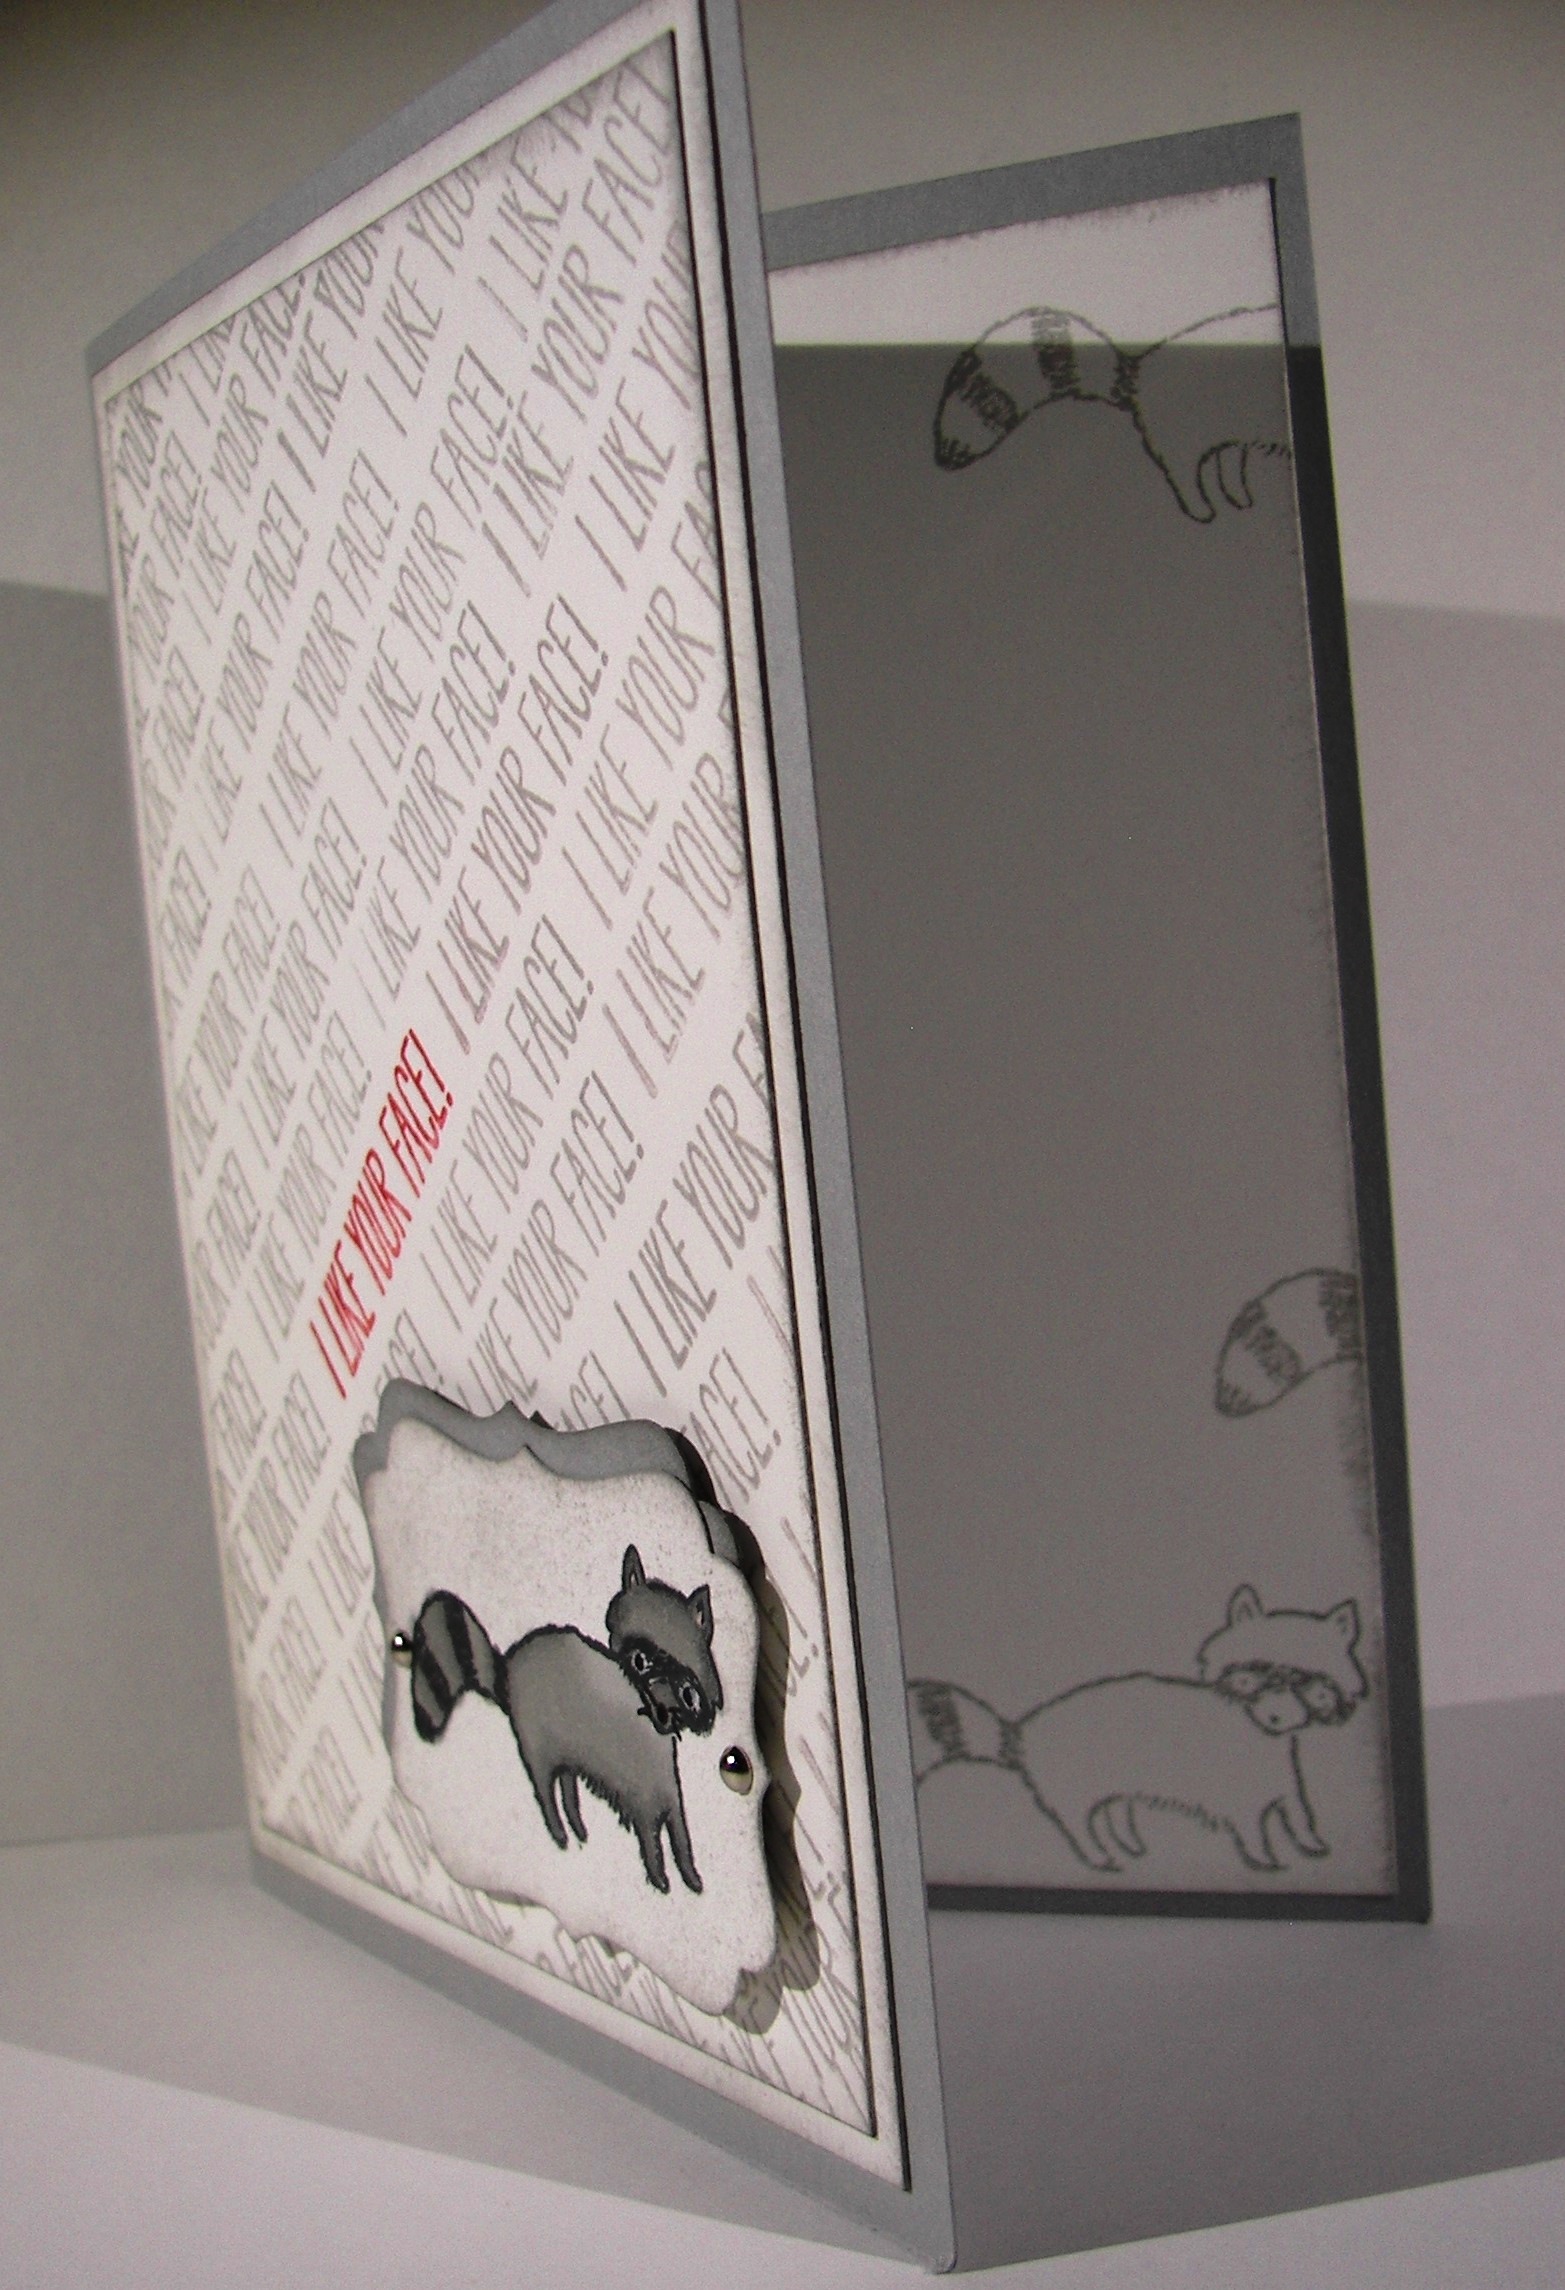
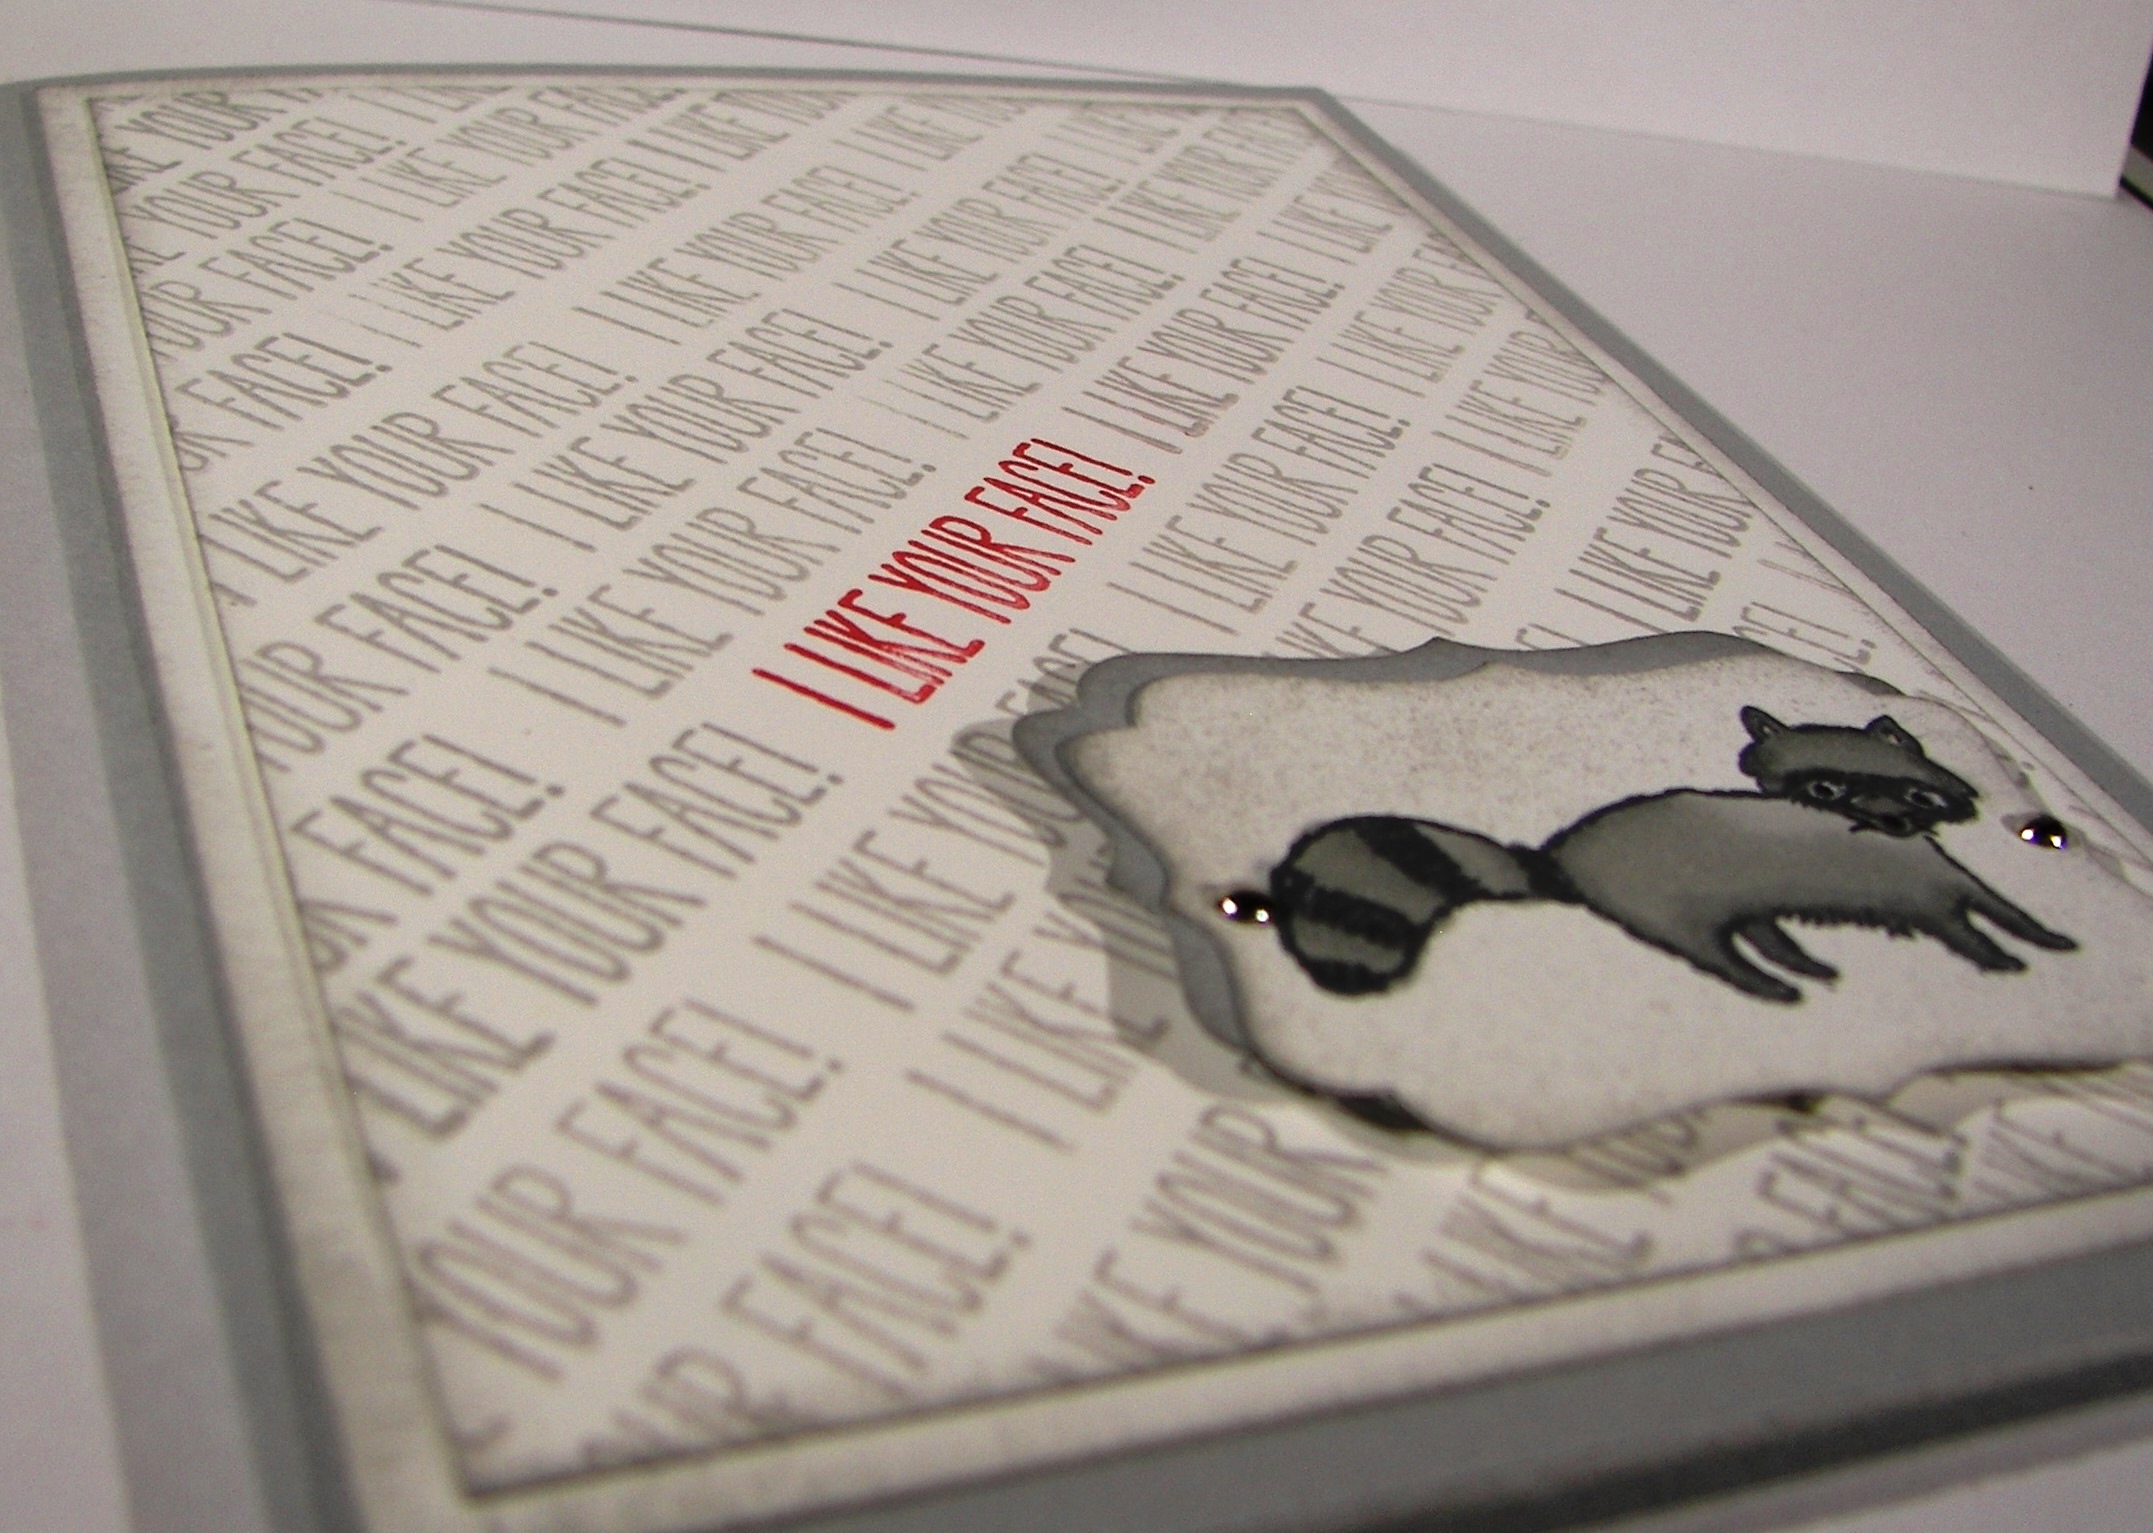
These were stamped in black stazon on water color paper then colored with water color pencils.  After I put the color down I wanted I moved it around with the aqua painter.  That has got to be the easiest way to water color ever, outside of having someone else do it for you. Seriously, it is shockingly easy.

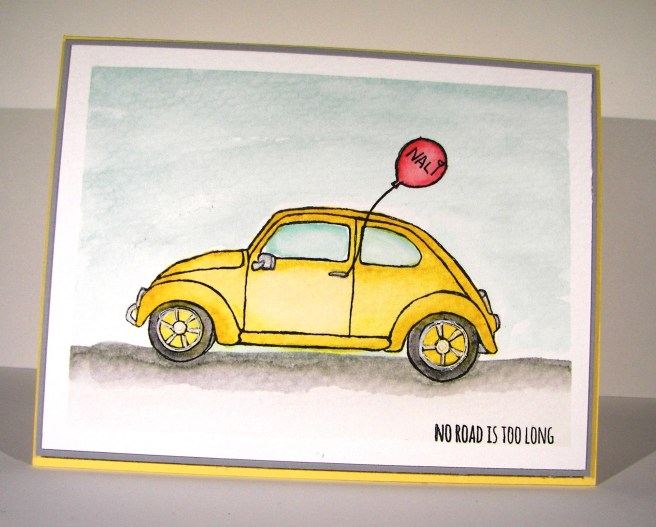
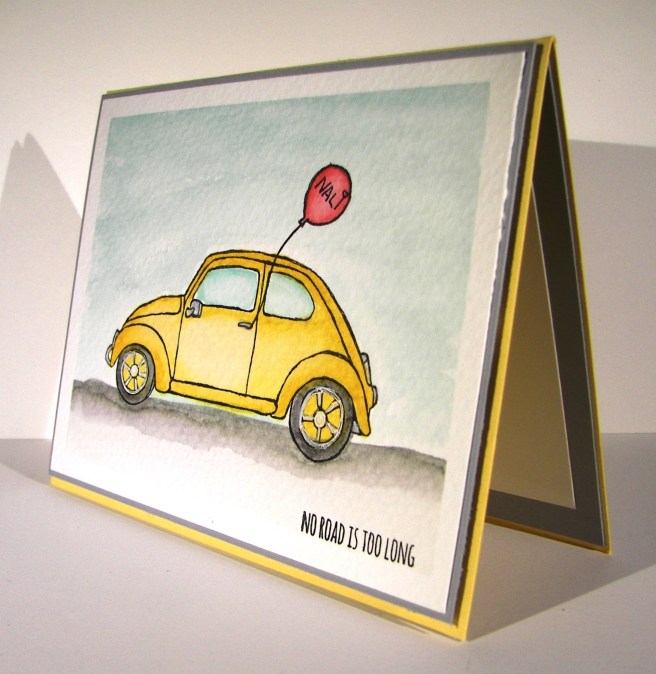
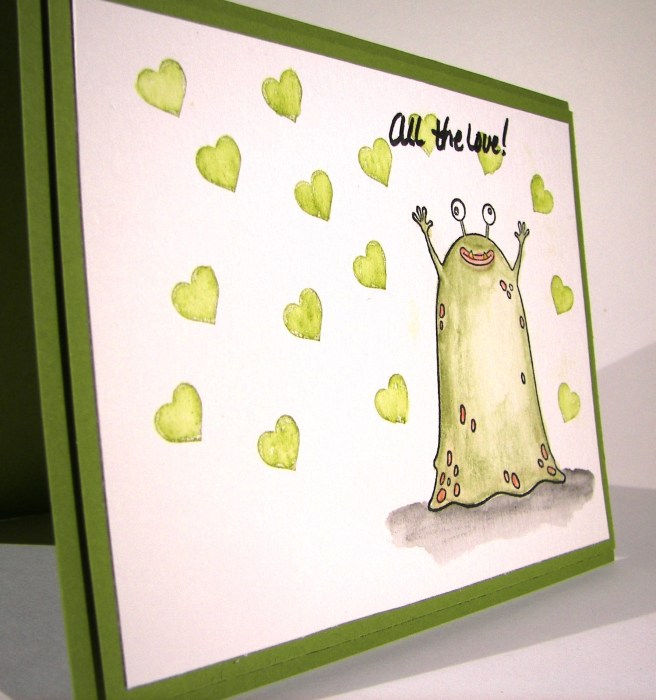
I had to add some hearts around this little green guy.  The clean and simple look really appeals to me, but  I had to have something.  Green hearts seemed to work nicely, but stamped alone they looked to different from the painting.  I went over each stamped heart with the aqua painter and it instantly made it look like I had somehow painted all these perfect hearts.  No way!

1-26-1

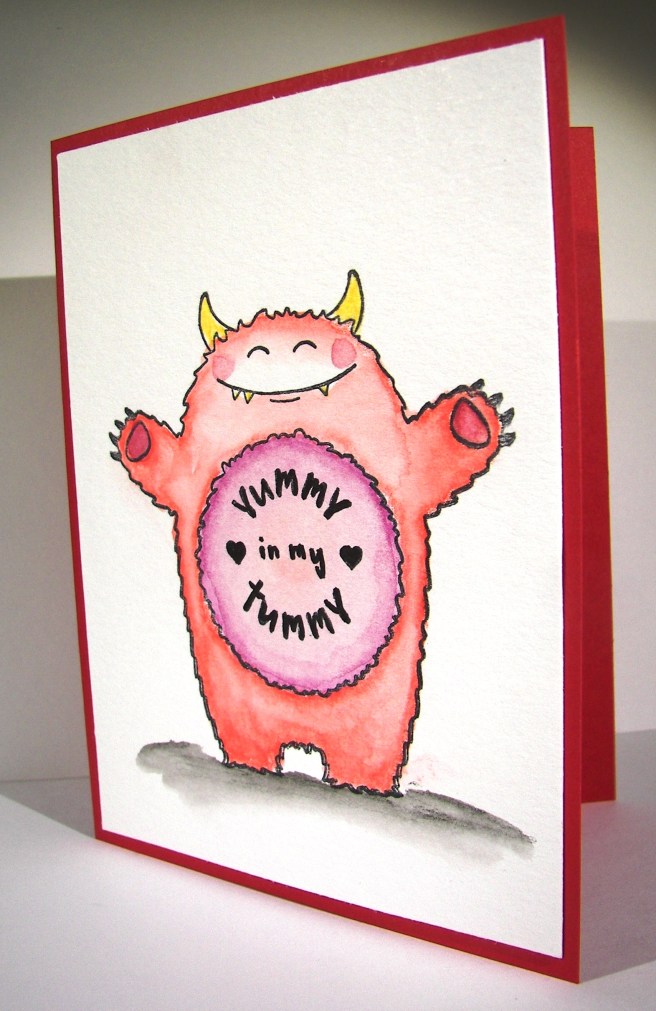
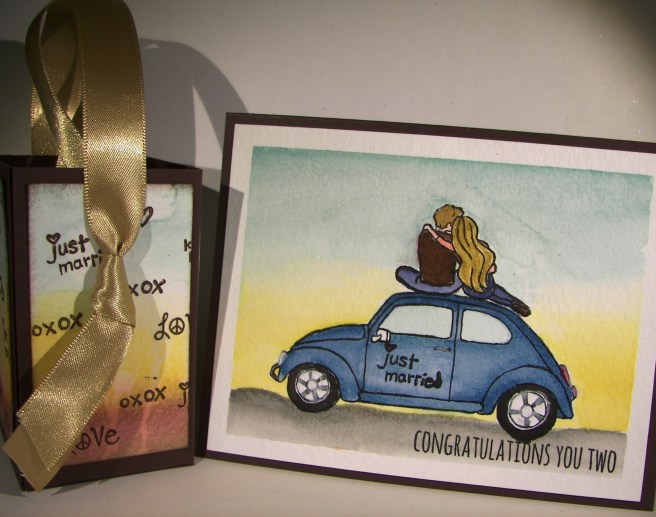
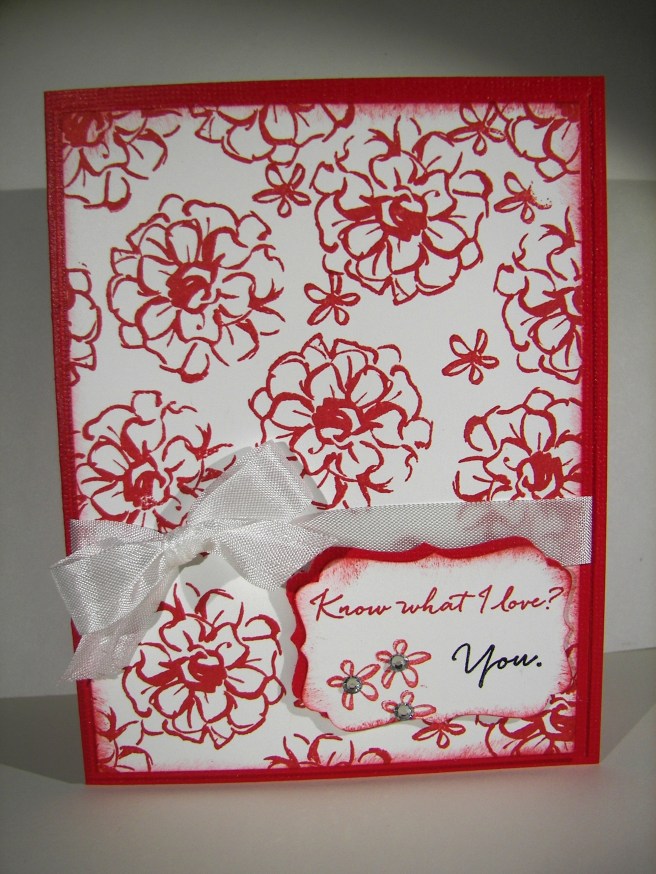
Big red just had to be alone.  Seriously, how adorable.  I couldn’t add anything else around him.  Little rosy cheeks and a stamp on his belly.  Giggles and grins all day!  I wanted a little sentiment to go with my green guy, but decided to put my own on.  My marker choice was a bit too stark for my taste, but live and learn, right?

1-26

Have a creative day!

Moana

Thank You Very Much

Holiday weekends offer a lot if you are willing to enjoy.  I love the extra time to sort through all of life’s adventures and endless “to do” lists.  But it is also a time to pace yourself and reflect.  This project offered me that time.

1-16

I started with the idea of more precise painting, but quickly learned that it had other things in mind.  Since I have such a hard time waiting for much of anything, my colors couldn’t stay still.  So I went with it and created a much more fluid and dreamy look.  You can tell from the warp of the side of the paper just how much water went into this project.  I had fun though, and it was truly relaxing.

1-16-1

The sentiment was stamped on very vanilla and cut out using one of the dies from the Bunch of Banners framelits set.  I love the crisp edges of a die cut.  The inside stamp was another image from the same stamp set.  This particular set isn’t available for regular purchase, but at a reduced price when you host a workshop.  Sounds like a win win to me!

Have a creative day!

Moana

Hey, Chick, I’m Back!

Well, I guess that kind of sums it up!  With two children’s weddings within six months, and a heavy dose of regular life, I just found myself taking a few things out of my day to help get through it all.  I have so missed this, it really does help keep me sane and happy.  I have still created, but not at the same volume and just haven’t taken the time to share.  Enough of that, so I am back to stay.

1-12-17-2

What better way than to be greeted by this adorable chicken, right?  Last year during sale-a-bration there was a different chick stamp set.  Here is the new one, and it has taken my number one favorite spot once again.  There are others in the set, but this guy is the best! What makes it better than that?  The set is free with a $50 product order.  Free is cool, but I would have bought this one in a heartbeat.

1-12-17-1

I stamped the chicken in black stazon ink on water color paper.  I knew I wanted the feathers on top red and decided to make the tail feathers match.  It really was a painting process here.  That is usually how my water coloring goes, layer upon layer.  I put out my colors, real red, pumpkin pie, and daffodil delight, and painted until I was happy.  I used a black marker to add some wild feathers and then hi-lighted with gold wink of stella.  His little eyes were a bit tiny, so I used my marker to make them a bit larger.

The tag was stamped on a scrap of water color and punched with the classic label punch. The stamped area was smaller than the punch, so I punched it again on one side to shorted it up a bit.  One quick hole punch and a double wrap of gold and black metallic thread and I called it done.  The water color is adhered down with a heavy dose of fast fuse while the tag got layered up a bit with dimensionals.  I forgot to include a photo of the inside.  I tipped the chicken a bit sideways and stamped him as if he was peeking around a corner.  I lightly water colored him to match the front and just giggled.

It feels good to be back.  Now, to make sure I give myself time to enjoy this lovely process every day once again.  It will be tricky, but worth it.

Have a creative day!

Moana

It’s Your Birthday

Do you broadcast your birthday or not?  Well, I think birthdays should always be celebrated, even if you like it small, celebrate.  This is the kind of card that can certainly draw attention and that is totally what I had in mind.

7-1

The stamp set has the marquee image by itself and has different sentiments you can put inside the middle as well as the bottom arrow box.  It doesn’t have to be about a birthday, but that is how I chose to use it for the first time.  I kind of muddled through this project since I only knew I wanted to use embossing powder and a black card base.  Leaves a lot of steps to be followed, even if a bit off.

Most if the projects I have seen with this particular stamp set include stamping the image on different colored card stock papers, cutting the different parts out and then layering them to give a little diversity.  I wasn’t in the mood for that, so I went with my trusty water coloring.  I am not used to coloring around an image so specifically, but it all worked out pretty good in the end.

7-1 (1)

Touches of wink of stella helped make it the rest of the way, even though it is hard to see in the photo here.  Projects always look better in real life rather than photos, but what else can you do, right?

Have a creative day!

Moana

Lots of Love

I had this little treasure ready for yesterday, but never got to share it.  I guess that is what happens when you are this close to throwing a reception for your child. And yes, that would be today.  I was obviously thinking about them and how sweet they are together.

6-11

This focal image is taken from a new host set called Love You Lots.  I am not usually one to go for whimsical images, but this set was way too cute.  I stamped these guys on water color paper and proceeded to take my time.  The background went through phases, several of them, then I finally just had to stop.  My girls were happy with how it turned out, but I am still a bit unsure.  Either way, here you go.

I wish I could just sit at my desk and water color my day away, but this household has a list of many last minute things to be done.  Some were pushed from other to do lists, but the day of the big event has things that can’t be done any earlier.  These are tasks of joy though, absolute joy.

6-11 (1)

Have a creative day!

Moana

Brushstrokes Through a Garden In Bloom

The ‘Brushstrokes’ background stamp finally made its way into my collection and I am wondering why I waited so long.  This project reminds me of a summer picnic.  The red checked table cloth, I think we have all had one at one time or another.

5-12 (1)

I stamped vertically and then horizontally with real red on water color paper.  I did tape it off first to give me the extra border I love so much.  The flowers and butterflies were stamped in black stazon and followed with the second step stamps to fill them in. Additional painting was done to sharpen the color some and touches of silver got in as well.

I used half a sheet of cardstock for the card base and couldn’t leave the other half just sitting there, so I made a tiny box to go along.  The black butterflies were stamped with the same set and I scored each panel measuring 7/8″ and topped it with a baby bow.  Adorable. Now another set can be added to the donation collection for Saturdays scouting fundraiser.

5-12

Have a creative day!

Moana


Beautiful Ride for Newlyweds

It may be hard to tell, but there are an absolute ton of colors going on here.  I had a blast working on this set.  When I finally finished I was a bit surprised to see how late it got, but it was worth it for sure.  I love making wedding cards just for special people in your life. This one is no different.

4-21

I worked the colors to create a sunrise look and I think it turned out really nice.  I was having a chocolate craving last night, so I settled for chocolate chip paper.  Not quite delicious, but it still worked out.  That led me to marina mist for the car color. From there everything else just came together.

4-21 (2)

I wanted a gift bag to go along with the card to give the gift card something to go in.  I think I will put a tiny selection of rich chocolates around it, wouldn’t you like to get a treat too? Opening gifts can be exhausting for a newlywed couple, so they deserve a sugar boost along the way.

The details in this set are really busy and probably hard to notice.  I think a project like this should look simple even if you know better.  Not everyone knows how much work goes into a tiny work of art like this, but that doesn’t stop me from sharing them.  Just a few more weeks and this card will find its way to the deserving adorable couple.

4-21 (1)

Have a creative day!

Moana

Beautiful Ride for My Nali Bug

This card has been in the planning part of my brain since the spring catalog came out.  I waited to get the set because I thought it would be one more for me than anything else.  I just might turn out to be wrong on that one, but we will see.  I made this one for my oldest daughter, Denali.  Some of my pet names for her are Nali, Bug, and the coziest is My Nali Bug.  That is just what this card is, My Nali Bug.  I shared it with her before this blog went live and she was so cute about it.  How fun is that!

3-10

I simply stamped the car in the lower portion of my water color paper and got the ink out.  I had originally thought to write her name on the car door, but changed to the balloon last minute.  I think I could get lost in this stamp.  How many creative ways have you seen one of these cars painted in the years they have been driving on the roads?  My brain is thinking of ways to make them on this little guy too.  So much fun and never enough time.

Simple layering of my two focal colors, and this card was done.  I enhanced the layering inside the card to give it a bit more color, but that is really it.  I added some wink of stella to the windows and the silver ink areas of the car.  I touched up the rims with a white gel pen.  It wasn’t perfect, but the surface wasn’t ideal for that pen.  The texture of cold press water color paper is my favorite, so there will be some concessions here and there.  Good enough.

3-10 (1)

Have a creative day!

Moana

Know What I Love?

My youngest is in the throws of re-decorating her room and the colors are so awesome.  I thought I would work with them for a few projects.  She has real red, basic gray, smokey slate, whisper white and basic black.  I used Stampin’Up! color names because that is just how my brain works anymore.  You get the idea.

101_1063

Either way, this card was so quick and fun.  I just used a bit of the stamps available in the Know What I Love stamp set.  We may still be in winter, but I couldn’t wait to start with some spring things.  Rain is so welcome, and flowers won’t be far behind.  How exciting!

101_1064

The card is pretty basic, just a few layers.  I do love it when a stamp sentiment fits inside a punch I already have.  It just makes life easier and definitely more fun.  If I hadn’t been distracted with other projects, this card would have come together in about twenty minutes, including design time.  That is what you get when you have great product to work with, and I definitely do.

101_1065

Have a creative day!

Moana

Bouquet Bigz L Die Meets Thrift Store Skirt

My daughter gave me a challenge.  She took a photo of this wild skirt she saw at the thrift store she works at.  She wanted to see it made into a card.  Well, I took it a different direction.  And yes, the skirt looks this wildy.  How fun!

Bouquet Bigz L Die Meets Thrift Store Skirt

I made flowers using the Bouquet Bigz L Die with real red.  It was actually the maiden voyage of that die cut.  As I looked at it I decided I could spend way too much time playing with it.    I distressed the petals before I put them together.  Even though it adds time in the process, it was worth it.

Bouquet Bigz L Die Meets Thrift Store Skirt

I attached them to a rectangle of black cardstock so I could put the flowers on the ribbon and not the box.  Makes for easy opening and the opportunity to re-use both the box and the flowers.  This box though.  The pattern of this paper is more than fun, don’t you think?  And with a simple wrap of satin ribbon it was done and ready to be used.

Bouquet Bigz L Die Meets Thrift Store Skirt

Have a creative day!

Moana

Workshop Wonders

What do you get when you bring together some creative friends?  A really unique workshop that was more fun than work that is for sure.  Just look at these adorable projects they created!

12-14

We really did have a wonderful time sharing ideas, laughing, exchanging gifts and enjoying a lovely luncheon.  I think they impressed themselves more than each other.  And I loved crafting with them.

12-14 (2)

I already blogged mine on Saturday, but wanted to just show theirs.  Two of our group couldn’t attend this one and they sure missed out.  Next time I am sure they will share something wonderful.  The ladies liked the activity so much that we decided to do it twice a year, once in December and once in the summer.  I do love these gals!

12-14 (1)

Have a creative day!

Moana

Wishing You a Sweet Season

Happy Thanksgiving!  It feel odd being surrounded in snow, but that is how it is working this year and it is rather pretty.  Just not fun to drive in.  I have gotten soft over the years and have lost most of that snow driving confidence.

11-25 (1)

Either way, I love this card.  Talk about simple elegance.  I thought it was kind of adorable that after I tied on the gold cording the strands fell into a large ‘s’ shape.  Totally unintended, but it made me giggle.

I stamped and layered my sentiment on the heavy whisper white cardstock.  I absolutely love that stuff.  I wanted the edges to show a bit, but didn’t want the uneven look of sponging.  I just put the edge directly onto the inkpad and got the most crisp even lines possible.  Not too dark and it didn’t bleed into the paper.  Thank you!  It turned out wonderful!

11-25

Have a creative day!

Moana

Joyful Season

This little red cardinal has eluded me a few times over, but today was my lucky day.  I wasn’t sure just which bird I wanted to create, but decided to stick with the cardinal.  Call it Christmas whimsy.

Joyful Season

The red inside was stamped first and then I added the outline in black.  It was easier for me that way.  I tried to do the outline first and then the inside, but wasn’t happy with my efforts.  I managed to get the extra front stamp pretty good giving the darker black around the face and I even got the beak color in the right spot.  Woo hoo!

 Joyful Season

The oval framelits worked nicely to frame the image.  I decided to frame it in early espresso to match the branch.  Again, nice results for sure.  These were layered up with dimensionals over another layer of real red.  That layer was put through the softly falling snow embossing folder and sanded a bit to add interest to the flakes.  A simple bow with a snowflake embellishment and the card was done.  How nice is that?

Joyful Season

Have a creative day!

Moana

Christmas Lighthearted Leaves

What a crazy morning!  However, slow and steady wins the race, right?  Like I said earlier in the week, I planned on casing myself from another project that looked like Christmas to me.  Here it is, my ‘Believe’ card.

10-19

As I stamped these leaves last time I kept thinking about mistletoe.  Of course, by the time I got done painting all the leaves green, I kept thinking of seaweed.  So now I want to do an ocean project.  What a great stamp set, right?

10-19 (1)

I painted the ‘berries’ real read and went with cucumber crush for my green.  It is such a fun, bright green.  When I trimmed my cardstock down I was left with a few narrow strips and decided to put them to work.  I thought about using some quilling techniques, but kept it simple instead.  I did decorate one of the leaf images with rhinestones for a little bling and loved how it turned out.  So, just like all of the other retailers out there, I have made some Christmas happen before Halloween.  It was fun though, definitely fun.

10-19 (2)

Have a creative day!

Moana

Planning Ahead for Christmas

These cards feel like such a cozy Christmas, don’t you think?  We are making plans for a sunny holiday this year, but peeking out a window to a snowy scene is more than inviting.

Planning Ahead for Christmas

This window framelit set is sure to be one of my favorites.  Peeking through the window, could this snowman be any cuter?  I don’t think so.

Planning Ahead for Christmas

I love inside stamping.  It makes the card feel so much more complete.  Sometimes we need a place to write a nice long note, but other times it is just wishing someone a happy day, or a happy holiday.

Planning Ahead for Christmas

Most people enjoy displaying their holiday cards as part of their seasonal decorations.  These two swaps would definitely be a welcome addition to anyone’s Christmas decorations.

Have a creative day!

Moana

Thank You for Everything and More.

What a wonderful way to start this special holiday.  Making this card this morning gave me some quiet alone time to contemplate.  I do my best thinking while I am crafting, I really do.

Thank You for Everything and More.

This project was more about the sentiment than anything.  Of course the color choices were important.  I kept everything subtle so the message was clear.

Thank You for Everything and More.

Gratitude, plain and simple.  Grateful for the freedoms I know I have, but so much more.  There is a larger picture that regular citizens are just simply unaware of, and sometimes grateful for that ignorance.  I do feel truly blessed for the way I am allowed to live my life.

Thank You for Everything and More.

Take the opportunity to share the gratitude you feel in the way you feel most comfortable.  I get to enjoy my quiet  beginning, attend a flag raising social at my church, and spend the afternoon with family.  Just wonderful.

Have a creative day!

Moana

Individual Worth

Day two of camp has arrived and I am sure I slept deeply after a really busy first day.  Something about camping.  Sleep feels better and food tastes wonderful.  I don’t know why, it just seems that way.

Individual Worth

Today the rest of the camp will be showing up.  It is a bit hectic, but within an hour, our numbers will nearly triple.  Talk about excitement!


Individual Worth

Tonight we will begin with our skit presentations.  There are so many great parts of camp, but I do love those.  We get to enjoy those two nights in a row.  I am sure these ladies will need a little pick me up, so here is another special treat.

Individual Worth

I used real read to showcase, since the value color for Individual Worth is red.  The theme for today is “I Serve With All My Heart”.  And that is the best thing to do.  I used some card bases and turned them into little bags.  A great trick to do when you need a bag quick!  Give it a try!

Have a creative day!

Moana

Maritime Thank You

Today is a day filled with gratitude.  Not only for our freedom, but for those who sacrificed so much to provide it to us.  Sometimes we feel a bit removed from celebrations like Memorial Day.  Today I have the opportunity to spend time with family, and to thank my own sailor, my father-in-law.  Hence, the nautical themed projects for today.

Maritime Thank You

I used the awesome anchor from Guy Greetings to make a background paper for my sentiment and stamp inside as well.  All you need to say is ‘Thank You’.  We will enjoy writing special notes in these.

Maritime Thank You

I had to make a treat bag, of course.  But I knew I would be making this specific, so I actually bought candy to go inside.  It is already tucked inside ready to go.  Everyone needs a treat once in a while.

Maritime Thank You

So, don’t forget to take some time in your busy, and hopefully wonderful, holiday to share your gratitude.

Maritime Thank You

Have a creative day!

Moana

Sassy Salutations with Flowering Flourishes

Let’s just say that my camera doesn’t always do me the best favors.  It is pushing ten years of heavy use, guess that is to be expected.  You get the idea though.

Sassy Salutations meets Flowering Flourishes

I was stumped for an idea, so I asked my youngest daughter for a little help.  All I asked her for was a color, something to get me started.  She said red, but not a love card.  I took her challenge and had fun with it.

Sassy Salutations meets Flowering Flourishes

I don’t normally work in red, but I do like the results.  I used two cut and ready card bases, retiring sad to say, for this set.  One for the card and the other for the box.  You could also make these from just one sheet.

Sassy Salutations meets Flowering Flourishes

I stamped on the velum with stazon and let it dry for a bit while I did the red stamping.  I hid my adhesive under the stamping and my embellishments.  Aren’t these just beautiful?  When they went on sale I broke down and bought a couple of containers.  So glad I did.  They are also retiring.

Sassy Salutations meets Flowering Flourishes

Even though my camera didn’t help out too much today, I think you get the idea.  Give yourself a challenge and see what happens.  You might be pleasantly surprised.

Have a creative day!

Moana

Dear Heart and Cheerful Critters

Today is totally out of my comfort zone, but I stuck with it.  It was hard not to add a ribbon or some sort of accessory.  Do the mini brads count?

Dear Critter

I took this cute little raccoon from the Dear Heart set.  I have enjoyed the little boys faces so much that I hardly noticed this guy.  I was ready to use the dinosaur instead, then I saw him.

Dear Critter

I couldn’t decide on a background, at all.  I had picked the sentiment from Cheerful Critters, but thought it would be a punch.  I actually went to bed frustrated with nothing but the raccoon colored.  In the morning I merged the two together.

Dear Critter

Even though I am not the most precise stamper when it comes to things like this, I liked the results.  But I have to admit I did rummage through the ribbon one more time trying to add something else.  I stayed firm though and left it as is.

I used smokey slate as my primary color for the paper, stamping, and blendabilities.  I only used a bit of real red for the focal sentiment.  All good? Thought so.

Have a creative day!

Moana