Butterfly Basics

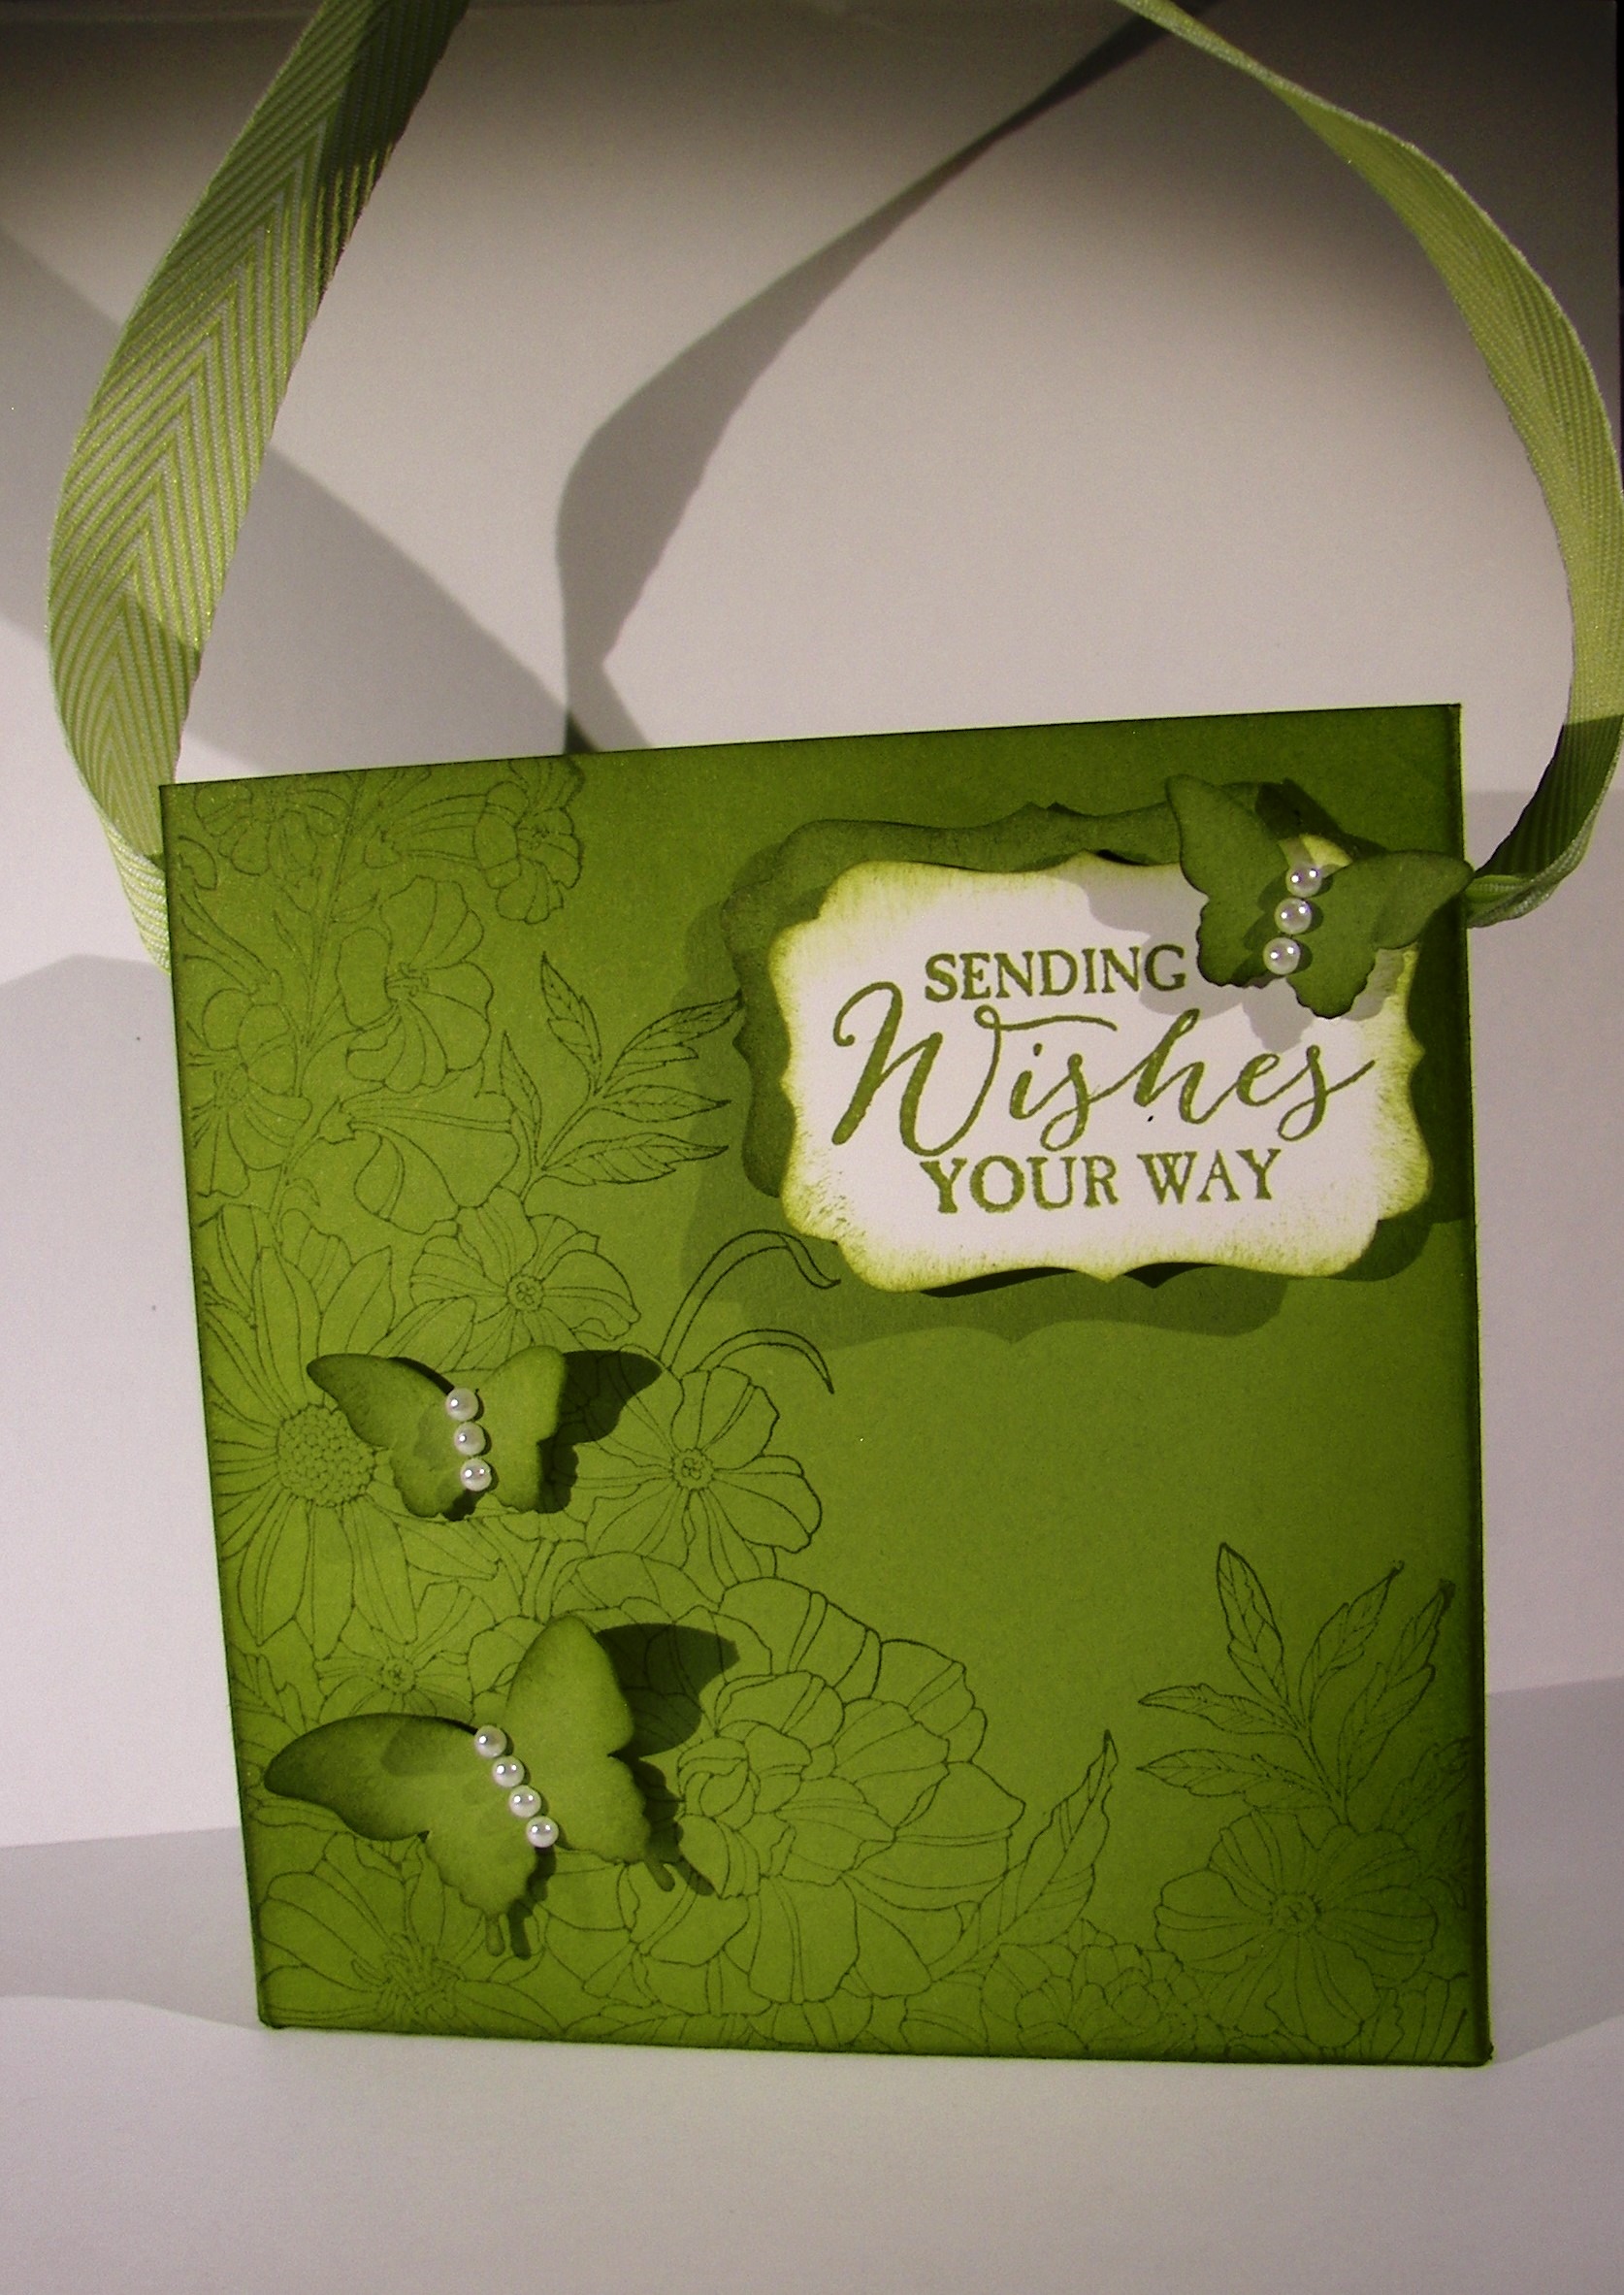
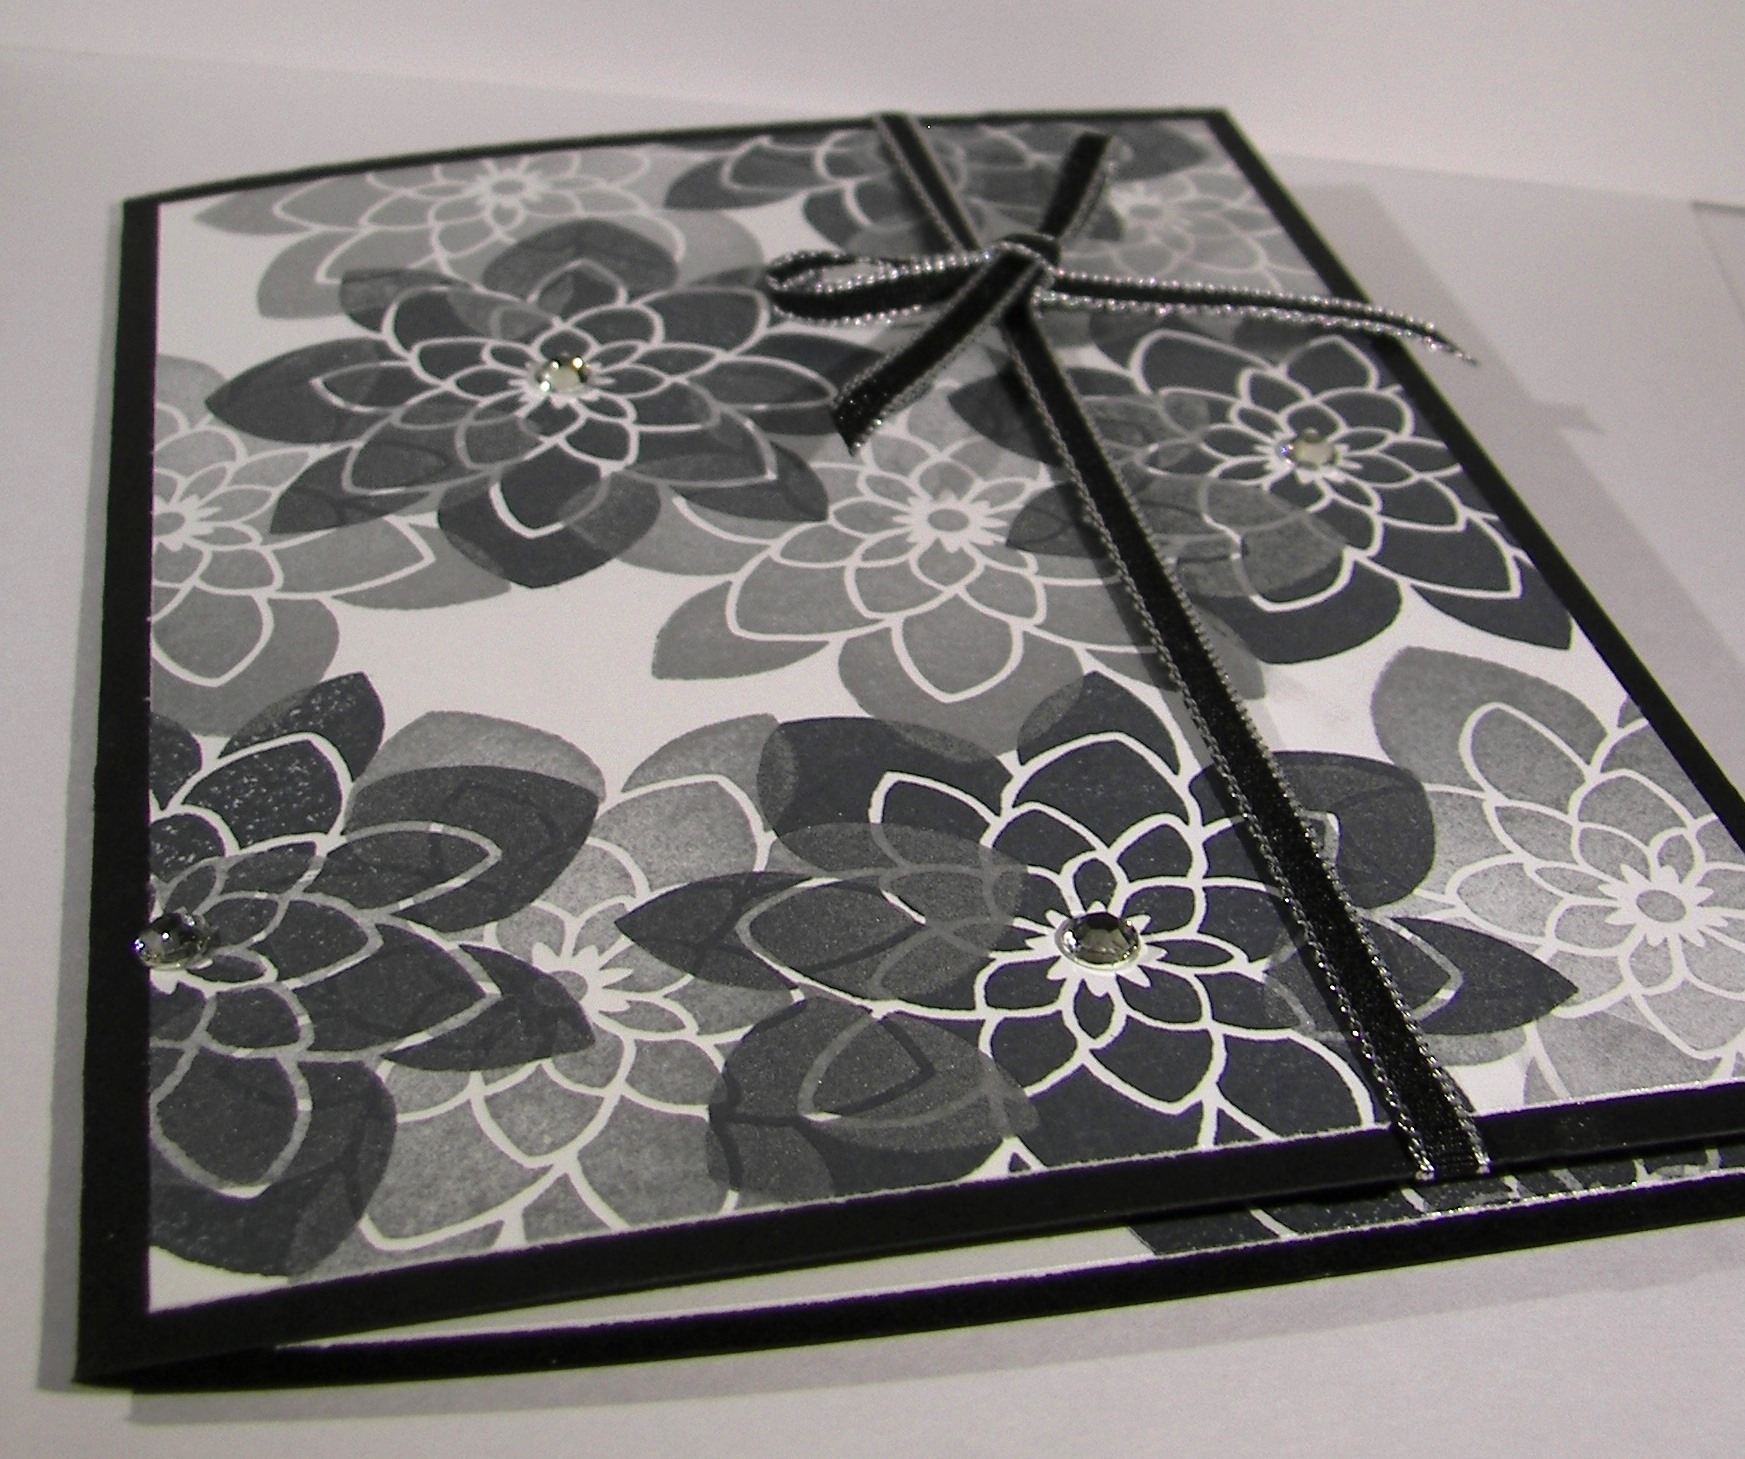
Simple elegance is one of my favorite things in a card.  This color combination surely does lend itself in that direction.  I even think it is neutral enough to be masculine, what do you think?

Butterfly Basics

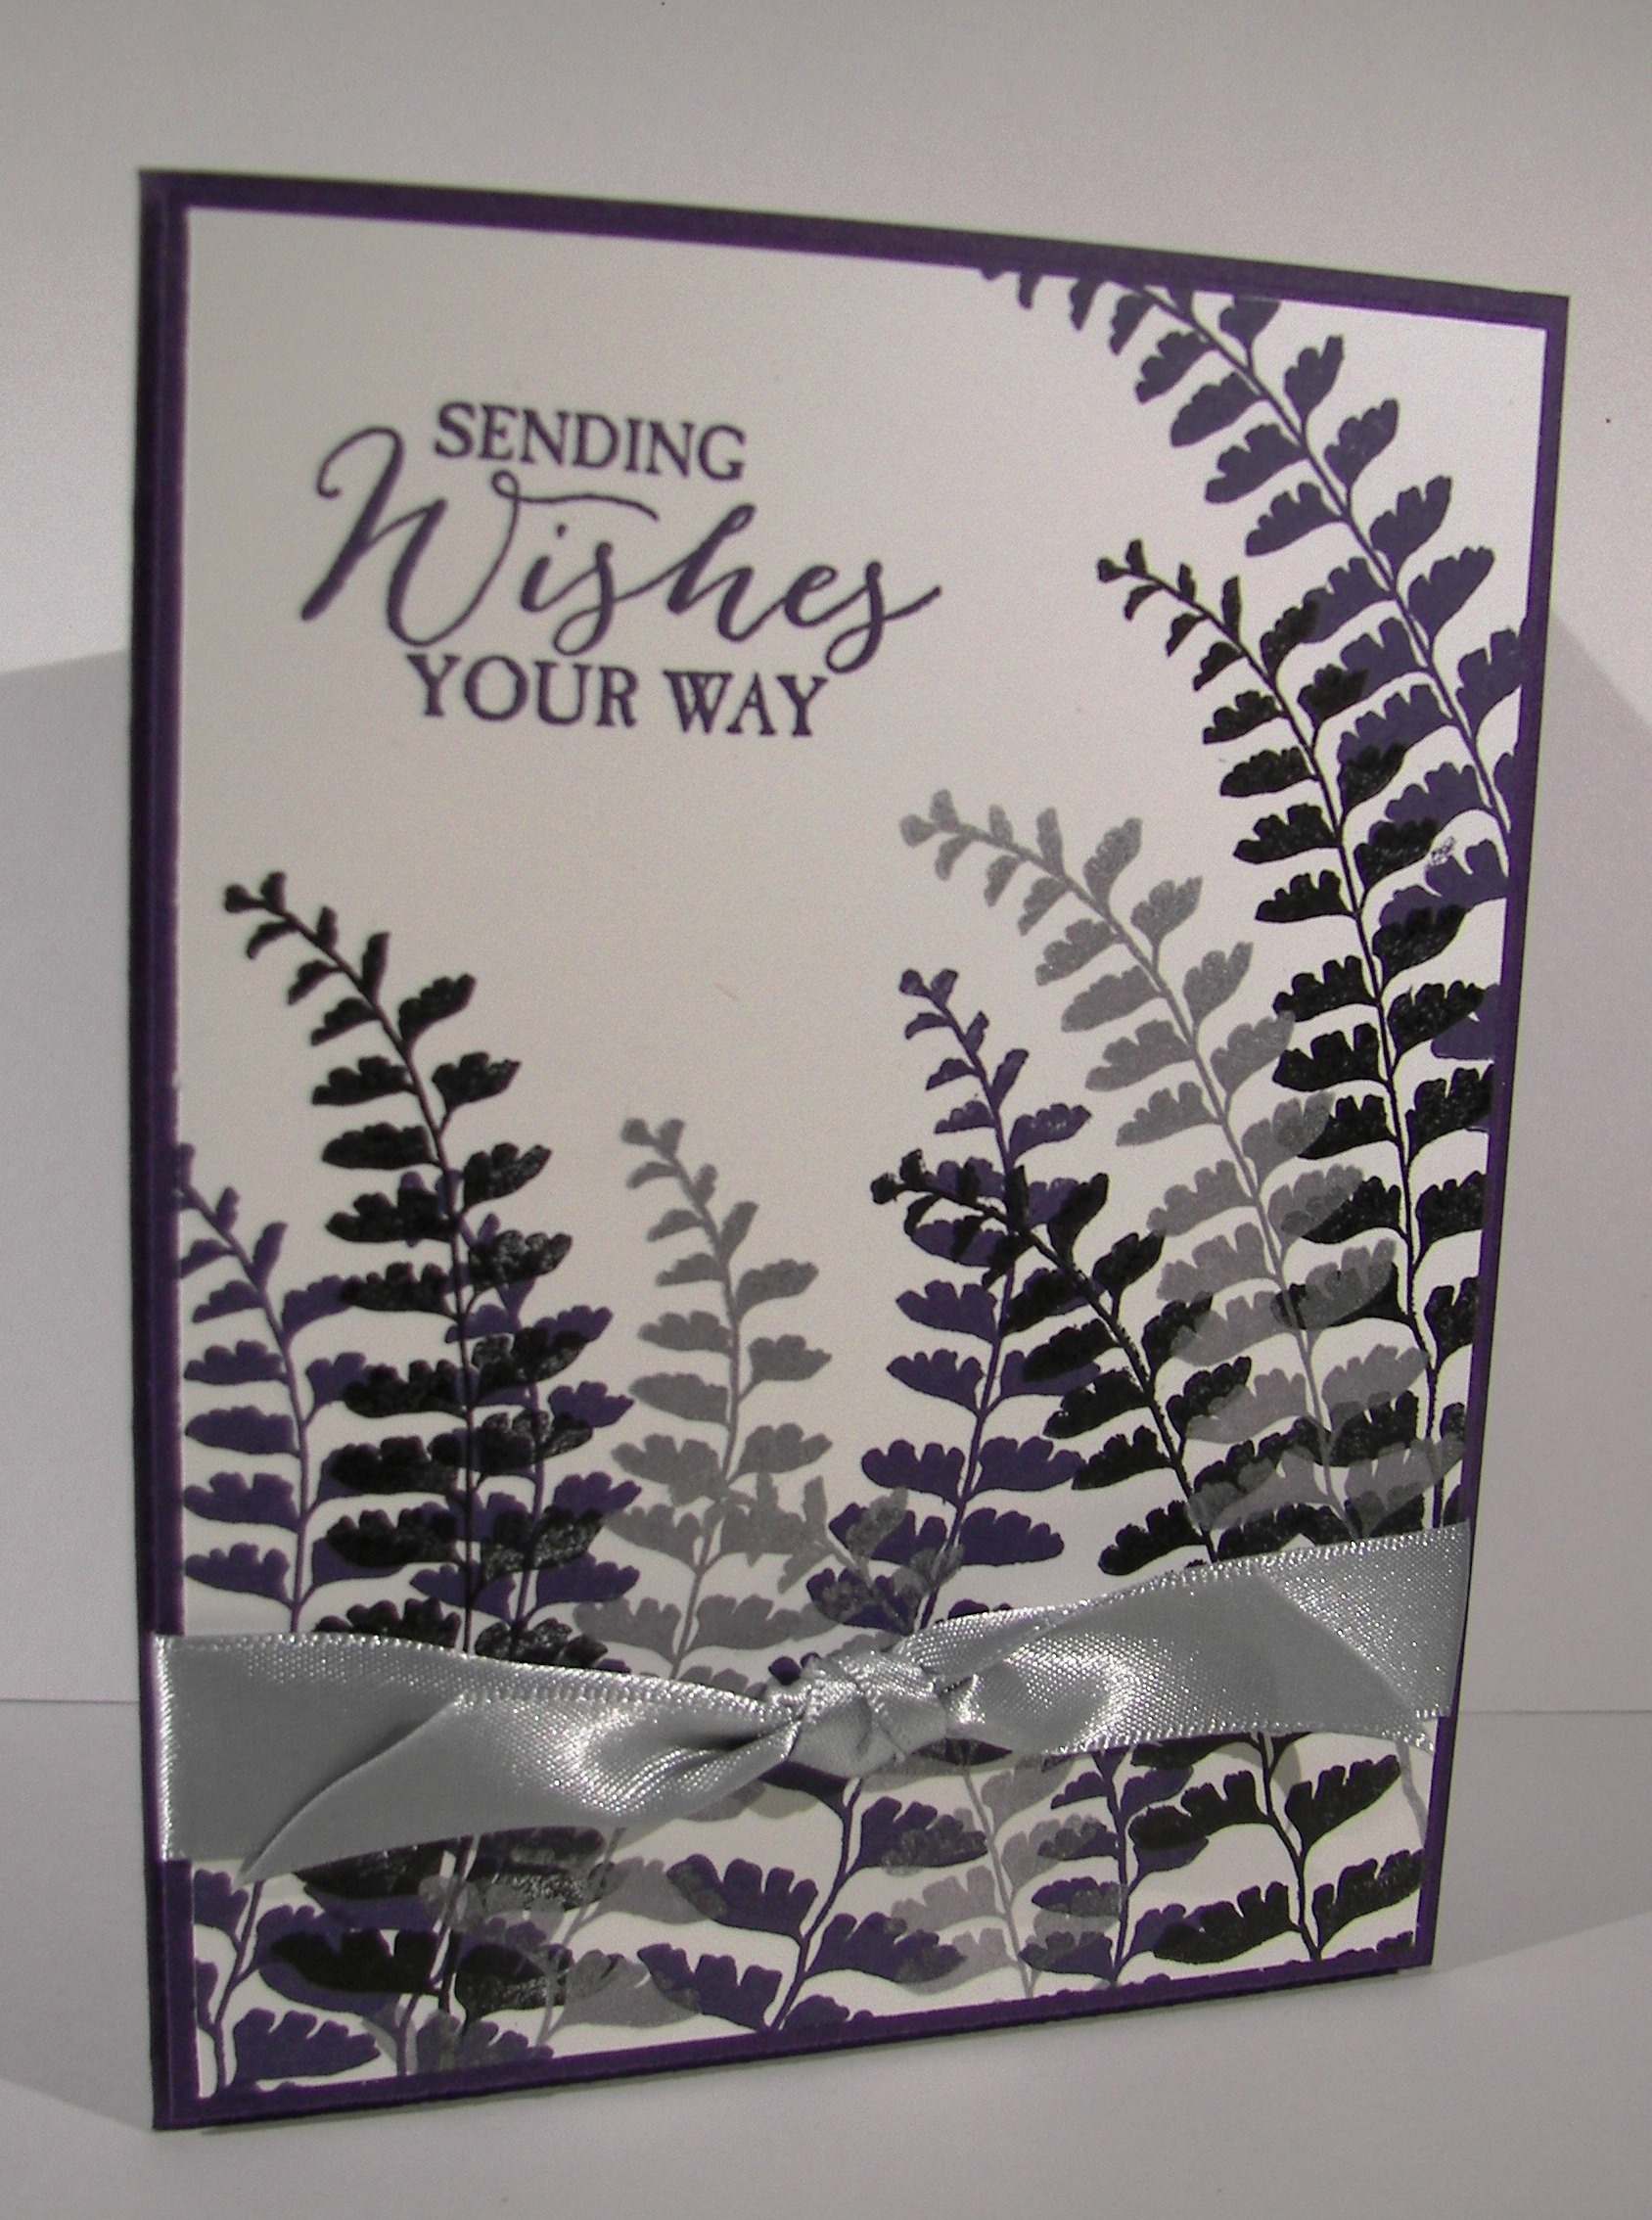
I used the Butterfly Basics set for this project for the element and sentiment.  I put the fern stamp to work with three different inks.  I started with black stazon, layered with silver encore, and finished up with elegant eggplant.  I continued stamping inside with just the elegant eggplant.

Butterfly Basics

I added some silver satin ribbon to keep those ferns together but kept it in a knot instead of a bow.  The ribbon kind of took over when it was tied in a bow, but just right in a knot.

Butterfly Basics

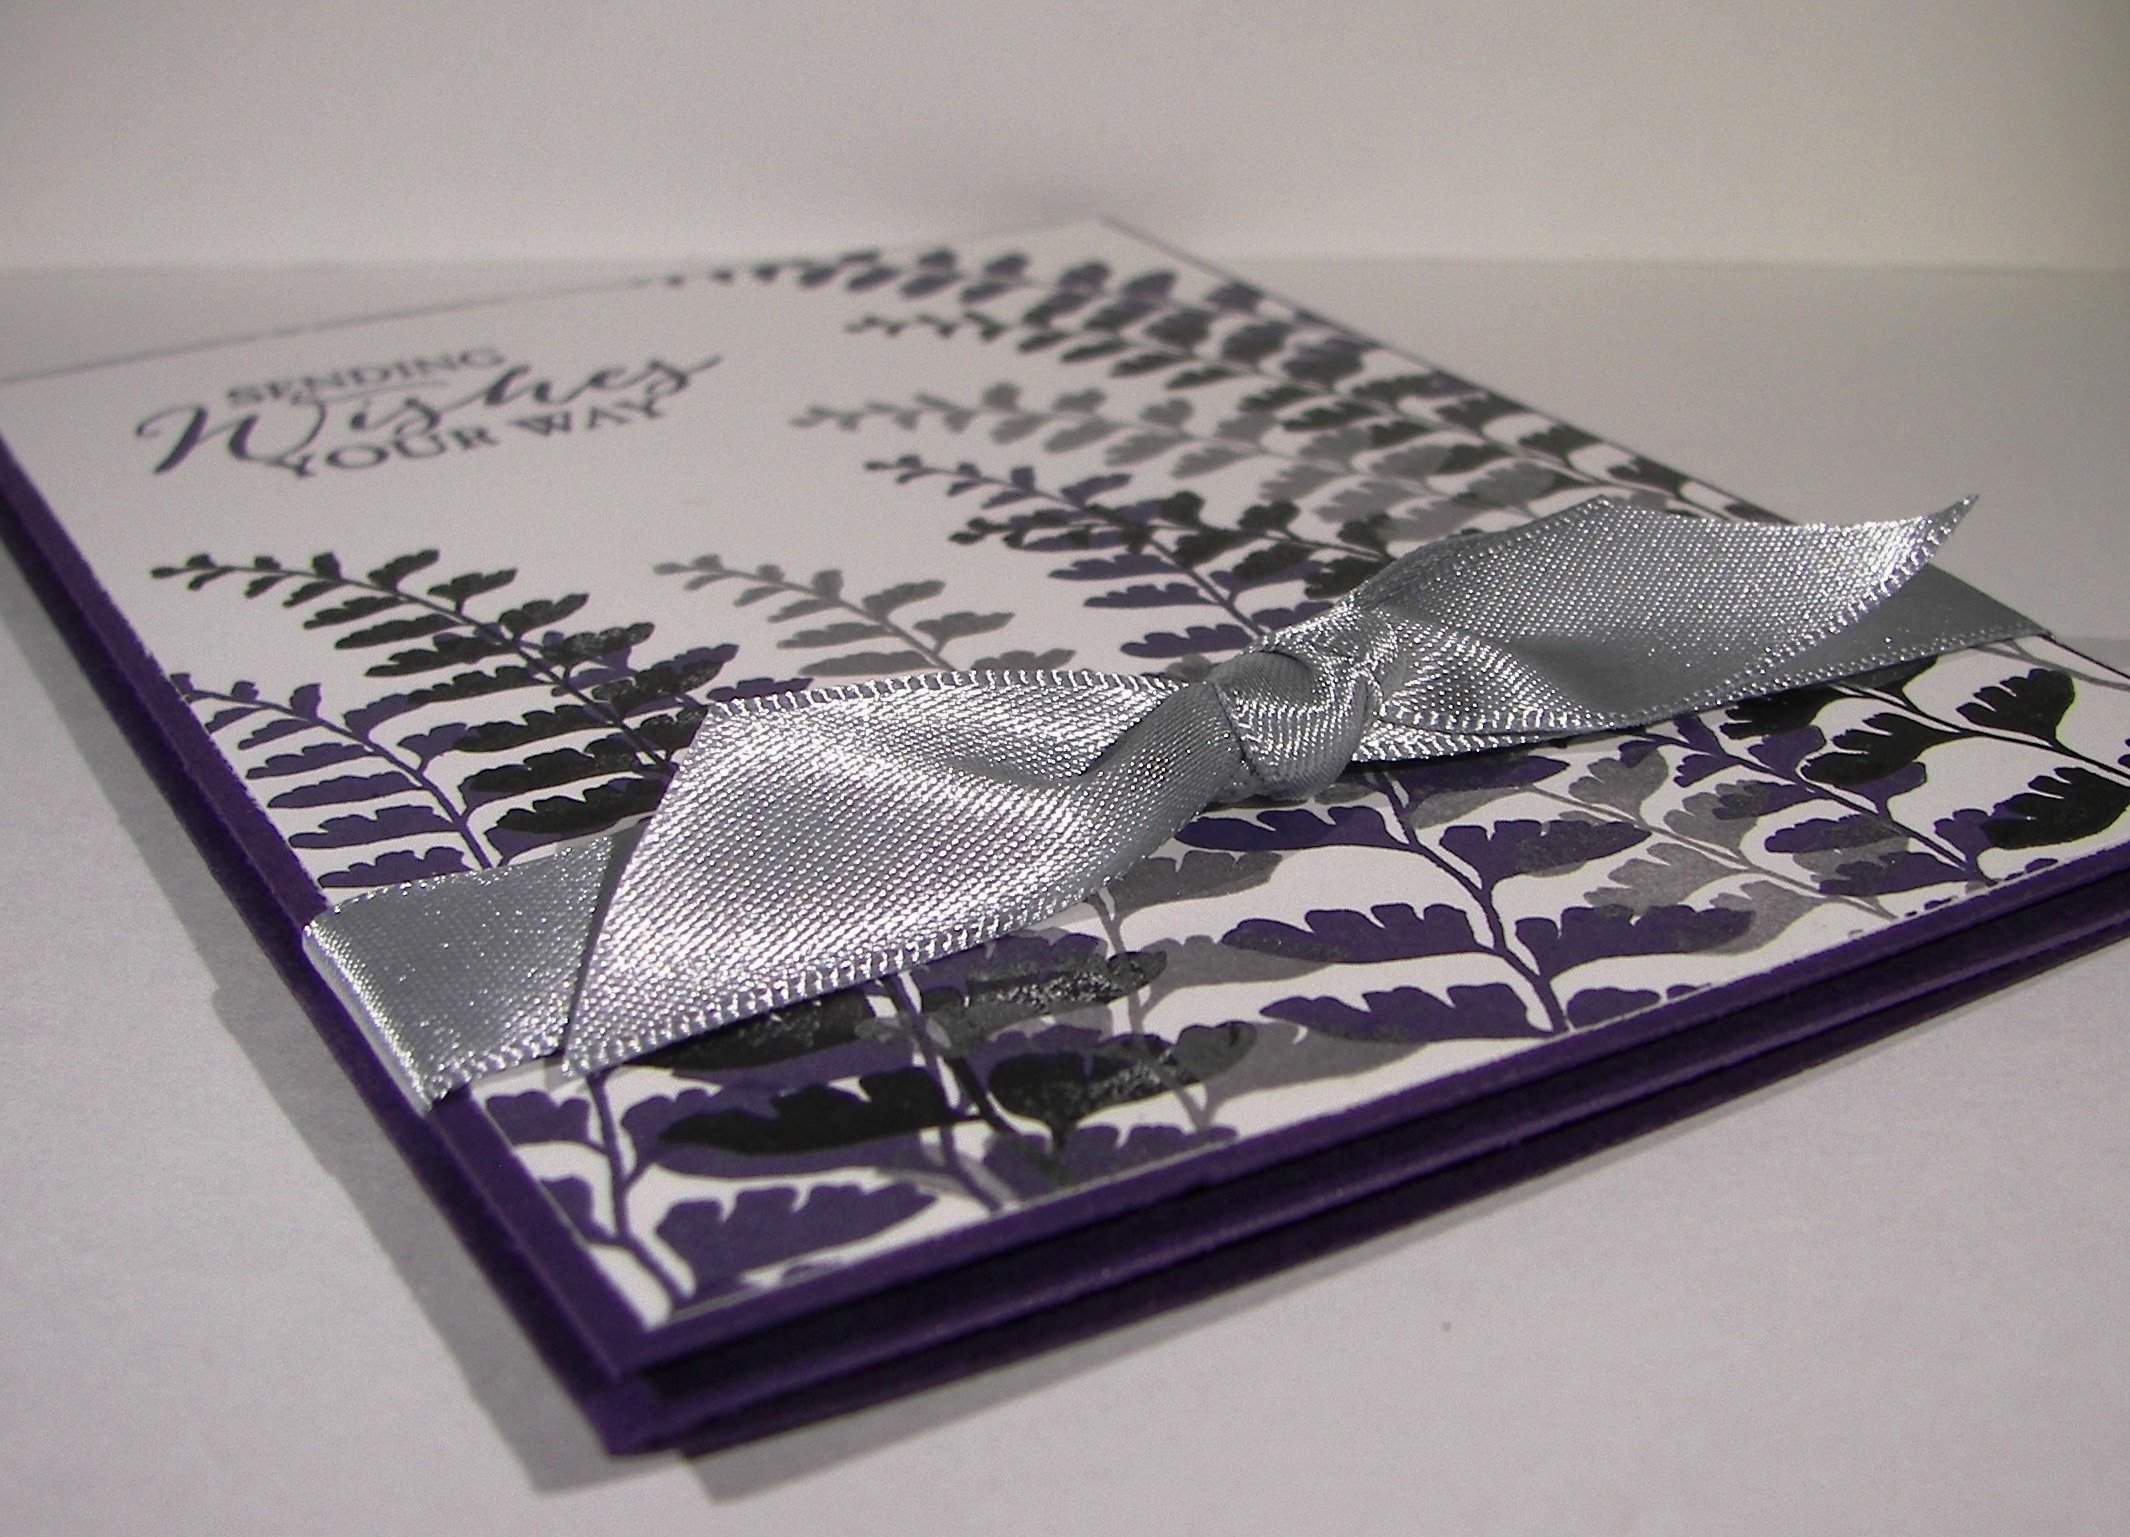
I kept the boarders narrow and popped the front up on dimensionals.  A nice clean look for an elegant card.  I think I have just the person to send it to.

Have a creative day!

Moana

Something to Say with Flowering Flourishes

I honestly sat down to my very messy desk and couldn’t think of what to do.  There are many reasons to stay organized, and that is one of them.  I looked to my paper for inspiration, as I usually do when I get stumped.  But I haven’t purchased any of the new paper yet, so that threw me another loop.  I really had to look for a little extra creativity, so I kept looking.  The foil velum carried over and I had some of that.  For the win!

Something to Say with Flowering Flourishes

I started out with the idea of making a purse style gift bag, but thought it was looking to be too bulky and wide.  So, I cut it in half and went for two of these little beauties.  I stamped my wisteria wonder card stock with the medium stamp from flowering flourishes to go under the velum.  I love the soft layering it gives.

Something to Say with Flowering Flourishes

I used a whole 12 x 12 sheet of velum to start with.  When I trimmed it to match the 8.5 x 11 I had a nice strip left over.  I cut that in two and made two mini envelopes for the tiny gift cards.  The cards are large enough for a tiny note and also house a gift card.  Nice, right?

Something to Say with Flowering Flourishes

I plan on putting a couple of gourmet cookies in a cellophane bag to tuck inside the gift bags.  It should make a lovely set.

Have a creative day!

Moana

Big News with Perpetual Birthday Calendar

I must be one of the few Stampin’Up! demonstrators not showing new product today.  It is the first day with the new annual catalog.  Well, I have a different perspective sometimes.  I get just as excited for the stamp sets I already have that carry over to the new catalog.  So, there you have it.

Big News with Perpetual Birthday Calendar

The first is Big News.  It has these fun sentiments designed around exciting news and events.  They are written like we talk in a quirky way.  It makes it kind of fun.  The second is Perpetual Birthday Calendar.  I sure have gotten a lot of use out of this set.  An easy background maker if you ask me.  It really gets a lot of use.

Big News with Perpetual Birthday Calendar

I am also happy that the cotton ribbon, which was new last catalog, stayed with us.  It really makes such a pretty accent.  I must say, this bow is nearly perfect.  I kept this card pretty simple, but sometimes that is all I want.

Big News with Perpetual Birthday Calendar

I did a small pre-order earlier in the month to get the new colors that I have already shared with you.  I also got a couple of host sets, and they will be so fun.  Now I will let myself get into the new catalog and get a few stamp sets.  Isn’t that fun?  I thought so.  You should check it out.

Have a creative day!

Moana

Congratulations to a Wonderful Man

Yesterday was such a wonderful day for my family, especially my husband.  He was able to participate in a graduation ceremony for earning his masters degree.  Working full time, teaching early morning religion classes, and completing his program in eighteen months with straight A’s.  Congratulations to a Wonderful Man, truly.  A card doesn’t sum up an accomplishment like that, but I needed somewhere to write the words that would.  Perfect solution.

Congratulations to a Wonderful Man

The new stamp set Happy Birthday, Everyone is obviously more versatile that just birthdays.  I used  one of the many phrases included in this host set to make my background paper.  I just stamped it over and over again, not even trying to be straight, and it turned out pretty well.  I added the congratulations from the Sassy Salutations set.  I used black paper as well to emphasize the main sentiment, all about the congratulations here.

Congratulations to a Wonderful Man

Even though it was for my husband, I though I could get away with a little of the dotted lace trim.  Almost compulsory there since it is new and coordinates so well.  I only used a tiny amount, no bows or anything.  Welcome to yet another wonderful In-Color.  Glad to have you Delightful Dijon!

Have a creative day,

Moana

Birthday Bundle Paper Pumpkin

I normally keep my Paper Pumpkin to myself and just have my own party.  But oh my goodness, this set was so huge and just had to share!

Birthday Bundle Paper Pumpkin

Imagine this set, but multiplied.  The kit comes with enough supplies to make six cards, with envelopes, and four of these huge bags.  Wowsers.  The bags are huge and super sturdy.  These kits just keep getting better and better.

Birthday Bundle Paper Pumpkin

I just got mine yesterday.  I normally wait til the weekend to play, but I thought I would share instead of making something else new.  I put these two together so quickly my husband was surprised.  “You are done already?”  He is such the patient husband of a craft blogger.

Birthday Bundle Paper Pumpkin

Well, there you go.  I used two little strips of adhesive from my fast fuse, the rest of everything came in the kit.  I love this stuff.  I should mention, just because it is nice to share, that if you sign up by June 10th you get your first two months half price.  Nice.

Have a creative day!

Moana

Corner Garden Gift Bag

Sometimes I design a bag around a gift or to match some cards I have made.  This time I wanted to work around a specific stamp.  I wanted to do a tone on tone with the Corner Garden stamp set.  The detail is fine and subtle, just the look I was going for.

Corner Garden Gift Bag

The bag is large enough to hold plenty.  It could hold a large set of cards and envelopes, or any number of things.  It is sturdy too.  A nice heavy cardstock bag with my favorite chevron ribbon.  Bring on the heavy gift, I am totally ready.

Corner Garden Gift Bag

At workshop Saturday my ladies teased me about my need to sponge the edges of everything.  I was able to say that I had controlled myself and we only sponged one of our three projects.  So I was feeling the need and definitely got busy on this bag. I just love the look it gives.

Have a creative day!

Moana

Hello There Farewell

I have been trying to stay focused on this years catalog and finish it through, but the new product keeps on sneaking into my thoughts.  I thought this would be a fitting solution to all that is going on.

Hello There Farewell

I like to make samples using the new in-colors for the season and send them along with the new catalog to my club ladies.  They love getting to see, and touch, some of the new product along with the catalog.

Hello There Farewell

Last year I made a card in this format using tangelo twist as one of the five samples included.  I thought it fitting to make another with a companion gift bag, since I love that these days, with an in-color that is retiring.  Farewell to strawberry slush, and your four other friends.  I have loved using you!

Hello There Farewell

I have begun planning my new samples with the wonderful new in-colors.  I also got to pre-purchase some of the new host sets, perks of being a demonstrator, and they are lovely!  They will make some great gifts for my ladies.

Have a creative day!

Moana

Sweet Taffy Gift Bag

How about a huge bag made from awesome paper?  Sounds like the perfect thing to me.  It wasn’t hard to decide which paper to use, but which stamp would go best on the tag.

Sweet Taffy Gift Bag

I knew it had to be bold and long.  But I didn’t want the reader to turn sideways to read it.  So I had to dig into my sale-a-bration stash and use this beauty.  I have used this one like crazy.

Sweet Taffy Gift Bag

I used the dotted hexagon stamp from the six-sided sampler set to coordinate with the paper.  I thought it paired wonderfully.  The bow does make it a bit more feminine, but if had put it in a knot it would be great for a guy as well.  Good stuff there.

Just how big is the bag?  I used a whole 12 x 12 sheet to make this one.  I measures nearly 3 x 3 at the base and goes up to 9″ to the top.  Plenty of space to put in a light gift or two, maybe even a stash of taffy?

Have a creative day!

Moana

Park Lane Duo

I started this set yesterday morning, got stumped, fussed last night, and finally fixed it this morning.  I kept trying to put the yellow butterfly on the card front.  Yes, the one I inlaid back into the gift bag I cut it from.  Strange how things come together better when you give your creativity a break to refocus.

Park Lane Duo

I colored the paper with my ink sponges.  I didn’t want a lot of exact color, just subtle hints.  So I just used the sponges with leftover ink already on them.  It did the job just right.  Of course my photos make it hard to see, but I love the effect.

Park Lane Duo

When you use delicate die cuts it helps tremendously to sandwich wax paper in between the layers.  The paper just pops out then.  I decided to use the wax paper ones as well.  I didn’t want to cover up the coloring and the yellow butterfly just took over.

Park Lane Duo

After I swapped things around I fell in love.  I attached my wax paper butterflies with some folded glue dots and then ran a string of basic pearls down the body.  It gave such a delicate finish.

Park Lane Duo

One quick stamp from the Sheltering Tree set and the card was done.  No ribbon, no other extras, just some light color and transparent butterflies.  Since they are so thin, the move when the card does.  Beautiful.

Get out there and have a creative day!

Moana

Adventure Awaits Gift Set

I made this lovely set for a baby shower I went to today.  Don’t you think motherhood is one of the great adventures in life?  It will be her first, so it is definitely an adventure.

Adventure Awaits Gift Set

I have used three of my favorite stamp sets to complete this project.  And yes, all three are retiring.  I will be using them regardless.  When I find sentiment sets that say just what I want, I have a hard time letting go.  The new catalog has some fun options, but I can’t share them just yet.  It goes live on June 2nd.  Wheee!!!

Adventure Awaits Gift Set

I am realizing more and more how my camera is giving up on me.  Sorry for the photo quality, but for now it will have to do.  My main color really is pear pizzazz, really.  I sponged my background paper to give it an ombre look that is so awesome with these patterns.  I had to use my yummy chevron ribbon as well, and am truly sad that it is retiring.  It is so great to work with.  No whining, right?

Adventure Awaits Gift Set

When I finished the two sets of cards I was giving as the actual gift, they didn’t fit in my first bag.  So I had to make another, get a bit creative, and pair them together.  It worked out great!  This bundle has 14 cards and envelopes in total!  The ladies loved it, especially my friend.

Adventure Awaits Gift Set

I think everyone should have beautiful cards to give away, especially as special thank notes.  That is why I love to gift these.

Have a creative day!

Moana

Sassy Salutations with Flowering Flourishes

Let’s just say that my camera doesn’t always do me the best favors.  It is pushing ten years of heavy use, guess that is to be expected.  You get the idea though.

Sassy Salutations meets Flowering Flourishes

I was stumped for an idea, so I asked my youngest daughter for a little help.  All I asked her for was a color, something to get me started.  She said red, but not a love card.  I took her challenge and had fun with it.

Sassy Salutations meets Flowering Flourishes

I don’t normally work in red, but I do like the results.  I used two cut and ready card bases, retiring sad to say, for this set.  One for the card and the other for the box.  You could also make these from just one sheet.

Sassy Salutations meets Flowering Flourishes

I stamped on the velum with stazon and let it dry for a bit while I did the red stamping.  I hid my adhesive under the stamping and my embellishments.  Aren’t these just beautiful?  When they went on sale I broke down and bought a couple of containers.  So glad I did.  They are also retiring.

Sassy Salutations meets Flowering Flourishes

Even though my camera didn’t help out too much today, I think you get the idea.  Give yourself a challenge and see what happens.  You might be pleasantly surprised.

Have a creative day!

Moana

Adventure Awaits on Sea Street

I do enjoy it when a designer series paper set has a matching stamp set.  Everything just goes together that much better.  I thought this stamp from the Adventure Awaits set had the perfect sailor sentiment.  All kinds of happy here.

Adventure Awaits on Sea Street

I don’t know why I can’t just make one card, but I like everyone to have friends, even my crafting projects.  That sure does make extra stacks of cards to deal with.  I have taken to just giving people blank cards to play with.  It works for everyone.

Adventure Awaits on Sea Street

How about the cute little bag though.  It started out as a bag, I measured wrong, tried a box, then went bag to a modified bag.  What a busy bit of paper.

Adventure Awaits on Sea Street

Of course I had to do some inside stamping.  Those little flags are so adorable.  If I had more patience last night I would have colored them with markers, but I kept it one color for the sake of sanity.  Everyone needs some of that.

The designer paper is retiring, as well as the little oval punch I used to punch out my little anchor from the Sea Street set.  I use that punch a lot.  I will keep that one on hand for sure.  Too useful.

Have a creative day!

Moana

Guy Greetings Thank You

How do you say thank you to a man with a card?  Just like this.  Simple, a bit of elegance, and a touch of humor, but just a touch.

Guy Greetings

Denali requested a special manly thank you card for her prom dates father.  He is doing all of the driving for the two of them, neither one have a license, even as seniors, so they need a little help.  Hence, the thank you.  I thought that was adorable.

Guy Greetings

Also, it works for sharing with you today!  This set doesn’t seem to be carrying over to next year, so we have to say goodbye.  So sad, because it is a great manly set.  Well, I won’t stop using it.

Guy Greetings

This is a quick project day, because it is prom day!  When you have a young lady going to her first and only prom, you want to make it special.  There are still some things that have to be dealt with, like sharing some joy and some basic chores. Other than that, we are all about getting pretty.  Nails and hair are already done, so just enjoying the fun of makeup.  The next photos I take will be filled with a lovely young lady and her good friend.  Wheeeeee!

Have a creative day!

Moana

Mixed Bunches of Sassy Salutations

Well Good Morning!  Isn’t this just a huge ray of sunshine?  Bright, happy, sunny, and they make me smile.  What a great combo!

Mixed Bunches of Sassy Salutations

There is something about huge polka dots that just makes me smile.  After adding a smattering of flowers and an adorable greeting, all you need is someone wonderful to share them with.

Mixed Bunches of Sassy Salutations

Out of this set, what is retiring?  The paper of course.  Such a versatile set, I will miss it.  The angled tag topper punch.  I am glad it have it.  I love the curled and pretty ones, but sometimes you don’t want that.  And of course the flower stamp used.  It is from a set of designed flowers that also have center round stamps for layering and extra fun.  I make backgrounds out of those all of the time.  There is a coordinating punch for the flower that I didn’t use on this one.  I didn’t have crushed curry ribbon, but the hello honey was just right.  This particular ribbon is retiring, but the color will be with us for another year.  It is hard to tell in my photo, but the ribbon is just a shade or two darker.  And I love it!

Mixed Bunches of Sassy Salutations

These went together really fast.  The perfect example of simple stamping with coordinating products to give it the professional look we all love.

Have a creative day!

Moana

Geometrical Confetti Celebration Retirement Party

More retirement stuff?  Absolutely!  So, out of this project, what did I use that will be retiring?  It would be easier to share what isn’t.  That would be the whisper white paper and coordinating seam binding ribbon.  Yup, everything else is heading out.

Geometrical

When I bought this stamp set I admit it was for the sentiments.  Specifically, the cheer up buttercup one.  Totally worth it in my mind.  But I have gotten a little more attached to the funny little shapes.  It is nice to do something different once in a while.

Geometrical

This card set was made from four cut and ready card bases.  Three cards and one holder, and yes, the holder was made from a card base.  A little scoring, a little edgelit work, a little inking and there you have it.  Crazy, right?  I need to get the whole video thing going, you would like to see how easy that one is.  I surprised myself.

Geometrical

I am enjoying more and more making sets that I can use as gifts.  People love getting pretty things they can turn around and use.  I love the smile on their faces when they look at them.

Geometrical

Well, I had better get going.  I have a prom dress to add sleeves to.  That is okay, my sewing machine feels neglected when I paper craft so much.

Have a creative day!

Moana

That’s the Ticket Retirement Party

What is with all of the product in this photo?  Well, I am beginning a series of posts that will last the next month.  It is a retirement party, and these products are invited.  I am trying to celebrate them, because I have had so much fun making beautiful projects with them.

That's the Ticket

When the new catalog comes out in June there will be tons of new product to oogle over.  But, some have to step aside to make room.  I really am bummed out about lots of them, but am trying to stay positive.  So, welcome to my party.

That's the Ticket

As you can tell, I still have babies on the mind.  Not for me, yikes!  Several of my friends are becoming grandmothers for the first time or enjoying the blessing of another grandchild.  It is infectious!

That's the Ticket

I used one sheet of wisteria wonder to make this trio.  I cut a large square 8 x 8 and used my gift box punch board.  I took the remaining strip, cut it in half and made two little gift cards to match.  Aren’t they adorable?  I chose the baby stamp from the stamp set and stamped tone on tone all over my paper before I folded it up.  Of course I had to sponge it a bunch.  Yummy.

That's the Ticket

All of the time I have used this ticket punch I have wondered how to incorporate the miniature tickets that punch out with the larger one.  I thought they fit perfectly below my favorite ribbon ever, weep weep, the lovely chevron ribbon.

With all that said, I love these products I have shown you.  Only a month left to get your own, unless they sell out sooner.

Have a creative day!

Moana

So Much Joy

There is so much joy in every day life, why not in our cards and paper projects too?

So Much Joy

When I saw this weeks specials on the Stampin’Up! site I knew I had to break out some tools and make something special with them together.  Both framelits shown here plus the large pansy punch are all on sale.  Plus a few other goodies that I don’t have, yet.  I love a good sale!

So Much Joy

I grabbed a piece of paper from the birthday bash set to set the color stage and gave it some friends with crushed curry and tangelo twist.  Good friends.  I knew I wanted to make a gate fold card and decided to anchor the fold with a flower.  Since it was going to be layered, I knew it needed some strength.

So Much Joy

Enter the awesome huge designer vintage faceted buttons.  They are so fabulous!  Just when you think you couldn’t possibly use a button that large, bam!  The perfect choice!

So Much Joy

Lots of sponging, some glue dots, and a few dimensionals and here is another great set!  I love it when everything comes together to create beauty like this.

Have a creative day!

Moana

Crazy About You With Elegance

“When you feel terrible, can you still create something beautiful?”  That is what I asked myself last night.  I had an endodontist appointment yesterday that I thought was headed one way and took another.  So, I wasn’t feeling very creative.

Crazy About You with Elegance

Or so I thought.  I knew black was my base, I had been wanting to make something with black for several days.  But the flower I wanted to stamp with I had just used and didn’t want to just create another card in another color.  I pulled the Crazy About You set out and picked this flower out of it.

Crazy About You with Elegance

I was reaching for my momento tuxedo black ink when I saw the silver.  I thought it could be cool to layer the stamping.  Was I right or what?

Crazy About You with Elegance

I love how this turned out.  I did learn, and please trust me on this one, that you have to clean your stamp after each layering stamp.  I stamped in silver first and let them dry for a while.  I went back in with the black, but it was picking up silver and then I was putting it back into the pad and getting silver in it.  Not fun.  So I ended up cleaning the stamp after each black flower was stamped.  Not too tiring, but necessary.  And yes, my ink pad survived nicely.

Crazy About You with Elegance

I placed just a few of the large basic rhinestones in the centers of the black flowers. It is kind of hard to tell with my photos, but they are the perfect touch.  I added a touch of ribbon and left the sentiment out of it.  They turned out very elegant.  My matching gift bag has an angled purse look to it, and I absolutely love it.

Sorry for the long post, I was apparently feeling a bit chatty.

Have a creative day!

Moana

Cheerful Critters Party

There are never enough birthday cards to be made, never.  Sometimes I just dip into my stash of designer paper, pick a sheet, and get working from there.

Cheerful Critters Party

That is exactly where these two came from.  Of course I love the Cheerful Critters stamp set.  I know I teased it at first, but I have fallen in love with it every time I use it.  Really, how cute are these guys!

Cheerful Critters Party

I absolutely love my inside stamping to coordinate with the my card front.  It makes me very happy.  To the point that I have a hard time leaving the inside blank.  Kind of like doing your hair.  Everyone can make the front look nice, but the back needs just as much attention, or so my brain says.

Cheerful Critters Party

I had a fun time using my stampin’ write markers on this guy.  I have such confidence issues with them and making it look smooth.  But I have to say, this one didn’t turn out too bad.  Maybe I can do it after all.

And let me just say one more time, the perpetual birthday calendar stamp set is so absolutely wonderful.  I use those little guys all of the time.  Since they are designed to accent different months of the year, they go with everything.  How perfect is that!

Have a creative day!

Moana

Guy Greetings Woo-Hoo!

This was an awesome set to make!  I couldn’t stop giggling at this little muscle man saying woo-hoo!  Really, so funny.  I was going for masculine here and think I nailed it.

Guy Greetings and Just Sayin'

The gift bag here is a tall one but still came from one sheet of card stock.  It measures 1 x 1 x 7.5.  Yup, pretty darn tall.  I think one of those huge candy bars would be awesome inside.  I like how I always want to put candy in my bags.  I did put some fairly stout items inside and my linen thread handle still held strong.  I couldn’t have a ribbon handle, no too girlie.

Guy Greetings and Just Sayin'

The mix of the image with the typeset paper along with the muscle man gave it a very vintage look.  I sponged everything to continue the look.  Even though you can’t see a lot of it, I think the alphabet embossing folder gave the texture I needed.

Guy Greetings and Just Sayin'

So how about you dig into your stamps and make something that brings a grin to you and the person you give it to.  That is why we do this after all, right?

Have a creative day!

Moana