Thoughts & Prayers Raining Down

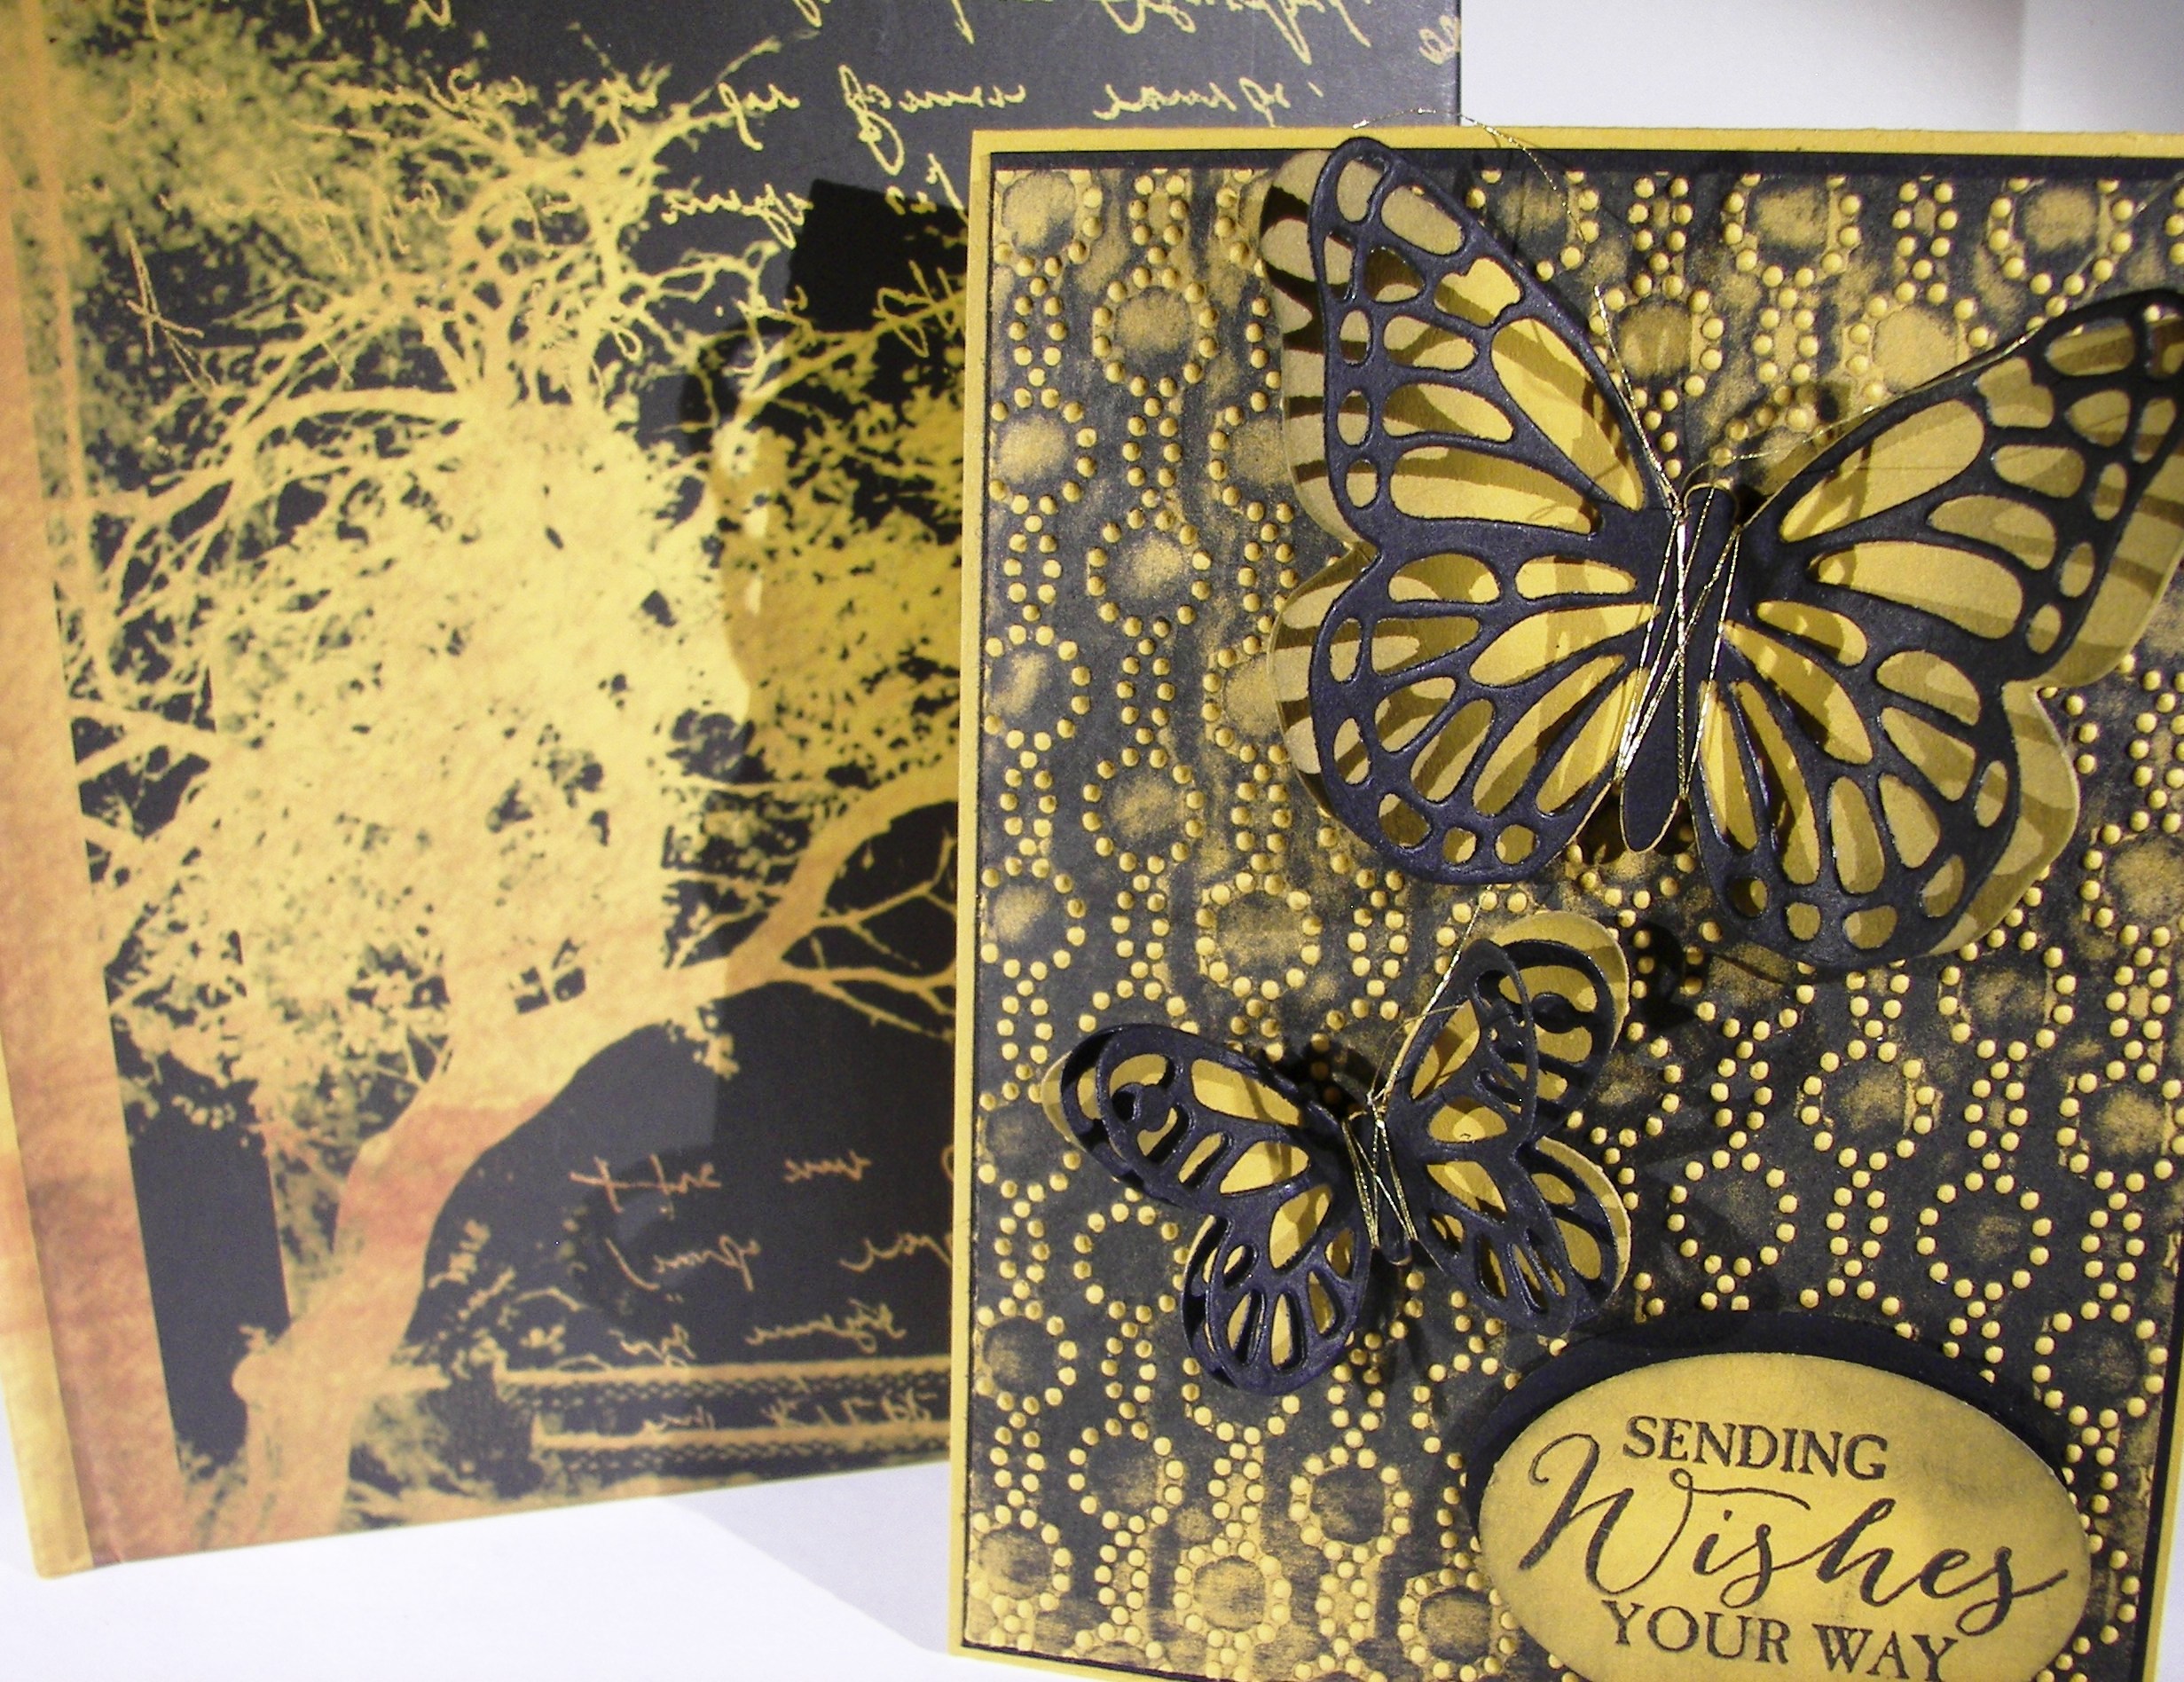
This is the lovely view I have had all this past week.  It has been so wonderful to enjoy the cool cloudy days filled with light rain.  It makes everything look bright and clean, and the smell is wonderful.

Thoughts & Prayers Raining Down

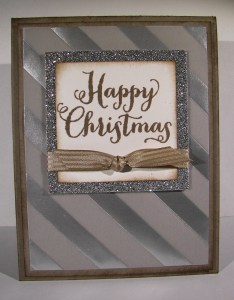
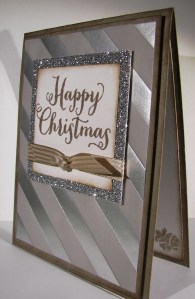
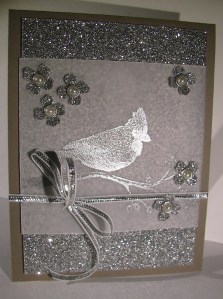
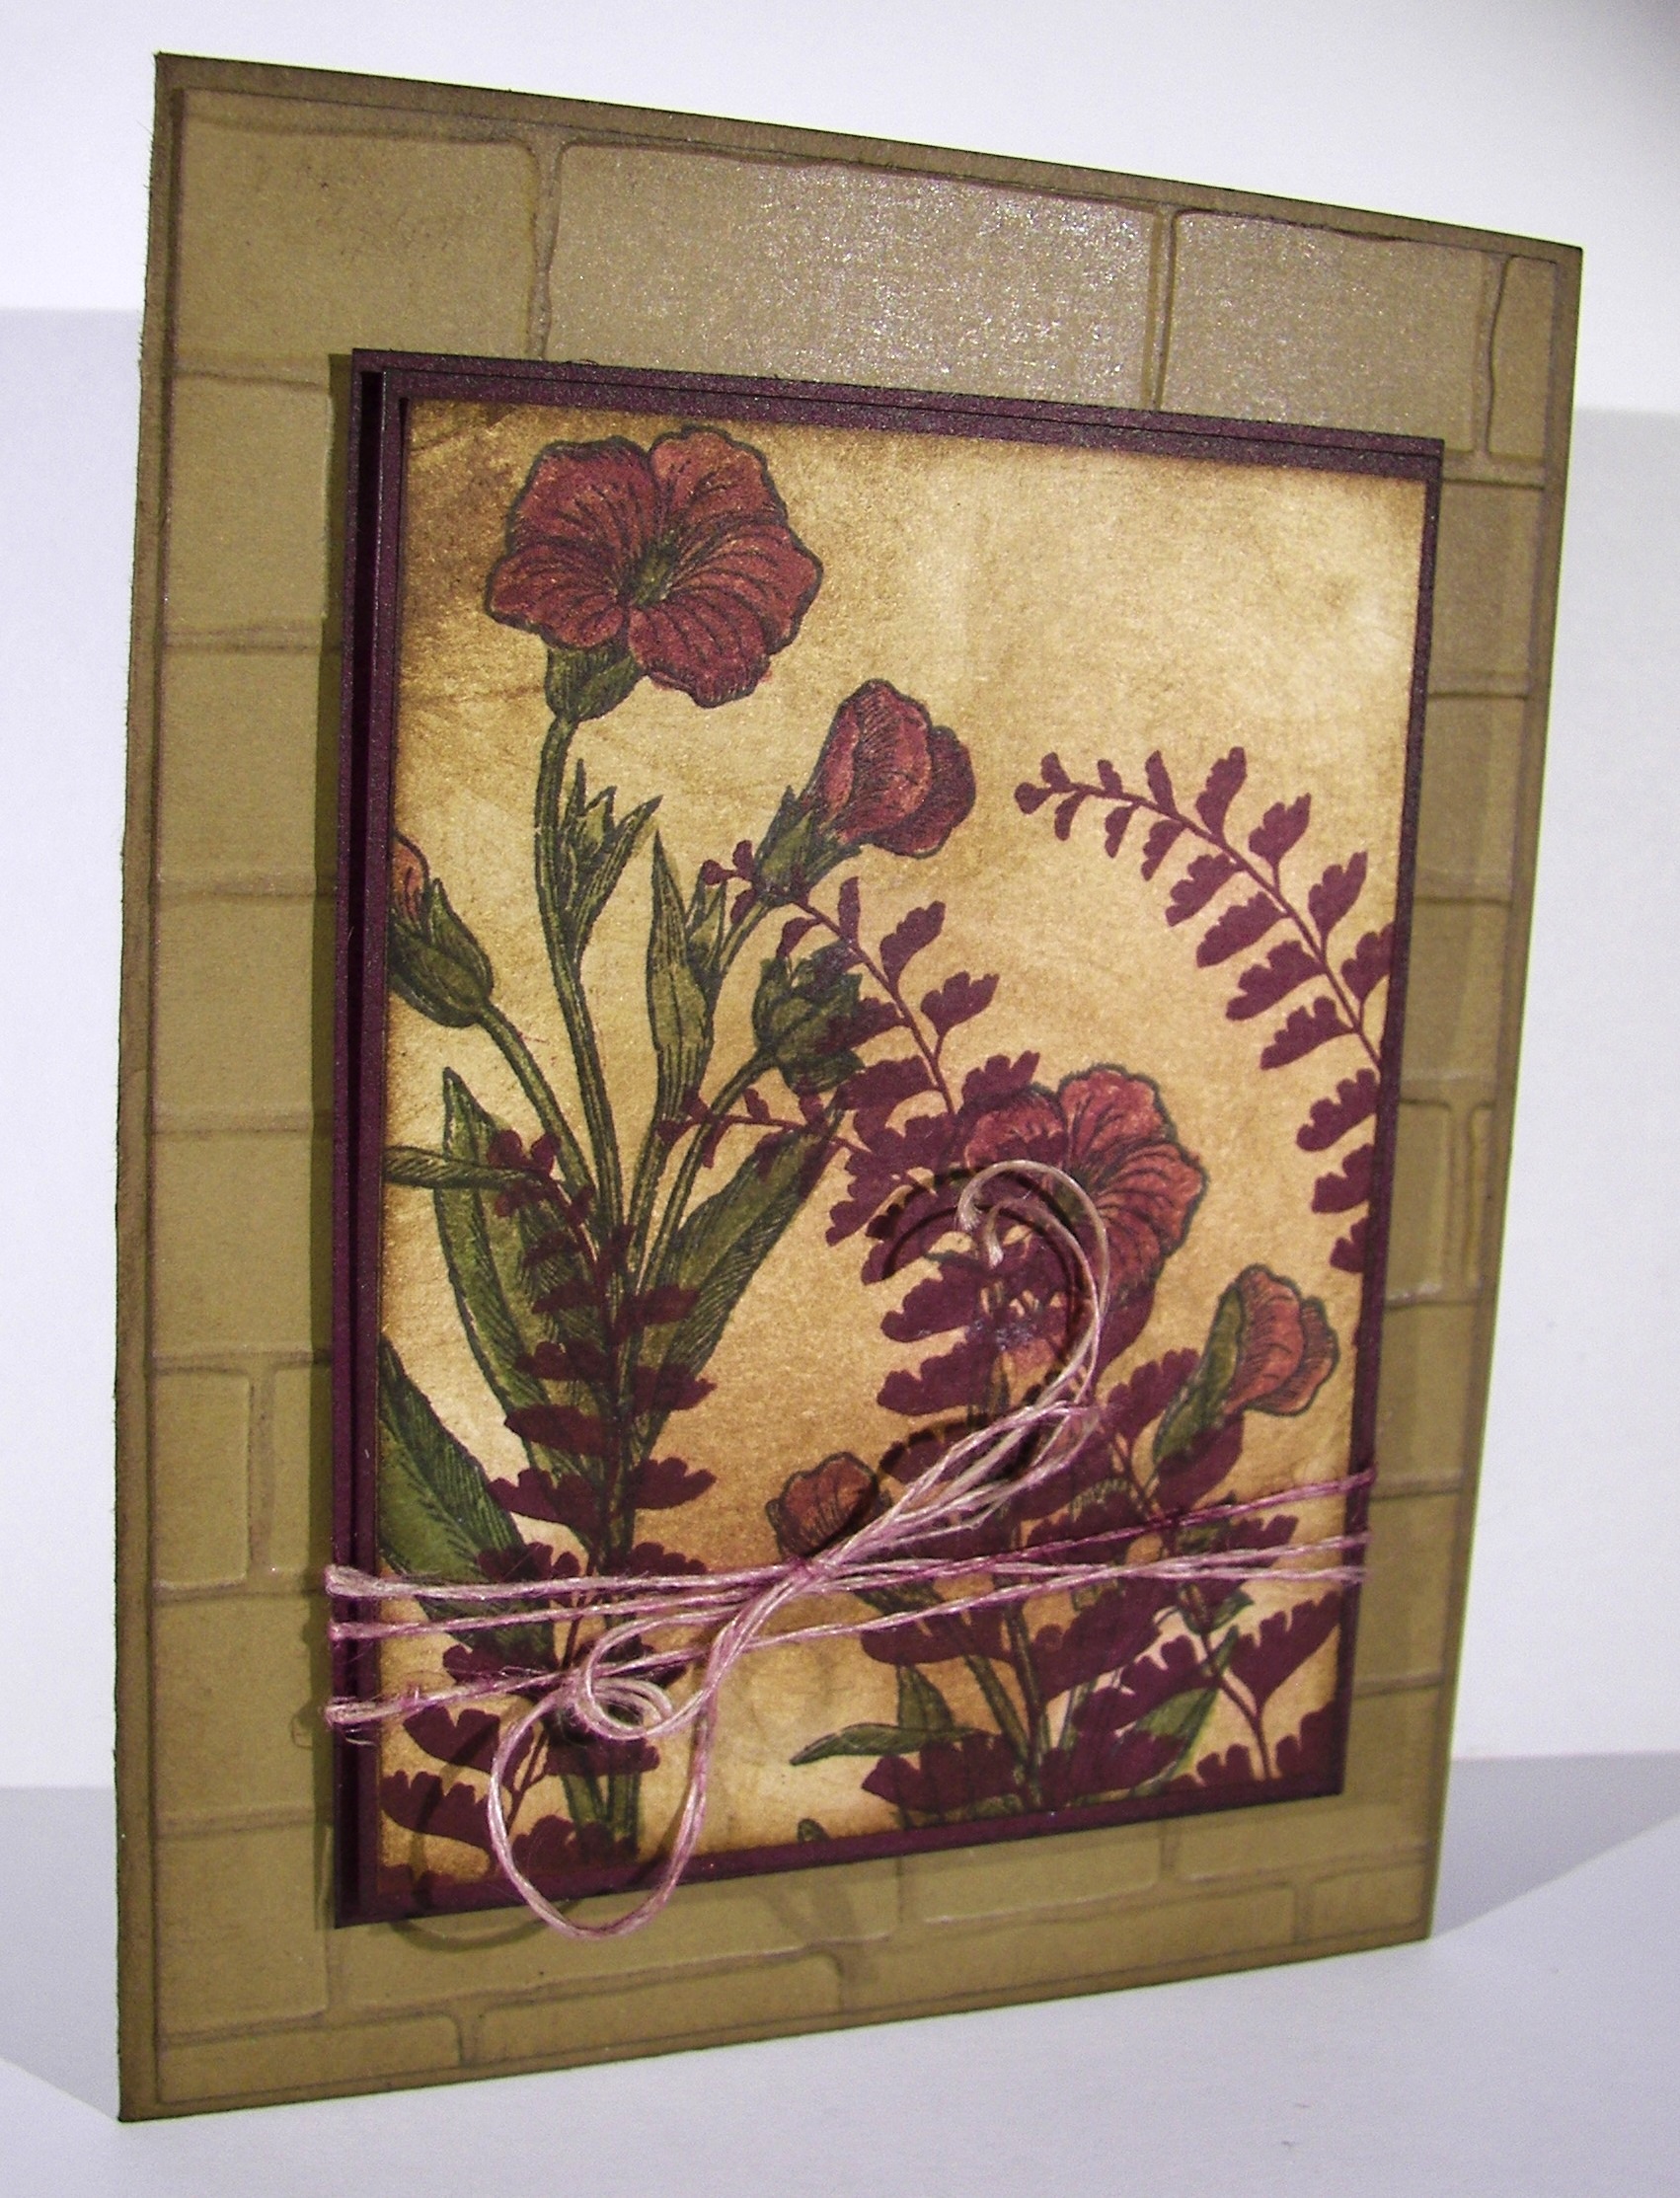
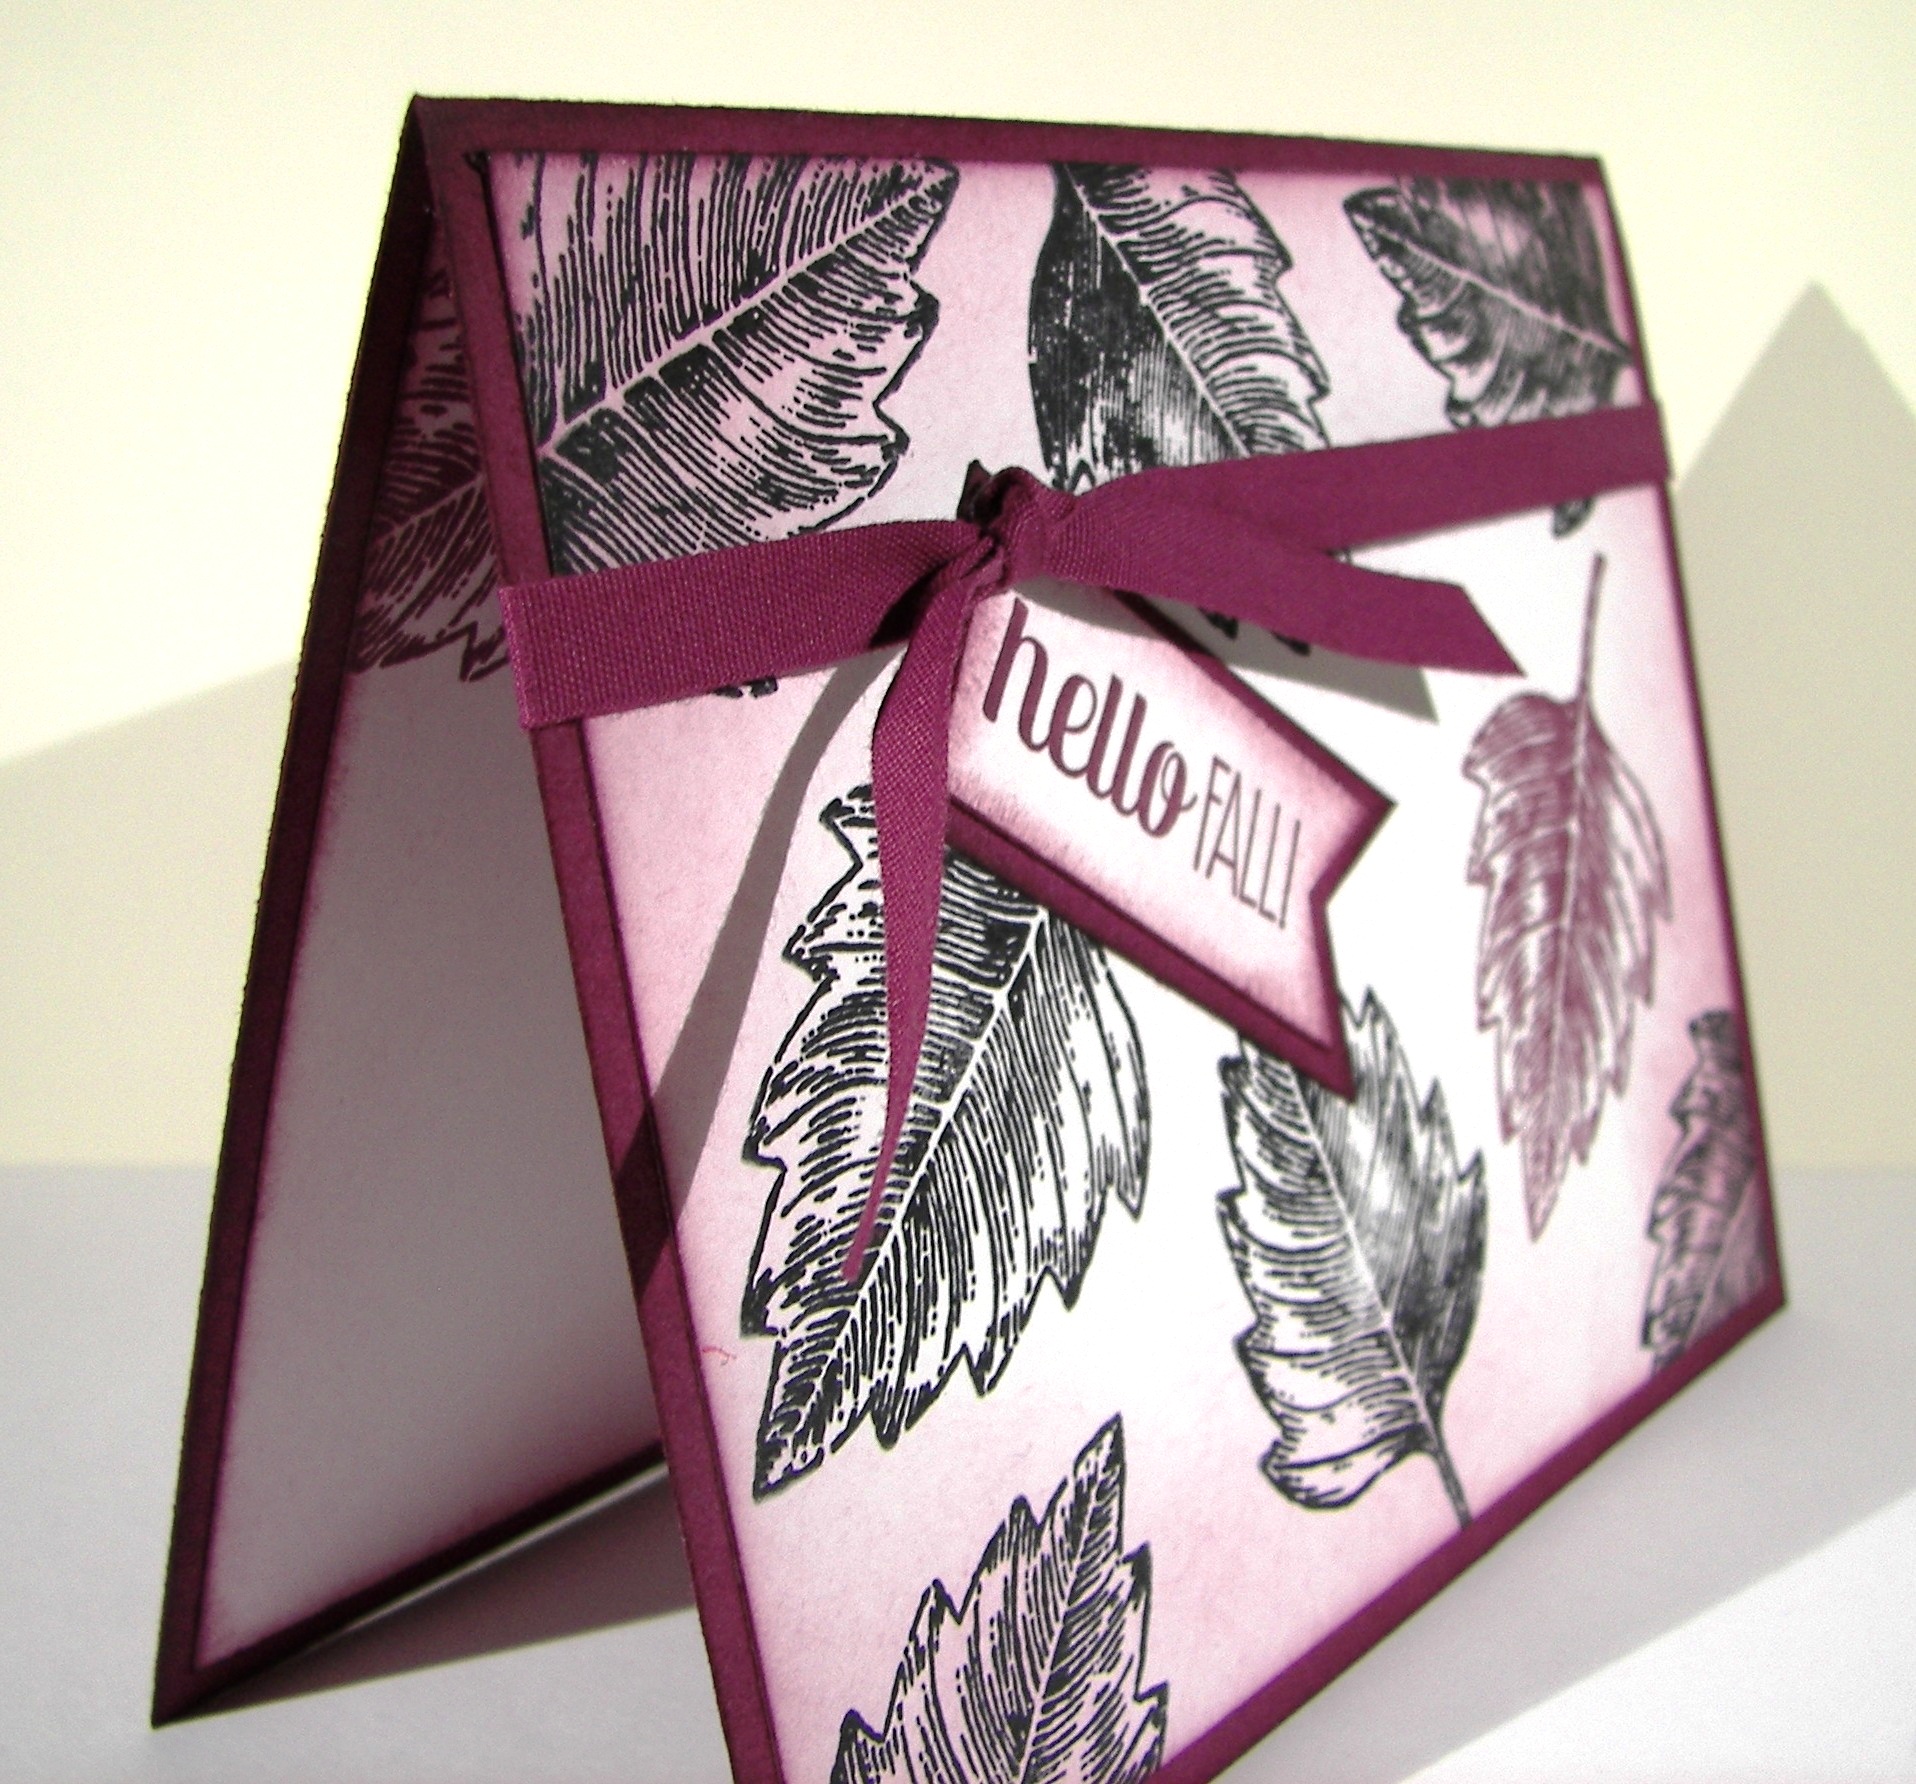
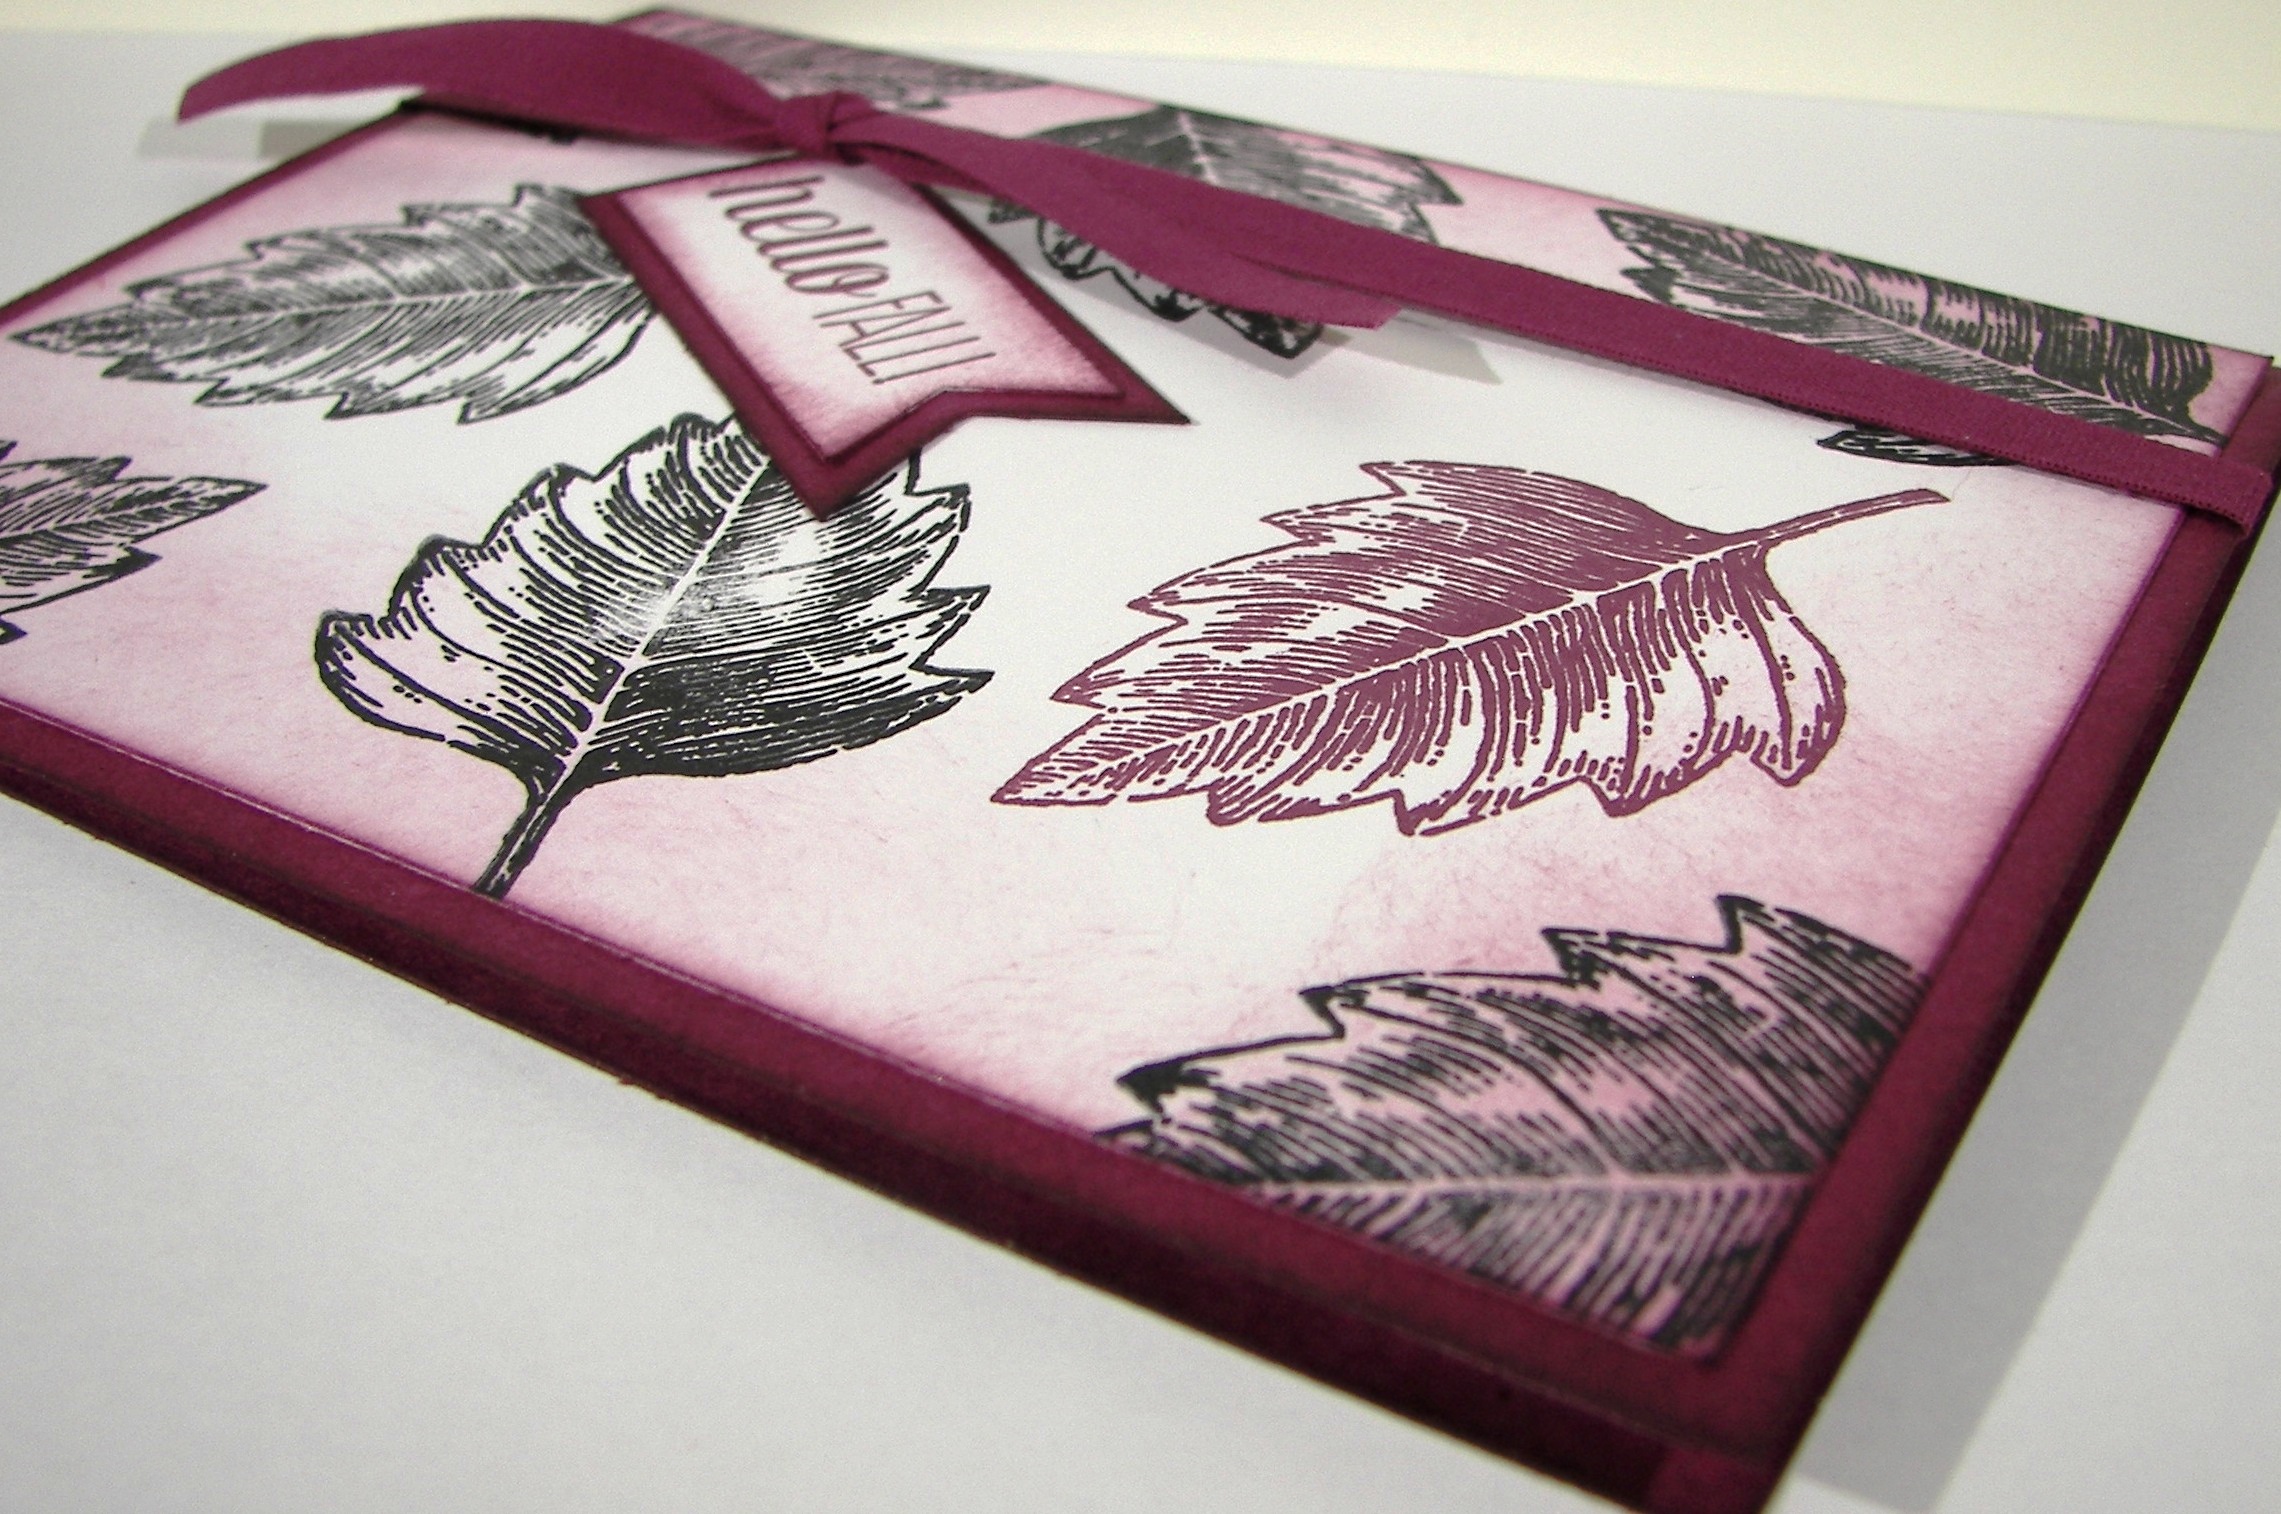
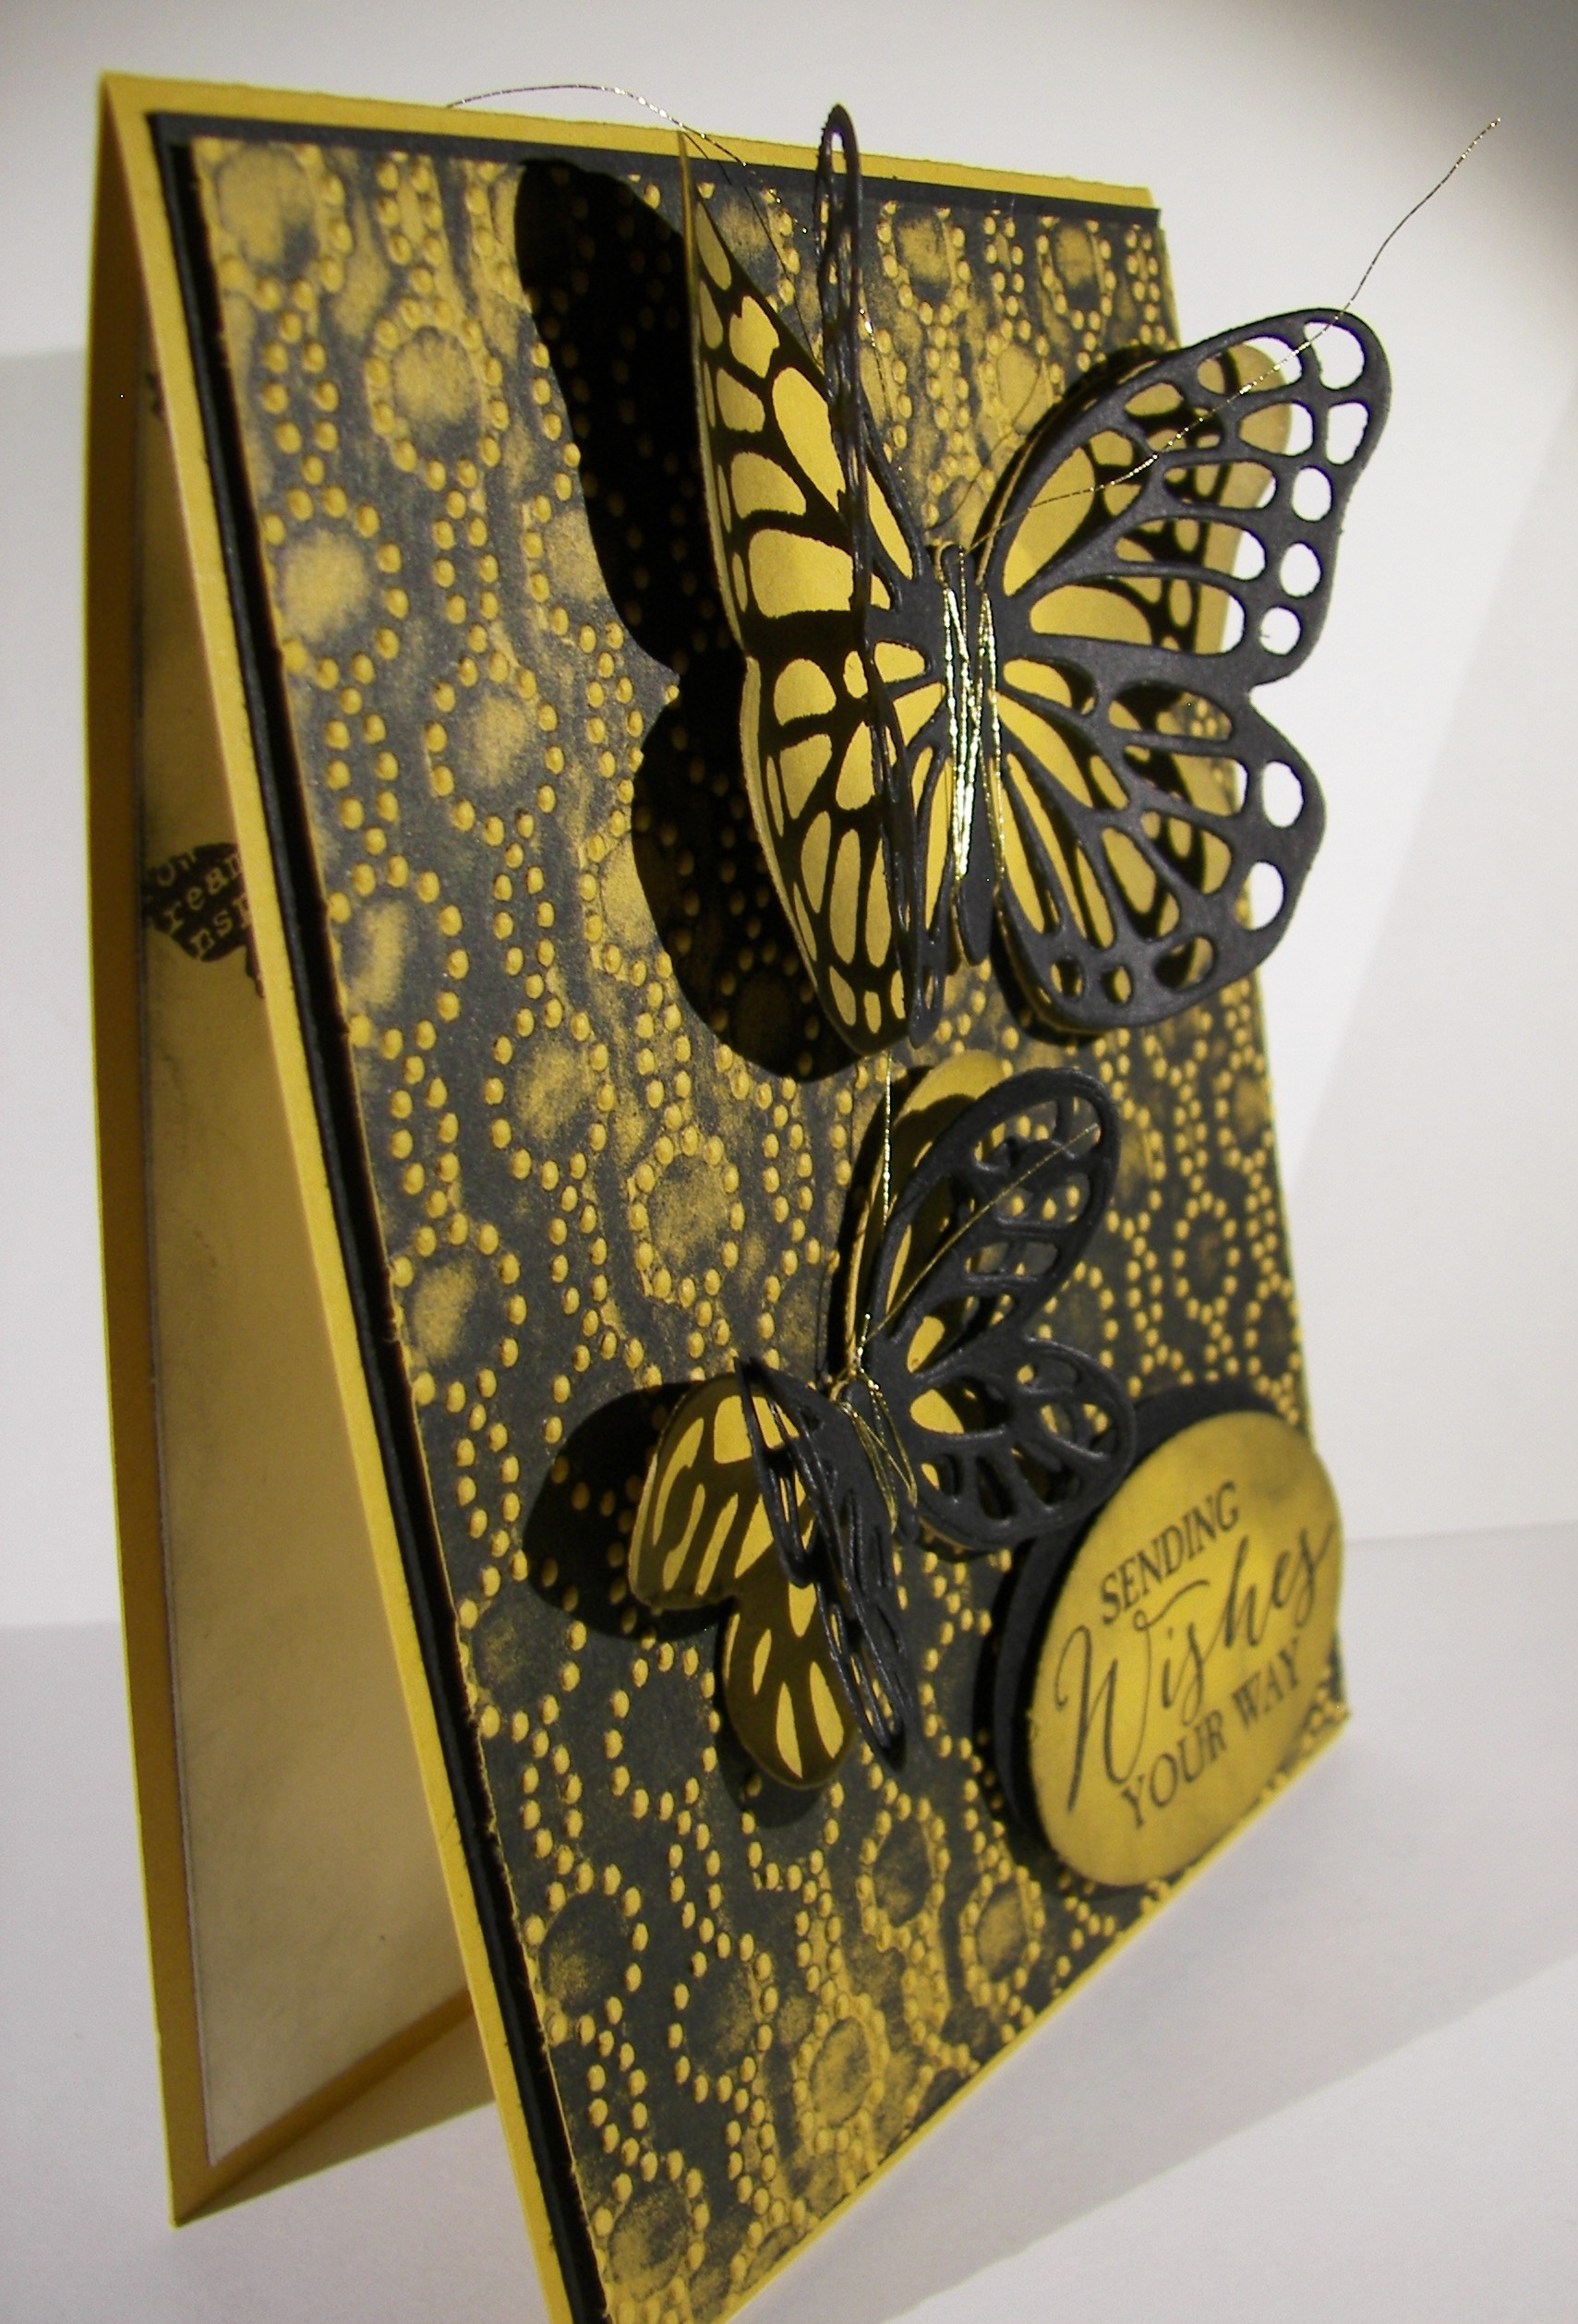
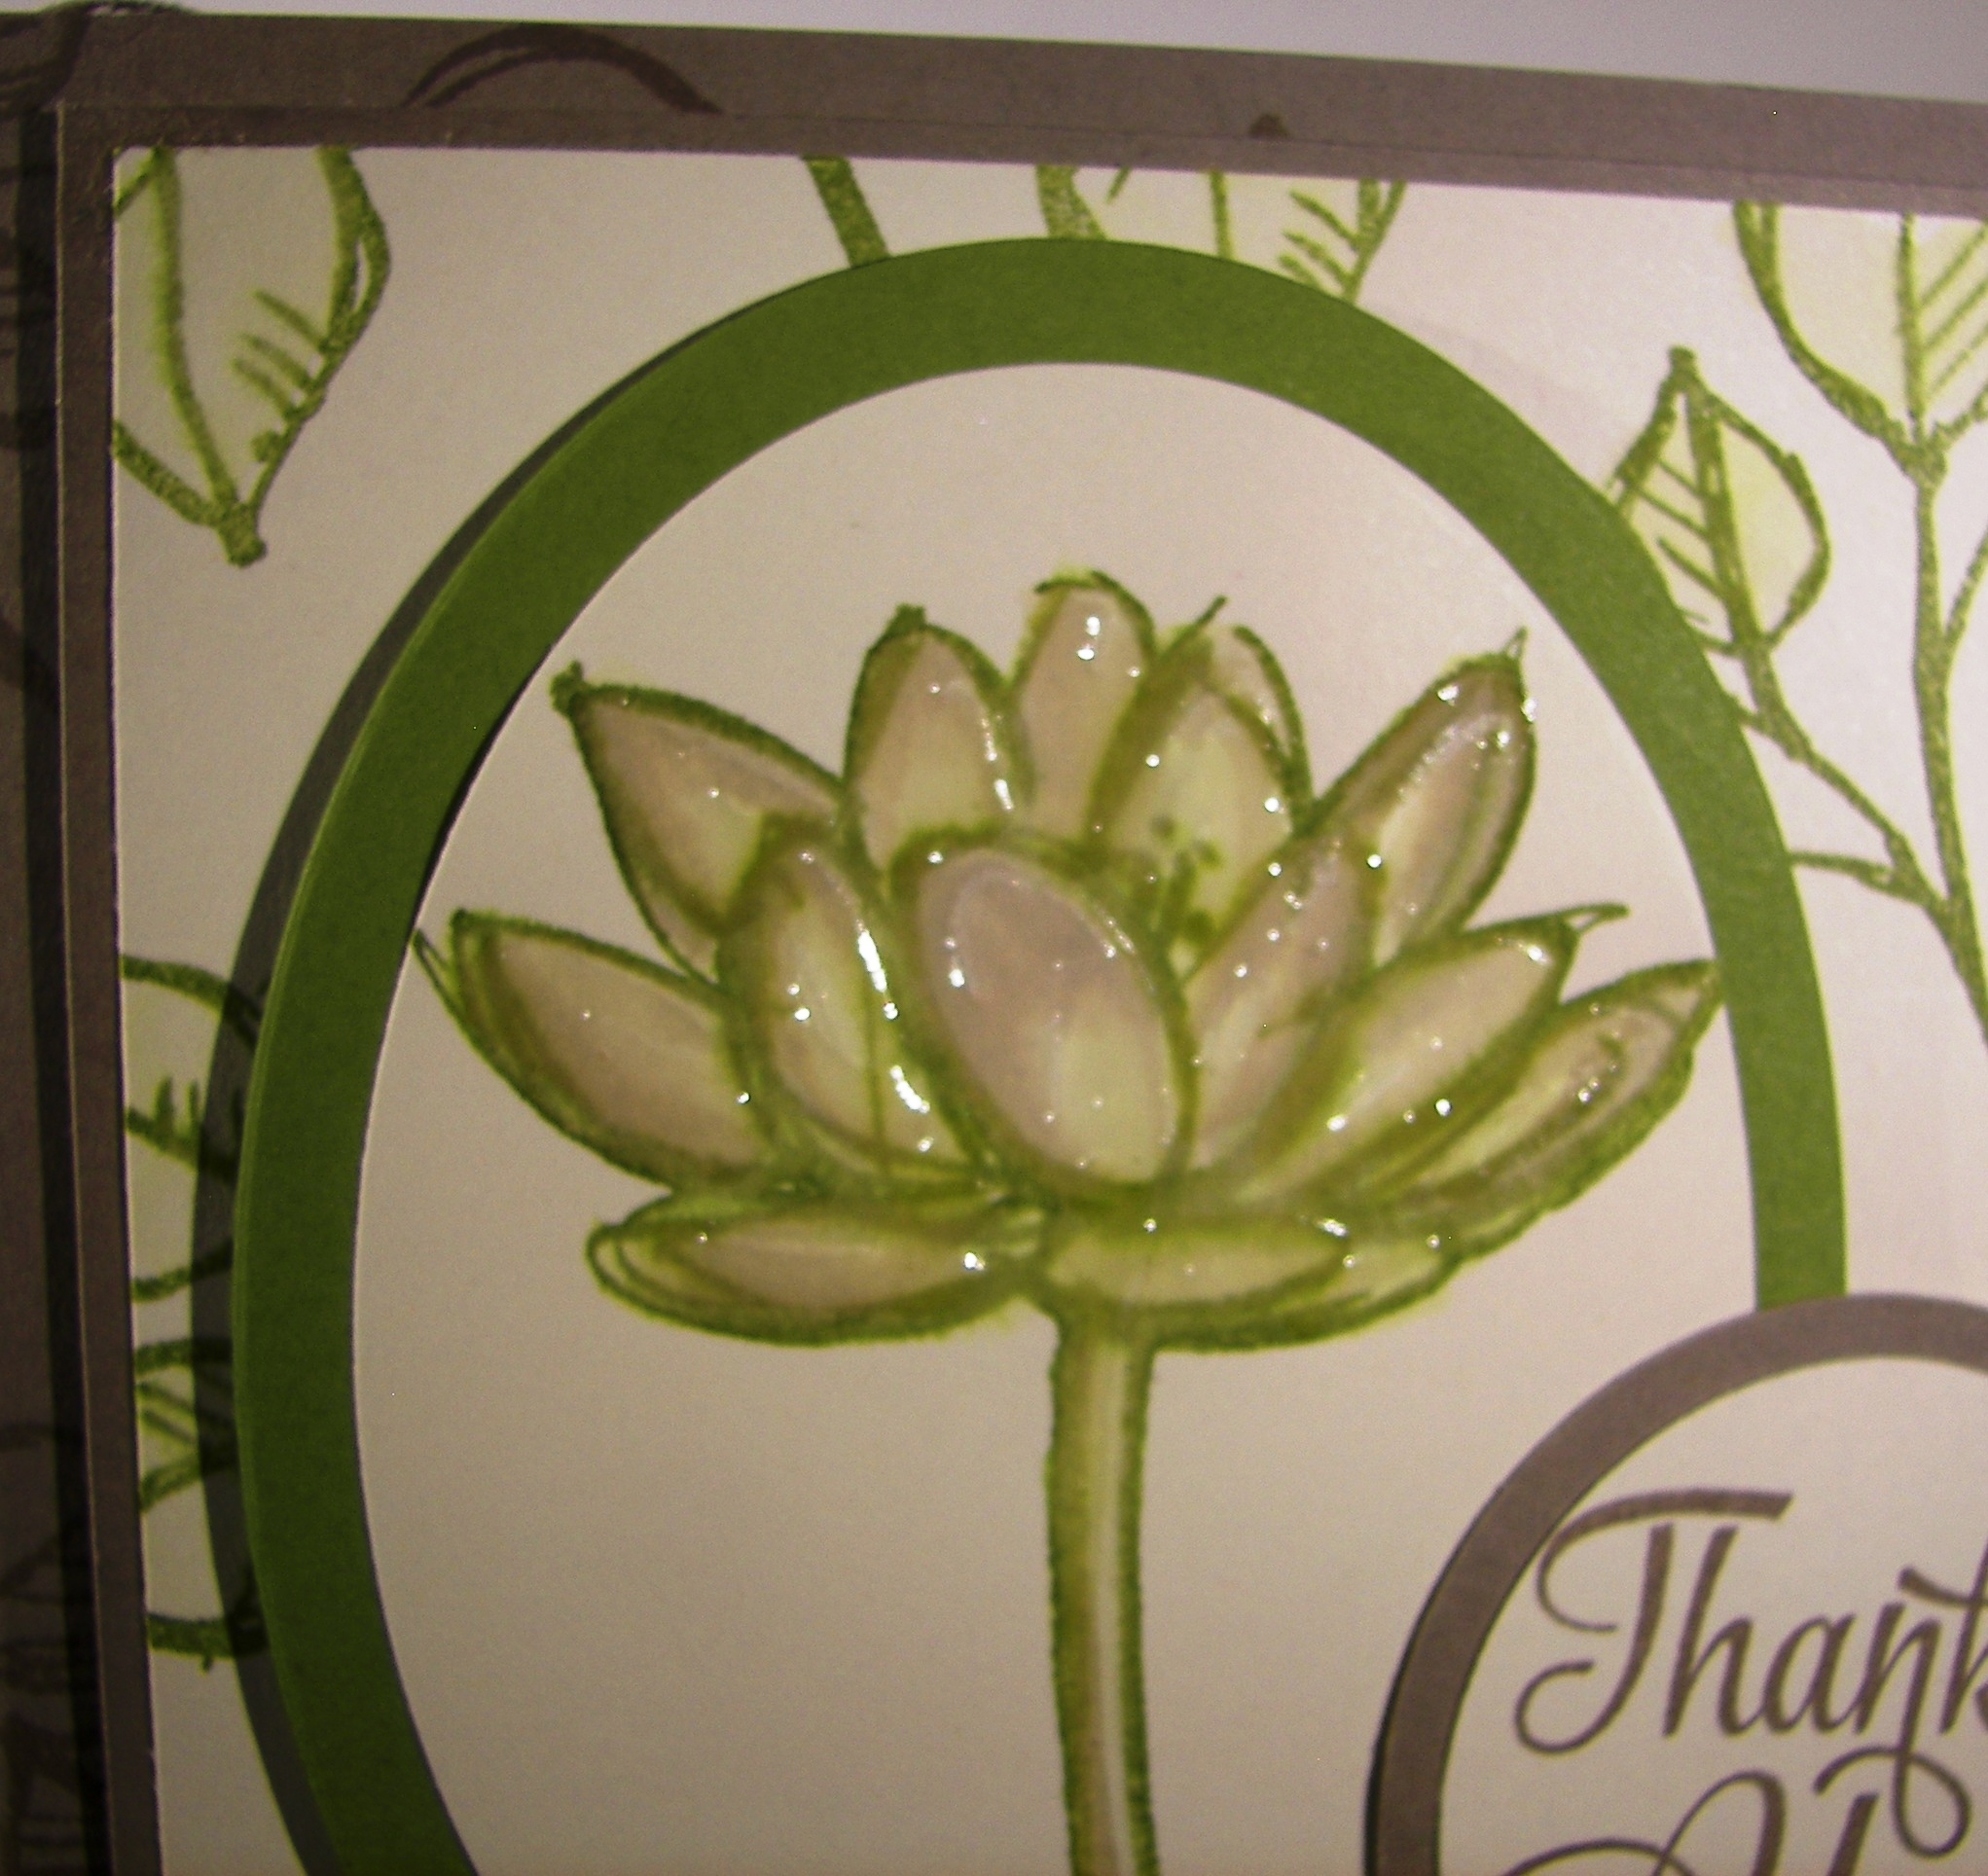
I stamped my image first and washed the paper with plain water.  I then proceeded to layer on my ink until it was dark on the top and the right layer of light on the bottom.  I continued dabbing my brush along the top pointing down for ink to kind of fall down.  It started to look more and more like rain.  I finished it off with spritzing water, allowing it to dry some and doing it again. The last time I spritzed heavier allowing for some drops to form, and then controlled them down the piece.  It worked wonderfully.  How simple is that?

Thoughts & Prayers Raining Down

Have a creative day.

Moana

Your Presents

Good morning to this bundle of happiness!  My daughter was teasing me about how I get these ideas, don’t know if they will work out, because they always look amazing.  Well, I don’t know if my original vision was achieved, but I do rather like how it turned out.

Your Presents

Wouldn’t it be fun to see a big pile of gifts like this?  With the holidays here and Christmas right around the corner, I guess it could happen.  It reminds me of growing up with the way my mother decorated and wrapped gifts.  She liked everything to coordinate, the wrapping, the tree, decorations, everything.  If someone gave a gift that didn’t coordinate, she would wrap it over to make it match.  She would approve of this card for sure.

Your Presents

Just one stamp set and all of this pattern just happened.  I bet if I worked harder I could have gotten more.  I know that I will get to use this for countless birthday cards.  A holiday stamp that can keep going on is my kind of stamp.  I just stamped and layered with glimmer paper.  The gifts were sponged lightly and a couple got bows stuck on top with glue dots.  A few stars inside and one on top of the pile and it was done.  So cute.

Your Presents

Have a creative day!

Moana

Happy Christmas Exchange

I usually don’t get the chance to blog on a workshop morning, but since we are doing things a little differently, my morning is a bit different.

Happy Christmas Exchange

For today’s workshop, my club ladies are each sharing a project and making a kit for everyone to complete.  This is my contribution.  It does need to be simple, the prep work done, and the project should be able to be completed in 5-10 minutes.  We then get to come home with several different projects and my ladies get a chance to show off their skills too!  I call that a win.

Happy Christmas Exchange

This project is all about simple layering with 1/4″ borders, two stamps, two different sized square framelits and a touch of ribbon.  Oh, and sponging please, plenty of sponging.  Really, it should be pretty satisfying.

We are also doing a little gift exchange and I am bringing my big bin of retired product that is their own little clearance rack.  I drag that out every 3-4 months after I add a bit here and there into it.  This will be our third year doing this, and I think it is a tradition here to stay.

Happy Christmas Exchange

Have a creative day!

Moana

White Christmas

I had intended on making a matching bag for yesterday’s card, but I spent so much time on the card I had to call it and move on.  Yet the large piece of velum was still waiting for me to finish it up.  I made an effort or two.

White Christmas

My original plan didn’t work because I didn’t punch my holes along the bag top evenly and the ribbon stitching looked horrible.  I cut off the top and tried again.  There were improvements, but it is still uneven.  It did look really nice with the card, but this is like the Where’s Waldo of crafting goofups to be honest.  Can you find them all?

White Christmas

How about this obvious one.  I was chatting to my daughter and not paying attention to my scoring and the measurements got off.  You don’t waste foil velum though, so I continued on.  That is when I goofed up the hole punching the first time, and a bit again on the second time.  I didn’t bother putting treats inside because I don’t know if I can let this goof off the desk.

But, the set does look nice even if I made mistakes.  I always tell my ladies that there are no mistakes, only opportunities.  I don’t know about this one, maybe an opportunity to learn from my mistakes?

White Christmas

Have a creative day!

Moana

Joy, Plain and Simple

As we have been showered with much needed rain here in Northern California, all I feel is joy and gratitude.  We have a long way to go, but every little bit helps.  I thought I would put my feelings into a card.

12-10

The Color Me Irresistible  Specialty DSP is so much fun to work with.  It was actually my inspiration.  I knew it had a raindrop pattern and the project just went from there.  I sponged with a dauber in silver encore ink all over in tiny swirls to give a cloudy gray look.  Turned out fantastic I must say.

12-10 (1)

The flowers were punched with the pansy punch hovering over the large dots in the silver fancy foil designer velum, using the dots as the flower center.  Nice idea, right?  I used a bone folder to curl the petals of the velum and decided I needed more flowers.  Basic gray became the flower background color and I punched another six of those.  I distressed those with a large stylus to give them dimension and lift.  Layered with dimensionals and glue dots, the side border came together.

A single stamp from the Your Presents set put the focus just right.  It was framed with a smokey slate oval and both were sponged with more silver ink.  The “i” was dotted with a metal rimmed pearl and a tiny ribbon was wrapped around.  Add one more awesome card to the mix.  A very rewarding project to make and enjoy.

12-10 (3)

Have a creative day!

Moana

Glittering Holidays

After nearly a two week run of a clean and simple holiday gift set I have been more than ready to make something fabulous.  That is exactly what I did, if that sounds a bit showy, well, just look at it!  I have been planning it all week.

Glittering Holidays

I really just had the flowers in mind and knew they should go on top of a box.  So, to get my brain going, I picked some paper, ink and a stamp and got to work.  The paper alone was just lovely.  I stamped in a way to further elongate the tall box I had in mind.  I really wanted it to be about the flowers.  I did have to use my hot glue gun to keep these guys in order.  After they were assembled I attached them to each other.  The ribbon is threaded between them to hold them on top, so they are not attached otherwise and can be used again.

Glittering Holidays

The box is just scored every two inches for the side measurements and the same for the top and bottom.  Simple there for sure.  I closed the bottom, but just folded the top in place.  I am so going to use this for a wonderful gift, so I needed to get back inside.  Not just for a blog post, nope.

Glittering Holidays

My husband actually designed the card for me.  We chatted while he drove to work and he did a great job with the stamp choices I must say.  I stamped in silver ink and heat embossed in clear to give it an extra shine.  So pretty.  I added flowers with metal rimmed pearls in the centers and added a thin ribbon to finish it off.  The ribbon also helped tie the gift box in as a set.

Glittering Holidays

Have a creative day!

Moana

Embellished Ornaments

This started out as a pretty darn good morning, but I am having quite the head cold, so my time management isn’t the best.  I think I am going in kind a slow motion mode.  The results still show nicely though, don’t you think?

Embellished Ornaments

New product, new product, new product!  I so enjoy working with new product!  Today was the first time for three different newbies to my collection.  Two stamp sets and one framelit set.  They are sure to get a lot of use this holiday, for sure.

Embellished Ornaments

My photos don’t let you know very well, the colors look off, but I am working with Sahara Sand and Not Quite Navy.  The ornament on the left is backed with a deep navy blue and it looks so pretty.  The smaller ornament is backed with Crumb Cake just to give a better contrast.  The stamping is all done in Sahara Sand, as well as the sponging.  I used the new gold cording to “hang” the ornaments and it worked great.  I have been waiting to use this set, and it was so worth it.  Be patient, you will be seeing it a lot.

Embellished Ornaments

Have a creative day!

Moana

Lighthearted Leaves Treat Carton

All day long I have tried to get this blog post done.  That gives you a little hint into how my day has been.  Not done yet, but definitely on my way.

Lighthearted Leaves Treat Carton

I had a bag of Lindt truffles on my counter and loved how the bag looked.  I thought that it would be fun to try to make a bag that could hold treats and look elegant too.  I asked my husband for a color choice, I grabbed a ribbon and matching ink and went to work.  Of course I had to use my current favorite stamp set, Lighthearted Leaves.

Lighthearted Leaves Treat Carton

One sheet of 8.5 x 11″ perfect plum cardstock went into this one.  Evenly scored and punched along the sides with the extra-large oval punch to give the windows.  Window sheet was scored along the same measurements and tucked inside.  It was a bit tricky to handle the placement, but with a little patience and plenty of glue dots, I experienced success.  I am so happy with the results.  I am sure to make this one again and again.

Lighthearted Leaves Treat Carton

Have a creative day!

Moana

Vintage Butterfly Basics

This project started out as something entirely different, but I love where it ended up.  Would you believe I thought I was going to make something dark and dreary with a Halloween theme?  Well…like I said, it ended up lovely.

Vintage Butterfly Basics

The floral images were stamped in black and water colored with blackberry bliss and mossy meadow.  The ferns were also stamped in blackberry bliss.  Then the soft suede ink was put to work.  Lots of sponging and swirling and edging went into image.  I ended up with something that look almost tea dyed.  Just what I wanted.

Vintage Butterfly Basics

A double layer of blackberry bliss became the frame for the card front.  Linen thread was pulled through my blackberry bliss sponge to give it a tint to coordinate.  The tan color it comes in didn’t quite go with the soft suede.  Extra attention went into dimensionals to give  lots of height.

Vintage Butterfly Basics

A narrow boardered piece of soft suede card was embossed with the brick wall embossing folder and then sponged to give additional detail to the embossing.  All together, these elements created something lovely, just lovely.

Have a creative day!

Moana

Lighthearted Leaves

I fell in love with this stamp set from the moment I saw it.  The images from Lighthearted Leaves are absolutely wonderful.  Artsy enough to get your attention, but not so simple as to be boring.  Such a nice balance.  I think I will case myself and make a Christmas version of this project.  I see mistletoe.

Lighthearted Leaves

I can also see an ocean theme.  The leaves kind of remind me of sea kelp and could be holding little fishies somewhere.  I do love an optional stamp set.

 Lighthearted Leaves

The layering is simple here.  Narrow borders help to not distract from the thin lines of the designs.  All around, I am very happy with how this turned out.  using the tags & labels framelits also make me happy. Subtle touches of color to accent the sentiment without taking over.  Just enough room to have a simple bit of ribbon and one little rhinestone in the center.  How perfect is that.  What more do you need than to ‘believe’?

Lighthearted Leaves

Have a creative day!

Moana

Color Me Irresistible

Fall events are starting to pile up and that means plan ahead and get it done early.  This isn’t quite early, just one week, but that helps, right?  There is a church youth dance coming up next weekend and we are hosting the pre-dance dinner party.  The theme is black and white, so we are going along with that for the decorations, and yes, party favors.  I think these will do nicely.

Color Me Irresistible

These two are very simple, as should any favor should be, especially if you need to make several quickly.  I started both of them with paper sized at about 4 x 6 1/2.  Simple scoring for the gift bag and a hole punch to thread through the ribbon.  Done and done.

Color Me Irresistible

Can you go wrong with a classic sour cream container?  I think not, especially when you are working with this ever so lovely silver foil velum.  I think silver wrapped candies or white mints would look so pretty inside.  Maybe even both?  Works for me!

Color Me Irresistible

Have a creative day!

Moana

Dazzling Diamonds Dragonfly

I liked the randomness of picking one single stamp and designing a project around it.  Today was just the beautiful dragonfly from the Awesomely Artistic stamp set.  My favorite image honestly.  I wish I had more.

Dazzling Diamonds Dragonfly

The new DSP pack patterns sure are awesome.  I had a hard time deciding which side to use.  I usually enjoy the patterns, but can see myself making gift sets with all of the different papers here.  Total coordination really makes me very happy, even within a gift set.

Dazzling Diamonds Dragonfly

It isn’t always easy to get decent photos of my work.  The ladies in my club often tell me how much better they look in person.  Isn’t that true of so many things though?  But the dazzling diamond dragonfly here needed to be angled a bit for you to really see it.  I wasn’t sure how happy I would be with it on whisper white, but I love it!

Dazzling Diamonds Dragonfly

Have a creative day!

Moana


Vintage Leaves

What happens to some mornings, I really don’t know.  Just when you think you might get a break here or there, it just doesn’t happen.  But I made it here, finally.

Vintage Leaves

I have taken my time in using this new set, Vintage Leaves, but am totally ready to go now.  I only used one leaf today.  I wanted to focus on color as much as detail and thought if I had too may patterns and colors it might get lost.  Rich Razzelberry was my focus, and this was totally what I wanted it to look like.

  Vintage Leaves

I stamped several of the same leaf in black Stazon and left space for just one rich razzelberry one.  So simple.  I used a second stamp set, For All Things, for the sentiment.  It was layered flat with a banner of coordinating cardstock.  I touched it up with a strand of cotton ribbon and called it good.  I really did love how this turned out.

Vintage LEaves

Have a creative day!

Moana

Journal Inspired Butterfly Basics

My husband bought this pretty journal and I immediately took it to my desk to stare it down.  I just knew there was a card in there somehow.  Well, after sharing swaps for nearly two weeks my creative bug was on high alert.  I sat down last night and gave myself some time to go at it.  And I did.

Journal Inspired Butterfly Basics

Isn’t is uncanny how close the colors are?  I guess that is why I migrated to it.  I have other off market stamps that might have gotten closer to the tree, but I really wanted to get my brain in gear for workshop this weekend.  I couldn’t be happier with the end result.

Journal Inspired Butterfly Basics

The borders are a narrow 1/8″, my favorite.  I bravely opened up my new elegant dots embossing folder and rubbed Stazon all over one side and then ran it through the  big shot.  I loved the result, and most of the ink came off.

Journal Inspired Butterfly Basics

I used lots of butterfly framelits and layered everybody up.  The smaller one has two black die cuts over the delightful dijon layer.  Light sponging made everything look a little grungy and tied it together.  There is a little stamping inside, as well as more sponging.  I used plenty of glue dots to hold the butterflies together and layered like crazy with dimensionals.  So fun!

Have a creative day!

Moana

Chalk It Up To Love

This is only one of the three projects available in this months Paper Pumpkin kit.  Two different kinds of cards, three of each, and three pretty boxes.  What a fun kit!

Chalk It Up To Love

I sat down to make this card and it literally took me three minutes.  That includes stamping on one side, not liking how it turned out, turning it over and stamping the other side.  Yup, three minutes including a goof.  How cool is that!

Chalk It Up To Love

And that my friends is the beauty of Paper Pumpkin.  All of the creativity bundled together in quick easy to make and even easier to love kits.  Just my speed sometimes.

Chalk It Up To Love

All of the preparation I do for others, including my classes, it is just so nice to have something made just for me.  I know it isn’t just for me, but sometimes it feels like it.  Thanks Stampin’Up!

Have a creative day!

Grateful

It isn’t very often you get to design a special card like this one.  Tomorrow will be me and my husbands 25th wedding anniversary and I feel truly grateful for every day we have loved together.

Grateful

I didn’t want to use a traditional ‘anniversary’ stamp or theme.  That isn’t how I feel.  I feel gratitude.  Having a lasting marriage isn’t the norm these days and I feel very fortunate to be among those who get to celebrate like this.  Hence the grateful sentiment.

Grateful

This card was made with the ever so lovely heavy weight whisper white cardstock.  I love that stuff like crazy.  Especially when embossed.  It handles the embossing folders so much better.  Look at that texture!  The flowers are my favorite, like always.  They were attached with glue dots and given a basic rhinestone center.  Just right.  Now, about the grateful phrase.  That thinlit will be available for order on September 1st, but since I am a demonstrator I got to get in on the pre-order during August.  Such a fun perk.  So, you can get to it too, soon.

Grateful

I wanted it to be dimensional a bit, so I used glue dots on it too.  I rolled a glue dot up a bit and stuck it on thicker parts of the word.  I ended up using four dots all together and it turned out great.

Have a creative day!

Moana

One Big Meaning and Remarkable You

To get my mind off the heat last night I sat down at my desk and got a little more creative.  It has been a bit since I spent this much time for one project, but to be fair, I didn’t have any idea what I was going to do when I sat down.

One Big Meaning and Remarkable You

I used a whole sheet of tip top taupe to make the bag.  Just simple scoring there, nothing fancy.  I did forget to stamp before I scored, ooops.  So, my stamping does have little crease marks on the edges.  Can’t be perfect.

One Big Meaning and Remarkable You

The base has two layers, tip top taupe and a stamped layer of very vanilla.  I brought out the aqua painter again, oh how I love that tool.  Just using the ink from the stamp gives such a soft look.

One Big Meaning and Remarkable You


The oval framelits were put to work again for the focal point.  What a lovely flower.  I brought in tip top taupe into the flower and water colored it into the old olive.  I can tell the color difference, but I can also see a hint of lavender forming.  Interesting.  Crystal effects really made a difference in the look of the flower.  I could really use that stuff way too much.  A final stamped sentiment layered with some circle punches finished the front.

A touch of dotted lace trim was put to the side and also used to make a simple handle for the bag.  It really turned out beautiful.

Have a creative day!

Moana

Irresistible Beautiful Bunch

Some days the creativity flows effortlessly and some days it would be easier to birth an elephant.  That would be today.  I had to walk away two different times before I called it done.

Irresistible Beautiful Bunch

The color me irresistible designer series paper is so very cool.  I love that I get to choose which colors I want to create as well as others that are already done and full of interest, especially this black paper.  Isn’t it so elegant?

Irresistible Beautiful Bunch

These flowers just about took me down, they still just might.  I was determined to use these new pearl embellishments and picked this flower stamp and coordinating punch to frame them.  Well, they turned out too light with my method of water coloring and I didn’t like the boarder from the punch, even though it was small, it made the flower just too light.  I did more painting and added black ink in too.  Just a bit, but it is there.  Tried curling the flowers more, and then just about tore them up.

Irresistible Beautiful Bunch


I just put them in place and grabbed the ribbon.  I wasn’t going to use a ribbon, but a sentiment layered on tags.  When I gave it a try, I decided it wasn’t so horrible after all.  I am sure there could have been other things to help, but I just had to call it and walk away.  Either way, I really don’t hate it anymore.

Have a creative day!

Moana