Floral Frenzy

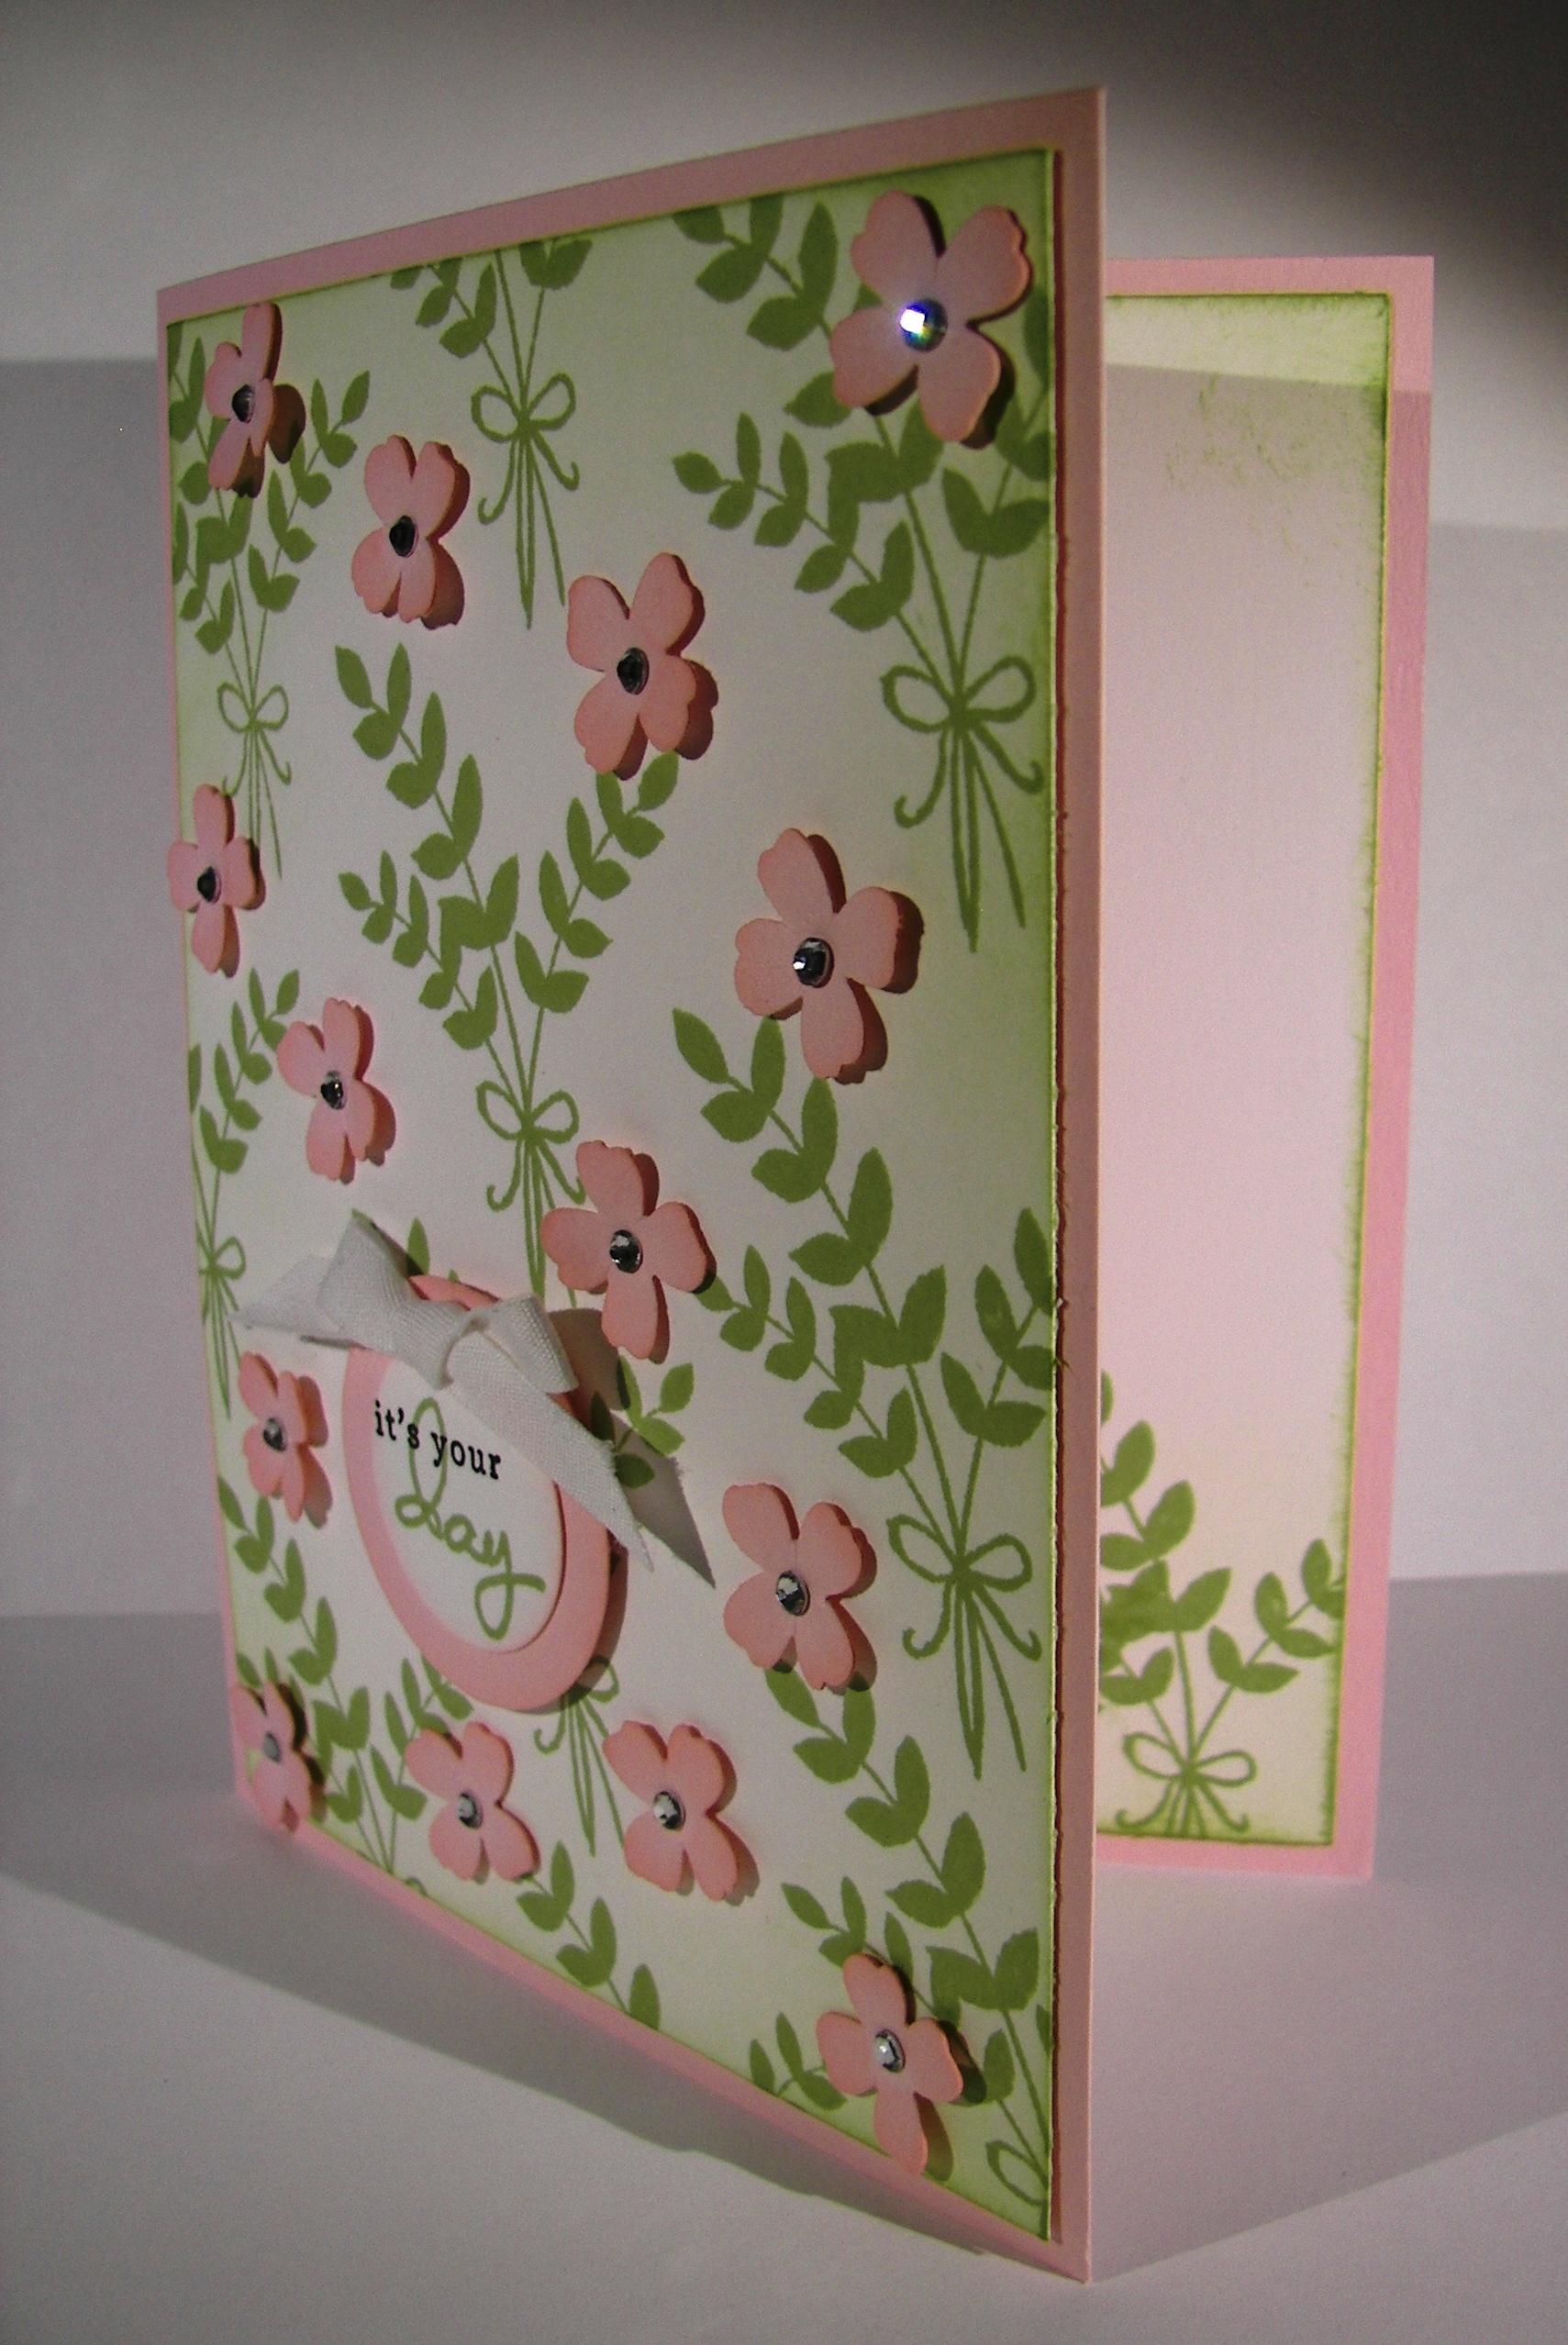
After a huge workshop I usually just take a break from my desk, but yesterday was different.  I got back home and found myself drawn into a project that was clean and full of floral punches.  No stamping at all.

Floral Frenzy

I think I just needed to make something in a calm setting away from the frenzy.  It can get a bit wild with too many people, especially with new stampers.  I think it is time to split the group.  We will have to see. 

Floral Frenzy

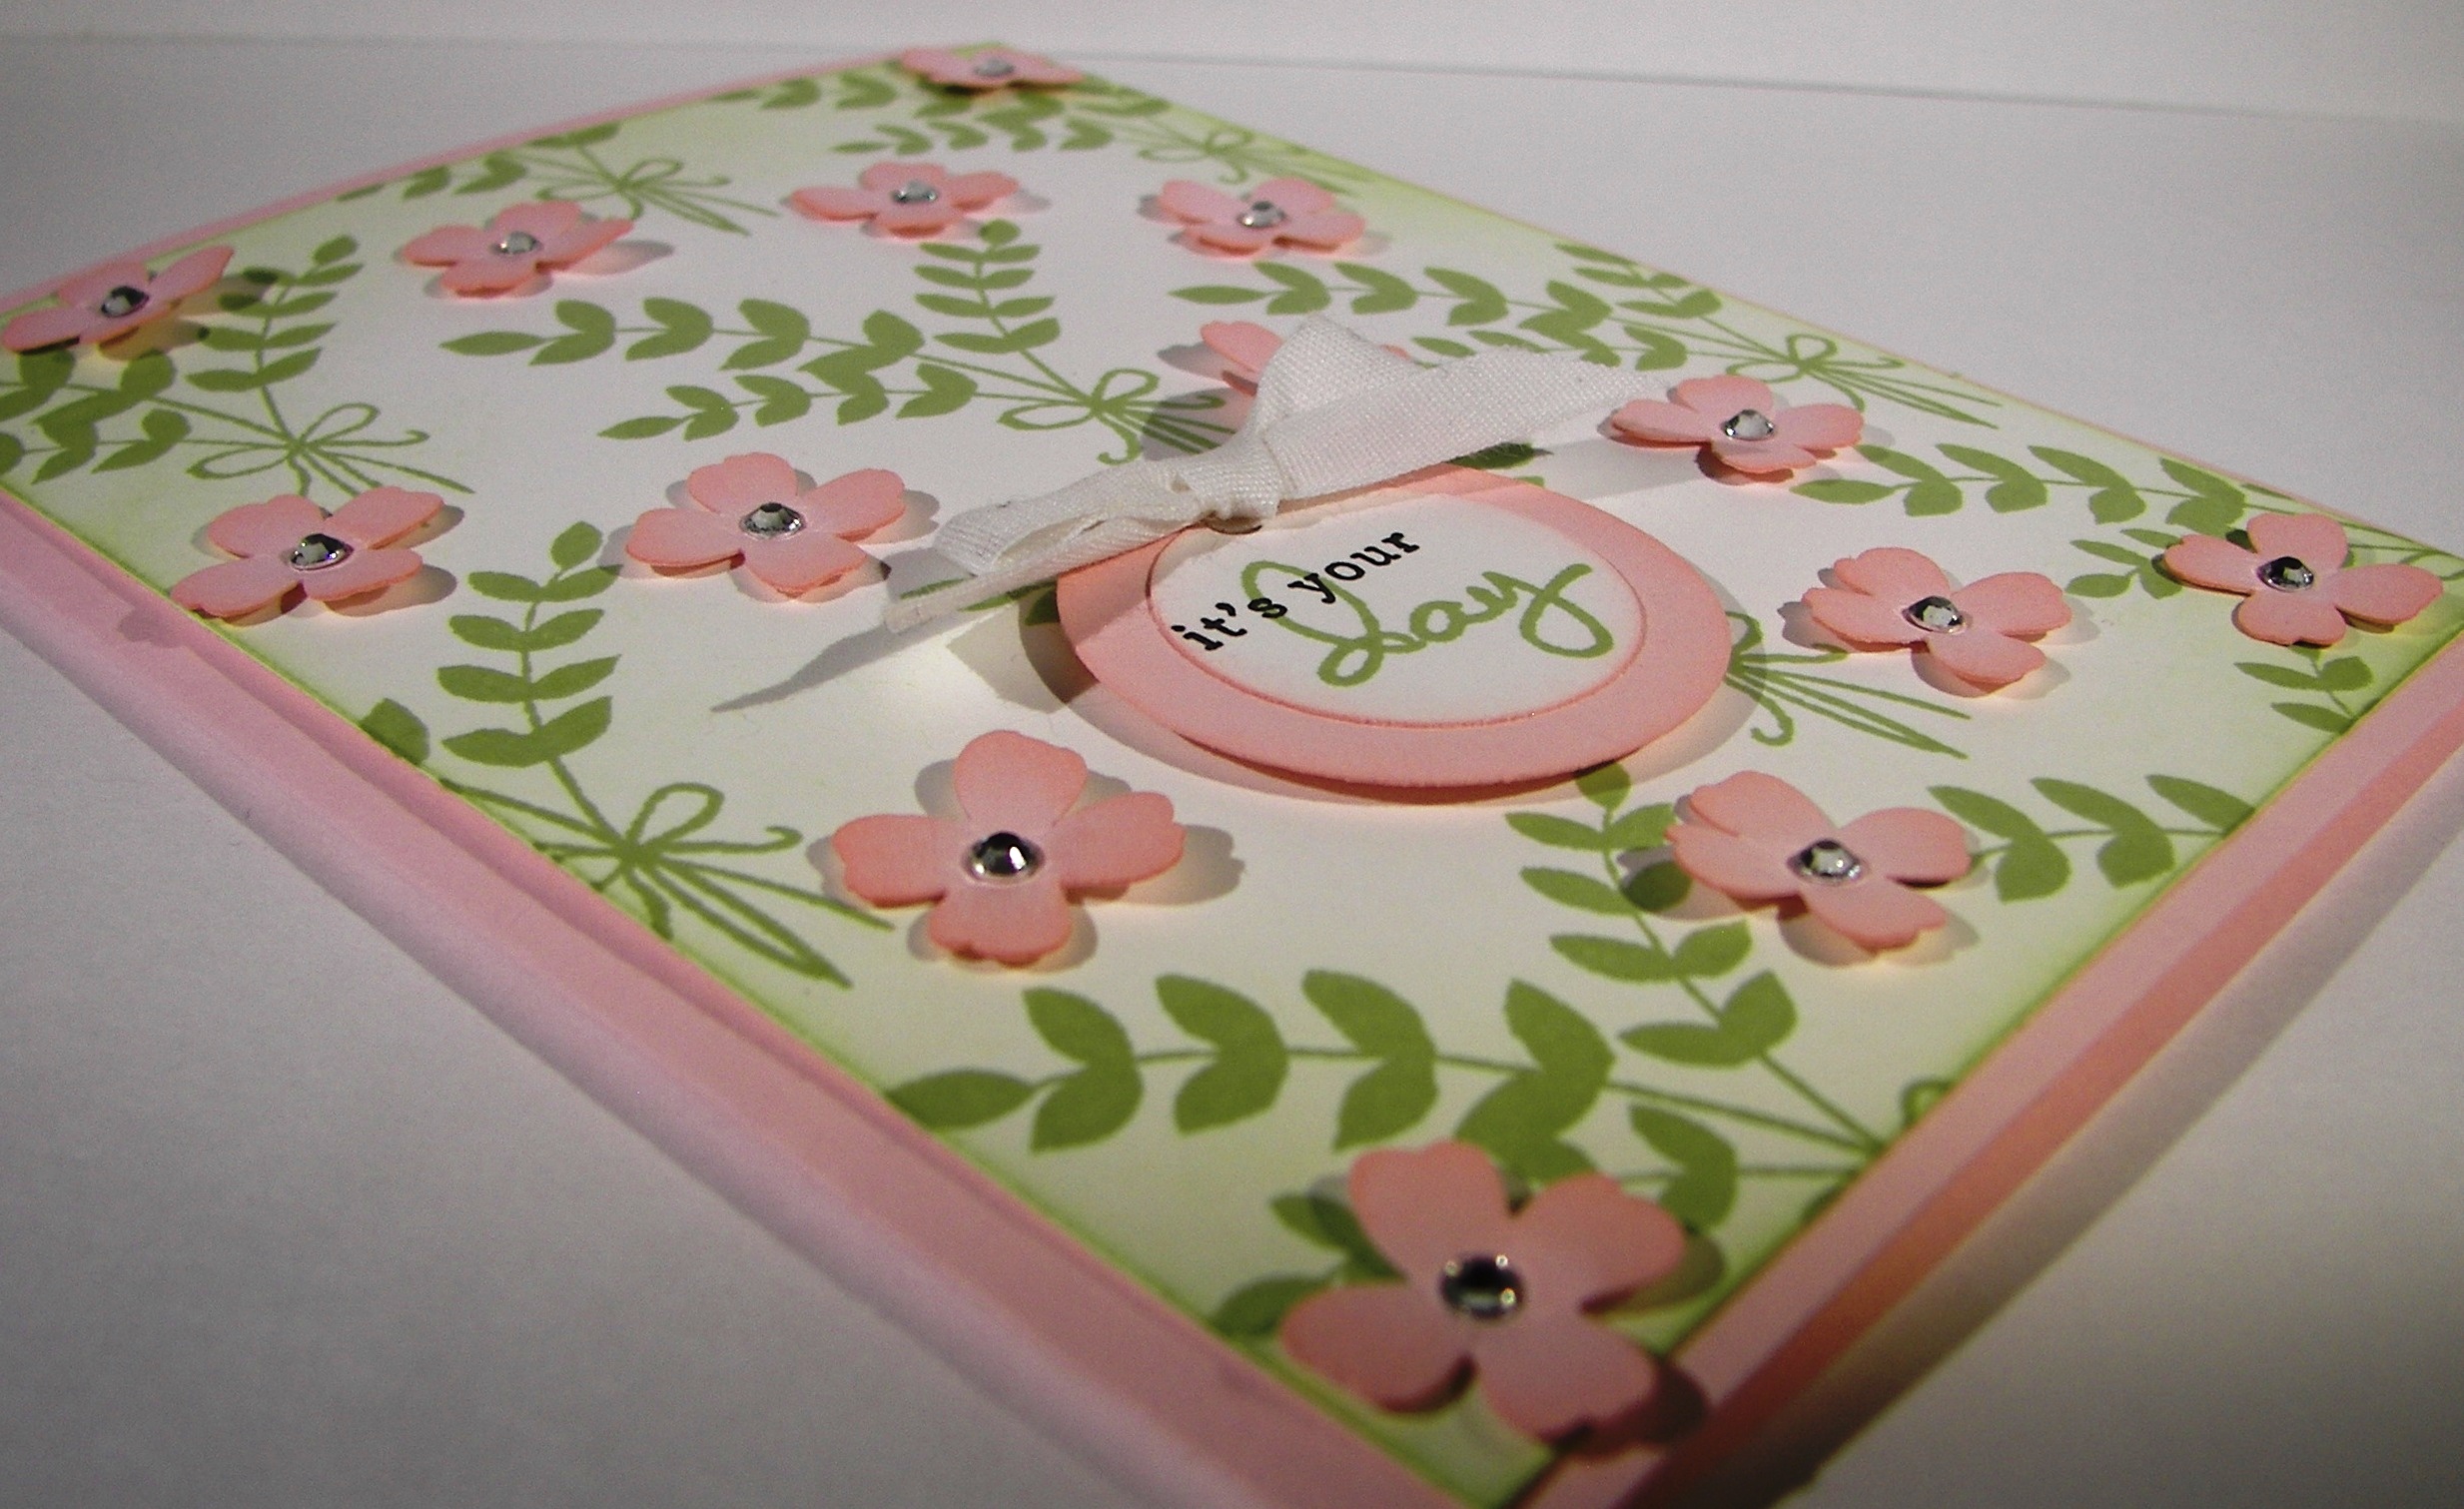
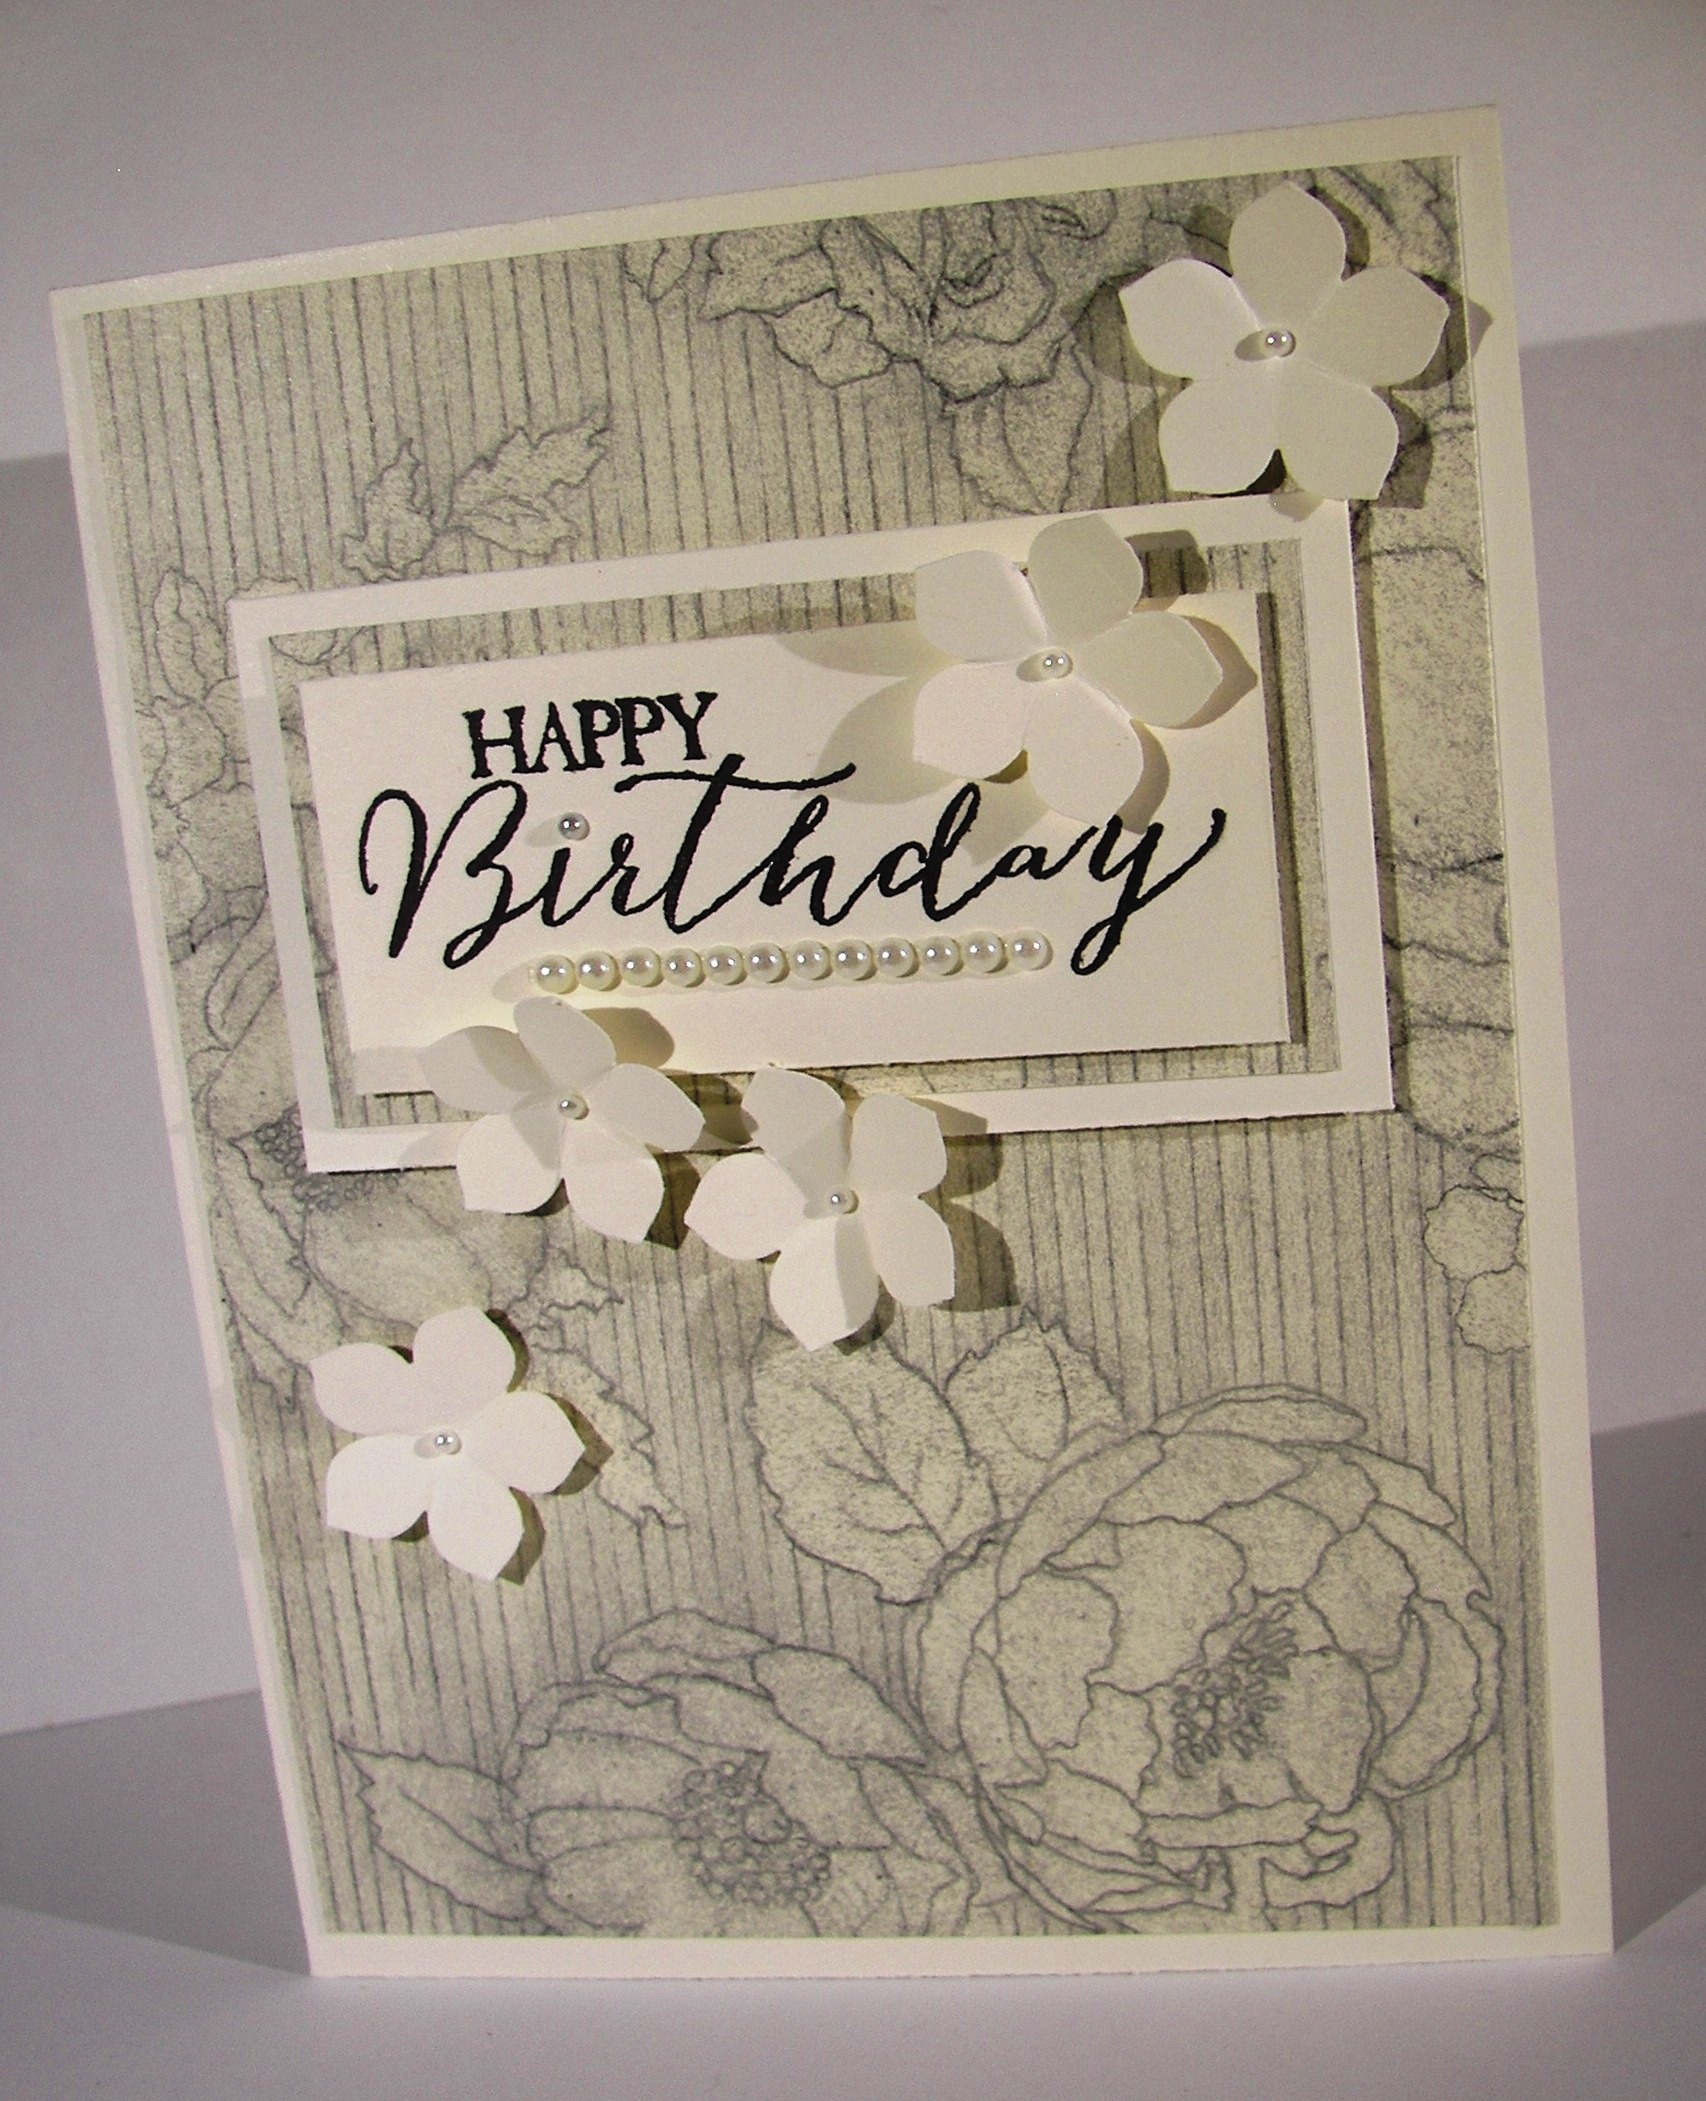
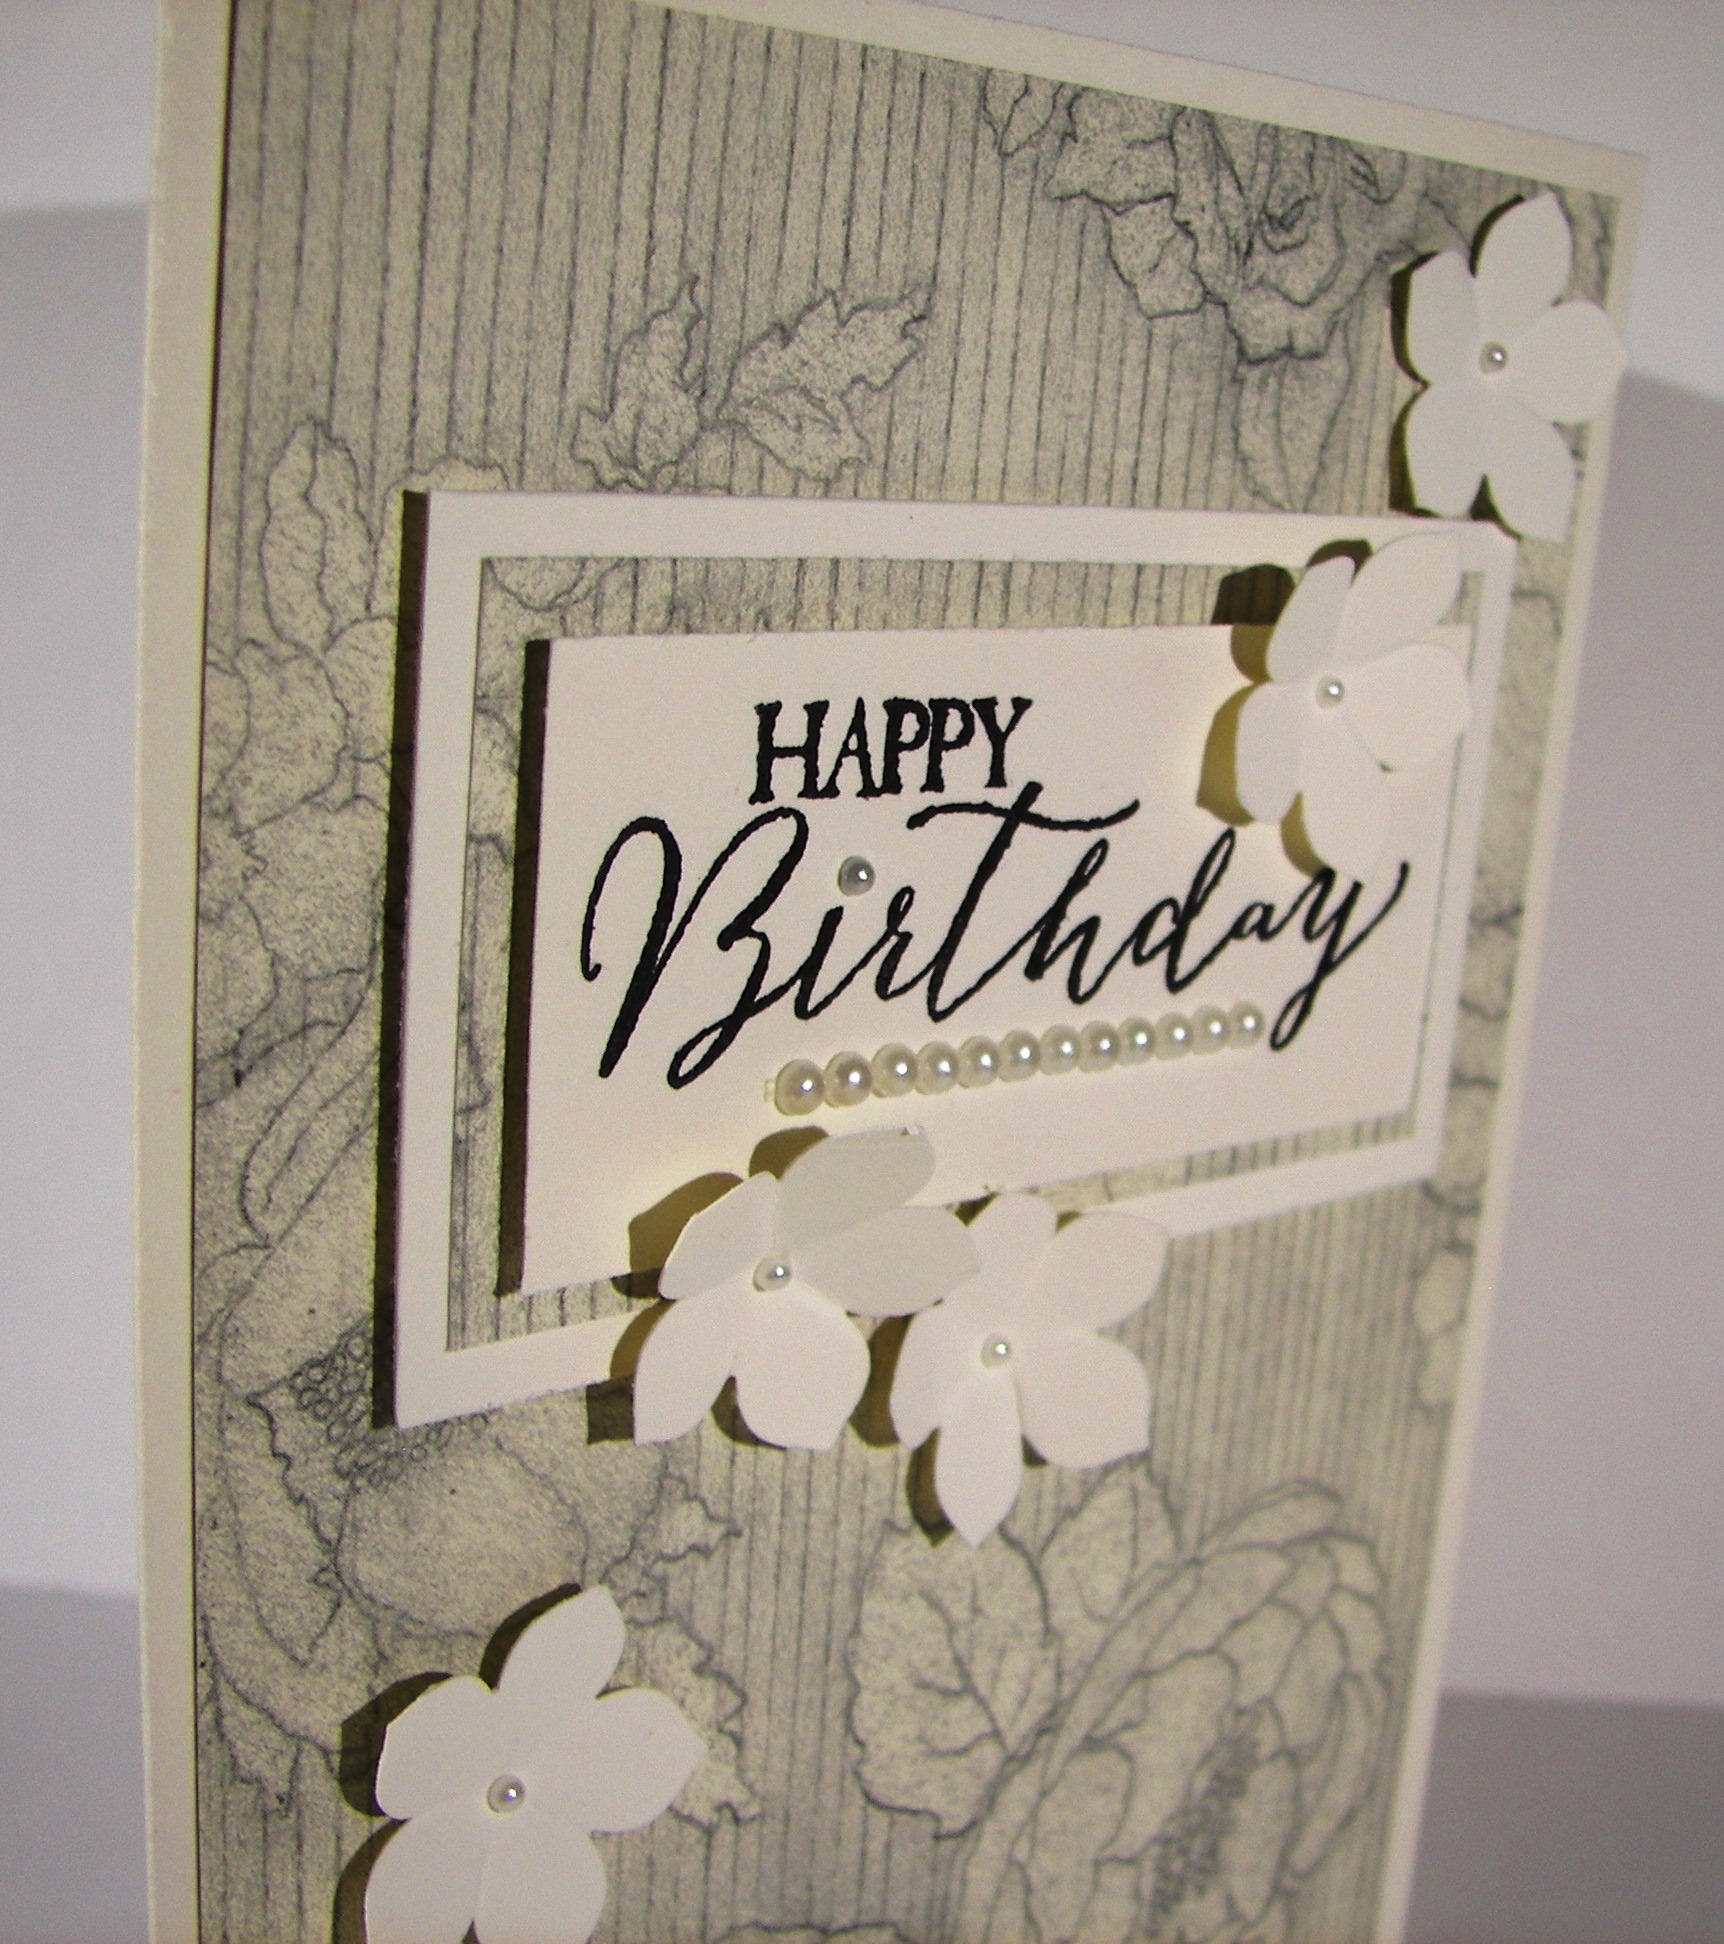
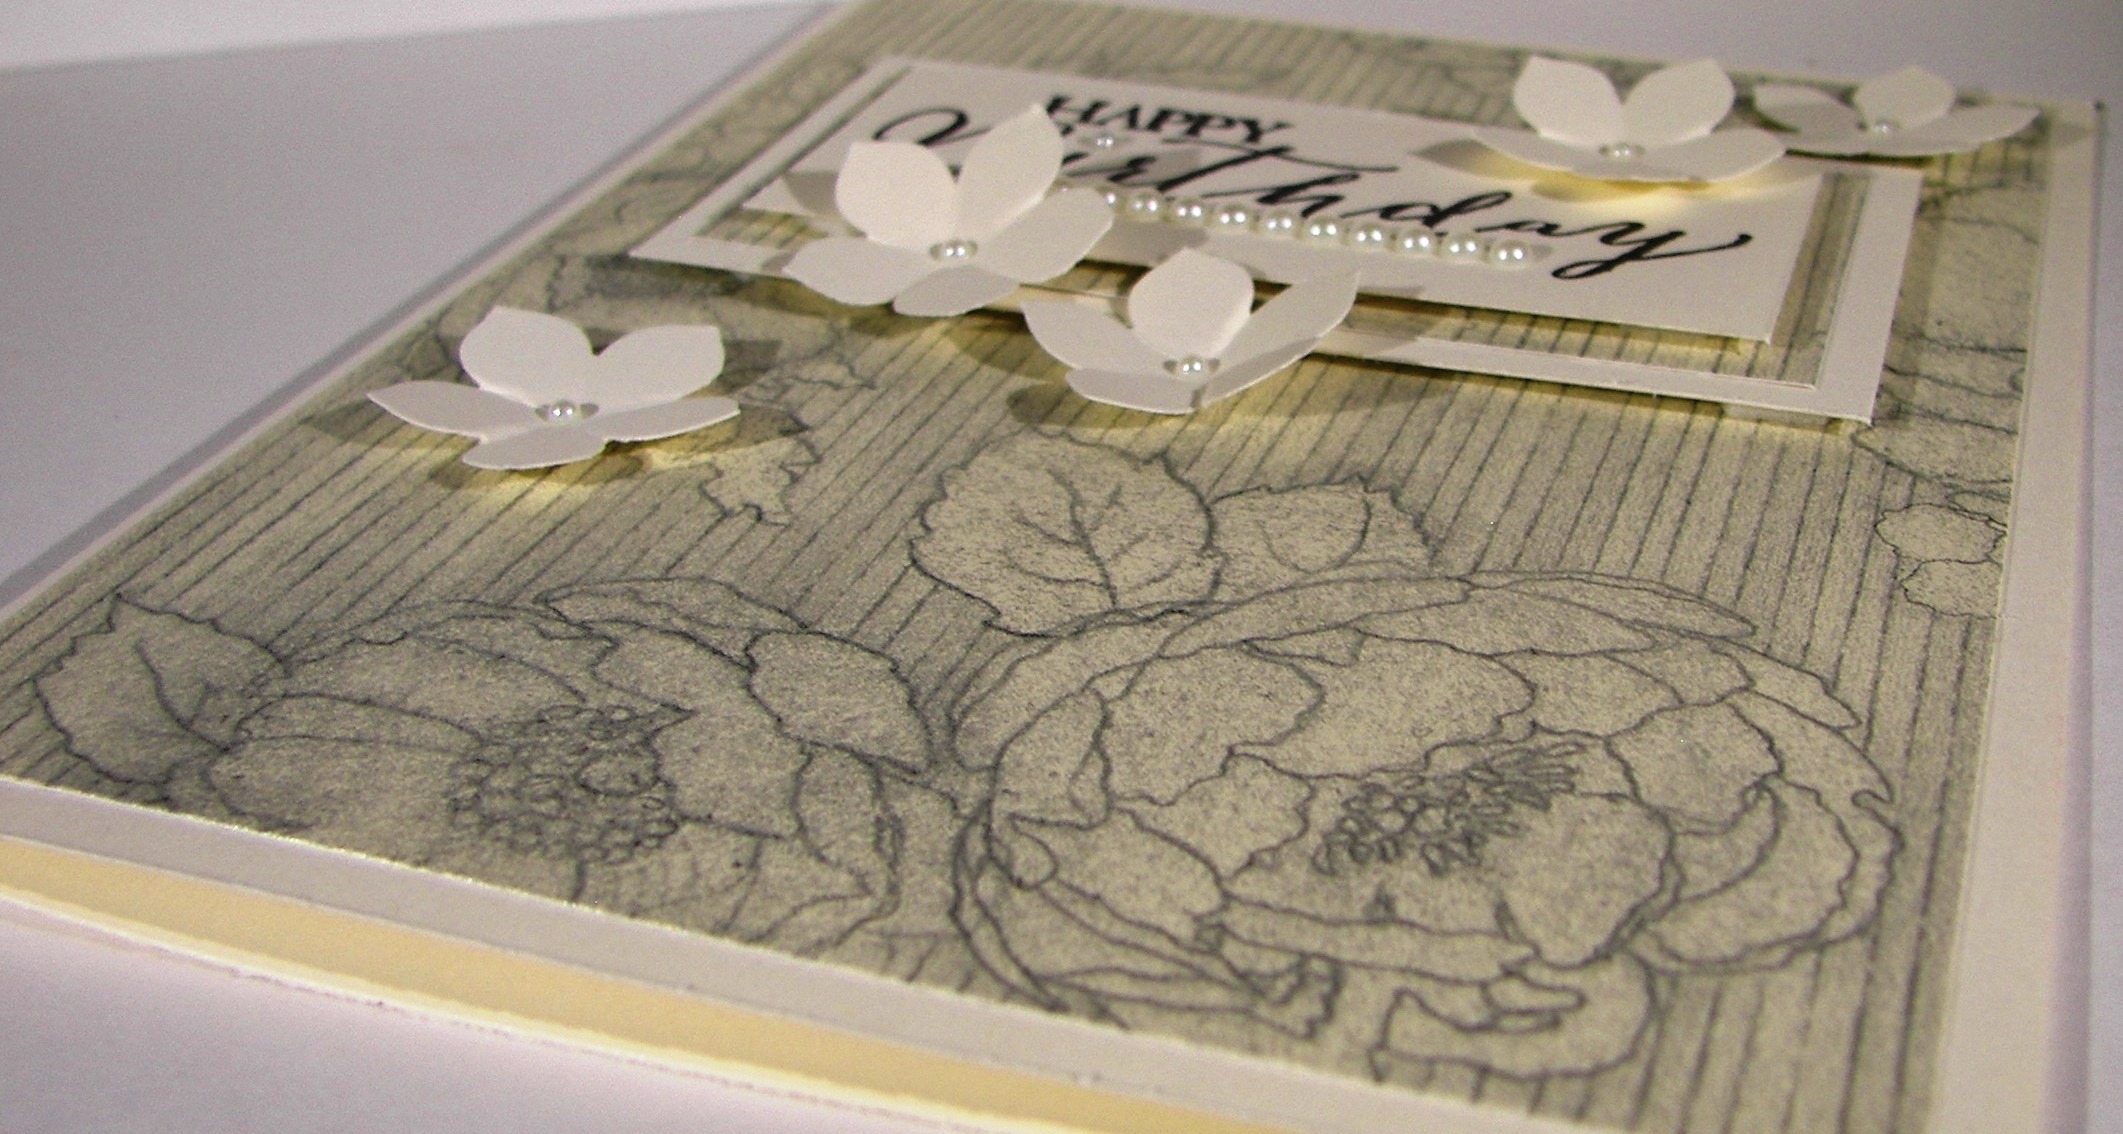
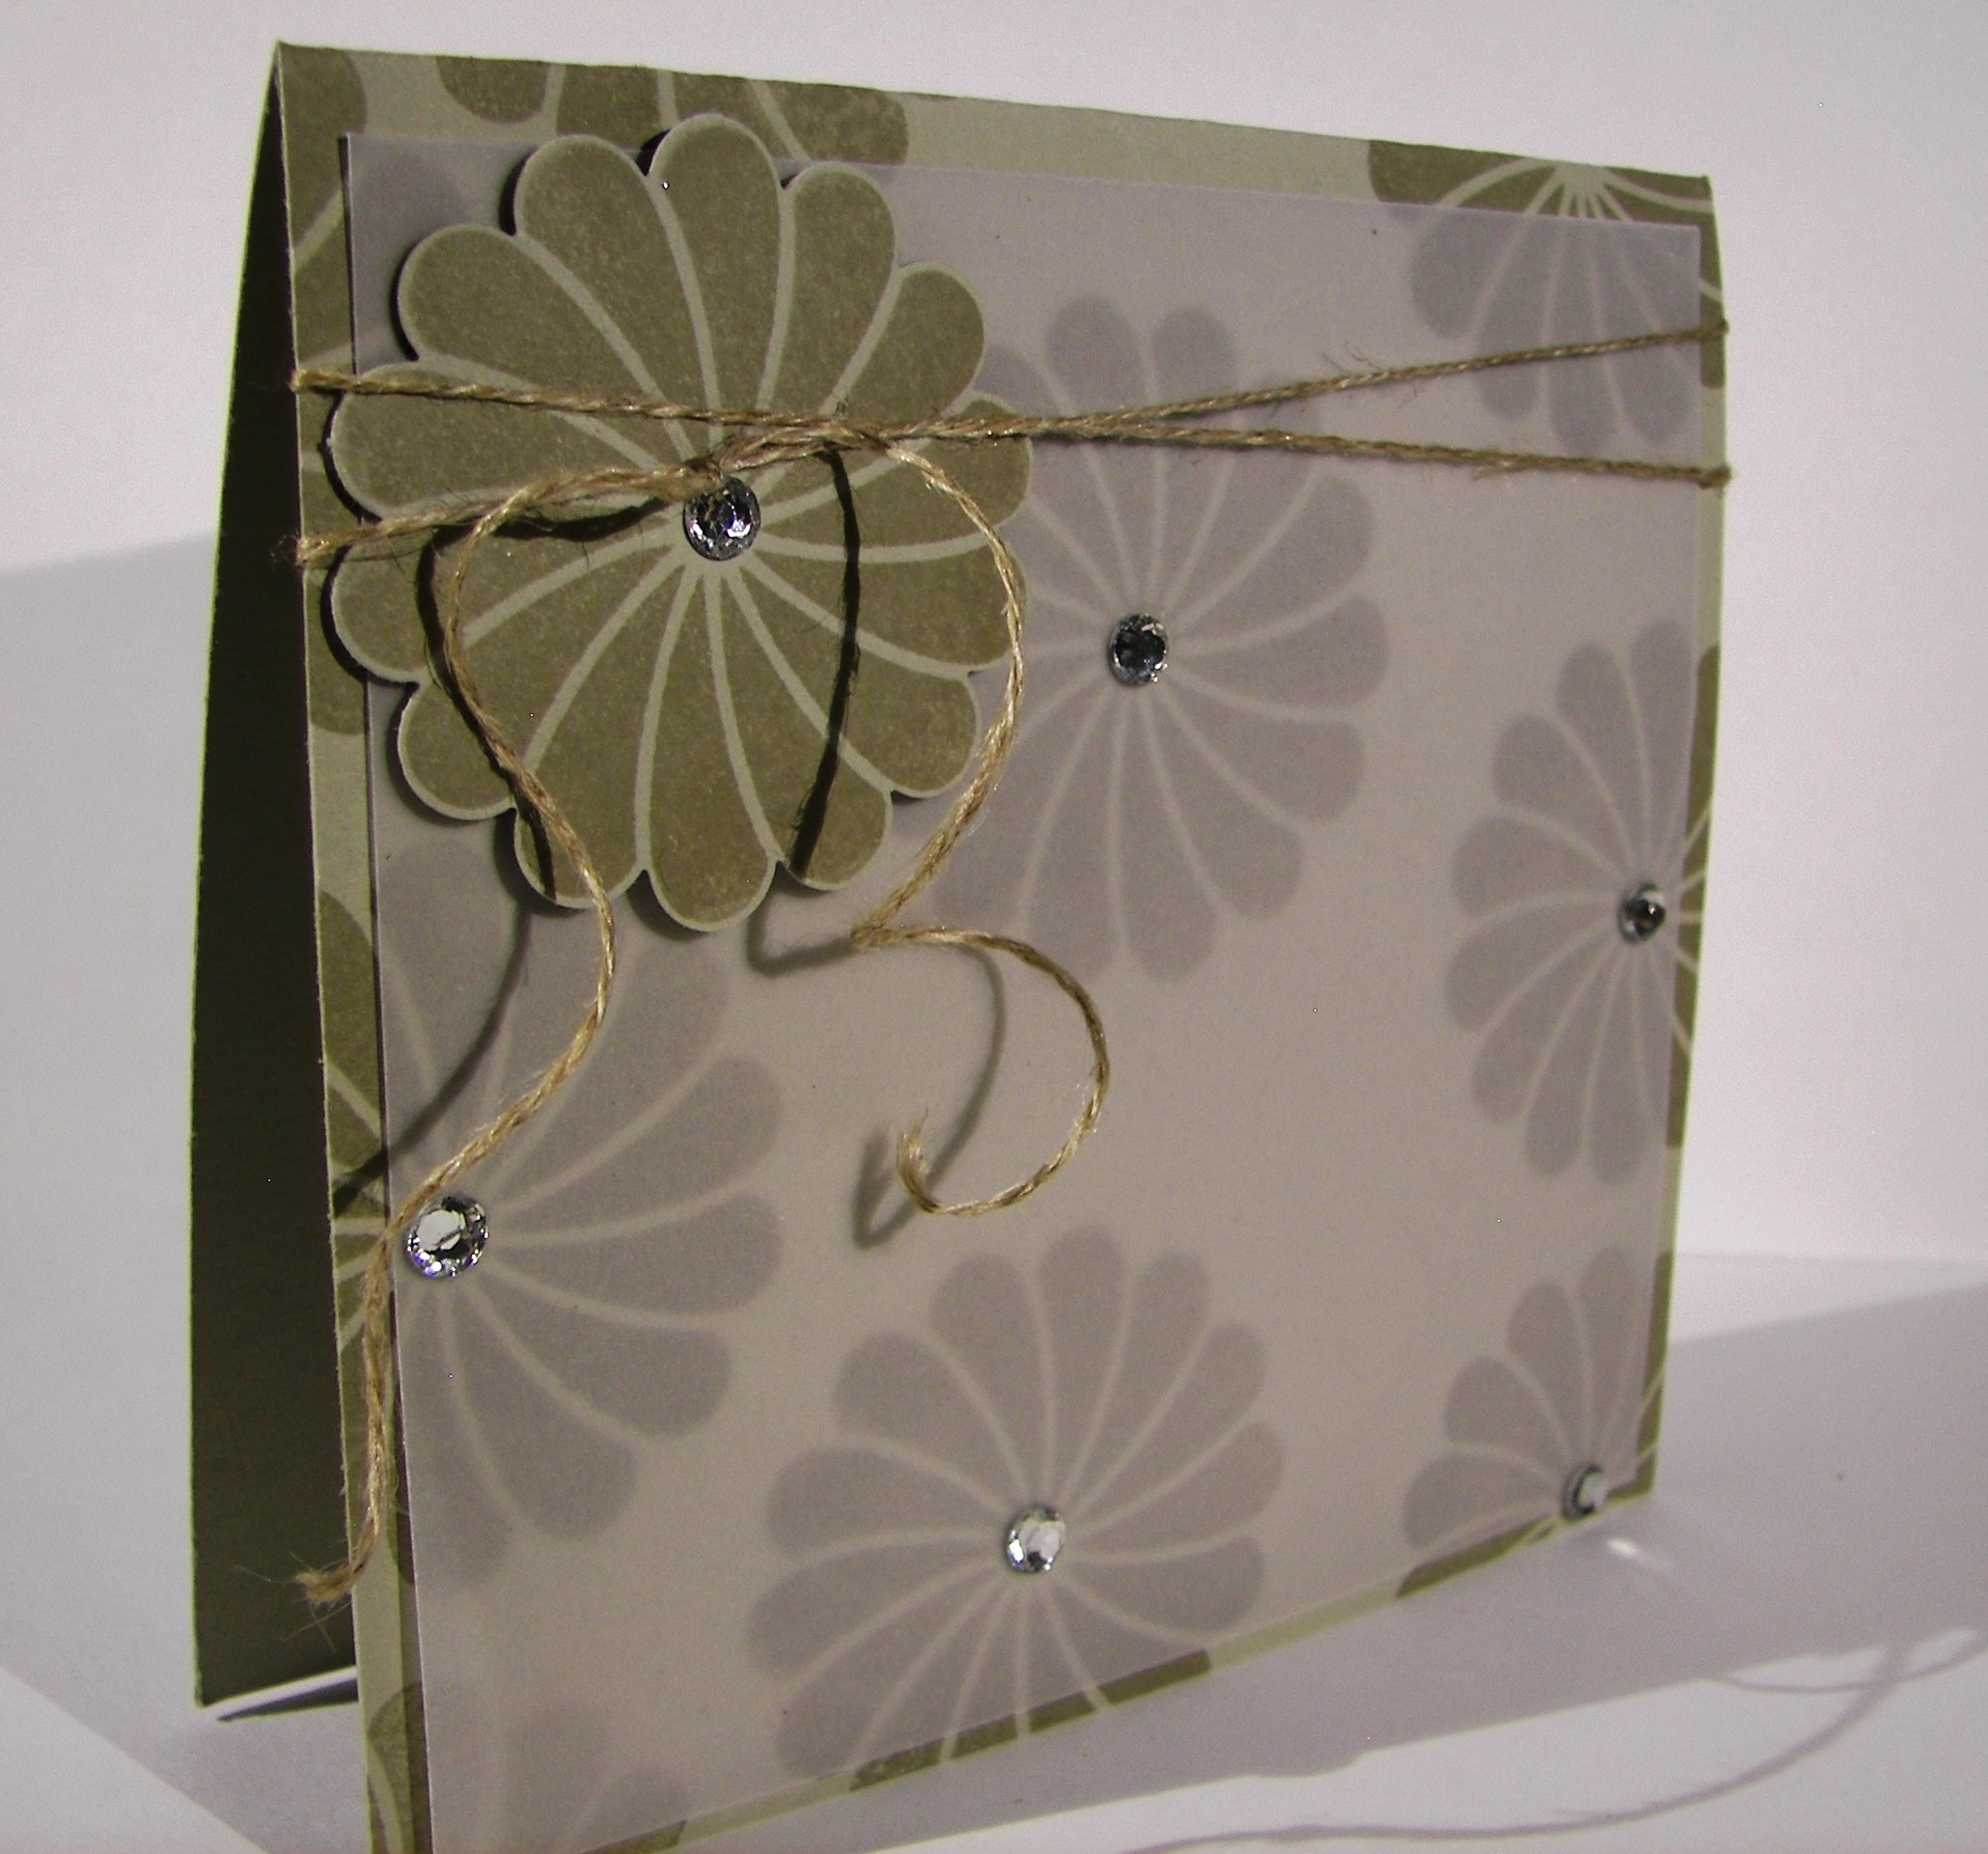
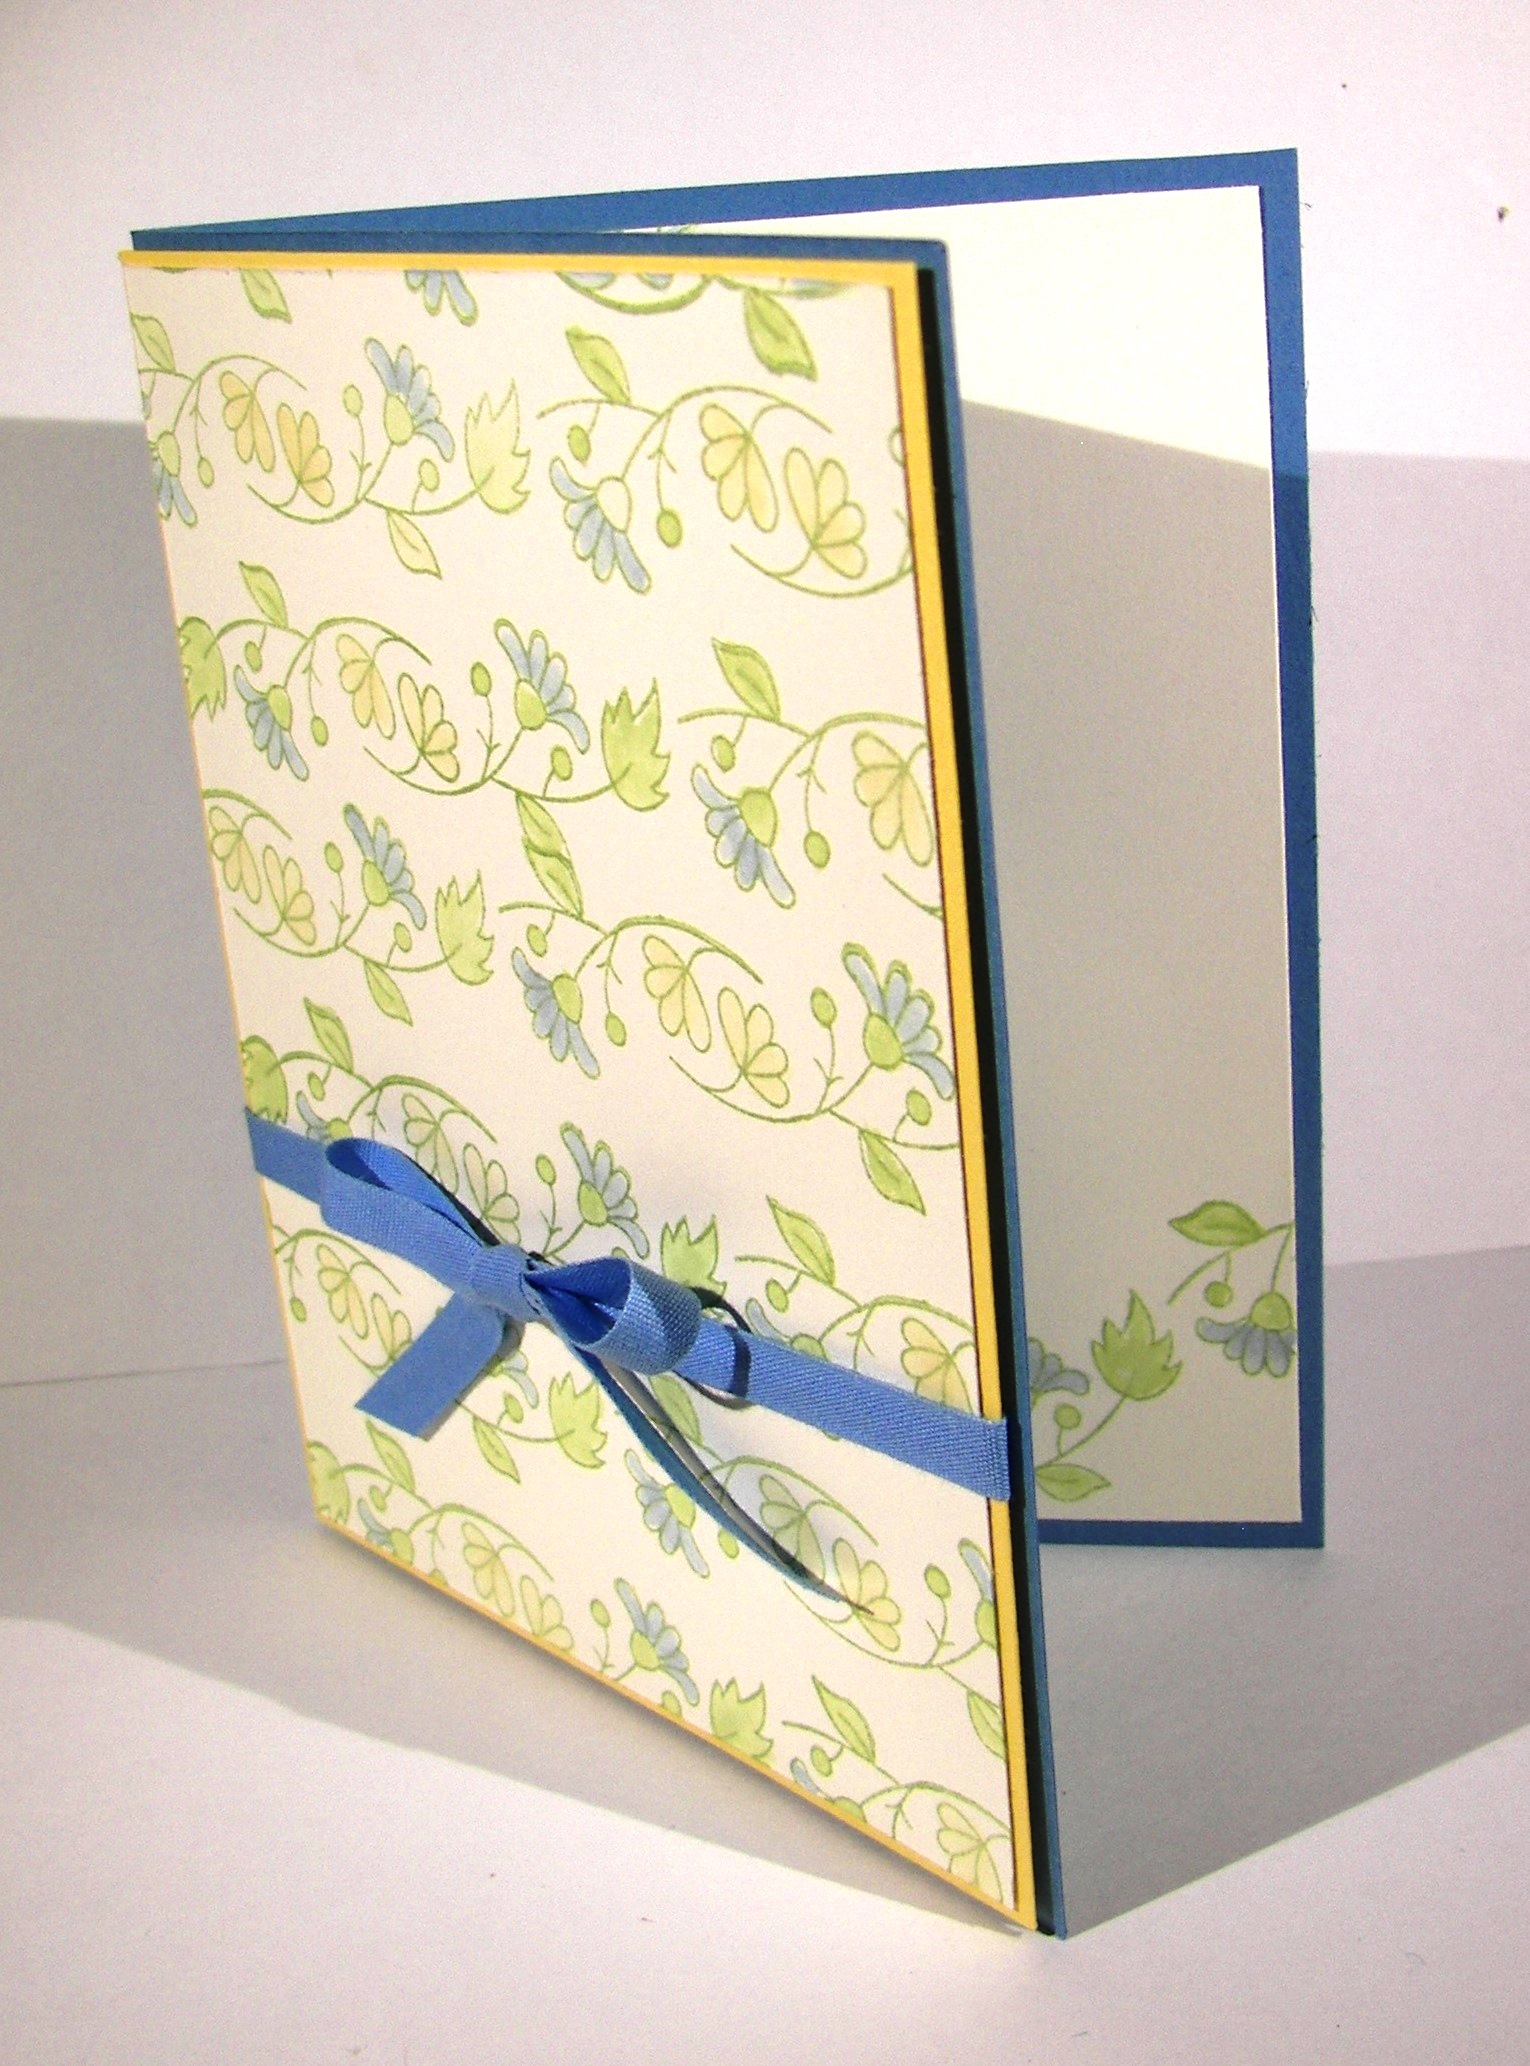
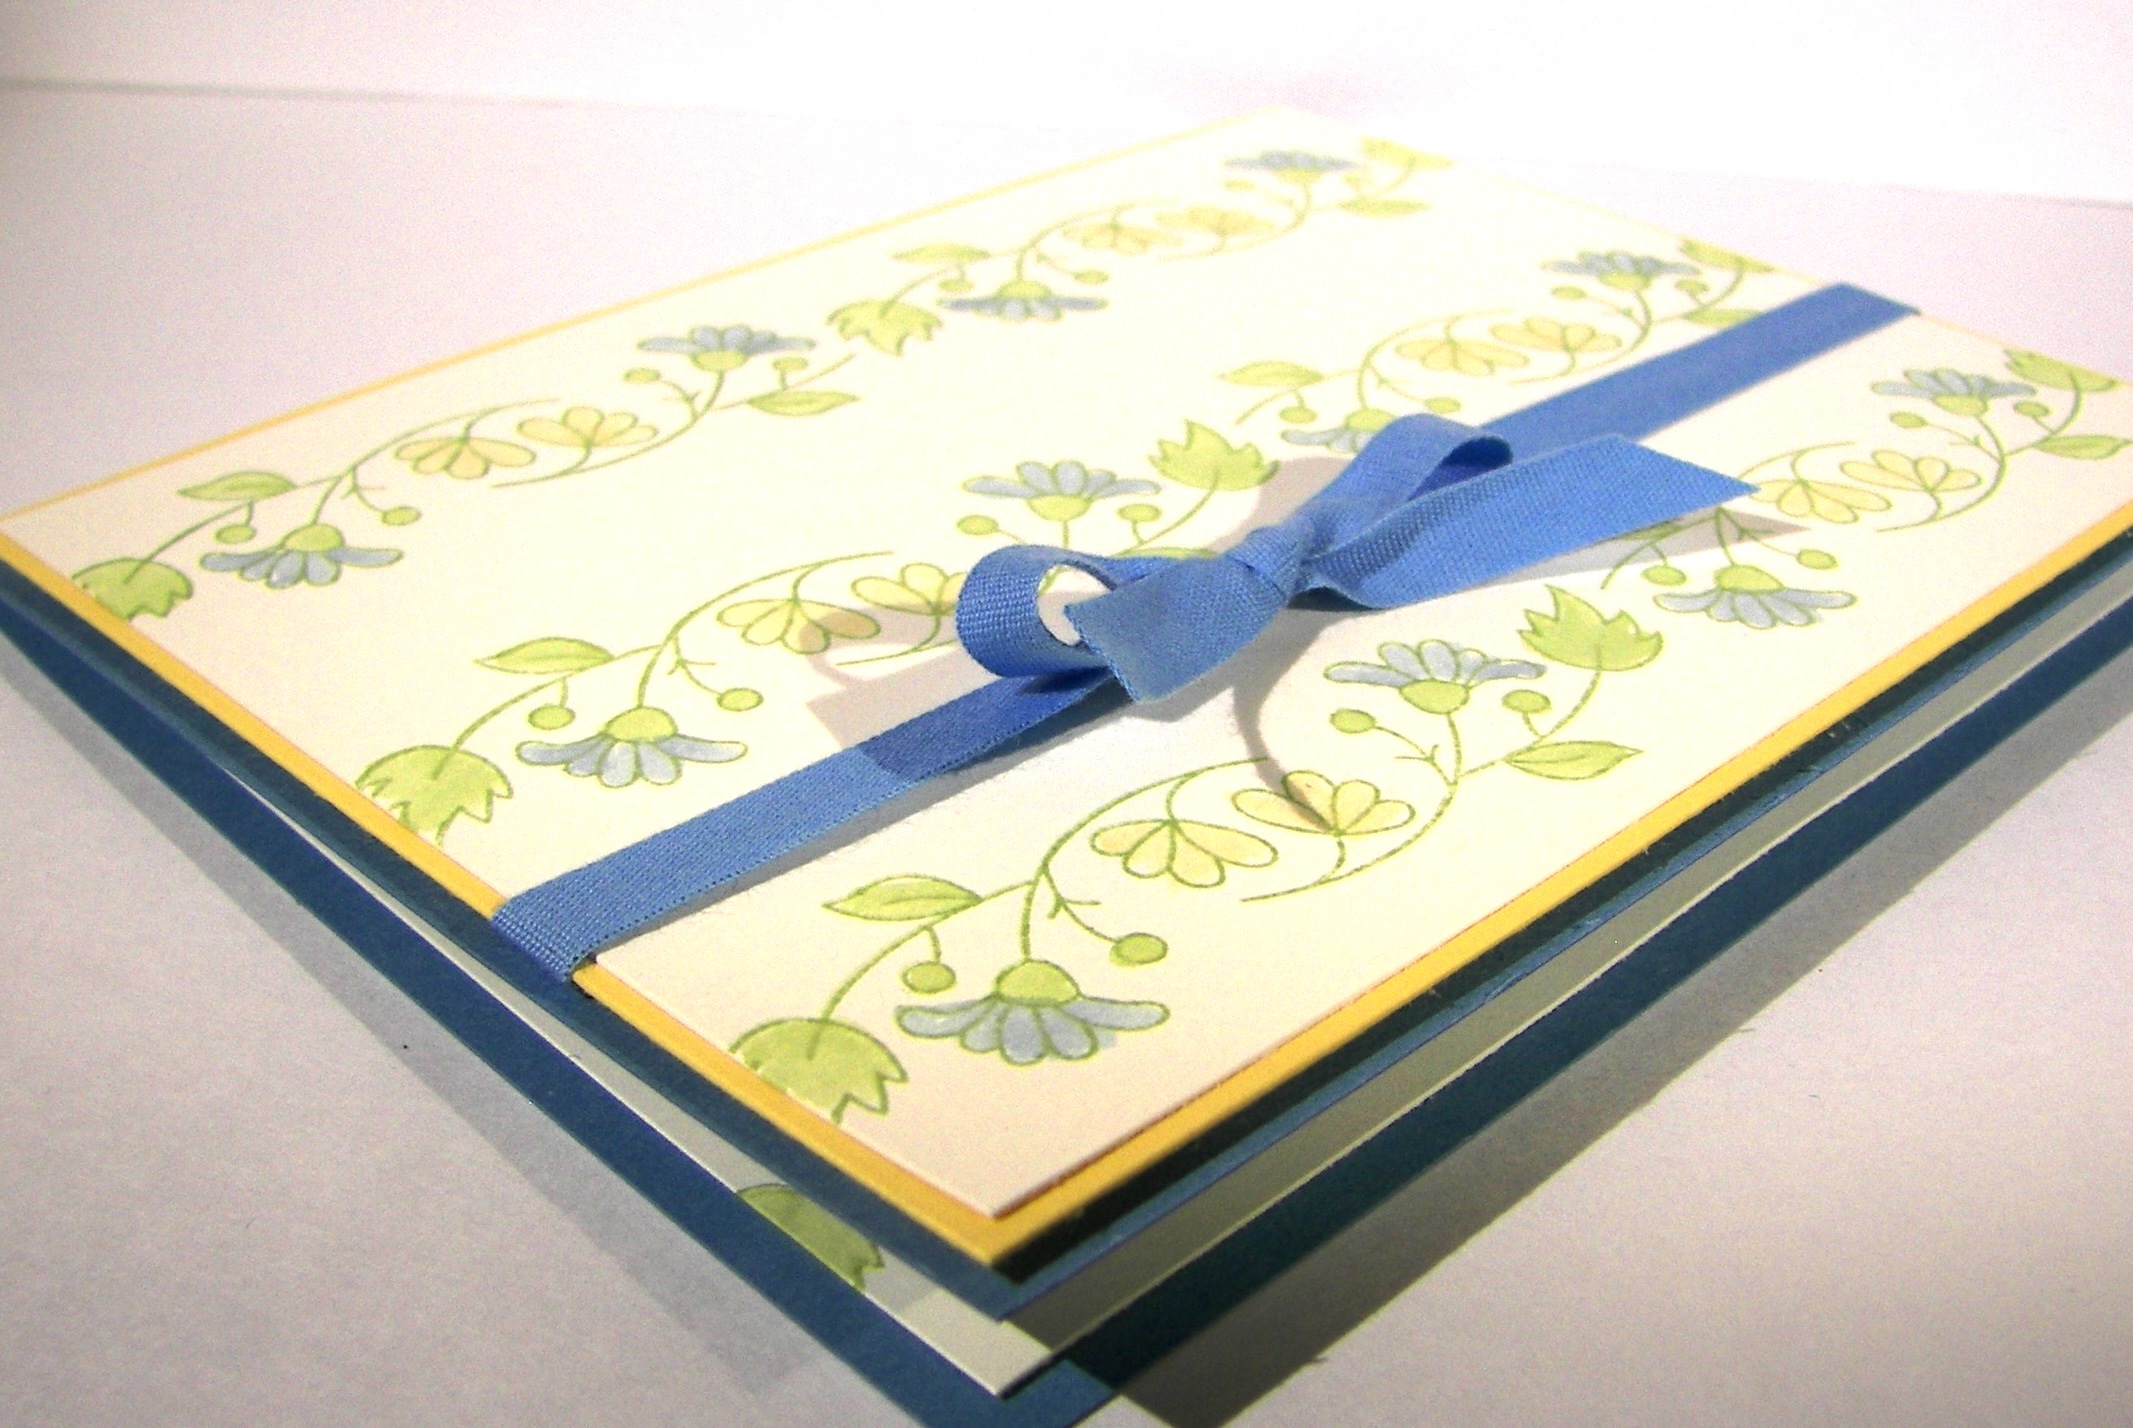
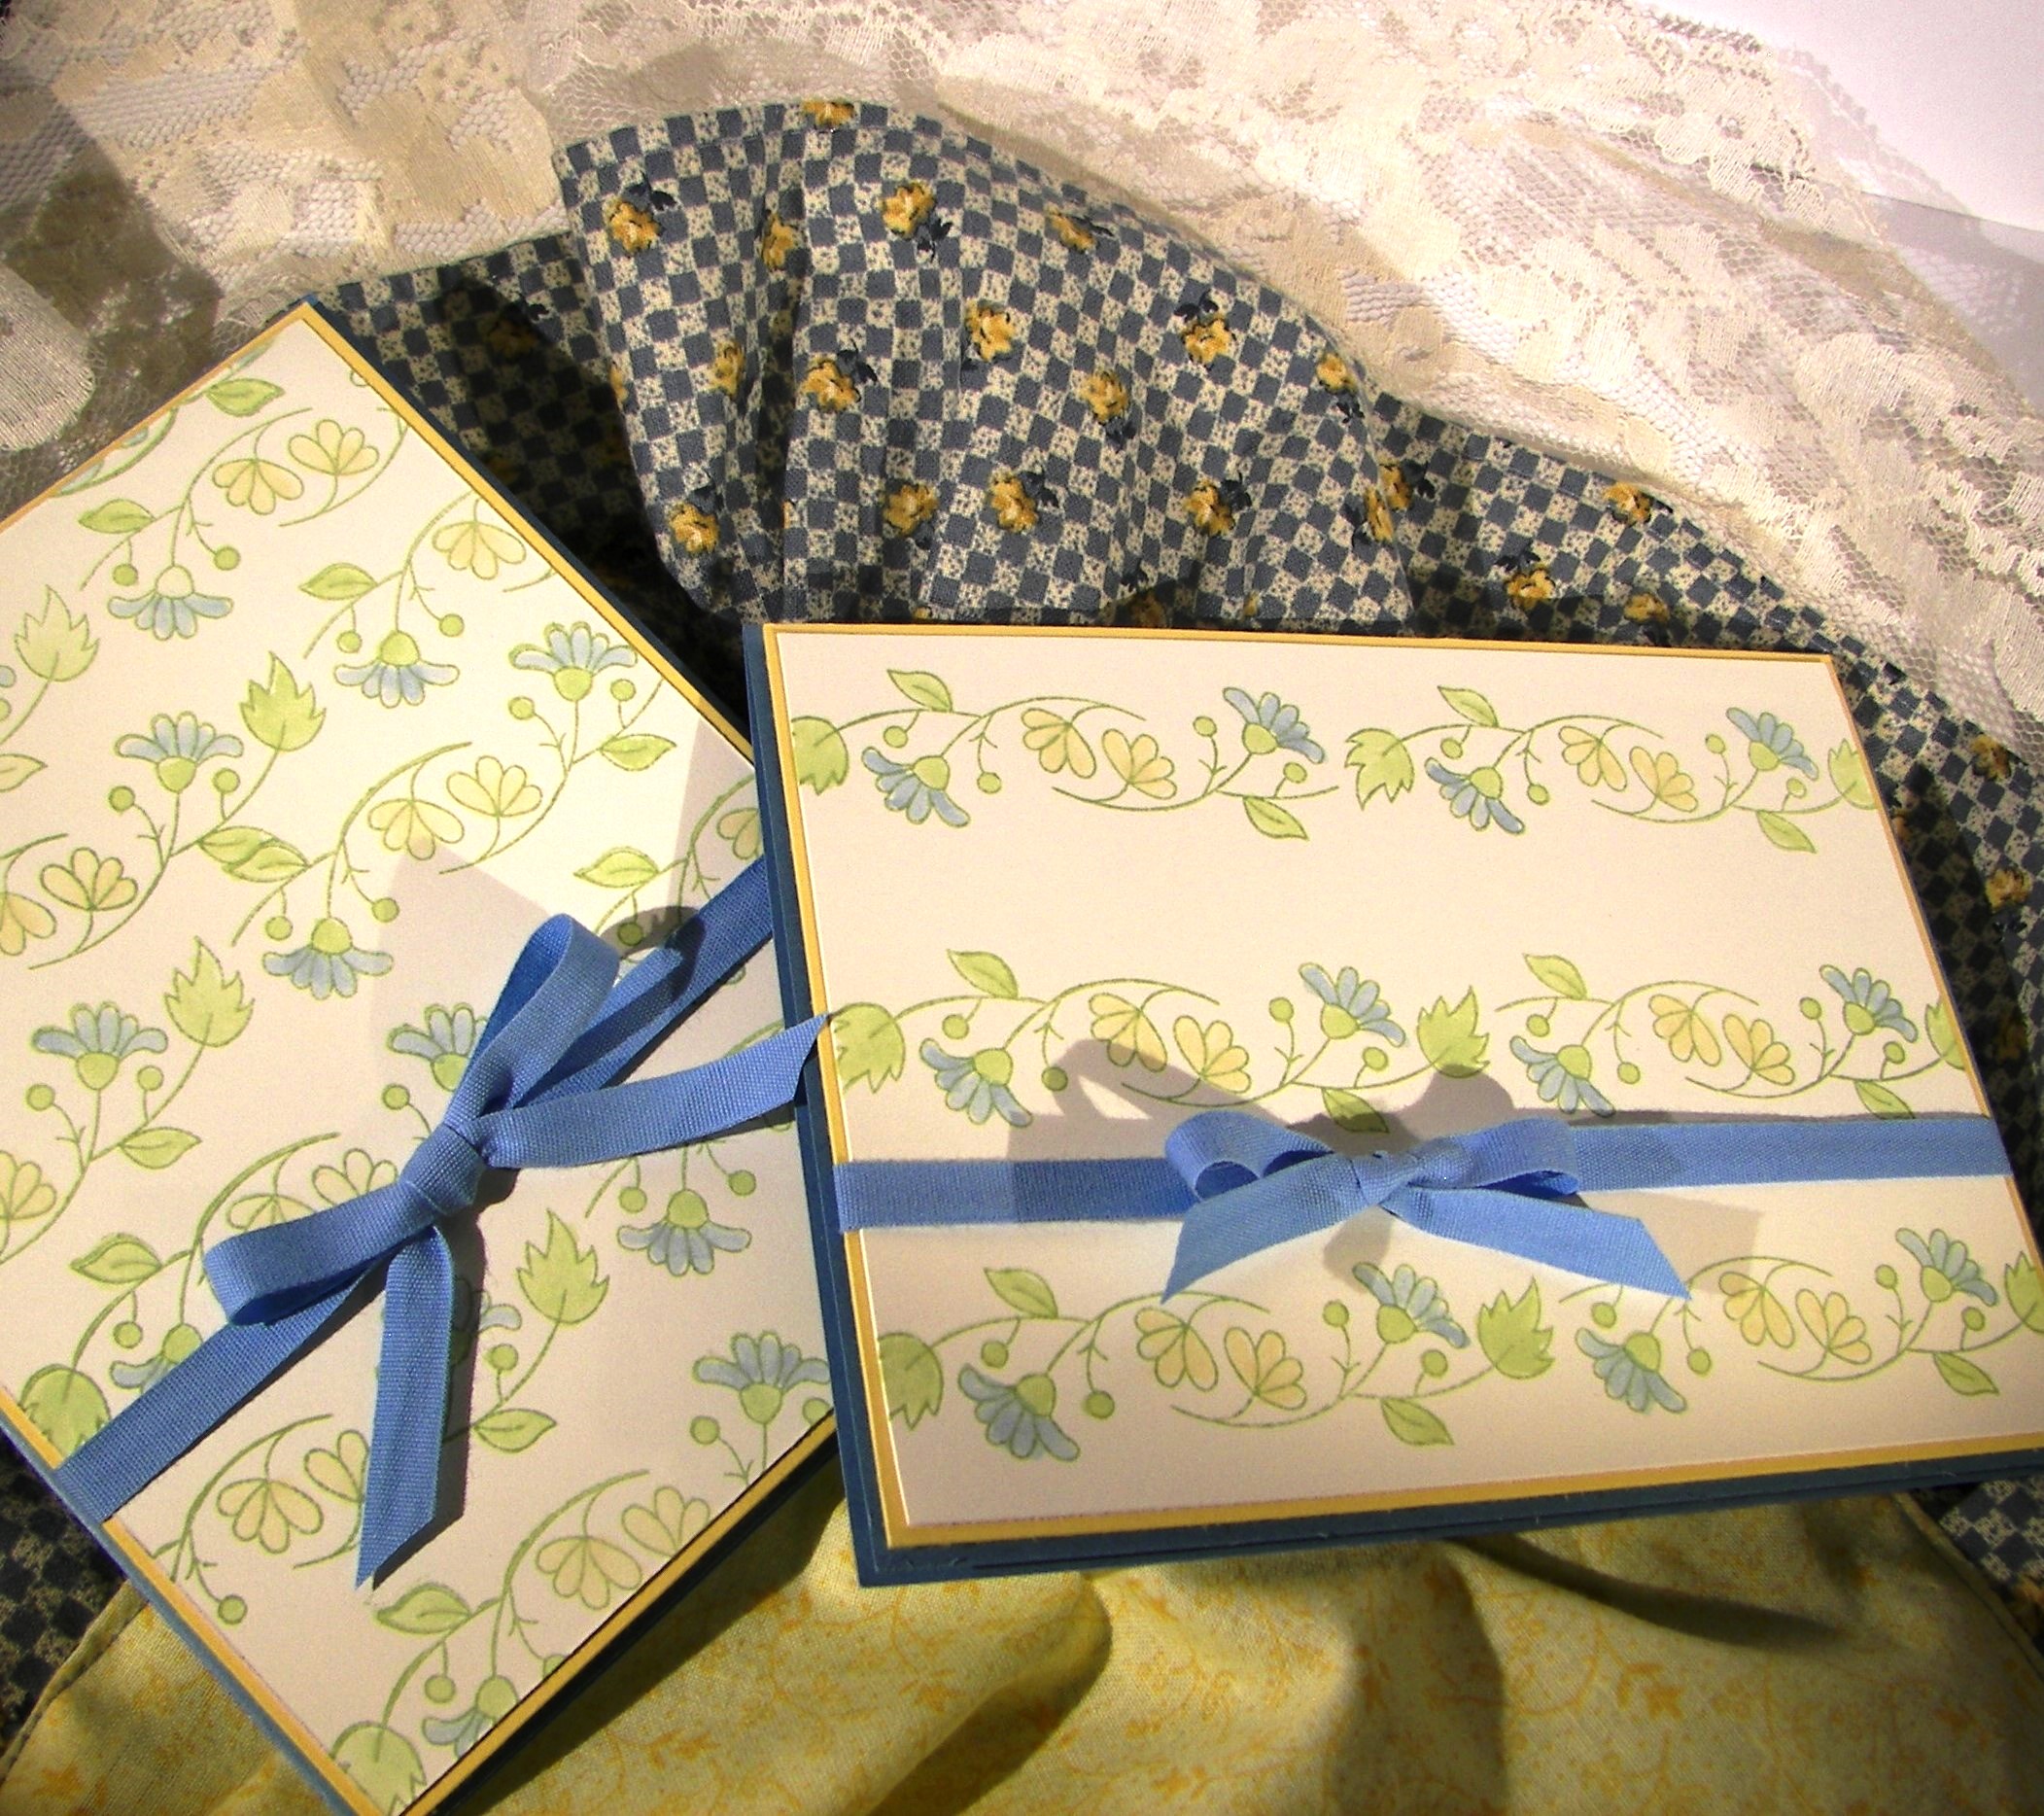
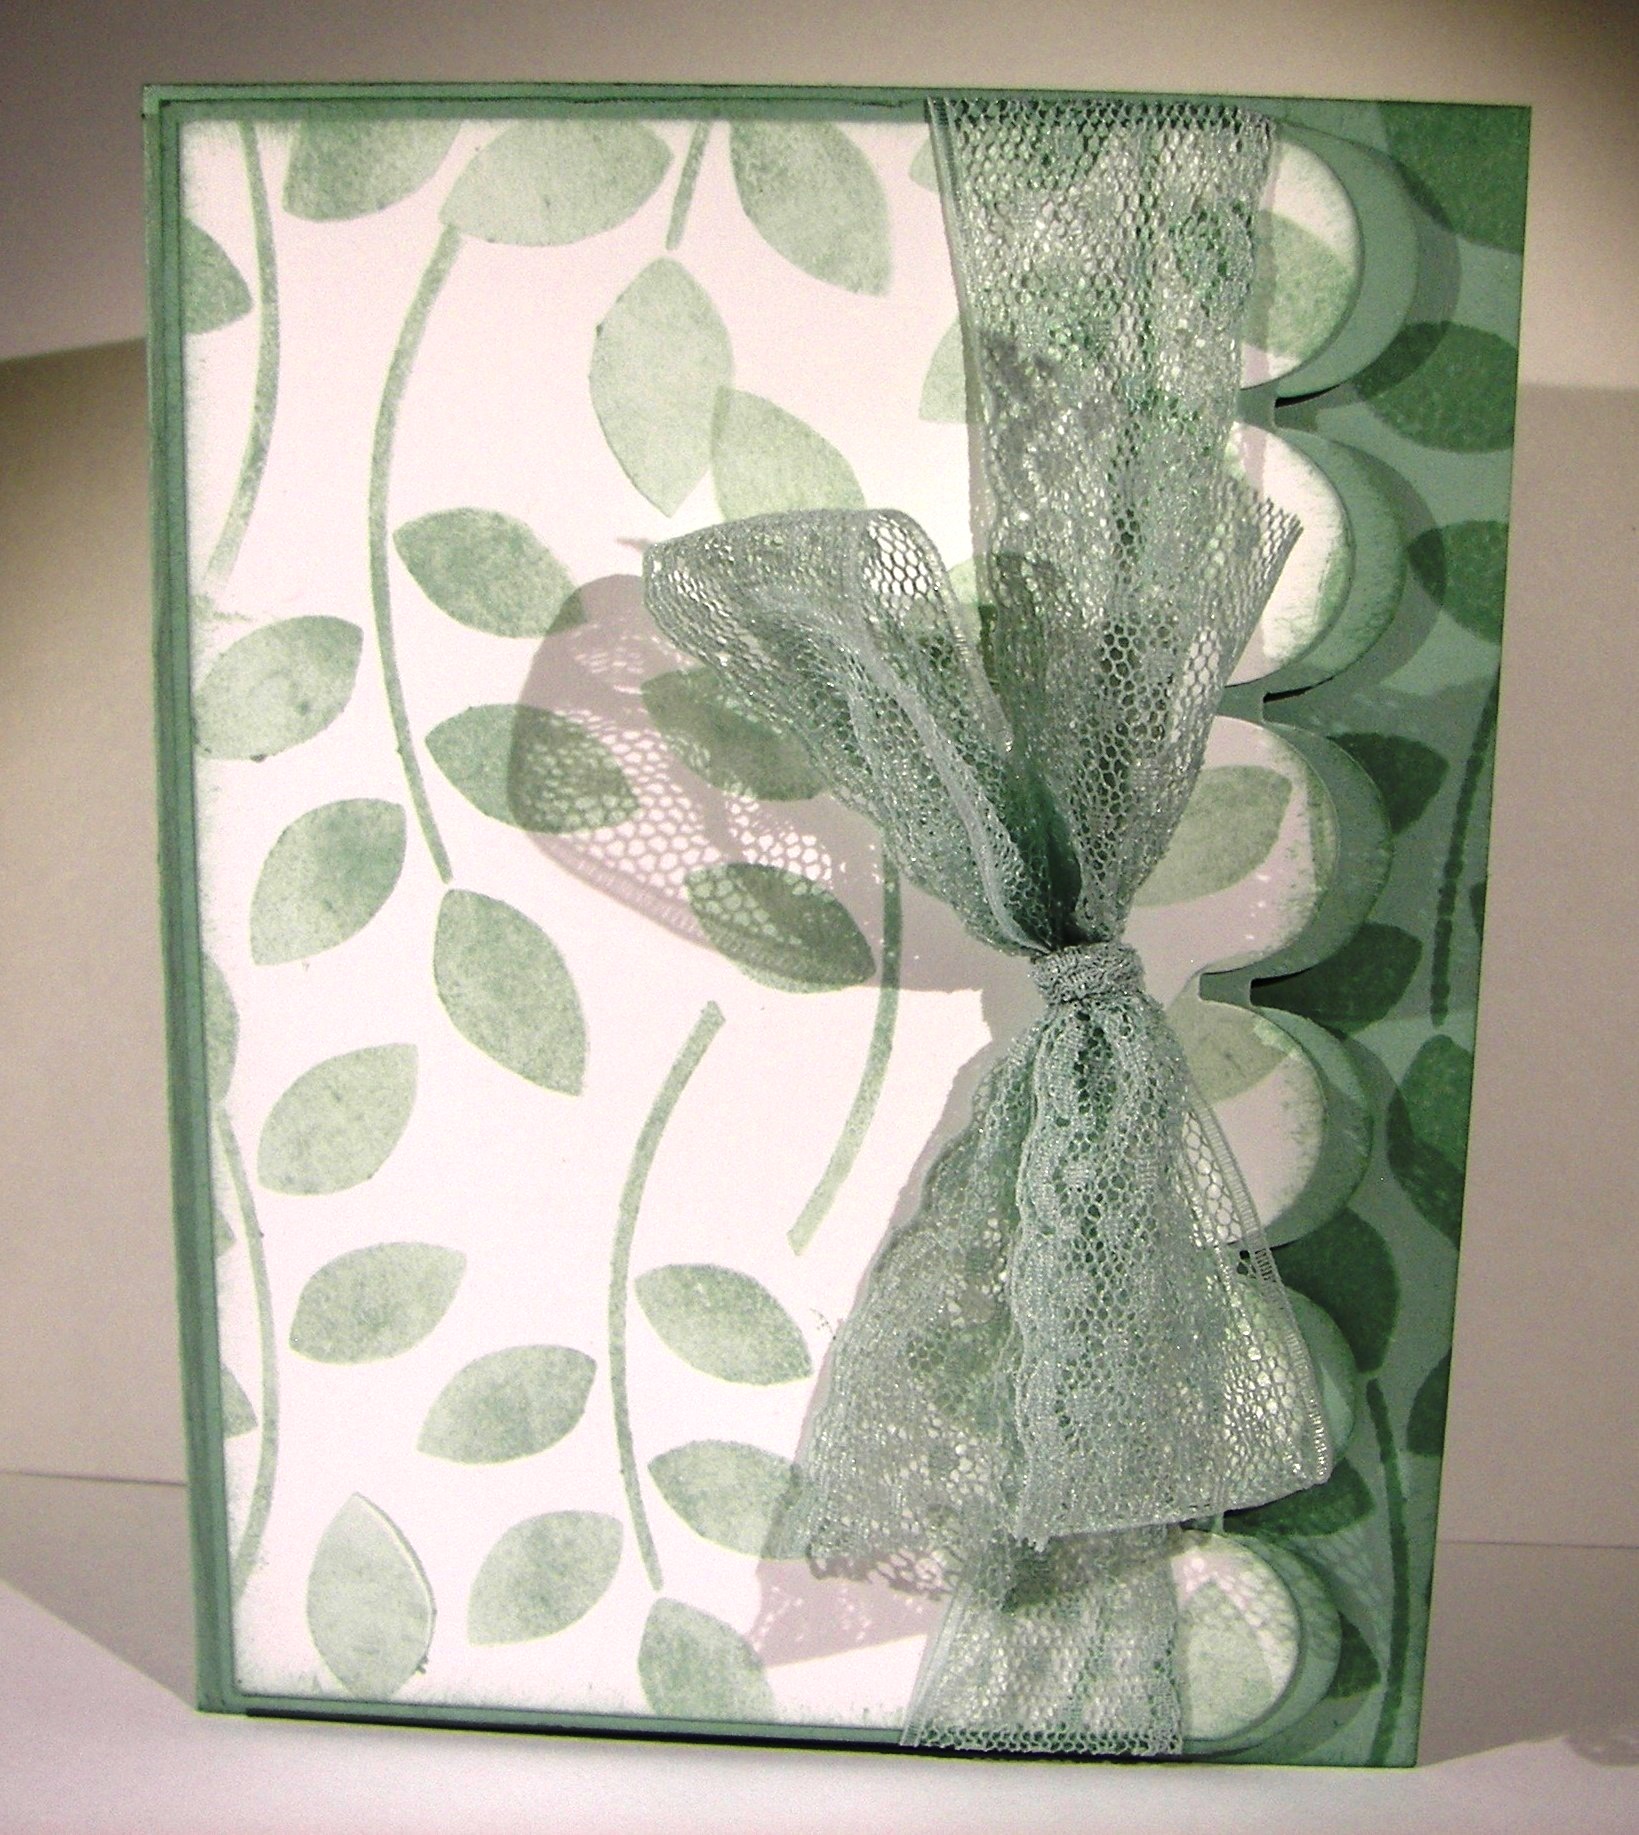
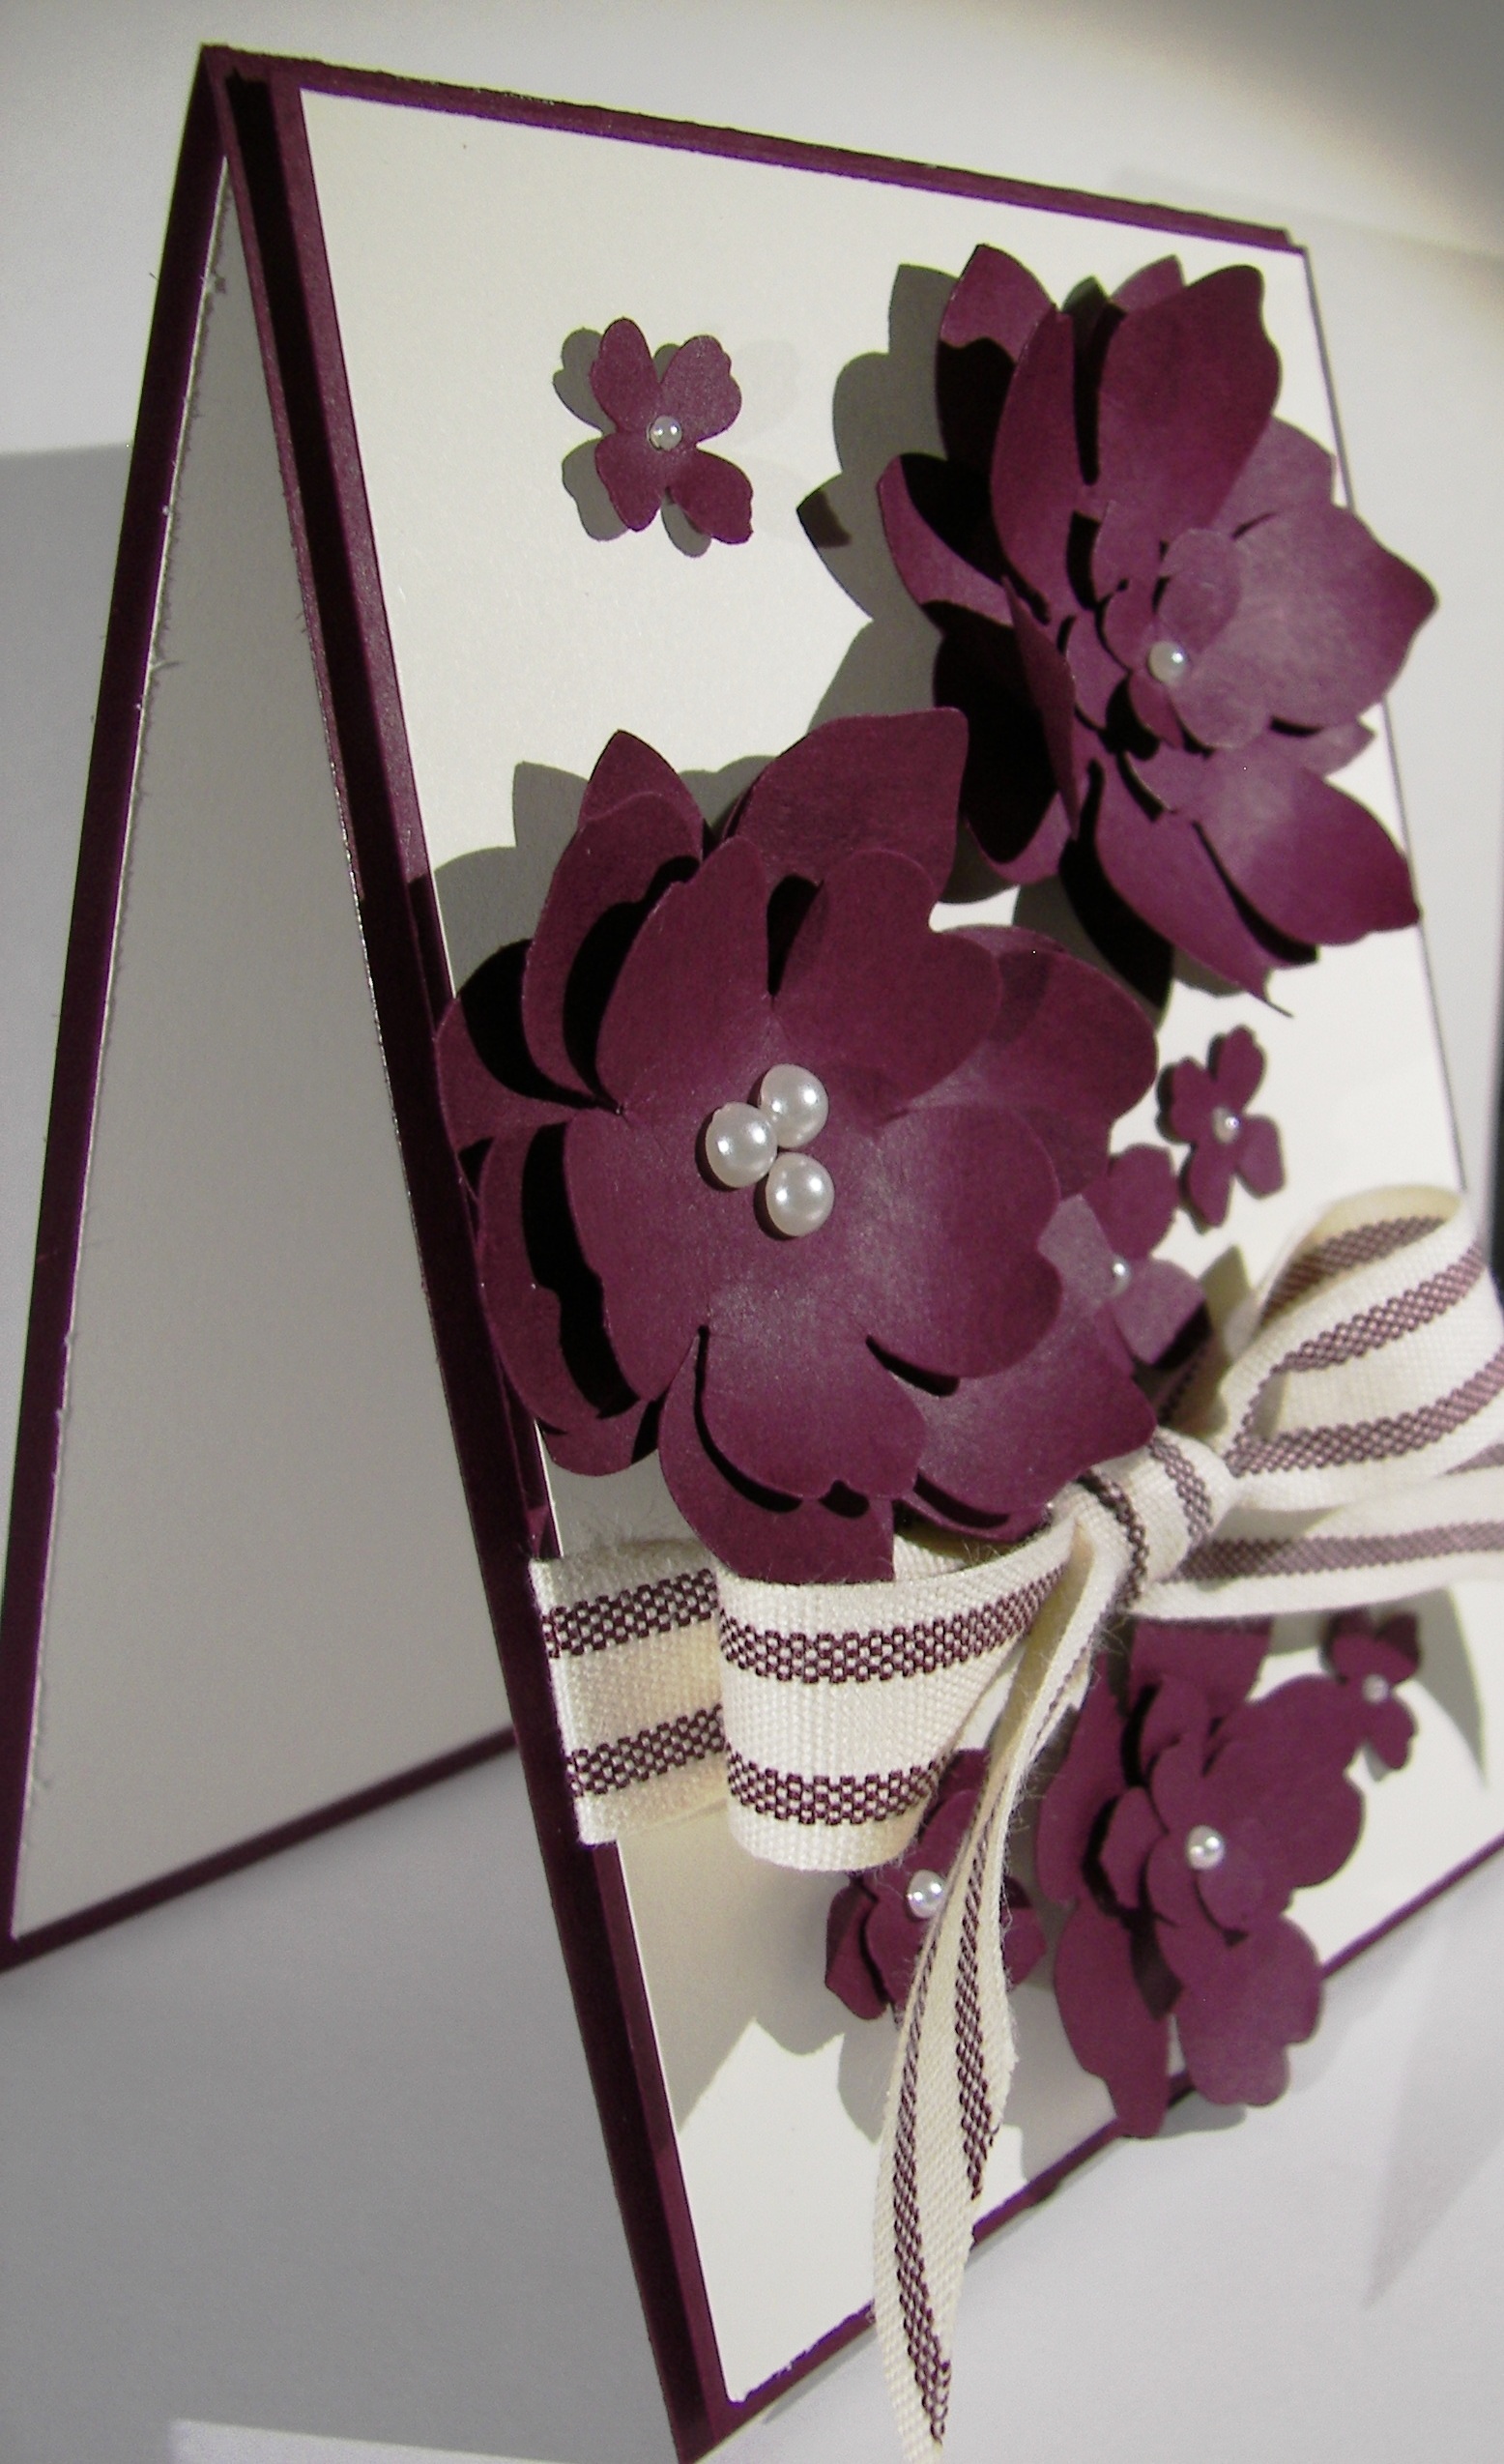
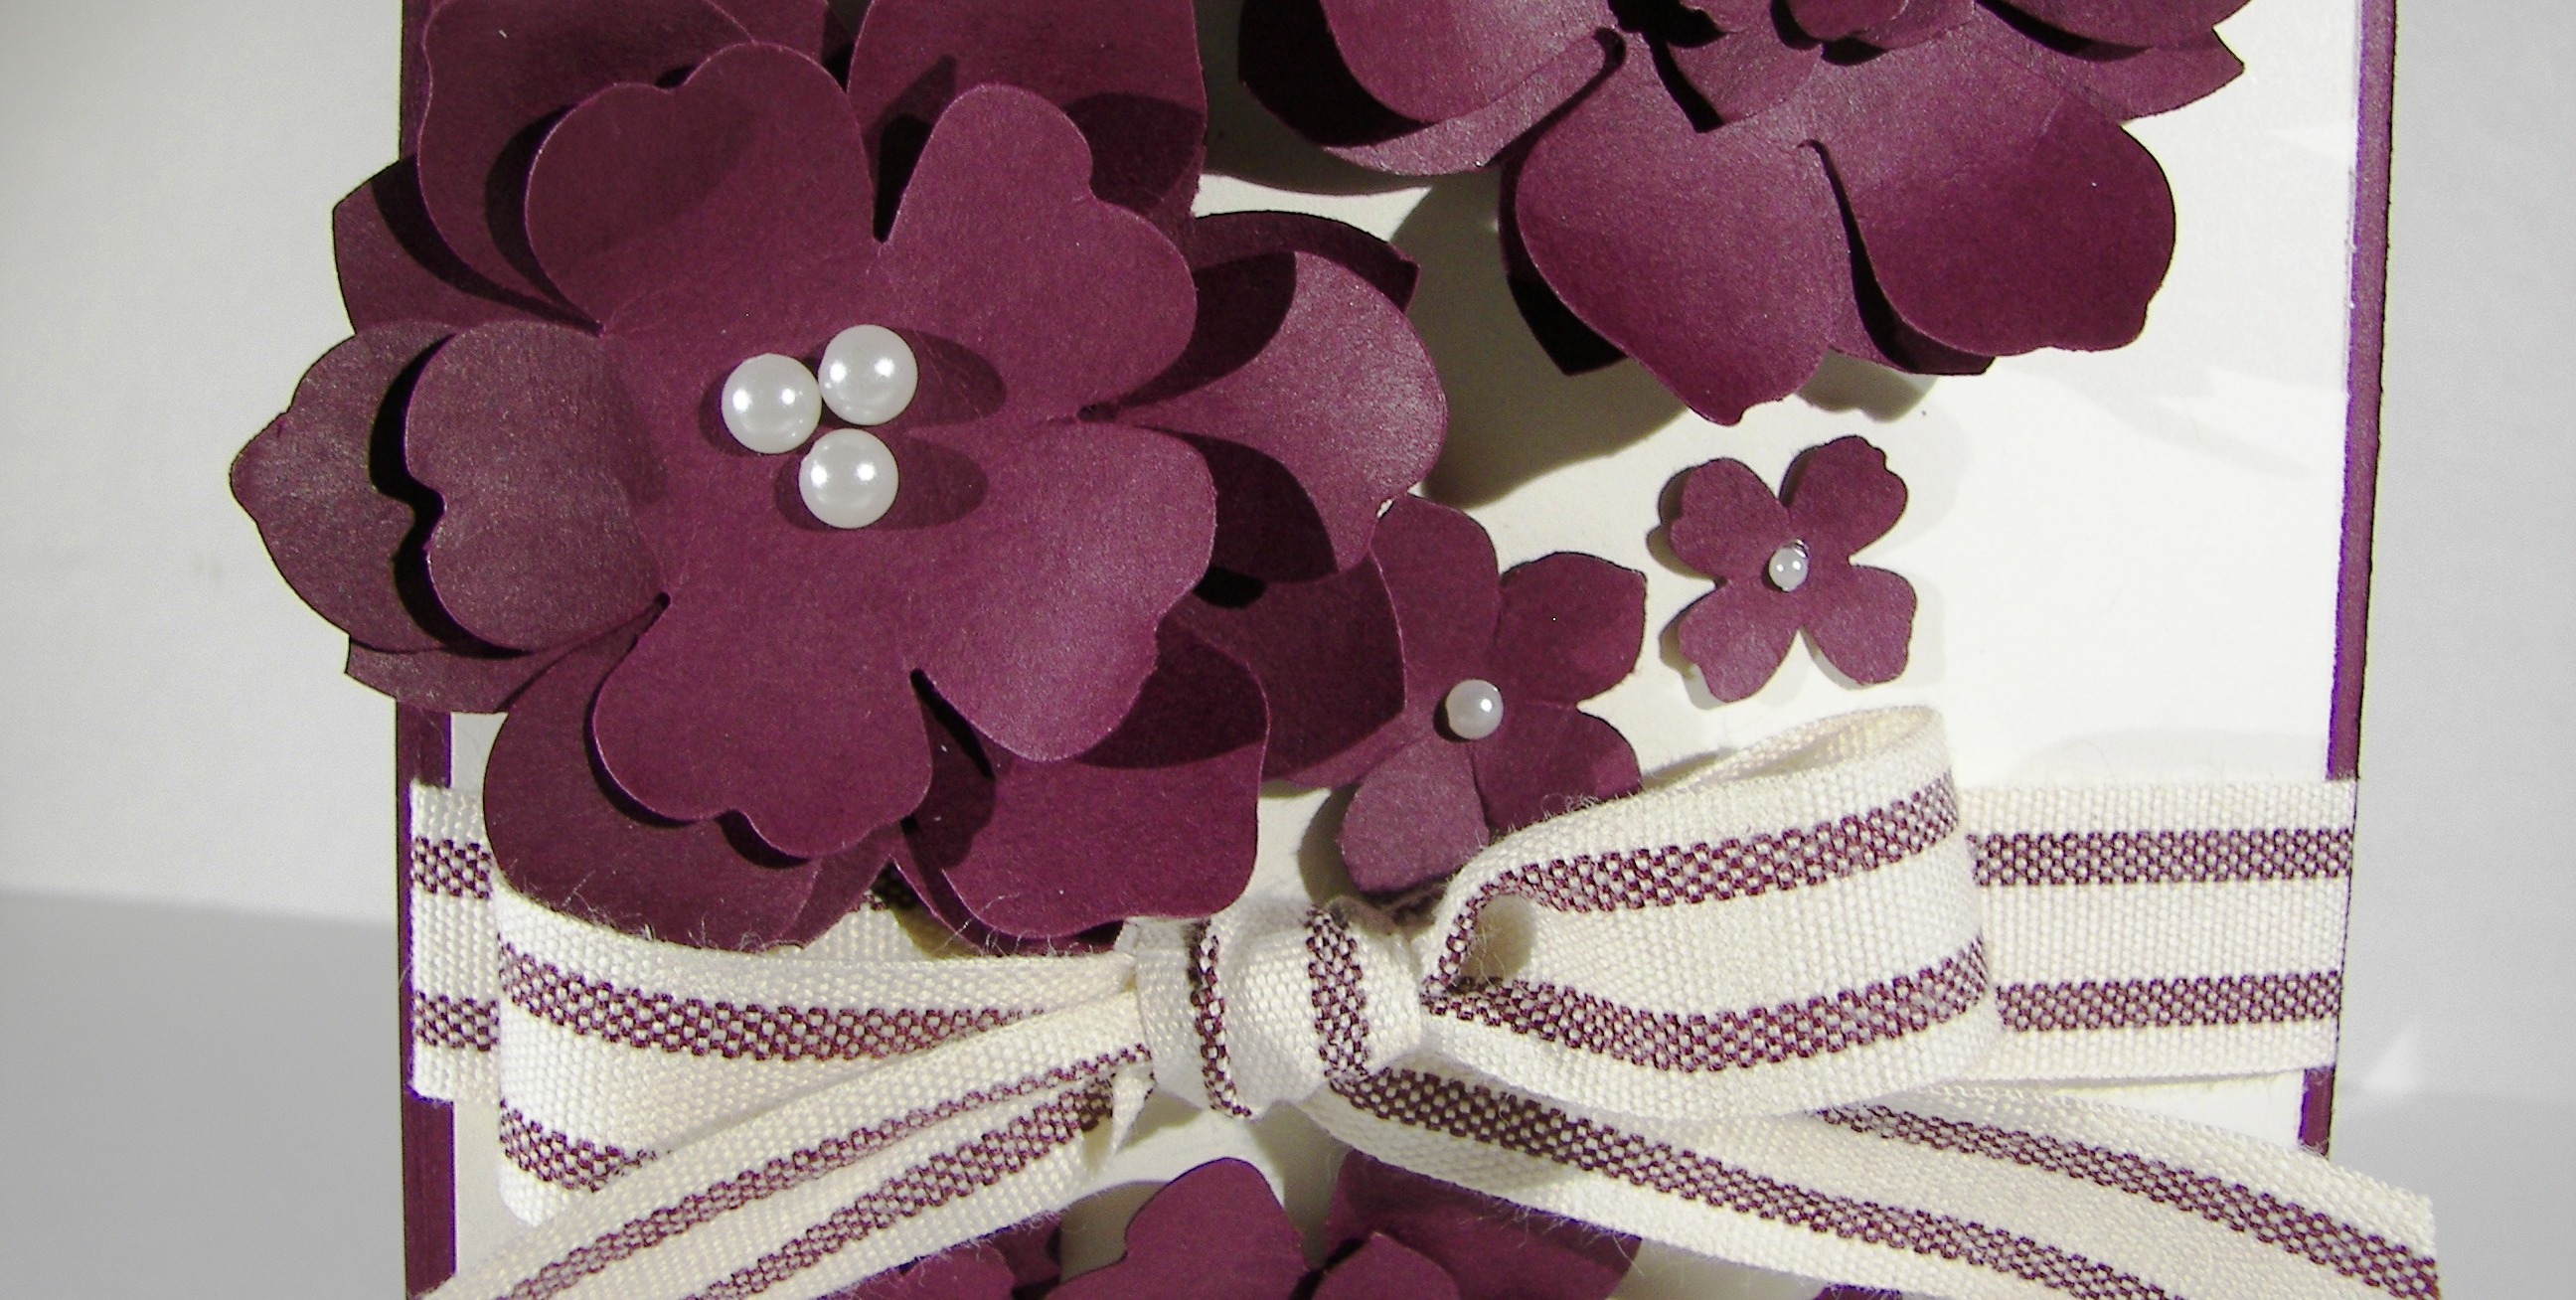
There isn’t even any ink here at all.  No sponging or a sentiment either.  Very clean and simple, with a ton of flowers, my favorite.  Kind of like my comfort craft.  All this card is about is punches, punches and more punches.  Five different flowers all layered about with basic pearls to finish them off.  I used the striped cotton ribbon because I wanted it to physically stand out as much as the flowers would.  Bows and flowers and now I feel better.

Floral Frenzy

Have a creative day!

Moana

A Whole Lot of Lovely

Today is quite the contrast to yesterdays color scheme.  But I certainly am all over the place in regular life, so why should my crafting be any different.  Makes sense enough to me.

A Whole Lot of Lovely

I have wanted to try this technique for ages but have never sat down to actually do it. I saw a card that did this as a lattice background for a lovely floral collection and saved the image for later.  That was two phones ago, and I have long since lost that image, but not in my mine.  

A Whole Lot of Lovely

I used my simply scored set and diagonal plate to make these lines.  If you look closely you will see all of my errors, but it was my first time trying.  I tried to keep my score lines 1/2″ apart, but didn’t get them exact every time.  The look turned out though, and you get the idea.

A Whole Lot of Lovely

Some simple stampin, layering everything up on dimensionals, a couple of strings of basic rhinestones, and a healthy dose of sponging helped to finish it off. I of course had to stamp and sponge the inside to make it almost as lovely as the front, they need to coordinate.

Have a creative day!

Moana

Chalk It Up To Love

This is only one of the three projects available in this months Paper Pumpkin kit.  Two different kinds of cards, three of each, and three pretty boxes.  What a fun kit!

Chalk It Up To Love

I sat down to make this card and it literally took me three minutes.  That includes stamping on one side, not liking how it turned out, turning it over and stamping the other side.  Yup, three minutes including a goof.  How cool is that!

Chalk It Up To Love

And that my friends is the beauty of Paper Pumpkin.  All of the creativity bundled together in quick easy to make and even easier to love kits.  Just my speed sometimes.

Chalk It Up To Love

All of the preparation I do for others, including my classes, it is just so nice to have something made just for me.  I know it isn’t just for me, but sometimes it feels like it.  Thanks Stampin’Up!

Have a creative day!

Hello You

How do you decide what to work with?  Today, I went with my skirt as inspiration.  While I am not wearing black and white zebra stripes with butterflies, the colors are right on.  I could hold it on display and coordinate so nicely.  I love how it turned out.

Hello You

I have to admit, this is the first time I have used my file tab edgelits and I have had them for a long time.  I wanted to use them, just in a different way.  The paper helps out a lot here, and I like them vertical instead of horizontal the way a file folder would normally look.  Mission accomplished.

Hello You

In order to coordinate the inside with the outside, I took the small butterfly stamp from Kinda Eclectic and stamped away.  It makes me so happy to have the inside match the front.    The card actually is quite simple, with patterned paper like this you do have to have some limits, just some.

Hello You


Have a creative day!

Moana

You Always Do For Others…

The people in our lives that give endlessly, they are so awesome!  They deserve much more than something like this, but always appreciate it.  Someone has to something nice for them, right?

You Always Do For Others...

My school secretary is just that person.  She even keeps the little containers I make her gifts in.  She has a cute little collection.  This one is a bit larger than others I have given her, but she deserves it!  The beginning of school is always so hectic.

You Always Do For Others...

One whole sheet of rich razzelberry for this gift bag.  Doesn’t it look lovely?  I didn’t have a project in mind, so I just reached to my paper files with my eyes closed, pulled the first file and there it was.  I then turned to my punches and grabbed the first one I focused on.  That would be the confetti hearts border punch.  The rest just fell into place.

You Always Do For Others...


I did my favorite sponging and opted not to layer the base.  Sometimes my fronts tend to curl a bit at the edges when I layer cardstock on cardstock with gift bags.  So, after I punched and sponged I used tombo liquid multipurpose glue to get to the edges well to make sure it stayed down nicely.  Perfect job.

A little matching cotton ribbon, subtle but still there, and the gift bag was done! Now I have the pleasure of getting the perfect treats and a gift to go inside.  That will be a fun little activity for sure.  Sea salt chocolates and maybe a lovely lotion.  Sounds nice.

Have a creative day!

Moana

It’s Your Day

I think I am ready for summer to cool off.  Looks like I am thinking of a spring day here.  My daughter told me this looks like a dress.  Would be a cute one.

It's Your Day

I thought it would be fun to use a stamp in a different way than intended.  This leave bouquet is in a thanksgiving themed set. Also, I hadn’t used pink pirouette for quite some time and decided to put the two together.  At first I wanted to use the flower punches as if they were a flower at the end of each stem.  Well, looking at them they created stripes of flowers.  Not so good.  They looked much better placed randomly.

It's Your Day

I used glue dots to secure them.  I didn’t feel like it, but I did sponge them all.  It made a difference, really.  Plenty of basic rhinestones to go around and I loved the sparkle it gave.

It's Your Day

The sentiment came from the endless birthday wishes set.  I really had ignored this one, but it is so great!  I love, love, love how you can partner the typeset phrases with pretty cursive ones.  A tiny tag with a bow in the middle and it was all done.  Of course I had to echo stamp the inside to match the front though, then it was really done.

Have a creative day!

Moana

Timeless Elegance Birthday

Well, this was to be yesterday’s post.  Talk about an adventure.  I think I killed my laptop.  Apparently it isn’t a good idea to drop your full cup of drink and have it spill all over the keyboard and stuff.  Who knew.  Either way, moving forward.

Timeless Elegance Birthday

Could this paper be any more beautiful?  I could probably open a pack and just project away until it was empty.  It truly is my favorite.  Elegant and so simple.

Timeless Elegance Birthday

Just some simple layering, one stamp, five punched flowers with tiny pearls at each center, dotted the “i” with a pearl, and laid down a string of pearls under ‘birthday’.  There you go.

Timeless Elegance Birthday


I did make a project for today, but I will be saving that for tomorrow.  Wait til you see what I did with a tiny cup die cut from my paper pumpkin kit.  Oh My Goodness, just amazing!

Have a creative day!

Moana

Love You My Friend

In the middle of cleaning out book shelves I had an idea for a card.  So I went to my desk, pulled out the stamps, dies and ribbon, and went back to my shelving.  This morning I just looked at them and thought, “What did I have in mind?”  Not sure, but this is what I ended up with.

Love You My Friend

I think it is funny because if you don’t read the little word love that is inside the heart cut out, the tags just say “you my friend”.  A bit basic, but really made me laugh.

Love You My Friend

All of the detail work went pretty quickly.  I started out by using the heart die cut on the whisper white paper and then ran it through the big shot to emboss it.  I thought the stamping inside the heart would be tricky to place.  Not at all.  I just eyeballed it and it was perfect!  Go figure!  The tags were simple stamping on scrap.  I do save scrap a bit too much sometimes.  But, the half inch that gets cut off when I trim down my paper works perfectly for sentiments and the banner punch.  Some might call it clutter, but I have used them so many times.

Love You My Friend

Have a creative day!

Moana

Just For You

Sometimes I feel like there are one too many butterflies flying around my craft area.  But then I remember, you can never have too many butterflies!  Especially when Stampin’Up! keeps coming out with even more exciting stamps to use.  This set is just one of those types.  I could just put these everywhere.

Just For You

The color scheme is very simple, blushing bride and whisper white with tiny 1/8″ boarders.  I do love those.  Only one butterfly on this card front.  The base image is done in blushing bride.  The next layer, the detailed image, was stamped in versamark ink.  That alone looked wonderful with the darker tone.  A quick sprinkle of iridescent ice went over the versamark while it was still sticky and took a trip to the heat gun to melt it in place.

Just For You

I tried to angle the photo to show you the almost purple glimmer that comes from the powder.  You can kind of see it.  Absolutely lovely stuff.  The body and antennae are separate stamps that make the body.  And yes, this is a photopolymer set.  You just have to see through these stamps to get images just where you want them.

A quick sentiment from the same set and a tiny cotton ribbon bow, and it was done.  I did stamp a few dots on the inside panel, of course.

Have a creative day!

Moana

My Dear Friend

I focused on one image for today’s project.  It initially reminded me of a Japanese maple tree as it starts to change colors.  They are so vibrant.  As I started to paint them I noticed the flowers and the leaves looking different.  I thought it was more of a shrub.  Put your glasses on, right?

My Dear Friend

I put the aqua painter to work here.  I stamped the image in cherry cobbler and brought the color in with just water.  Then I added in old olive and mixed the colors, just as the leaves would be looking.  I decided I wanted the flowers to stand out more, so I darkened the centers to bring out the detail.  I can’t believe I didn’t notice the flowers the first time.

My Dear Friend

Talk about being generous with the basic rhinestones, but I wanted all of the centers to sparkle.  Such a pretty look.  Is it over the top?  Well, if it is for a dear friend, you want it special.  The friend stamp seemed a bit lonely, so I wrote in above it using an old olive stampin’ write marker.  First try even, not bad.

My Dear Friend

There are so many new products used today.  The framelits, the embossing folder, the stamp, and they work together great!  I even got all nostalgic thinking about an old friend that I just don’t get to see anymore.  Guess I know where this one is going!

Have a creative day!

Moana

Remarkable You

I think going on that pioneer trek took a little more out of me than I thought.  I tried to sit down at my usual 5:30 this morning, but I could hardly focus.  Time to get into a good summer routine.

Remarkable You

I absolutely fell in love with this stamp set when I saw it in the catalog.  The floral images are so elegant.  They cover several of my favorites.  I had to use this one first, because it is my absolute favorite.

Remarkable You

I started by stamping the image in garden green.  I got out my aqua painter and drew in the color for the stems and some of the outer lining.  I brought in daffodil delight and hi-lighted with so saffron.  Just a touch of color there.

Remarkable You

I used the oval framelits to make my layers with the third largest for the flowers and the second largest for the frame.  I stamped and sponged and put everything I could up on dimensionals.  I tried out the triple banner punch and it works like a champ.  That is going to get a lot of use.  Finally, I hid my glue dot under the velum with a rhinestone.  I used a section to curve around the top left of the frame and called it done.  I didn’t even stamp inside!  Scandalous,  I know.

Have a creative day!

Moana

Awesomely Artistic at last!

I have made it through my June adventures and have finally been able to sit down with a long awaited stamp set and designer series paper.  I am still way beyond tired after completing a sixteen mile handcart trek, so it took me longer than normal to get going, but I did it.  It kind of feels a bit vintage and a strong nature theme.  So pretty.

Awesomely Artistic at last!

I learned my lesson with the last designer series paper that I loved too much to use for way too long.  I opened this pack up, took out my favorite pattern, and cut it for the card front.  Quite brave if you ask me.

Awesomely Artistic at last!

I stamped inside with two of the stamps from the set using night of navy and soft suede.  I have a hard time leaving the inside blank.

Awesomely Artistic at last!

I used a piece of water color paper to stamp the dragonfly a few times.  I started with black stazon, water colored with night of navy on the wings, then used some two way glue to attach dazzeling diamonds glitter to the wing edges.  I absolutely love dragonflies.  They are my signature mark and have been for some time.

Have a creative day!

Moana

One Butterfly Too Many? I Think Not…

It was time to gather the butterflies, and I didn’t even use them all!  There is another punch and framelit and other stamps as well.  Clearly I love these!  Can you blame me?  They are so beautiful.  I am getting excited for a new stamp set that is on its way.  It has a dragonfly in it and those are my favorite.

One Butterfly Too Many?  I Think Not...

It is hard to match this combination though.  I wonder how many butterflies I have seen so far on my pioneer trek.  I might be too tired this morning to notice.  But today I get to come home.  This yellow is the accent color in my skirt and matching apron I made for this trek.  What an event it must have been.  I will have to tell you more later.

One Butterfly Too Many?  I Think Not...

I layered up this beautiful butterflies after I sponged their edges pretty heavily.  I wanted them to be one color, but have a subtle difference as well.  It worked nicely,  I also used the tiny butterfly stamp from the perpetual birthday calendar set to create a flock of them flying up the side and across the top.  That was really fun.  With some heavy sponging that look was complete.

One Butterfly Too Many?  I Think Not...

I didn’t know if I wanted to stamp my sentiment with so saffron or black.  I started with so saffron, decided it wasn’t bold enough, and offset a second stamping in black.  It worked out really well.  The photopolymer stamps really make things like that super easy.  I repeated some of those stamps on the inside and then blinged up the butterflies properly.  They do look grand, do they not?

Have a creative day!

Moana

Flower Patch Beauty

My husband was given a thank you note that inspired this simple creation.  I usually like more, but this couldn’t be more perfect.  The subtle layering of the flower, the gentle stem, and the touch of glitter come together to make this stunner.

Flower Patch Beauty

I did a narrow border with an additional layer of watermelon wonder and popped that combo up on dimensionals.  I thought about adding some of that lovely dotted lace trim, but didn’t want to interfere with the glitter or the stem.  Really, it turned out so nice.

Flower Patch Beauty

So, here it sits, in its simple glory.  I love this color and I love it even more in this beautiful card.  Maybe I should send this note back to the friend that inspired it.  They certainly are wonderful.

Flower Patch Beauty


Look for inspiration in every day life, it is there waiting for you.

Have a creative day!

Moana

Crazy About You

A simple gift set that is truly all occasion.  You never know when you will need a ready to go set at the last minute.  It would be nice to remember all of our events all of the time, but that doesn’t always happen.  Or when someone is wonderful and you just want to say thank you in a special way.

Crazy About You

That is what this set is for.  I used the scalloped flower from the Crazy About You set to make the background for the card and matching bag.  I did a simple overlay of velum and scattered large rhinestones in the center of the flowers.  So simple, yet so pretty.

 Crazy About You

I added a touch of linen thread and used my bone folder to help it curl just a little.  It also takes the kinks out, but I do love a bit of curl.  I stamped a couple on scrap and punched them out with the 1 3/4″ scalloped circle punch and accented the front and the inside of the card.

Crazy About You

Well, this project was a quick make and has lots of possible uses.  Try one out for yourself!

Have a creative day!

Moana

Happy Birthday My Friend

Making my own background paper is one of my favorite things to do.  Part of it comes from not having all of the new paper, and the other more important part is customizing it to exactly how I want my project to feel.  I loved these tiny little flowers, so that is what I went with.

Happy Birthday My Friend

I didn’t have patience to use my stamp-a-majig, so I just did my best.  It didn’t turn out too bad and the secondary pattern looks great.  Hexagons can look a little more strict by their shape, but using the floral one gave it a much softer look.  And of course I love a layered tag.  Go ornate tag topper punch!  I love a great set of tools.

Happy Birthday My Friend

I have some work to get done today for use.  I will be gone all next week between taking my daughter to university and participating in a pioneer trek.  I will blog ahead like I did during girls camp, that seemed to work out just fine.  I think July will be a little more kind to my schedule, I hope.

Have a creative day!

Moana

Trek Inspired Bordering Blooms

Trek Inspired?  Well, of course!  Coming up next week around two hundred youth and adult leaders will be heading out for a three day handcart pioneer trek covering about 15 miles.  My husband and I get to participate as “Ma and Pa” for a group of eight youth who will be our “children” during the trek.  I don’t know if I am more excited or scared.  Good to be both though.

Trek Inspired Bordering Blooms

I have been sewing my pioneer outfit and have it ready to go.  I am actually typing while wearing it.  What a great pioneer thing to do, right?  I even have my hair in french braids and my straw hat on.  I thought it might be a good idea to try and walk around in these skirts a bit.  My lace will be getting dirty I think.

Trek Inspired Bordering Blooms

While I saw sewing I saw a card coming together.  Mix my two favorites, right?  I stamped with one of the border stamps in old olive on very vanilla.  I used my aqua painter and the other ink colors to color in the flower and leaf patterns.  Yet another background creation.  And now I have two all occasion cards ready to go.

Trek Inspired Bordering Blooms

Here is a sneak peek at part of my apron.  Can you see the colors coordinating?  I know the marina mist is a bit brighter, but it was close enough to get my brain creating.  Ruffles and lace and ruffles and lace.  My mother will be so proud.

Trek Inspired Bordering Blooms

I think I will do some more trek inspired projects to share while I am gone.  Yee-Haw!

Have a creative day!

Moana

Crazy About You Mint Macaron

I tried something different today.  I started an all occasion card and found I had measured wrong.  My brain is really rattled with the end of school here in two days, girls camp around the corner, and my daughters graduation smack in the middle.  Not to mention all of the things that go along with that schedule.

Crazy About You Mint Macaron

Focus here, try to stay focused.  So, I just thought I would use an edgelit to fix my piece that was too narrow.  The only boarder edgelit that wasn’t retired is the file tab one, and I didn’t think that would work with my design idea.  I looked through the framelits to look for something that could give a fun edge.  Enter the striped scallop thinlits die.  I just lined up my paper one sheet at a time along the very last scallop and look what I got!  How cute is this?  At first, the whisper white sheet looked like big teeth.  Admit it, you can see them.  Once they were layered and sponged the teeth went away, for the most part.

Crazy About You Mint Macaron

I started the card portrait, but discovered it looked nice either way.  Talk about a versatile card.  There you have it.  I started with only a color in mind, added a stamp for background, goofed my measurements and then discovered something fun.  I honestly have been nervous to put this thinlit to work.  How funny that the first time I use it you can hardly recognize it.

Crazy About You Mint Macaron

Now I get to see if I figured out how to schedule this post correctly.  I am shooting for 5:00 am, we will have to see.  My blog clock doesn’t match mine.  I need to get this sorted before I go to camp next week so my posts can happen.  Or, I might just take the week off.

Have a creative day, or night, or afternoon, whenever this blog shows up.

Moana

Big News with Perpetual Birthday Calendar

I must be one of the few Stampin’Up! demonstrators not showing new product today.  It is the first day with the new annual catalog.  Well, I have a different perspective sometimes.  I get just as excited for the stamp sets I already have that carry over to the new catalog.  So, there you have it.

Big News with Perpetual Birthday Calendar

The first is Big News.  It has these fun sentiments designed around exciting news and events.  They are written like we talk in a quirky way.  It makes it kind of fun.  The second is Perpetual Birthday Calendar.  I sure have gotten a lot of use out of this set.  An easy background maker if you ask me.  It really gets a lot of use.

Big News with Perpetual Birthday Calendar

I am also happy that the cotton ribbon, which was new last catalog, stayed with us.  It really makes such a pretty accent.  I must say, this bow is nearly perfect.  I kept this card pretty simple, but sometimes that is all I want.

Big News with Perpetual Birthday Calendar

I did a small pre-order earlier in the month to get the new colors that I have already shared with you.  I also got a couple of host sets, and they will be so fun.  Now I will let myself get into the new catalog and get a few stamp sets.  Isn’t that fun?  I thought so.  You should check it out.

Have a creative day!

Moana

Welcome Cucumber Crush

Let me introduce you to Cucumber Crush.  Now you have seen all of the five new In-Colors that will be with us for the next two years.  I can’t believe we have had the other set for a year already.  But this bright, perky green, we don’t have a color like it.  And it is bright.

Welcome Cucumber Crush

My family assured me this wasn’t too much and they really liked it.  I kind of didn’t, at all.  I thought it looked like a leprechaun got into a fight with Valentine’s Day.  But, I went with it anyway.  Everyone makes mistakes and I don’t mind that at all.  I do think that this particular combo won’t happen again.  Cucumber Crush needs to have another color or two to balance it out.  Just my thoughts though.

Welcome Cucumber Crush

This is also another sneak peek at the Happy Birthday, Everyone host set.  I touched on it yesterday, but went further today.  The ‘Happy Birthday’ sentiment is the large main one and it comes with several support phrases.  Too fun.

Either way, a new set of fun In-Colors combined with a great new catalog looks to make another great year.  So much creativity in store.  I hope you find yours.

Have a creative day!

Moana