You Deserve a Happy Birthday!

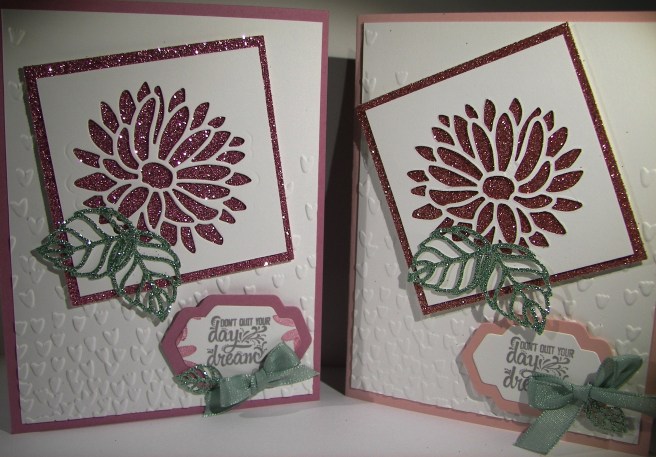
Here we go with day two of this little seven day adventure.  Use up my extra kits and make them look different.  Some parts I like better than others, but here it is just the same.

3-30

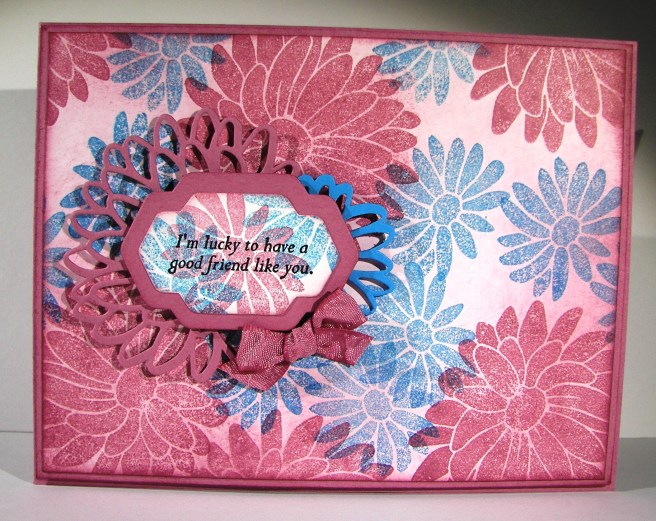
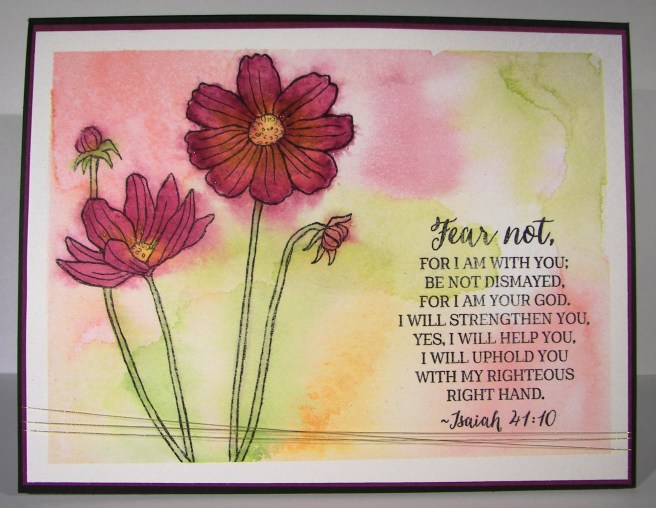
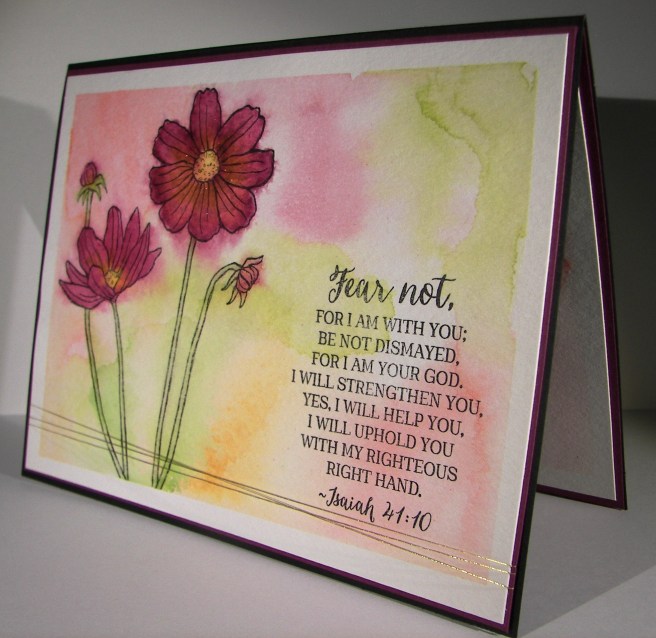
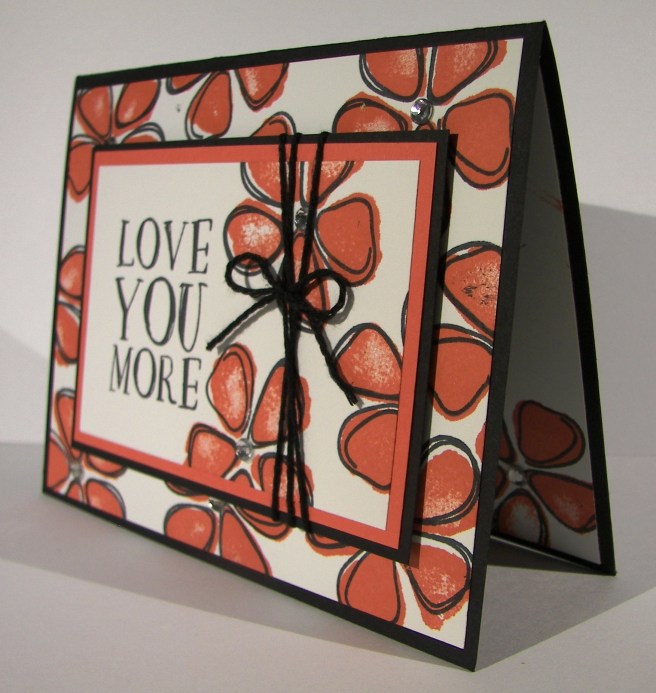
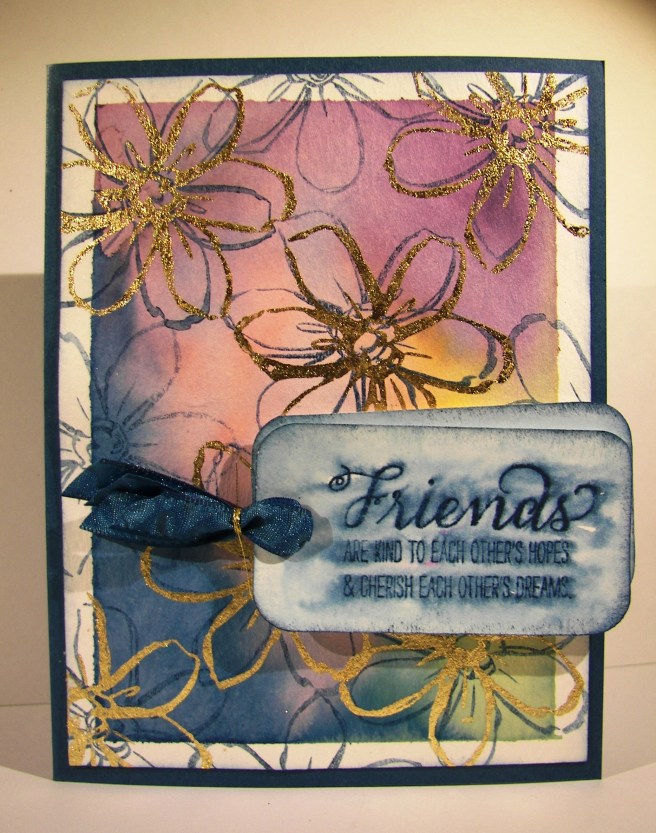
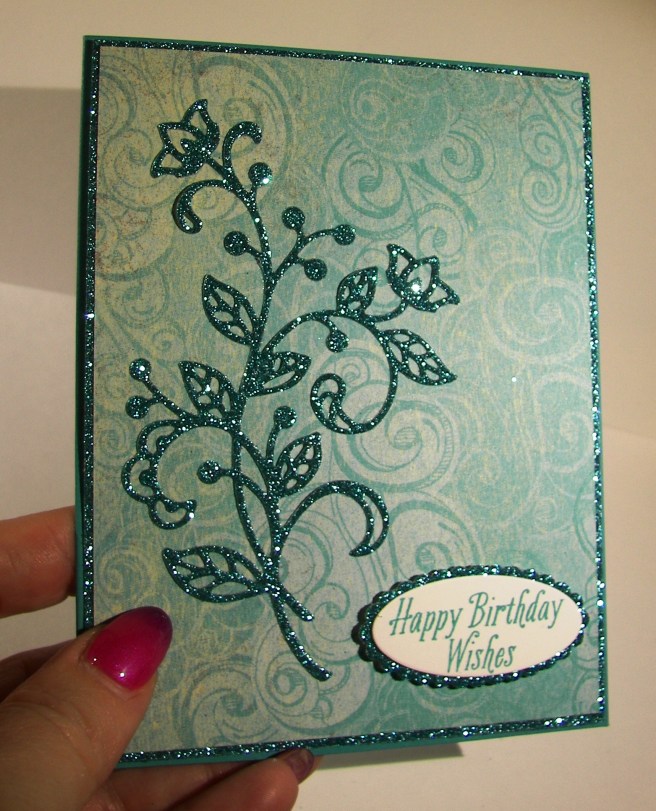
The background cardstock had some floral stamping from the flower shop stamp set and then was run through the big shot with the lovely lace embossing folder.  The patterns might not have gone the best, but I stuck with it.  When I continued the stamping on the sentiment layer I wasn’t sure again.  I thought black wording would look too similar to the night of navy so I went with flirty flamingo.  Wouldn’t you know it that one of the words got hidden in a flower. So I stamped the sentiment again offset with versamark and then sprinkled on copper embossing powder.  It coordinates nicely with the foiled pattern on the designer series paper.

3-30 (4)

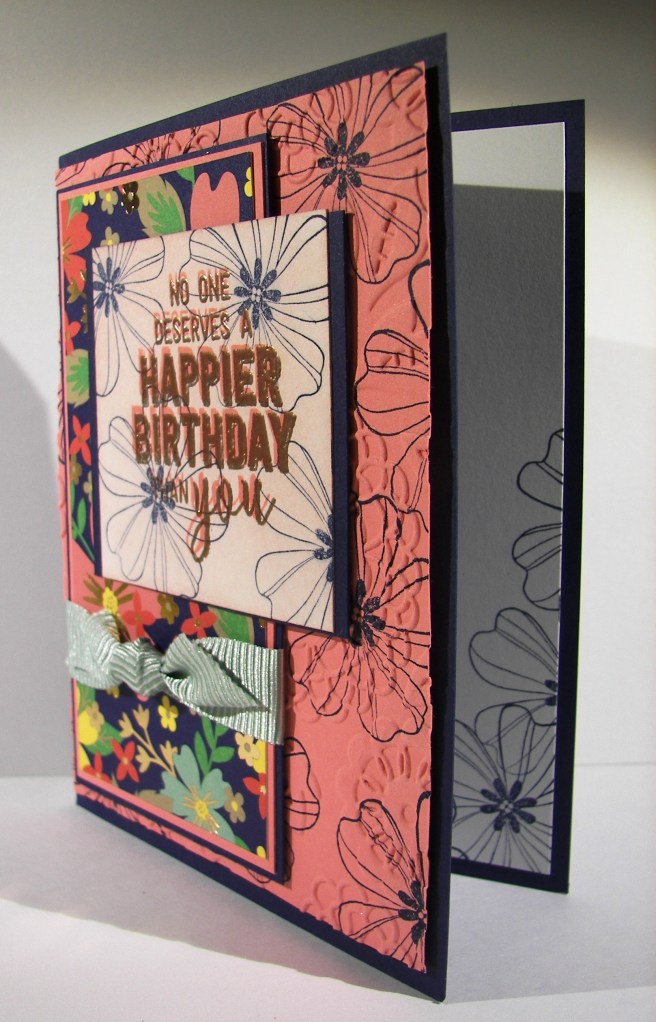
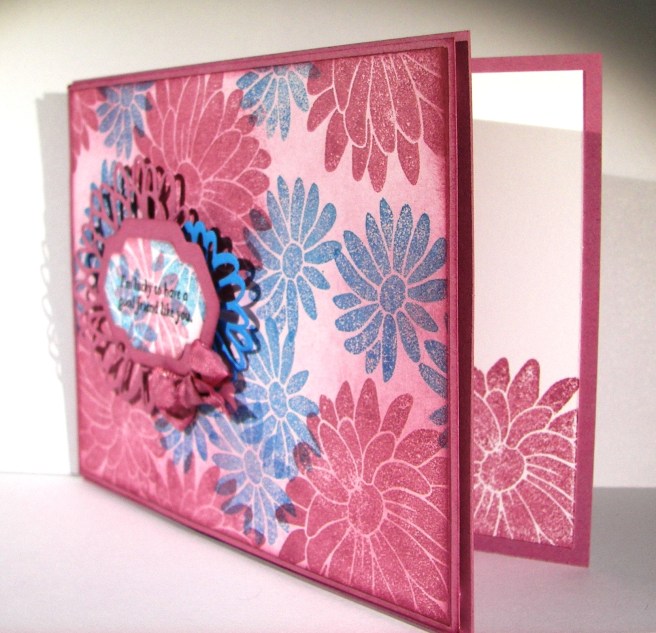
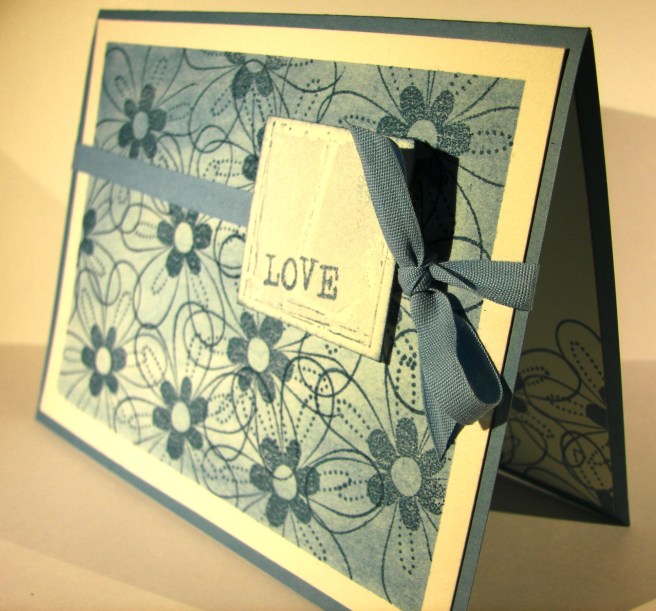
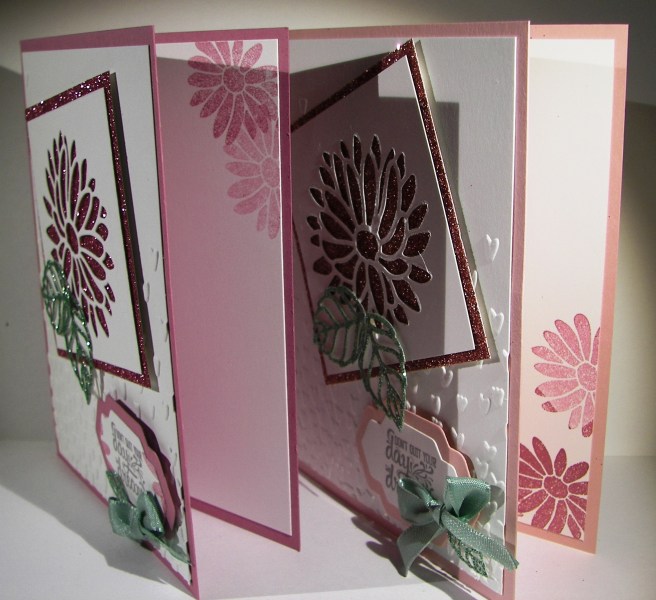
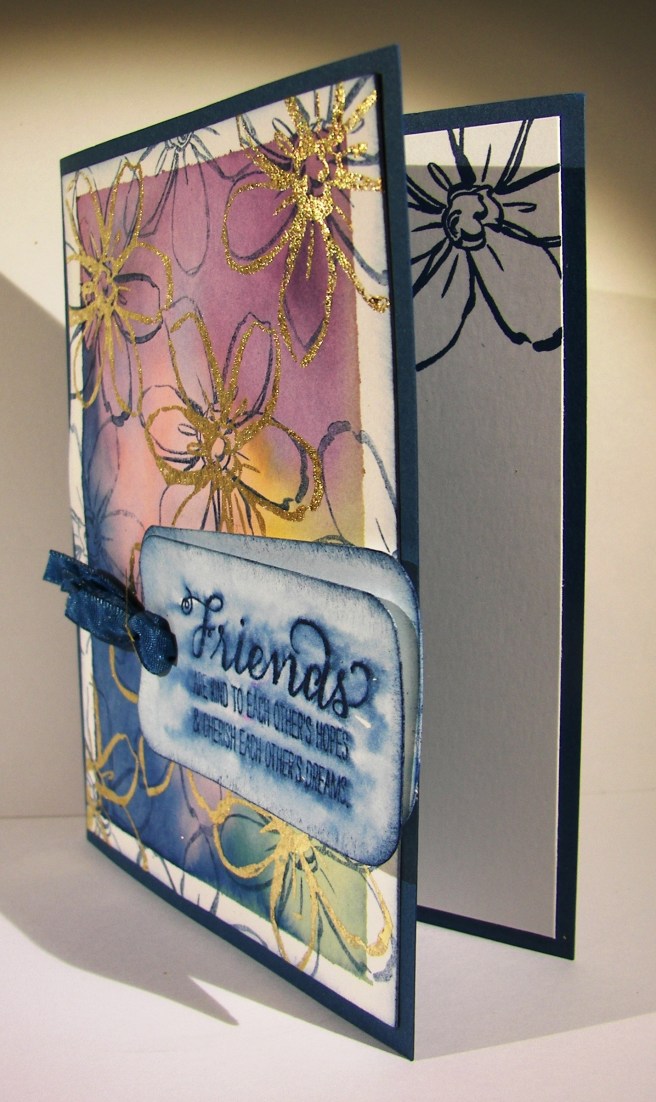
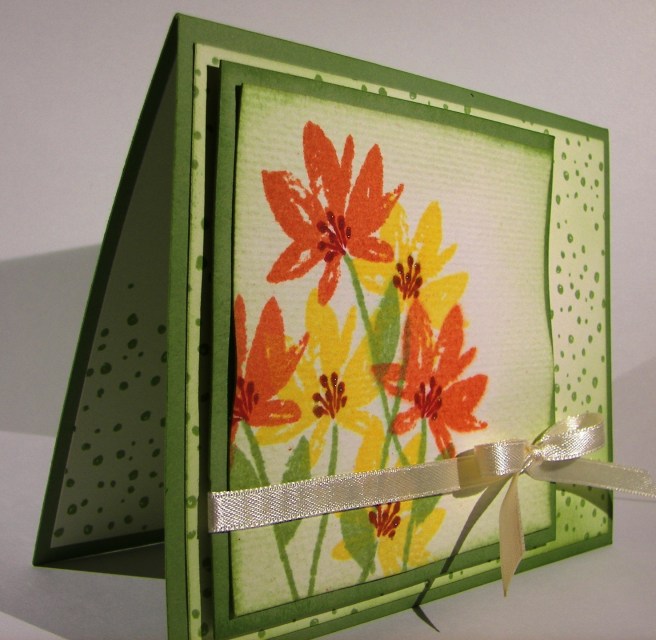
It did give it a bit of a 3-D look, but you could read it easier.  I still wasn’t sure about all of the patterns going on here.  It seems like they are fighting for attention.  I don’t think I could tell you who won, but I kept on with it anyway.  I tilted the card a bit for this photo trying to show the foiled paper and matching embossing, you get the idea I think.

3-30 (3)

Have a creative day!

Moana

Out of Limitations Come Creativity

When a couple of friends get together to explore a few techniques, really cool things can happen.  The sentiment reads, Out of Limitations Comes Creativity.  Sometimes the limitations are our own minds, not finding new things to try, or new ways to try the things we already have.  Great example below if I do say so myself.

3-27

We wanted to try a technique Jennifer McGuire recently shared using versamark ink and perfect pearls.  That was a lot of fun.  My beginning samples are fun to look at, and might turn into a project, but might not.  I still have them at my desk, but they led me to this project.  The sentiment was created with this technique.  It was neat though, how the perfect pearls clung to areas of the water color paper that weren’t all the way dry.  A neat accident that really adds to the look.  I also gave distress crayons a go.  Those are pretty darn cool.  I bought a set that came with the stamps I used here as well as a basic technique booklet.  Those techniques were put together and actually turned into this project.

Literally, we sat down with several products, a technique idea, and some great conversation. That was so much fun!  So, maybe I should have a sentiment stamp that says something like, Good Company Sets Free Creativity, or something much more poetic, but you get the idea.  Can’t wait til our next time together. Creative friends are so much fun!

3-27 (1)

Have a creative day!

Moana

Don’t Quit Your Day Dream

Glimmer paper makes everything look better.  How fun!  These projects were part of this last weekends workshop and the ladies really enjoyed making one.  Good thing we worked with the glimmer paper from this years sale-a-bration because it ran out and they would have missed out completely.  So glad I could share a little at least.

3-22

Pretty straightforward cards here.  A few layers, some stamping and a delicate little bow. I helped out the ladies by pre-diecutting their leaves.  Folks get a bit frustrated waiting to die cut or emboss their work, so I try to make it a bit easier.  Maybe one day I will add a second Big Shot, maybe.

The sweet sugarplum glimmer paper may be gone, but the blushing bride is part of the annual catalog, so I can make more of these.  I am thinking about a thank you card gift set and this might just be the thing, with a different sentiment of course.  I think yes.

3-22 (1)

Have a creative day!

Moana

A Simple Thank You

Sometimes you just need a simple thank you card.  This is just right.  Not too bland, but a quick put together too.  The ladies at my card class this last weekend really liked it, quick and pretty is always welcome.  A project doesn’t always have to be a big production to say what you want.

3-21

I used the three small flowers from the So In Love set to decorate the paper here.  They were placed together on one block for quicker stamping.  It really made quick work of decorating. Each time I added another stamped set of flowers I turned the block a quarter turn.  This gave the flowers a different look without trying to use each blossom one at a time.  I will be using that idea again for sure.

3-21 (1)

Of course I had to add some to the inside to tie the card together.  This delicate ribbon is only a quarter of an inch wide and somehow has room for three rows of stitching.  Isn’t it precious?  That is as decorated as I let myself go here.  I was tempted to water color the flowers and get into some sponging, but I held back.  The result is simple yet perfect.

Have a creative day!

Moana

Hello Glimmer!

Glimmer paper, floral stamps and dies, water coloring, beautiful ribbon, these are several of my favorite things.  Seeing them all together really does make me happy. I needed a special thank you card and this has more than accomplished that.

3-17

I hadn’t had the detailed floral thinlits out for a bit, so that was reason enough.  The sweet sugarplum glimmer paper is where it all started though.  It is such a fun paper pack.  Four 6×6 sheets in three colors, sweet sugarplum, bermuda bay and mint macaron, and the set is free with a $50 purchase.  If you are going to enjoy great product, why not get a bonus at the same time, right?  Since sale-a-bration ends this month, I will have to make sure I get another pack.  So pretty.

The background had a light patterned water color wash in the same ink color and then lightly stamped as well.  I glued the edges of the detailed cut outs to secure them easily. This allowed my ribbon to be tied easily and not look like it was pulling on the paper.  I stamped lightly on the inside as well to coordinate it.

3-17 (1)

The thanks sentiment was cut out four times from inexpensive white cardstock and then glued together one piece at a time. A bit sticky, but worth it. I then added the glimmer paper one to the top and used my trusty tombo glue to place it on the front at a slight angle.  I was temped to add more, but made myself stop.  Details are great, but not if they distract from the simple beauty you started with. My club ladies would love this card, but I think a large group would be too messy, so I will just share the sample for ideas.

Have a creative day!

Moana

A Perfect Day

It is kind of ironic that I created this card last Thursday evening for Friday’s blog post. Then I entered into a series of hectic, not perfect days at all.  So, here it is five days later.  Today can still be that perfect day though, right?

3-15

I usually am not into realistic photo paper, but this designer series pack has some really nice pieces in it.  This one especially. It looks really dimensional to me and I know it isn’t. It did create a lovely background though, and is the inspiration behind the card, literally.

I went with the country feel and scattered flowers all around the sentiment.  That was stamped, die cut and layered up a bit.  Those stitched shapes framelits are cool.  I debated turning the sentiment into a wall hanging with brads and linen thread, but knew I wanted to use burlap ribbon, so I left it alone.

3-15 (1)

The pearls were so fun to place.  I usually don’t use the largest ones that often, or so many, but this card called for it.  I might have to make an envelope for this one, I don’t think it will fit, or very well.  Works for me!

Have a creative day!

Moana

Golden Garden in Bloom

Distracted, distracted, distracted.  That would be my theme for the last several days. Sometimes we complain when we get stuck in a run, other times we stress out looking for that comfortable rut.  I think mine was on another planet all together.  Still looking, but getting closer for sure.  This lovely project has waited on my desk for four days to be shared. Worth it though, it is so pretty.

3-7

I sat down, picked out five different colors and began a water color background. That has to be one of my favorite activities, just making soft blending colors.  Almost soothing. When it was dried I added the huge floral stamp from the garden in bloom set. Some images were stamped full strength and others stamped off once. I wasn’t quite happy there, so I took it up a notch. I have these awesome guilding flakes that give a really cool embossed look. You brush on glue from a pen, set them on the glue and swirl a stipple brush over that to get rid of the excess.  This time I brushed the glue directly on the stamp, stamped a glue image and then put the flakes on.  It worked out so great!  Can’t wait to do it again.

The tag was simply created with water color paper.  I stamped the image, rounded the corners and sponged the edges.  It was a bit stark so I took a light wash of color right over the top.  It blurred the sentiment a bit, but not too much.  A touch of ribbon on the side anchored with metallic thread and I was ready to go.

3-7 (1)

The inside got a bit of echo stamping of course. I nearly always put that in place.  It just ties it all together so nicely.

Have a creative day!

Moana

Flourish Wishes

Such a perfect combination here. Nearly all of my favorite things combined into one project. The only thing missing would be some water coloring, but with paper this beautiful I don’t feel like there is anything lacking here. Even better, this took almost no time at all.

3-1

I just received an order that had this glimmer paper in it, one of the new free items during Sale-a-bration right now, and I couldn’t wait to enjoy it.  It comes in three colors, but the bermuda bay tone was on top so it was literally that simple. I knew there was the same color included in the cupcakes and carousel dsp stack and that became step two, pick a pattern. I probably spent the longest just deciding which one to choose.

The die cut was not as easy to decide because there are so many wonderful ones to choose from.  I kept it simple though and went for a favorite. The glimmer paper was cut to size and then I did the die cutting from the center, knowing it wouldn’t show, and I could make that paper last longer.  Glimmer paper is such a weakness for me, especially in colors like this. The flourish was glued down with tombo and then the designer paper adhered to the glimmer paper with fast fuse.  Regular adhesive and glimmer paper aren’t friends, it needs something stronger.

3-1-1

The sentiment was stamped in the same ink color, die cut, layered zippity quick and raised up on dimensionals.  How easy is that? I had a bit of room for another little die cut before I adhered it down, so that had to happen, hence the need for a matching gift box to use that piece. No problem, just get another piece of the same paper and happiness was achieved. What a great way to launch National Craft Month!

Have a creative day!

Moana

Elegant Botanicals

I started this lovely project yesterday, but got distracted by a shopping adventure with my mother-in-law and two sister-in-laws.  The weather was terrible, but the company was great, and who doesn’t need a shopping adventure once in a while!  This was waiting for me though, and I couldn’t wait to finish it.

2-21

On Sunday I created some favor handouts for a church lesson I taught and they were so cool. Nothing like this card, but the paper I painted for the die cuts had left overs I knew I could use again.  That is where all of these flowers came from.  Yes, a scrap pile.  You never know what those scraps could turn into.

I created a simple background with three liquid metal colors wet on dry.  They were too stark, so I gave a water wash over the top and was much happier.  I had some accidental splotches happen, so I gave a bunch more to disguise them and called it good.  Then the placement of all of these flowers.  Phew, it took some time.

I first layered the flowers together with different sized floral pieces and began my arrangement.  After I was done I began to adhere them down.  Since they were die cut from water color paper they were more pliable, even kind of molded.  The leaves really looked great with some curling and bending.  Little by little the arrangement came together.  Some pieces were adhered with dimensional foam, some with glue dots and several with tombo liquid glue.  Again, no worries because of the weight of the paper.  So very liberating!

I layered the front on another piece of water color paper and repeated the choice again for the card base itself.  It looks so clean and elegant.  It isn’t always easy to capture the different elements on camera, but this didn’t turn out too bad.  Just look at all of that metallic shine.  It took a bit of time, but was absolutely worth it!

2-21-1

Have a creative day!

Moana

Avant Garden

My daughter has this cute little app that allows her to ‘grow’ flowers and then ‘send’ them to someone.  I had a lovely bouquet this morning and I thought I would make a card like it. Her flowers actually had orange and yellow together, almost striped like an orchid.  This is what I came up with.  What a fun kind of game, right?

2-15

I used a piece of water color paper to stamp these little flowers.  The set I used is actually a free one with a $50 order during Stampin’Up! Sale-a-bration event.  The flowers went in first, tangerine tango then on to the crushed curry.  The stems were added in next followed by a smattering of leaves.  The stamen were added last using cherry cobbler on the tangerine tango flowers and cajun craze on the crushed curry ones.  I decided to soften the look with a healthy spritzing of water.  It was a slow process because I didn’t want the images to go all wobbly, just soften.  When the paper started to get pretty wet the edges started to blur a bit and I stopped.  This particular paper can hold a lot of water.  So, I had to use my heat tool for a while to get it all dry.  There was a bit of warping, but I liked it.

2-15-1
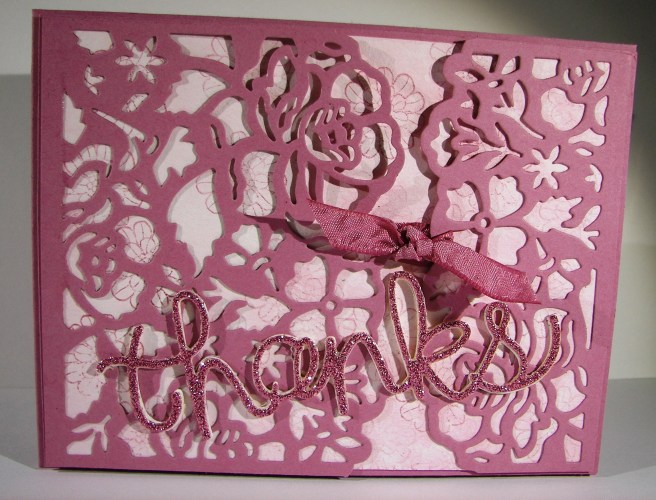
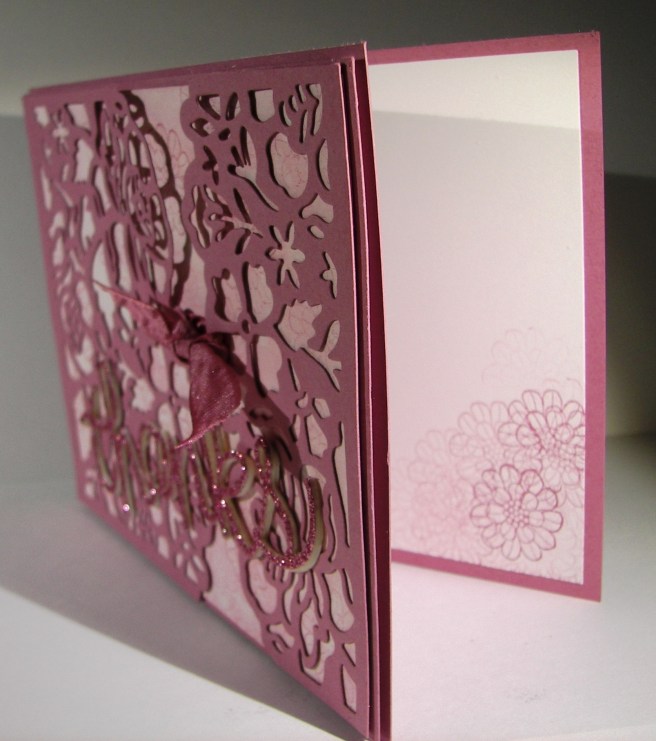
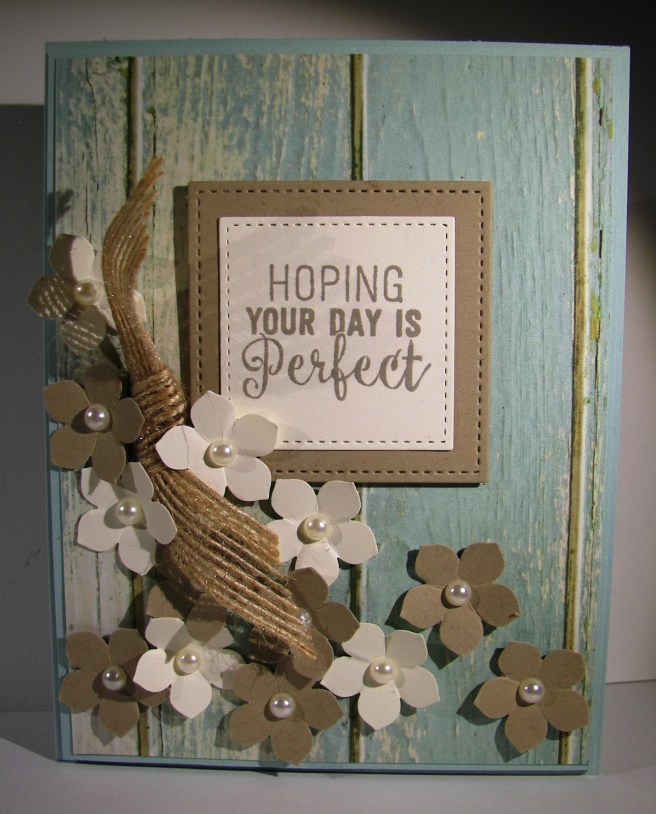
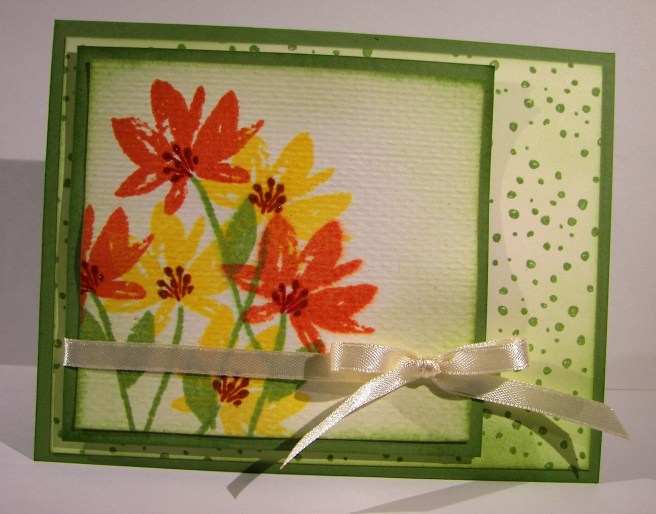
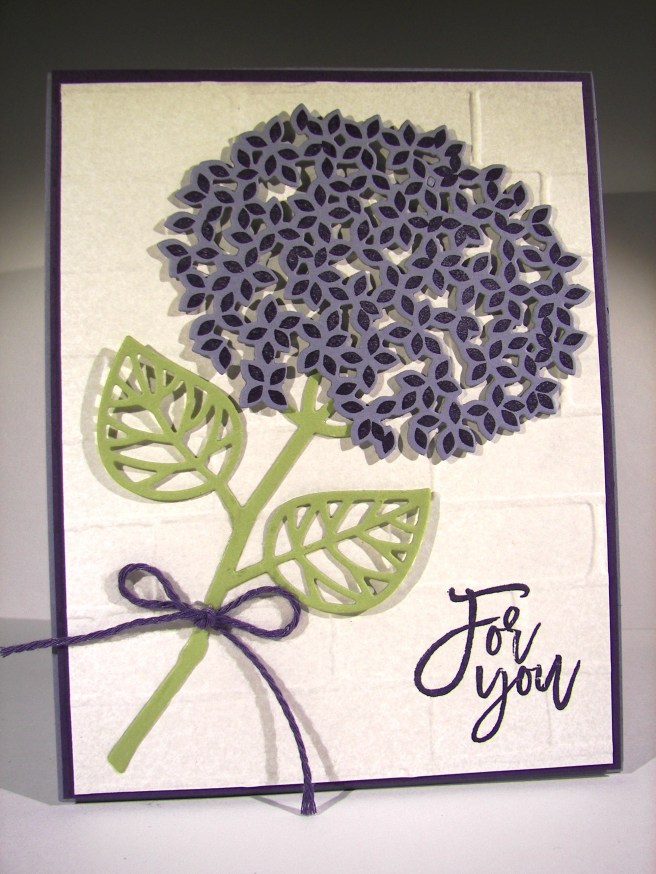
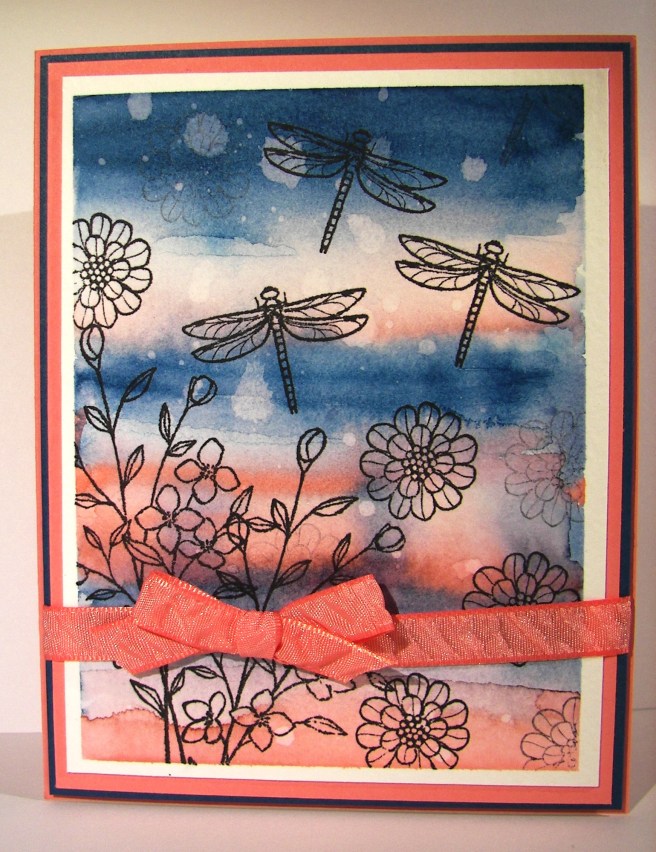
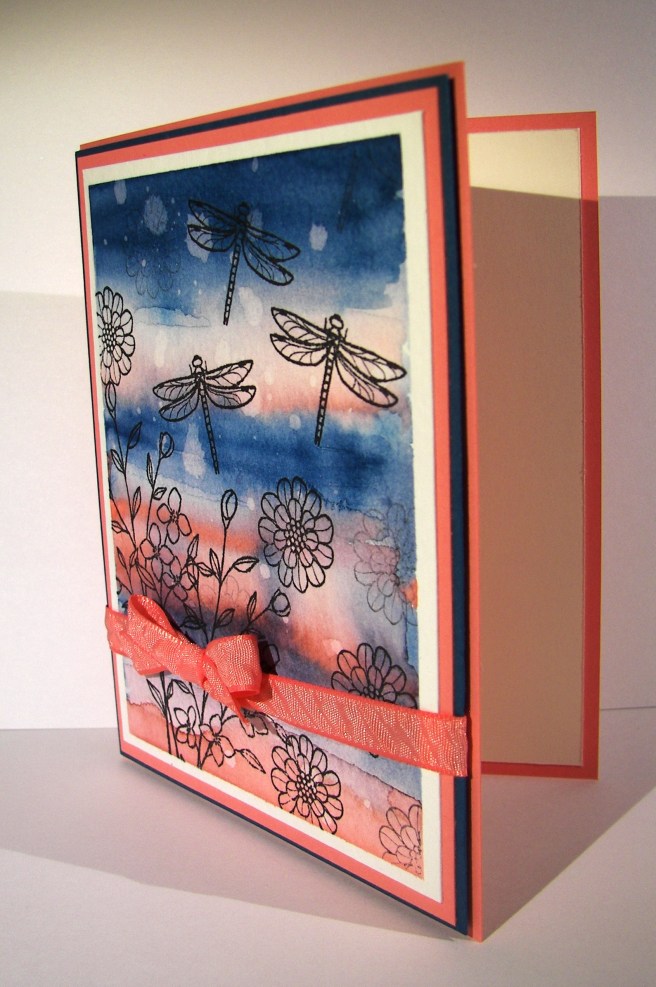
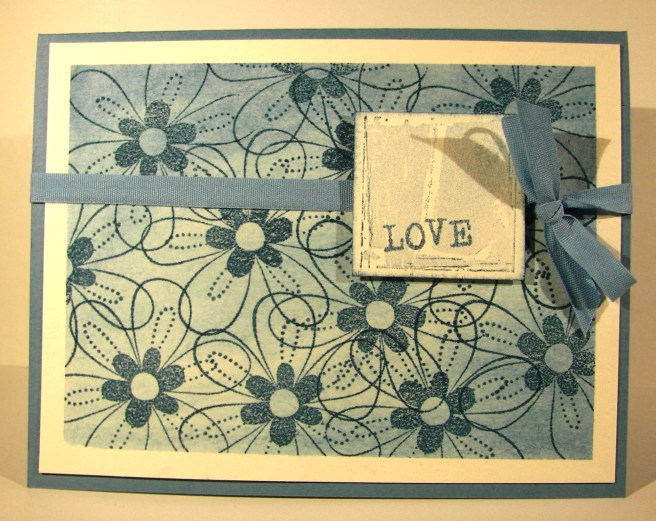
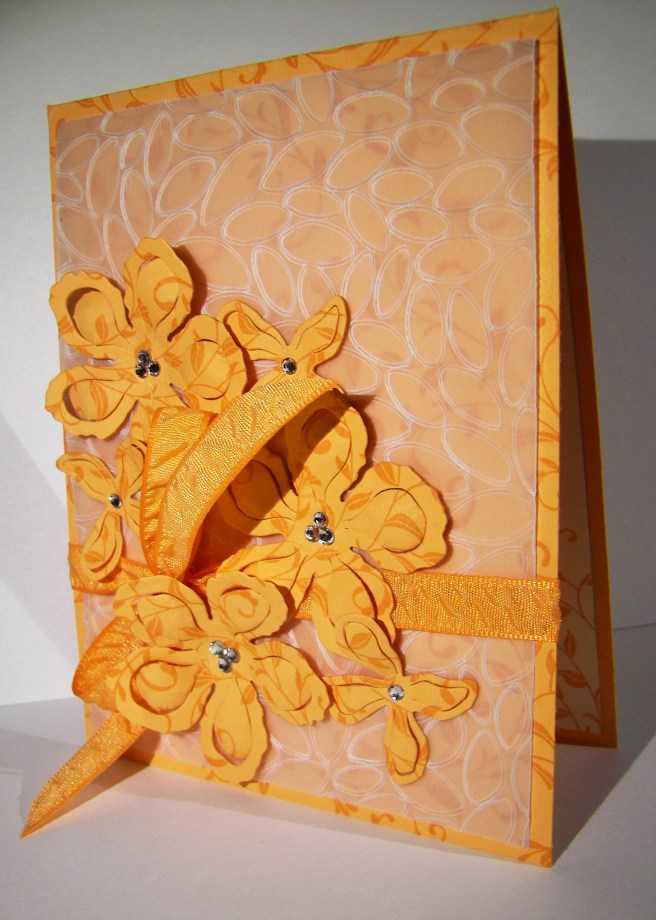
The background, and a bit on the inside, was stamped with the spotted stamp from the same set.  It is random, but has a defined shape to allow filling in the entire space without looking repetitive.  Very nice, very nice indeed.  The front piece was wrapped in some very vanilla satin ribbon and layered up on dimensionals.  The sentiment was left off completely allowing this to be an all occasion card ready to go.

Have a creative day!

Moana

Special Reason

Opening new product is so much fun.  This is a stamp and framelit bundle I bought from the spring Stampin’Up! catalog, and I love it.  I had a tag sitting on my work station trying to inspire me, and I went to this set.  Fresh eyes are hard to come by sometimes.  The tag had some colors that I would not have put together myself, or I thought, because I had made that tag!  Silly me.

2-6

Either way, this is what I came up with.  I stamped my background paper using the two floral images from the Special Reason set and then sponged with sweet sugarplum to fill in the spaces some.  The flowers were stamped off once before hitting the background to soften the colors.

I made a die cut from each of the ink colors in coordinating card stock to become the background for my sentiment.  How lovely.  Instead of wrapping ribbon around the card, which is what I love to do, I only made a sweet little bow from ruched ribbon and attached it with a glue dot.  I wanted the ribbon, but not the distraction it would have caused with too much of it.  A very nice balance.

2-6-1

The inside got a little stamping, as always, to finish it off.  I like this project so much, I think it will become the second project for my class on Saturday.  The ladies love to make their own background paper.

Have a creative day!

Moana

Thanks For Being You

What a perfect way to say thank you, for just being you.  A great compliment anyone would love to receive, I know I would.  Mixing a project with butterflies and flowers are one of my favorites.  Interesting how even when creating my moods show through.

1-31

I have dipped into the falling in love designer series paper pack so many times since I got it. It really is a lot of fun.  I had put off using this pattern, feeling like I use too many butterflies in my work. When I was a bit fussy though, I went right for it.  The flower stamp and these tiny butterflies and a perfect pairing.

The flower and sentiment come from the Avant-Garden stamp set which is another free one available during this springs Sale-a-bration.  If you are going to buy fun product to work with, you might as well get something free too, right?

1-31-1

There isn’t anything too complicated here today.  Just a little extra layering.  I even refrained from sponging, but looking at it again I think I would have liked it sponged up. I might have to try it again.

Have a creative day!

Moana

Blooms & Wishes

This stamp set sat in the annual catalog and teased me often.  I would try to pass by it saying that I surely did not need yet another floral stamp set.  Well, I broke down and bought it.  So very glad I did.  What a beautiful watercolor piece, right?  Great stamps make all of the difference.

1-15

I chose a few spring colors to work with, focusing on daffodil delight.  With all of the rainy, cloudy days we have had I wanted something bright and cheery. Mission accomplished for sure!  I stamped the large flowers from the set in different colors, stamping off as I went along.  The centers were all daffodil delight and more of an idea than a detailed center.  I sponged more yellow ink all around the flowers filling in most of the white areas before moving on to spritzing with water.  It was just a matter of managing the water spritzing to allow some ink movement, but not blurring too much.  It didn’t take long before I was satisfied.  A quick drying moment or two with my heat tool and it was ready for the sentiment.

That was stamped on a strip of velum cardstock and then wrapped around the bottom of the card front.  I used a lovely mint macaron satin ribbon to accent the bottom and layered it up with dimensionals.  Such a lovely spring card.  Of course I had to stamp a bit inside with a few yellow daisy images and one for the back too.

1-15-1

Have a creative day!

Moana

For You

This was the third project we created at workshop last weekend.  I know this stamp and framelit set are about a whole lot more, but as yet I still haven’t gotten past the hydrangea. I think with fall and the holiday seasons coming I will enjoy more of the trees, but not yet.

8-26

I used the heavy weight whisper white card stock for the background.  I handles the deep impressions of the embossing folders much better.  Also, I had plans for spritzing some color and that would have made some warping sadness otherwise.  It isn’t easy to see, but there is a light tan speckling going on there.  Such an easy technique to employ.

I stamped on wisteria wonder with elegant eggplant for the different tones and accented with more elegant eggplant.  The ink, thick bakers twine, and border piece were all done in elegant eggplant.  It is a dark color, so I kept it under control.  I didn’t sponge anything, that was a challenge to be honest.  The die cutting was simple and then layered in place. The stamping was done last. It did give a bit of a crease line in the sentiment, but worth it.  I worried if I stamped and then spritzed the wording would bleed and I wanted it crisp.  Done.

8-26 (1)

Have a creative day!

Moana

Fear Not My Friend…

When I am wanting to convey more emotion in a card, I go directly to water coloring.  The softness it creates is perfect.  And with this card, I literally poured my heart into it.

8-20

I wanted more space to work with so I created a larger card than normal.  This one measures 5″ x 6.5″.  Big, but not too big.  I also created my inside writing panel at the same time.  This card wasn’t going to just get a blank insert, or even a nicely stamped one. Besides, I love writing on water color paper, so very satisfying.

I stamped my floral image and sentiment first so I could control the strength of color where they were.  Then I brushed the papers with clean water to allow plenty of color movement. I kept the background light and tried to keep mixing to a minimum.  The colors I choose don’t always blend nicely, but that doesn’t stop me.  I dried, distressed a bit, and dried until I was happy.

I painted the flowers with strong color, allowed them to dry clean.  Then worked them over properly.  This included adding, dobbing, and adding color on the flower petals for a bit.  I centered the flowers with a strong yellow, but kept the color from the edge of the flower center.  Then I hit that area with a water spritzer and watched the flower bloom all over again.  The color moved nicely and then was dobbed some more.  Gold wink of stella was brushed into the petals and blended with water again.  The overall effect was lovely.

A special card for a very special friend.  She is far more brave than I can imagine.

8-20 (1)

Have a creative day!

Moana

Touches of Texture

Where has the time gone?  Always rushing away, but I managed to sneak a few extra minutes to play with some water coloring.  During the summer I thought nothing of spending a good hour or so creating a project.  Well…maybe that will have to be a weekend thing now that school is back in session and schedules have changed.  It still felt good, even if it was a quick one.

8-19

I masked my paper around the edges and applied a wash of clean water.  From there I just started to make stripes.  First with the blue and then the pink.  However, I applied the blue in stripes tipping the project so the ink could flow down a bit.  Then I flipped it around and applied the pink, also tipping the project, this time so the pink could flow into the blue. There was hardly any blending on my part.

The stamps were all from the same set, Touch of Texture.  That is a big set.  Definitely wants time to sit down and really play with the layering options.  I stuck with basic black with a little stamping off too.  Then I distressed with water droplets and called it.  I wasn’t sure if I wanted it to be done or not, but the clock said yes.  So there it is!

8-19 (1)

Have a creative day!

Moana

Love You More

Smudges and all, I love this card.  Leave it to me to use a stamp set that is filled with two step fruit images to use the flowers instead.  Like I said, I love flowers.  The fruits are great though, and I do plan on making fun projects with them too.  I actually used an old kit from nearly a year ago.  I love putting old kits to use.

8-12

The prior kit had patterned paper in these colors, but has been retired, so I thought I would make my own.  Making background images is so much fun to me.  It takes me back to the roots of my stamping, using quality tools for endless creativity.  This stamp set is made for just that thing.  You will be seeing it a lot I think.

The flowers were stamped first in calypso coral and then outlined with the coordinating stamp.  They match, but don’t have to be exact.  It goes with the artsy look it is designed with.  Works even better for me.  And the sentiment, how perfect is that.  I opted to center the flowers with large basic rhinestones instead of the stamped center.  Either would have been nice, but I wanted sparkle.  A finishing touch of solid bakers twine with a sweet bow. It actually came together pretty quick, it helps to have leftover kits to work with.  That makes me fuss less when I have last minute class cancellations because I know I will put the pre-cut kits to good use eventually.

8-12 (1)

Have a creative day!

Moana

Thoughtful Branches Thankyou

This card comes from a limited time stamp and framelit bundle.  There are many options within, all kinds of trees and fun things, but this is why I bought mine.  I love hydrangeas so much.  I am so going to enjoy this set.

8-9

I put a new stamp pad to use.  Stampin’Up! has produced a few ombre pads, this one in particular is rich razzleberry.  I am usually a bit more traditional, wanting more self control over the colors I use.  But this was pretty darn fun.  I like how it turned out and I am glad I bought them.  I wanted the color to bleed some, so I spritzed the flower with water after it was die cut.  It softened the color without compromising the ombre effect.

I painted another piece of water color paper with almost artichoke and used the stem die cut.  I didn’t have to add any color afterwards, it turned out nice.  I knew I would be working in water color paper, so I made both flower parts and the card front from the same paper. That way the ink would react the same and have a uniform look.  The background was done with a light wash in crushed curry.  No distressing, just painting.

I stamped the sentiment directly to the card front and called it good.  I did layer it up on another piece of almost artichoke paper for a bit of interest and to help control curling of the card front.

8-9 (1)

Have a creative day!

Moana

L is for Love

Current product is always fun and often a bit too exciting.  How about something that isn’t brand new, but new to you?  I was given a few stamp sets from my daughter-in-love and I couldn’t have been more pleased.  We did some stamping together and she just might have gotten the bug.  How fun!

8-8

These stamp sets are over a decade old, but just adorable.  The word set is fantastic.  I don’t know how I missed these because they are just what I would have purchased.  Well, they are mine now and I didn’t even have to hunt them down on eBay or something.  Retired product can be found all around online, but isn’t always priced reasonable.  If you find something you love in a current catalog, you should just get it.  Like I need another flower stamp set.  I don’t think I will ever stop buying floral stamps.

I brushed the background with ink until I got good coverage and then blotted a bit with a paper towel.  Then I used the largest floral stamp and put them all over the front overlapping generously.  I stamped ‘love’ on another piece of paper, trimmed it and placed it over a wrap of cotton ribbon, also retired.  Just because product gets retired doesn’t mean it isn’t beautiful.  It just means I can’t sell it because of availability.  No big deal there.

8-8 (1)

Have a creative day!

Moana

Building With Peekaboo Peach

The last days of summer are waning and I love spending a lazy morning with my youngest. We have had more laughs than tasks done, but I wouldn’t have it any other way.

8-4 (2)

I very much enjoyed giving myself a bit of a challenge with this one.  Working with one color can seem limiting, but can turn out more lovely than you might think.  The tone on tone stamping certainly made a difference and I think it is my favorite part of this card.

The floral die cuts did get put through some distressing with a large tipped stylus and a foam mat.  It helped lift them off the card front without obvious creases.  A simple yet effective technique.  I work the back side of the flower first then turn it over and hit the center.  It curls wonderfully, give it a try.

I hid my adhesive under the flowers and ribbon since it is not an attractive part of using velum card stock.  The inside of the card also got a bit of stamping to tie it together, but that was about it.

8-4 (1)

Have a creative day!

Moana