Flower Fair Gift Box

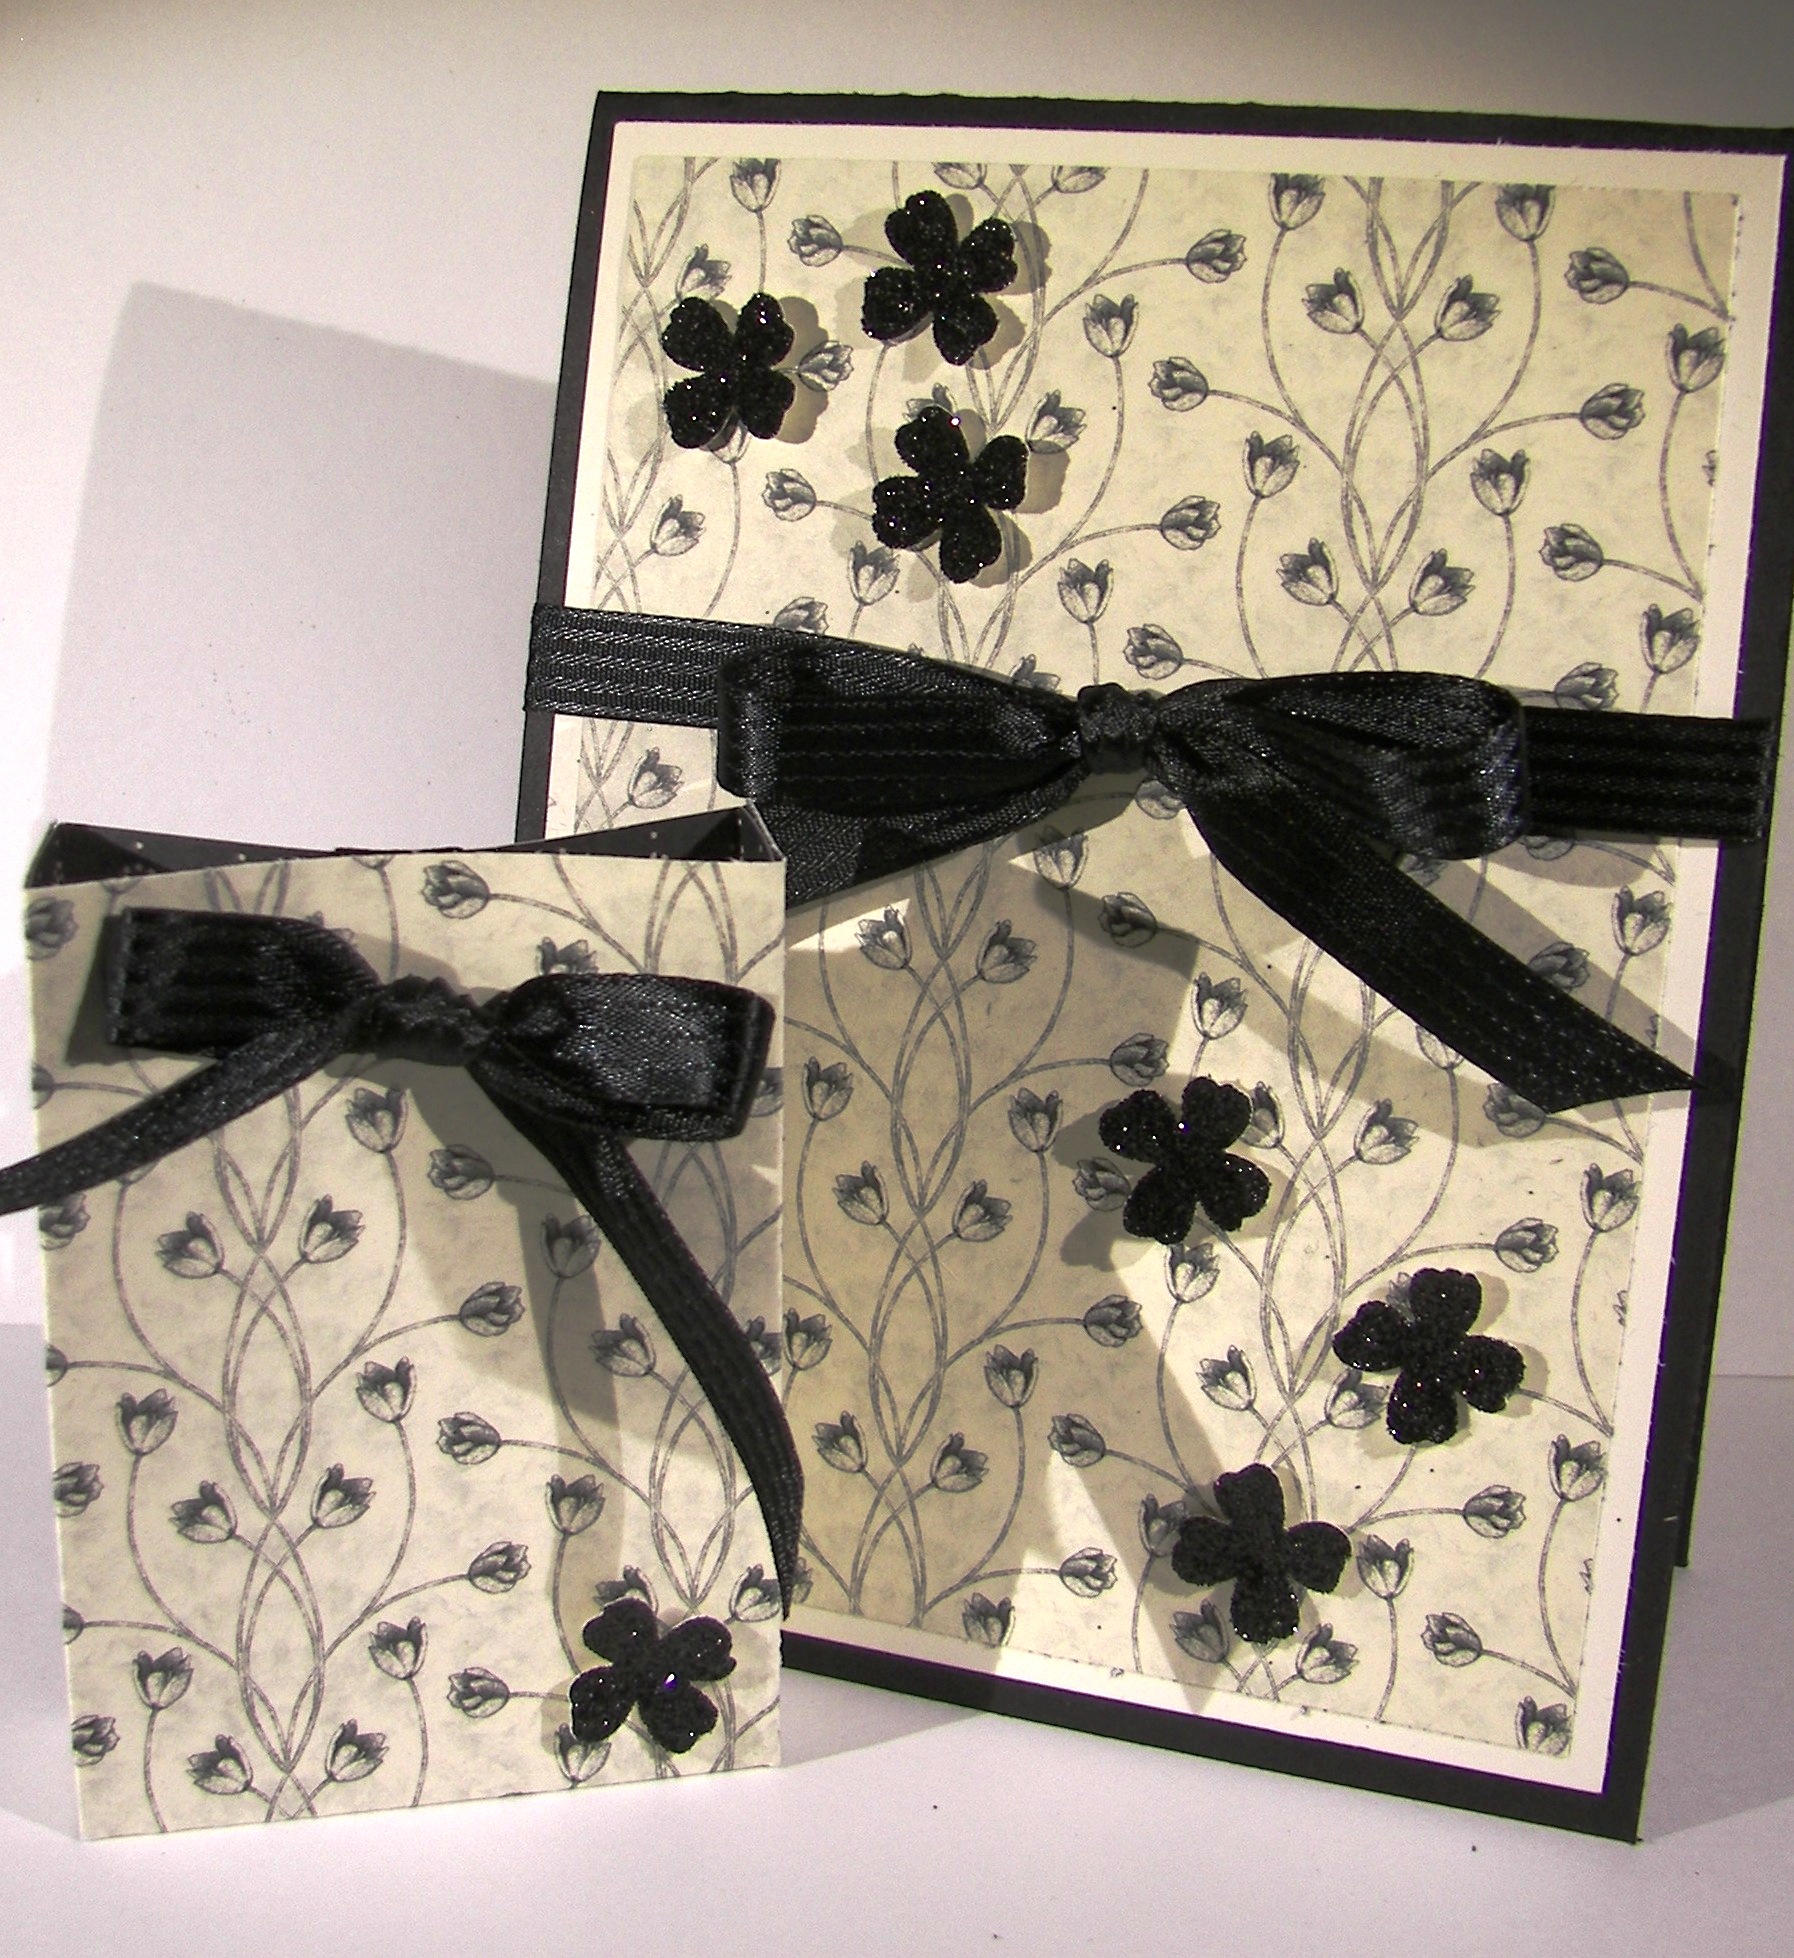
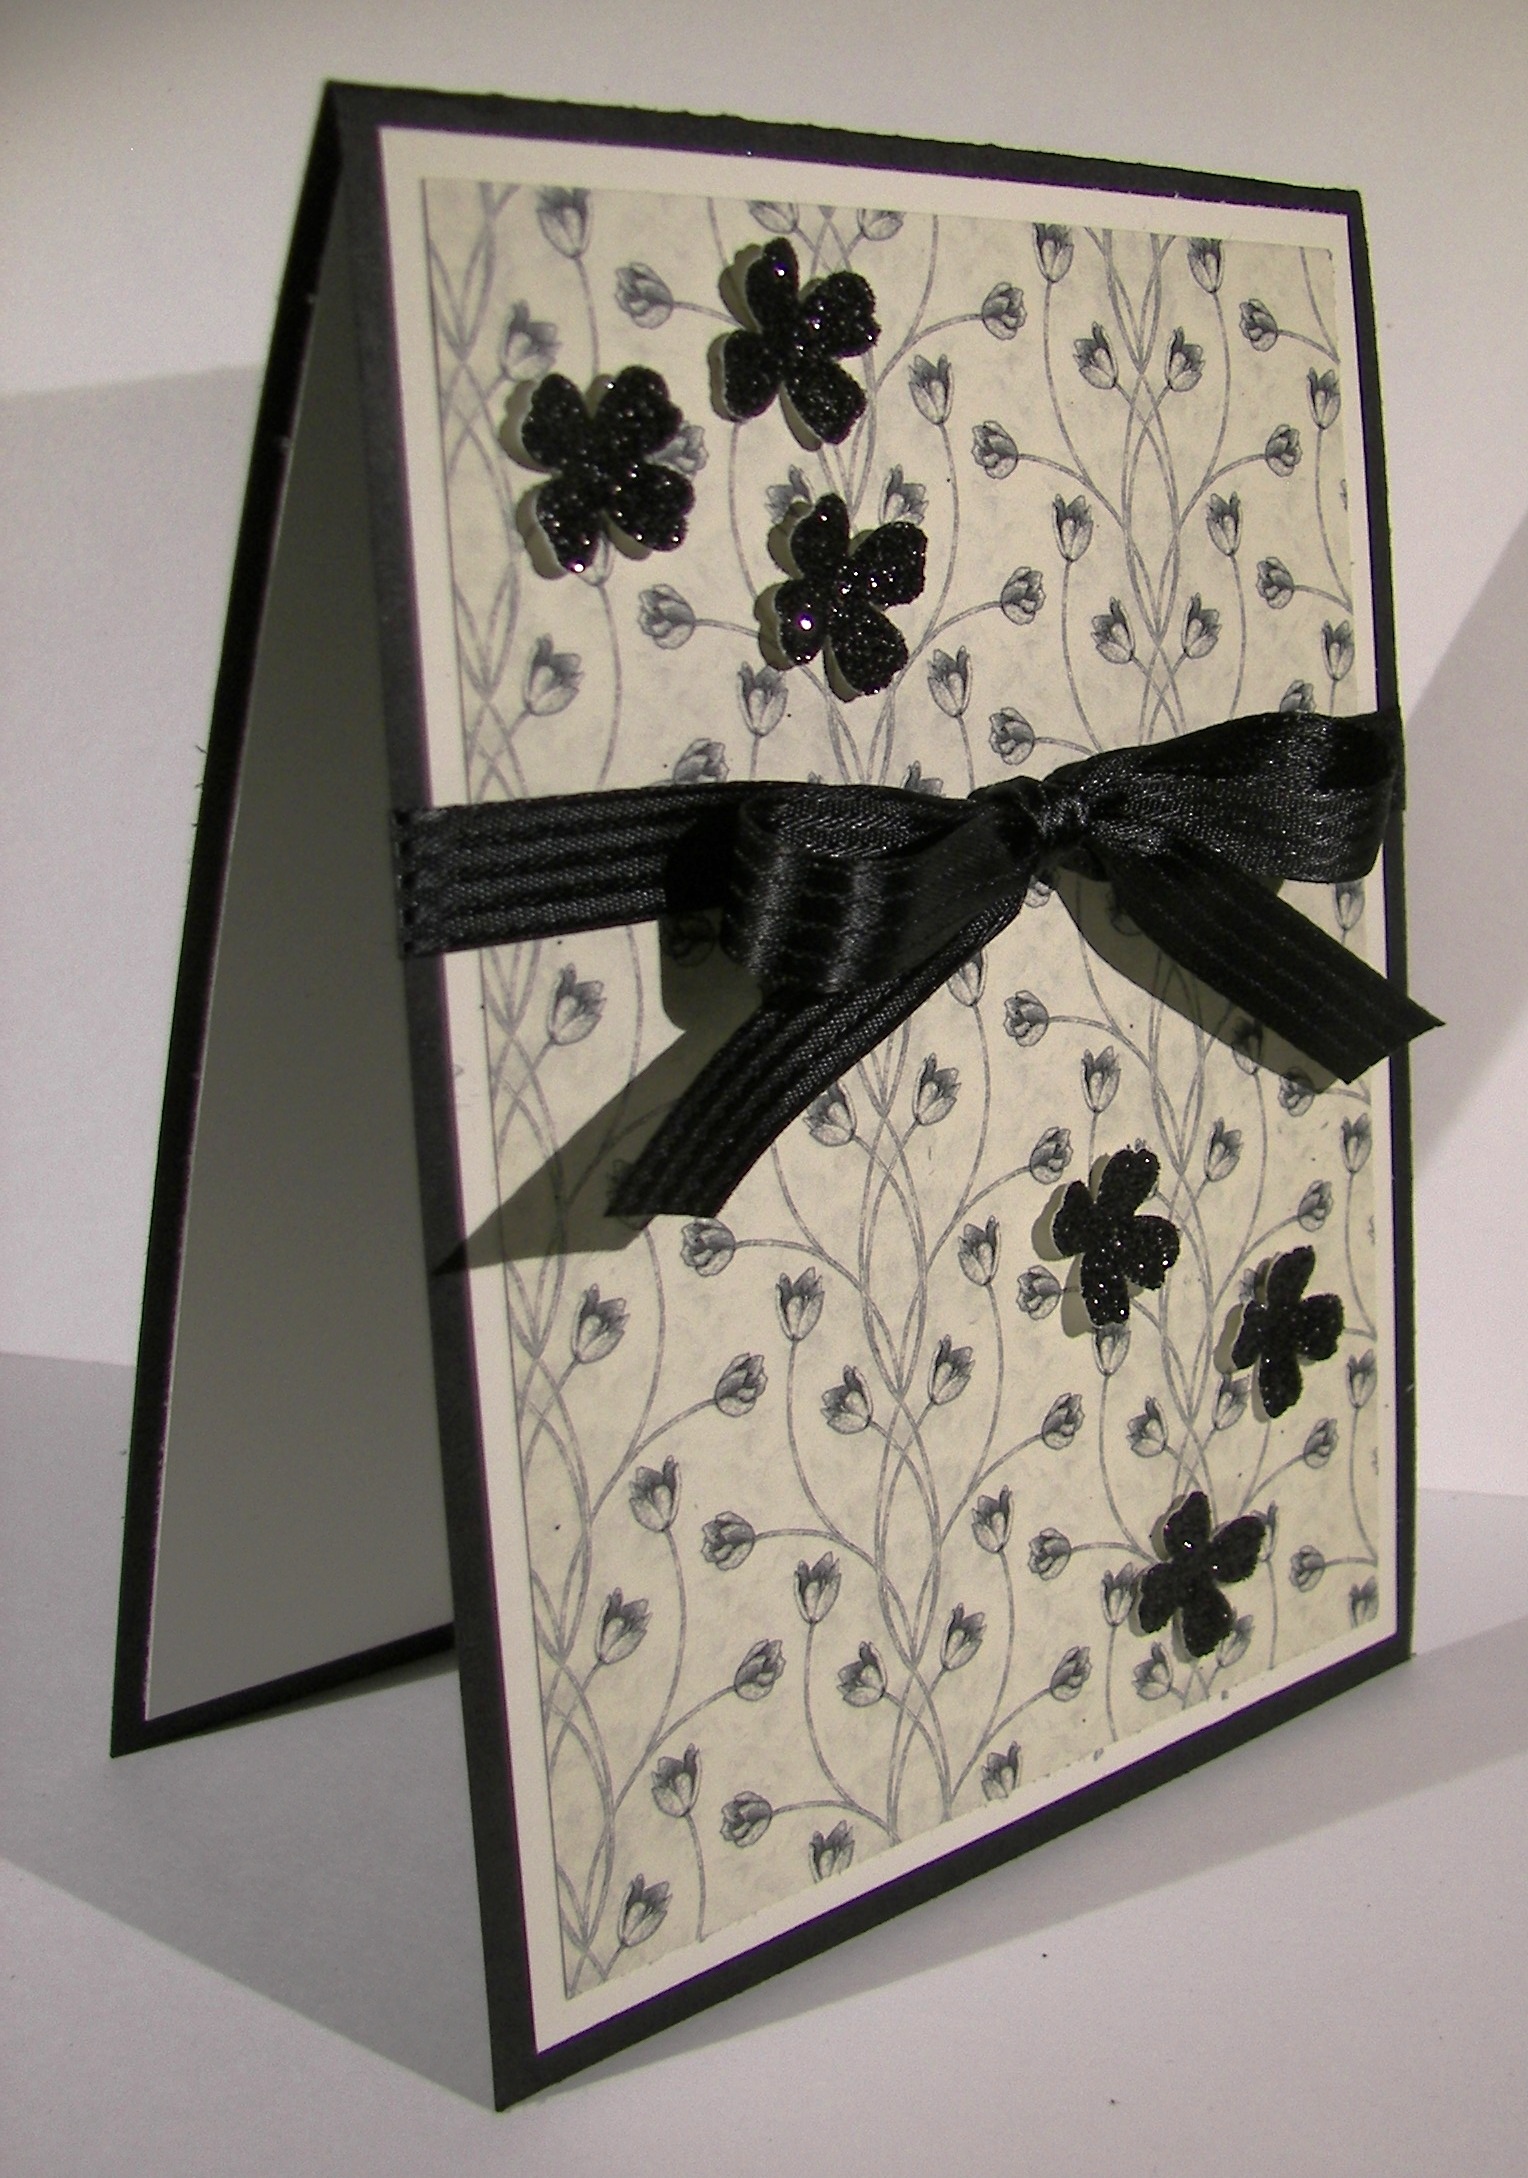
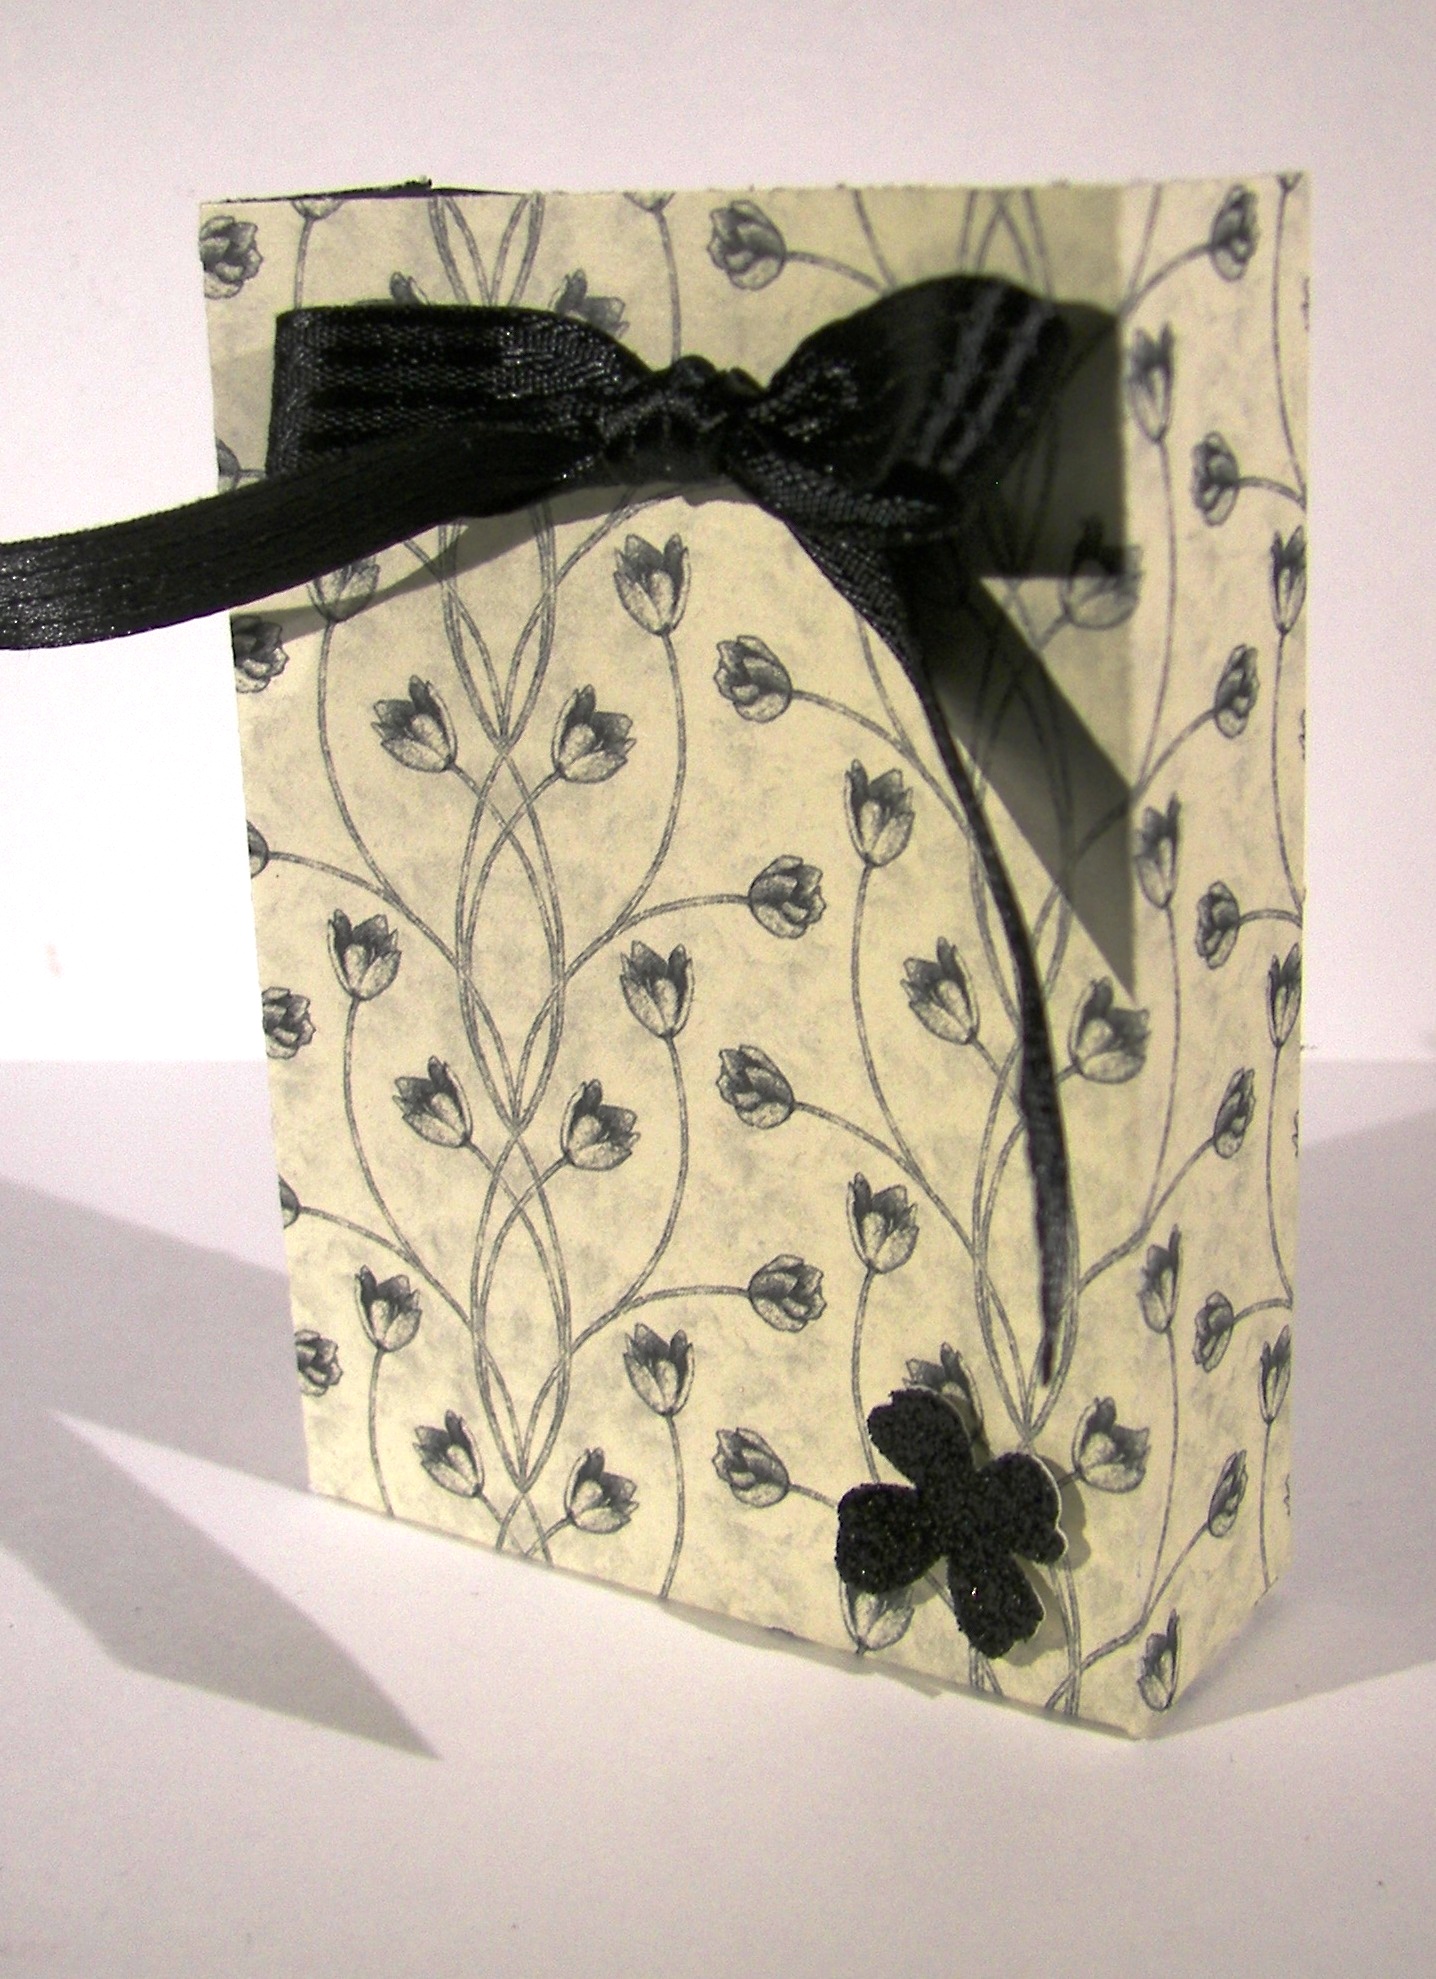
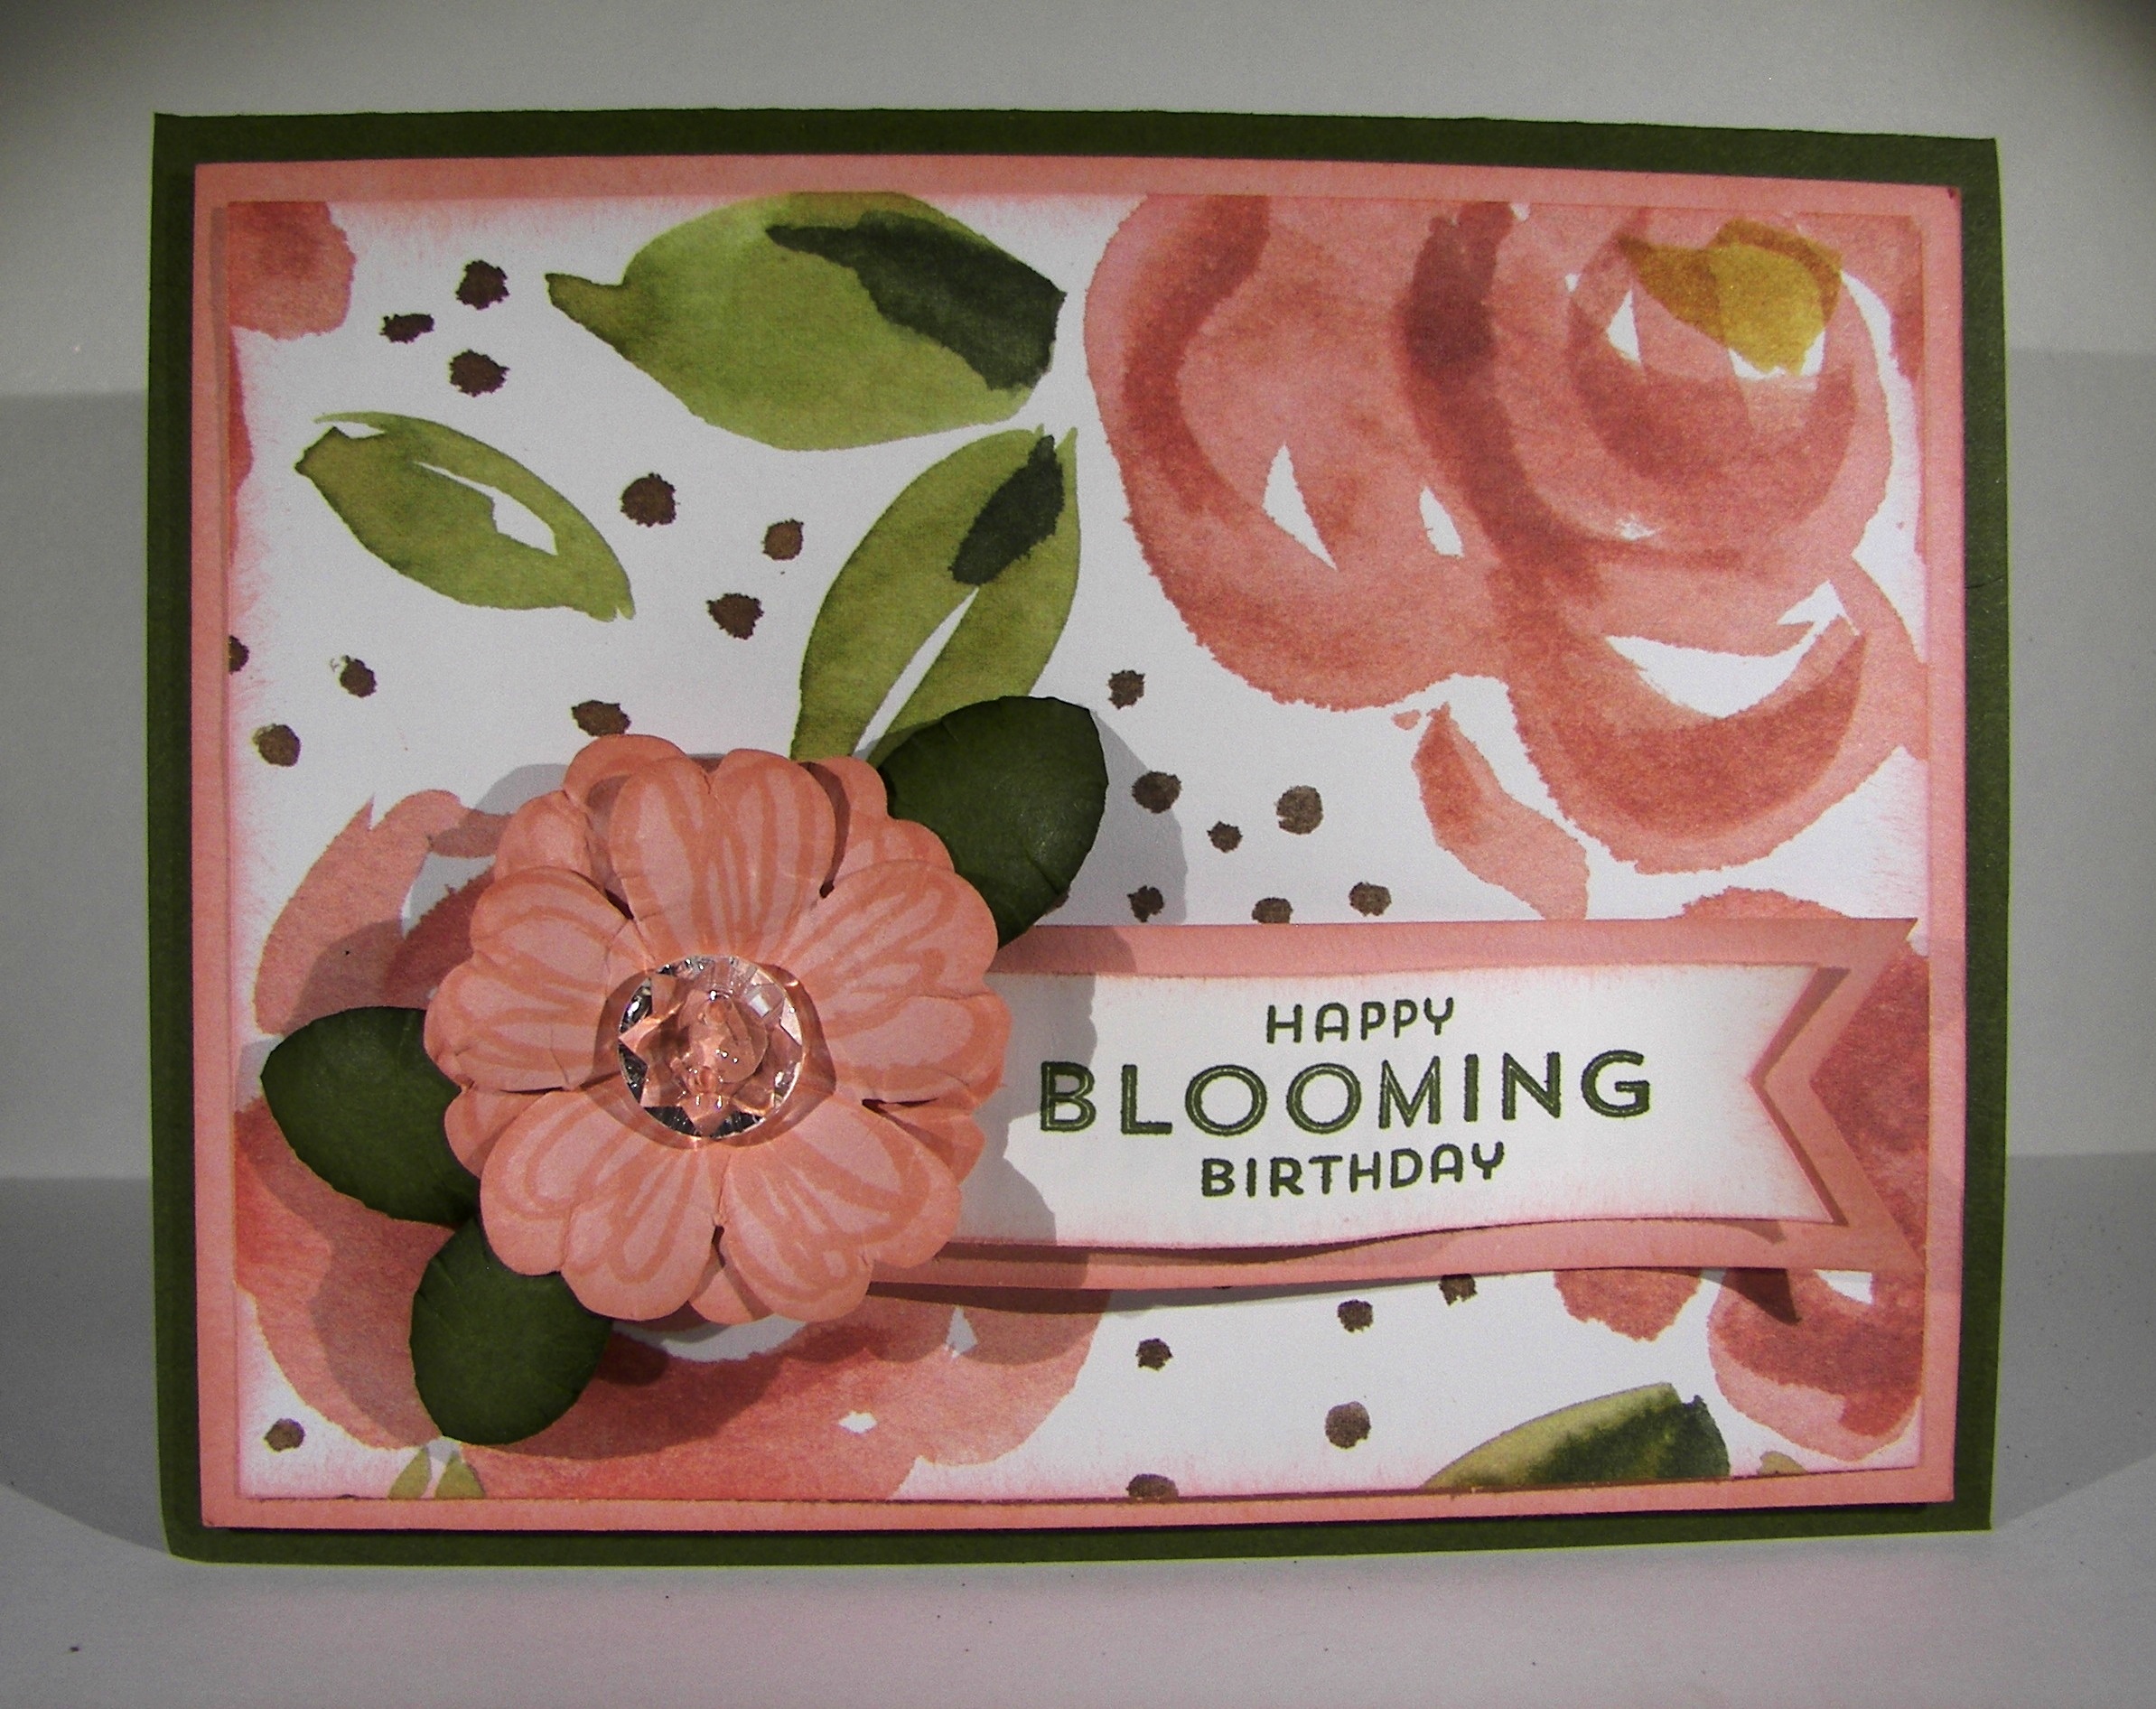
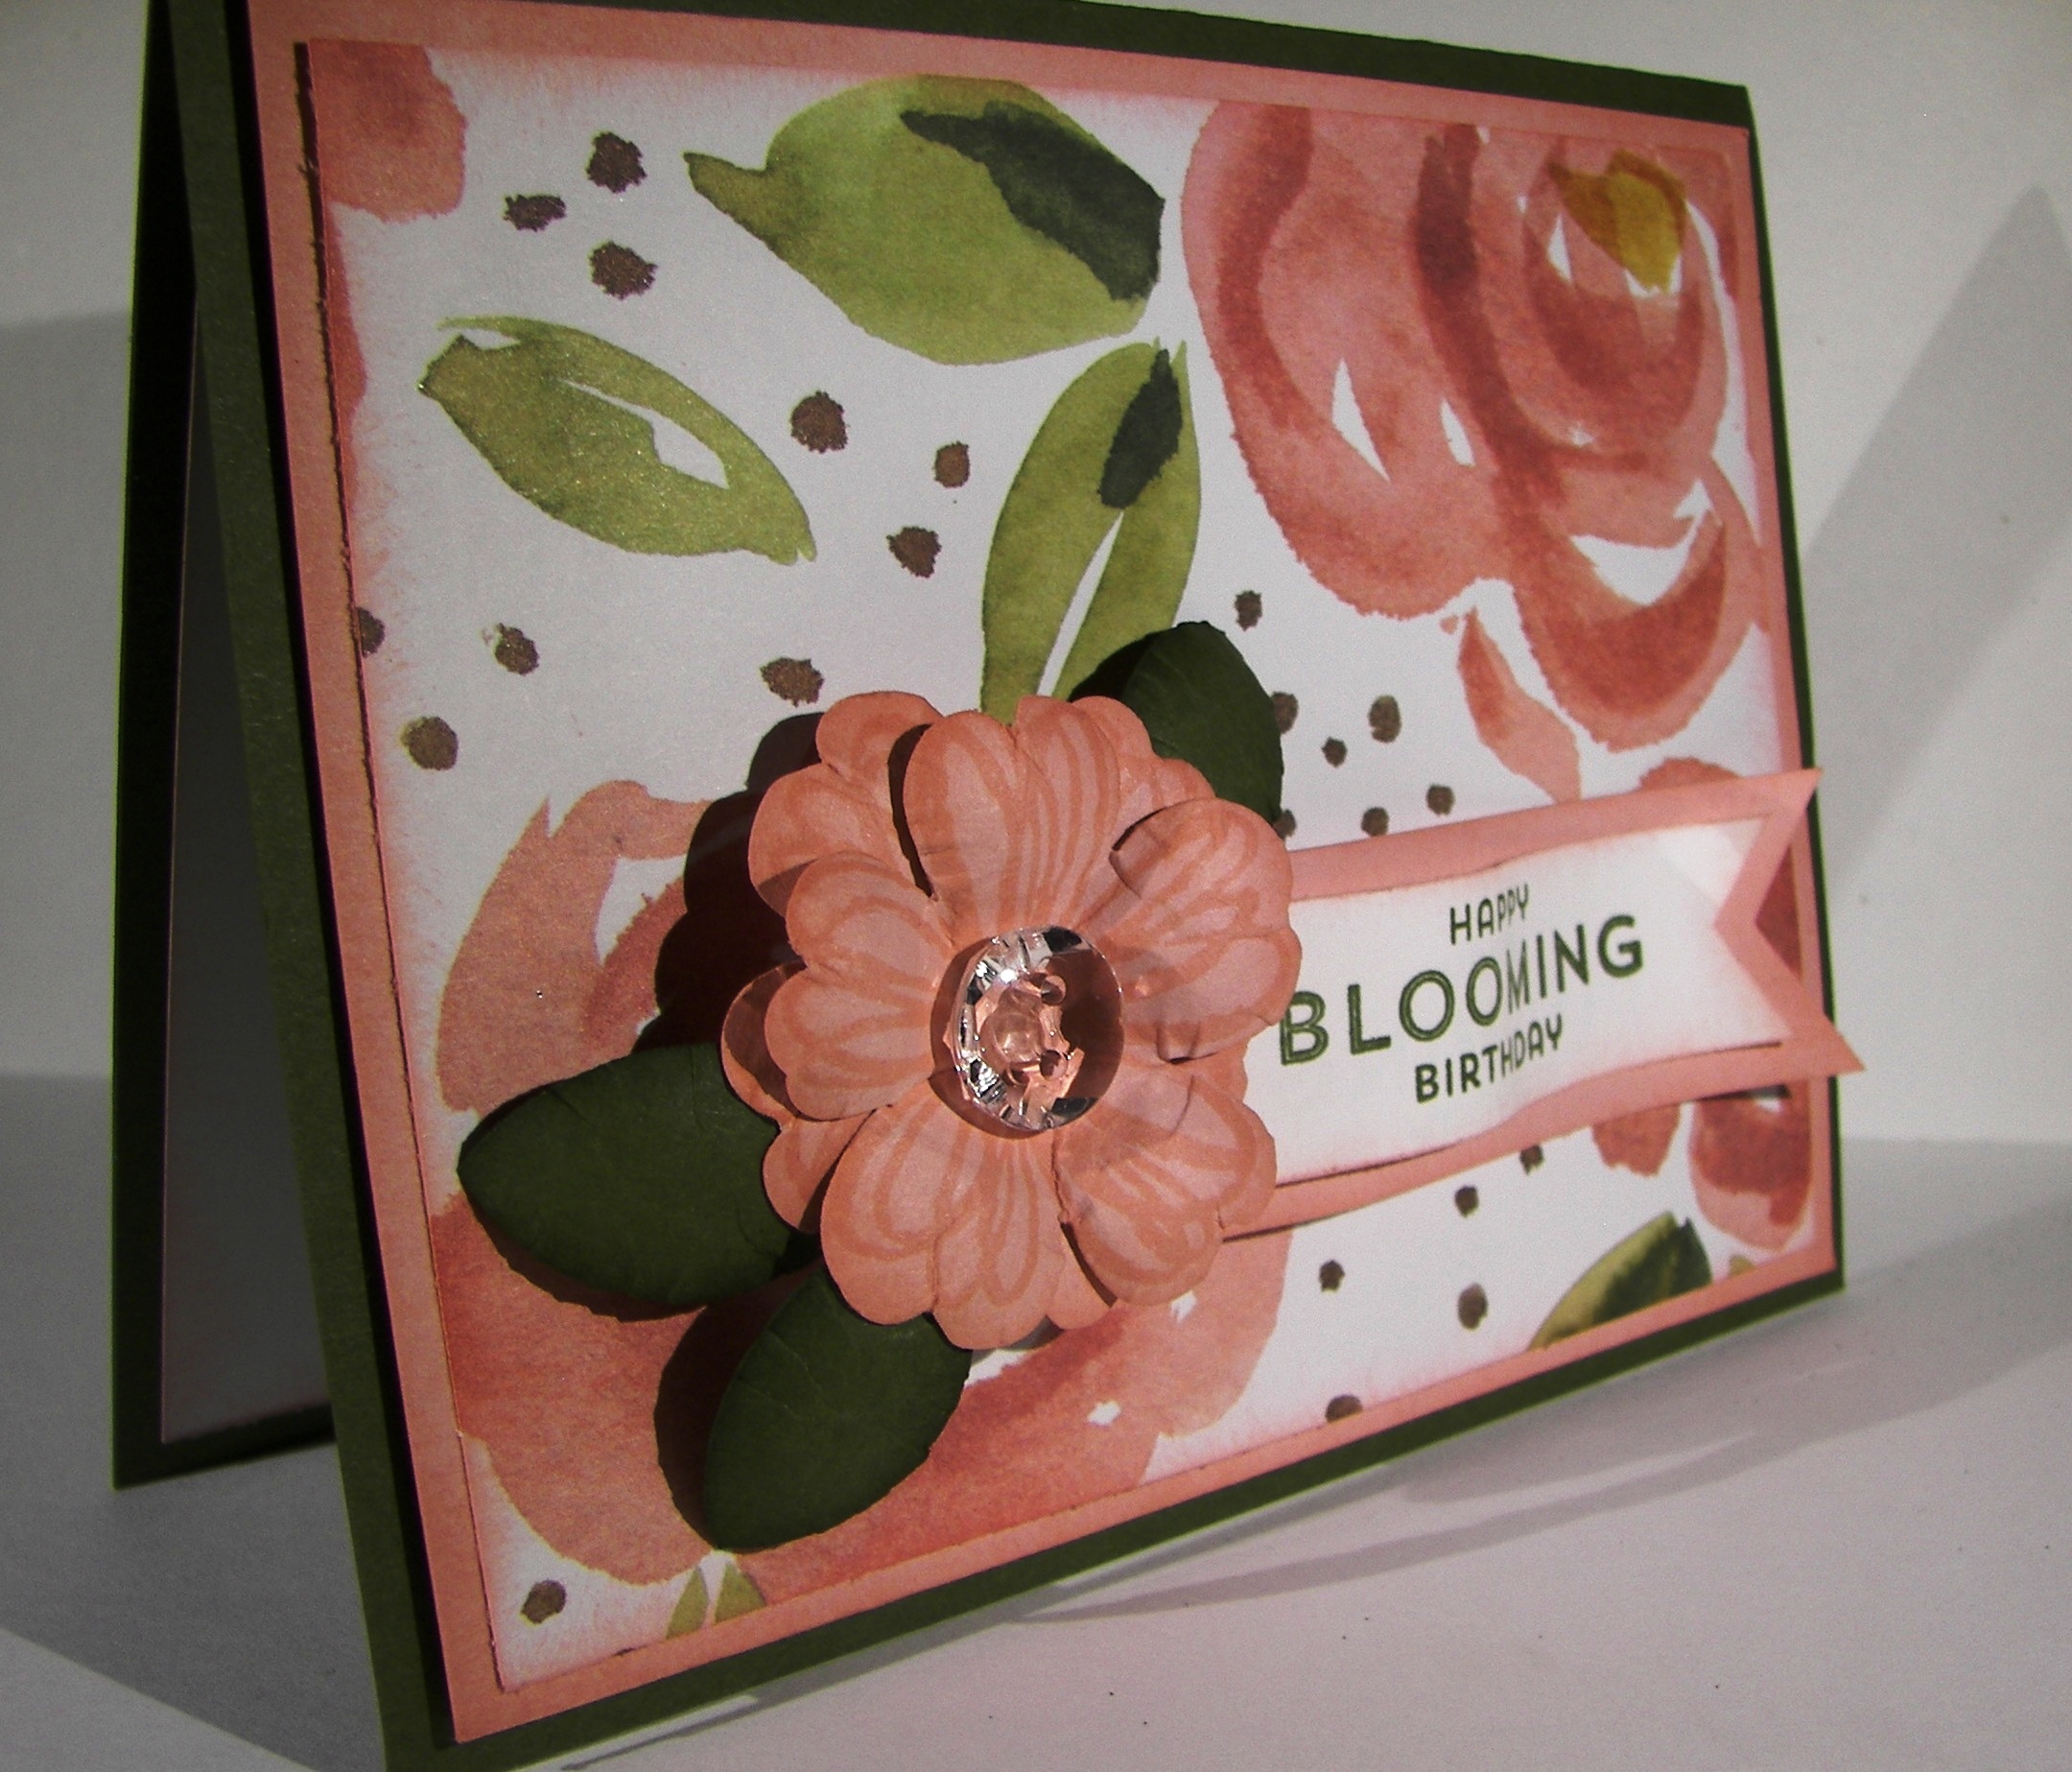
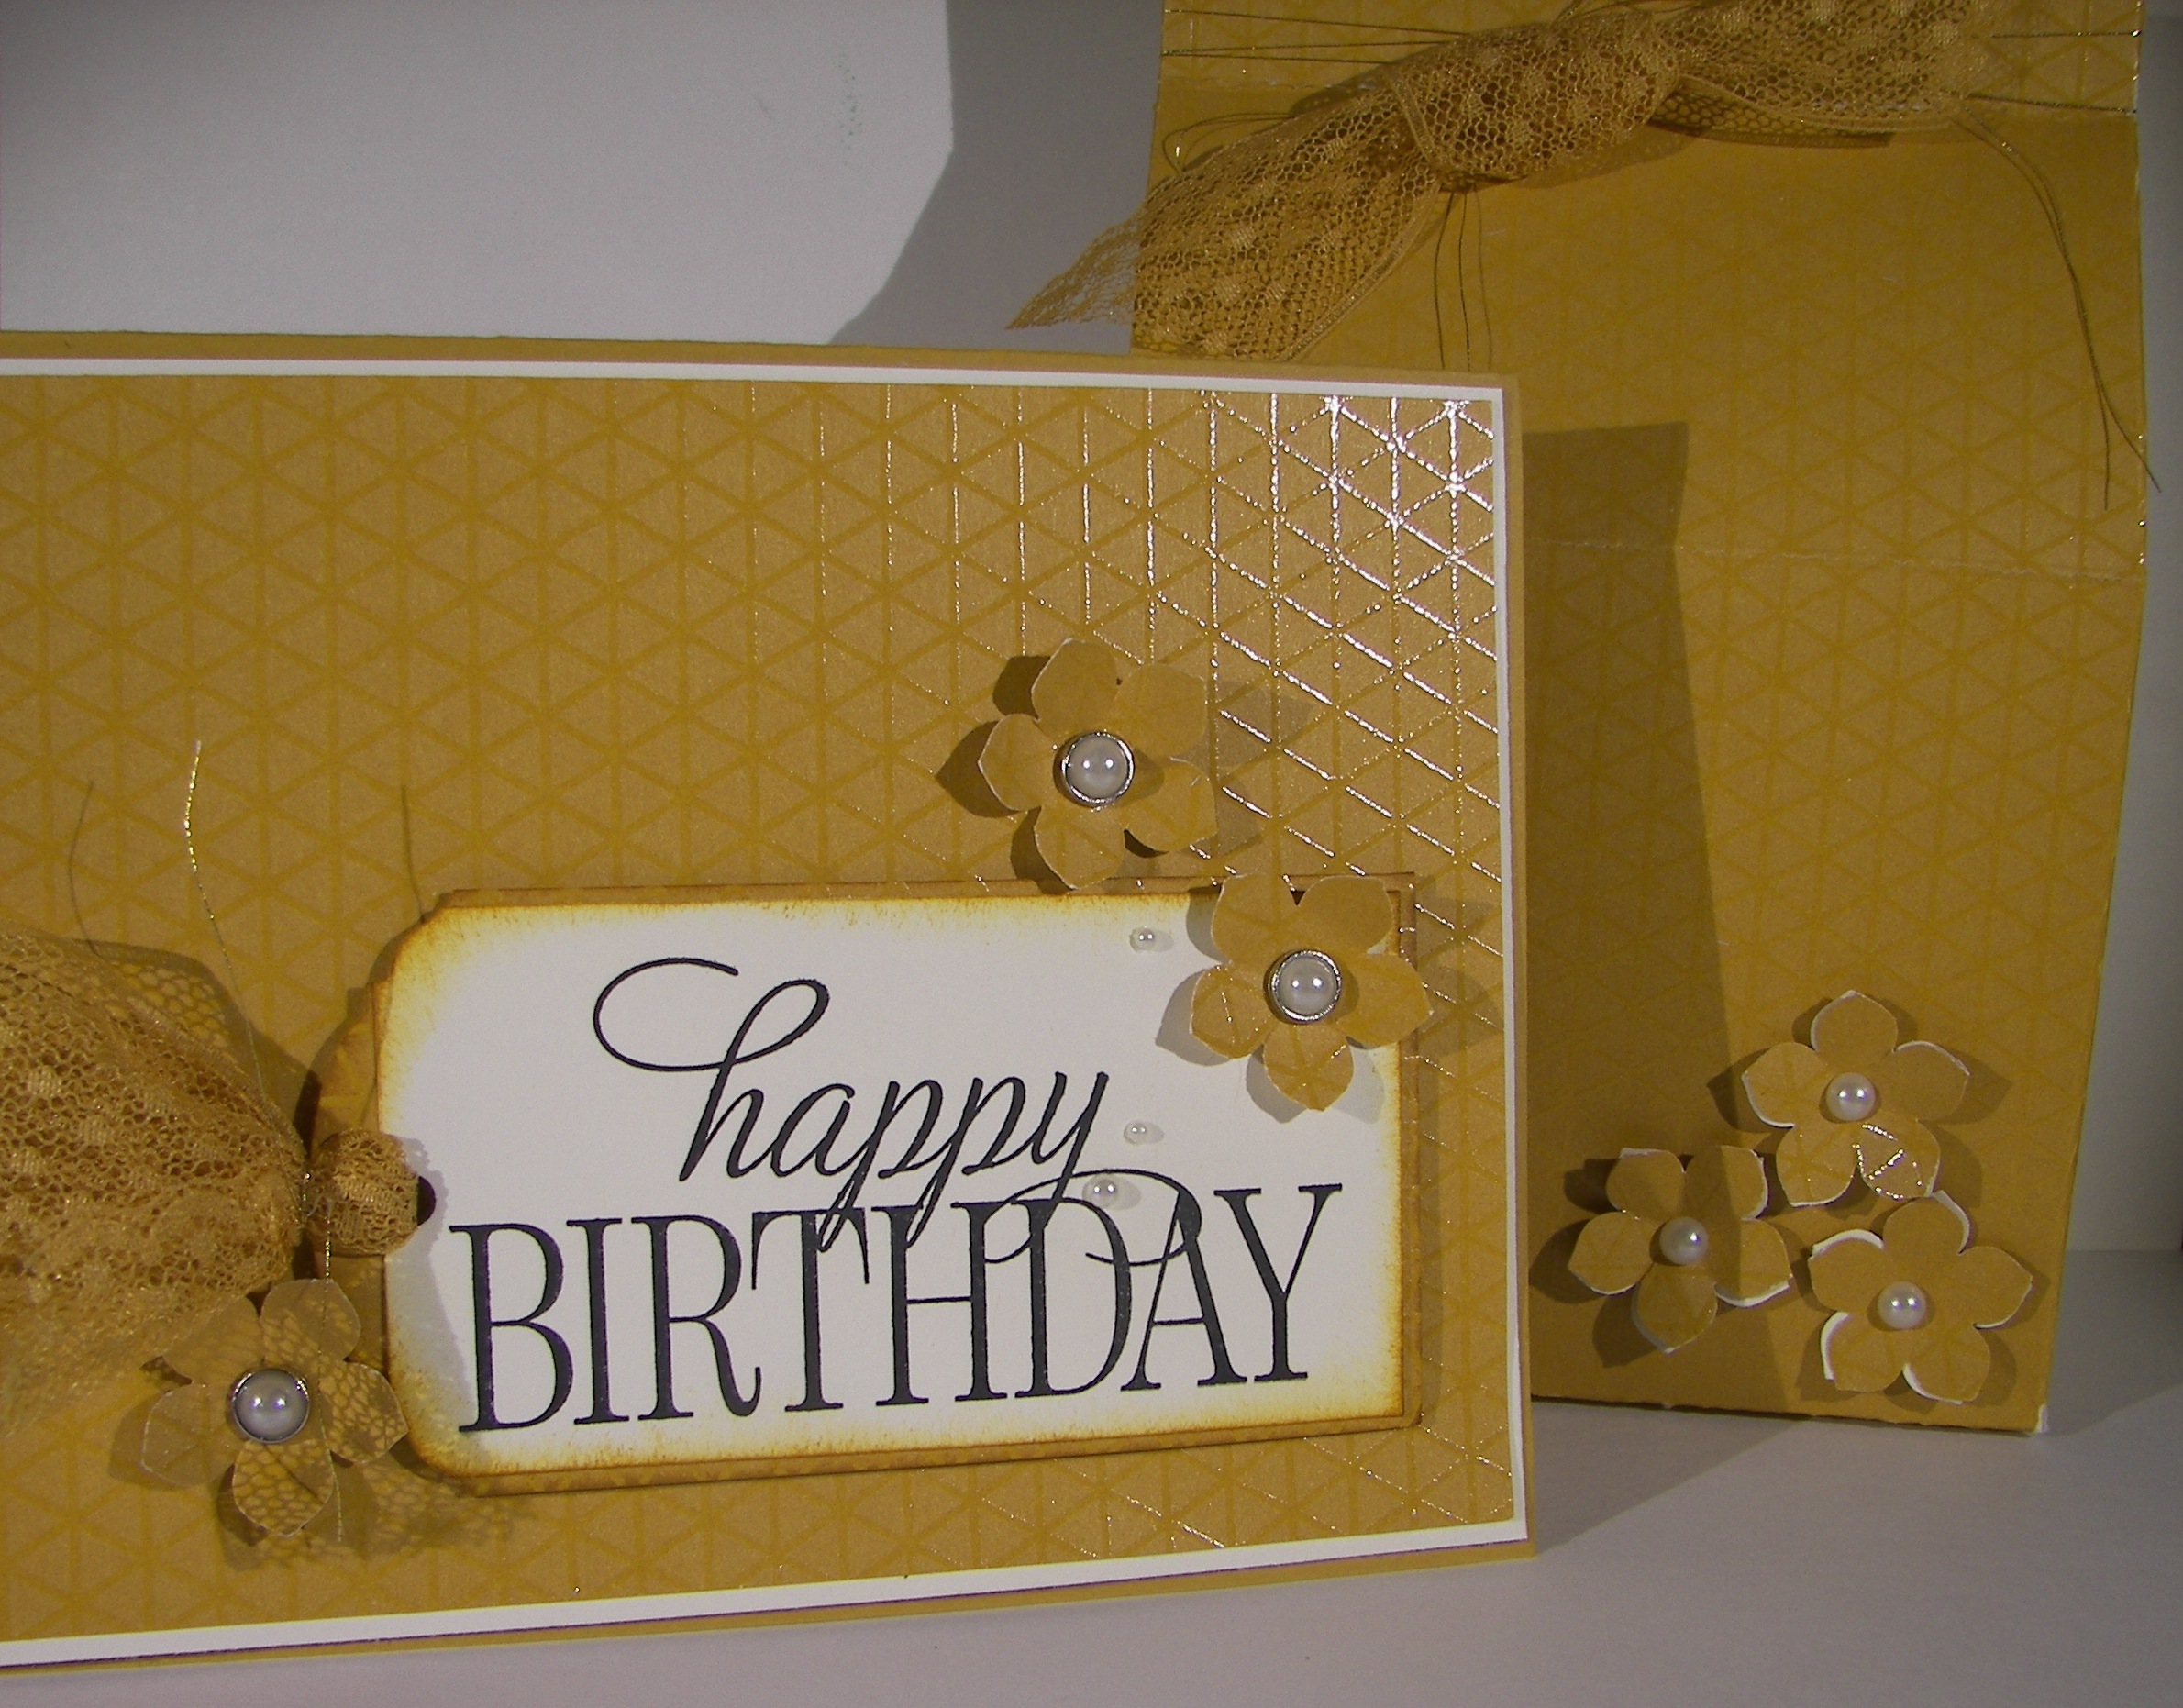
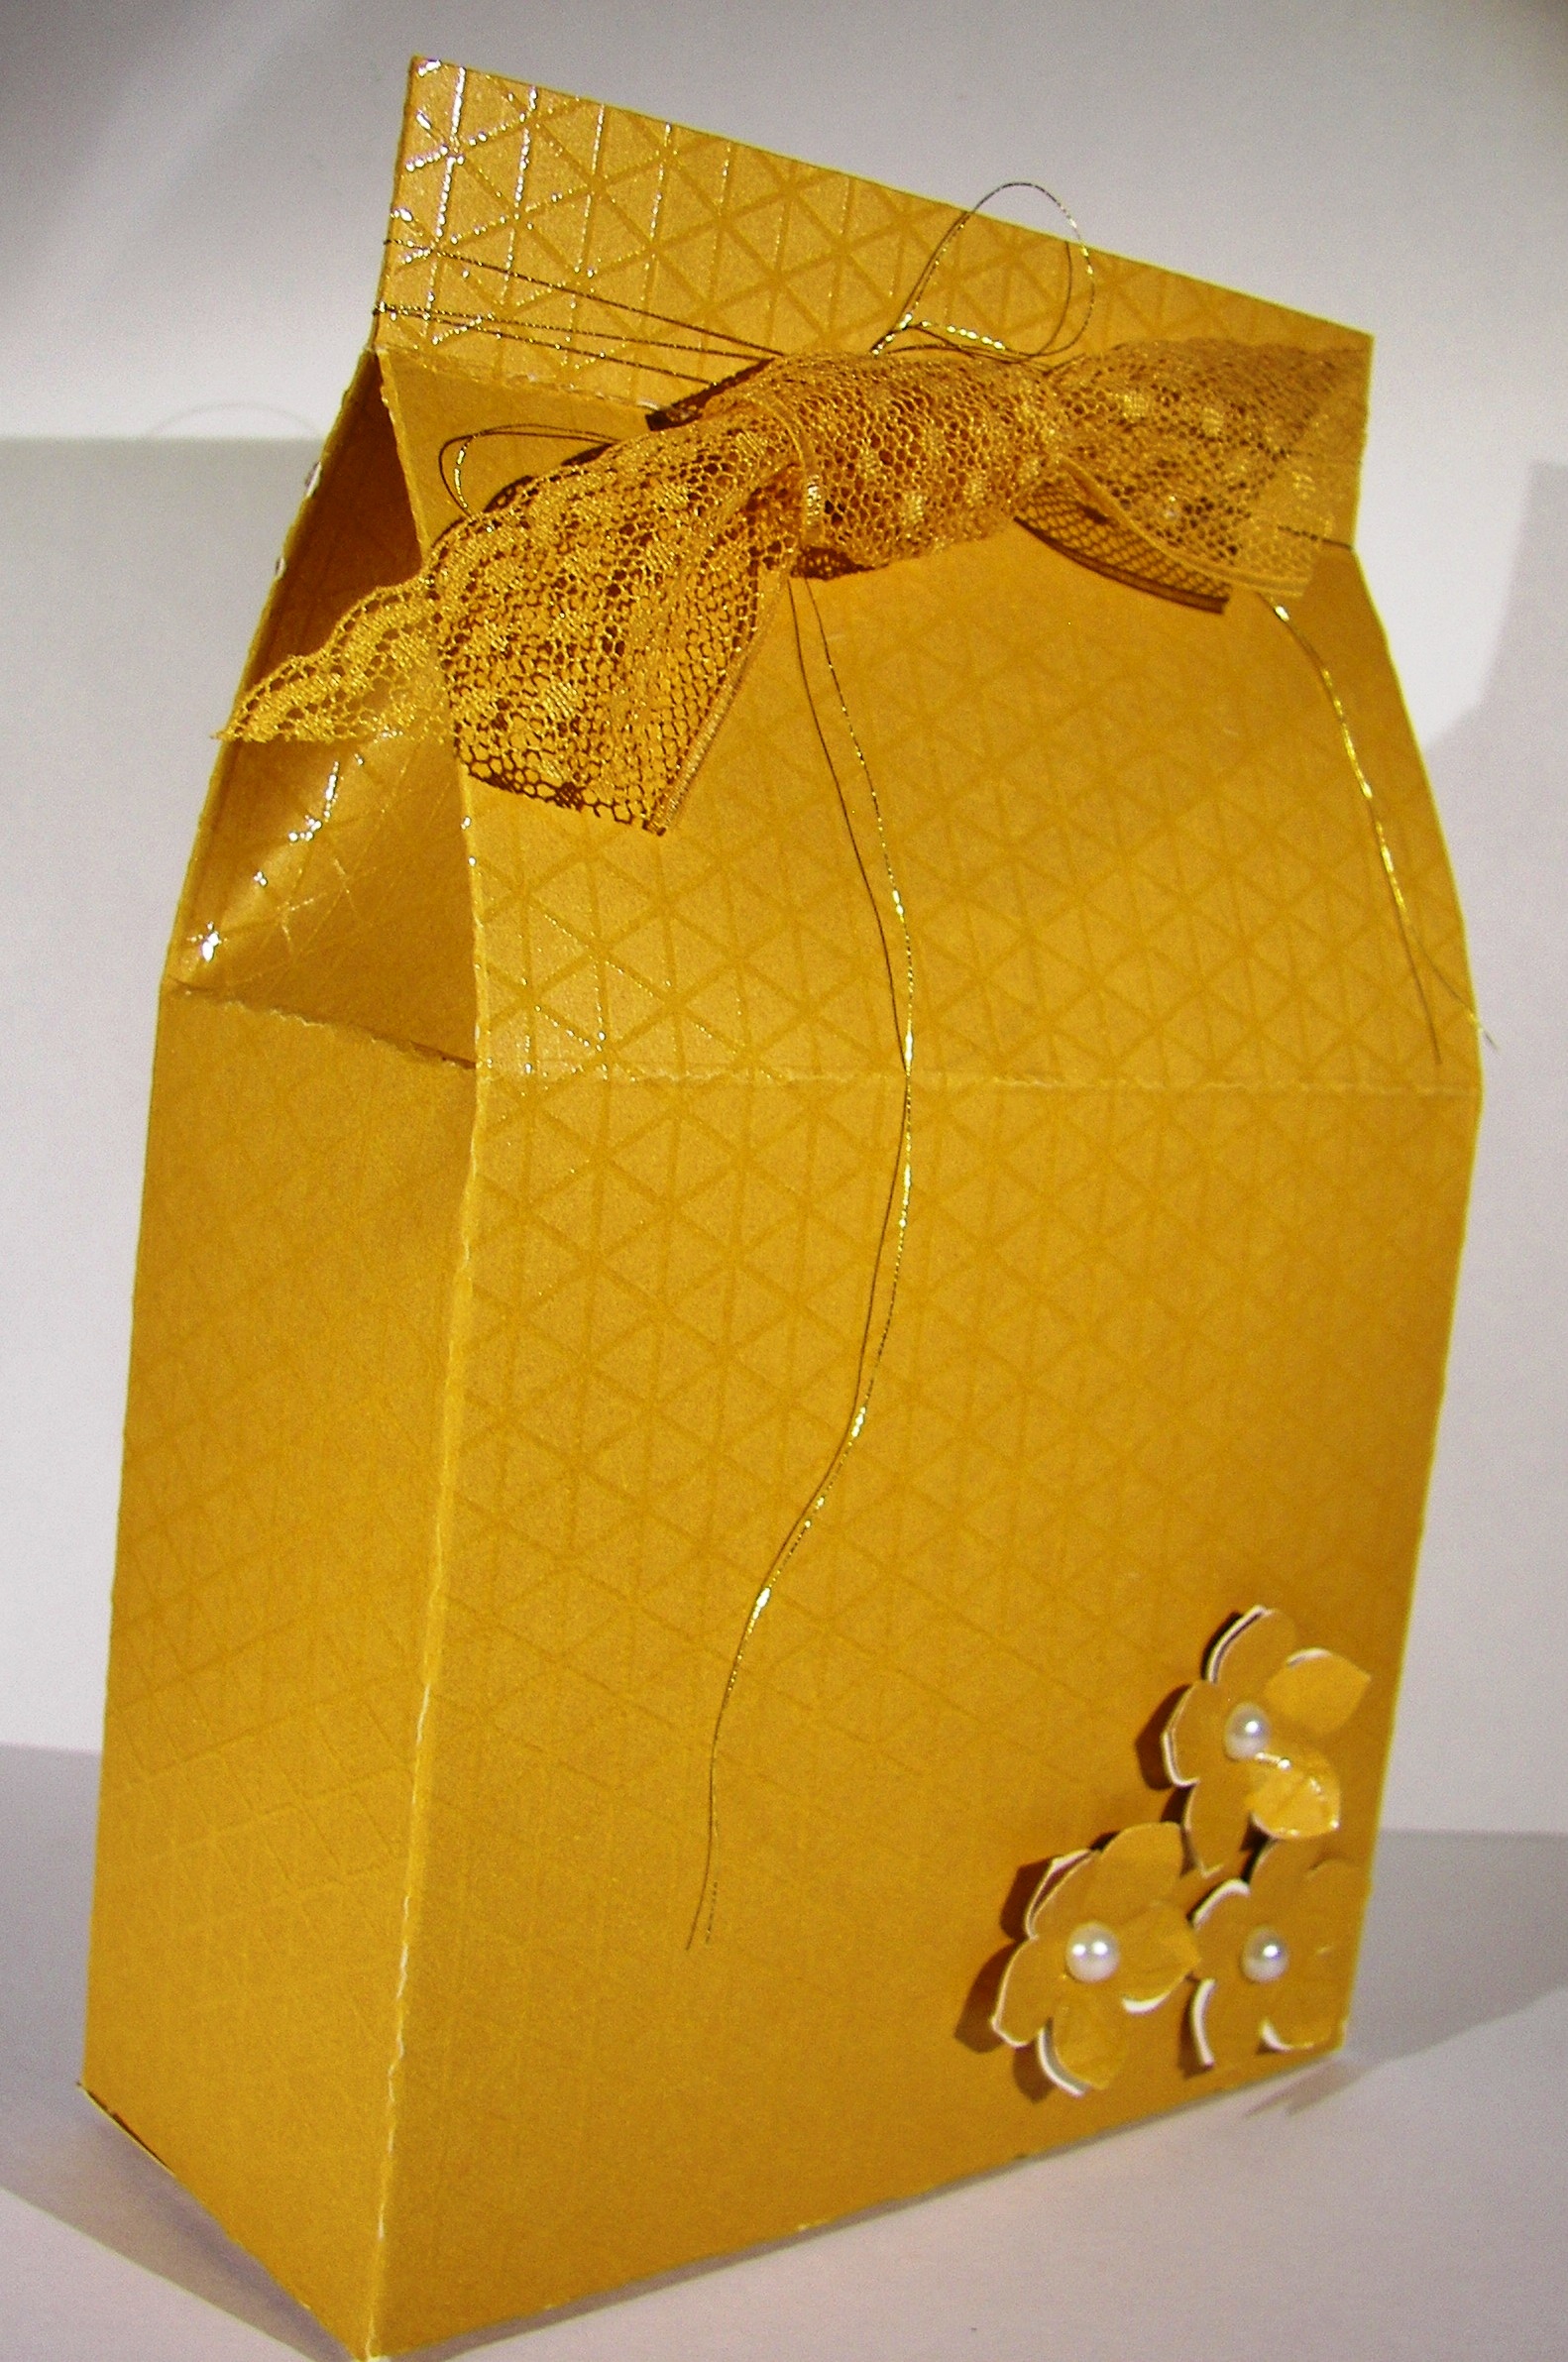
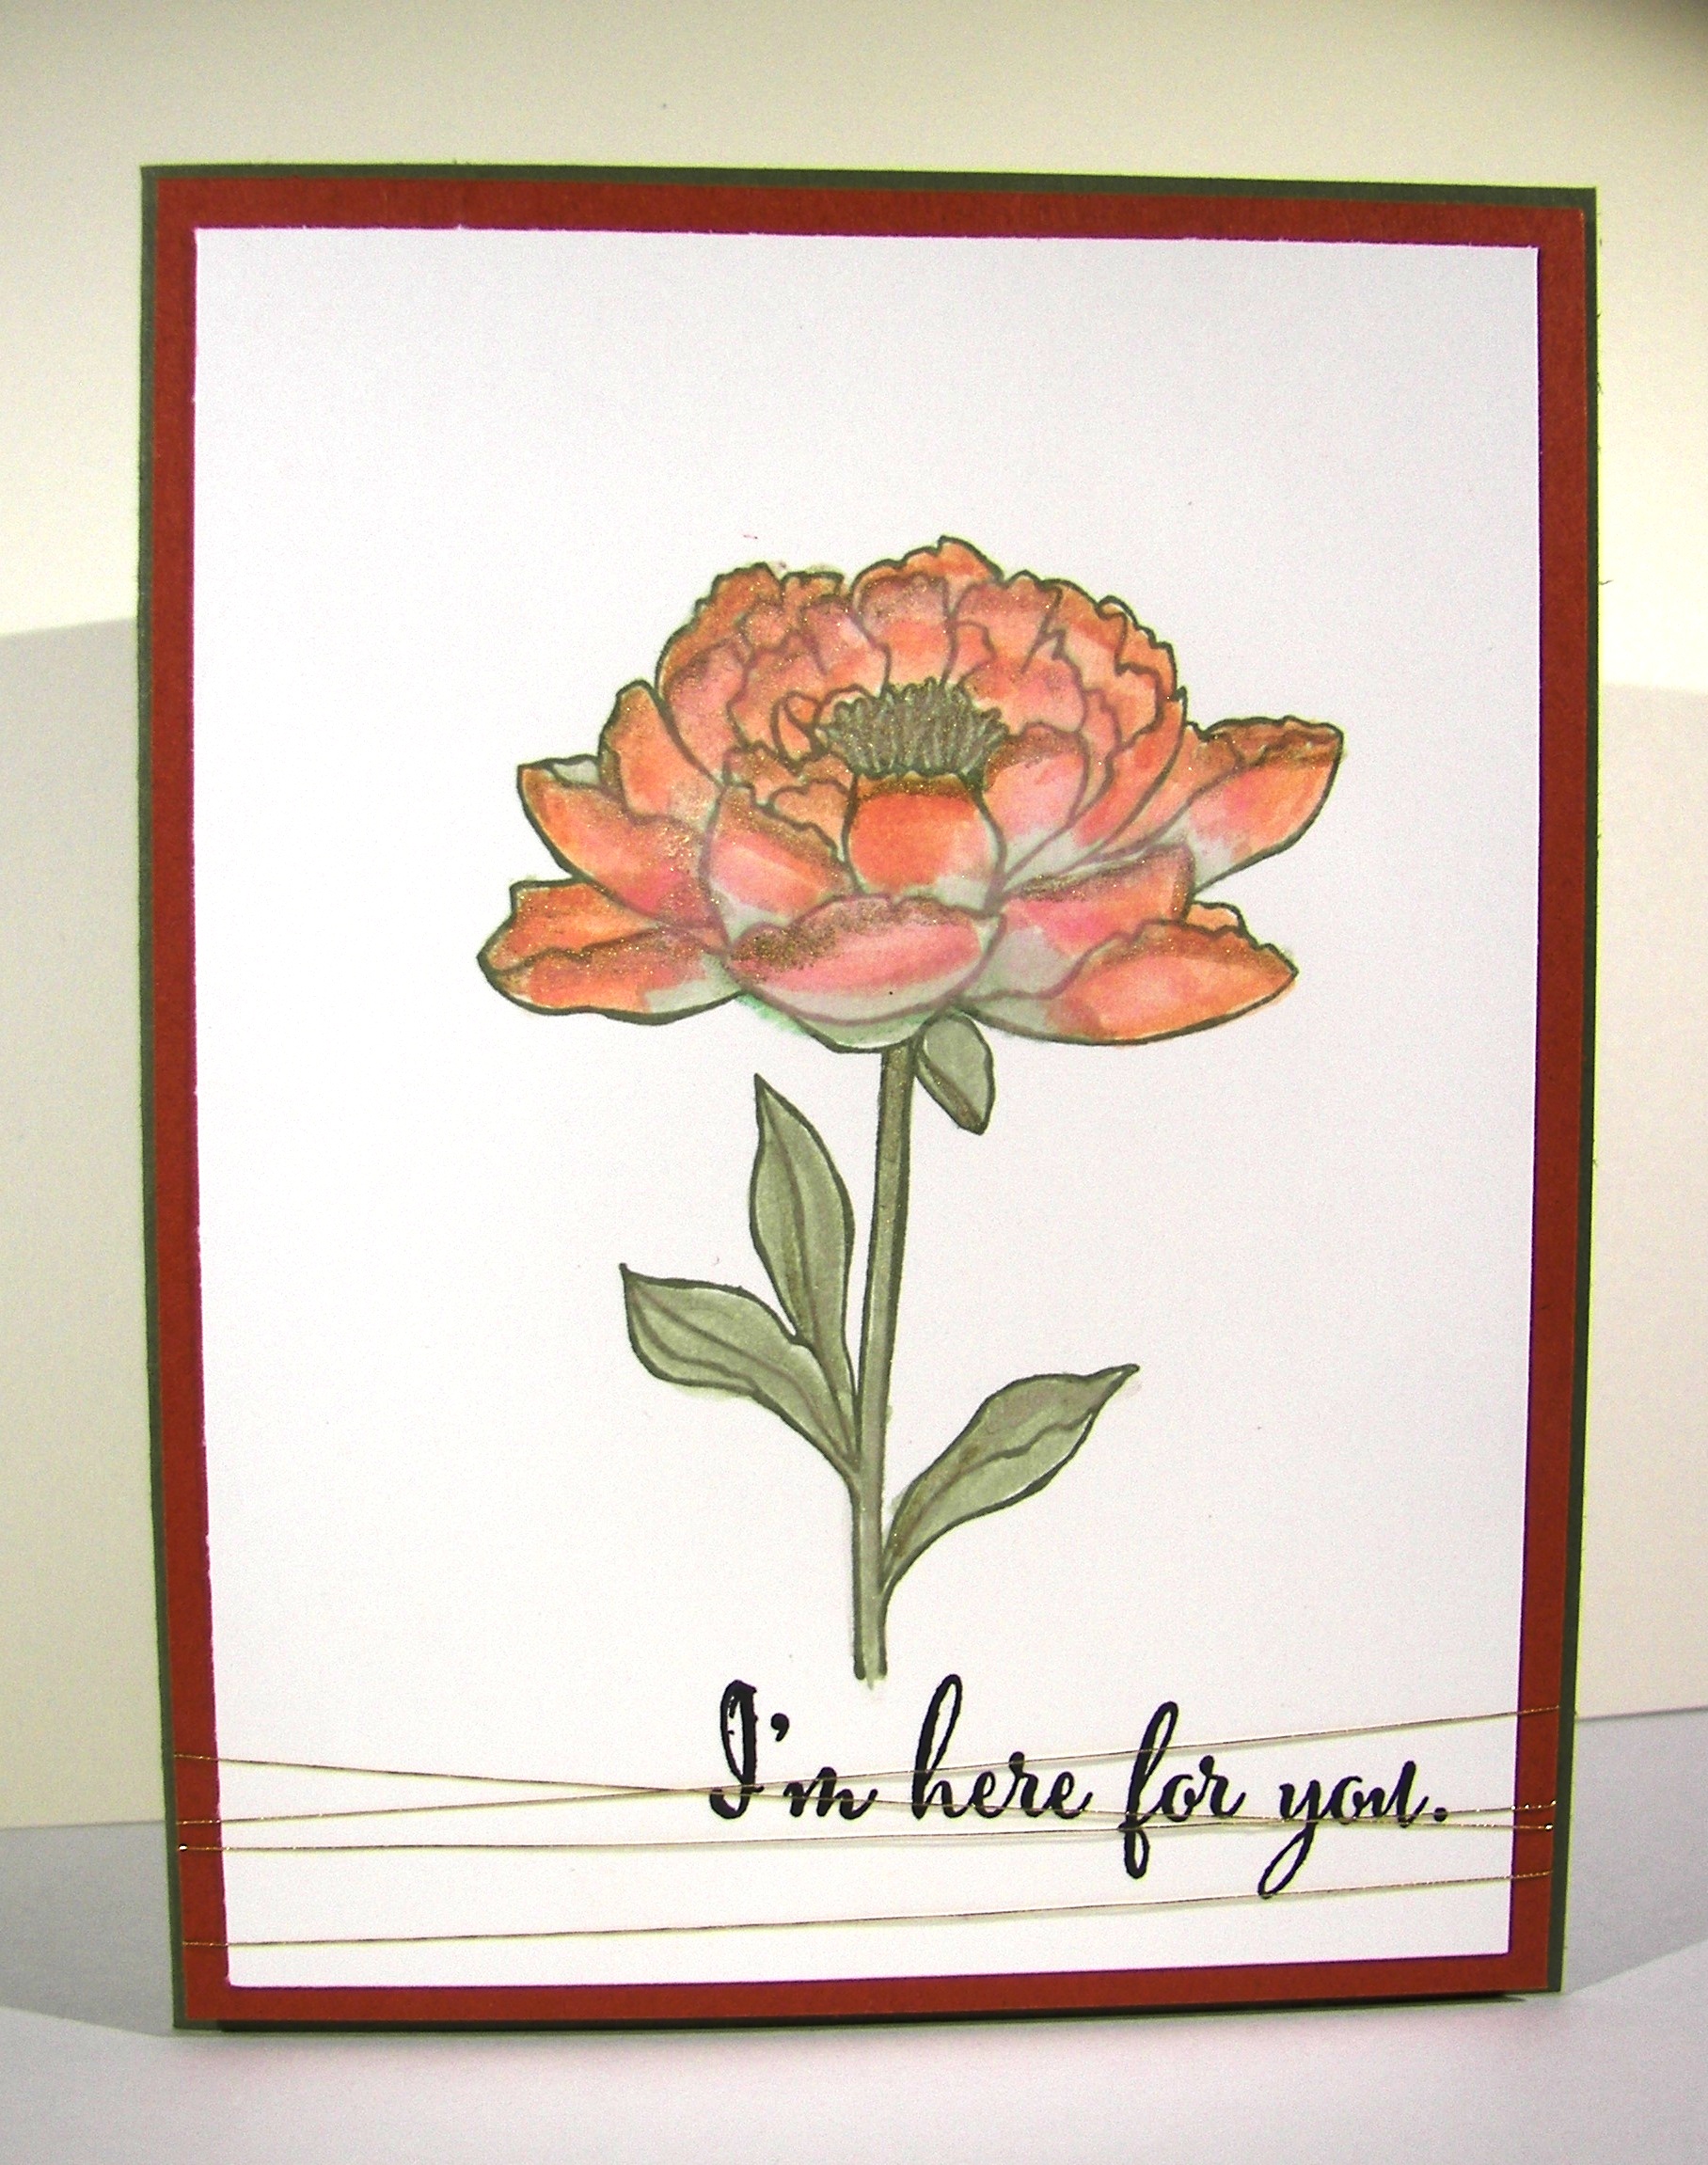
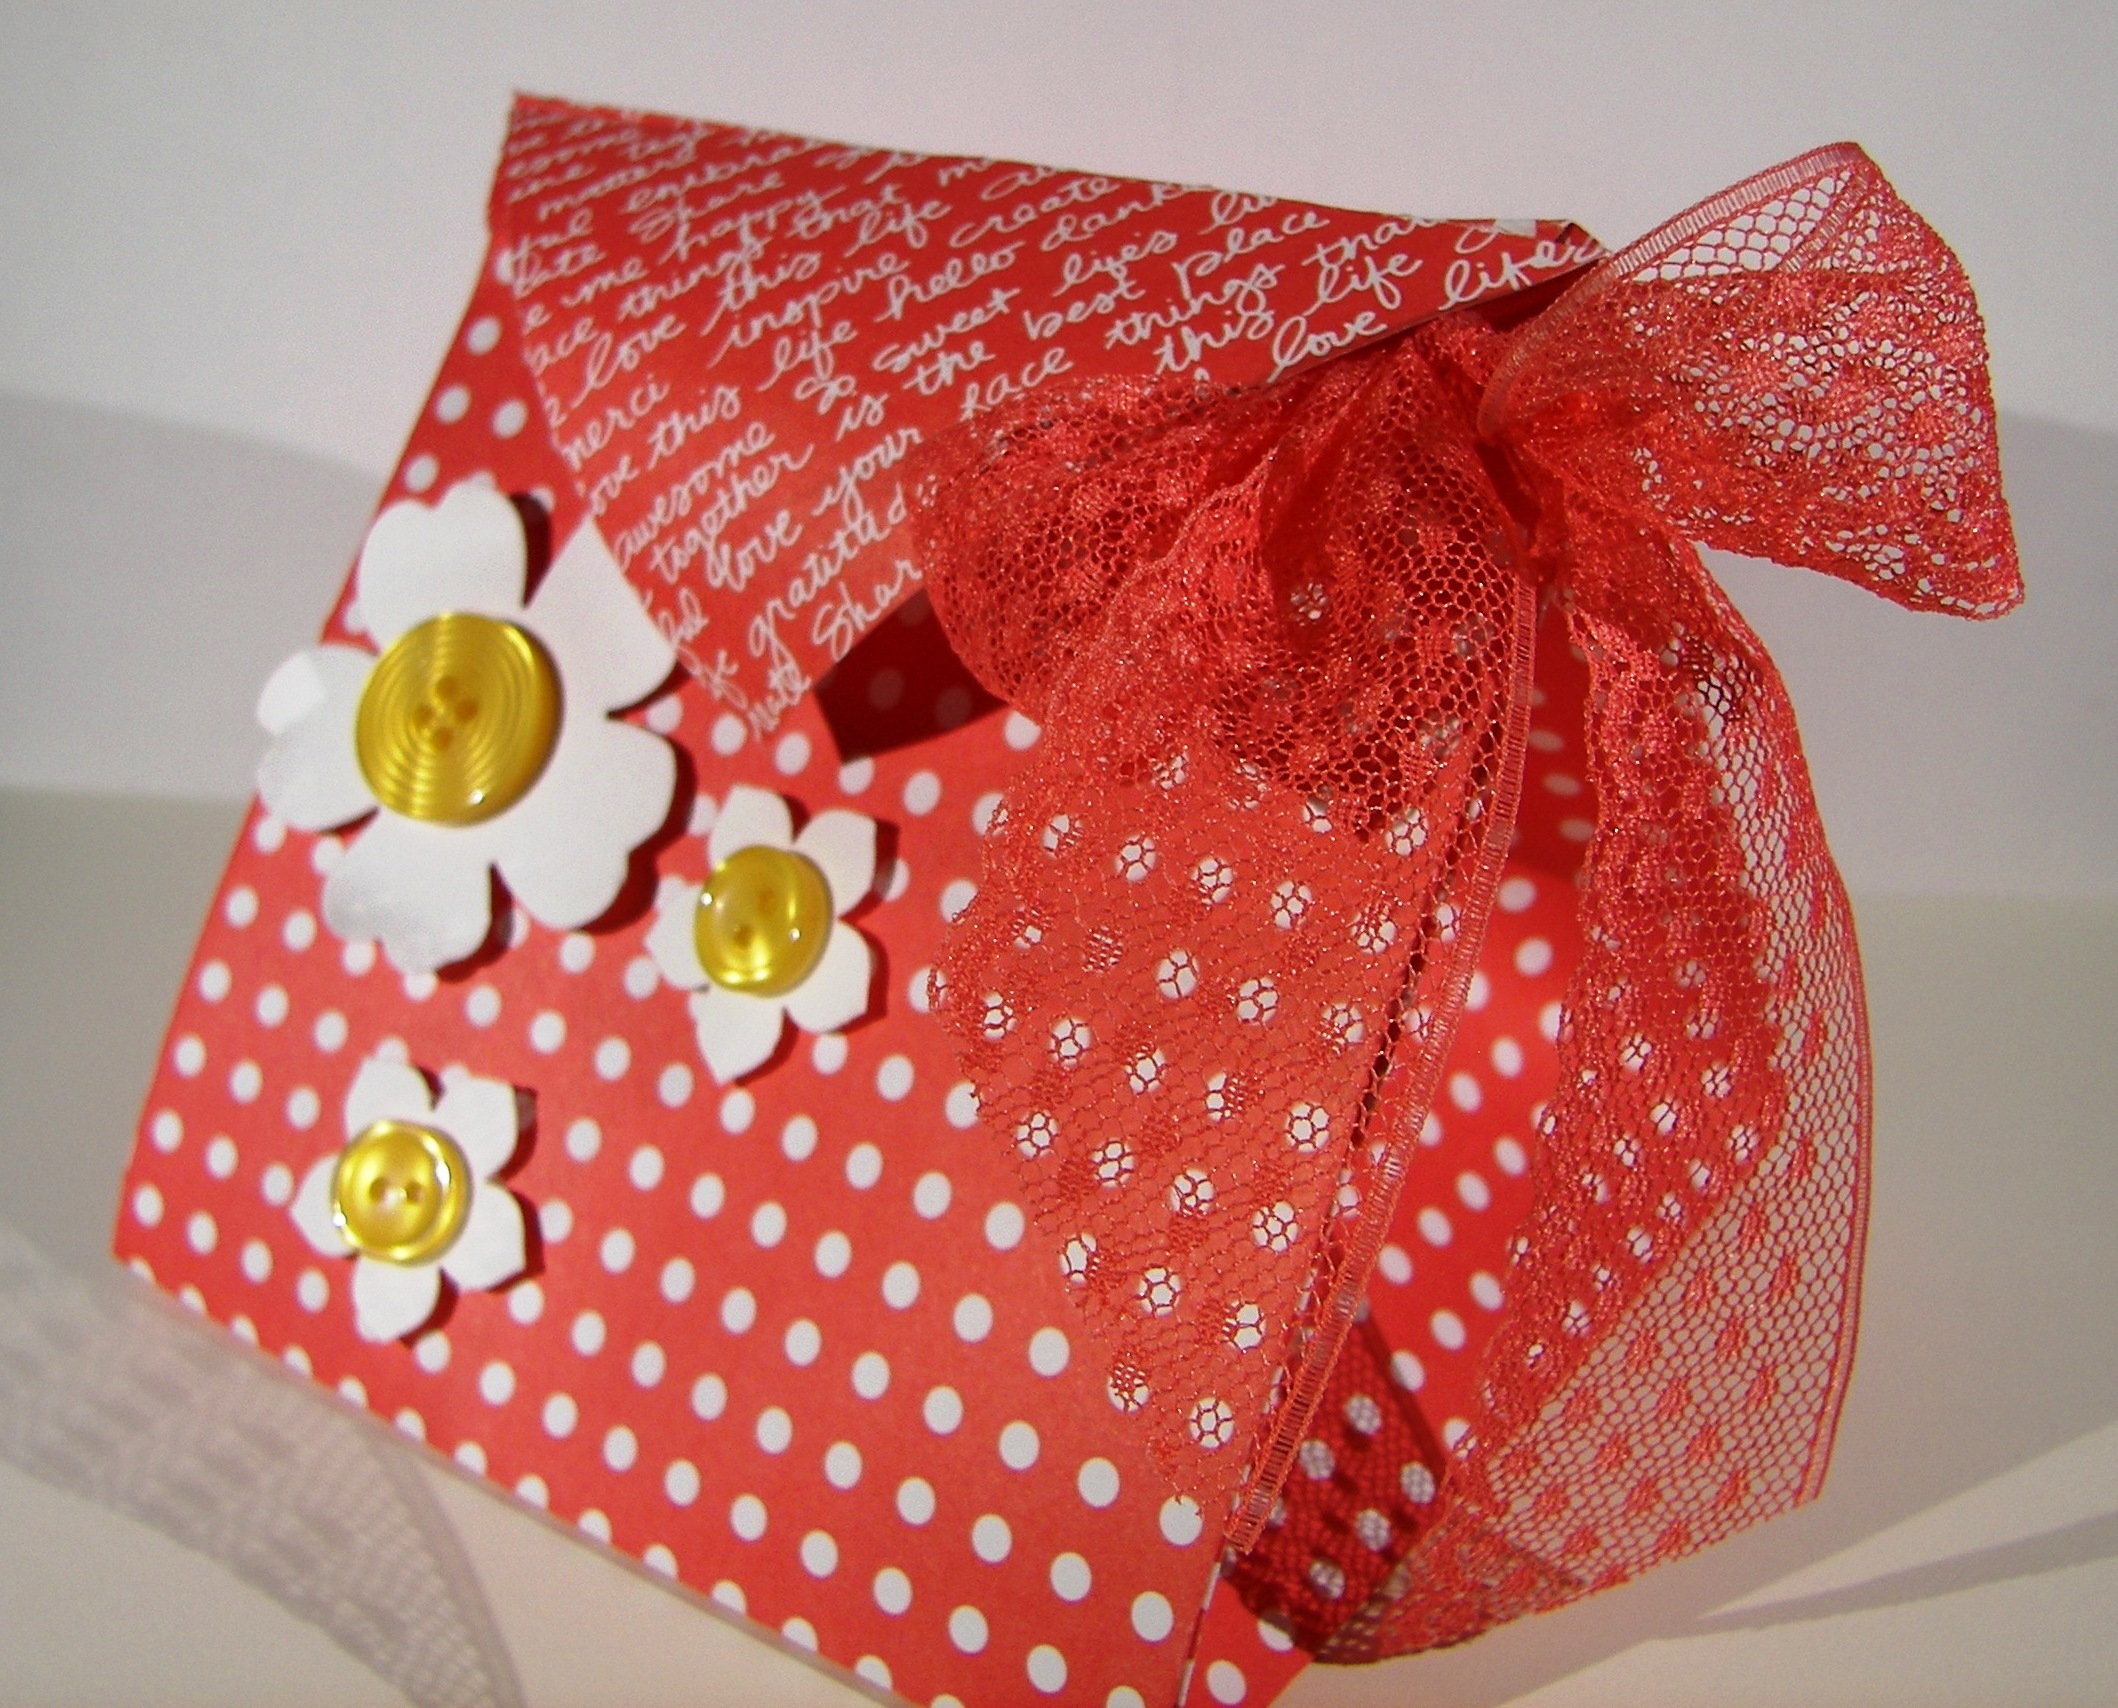
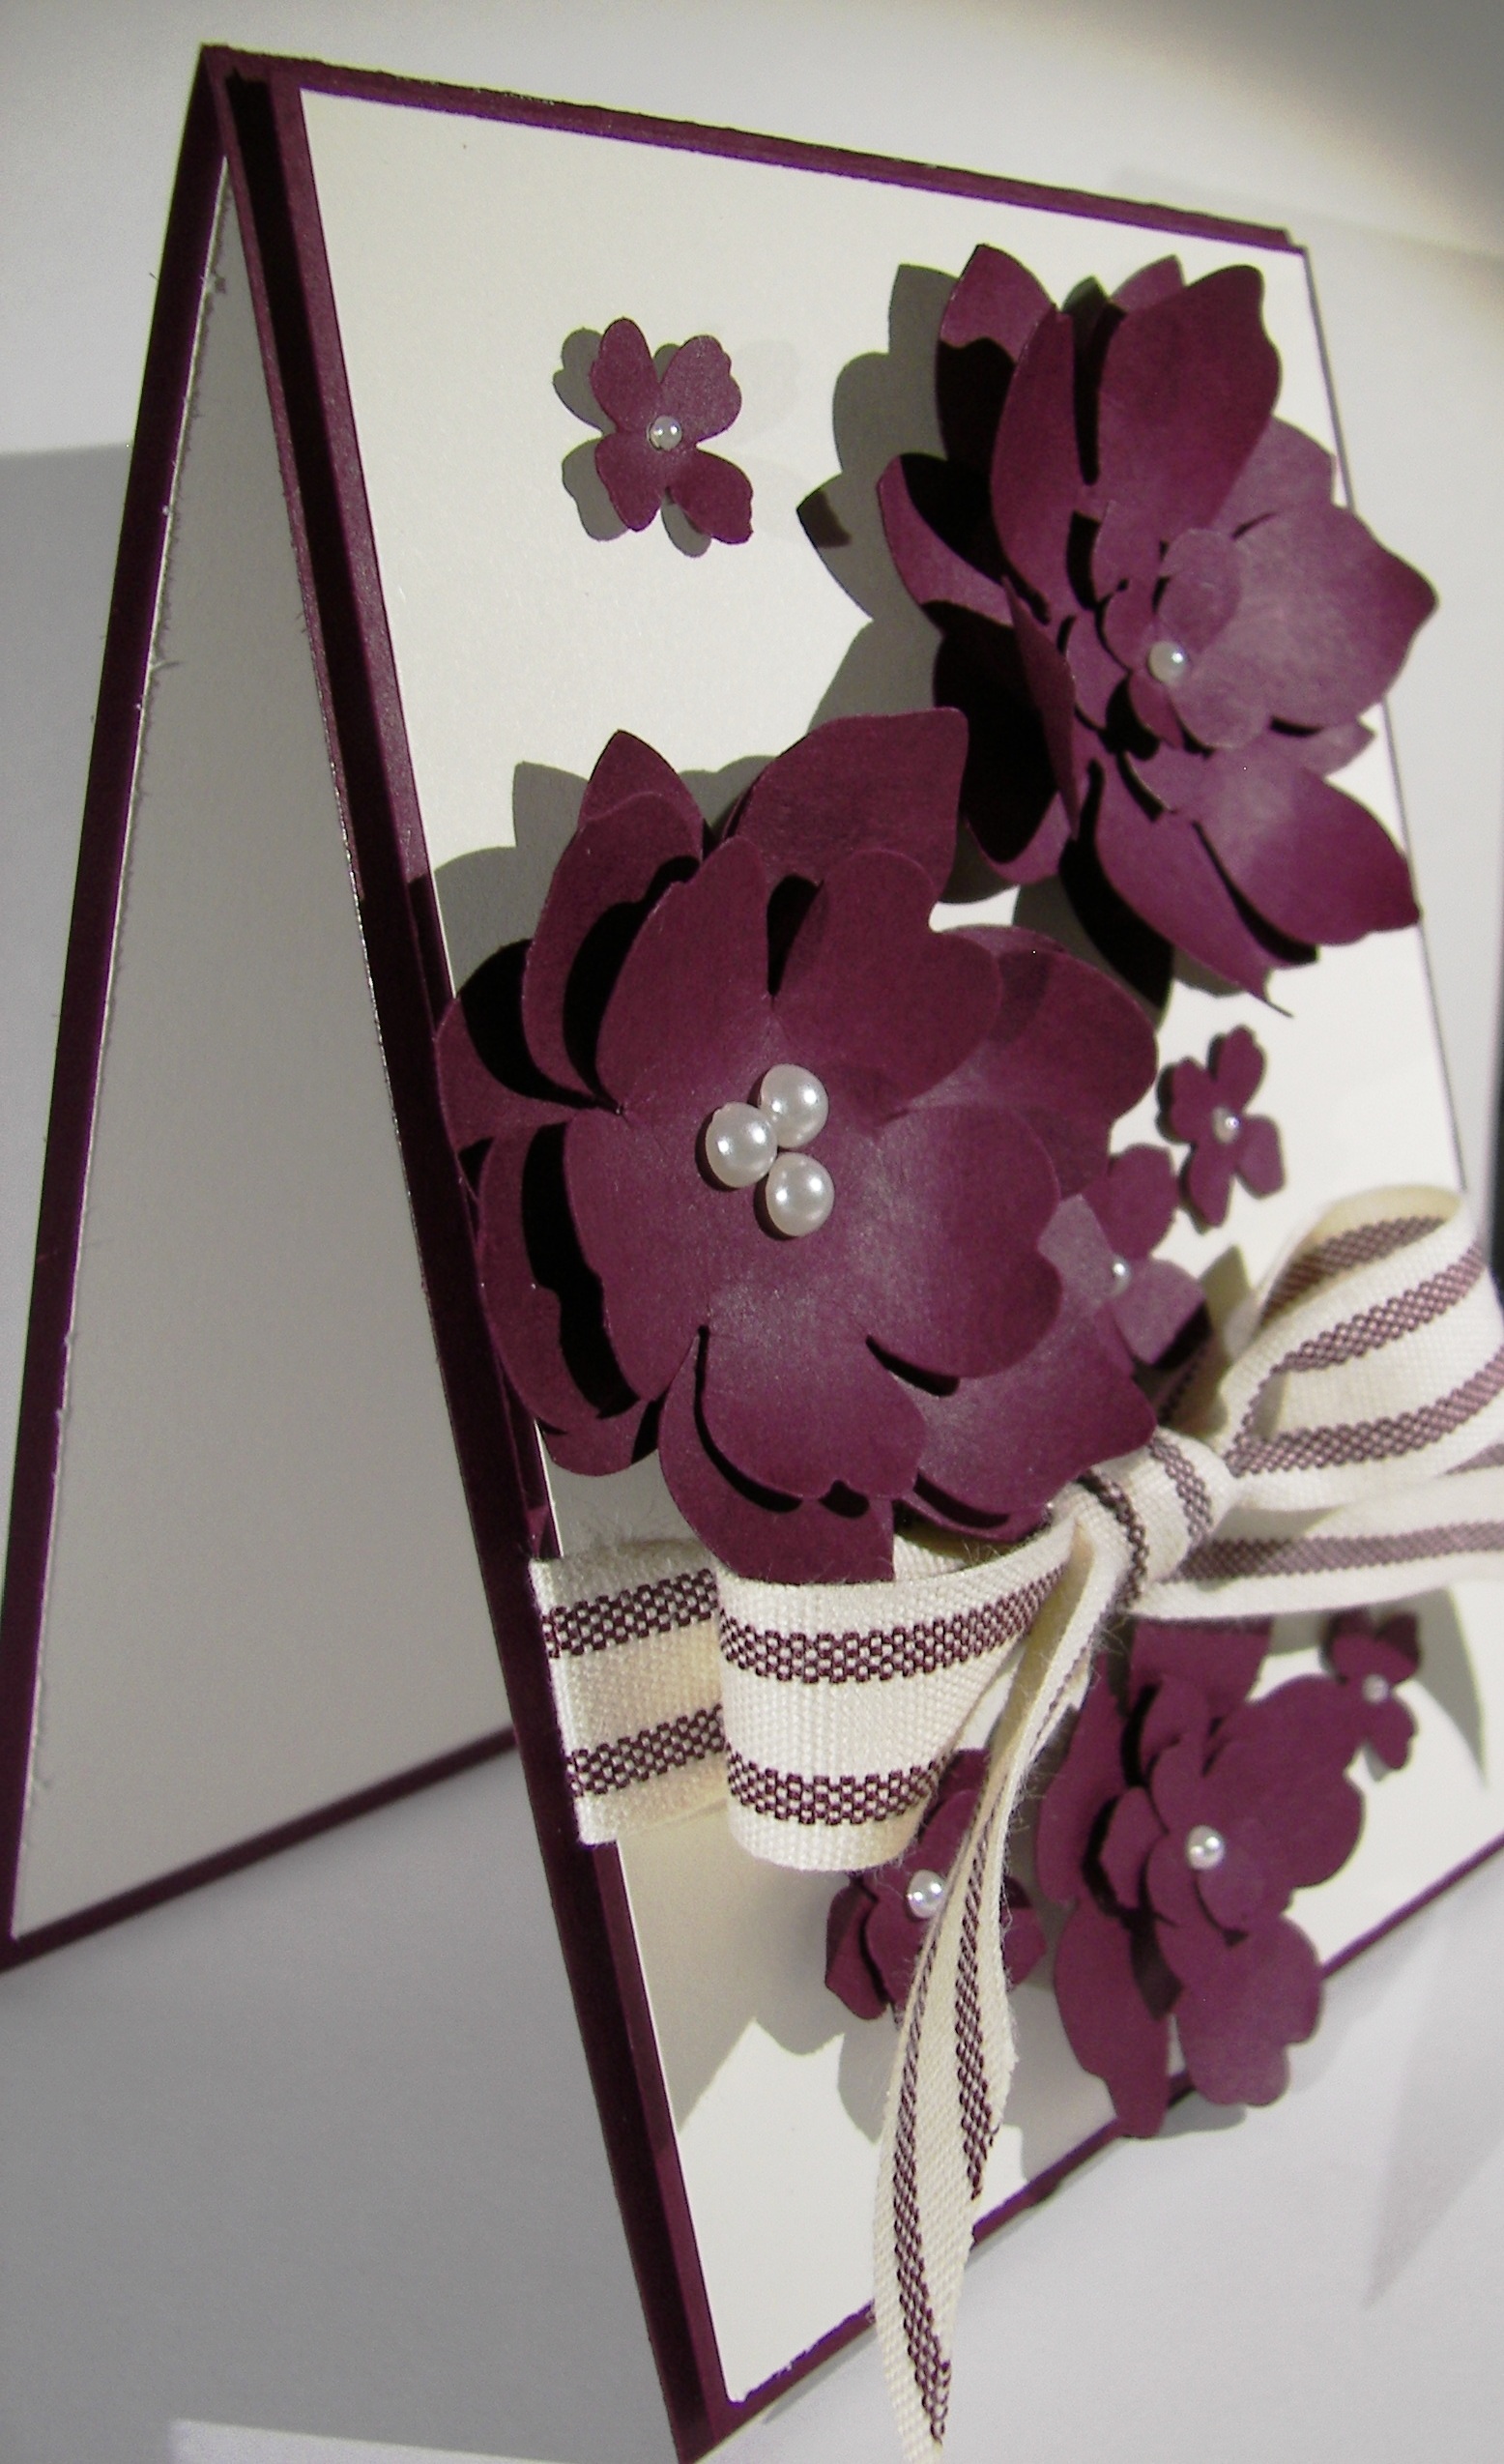
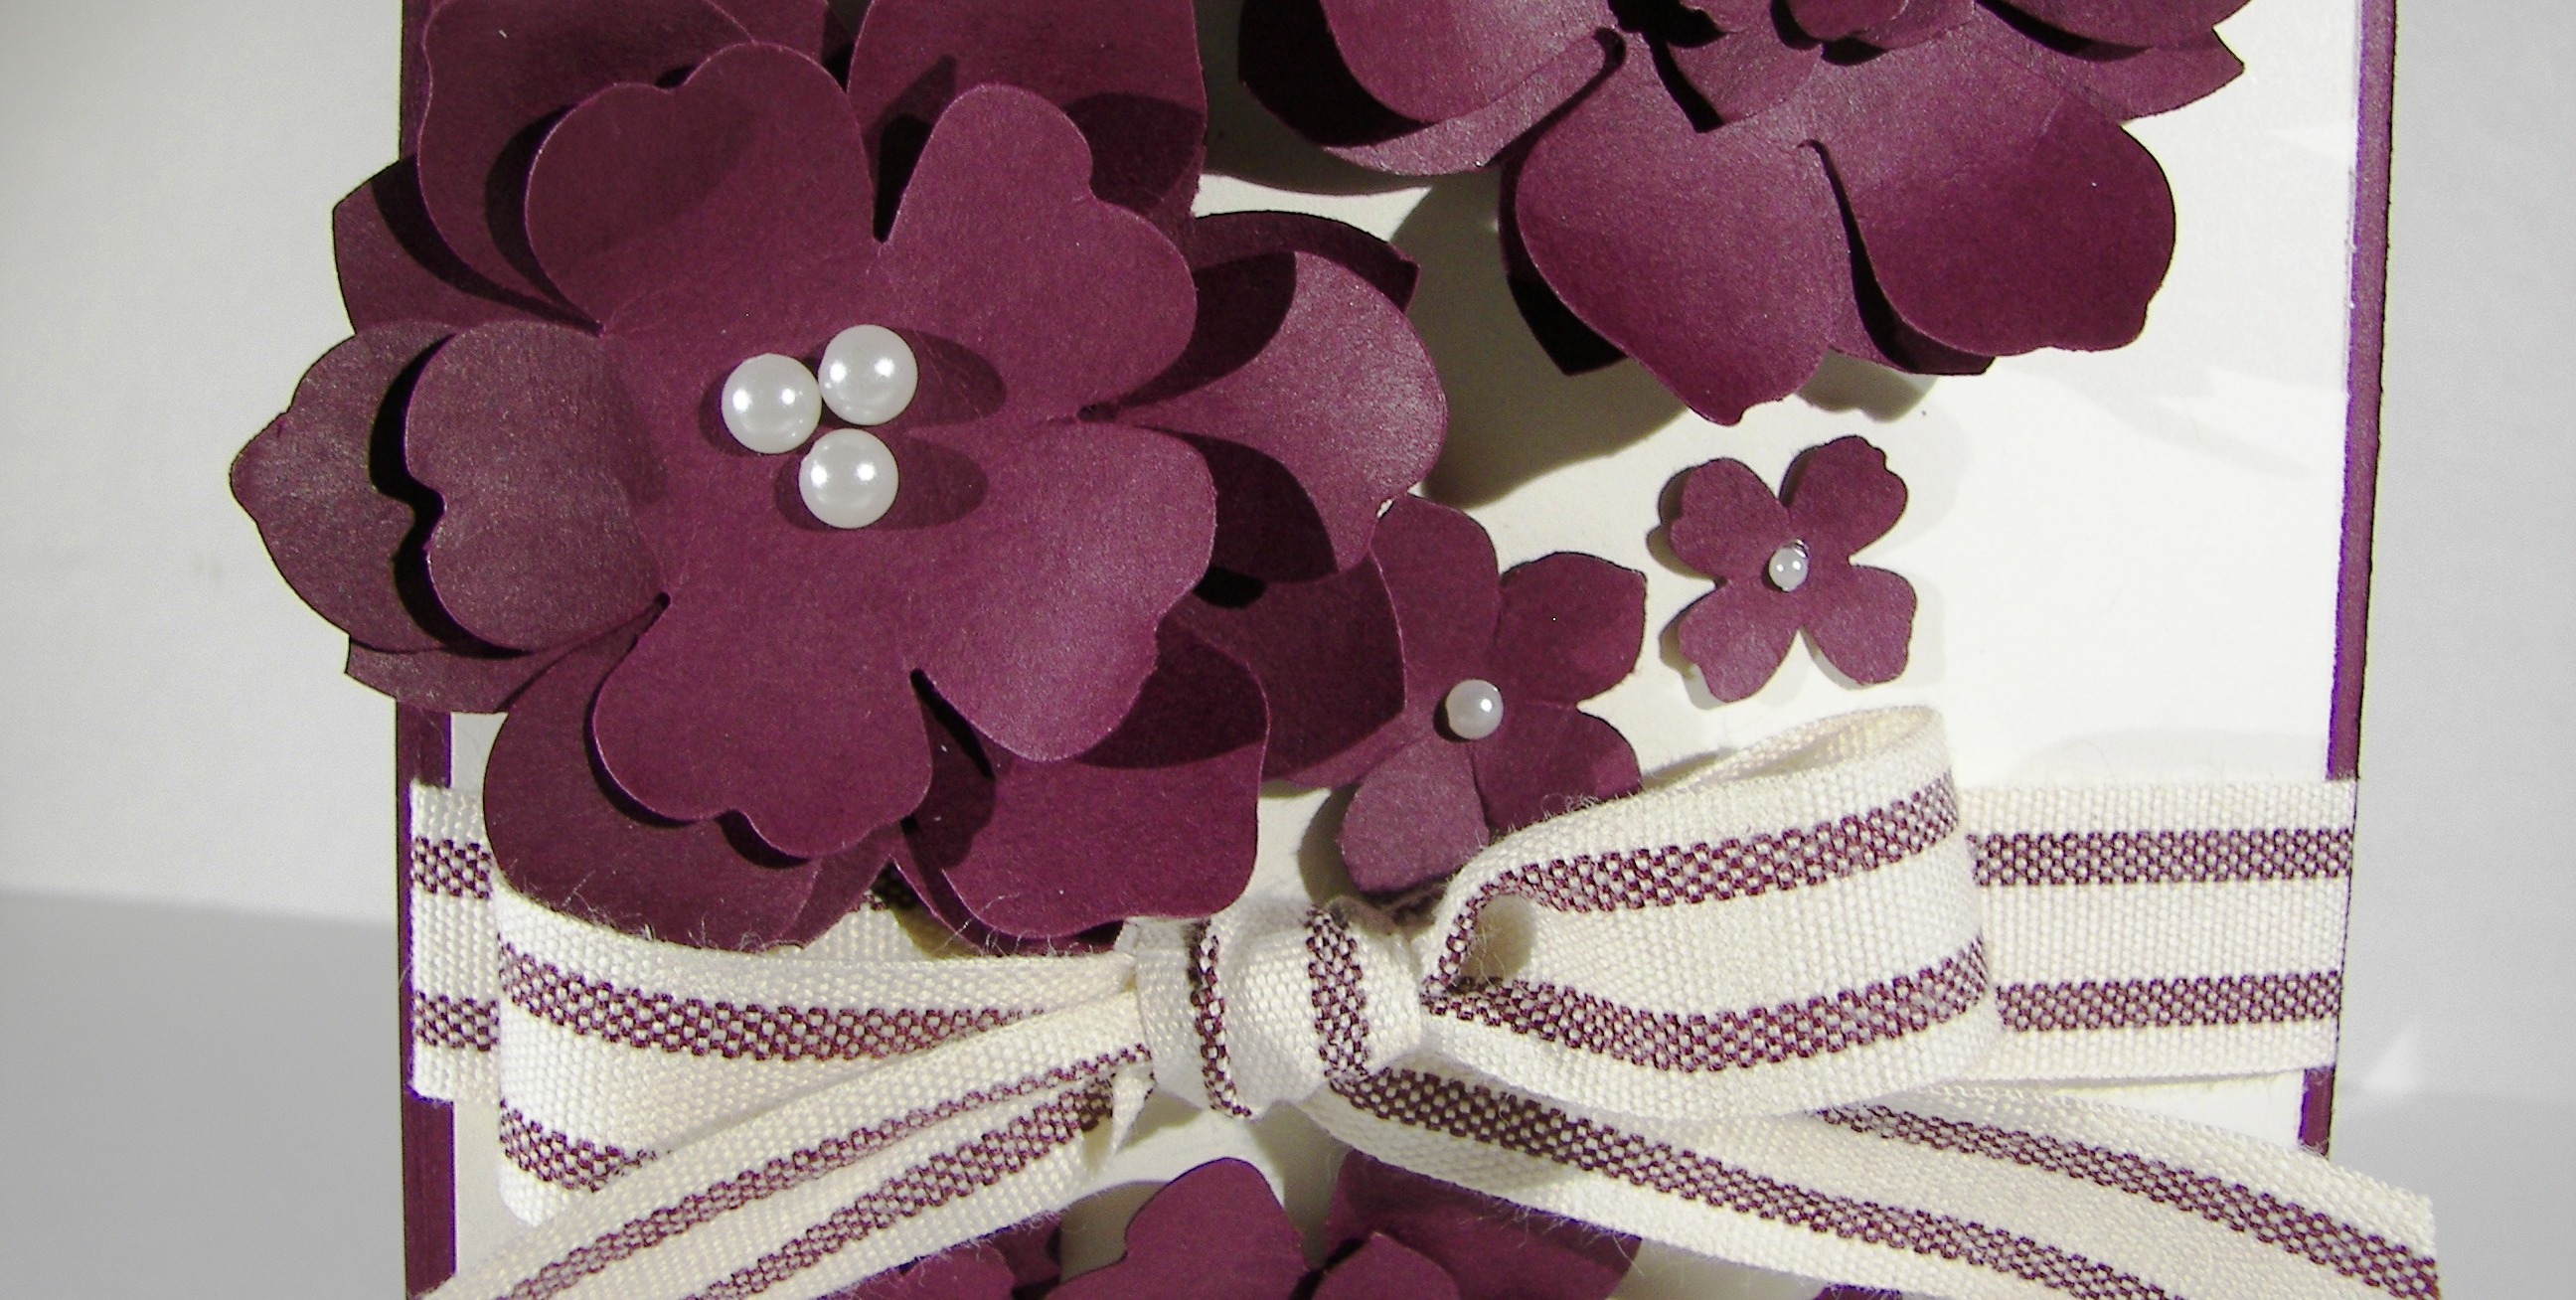
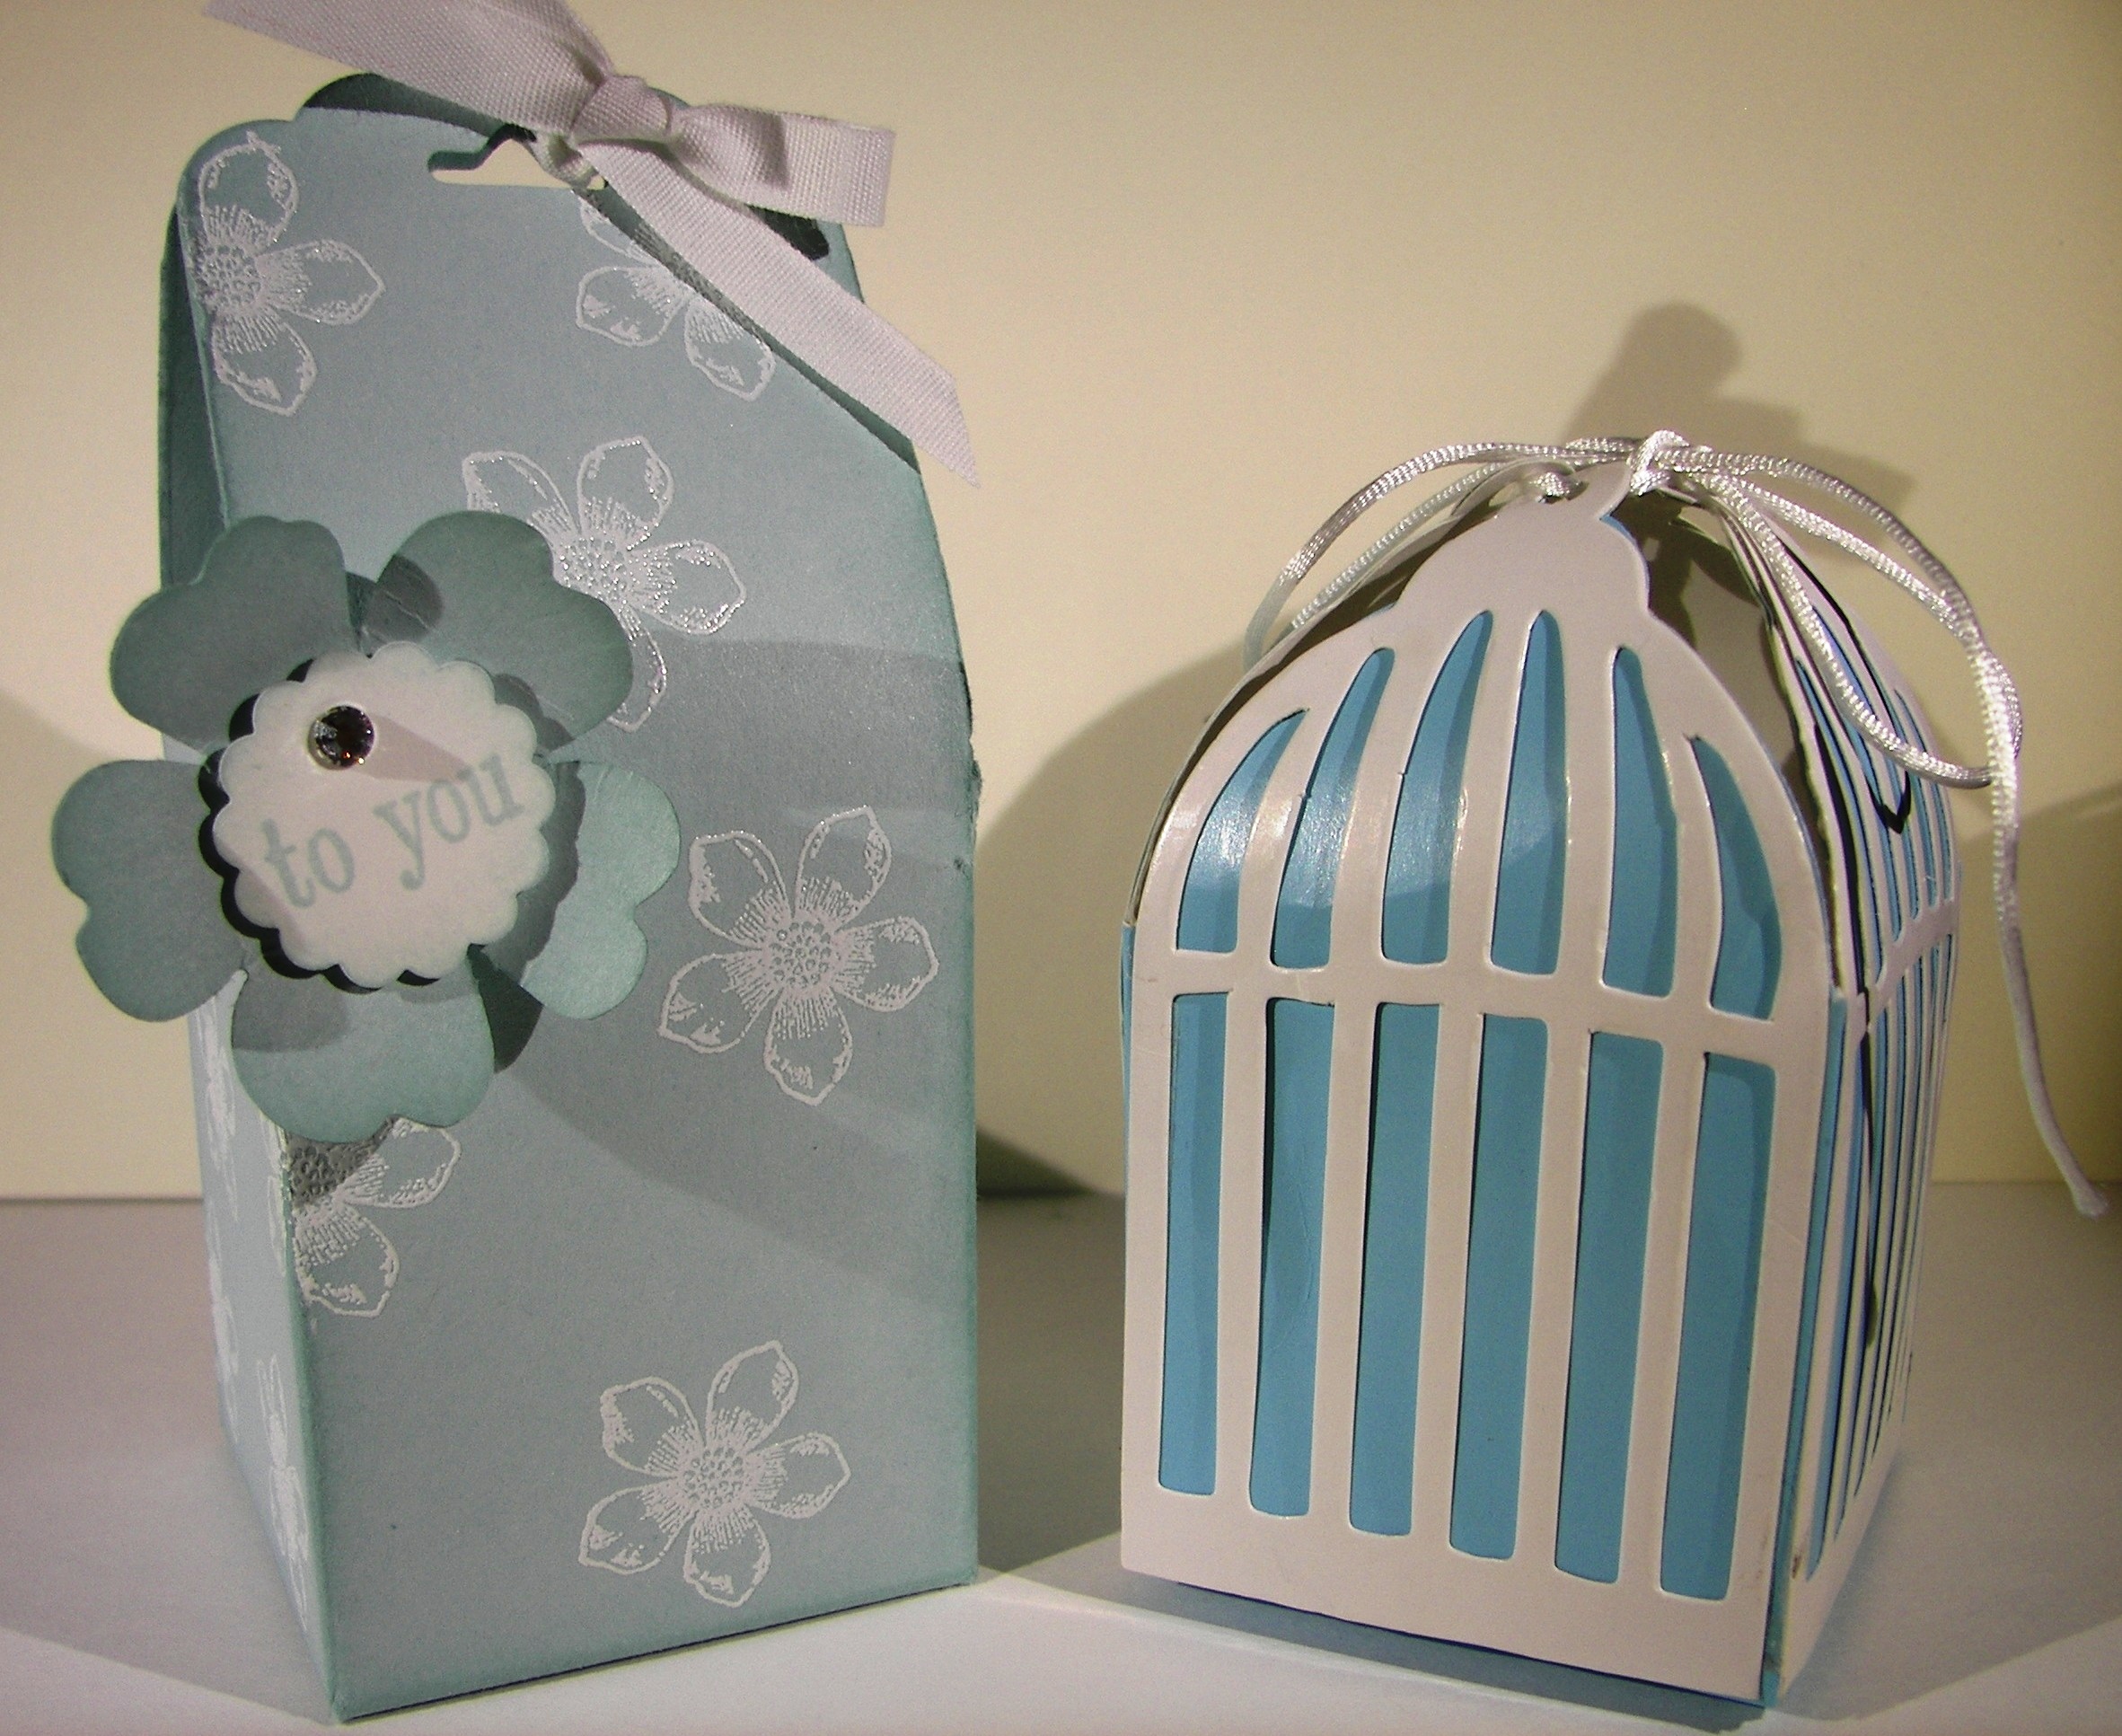
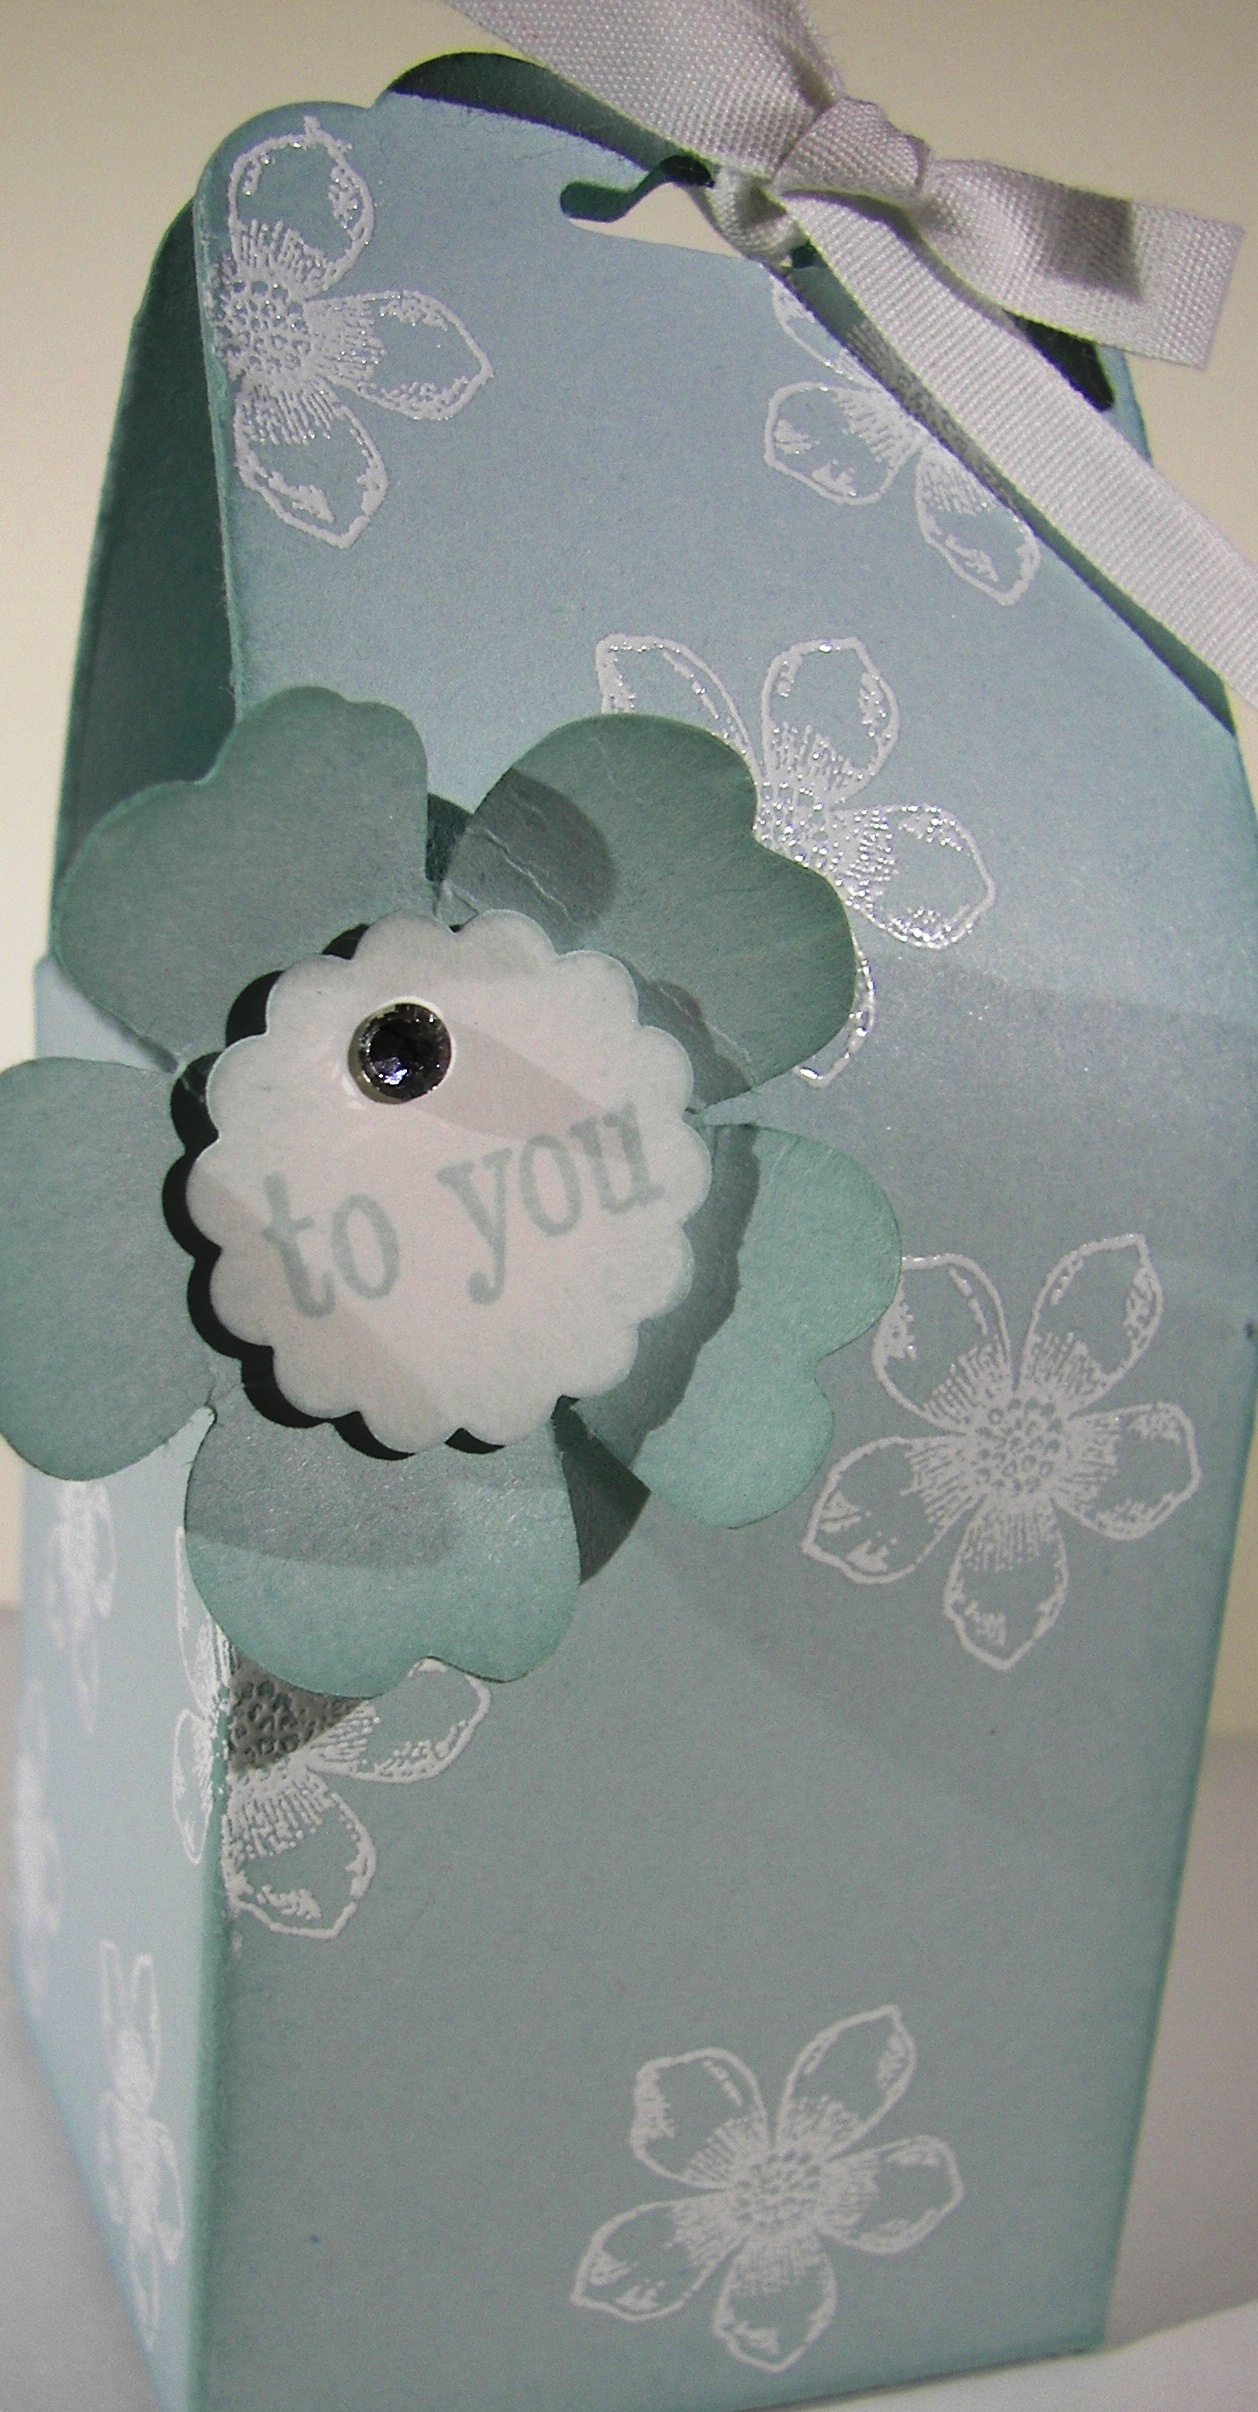
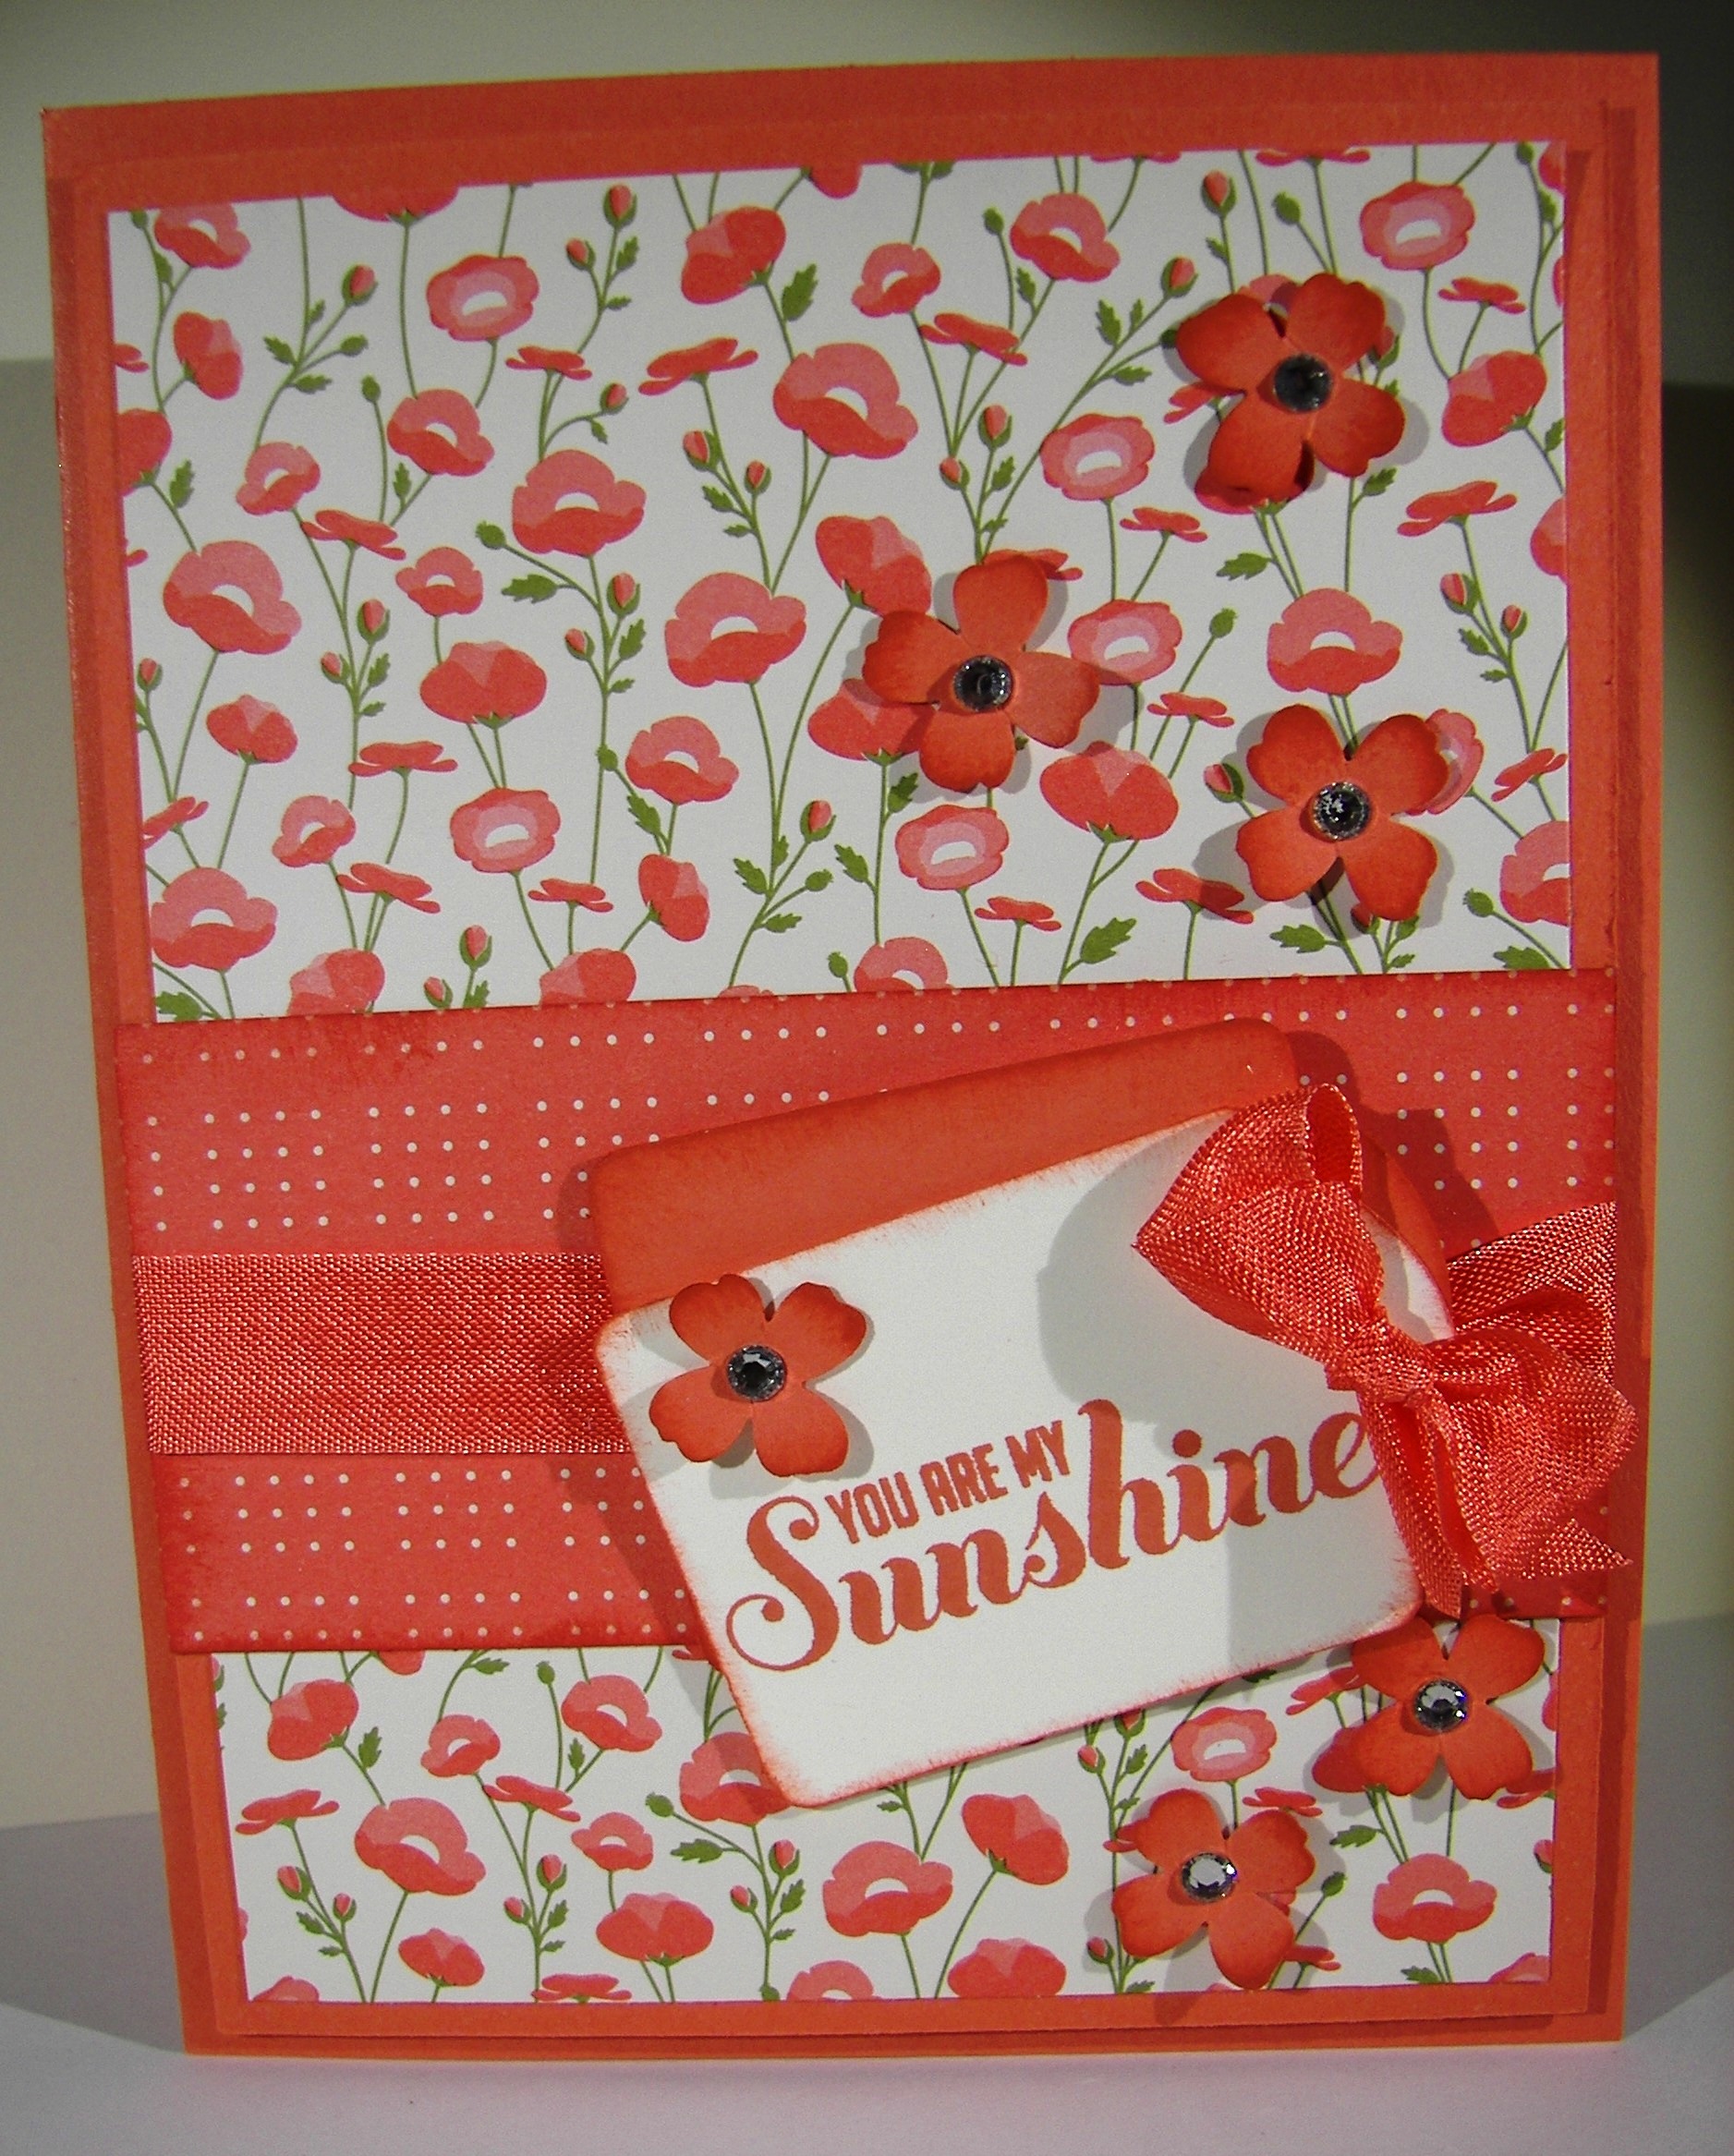
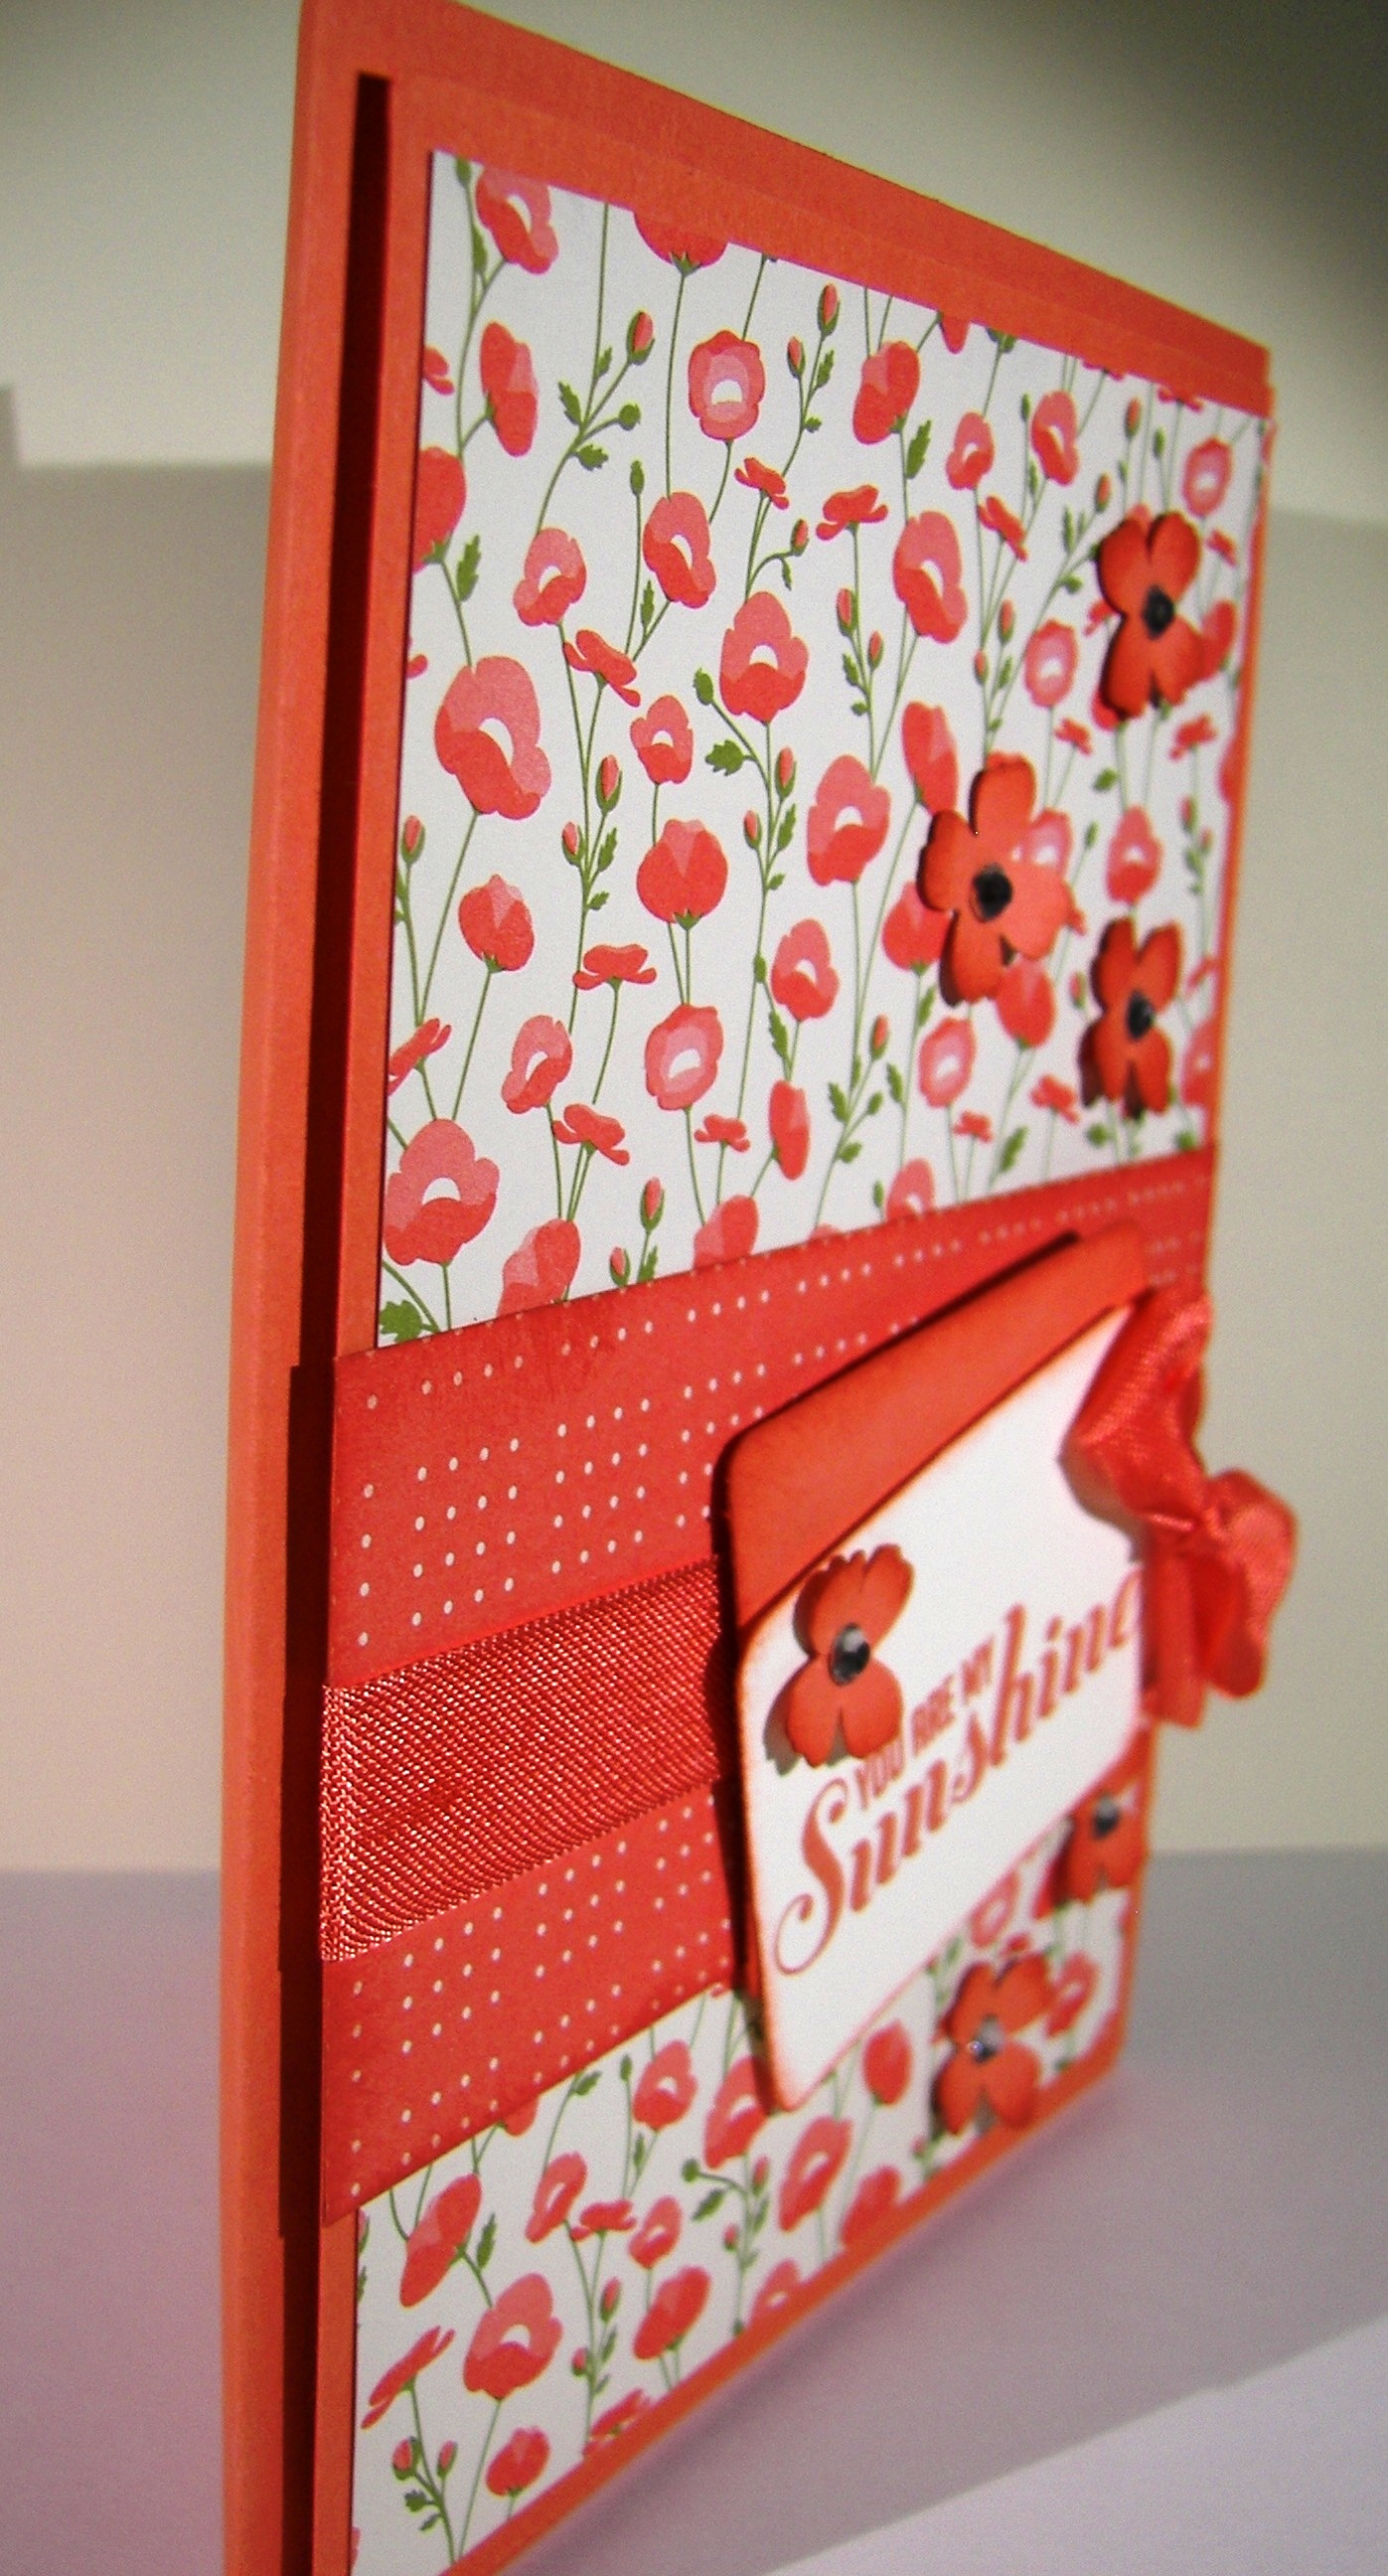
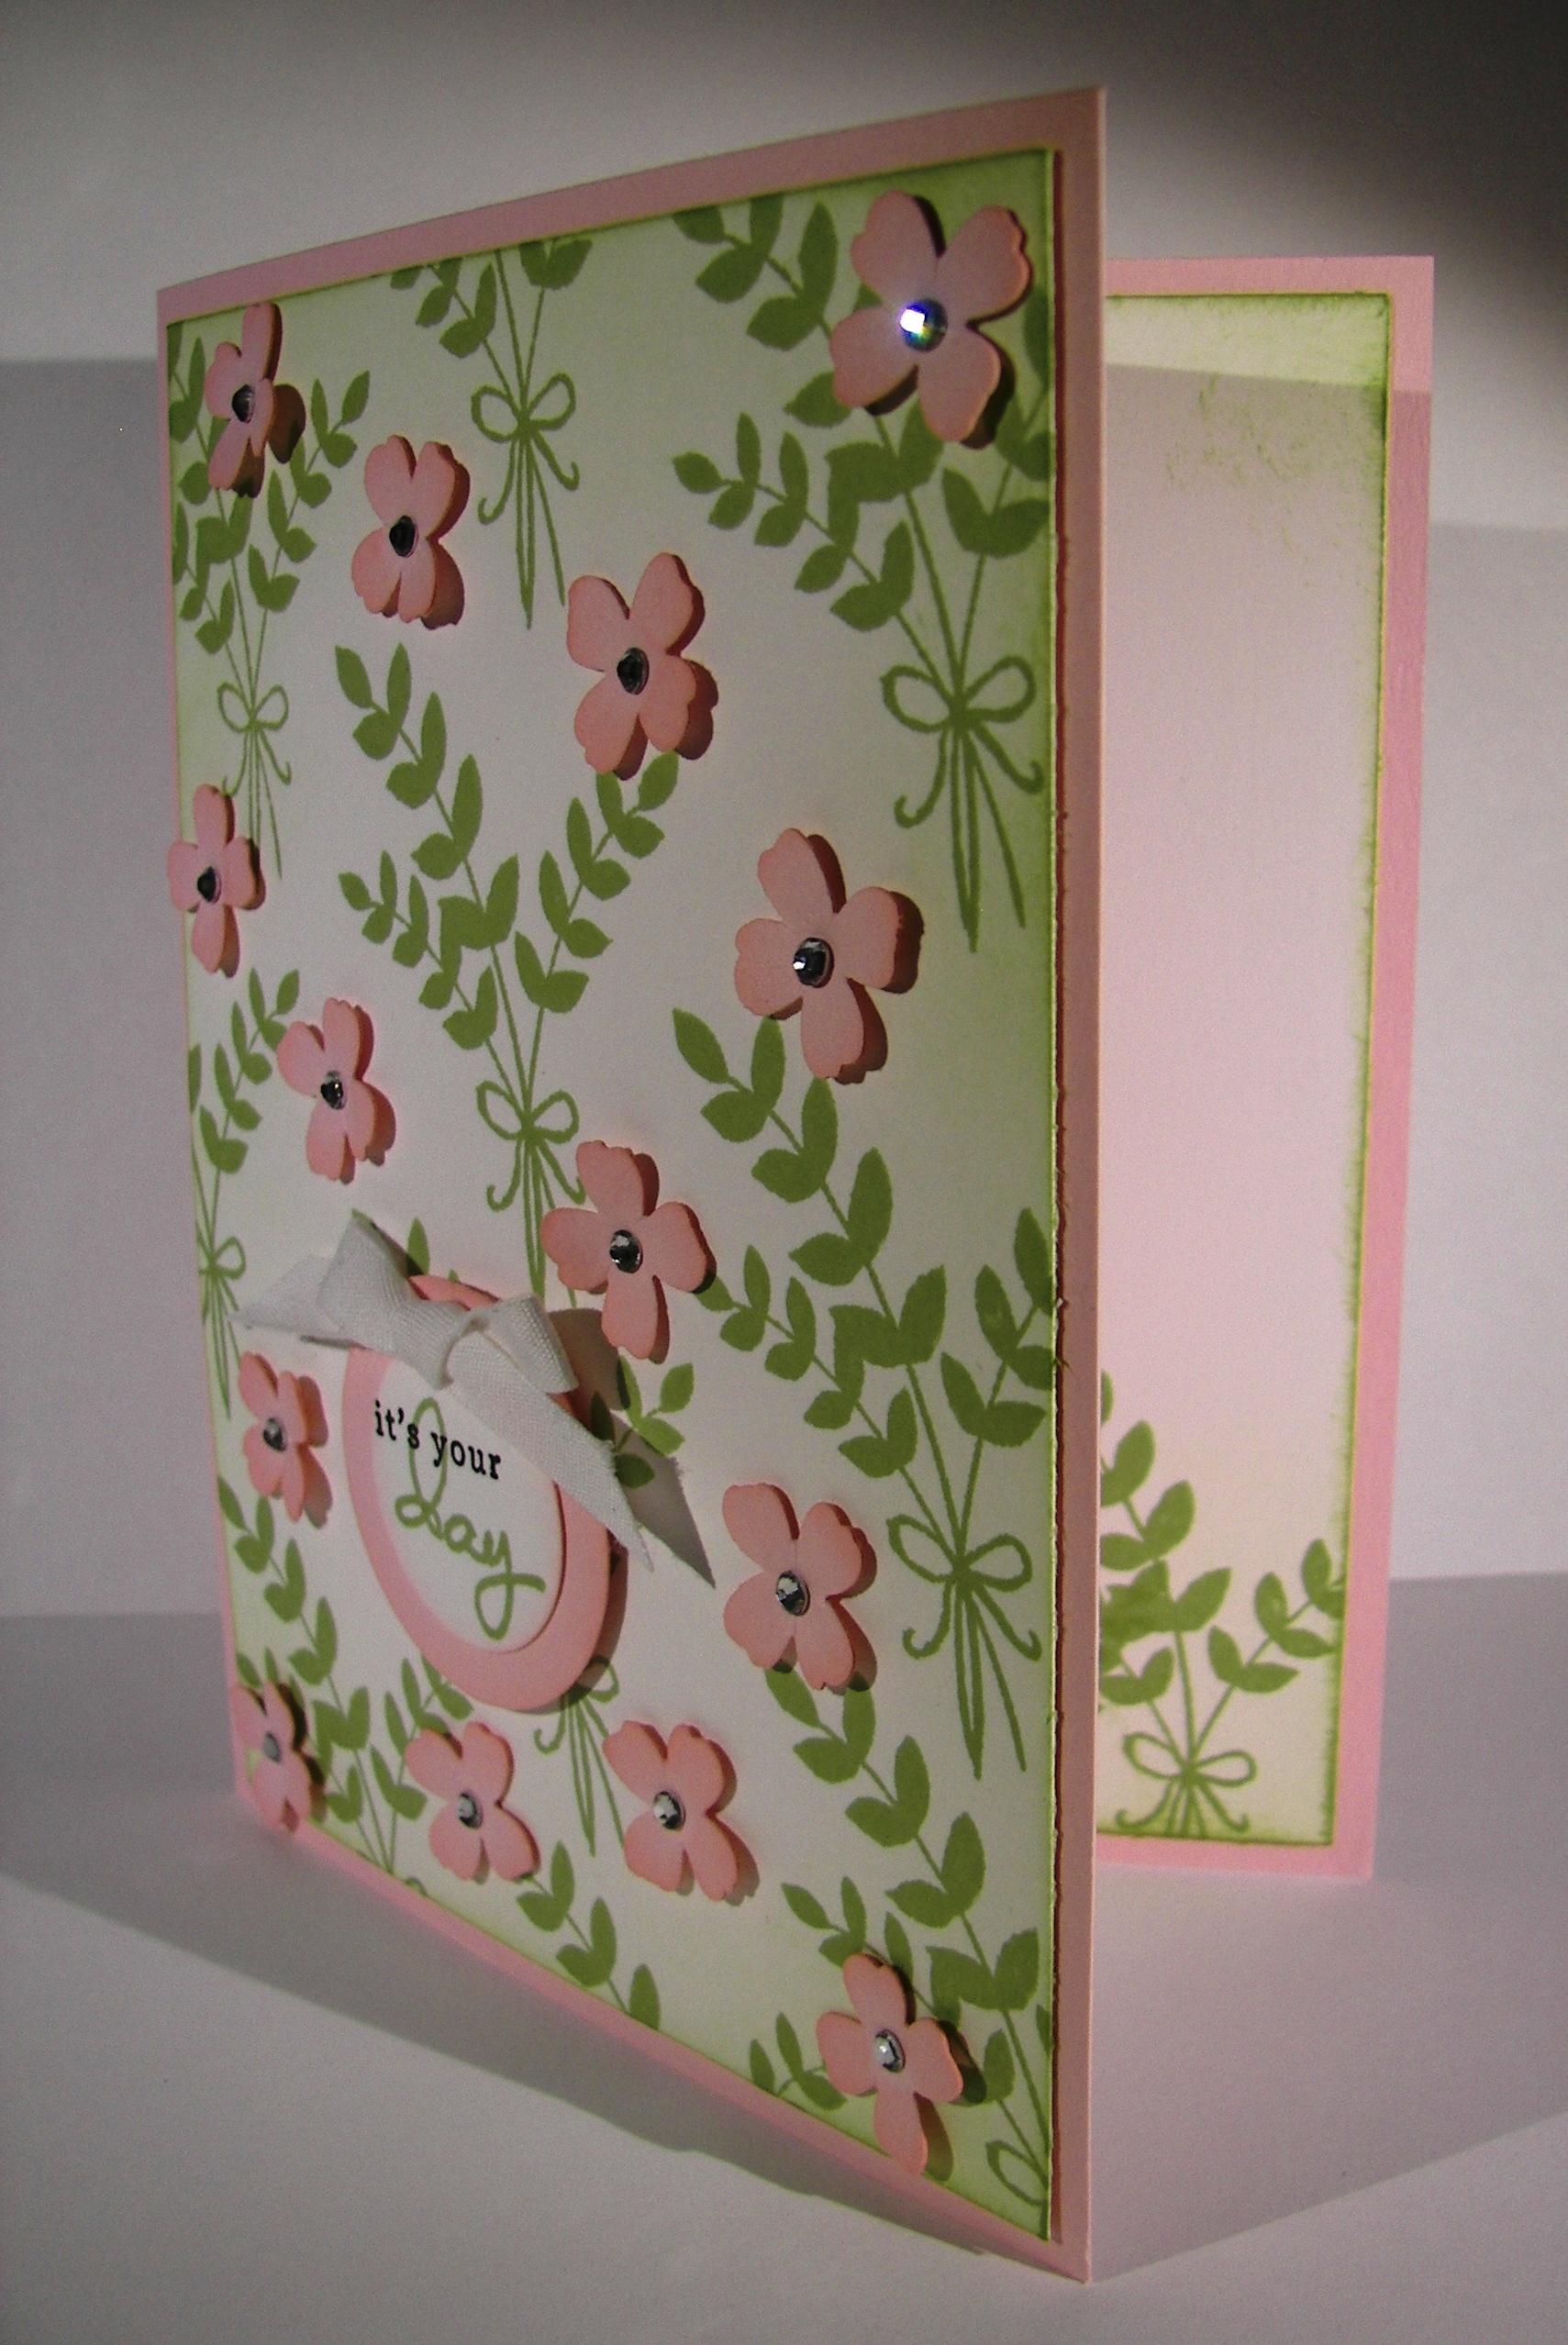
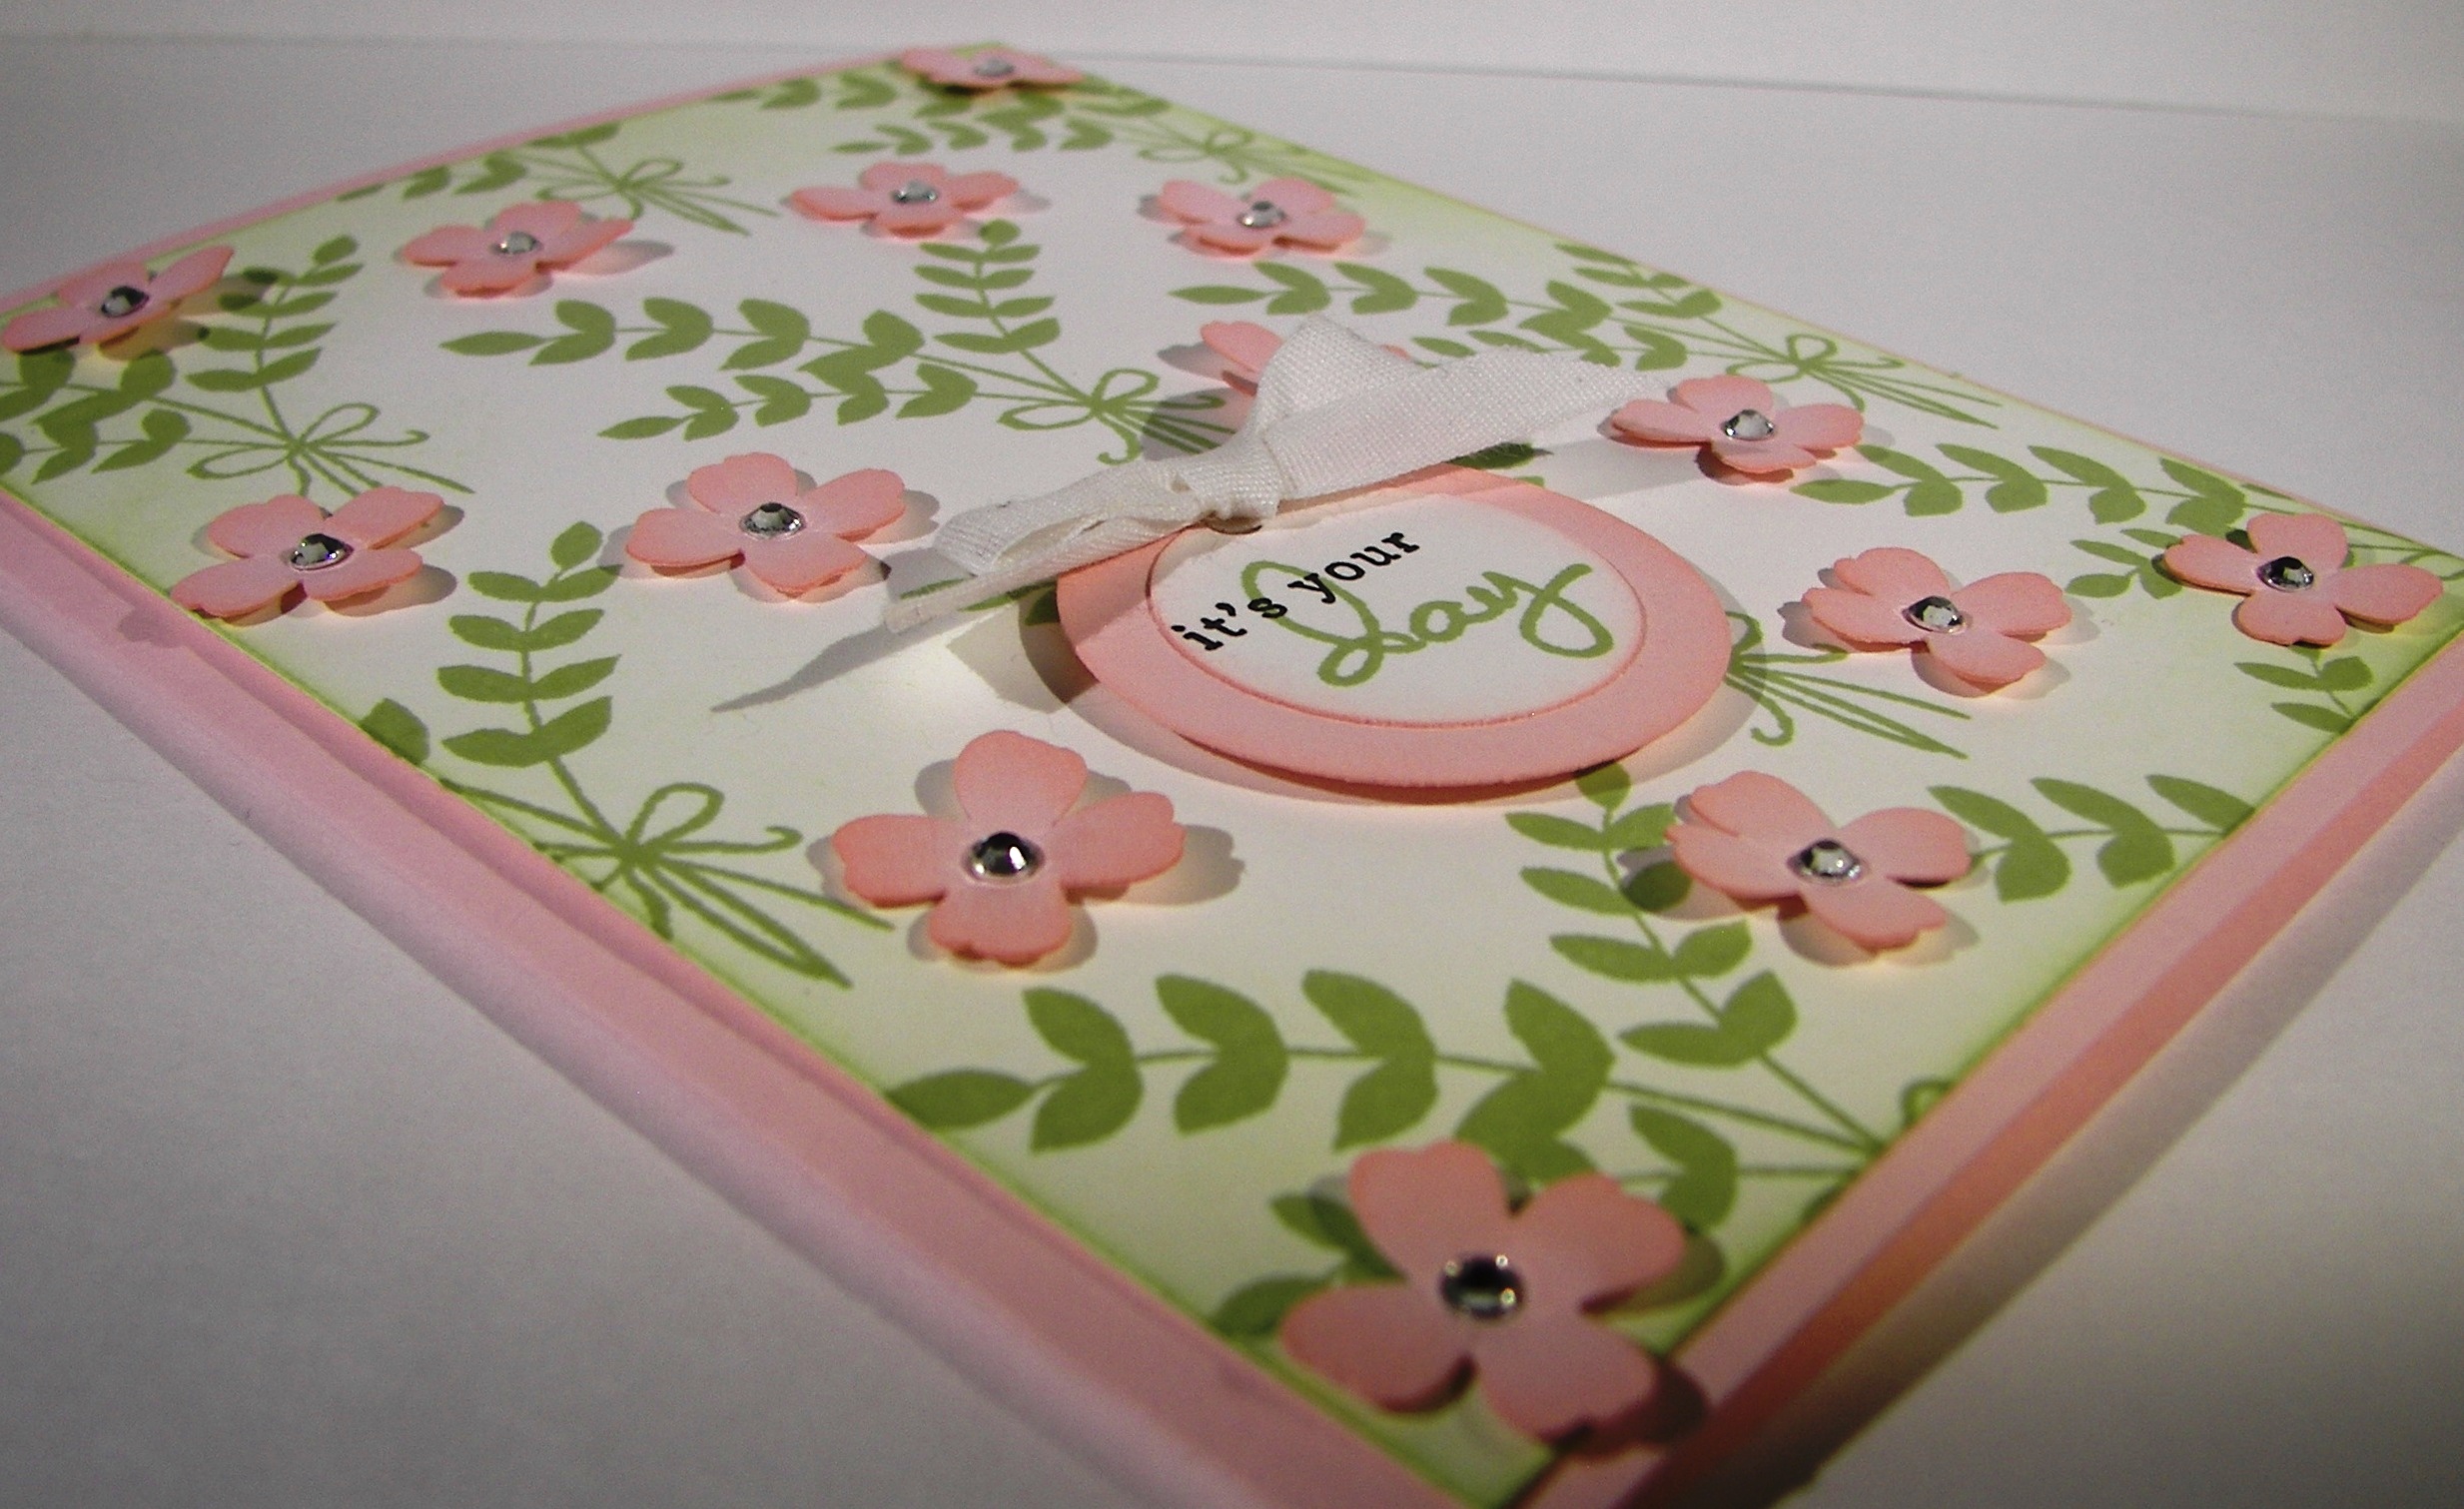
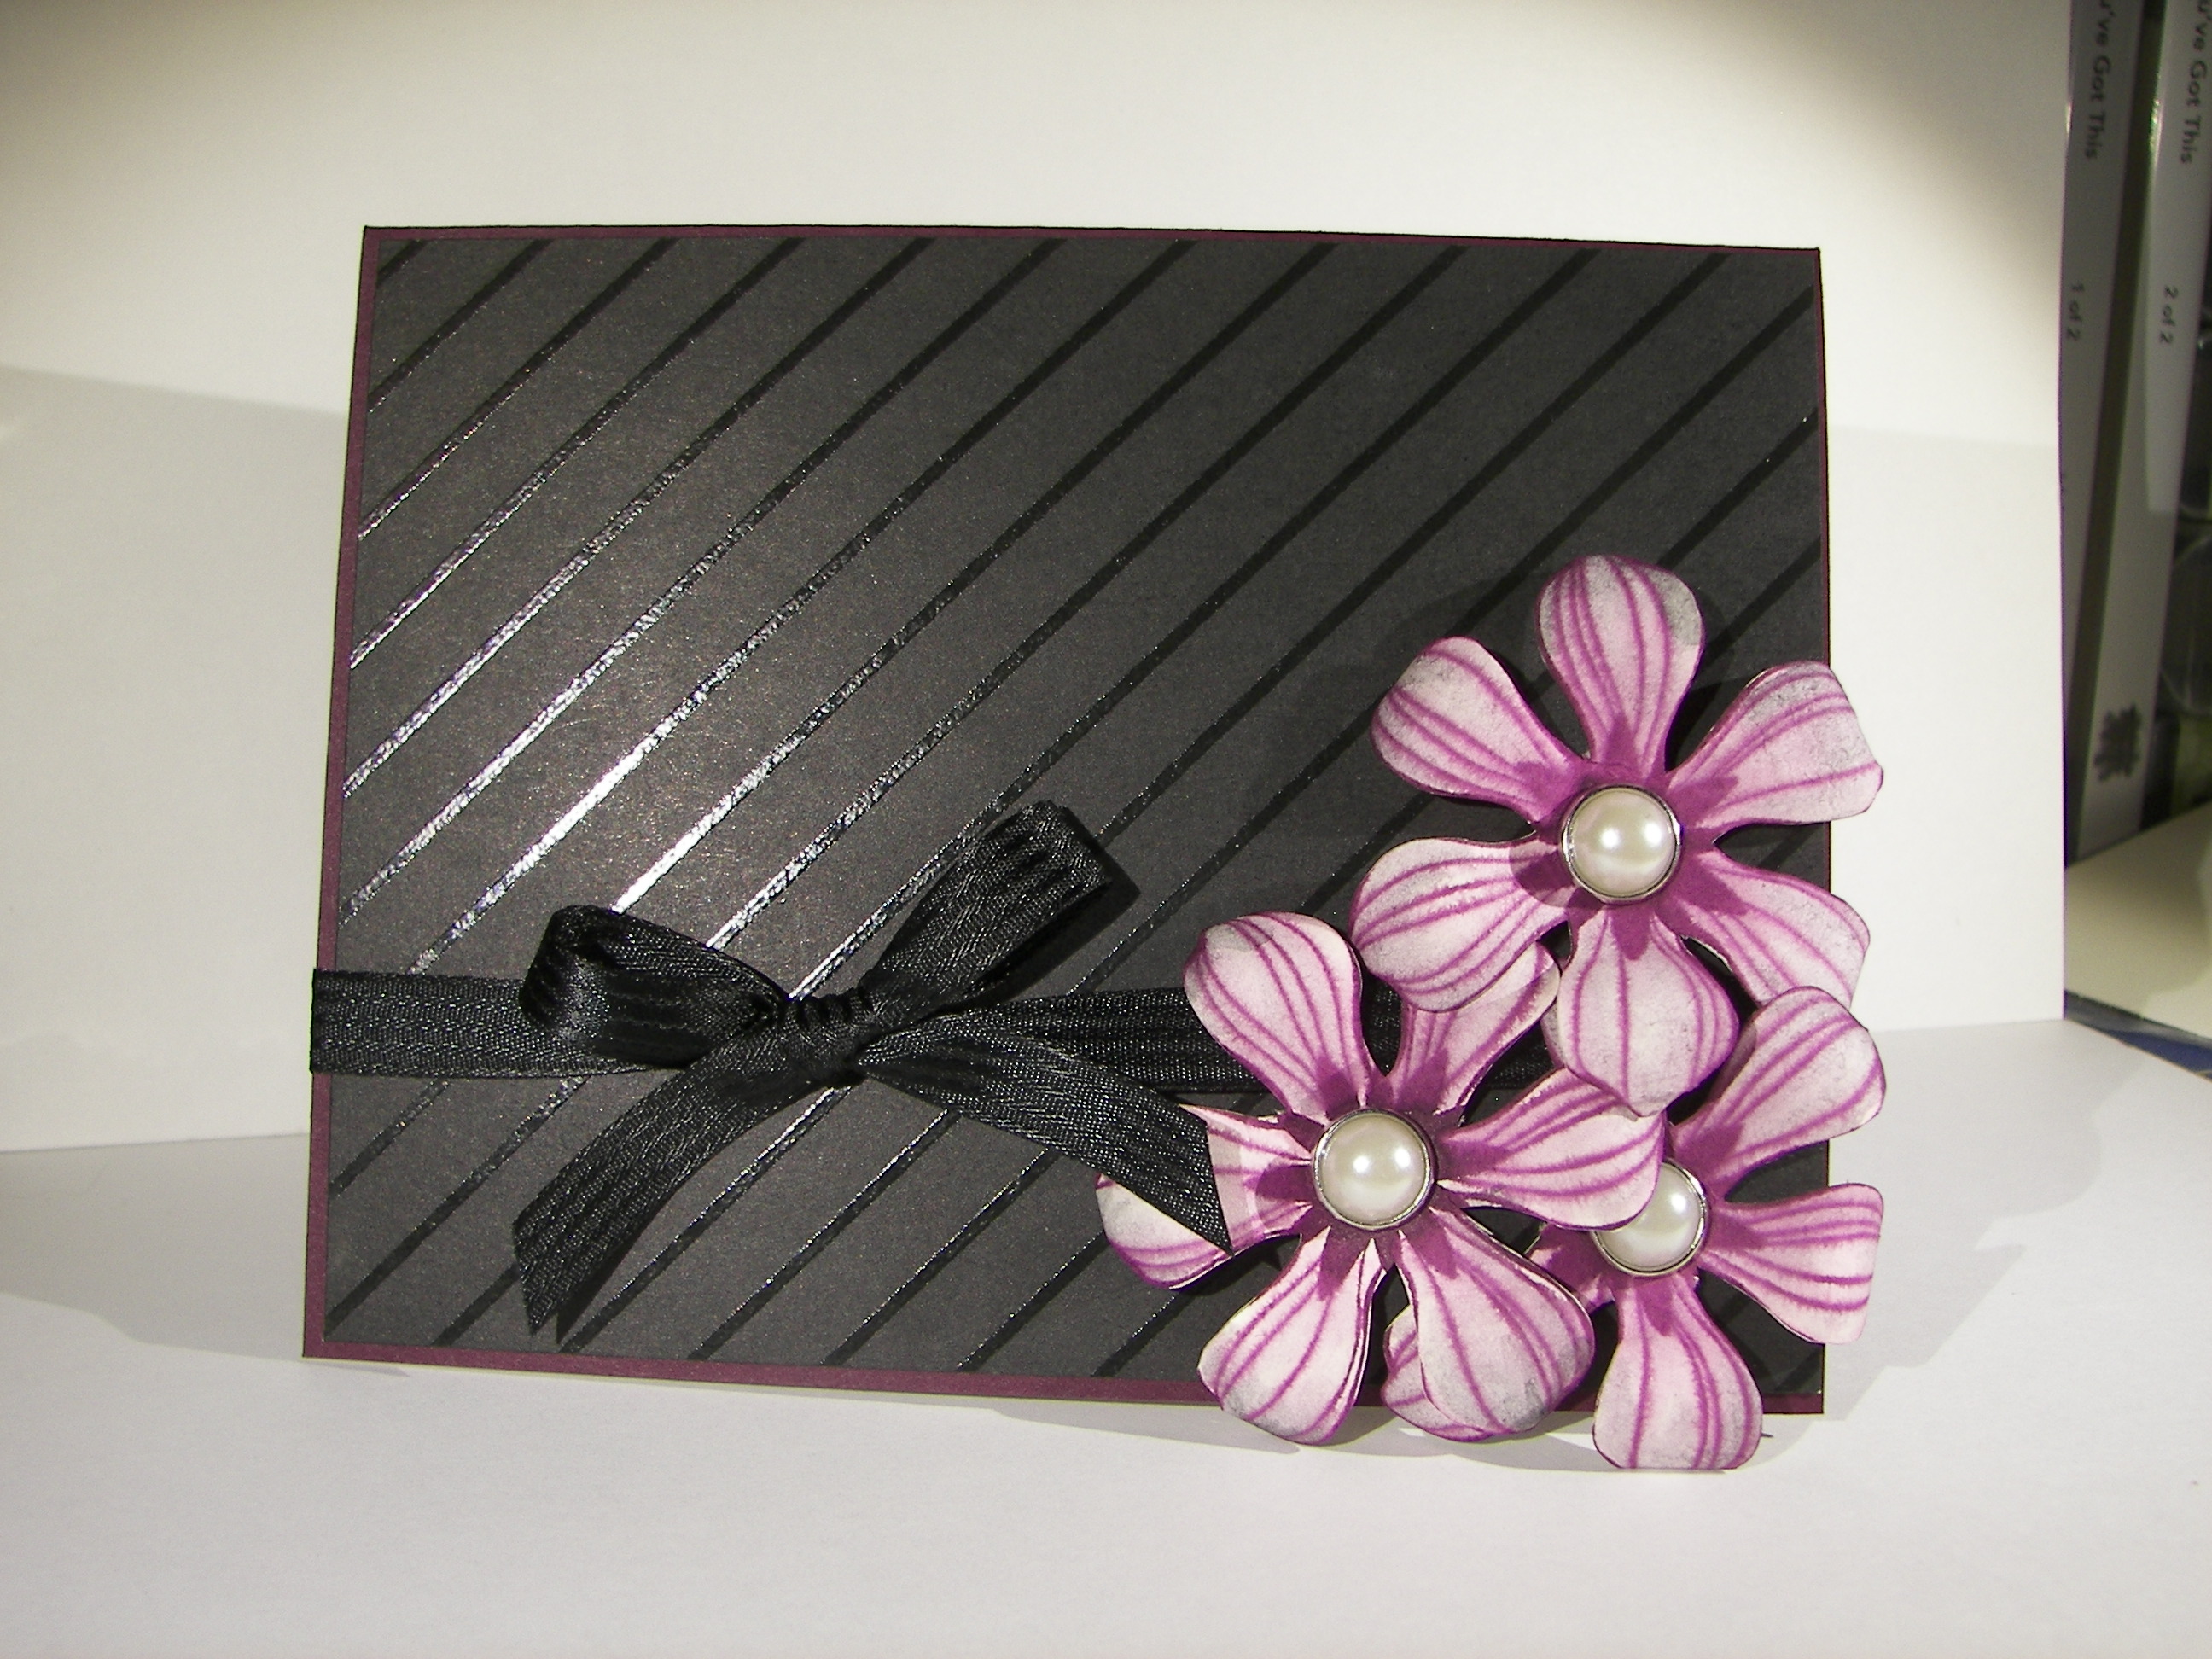
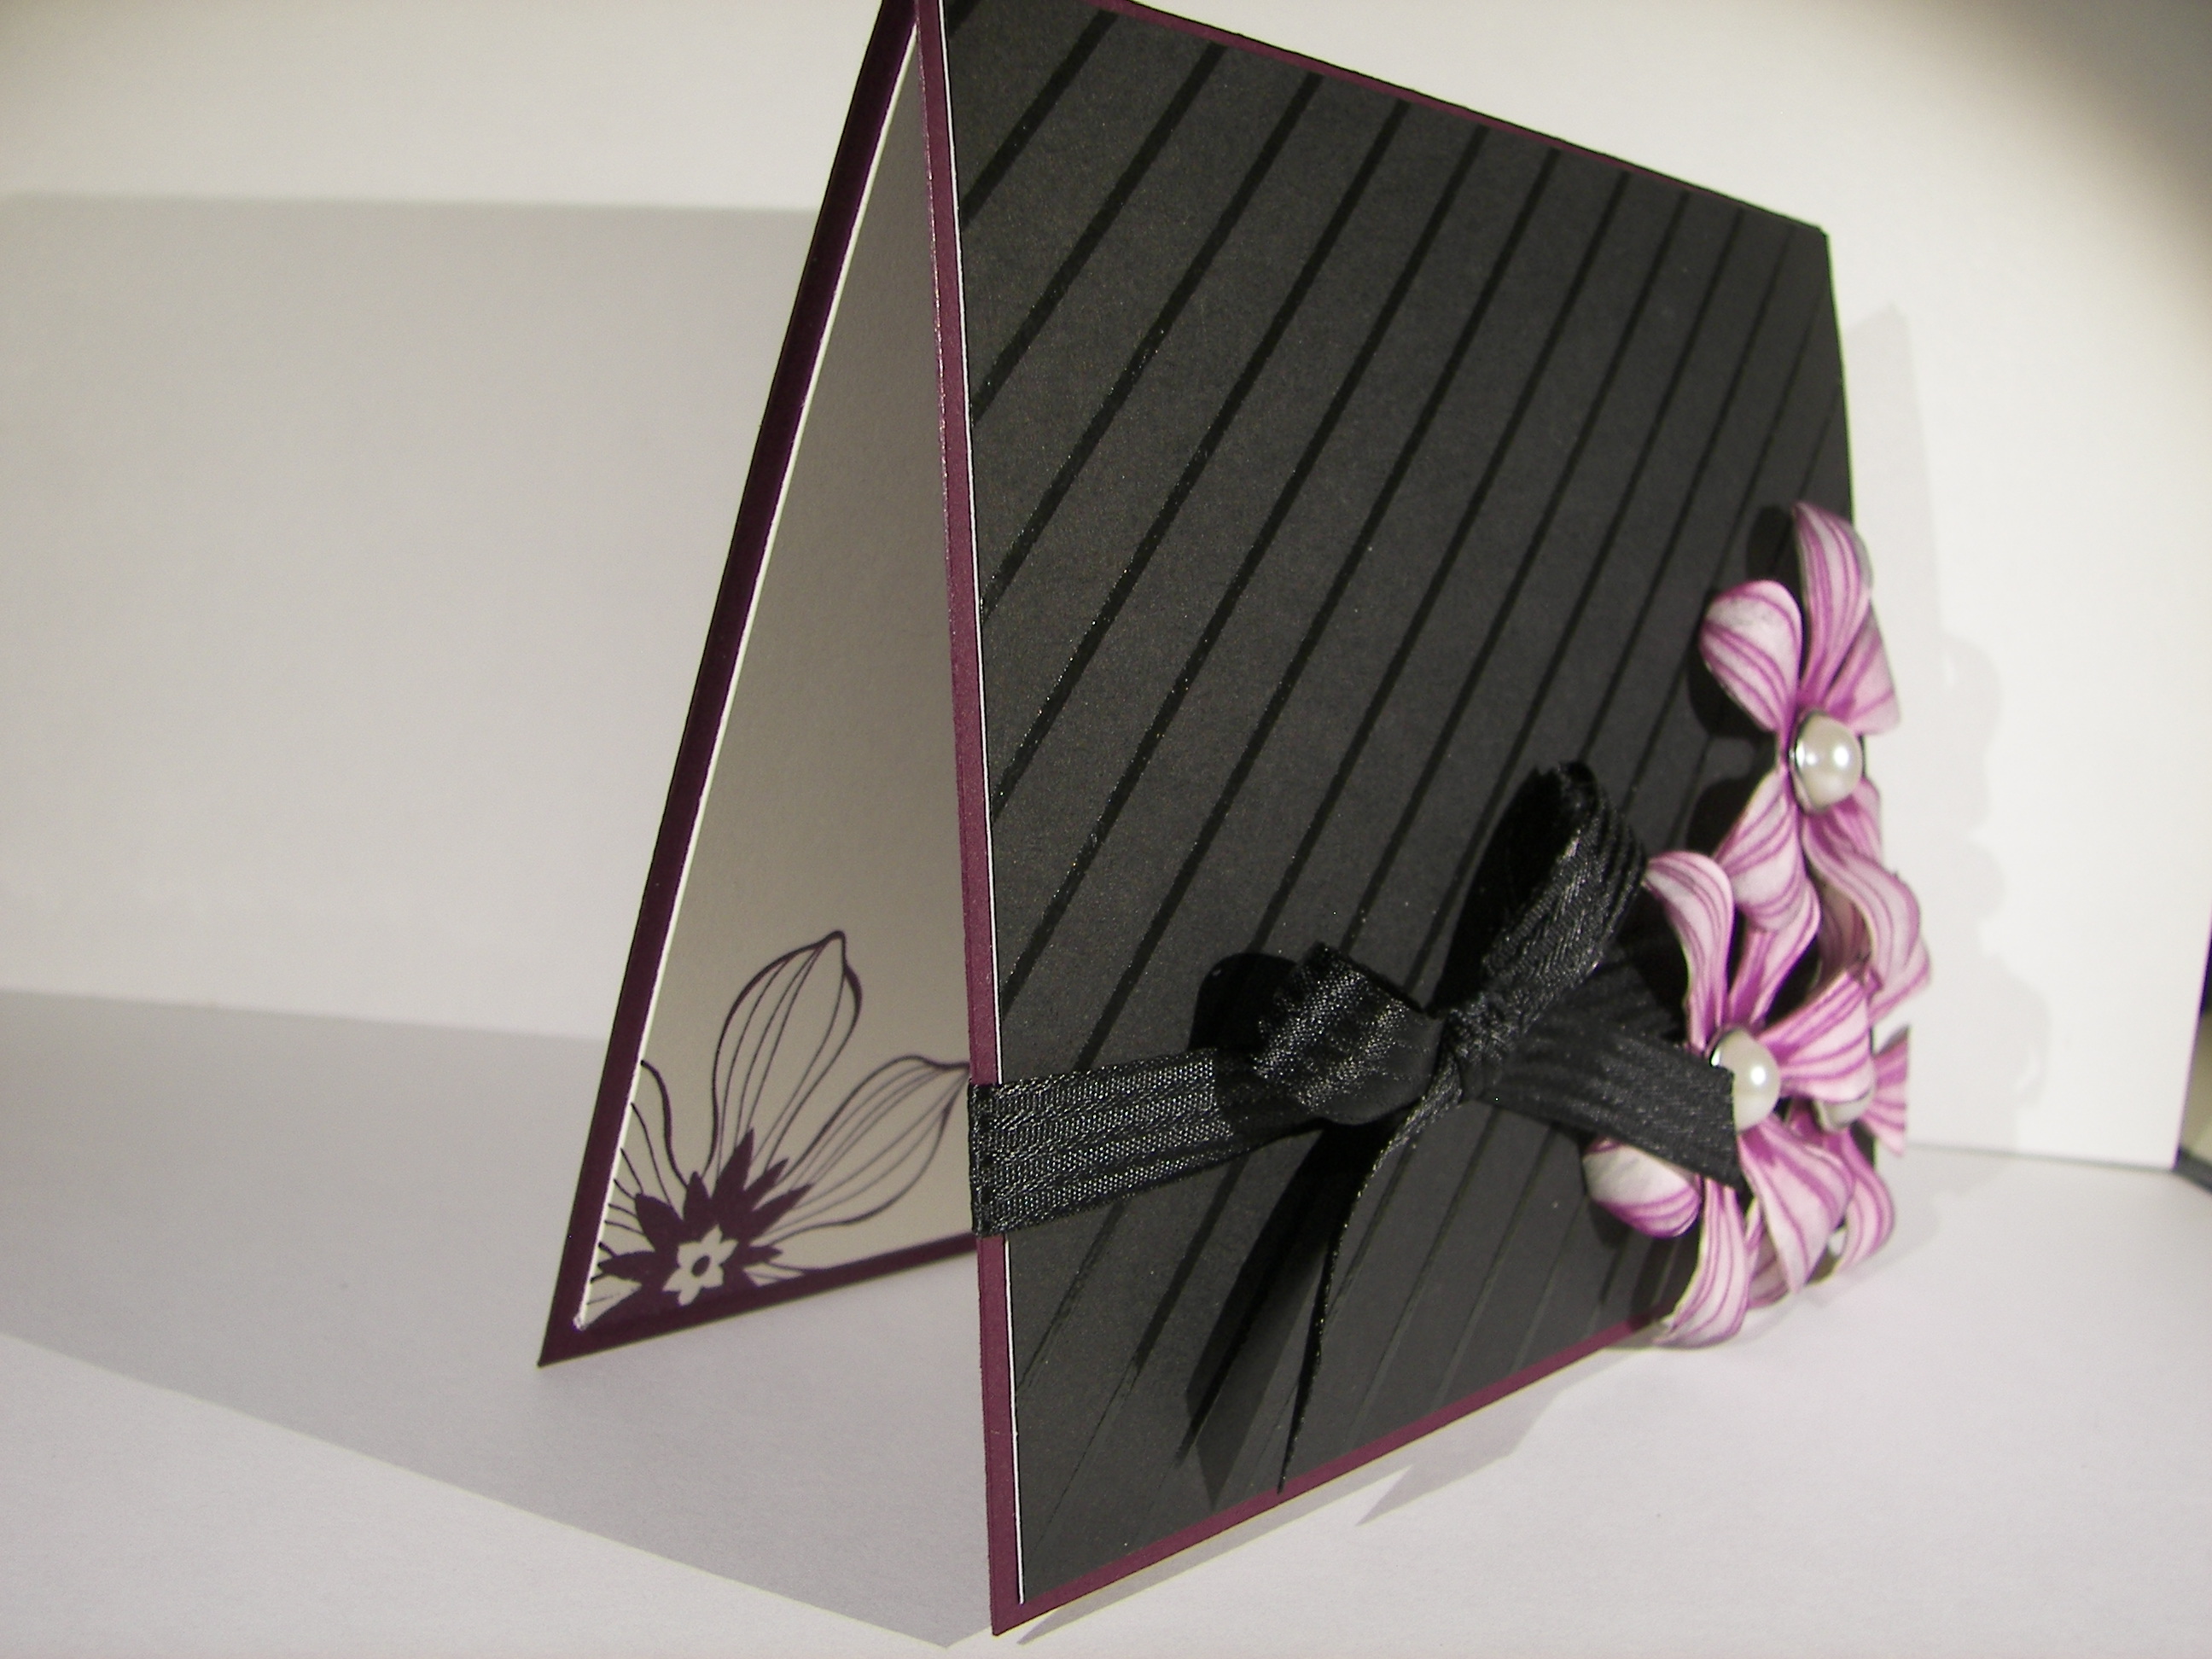
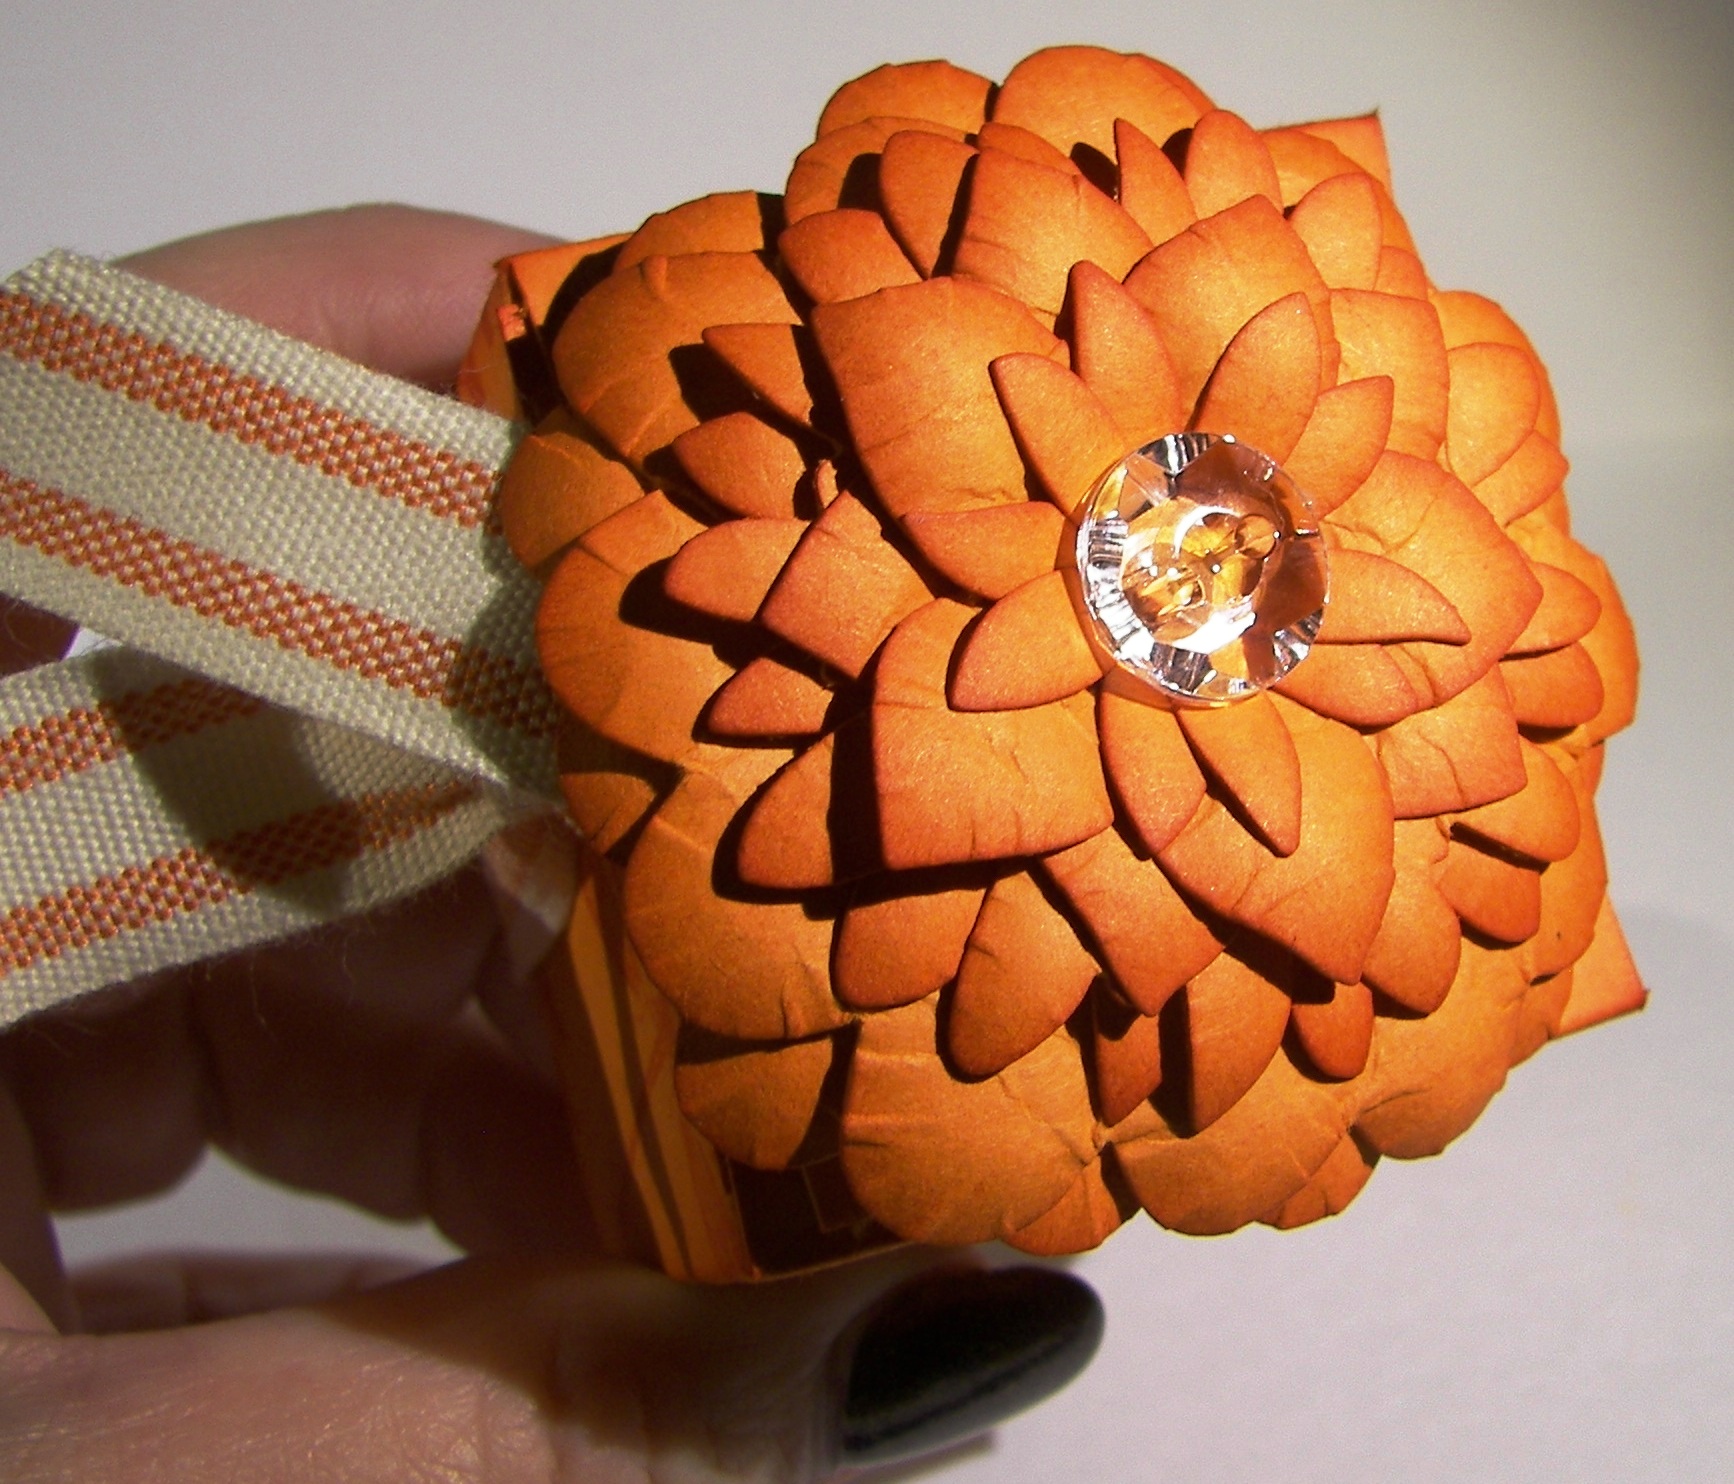
I am definitely in the mood for gift boxes.  I wanted to make a huge floral bloom and then make a box sized right for the flower to cover the whole top of it.  And here you go .

Flower Fair Gift Box

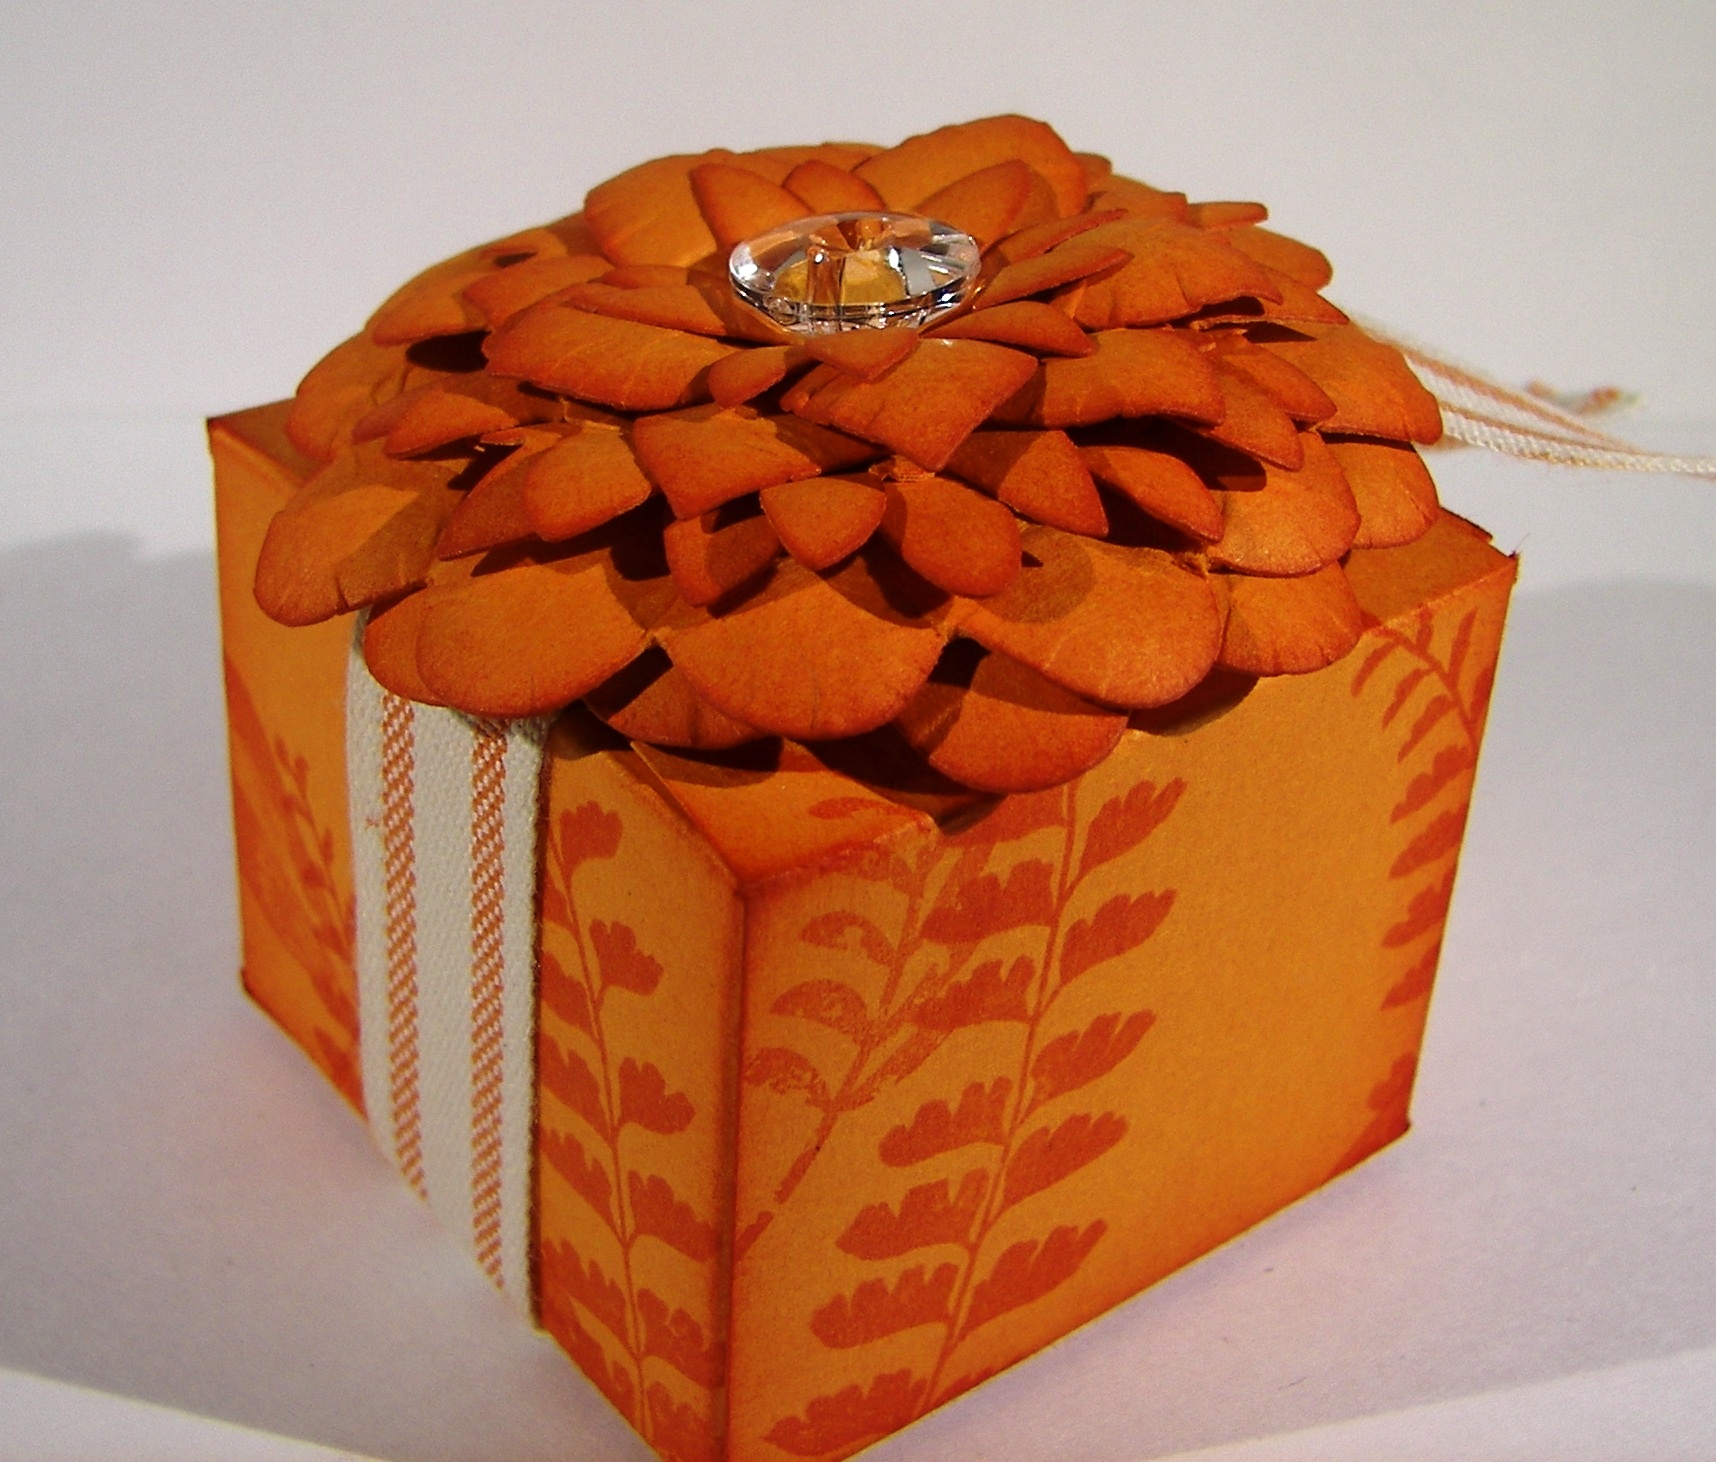
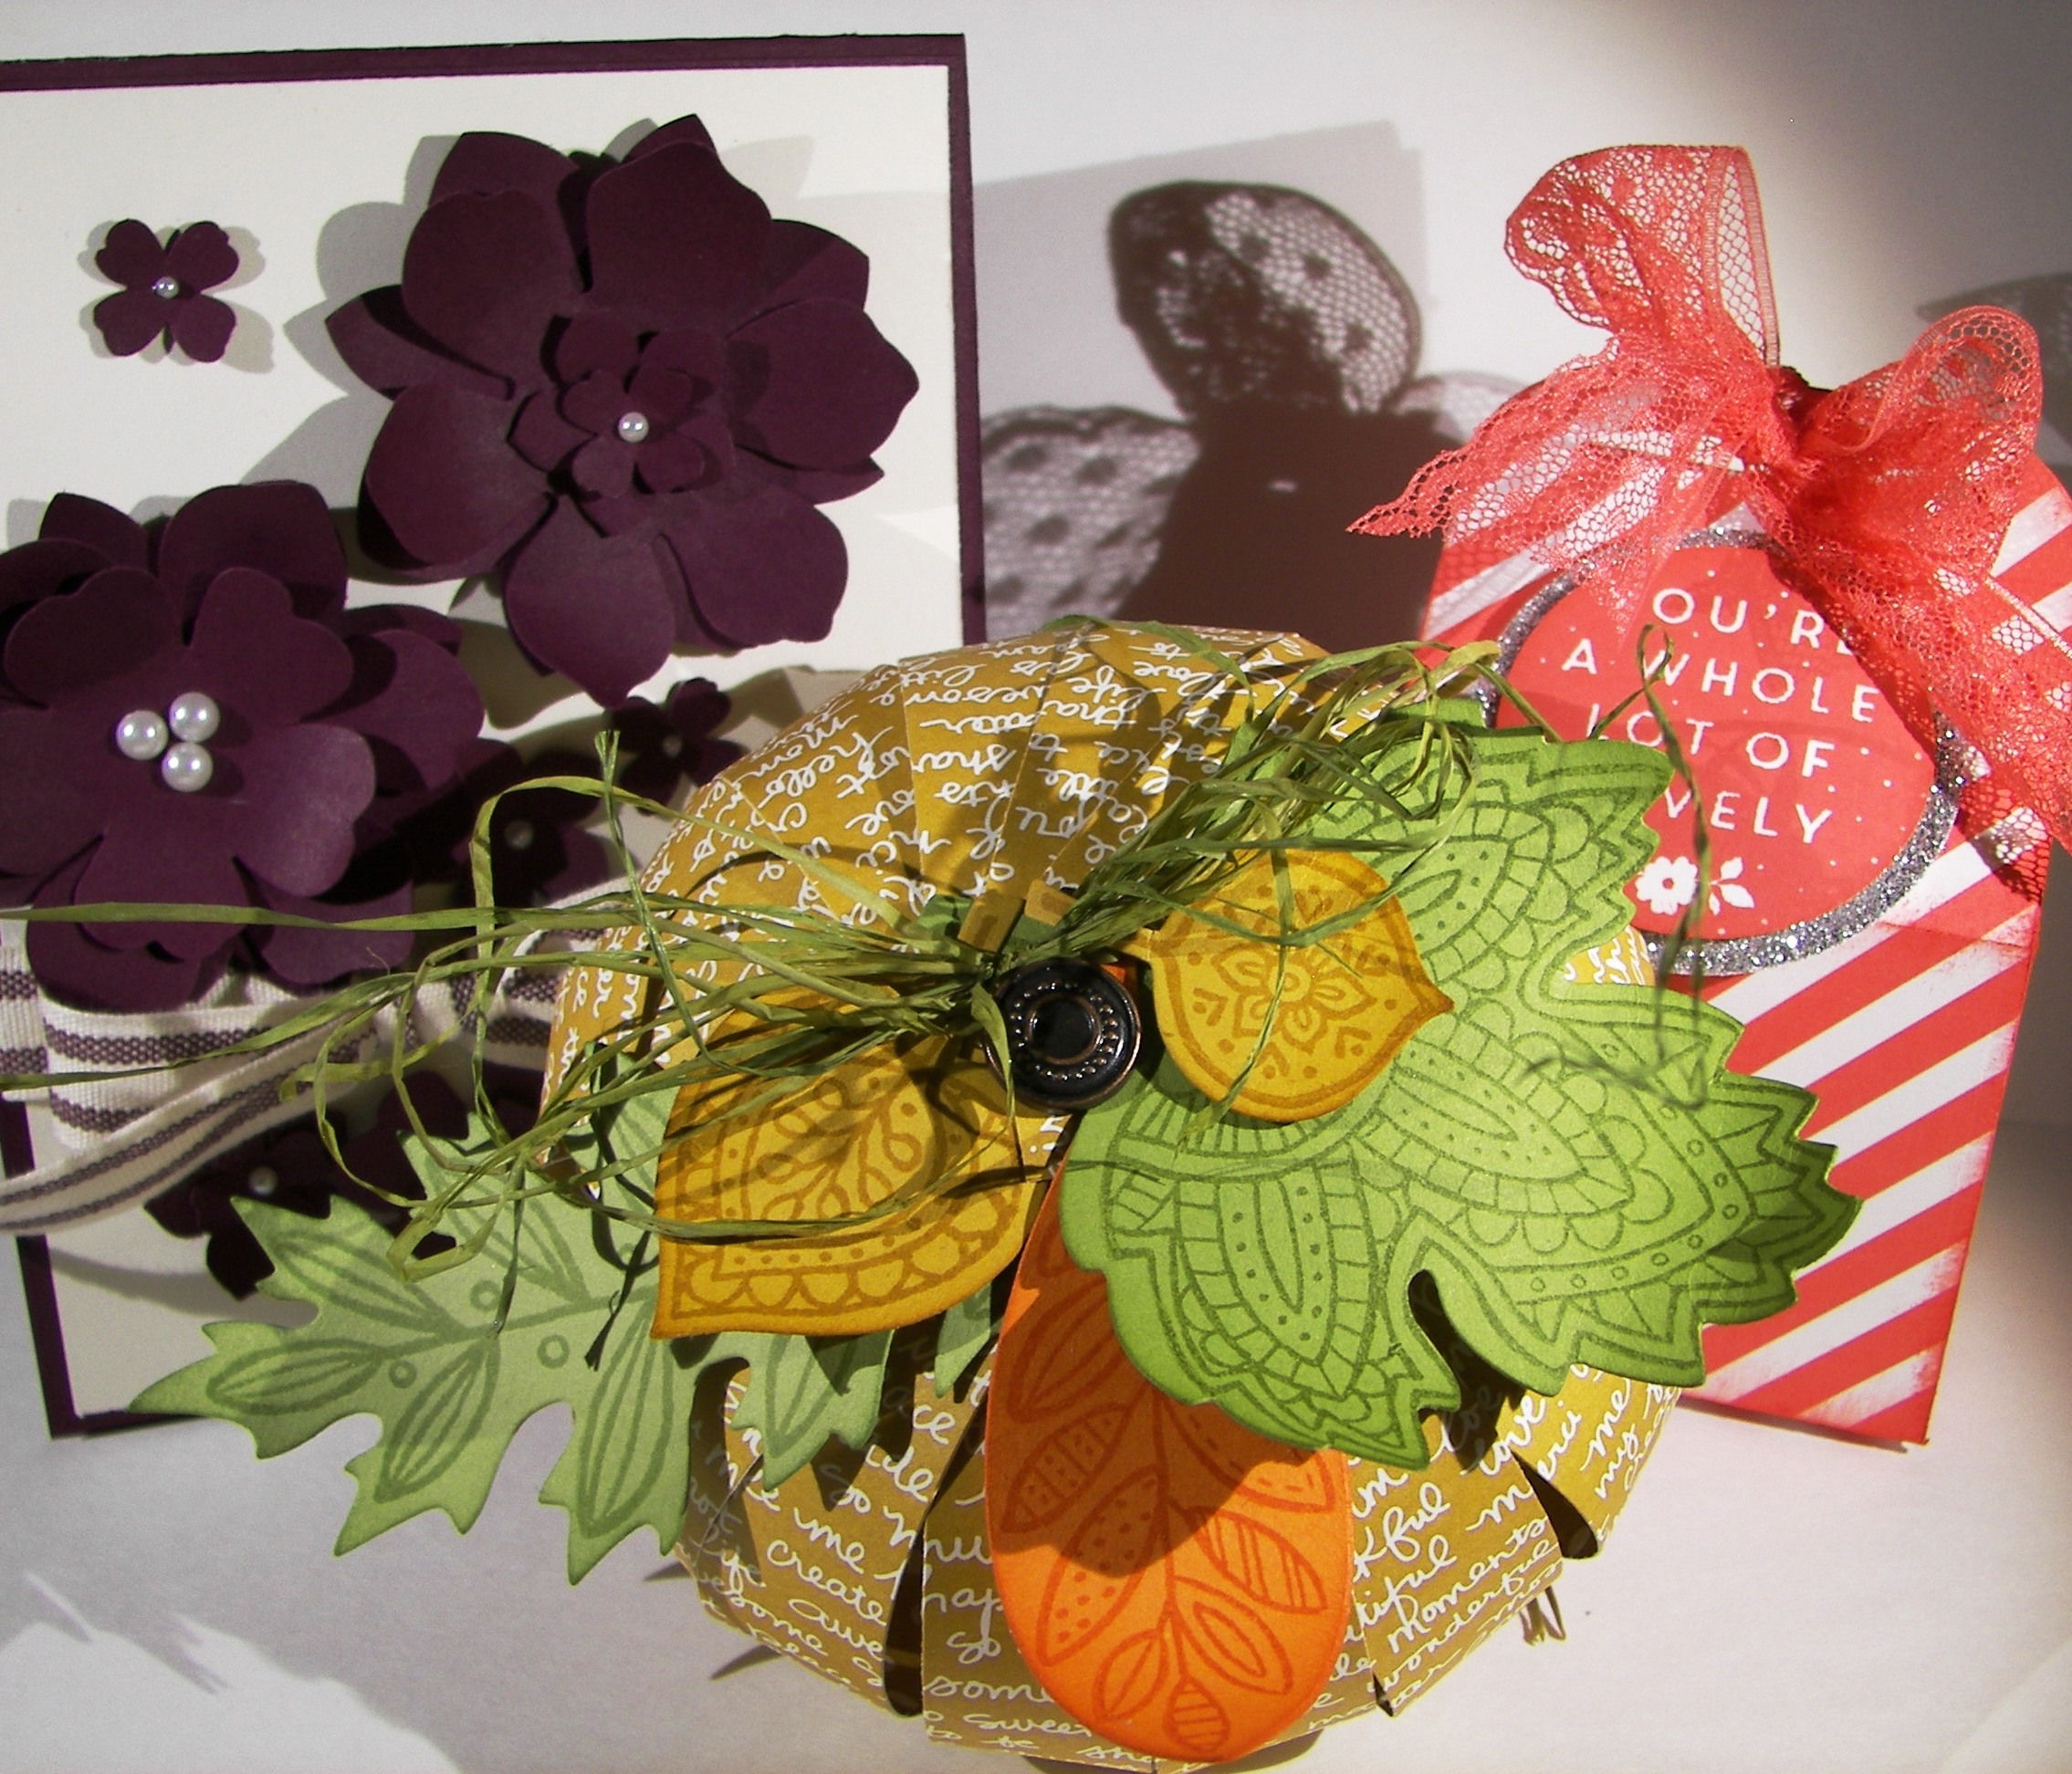
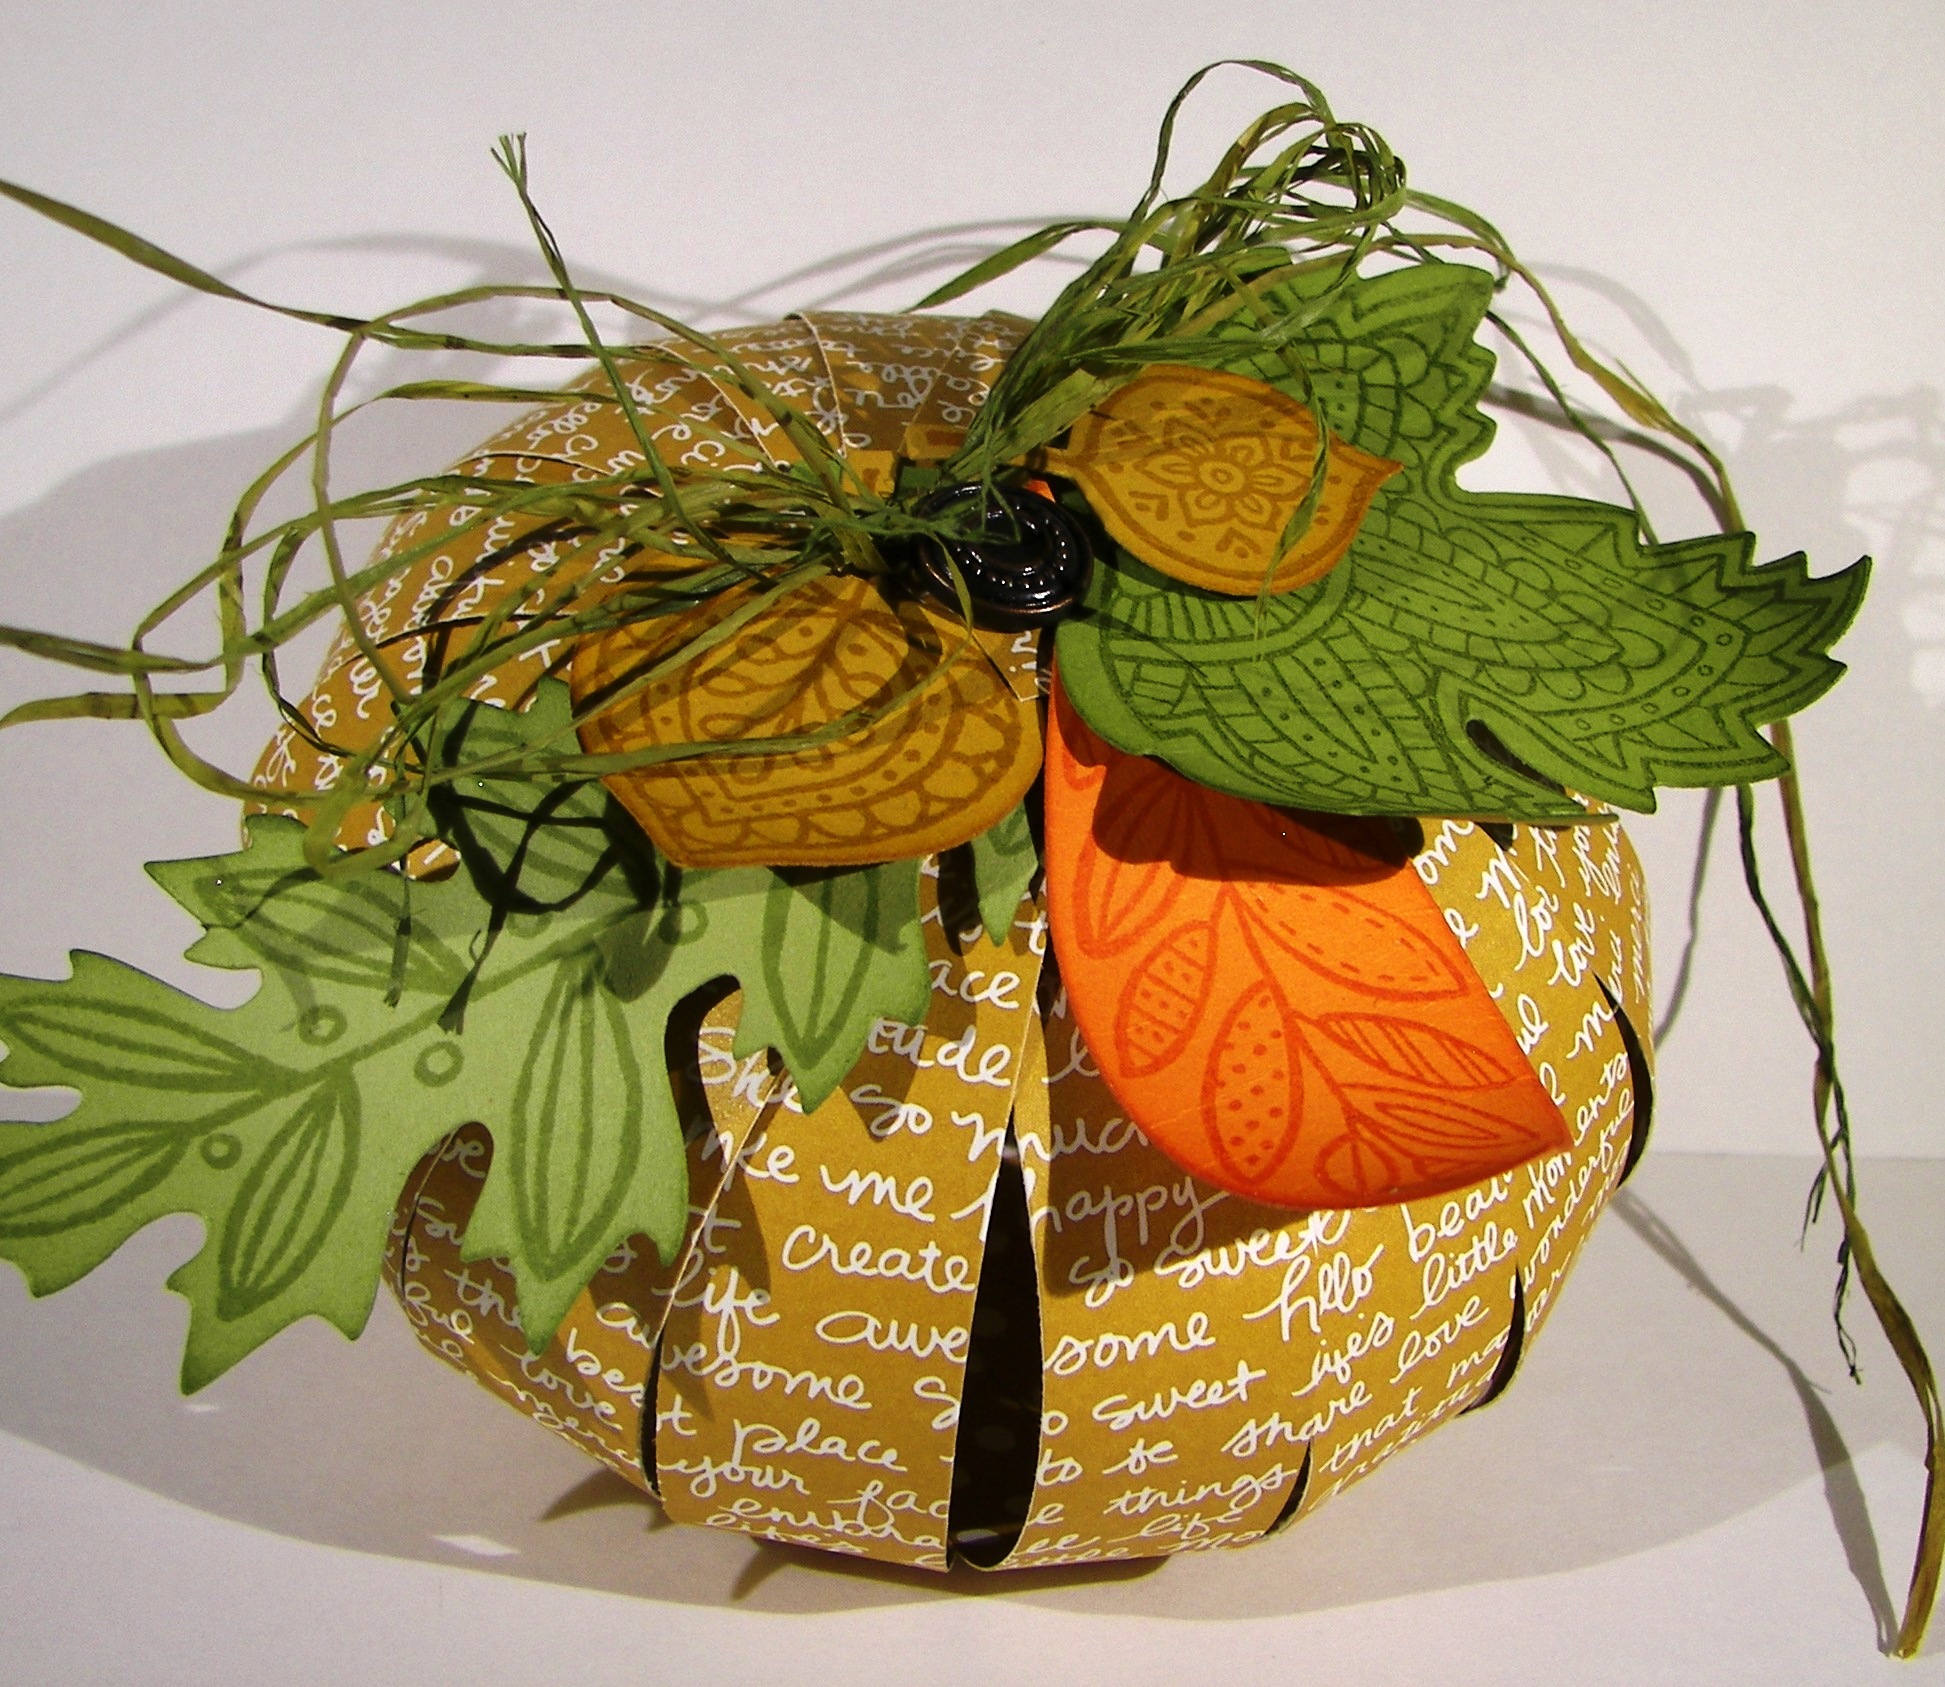
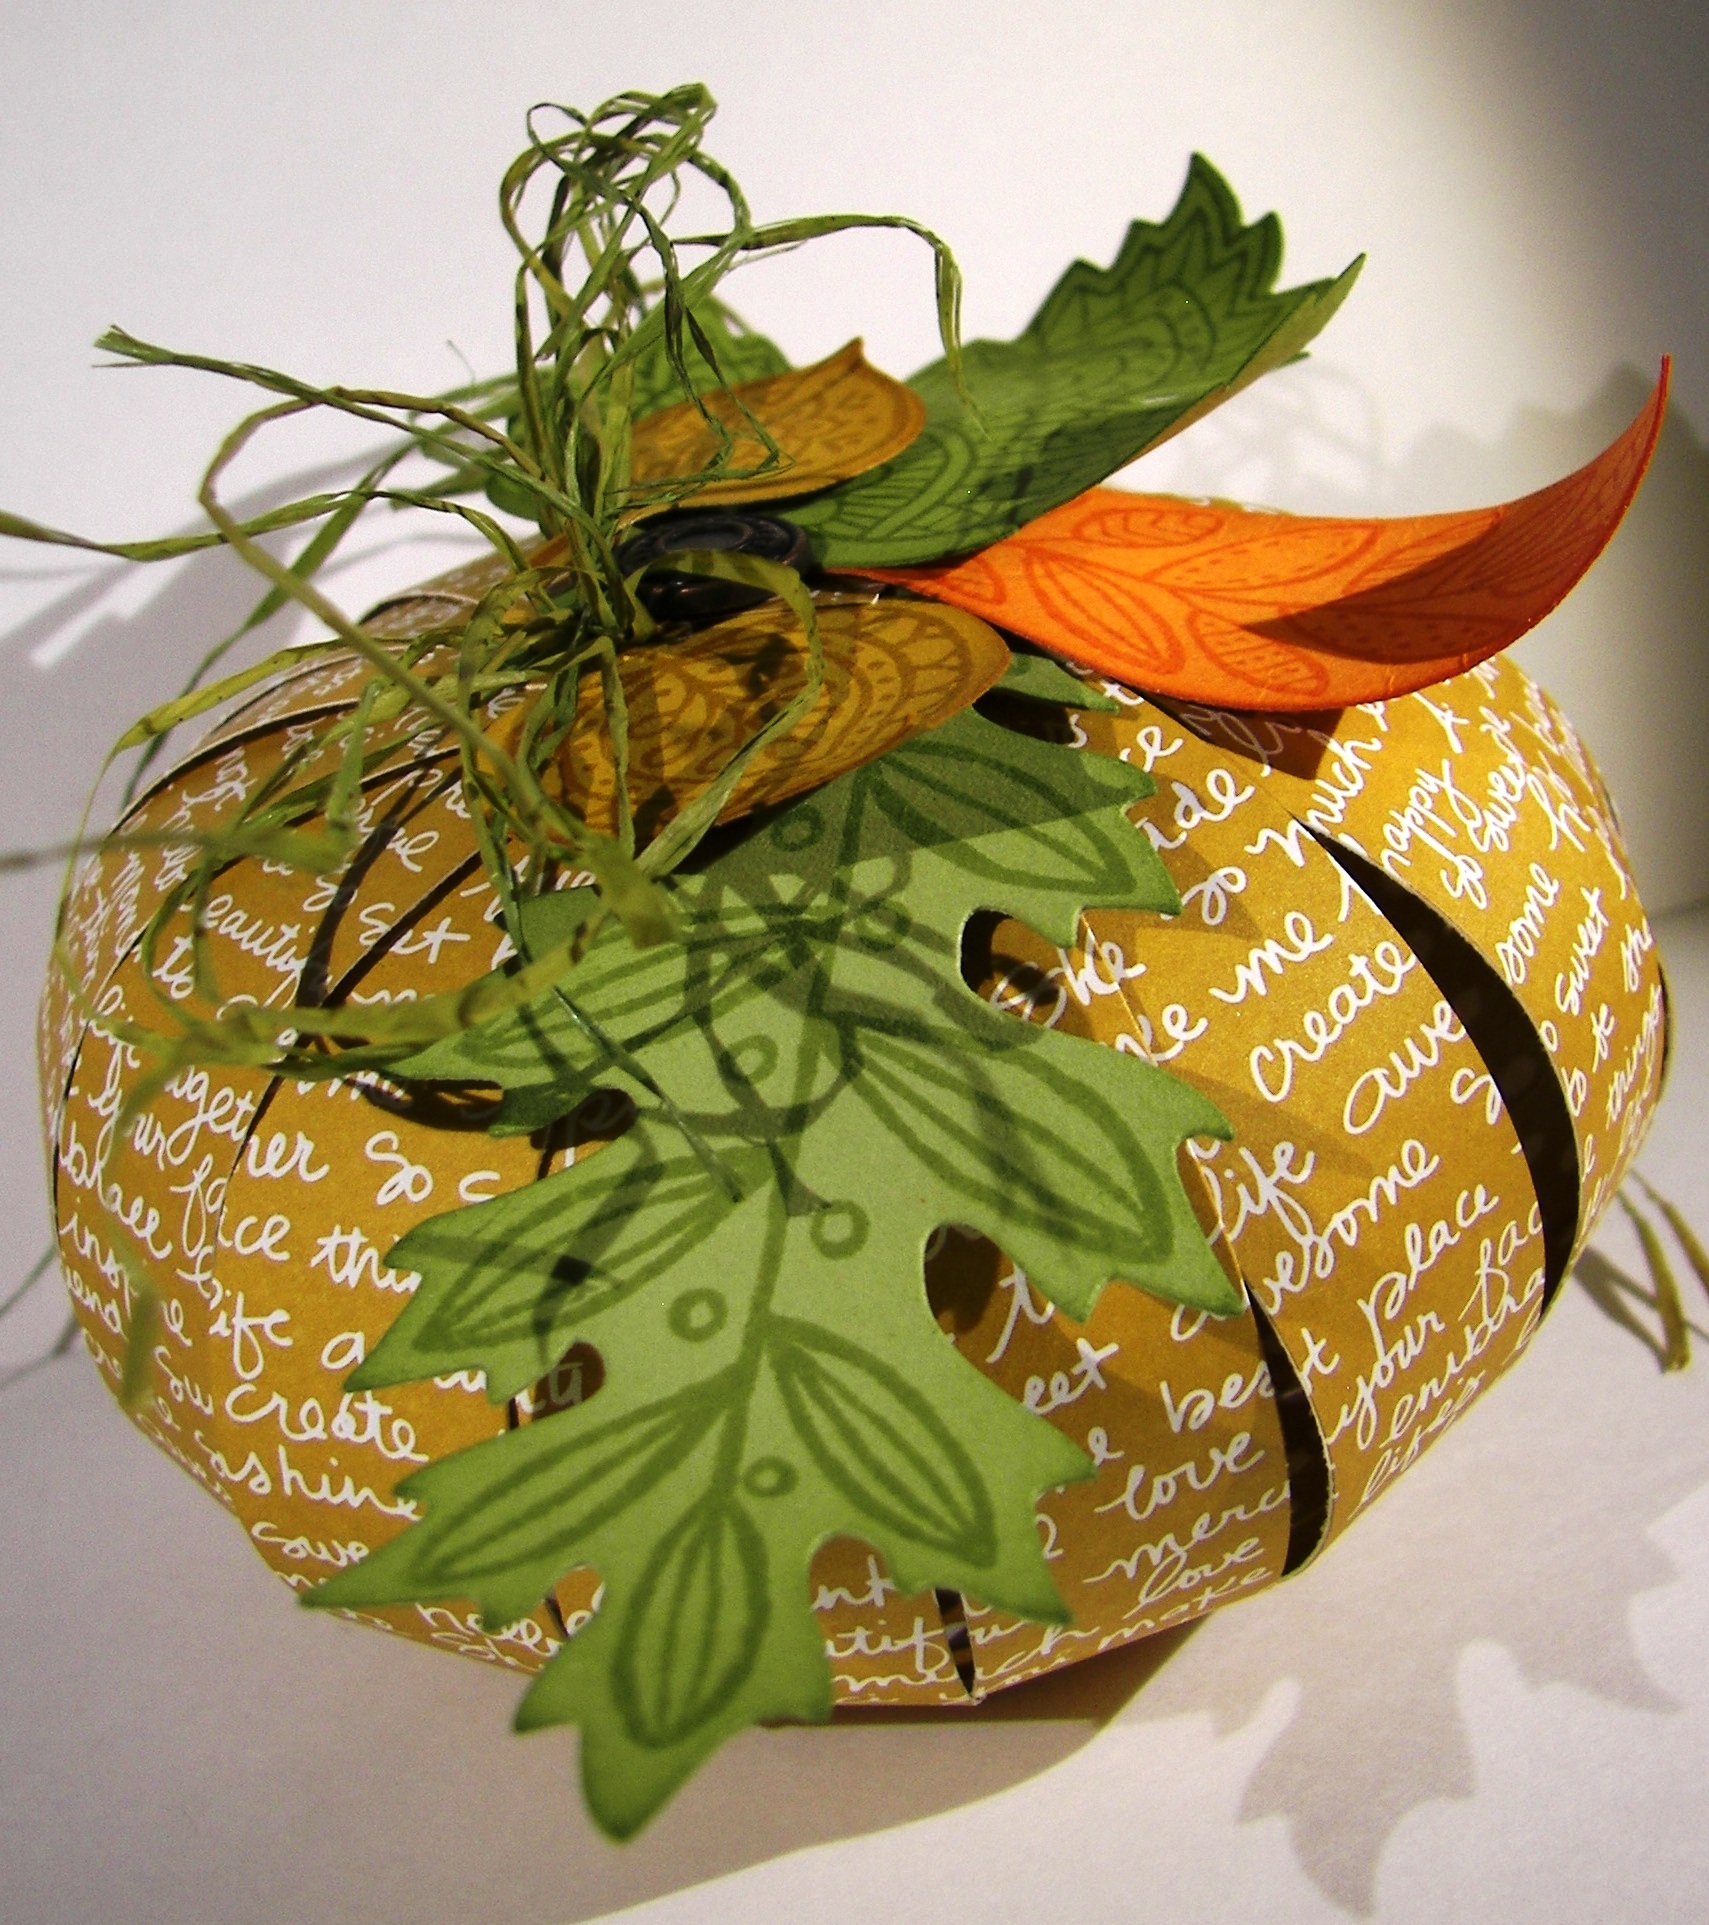
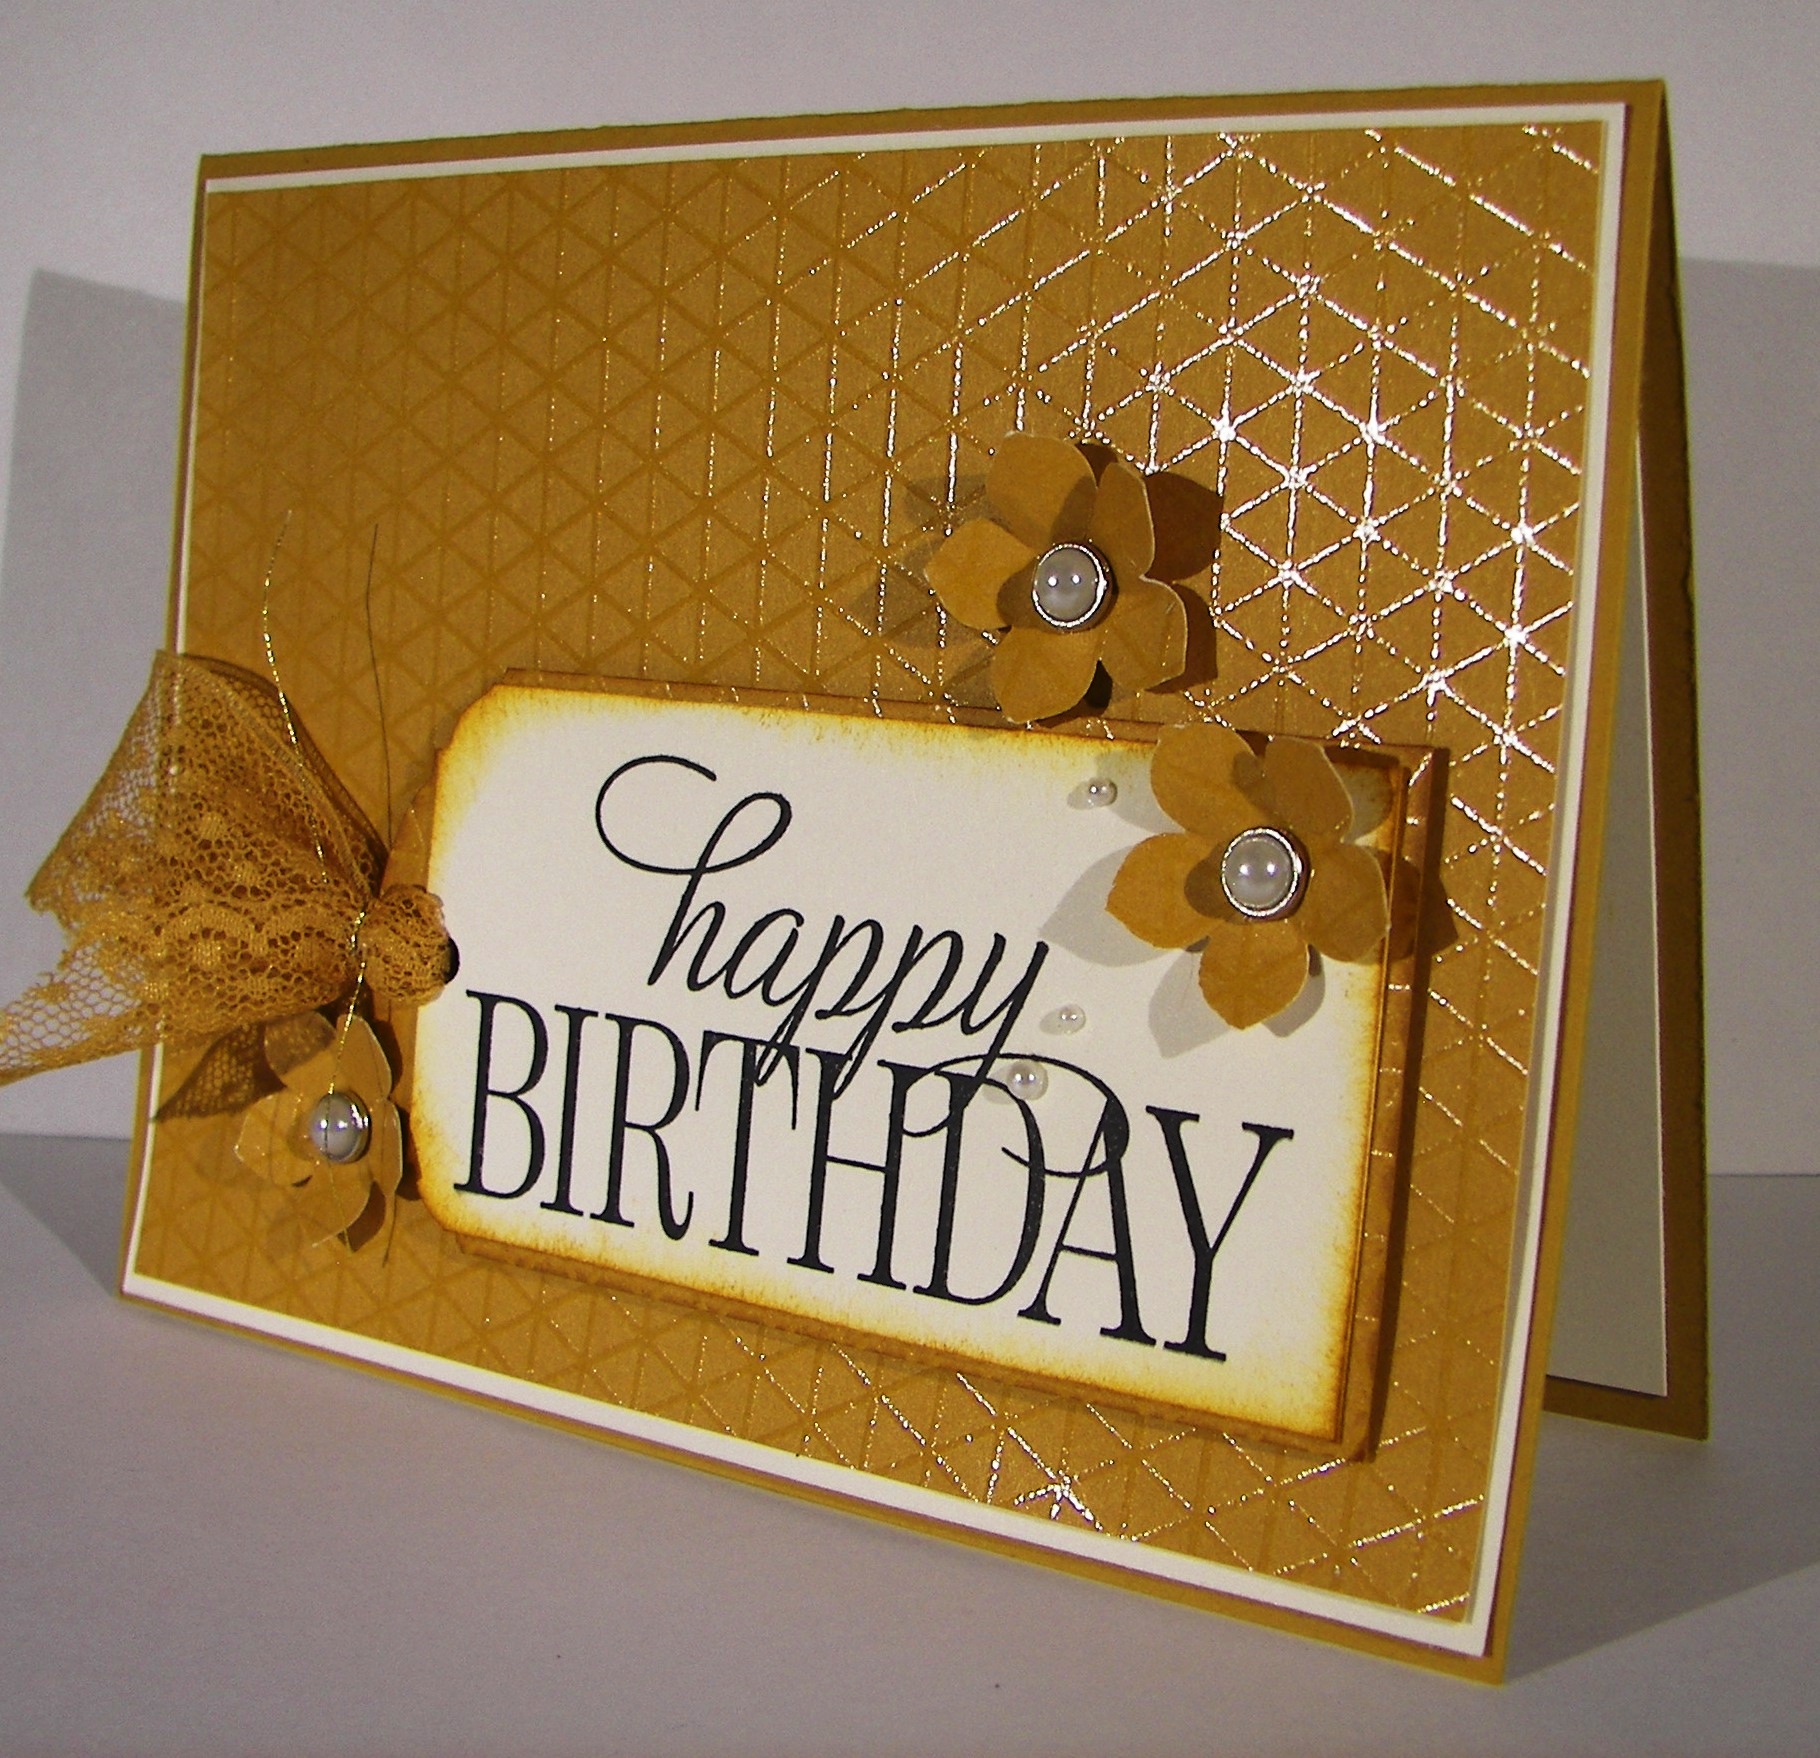
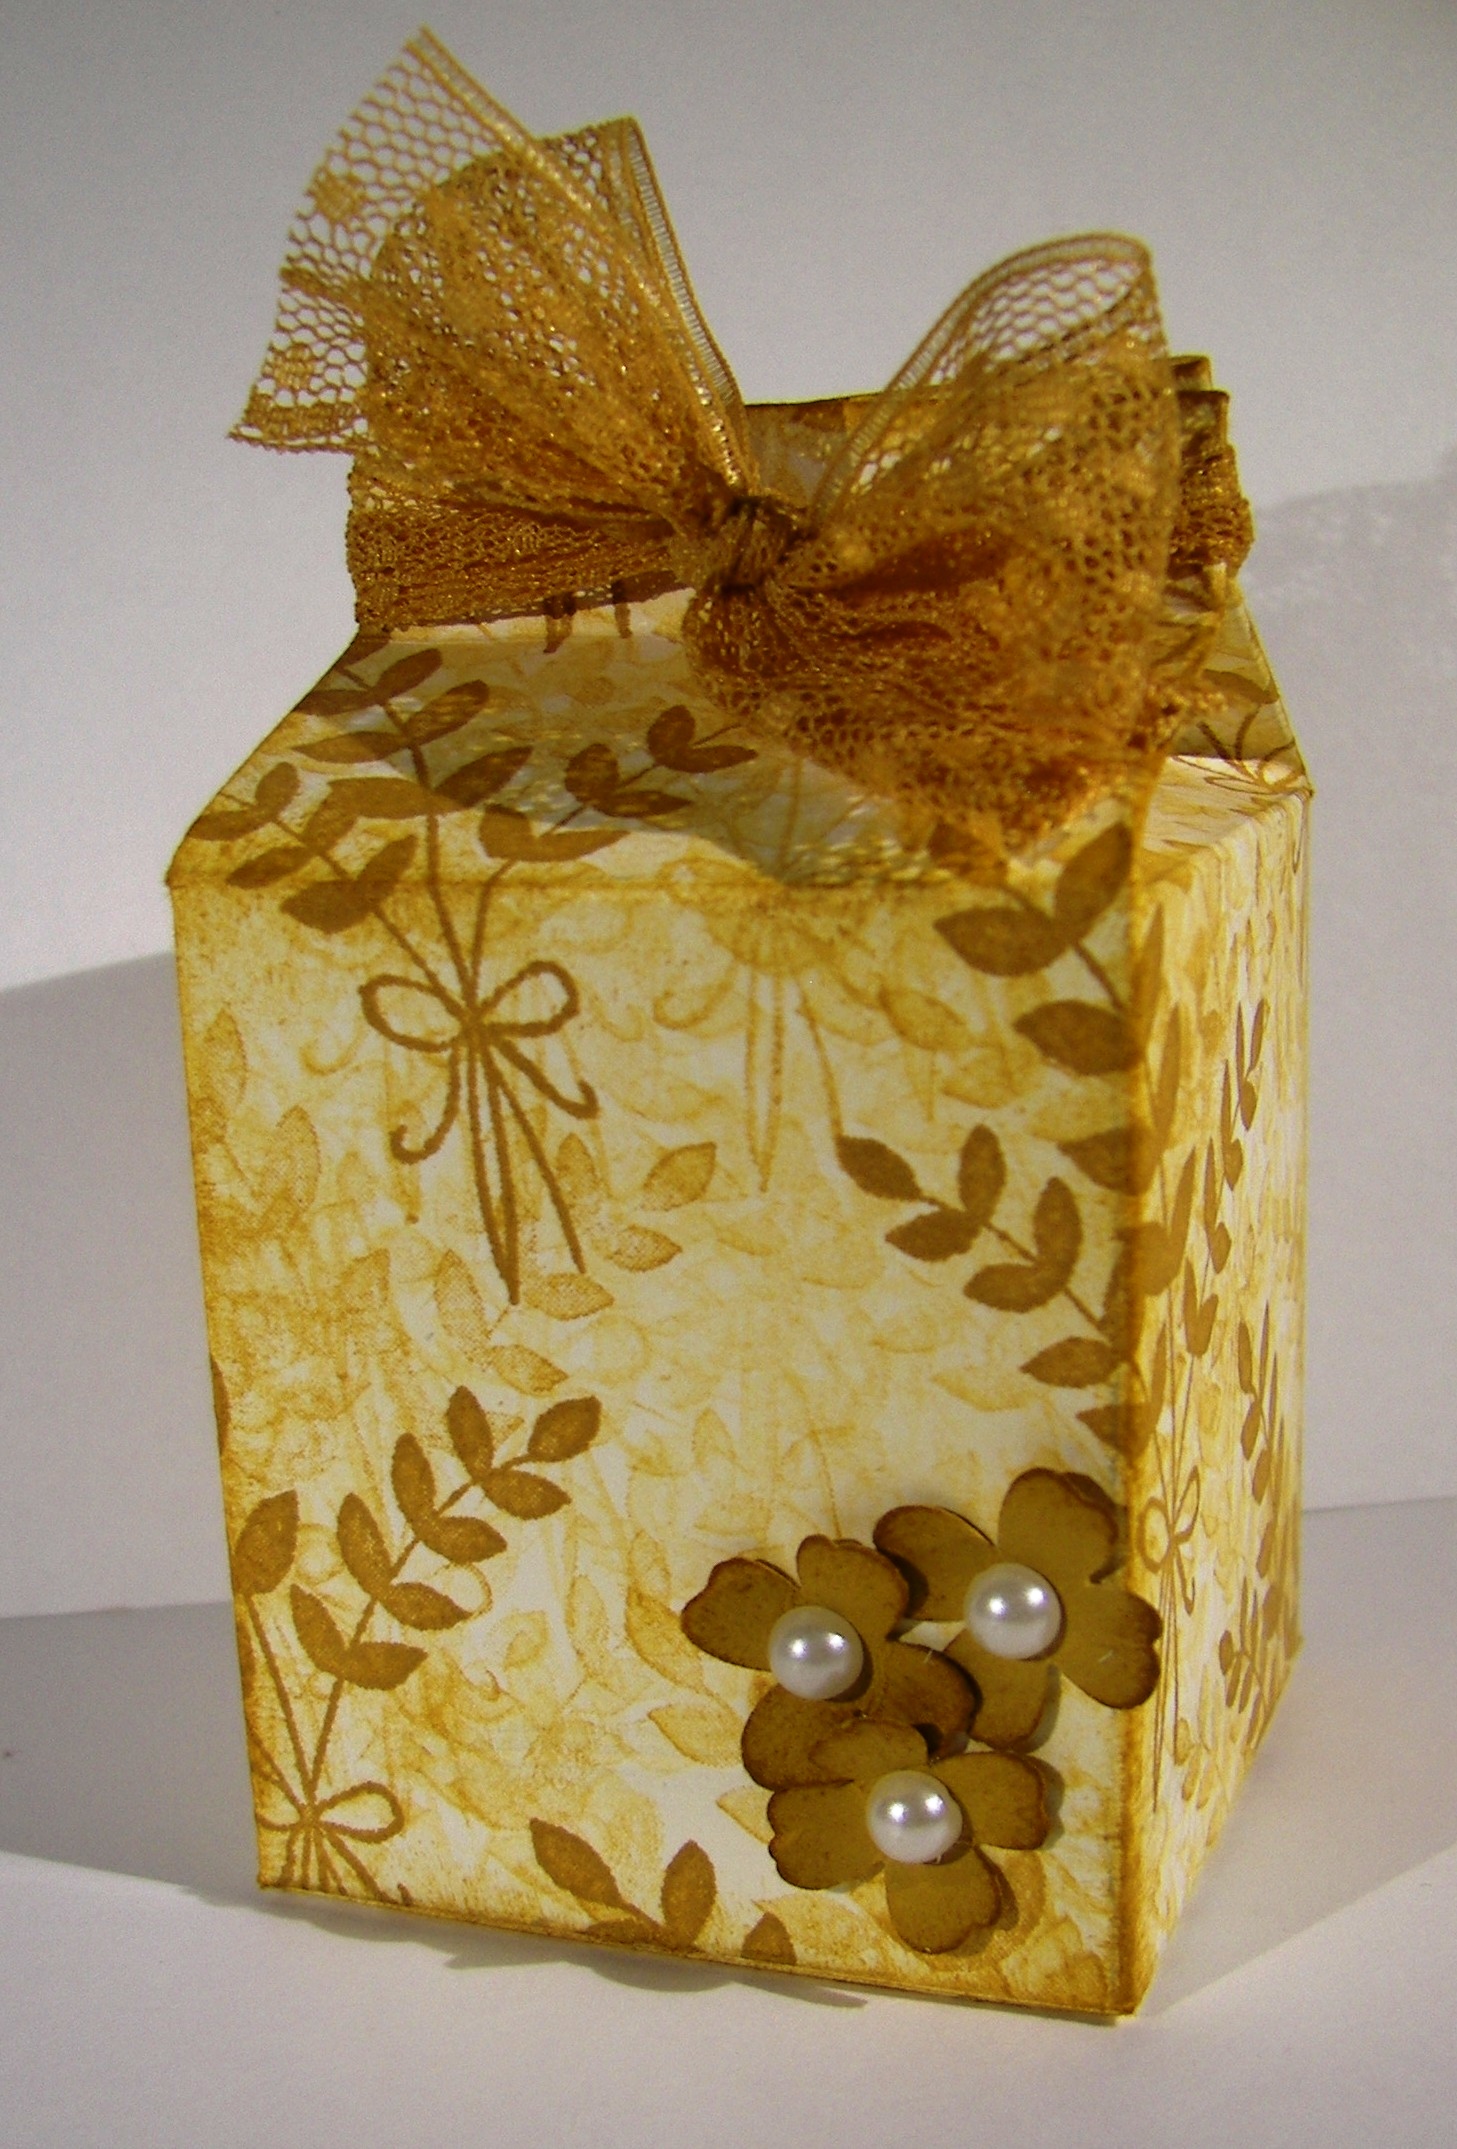
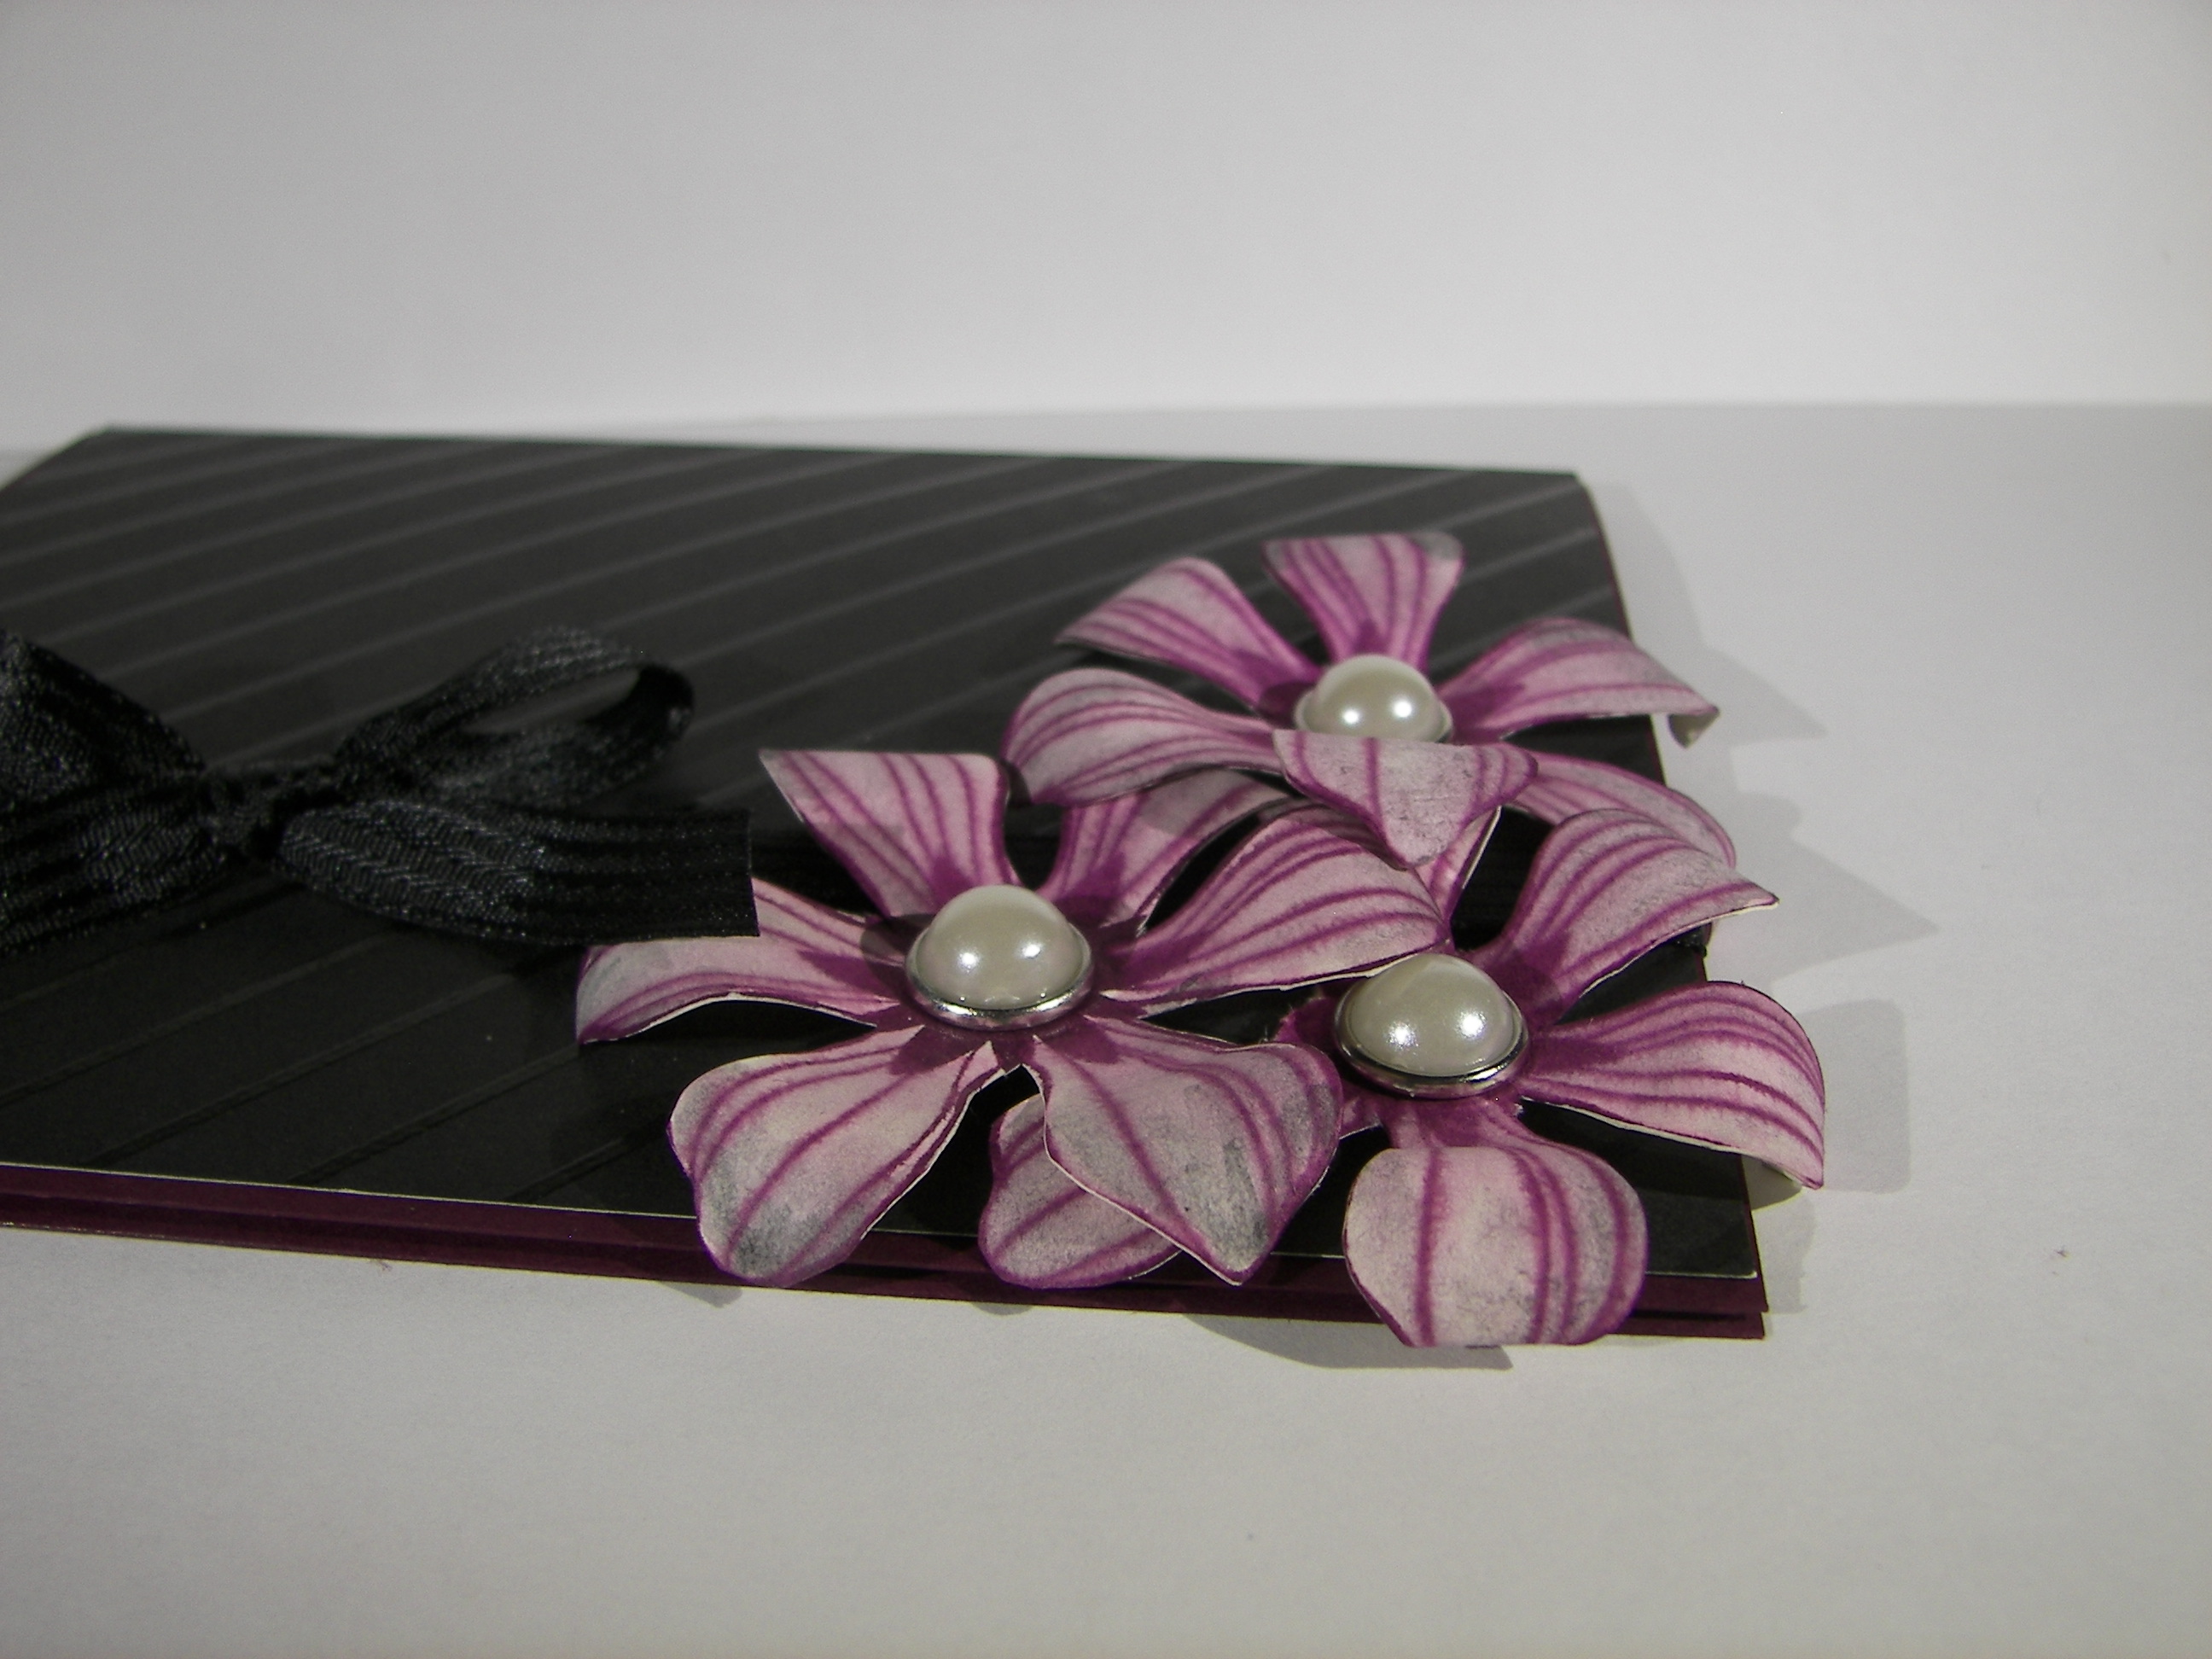
I used pumpkin pie paper with stamping and sponging in tangerine tango.  Color families make such lovely projects.  I wanted the sponging to be more prominent and give a bit more depth.  I think it worked out nicely.

Flower Fair Gift Box

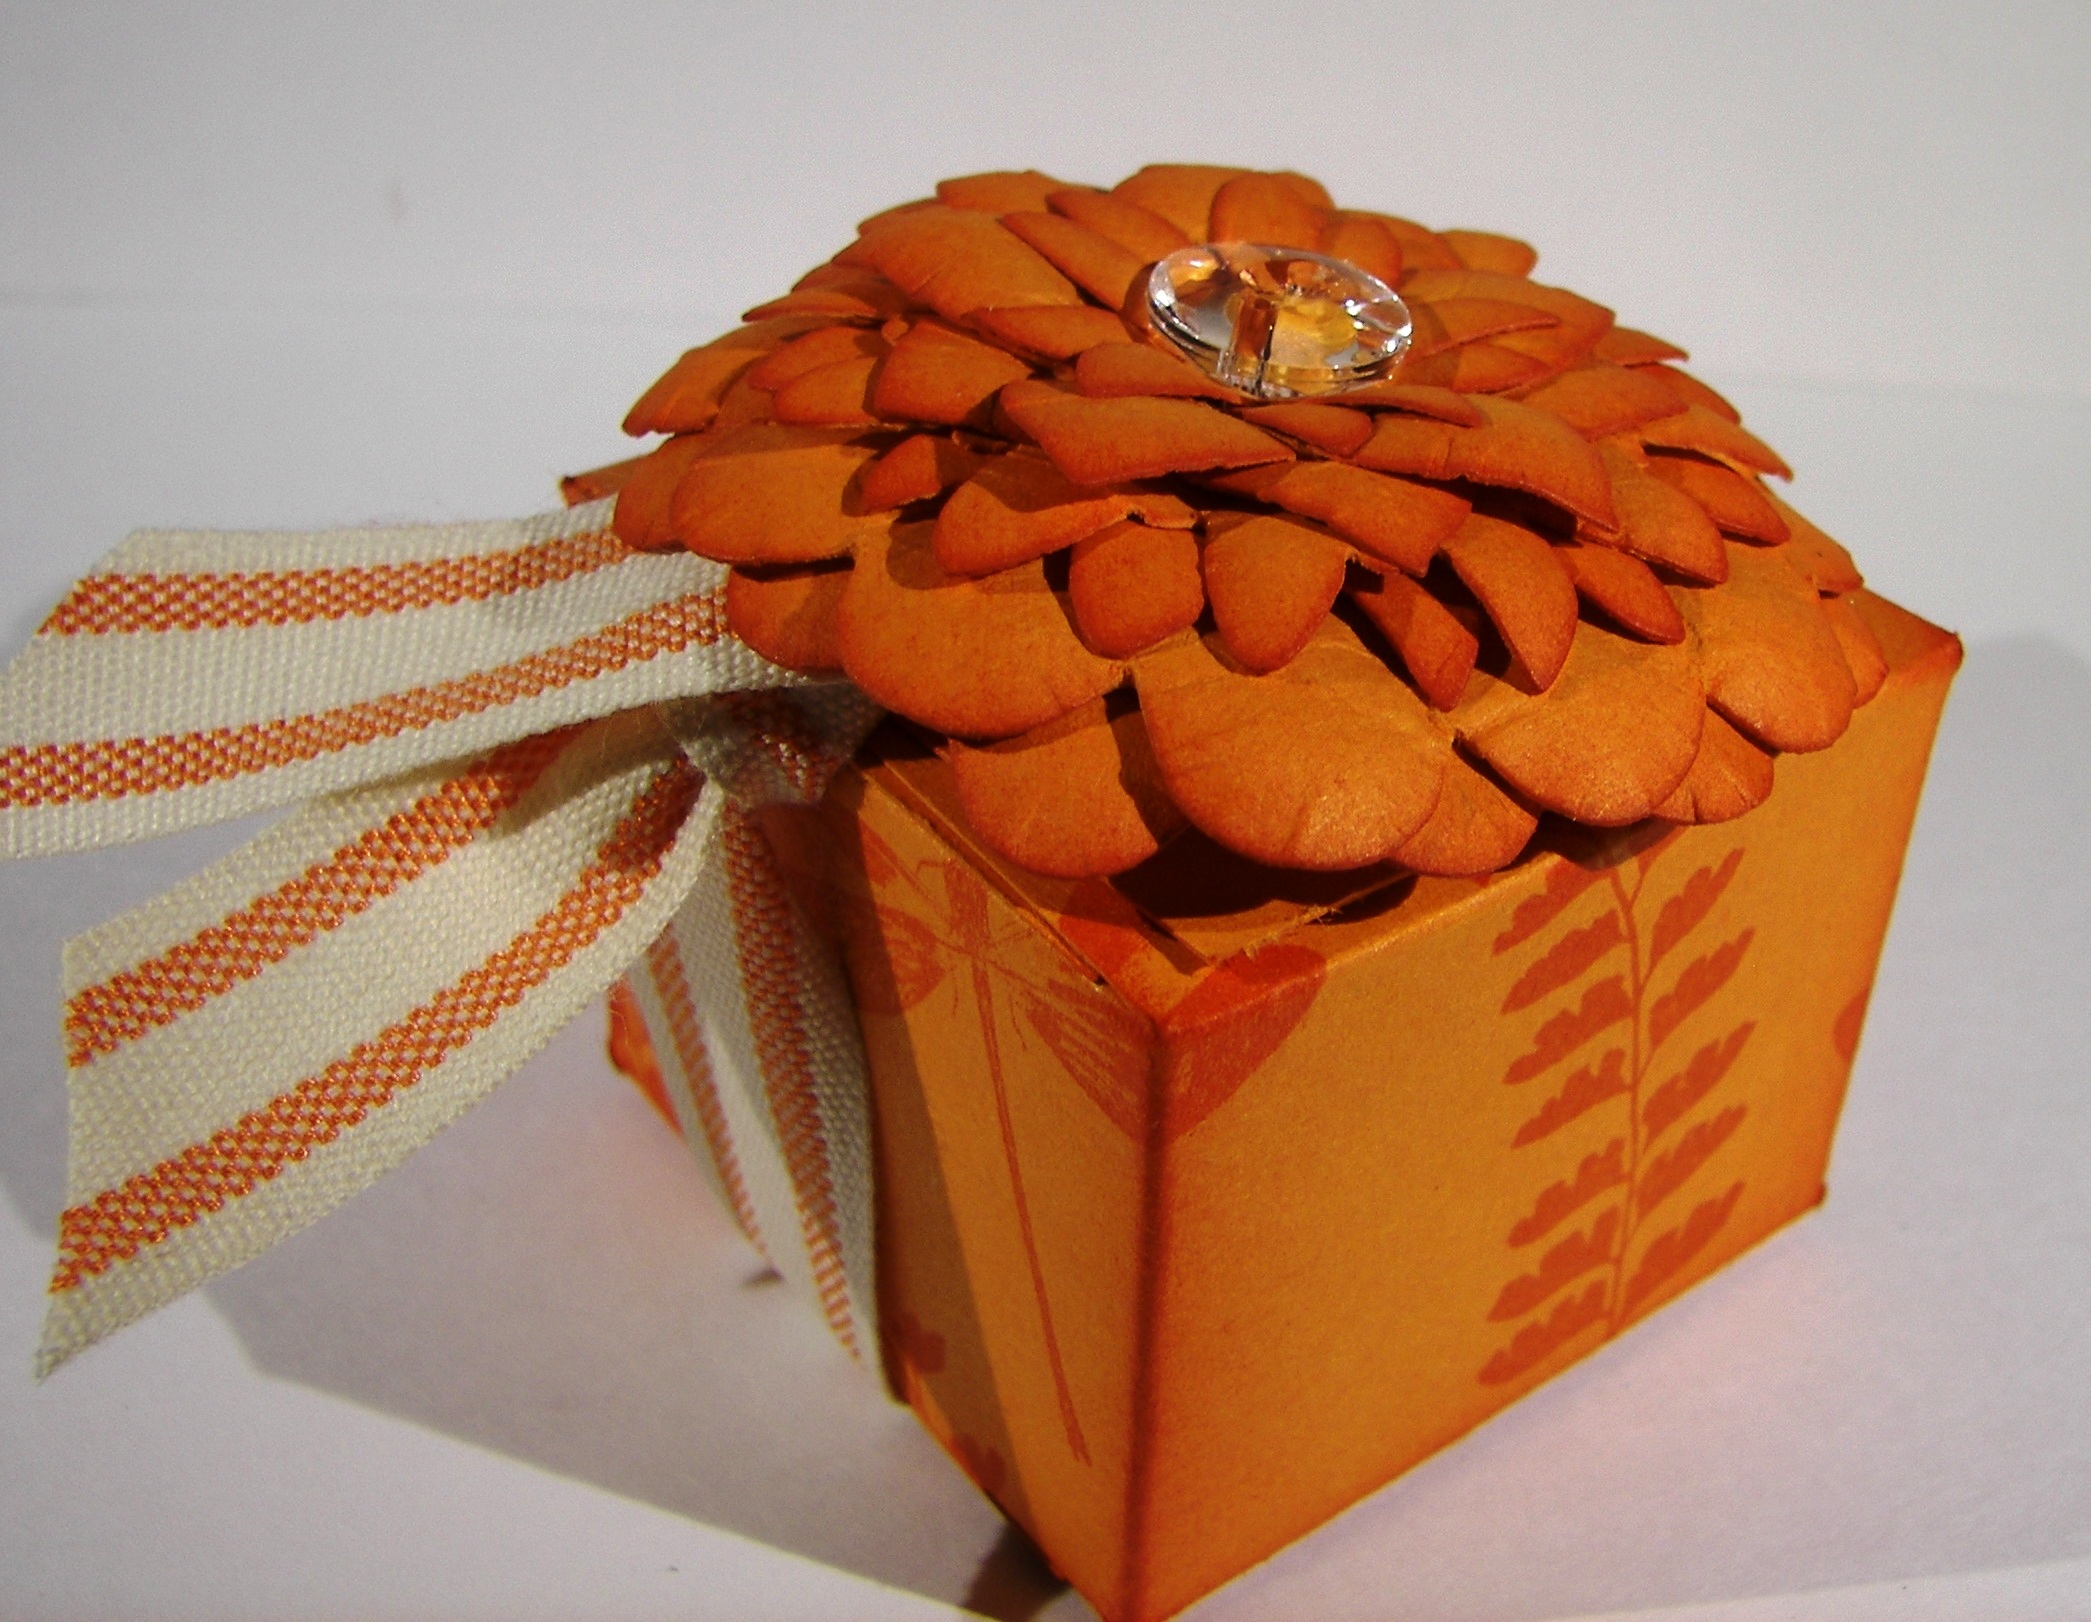
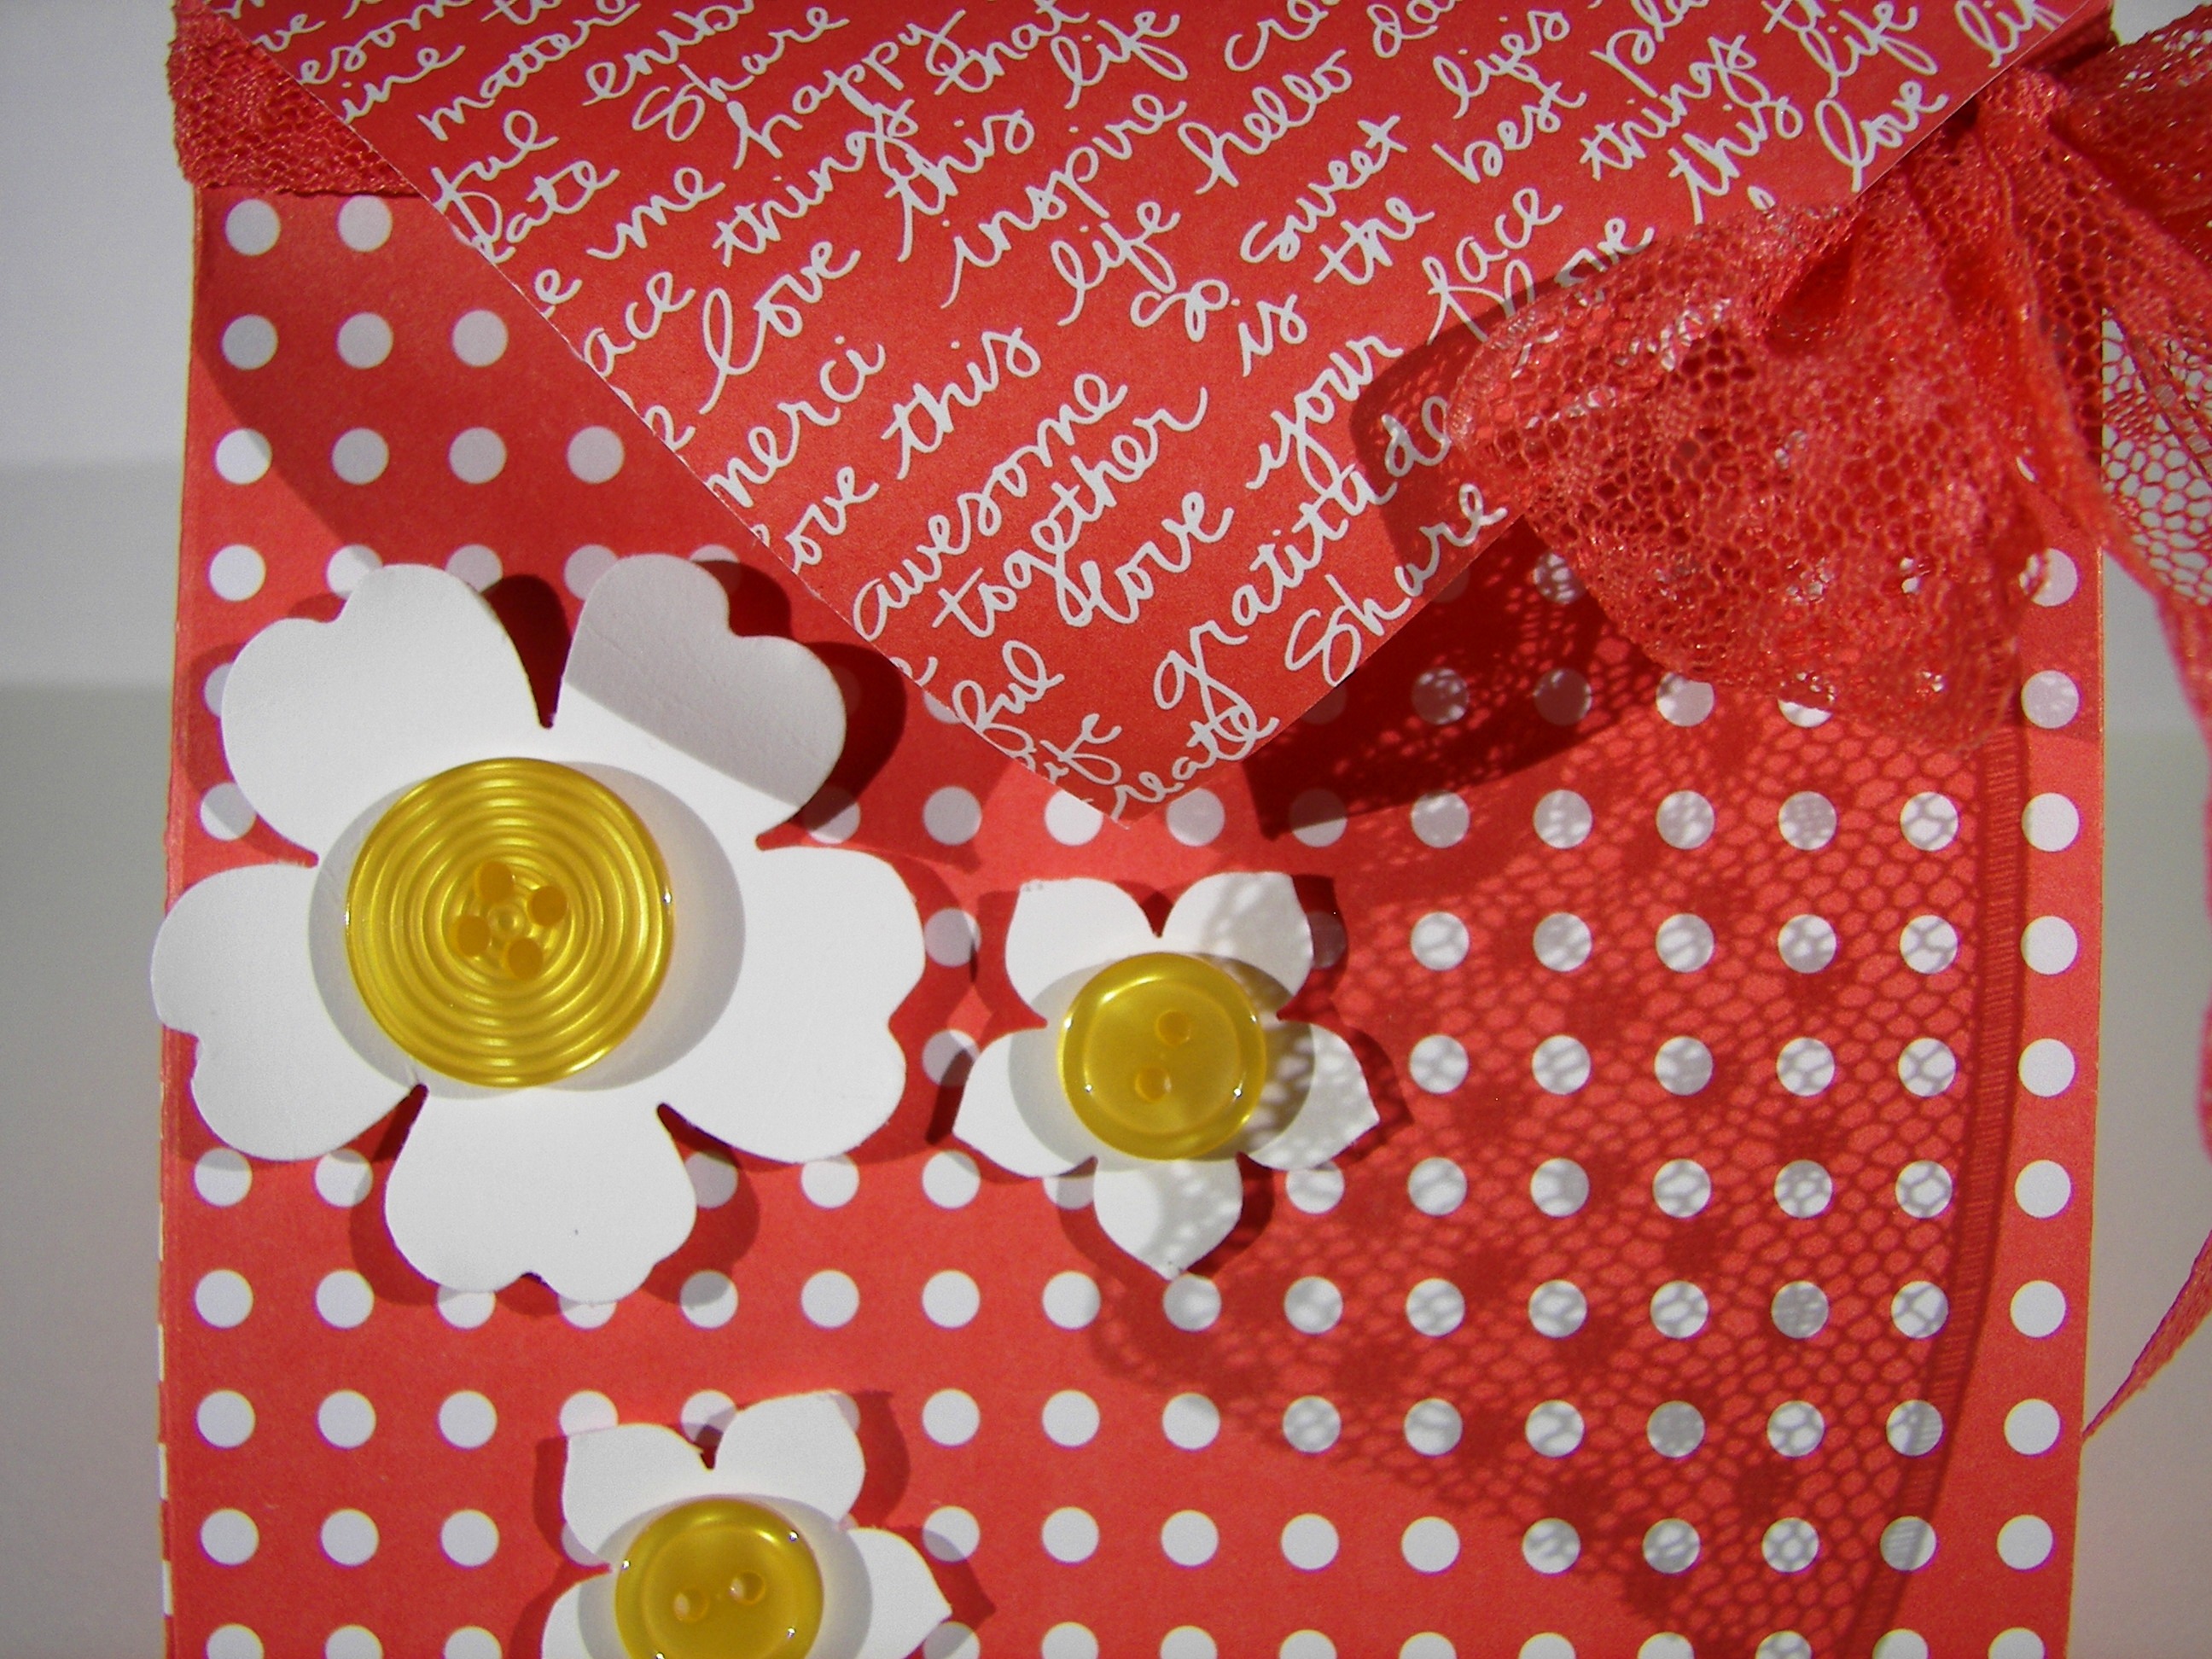
The flower layers were adhered with dimensionals with the larger flowers and then switched to glue dots withe the smaller ones.  Overall, it was a very satisfying creative process.  When I scored the box, I just made sure that the dimensions allowed the right base for the flower, 2″ square.  The top isn’t sealed shut, just folded for easy opening and closing.  This great big flower is actually stuck to the ribbon, so it could slide off without damaging the box.  I also tied the ribbon in a knot so it could be folded over and appear to be leaves or a banner looking element.  Great fun!

Flower Fair Gift Box

Have a creative day!

Moana

Timeless Elegance with Black Glimmer Paper

It is so enjoyable to create something very lovely that is so simple to put together.  That is just how nice it is to work with great product that makes you feel so creative and talented.

Timeless Elegance with Black Glimmer Paper

I had been wanting to use this fun black glimmer paper differently than shown in the catalog.  It was fun to see it with all of the Halloween projects, but I think it has a lot more uses.  Simple little flowers for instance.  I didn’t want to use a punch too large because I wasn’t sure how to center them.  These little flowers didn’t require a button or anything.  So adorable.

Timeless Elegance with Black Glimmer Paper

I cut a strip of the dsp 3 3/4″ wide for the card front and thought it would be nice to make a matching gift bag with the rest of the strip.  It worked out pretty nicely, don’t you think?  It is big enough for a few treats, or even a gift card.  Just my kind of favorite thing, a card and matching bag.

Timeless Elegance with Black Glimmer Paper

Have a creative day!

Moana

English Garden with Flower Patch

Can we just not jump right into the next holiday?  That is my theme for today.  I know everyone will be all into Christmas, blowing right by Thanksgiving, but I am going to take a break in between.  So, how about a lovely birthday card?

English Garden with Flower Patch

This paper is so absolutely wonderful.  I would love it in fabric so I could have it all around.  However, I wanted to partner a technique I recently learned with flowers, so I knew the pretty paper wouldn’t be the focus.  Is that even possible?

English Garden with Flower Patch

After stamping and punching out these pansies, I tried the technique out.  I used a very large stylus to just roll around the petals, slowly breaking down the fibers and creating curl.  Oh, you do this on a foam pad so you can squish a lot. It was so fun.  I did the same thing with the little leaves I made.  For those I punched a circle and then used the same punch to punch a section out of both sides giving the leaf shape.  It leaves kind of an apple core looking center behind.  Hope that makes sense.  One day I will get brave and try videos, not there yet though.  Lots of sponging for everything involved and tons of dimensionals.  This is one thick card, extra postage for sure.

English Garden with Flower Patch

Have a creative day!

Moana

Workshop Fun

Workshop was yesterday and this is the first chance I have had to share it with you.  Two of the projects you have already seen, but this cute little pumpkin is new.

Workshop Fun

I had the opportunity to attend one day of a scrapbooking convention with all kinds of lovely things to see, touch, and of course buy.  One of the many make and takes available was this cute little pumpkin.  When my friend and I would go by this particular area, there was always someone using the stations, but I knew I wanted to try one out.  I took a few photos of the samples and did my best.

Workshop Fun

There are a few other pumpkins on my counter, but this is the one I ended up making for my workshop ladies to play with.  I used  a piece of dsp cut at 6 x 12 and cut strips measuring 3/4″.  You get 15 strips from the sheet exactly, no waste at all.  They were stacked, clipped together, and punched with the ever handy crop-o-dile at both ends.  A hearty brad was used to keep the strips together, then you just fan them out.  Promise, they fan out nicely and curl into this pumpkin.  Then stamping and die cutting the fun leaves and place them where you like.  Some of the samples had ribbon, you could top it how you like.

Workshop Fun

Have a creative evening, since the day is pretty much done.

Moana

Vintage Butterfly Basics

This project started out as something entirely different, but I love where it ended up.  Would you believe I thought I was going to make something dark and dreary with a Halloween theme?  Well…like I said, it ended up lovely.

Vintage Butterfly Basics

The floral images were stamped in black and water colored with blackberry bliss and mossy meadow.  The ferns were also stamped in blackberry bliss.  Then the soft suede ink was put to work.  Lots of sponging and swirling and edging went into image.  I ended up with something that look almost tea dyed.  Just what I wanted.

Vintage Butterfly Basics

A double layer of blackberry bliss became the frame for the card front.  Linen thread was pulled through my blackberry bliss sponge to give it a tint to coordinate.  The tan color it comes in didn’t quite go with the soft suede.  Extra attention went into dimensionals to give  lots of height.

Vintage Butterfly Basics

A narrow boardered piece of soft suede card was embossed with the brick wall embossing folder and then sponged to give additional detail to the embossing.  All together, these elements created something lovely, just lovely.

Have a creative day!

Moana

Birthday Jar Wishes That Last

It isn’t my usual project to share, but I do make these particularly often.  The idea is lovely and I get to put a lot of retired product to good use.  I do hate to ignore it, so I thought I would share  a way to use it differently.

Birthday Jar Wishes That Last

I bought some of those washi sheets having no idea what I would do with them.  Until this fun series of projects came about.  I work with the young ladies in my church, along with several other ladies, and we come together as a team in a large variety of events from large to small and everything in between.  Of course we celebrate birthdays!  And that is what this is.

Birthday Jar Wishes That Last

I decorate jars and vases with washi paper punches to the mood I am in.  Sometimes I use framelits, or punches, or both.  I have a large collection of last springs sale-a-bration ribbon, so it always goes together.  You know how I love to coordinate as much as possible.  So these jars are created for each young lady or woman in our group.  We all then write inspirational wishes, birthday wishes, and just kind words in general to fill the jar.  Then, the recipient can read them all at once, or read them one at a time, or open them over time when a bad day happens and they need a pick me up.  Something sweet for whenever you want them.  So, try something different with the awesome product you have, either current or retired, it is all wonderful!

Birthday Jar Wishes That Last

Have a creative day!

Moana

Delightful Birthday

It has been a while since I made a matching set like this.  For a while it seemed like I couldn’t get enough of them.  But, you can only use so many, and share so many, and eventually store so many.  I took a break, but found my way back.  So much fun!

Delightful Birthday

One full sheet of the wonderful ‘Color Me Irresistible Specialty DSP’ was used to makey great set. I love that is has white sheets that can be altered to any color or tone, but I also love that it comes in colors and patterns.  The options are great, so diverse.

Delightful Birthday

A pretty gift bag with a lovely matching card has to be one of my favorite things.  I think people feel special when the attention to details are brought together like this.  The assembly was pretty direct, nothing very fancy.  Simple work and lovely results, my favorite.

Delightful Birthday

Have a creative day!

Moana

You’ve Got This

Sometimes simple words are all you have, and sometimes that is all you need.  That is just how I feel this morning.

You've Got This

I took my time painting this lovely flower with a few of my favorite inks.  I stamped the flower in almost artichoke and did light water coloring to get the base down.  I added cajun craze but kept it light the first time through.  Adding more water helped to do a little blending, but I didn’t want too much of that.  I like that two colors together can create a third unexpected surprise.  In person, you can see the blended areas have nearly a cherry cobbler tone.  Cool, right?  I thought so too.

You've Got This

The entire image was accented in gold encore ink, still using the aqua painter.  That really creates a fun look and is surprisingly easy to control.  One simple sentiment in black stazon ink with a little gold metallic thread and this simple card was done.  Well, I did have to stamp inside as well.  I stamped off twice before I placed the stamp on the inside paper.  Nice and light.  And look, absolutely no sponging!  Crazy.

You've Got This

Have a creative day!

Moana

Floral Gift Bag

The seasons are all backwards, so why not create a spring themed gift bag!  Seems kind of silly to really feel like fall might have arrived, then summer heat, then what.  Who knows, so I will craft what I like, and I like this.

Floral Gift Bag

One whole sheet of 12 x 12 dsp went into this bag.  The dots are too much cuteness, so they had to be out front.  I wasn’t feeling a particular stamp, so I curled a couple of flaps over to show the writing side.  This paper pack is so adorable.  A bunch of bright and happy paper going on.

Floral Gift Bag

The diagonal scoring plate is what helped this box happen.  I scored on the 3″ marker, on the diagonal, on each corner.  It worked out pretty darn good.  I don’t always feel confident my scoring is accurate when using the diagonal plate, but when putting the bag together, my sides and corners matched up.  Go me!

Floral Gift Bag

A few punches from the heavy whisper white cardstock and regal buttons for centers made the embellishments I wanted.  The bag was sealed, but not sealed, with a stretch of dotted lace trim.  It is stretched around the top, under the front and back flaps, and then tied in a bow.  Just untie it and the bag will flop open.  Easy to use and re-use.  My kind of bag.

Have a creative day!

Moana

For All Things

It can be hard to get even the simple things done when you don’t quite feel yourself.  That is why today’s project is super simple, just what I needed.

For All Things

I started with a half sheet of very vanilla cardstock and scored every 2″ on the 8.5″ side which left me a 1/2″ edge to seal the box together.  I also scored along the length at 2″ to make the bottom, and at 3/4″ at the top and then 1″ over from there.  I know I am not very exact at sharing my measurements, but it works out I promise.  Oh, I did do my stamping before I scored, forgot to mention that.

For All Things

I have held the box together using the tear n tape adhesive.  I do like that stuff, easier to work with than sticky strip.  The flaps are folded together and adhered with the same and then I got to sponging.  All the edges and even on these bitty little flowers.  I love that look!  I put the largest basic pearls inside each flower and grabbed for a scrap of ribbon.  The dotted lace trim has a good bit of stretch to it, so it is held on just by that.  Not a glue dot or anything.  That makes it easy to use and re-use.  A simple bow and it was all done!

For All Things

Have a creative day!

Moana

Floral Frenzy

After a huge workshop I usually just take a break from my desk, but yesterday was different.  I got back home and found myself drawn into a project that was clean and full of floral punches.  No stamping at all.

Floral Frenzy

I think I just needed to make something in a calm setting away from the frenzy.  It can get a bit wild with too many people, especially with new stampers.  I think it is time to split the group.  We will have to see. 

Floral Frenzy

There isn’t even any ink here at all.  No sponging or a sentiment either.  Very clean and simple, with a ton of flowers, my favorite.  Kind of like my comfort craft.  All this card is about is punches, punches and more punches.  Five different flowers all layered about with basic pearls to finish them off.  I used the striped cotton ribbon because I wanted it to physically stand out as much as the flowers would.  Bows and flowers and now I feel better.

Floral Frenzy

Have a creative day!

Moana

A Whole Lot of Lovely

Today is quite the contrast to yesterdays color scheme.  But I certainly am all over the place in regular life, so why should my crafting be any different.  Makes sense enough to me.

A Whole Lot of Lovely

I have wanted to try this technique for ages but have never sat down to actually do it. I saw a card that did this as a lattice background for a lovely floral collection and saved the image for later.  That was two phones ago, and I have long since lost that image, but not in my mine.  

A Whole Lot of Lovely

I used my simply scored set and diagonal plate to make these lines.  If you look closely you will see all of my errors, but it was my first time trying.  I tried to keep my score lines 1/2″ apart, but didn’t get them exact every time.  The look turned out though, and you get the idea.

A Whole Lot of Lovely

Some simple stampin, layering everything up on dimensionals, a couple of strings of basic rhinestones, and a healthy dose of sponging helped to finish it off. I of course had to stamp and sponge the inside to make it almost as lovely as the front, they need to coordinate.

Have a creative day!

Moana

Floral Gift Box

When my daughter came home this week for her university break she brought this little birdhouse box with her.  My mother had given it to her to deliver to me to try and create a version of it.

Floral Gift Box

I don’t have a diecut that would do this, so I had to think it out a little bit.  Although I had several frustrations, I ended up with something cute.

Floral Gift Box

I started out with a piece of paper 7″ x 8.5″.  I scored along the 8.5″ side at 2, 4, 6, and 8″ leaving an edge of a half inch.  I turned it one quarter around and scored it at 2″.  This became the bottom.  Along the top, with the long scores going up, I proceeded to cut with my trimmer, not scissors.  I cut along the score lines down to 2.5″ on all score lines.  This gave the top flaps.  Two of them were punched with the scallop tag topper and the other two were trimmed down a bit.  My design became a bit flawed and I had to improvise a bit.

Floral Gift Box

I stamped the paper with versamark ink and applied white embossing powder to give me the cute little flowers you see.  They turned out so pretty.  The rest of the box assembly was pretty basic.  I know I don’t give a lot of detail, I get impatient.  I am working on it.

Have a creative day.

Moana

One Big Meaning and Remarkable You

To get my mind off the heat last night I sat down at my desk and got a little more creative.  It has been a bit since I spent this much time for one project, but to be fair, I didn’t have any idea what I was going to do when I sat down.

One Big Meaning and Remarkable You

I used a whole sheet of tip top taupe to make the bag.  Just simple scoring there, nothing fancy.  I did forget to stamp before I scored, ooops.  So, my stamping does have little crease marks on the edges.  Can’t be perfect.

One Big Meaning and Remarkable You

The base has two layers, tip top taupe and a stamped layer of very vanilla.  I brought out the aqua painter again, oh how I love that tool.  Just using the ink from the stamp gives such a soft look.

One Big Meaning and Remarkable You


The oval framelits were put to work again for the focal point.  What a lovely flower.  I brought in tip top taupe into the flower and water colored it into the old olive.  I can tell the color difference, but I can also see a hint of lavender forming.  Interesting.  Crystal effects really made a difference in the look of the flower.  I could really use that stuff way too much.  A final stamped sentiment layered with some circle punches finished the front.

A touch of dotted lace trim was put to the side and also used to make a simple handle for the bag.  It really turned out beautiful.

Have a creative day!

Moana

Ray of Sunshine and Pretty Petals

How about another one of those crazy mornings, that absolutely ran away from me.  To be honest, I was helping out everyone else and didn’t get my own goodies done.  Everything came together and worked out so, no worries!

Ray of Sunshine and Pretty Petals

Is this designer paper adorable or what!  This particular print reminded me of a recently retired stamp that has the most beautiful poppies in it.  I do love it when everything goes together so nicely.

Ray of Sunshine and Pretty Petals

A simple layering of designer paper, with coordinating paper and a length of ribbon to bring it all together.  I did a double layer of tags and squeezed in this sunshine sentiment keeping everything in calypso coral.  Love that color.  Six pretty little flowers all sponged and centered with basic rhinestones and I am in love with this card.

Ray of Sunshine and Pretty Petals


Have a creative day!

Moana

It’s Your Day

I think I am ready for summer to cool off.  Looks like I am thinking of a spring day here.  My daughter told me this looks like a dress.  Would be a cute one.

It's Your Day

I thought it would be fun to use a stamp in a different way than intended.  This leave bouquet is in a thanksgiving themed set. Also, I hadn’t used pink pirouette for quite some time and decided to put the two together.  At first I wanted to use the flower punches as if they were a flower at the end of each stem.  Well, looking at them they created stripes of flowers.  Not so good.  They looked much better placed randomly.

It's Your Day

I used glue dots to secure them.  I didn’t feel like it, but I did sponge them all.  It made a difference, really.  Plenty of basic rhinestones to go around and I loved the sparkle it gave.

It's Your Day

The sentiment came from the endless birthday wishes set.  I really had ignored this one, but it is so great!  I love, love, love how you can partner the typeset phrases with pretty cursive ones.  A tiny tag with a bow in the middle and it was all done.  Of course I had to echo stamp the inside to match the front though, then it was really done.

Have a creative day!

Moana

Irresistible Beautiful Bunch

Some days the creativity flows effortlessly and some days it would be easier to birth an elephant.  That would be today.  I had to walk away two different times before I called it done.

Irresistible Beautiful Bunch

The color me irresistible designer series paper is so very cool.  I love that I get to choose which colors I want to create as well as others that are already done and full of interest, especially this black paper.  Isn’t it so elegant?

Irresistible Beautiful Bunch

These flowers just about took me down, they still just might.  I was determined to use these new pearl embellishments and picked this flower stamp and coordinating punch to frame them.  Well, they turned out too light with my method of water coloring and I didn’t like the boarder from the punch, even though it was small, it made the flower just too light.  I did more painting and added black ink in too.  Just a bit, but it is there.  Tried curling the flowers more, and then just about tore them up.

Irresistible Beautiful Bunch


I just put them in place and grabbed the ribbon.  I wasn’t going to use a ribbon, but a sentiment layered on tags.  When I gave it a try, I decided it wasn’t so horrible after all.  I am sure there could have been other things to help, but I just had to call it and walk away.  Either way, I really don’t hate it anymore.

Have a creative day!

Moana

Timeless Elegance Birthday

Well, this was to be yesterday’s post.  Talk about an adventure.  I think I killed my laptop.  Apparently it isn’t a good idea to drop your full cup of drink and have it spill all over the keyboard and stuff.  Who knew.  Either way, moving forward.

Timeless Elegance Birthday

Could this paper be any more beautiful?  I could probably open a pack and just project away until it was empty.  It truly is my favorite.  Elegant and so simple.

Timeless Elegance Birthday

Just some simple layering, one stamp, five punched flowers with tiny pearls at each center, dotted the “i” with a pearl, and laid down a string of pearls under ‘birthday’.  There you go.

Timeless Elegance Birthday


I did make a project for today, but I will be saving that for tomorrow.  Wait til you see what I did with a tiny cup die cut from my paper pumpkin kit.  Oh My Goodness, just amazing!

Have a creative day!

Moana

You’ve Got Me

I love it when everything coordinates so perfectly, but today is all about the sentiment.  I love these paired phrases, simple but strong.

You've Got Me

The card layering is fairly basic and puts a few favorite punches to work.  A dash of basic rhinestones to draw further attention to the sentiment and the front was done.

You've Got Me

I don’t normally stamp inside a card, but this one needed it.  I zoomed in on the detail, but it actually measures barely over a square inch.  When that card gets opened, that is what you see. “You’ve Got Me.”  How perfect is that.

You've Got Me

This new paper pack is loaded with beautiful paper.  I just used one sheet for this card.  The green floral is the other side to the main floral front.  My little flowers are from scrap of the same sheet.  I love putting all everything to work.

Have a creative day!

Moana

I’m So Grateful For You

After yet another awesome summer concert I am super exhausted!  So I asked my daughter this morning what color she thought this flower would be.  She talked about purple, orange or yellow.  I thought about tropical, but went with elegant eggplant.

I'm So Grateful For You

It is hard to tell, but there is silver ink painted over the purple.  Of course I had to get out my trusty aqua painter for all three ink colors I used.  Totally love that thing!

I'm So Grateful For You

There was a heavy amount of sponging as well.  I loved the sentiment, but it was the second half of the front sentiment and it was basically a dangling participle.  So, I just didn’t ink up the ‘and’ and the beginning.  Perfect!

I'm So Grateful For You

I may have been half asleep for this project, but it turned out really wonderful.  It is great when I get to sit back and be impressed with myself.  A job well done.

Have a creative day!

Moana