Lighthearted Leaves Treat Carton

All day long I have tried to get this blog post done.  That gives you a little hint into how my day has been.  Not done yet, but definitely on my way.

Lighthearted Leaves Treat Carton

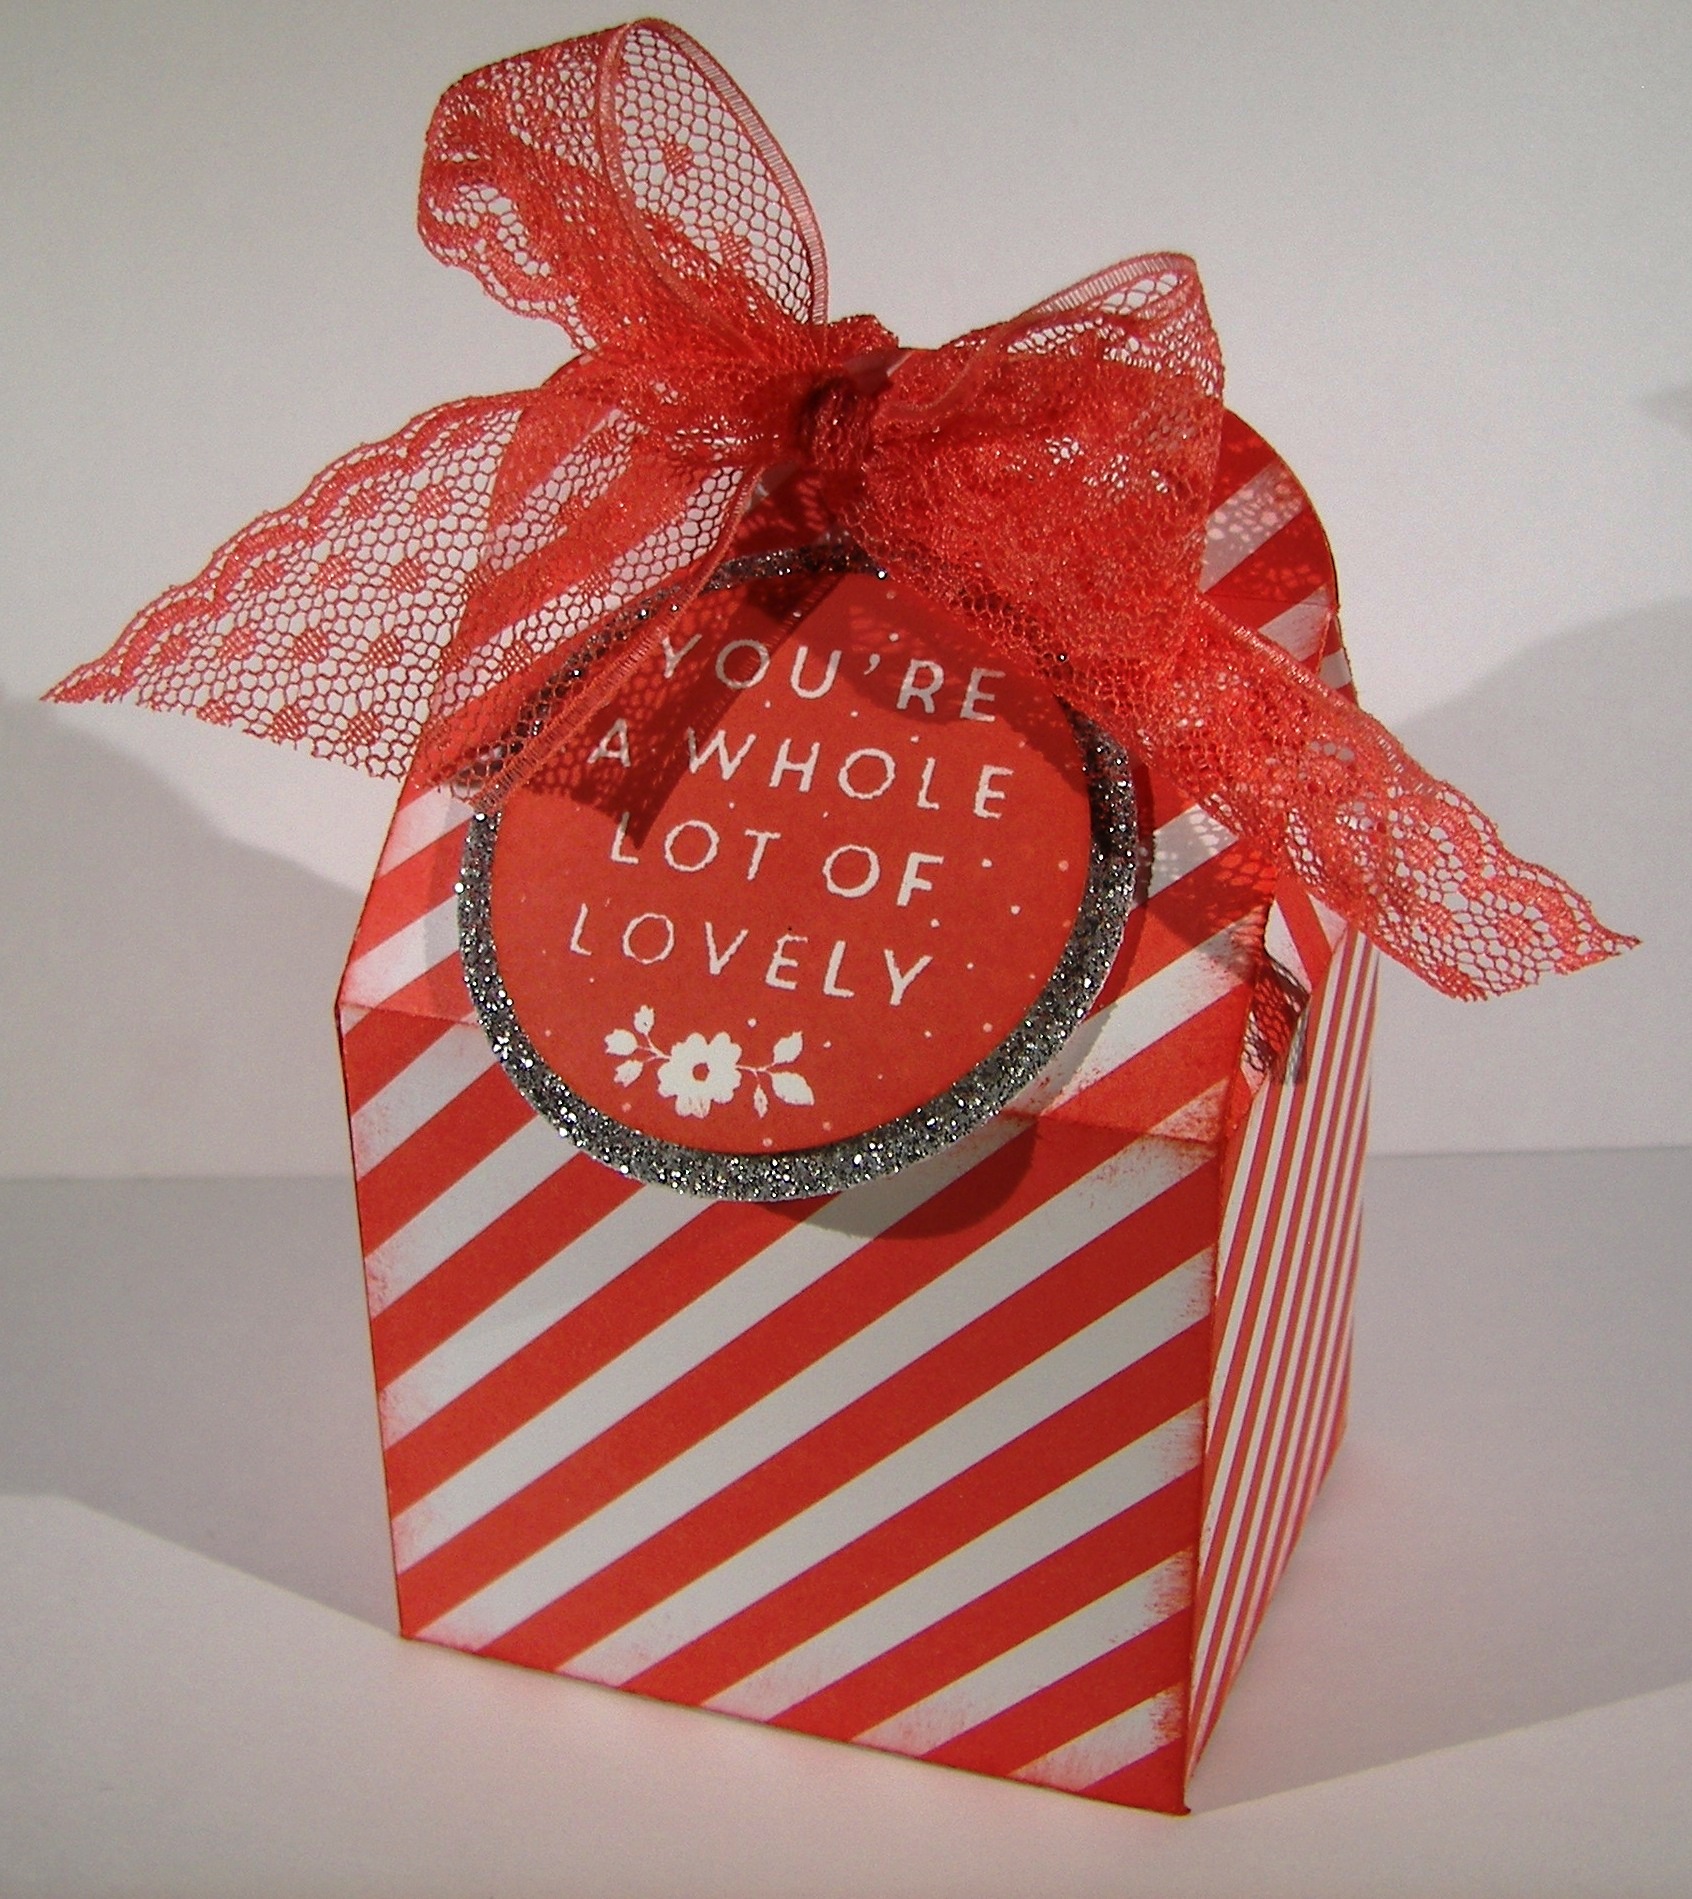
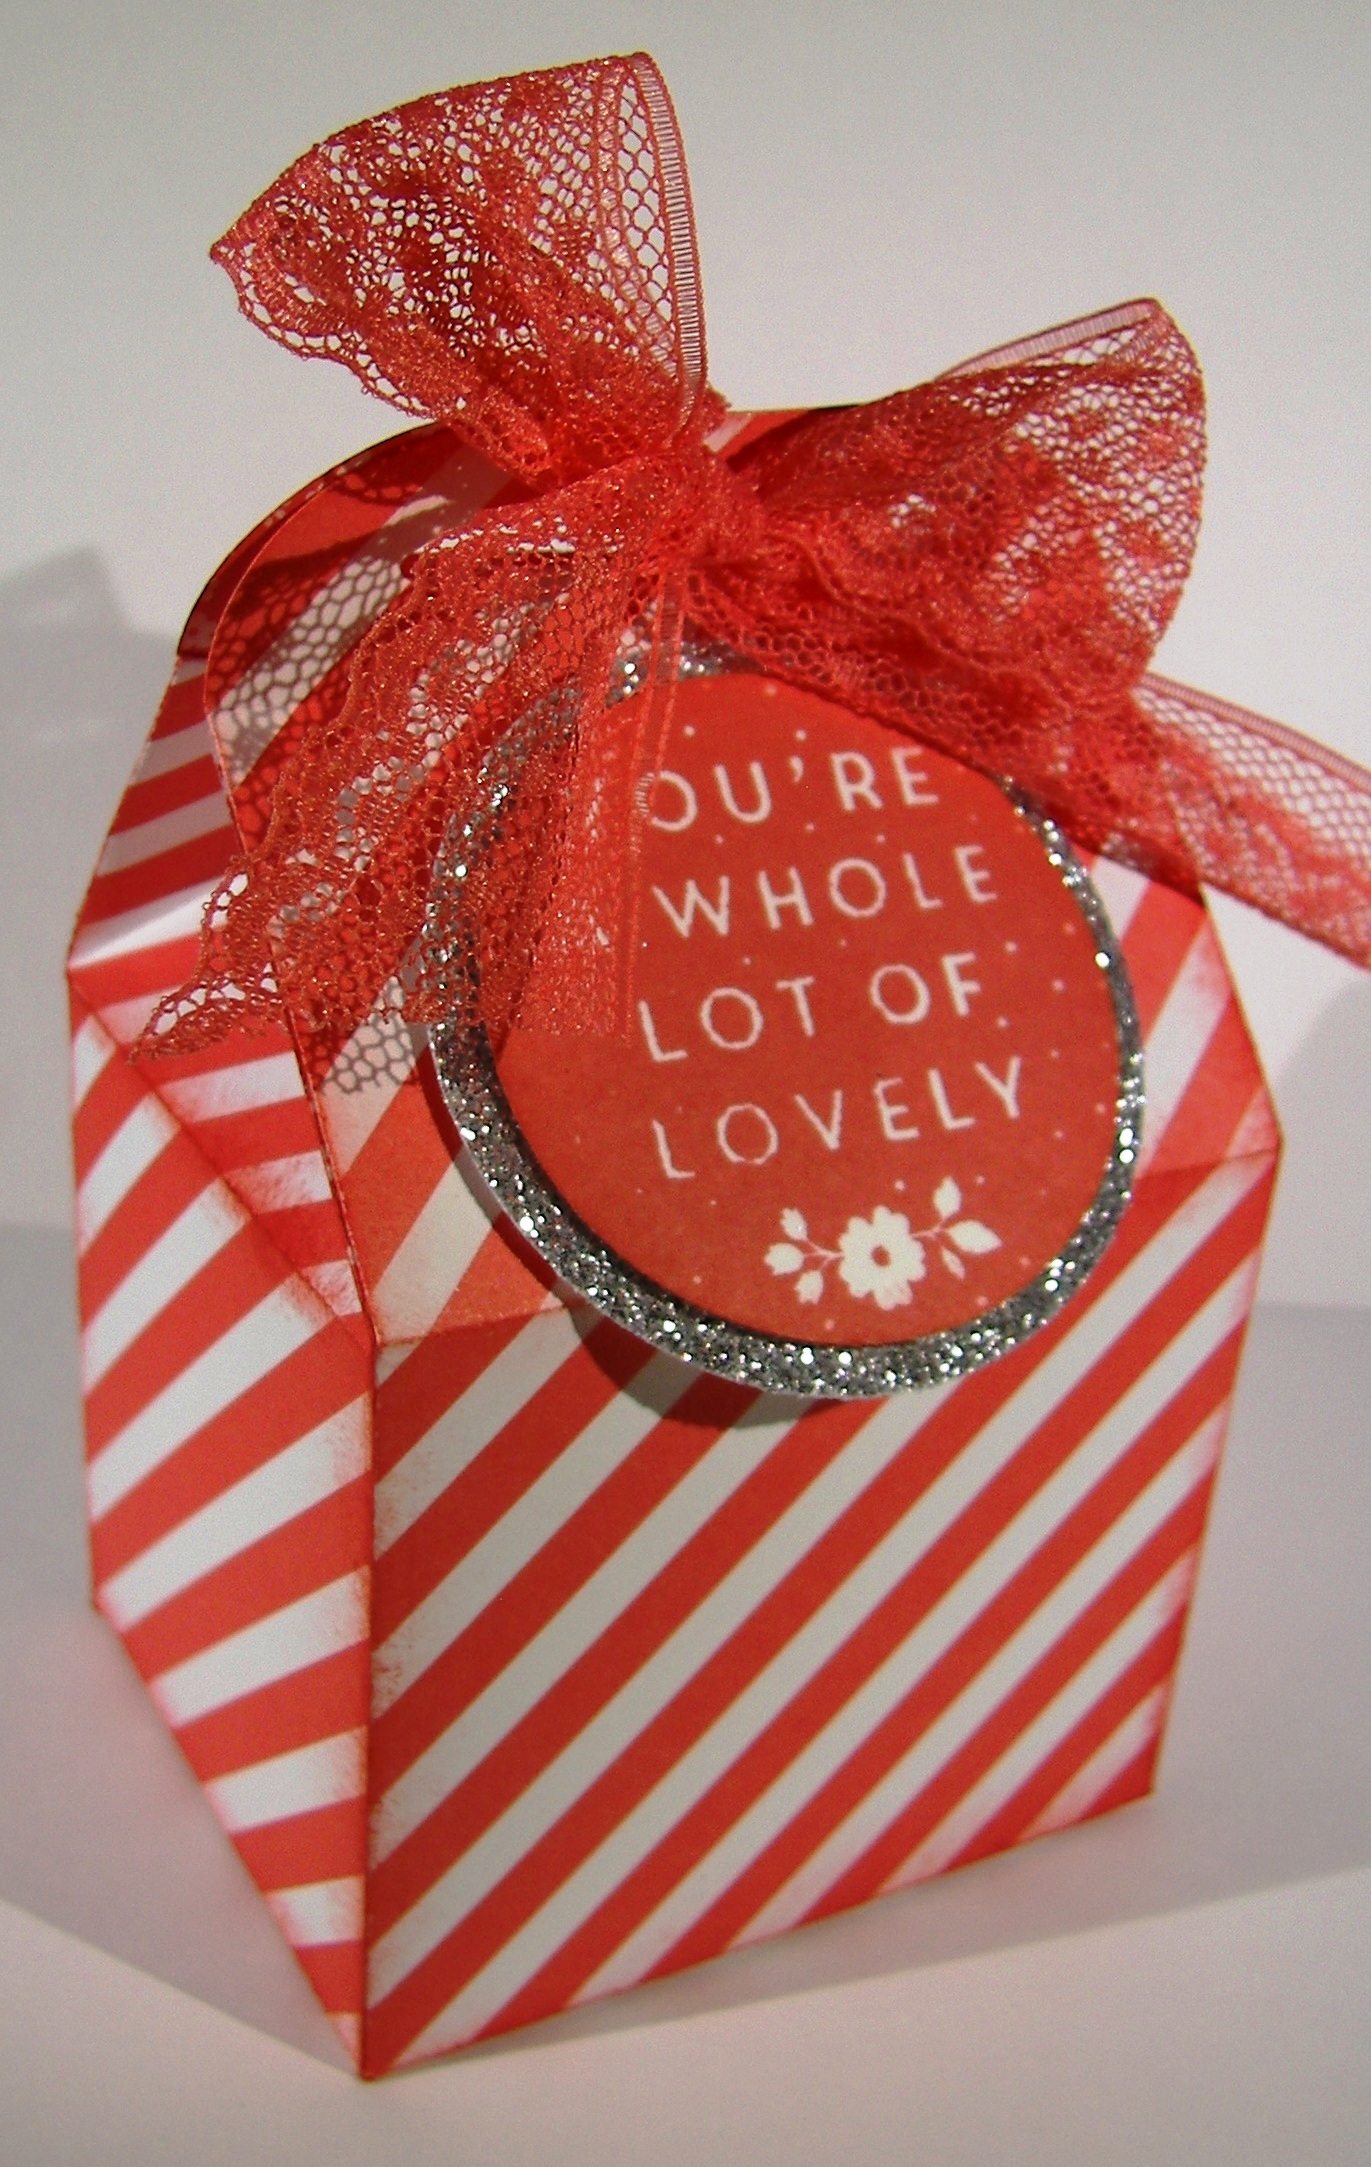
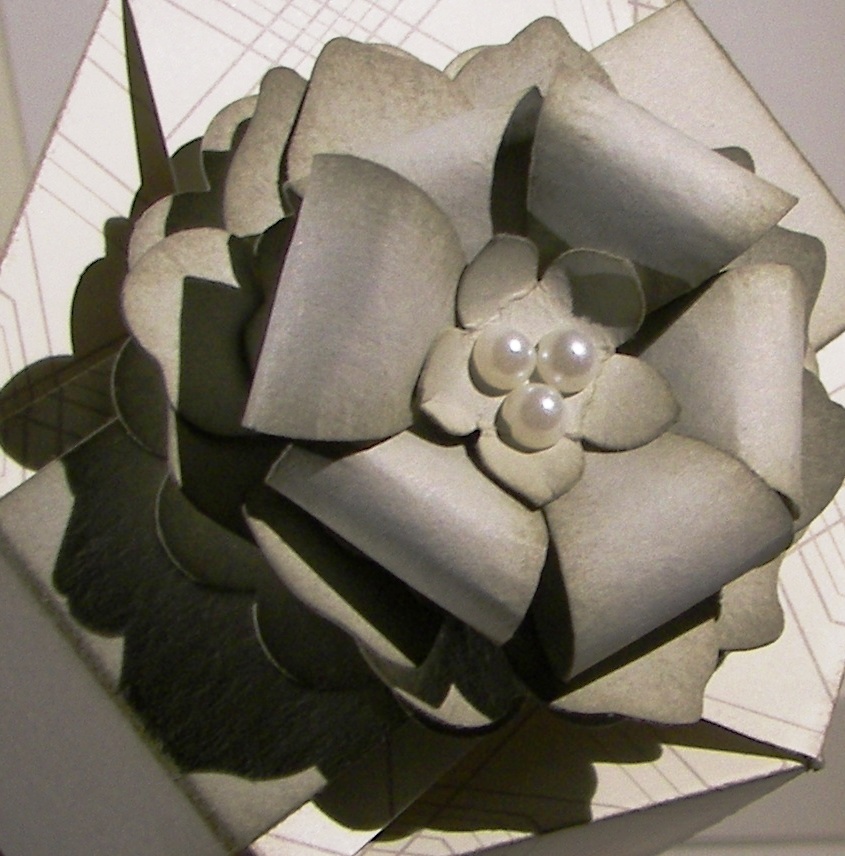
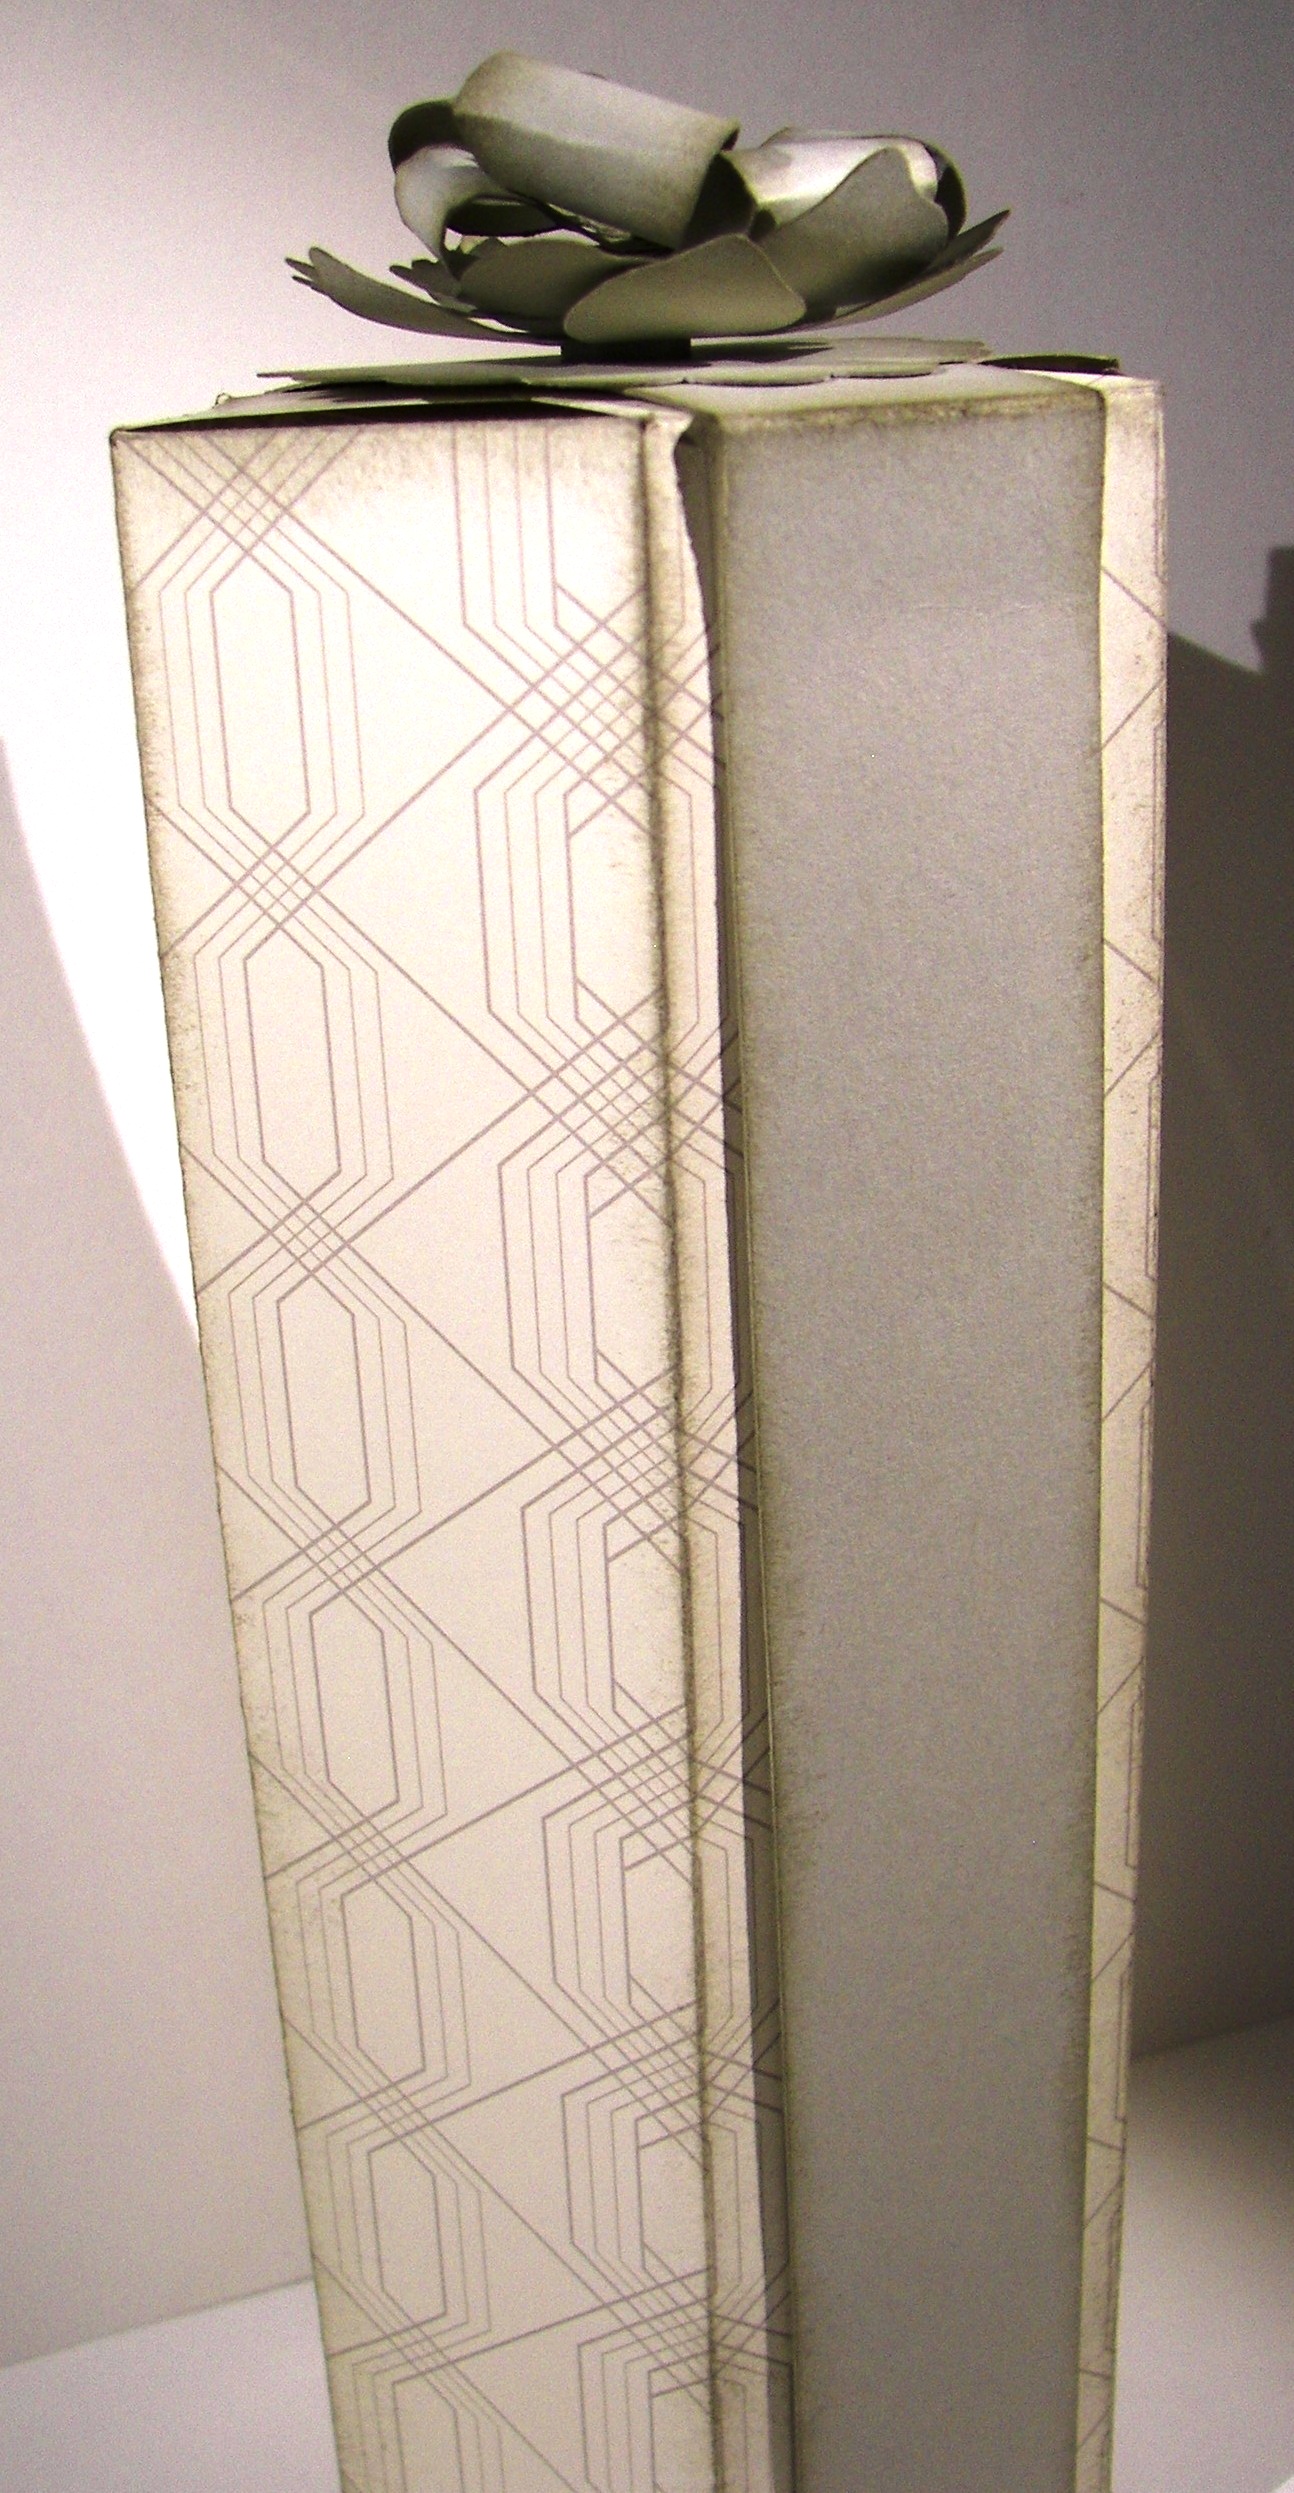
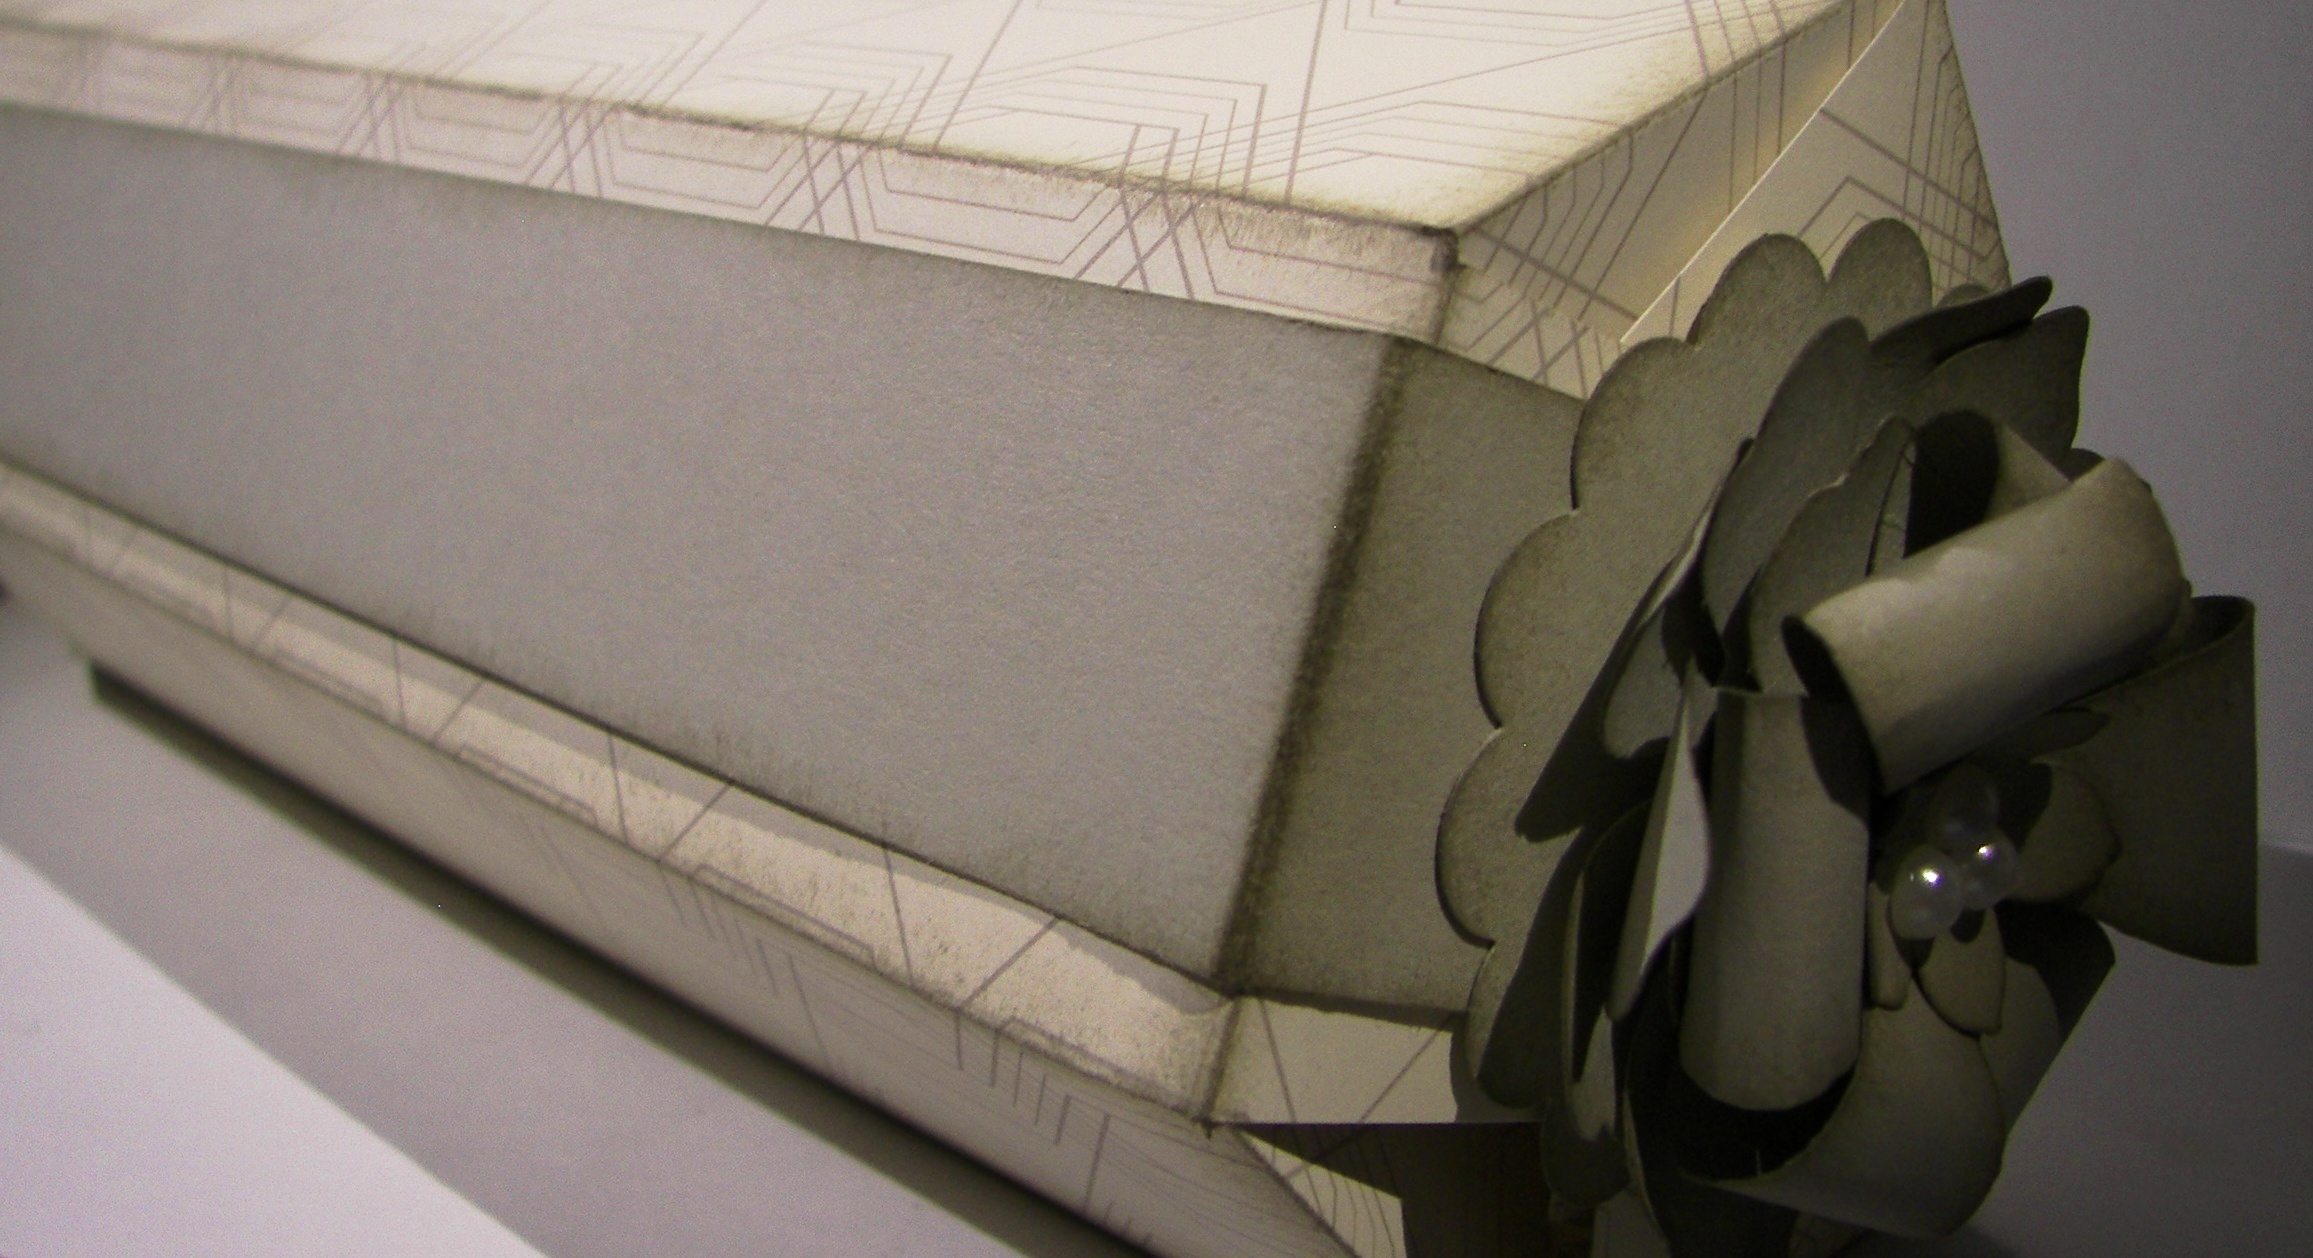
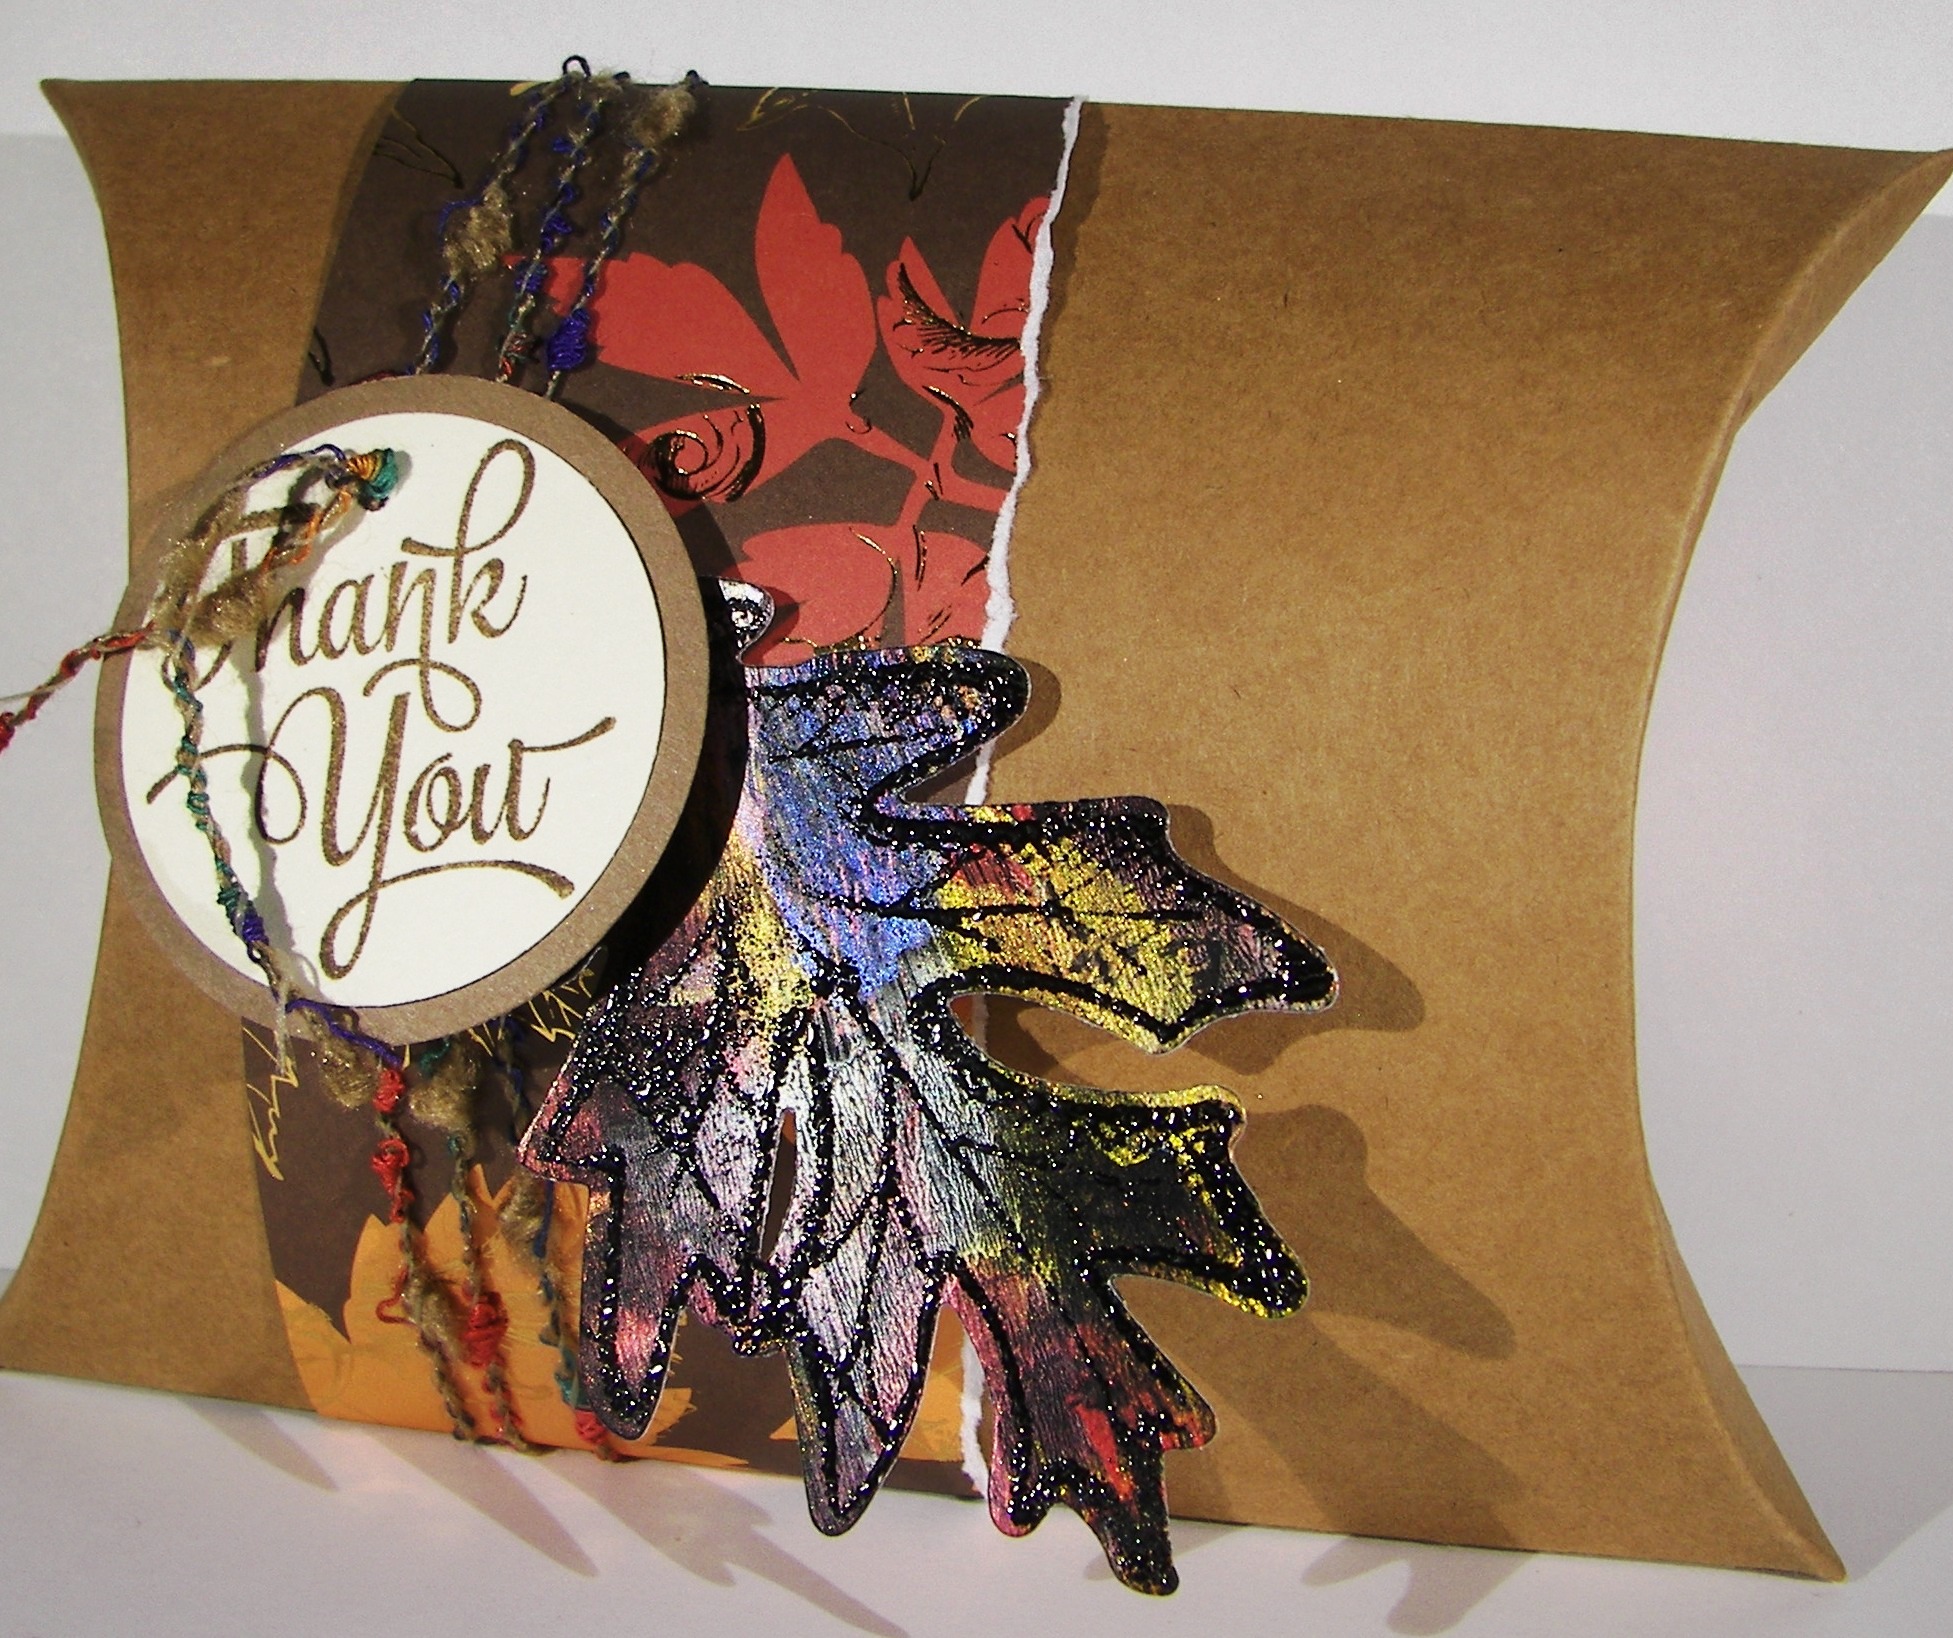
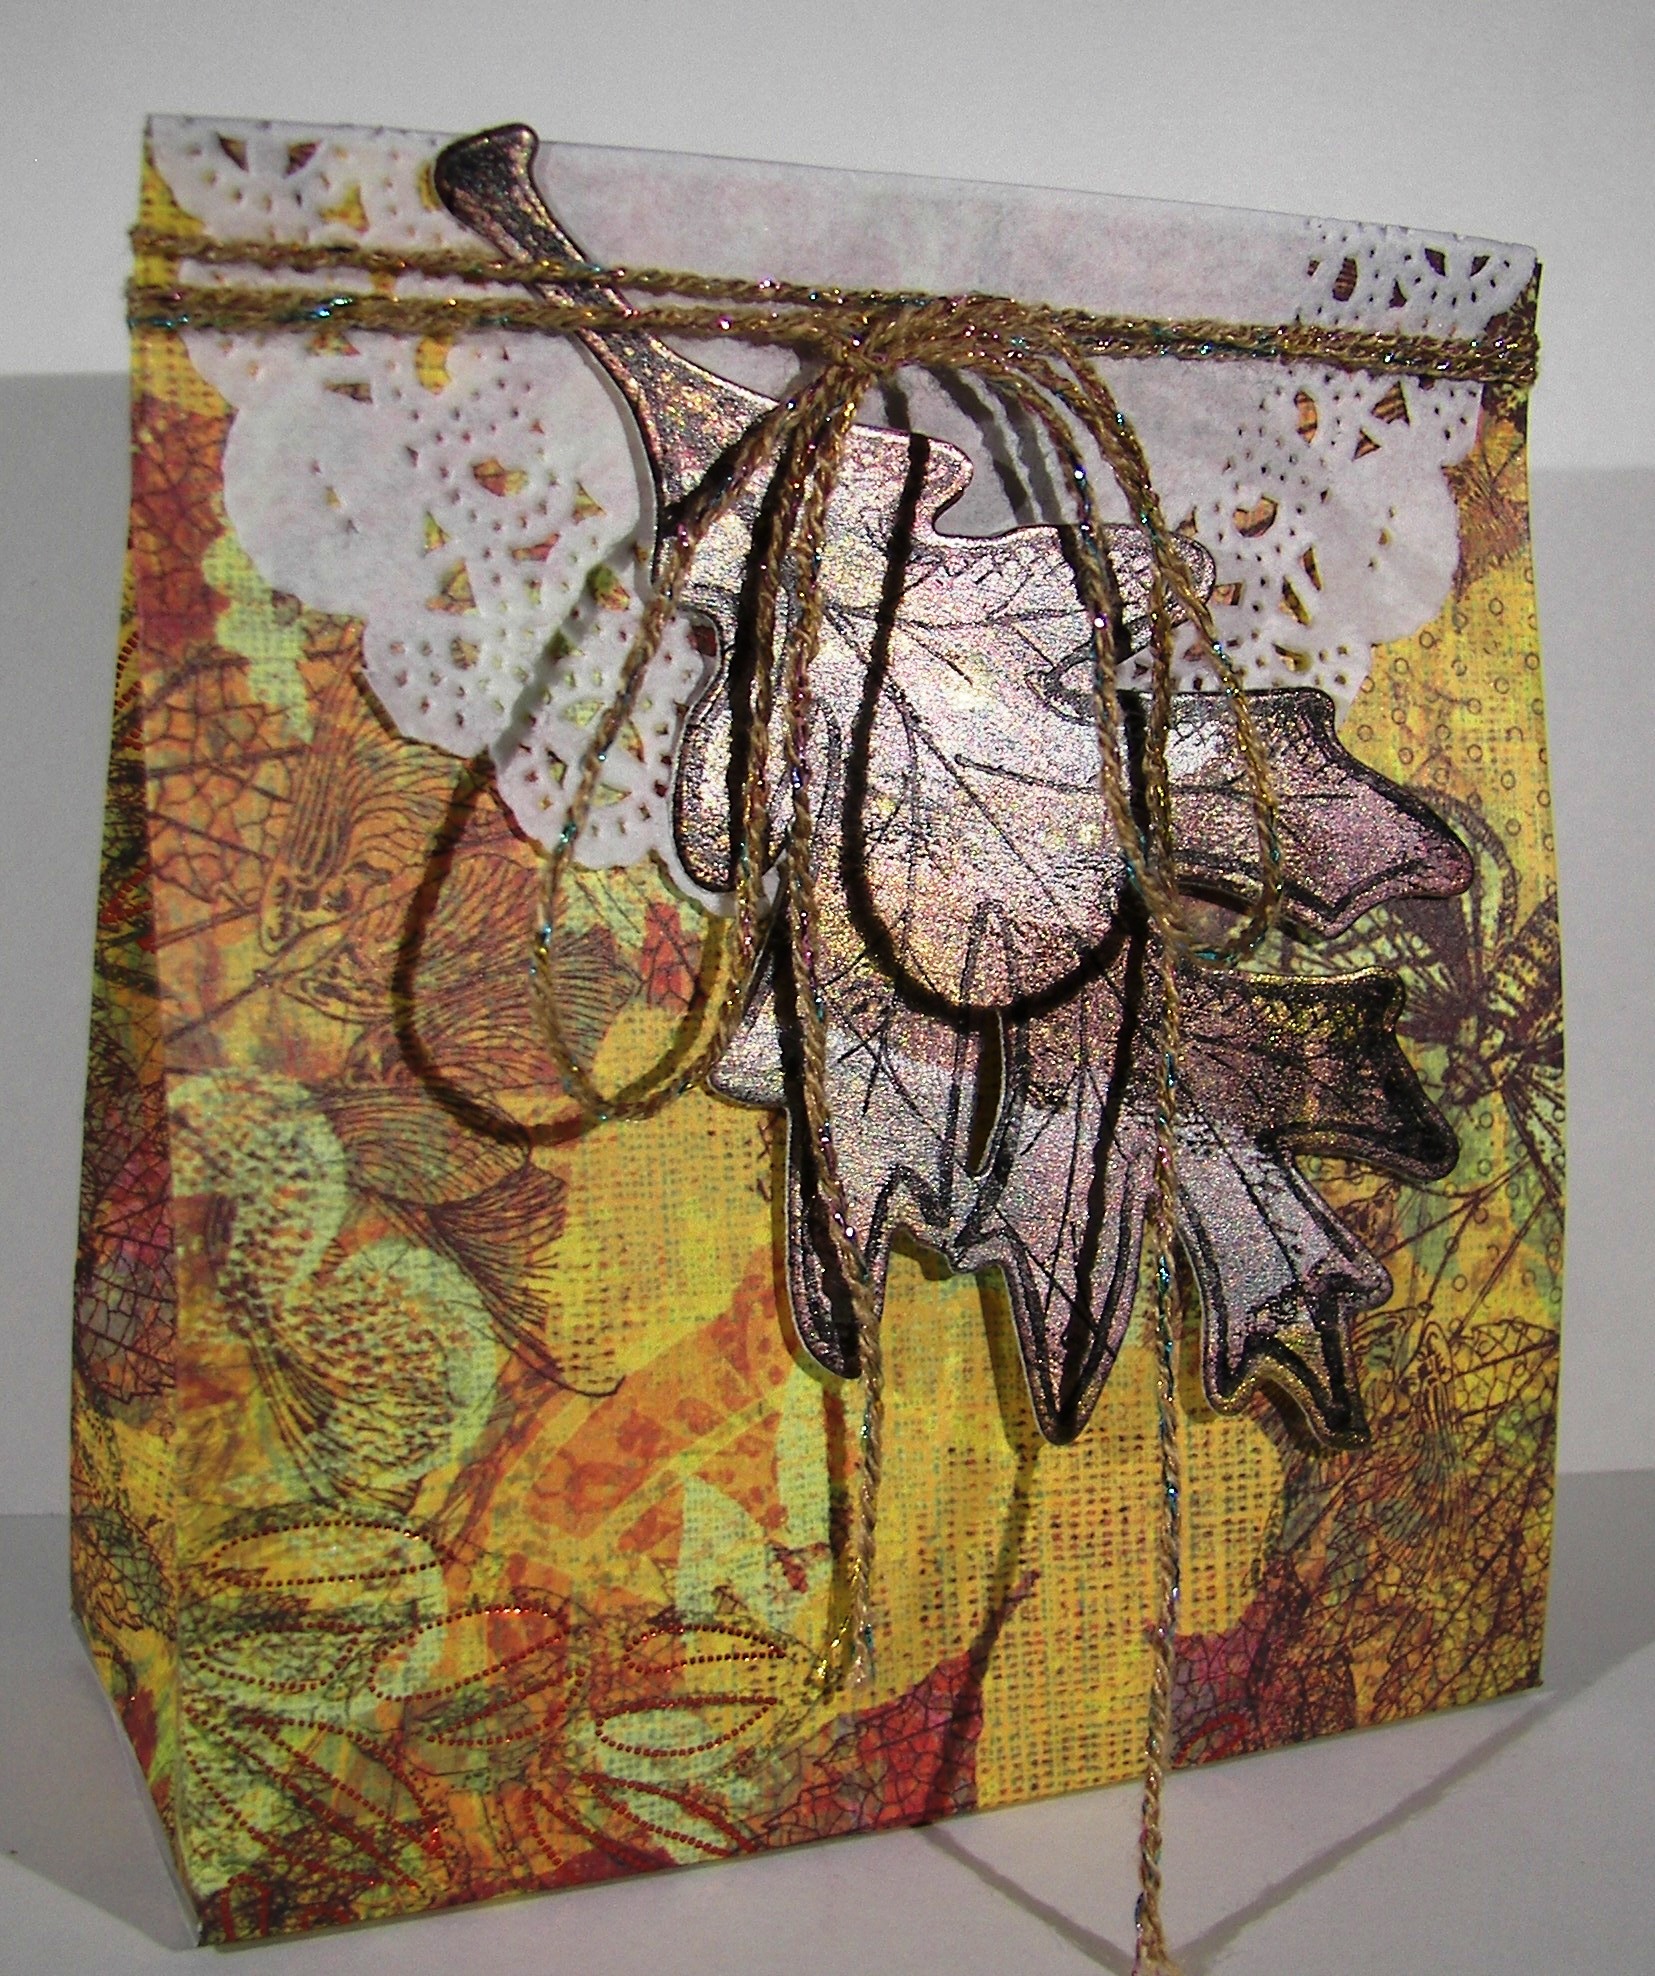
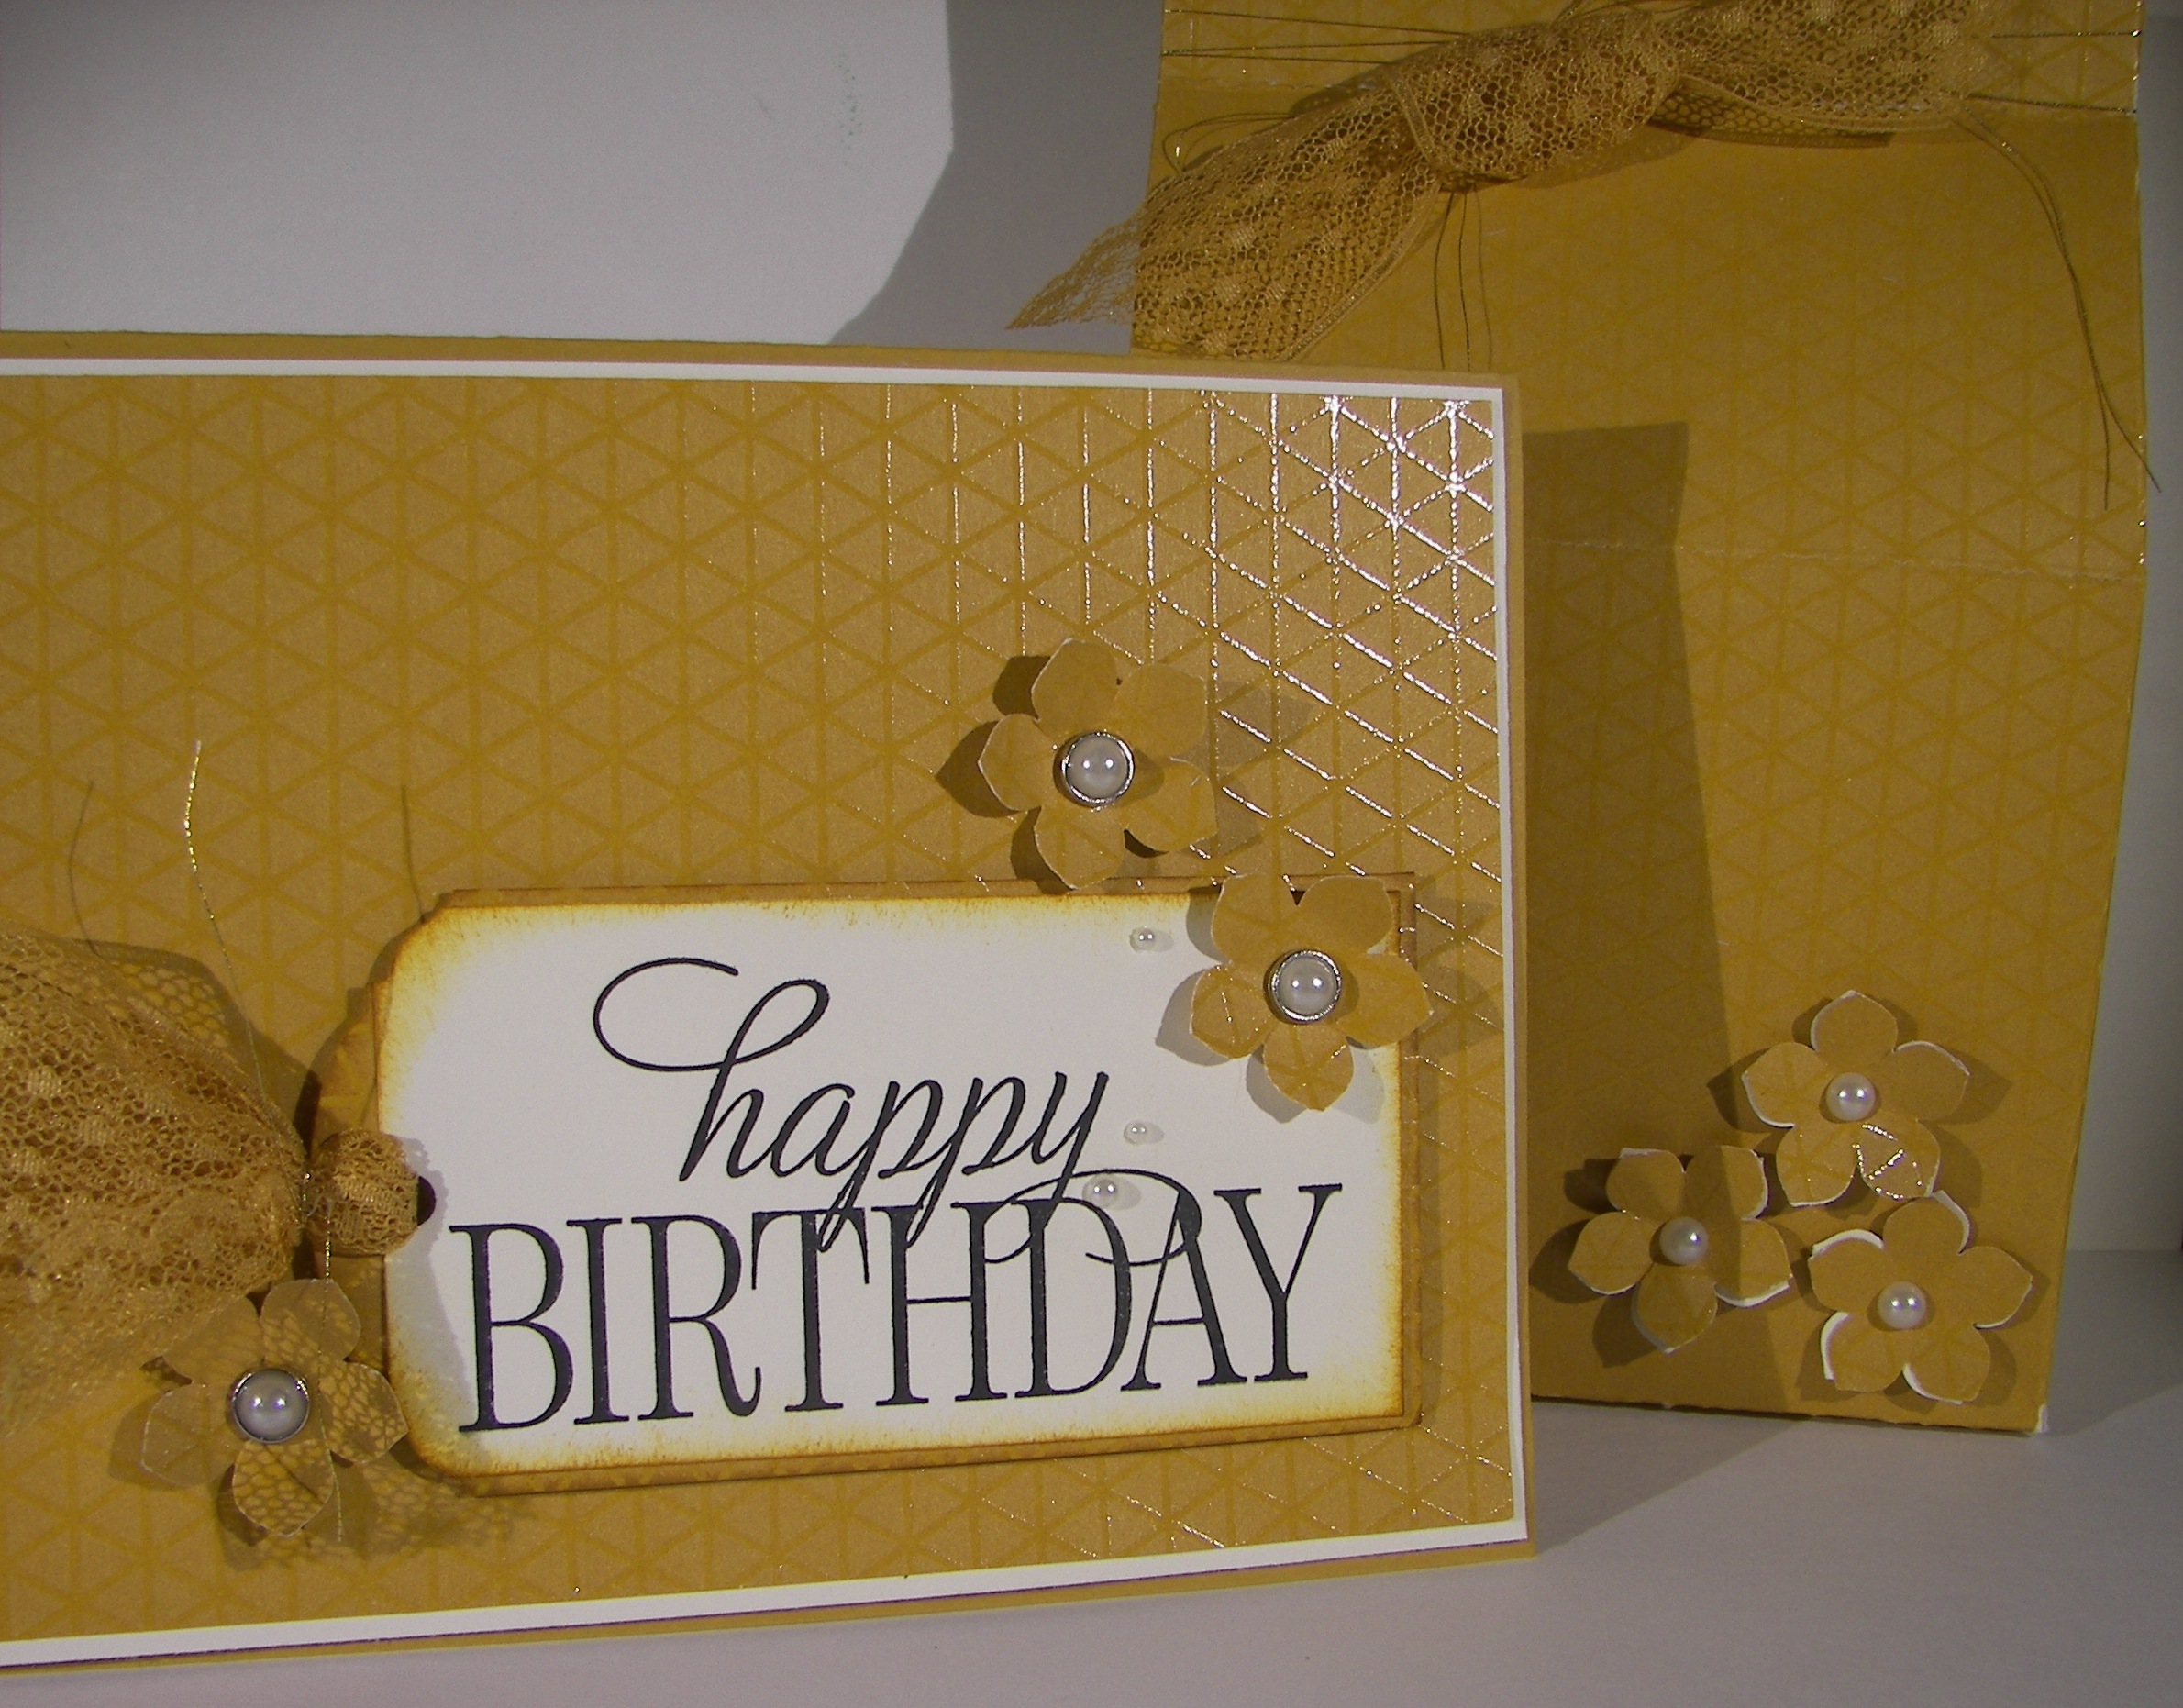
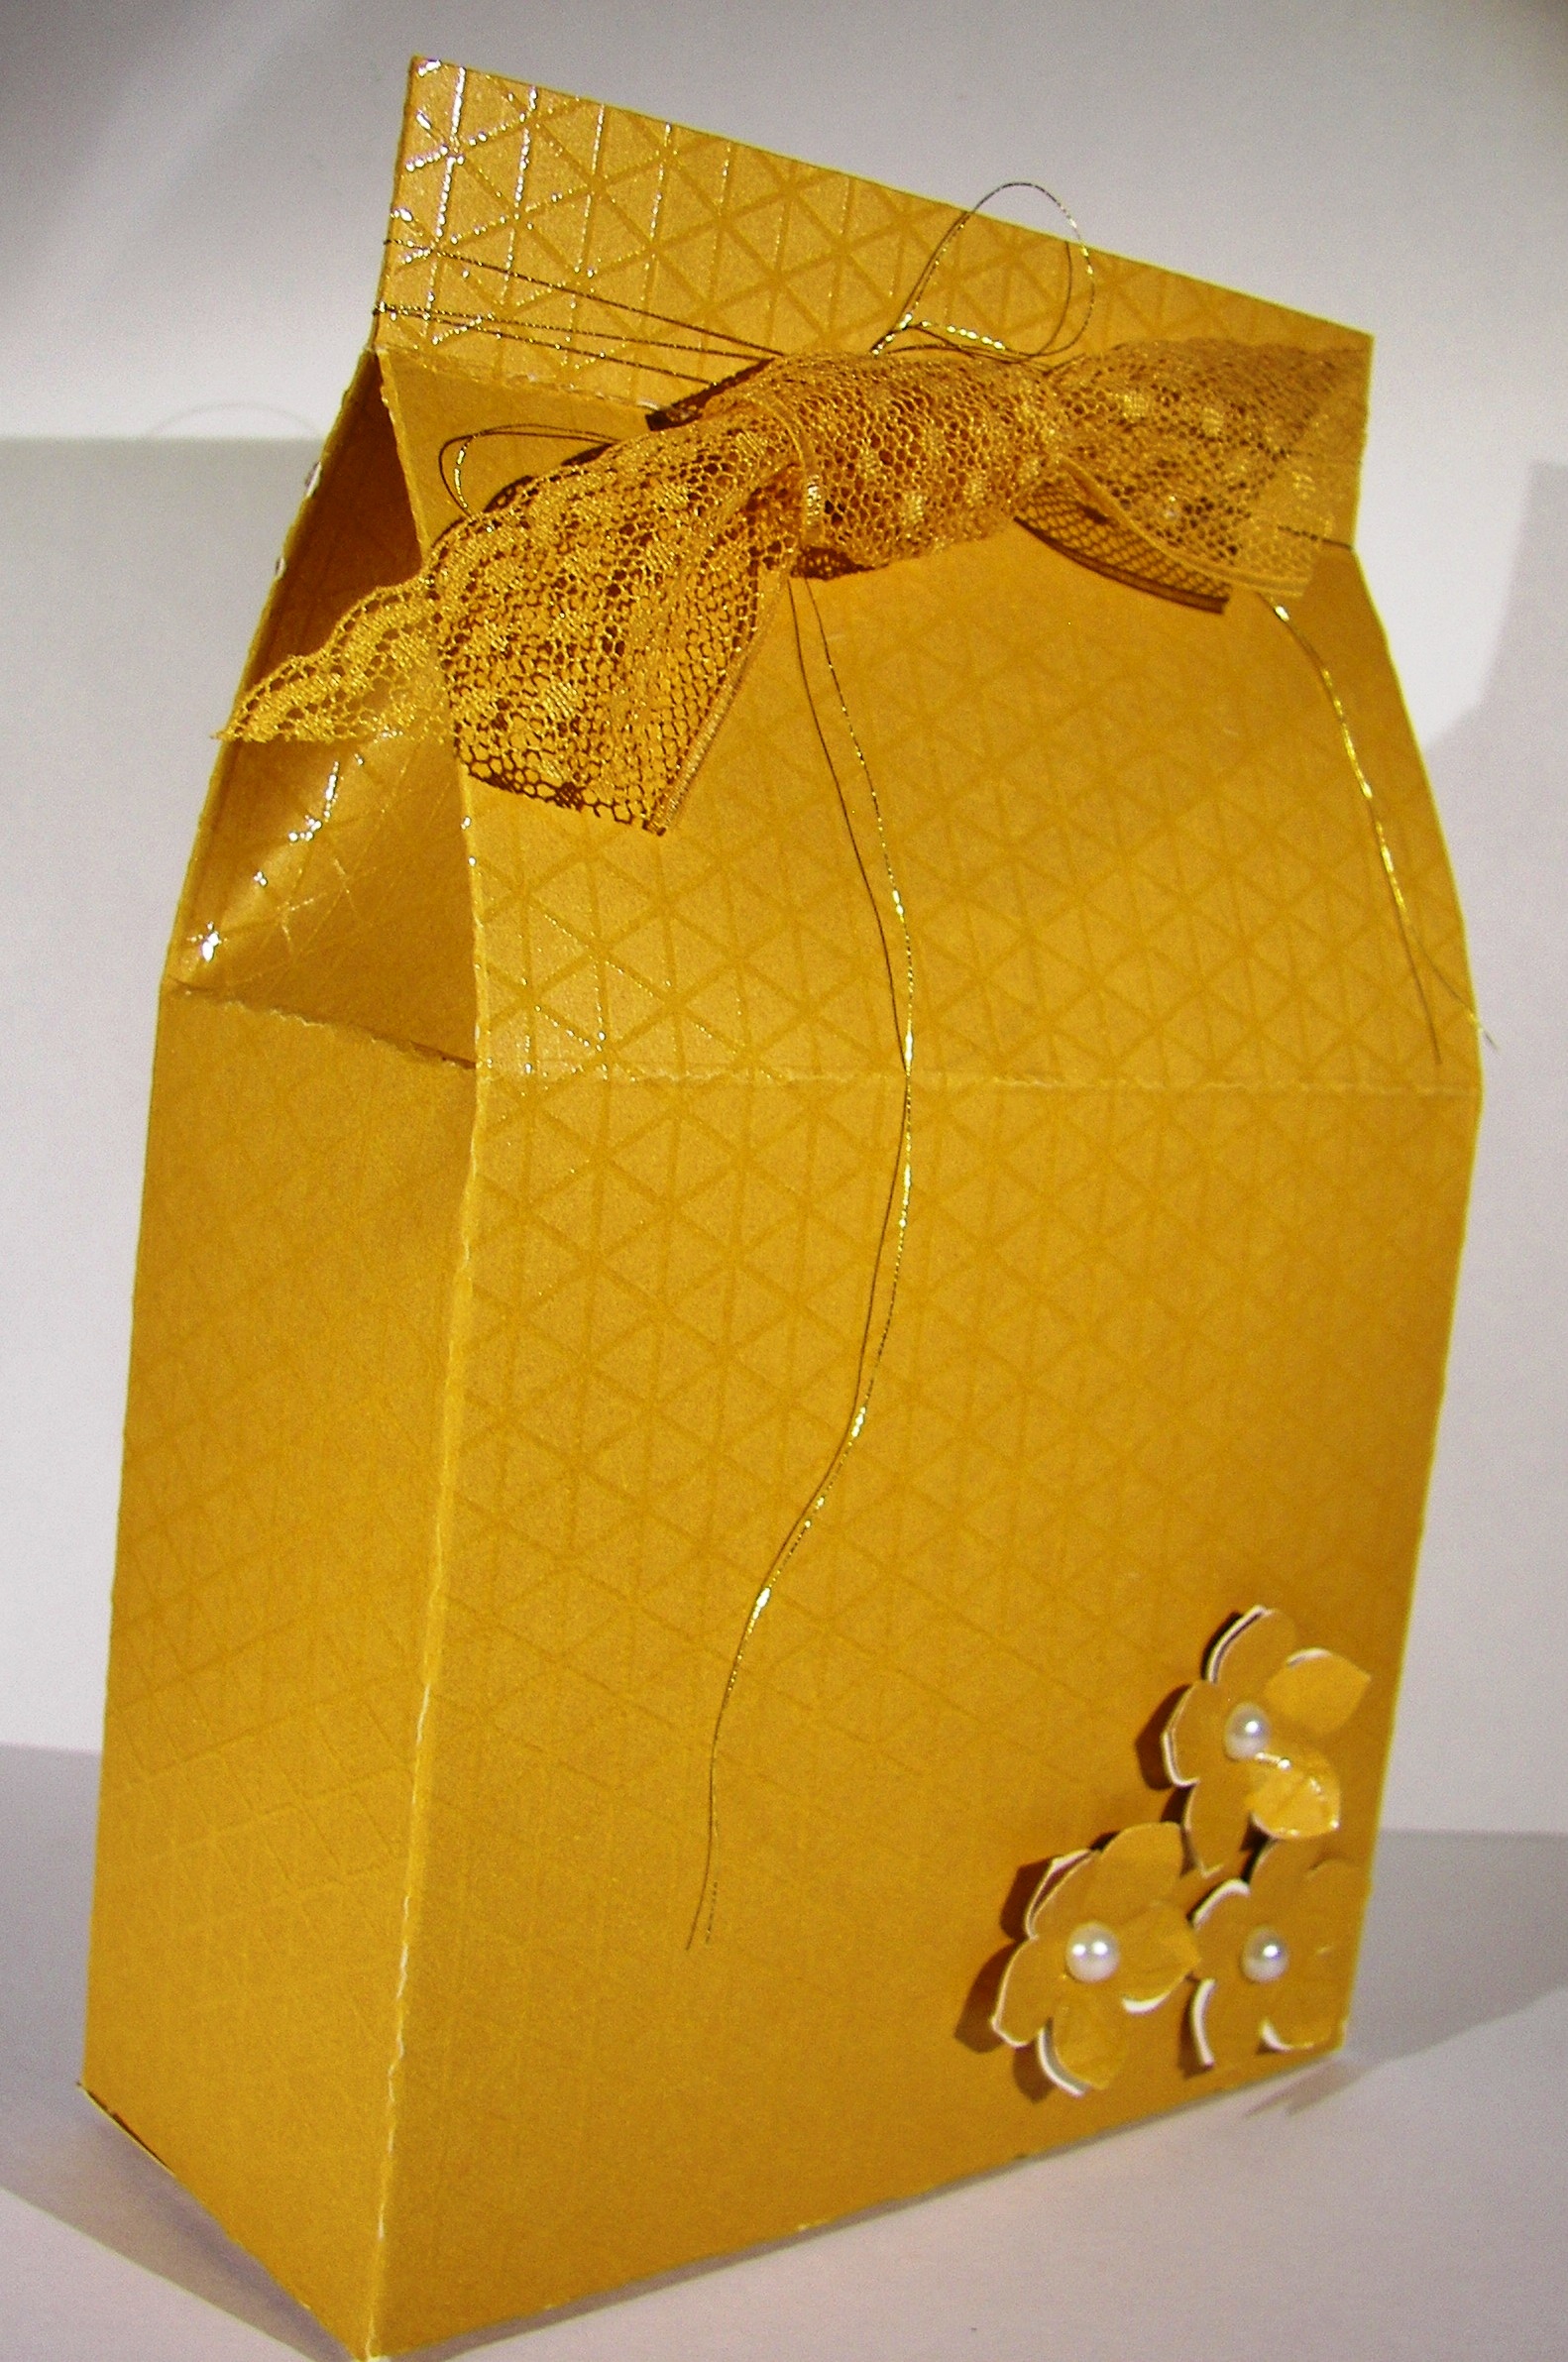
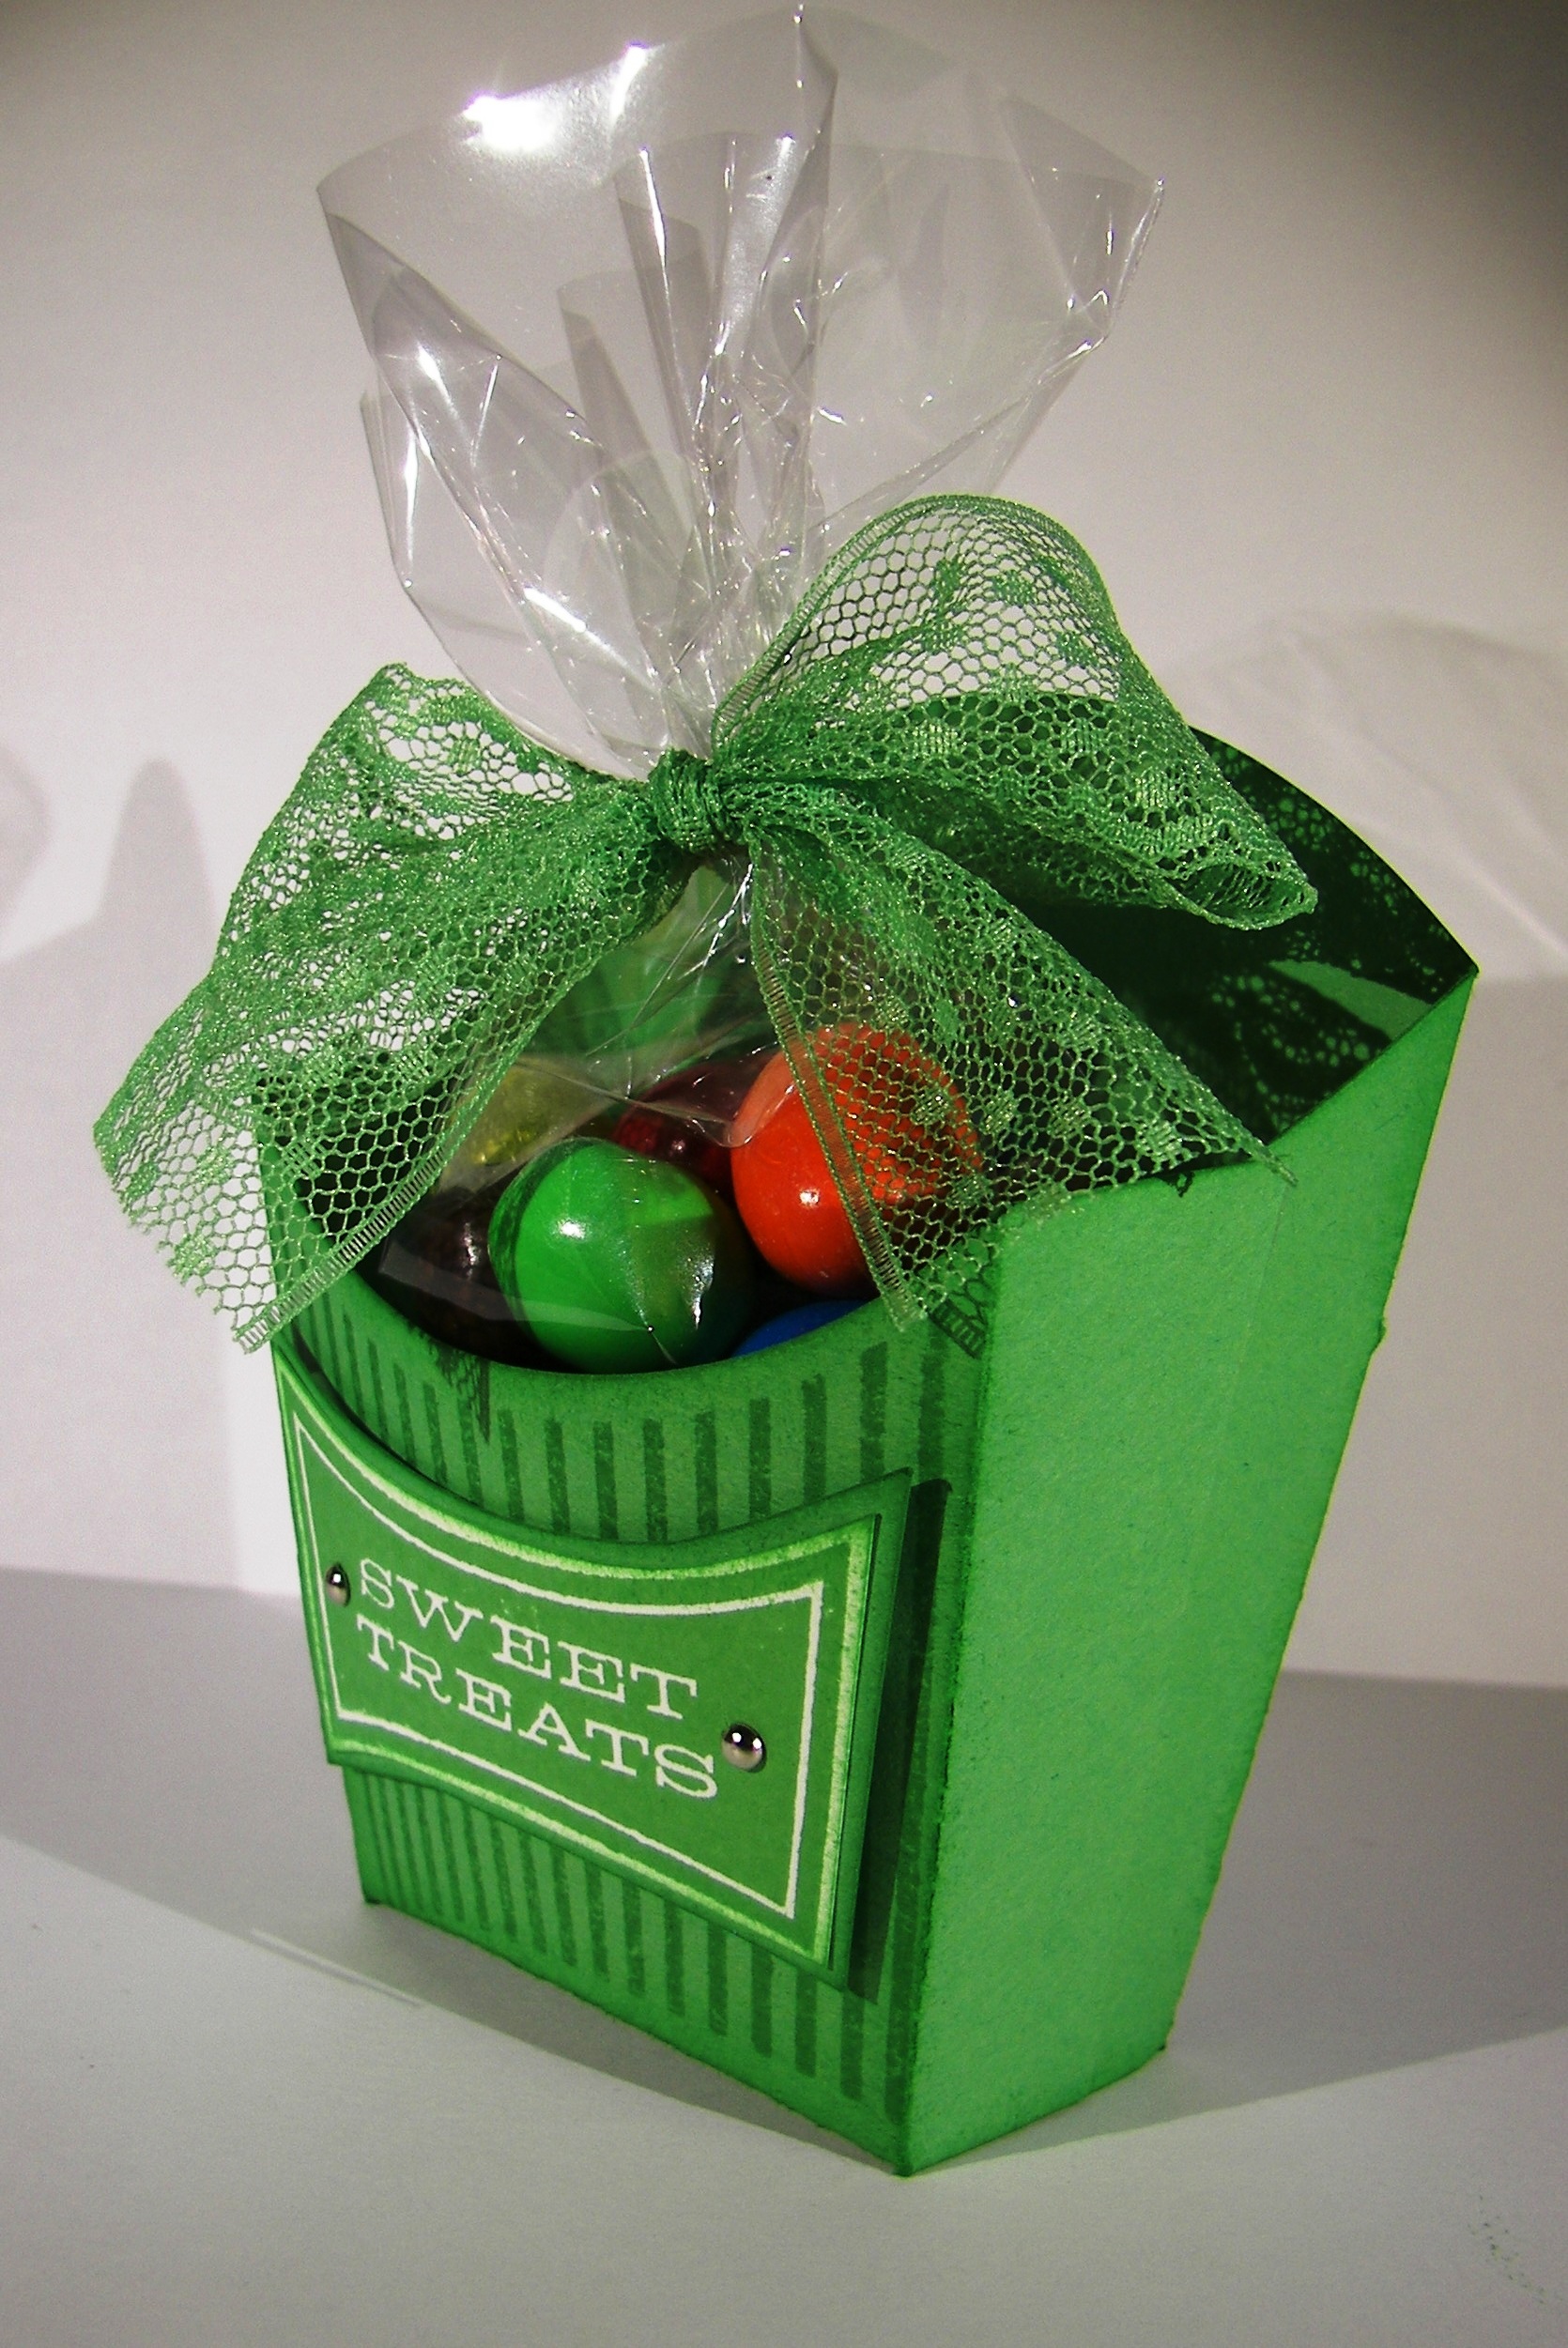
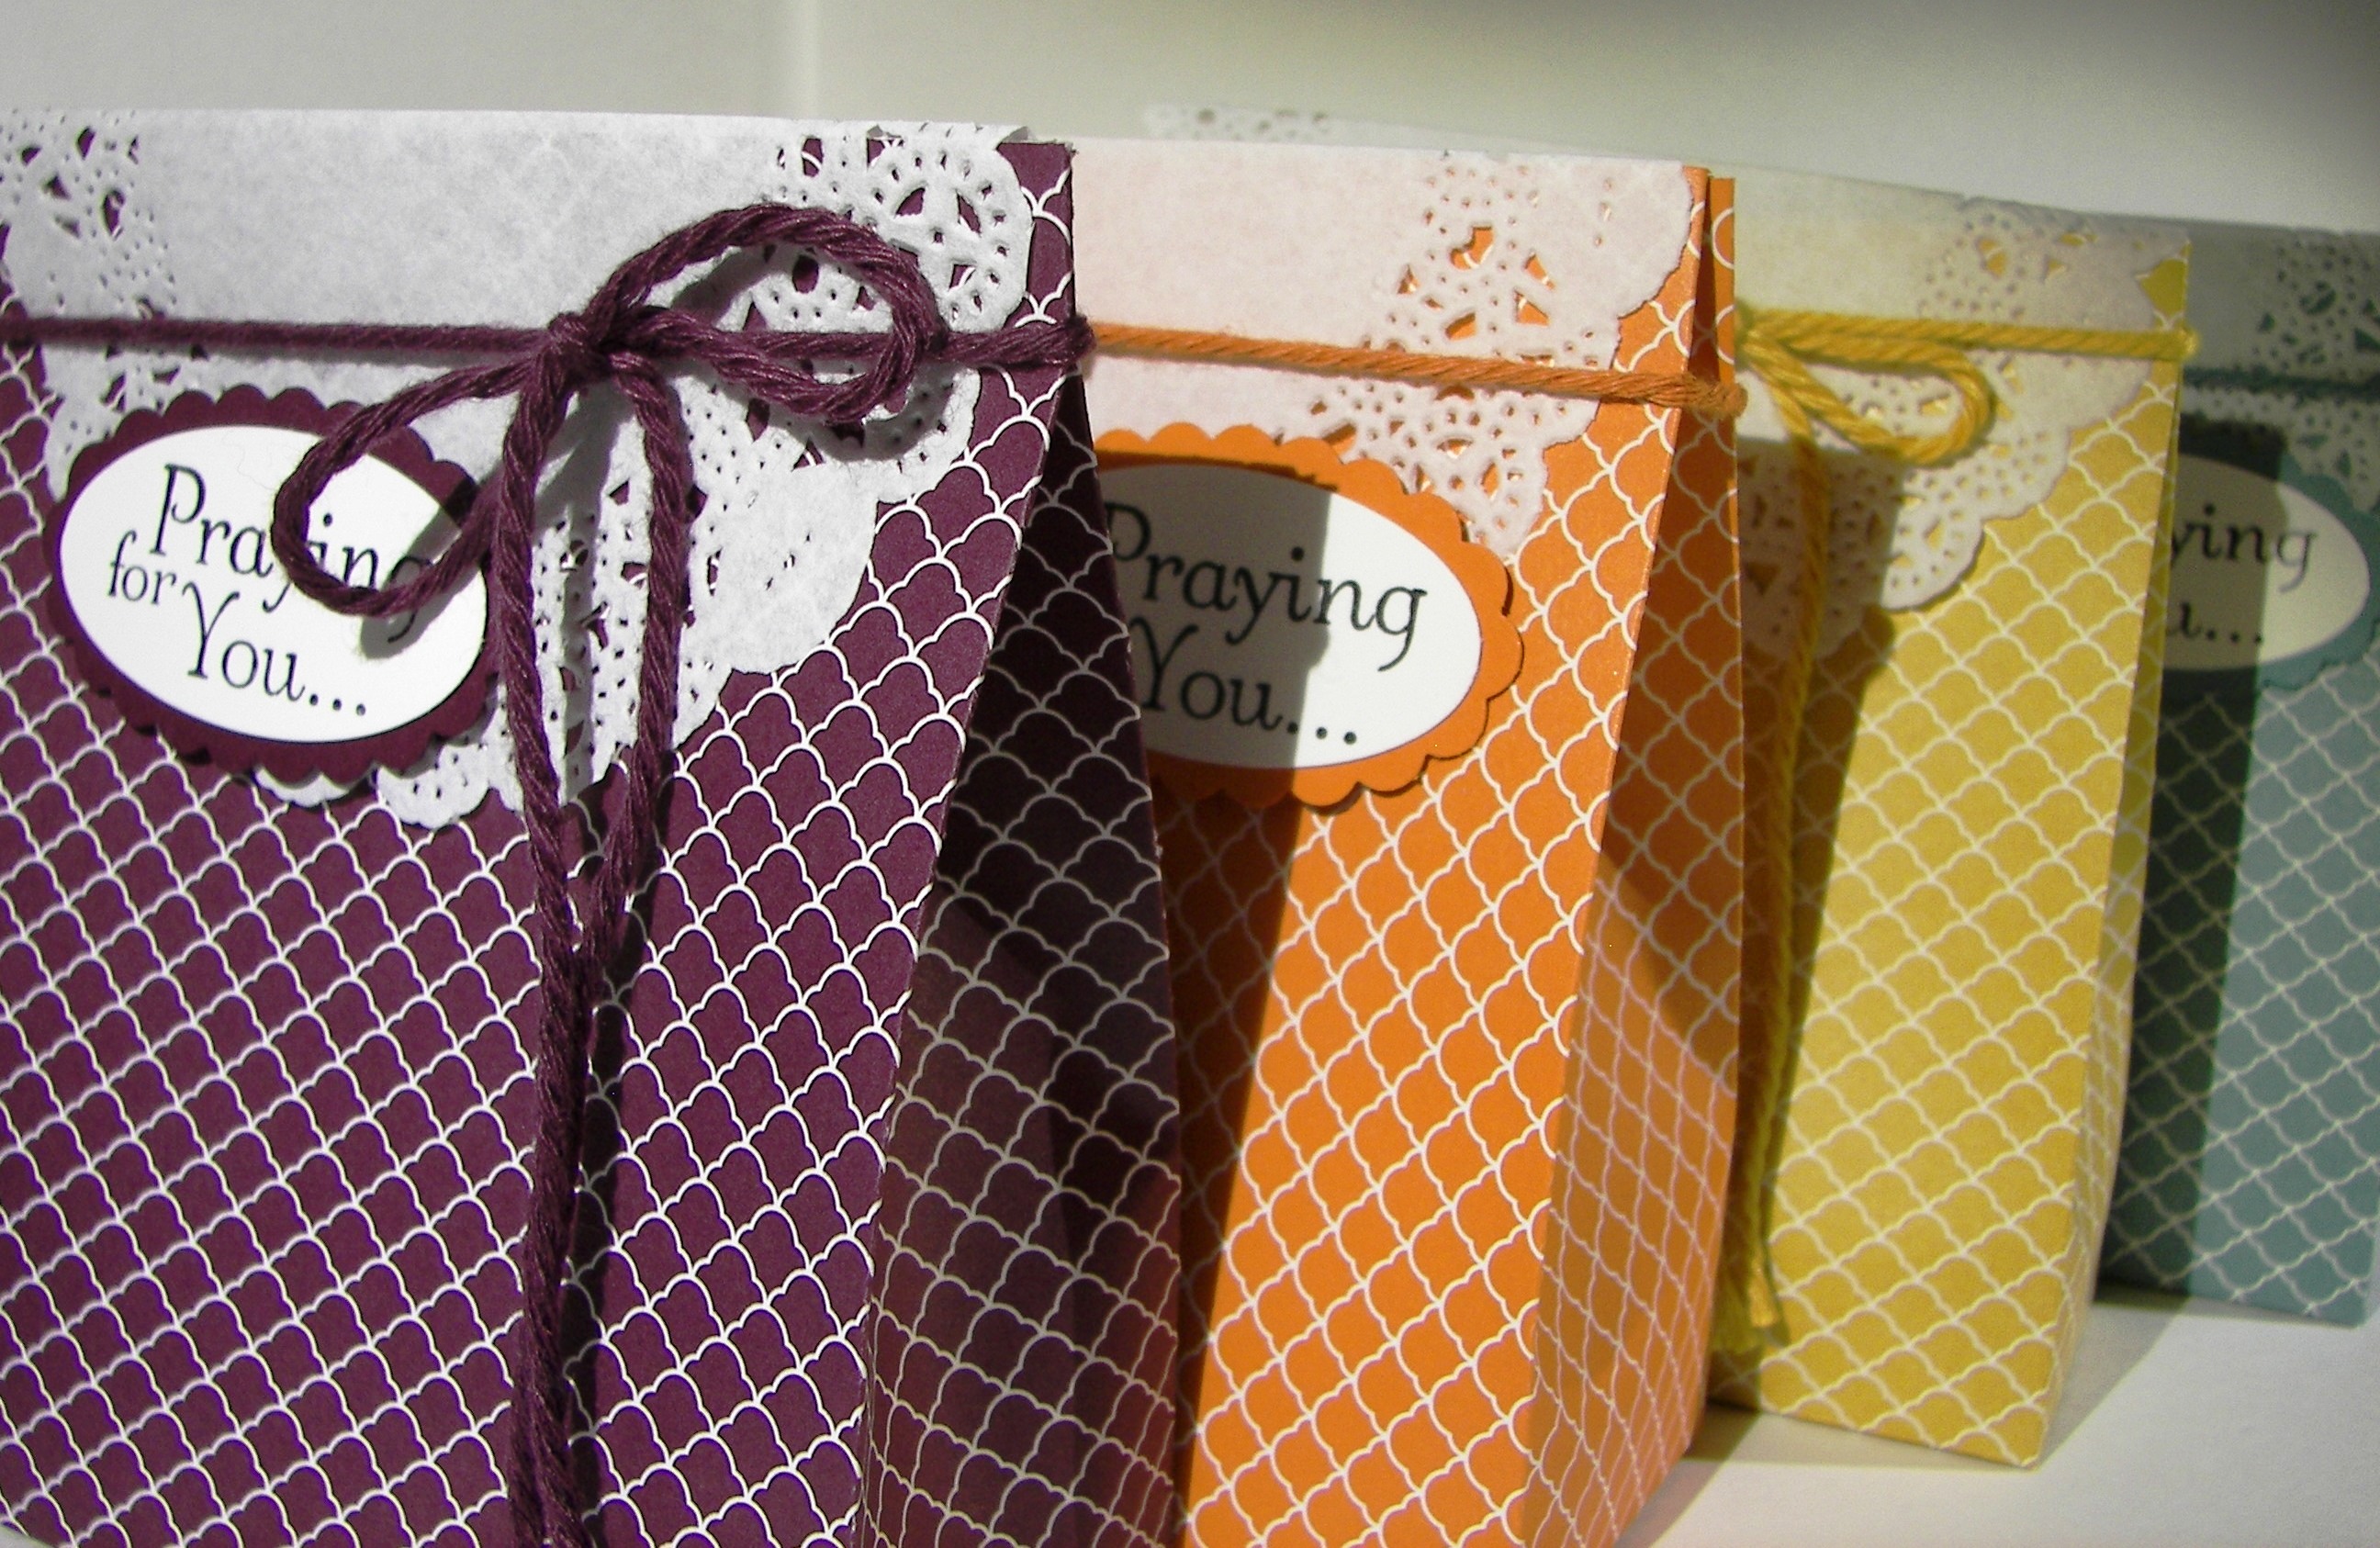
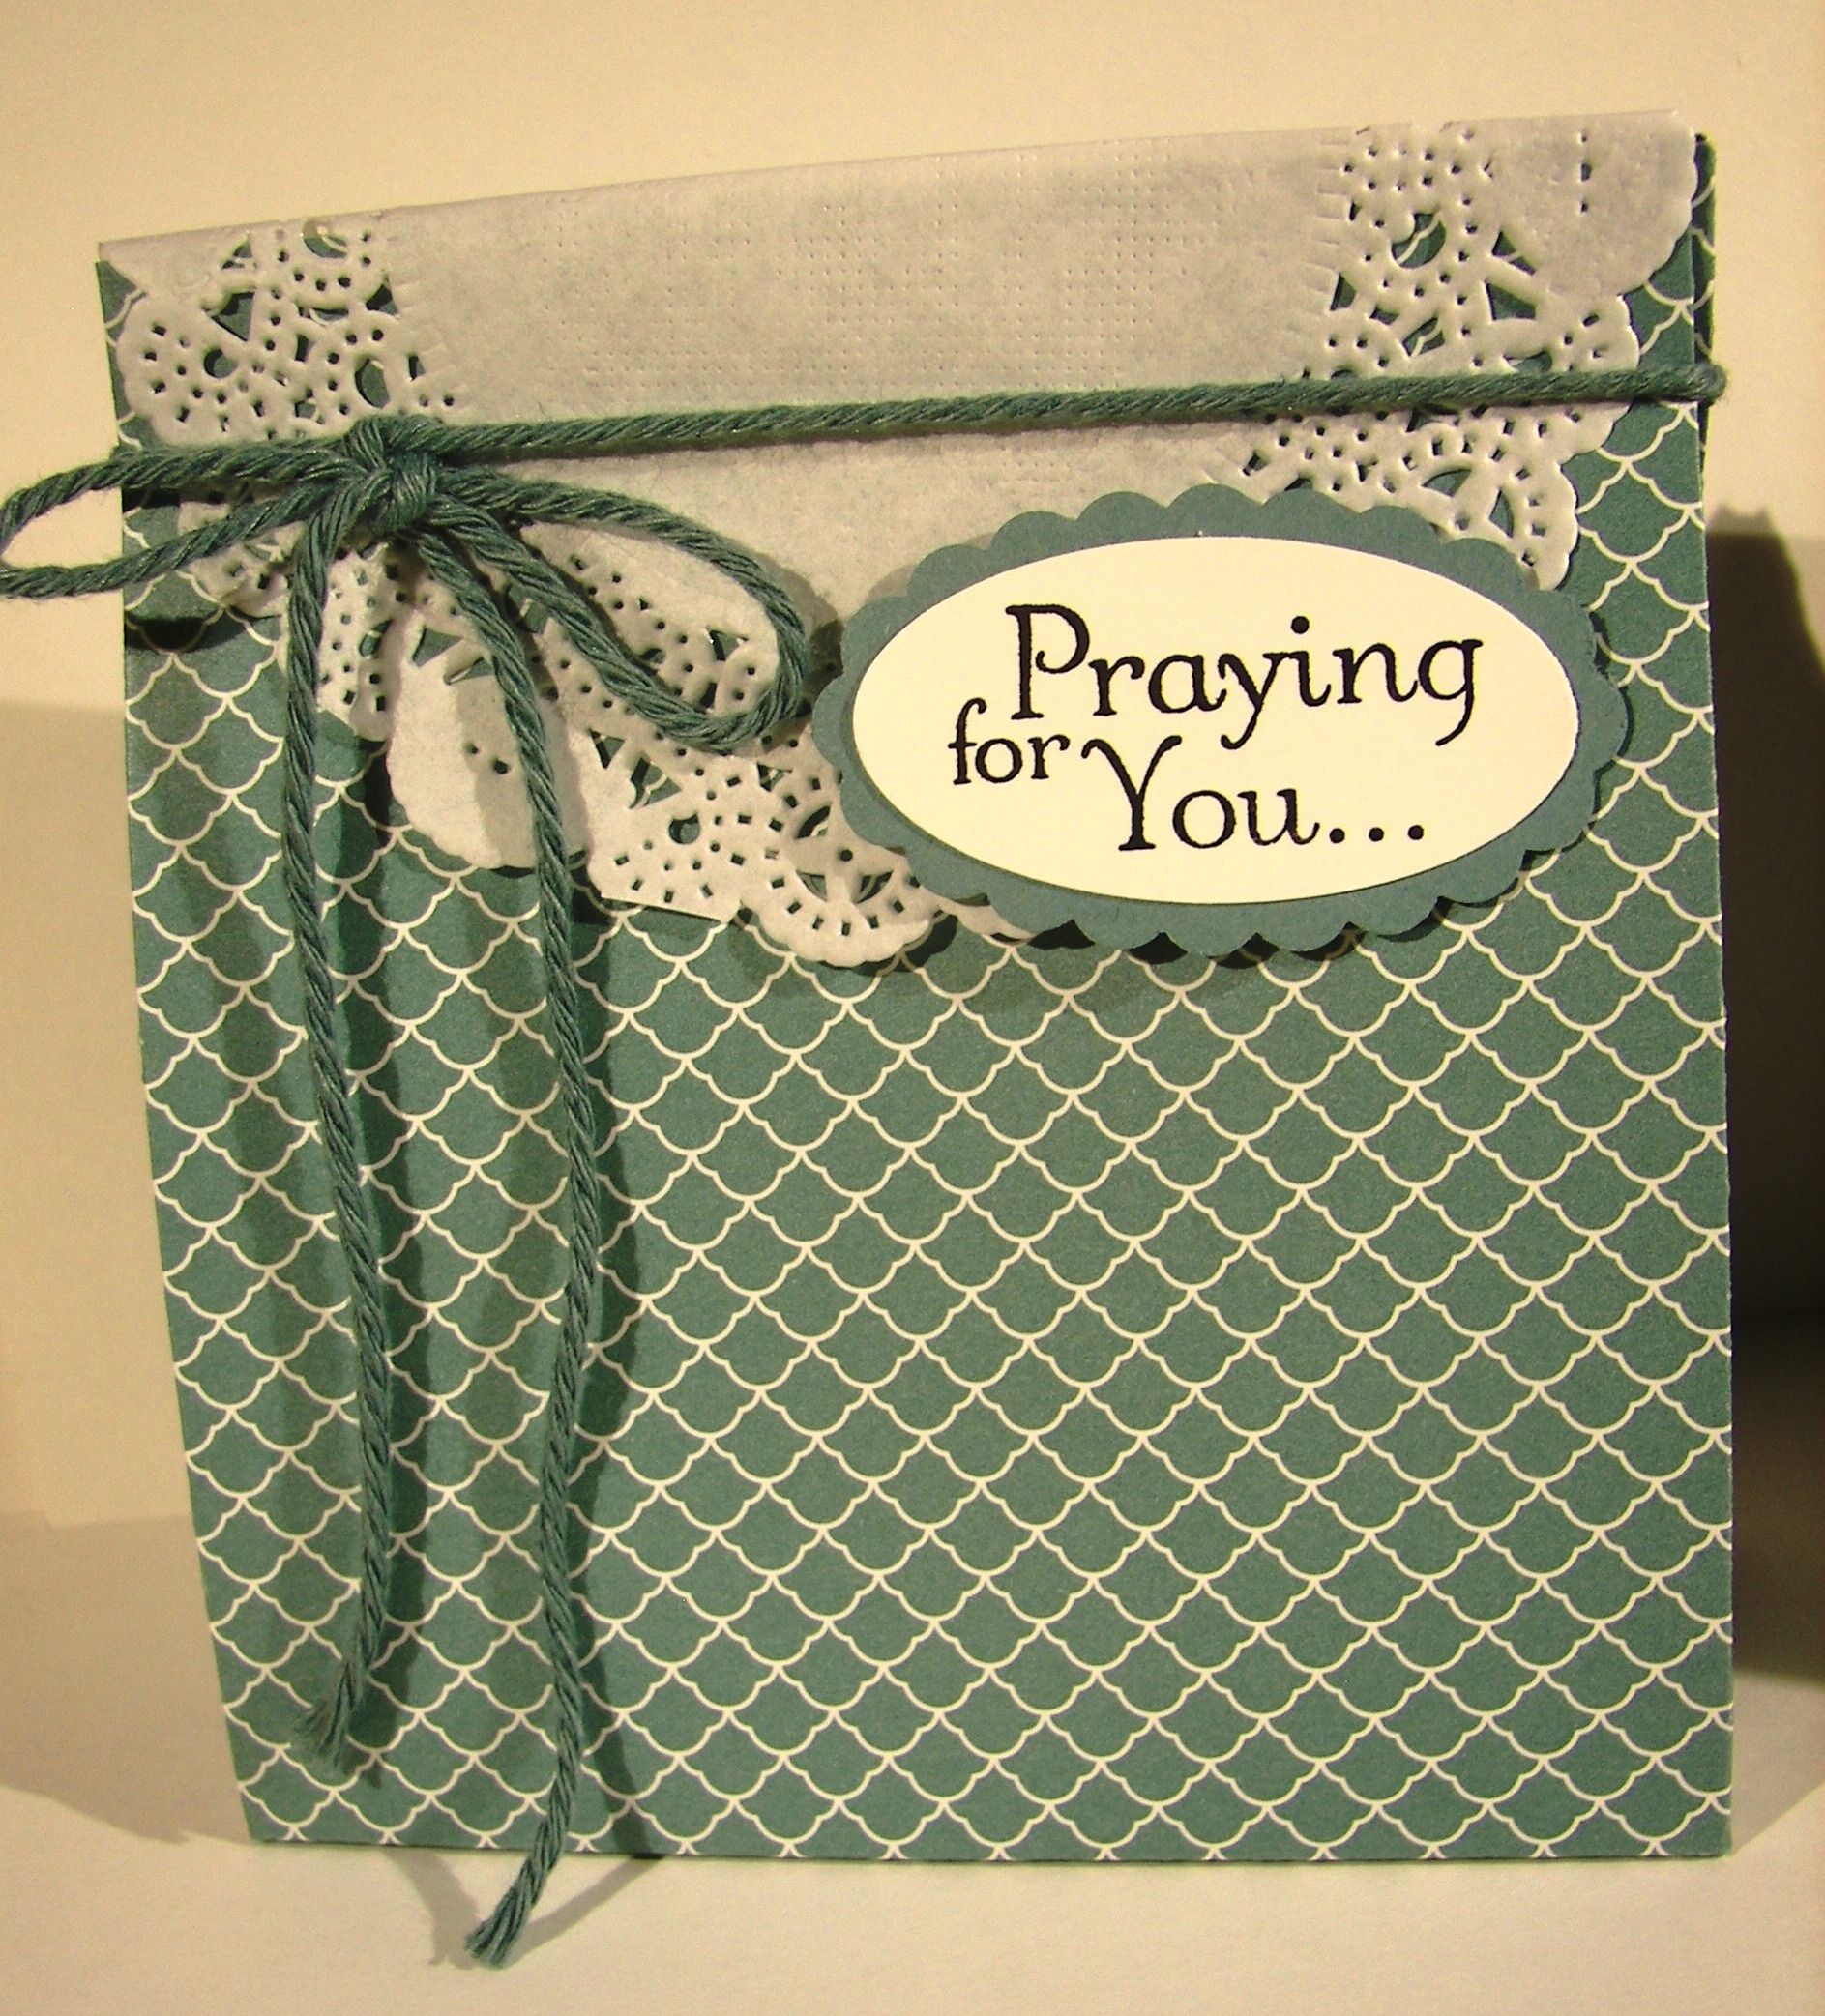
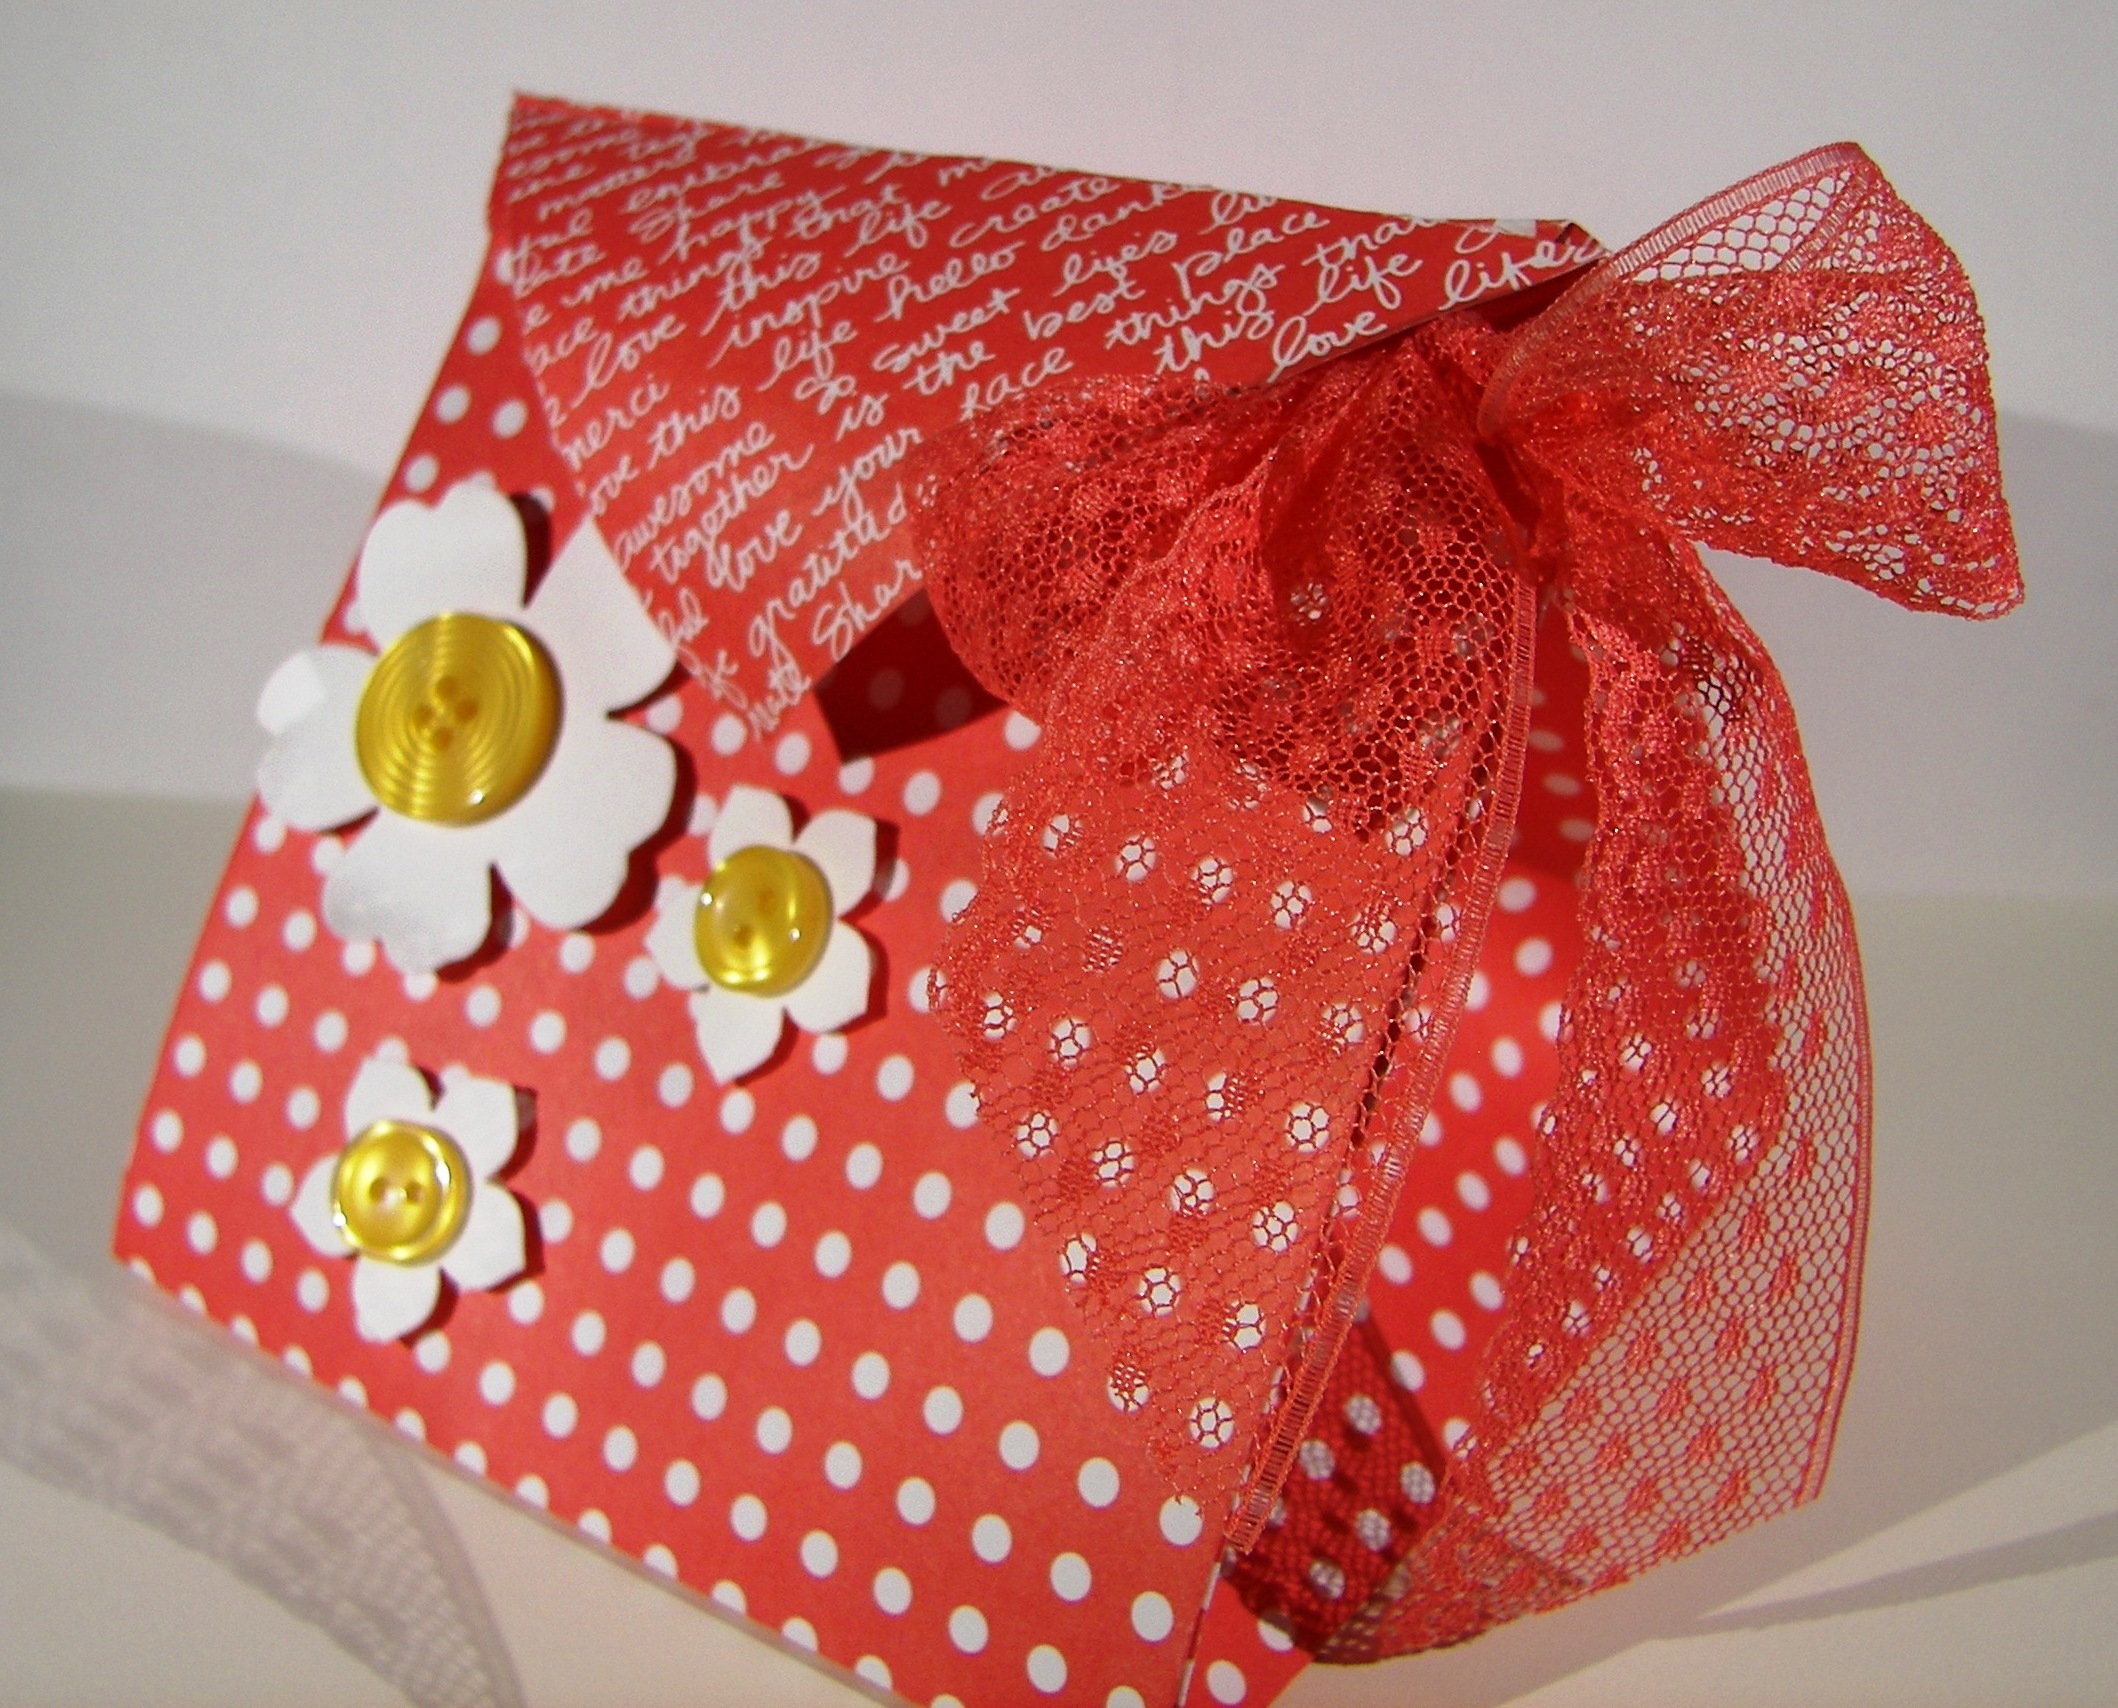
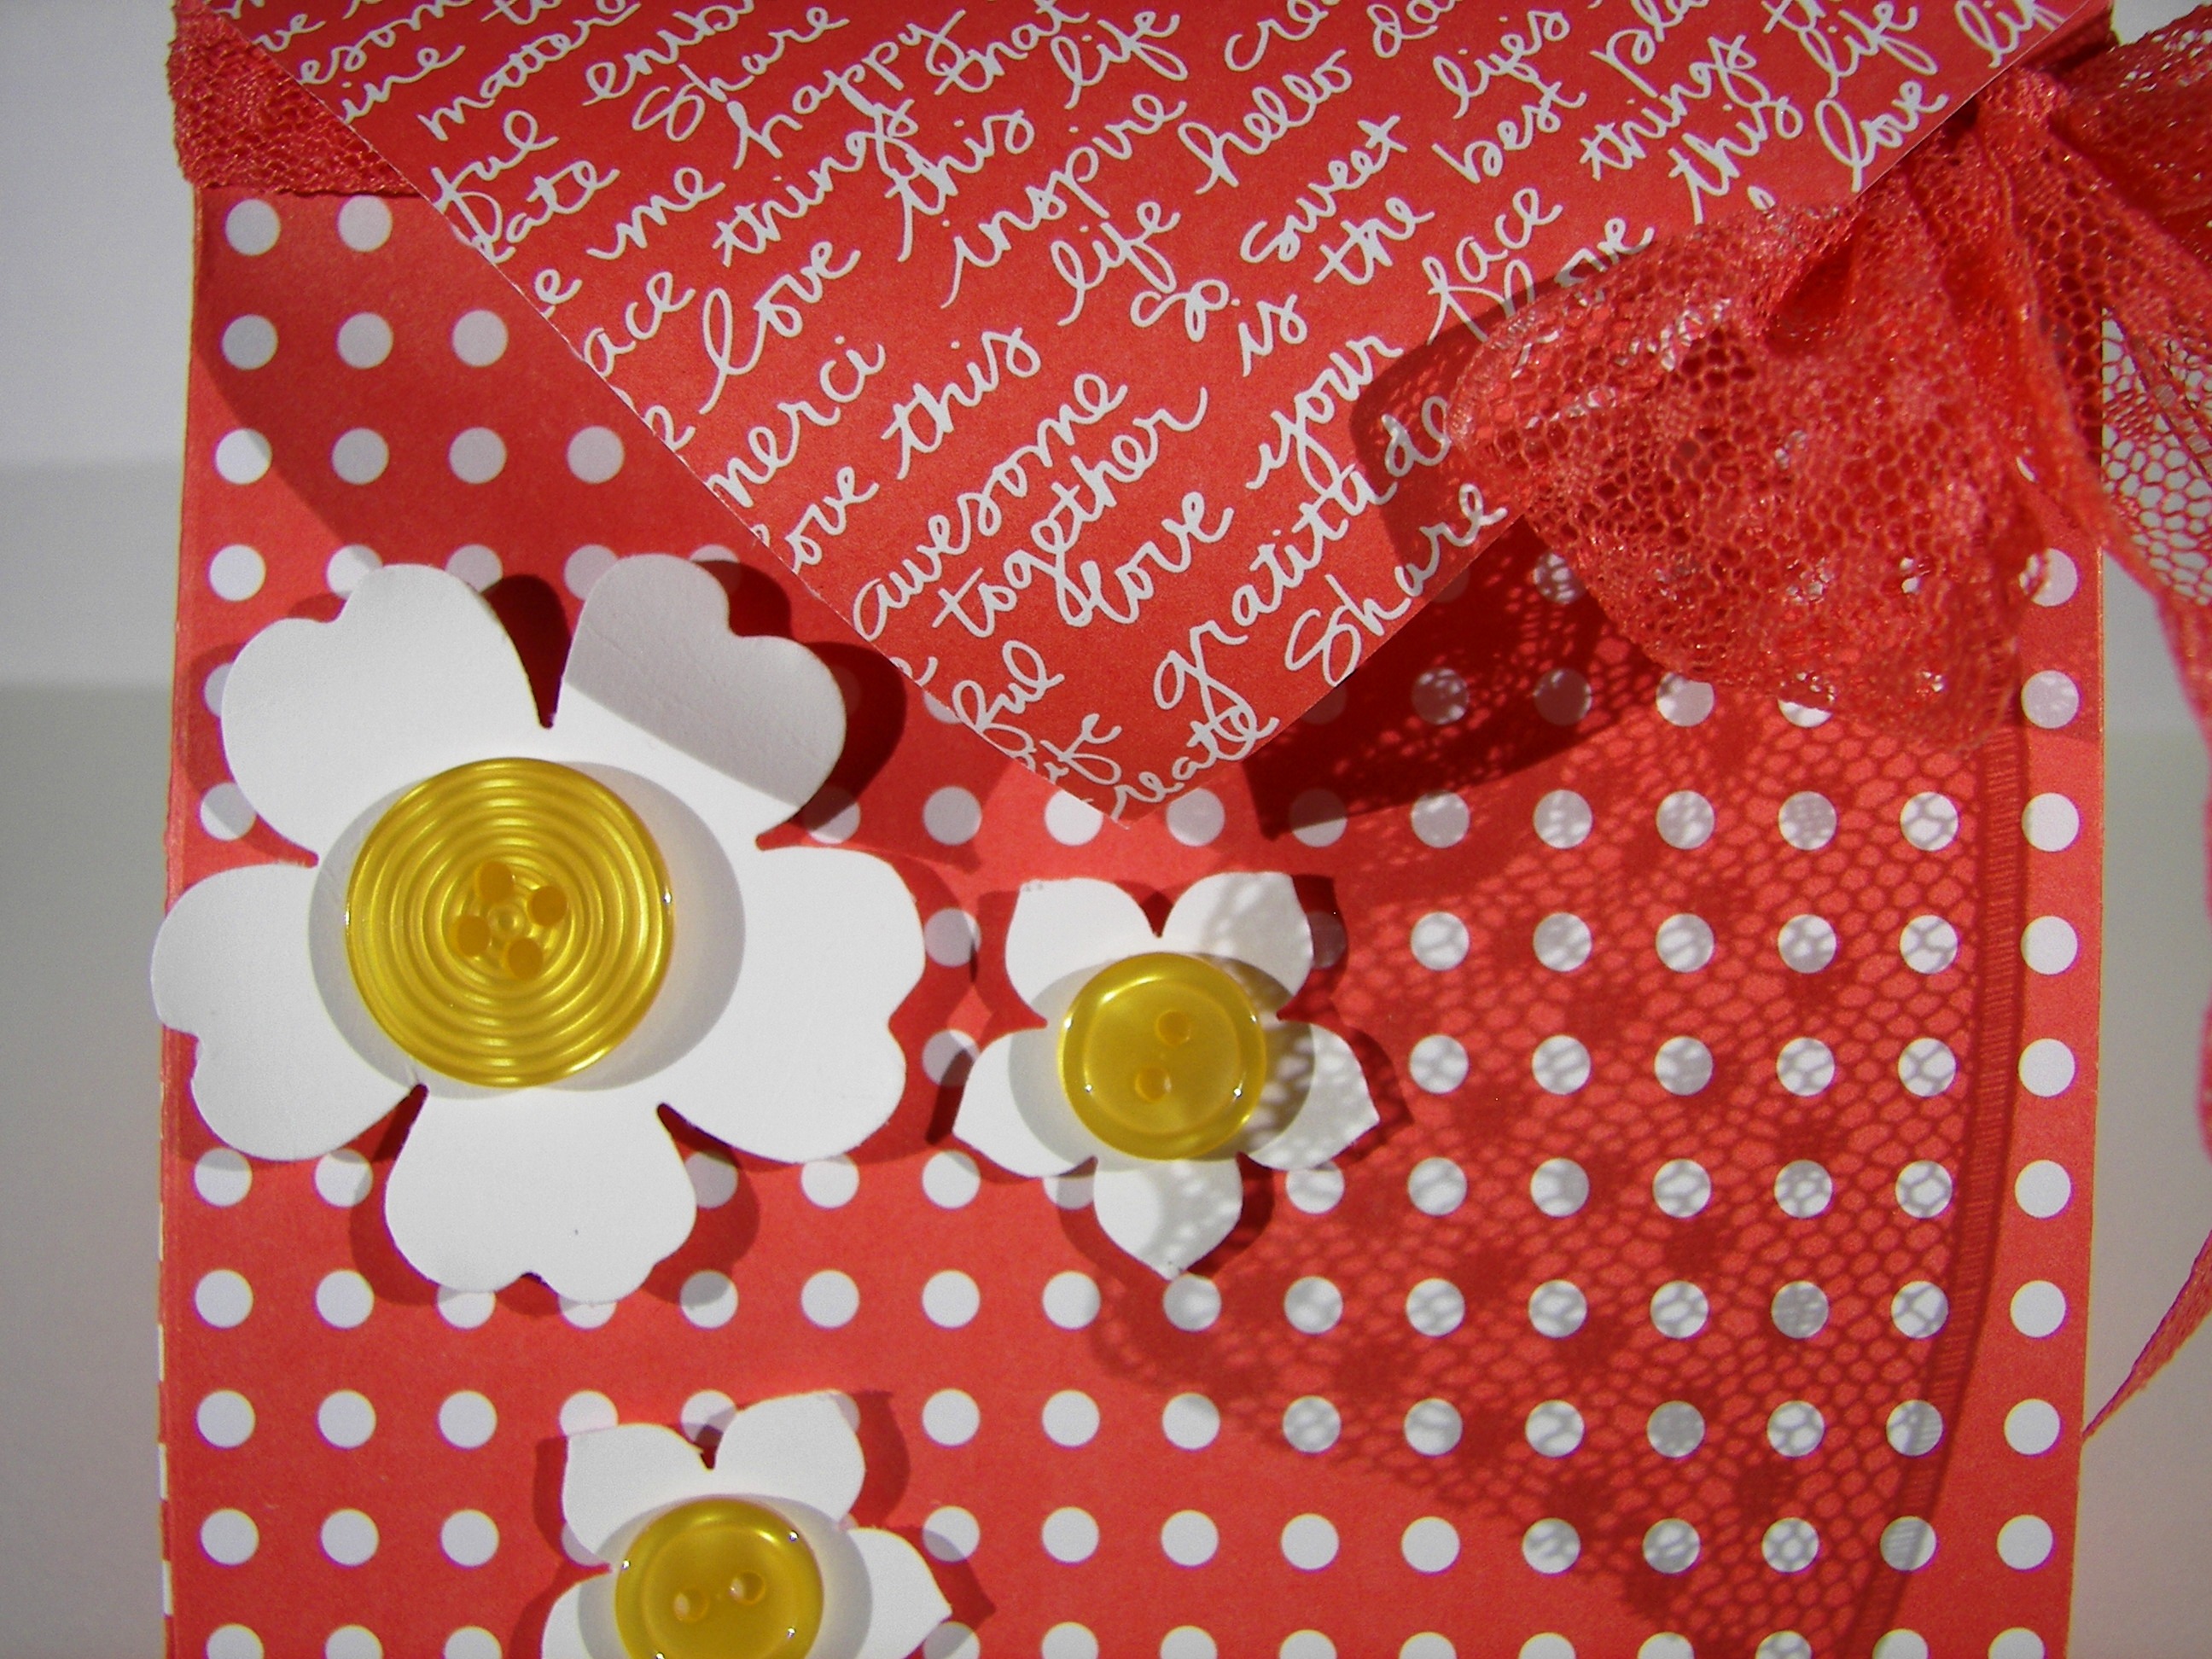
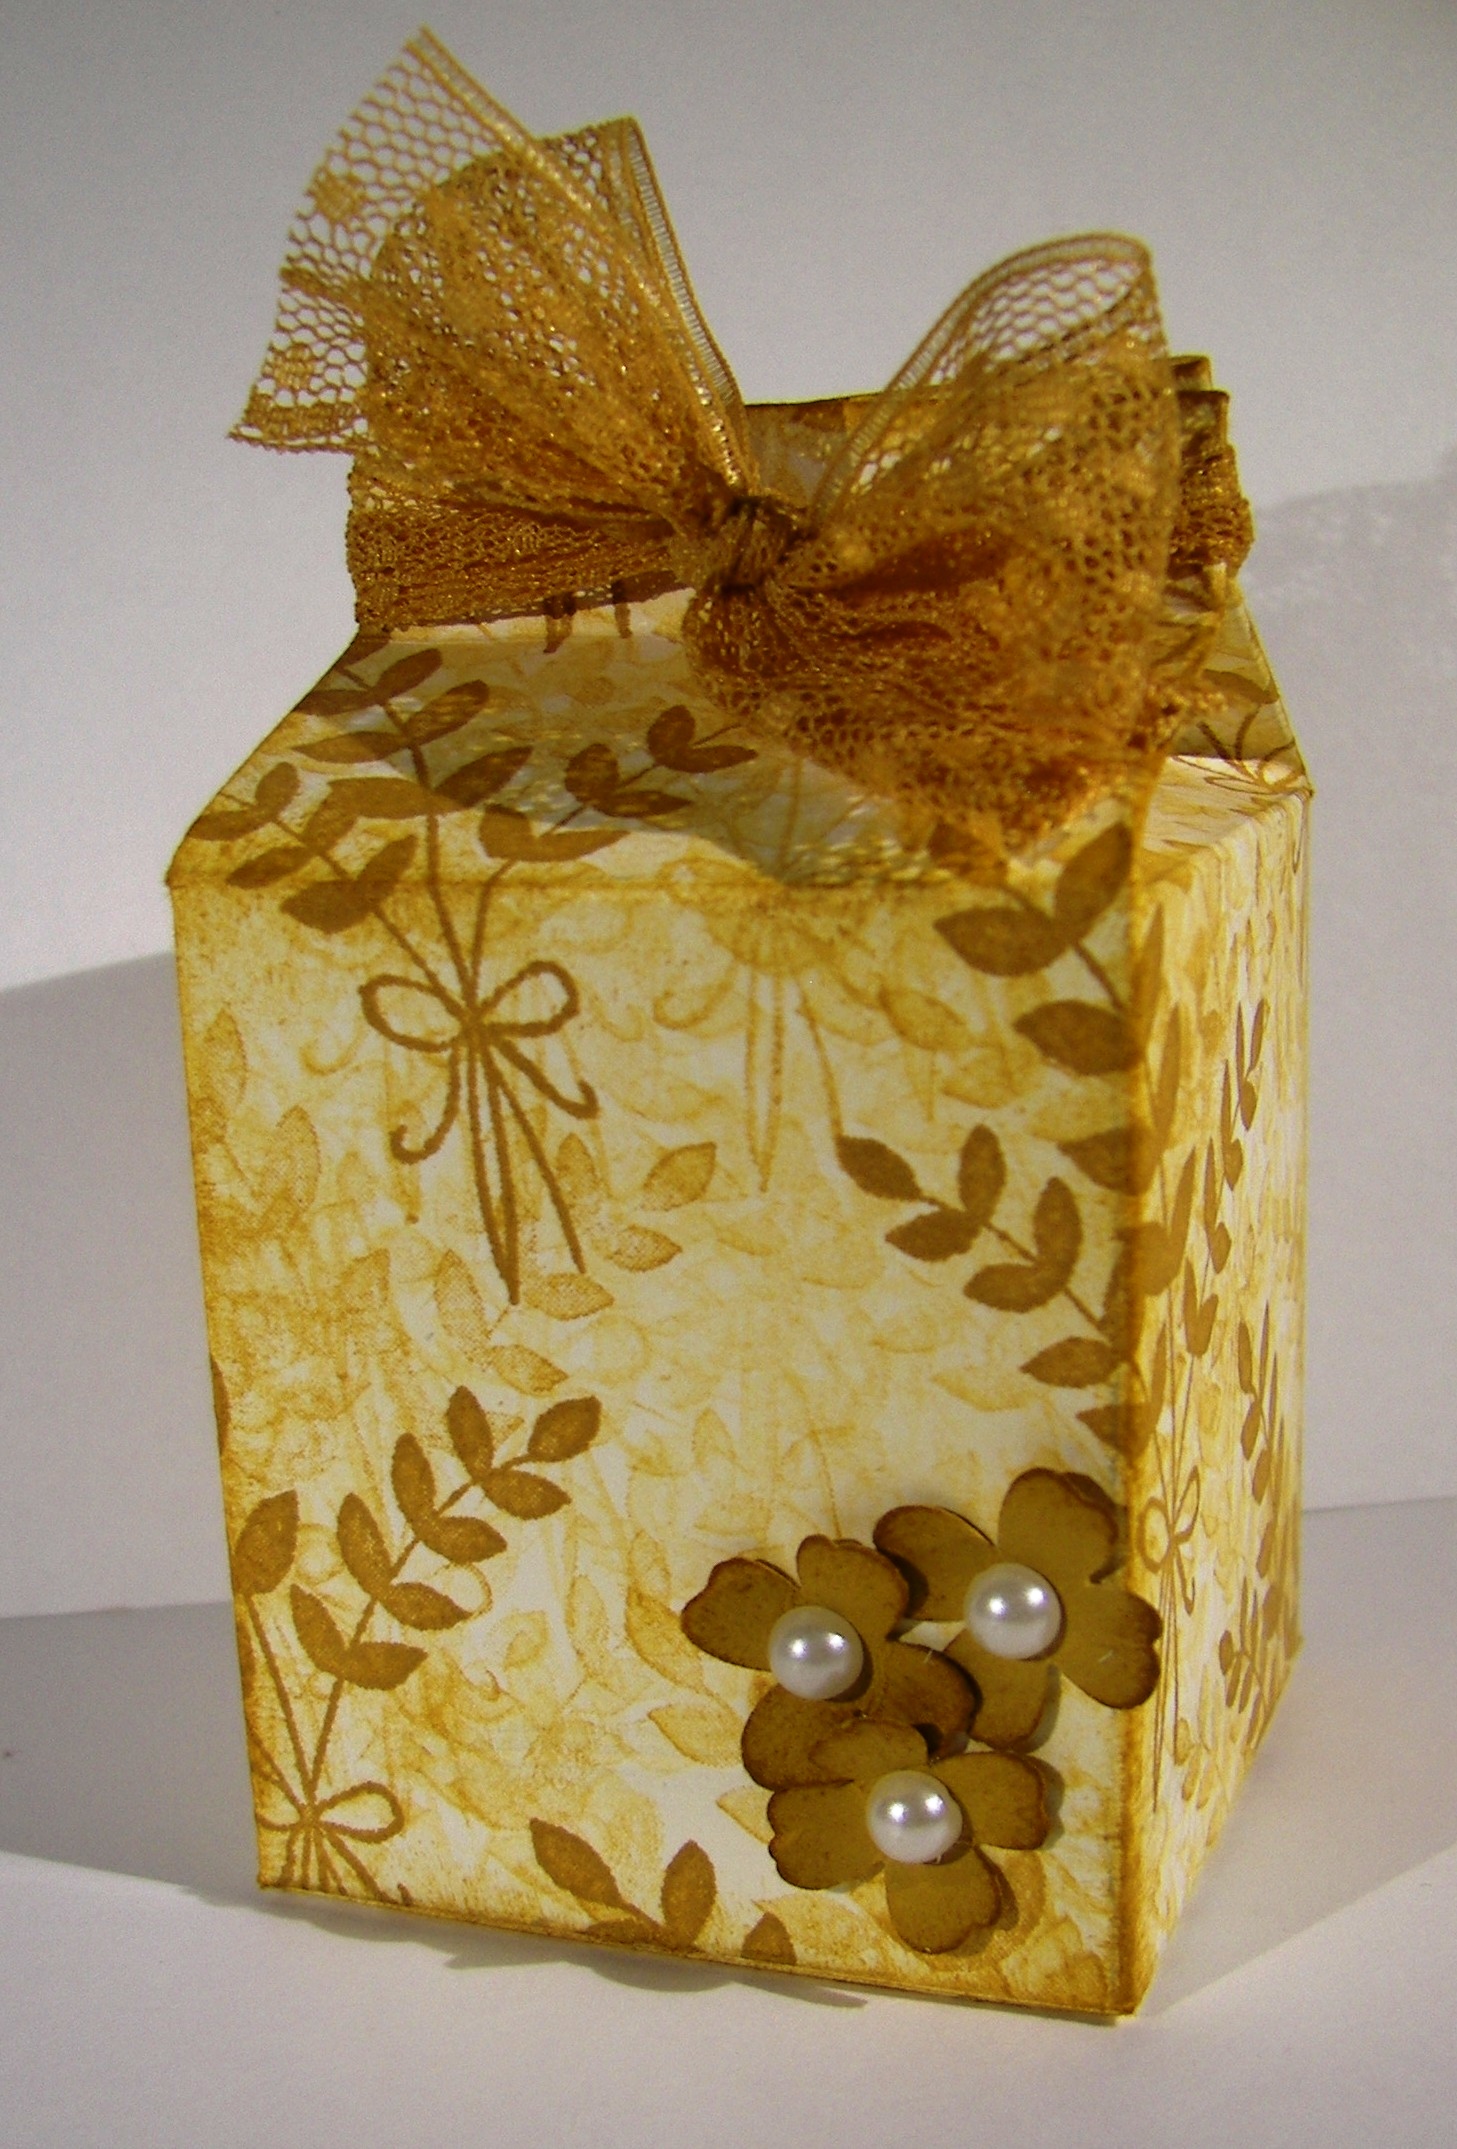
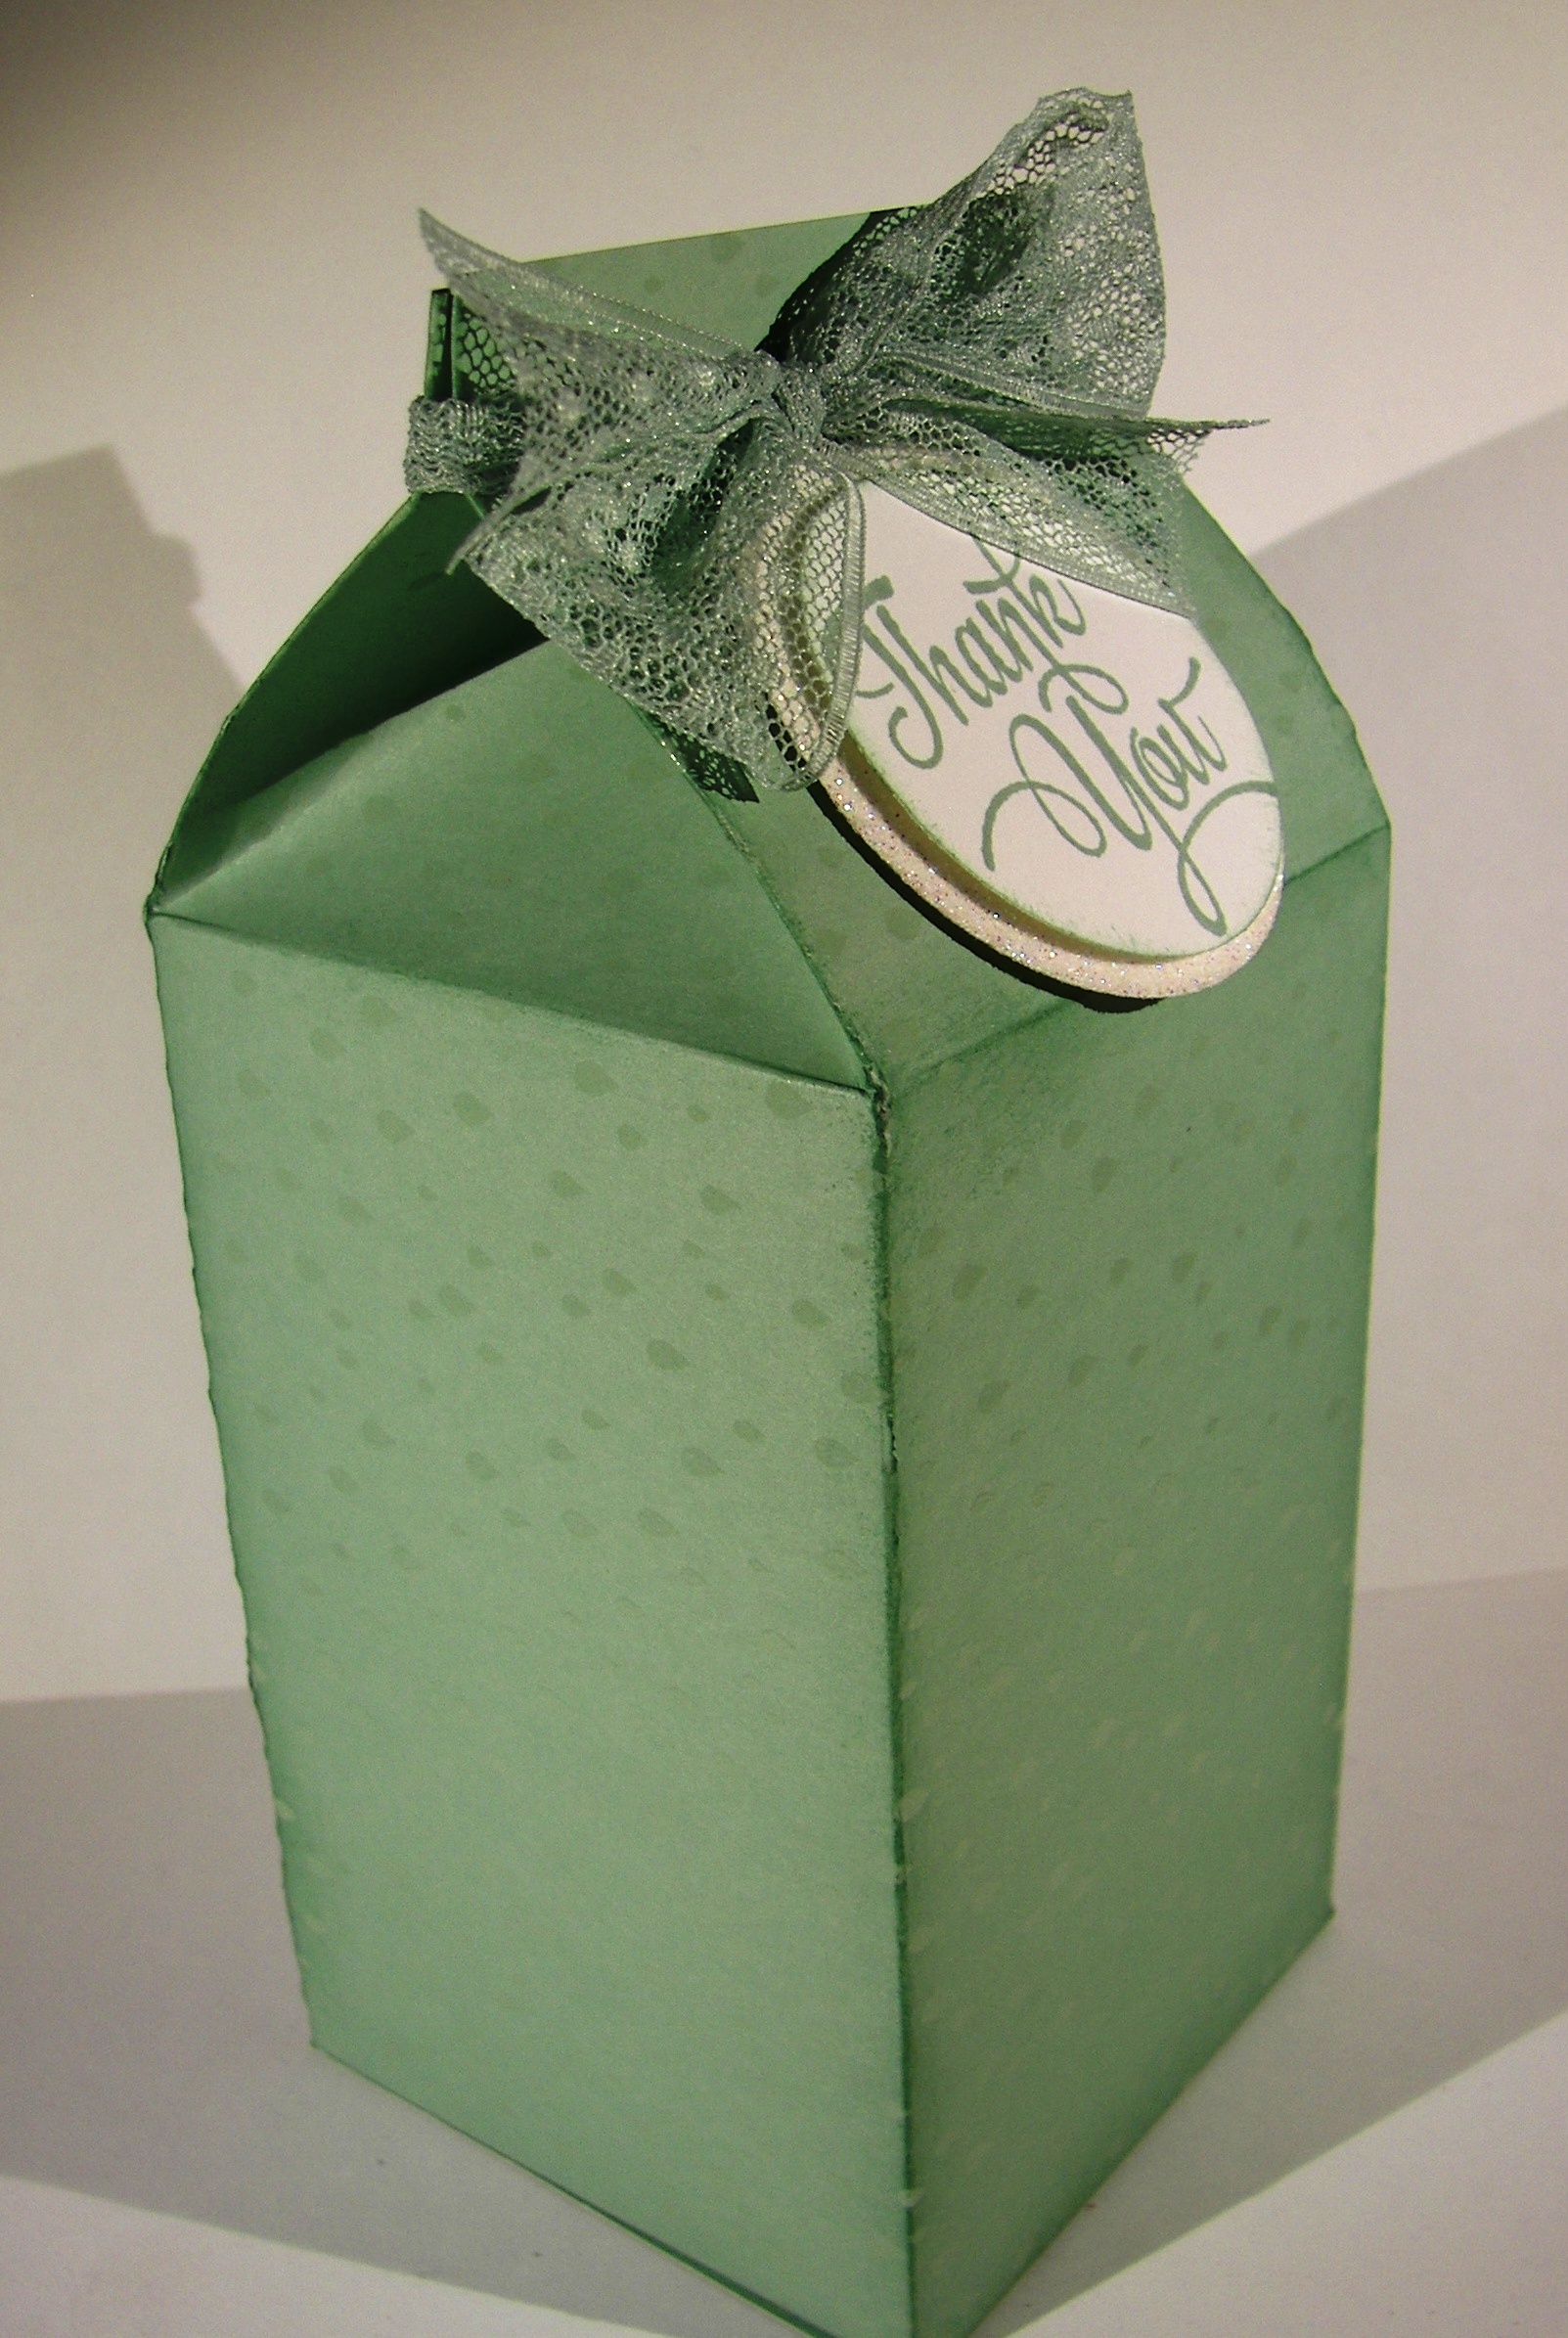
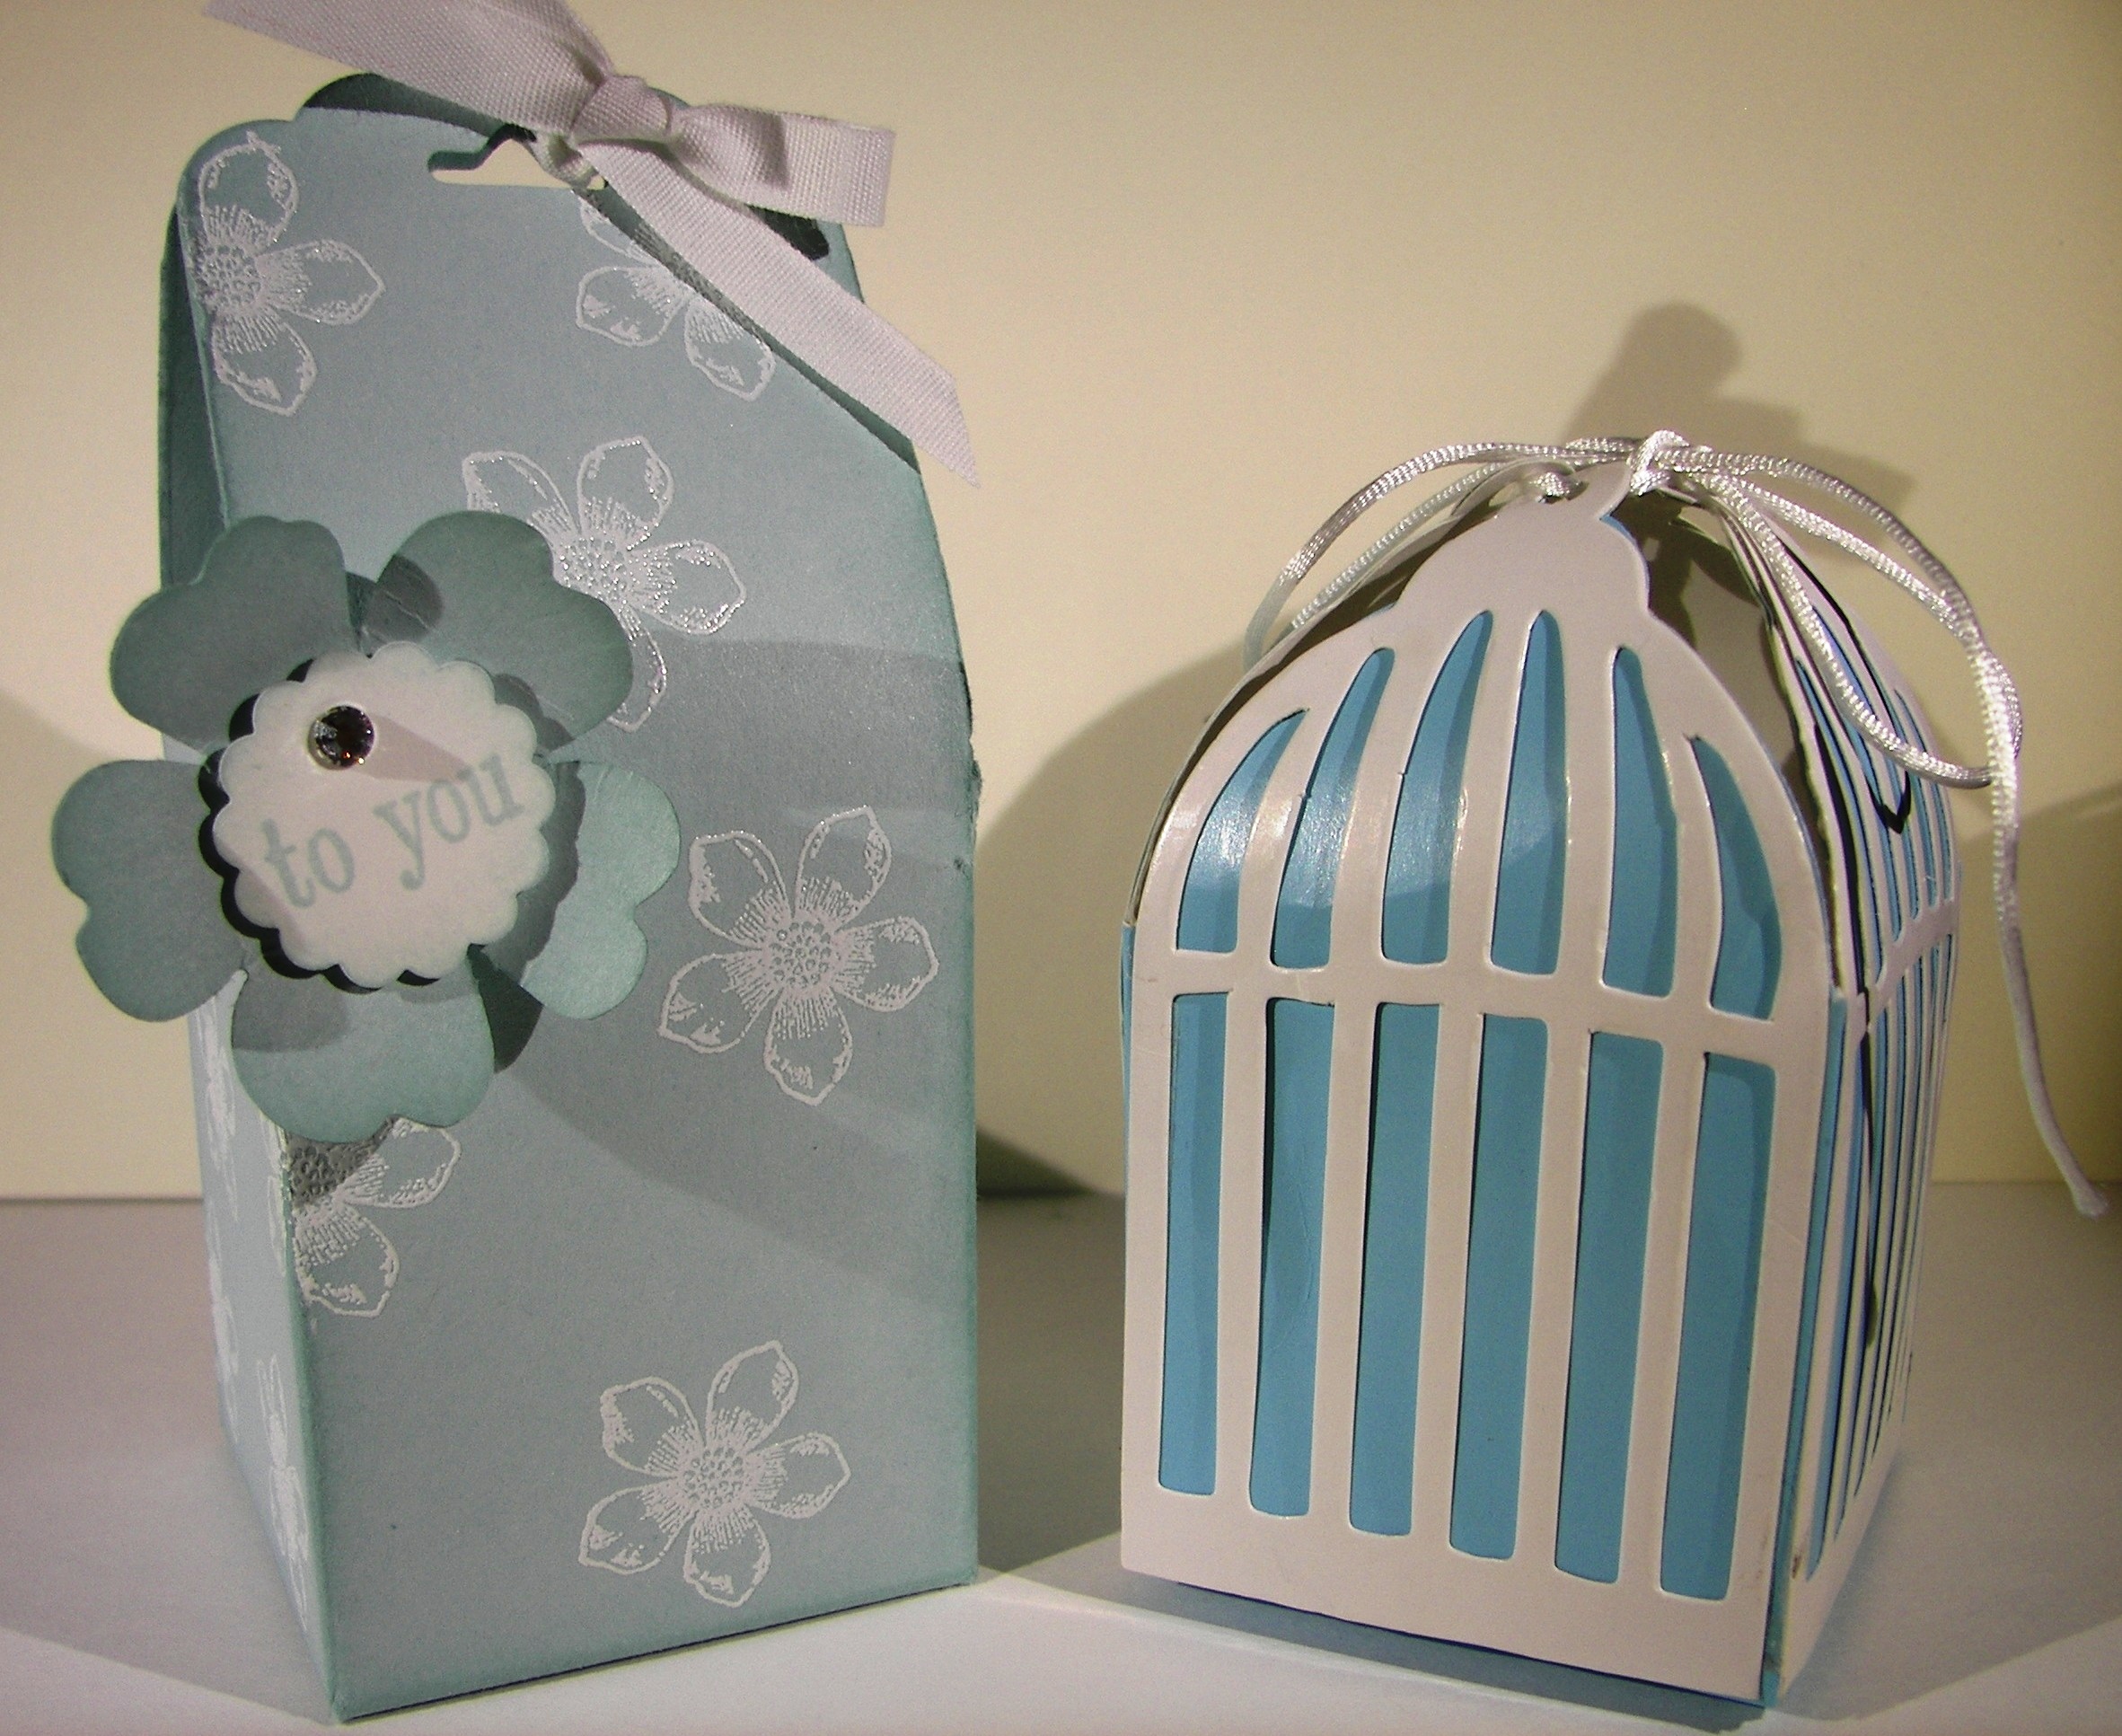
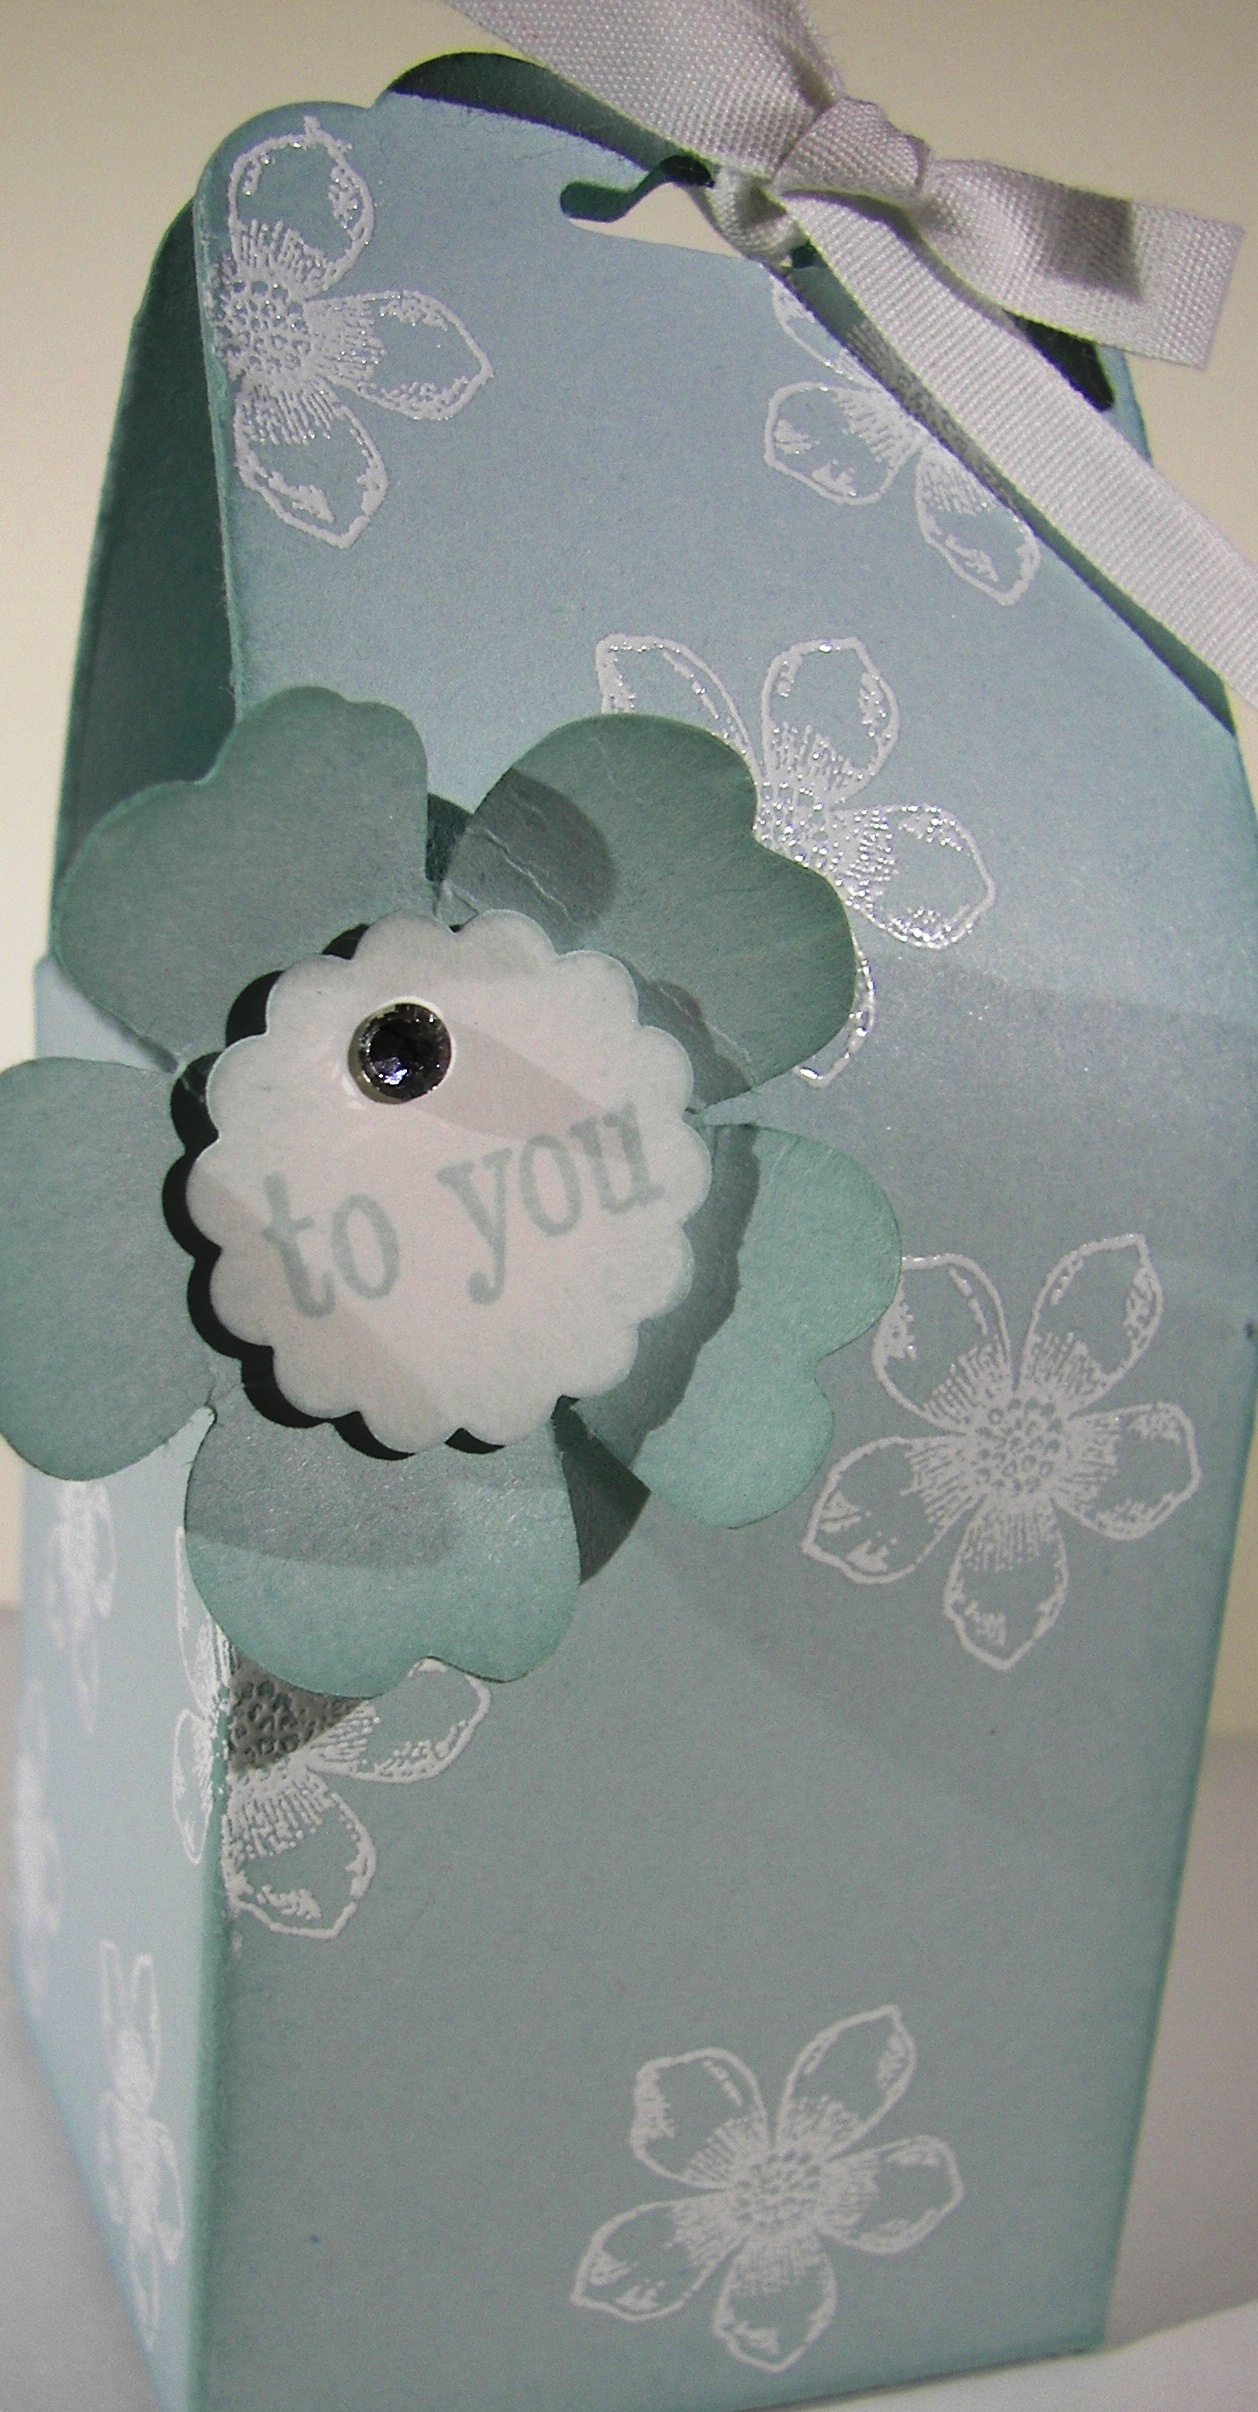
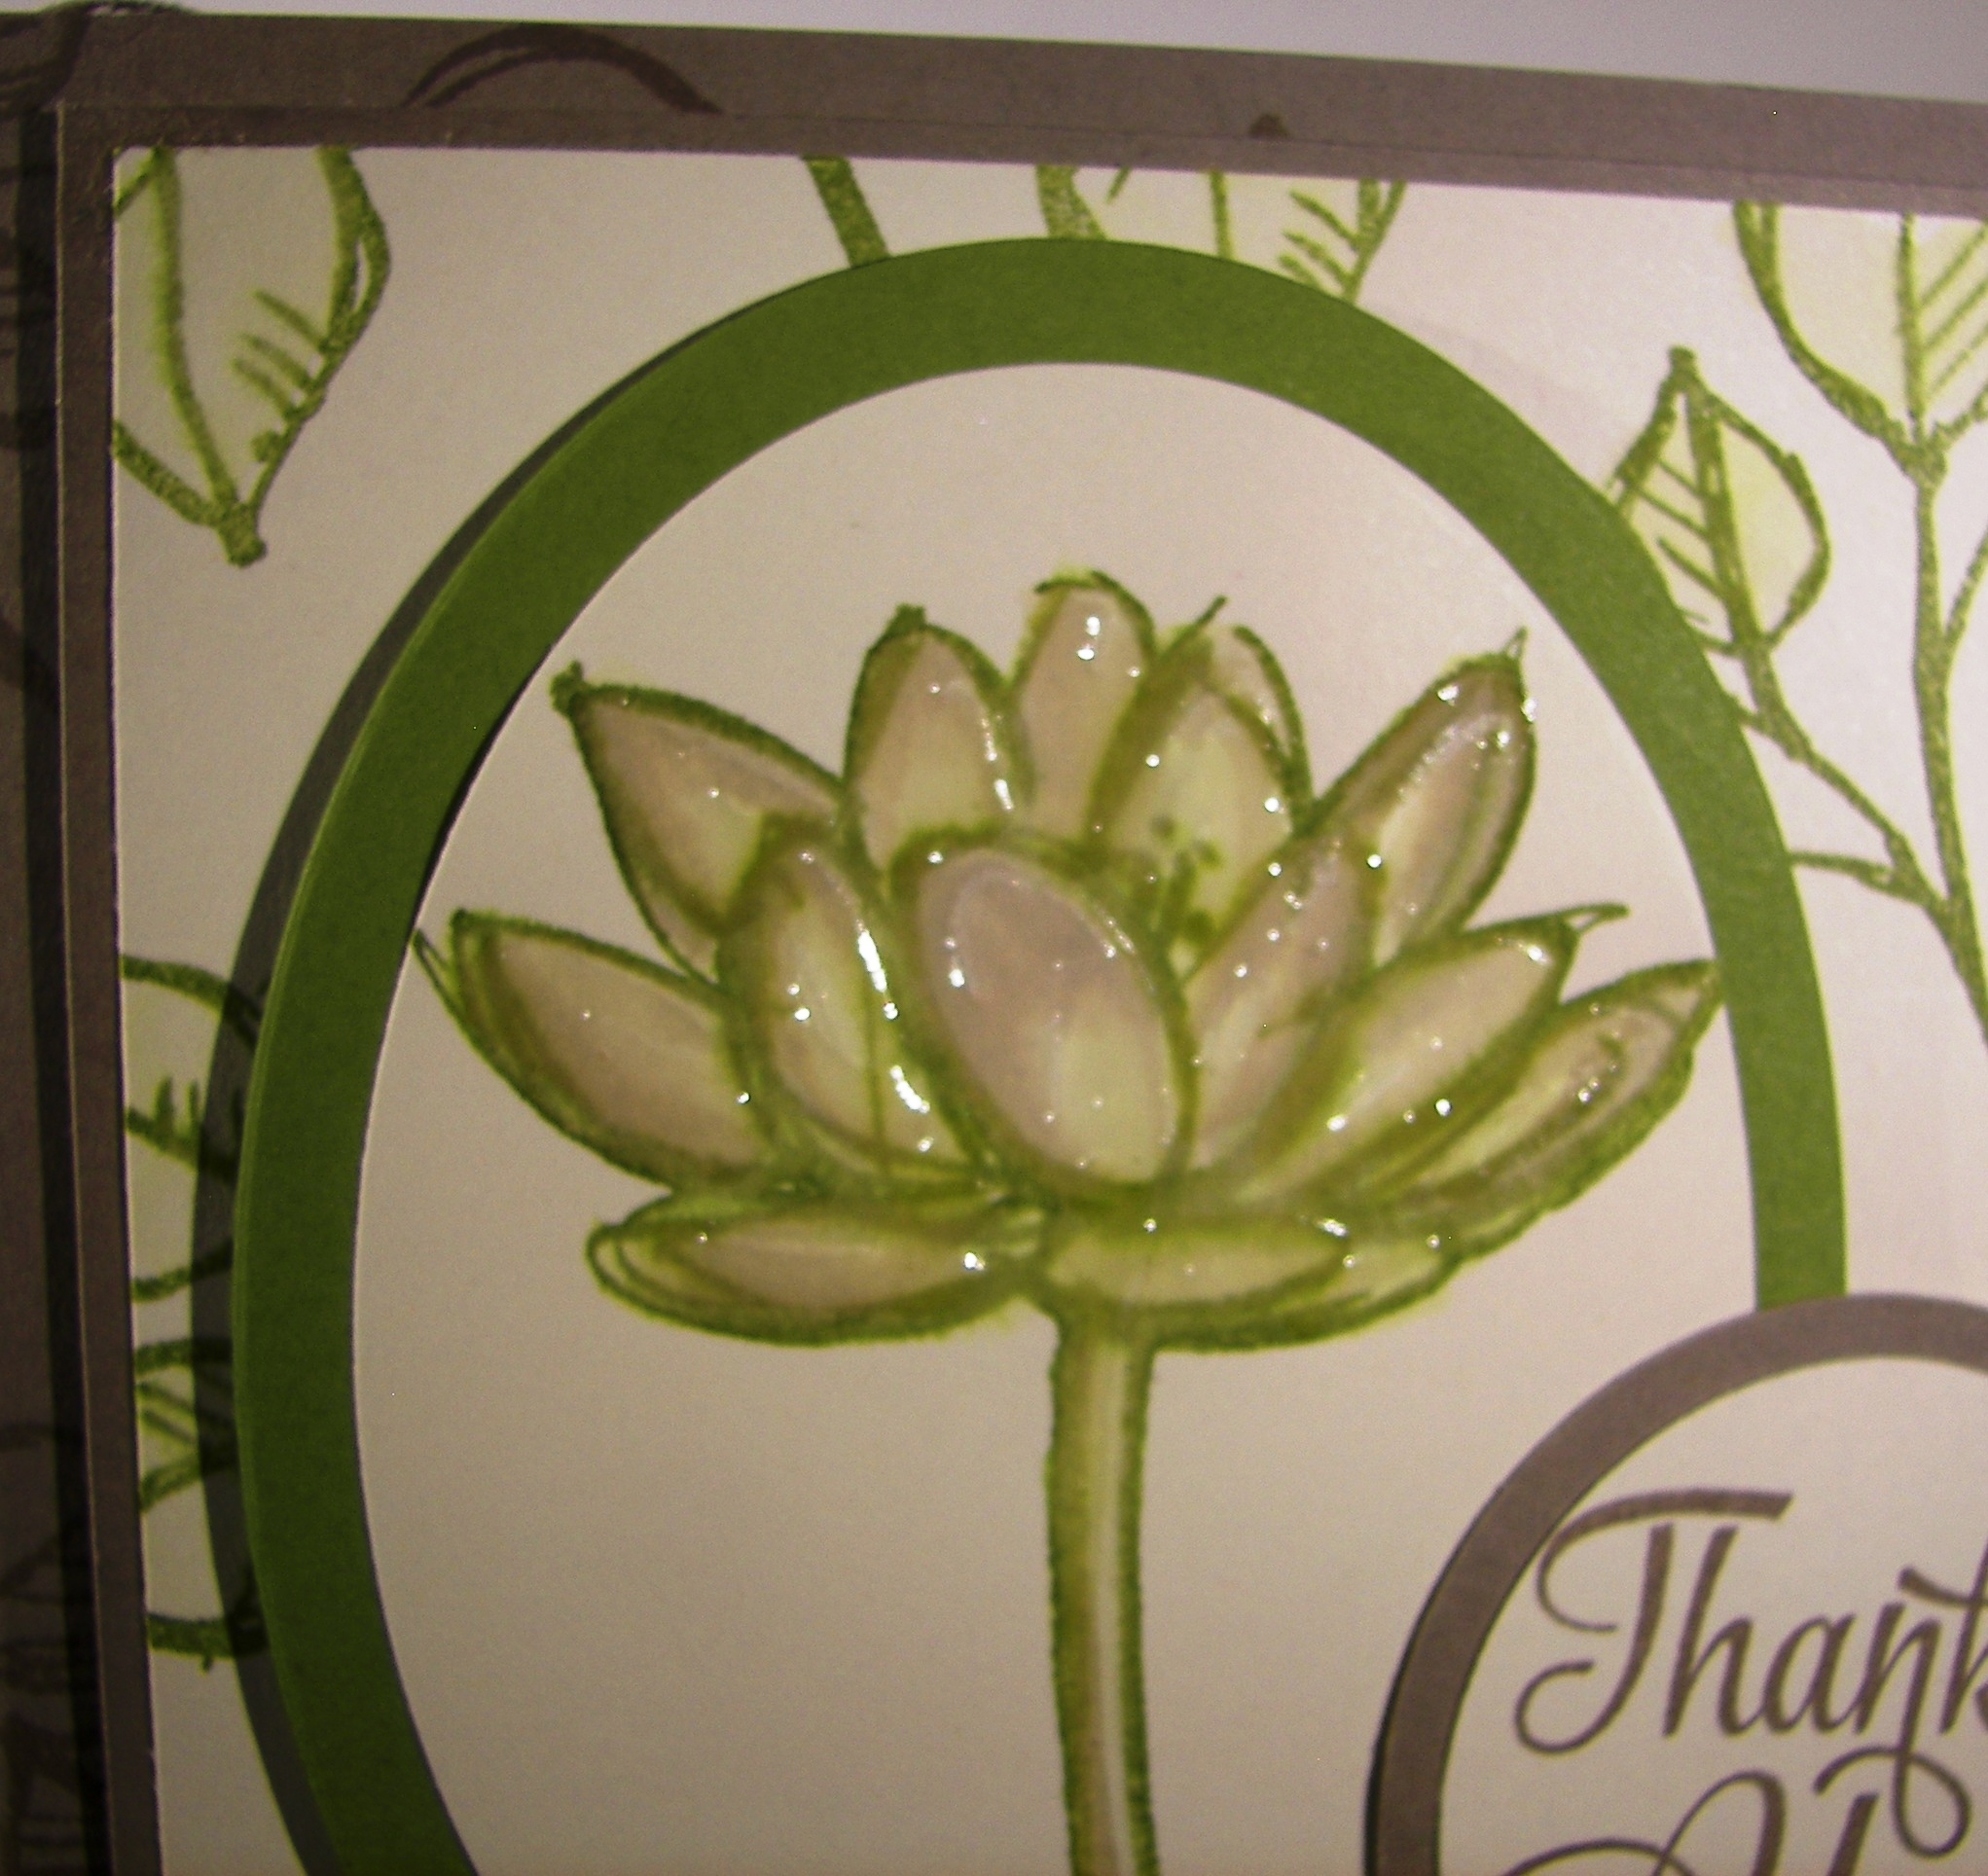
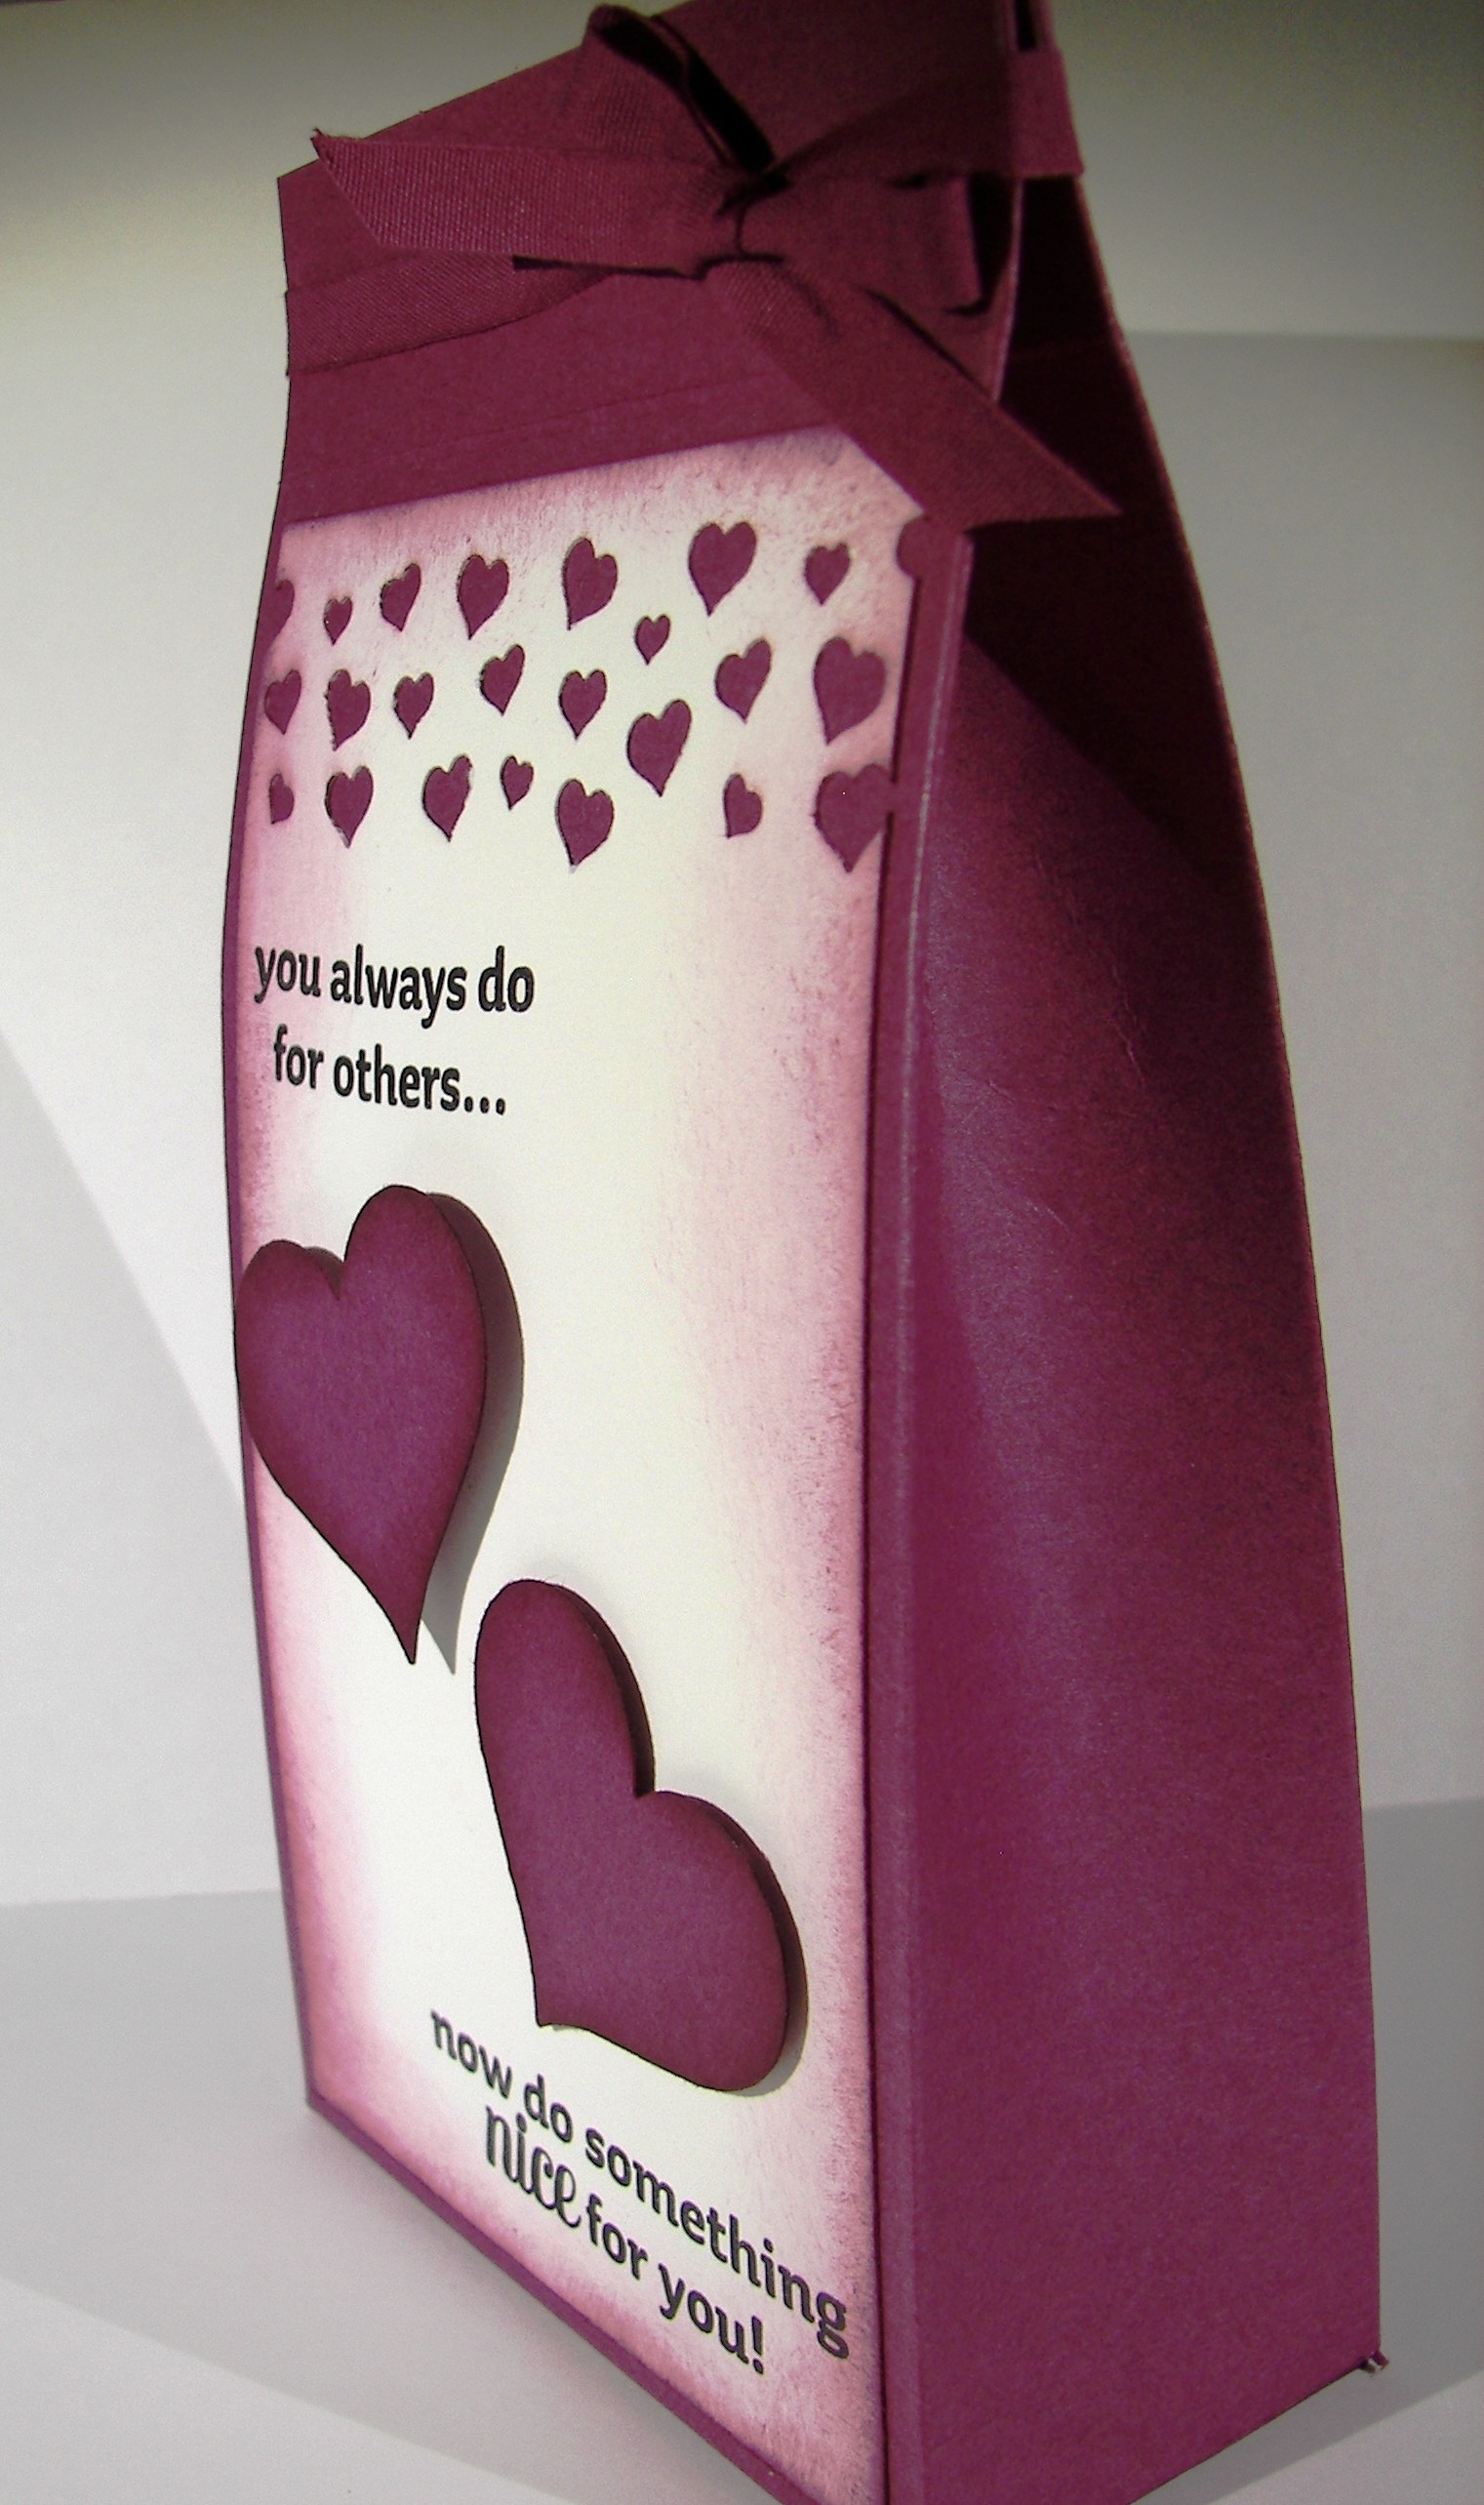
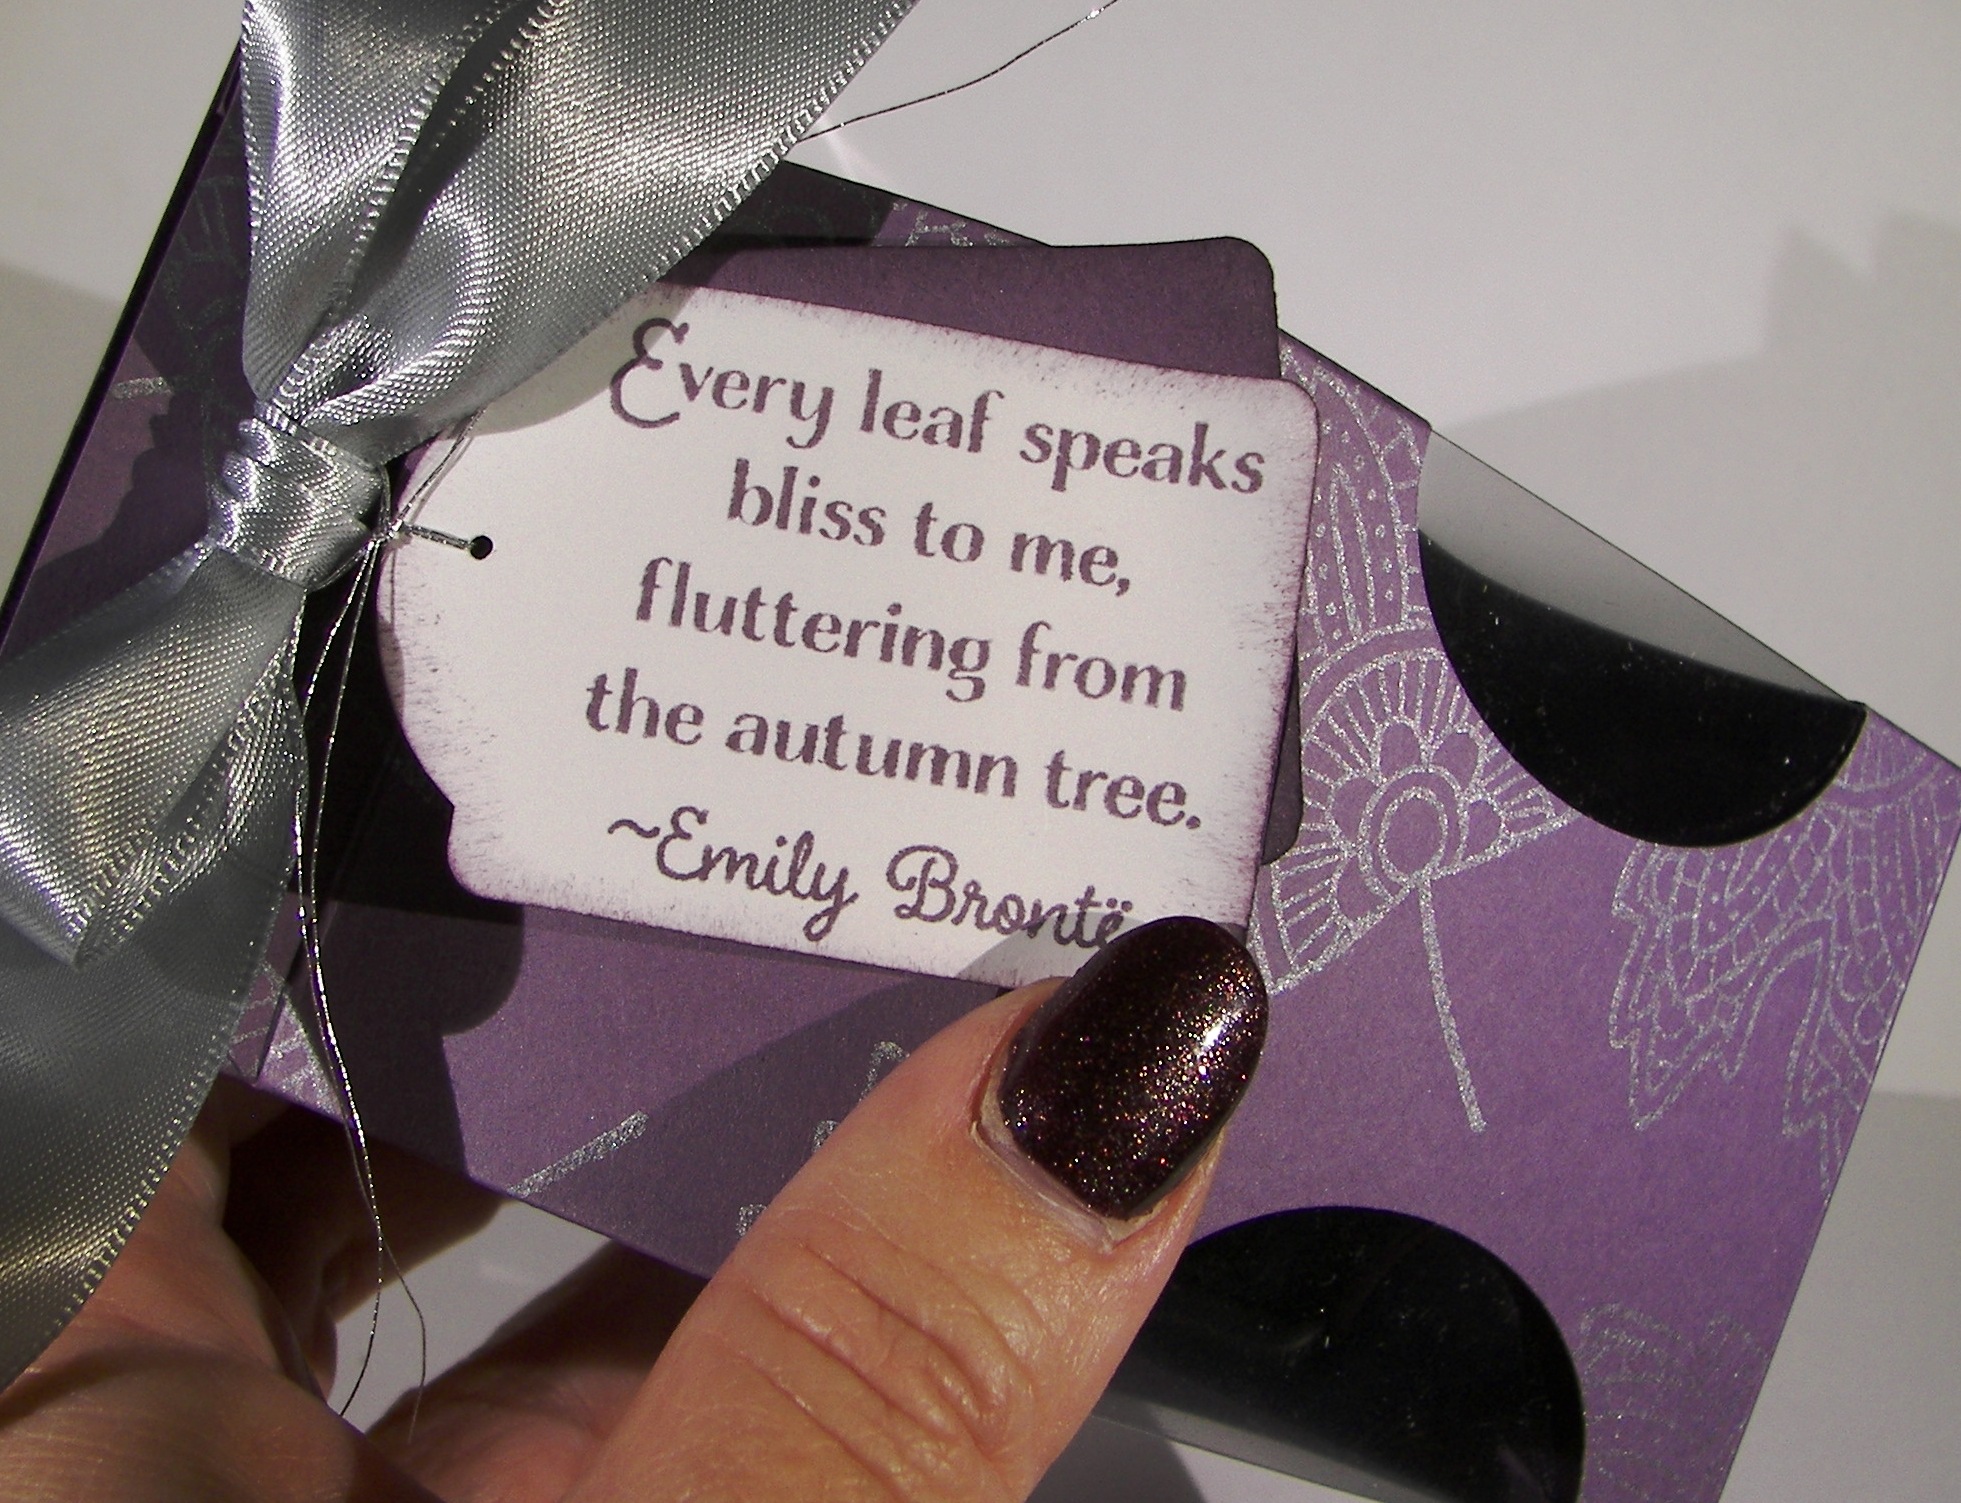
I had a bag of Lindt truffles on my counter and loved how the bag looked.  I thought that it would be fun to try to make a bag that could hold treats and look elegant too.  I asked my husband for a color choice, I grabbed a ribbon and matching ink and went to work.  Of course I had to use my current favorite stamp set, Lighthearted Leaves.

Lighthearted Leaves Treat Carton

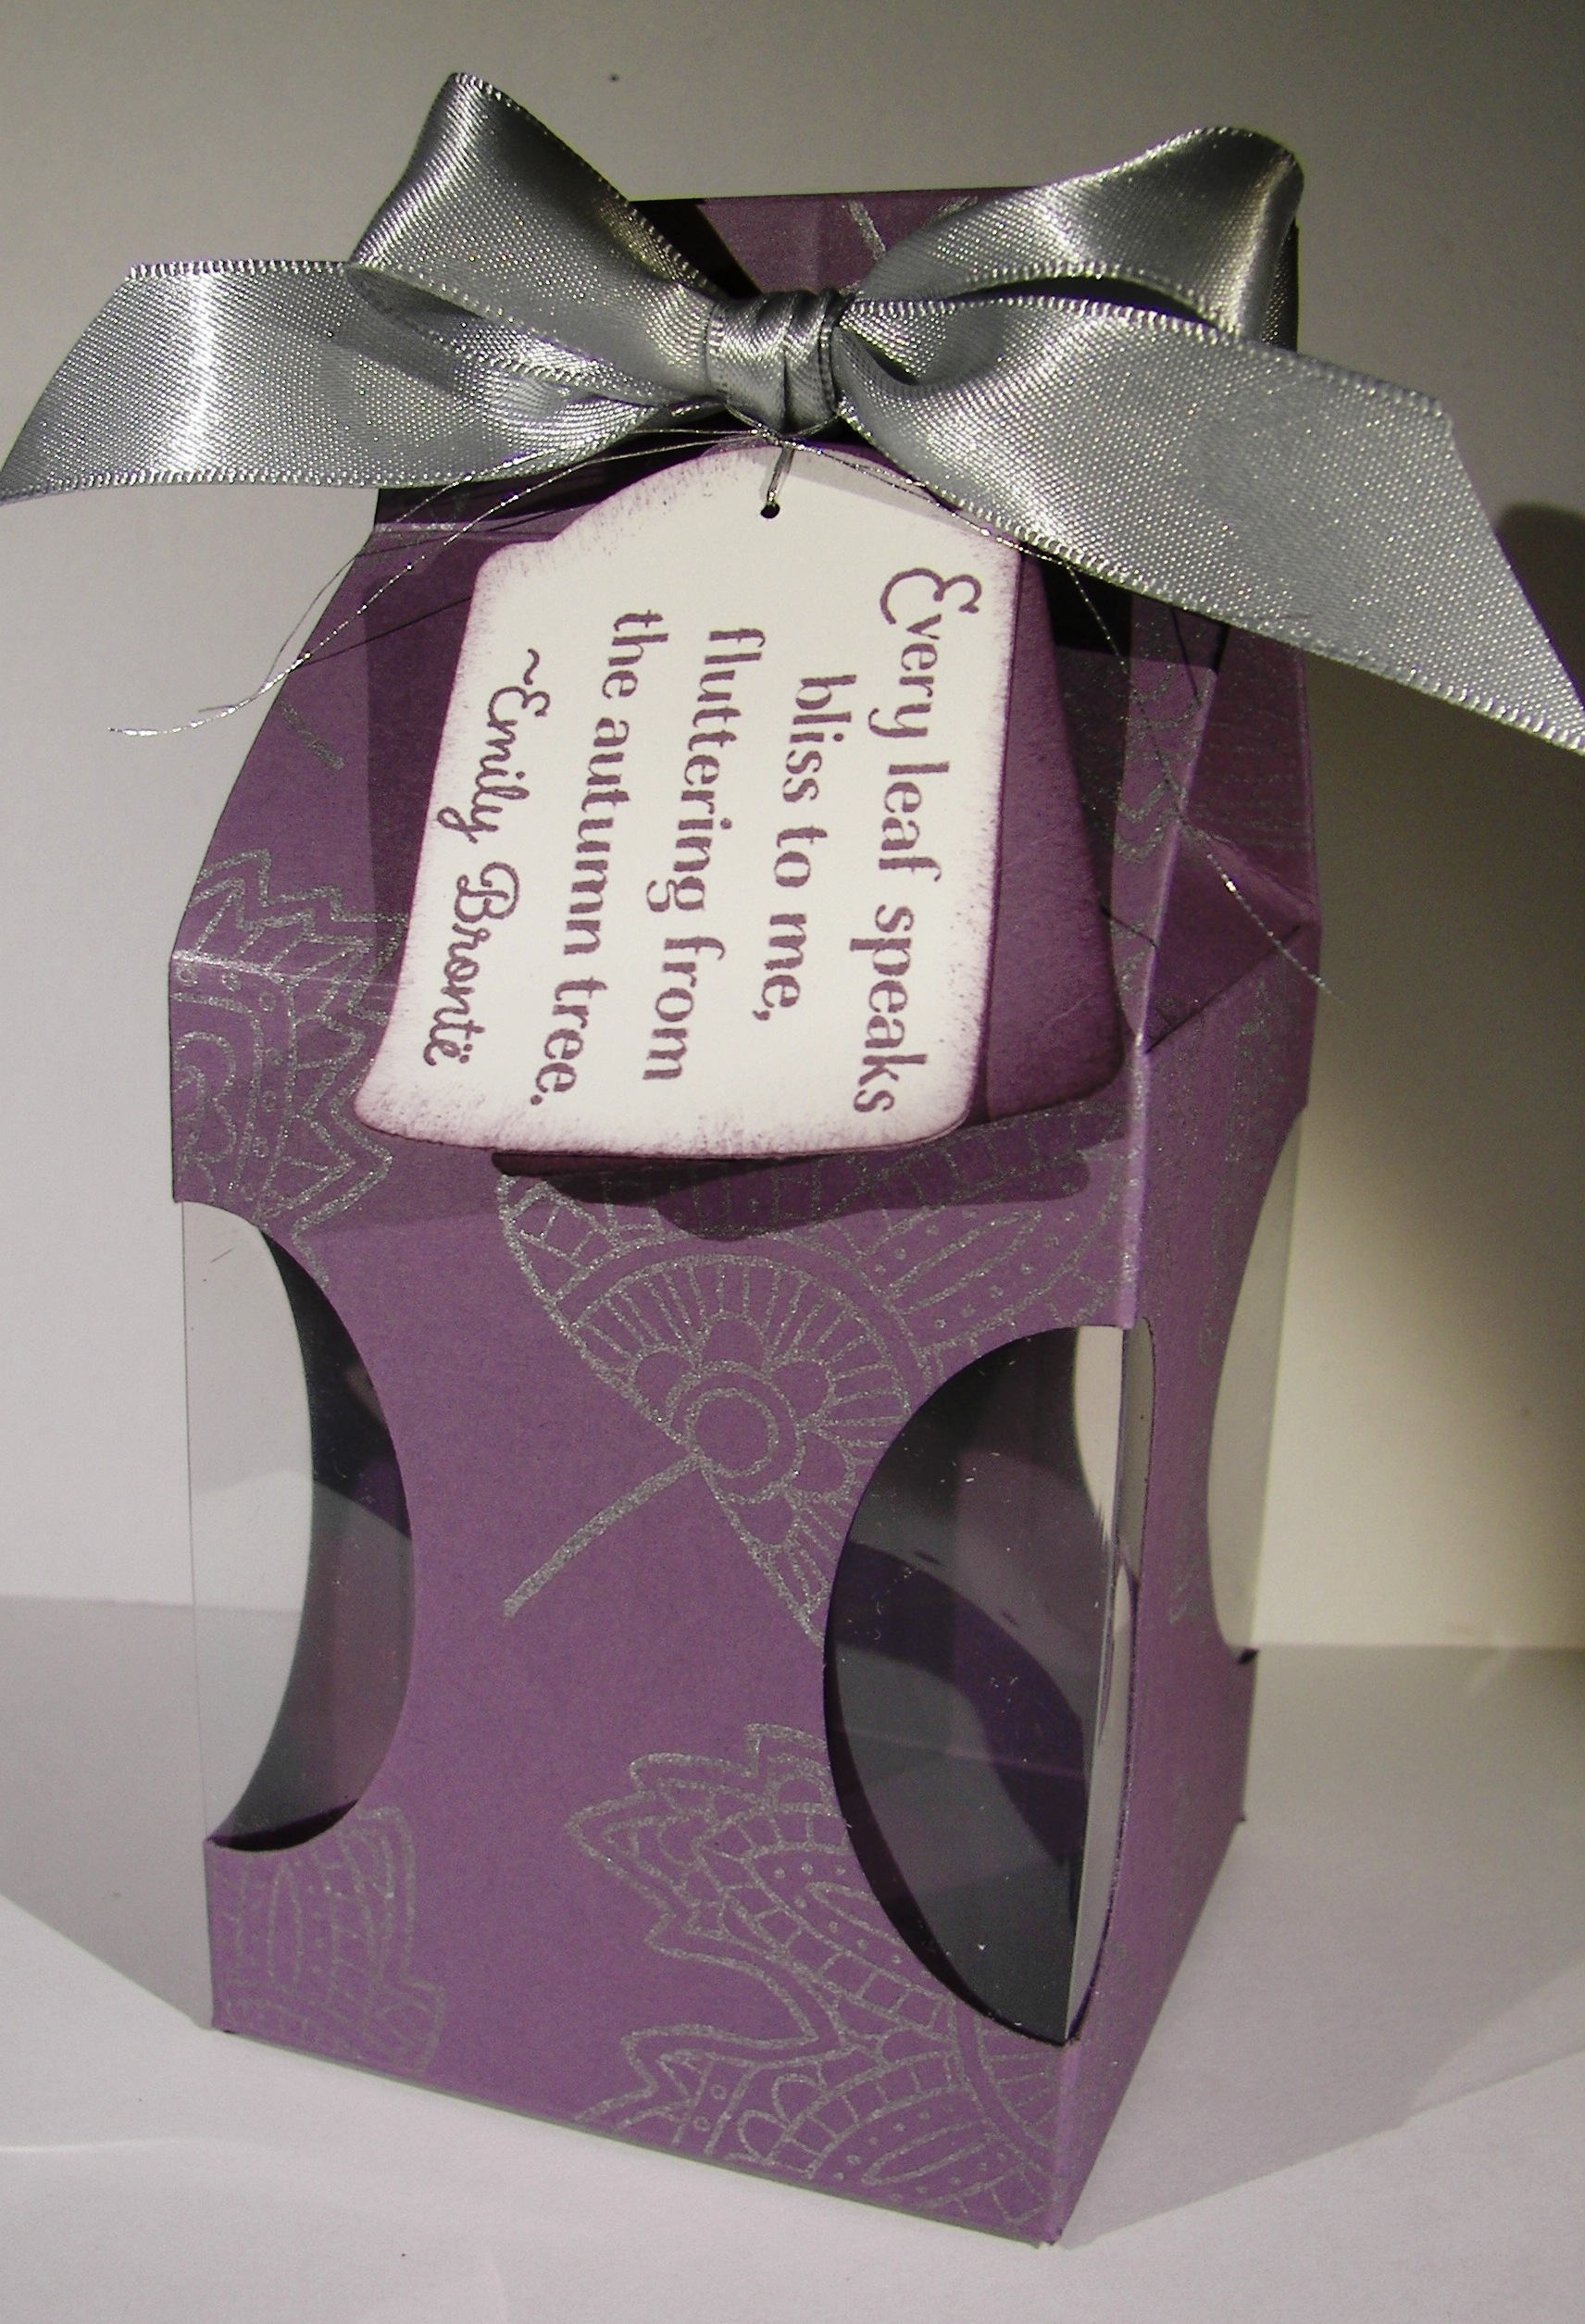
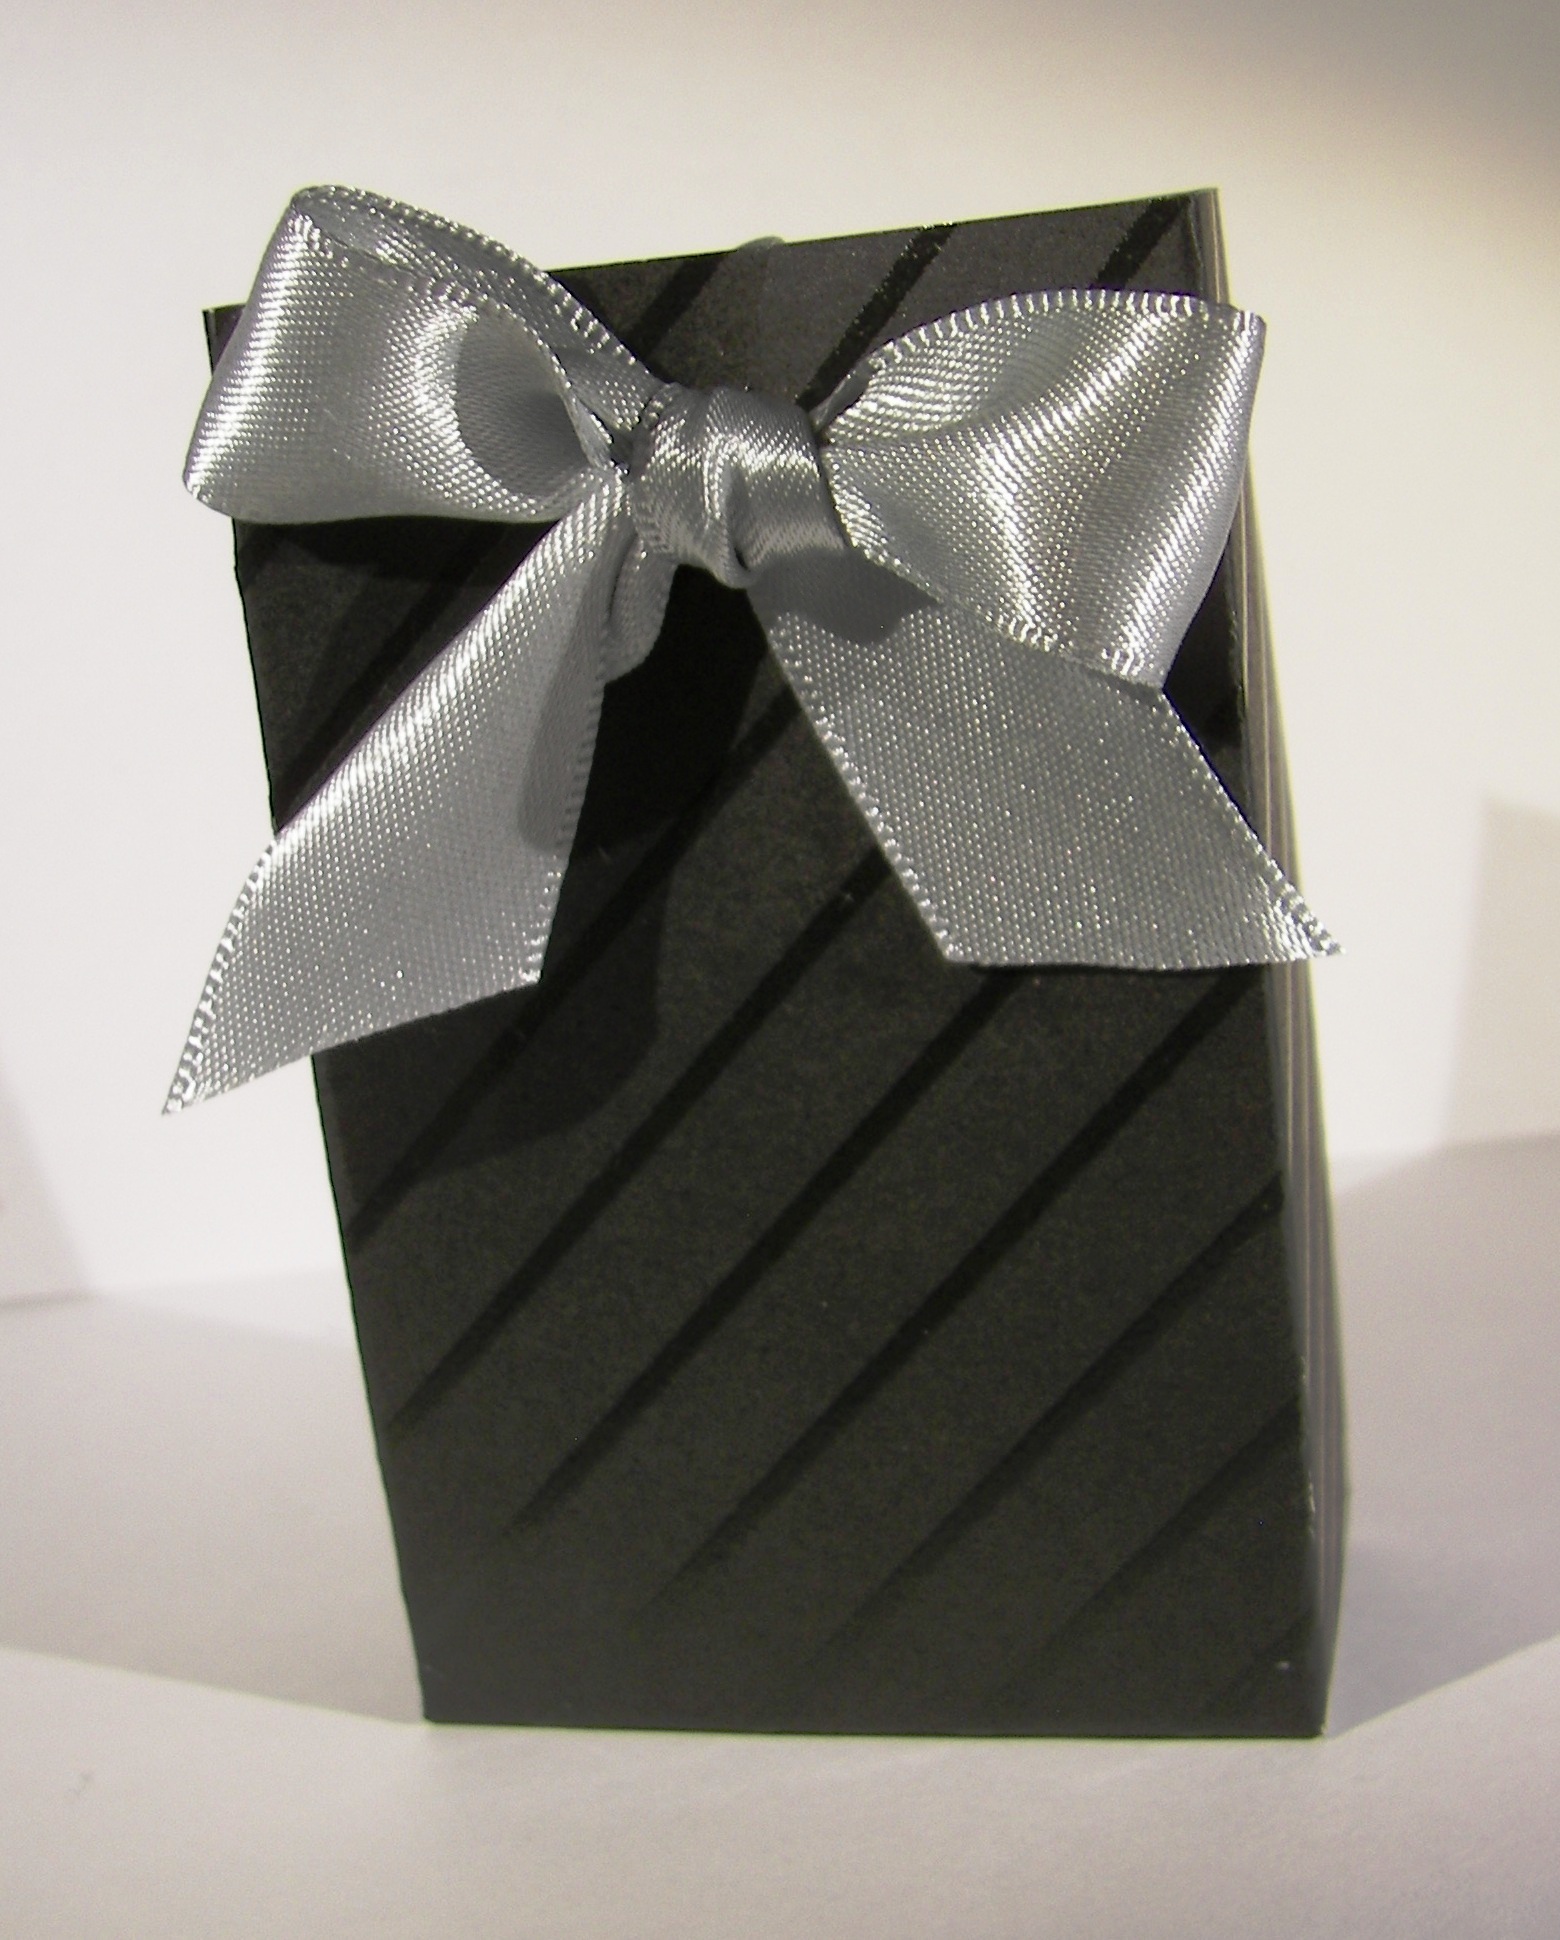
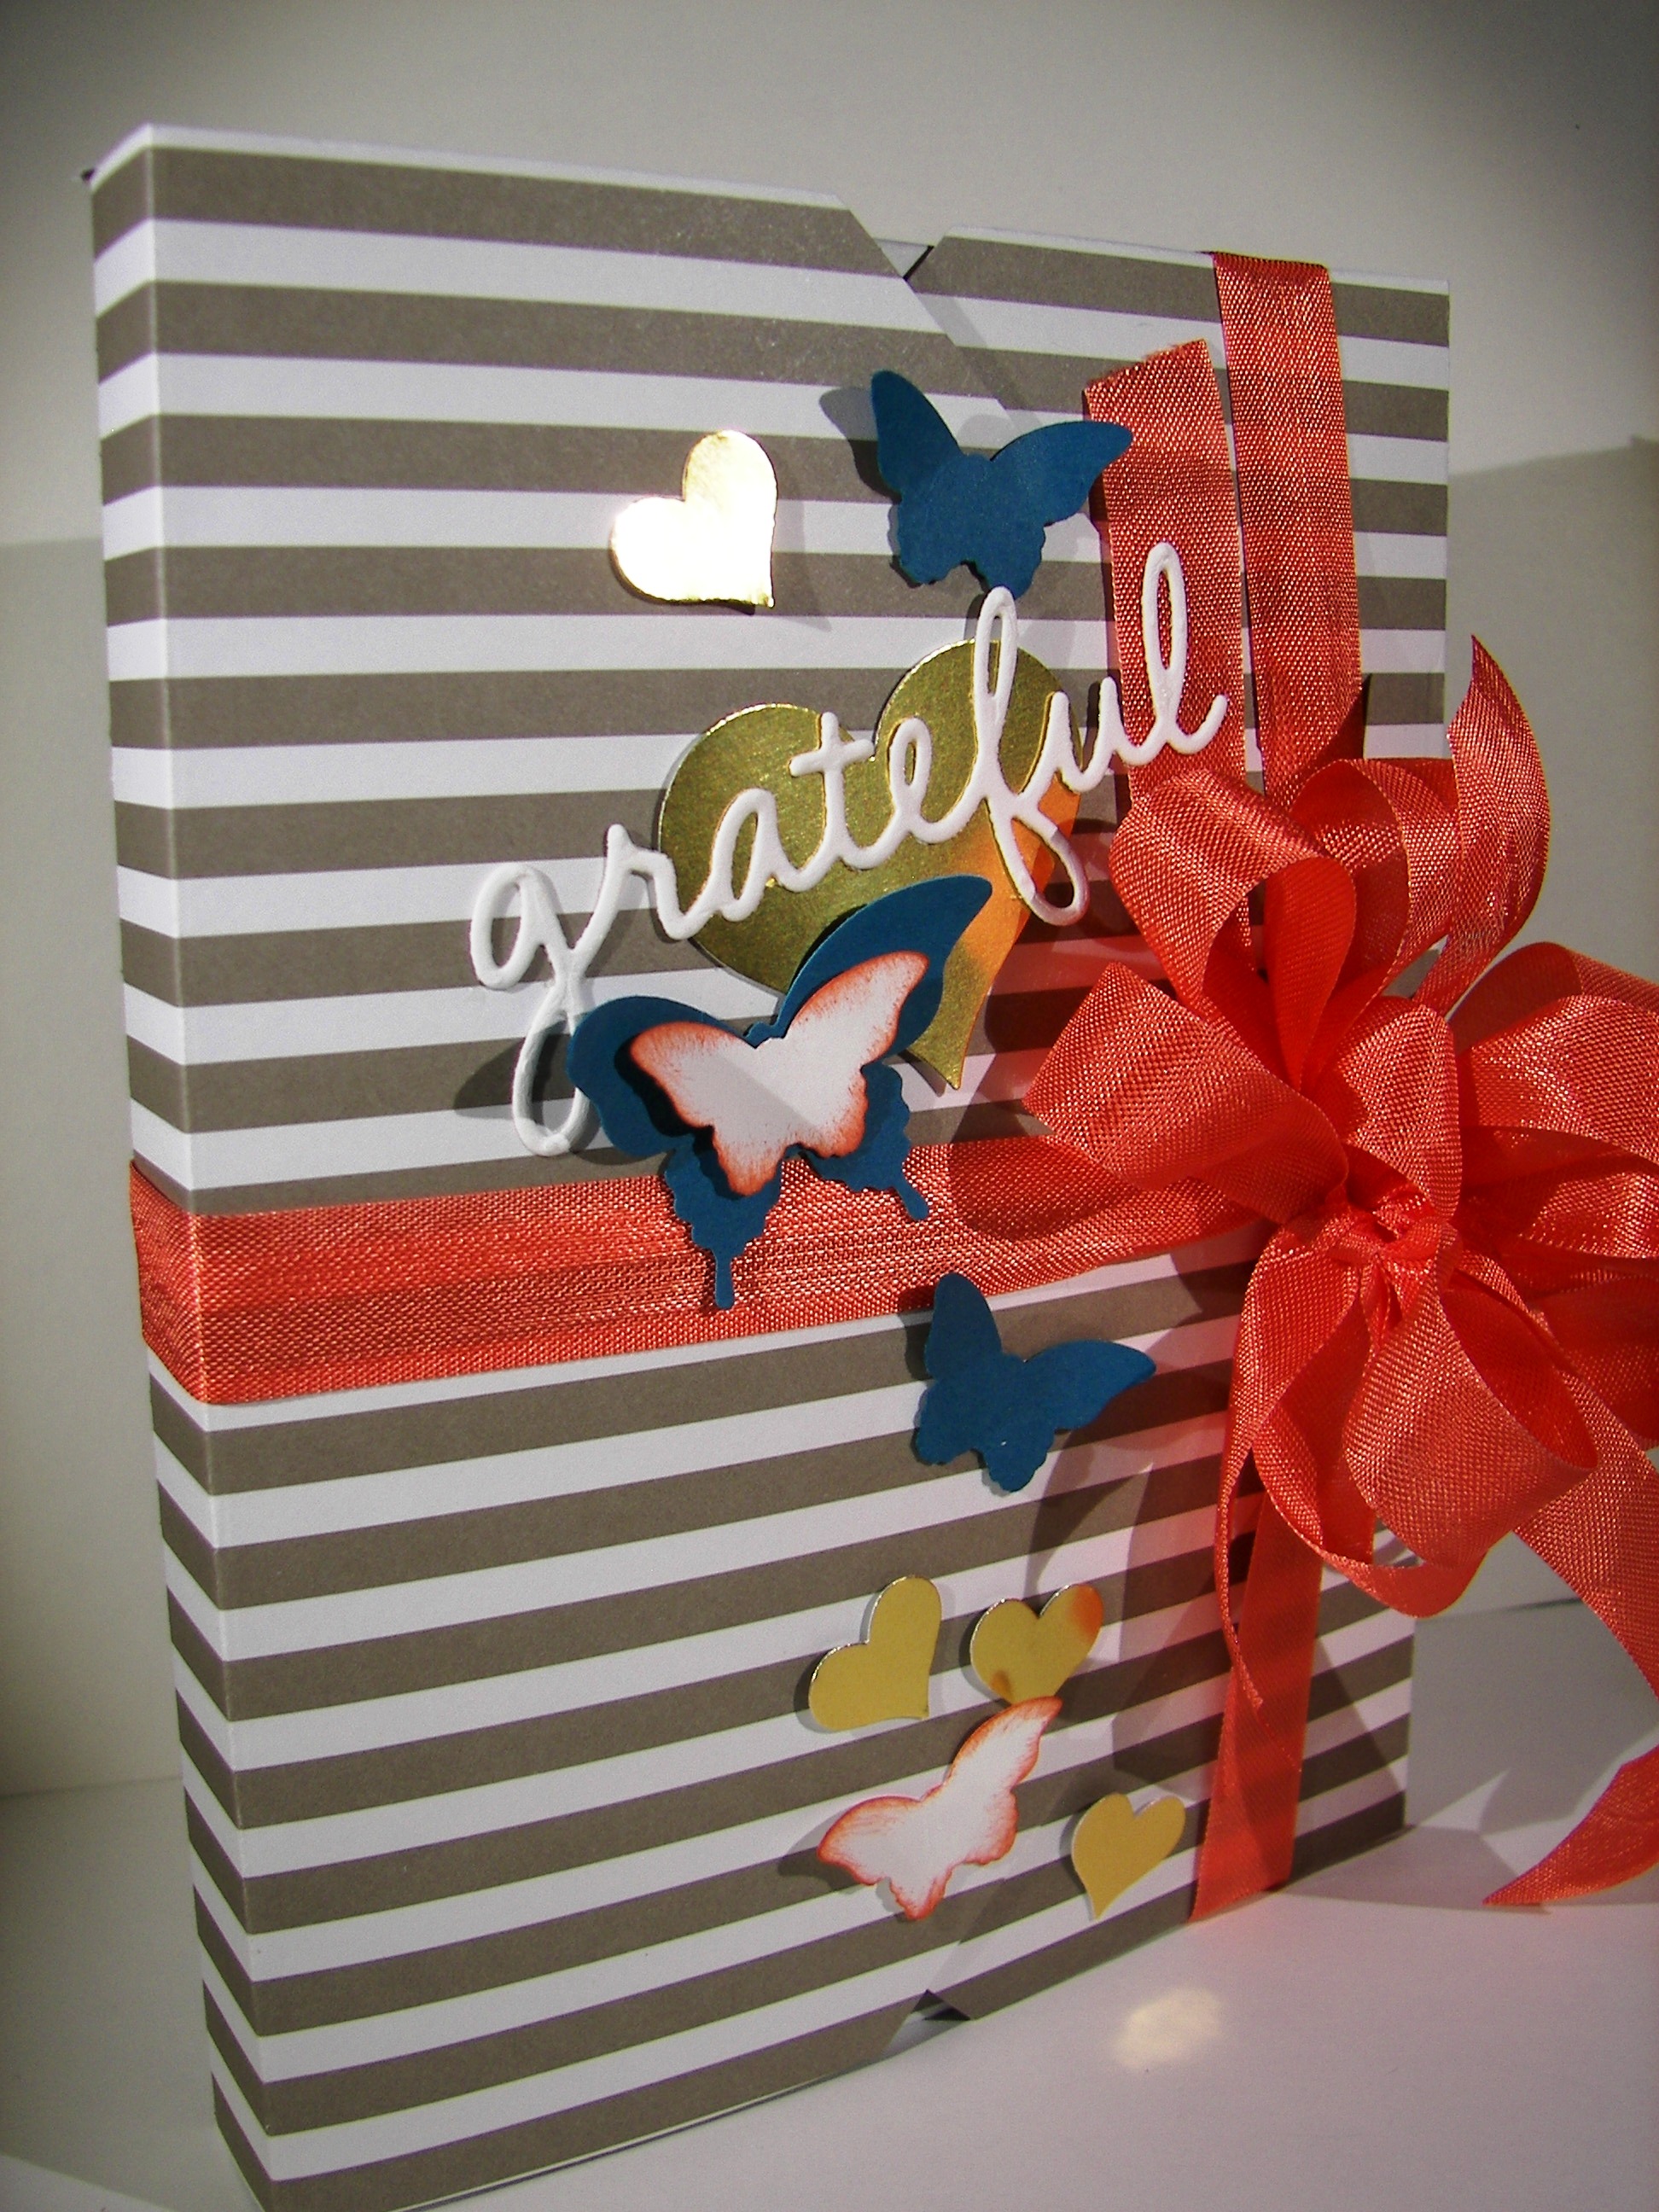
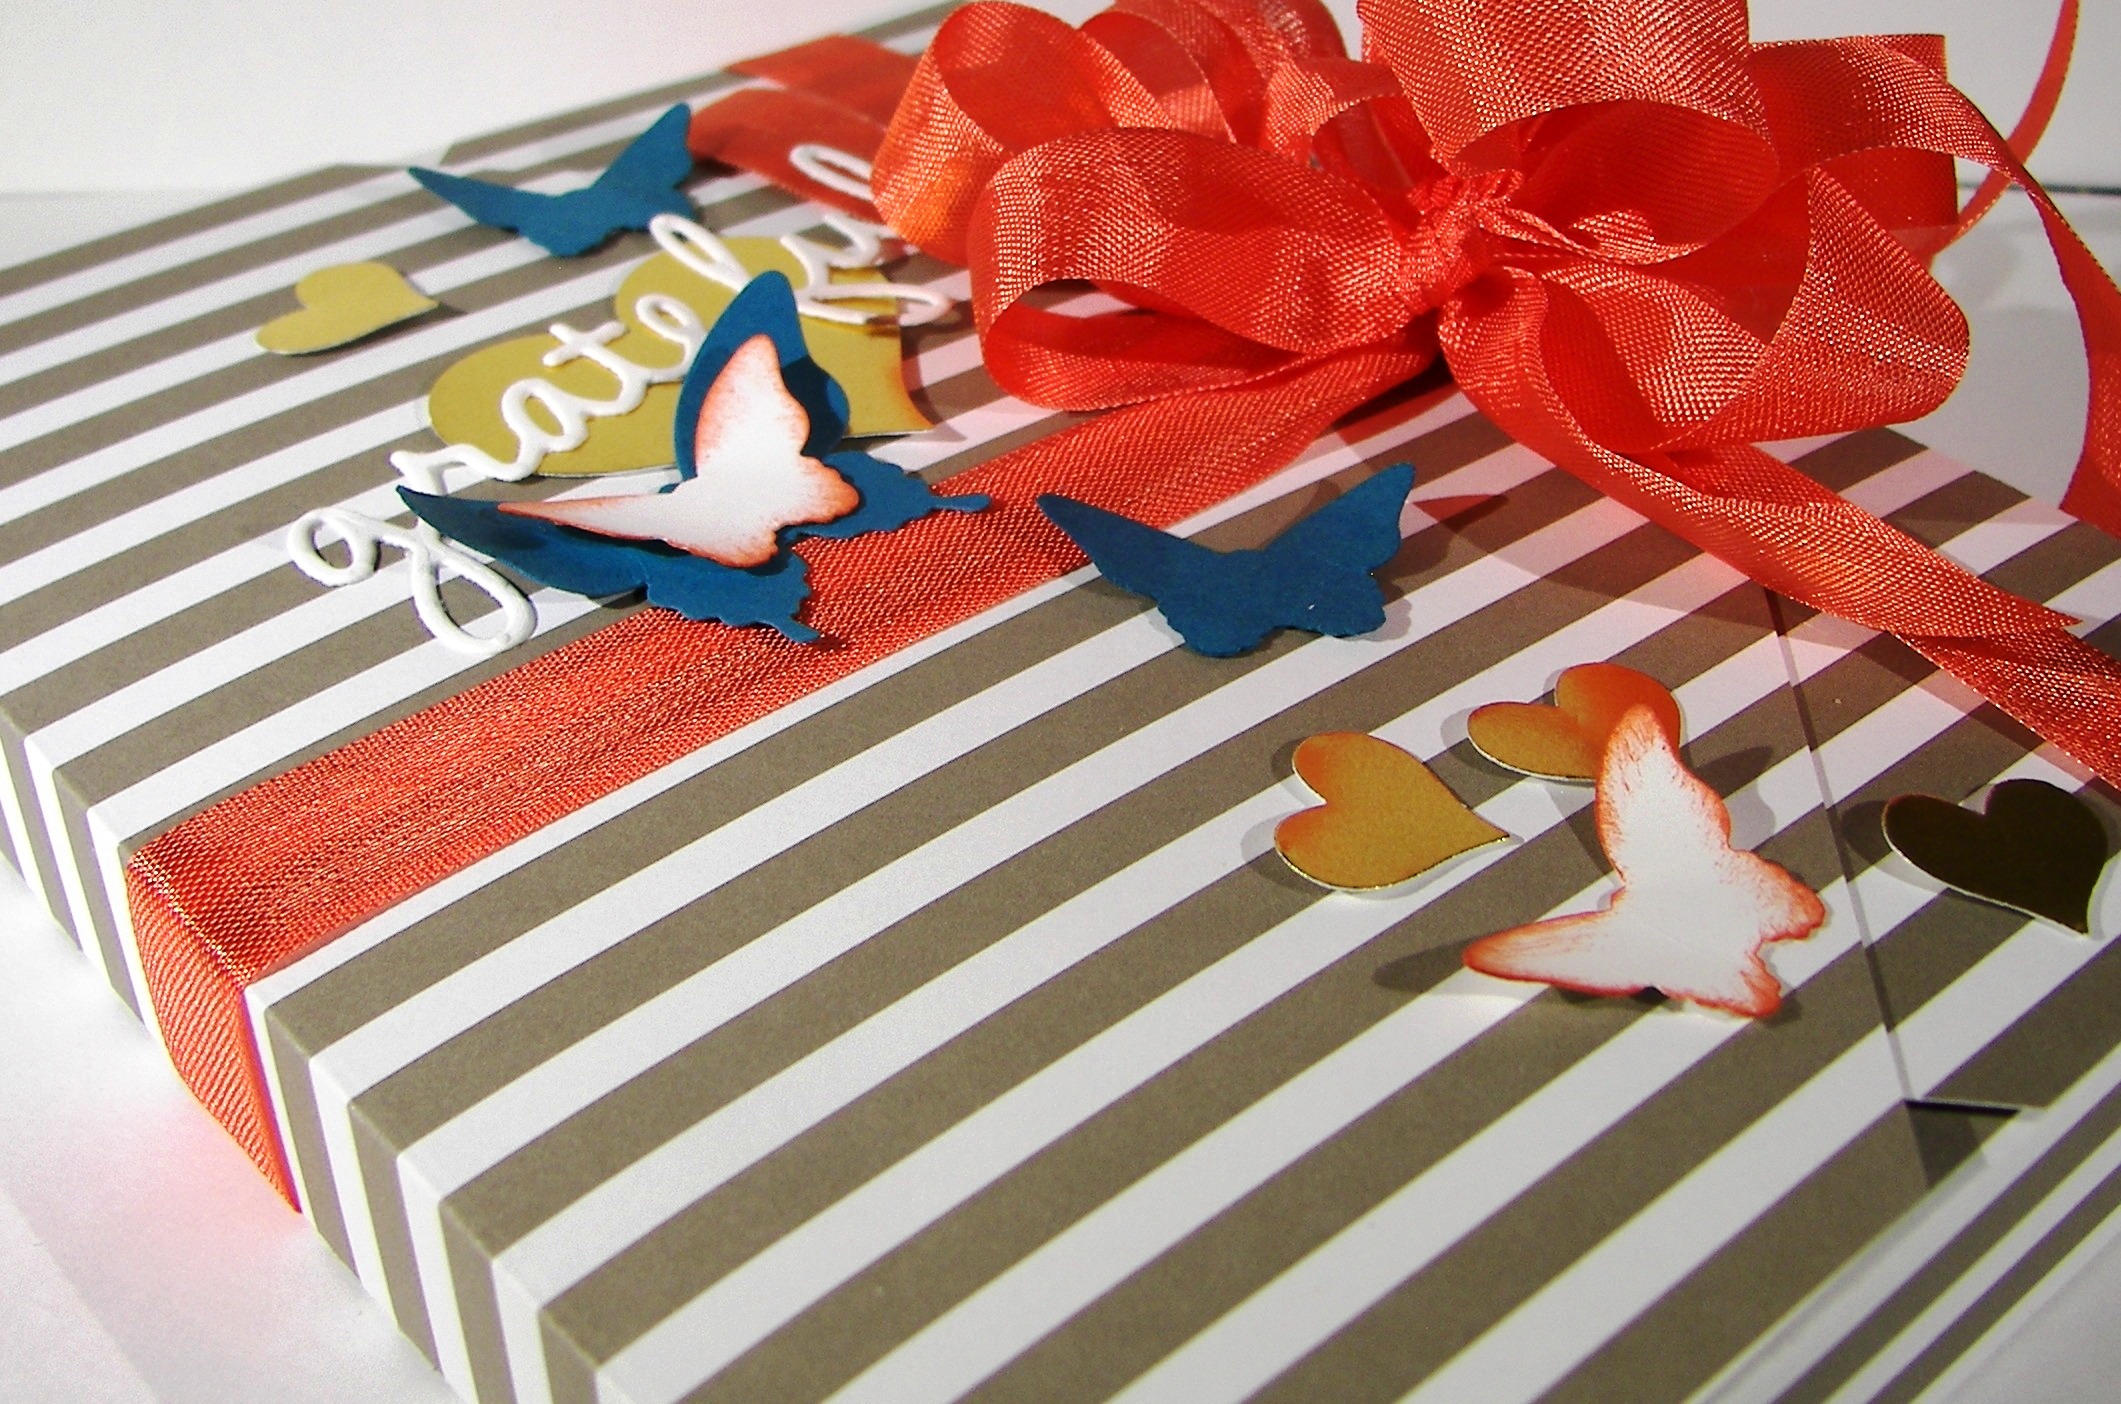
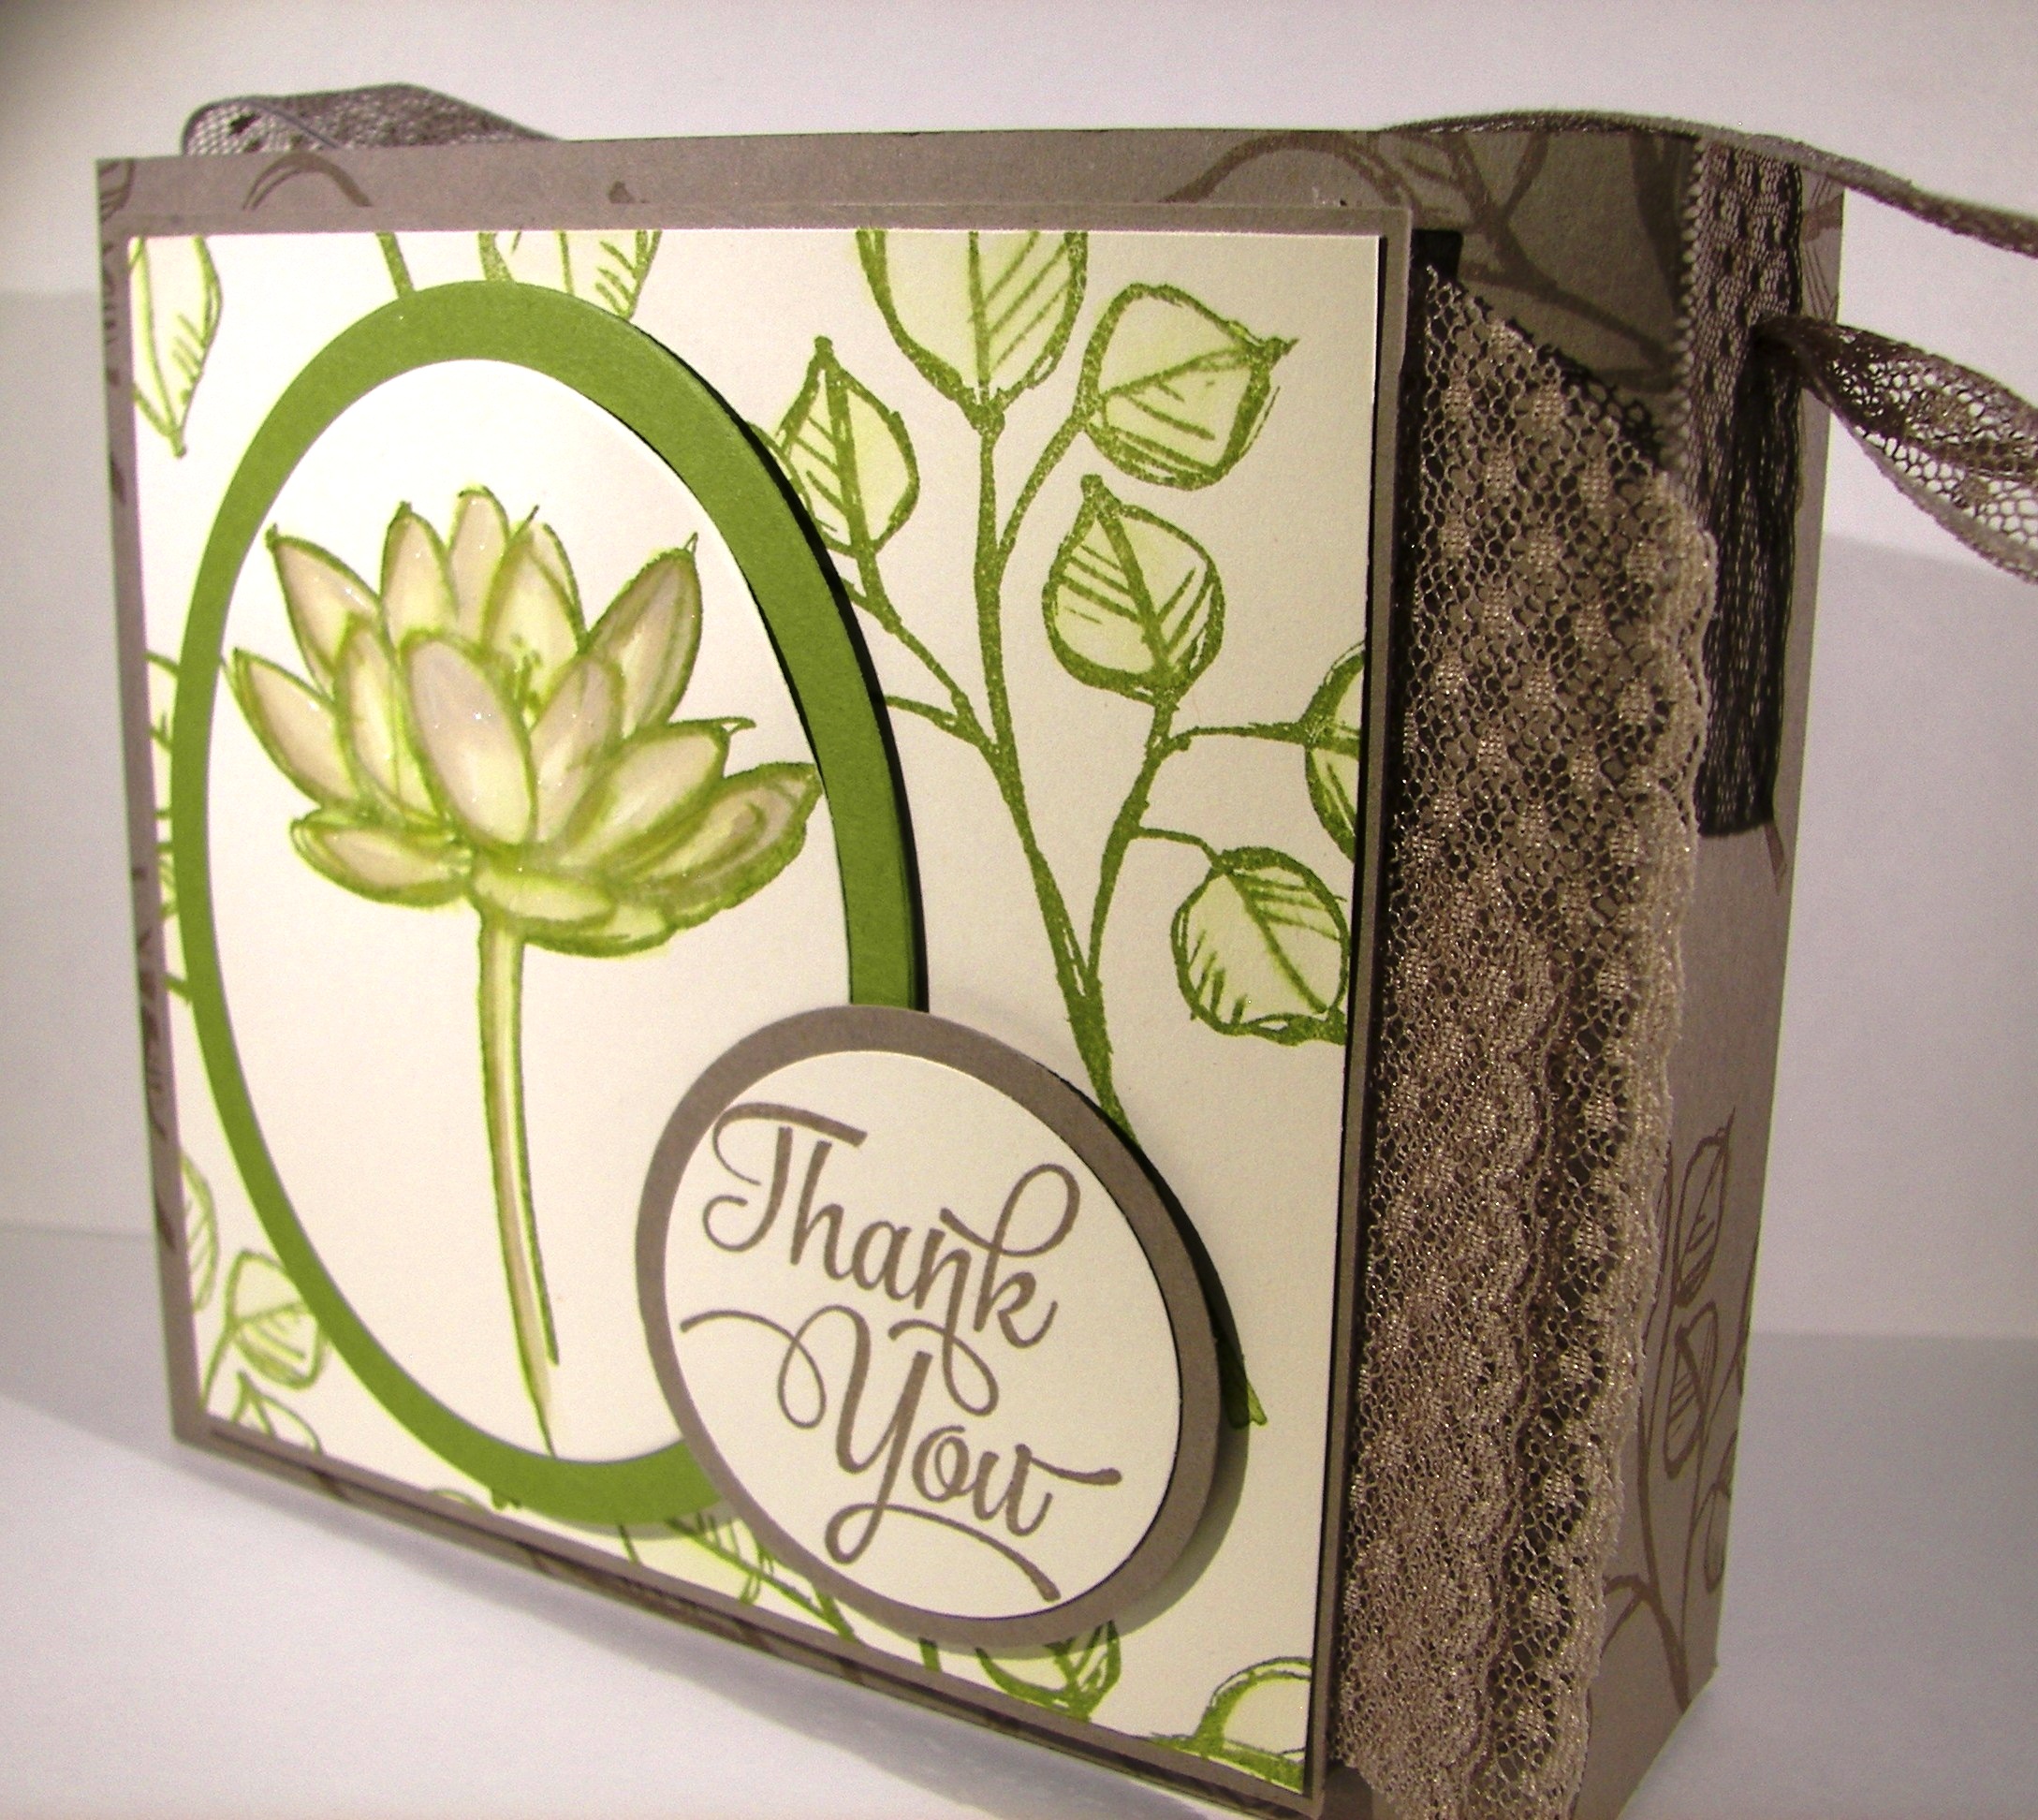
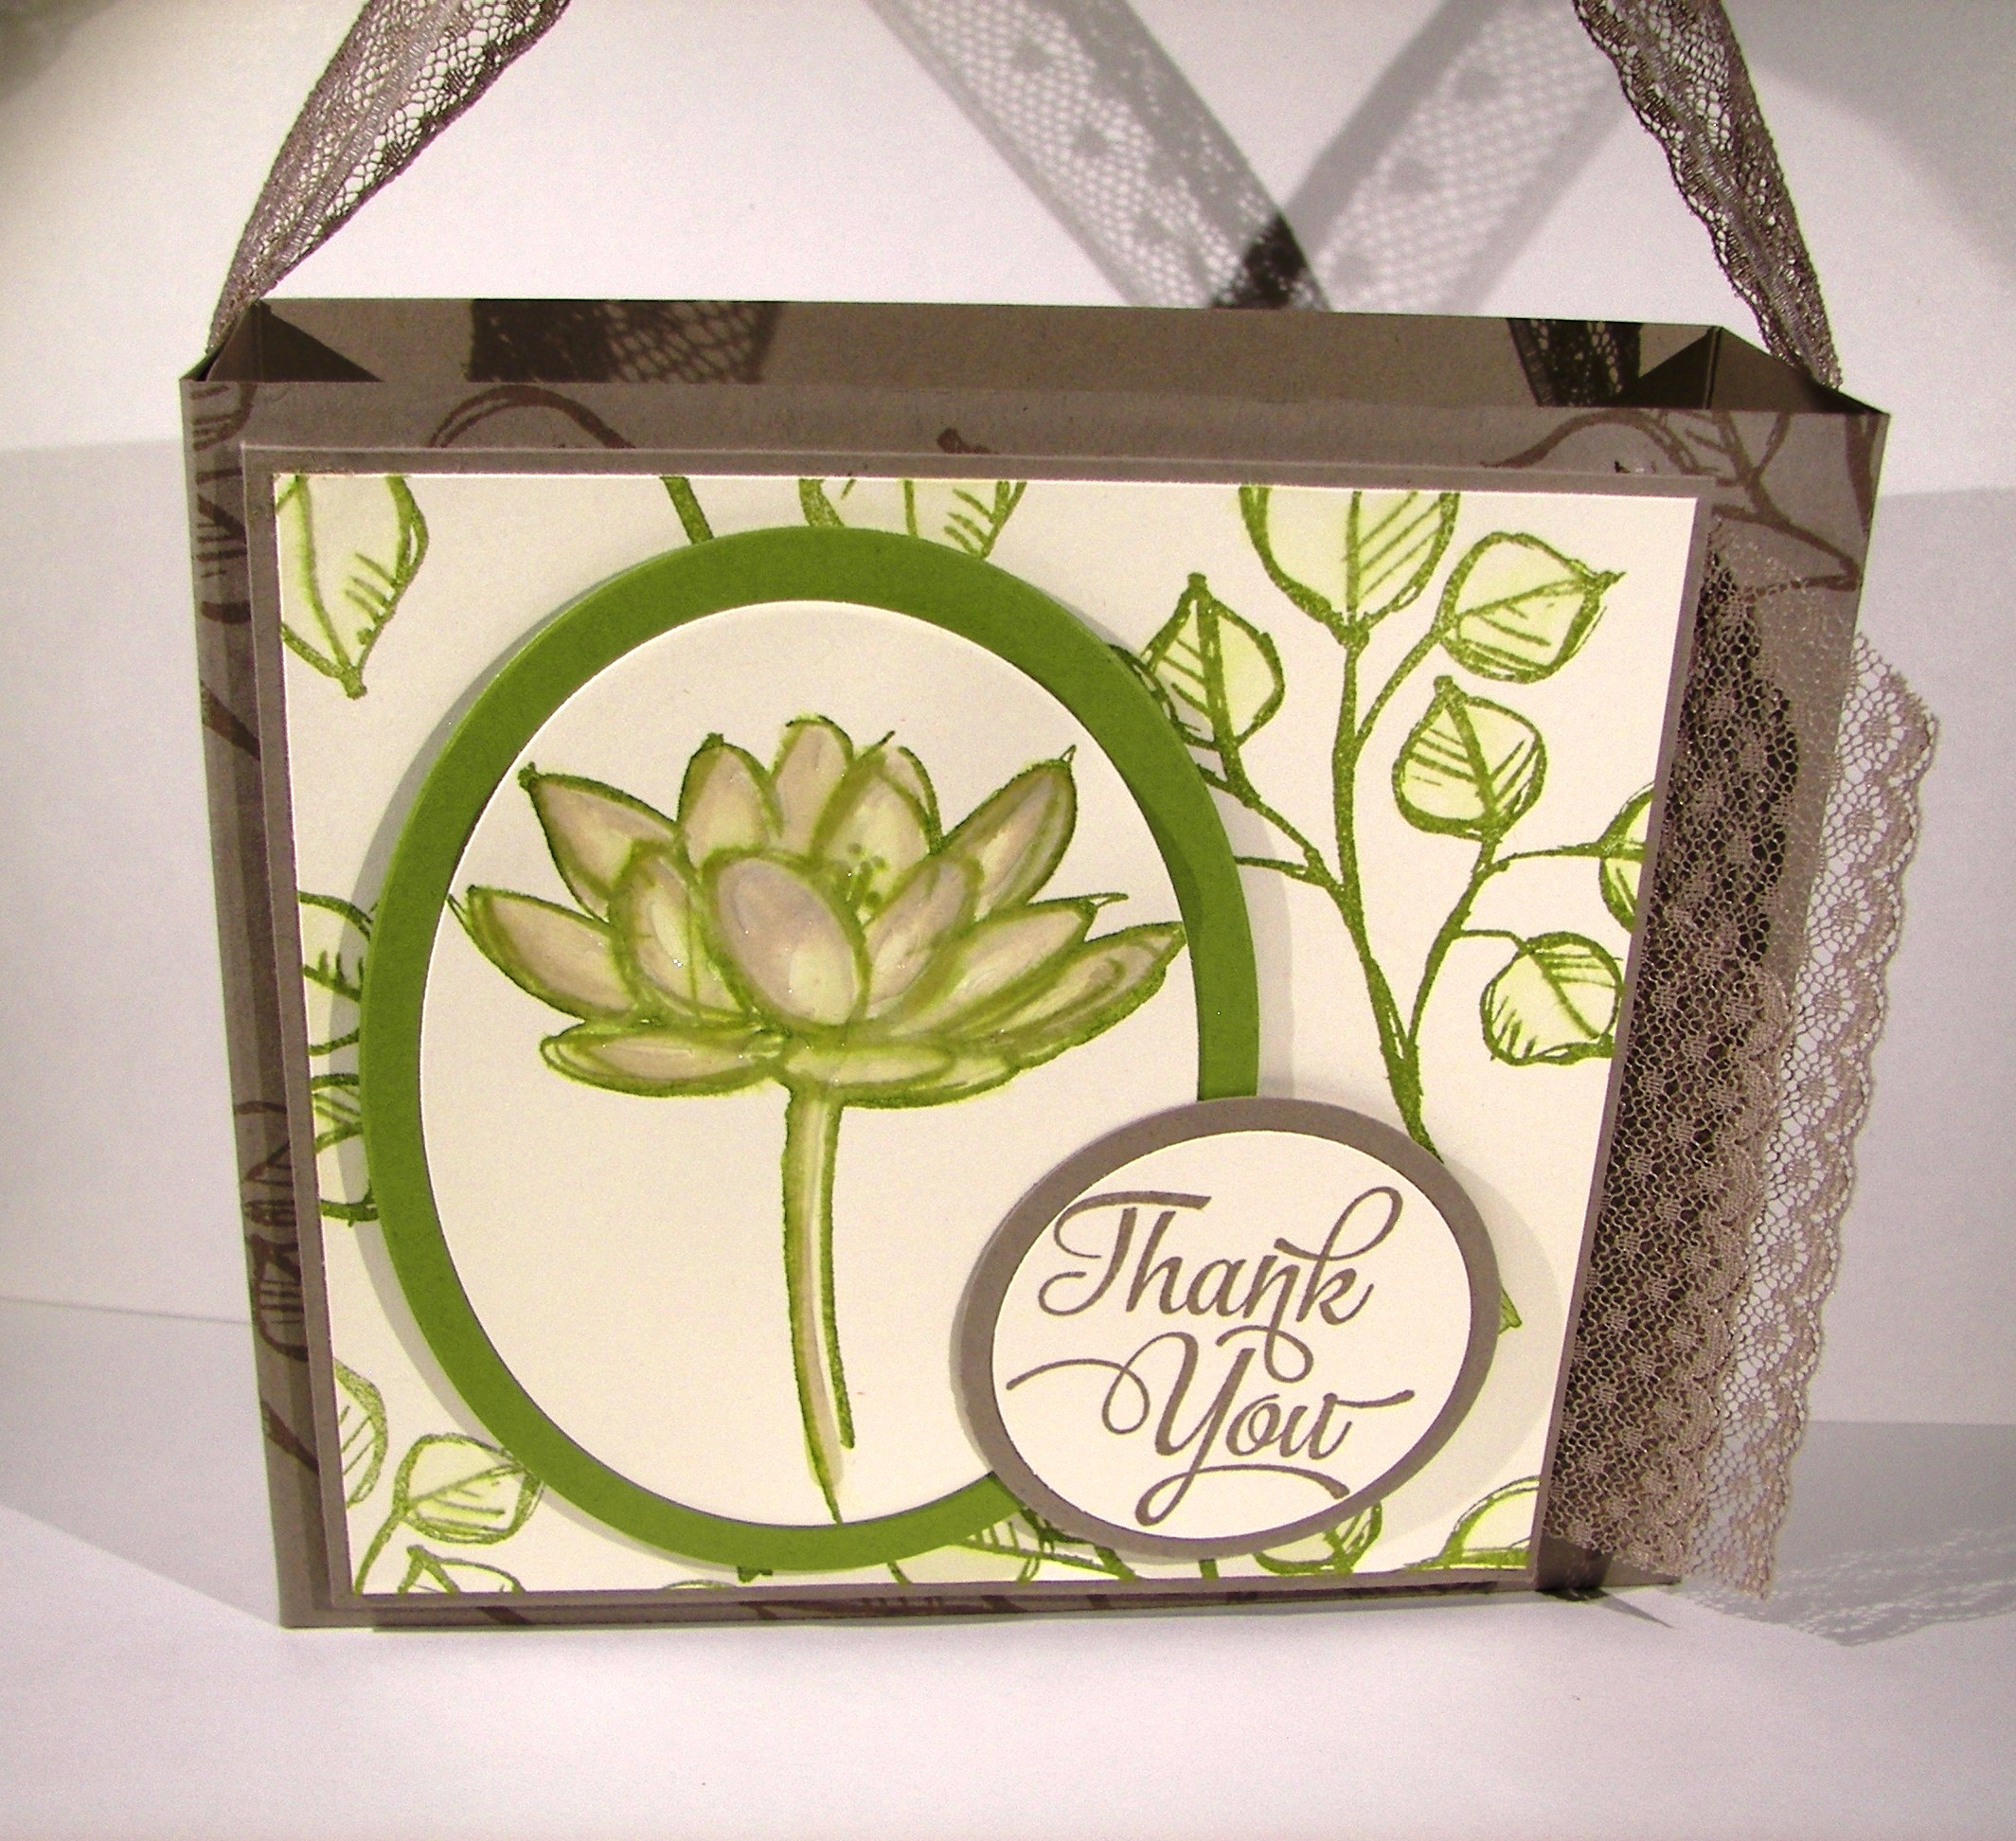
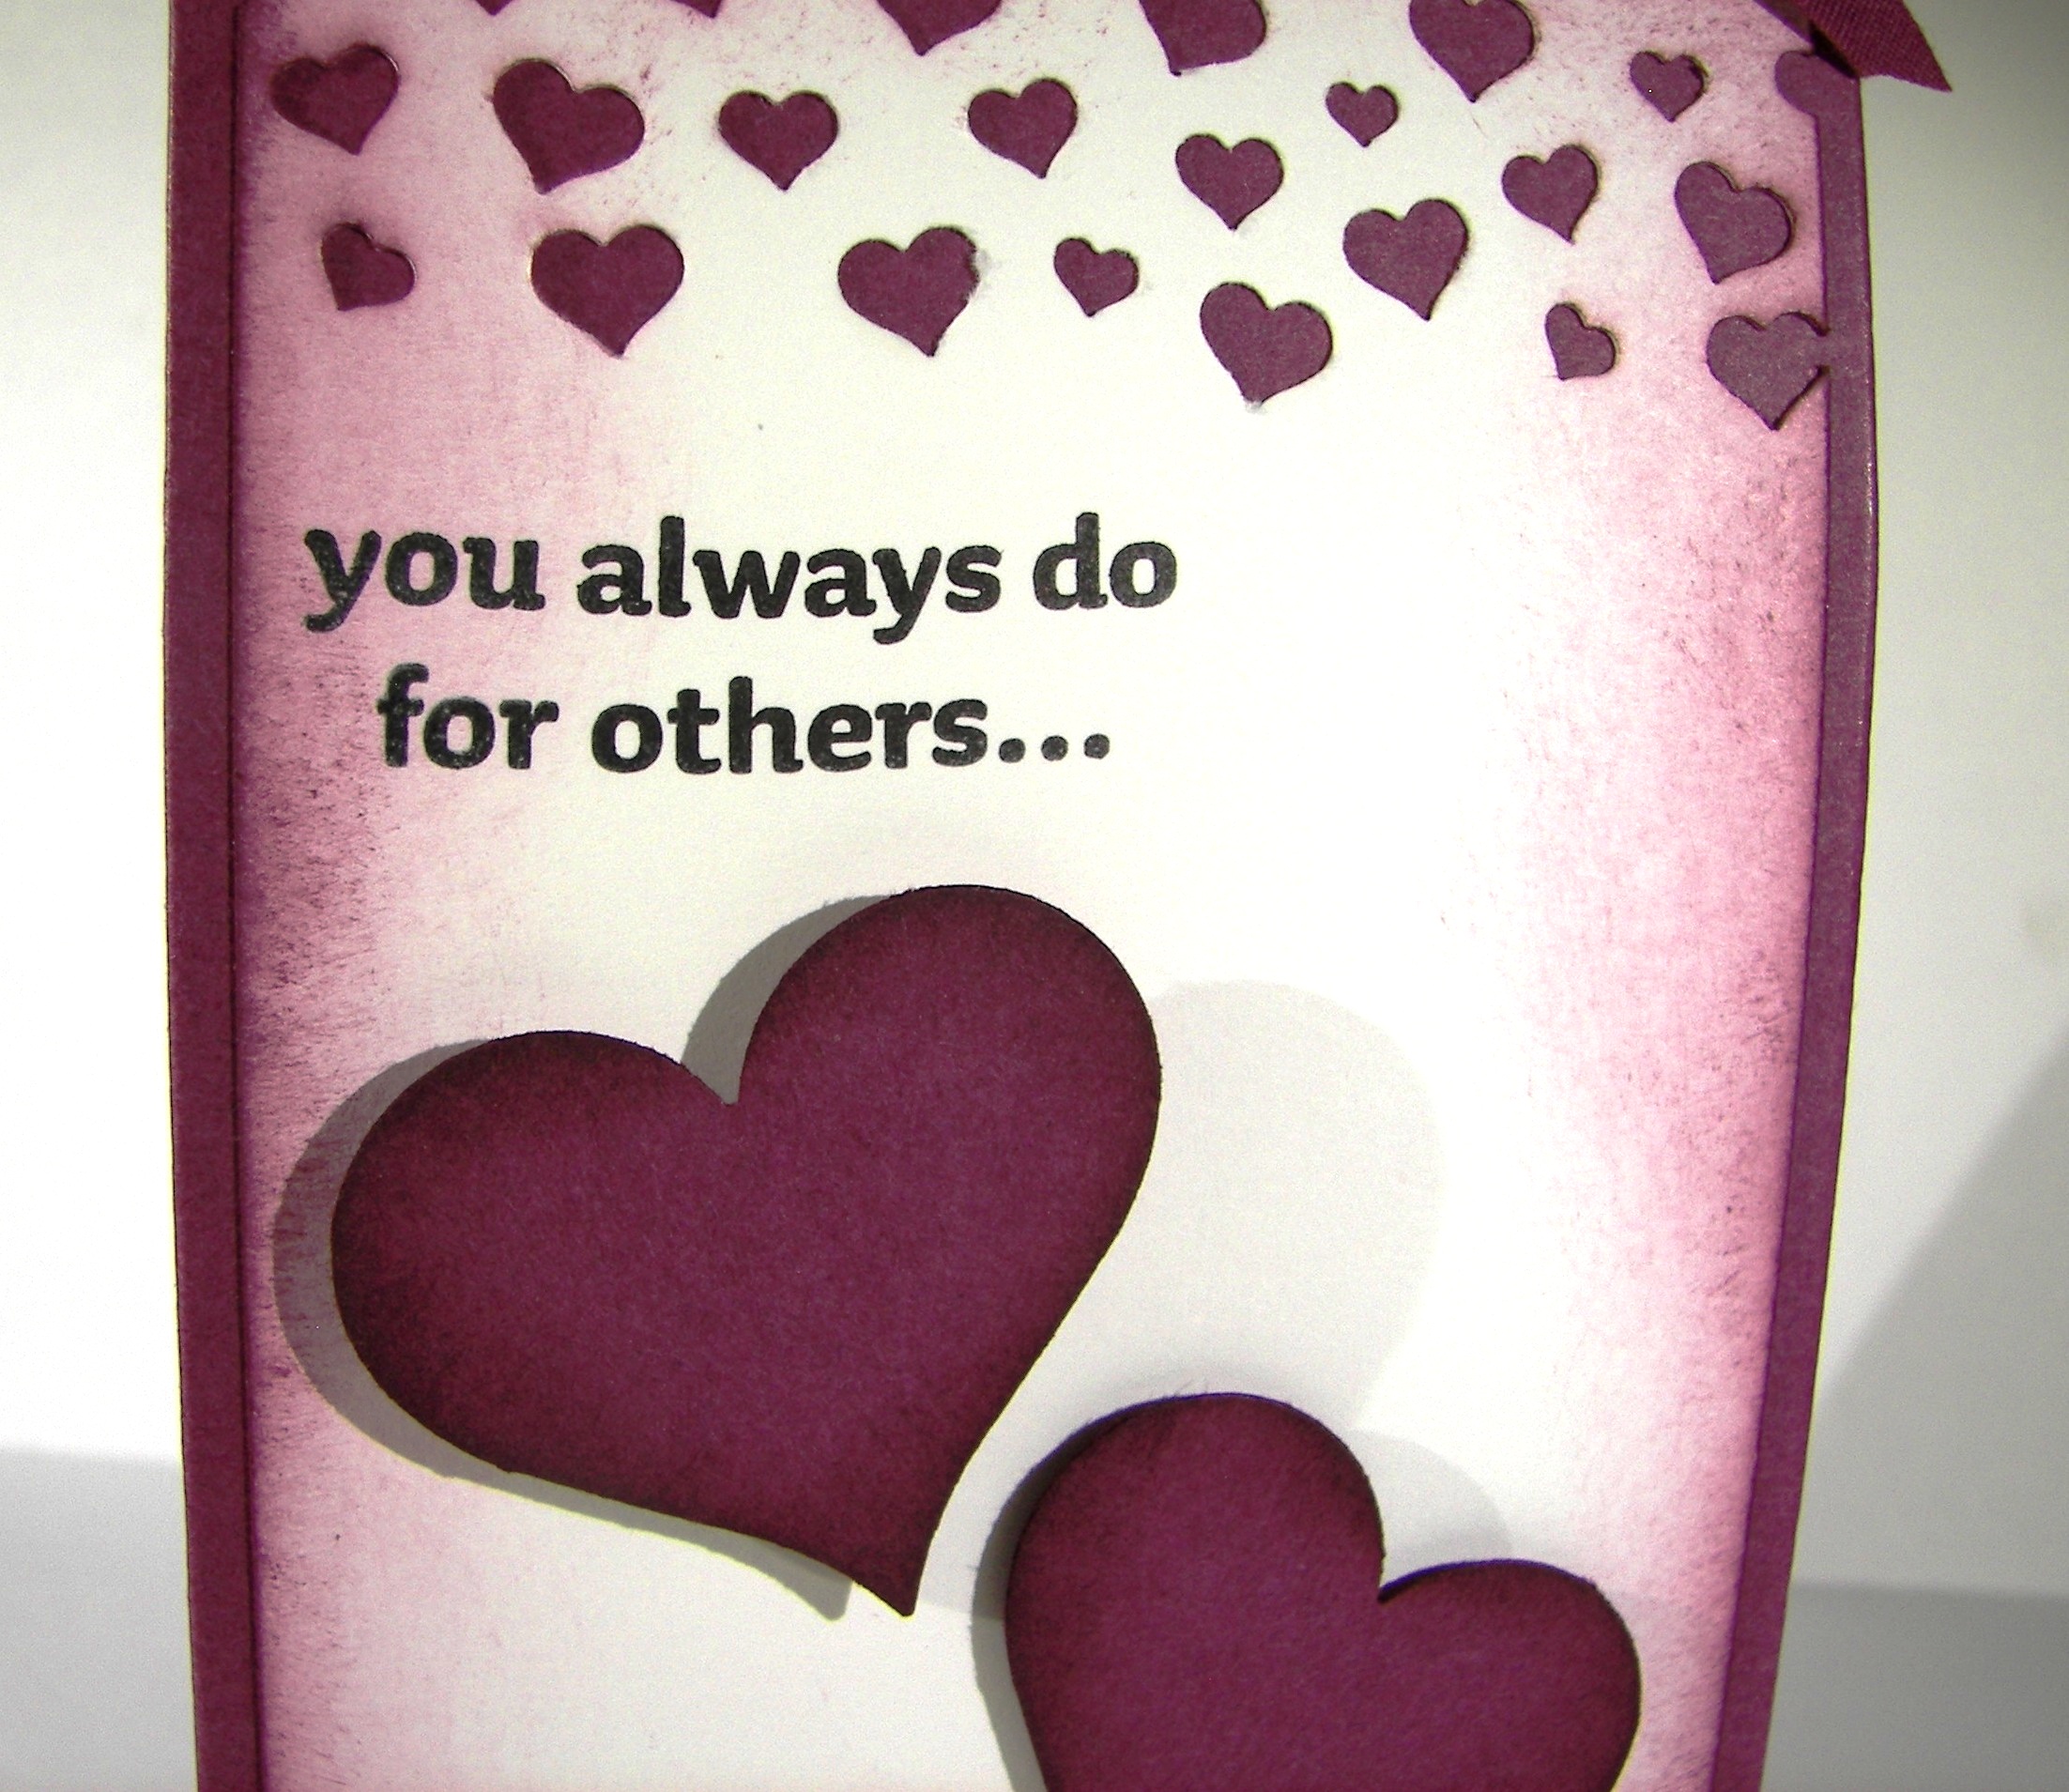
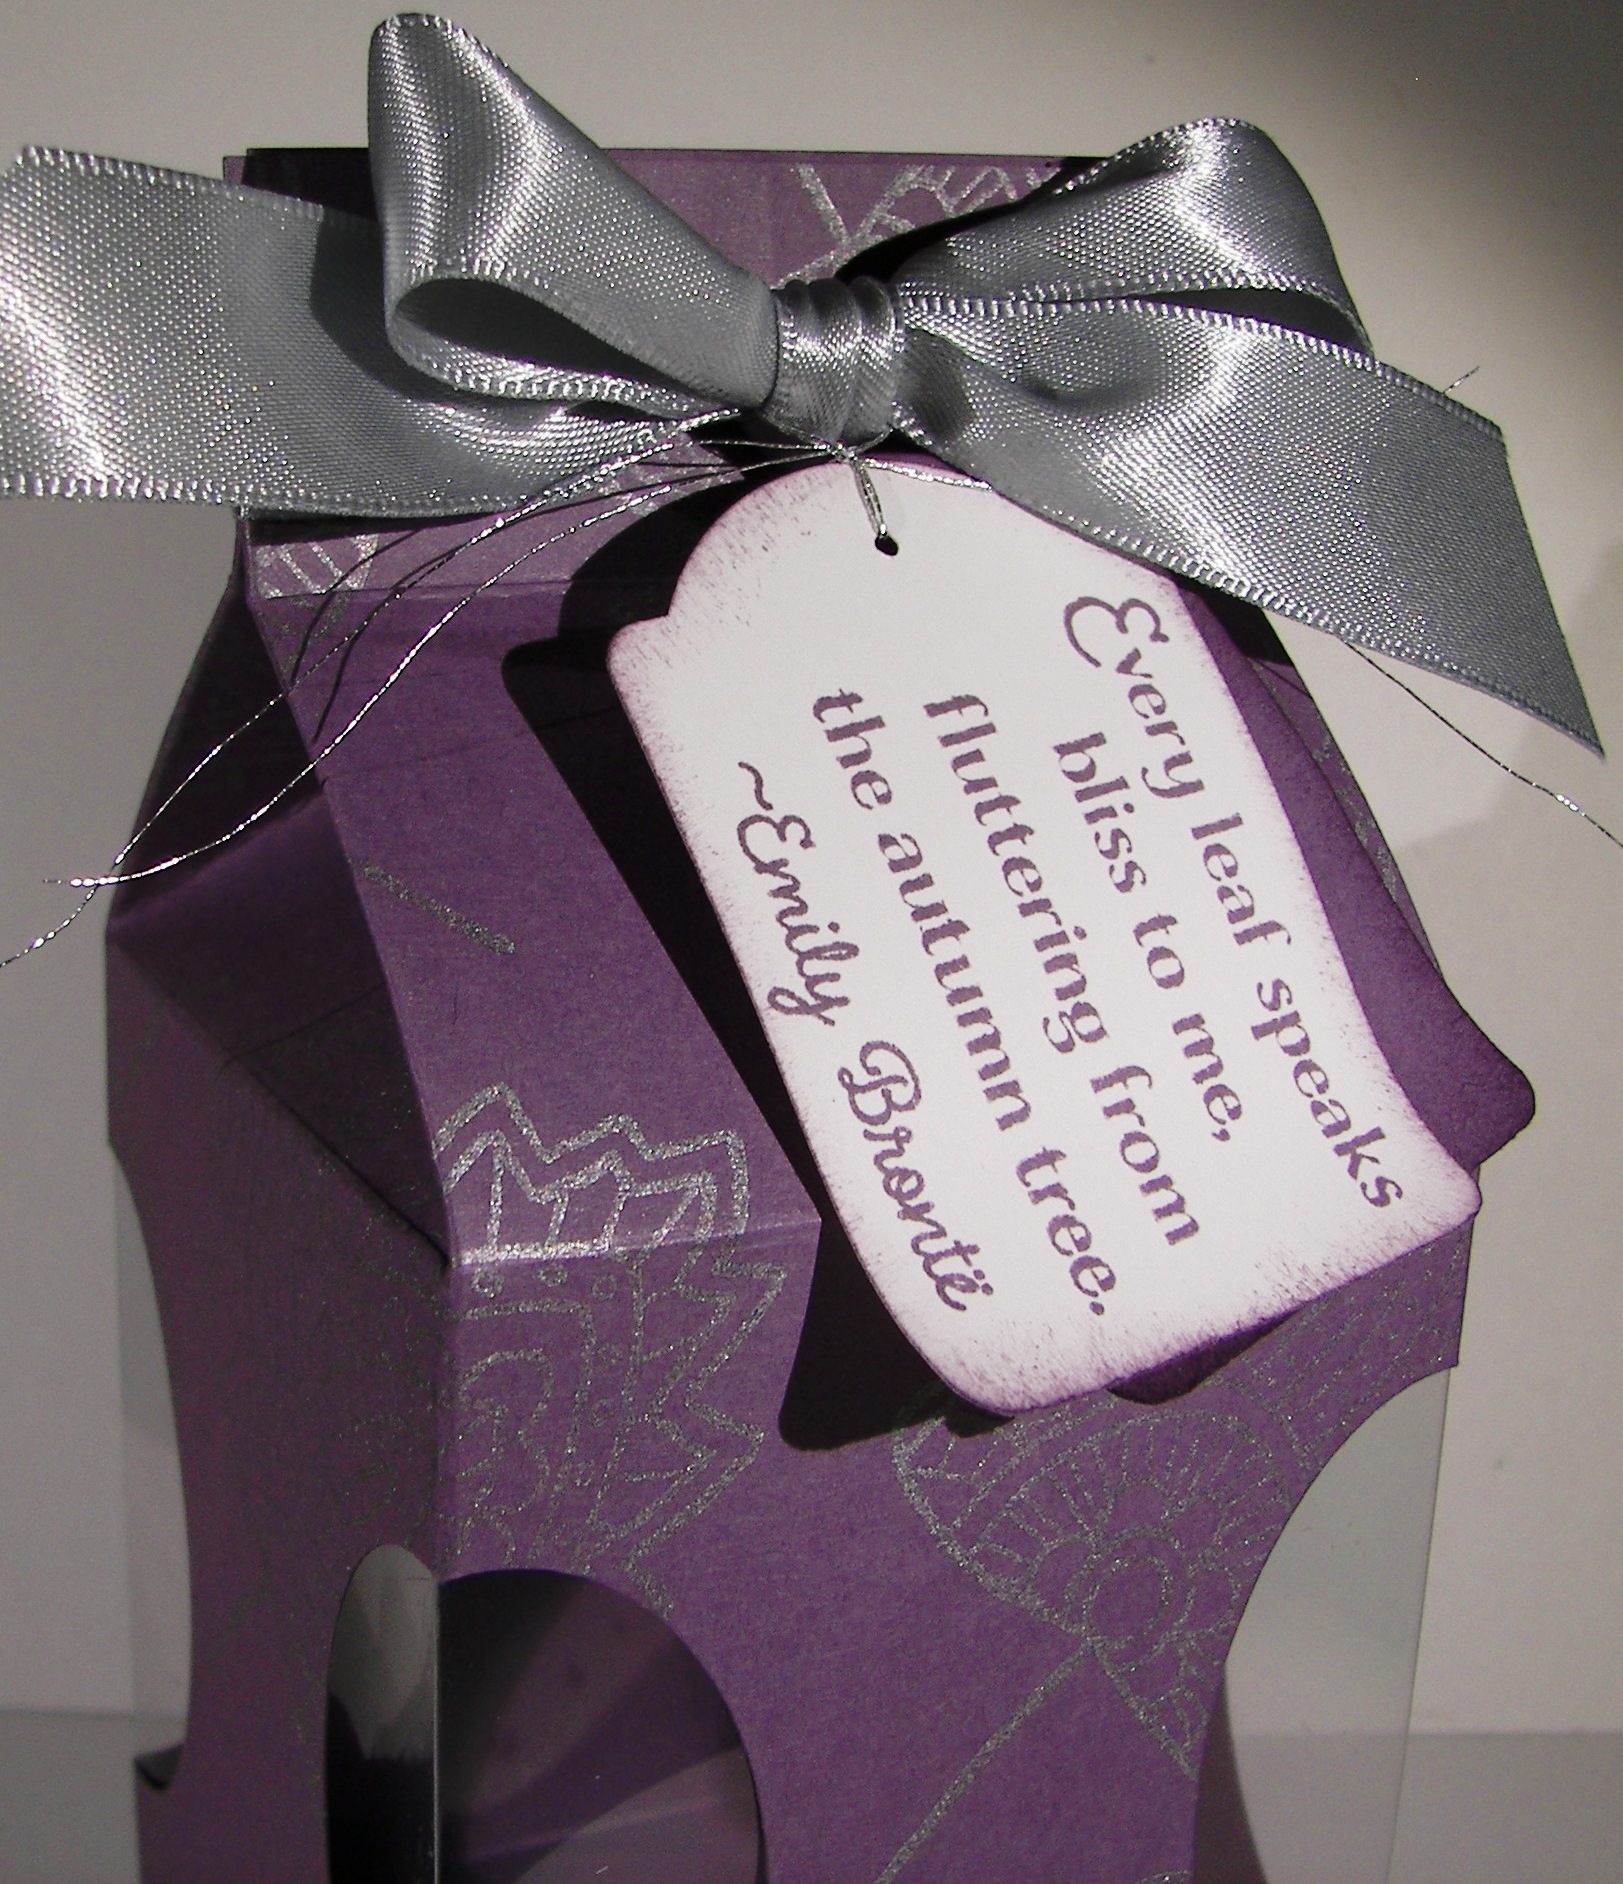
One sheet of 8.5 x 11″ perfect plum cardstock went into this one.  Evenly scored and punched along the sides with the extra-large oval punch to give the windows.  Window sheet was scored along the same measurements and tucked inside.  It was a bit tricky to handle the placement, but with a little patience and plenty of glue dots, I experienced success.  I am so happy with the results.  I am sure to make this one again and again.

Lighthearted Leaves Treat Carton

Have a creative day!

Moana

Sweet Hauntings

I was pretty darn excited to get this stamp set and even more to put it to work.  These bottles, they really make me laugh!  I normally don’t purchase Halloween sets because of the limits of use.  This one, I know I will be having fun with it all year long.

Sweet Hauntings

Picking the color pallet was the easy part, some of my favorites for sure.  I love fall and all of the colors that live there.  Creating my own patterns for background paper is one of my favorite parts.  I would love this in whole sheets.  Hmmmmm, perhaps that will be a fun activity later on.  I stamped each bottle again so they could be fussy cut and layered up.  Those fun little bottles, love them!

 Sweet Hauntings

Lots of sponging on the vanilla paper.  Early espresso gives a great vintage look, which is just what I needed.  I sponged everything, lots, even the ribbon.  It gave it  a great grungy look.  I did echo stamping on the inside as well, can’t get enough of these bottles.  Did you notice the tiny little rhinestones I put on the skull bottle stopper?  Way beyond fun!

Sweet Hauntings

Have a creative day!

Moana

A Whole Lot of Lovely Baker’s Boxes!

I tried to not purchase this particular die cut, but I fell in love with it at a workshop.  I guess that isn’t too different from the ladies I teach in my workshops.  It works for me because I just love this box!

A Whole Lot of Lovely Baker's Boxes!

This adorable box came together so quickly.  The set comes with several other dies to accent or accessorize how you like.  More than enough choices.  I just chose one of my favorite combinations of circle punches with a simple stamp framed with glimmer paper.  How absolutely lovely, right?

A Whole Lot of Lovely Baker's Boxes!

One little glue dot just below the handle was all I needed to keep the top snug to add my favorite dotted lace trim with a big bow.  I moved into my favorite sponging party and did it up right.  Simple yet so adorable.   Hope this little project finds you in a good mood and ready to try your own.

A Whole Lot of Lovely Baker's Boxes!

Have a creative day!

Moana


Timeless Elegance Gift Box…Thing

This morning caught me a bit off guard.  Way too much to do and never enough time.  But as always, things come together in the end and everyone gets their needs met.  This little blog of mine often has to wait its turn, and it never even complains, how nice.

Timeless Elegance Gift Box...Thing

I am not sure what to make of this kind of box thing I came up with.  I wanted to use the dsp, but to be honest, it isn’t sturdy enough for the height I had it have.  But I was determined, so it still happened.  I made up the topper as I went.  Boy, did I use a lot of punches.  So glad I have so many to choose from.  I like how it looks though.

Timeless Elegance Gift Box...Thing

I used a full sheet of the dsp.  The box ended up about 8 1/2″ tall.  The band I made used two strips of paper 1 1/4″ x 10″ and I experimented a bit on the scoring to make it fit.  Only took two times.  I hid those on the bottom.  Lots of sponging all the way around really make it look nice.  I sealed up the bottom with tear n tape and left the top open to put stuff inside.  As I said, it will have to be light because the paper won’t handle much.  The band does give it extra structure though.  Give it a try!

Timeless Elegance Gift Box...Thing

Have a creative day!

Moana

Happy Birthday Workshop!

Yesterday was just too busy, but wonderful at the same time.  I had the opportunity to throw a workshop for a bunch of ladies, which was fantastic! The workshop was actually the cover for the real surprise party though.  Worked like a charm!

10-18 (3)

These three projects were the fun distraction for all to enjoy.  I had done all of the prep work so it could get finished super fast.  Couldn’t keep dinner waiting too long after all.

10-18 (1)

Also, there were going to be many there that hadn’t done much crafting and it had to be fun, not frustrating.  The gal that the party was for is one of my regular workshop members, so she got through super fast and got to chat with all of her friends.  How convenient that they were all there.

10-18 (2)

We were all more than excited as the surprise was revealed.  Cheers all around and boy, did her face get super red!  It went great with her huge grin!  A fun part for her is that if people wanted to give a gift, they were encouraged to donate to her Stampin’Up! shopping spree!  What fun that will be.

  10-18

Have a creativc

Thanks and Giving

People all around us are kind and give, often more than we have asked for.  I love those people.  They inspire me.  To be creative, and more importantly, to say thank you right back.

Thanks and Giving

A full sheet of bermuda bay card stock went into this tall and lovely gift bag.  The scoring was done vertically at 2″, 4″, 6″, and 8″.  A quick twist horizontally for one more score at 2″ to make the bottom of the bag.  Two hole punches on opposite sides and the ribbon was squished in.  A very tight fit, it didn’t even need to be knotted off or adhered.

 Thanks and Giving

A leftover card front was scored in half to make this tiny card.  Just big enough to echo the stamp used on the bag both on the card front and inside.  The sentiment comes from the same lighthearted leaves set and works perfectly.  Plenty of sponging and this lovely project was all done.  All I need is something wonderful to put inside.  I just need to decide who needs it.

Thanks and Giving

Have a creative day!

Moana

Birthday Jar Wishes That Last

It isn’t my usual project to share, but I do make these particularly often.  The idea is lovely and I get to put a lot of retired product to good use.  I do hate to ignore it, so I thought I would share  a way to use it differently.

Birthday Jar Wishes That Last

I bought some of those washi sheets having no idea what I would do with them.  Until this fun series of projects came about.  I work with the young ladies in my church, along with several other ladies, and we come together as a team in a large variety of events from large to small and everything in between.  Of course we celebrate birthdays!  And that is what this is.

Birthday Jar Wishes That Last

I decorate jars and vases with washi paper punches to the mood I am in.  Sometimes I use framelits, or punches, or both.  I have a large collection of last springs sale-a-bration ribbon, so it always goes together.  You know how I love to coordinate as much as possible.  So these jars are created for each young lady or woman in our group.  We all then write inspirational wishes, birthday wishes, and just kind words in general to fill the jar.  Then, the recipient can read them all at once, or read them one at a time, or open them over time when a bad day happens and they need a pick me up.  Something sweet for whenever you want them.  So, try something different with the awesome product you have, either current or retired, it is all wonderful!

Birthday Jar Wishes That Last

Have a creative day!

Moana

Color Me Irresistible

Fall events are starting to pile up and that means plan ahead and get it done early.  This isn’t quite early, just one week, but that helps, right?  There is a church youth dance coming up next weekend and we are hosting the pre-dance dinner party.  The theme is black and white, so we are going along with that for the decorations, and yes, party favors.  I think these will do nicely.

Color Me Irresistible

These two are very simple, as should any favor should be, especially if you need to make several quickly.  I started both of them with paper sized at about 4 x 6 1/2.  Simple scoring for the gift bag and a hole punch to thread through the ribbon.  Done and done.

Color Me Irresistible

Can you go wrong with a classic sour cream container?  I think not, especially when you are working with this ever so lovely silver foil velum.  I think silver wrapped candies or white mints would look so pretty inside.  Maybe even both?  Works for me!

Color Me Irresistible

Have a creative day!

Moana

Delightful Birthday

It has been a while since I made a matching set like this.  For a while it seemed like I couldn’t get enough of them.  But, you can only use so many, and share so many, and eventually store so many.  I took a break, but found my way back.  So much fun!

Delightful Birthday

One full sheet of the wonderful ‘Color Me Irresistible Specialty DSP’ was used to makey great set. I love that is has white sheets that can be altered to any color or tone, but I also love that it comes in colors and patterns.  The options are great, so diverse.

Delightful Birthday

A pretty gift bag with a lovely matching card has to be one of my favorite things.  I think people feel special when the attention to details are brought together like this.  The assembly was pretty direct, nothing very fancy.  Simple work and lovely results, my favorite.

Delightful Birthday

Have a creative day!

Moana

One Big Meaning Tiny Treats

Welcome back and thank you too!  Going back to work yesterday, after taking a long weekend off, left me thinking I should give a little thank you to my student TA’s.  They are a great bunch and were honestly quite happy with these treats.

One Big Meaning Tiny Treats

I kept things very simple, because I knew they would really just want the candy.  So, I used some adorable retired ribbon, with an effort to keep it neutral.  I have young men and knew they wouldn’t appreciate anything too girlie.  However, I did give them color choices and they picked the ones they liked best.  Three of five kept the little tag in their things.  How cute is that!

One Big Meaning Tiny Treats

What do we gain from this?  First of all, saying thank you is so important.  Secondly, it doesn’t have to be huge and elaborate to be appreciated.  Honestly, these took me maybe ten minutes from start to end, including a quick set of photos.  Having great tools to work with makes all the difference.  Give something like this a try.  This punch combo is fantastic!  The 1 3/4″ circle punch is large enough that lots of sentiments fit inside quite easily.  Add the 2″ circle for a tiny border and it looks so great!

One Big Meaning Tiny Treats

Have a creative day!

Moana

All About Sugar Fry Box

It is so nice to be home, even though I miss my college kids.  After falling asleep at a ridiculously early hour last night, I woke up full of energy and enthusiasm.  Maybe that is why I migrated to a fun treat box!  I do have some thank you’s to give out today.  I have five student TA’s at school that I know kept things just as I like them for my return from a four day weekend.  They are awesome!

All About Sugar Fry Box

So is this adorable fry box die.  As soon as it hit the catalog last year I had to have it.  Along with its hamburger box friend.  They just make me giggle.  And to have a coordinating stamp set makes it even better!  I love sharing treats and kindness, but when it looks as cute as this, I like it even better.

All About Sugar Fry Box

A half sheet of card is all it takes to make this guy, plus a little scrap.  I used cucumber crush, because it is just a super happy color.  The sentiment was stamped on whisper white, fussy cut, layered on some more cucumber crush, fussy cut again, and sponged like crazy.  Two mini silver brads finish off the front so nicely.  And with some yummy treats all tucked into a bag, tied off with the lovely dotted lace trim, this little gift is ready to go.  I did sponge the entire box to keep everybody coordinated.  Love my sponging!

All About Sugar Fry Box

Have a creative day!

Moana

Banner Blessings Gift Box

And here is my lovely gift box.  I actually started with this and worked backwards to the cards I put inside.  A different process for sure, but I liked it.  And to be honest, I didn’t take very good notes on the product I used.  Sorry, but now I am out of town trying to keep up.  Ooooops.

Banner Blessings Gift Box

The colors and elements of each card are represented in this box.  Believe it or not, there is an easy way to get inside without messing it up so it can be used again.  I thought that was pretty clever myself.  I used my trusty score board to create this one, with the help of the angled plate.  I wasn’t sure how it would work out, but it did.  Now, on to the next project.  That is after I get home from my drive from Utah.  Maybe the desert will inspire me.

Banner Blessings Gift Box

Have a creative day!

Moana

Banner Blessings Gift Set – Joyful

I get to be out of town this weekend and enjoy some time with my two children away at school. Utah is so pretty this time of the year, the rain is making it even better.

Banner Blessings Gift Set - Joyful

This is the second card in the gift set I made for my daughter. Bright and cheery for sure. The color scheme certainly does go with the word joyful.  I love this stamp set.  Very inspiring and the writing style is awesome.

Banner Blessings Gift Set - Joyful

The card base is the heavy whisper white. Love having something this heavy to work with. I stayed away from white cards, but not any more.  I enjoyed sponging  the front to bring out the heart detail. A couple of hearts punched on the front and inside to coordinate.  Second card in the series is done. Wait til you see the gift box.

Banner Blessings Gift Set - Joyful

Have a creative day!

Moana

Thoughts & Prayers

I took a day away to recover from a great birthday celebration for my youngest.  I can’t believe she is 15 already.  Family first, so it was all about her.  Even so, some things still have to get going.  These projects were made to give to the young women I taught a Sunday lesson.  There were fourteen of them all together and they looked wonderful.

Thoughts & Prayers

I usually share current product, but made an exception for these.  The paper is retired from last year and the heavy bakers twine is from the last sale-a-bration.  The stamps, doilies and punches are current though.  I do love how things coordinate together so nicely though, very satisfying.

Thoughts & Prayers

Setting a piece of paper on my score board is so liberating.  A little bit of math and you are off and running.  I cut the 12 x 12 sheets in half and went for it.  They came together rather quickly and the girls really enjoyed them.  I love to make things for people, I truly do.

Thoughts & Prayers

Have a creative day!

Moana

Floral Gift Bag

The seasons are all backwards, so why not create a spring themed gift bag!  Seems kind of silly to really feel like fall might have arrived, then summer heat, then what.  Who knows, so I will craft what I like, and I like this.

Floral Gift Bag

One whole sheet of 12 x 12 dsp went into this bag.  The dots are too much cuteness, so they had to be out front.  I wasn’t feeling a particular stamp, so I curled a couple of flaps over to show the writing side.  This paper pack is so adorable.  A bunch of bright and happy paper going on.

Floral Gift Bag

The diagonal scoring plate is what helped this box happen.  I scored on the 3″ marker, on the diagonal, on each corner.  It worked out pretty darn good.  I don’t always feel confident my scoring is accurate when using the diagonal plate, but when putting the bag together, my sides and corners matched up.  Go me!

Floral Gift Bag

A few punches from the heavy whisper white cardstock and regal buttons for centers made the embellishments I wanted.  The bag was sealed, but not sealed, with a stretch of dotted lace trim.  It is stretched around the top, under the front and back flaps, and then tied in a bow.  Just untie it and the bag will flop open.  Easy to use and re-use.  My kind of bag.

Have a creative day!

Moana

For All Things

It can be hard to get even the simple things done when you don’t quite feel yourself.  That is why today’s project is super simple, just what I needed.

For All Things

I started with a half sheet of very vanilla cardstock and scored every 2″ on the 8.5″ side which left me a 1/2″ edge to seal the box together.  I also scored along the length at 2″ to make the bottom, and at 3/4″ at the top and then 1″ over from there.  I know I am not very exact at sharing my measurements, but it works out I promise.  Oh, I did do my stamping before I scored, forgot to mention that.

For All Things

I have held the box together using the tear n tape adhesive.  I do like that stuff, easier to work with than sticky strip.  The flaps are folded together and adhered with the same and then I got to sponging.  All the edges and even on these bitty little flowers.  I love that look!  I put the largest basic pearls inside each flower and grabbed for a scrap of ribbon.  The dotted lace trim has a good bit of stretch to it, so it is held on just by that.  Not a glue dot or anything.  That makes it easy to use and re-use.  A simple bow and it was all done!

For All Things

Have a creative day!

Moana

Thank You For Strong Girls

I do so love a pretty little carton to give someone, especially when it is full of their favorite treat.  I was thinking about my girls this morning, and how strong and amazing they are, and this treasure came to life.

Thank You For Strong Girls

I am so grateful for my daughters who remain strong through adversity.  When a woman can stand up for herself, and truly value herself, it is something worth celebrating for sure.

Thank You For Strong Girls

I took a full sheet of this wonderful Color Me Irresistible Specialty DSP, cut off two inches from one side and began to score.  Each side measures 2 7/8″, so you need to start from one side, measure that distance and score each time.  This will leave you with 1/2″ on the edge that will allow you to adhere the box.  The bottom score line also measures at 2 7/8″.  I scored the top at 1/2″ and then at 3″.  Although I am not the best at directions, it does come together pretty easily.

Thank You For Strong Girls

I stamped Thank You from the One Big Meaning set.  It fit perfectly within the 1 3/4″ circle punch.  I punched a 2″ circle from the Dazzeling Diamond paper and layered them with dimensionals.  A lovely bow made from the Dotted Lace Trim finishes it off.  I did do a bit of sponging on all of the edges.  I love a sponged edge.

Have a creative day!

Moana

Floral Gift Box

When my daughter came home this week for her university break she brought this little birdhouse box with her.  My mother had given it to her to deliver to me to try and create a version of it.

Floral Gift Box

I don’t have a diecut that would do this, so I had to think it out a little bit.  Although I had several frustrations, I ended up with something cute.

Floral Gift Box

I started out with a piece of paper 7″ x 8.5″.  I scored along the 8.5″ side at 2, 4, 6, and 8″ leaving an edge of a half inch.  I turned it one quarter around and scored it at 2″.  This became the bottom.  Along the top, with the long scores going up, I proceeded to cut with my trimmer, not scissors.  I cut along the score lines down to 2.5″ on all score lines.  This gave the top flaps.  Two of them were punched with the scallop tag topper and the other two were trimmed down a bit.  My design became a bit flawed and I had to improvise a bit.

Floral Gift Box

I stamped the paper with versamark ink and applied white embossing powder to give me the cute little flowers you see.  They turned out so pretty.  The rest of the box assembly was pretty basic.  I know I don’t give a lot of detail, I get impatient.  I am working on it.

Have a creative day.

Moana

One Big Meaning and Remarkable You

To get my mind off the heat last night I sat down at my desk and got a little more creative.  It has been a bit since I spent this much time for one project, but to be fair, I didn’t have any idea what I was going to do when I sat down.

One Big Meaning and Remarkable You

I used a whole sheet of tip top taupe to make the bag.  Just simple scoring there, nothing fancy.  I did forget to stamp before I scored, ooops.  So, my stamping does have little crease marks on the edges.  Can’t be perfect.

One Big Meaning and Remarkable You

The base has two layers, tip top taupe and a stamped layer of very vanilla.  I brought out the aqua painter again, oh how I love that tool.  Just using the ink from the stamp gives such a soft look.

One Big Meaning and Remarkable You


The oval framelits were put to work again for the focal point.  What a lovely flower.  I brought in tip top taupe into the flower and water colored it into the old olive.  I can tell the color difference, but I can also see a hint of lavender forming.  Interesting.  Crystal effects really made a difference in the look of the flower.  I could really use that stuff way too much.  A final stamped sentiment layered with some circle punches finished the front.

A touch of dotted lace trim was put to the side and also used to make a simple handle for the bag.  It really turned out beautiful.

Have a creative day!

Moana

You Always Do For Others…

The people in our lives that give endlessly, they are so awesome!  They deserve much more than something like this, but always appreciate it.  Someone has to something nice for them, right?

You Always Do For Others...

My school secretary is just that person.  She even keeps the little containers I make her gifts in.  She has a cute little collection.  This one is a bit larger than others I have given her, but she deserves it!  The beginning of school is always so hectic.

You Always Do For Others...

One whole sheet of rich razzelberry for this gift bag.  Doesn’t it look lovely?  I didn’t have a project in mind, so I just reached to my paper files with my eyes closed, pulled the first file and there it was.  I then turned to my punches and grabbed the first one I focused on.  That would be the confetti hearts border punch.  The rest just fell into place.

You Always Do For Others...


I did my favorite sponging and opted not to layer the base.  Sometimes my fronts tend to curl a bit at the edges when I layer cardstock on cardstock with gift bags.  So, after I punched and sponged I used tombo liquid multipurpose glue to get to the edges well to make sure it stayed down nicely.  Perfect job.

A little matching cotton ribbon, subtle but still there, and the gift bag was done! Now I have the pleasure of getting the perfect treats and a gift to go inside.  That will be a fun little activity for sure.  Sea salt chocolates and maybe a lovely lotion.  Sounds nice.

Have a creative day!

Moana