Weather Together with Love

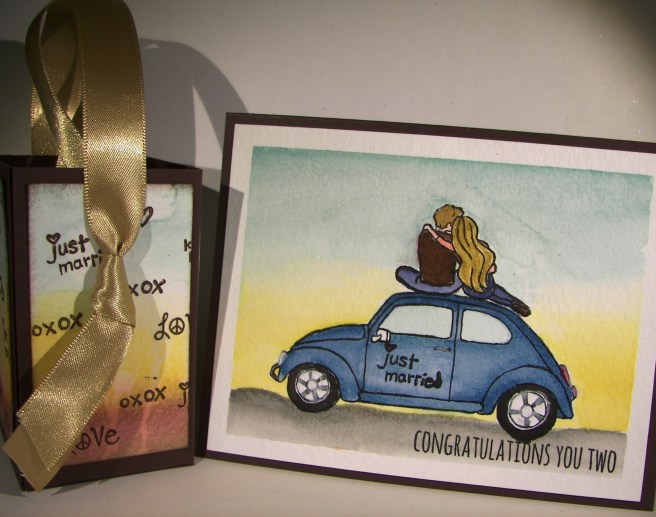
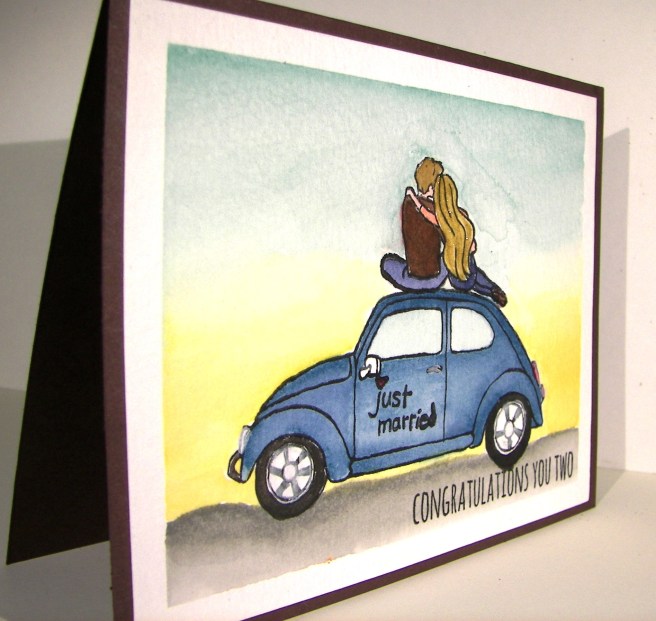
This is what I had in mind this morning, thinking of my recently married son and my soon to be married daughter.  Love is definitely in the air.  Then I read the news.  Seems like love is needed elsewhere today, and so much of it.

7-15

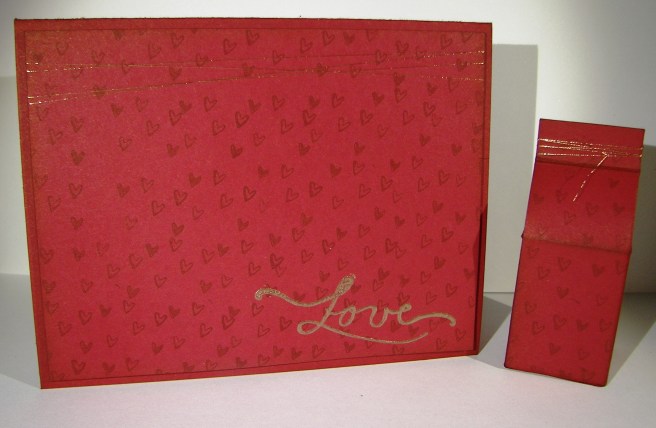
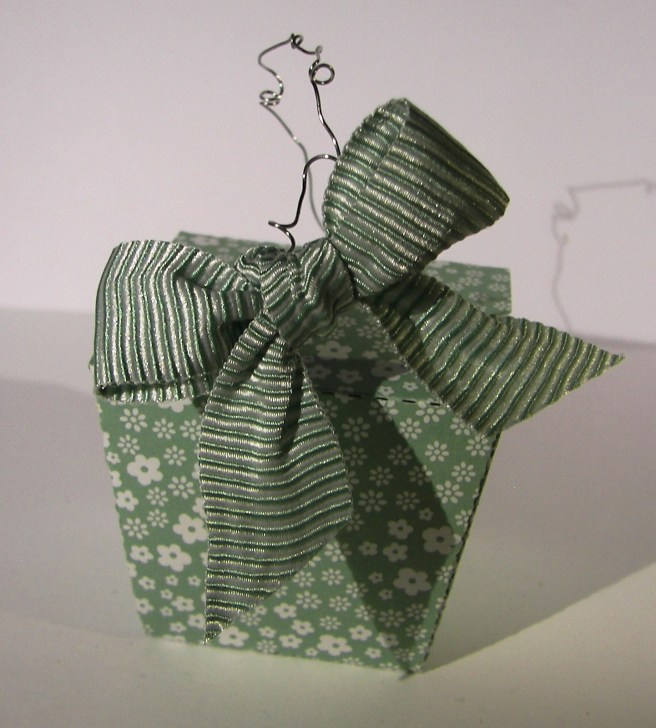
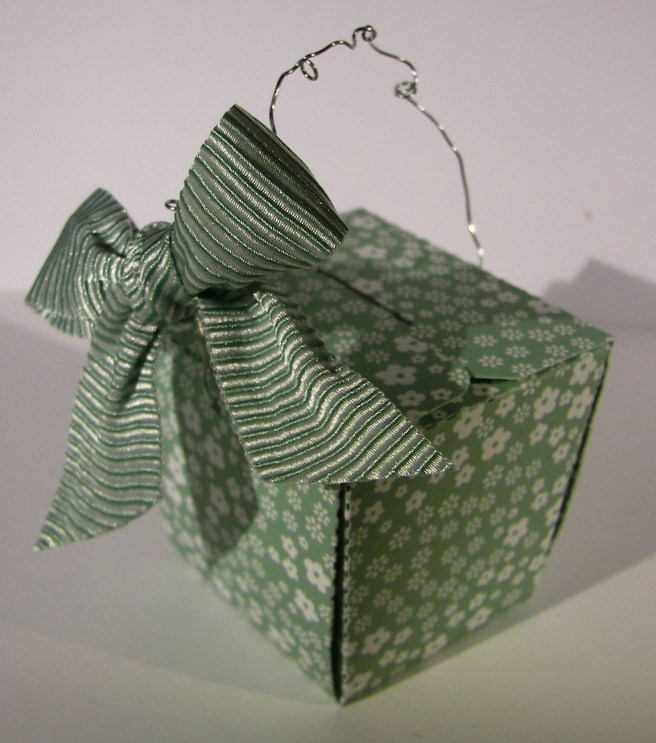
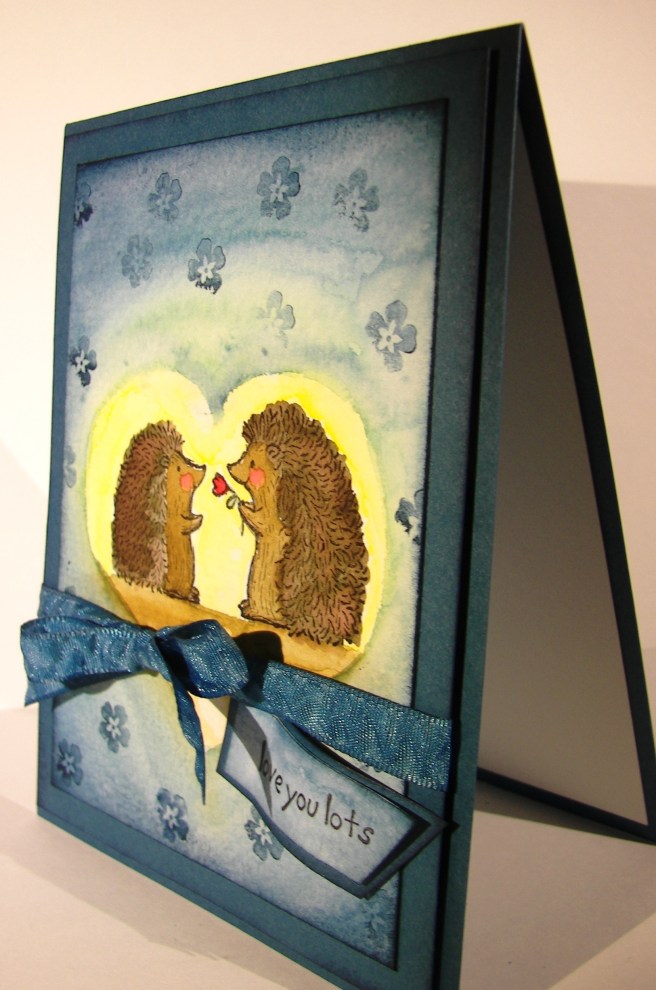
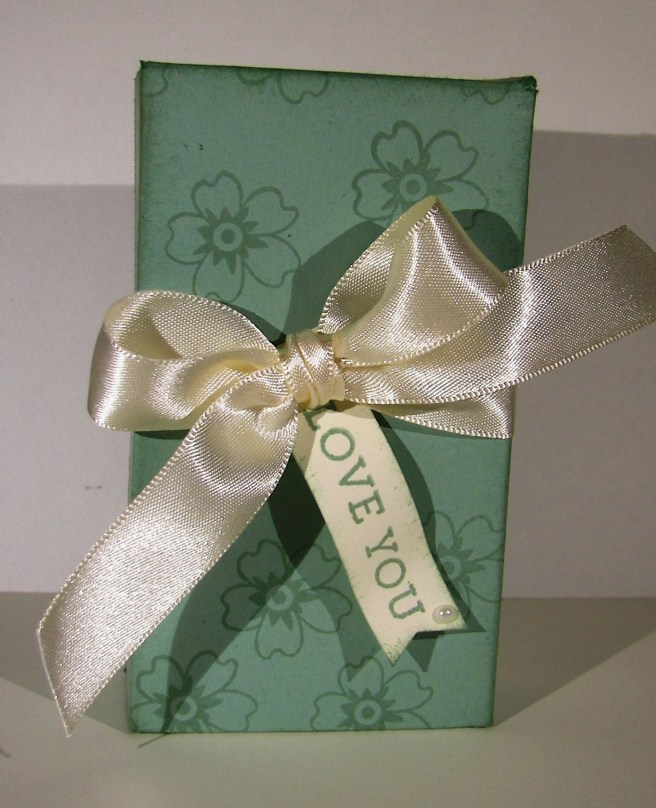
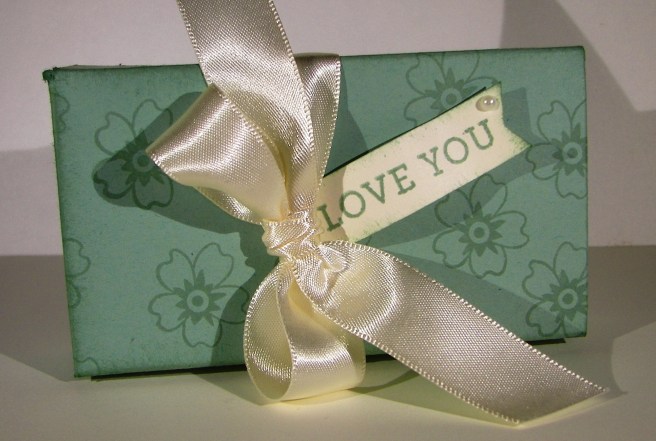
It doesn’t take a lot to show someone you care about them and sometimes it is the little things that mean the most.  Little treat boxes, little hearts, and a little love.  This kind of thing really brings me joy.  Something wonderful from something a simple as a piece of paper.  Yup, just one piece of paper.

7-15 (1)

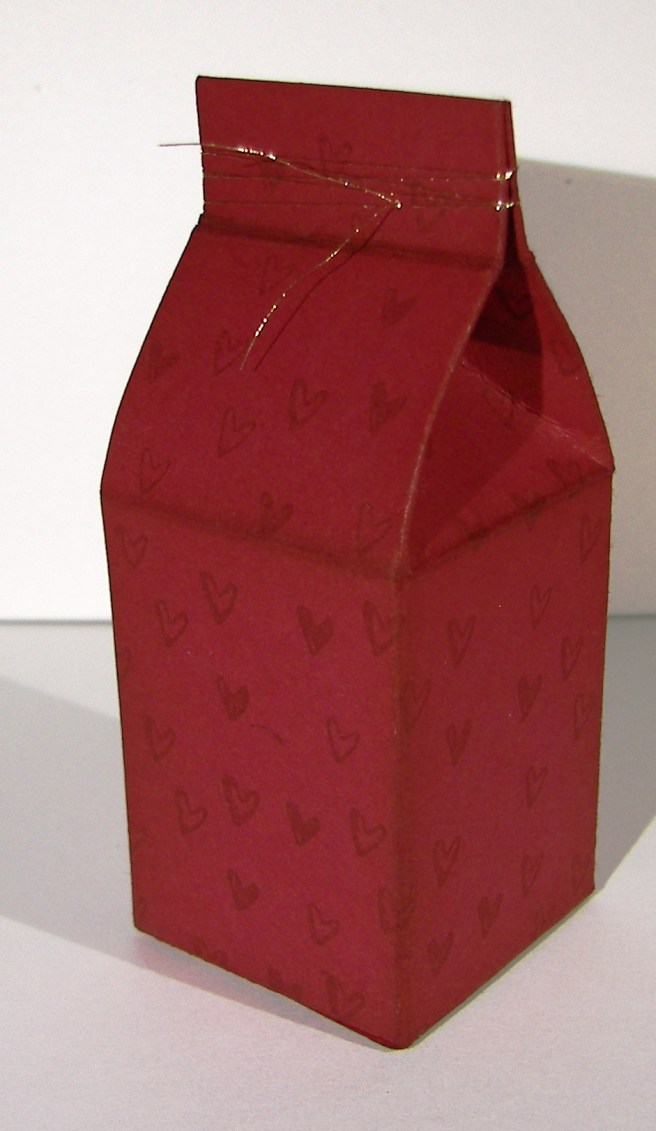
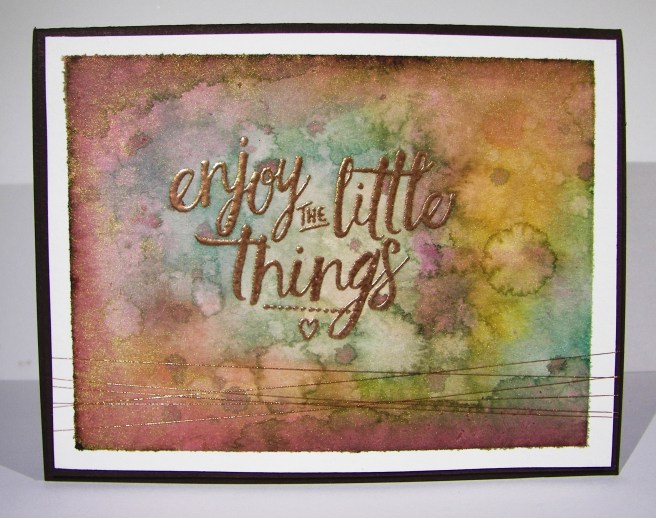
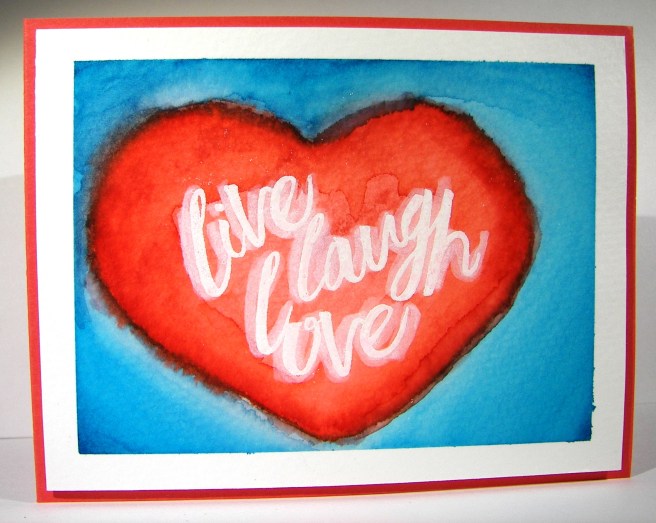
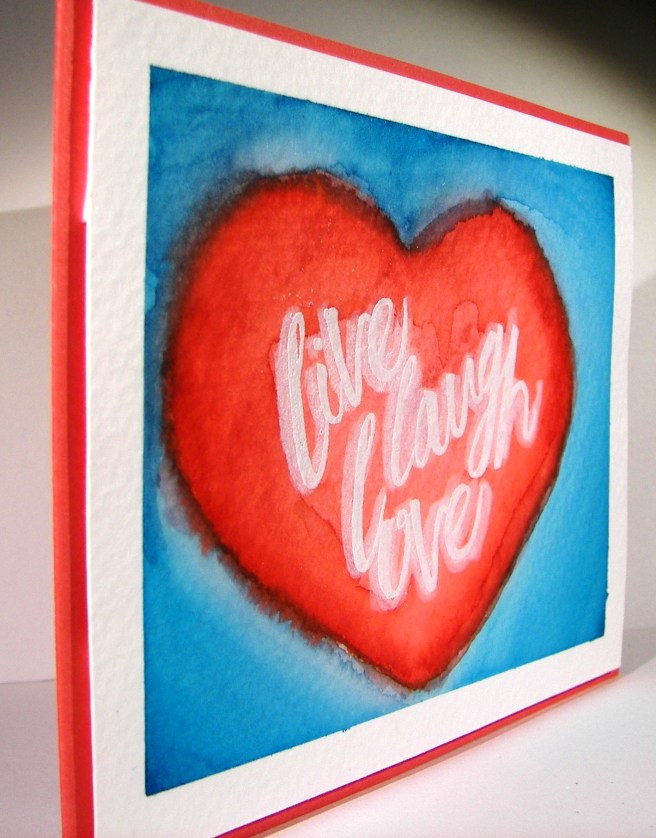
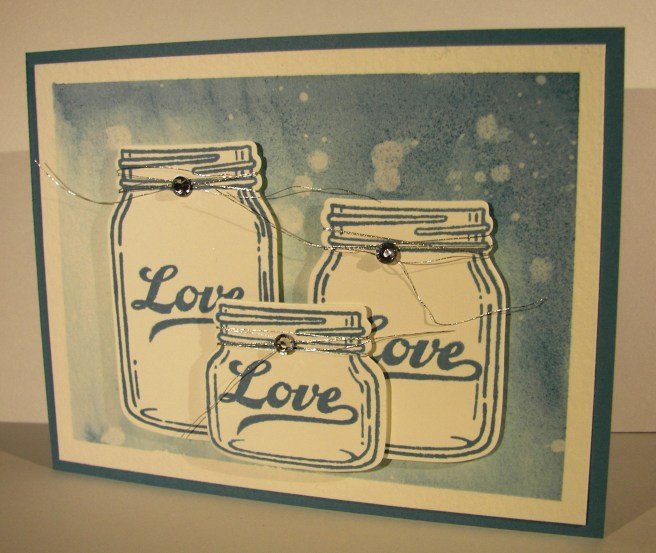
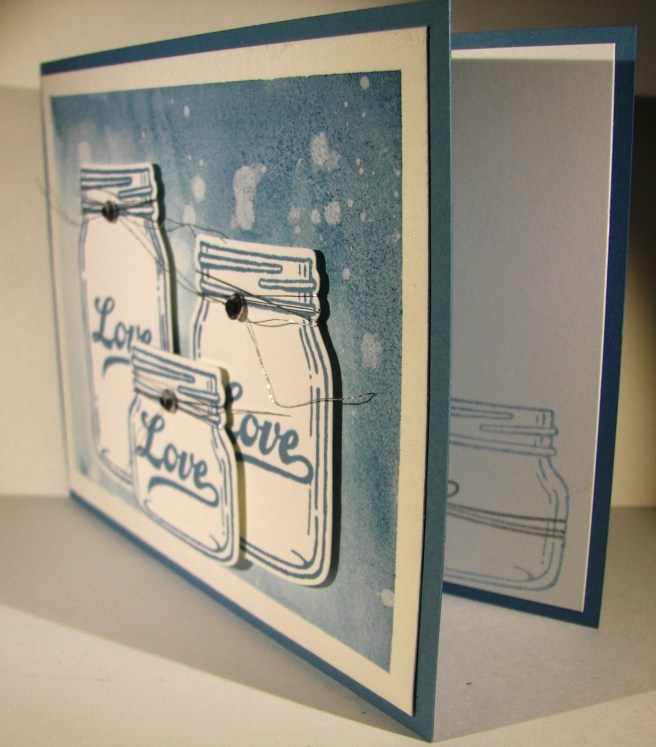
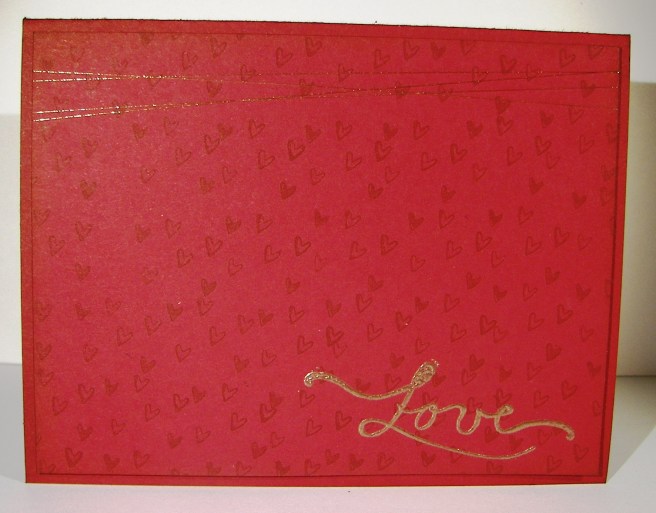
The card was made with a half sheet, the front with one quarter and the box with the last quarter.  Hearts were stamped like crazy using the stamp from the weather together set. The word ‘Love’ also came from the same set.  I know I could have written it myself, but I don’t trust my writing all of the time and I wanted it embossed to really stand out.  After all, isn’t love the most important thing of all?

7-15 (2)

Have a creative day!

Moana

Enjoy the Little Things

Yesterday was a very thoughtful day.  I was able to enjoy a day all to myself, which is quite rare in itself.  I had grand plans, a bit too grand, but decided to change them all around and enjoy it differently. This was one of my moments spent, a very indulgent chunk of time working ink all over this lovely card.

7-9

I was given some new paper and brushes for my birthday, so of course I had to get to work using them.  I took this beautiful paper to the brink of maximum absorption.  Sometimes it just takes more time to get the colors just the way you want them.  If you were to smooth your hand over the top of this card you would feel the difference in texture.  The edges of course kept their very smooth surface, but the inked area is actually raised up.  Cool, right?

I did start with the embossed phrase first.  Then I worked around the edges and started in with all of the color mixing.  This copper embossing powder is so fantastic, I absolutely love the color.  It gives a much more masculine feel and goes better with my kind of color pallet ideas for sure.  So, I basically just embossed my sentiment and then went to town on the ink til I was happy.  And I am so happy, so very happy with this one.  I tend to do my best work when I am creating for someone in particular, especially when that someone is my husband.  What more can I say?

7-9 (1)

Have a creative day!

Moana

Wedding Favors?

What kind of summer has been going on here?  Well…I guess it has been about weddings. We just finished enjoying our son’s wedding and both receptions.  So much fun and truly a joy throughout the entire process.  Much easier to say that now that it is through.  Guess who is looking at wedding favor possibilities?  My oldest daughter.  Wow, two weddings in one year?  Okay…I guess…

6-27 (2)

Not much to talk about here to be honest.  I have used a die cut I got from a thrift store and I don’t even know who makes it.  But it is totally adorable.  I don’t even know if I can fit an entire fortune cookie in it, but we are going to try.  The ribbon is current in this years catalog and I love it.  I might go with the other mint macaron ribbon though, a bit smaller scale, easier to work with and a touch less expensive.  The paper I have here is a retired paper from last year.  I will have to use regular card stock or find another paper that is close to the color she loves.  Shouldn’t be too hard though.  I would rather use designer paper instead of card stock so it can be patterned and avoid stamping, mass stamping actually.  I would never avoid stamping.

6-27 (1)

Either way, you can get a tiny glimpse into the adventures ahead.  It should be more than wonderful.

Have a creative day!

Moana

Flourishing Phrases

This particular project went through a few different phases.  This is how it started out, all about blue.  I had the ocean on my mind and gave it a try.  I had intended on using a new embossing folder after I water colored, but to be honest, I forgot once I got all this going.

6-25

After I painted with all of the blue inks I have I did some detail work using my gold wink of stella.  I focused on some of the watermarks and edges of color.  The look it creates is really awesome.  It is tricky to know when to stop because it is so much fun.  Mission accomplished here for sure.

6-25 (1)

The next step was to add a special tag.  This one got a bit out of control and went to a busy style that really isn’t my own.  However, I decided to leave it and see how it balanced out with the huge butterfly addition I had in mind.  I water colored large areas of paper to provide both my tag area as well as the butterflies.  It is much easier to paint whole sheets instead of small specific die cuts.

6-25 (2)

When this butterfly combo came along I really began to wonder just what I was up to.  I think that is because I love decorative painted backgrounds so much I rarely cover them up. They are such great all occasion cards, but I pushed forward.  I did edge the butterflies with the wink of stella, which of course you cannot see in these photos.  It is there though, and it looks so pretty.  You can see it better in the lead featured image which is much more close up.  Basic pearls, gold metallic thread with a little more patience and this project was finally finished.  It measures 5 1/2 x 5 1/2 plus the butterfly hanging off the edge.  A custom envelope will definitely be in order here.

Have a creative day!

Moana

I am Much More Me When I’m With You

What do you do with a huge pineapple stamp?  Well, just about anything you want I guess.  I loved it, but probably had more questions than answers.  This is definitely one of those answers.  I asked my daughter to pick out a stamp from my stash of new product and give me a color.  She chose light green and this stamp.  Sometimes you just need a nudge in the right direction to get moving.

6-24

Yesterday, and well into the evening, I spent my time helping a good friend with a wedding photo shoot.  You never know how much you are needed, but judging how tired I am today, it would have been so hard for her without me.  And of course we had an absolute blast.  We work nearly seamlessly together, another plus.  I thought this would suit us nicely.

I went with light water color washing using only two colors.  I wasn’t sure how they would blend in the middle, hoping it wouldn’t make some kind of brown.  It turned out great.  I opted for minimal distressing and one single stamping.  The leaves needed a bit, so I used my aqua painter to blend them a bit, but left the pineapple pattern alone.  I stamped it again on the inside, but more in the corner for more interest.  Good stuff there!

6-24 (1)

The tags & labels framelit set fit perfectly around the sentiment and provided the perfect place for my favorite ribbon.  A few of the new enamel dots found there way as well.  The card front and inside panels were both layered with an additional piece of pear pizzazz card stock and the front was popped up with dimensionals.  There you go!

Have a creative day!

Moana

We’ll Weather This Together

A project can go through several phases, and some can be unexpected.  The original vision kind of got lost somewhere along the way, had some confusion, but ended up reasonably pleasing.  These ladybugs though, too much love there.

6-22

My daughters have a canvas in their bedroom that inspired this little card.  I was looking at it recently and thought of the new stamp and framelit set that could help me create my own version.  I pulled some of my favorite pastel colors for the background and started the process.  The more colors I use the longer it takes me to become satisfied with how they blend and flow together.  I went through this one three different times and then once more when I added in the yellow around my little bugs.

6-22 (1)

I water colored on a scrap piece a mix of pool party and blushing bride.  The umbrella was then cut out and hit again with more blushing bride.  The clouds and raindrops were cut from areas that just had pool party.  And yes, I did glue all of those parts down, even those little drops.  I love the dimension the thick water color paper gives to them. Before I stamped my sentiment I added a touch of wink of stella to the clouds and raindrops.  All the pieces were layered together and put in place.  And before the blog had even been finished I was able to use it to brighten someones day.  Wonderful.

Have a creative day!

Moana

Artistically Asian

New stamps, new stamps, new stamps!  I love having new stamps!  This particular one caught my eye right away on my first browse through this seasons catalog.  I could easily get lost exploring the possibilities, there are so many.

6-17

But, I am totally in the mood for water coloring, so what else would I turn to just now?  I thought some of the new in-colors combined with gold would compliment the Asian feel of the stamp set.  And, I absolutely agree with myself.  Good thing too…

Flirty flamingo is the card base and the main color I painted with.  These colors go so very well together.  I used a lot of water and kept the color light building the intensity but not overdoing it.  Experimenting with this kind of painting is really something you just need to sit down and do it.  I have learned some things that work better for me, and of course there are tons of very talented people online that generously share their techniques to learn from.

I did stamp over the floral image again with both flirty flamingo and gold encore ink.  I wasn’t looking for a particular effect, just more of the image itself.  Then I hit it pretty hard with the gold wink of stella brush pen.  I accented the image quite a bit then followed along some of the water mark lines.  They ended up giving me a bit of a mound for the plant to rest on and maybe an interesting mountain or two in the background?  That wasn’t the intention, but I keep seeing that when I look at it.  Judge for yourself.

6-17 (1)

Have a creative day!

Moana

Layering Love

Summer is here and it seems like love is everywhere.  How fun is that!  I wanted to capture some of that carefree spirit that summer can bring and had a fun time giving it a try.

6-16

I must admit, I have been enjoying my water coloring quite a bit, but it is still my favorite medium right now.  I thought I might use a die cut on this image and layer it, but I forgot about that until I started typing.  I was wondering why I left the image off center like that.  I then remembered my original plan.  Well, I am okay with how it turned out.

It began with stamping the sentiment in versamark ink and then embossing with white embossing powder.  The next step was to create some kind of heart over and around the words.  When that was done I stared at it for a while trying to decide on a background color. My oldest daughter suggested tempting turquoise since it felt like summer.  That went with my plans, so I went for it.  I kept the color the strongest in the corners and painted towards the heart.  I was trying to create a lighter area around the heart to make it look like it was floating a bit.  That worked pretty good.  Wish I could make a more balanced heart, guess that is why I love die cuts and punches so much.  They correct my work some…

In the end I was happy with the result.  I went ahead and did a touch of blending along the edge of the heart and the blue background.  This provided a bit of a border and gave some cool layering effects.  I went back around the lettering with a wink of stella brush which gave a bit of shadow, but also made the image appear almost blurred.  Interesting, but I still went with it.  I left it a single layer on the card base of watermelon wonder and there you go.

6-16 (1)

Have a creative day!

Moana

Lots of Love

I had this little treasure ready for yesterday, but never got to share it.  I guess that is what happens when you are this close to throwing a reception for your child. And yes, that would be today.  I was obviously thinking about them and how sweet they are together.

6-11

This focal image is taken from a new host set called Love You Lots.  I am not usually one to go for whimsical images, but this set was way too cute.  I stamped these guys on water color paper and proceeded to take my time.  The background went through phases, several of them, then I finally just had to stop.  My girls were happy with how it turned out, but I am still a bit unsure.  Either way, here you go.

I wish I could just sit at my desk and water color my day away, but this household has a list of many last minute things to be done.  Some were pushed from other to do lists, but the day of the big event has things that can’t be done any earlier.  These are tasks of joy though, absolute joy.

6-11 (1)

Have a creative day!

Moana

Love, Love, Love…

When the new catalog comes out each year I do a quick scan for the super obvious favorites. Here is the first one that was an absolute must have.  To be honest, I focused so much on the adorable jars and lettering I didn’t notice just how huge the stamp set was.  Well, it is amazing.  Talk about options.  I could do a series just using this set and have tons of projects, all looking unique.

6-9

I began by creating a background using marina mist ink on water color paper.  I have been using quite a bit of designer series paper lately and missed making some of my own.  I do feel better now.  After it was all painted and distressed I moved onto the jars.  I could hardly wait.

They were stamped in marina mist on whisper white paper then cut out using the matching framelit pieces.  I do love perfect little images all ready to go.  They were layered a bit, but you can still easily see that they all say love on the front.  I am still in wedding mode and the card reflects this.  I will be hanging dozens of mason jars below several of my trees today that will get candles and create a lovely look.  The couple is already so wonderful, I just want a beautiful evening for them and all of our friends.  Just two days away!

I did a tiny bit of stamping inside.  The small jar was used but stamped off once to give it a lighter look and allow me to write over it if needed.  Then, I stamped with silver encore ink a wrapped string to match the front.  I went back and added large basic rhinestones on the metallic thread and thought it was perfect.

6-9 (1)

Have a creative day!

Moana

Layering Love with Dapper Denim

When I got done complaining that they were changing out the square framelit set with another one I was pleasantly surprised.  Coordinating scalloped squares, how very thoughtful!  This also helped me not be so sassy about the wonderful scallop circle punches being retired.  There are always adjustments when it comes to new catalogs, products and plenty of favorites retiring.

101_1418

The card front was stamped with the Brushstrokes background stamp using the new dapper denim in-color.  I then spritzed it with water until the ink started to move around, let it sit for a bit, dabbed it with a paper towel and then dried it with my heat tool.  All done!

A quick stamp, but a lovely one, cut out with a new framelit, echoed with some more dapper denim in a scalloped framelit and layered up on dimensionals.  Of course I had to use more of that new wonderful ruched ribbon.  Dangerous stuff there.  I can usually control my ribbon purchasing for me and my club ladies, but I don’t know about this time.

The inside was stamped with a bunch of tiny little anchors to fill opposing corners.  It is also part of the same stamp set, which has several fabulous sentiments to be enjoyed.  I think today is a wonderful stamping day.

101_1419

Have a creative day!

Moana

Love You

Love, love and love.  It is in the air like crazy and I can’t seem to get enough of looking at it, feeling it, and most of all, sharing it.  What a great thing in life to experience.  Less than two weeks now and my oldest will be married!  How exciting!!!

5-24

Simple layered card today.  I stamped the background paper with the floral heart from the Bloomin’ Love stamp set.  Real quick work there.  I did a tiny love you stamp on a scrap of whisper white and punched it out with the soon to be retired large oval punch.  Sad days there.  I matched it with the scalloped oval punch in bermuda bay.  That was sponged along with the card front and the card inside.  The inside also got a bit of stamping, my favorite. Then the ever so lovely, and larger than life, striped ribbon got to be used once more.  What a fun and huge bow.  Yes, this will need a custom envelope and extra postage, but it is worth it!  What a great project for today!

H5-24 (1)

Have a creative day!

Moana


Corner Garden Bliss

As another catalog year comes to a close I have to be brave and say goodbye to the things that I have loved so much.  This card has so much of that in it.  The stamp, and three of the colors.  A very sad farewell indeed.

5-5

I masked a piece of water color paper and stamped the floral image in black stazon ink.  I have loved this stamp so much.  I do think it will stay with me even when it isn’t available to purchase.  The only color I wanted for the flower petals was blackberry bliss.  So, that meant some had more color than others and they all got special treatment to make them look unique but coordinated.

Before I painted the leafs and stems I applied the soft sky background.  I knew that mossy meadow would cover easily and I still wanted to allow it to blend out a bit.  It worked like a charm.  The flower centers were painted in hello honey and allowed to blend out a bit into the flower.  After the painting was done I  just stared at it wondering how I wanted to distress it.  I didn’t want splatters or spots, but didn’t want to leave it either.

I decided to use a spritzer and water.  Several sprays later I started to like what I was seeing. I did some sponging with a paper towel to lift off some color, then a neat thing happened. I took my damp, inky paper towel and sponged from the bottom to the top which brought a very light amount of blackberry bliss with it.  It looked pretty great so I went with it.  I bet I couldn’t recreate it though, but I will most certainly try.

5-5 (1)

Have a creative day!

Moana

Beautiful Ride for Newlyweds

It may be hard to tell, but there are an absolute ton of colors going on here.  I had a blast working on this set.  When I finally finished I was a bit surprised to see how late it got, but it was worth it for sure.  I love making wedding cards just for special people in your life. This one is no different.

4-21

I worked the colors to create a sunrise look and I think it turned out really nice.  I was having a chocolate craving last night, so I settled for chocolate chip paper.  Not quite delicious, but it still worked out.  That led me to marina mist for the car color. From there everything else just came together.

4-21 (2)

I wanted a gift bag to go along with the card to give the gift card something to go in.  I think I will put a tiny selection of rich chocolates around it, wouldn’t you like to get a treat too? Opening gifts can be exhausting for a newlywed couple, so they deserve a sugar boost along the way.

The details in this set are really busy and probably hard to notice.  I think a project like this should look simple even if you know better.  Not everyone knows how much work goes into a tiny work of art like this, but that doesn’t stop me from sharing them.  Just a few more weeks and this card will find its way to the deserving adorable couple.

4-21 (1)

Have a creative day!

Moana

You Are My Everything

There are days when I really don’t know what I want to make, but that isn’t today and it shows.  When I know who I am creating for it shines through.  The awesome extra free stamp set in this months paper pumpkin kit had the stamps I had to use.  How beautiful are they?  Well, I will be using them excessively I am sure.

4-17

I knew I wanted to make a card for my husband with the two stamps  that share the phrase ‘You Are My Everything’.  It couldn’t be more perfect.  Once I knew that I knew the color pallet I needed and the medium as well.  Blues and water coloring are the perfect combination for him.

The technique of water coloring really doesn’t have a lot of guidelines.  I do start with a wet masked surface.  Then I begin to add and take away color, dry and wet again sprinkle and dab, and color all over again.  It is more of keep going til you get the results you want than a step by step process.  So much fun, really.

Then I stamped the large flower in bermuda bay, once stamped off first, here and there.  I added a fern stamp a few times, full strength not stamped off.  Then finished with the two stamps that make the sentiment.  I did a little echo stamping to coordinate the inside with the card front.  To complete the project I layered the art onto another piece of bermuda bay card stock and wrapped it several times in silver metallic thread.  Then up on dimensionals for a little extra style and sit back to enjoy the view.  I do love this card.  I think it looks like a beautiful batik fabric I would love to own and sew with.

4-17 (1)

Have a creative day.

Moana

Helping Me Grow

I do love to water color, that much is more than obvious.  Since spring is everywhere I knew I had to do some flowers like the ones I see everywhere.  How about lupin?  Pretty sure I spelled that wrong, but they are the prettiest wildflower, next to the poppy of course, that are growing all around this time of year.  My husband even recognized the flower on the card, and that is saying something.

4-13 (2)

I stamped the large floral image on my masked piece of water color paper in black stazon. The flowers were initially painted in marina mist, letting the ink run lighter as I went up the flower.  After, I added in hi-lights of wisteria wonder in the centers and across some of the petals.  The stems were done in pear pizzazz.  I did a touch more with the gold wink of stella to give it a sparkle.  That was both on the petals and the stems.  I know, it is hard to see in the photo, but it is there.

I painted the background in so saffron, allowing it to be lighter and darker just here and there.  I didn’t have a specific rule in mind, I let it happen.  I then used my aqua painter to drop clean water across the card to make water spots.  I let the drops sit there for several minutes then came back and dabbed them up with paper towels.  That removed ink and left the fun spots behind.

A simple bow across the front finished it off.  I used a piece of very vanilla for the inside.  I decided not to leave it blank and opted for a repeated image of the front.  Instead of black, I used so saffron stamped off and placed it right in the middle just like the front.  The idea is that it is light enough to be written over, kind of like a water mark.  It looks great.

4-13 (1)

Have a creative day.

Moana

Mother’s Day Take Two

Earlier in the year I made a couple of cards with this darling little chick from a sale-a-bration stamp set.  I instantly fell in love.  So did my mother.  I decided she needed to have one of her own and not just a card.

4-12 (1)

A prior paper pumpkin kit had this frame along with pretty little things to make a wonderful decorative gift.  I couldn’t make it for my own mother since she gets the same kits each month and I didn’t want to give her something she already had.  It sat upon the shelf for some time.  Until last night when I needed it, the frame that is.  I also used the wrapping cardstock and ribbon to go around it.  Now I will send it away for an early mother’s day gift.  She will be super excited.

The little chick was stamped in black stazon on a 4 x 4″ sheet of water color paper.  I started pulling ink pads until I had everything painted just like I wanted.  I did use my heat tool a few times along the way to set color when I wanted to layer another.  The yellows I let all blend together without worry.  But I wanted the cheeks to stay pink and tried to keep the beak a little more under control.  The shadow needed to be dried before the background was applied, but that is about it.  After I put a touch of marina mist for blue eyes I used wink of stella to give them some sparkle.  Just a fun little project to make my mom smile.  So fun.

4-12

Have a creative day.

Moana

Love You Bloomin’ Love

Just when I thought I could sit down and make something new my time got snatched up. It seems to happen that way more often than I would like, but we do what we have to do.  So, I grabbed a leftover kit from last months workshop and turned a card base into a box.  Pretty cool if I do say so myself.

4-11

I stamped tone on tone with mint macaron using one of the larger flowers from the Bloomin’ Love set to create the background pattern.  My tag was a tiny piece of very vanilla which measured 1/2″ x 4″.  After I stamped the ‘love you’ sentiment from the same set I punched a banner at the end with the bitty banner punch and sponged around the edges with the same ink.  I curled the banner a bit before I set it in place.

The cardstock was cut at 4 1/4 x 11″.  All ready to be a tall folded card.  I scored along each of the long sides at 1″, turned it one quarter turn and scored at 5″ and 6″.  Those last two scored would become the hinge side of the box.  Scoring, snipping and a bit of gluing later and this little box came together.

4-11 (1)

I chose the large satin ribbon for my bow.  That is such a rich ribbon.  I just wrapped it around the short side and tied a pretty bow, leaving the tails a bit longer than normal.  I usually wrap my boxes up more, but wanted to be able to slide the ribbon off easy to fill with treats when the time came.  I also decided to add a tiny basic pearl on the banner, but just one.  How cute is that?

Have a creative day.

Moana

Thanks to You I Grew Up Loved

What a sweet, tender card.  I was thinking of my mother as I put this one together.  She is all about flowers and everything that go along with them.  As I shared this one with her, we shared a few tears.  Having a wonderful mother that helped you grow up loved is more than a blessing, it is an absolute treasure that we both share.

3-31 (2)

This lovely card showcases the dsp almost as much as the sentiment.  It is hard to decide which is the focal point, so I will call it a draw.  I stamped the sentiment on whisper white and punched it with the most narrow portion of the triple banner punch.  I then created a border of calypso coral and repeated the punching  to give a nice quarter inch boarder that tied the entire card front together.  After a lovely bow tied with seam binding ribbon I decided to put the tag on an angle.  It turned out so adorable and yet so simple.  One of my favorite ways to work.

3-31 (1)

Have a creative day!

Moana

A Very Special Invitation

I know I used a bunch of retired product, but I still love it too!  The wonderful thing about tools is that you can use them again and again no matter how long you have them.  This stamp set and coordinating embossing folder are retired Christmas product.  I think they are still beautiful and perfectly wonderful for this project.  So there, use the product you have and love!

3-21

These were special handouts for a Sunday church lesson I taught to a group of 14 & 15 year old girls.  They are so dear to my heart, I can’t help myself but make them something special every time I teach.

I embossed my card front after I did my stamping.  The stamp is photopolymer, so exact placement was super easy.  Then I centered my folder just where I wanted it to be.  I traveled through my framelit collection to find one that had the shape to match the background stamp and my sentiment stamp.  Of course it was the last one I looked at.  But it was a perfect fit.  A touch of sponging on the diecut piece and it was done.

I did get the cording out and do a few loops of it behind my card front.  After I had placed my dimensionals behind my diecut, I looped the cording and set it on the exposed sticky side.  I added a couple of glue dots over the top and stuck it down on the card front.  No problems there!  The cording wants to loop because it is stored on a spool.  Even better!]

3-21 (1)

Have a creative day!

Moana