Thank You, Friend

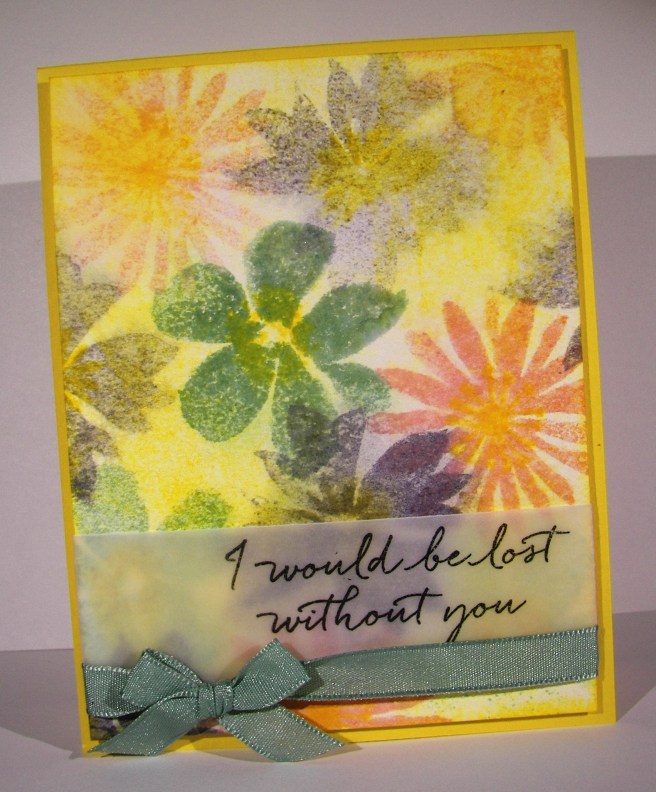
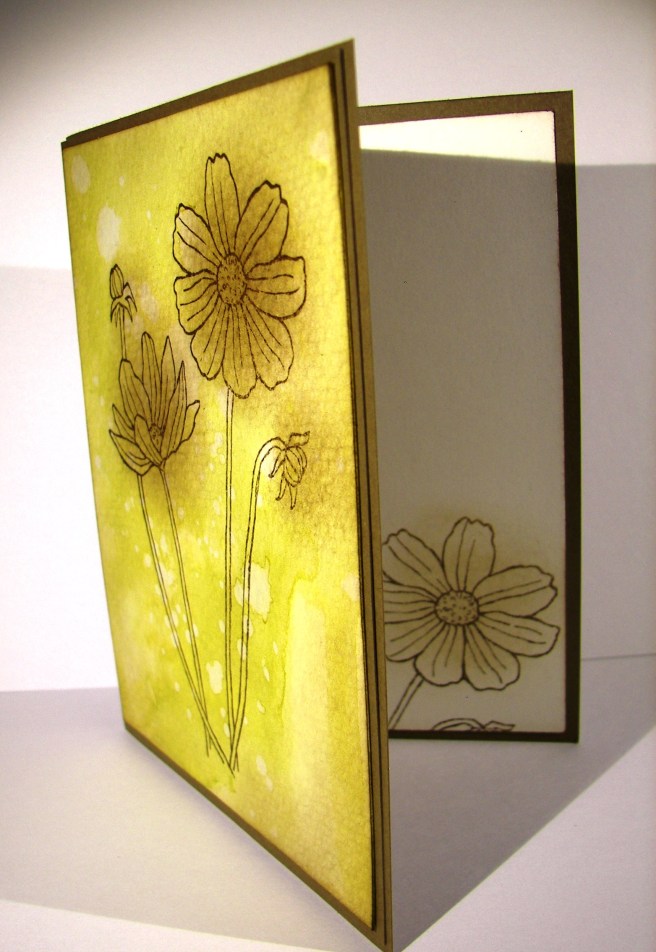
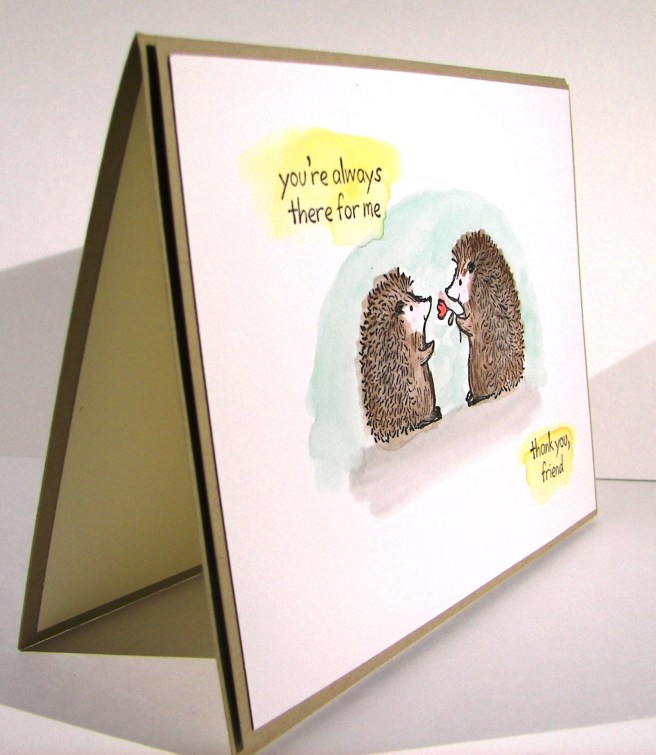
Simple and sweet, just like any true friendship worth having.  Sometimes we get so caught up in the day to day demands of life that we set aside those we really care about.  But, since they don’t judge us, and they truly understand, we can get away with it for a time.  That doesn’t mean they don’t hold a special place all of the time.  Good friends are the best!

1-22

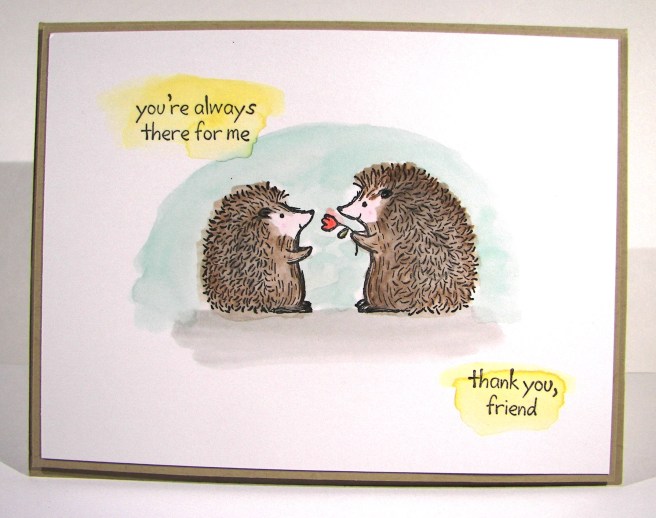
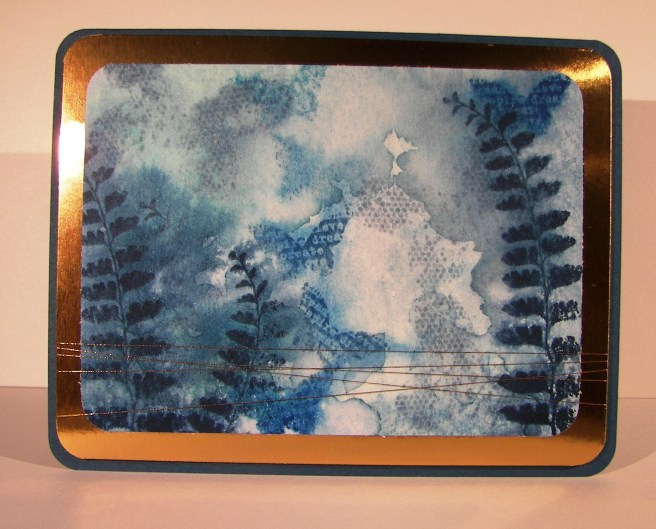
This little number was painted with the new water color pencils and an aqua painter.  The hedgehogs I should say.  The bit of background was done using classic inks with the aqua painter as well.  I stamped the guys in the center with the sentiments to the top left and bottom right.  I colored in the hedgehogs first, left them alone and painted the background, and dried the card well before continuing.

They were pretty easy to finish, I didn’t have too many problems.  I did several of these cards for gifts so I got a bit careless.  Good thing water color can be more loose.  They turned out adorable though.  I mounted the card front on a base of crumb cake and layered those on top of a crumb cake card base.  The inside was given two panels, one on the top and bottom of the inside for extra writing space.  Can’t wait to send it!

1-22-1

Have a creative day!

Moana

Here’s to Another Year Full of Adventures!

That sounds like a perfect theme for the year, doesn’t it?  Well, it also makes one great statement for a birthday card.  I made this card along with yesterday’s project so they definitely go together.

1-21

I wanted to use both sides of the designer series paper just to see the differences.  The polka dots were a bit more whimsy with this side definitely leaning towards the masculine side. This new candle border punch could keep me busy for days!  Doesn’t it give such a great look both inside and out?  I had to restrain myself from keeping all of the punched pieces to build little candles on other things.  Another time perhaps.

I kept the stamping light as well as the water coloring.  Just one color here, delightful dijon, and I love the simplicity of it.  I did have to tie some metallic thread though, it needed it.  When I looked at the stamping I wanted a bit more with some of the words, so I had a couple of ideas.  I colored in the ‘another year’ portion with the daffodil delight water color pencil, it matched great!  I also went over the ‘full’ portion with the gold wink of stella brush pen and loved it.

I did distress the water coloring a bit with water drops, just can’t help myself sometimes.  I do what I love and I love what I do.  Can’t wait to try this one again.

1-21-1

Have a creative day!

Moana

Thank You Very Much

Holiday weekends offer a lot if you are willing to enjoy.  I love the extra time to sort through all of life’s adventures and endless “to do” lists.  But it is also a time to pace yourself and reflect.  This project offered me that time.

1-16

I started with the idea of more precise painting, but quickly learned that it had other things in mind.  Since I have such a hard time waiting for much of anything, my colors couldn’t stay still.  So I went with it and created a much more fluid and dreamy look.  You can tell from the warp of the side of the paper just how much water went into this project.  I had fun though, and it was truly relaxing.

1-16-1

The sentiment was stamped on very vanilla and cut out using one of the dies from the Bunch of Banners framelits set.  I love the crisp edges of a die cut.  The inside stamp was another image from the same stamp set.  This particular set isn’t available for regular purchase, but at a reduced price when you host a workshop.  Sounds like a win win to me!

Have a creative day!

Moana

Blooms & Wishes

This stamp set sat in the annual catalog and teased me often.  I would try to pass by it saying that I surely did not need yet another floral stamp set.  Well, I broke down and bought it.  So very glad I did.  What a beautiful watercolor piece, right?  Great stamps make all of the difference.

1-15

I chose a few spring colors to work with, focusing on daffodil delight.  With all of the rainy, cloudy days we have had I wanted something bright and cheery. Mission accomplished for sure!  I stamped the large flowers from the set in different colors, stamping off as I went along.  The centers were all daffodil delight and more of an idea than a detailed center.  I sponged more yellow ink all around the flowers filling in most of the white areas before moving on to spritzing with water.  It was just a matter of managing the water spritzing to allow some ink movement, but not blurring too much.  It didn’t take long before I was satisfied.  A quick drying moment or two with my heat tool and it was ready for the sentiment.

That was stamped on a strip of velum cardstock and then wrapped around the bottom of the card front.  I used a lovely mint macaron satin ribbon to accent the bottom and layered it up with dimensionals.  Such a lovely spring card.  Of course I had to stamp a bit inside with a few yellow daisy images and one for the back too.

1-15-1

Have a creative day!

Moana

Rainy Sky or Under Water, Yes

This lovely water color started as a fun project with my daughter-in-love.  We sat down together with a bunch of blue ink and totally different ideas.  I can’t wait to see what her card ends up looking like.  I wanted to create dimension in a single layer water color.  I love how it turned out.

1-13-17

I started with a wet brush and paper.  I put different colors in all four corners and the lightest blue in the center.  The wet ink blooms did a lot of blending, but I moved the paper around to control the rest.  My patience runs thin often, which ends up in me drying my projects along the way to speed them up.  This time was different.  I only dried the paper enough to apply some stamped images here and there.  Then, I spritzed the entire piece to soften the images and allow more blending to happen.

After a few hours I came back to see how it ended up.  Just like this.  I even controlled myself and didn’t add anything else.  No more color, or blending or water droplets.  It was accented with copper foil paper and copper metallic thread.  What a great all occasion card to have on hand.

1-13-17-1

Have a creative day!

Moana

Hey, Chick, I’m Back!

Well, I guess that kind of sums it up!  With two children’s weddings within six months, and a heavy dose of regular life, I just found myself taking a few things out of my day to help get through it all.  I have so missed this, it really does help keep me sane and happy.  I have still created, but not at the same volume and just haven’t taken the time to share.  Enough of that, so I am back to stay.

1-12-17-2

What better way than to be greeted by this adorable chicken, right?  Last year during sale-a-bration there was a different chick stamp set.  Here is the new one, and it has taken my number one favorite spot once again.  There are others in the set, but this guy is the best! What makes it better than that?  The set is free with a $50 product order.  Free is cool, but I would have bought this one in a heartbeat.

1-12-17-1

I stamped the chicken in black stazon ink on water color paper.  I knew I wanted the feathers on top red and decided to make the tail feathers match.  It really was a painting process here.  That is usually how my water coloring goes, layer upon layer.  I put out my colors, real red, pumpkin pie, and daffodil delight, and painted until I was happy.  I used a black marker to add some wild feathers and then hi-lighted with gold wink of stella.  His little eyes were a bit tiny, so I used my marker to make them a bit larger.

The tag was stamped on a scrap of water color and punched with the classic label punch. The stamped area was smaller than the punch, so I punched it again on one side to shorted it up a bit.  One quick hole punch and a double wrap of gold and black metallic thread and I called it done.  The water color is adhered down with a heavy dose of fast fuse while the tag got layered up a bit with dimensionals.  I forgot to include a photo of the inside.  I tipped the chicken a bit sideways and stamped him as if he was peeking around a corner.  I lightly water colored him to match the front and just giggled.

It feels good to be back.  Now, to make sure I give myself time to enjoy this lovely process every day once again.  It will be tricky, but worth it.

Have a creative day!

Moana

Fruit Stand Delight

This project is a different take from a prior card I made.  The first one was a full water color card front, stamped and water colored.  This one uses the coordinating designer series paper with a single pear stamped and water colored.  I like the difference, and so did my card workshop ladies.  They are the best!

8-24

I added an extra layer, but the process was the same.  A single pear stamp in pear pizzazz, and water color the lighter areas of the image with daffodil delight and blend it together. The leafs and stem were done in garden green and blended a bit too.  The background was a light wash of daffodil delight.  Then, top the pear with a tiny bow of linen thread with a glue dot and grin at your work.  What a fun way to spend time with friends, making cards like this.

8-24 (1)

Have a creative day!

Moana

Fear Not My Friend…

When I am wanting to convey more emotion in a card, I go directly to water coloring.  The softness it creates is perfect.  And with this card, I literally poured my heart into it.

8-20

I wanted more space to work with so I created a larger card than normal.  This one measures 5″ x 6.5″.  Big, but not too big.  I also created my inside writing panel at the same time.  This card wasn’t going to just get a blank insert, or even a nicely stamped one. Besides, I love writing on water color paper, so very satisfying.

I stamped my floral image and sentiment first so I could control the strength of color where they were.  Then I brushed the papers with clean water to allow plenty of color movement. I kept the background light and tried to keep mixing to a minimum.  The colors I choose don’t always blend nicely, but that doesn’t stop me.  I dried, distressed a bit, and dried until I was happy.

I painted the flowers with strong color, allowed them to dry clean.  Then worked them over properly.  This included adding, dobbing, and adding color on the flower petals for a bit.  I centered the flowers with a strong yellow, but kept the color from the edge of the flower center.  Then I hit that area with a water spritzer and watched the flower bloom all over again.  The color moved nicely and then was dobbed some more.  Gold wink of stella was brushed into the petals and blended with water again.  The overall effect was lovely.

A special card for a very special friend.  She is far more brave than I can imagine.

8-20 (1)

Have a creative day!

Moana

Touches of Texture

Where has the time gone?  Always rushing away, but I managed to sneak a few extra minutes to play with some water coloring.  During the summer I thought nothing of spending a good hour or so creating a project.  Well…maybe that will have to be a weekend thing now that school is back in session and schedules have changed.  It still felt good, even if it was a quick one.

8-19

I masked my paper around the edges and applied a wash of clean water.  From there I just started to make stripes.  First with the blue and then the pink.  However, I applied the blue in stripes tipping the project so the ink could flow down a bit.  Then I flipped it around and applied the pink, also tipping the project, this time so the pink could flow into the blue. There was hardly any blending on my part.

The stamps were all from the same set, Touch of Texture.  That is a big set.  Definitely wants time to sit down and really play with the layering options.  I stuck with basic black with a little stamping off too.  Then I distressed with water droplets and called it.  I wasn’t sure if I wanted it to be done or not, but the clock said yes.  So there it is!

8-19 (1)

Have a creative day!

Moana

Fresh Fruit

The same stamp set as yesterday, but fruit as promised.  I went much lighter in tone and worked with water coloring for a softer look.  Maybe this is my guilt for not picking pears that are ready to go, but I would rather just enjoy the art of it instead.  I do have pears to pick though…

8-13

This particular stamp set recreates the look of water coloring so nicely.  I started with a base image of the pear in pear pizzazz of course.  The light area is left blank, all ready to receive another color.  I painted in some so saffron and then blended into the green.  It was really fun.  The stem and leaf stamp is one and was stamped in garden green.  I also went over that image lightly with a wet brush to blend again.

I thought about leaving the background blank, but decided it looked unfinished.  I kept with the so saffron, just diluted it a bunch more.  I didn’t worry about being too perfect around the edges, but since I was working wet on dry I didn’t have too many problems.  There you have it!  I even made a pretty pear on the inside of the card.  I think I should go pick pears, put them in a basket and give them to someone along with this card.  Maybe tonight when it cools off some.

8-13 (1)

Have a creative day!

Moana

Thoughtful Branches Thankyou

This card comes from a limited time stamp and framelit bundle.  There are many options within, all kinds of trees and fun things, but this is why I bought mine.  I love hydrangeas so much.  I am so going to enjoy this set.

8-9

I put a new stamp pad to use.  Stampin’Up! has produced a few ombre pads, this one in particular is rich razzleberry.  I am usually a bit more traditional, wanting more self control over the colors I use.  But this was pretty darn fun.  I like how it turned out and I am glad I bought them.  I wanted the color to bleed some, so I spritzed the flower with water after it was die cut.  It softened the color without compromising the ombre effect.

I painted another piece of water color paper with almost artichoke and used the stem die cut.  I didn’t have to add any color afterwards, it turned out nice.  I knew I would be working in water color paper, so I made both flower parts and the card front from the same paper. That way the ink would react the same and have a uniform look.  The background was done with a light wash in crushed curry.  No distressing, just painting.

I stamped the sentiment directly to the card front and called it good.  I did layer it up on another piece of almost artichoke paper for a bit of interest and to help control curling of the card front.

8-9 (1)

Have a creative day!

Moana

L is for Love

Current product is always fun and often a bit too exciting.  How about something that isn’t brand new, but new to you?  I was given a few stamp sets from my daughter-in-love and I couldn’t have been more pleased.  We did some stamping together and she just might have gotten the bug.  How fun!

8-8

These stamp sets are over a decade old, but just adorable.  The word set is fantastic.  I don’t know how I missed these because they are just what I would have purchased.  Well, they are mine now and I didn’t even have to hunt them down on eBay or something.  Retired product can be found all around online, but isn’t always priced reasonable.  If you find something you love in a current catalog, you should just get it.  Like I need another flower stamp set.  I don’t think I will ever stop buying floral stamps.

I brushed the background with ink until I got good coverage and then blotted a bit with a paper towel.  Then I used the largest floral stamp and put them all over the front overlapping generously.  I stamped ‘love’ on another piece of paper, trimmed it and placed it over a wrap of cotton ribbon, also retired.  Just because product gets retired doesn’t mean it isn’t beautiful.  It just means I can’t sell it because of availability.  No big deal there.

8-8 (1)

Have a creative day!

Moana

Oh Happy Day

There is a certain someone getting close to having a baby girl and this just about sums it up. It is truly a happy day and I can’t wait.  And with the heat we have been having I am sure she is more than excited.

8-6

The very fun and exciting playful palette designer series paper stack almost overwhelmed me. The colors and patterns are so busy, almost too busy for me.  I started out with the most subtle one in the stack.  I can’t imagine some of these patterns in a 12 x 12, good thing this is contained to a 6 x 6 stack.  There will be a lot of fun card and gift bag sets I think. Smaller than my regular by far, which makes it much more manageable.

I punched several balloons from plain card stock, but wanted a different look too.  With my aqua painter I covered a section of water color paper with wide light swipes of coordinating ink.  I did sponge all of them as well. The stamp set, Thoughtful Banners, has tons of sayings that fit inside the banner stamp.  There is a coordinating punch for the banners, so that makes me very happy.  I did my stamping, but trimmed it right to the stamp so I could punch another one from card stock and have a tiny border all the way around.

8-6 (2)

The solid bakers twine really makes me happy.  I had longer strings attached to each balloon and trimmed them after they were squished into place with glue dots.  With the extra hanging off the card I tied one simple knot and used it as the embellishment for the gift card sized gift bag.  I do hate wasting product.  It turned out great!

Have a creative day!

Moana

Delightful Garden in Bloom

This project is a companion to yesterdays post.  Both card fronts were made with the same combination of distress inks, just in different sequences.  This one was actually done first which is why the colors are more distinct.  I certainly am enjoying this kind of painting.

7-31 (2)

As I placed the water color paper into the smeared and spritzed inks I made sure to allow white spaces to remain.  I had to make myself stop adding color before some of that effect was lost.  I can’t wait to try it some more.

When I finished drying the piece it felt like something more was needed to tie it together. I found a great stamp from the Garden in Bloom set and did some random stamping. The ink was too dark full strength, so these flowers were stamped off once before being applied. Then a fun ribbon for a bit of interest to finish the front.  A little echo stamping was applied to the inside and the card was done.

7-31 (1)

Have a creative day!

Moana

Simple Distressing

I love it when a card looks more complicated to make than it really was.  This is a great example of that process.  This is probably as close to clean and simple as I get while staying comfortable with the end product.

7-30 (2)

I began with a piece of water color paper.  Normally I mask it to a board and apply ink to the surface.  This time I took some distress inks, rubbed them onto a craft surface, spritzed them with water and began to lay the paper into the ink.  I moved it around until I was happy with the coverage and dried it completely.  I sprinkled water with a wet brush to give the light spots.

One large stamp is all I wanted.  I sponged all around the edges to darken it a bit then decided to sponge the flowers themselves.  A simple task, but a lovely look. I left it at that, no other embellishments and I was good with it.  I did repeat it on the inside and loved it.

7-30 (1)

Have a creative day!

Moana

Yellow Brick Road

I have gotten a bit lost over the past few days over a different series.  It is a re-telling of The Wizard of OZ, very unique perspective.  It is actually a quite twisted tale of what happens after the story we all know.  Working with middle school aged children gives me permission to read young adult fiction and I must be honest, I love it.  This one is no exception.  Hence my yellow brick road card today.  Book three done, but it continues on…darn!

7-19

Either way, how about this fun, bright and cheery card!  Using my brayer to apply ink to the inside of my embossing folder really makes these bricks interesting.  However, I wanted more, so I distressed as well.  First, I gave the freshly inked paper a hearty spritz with water.  That got the ink moving nicely.  I knew I was going to work this over a bit, so I did start out with water color paper, quite necessary.  I added more ink with my aqua painter all around the bricks, sponged off with a tissue to lighten areas, then dripped water all around and dabbed to remove ink too.  Great look here at the end.

I also had a bit of fun with the tag.  I stamped and punched my sentiment on water color paper.  I then liberally rolled the edges and in a bit too in the ink pad.  Then I spritzed it too. That caused the ink to move to the middle, but not all of the way.  So much fun.  The leaf die cuts were smushed in the ink pad too and then spritzed as well.  Everything got the same kind of treatment.  It allowed a different but connected look for all of the elements.  Wheee!

7-19 (1)

Have a creative day!

Moana

Country Basics

This particular project really made me slow down and think.  My usual haphazard color selection just didn’t work out, as you can tell from the huge collection of colors I have listed. This might be the most color I have used on one project.  It ended up kind of cool in the end, but not sure what it will end up serving as.

7-18

One single stamp was the beginning, just the guitar.  The rest of the images were at the end and quite an afterthought to be honest.  I painted the guitar with cajun craze and the color adventure began.  I had thought it would have been fun to sew metallic thread in the guitar string area, but when I spent so much time on the painting I really wanted to walk away. Maybe next time.

Even though it can be a bit frustrating, it is also quite relaxing to work like this.  It also helps a lot with patience.  I know that if I just stick with it, eventually it will come together. Then, the next project doesn’t seem so daunting, because look at what I managed to pull out of the trash bin!

7-18 (1)

I left it clean of sentiment and all other embellishments.  The images speak for themselves and that guitar, I love that guitar.

Have a creative day!

Moana

Fear Not

This was something new for me.  I knew I wanted to have water colored bookmarks, but thought it would be smarter to make one large background piece and then trim it down to the sizes I needed.  Such a large piece of blank paper.  It was a bit overwhelming for some time.  Like the stamp says, fear not.

7-17 (1)

After a while I felt a little more comfortable, but not all the way there.  Distressing such a large piece was kind of confusing.  I stuck with it, dried it and took it to the cutting board. When they were smaller I knew they would be wonderful.  The edges got a gentle sponging along with light stamping from the same set.

Then a quick layering on elegant eggplant cardstock, the main color I painted with, and some new solid bakers twine to coordinate and it was all done.  These will be wonderful to share with the young women I teach.  Love those girls.

7-17 (2)

Have a creative day!

Moana

Country Livin’ Rocks!

Living in the country has its perks, and wouldn’t this be just one of them?  I unfortunately do not have an adorable old truck like this, but it sure would be wonderful!  I will have to settle for the stamp and my imagination.

7-2

This image was stamped with black stazon ink on water color paper and then adorned with a whole bunch of ink colors.  I started with a pallet of six colors, but it didn’t stay there.  I ended up with ten, but it called for it.  That doesn’t include the colors that emerged from simple blending and colors flowing together.  This kind of work is my favorite.  No real rules, just lots of distressing.

The perfect companion to the card is the new copper metallic thread.  It almost reminded me of barbed wire or old fence wire.  I like a little of embellishment, but don’t want any distractions when I water color.  The thread works for me.  There was a touch of stamping on the inside panel.  The splat image from the perpetual calendar set with cherry cobbler stamped off once.  Yummy!   I do think it would be interesting to try and paint this stamp with flames and metallic chrome.  I will have to see on that.

7-2 (1)

Have a creative day!

Moana

It’s Your Birthday

Do you broadcast your birthday or not?  Well, I think birthdays should always be celebrated, even if you like it small, celebrate.  This is the kind of card that can certainly draw attention and that is totally what I had in mind.

7-1

The stamp set has the marquee image by itself and has different sentiments you can put inside the middle as well as the bottom arrow box.  It doesn’t have to be about a birthday, but that is how I chose to use it for the first time.  I kind of muddled through this project since I only knew I wanted to use embossing powder and a black card base.  Leaves a lot of steps to be followed, even if a bit off.

Most if the projects I have seen with this particular stamp set include stamping the image on different colored card stock papers, cutting the different parts out and then layering them to give a little diversity.  I wasn’t in the mood for that, so I went with my trusty water coloring.  I am not used to coloring around an image so specifically, but it all worked out pretty good in the end.

7-1 (1)

Touches of wink of stella helped make it the rest of the way, even though it is hard to see in the photo here.  Projects always look better in real life rather than photos, but what else can you do, right?

Have a creative day!

Moana