Don’t Quit Your Day Dream

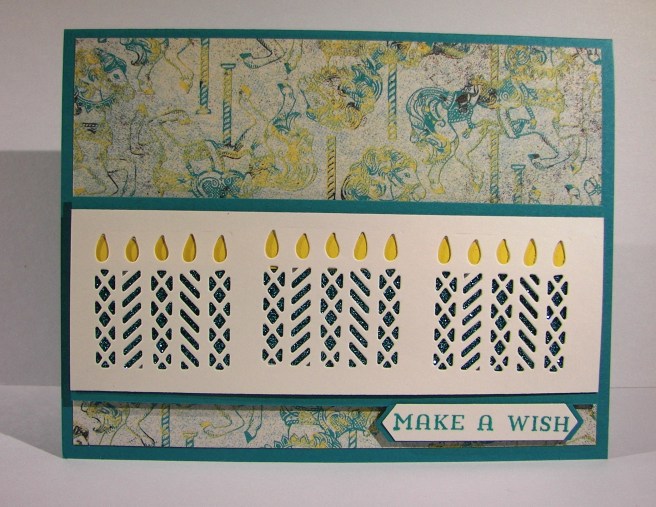
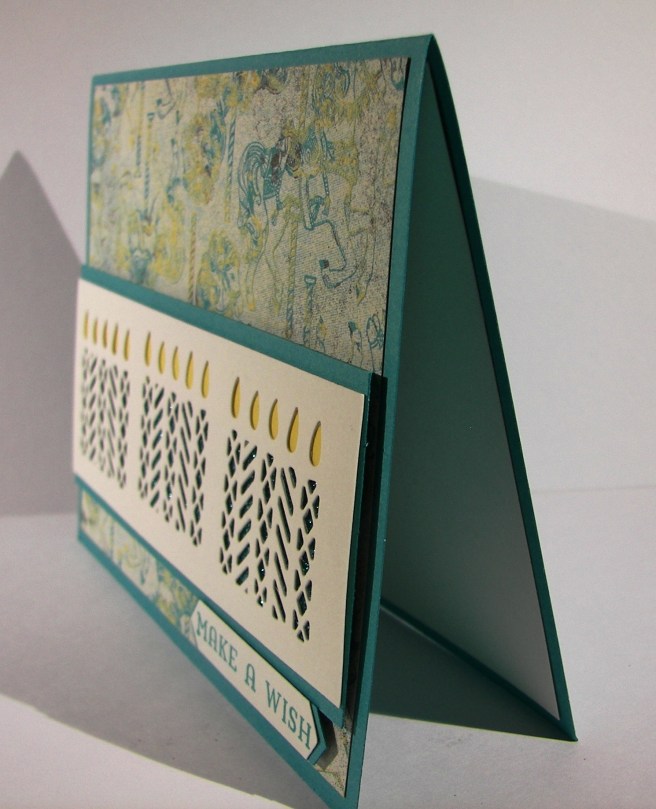
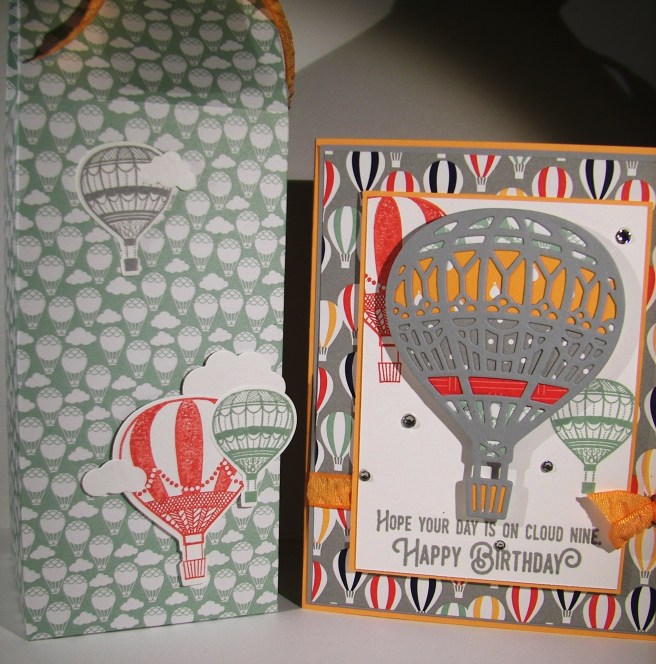
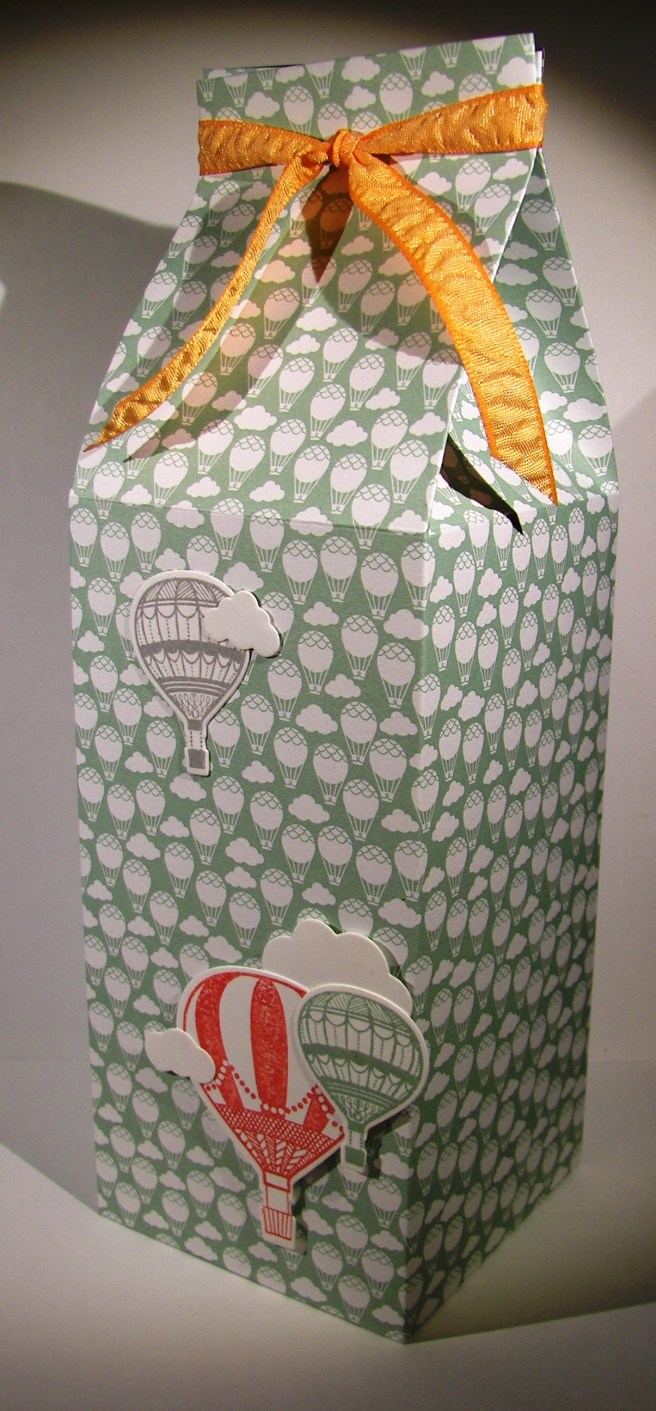
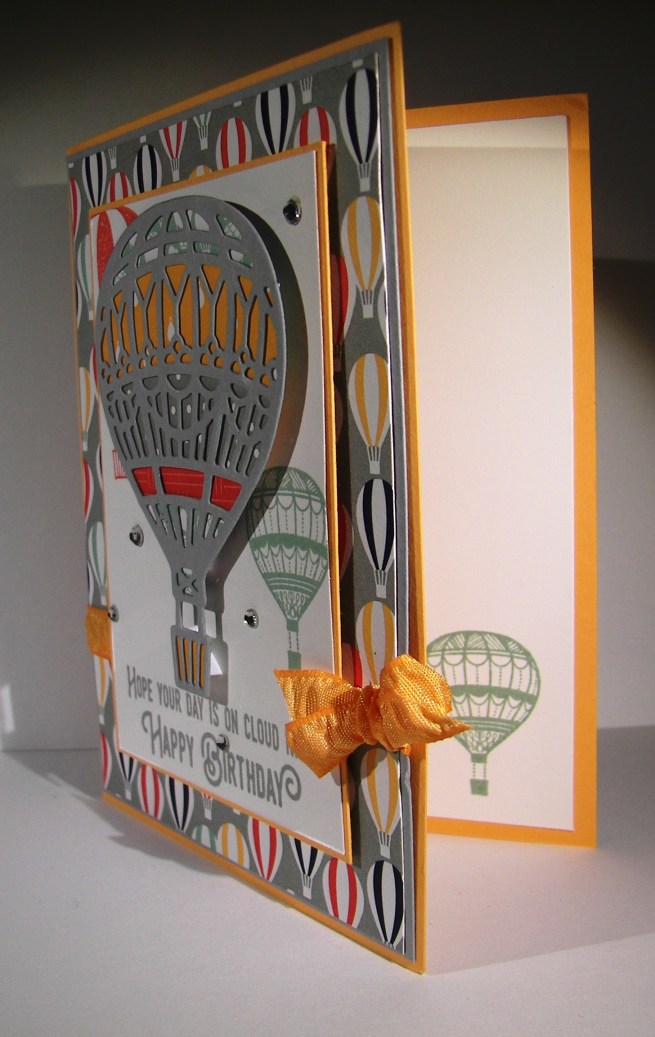
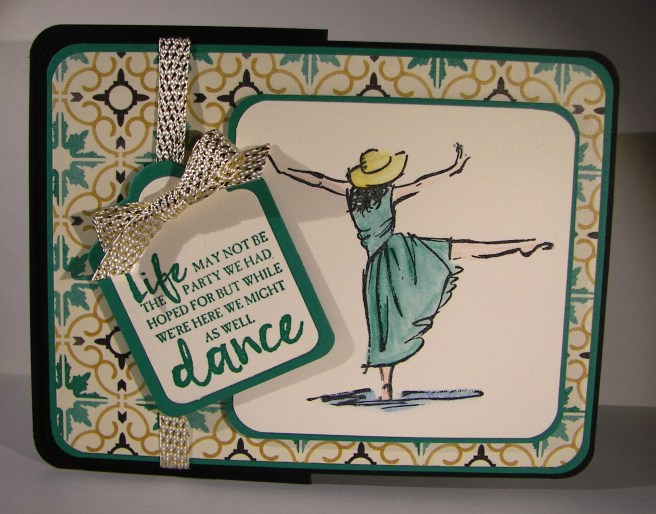
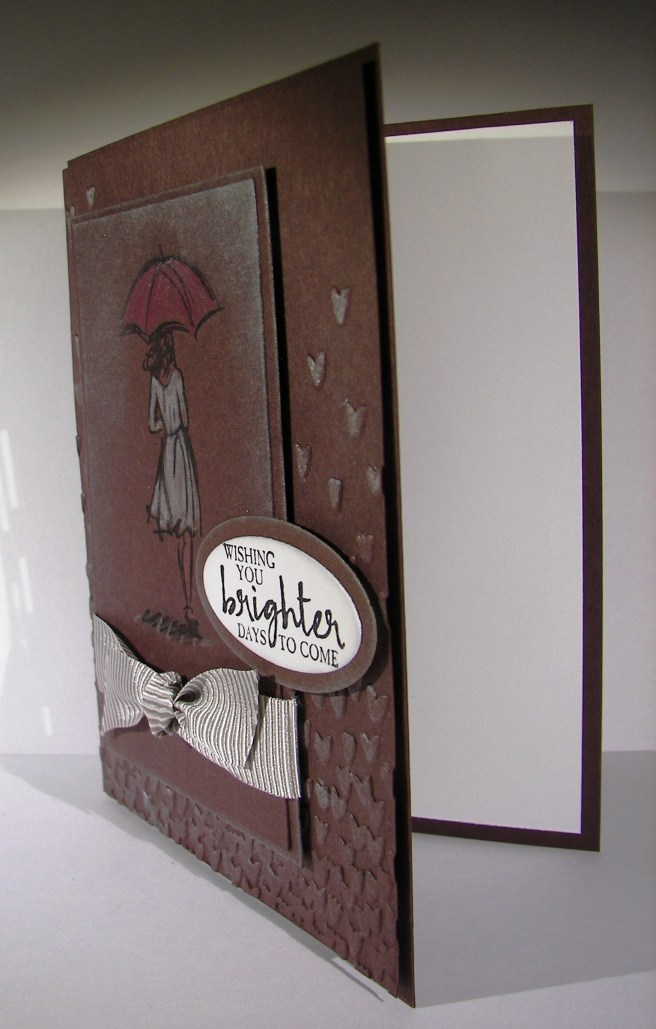
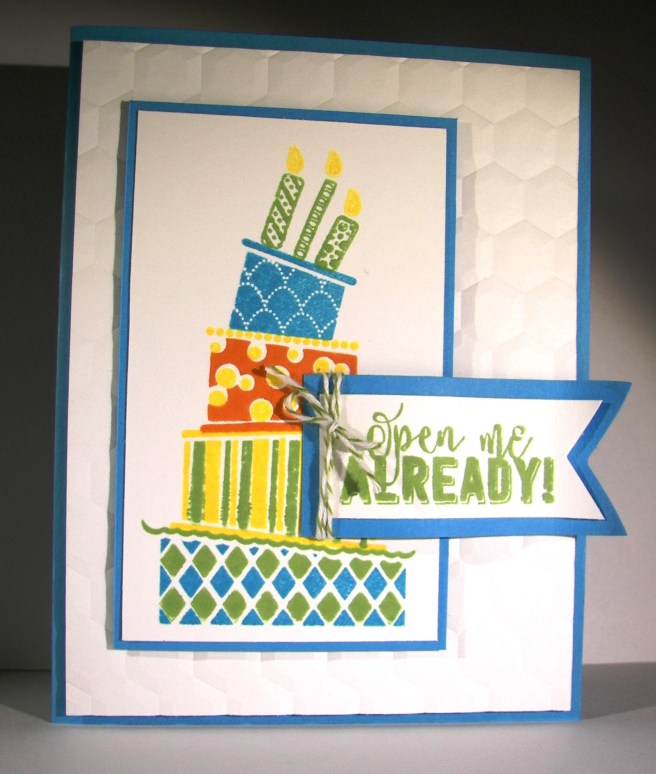
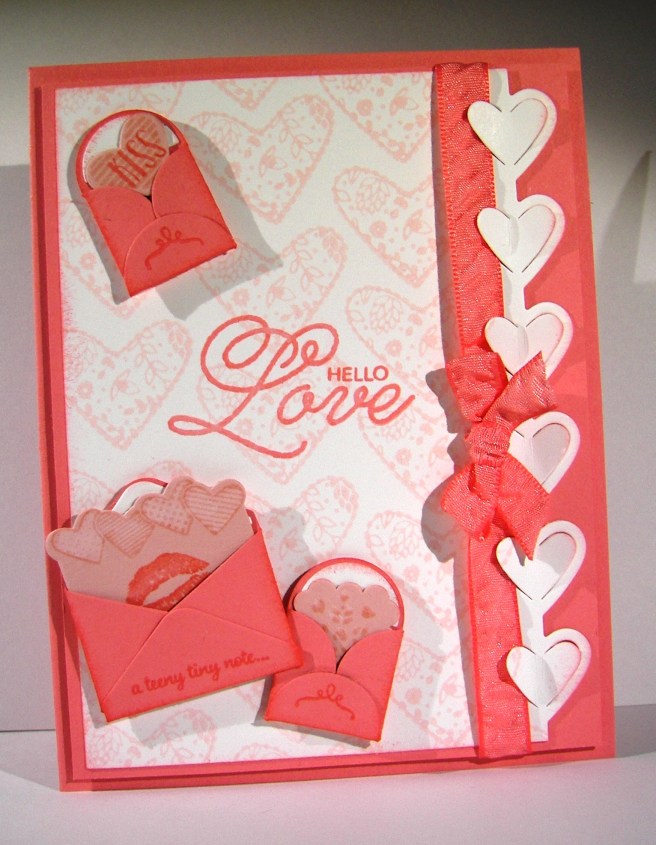
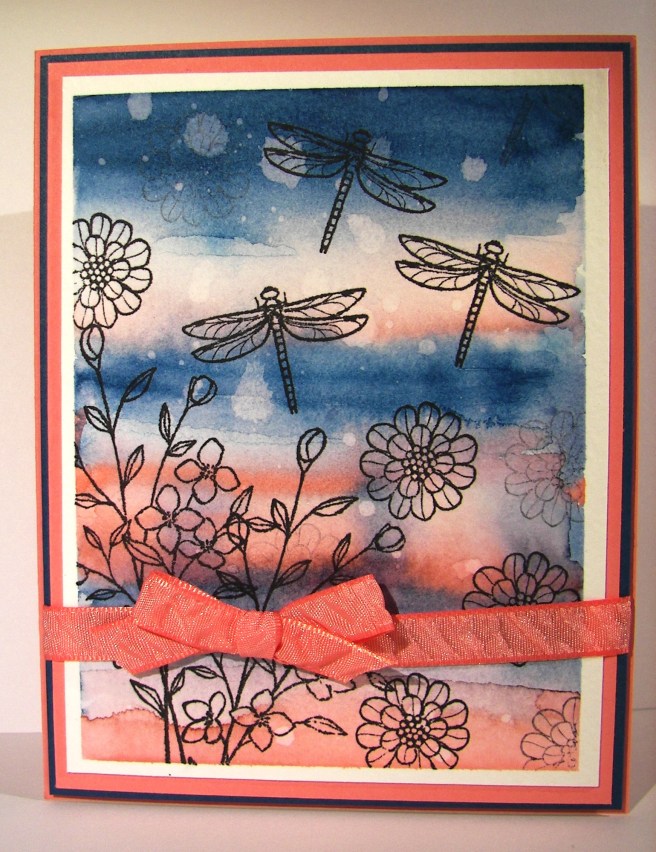
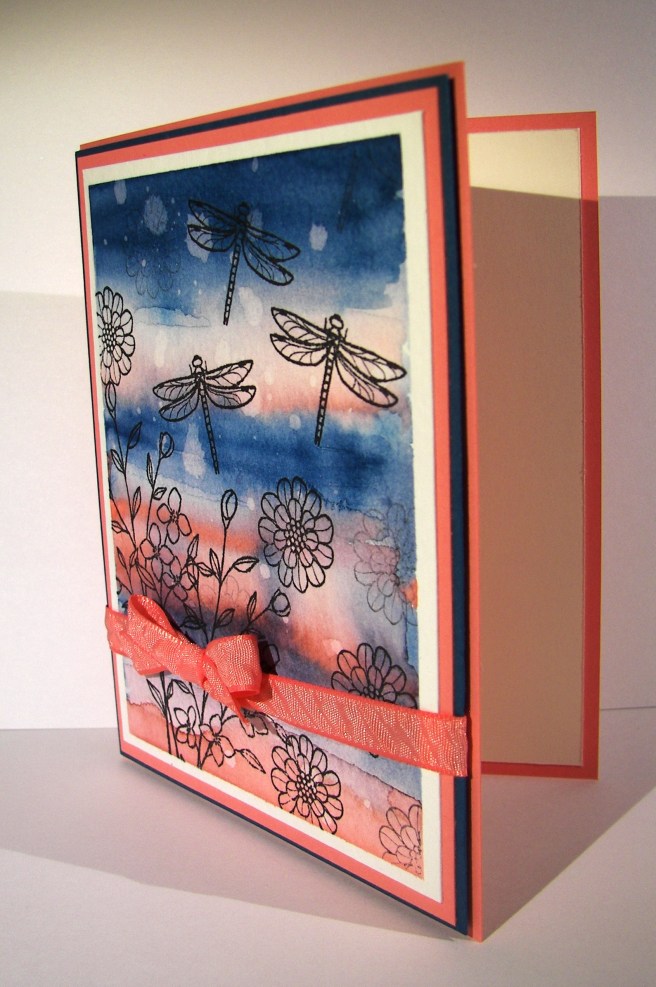
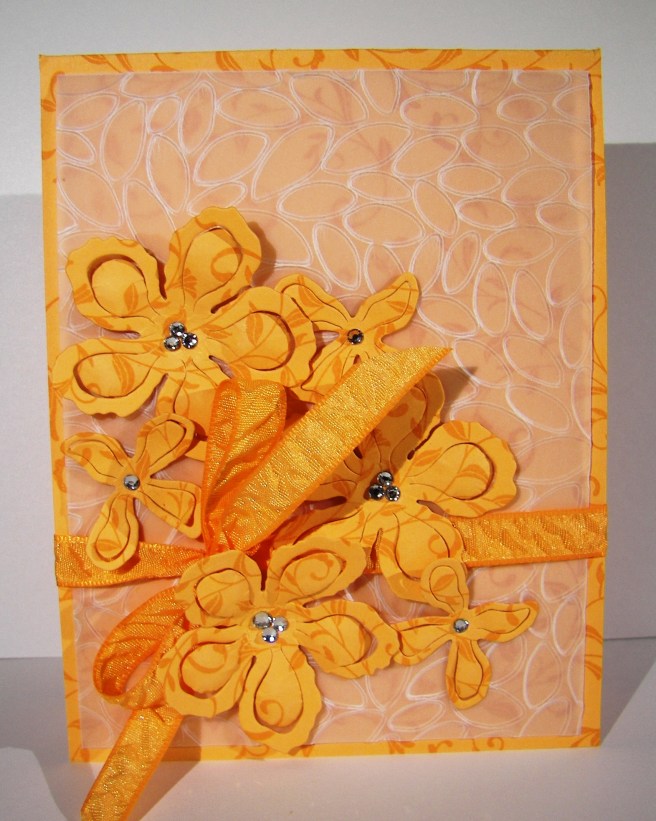
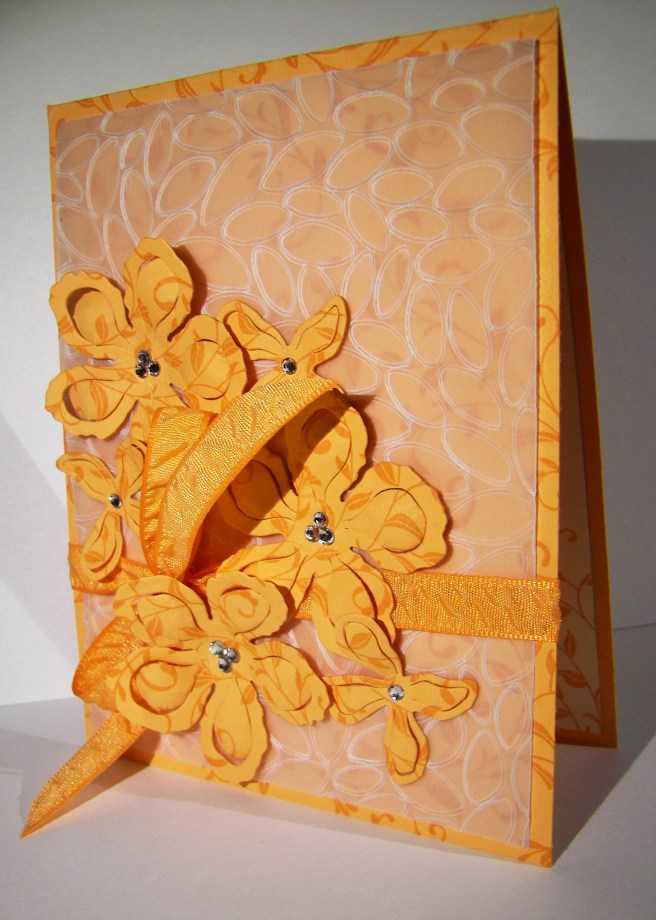
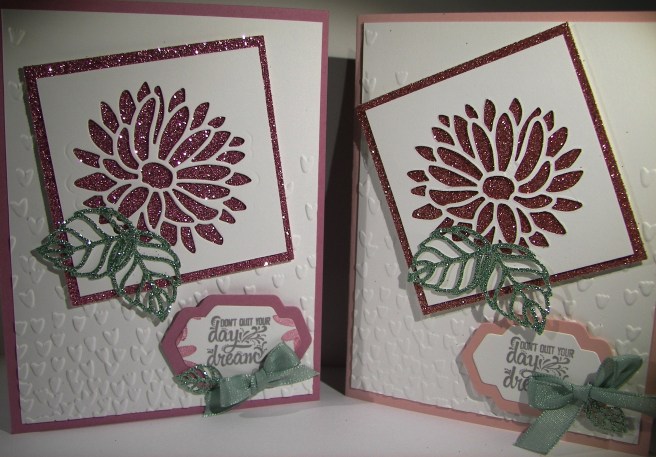
Glimmer paper makes everything look better.  How fun!  These projects were part of this last weekends workshop and the ladies really enjoyed making one.  Good thing we worked with the glimmer paper from this years sale-a-bration because it ran out and they would have missed out completely.  So glad I could share a little at least.

3-22

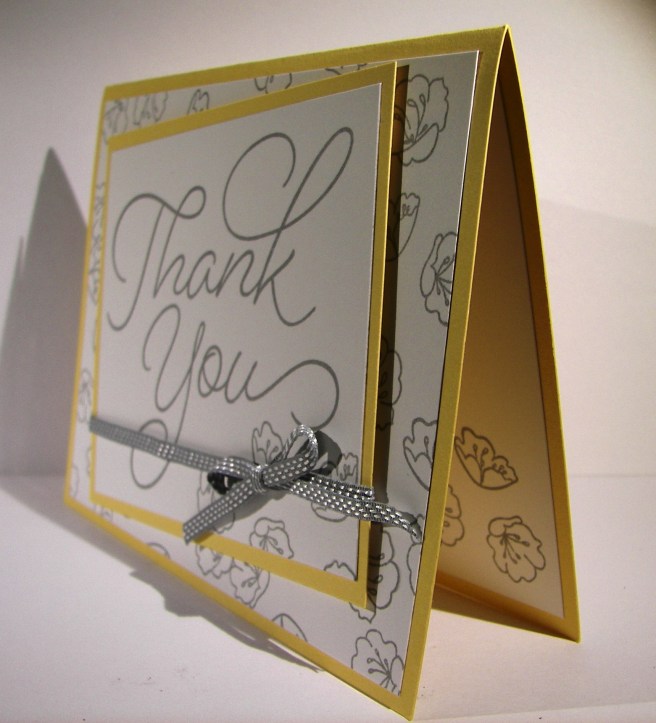
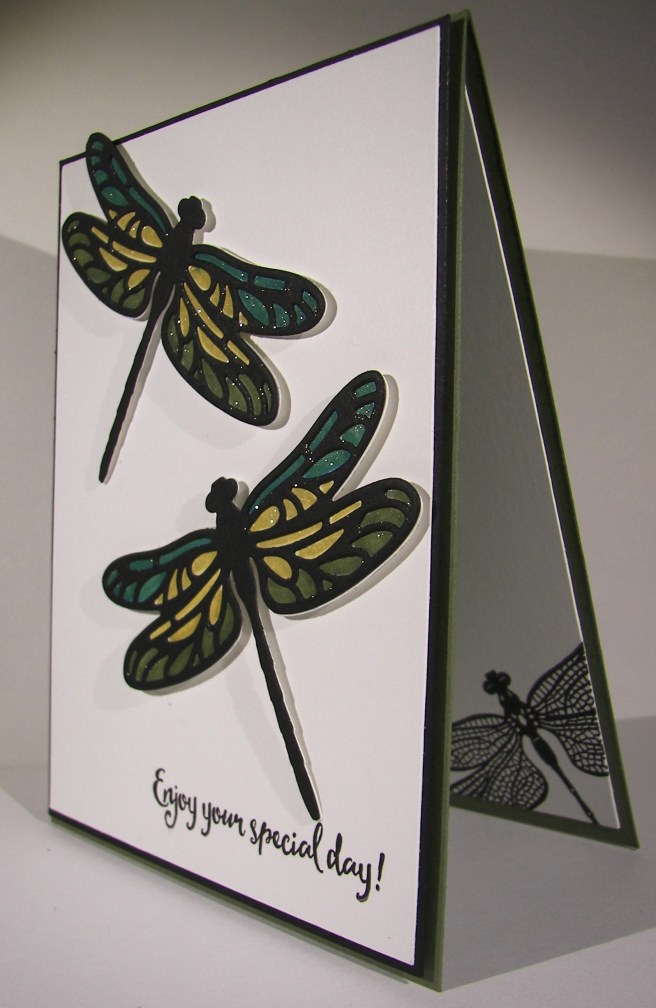
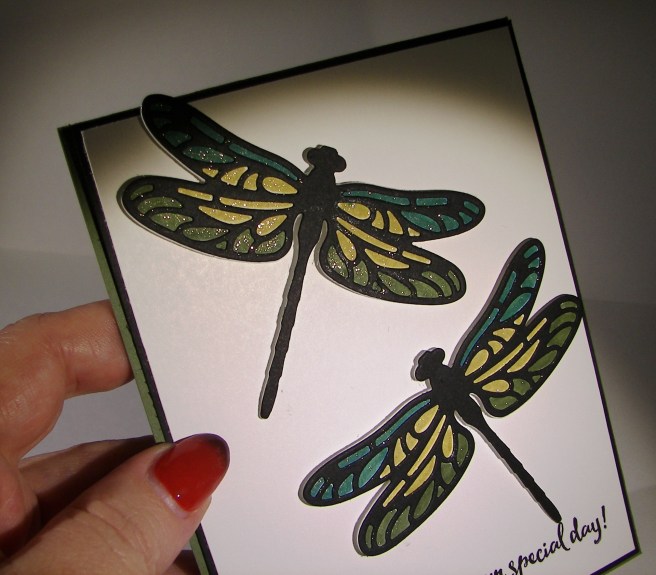
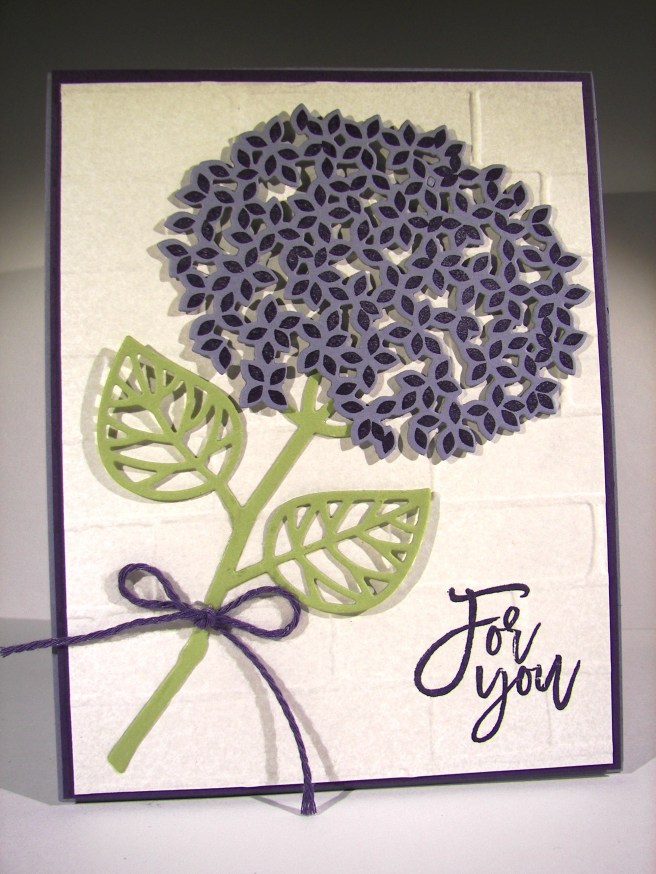
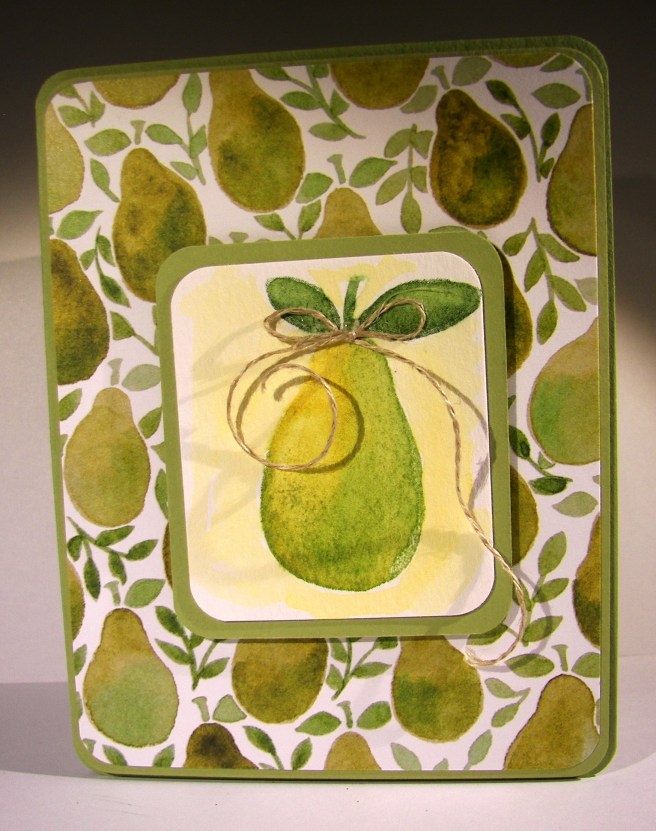
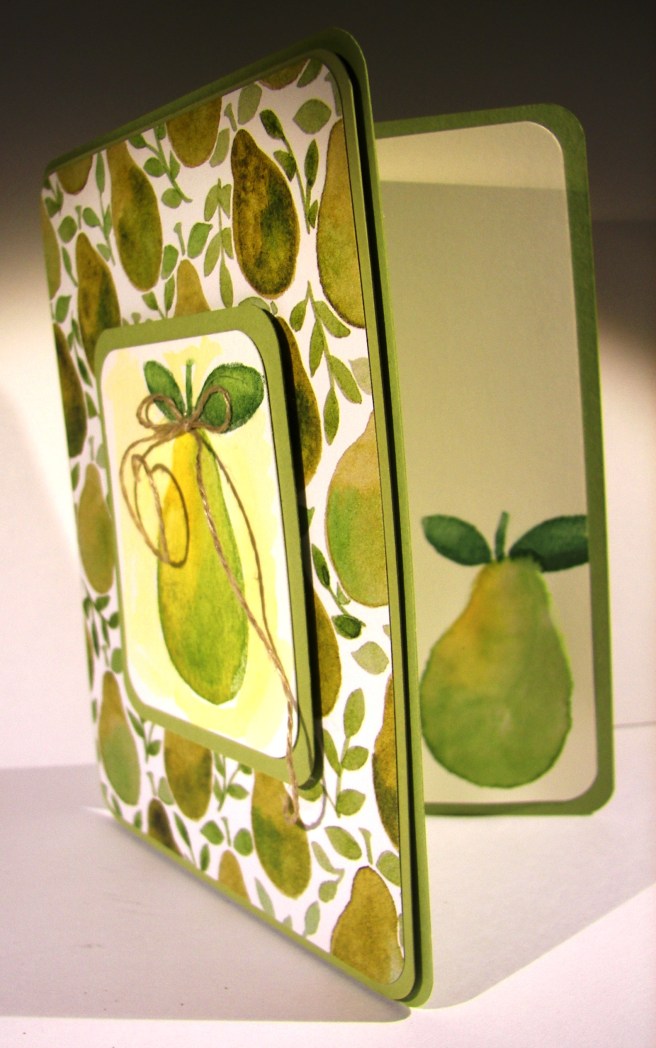
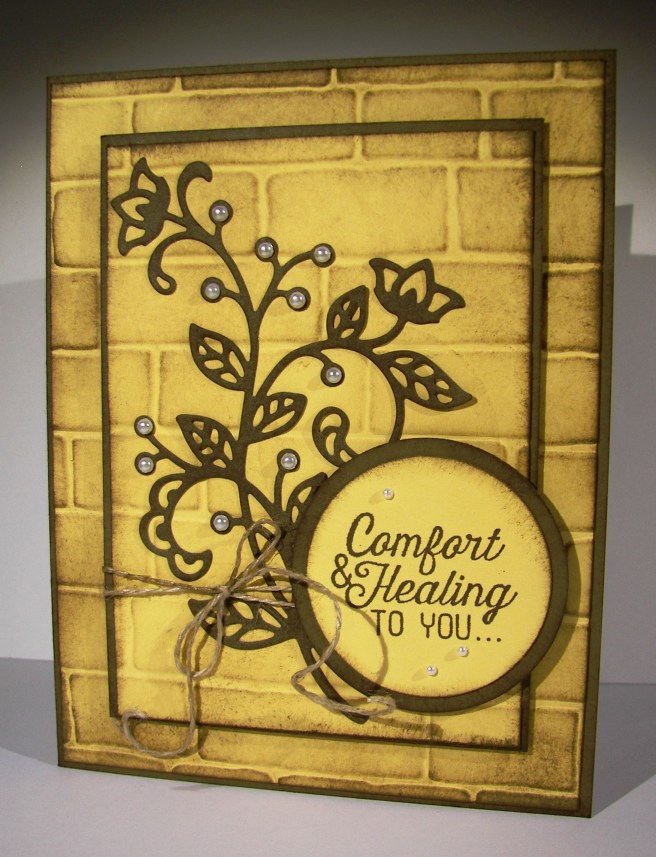
Pretty straightforward cards here.  A few layers, some stamping and a delicate little bow. I helped out the ladies by pre-diecutting their leaves.  Folks get a bit frustrated waiting to die cut or emboss their work, so I try to make it a bit easier.  Maybe one day I will add a second Big Shot, maybe.

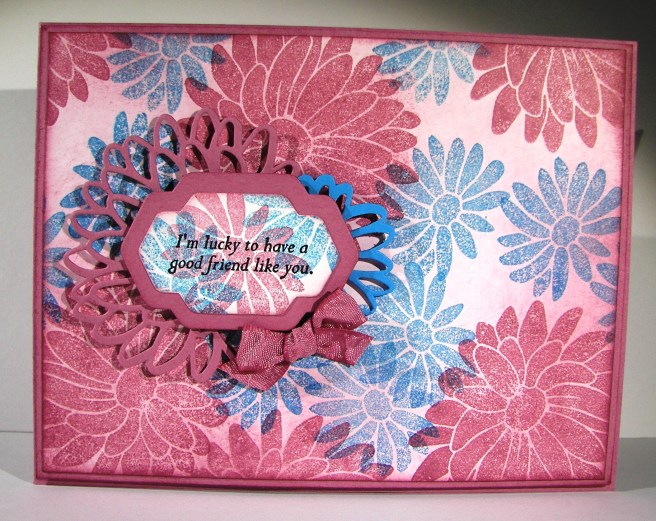
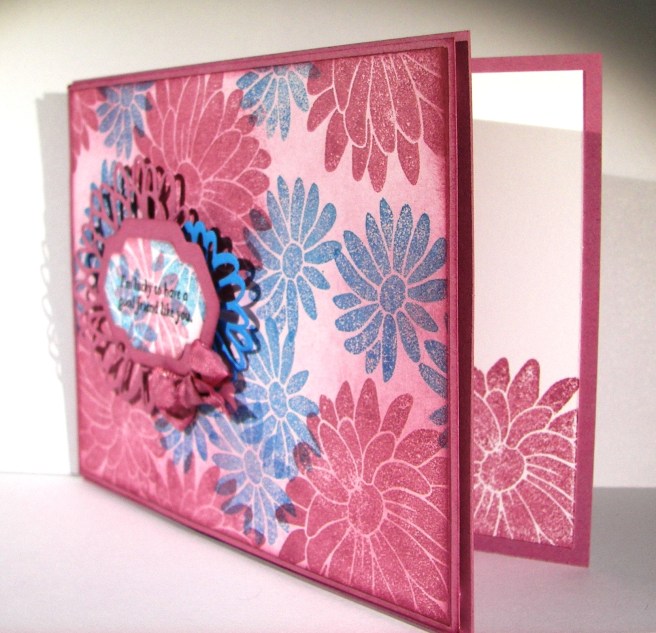
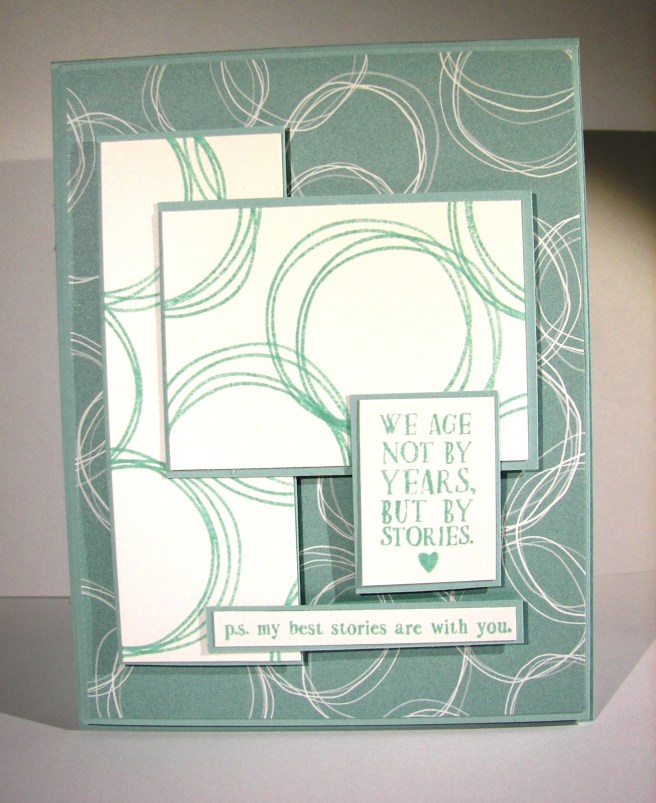
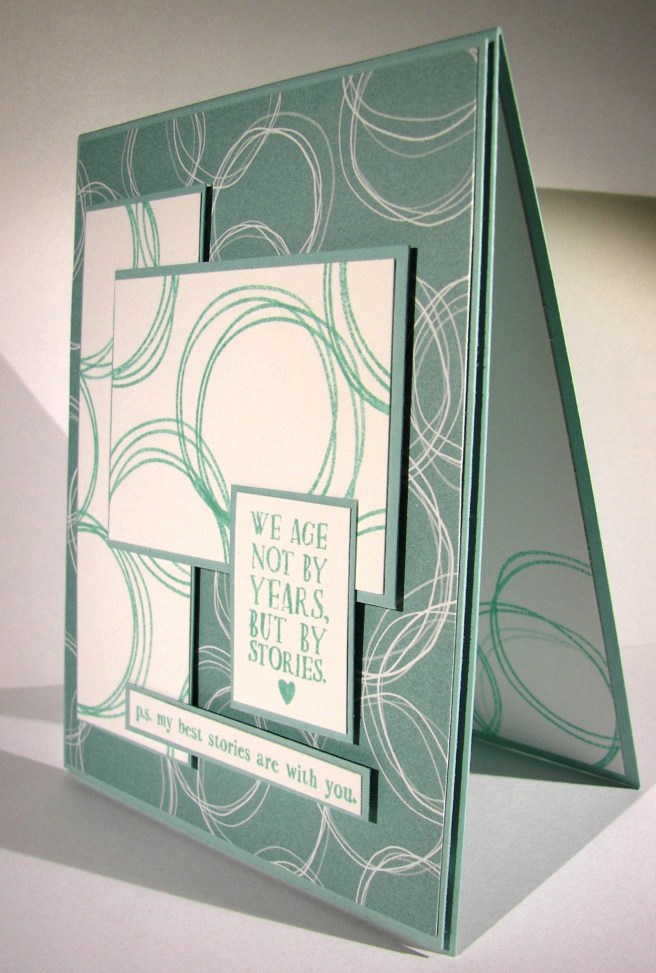
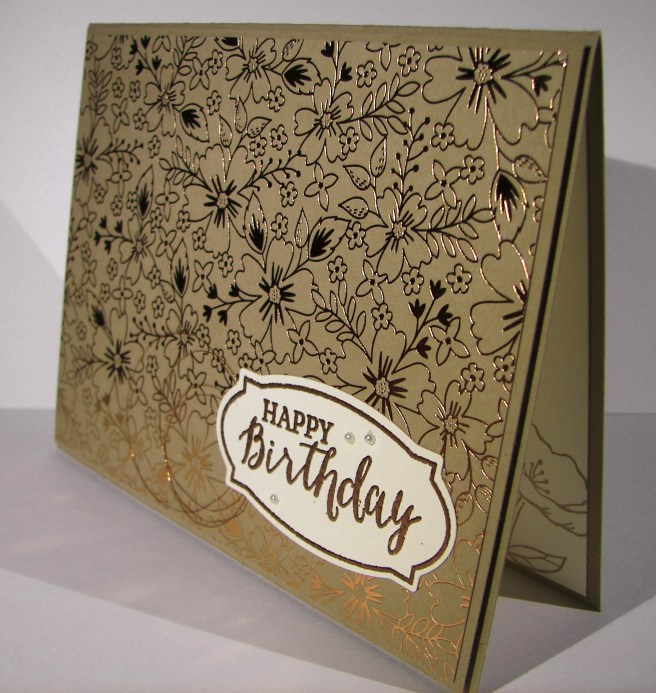
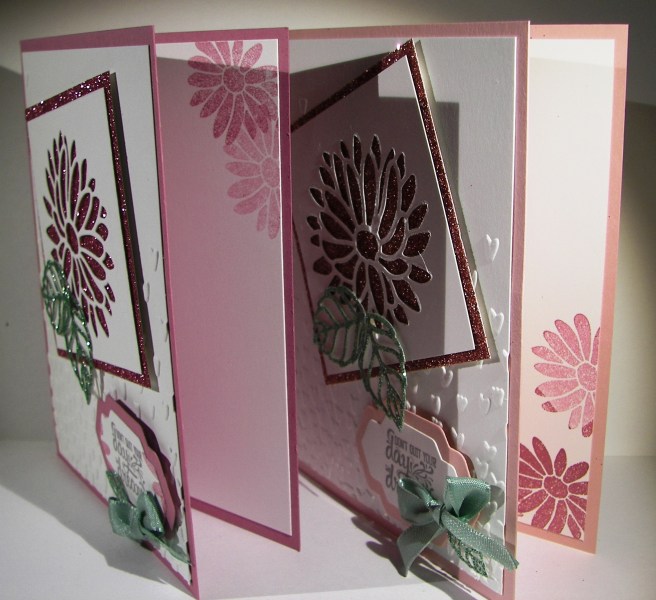
The sweet sugarplum glimmer paper may be gone, but the blushing bride is part of the annual catalog, so I can make more of these.  I am thinking about a thank you card gift set and this might just be the thing, with a different sentiment of course.  I think yes.

3-22 (1)

Have a creative day!

Moana

A Simple Thank You

Sometimes you just need a simple thank you card.  This is just right.  Not too bland, but a quick put together too.  The ladies at my card class this last weekend really liked it, quick and pretty is always welcome.  A project doesn’t always have to be a big production to say what you want.

3-21

I used the three small flowers from the So In Love set to decorate the paper here.  They were placed together on one block for quicker stamping.  It really made quick work of decorating. Each time I added another stamped set of flowers I turned the block a quarter turn.  This gave the flowers a different look without trying to use each blossom one at a time.  I will be using that idea again for sure.

3-21 (1)

Of course I had to add some to the inside to tie the card together.  This delicate ribbon is only a quarter of an inch wide and somehow has room for three rows of stitching.  Isn’t it precious?  That is as decorated as I let myself go here.  I was tempted to water color the flowers and get into some sponging, but I held back.  The result is simple yet perfect.

Have a creative day!

Moana

Make a Wish

This last weekend was my card workshop and this was one of the projects we made.  Some of my ladies get intimidated easily, so I do try to keep it fun and simple.  This one fit the bill quite nicely.

3-20

The card base and ink are bermuda bay, even the glimmer paper that is hi-lighting the candles.  That glimmer paper has been super fun to work with, I will be sad to see it go away at the end of sale-a-bration this month. I will probably get one more pack with my order this month.  Maybe it will be put into the new catalog this summer?  One can only hope.

3-20 (1)

I die cut the candle framelit three times along the strip of very vanilla and adhered a strip of glimmer paper and daffodil delight paper underneath.  Such a nice accent.  That little set was then added to another strip of bermuda bay for the top layer.  The sentiment was direct enough, stamp and punch, my favorite.

The background piece is from a great paper stack.  I must have used half of it so far.  That is unusual for me, I don’t always love so many of the patterns.  Yes for sure this time around. I gave the ladies several choices for their cards and they all looked so different depending on the background piece.  Fun stuff there!  The inside earned a stamping of ‘Happy Birthday’ from the coordinating stamp set, window shopping, because I didn’t like it on the front.  It was a distraction. Can’t have that!

Have a creative day!

Moana

Enjoy Your Special Day

With all of the crazy flood problems and evacuation orders in our area (Northern California), writing this blog almost seemed silly.  But, instead of constantly worrying, I thought I would try to do something a bit more productive.  This project was actually for Saturday, but I never seem to be able to get a blog in on workshop day.  Just a bit much for a Saturday morning I think.  So here you go!

2-13-4

The ladies sure did love making these.  I was kind and did the die cutting for them, but that was just so the big shot would be available for the hot air balloon birthday card.  That was blogged the other day, and they loved it too!  I know how to challenge them, make them a bit crazy, and help them have a wonderful creative time.

This project idea came from another Stampin’Up! demonstrator, who got it from one of her friends.  Either way, Dawn’s Stamping Thoughts is the inspiration behind this project.  She used different colors and the white wink of stella covering the entire dragonfly, so only a tiny touch different. I added a bit of inside stamping.

2-13-1

It looks so much more complicated than in really is.  The back piece of the dragonfly was die cut from whisper white and the detailed overlay from basic black.  They were glued together and the sections were colored in with the brush end of the marker.  I then went over all of the sections with gold wink of stella.  How easy is that!  It is so beautiful in person. I tried to get an angled photo just right to show off the shimmer, but it is so hard to capture those tiny little glimmers.  You really have to try it out.

2-13-3

Have a creative day!

Moana

Cloud Nine Birthday

Birthday gift sets really make me smile.  I love everything have a theme and coordinating, very satisfying.  Another workshop project all ready to go.  Should be a large group and this will be the detailed project for sure, not a hard one, but a bit time consuming.

2-10

I have found myself staying away from peekaboo peach because it is so bright.  Almost too bright for my taste.  So, I thought I would take it head on and go for it.  Also, this main pattern of designer paper overwhelmed me like crazy.  Keeping the view controlled really made a difference and I love how it turned out!  Of course it helps to have such a wonderful die cut to focus on.  These balloons are so great.

2-10-3

The matching gift bag used a whole sheet of paper.  I do try to use and not horde fun paper and this is one of the ways to do that.  Just use it!  It is a bit of therapy for my card group too, they aren’t the best about using up their paper either.  We all need a nudge now and again.  The gift bag is simple, letting the balloon accents take front stage.  The ribbon is a nice accent, but really just a closure.  No bow or focus up there, letting it all fall around the balloons and clouds.

2-10-1

While this card requires some patience, I think it is worth it.  I love how the die cuts let me decorate the balloon as I would like.  I simply used portions of the same designer series paper that was more solid to fill those spaces.  That way it really coordinates well. I used tiny dots of tombo glue on the back of the balloon to adhere my pieces.  That way I had some wiggle room to put them just where I wanted.  I also used foam adhesive strips to layer it up.  That way there was an extra bit of adhesive to keep those pieces in place and the balloon got extra lift, more height than dimensions alone offer.  I thought that to be appropriate.  I didn’t plan on using basic rhinestones, but I had a tiny dot of ink in a spot I couldn’t get past, so I covered it up.  Job well done!

Have a creative day!

Moana


We Might as Well Dance

When things get crazy it always helps me to have a creative outlet. I think the theme of my projects this last weeks speaks volumes.  Good thing I have a way to share that really brings me joy as well as peace.  Just yummy.

2-9

This is my kind of card.  Lots of layers, a bit of interest, a touch of water color and a lovely sentiment.  Not to mention wonderful designer series paper as a background. This one has to be a workshop project for sure.  So great!

The layers were simple and all of the corners rounded. I even found tag framelits that would also carry the rounded corner.  The card base was cut normally measuring 4 1/4 x 11″, scored at 5 1/2″.  There is an additional score to fold the front back on itself perfectly in half.  That half folded front became the base for the decorative front to be place.  A little different, but not too much.

The water color pencils don’t come in all of the classic ink colors just yet, but the colors I chose match really well.  I used bermuda bay, daffodil delight, pacific point and calypso coral.  It worked out fantastic.  Light coloring and even lighter water coloring with the aqua painter.

To complete it I wrapped some of this years Sale-a-bration free ribbon.  Metallic ribbon often is a bit stiff and not fun to work with.  Not this, I love how soft and pliable it is. I would love it if this became a regular product carried in the annual catalog.  Fingers crossed!

2-9-1

Truly a wonderful project today.  I couldn’t be more pleased, hope you enjoyed and better yet, try one out for yourself!

Have a creative day!

Moana

Special Reason

Opening new product is so much fun.  This is a stamp and framelit bundle I bought from the spring Stampin’Up! catalog, and I love it.  I had a tag sitting on my work station trying to inspire me, and I went to this set.  Fresh eyes are hard to come by sometimes.  The tag had some colors that I would not have put together myself, or I thought, because I had made that tag!  Silly me.

2-6

Either way, this is what I came up with.  I stamped my background paper using the two floral images from the Special Reason set and then sponged with sweet sugarplum to fill in the spaces some.  The flowers were stamped off once before hitting the background to soften the colors.

I made a die cut from each of the ink colors in coordinating card stock to become the background for my sentiment.  How lovely.  Instead of wrapping ribbon around the card, which is what I love to do, I only made a sweet little bow from ruched ribbon and attached it with a glue dot.  I wanted the ribbon, but not the distraction it would have caused with too much of it.  A very nice balance.

2-6-1

The inside got a little stamping, as always, to finish it off.  I like this project so much, I think it will become the second project for my class on Saturday.  The ladies love to make their own background paper.

Have a creative day!

Moana

Wishing You Brighter Days to Come

Life isn’t always fun, often more discouraging.  Those around us need a pick me up now and again.  A special someone needs this, along with a red umbrella I think.

2-5

So many people have been stamping and coloring on craft paper giving a really unique look. I wanted to try a different tone.  Chocolate chip cardstock seemed like a challenge enough. And it was, for sure.  Silver encore ink really helped bring some diversity to the layers though. The background piece was embossed with the falling petals folder and hi-lighted with silver ink.  At first I started with just a sponge dauber but wanted more ink to show. The aqua painter did the trick.  I just sponged the ink pad onto the top of the ink lid and used that for the pallet.  Quick brushstrokes along the petals gave plenty of dimension.

I stamped the woman in black stazon then colored her with water color pencils.  I made sure I liked the look of the colors on this dark paper.  The red pencil looked more orange on the paper, so I went with melon mambo.  It definitely looked more red that way.  Her dress was done in white and yellow and brushed again with wink of stella.  That made her dress really pop.  I went back over with the black pencil to define the contour lines better, they got lost in the white.

Plenty of sponging with silver to give the clouded rain look.  I love how it turned out.  The ribbon is actually tip top taupe striped, but it looked great next to the chocolate chip and definitely took on a darker tone.  Wonderful!

2-5-1

I think my card ladies would enjoy trying this card out.  This coming Saturday is workshop, this could end up being the first project.

Have a creative day!

Moana

Crazy Cake with Balloon Adventures

Birthday cards are just the best!  This totally adorable stamp set builds one great cake, don’t you think?  And this card only shows about half of the stamps.  I love, love, love it!

1-18

The three bottom layers were done with two stamps.  Good thing they are photopolymer, or totally clear, for super easy placement.  There is no way I would be this patient or exact without great stamps like that.  And yes, the top stamp is a set of three candles that I stamped a little flame for each one.  Normally I don’t go for all the extra work, but I loved it and it was so easy!  Easy enough that I included this project in the lineup for this weekends workshop.

The embossing folder is another new product from the spring catalog.  It is shown with a bunch of manly stuff, and it is manly of course, but I loved it here too.  My daughter thought I should be stamping bees because it reminded her of a honeycomb.  Cute idea!

The sentiment is from another great birthday stamp set called Balloon Adventures.  Also from the spring catalog, but it has a great trick of its own.  That will be for another blog project for sure.  I stamped on a strip of cardstock and put the triple banner punch to work. Of course I had to layer it as well.  What is with me and layers these days?  Oh well!

1-18-1

I couldn’t resist.  I had to stamp all along the inside with those darn candles again.  And I didn’t even mind stamping all of the little flames.  I am telling you, it really was fun!

Have a creative day!

Moana

Hello Love

If you know me well, you know I absolutely adore tiny things.  This little number took longer to finish because I was having so much fun playing with the tiny elements.  Seriously, they are so adorable!

1-17

The card base was done in flirty flamingo along with the card front matte, the die cut envelopes and the coordinating ribbon.  The tiny little cards were cut in blushing bride surrounding tiny precious stamps stamped in the same color.  I added a second stamp to two of the tiny cards in flirty flamingo as well as accent stamping and sponging .  The heart stamping on the card front was done in pink pirouette with the main sentiment in flirty flamingo.

I wasn’t sure if this was too much of a card to do for my workshop ladies, but it is was so much fun we just might need to.  I can’t wait!  I almost forgot the edge of the card.  All of the die cutting done on this card came from the same set of framelits.  This edge of dimensional hearts is so fantastic.  It totally works for Valentine’s Day, but I can see wedding cards and then some going on here.

1-17-1

Have a creative day!

Moana

For You

This was the third project we created at workshop last weekend.  I know this stamp and framelit set are about a whole lot more, but as yet I still haven’t gotten past the hydrangea. I think with fall and the holiday seasons coming I will enjoy more of the trees, but not yet.

8-26

I used the heavy weight whisper white card stock for the background.  I handles the deep impressions of the embossing folders much better.  Also, I had plans for spritzing some color and that would have made some warping sadness otherwise.  It isn’t easy to see, but there is a light tan speckling going on there.  Such an easy technique to employ.

I stamped on wisteria wonder with elegant eggplant for the different tones and accented with more elegant eggplant.  The ink, thick bakers twine, and border piece were all done in elegant eggplant.  It is a dark color, so I kept it under control.  I didn’t sponge anything, that was a challenge to be honest.  The die cutting was simple and then layered in place. The stamping was done last. It did give a bit of a crease line in the sentiment, but worth it.  I worried if I stamped and then spritzed the wording would bleed and I wanted it crisp.  Done.

8-26 (1)

Have a creative day!

Moana

Fruit Stand Delight

This project is a different take from a prior card I made.  The first one was a full water color card front, stamped and water colored.  This one uses the coordinating designer series paper with a single pear stamped and water colored.  I like the difference, and so did my card workshop ladies.  They are the best!

8-24

I added an extra layer, but the process was the same.  A single pear stamp in pear pizzazz, and water color the lighter areas of the image with daffodil delight and blend it together. The leafs and stem were done in garden green and blended a bit too.  The background was a light wash of daffodil delight.  Then, top the pear with a tiny bow of linen thread with a glue dot and grin at your work.  What a fun way to spend time with friends, making cards like this.

8-24 (1)

Have a creative day!

Moana

It’s Your Birthday!

Shaker cards are so much fun, and they really are quite trendy in card making.  I finally broke down and had my card ladies make one for one of our workshop projects this last weekend.  They did great!

8-23

Of course it helps when you have a great stamp set to work with.  This set has a few fun combinations that fit perfectly with this style.  Cutting out the window was made super easy with the layering squares framelits.  I don’t mind fussy cutting things out, but I would rather not.  It also kept the edges nice an clean.  Now we have a card that is neutral enough for anyone, yet fun for most ages.  Great project!

8-23 (1)

Have a creative day!

Moana

Touches of Texture

Where has the time gone?  Always rushing away, but I managed to sneak a few extra minutes to play with some water coloring.  During the summer I thought nothing of spending a good hour or so creating a project.  Well…maybe that will have to be a weekend thing now that school is back in session and schedules have changed.  It still felt good, even if it was a quick one.

8-19

I masked my paper around the edges and applied a wash of clean water.  From there I just started to make stripes.  First with the blue and then the pink.  However, I applied the blue in stripes tipping the project so the ink could flow down a bit.  Then I flipped it around and applied the pink, also tipping the project, this time so the pink could flow into the blue. There was hardly any blending on my part.

The stamps were all from the same set, Touch of Texture.  That is a big set.  Definitely wants time to sit down and really play with the layering options.  I stuck with basic black with a little stamping off too.  Then I distressed with water droplets and called it.  I wasn’t sure if I wanted it to be done or not, but the clock said yes.  So there it is!

8-19 (1)

Have a creative day!

Moana

We Age Not by Years, but by Stories

Well, I survived the first couple of days back to school.  Time to get other things back into place as well.  Seems like there isn’t enough time for the fun things.  I will just have to sneak it in when I can.  Like this little project.

8-17 (1)

I opened a new dsp stack and found a bunch of great paper.  One side is a variety of printed photo images and the other is designer paper.  I intended on using a distressed wood pattern, but looked on the other side and found this one.  It reminded me of a stamp in my new Fresh Fruit set and the project was on its way.

I created a coordinating piece of white card stock double stamping the swirly circles in pool party.  I thought that was pretty cool.  Then I stamped two sentiment parts and layered the lot of them.  A simple arrangement stuck together and then raised up all together on dimensionals.  With a little bit of stamping inside as well, of course.

8-17

Have a creative day!

Moana

You’re in My Thoughts

This is me getting more comfortable with this sassy paper stack.  I have to admit though, the colors are what make it work.  Aren’t they beautiful together?  I don’t think I would have paired them myself, but I will be now.

8-14

Sometimes a simple card works for me.  This one just has a few layers focusing on the patterns of the paper and a simple sentiment.  I left a bit of a gap at the top of the sentiment so I could wrap a bit of ribbon around it.  This ribbon, I love it.  It looked kind of funky in the catalog, but I went for it anyway to share it with my class.  Glad I did.

8-14 (1)

Have a creative day!

Moana

Building With Peekaboo Peach

The last days of summer are waning and I love spending a lazy morning with my youngest. We have had more laughs than tasks done, but I wouldn’t have it any other way.

8-4 (2)

I very much enjoyed giving myself a bit of a challenge with this one.  Working with one color can seem limiting, but can turn out more lovely than you might think.  The tone on tone stamping certainly made a difference and I think it is my favorite part of this card.

The floral die cuts did get put through some distressing with a large tipped stylus and a foam mat.  It helped lift them off the card front without obvious creases.  A simple yet effective technique.  I work the back side of the flower first then turn it over and hit the center.  It curls wonderfully, give it a try.

I hid my adhesive under the flowers and ribbon since it is not an attractive part of using velum card stock.  The inside of the card also got a bit of stamping to tie it together, but that was about it.

8-4 (1)

Have a creative day!

Moana

Happy Birthday

When you have beautiful paper you really don’t need to worry about much else.  This particular specialty designer series paper is exceptionally beautiful.  Truly beautiful.

8-1 (2)

What does that mean for this card?  You don’t really need much else.  I kept the copper theme going along and embossed the outline and happy birthday sentiment.  Then, the coordinating die cut from the rose garden thinlits set made it very easy.  A few loops of copper metallic thread off to the side and this project was done.  So elegant with all of the foil and copper.  It will be enjoyed I am sure.

8-1 (1)

Have a creative day!

Moana

Delightful Garden in Bloom

This project is a companion to yesterdays post.  Both card fronts were made with the same combination of distress inks, just in different sequences.  This one was actually done first which is why the colors are more distinct.  I certainly am enjoying this kind of painting.

7-31 (2)

As I placed the water color paper into the smeared and spritzed inks I made sure to allow white spaces to remain.  I had to make myself stop adding color before some of that effect was lost.  I can’t wait to try it some more.

When I finished drying the piece it felt like something more was needed to tie it together. I found a great stamp from the Garden in Bloom set and did some random stamping. The ink was too dark full strength, so these flowers were stamped off once before being applied. Then a fun ribbon for a bit of interest to finish the front.  A little echo stamping was applied to the inside and the card was done.

7-31 (1)

Have a creative day!

Moana

Comfort & Healing to You…

There are so many talented people out there that love to share their projects like I do. Sometimes one will come along that I not only enjoy, but have to give it a try.  This project is a mix of a couple of different ideas with my own twist.  I do love how it turned out.

7-21

One of the projects I studied had the card base smooth, which was lovely, and no extra layers, just the circle tag.  The other had the same layers I used with a different embossing folder, but I didn’t want to use that one.  I decided on the brick wall folder, but thought it still looked a bit plain.  After it got a good sponging and distressing I was much happier.  I even sponged the die cut piece because it just didn’t match the rest.  A healthy dose of basic pearls finished everything off.

7-21 (1)

The inside of a card almost always gets a whisper white or very vanilla piece, but I went with the card front color of so saffron like another example showed.  The color is light enough to be written and stamped on equally well.  A very nice touch.

Have a creative day!

Moana