More Thankful Swaps

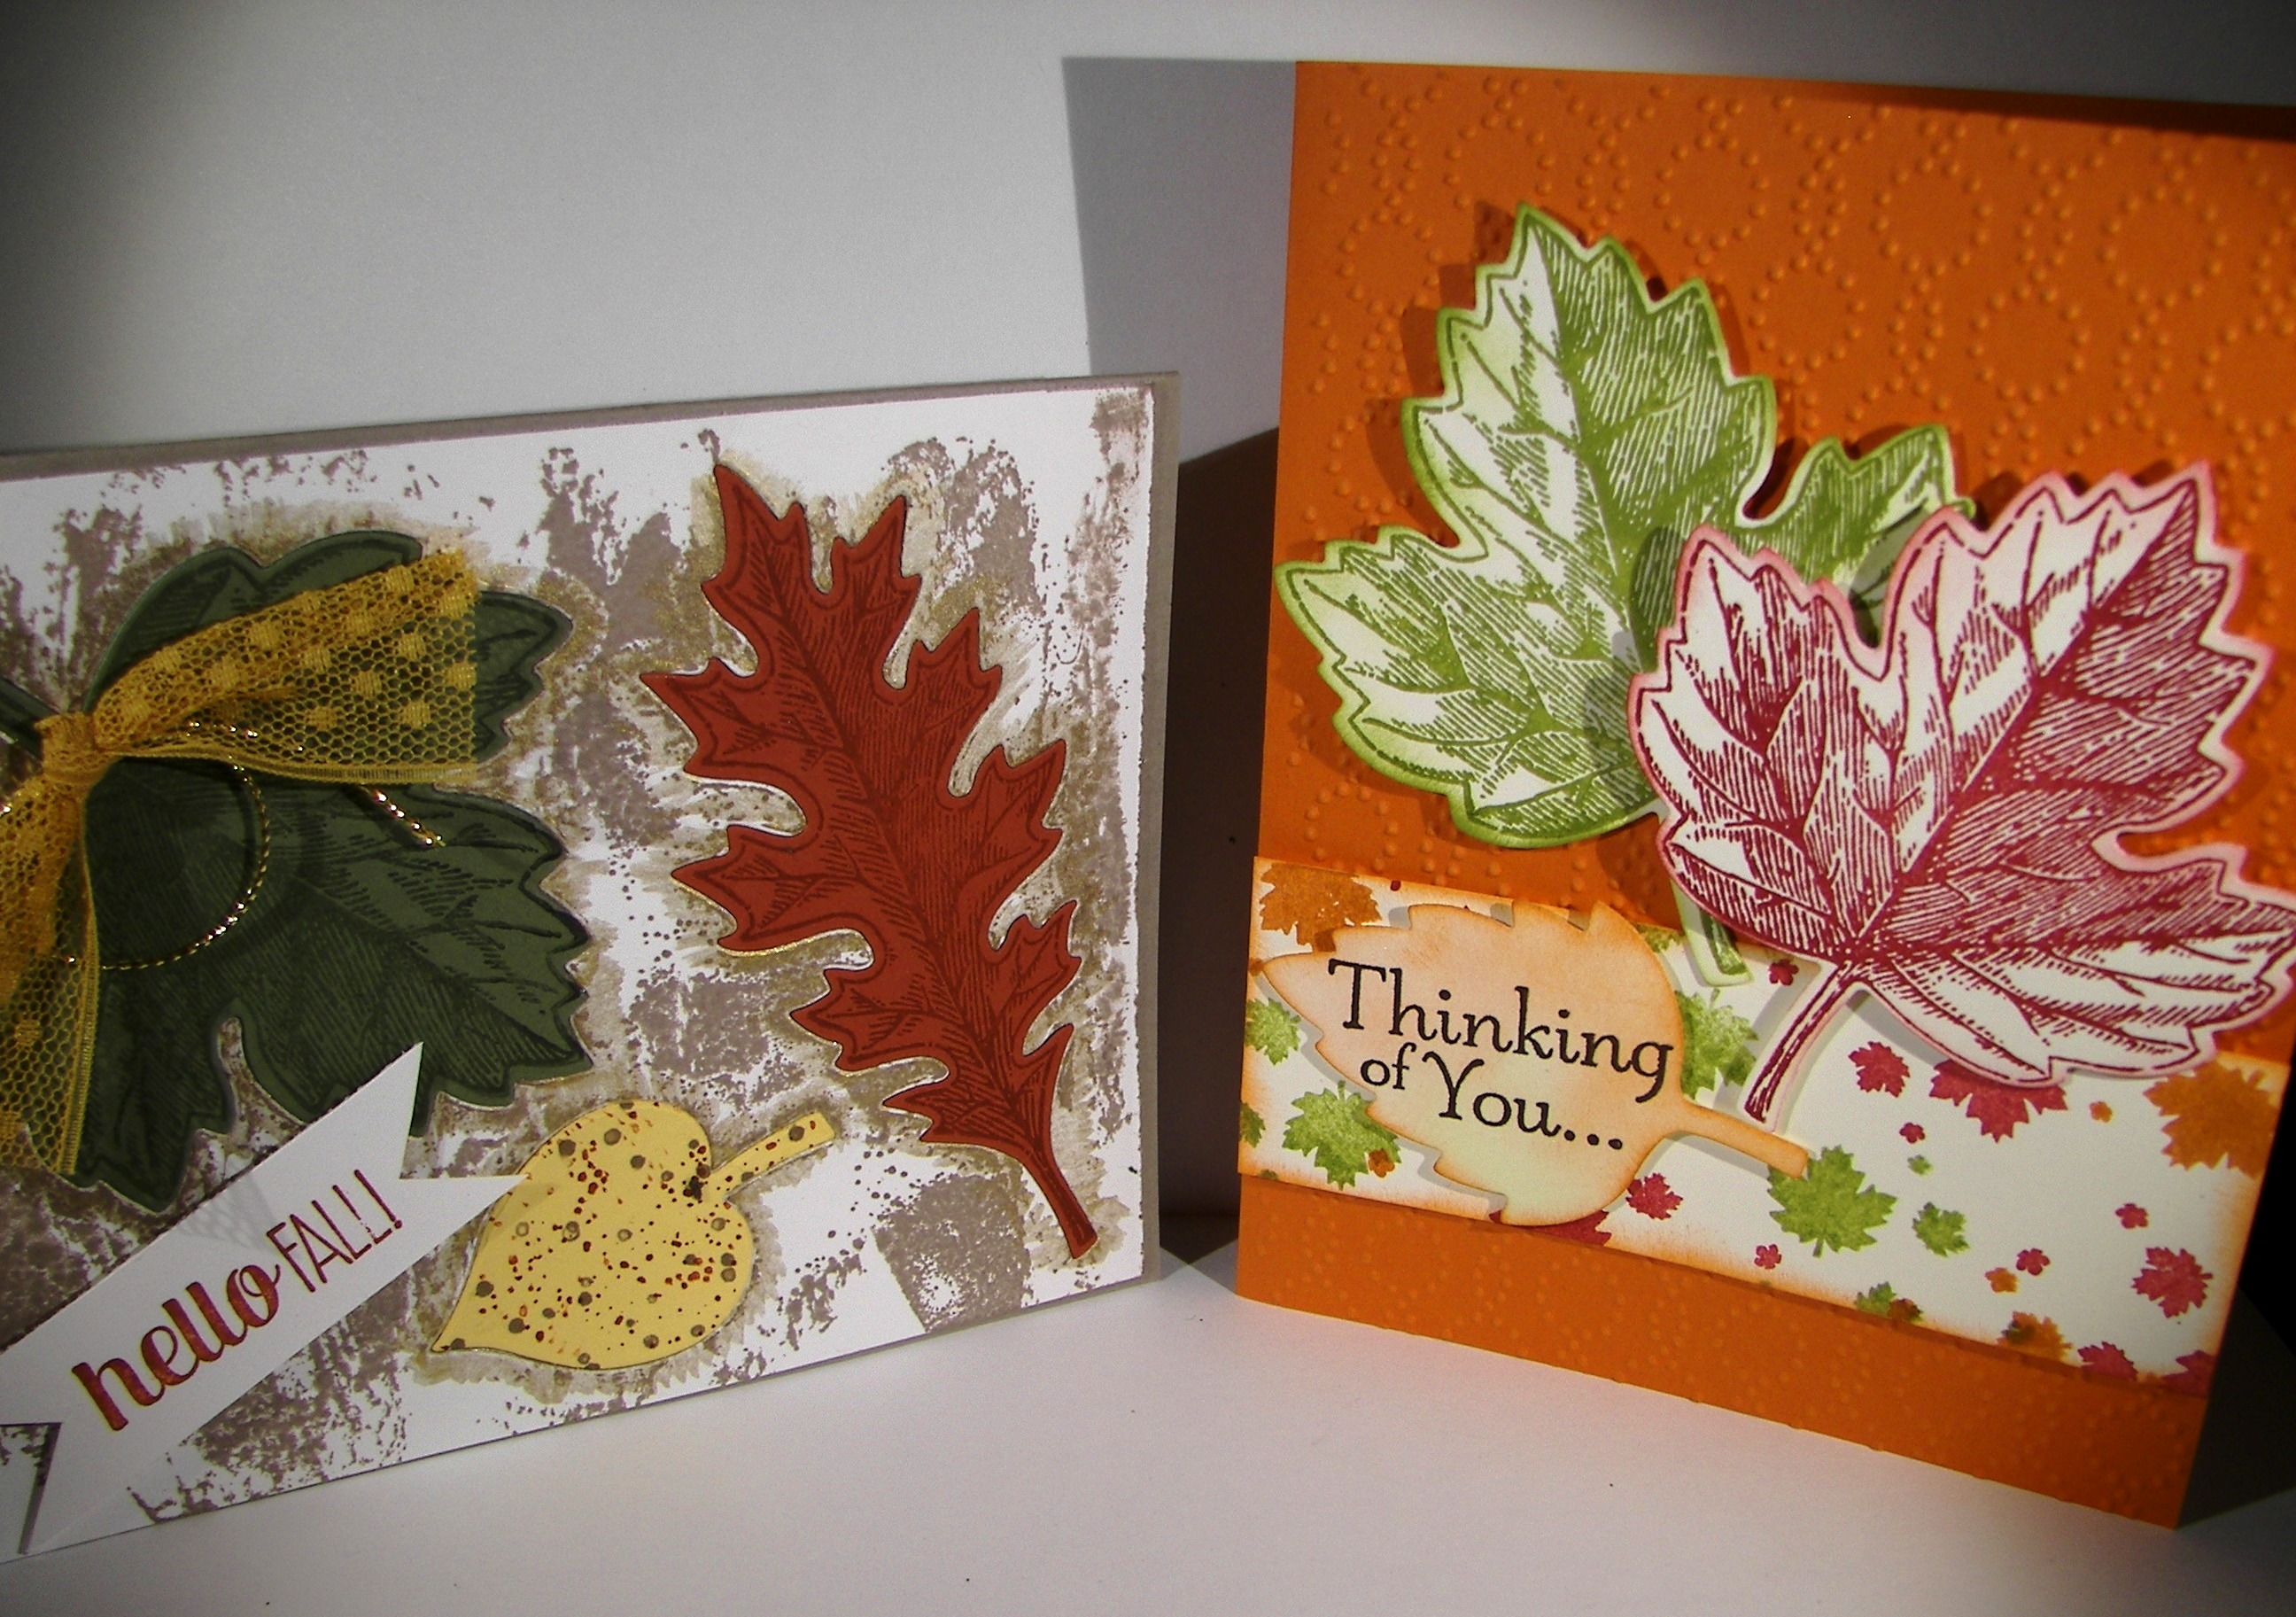
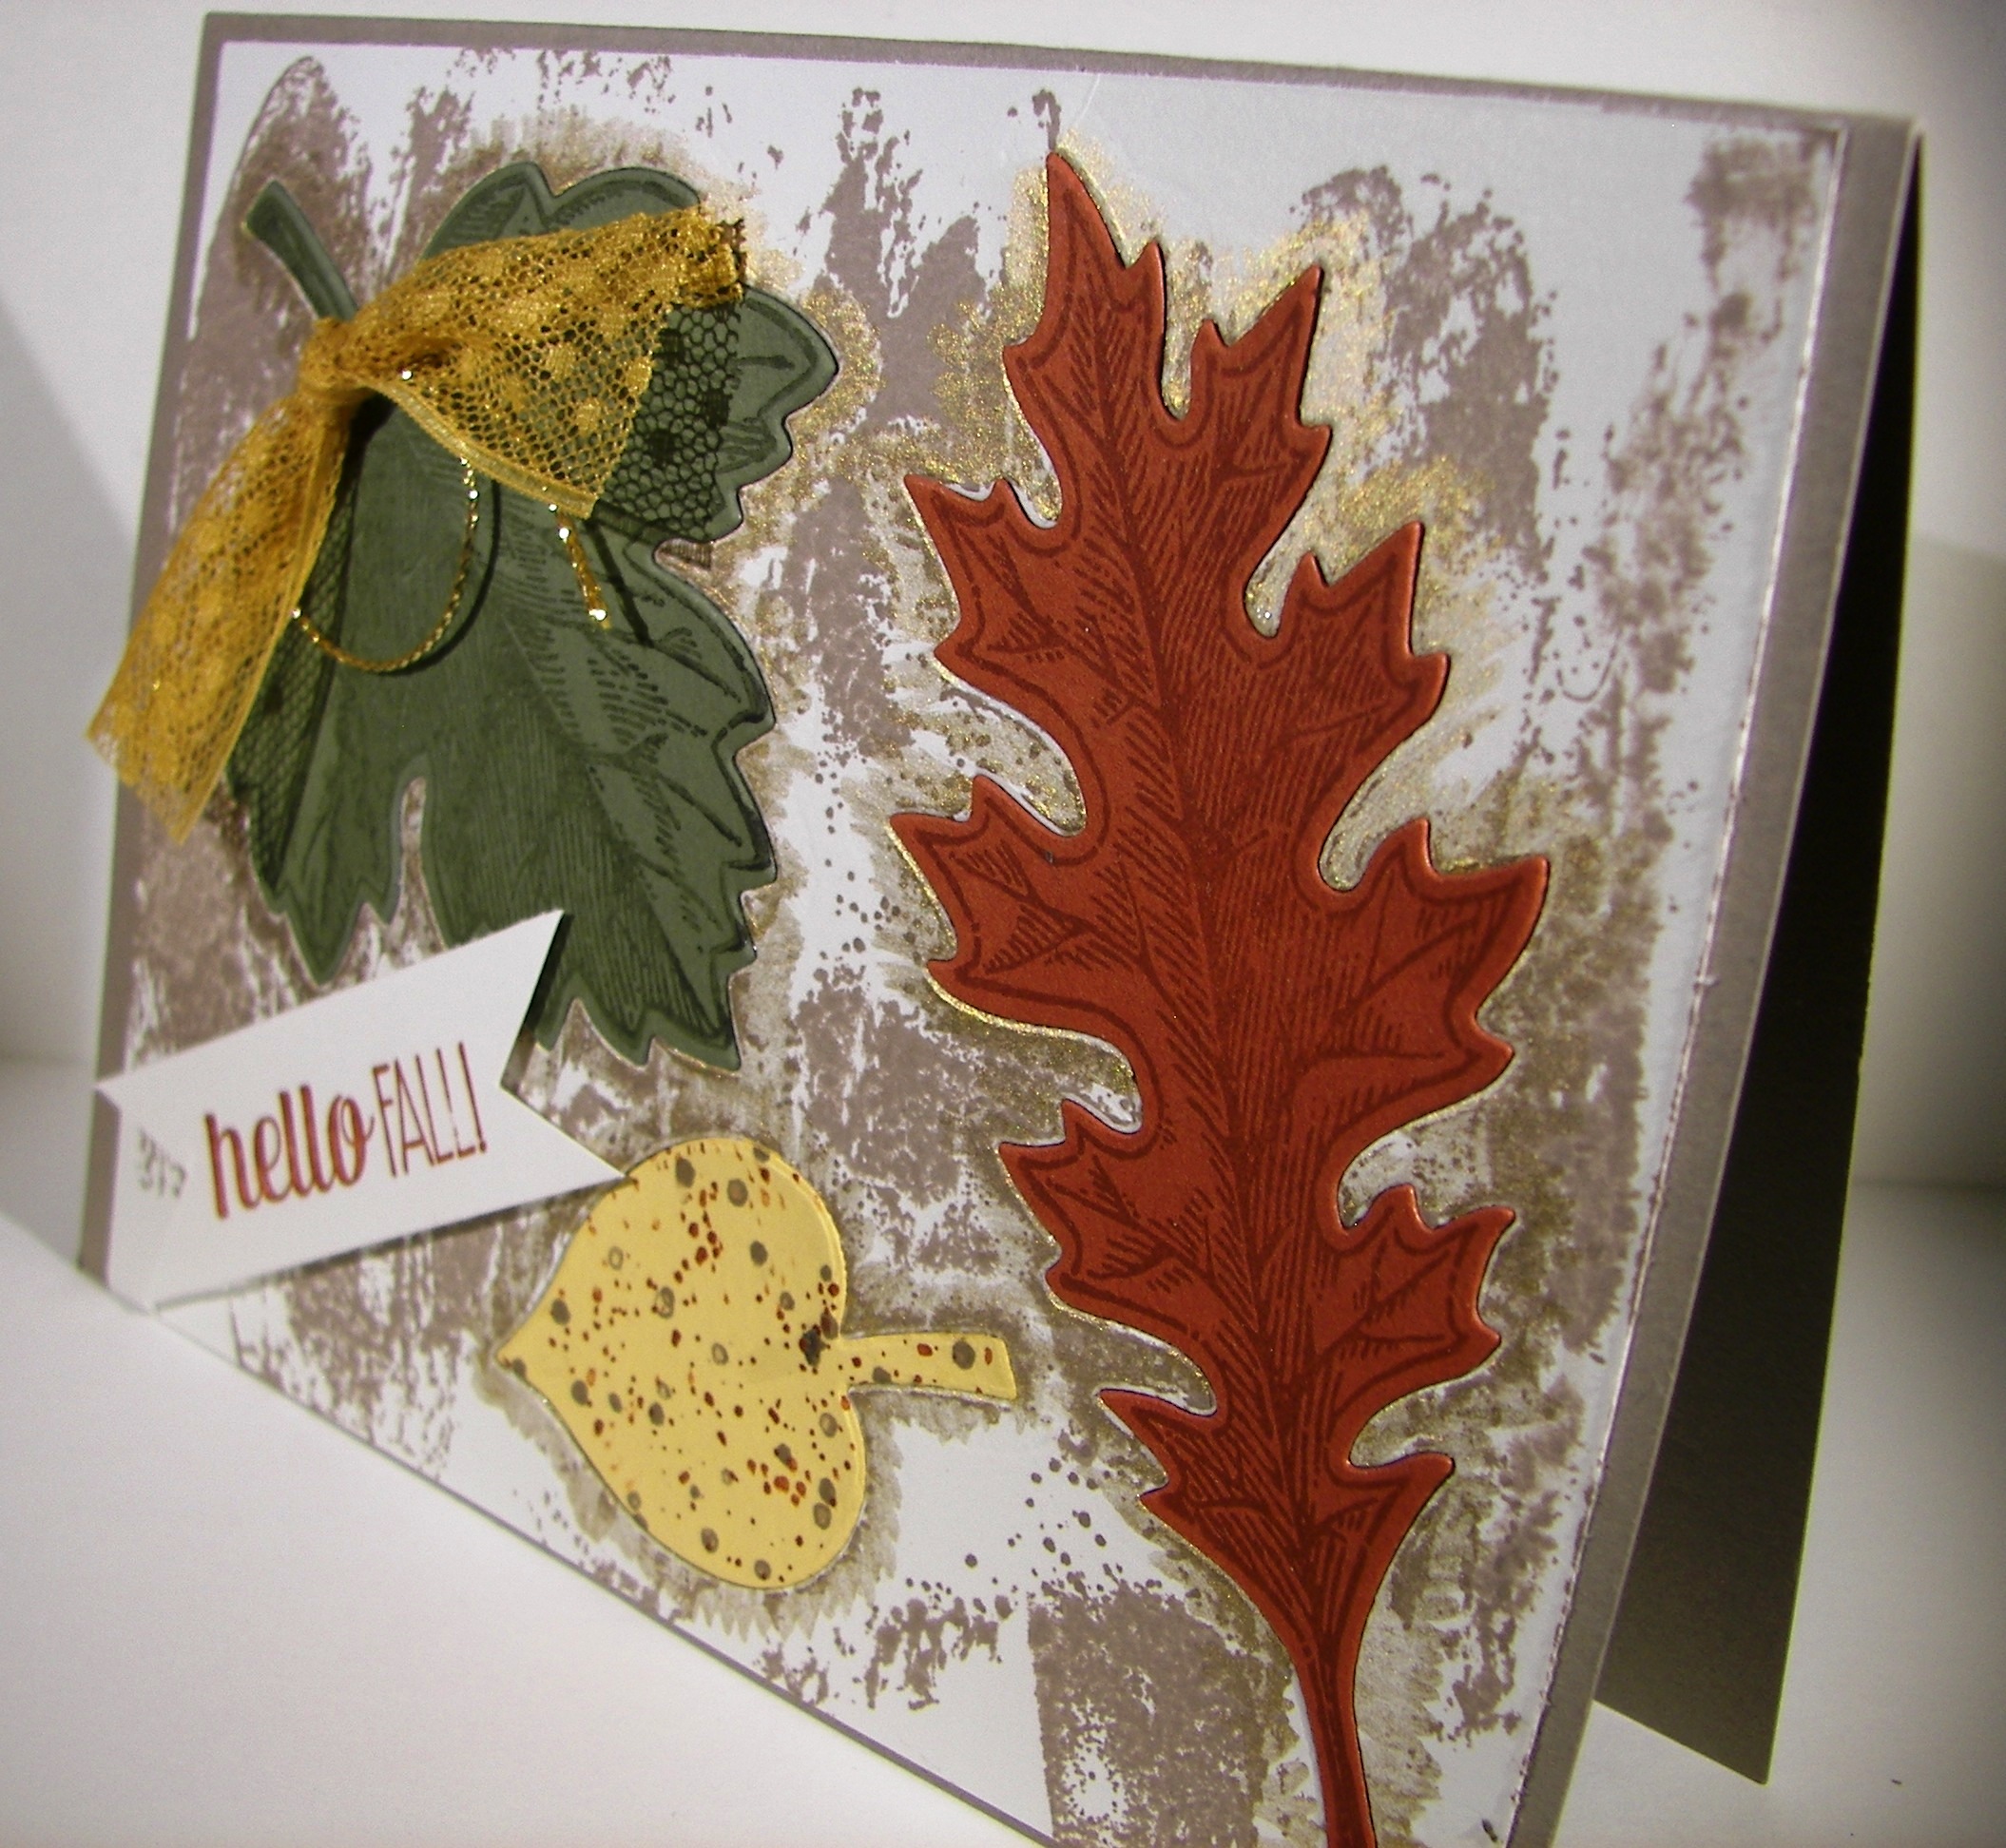
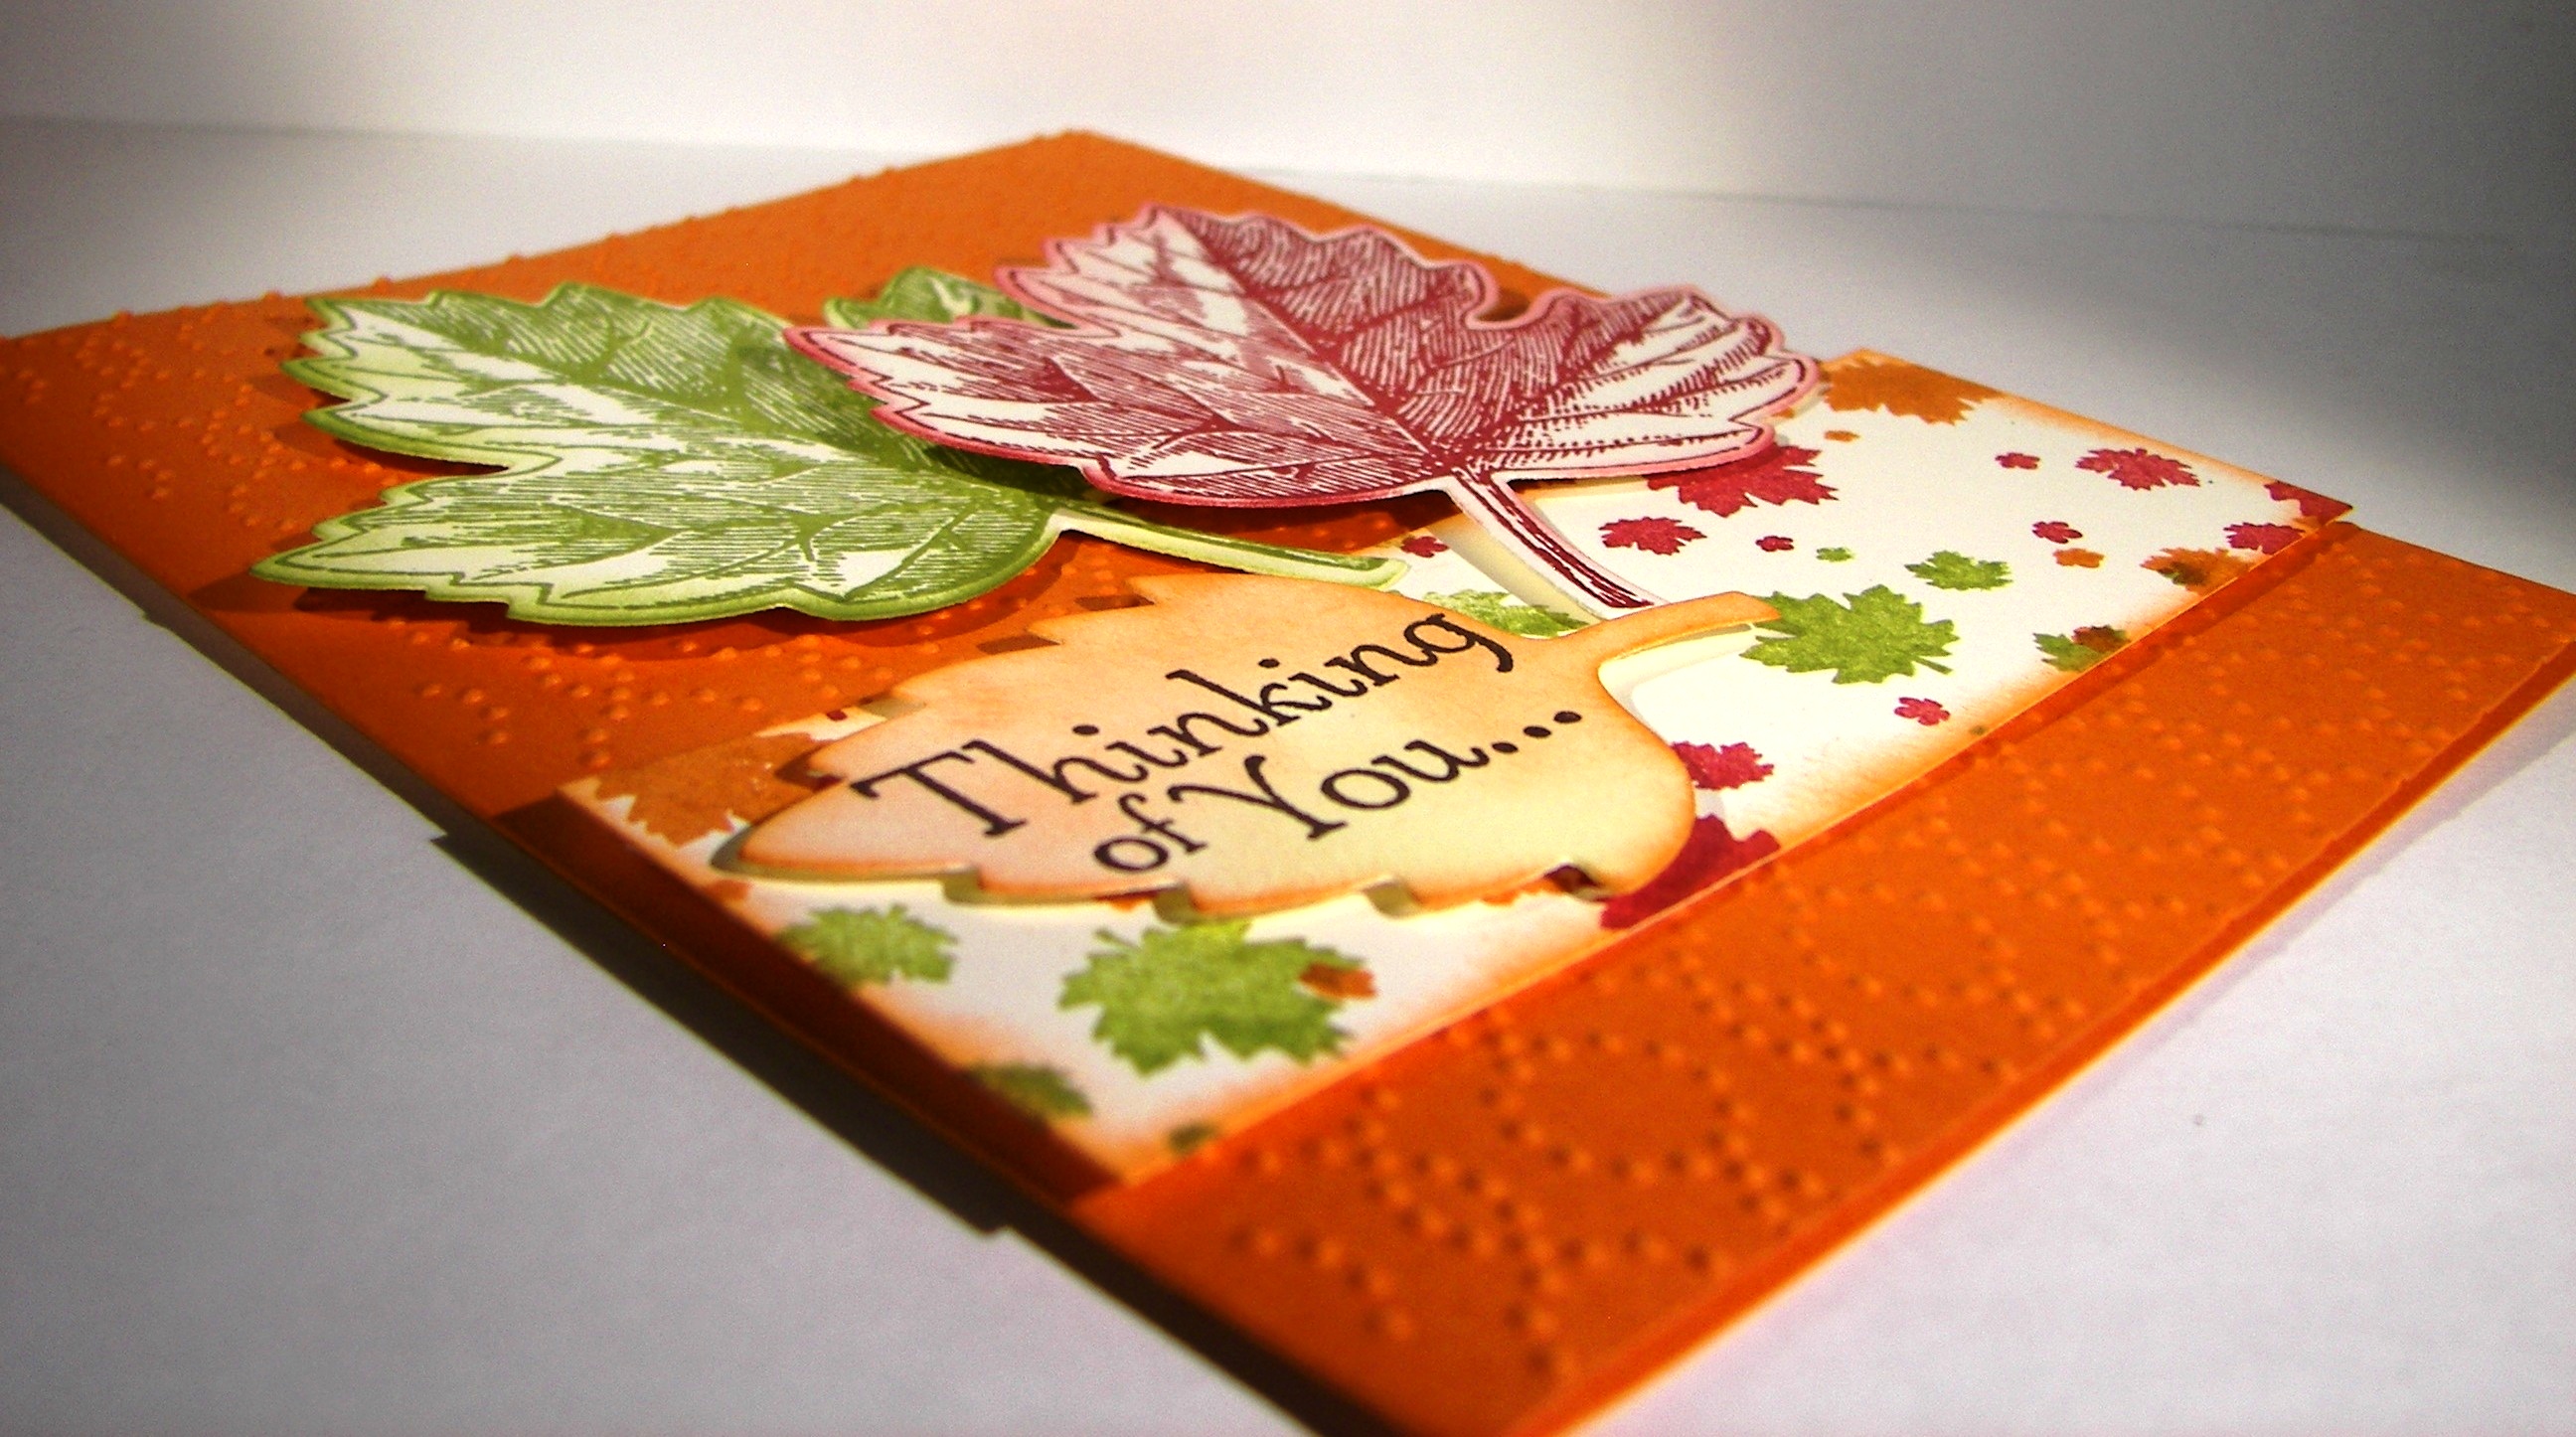
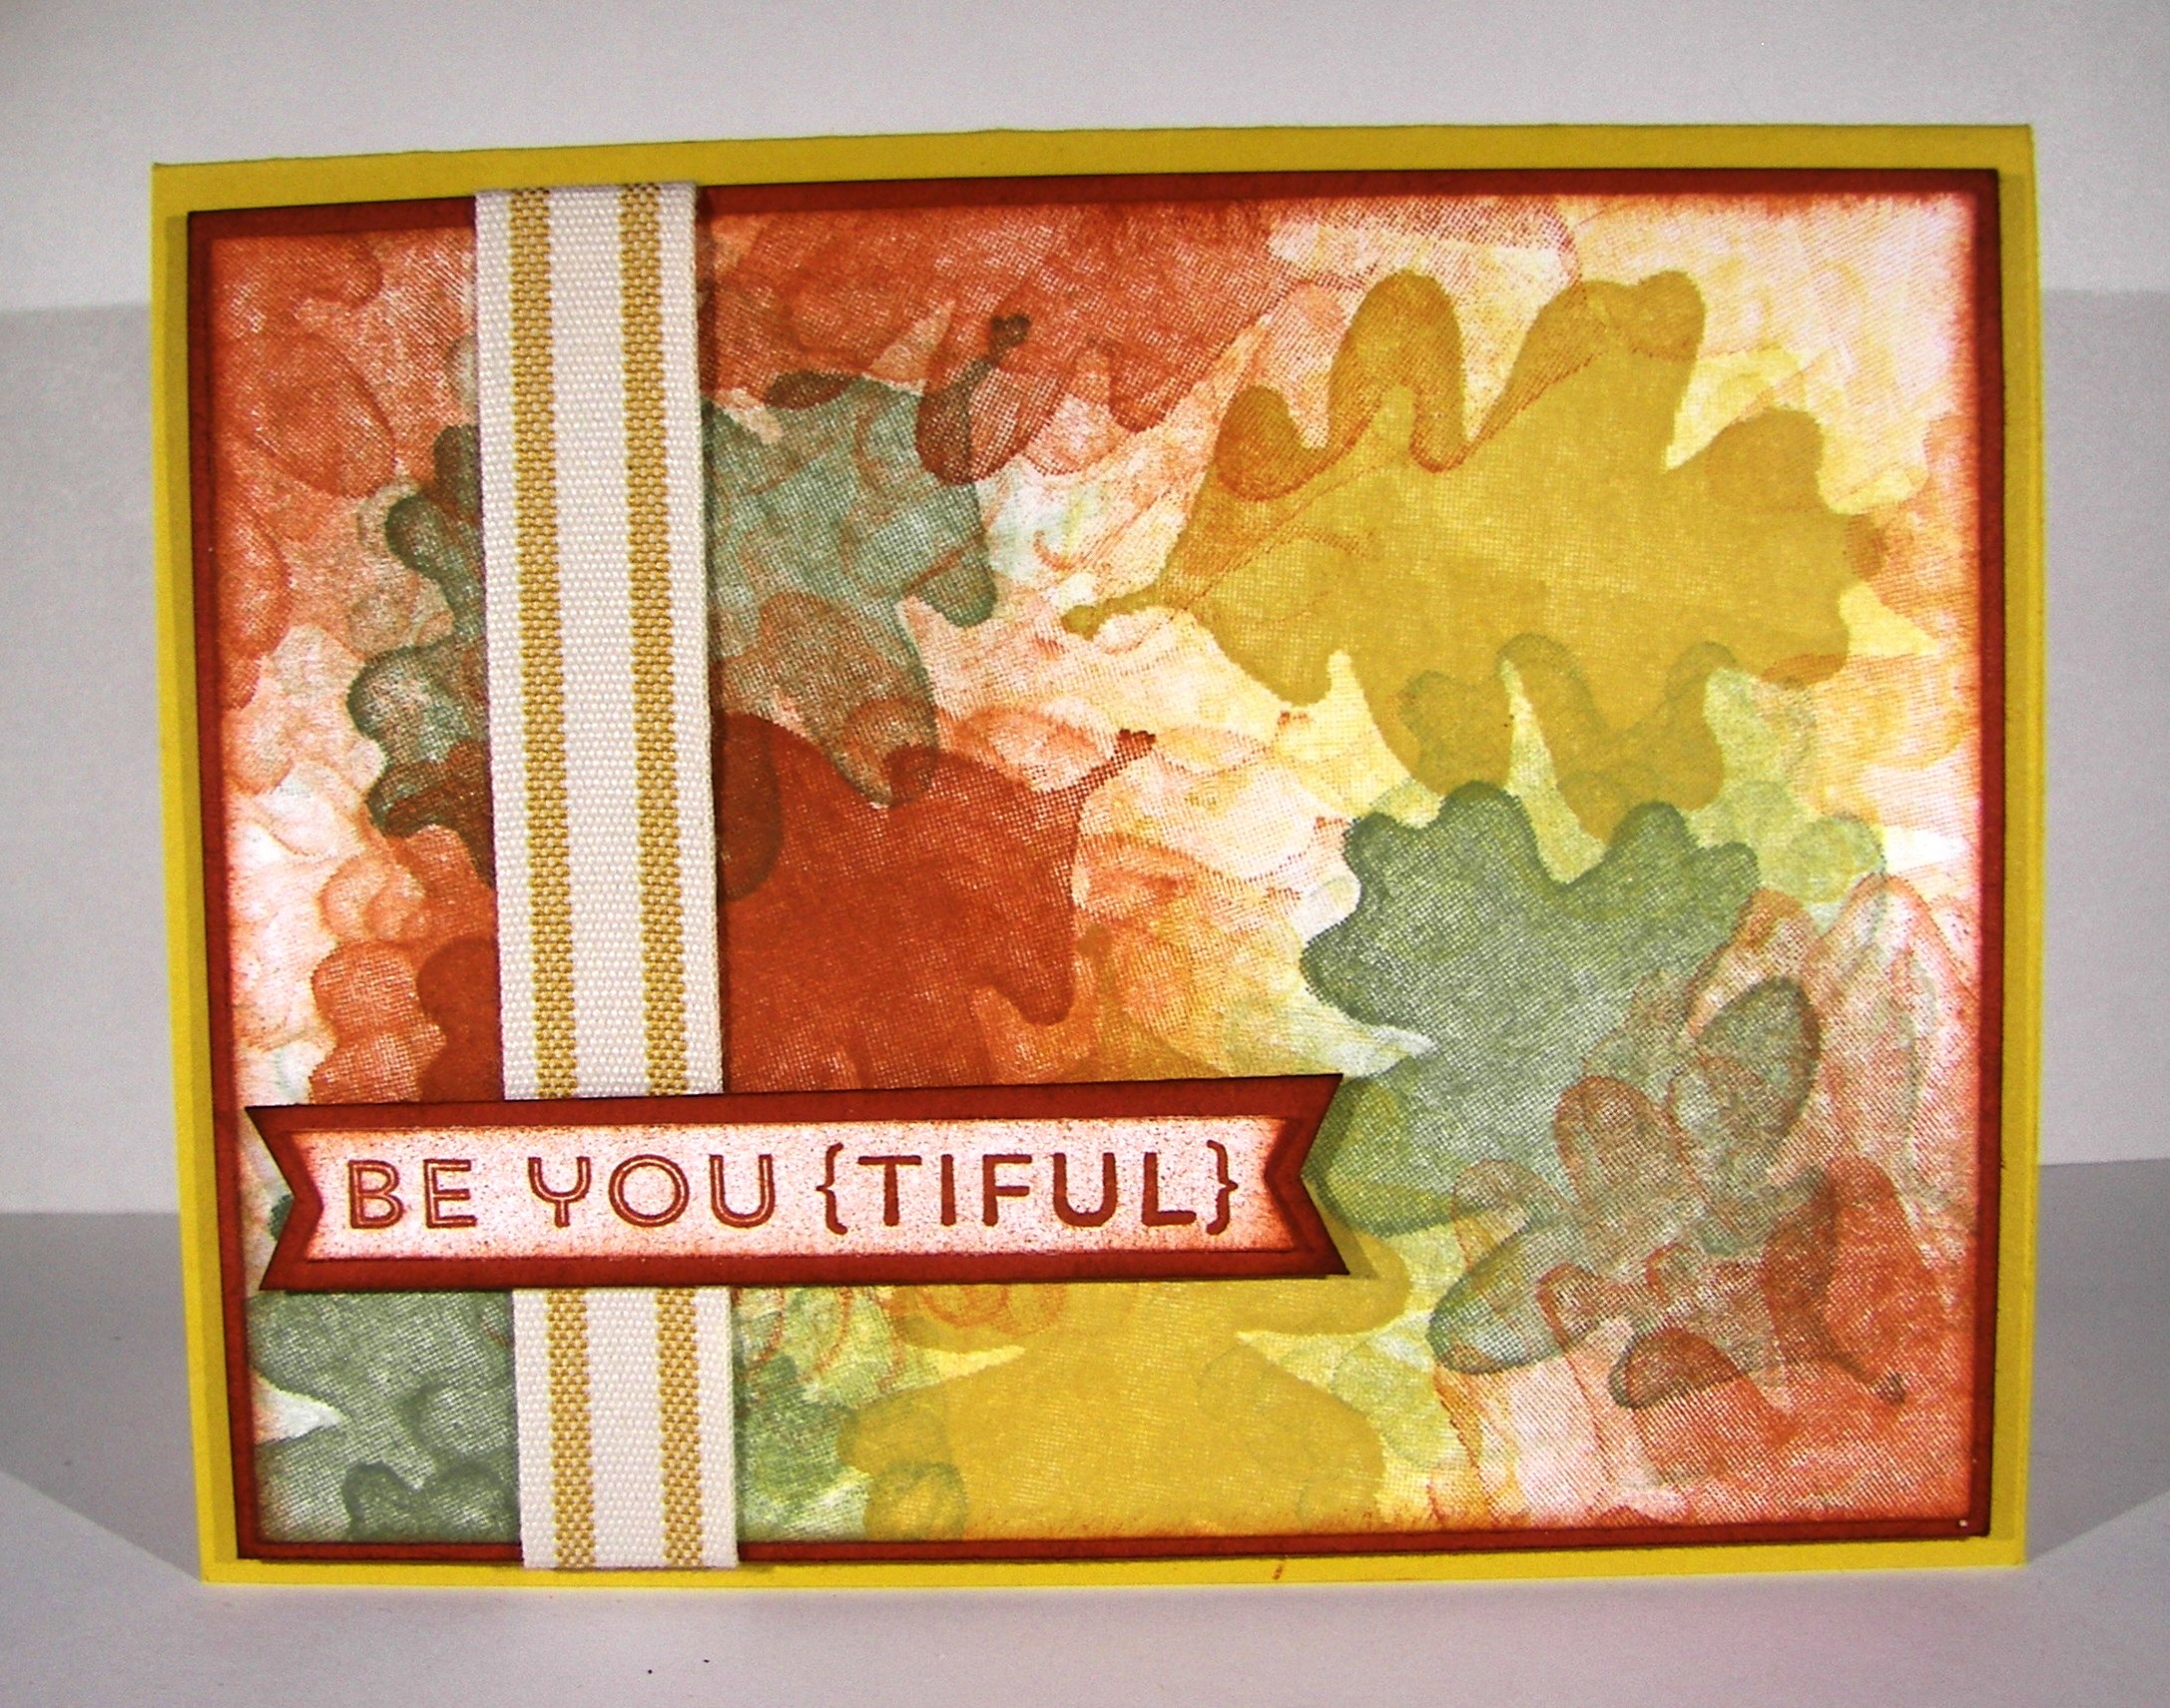
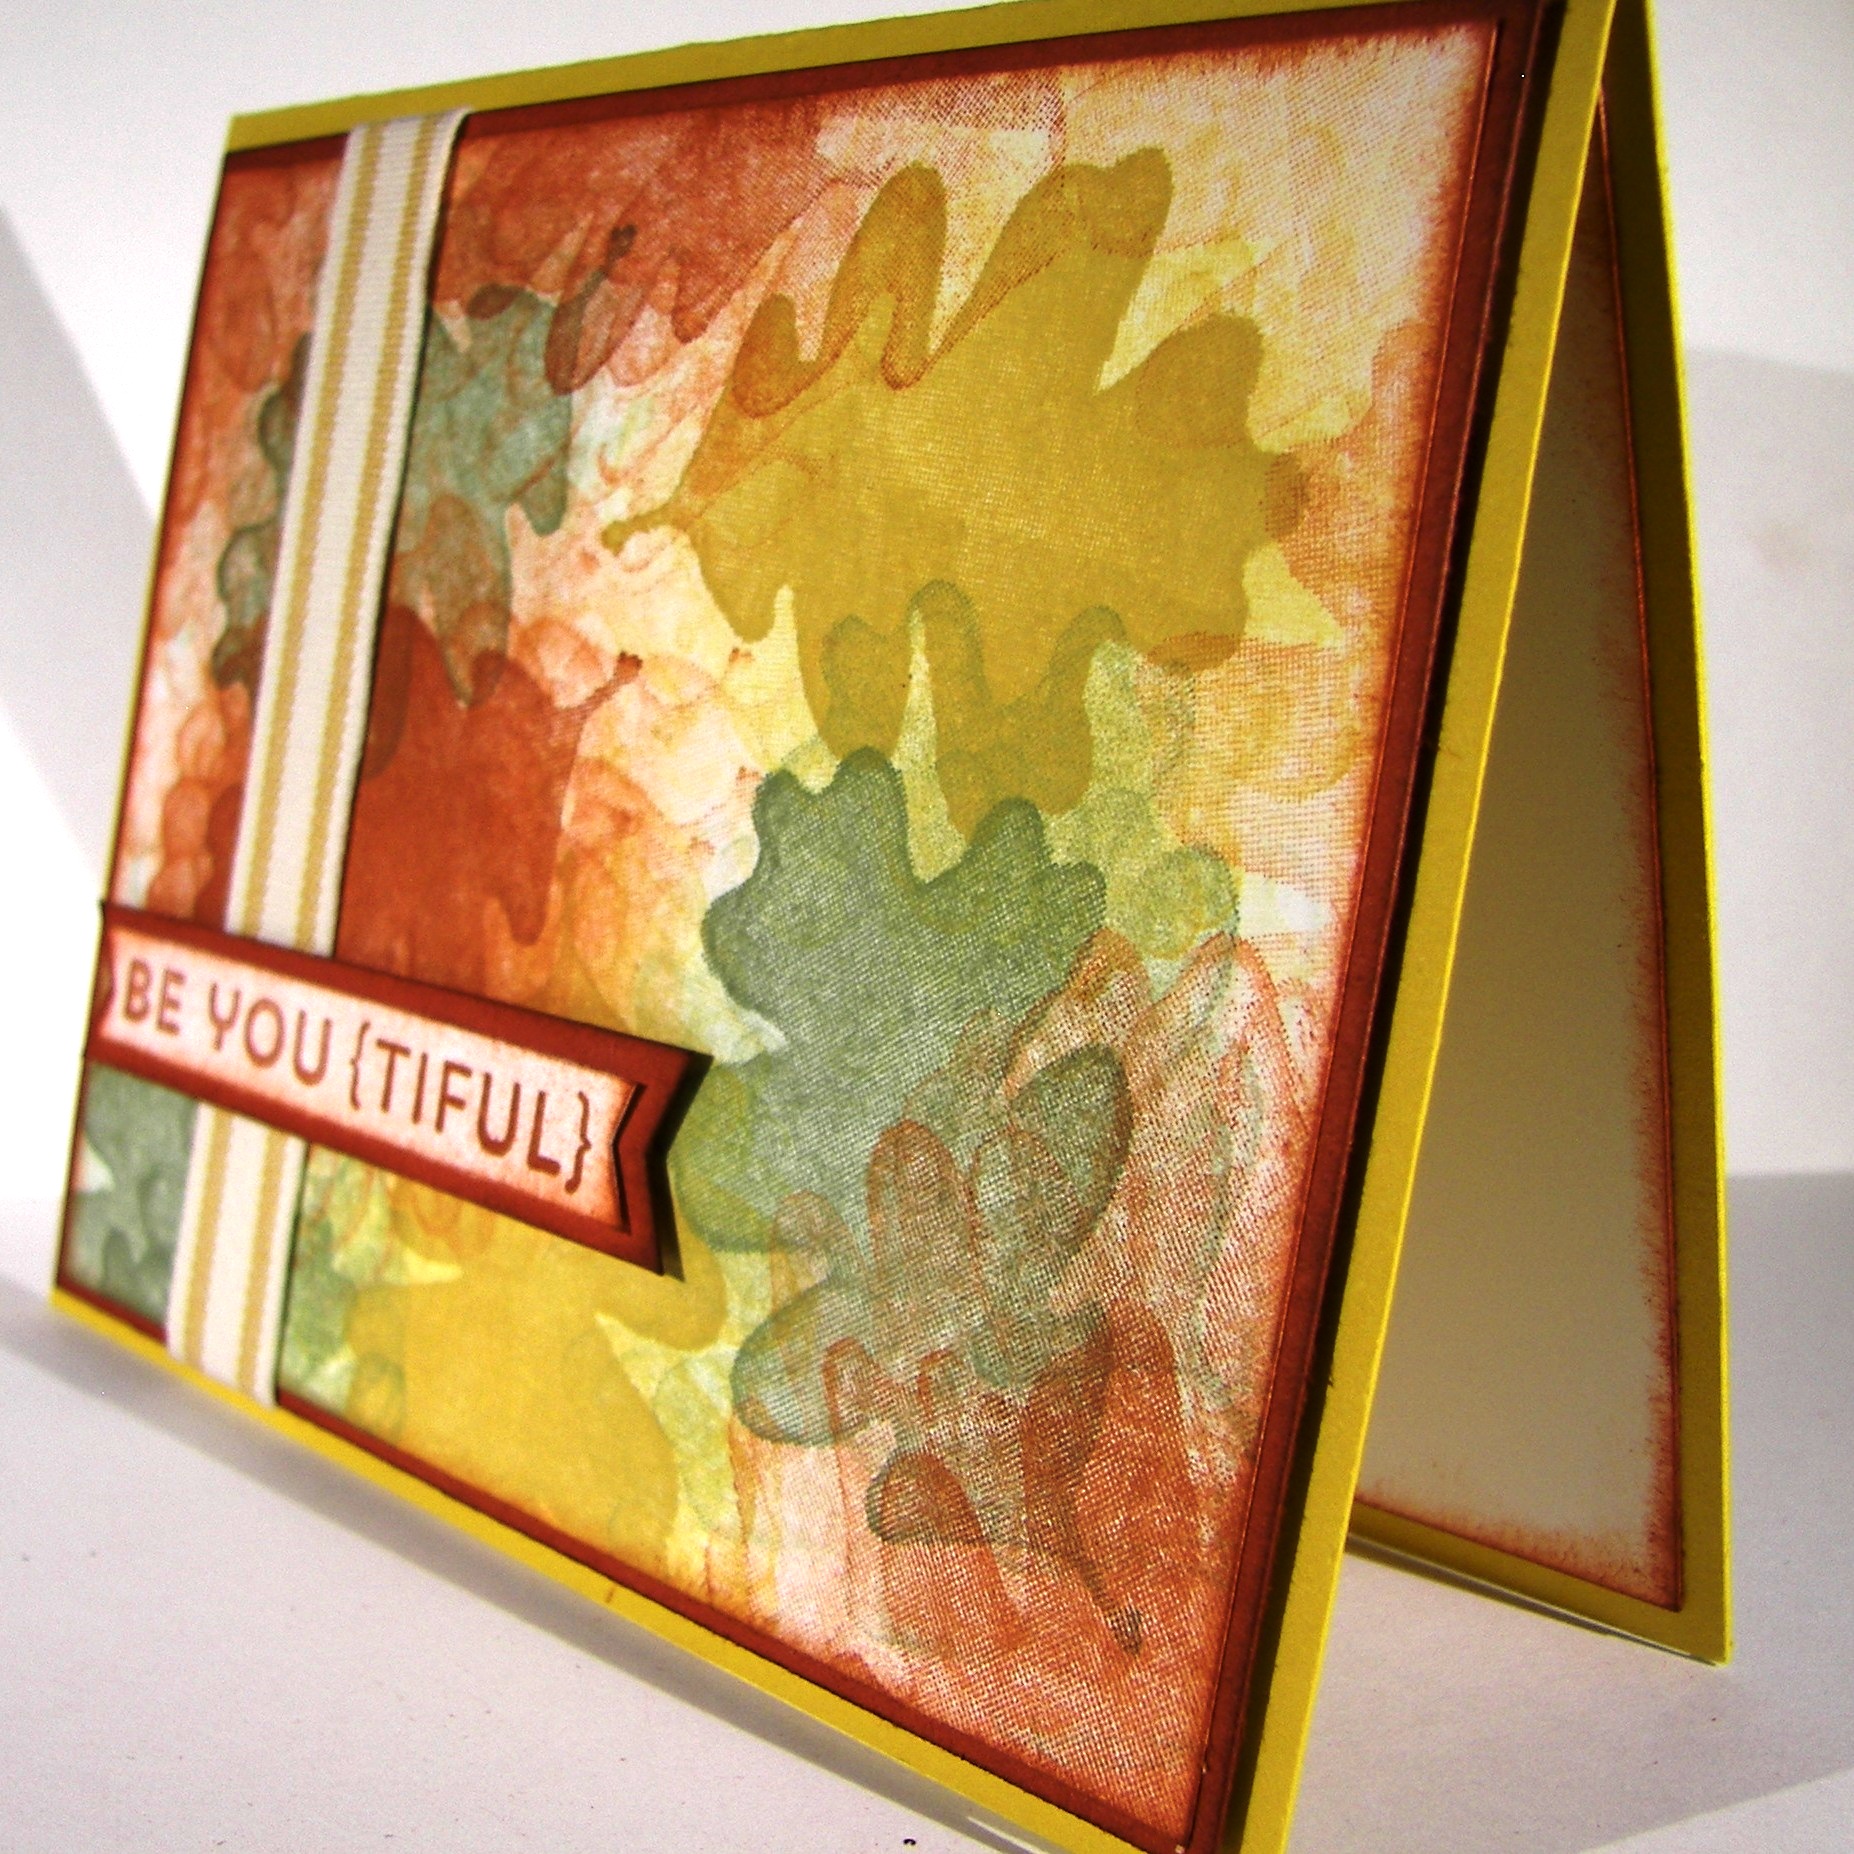
Isn’t this a lovely pairing?  The colors of fall are so beautiful to me, truly my favorites.  It should be turning fall here, but is still hot like summer.  A girl can dream, and enjoy pretty cards about fall, right?

More Thankful Swaps

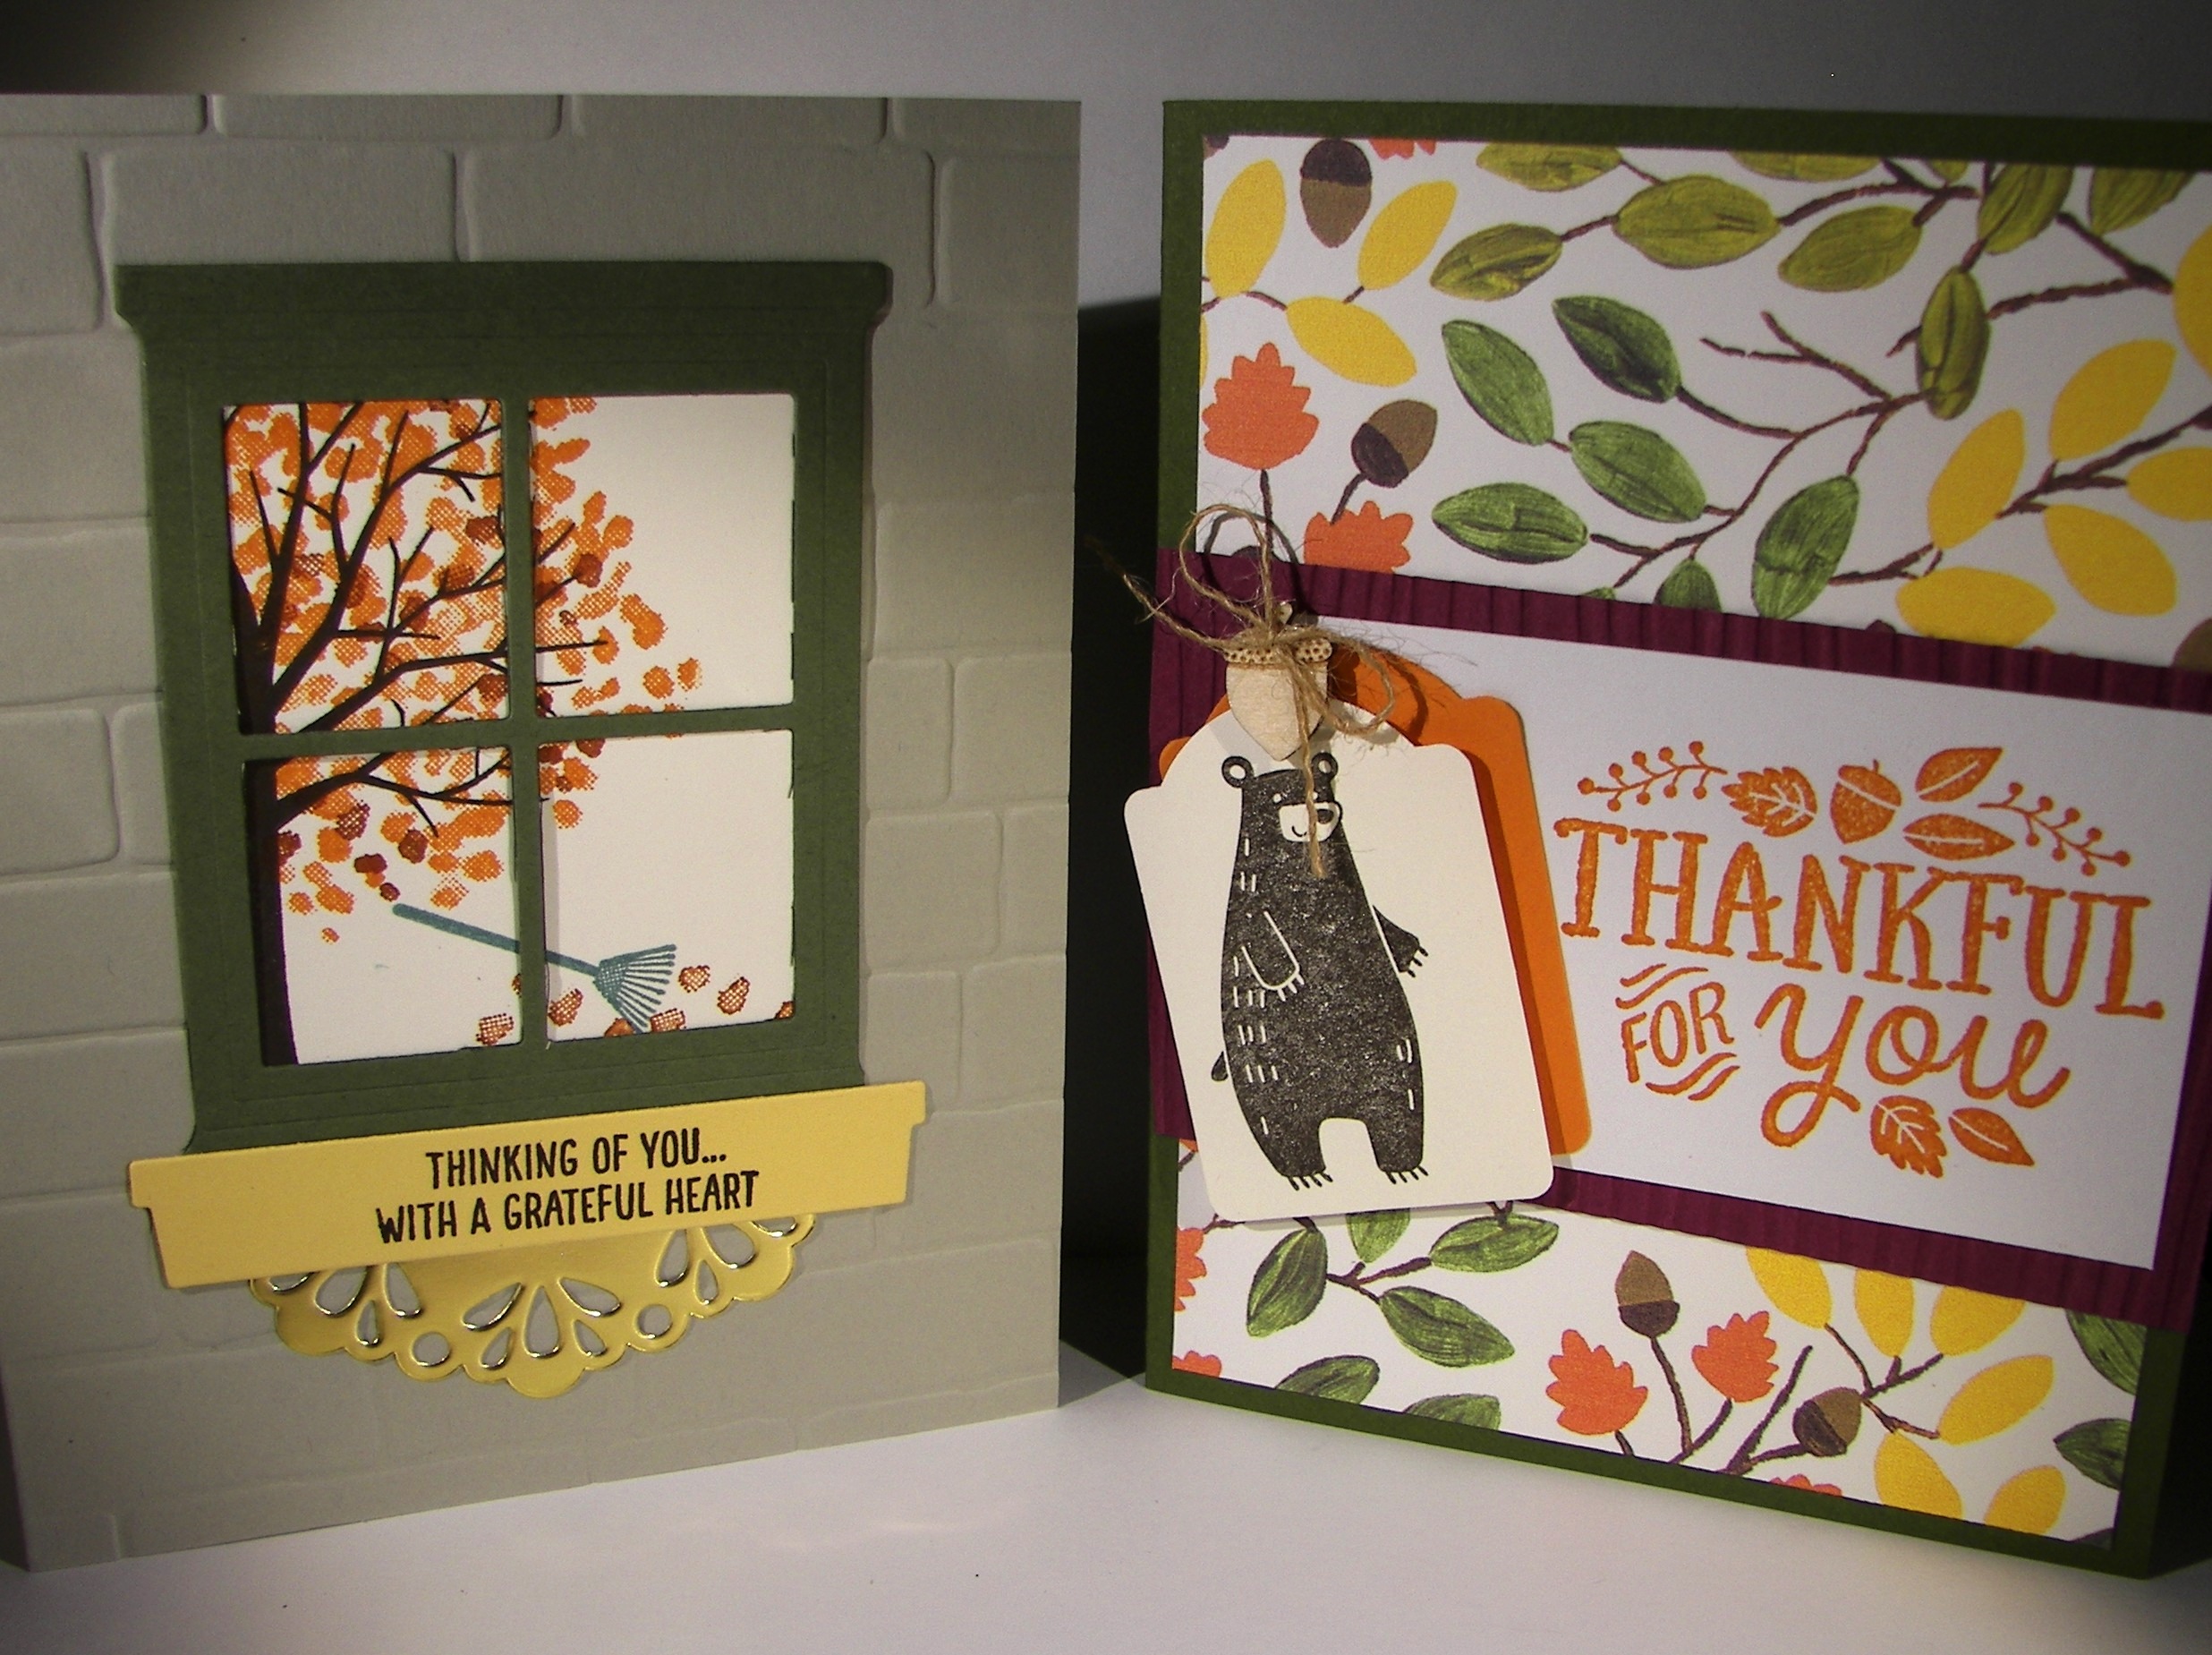
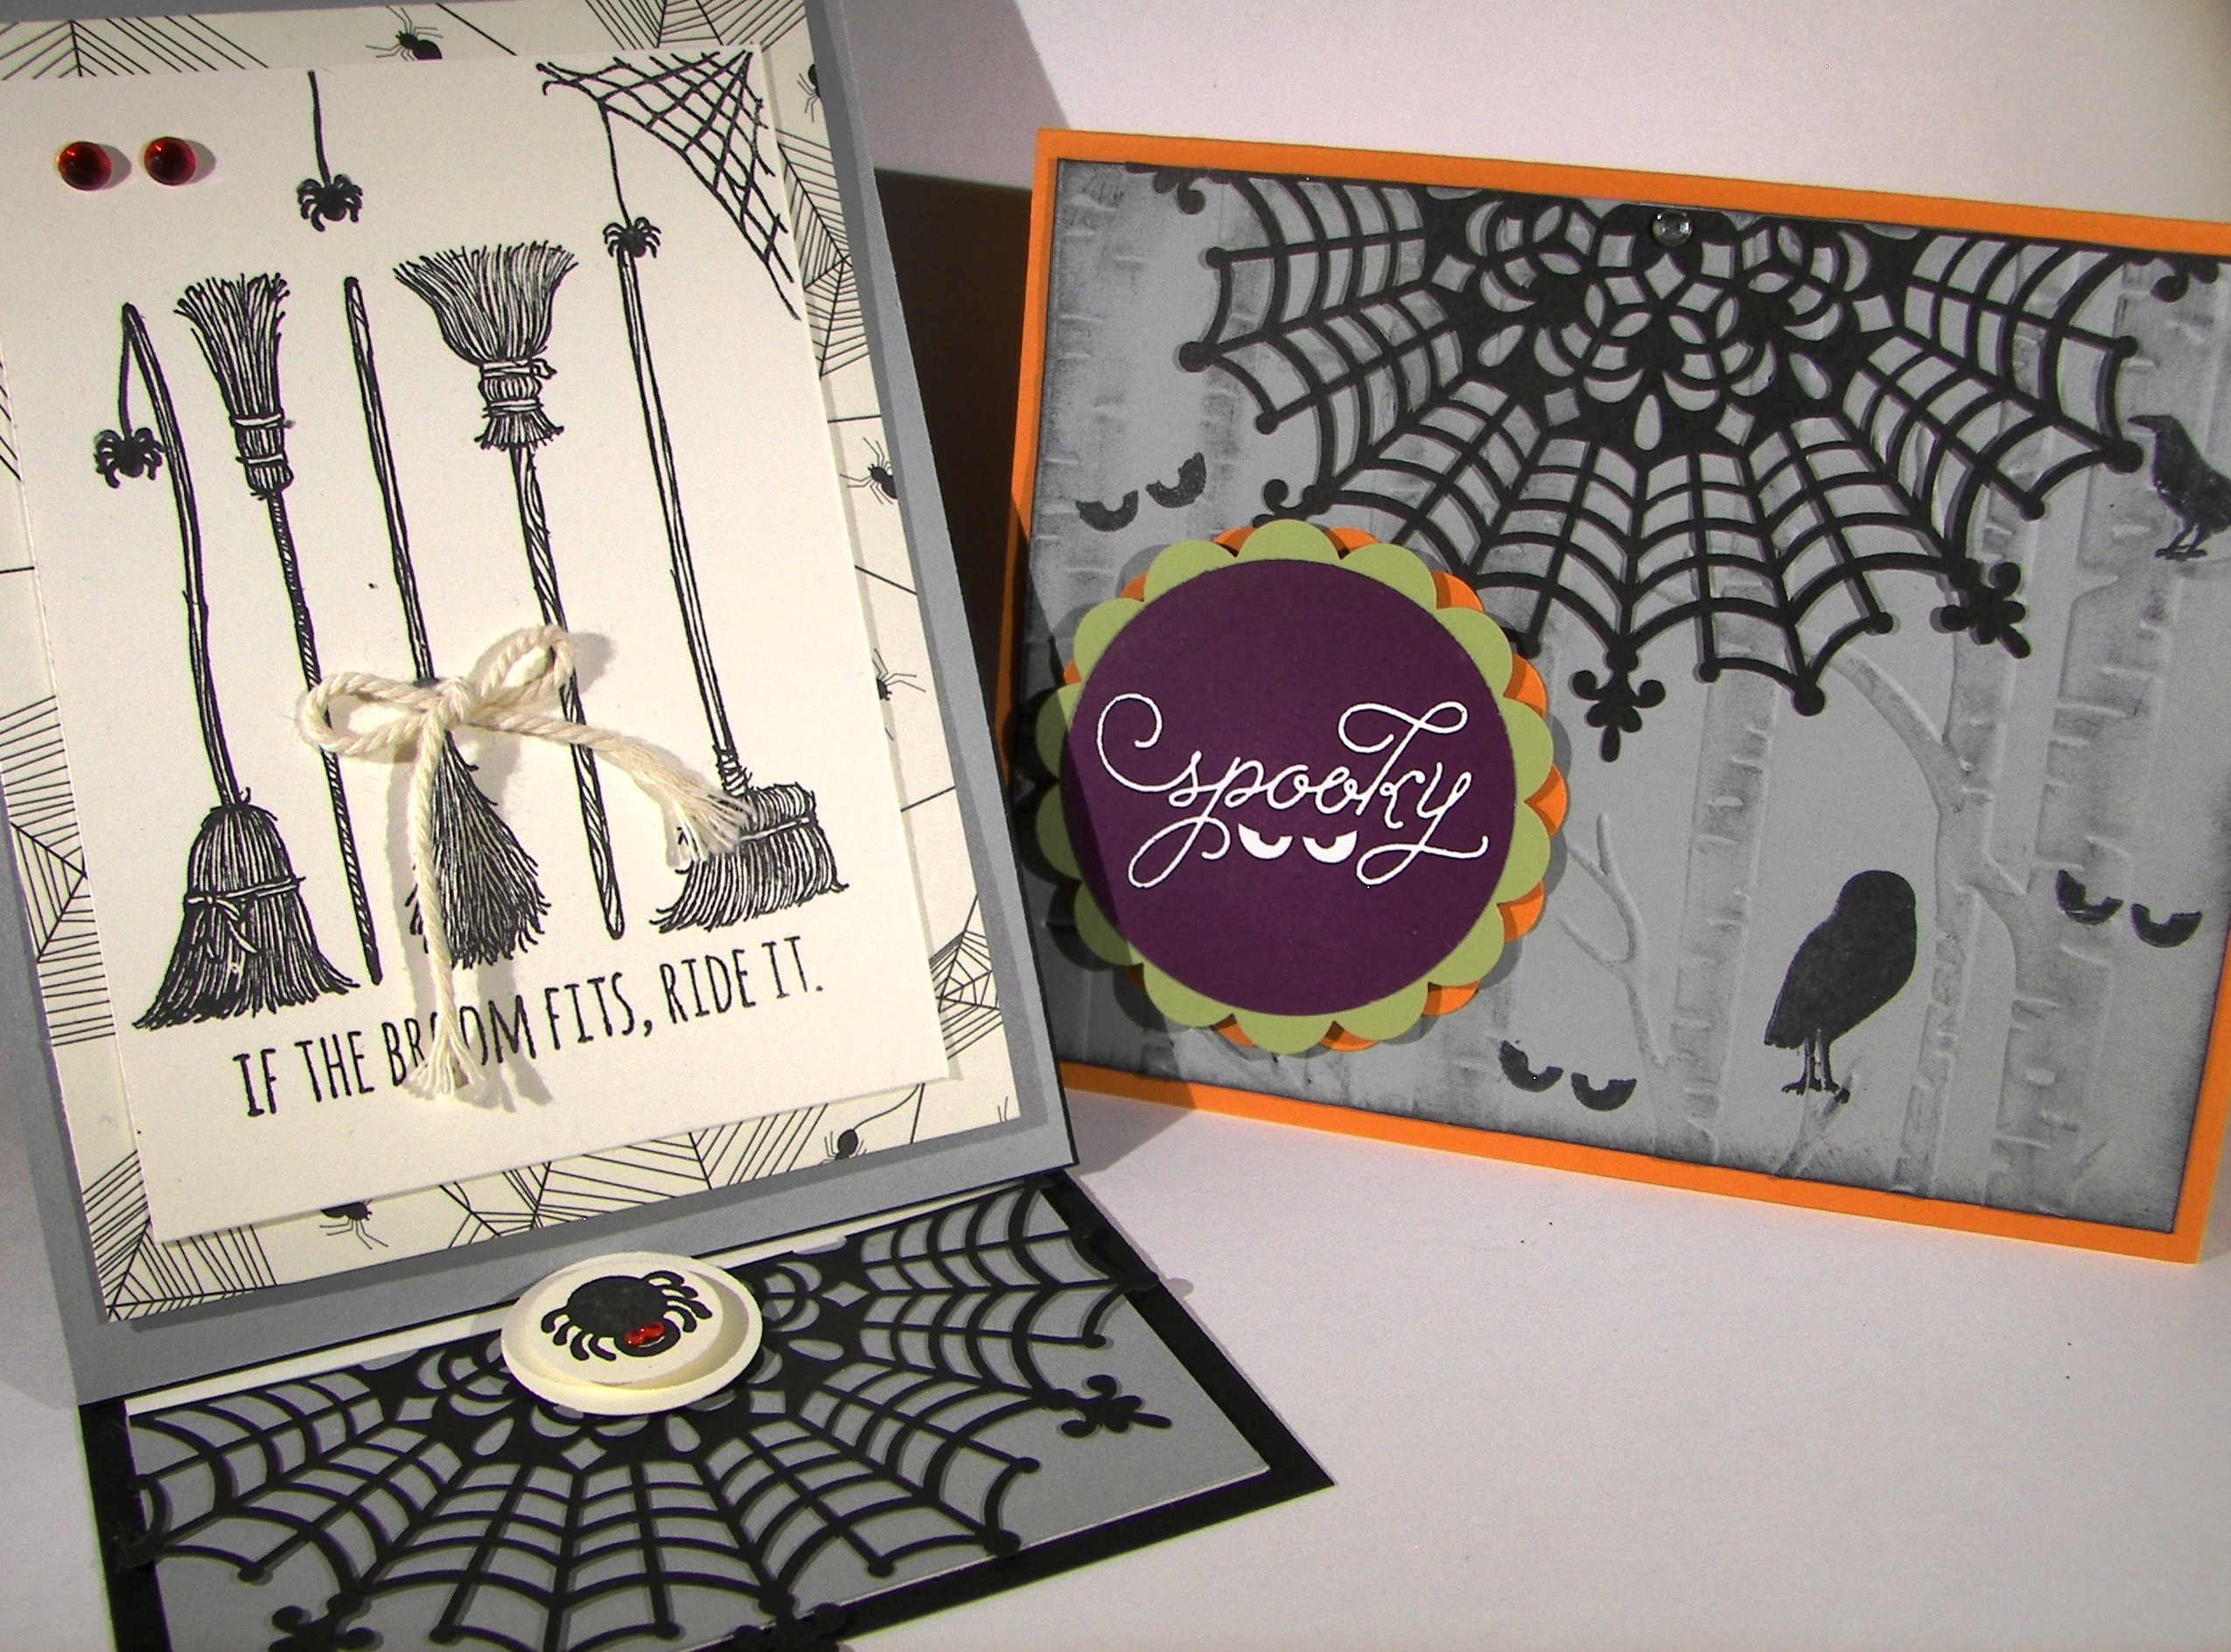
These are other swaps that were completed samples for me, but I can’t wait to make them myself.  I have a lot of the tools, but didn’t get that cute little bear.  It comes from the Thankful Forest Friends set and I saw it as a bit too whimsy for me.  I think he, and his friends, are adorable and have put it on my wish list.

More Thankful Swaps

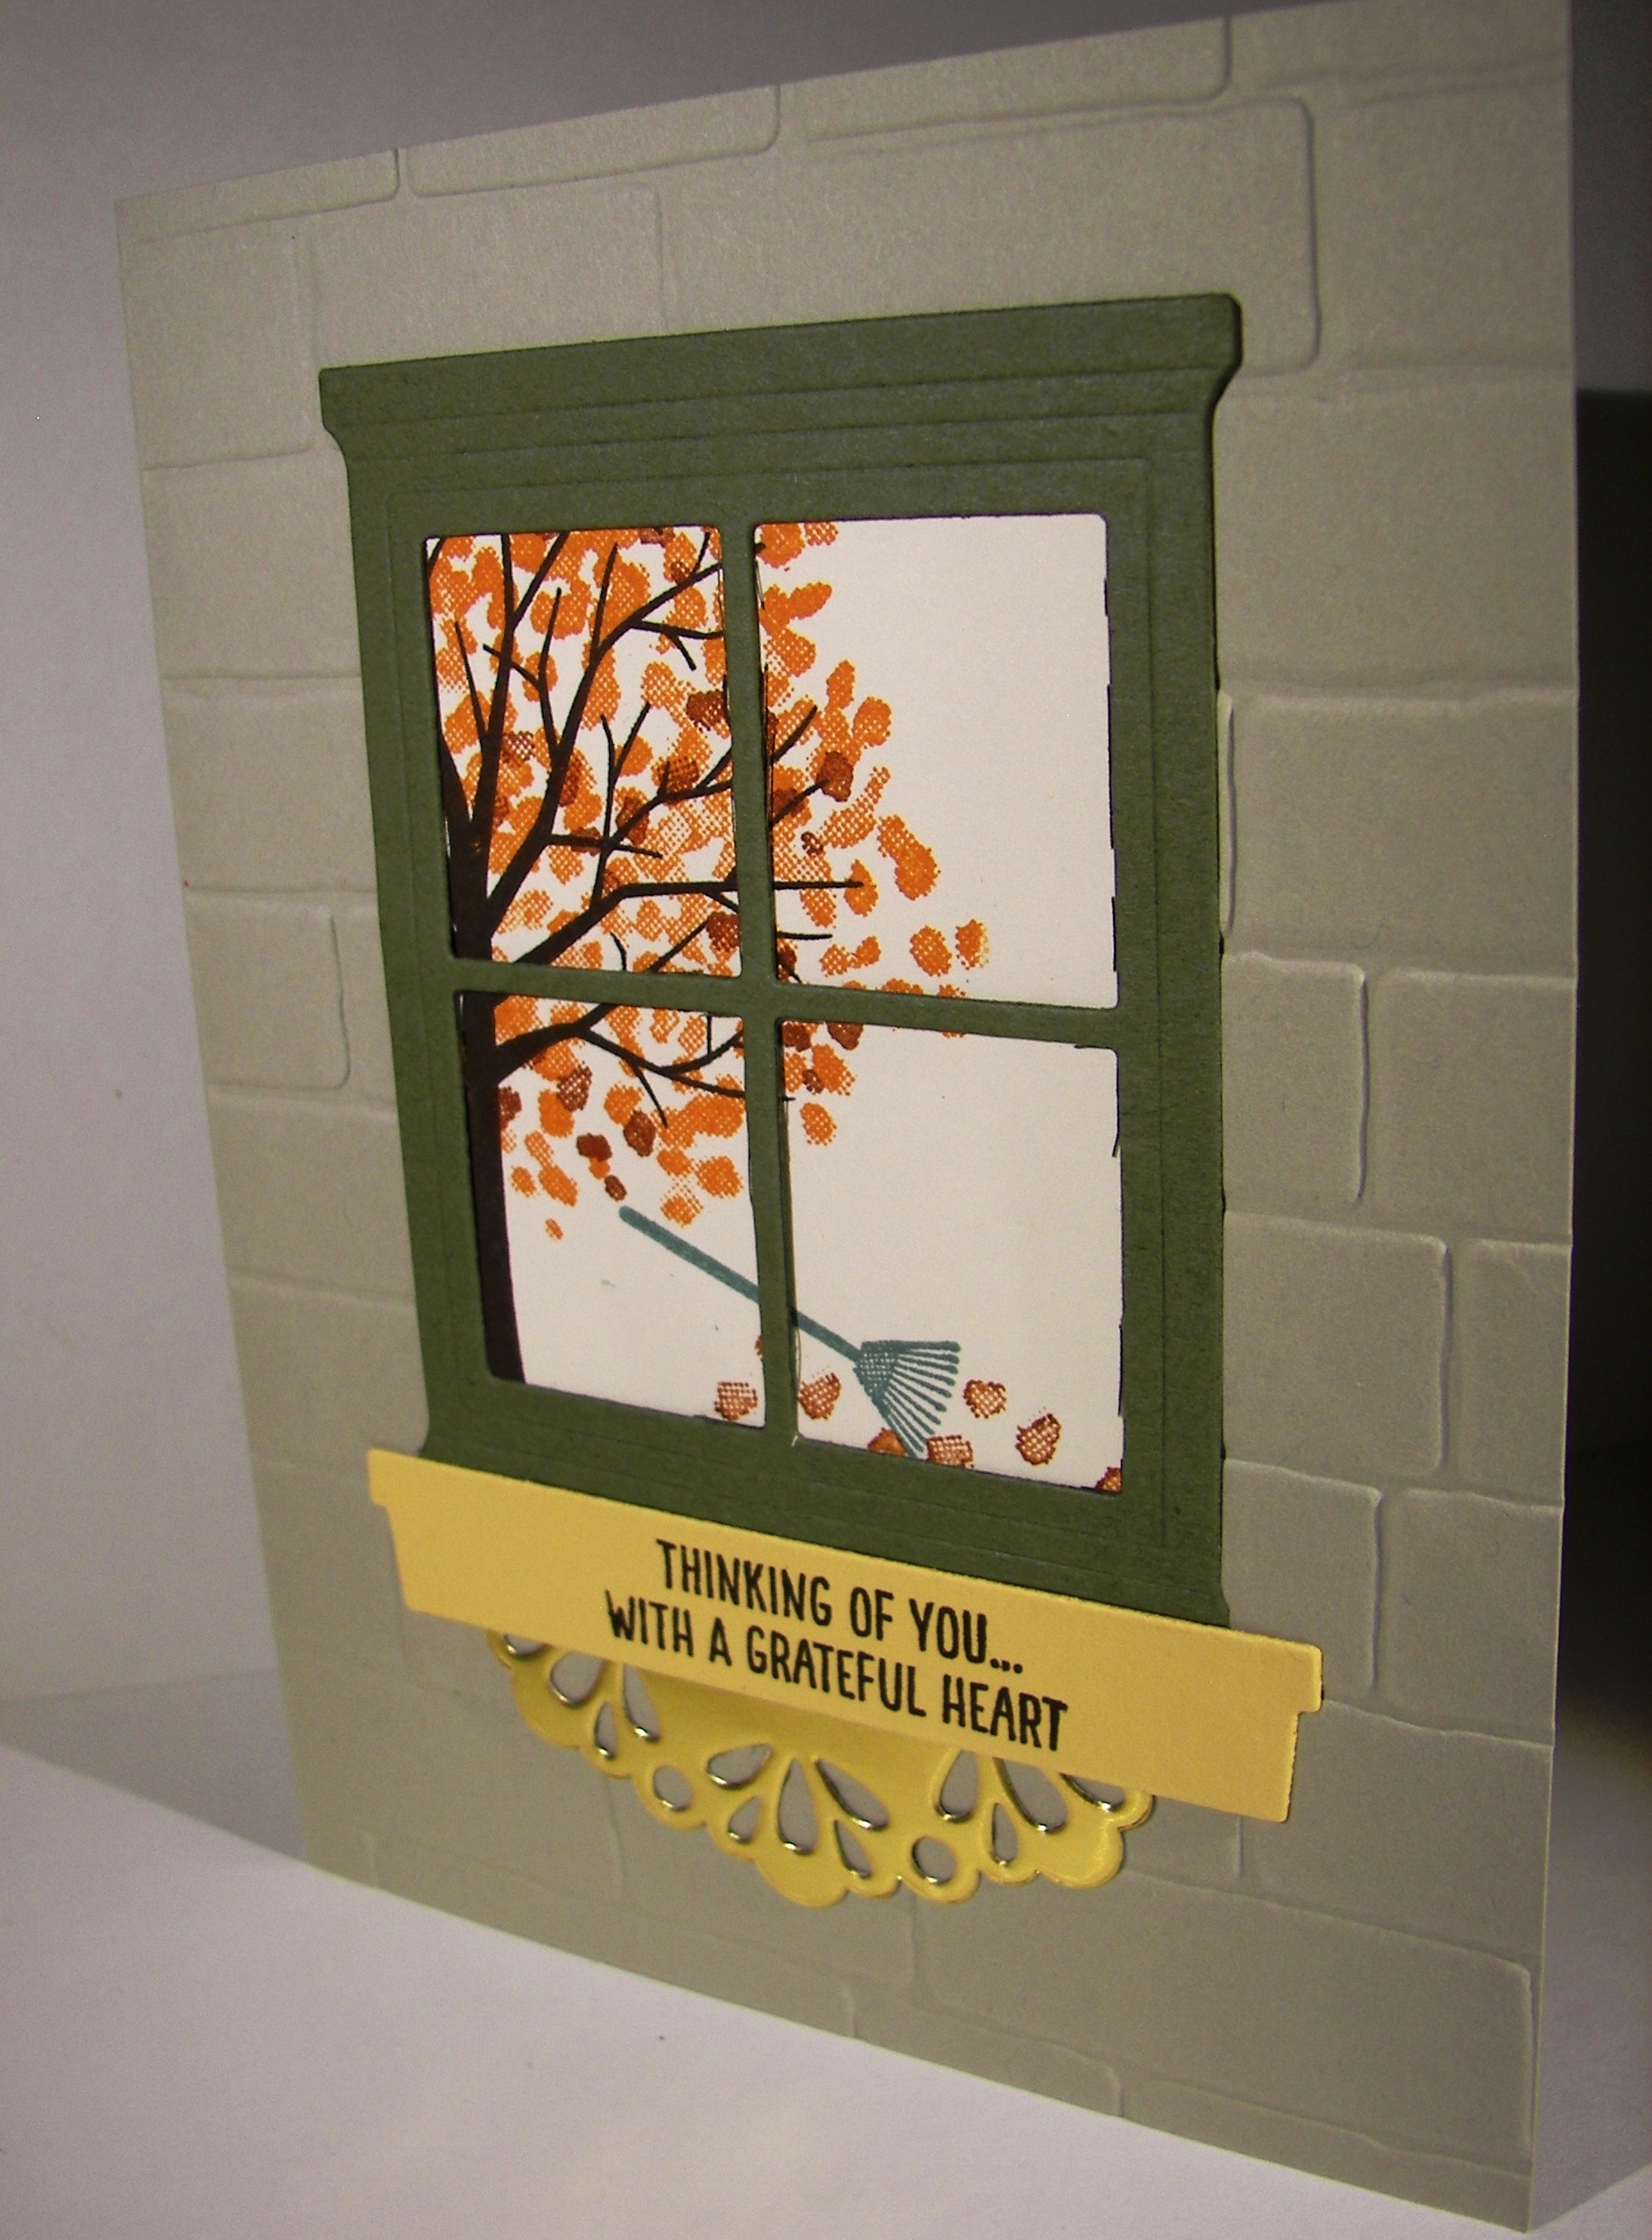
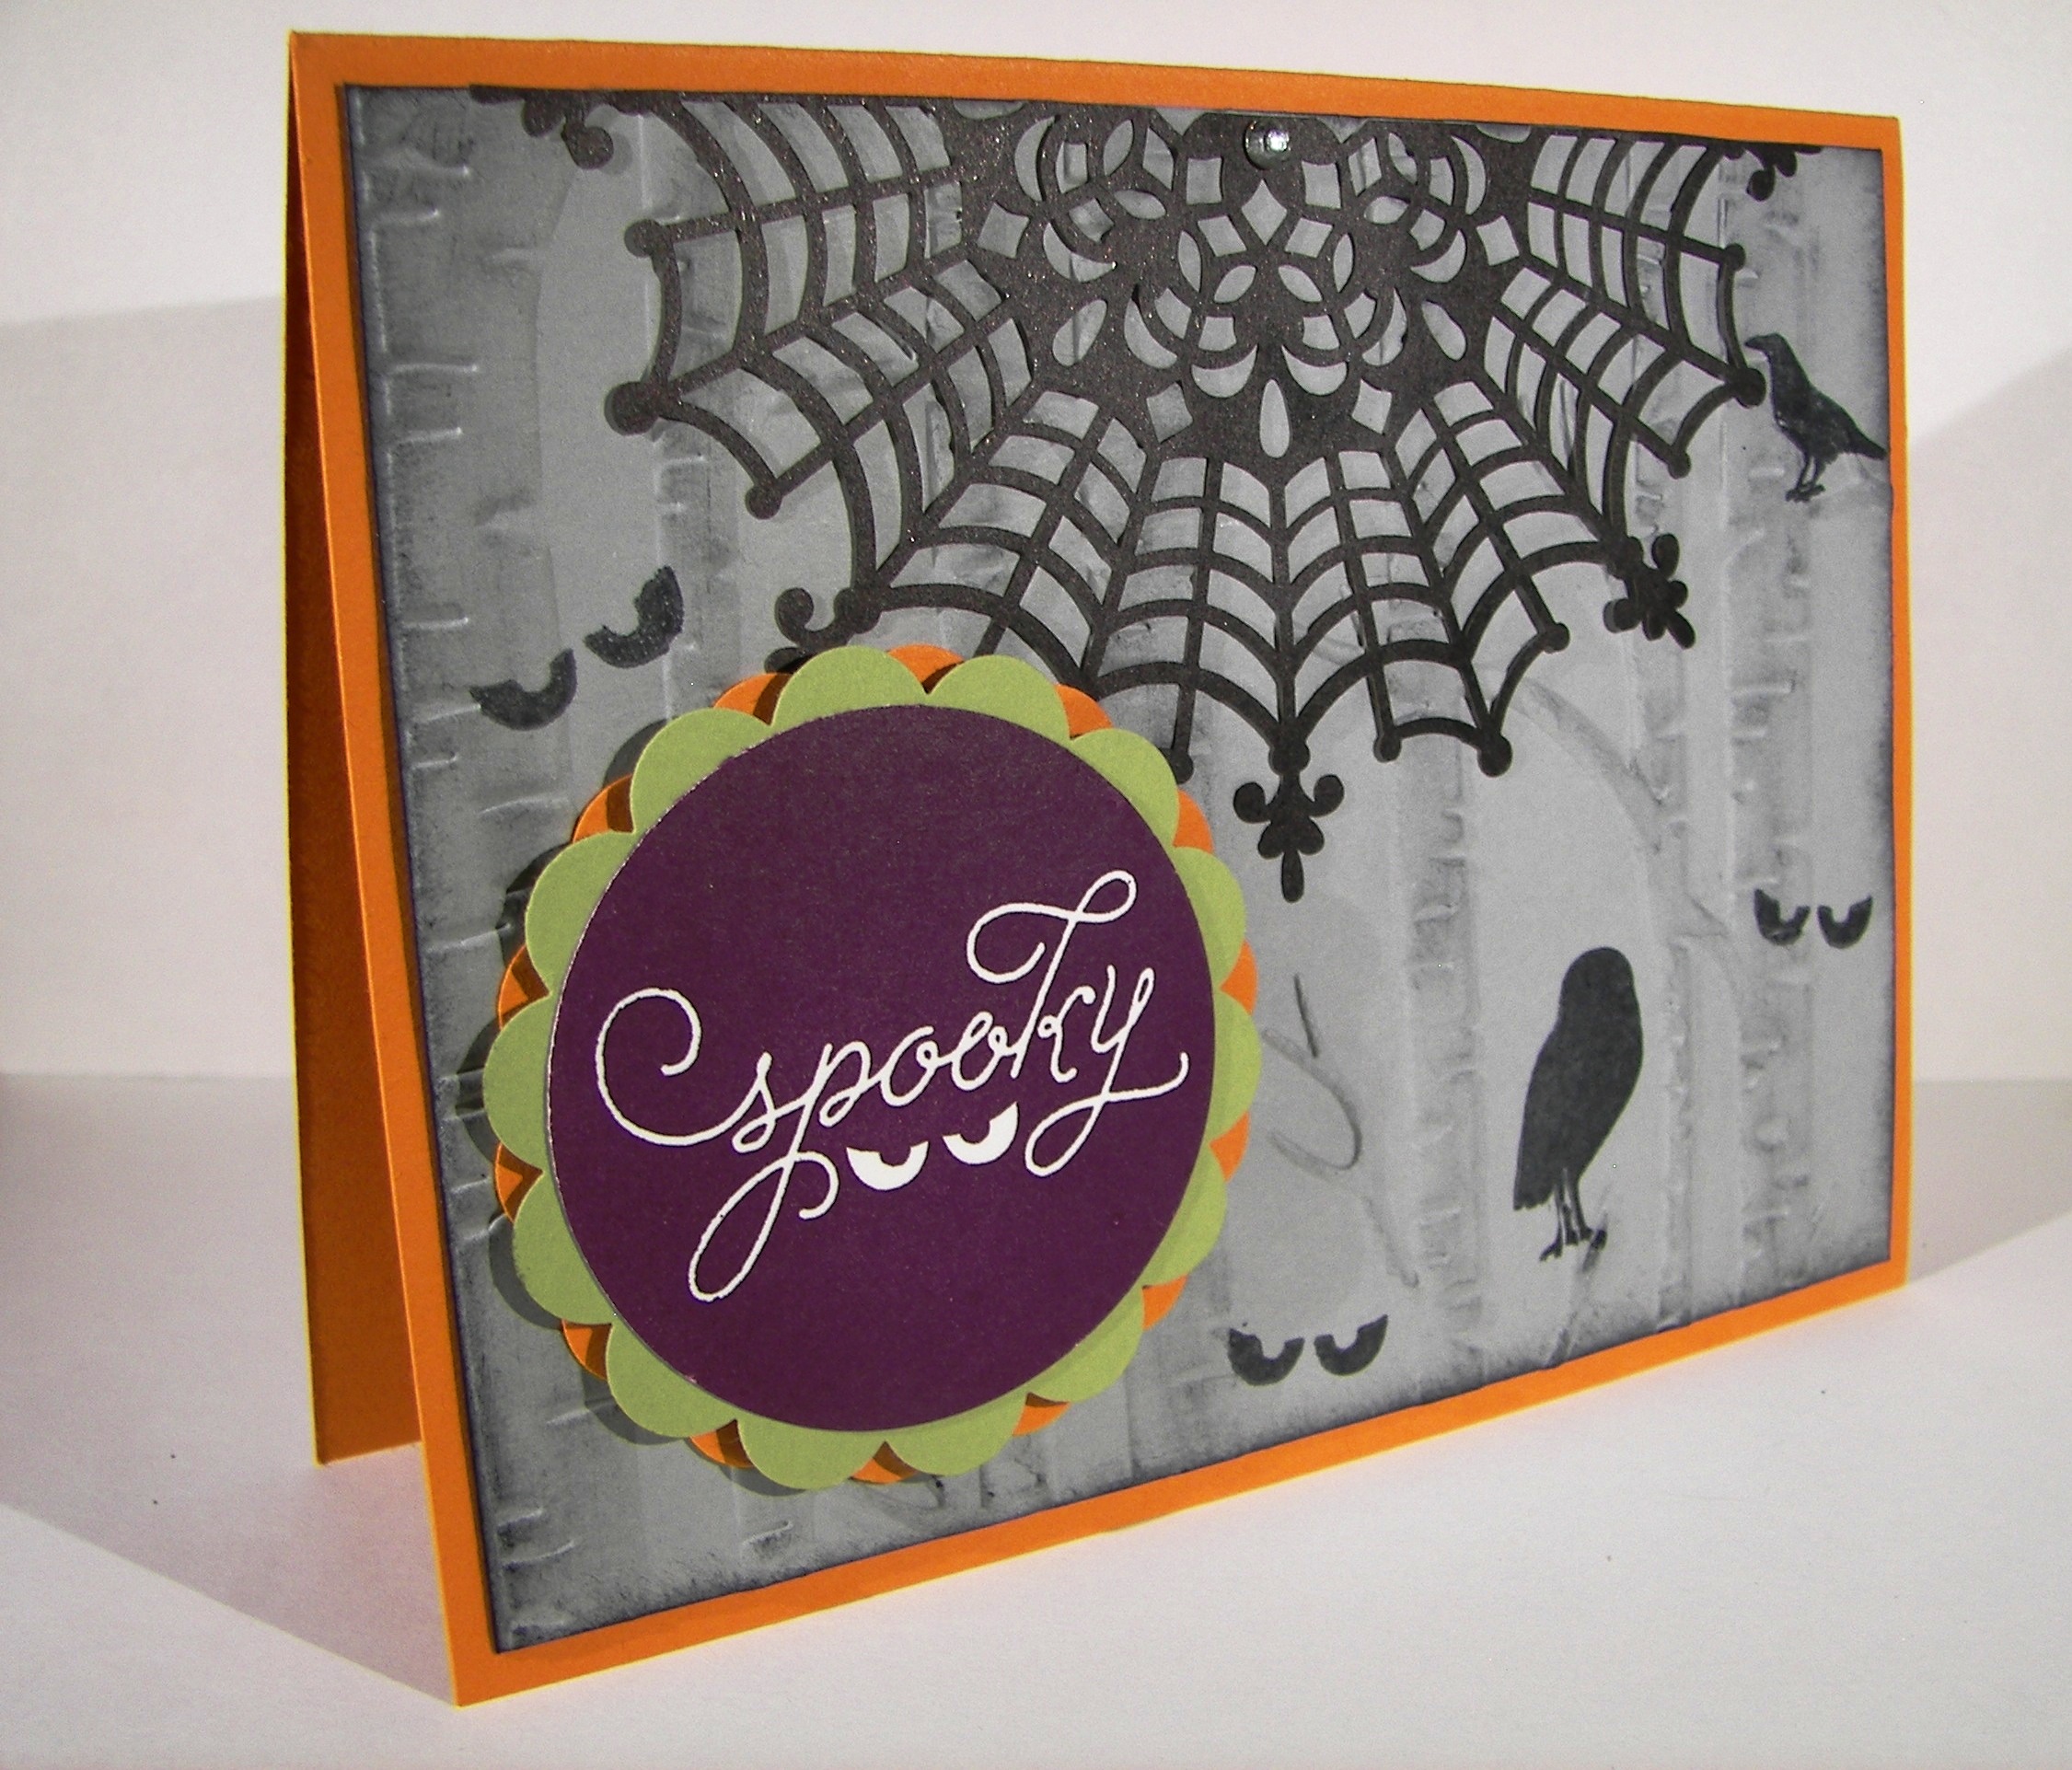
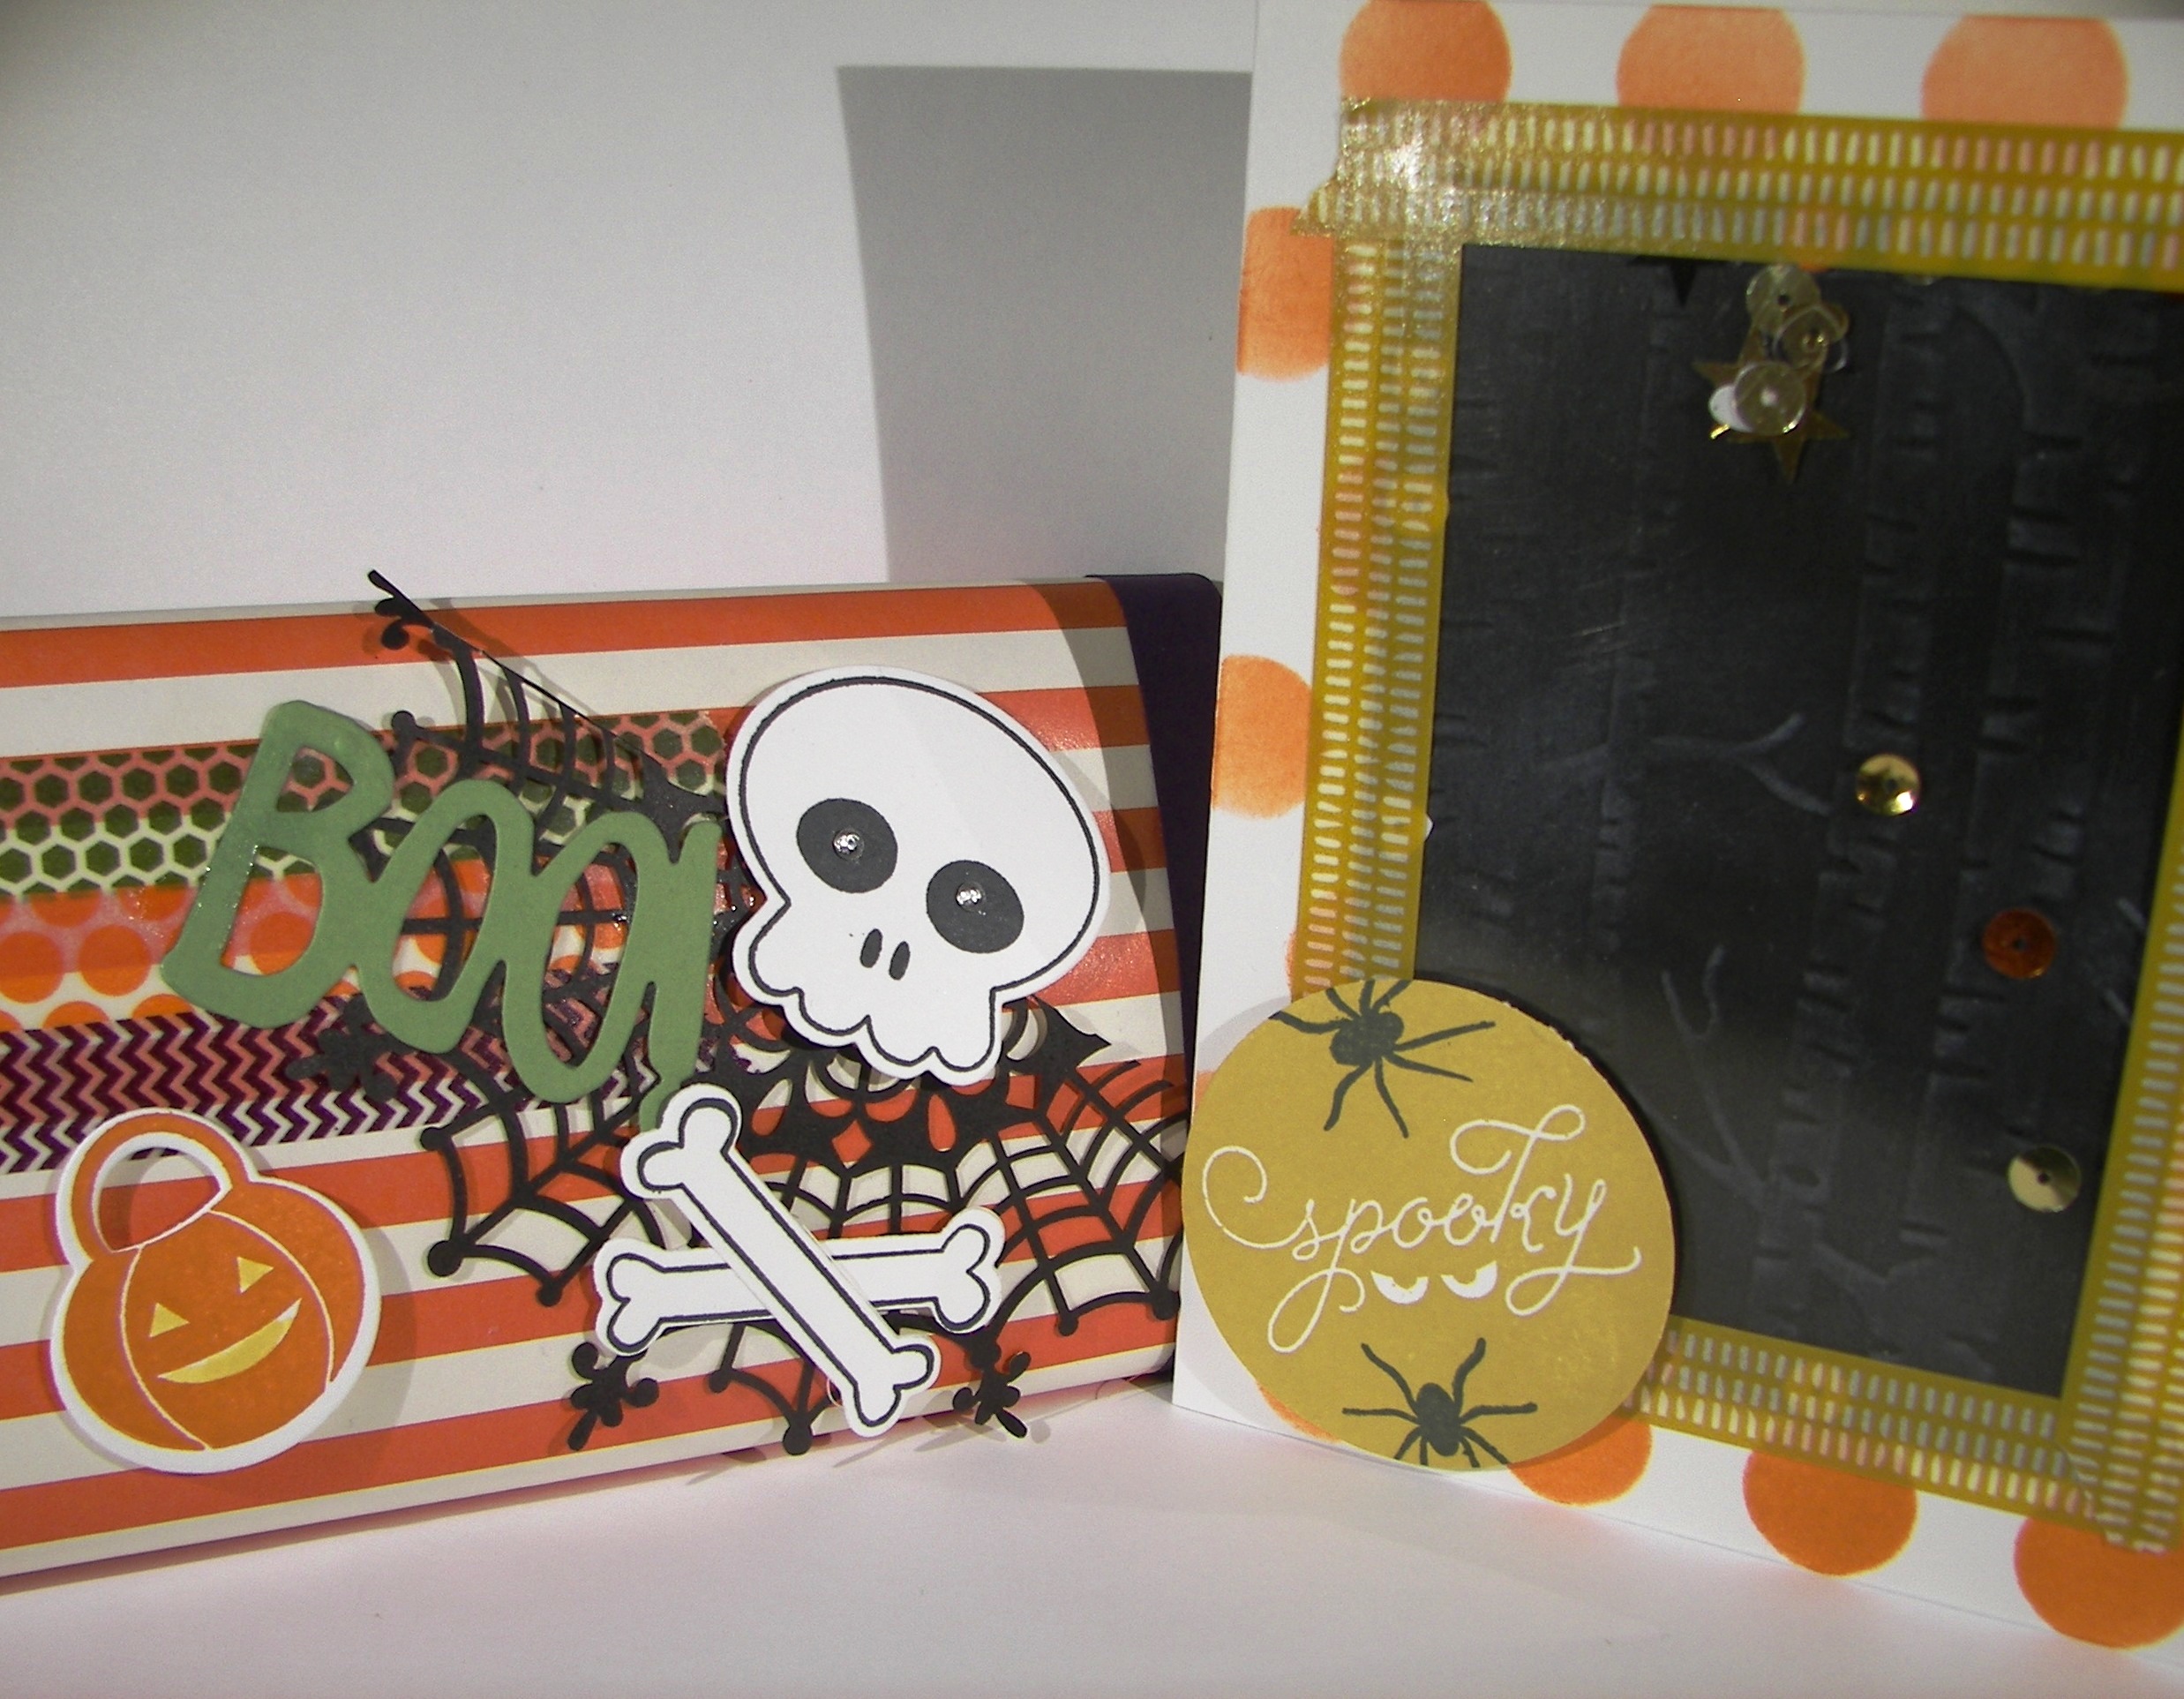
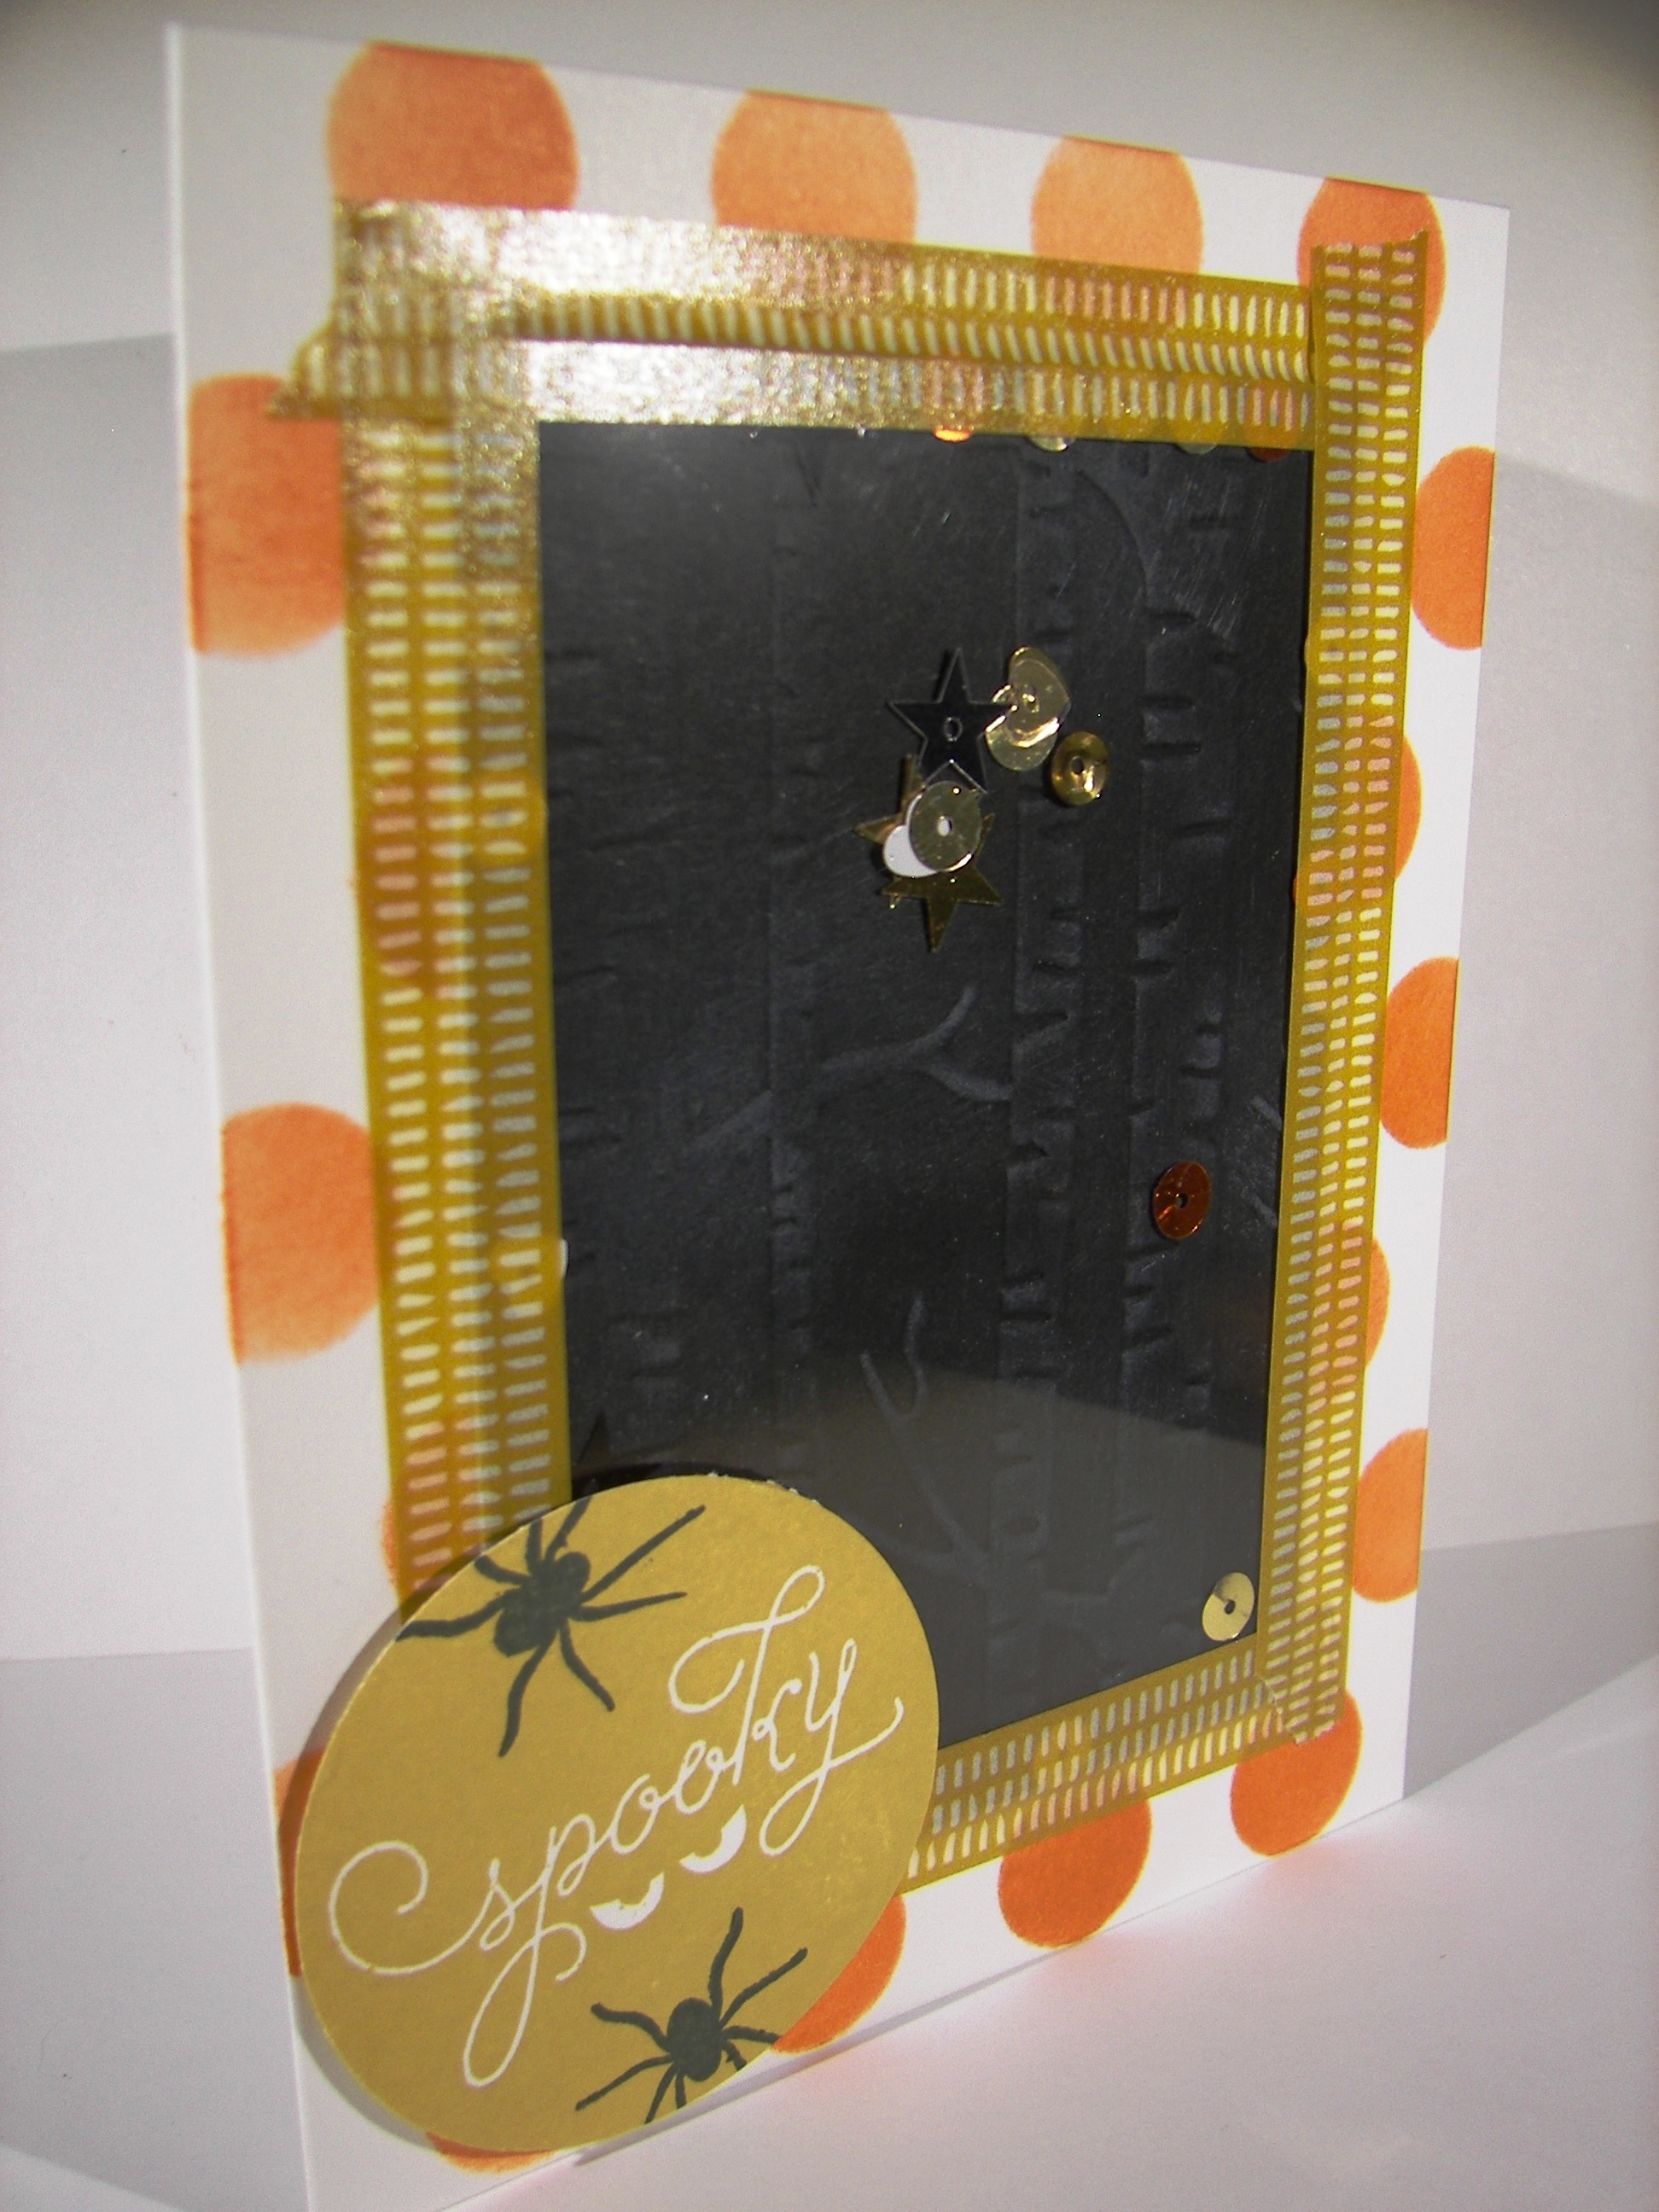
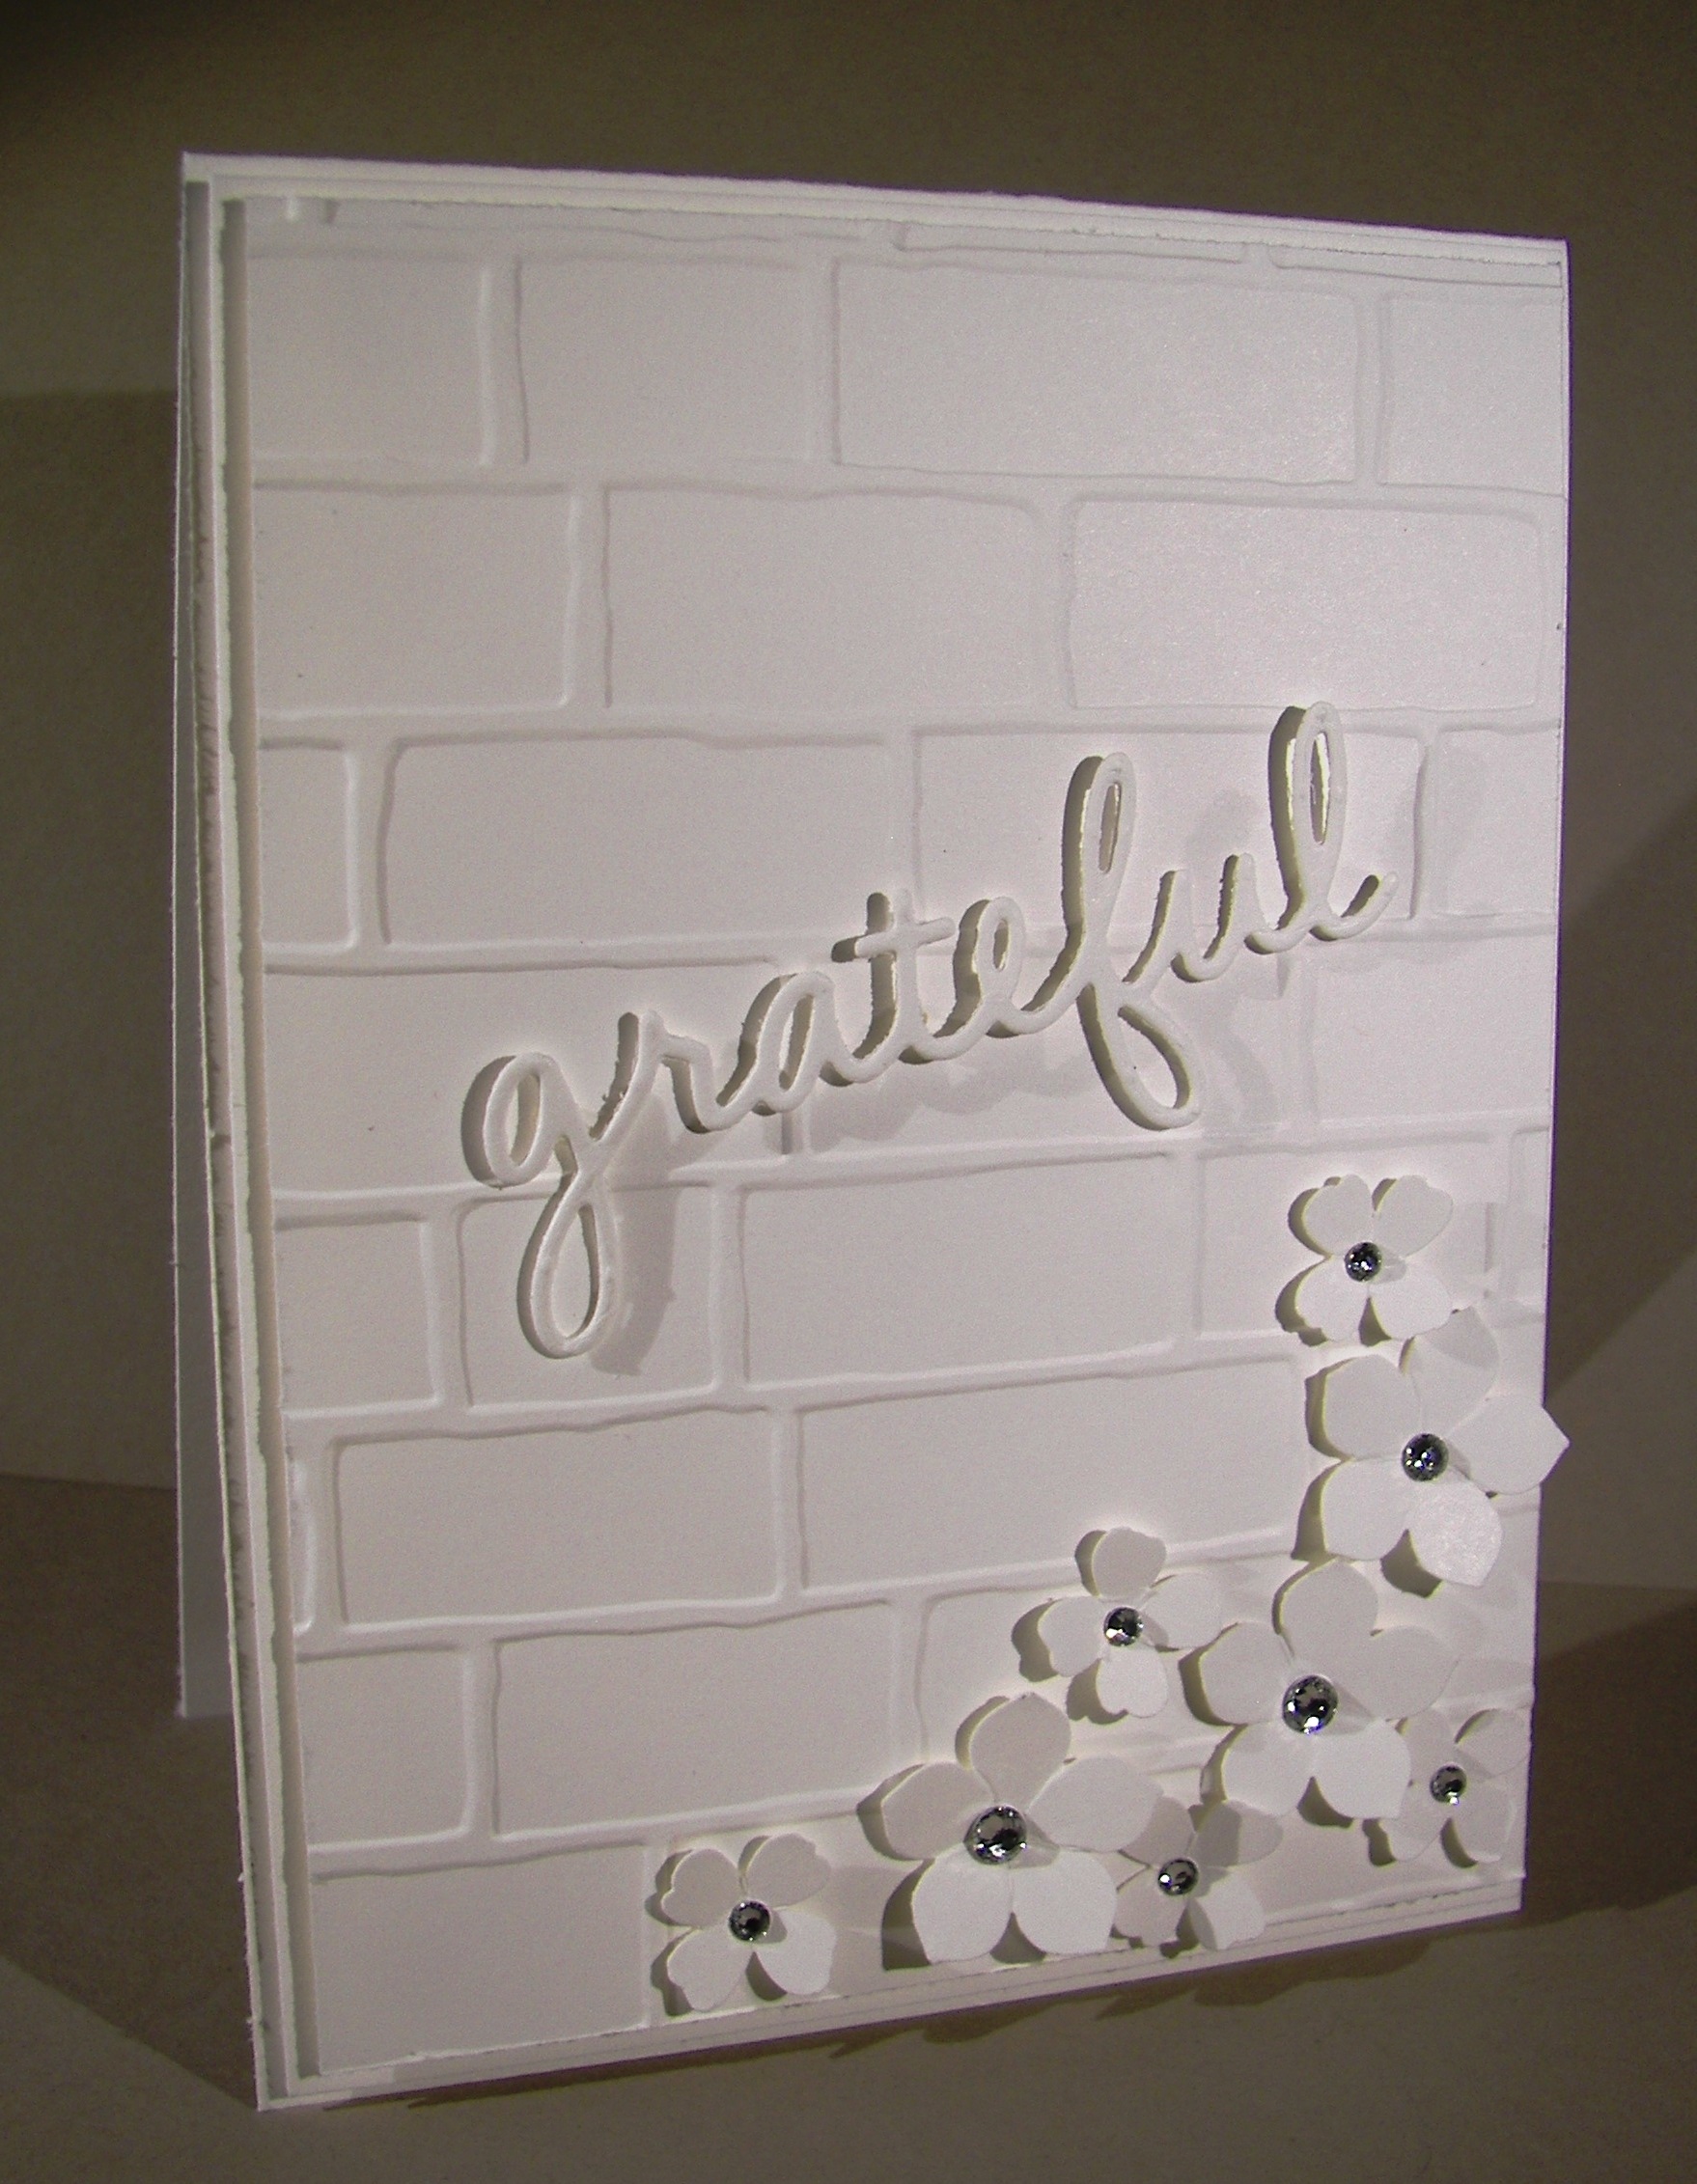
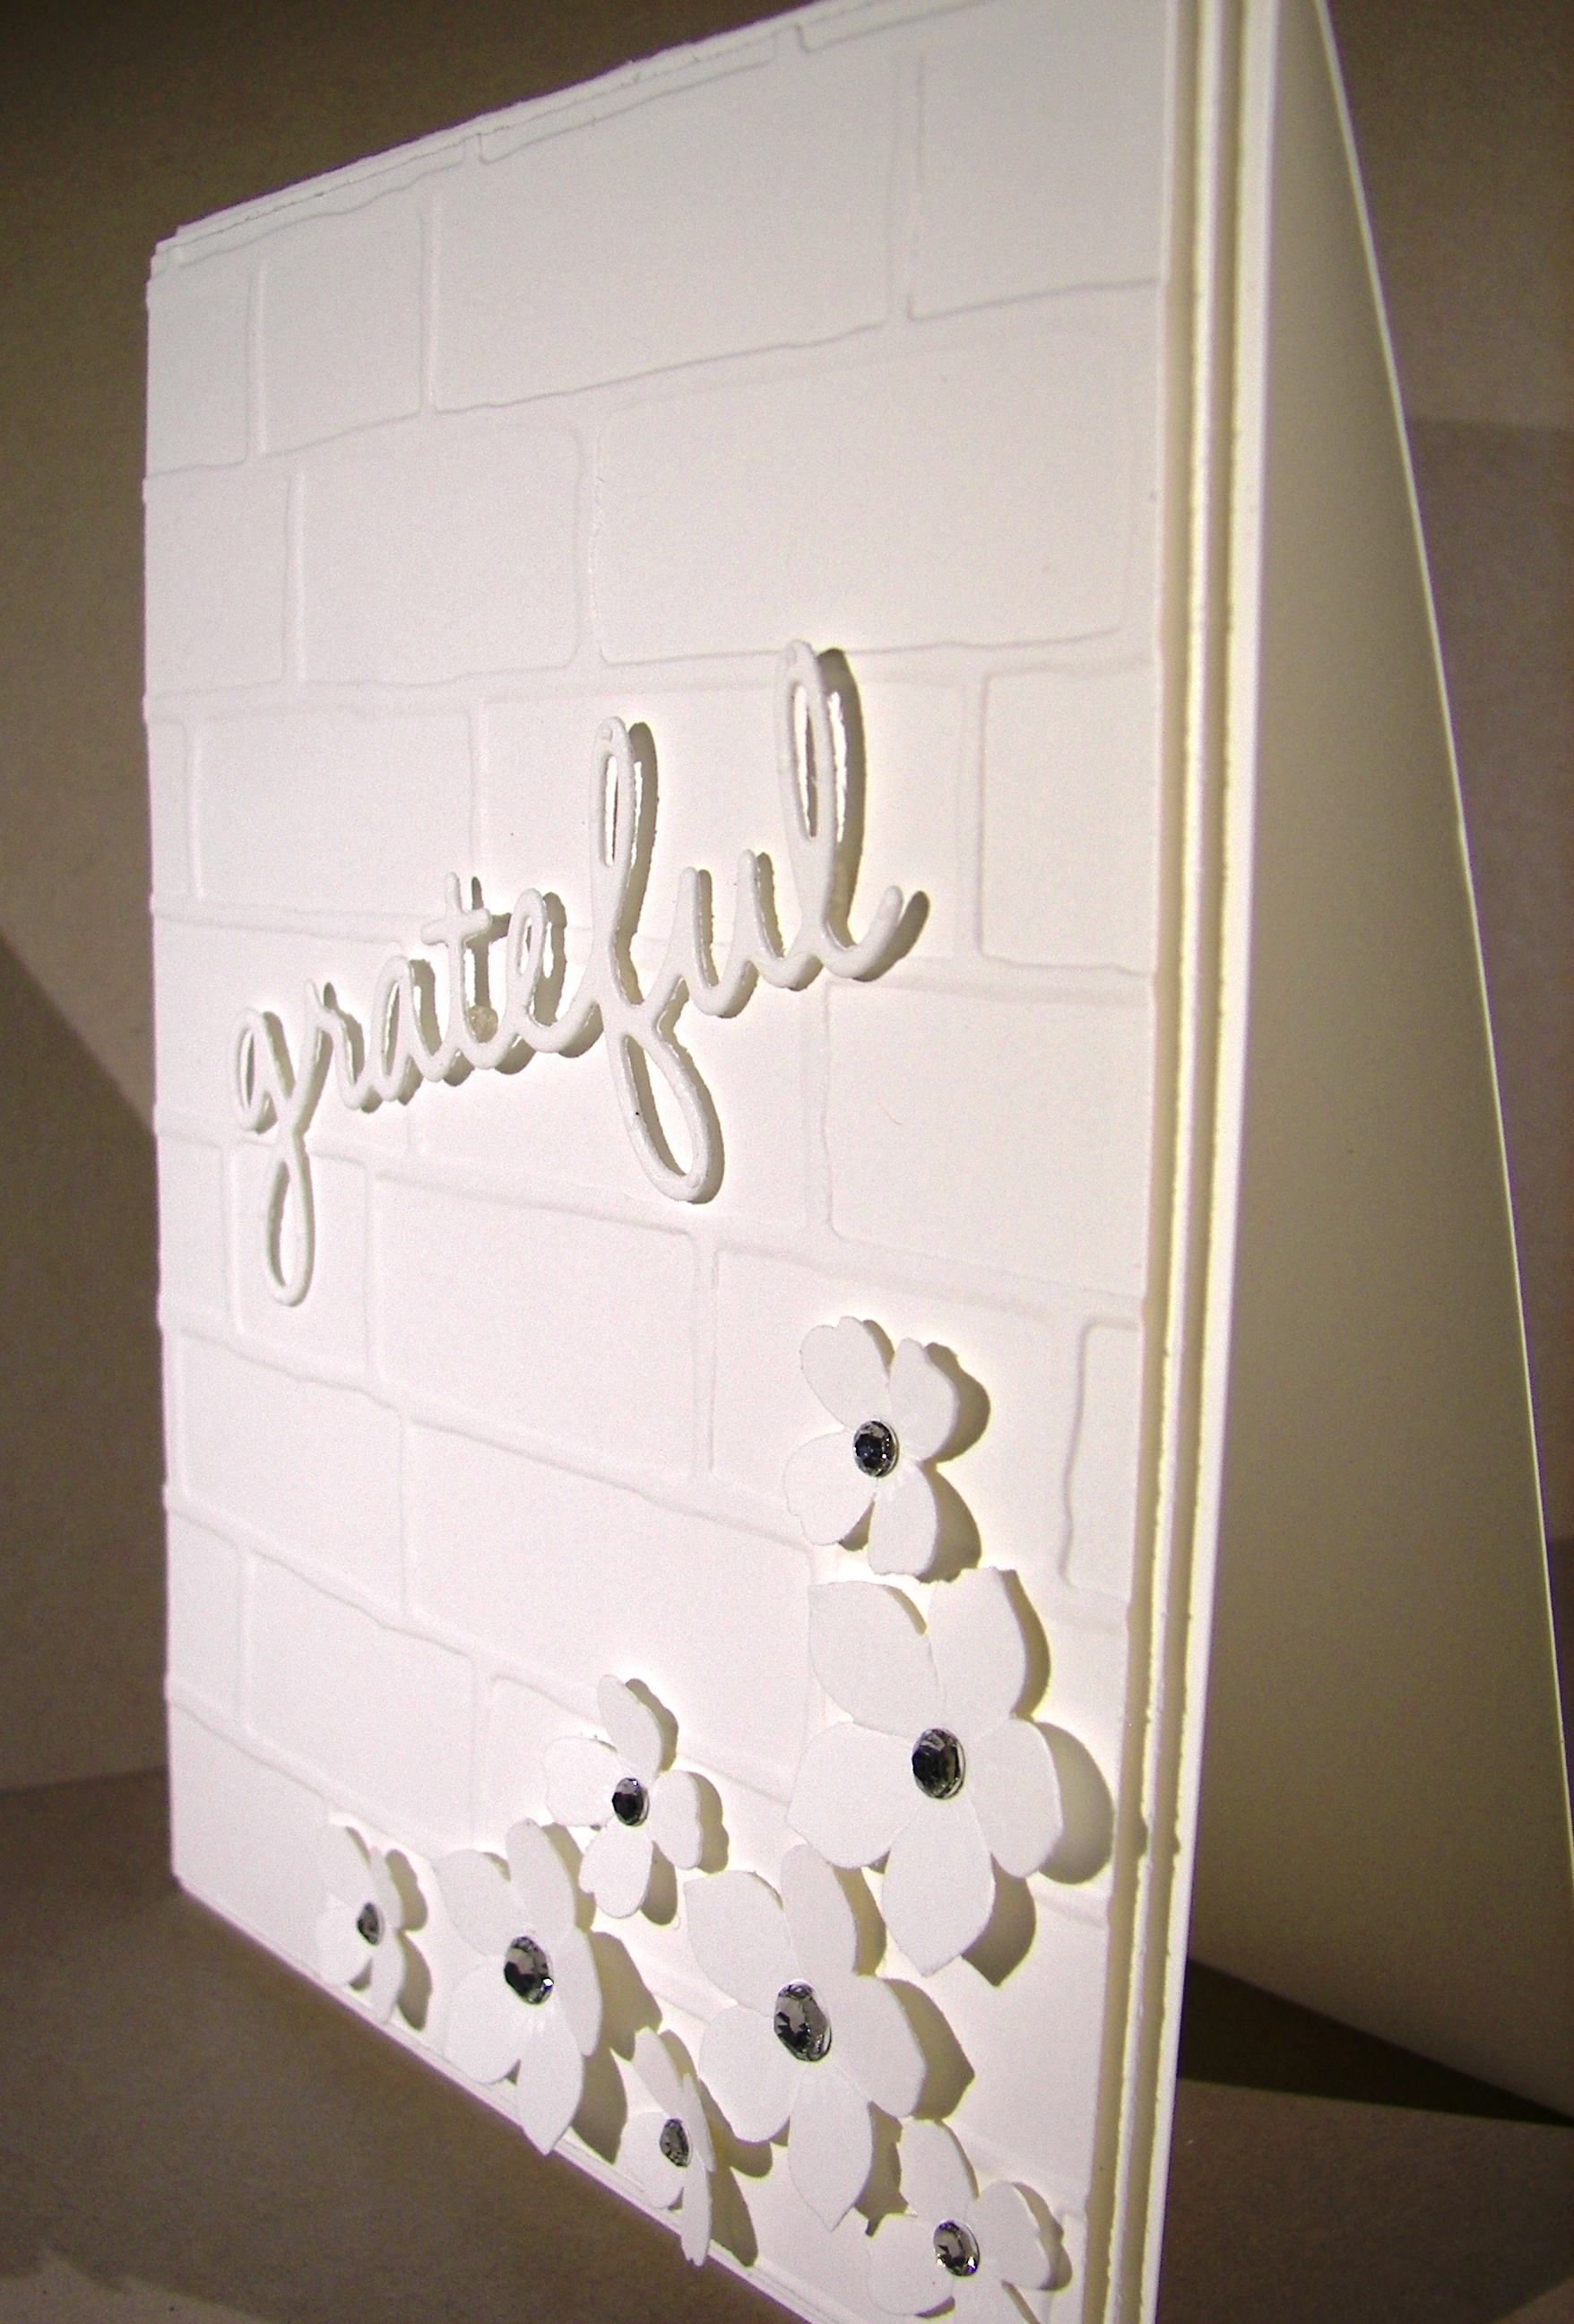
This window frame framelit set is a must have.  Paired with the brick wall embossing folder, there are endless options to enjoy.  I can honestly see myself making way too many projects with those in hand.  How fun!

More Thankful Swaps

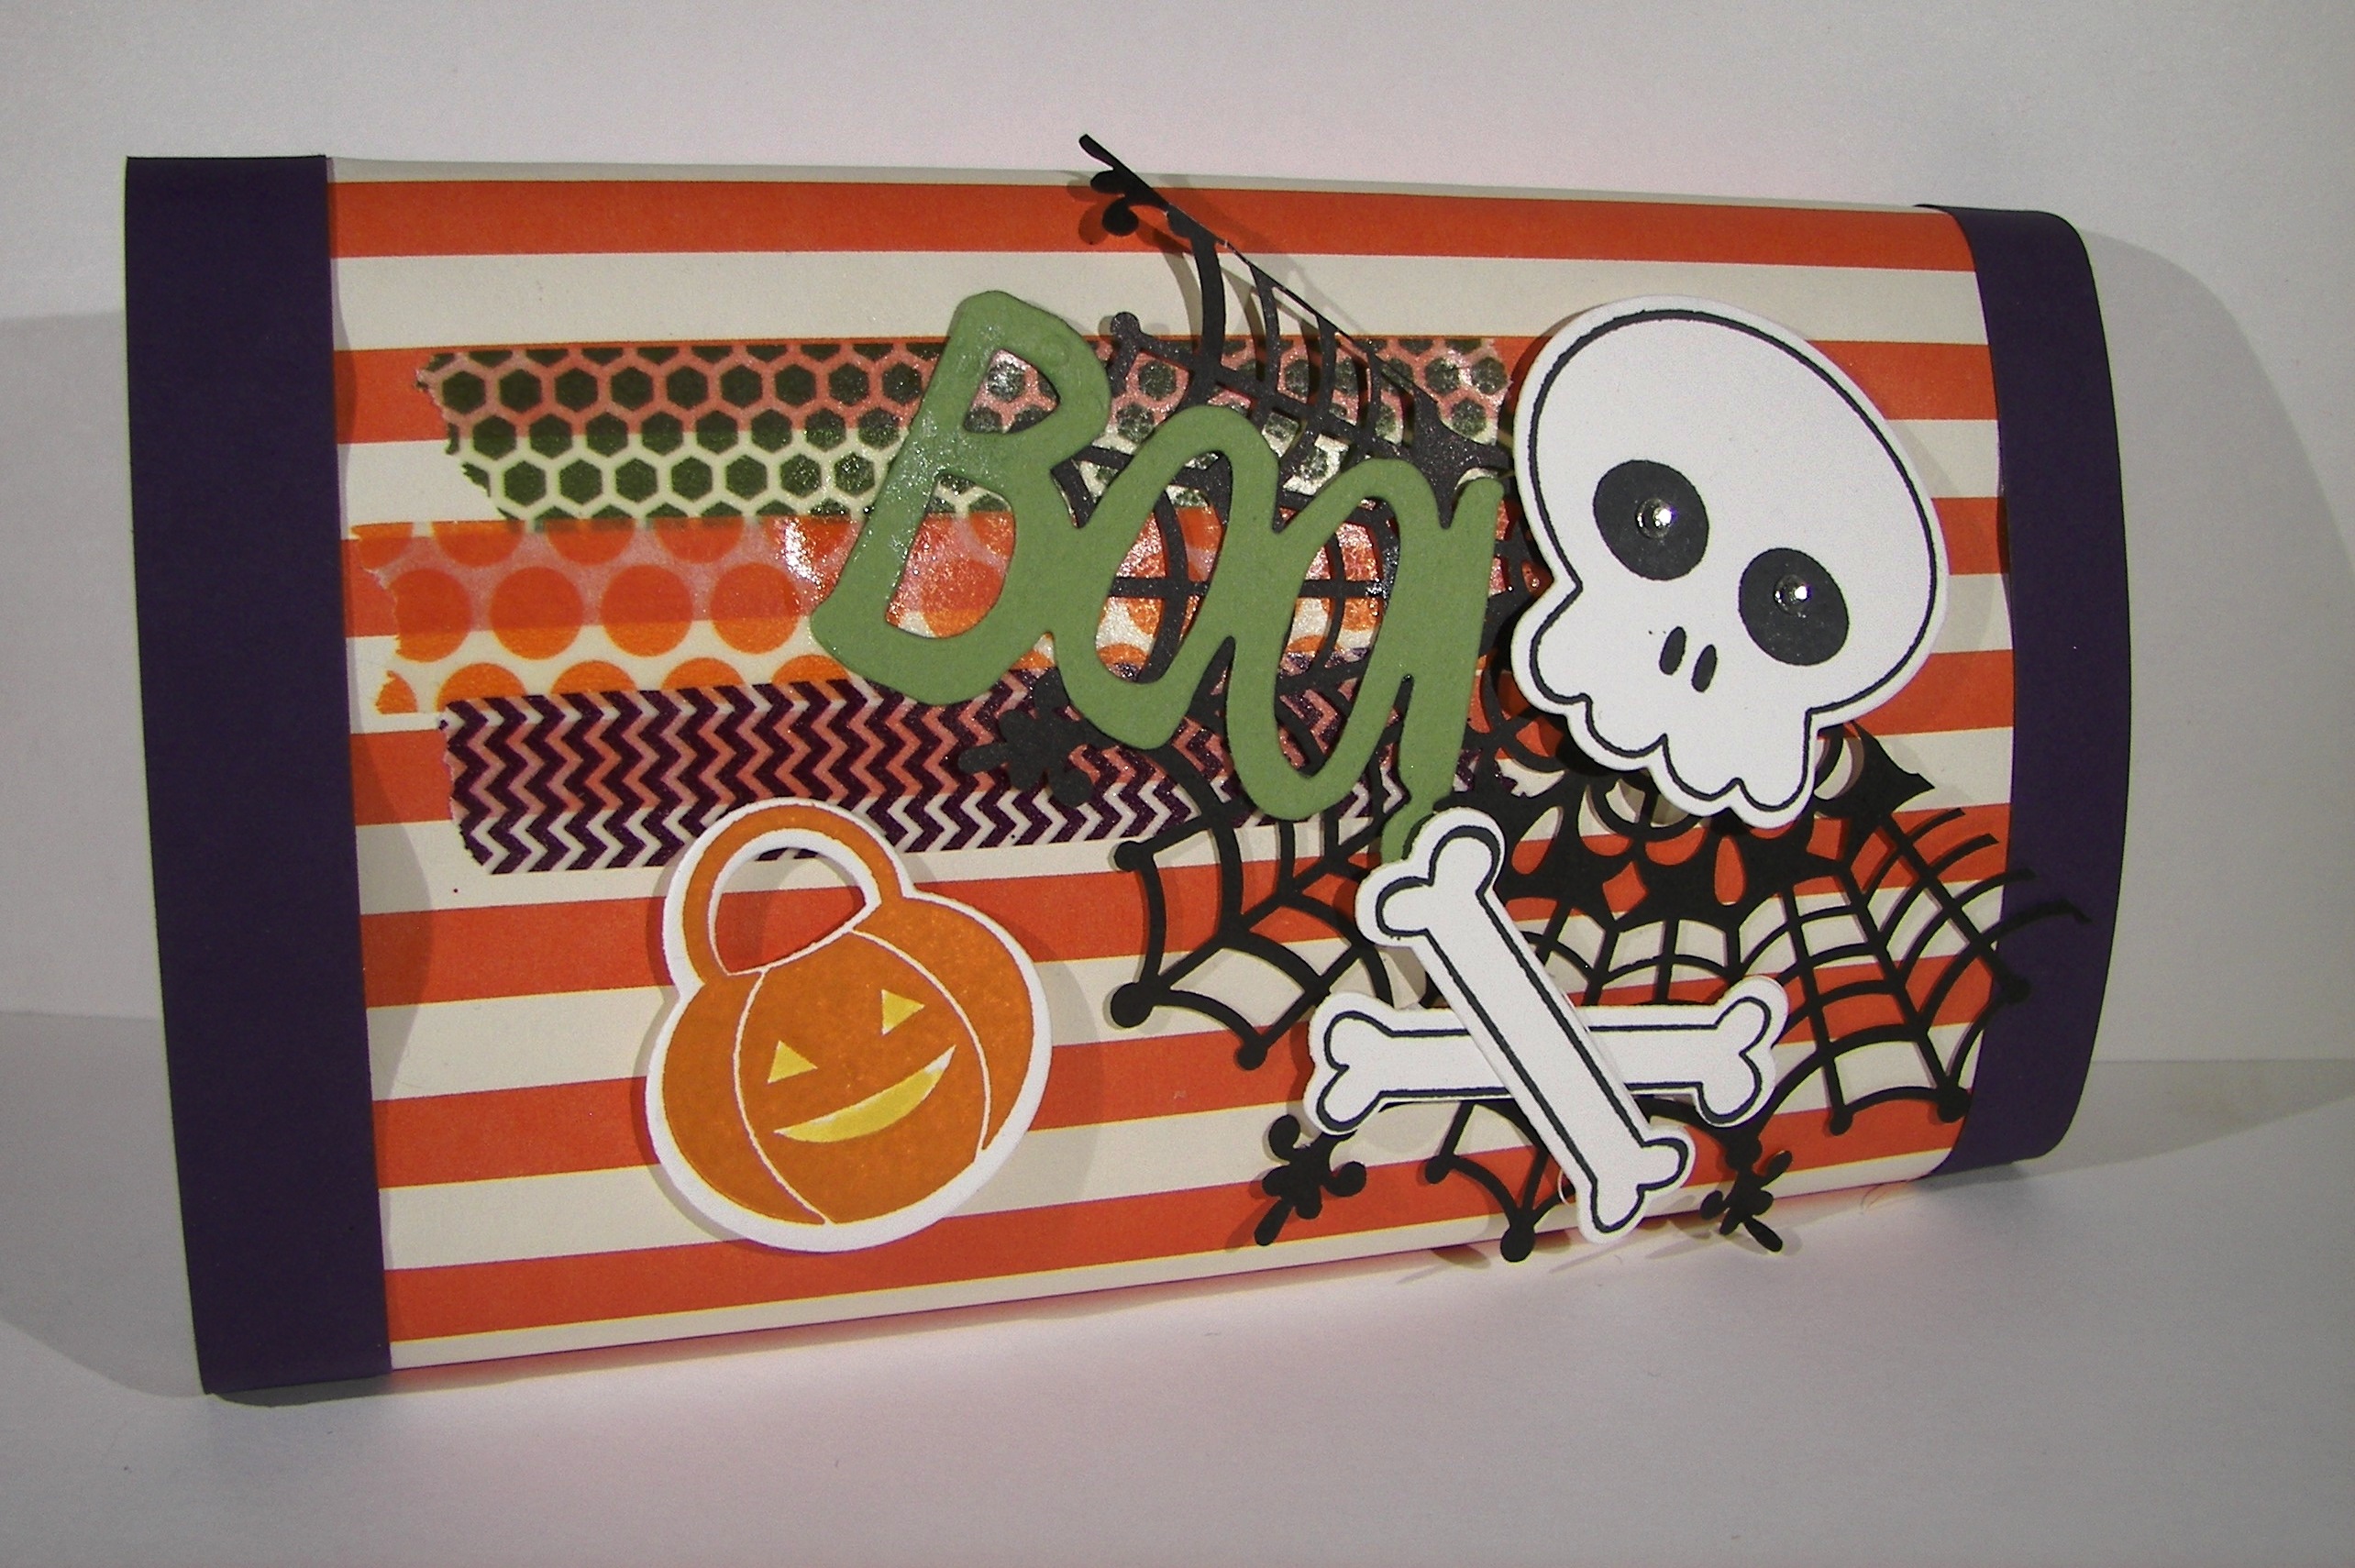
The Into the Woods designer paper is so wonderful.  As I said, fall colors are my favorite, and these showcase them beautifully.  Hard to resist for sure.

I think my little stamping group would love the swap idea.  We haven’t yet, but I am going to have us try this out for sure.  Everyone has a different style and a unique set of artistic skills.  It is so fun to experience so many all at once.

Have a creative day!

Moana

Thankful Swaps

I have been out of town this last weekend and it is nice to be home for lots of reasons.  I did love my trip, seeing my daughter and son at university is just fantastic!  Something about your own space though, just feels cozy.

Thankfuln Swaps

I also discovered that I am not the best blogger on my iPad.  They were pretty basic, but I managed.  I was honestly just too tired yesterday and had tons more standing in line waiting to be tended.  Day survived.

Thankfuln Swaps

There were several fall themed swaps I wanted to share as well.  I had recently ordered this stamp and framelit set but haven’t gotten to play with it just yet.  So it was nice to play at the demonstrator workshop event.  Working through someone else’s vision is different, but entertaining.

Thankfuln Swaps

While it is fun to share these swaps, I am getting anxious to dig back into my supplies and create.  Especially with some of the new treasures.

Have a creative day!

Moana

Workshop Madness Day 5

This has been a really fun run of swap sharing Halloween style.  Today I get to share my favorites.  My style tends to lean towards an elegant traditional look and these two are just the thing.

9-7 (3)

I have already blogged a project with If the Broom Fits, so of course I would migrate here. But how about taking it up a notch with an easel card to display it all.  Just lovely with a bit of whimsy.   If you look in the upper left corner you will see a set of floating eyes, cute right?

9-7 (2)

How about this treasure?  You know you you have connected with someone when you love their crafting style on top of all the other yummy goodness.  This ‘spooky’ card was designed by a friend and I love the balance of elements.  She is at http://www.stampingwithvalory.com and you should totally go enjoy her blog. Truly a joy.

9-7 (1)

I have enjoyed sharing this set of swaps.  I think there will be a bundle of nieces and nephews who will be getting these in the mail.

Have a creative day!

Moana

Workshop Madness Day 4

These two bags were my favorite favors. I do love the Sweet Hauntingshappy set.  The sentiments are the best.i think they can hang around longer than just Halloween though. I do love it when a seasonal stamp can get used more than it was intended.

9-6 (2)

Sometimes I see a Halloween favor and it makes me want to host a party just so they can be used. These two did this for me, especially the bakers style box. The bottles labeled all cute are awesome. And how can you not love saying death by chocolate?

9-6

It is hard to tell, but the orange box is also embossed with ever so wonderful woodland textured embossing folder.  I really hope it gets to carry over from this catalog.

9-6 (1)

I have saved my favorite Halloween themed projects to share tomorrow . So much fun!

Have a creative day!

Moana

Workshop Madness Day 3

How about another day of workshop madness?  One of these was a swap and the other I enjoyed putting together. The kit was ready for me, so that was lots of fun.

9-4 (2)

This black sparkly card was different for me, but I enjoyed it.  We used two circle punches in the black glimmer paper to create the spider. Then we used the fun doily but turned it around to show the white side instead of the black. We drew our spider web and stamped inside as well.

9-4 (1)

This card is not my speed, however, I loved the bats.  I do want to try and recreate it though. I think it is important to challenge yourself and step out of your comfort zone.  I could have fun with some of this.

9-4

Have a creative day!

Moana

Workshop Madness Day 2

How cute is this little set?  Here are two more projects to share.  Again, these aren’t mine, but I can totally see myself giving them a try.

9-5 (3)

This lovely little card uses a window sheet, washi tape and sequins to make the shaker card front.  It is a little hard to see, but there is some texture using my new favorite embossing folder.

9-5 (2)

Now this treat favor was a huge hit. It actually wrapped around a huge candy bar. Not only is it adorable, but was delicious.  I love how she put rhinestones inside the skulls eyes. Just too cute!

9-5 (1)

Have a creative day!

Moana

Workshop Madness Day 1

In a prior post I mentioned a demonstrators workshop that I was able to attend.  There were a lot of ladies there and excitement was certainly in the air.  I thought I would go through some of the samples I brought back and show them to you.

Workshop Madness Day 1

The next five days will be all about Halloween.  For some reason, there was a lot more of that than the other holidays, maybe because it was closer.

Workshop Madness Day 1

This gift bag was created with scoring and cutting, and then layering up with lots of cute things.  The stamp and punch were actually carry over from the last holiday catalog and I am so glad.  Such a great set.  But the paper is new, and it is so cute!

Workshop Madness Day 1

This bag is made from the gift bag punch board and really goes together easy.  I hadn’t thought I could put this to use, since I adore my score board for bags, but I just might change my mind.  It doesn’t have to complicated to look great.  Sometimes a simple favor is all you need.

Have a creative day!

Moana

Dude, Happy Birthday

While chatting with my daughter I asked her for a little inspiration for a project.  She came up with these two stamp sets.  She remembers the Paper Pumpkin stamps much better than I do.  Good to get a reminder or two.

Dude, Happy Birthday

I have to admit, I am really into the Bombs Away Birthday set.  This particular one is my favorite, but they are all pretty awesome.

Dude, Happy Birthday

I was originally going to spritz the designer paper, but I forgot to get a re-inker in tip top taupe.  Ooops!  So I opted to sponge it instead.  The geometric pattern looks pretty darn cool.  A little bit of layering, lifting everything up on dimensionals, touches of silver mini brads and a finish with silver metallic thread and this card is ready to go.

Dude, Happy Birthday

I need to remember to get those paper pumpkin stamp sets out more often.  The kits are so fun to work with when they first come, but I often put the stamps away and then move on.  I think I will have to work on getting them in cases to keep them more visible.

Have a creative day!

Moana

Let It Snow

I know it is only the beginning of  September, but I do love seasonal cards, especially winter scenes and Christmas.  Not to mention that the Stampin’Up! holiday catalog goes live today.  So much fun!

Let It Snow

I have used several new products in today’s project.  New stamp set, new framelit set, new embossing folder and then comes a new card.  How cute is this little snowman?

Let It Snow

I stamped the image where I wanted it along with the sentiment.  Then I embossed the card front.  At first I wanted to have all the snowflakes sky blue and thought to use the brayer.  But I decided to be more selective and yes, I did water color select flakes.  It didn’t take that long, really.  The effect is nice.

Let It Snow

I had an extra ‘snow’ die cut from Saturday’s event project and knew just where to use it.  Actually, that is what started the card out.  I added in a little silver metallic threat and layered it all up on dimensionals.  Just my speed.

Have a creative day!

Moana

Larger Than Life Birthday Wishes

Any wonder what today’s card is all about?  Couldn’t get any more direct that this and I love it!

Larger Than Life Birthday Wishes

A certain young man is having a birthday this month and his grandmother requested a special card.  I love personalized items, especially when you aren’t likely to see that name all of the time.  Call it childhood memories.

Larger Than Life Birthday Wishes

My youngest daughter might disagree as to who this should be for.  She might want to send it to a particular One Direction band member who also might be named Liam, but that isn’t going to happen.  She can make her own.

Larger Than Life Birthday Wishes

The Larger Than Life Alphabet and Number set is so wonderful for things like this.  I took the ‘happy birthday’ sentiment from That Thing You Did.  Some Cucumber Crush for a fun bright green and it was nearly done.  A touch of ribbon to bring it all together and I was happy.  I think Liam will be too.

Have a creative day!

Moana

Christmas Snow

So, I took the day off yesterday.  I had the opportunity to attend an event my upline hosted for demonstrators.  It was a bit crazy, but lots of fun too.  So much creativity in one room.

Christmas Snow

This was my project to share and I got to make a whole bunch of others in return.  Yes, I made a lot of these, but it was worth it.

Christmas Snow

I tried to put “snow” on some of the tree branches, but wasn’t happy with these results.  For the event I went “snowless” but I want to get it sorted out with another product or two.  I have time, it is still August after all.  But you get the idea.

8-30 (2)

Three of the products used here are in  the new seasonal catalog that goes live September 1st!  How exciting!

Have a creative day!

Moana

Wedding Favors in Progress…

I have to admit, I am a bit of a Stampin’Up! purist, but sometimes I have to dip into my other craft life for something very specific.  A workup of wedding favor rough samples for example.

Wedding Favors in Progress...

A friend is trying to make her sister’s wedding very special on a ridiculously tiny budget.  I thought I could help out a little bit with some of my tools.

Wedding Favors in Progress...

How can you not just love this adorable curvy box?  I am so glad this framelit carried over from the last holiday catalog.  I have used it so much.

Wedding Favors in Progress...

This one is a slightly larger version of a favor I made using the Go Wild DSP stack.  The shape was working for her, so I gave it a try.

Wedding Favors in Progress...

The original request was a pillow box though.  I brought out the die cut from my retired stash, yes I do keep those for sure.  I am addicted to die cuts and keep them all.  So, I embossed it as she had seen it done in tiny dots, also a retired folder.  See how I am?

I do have to admit that the die cuts are all other brand materials, but the wedding is on the beach and that is the theme all the way through.  I had the ribbon left over from a wedding favor production from last summer.  That was a fun one.  I made just over four hundred of those, yes four hundred.  It took quite a few movie watching sessions to finish those up.  Either way, these are some rough options for her to choose from.  See how creative you can be with some nice paper and a few good tools?

Have a creative day, what’s left of it anyway.  Can life just slow down a bit?

Moana

Chalk It Up To Love

This is only one of the three projects available in this months Paper Pumpkin kit.  Two different kinds of cards, three of each, and three pretty boxes.  What a fun kit!

Chalk It Up To Love

I sat down to make this card and it literally took me three minutes.  That includes stamping on one side, not liking how it turned out, turning it over and stamping the other side.  Yup, three minutes including a goof.  How cool is that!

Chalk It Up To Love

And that my friends is the beauty of Paper Pumpkin.  All of the creativity bundled together in quick easy to make and even easier to love kits.  Just my speed sometimes.

Chalk It Up To Love

All of the preparation I do for others, including my classes, it is just so nice to have something made just for me.  I know it isn’t just for me, but sometimes it feels like it.  Thanks Stampin’Up!

Have a creative day!

For All Things and Flower Patch

While enjoying a long and lovely visit with my daughter this morning, fall came up.  It is her favorite season of the year.  She is getting excited because where she is attending university fall has begun.  The temperatures, the colors, the smells, she loves it all.  So, together we created this card.  What a fun way to stay connected.

For All Things and Flower Patch

The card is made from a Hello Honey card base, layered with a Cajun Craze framed stamped card front.  I used the leaf stamp from the For All Things set to create the paper.  One full ink stamp and then several others around it until the ink runs out.  I did this using Cajun Craze, Hello Honey and Almost Artichoke.  Such a great trio.

For All Things and Flower Patch

A quick stamp from the Flower Patch set for the sentiment and it was nearly done.  I adhered a strip of the new Striped Cotton Ribbon and layered my sentiment with a bit of color.  The Bitty Banner Punch helped me get the banner edges and it was all done.  Well, I did have to sponge nearly everything of course.

For All Things and Flower Patch

Have a creative day!

Moana

Thank You For Strong Girls

I do so love a pretty little carton to give someone, especially when it is full of their favorite treat.  I was thinking about my girls this morning, and how strong and amazing they are, and this treasure came to life.

Thank You For Strong Girls

I am so grateful for my daughters who remain strong through adversity.  When a woman can stand up for herself, and truly value herself, it is something worth celebrating for sure.

Thank You For Strong Girls

I took a full sheet of this wonderful Color Me Irresistible Specialty DSP, cut off two inches from one side and began to score.  Each side measures 2 7/8″, so you need to start from one side, measure that distance and score each time.  This will leave you with 1/2″ on the edge that will allow you to adhere the box.  The bottom score line also measures at 2 7/8″.  I scored the top at 1/2″ and then at 3″.  Although I am not the best at directions, it does come together pretty easily.

Thank You For Strong Girls

I stamped Thank You from the One Big Meaning set.  It fit perfectly within the 1 3/4″ circle punch.  I punched a 2″ circle from the Dazzeling Diamond paper and layered them with dimensionals.  A lovely bow made from the Dotted Lace Trim finishes it off.  I did do a bit of sponging on all of the edges.  I love a sponged edge.

Have a creative day!

Moana

If the Broom Fits

I love halloween!  Well, all of the fun decorations and cuteness that can go along with it.  Orange is also my favorite color, so that makes sense too.  You would think that I make lots of halloween cards from the collection I have to work with, but, not so much.  Same goes for Christmas though.  I am a stamper, and I love stamps!

If the Broom Fits

So, the irony of today’s card is that today is my 25th wedding anniversary.  I don’t think this particularly applies to me directly, but the phrasing of it surely does make me laugh.  Well, giggle actually.  I do have someone I can give it to.  I don’t know if she would laugh or not, but I think she will.

If the Broom Fits

It was a very simple card to create.  One big stamp cut out with the largest smooth oval framleit.  I sponged the edges up and added it to the scalloped layer I cut out with the largest framelit from the same set.   It nearly didn’t fit on the card front.  I did do background stamping on the card base and sponged the edges as well.  A lovely little ribbon between layers to tie in the early espresso ink and it was nearly done.

If the Broom Fits

I managed to use the edge of the stamp to sneak one broom on the inside.  This lovely stamp is another image available in the coming catalog that goes live on September 1st.  Fun little sneak peeks!

Have a creative day!

Moana

Grateful

It isn’t very often you get to design a special card like this one.  Tomorrow will be me and my husbands 25th wedding anniversary and I feel truly grateful for every day we have loved together.

Grateful

I didn’t want to use a traditional ‘anniversary’ stamp or theme.  That isn’t how I feel.  I feel gratitude.  Having a lasting marriage isn’t the norm these days and I feel very fortunate to be among those who get to celebrate like this.  Hence the grateful sentiment.

Grateful

This card was made with the ever so lovely heavy weight whisper white cardstock.  I love that stuff like crazy.  Especially when embossed.  It handles the embossing folders so much better.  Look at that texture!  The flowers are my favorite, like always.  They were attached with glue dots and given a basic rhinestone center.  Just right.  Now, about the grateful phrase.  That thinlit will be available for order on September 1st, but since I am a demonstrator I got to get in on the pre-order during August.  Such a fun perk.  So, you can get to it too, soon.

Grateful

I wanted it to be dimensional a bit, so I used glue dots on it too.  I rolled a glue dot up a bit and stuck it on thicker parts of the word.  I ended up using four dots all together and it turned out great.

Have a creative day!

Moana

Bombs Away Birthday!

Well, I must admit, I think Call of Duty visited my craft table this morning.  My plan began differently, honestly.  But then things got a little interesting.

Bombs Away Birthday!

I started out with the fun birthday bomb stamp and made background paper.  I knew I wanted to add my husbands name, but wasn’t sure on the color.  Since the black is so strong, I knew I needed to heat emboss the lettering.

Bombs Away Birthday!

Of course all of my colors are not quite masculine, and I wanted bright color.  I guess I could have done silver, but too late for that.  I had a couple of tiny spots that didn’t get powder to stick, so I thought I would just sponge a little ink here and there to fill them in.

Bombs Away Birthday!

I went out of the lettering a bit on the second B, so I gave in and sponged away. Then I giggled as I imagined how much cherry cobbler looked like dried blood, especially next to a bunch of bombs.  Maybe this is a bit tacky or even offensive, but my husband will get a kick out of it, and it is totally for him.  Happy Birthday my love!

Have a creative day!

Moana

All About Sugar and No Bones About It

When you get asked for a birthday card for a little boy, don’t you just think of dinosaurs?  This fun card could be for folks of all ages.  You know, the cards that tease you about being older than a dinosaur, or a fossil in this case.

All About Sugar and No Bones About It

I gave warning that I would be into this set like crazy, and I love every chance I get to use it.  I have a few more children’s birthday cards to make and I think they will all have a dinosaur on them.  Tee hee.

All About Sugar and No Bones About It

The card itself is very simple.  Narrow borders layered together with some very simple stamping.  I only used three stamps for this card.  I think it looks like this dinosaur is smiling.  I digress…

All About Sugar and No Bones About It

Simple stamping, basic color pallet, sponging on the edges and a touch of ribbon.  Keeping open spaces on a project isn’t my strength, but when I manage it, I realize that I really do like it.  I just forget.

Have a creative day!

Moana

Floral Gift Box

When my daughter came home this week for her university break she brought this little birdhouse box with her.  My mother had given it to her to deliver to me to try and create a version of it.

Floral Gift Box

I don’t have a diecut that would do this, so I had to think it out a little bit.  Although I had several frustrations, I ended up with something cute.

Floral Gift Box

I started out with a piece of paper 7″ x 8.5″.  I scored along the 8.5″ side at 2, 4, 6, and 8″ leaving an edge of a half inch.  I turned it one quarter around and scored it at 2″.  This became the bottom.  Along the top, with the long scores going up, I proceeded to cut with my trimmer, not scissors.  I cut along the score lines down to 2.5″ on all score lines.  This gave the top flaps.  Two of them were punched with the scallop tag topper and the other two were trimmed down a bit.  My design became a bit flawed and I had to improvise a bit.

Floral Gift Box

I stamped the paper with versamark ink and applied white embossing powder to give me the cute little flowers you see.  They turned out so pretty.  The rest of the box assembly was pretty basic.  I know I don’t give a lot of detail, I get impatient.  I am working on it.

Have a creative day.

Moana