Bohemian Work of Art

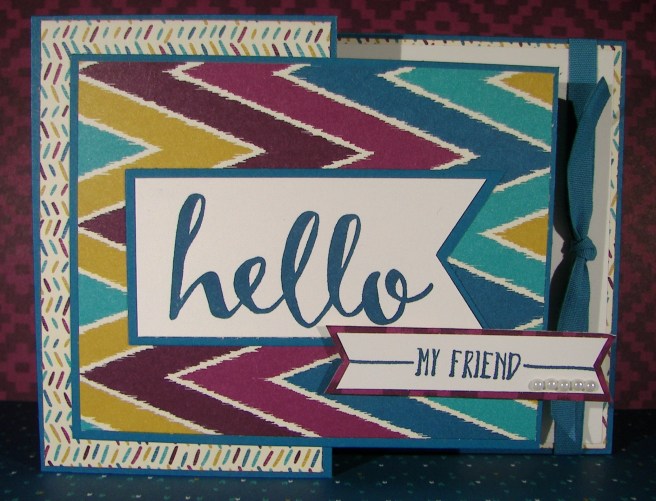
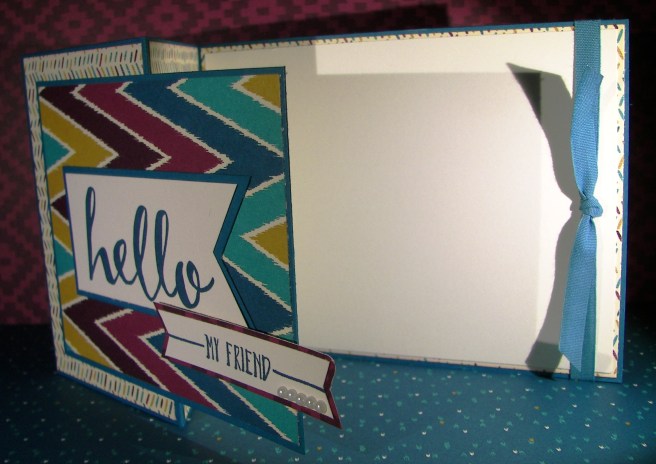
Rich colors and exciting patterns, that is the theme for today.  In between wedding reception planning I have managed to create this lovely due.  Now I get to add this to the collection of card sets and greeting cards I am donating for a cub scout fundraising event tonight.  I get to share my work and clean out my stash at the same time!  I call that a win.

5-14

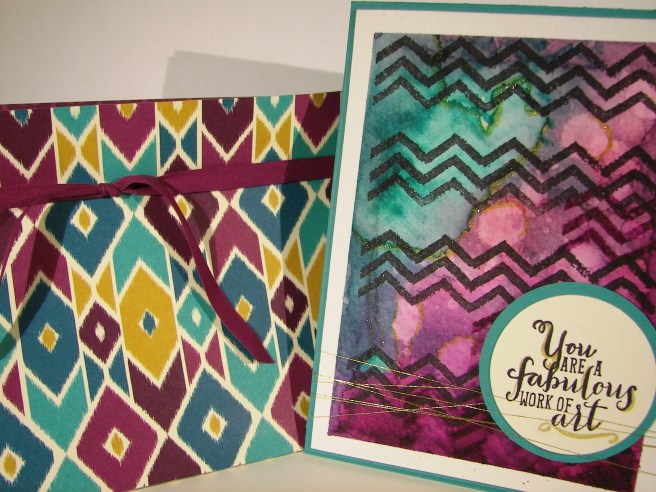
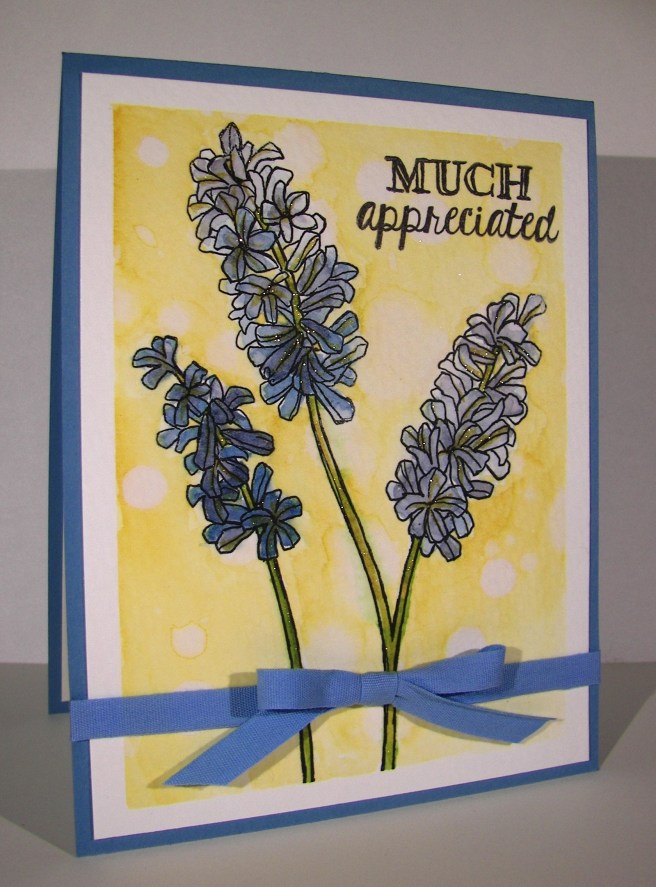
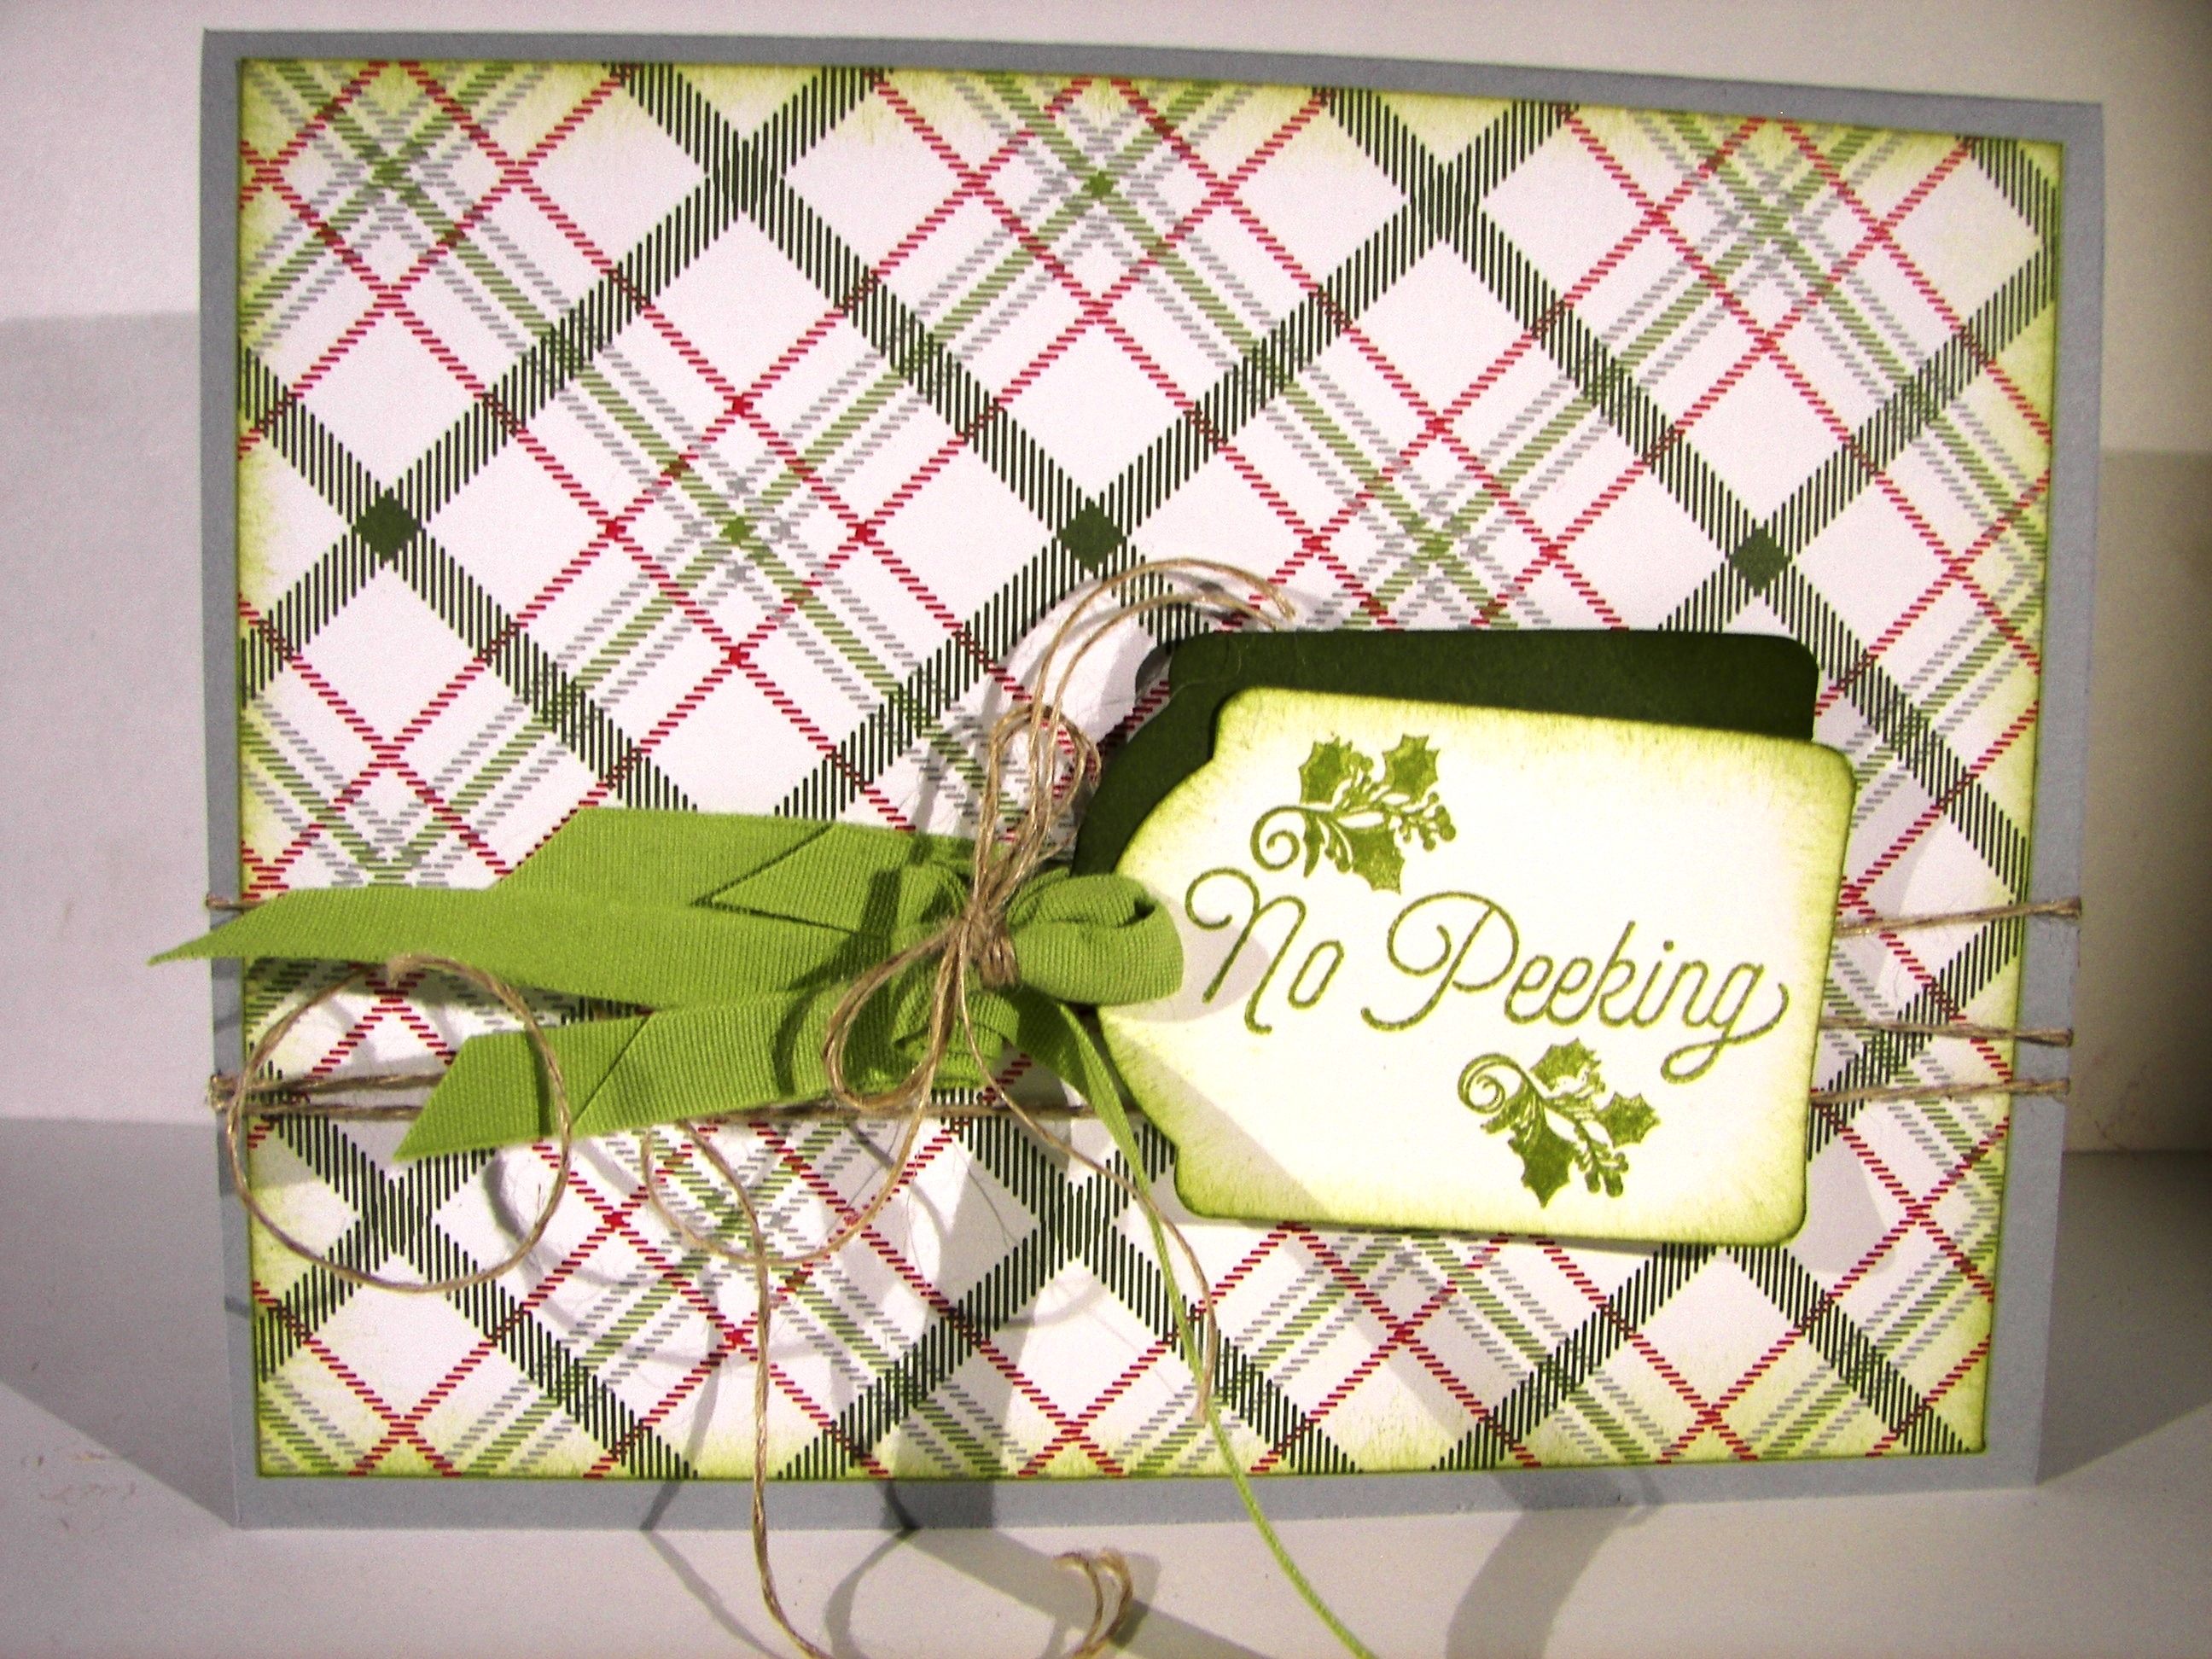
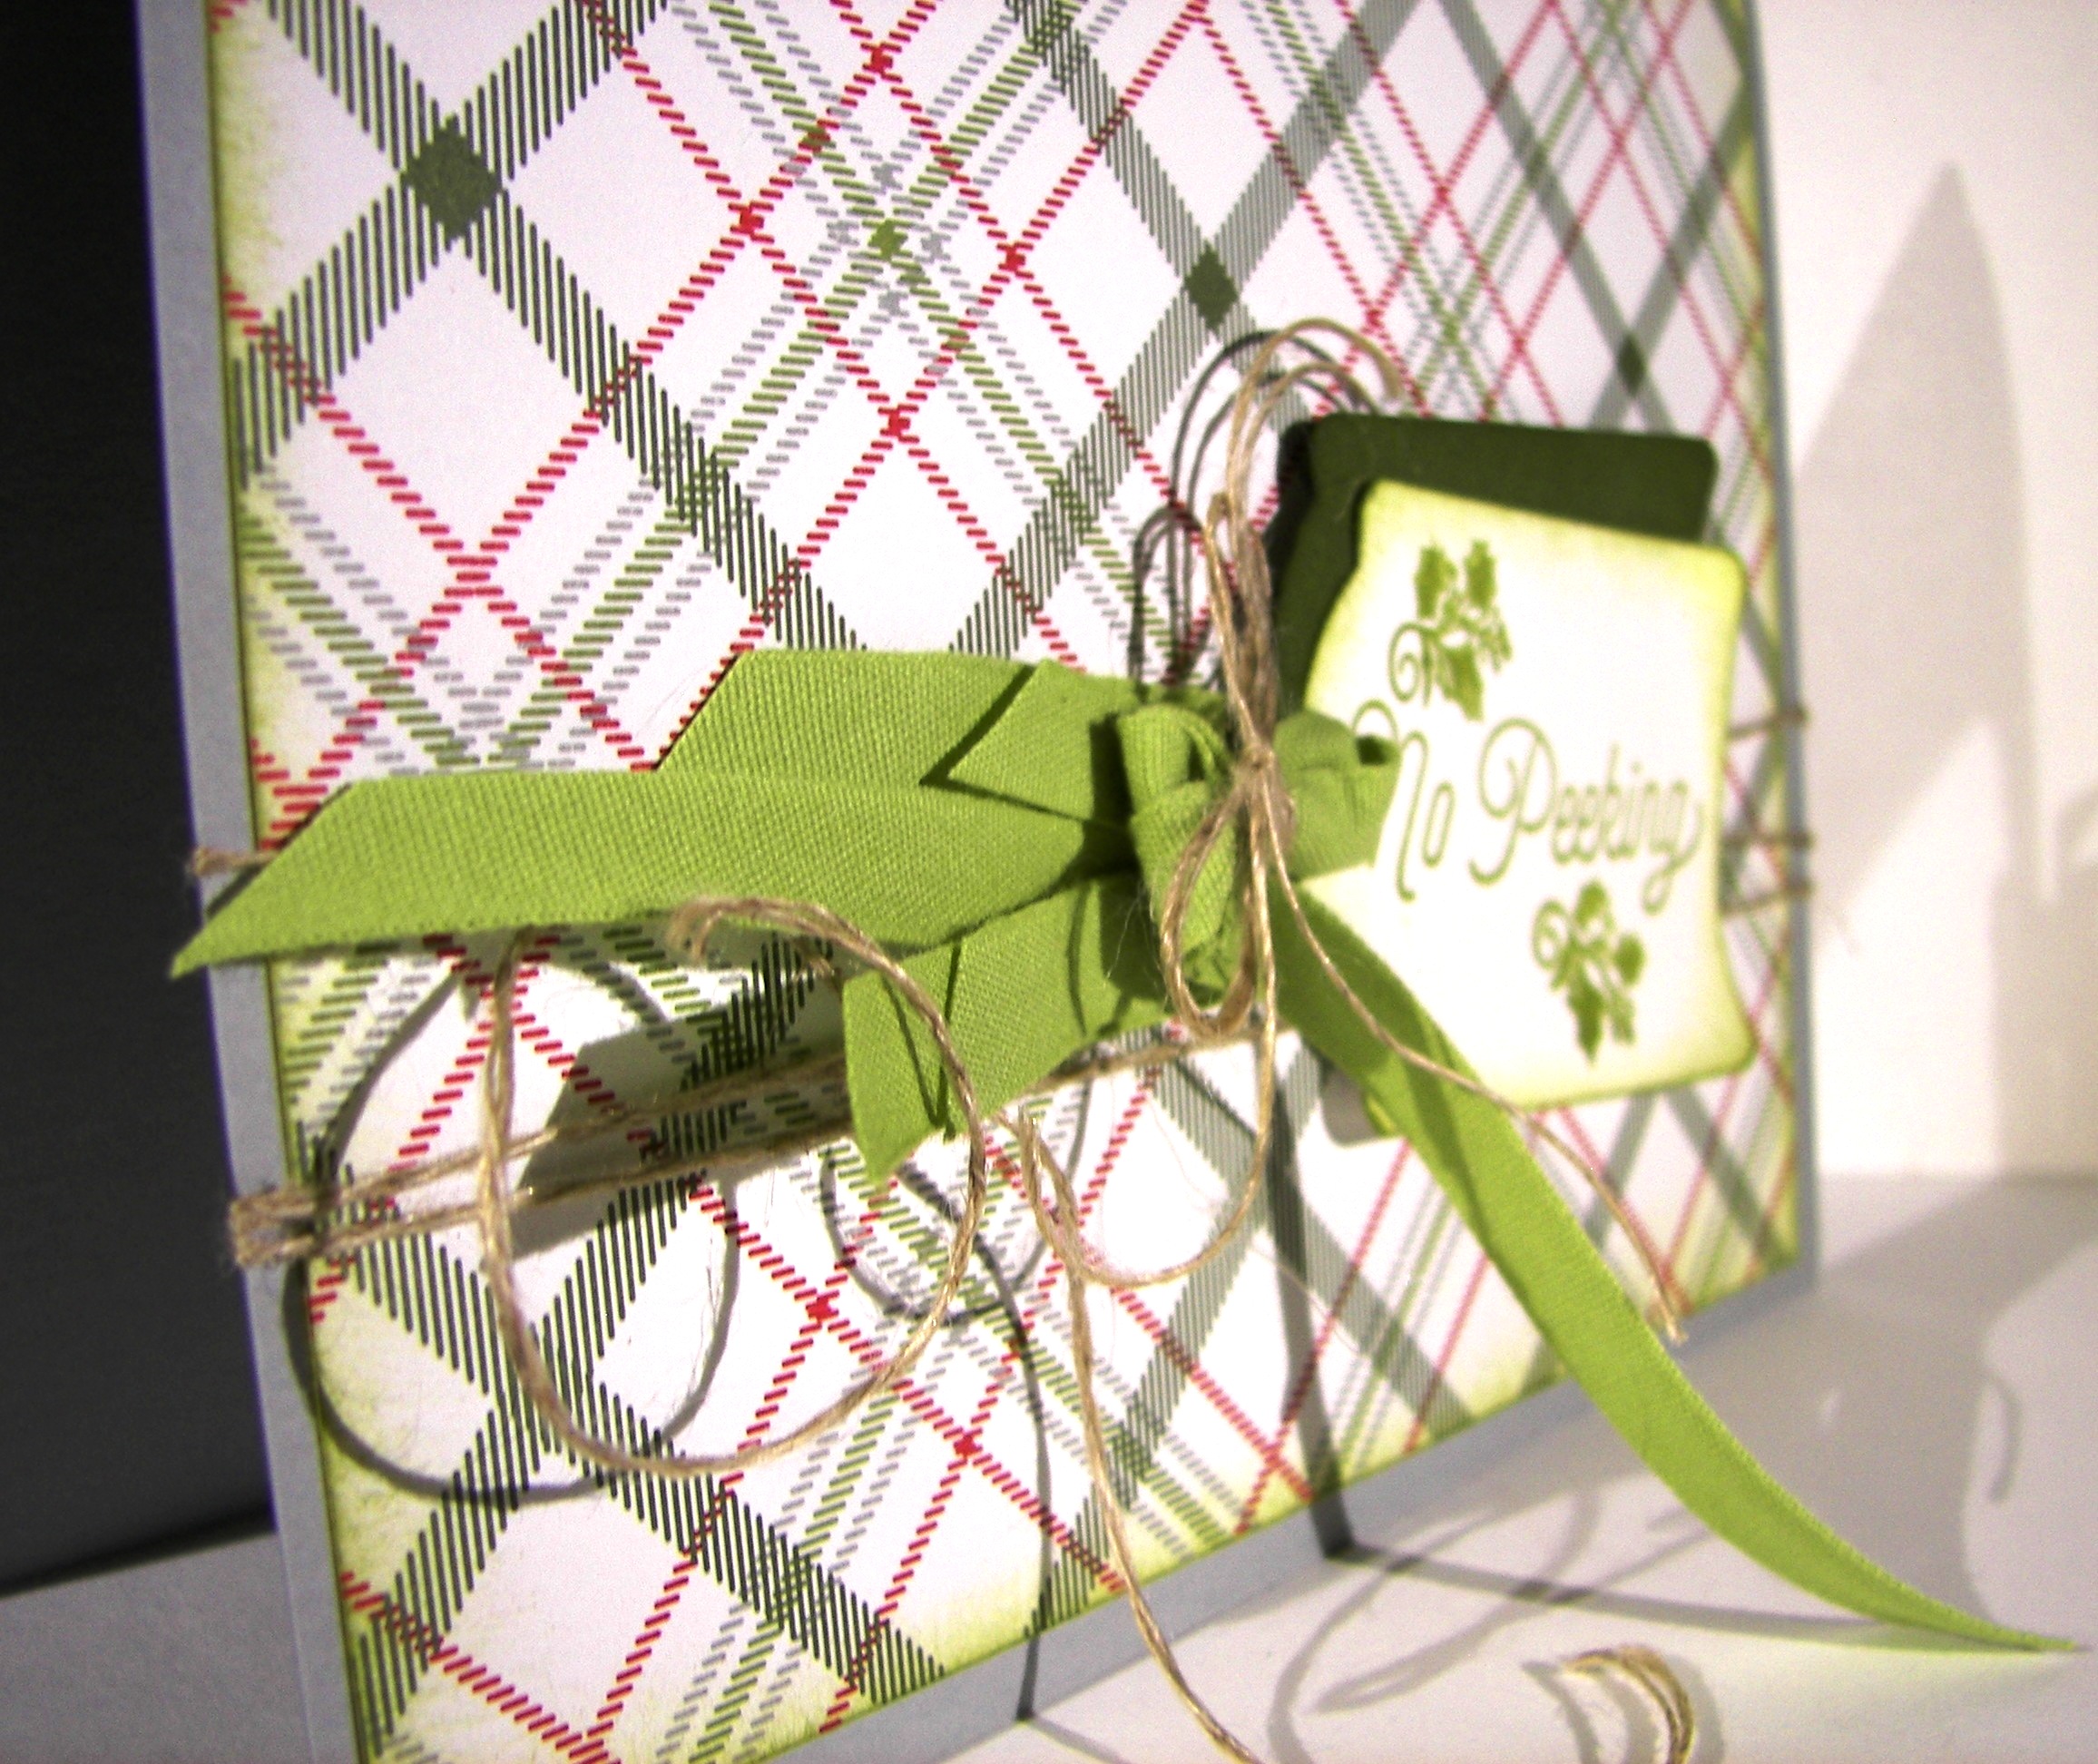
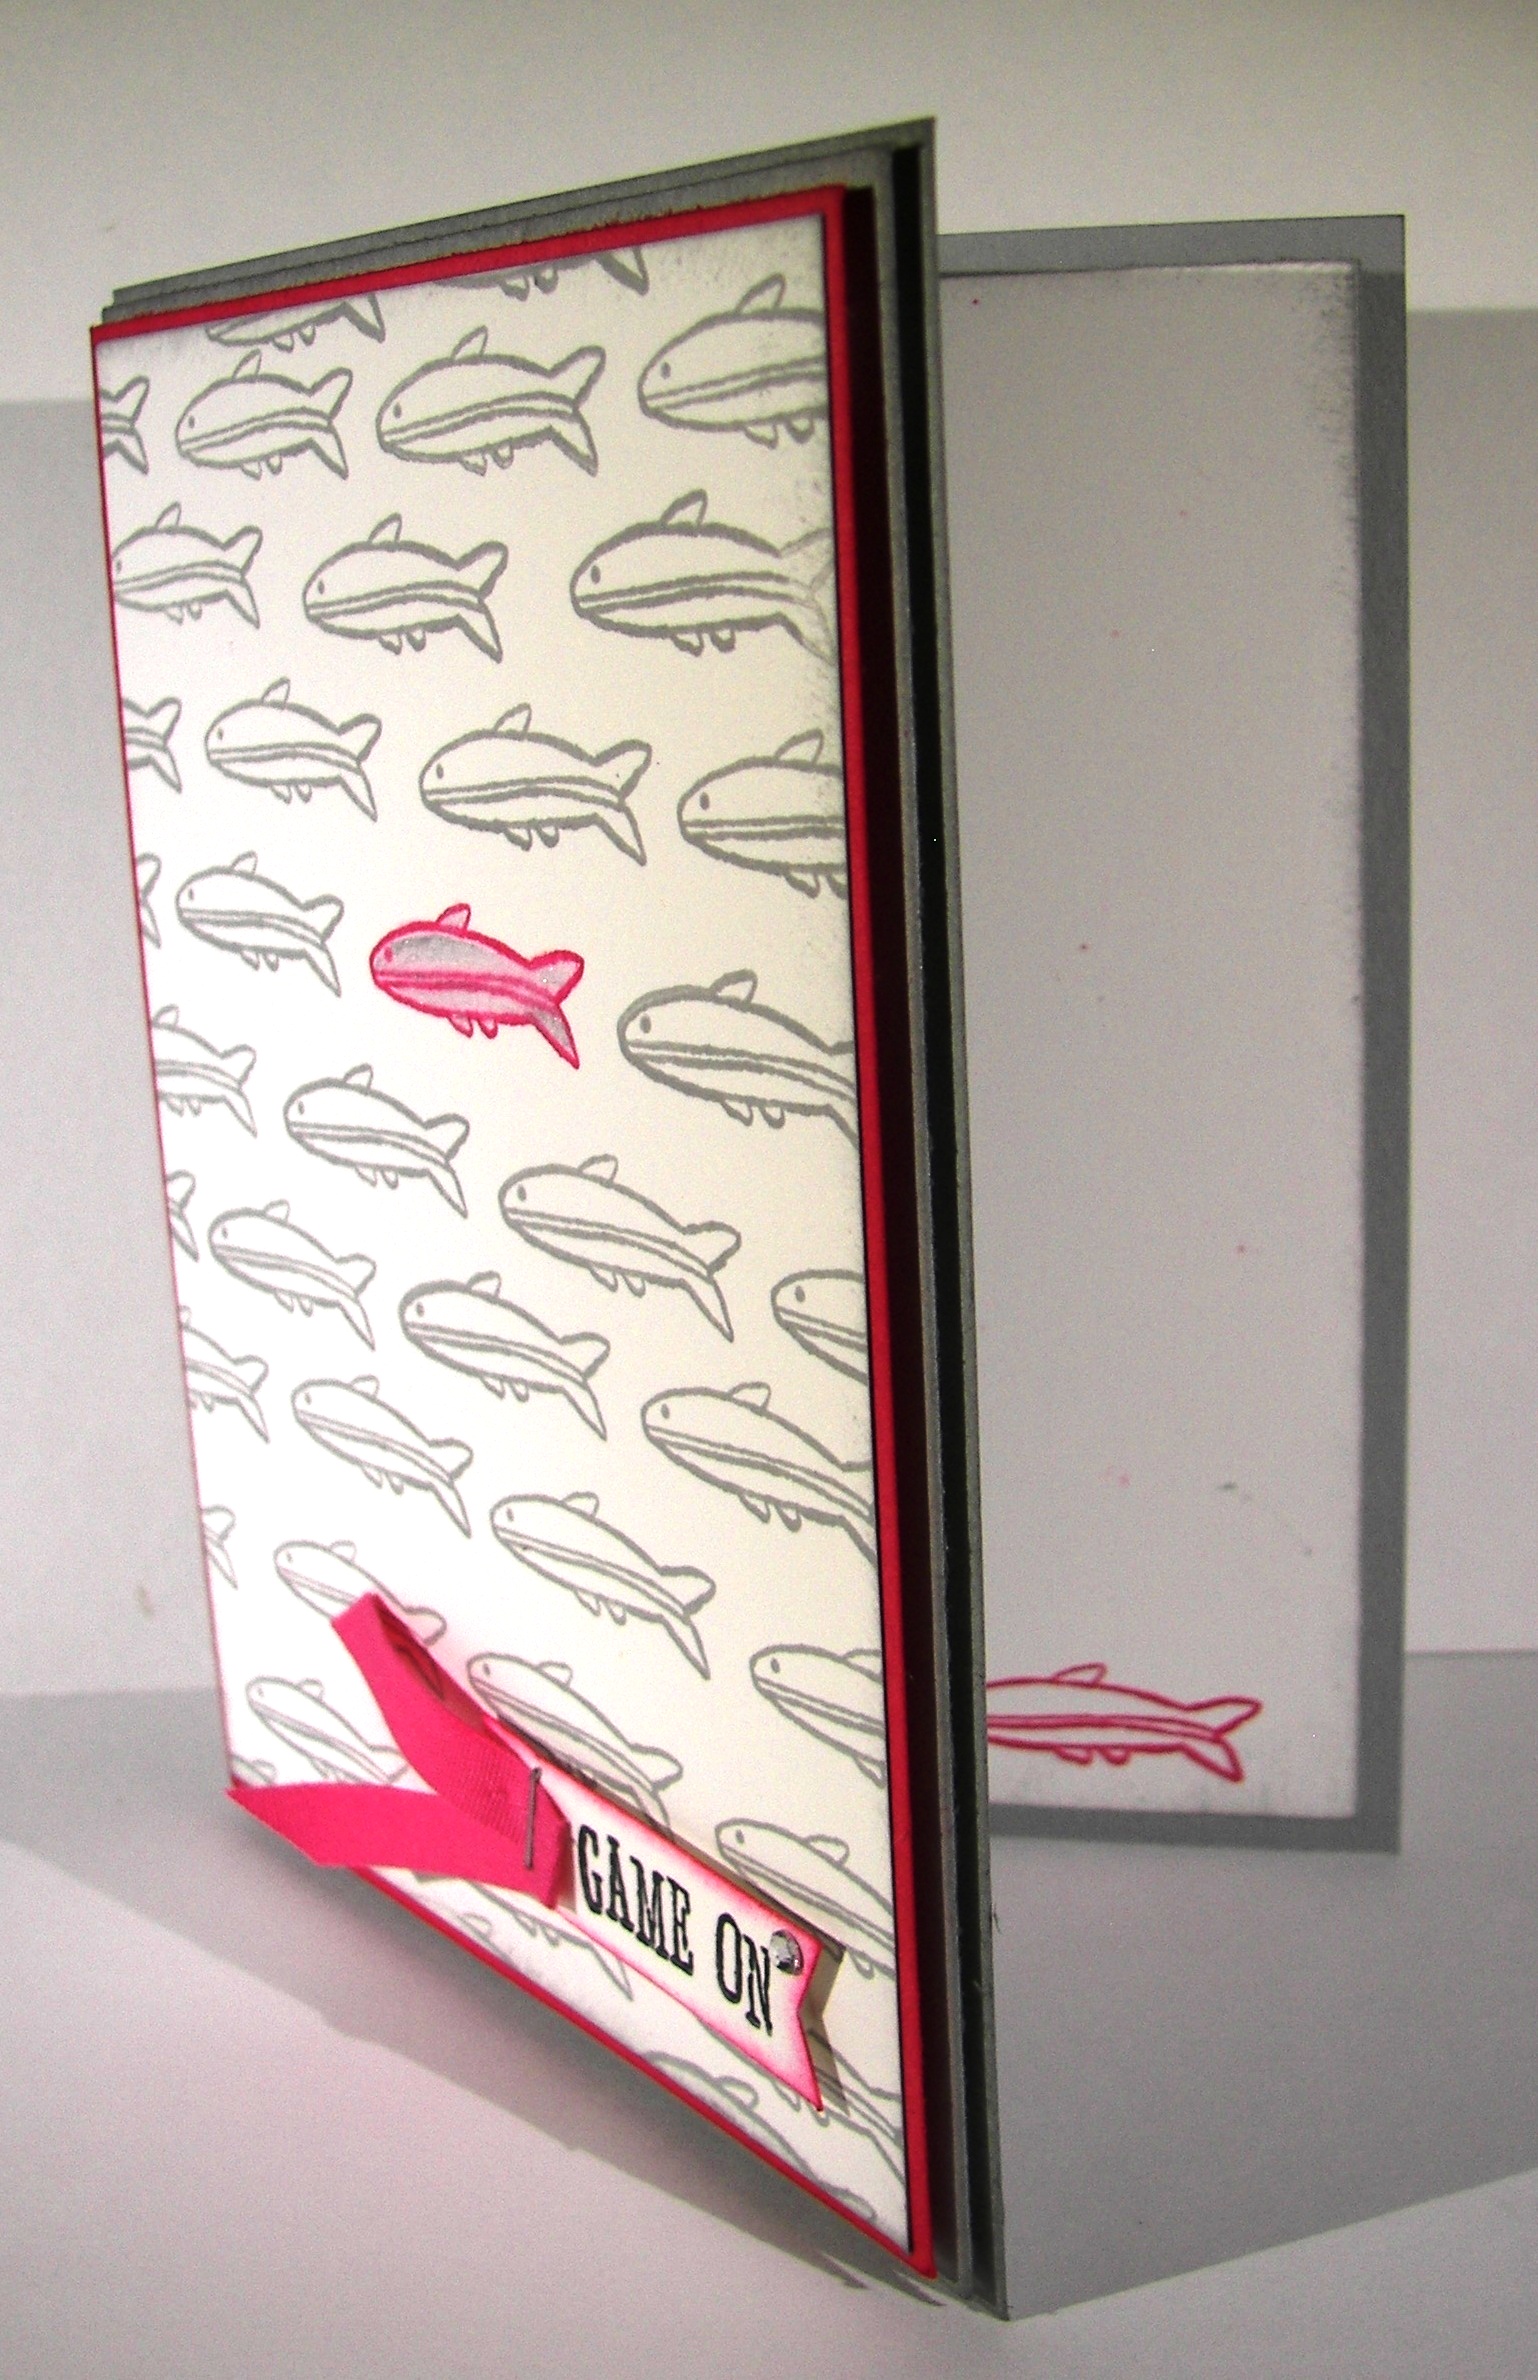
The card began with the chevron stamp from the Work of Art set.  I didn’t really pay too close attention, just stamped it four times down a piece of water color paper.  The color pallet came from the bohemian designer series paper set, only leaving out the yellow tone. The focus was on bermuda bay and I started there.  Color was layered, sponged off, added, and distressed a ton until I was satisfied.  Then I did something that was new for me.  I hi-lighted some of the distress areas with my gold wink of stella brush pen.  That was super fun and I had a hard time stopping.

5-14 (1)

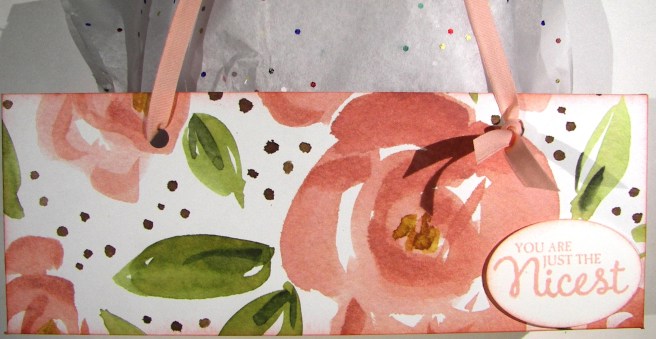
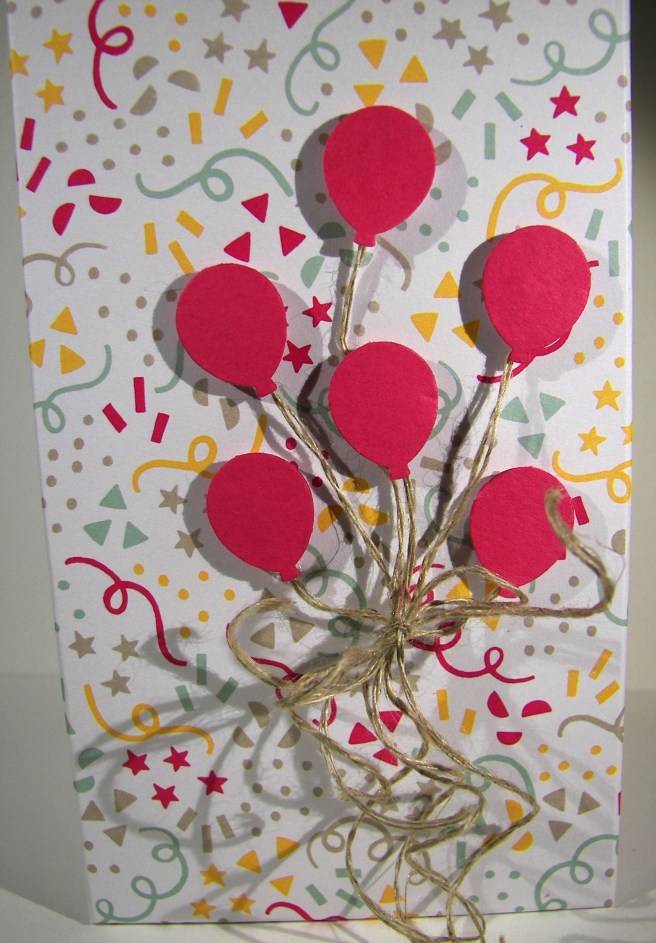
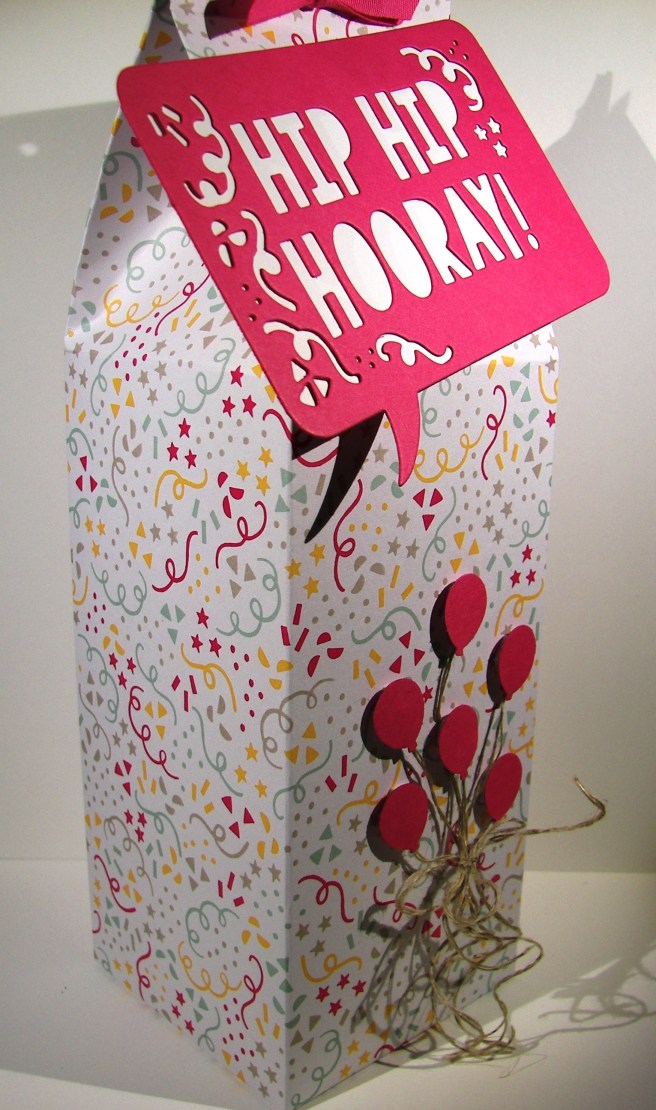
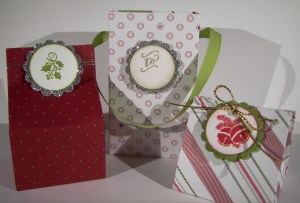
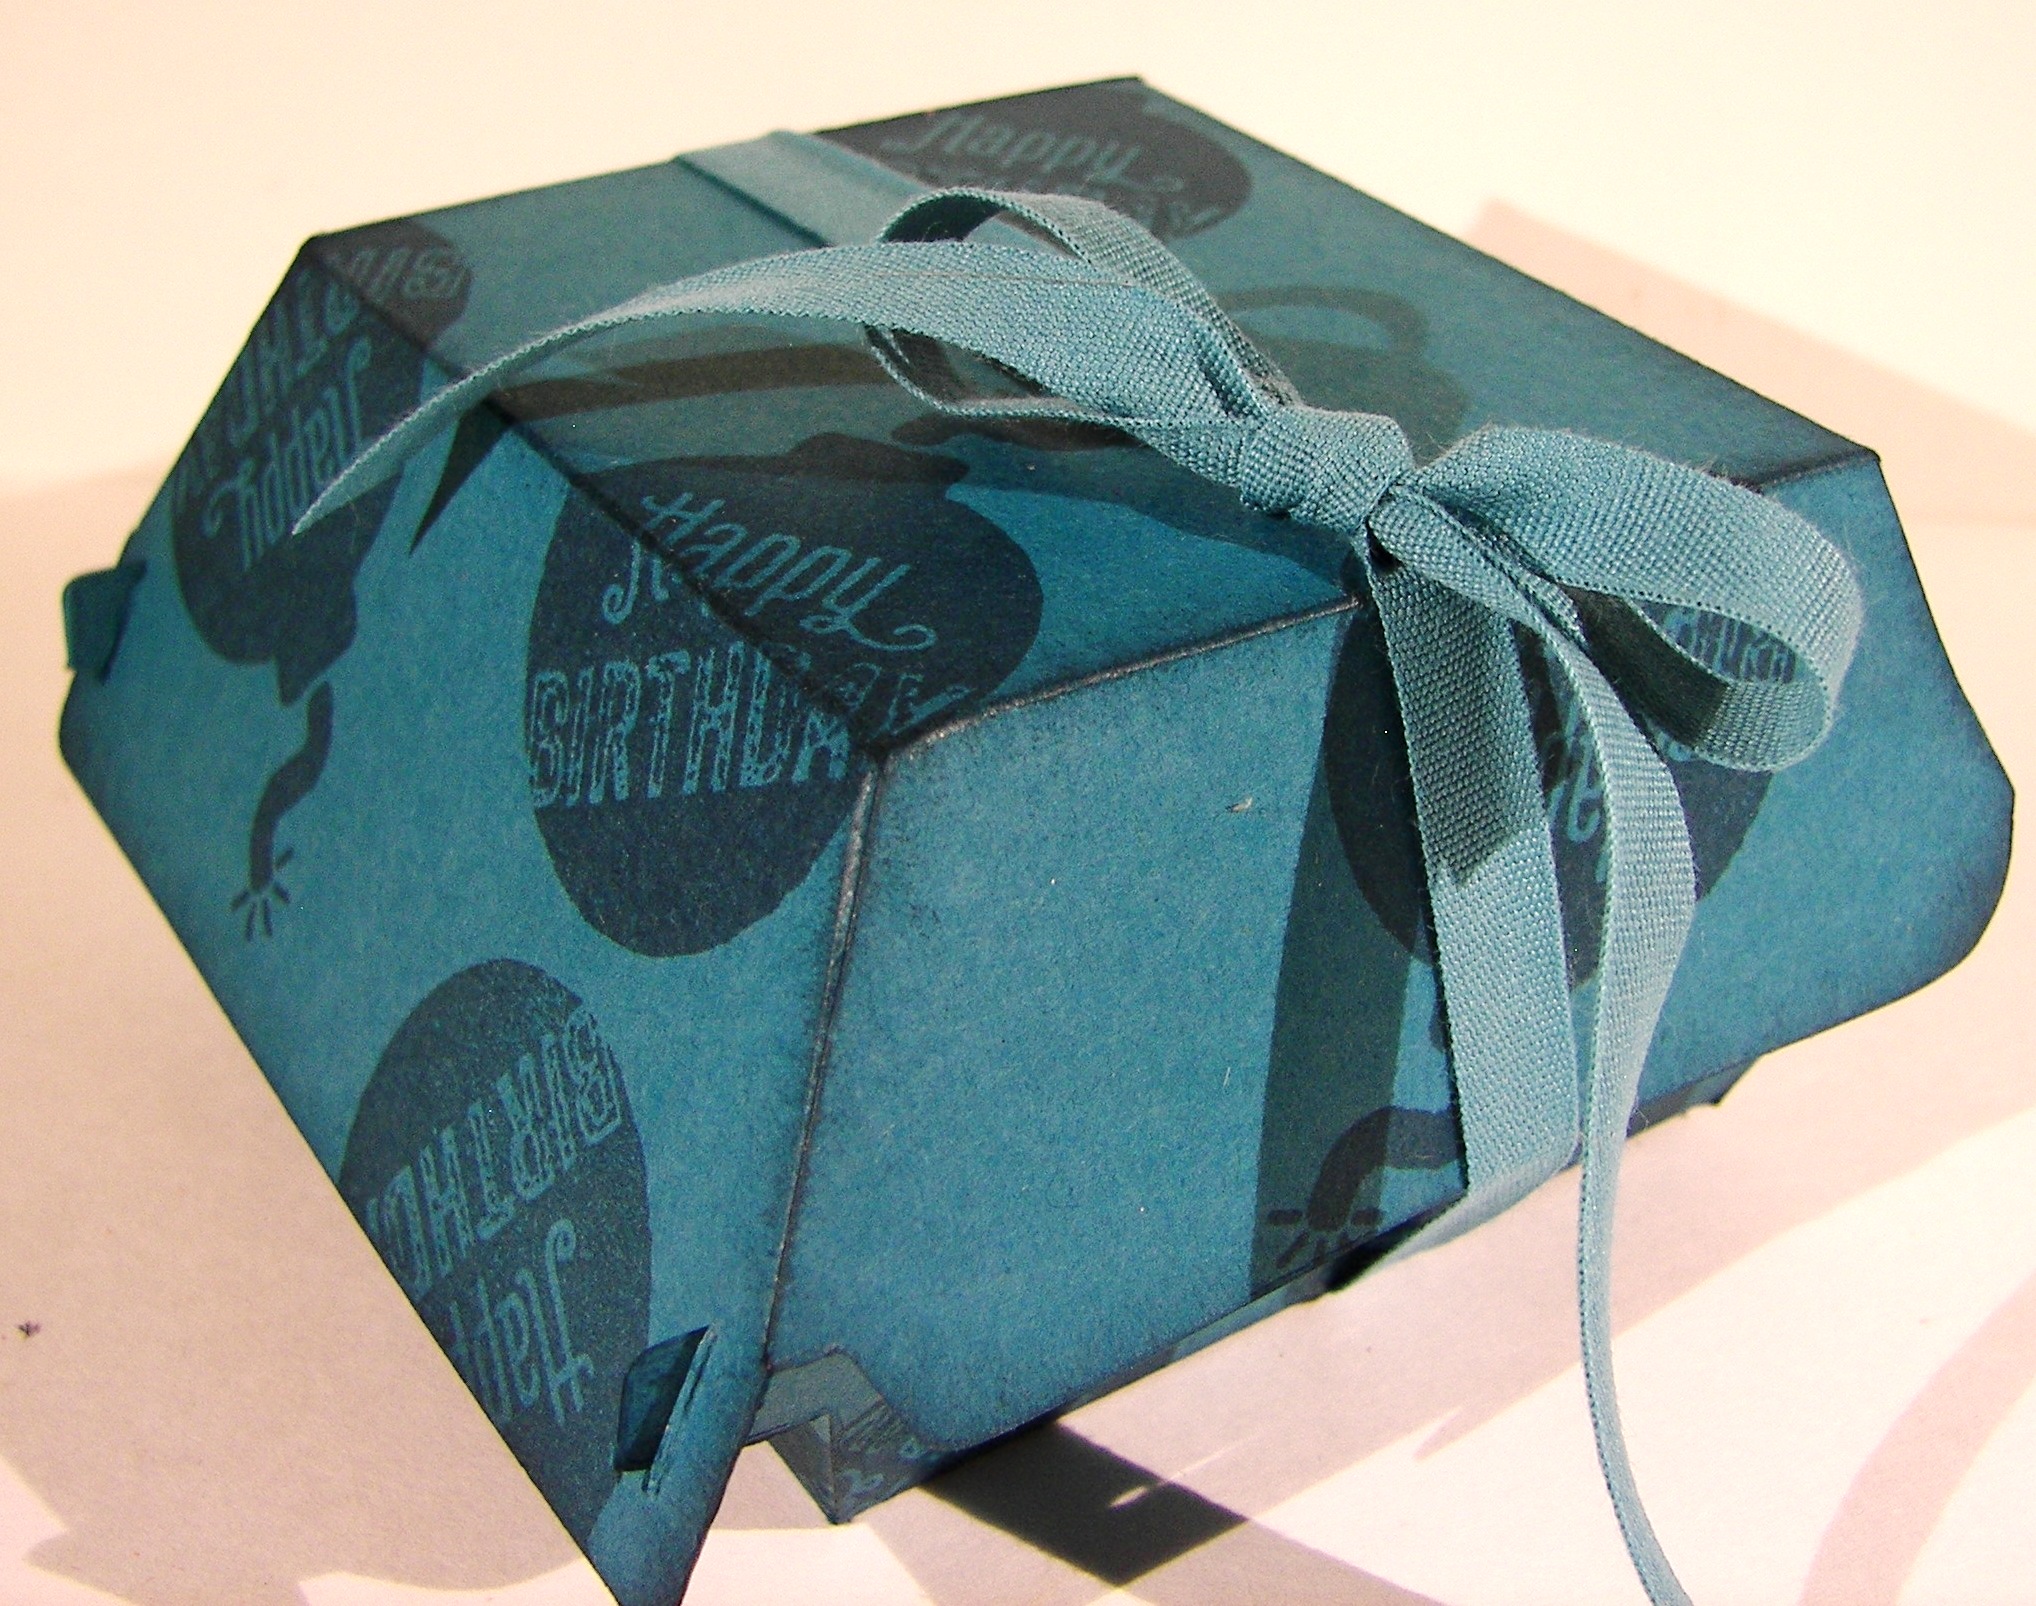
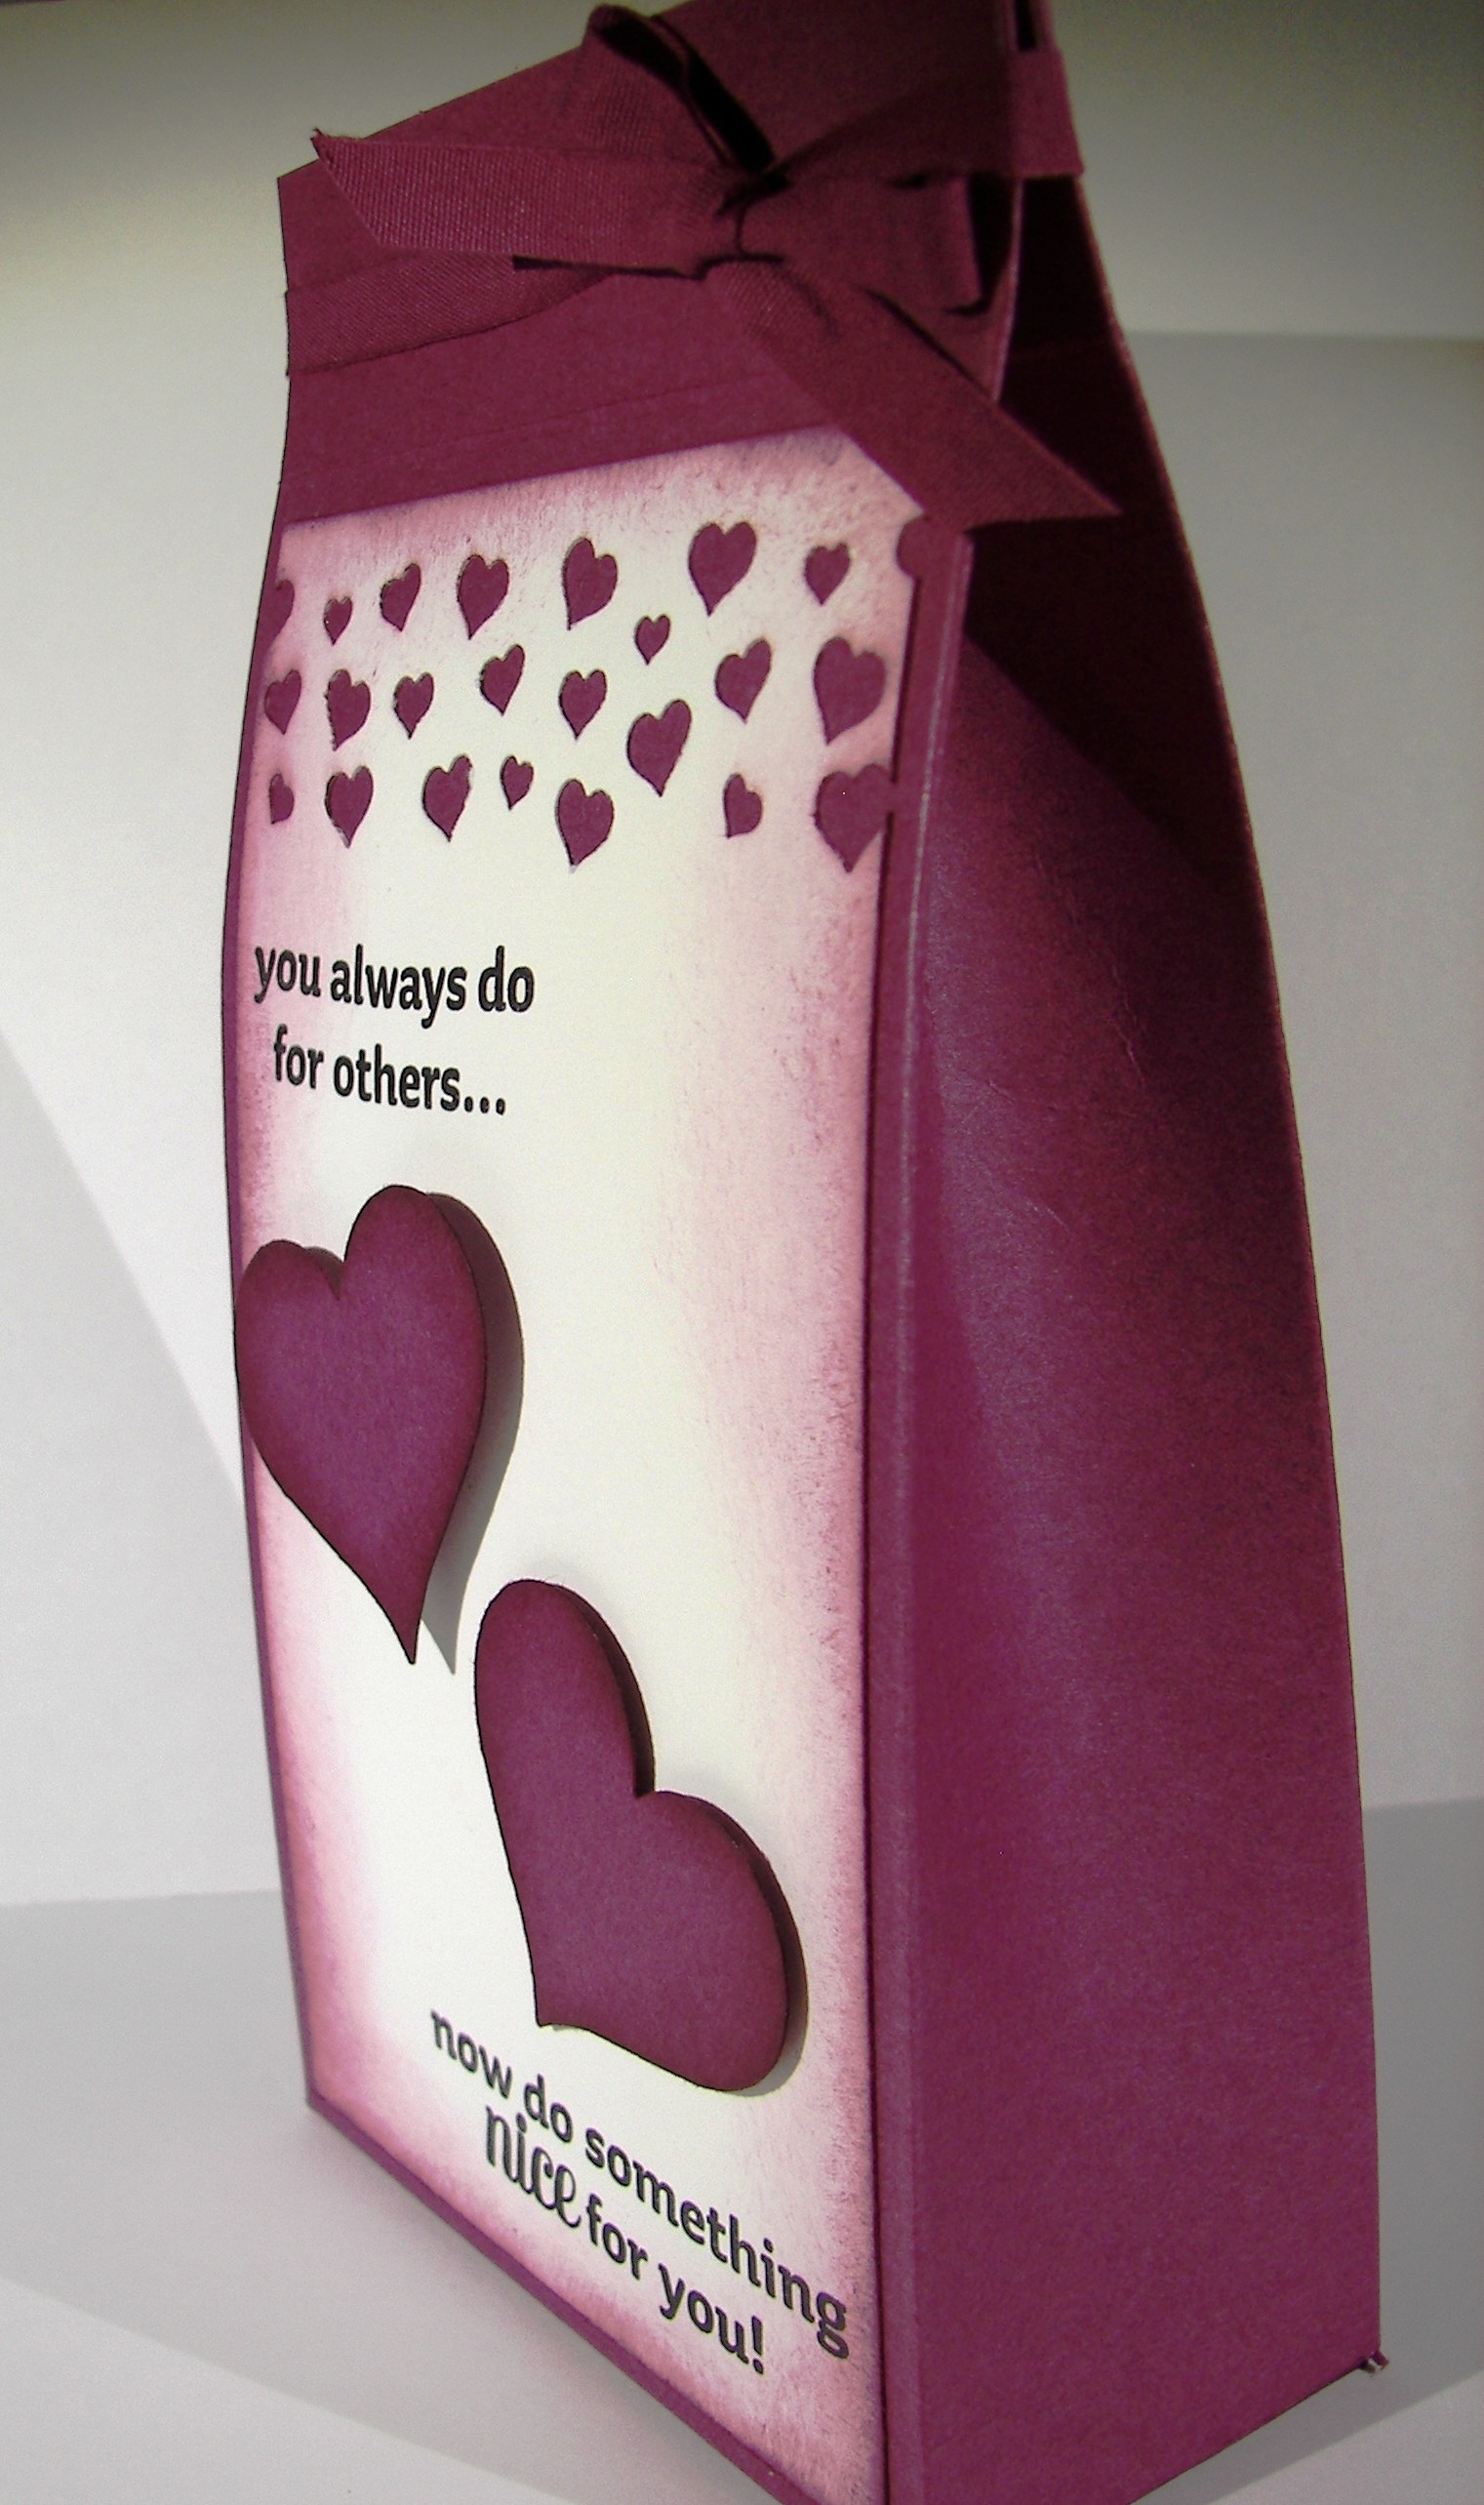
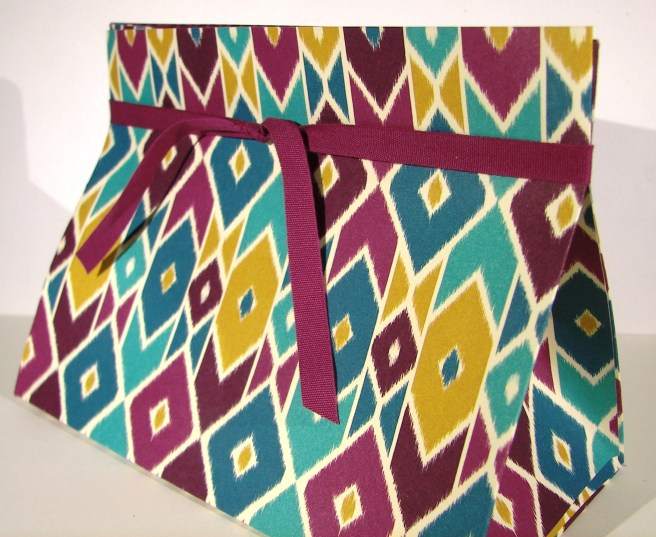
The gift bag was made from a whole sheet of designer series paper.  I went for a wide stocky bag instead of my usual tall slender ones.  It is nice to change things up a little bit here and there, don’t you think?  The ribbon I had in rich razzleberry was just long enough to go around the bag top.  I do love using up product that is retiring before it actually retires.  I am not often that lucky.

5-14 (2)

Have a creative day!

Moana

English Garden with Rose Wonder

The morning may be trying to run away from me, but I am trying to keep up.  I did get this set made yesterday, but haven’t had the chance to get it shared yet.  Let’s hear it for lunch breaks, everyone needs one.

4-29 (3)

The card was the beginning of this trio, and the paper was the focus.  It is sad to say that this paper is retiring soon, I sure have loved using it.  What can be better than water colored floral paper?  With my kind of projects, not much.  Unless I sit down and paint my own, with paper this pretty I don’t have to.

The designer paper is layered on a piece of blushing bride cardstock and then on a pear pizzazz card base.  Old olive is actually the light green used in this paper, but I wanted a lighter tone and thought it looked nice.  All of the sentiments come from the Rose Wonder stamp set, there are some lovely ones in there.  I stamped, did a banner punch, sponged and then sponged another one to layer underneath.  The strip is 1/2″ wide and was left over when I cut the piece of whisper white for the inside card panel.  I love those little leftover strips, they always come in handy.

4-29 (2)

I made a couple of gift bags with totally different dimensions in mind.  I usually work with tall rectangle shapes, but went with a short clutch concept.  The cardstock version could hold heavier tall items, but the designer series paper needs to keep it light.  I had several ideas of gift items that would fit inside easily inside, lots of chocolate to be honest.  I love sharing a chocolate treat or two, you should give it a try.

4-29 (1)

Have a creative day!

Moana

A Happy Hello

I tell you what, the more I think things should calm down, the more they wind up.  No need to fuss I say, just pick up where you left off and get going.  So, here we go!

4-26 (1)

I thought it would be fun to pull out some paper that I did not know how I would put to use. The School House DSP is definitely in that category.  I don’t have young children, and I don’t work in an elementary school setting anymore.  That is when you look to the other side of the paper.  And what did I discover?  These awesome spots!  They just had to get to work in a huge box to show them off.

I stamped the little fish from the Sea Street set in pool party and my sentiment in pacific point.  The color combination is so fun and happy.  Just what I needed.  I even had an unopened spool of pool party cotton ribbon.  That called for a double bow for a little extra fun.  Then my favorite combo of circle punches and I didn’t even sponge them.  The spots were huge and clean looking, so I stayed with that look.  And there you go!

4-26

Have a creative day!

Moana

Helping Me Grow

I do love to water color, that much is more than obvious.  Since spring is everywhere I knew I had to do some flowers like the ones I see everywhere.  How about lupin?  Pretty sure I spelled that wrong, but they are the prettiest wildflower, next to the poppy of course, that are growing all around this time of year.  My husband even recognized the flower on the card, and that is saying something.

4-13 (2)

I stamped the large floral image on my masked piece of water color paper in black stazon. The flowers were initially painted in marina mist, letting the ink run lighter as I went up the flower.  After, I added in hi-lights of wisteria wonder in the centers and across some of the petals.  The stems were done in pear pizzazz.  I did a touch more with the gold wink of stella to give it a sparkle.  That was both on the petals and the stems.  I know, it is hard to see in the photo, but it is there.

I painted the background in so saffron, allowing it to be lighter and darker just here and there.  I didn’t have a specific rule in mind, I let it happen.  I then used my aqua painter to drop clean water across the card to make water spots.  I let the drops sit there for several minutes then came back and dabbed them up with paper towels.  That removed ink and left the fun spots behind.

A simple bow across the front finished it off.  I used a piece of very vanilla for the inside.  I decided not to leave it blank and opted for a repeated image of the front.  Instead of black, I used so saffron stamped off and placed it right in the middle just like the front.  The idea is that it is light enough to be written over, kind of like a water mark.  It looks great.

4-13 (1)

Have a creative day.

Moana

They Say It’s Your Birthday

Fun, fun and fun. That is what this birthday card says to me.  When you have a fun paper that isn’t just masculine or feminine, you are fortunate.  This card can be for just about anyone, regardless of age too.  I call that a super win!  The series I started is nearly to an end.  I can’t wait to share the cute box I made to hold the whole dozen cards for the gift set.

4-3

The tag was made using the triple banner punch.  Dang, I sure do love that tool.  When it first came out I thought it was a bit excessive, but I gave it a try.  I use it so much.  It makes layered banner tags so easy.  This one was whipped together super fast, layered up on dimensionals, given a tiny ribbon accent and slapped in place.  Honestly, this was one super fast card.  Again, the paper is a win.

4-3 (1)

Have a creative day!

Moana

My Heart Smiles Just Thinking of You

It has been a very busy, but very fun, visit to Utah.  We have stayed a week, been snowed on twice, enjoyed the rain, and driven all over to spend more time with our son and his fiance. I would always like more time, but also can’t wait to get home.  Facing the long drive isn’t very inviting though.

4-1

This is a tall card, cut at 4 1/4″ and scored at 5 1/2″.  I like working with cards this way because of how easy it is to add ribbon.  I arranged my tag just under the ribbon to make it look like it was attached.  There wasn’t room on the tag for an actual punch, so I had to make do.  It looks great though, don’t you think?

4-1 (2)

Have a creative day!

Moana

Hello Bohemian DSP!

Guilty as charged.  I have loved this pack of paper and haven’t cut into one single sheet.  For shame, I know.  However, I have sorted that out and made something I quite like.  So much so that I think it will make it into this Saturday’s workshop.  I have a few ladies in particular that enjoy this paper as much as I do.

101_1164

I haven’t done a ‘z’ fold card for some time.  I saw some projects done by a few people I follow and thought I would give it a go.  The card turned out pretty darn good if I do say so myself.  Also, I love how I have been able to showcase so much of this fantastic paper.  The ribbon on the back of the card is also something new, but thought it brought a nice balance the the closed project.

101_1165

Have a creative day!

Moana

Hip Hip Hooray for Today!

What kind of fun events do you get excited for?  There are so many special days to celebrate it is hard to choose just one.  For me?  Well, today is all about celebrating the special meeting of my future daughter-in-law.  I have to admit, there is a bit of nervous energy going on there, more than I am aware of I am sure.  But still, what a wonderful day to celebrate.

2-12 (2)

I am in love with this tiny little balloon punch.  It has two friends, a tiny cupcake and a tiny candle, but I can’t get past the balloon.  I have a thing with tiny things and this fits the bill perfectly.  They are just big enough to fit a dimensional behind so they get to look like they really are floating.  And if you use your bone folder across the linen thread it will curl just a bit.  It makes me smile.

The framelit is from a set two piece set that makes pop up card centers.  I trimmed the sides to give me this huge tag.  It was very difficult to throw out the inside cut pieces.  They were perfect!  I played with them, told myself to throw them in the bin, I did, then I got them back out, played again and tossed them again.  Seriously, get a grip.

2-12 (3)

Have a creative day!

Moana


Oh Hello Baby Box…

When something is this tiny, all you can do is giggle.  Especially when you are greeted by an adorable little smiley face that is just large enough to fit inside a 1/2″ circle punch.  The ribbon is just 1/4″ wide.  I absolutely adore tiny things.

1-23

This is made entirely from my to be filed scraps on the side of my desk.  Just like the flowers from my last project.  I guess if I keep pulling from there I won’t have anything to file back.  There is a thought.  I am hoping to spend some time cleaning up a bit today.

The dimensions of this box are 1″ x 1″ x 3 1/4″.  How about that?  I wasn’t sure if the striped dsp would match up okay, but it did pretty darn good.  I tried to save on dsp and cut only a strip off the end to snip up into place.  If I had cut a square and then my strips they would have lined up better, but I chose to save the dsp.

A double layer of the bitty banner punch with one tiny little stamp.  The image is from the Hello free Sale-a-bration set.  As I have said before, I love it when a stamp fits into a punch.  Makes my life easy and keeps the images super clean.

I thought about putting candies inside, switched to a chapstick, but I think I could even put a lovely lipstick inside.  I will have to see what I get up to on this one.  Love it though!

1-23 (1)

Have a creative day!

Moana

Just For You Gift Set

One of these days I will be able to create beautiful calligraphy like this, but until then, thank you Stampin’Up! for making yet another beautiful phrase for me to use!  Isn’t it just so pretty?

Just For You Gift Set

The set has three secondary phrases to go with it.  However, I think that it could stand alone quite easily.  You do know how I love to make a matching gift set though.

Just For You Gift Set

I finally got on board and got the curvy corner trio punch.  I can totally see why it was on back order so much.  Love that guy!  This set was made with one sheet of dsp, and I have a section left still, and a single card base.  Not a lot of tricks here, just the basic layering with beautiful product to work with.  Nice.

Just For You Gift Set

Have a creative day!

Moana

Oh, Hello 2016

It would appear I have taken a few days off, and I guess I did.  I worked ahead to be out of town and still blog, but didn’t have quite the time to get back to it when I got home.  Sometimes life just has to happen, and it was so much fun!

Oh, Hello 2016

This card is just cuteness overload!  I am absolutely in love with this little chick, aren’t you?  It comes from a free set that is only available during Sale-a-bration.  It is a free gift option when you buy $50 of product.  No problems here, I love free!

Oh, Hello 2016

I snatched a tiny stamp from December’s Paper Pumpkin kit that says 2016.  It works with the calendar kit, but is just what I needed for this card.  Kind of like the year 2016 was there before I realized it.  I do think this chick will find its way on everything I can think of.  I have tons of other new product to play with, but nothing this cute.  Oh how I do love cute!

Oh, Hello 2016

Have a creative day, what’s left of it.

Moana

Bitty Boxy Holiday Bags

I managed to sneak yet another project out of that paper set.  I still have enough for a couple of cards or a medium sized gift bag.  Dang, what a lot of fun I have had using this paper.  But these tiny little bags certainly do take the cake.  Aren’t they just absolutely adorable?

Bitty Boxy Holiday Bags

My husband was given a large bag of candy as a thank you and he brought it home.  And he opened it.  So that is just dangerous.  I knew I had to come up with several little bags to use them up.  I am getting there.

Bitty Boxy Holiday Bags

Three different styles of box bags to get me going today.  I am partial to a milk carton style to be honest, but the tiny pinch pouch is just so sweet.  I used up three scraps of paper with a touch of glimmer paper to give them some bling.  I don’t know what I love more, the cording or metallic thread, so I had to use them both.

Bitty Boxy Holiday Bags

Have a creative day!

Moana


No Peeking

Planning ahead and definitely working ahead is what works best for today.  As this posts, I will be heading back home from my wintery holiday with family back to sunny California.  Not really good timing to let myself enjoy early morning blogging like I do.

No Peeking

For a simple card, there is a lot of dimension going on.  The ribbon and thread work great together with the tag duo and still manage to lay flat.  Three strands of ribbon were poked through the tags and then bound in linen thread.  I left the lengths of linen thread rather long and just curled them a bit with my bone folder.  Love it!  The ribbons were cut at different lengths to add interest and that finished the tag.  I thought it would be an adorable gift tag too.  Might have to make more of those.

Well, of course I sponged this lovely plaid paper before adding it to the card base.  A few wraps with even more thread were just what I needed.  I certainly have enjoyed this holiday card series, but we aren’t done yet!  Still five more cards to share.  So much fun!

No Peeking

Have a creative day!

Moana

Holly Jolly Ho Ho Ho

Another Christmas card is ready to go!  I think this one is adorable.  I wasn’t sure about these dots, but they turned out pretty cute.  It is hard to concentrate this morning as I need to drive down to Provo and it is snowing, and sticking.  Such a pansy anymore.

Holly Jolly Ho Ho Ho

Either way, I love this little card.  I actually got a little brave and did a little curving with the photopolymer stamp.  The ‘ho ho ho’ is actually straight, but I wanted a circle punch and it had to fit.  So now it does.

Holly Jolly Ho Ho Ho

Have a creative day!

Moana

Birthday Hamburger Box

This die cut hasn’t been out in a while and I miss it!  I have had so much fun making boxes of one kind or another and I just love the shape.  I am pretty darn good at making a box or bag for a custom gift, but boxes like this just need a die cut.

Birthday Hamburger Box

One of my TA’s has a birthday today and I thought he would get a kick out of this guy.  I think he is expecting something because he has mentioned his birthday several times in the previous weeks.  Well, of course I had to deliver.  I think I will pick up a wonderful pastry this morning to put inside.  Yummy.

Birthday Hamburger Box

One sheet of  island indigo went into the box.  I was left with scrap enough to make the matching gift card and leave a couple of good sized scraps behind.  That is great.  I did sponge all of the edges really well before I glued it together.  I also used tombo to put the edges together.  Much easier with a little bit of wiggle room while it bonds and then it is there to stay.  My kind of adhesive.  I ran my bomb stamp down one direction of the die cut and then flipped it around and went the other.  The pattern turned out random enough to look like patterned paper.  I love making my own background paper for projects.

Birthday Hamburger Box

Have a creative day!

Moana

Lighthearted Leaves

I fell in love with this stamp set from the moment I saw it.  The images from Lighthearted Leaves are absolutely wonderful.  Artsy enough to get your attention, but not so simple as to be boring.  Such a nice balance.  I think I will case myself and make a Christmas version of this project.  I see mistletoe.

Lighthearted Leaves

I can also see an ocean theme.  The leaves kind of remind me of sea kelp and could be holding little fishies somewhere.  I do love an optional stamp set.

 Lighthearted Leaves

The layering is simple here.  Narrow borders help to not distract from the thin lines of the designs.  All around, I am very happy with how this turned out.  using the tags & labels framelits also make me happy. Subtle touches of color to accent the sentiment without taking over.  Just enough room to have a simple bit of ribbon and one little rhinestone in the center.  How perfect is that.  What more do you need than to ‘believe’?

Lighthearted Leaves

Have a creative day!

Moana

Banner Blessings Gift Set – Friend

The morning took off without me, and there was nothing I could do about it.  This has sat at my computer waiting for me to take a lunch.  Well, never happened.  How about a tiny break?  Works for me.

Banner Blessings Gift Set - Friend

This is the first card of a set of four with a coordinating gift box.  It was so fun to make.  I actually made it for a special someone and I can’t wait to deliver it.  Should be tomorrow!

Banner Blessings Gift Set - Friend

I attached the island indigo torn card stock to the thin whisper white before I ran it through the fluttering embossing folder.  Everything got done at once.  The sentiment was stamped in black stazon and sponged a bit with coordinating ink.  I love the cotton ribbon, it makes such cute bows.  The inside stamping is actually negative punching.  I punched a butterfly or two from the white insert and revealed the card base.  Simple and very effective!  So fun.  Those pretty pearl accents.  I could really get used to those.  I had it dot the “i”, even though it wasn’t needed, I wanted to use one and it fit the image.  A bit of dimensionals and this card was done!

Banner Blessings Gift Set - Friend

Have a creative day!

Moana


Game On Dear Heart

I absolutely love, love, love making my own paper with unique stamps.  Most of the time my friends can’t even place which stamp set it came from.  I have overlooked several stamps myself.  Example, look at this cute little fish!

Game On Dear Heart

Sometimes we feel like we don’t fit in, but I feel like that is a beautiful thing.  I made this card with that theme in mind.  He is stamped in melon mambo, water colored a bit, and water colored again with silver encore ink.  Everything is lightly sponged and there are plenty of dimensionals here.

Game On Dear Heart

The sentiment was stamped on a little scrap, punched with the bitty banner punch on one end, and given a bit of ribbon on the other.  How easy is it to just staple some ribbon on.  Some cards need just that, a little different look.  And of course this is layered up as well.  Did you see the little fish repeated inside?

Game On Dear Heart

Have a creative day!

Moana

Vintage Leaves

What happens to some mornings, I really don’t know.  Just when you think you might get a break here or there, it just doesn’t happen.  But I made it here, finally.

Vintage Leaves

I have taken my time in using this new set, Vintage Leaves, but am totally ready to go now.  I only used one leaf today.  I wanted to focus on color as much as detail and thought if I had too may patterns and colors it might get lost.  Rich Razzelberry was my focus, and this was totally what I wanted it to look like.

  Vintage Leaves

I stamped several of the same leaf in black Stazon and left space for just one rich razzelberry one.  So simple.  I used a second stamp set, For All Things, for the sentiment.  It was layered flat with a banner of coordinating cardstock.  I touched it up with a strand of cotton ribbon and called it good.  I really did love how this turned out.

Vintage LEaves

Have a creative day!

Moana

You Always Do For Others…

The people in our lives that give endlessly, they are so awesome!  They deserve much more than something like this, but always appreciate it.  Someone has to something nice for them, right?

You Always Do For Others...

My school secretary is just that person.  She even keeps the little containers I make her gifts in.  She has a cute little collection.  This one is a bit larger than others I have given her, but she deserves it!  The beginning of school is always so hectic.

You Always Do For Others...

One whole sheet of rich razzelberry for this gift bag.  Doesn’t it look lovely?  I didn’t have a project in mind, so I just reached to my paper files with my eyes closed, pulled the first file and there it was.  I then turned to my punches and grabbed the first one I focused on.  That would be the confetti hearts border punch.  The rest just fell into place.

You Always Do For Others...


I did my favorite sponging and opted not to layer the base.  Sometimes my fronts tend to curl a bit at the edges when I layer cardstock on cardstock with gift bags.  So, after I punched and sponged I used tombo liquid multipurpose glue to get to the edges well to make sure it stayed down nicely.  Perfect job.

A little matching cotton ribbon, subtle but still there, and the gift bag was done! Now I have the pleasure of getting the perfect treats and a gift to go inside.  That will be a fun little activity for sure.  Sea salt chocolates and maybe a lovely lotion.  Sounds nice.

Have a creative day!

Moana