Gather Sunshine

It started with one stamp, ‘gather’, from the Seasonal Snapshot 2015 set.  I love it, just love it.  Then I began rooting around for word stamps or images that would go with it.

Gather Sunshine

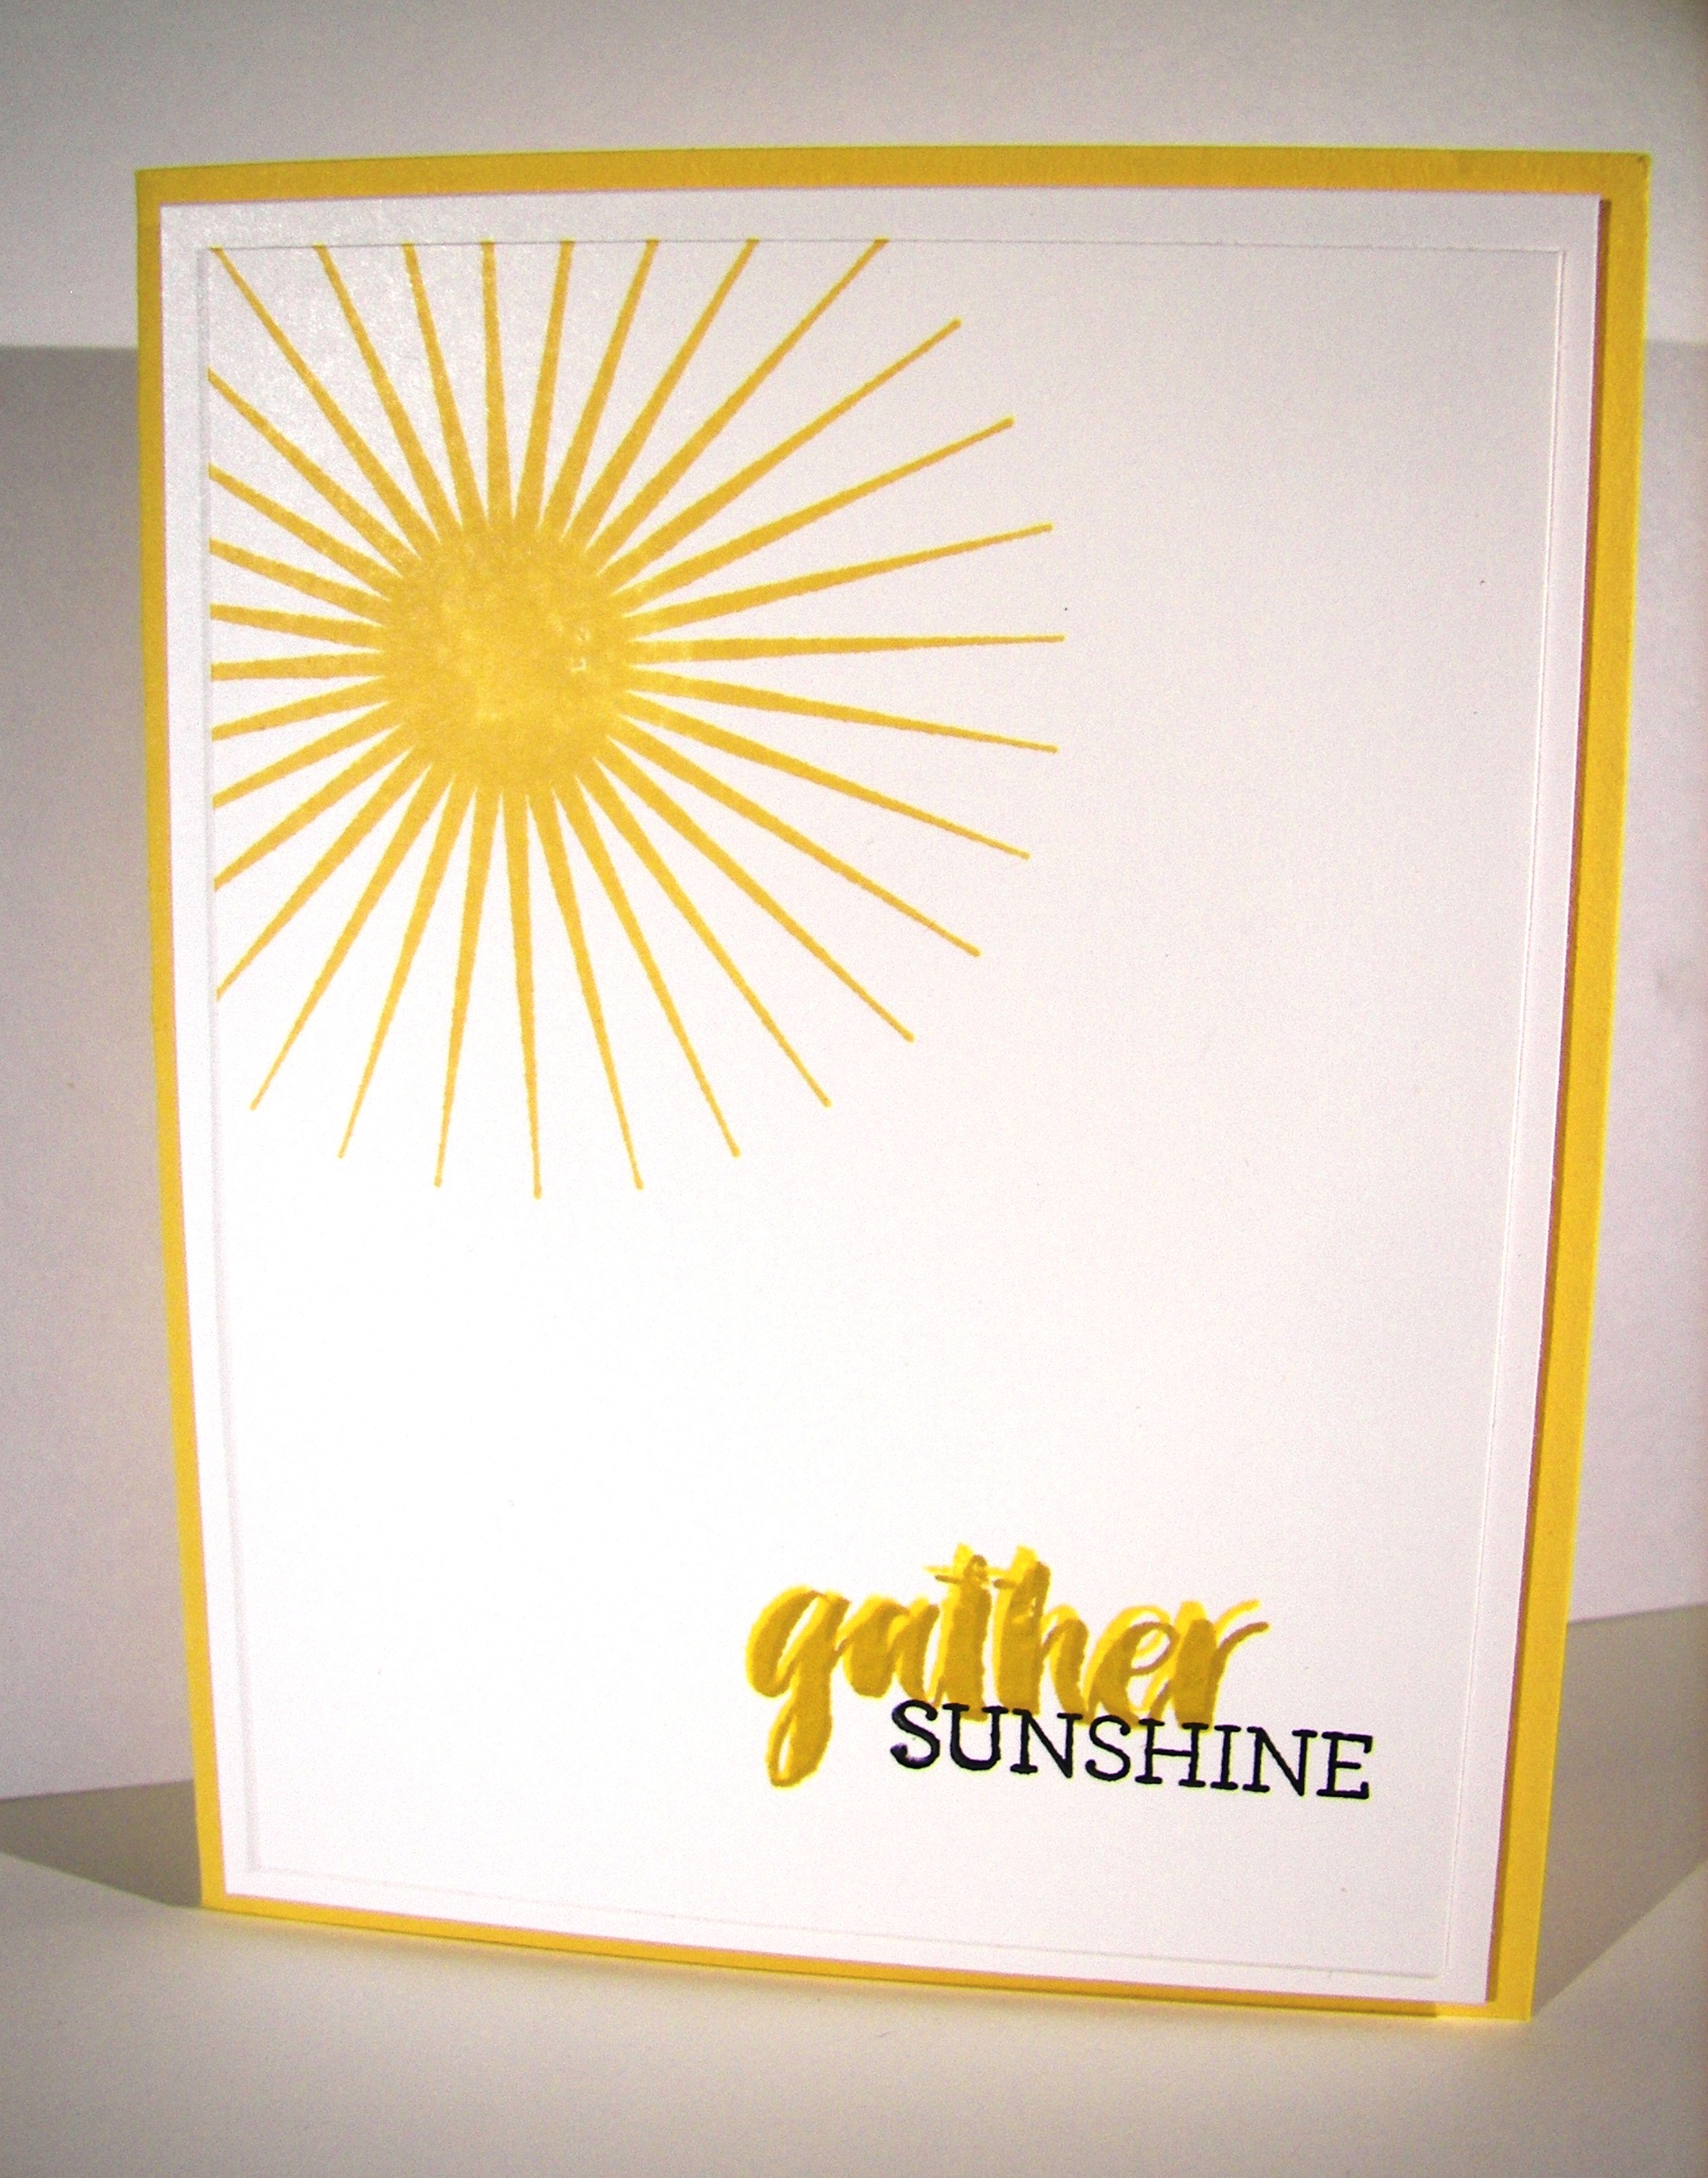
I pulled out Crazy About You, because it has all of those phrases and word sets.  There it was, sunshine.  I immediately went to the Kinda Eclectic set because of the beautiful sunburst in it.  Great combo going on for sure.

Gather Sunshine

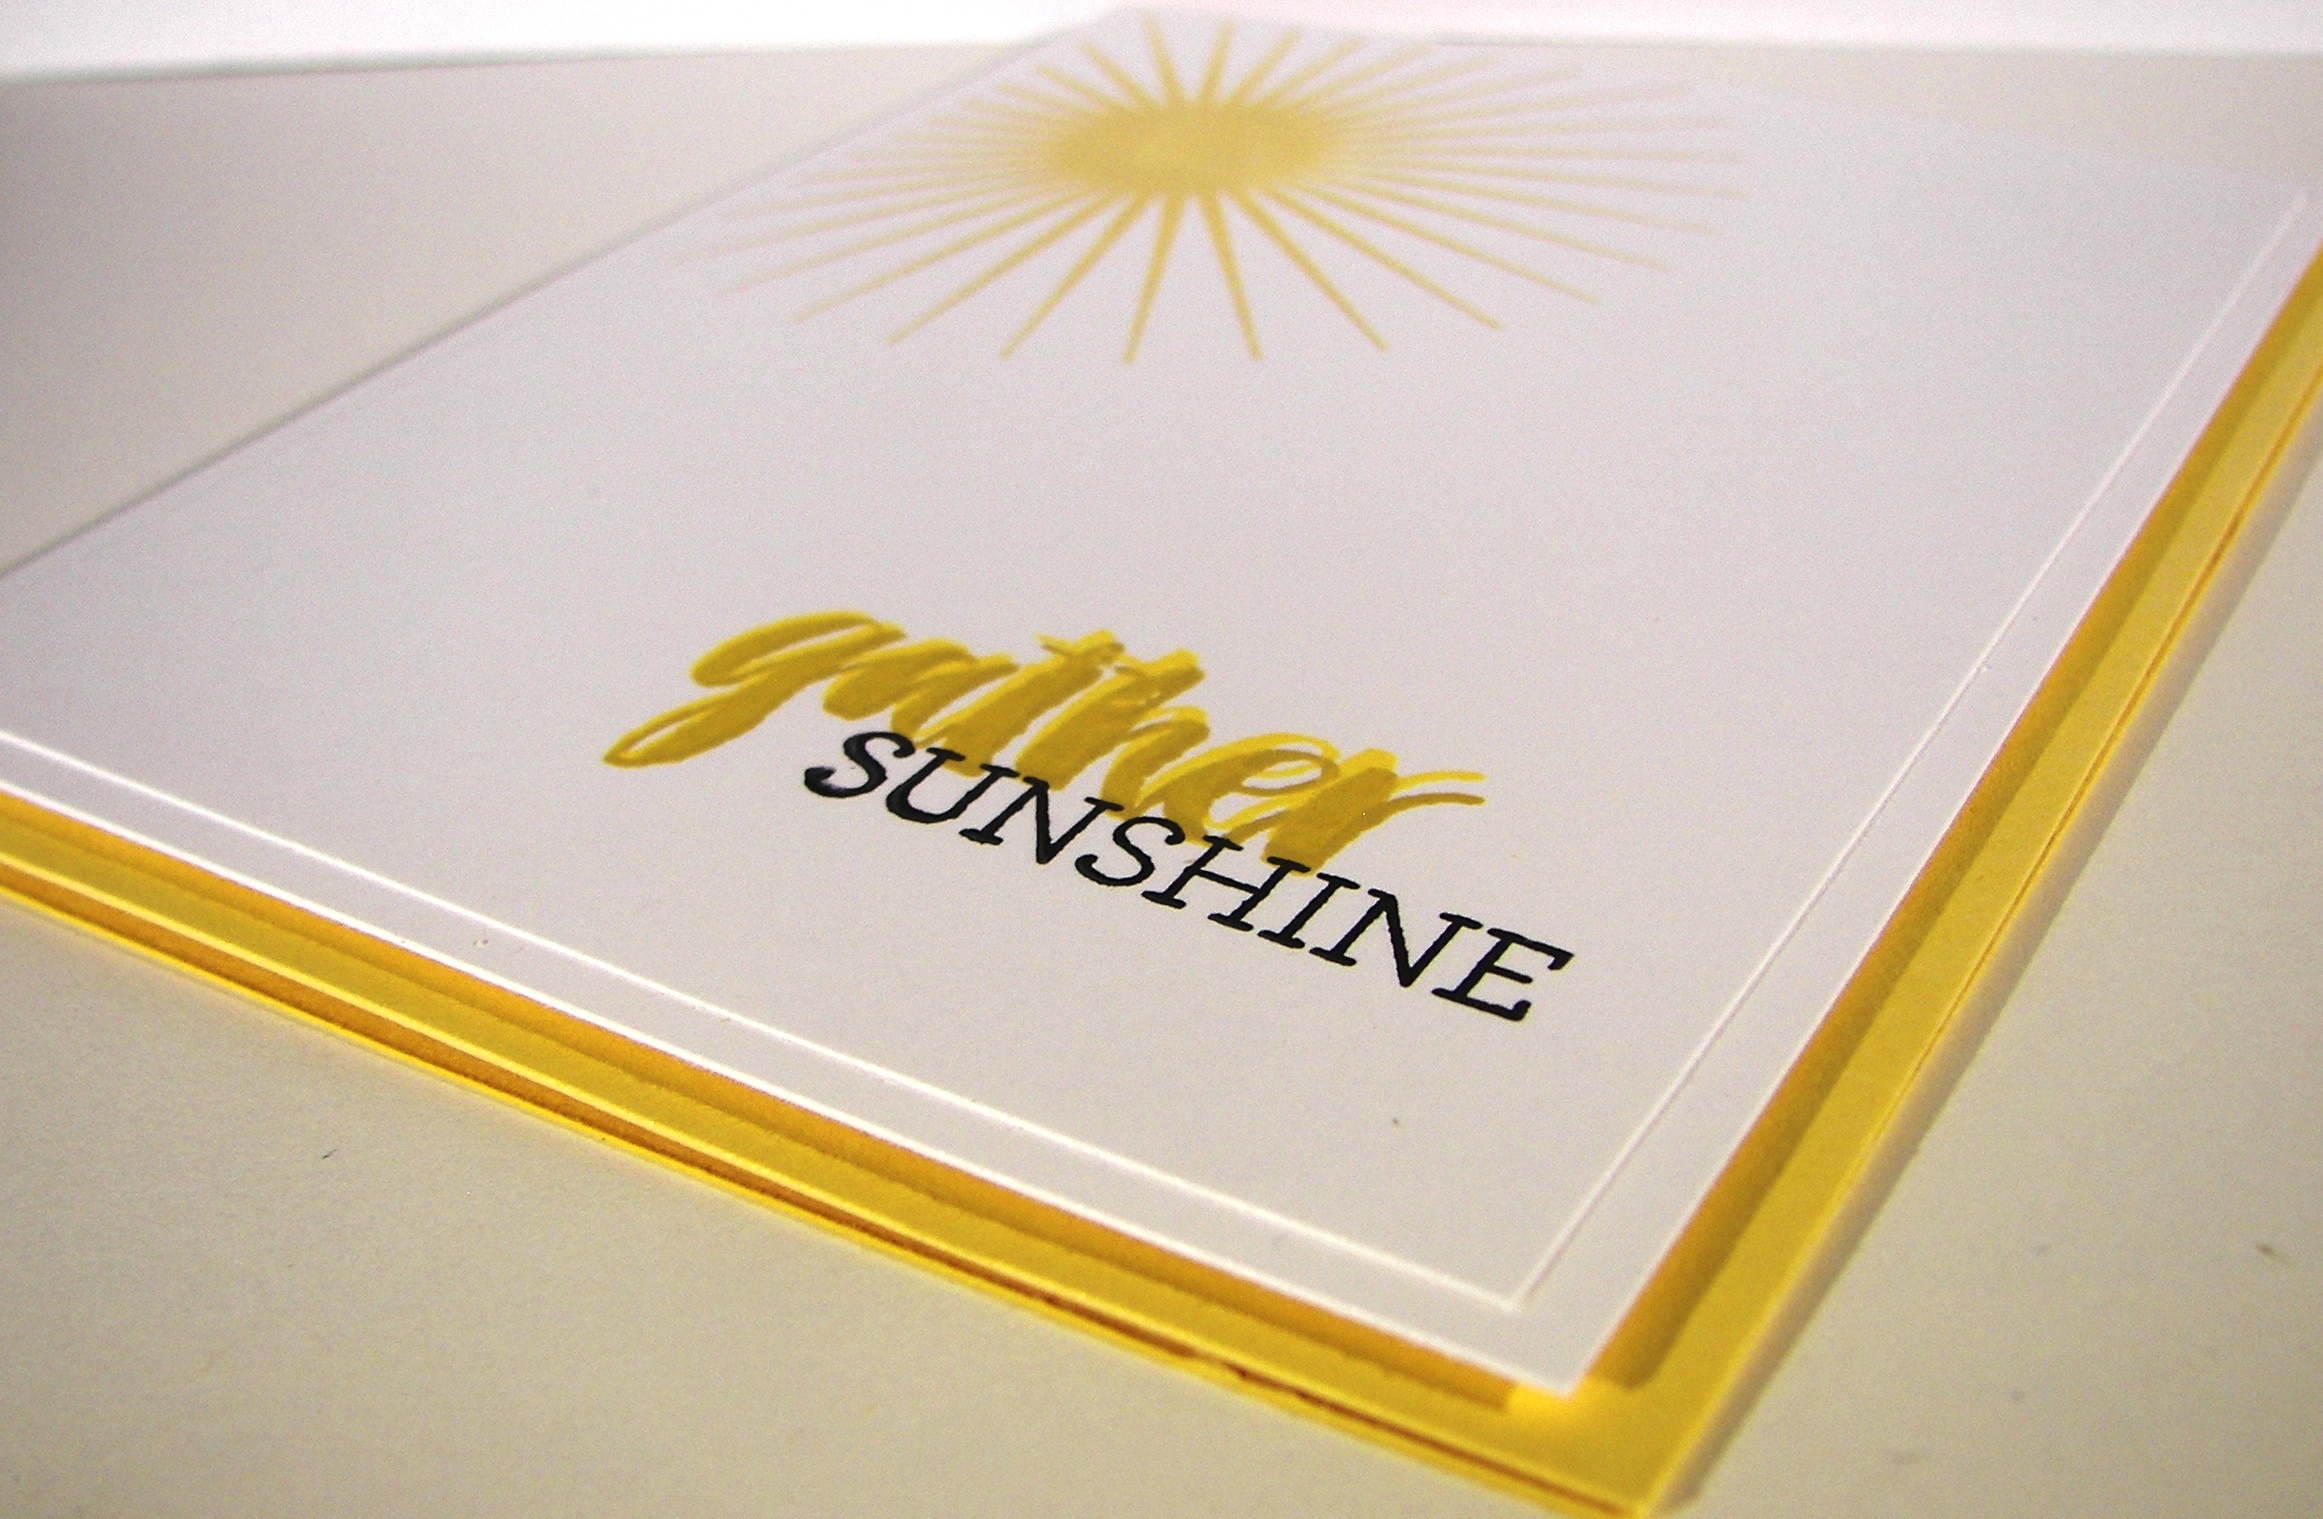
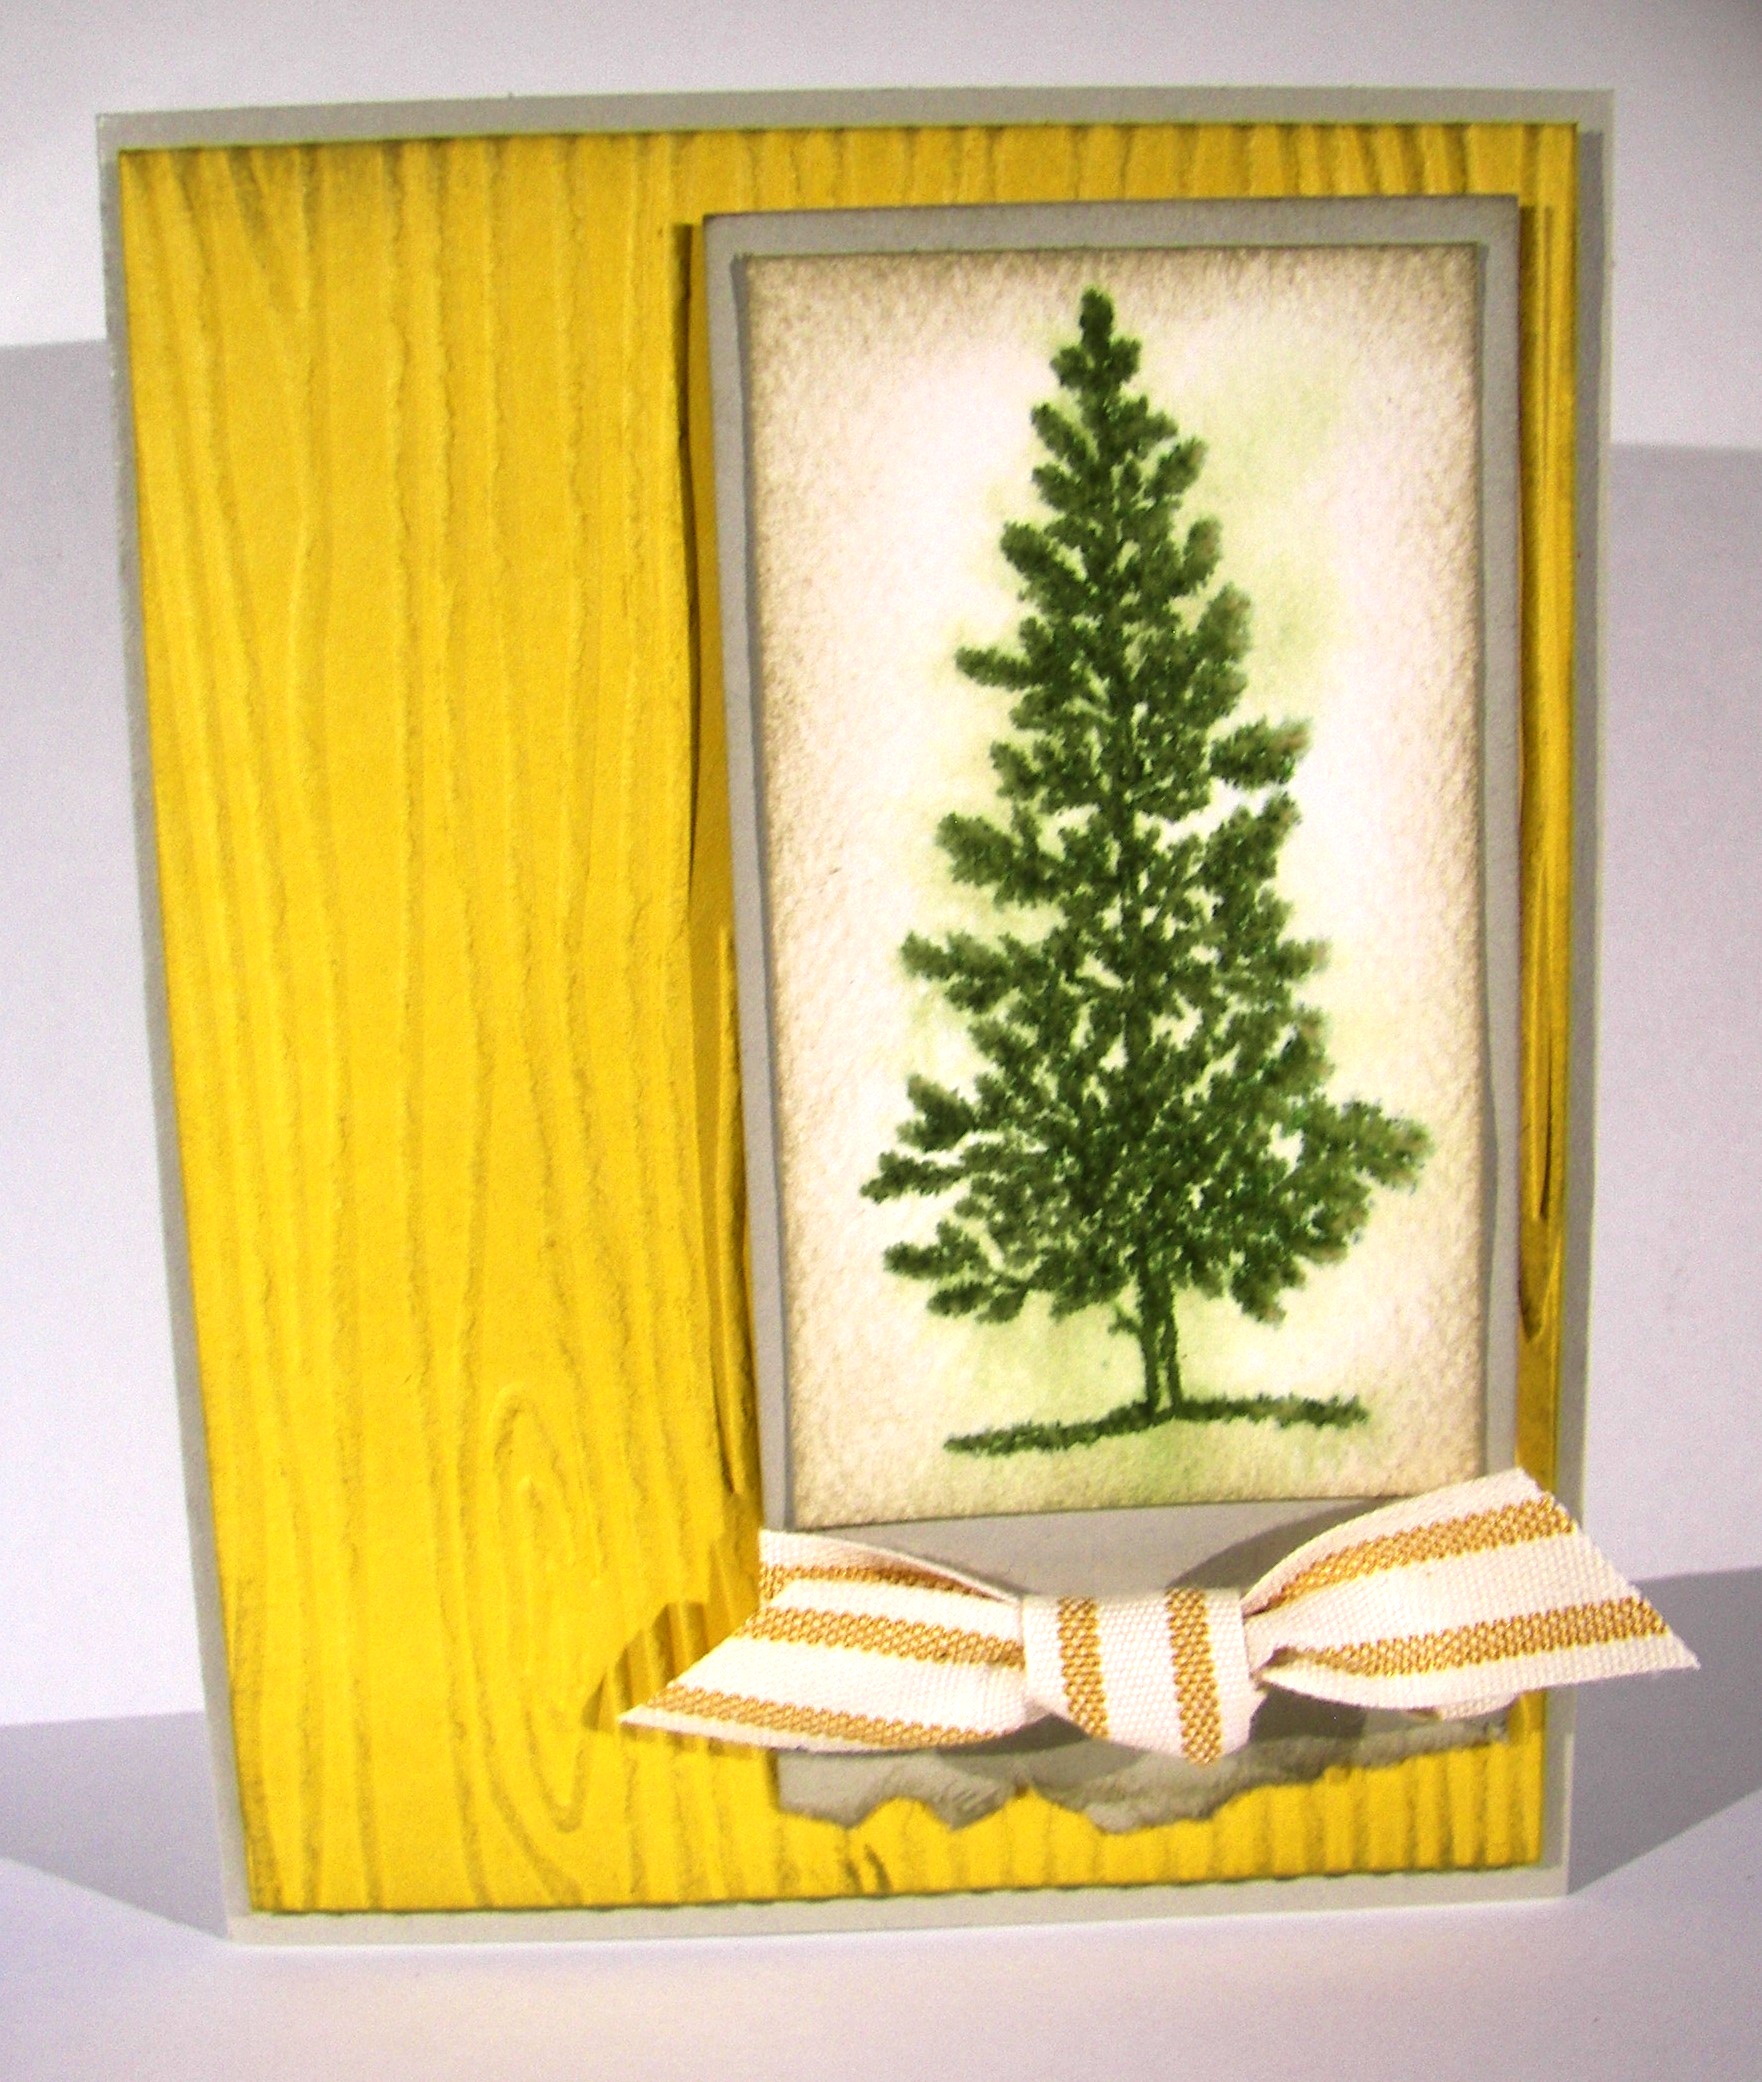
I wanted more than one yellow tone going on, so I have three.  The sunburst and the card base are So Saffron.  The base of ‘gather’ was done in Daffodil Delight and layered over in Hello Honey.  Sunshine was stamped in stazon and the inks were put away.  The paper layering is simple with a double layer of smooth whisper white put up on dimensionals.  No ribbon, nothing else, just clean and simple.  Not my usual style, but I rather like it.

Gather Sunshine

Have a creative day!

Moana

Game On Dear Heart

I absolutely love, love, love making my own paper with unique stamps.  Most of the time my friends can’t even place which stamp set it came from.  I have overlooked several stamps myself.  Example, look at this cute little fish!

Game On Dear Heart

Sometimes we feel like we don’t fit in, but I feel like that is a beautiful thing.  I made this card with that theme in mind.  He is stamped in melon mambo, water colored a bit, and water colored again with silver encore ink.  Everything is lightly sponged and there are plenty of dimensionals here.

Game On Dear Heart

The sentiment was stamped on a little scrap, punched with the bitty banner punch on one end, and given a bit of ribbon on the other.  How easy is it to just staple some ribbon on.  Some cards need just that, a little different look.  And of course this is layered up as well.  Did you see the little fish repeated inside?

Game On Dear Heart

Have a creative day!

Moana

For All Things

It can be hard to get even the simple things done when you don’t quite feel yourself.  That is why today’s project is super simple, just what I needed.

For All Things

I started with a half sheet of very vanilla cardstock and scored every 2″ on the 8.5″ side which left me a 1/2″ edge to seal the box together.  I also scored along the length at 2″ to make the bottom, and at 3/4″ at the top and then 1″ over from there.  I know I am not very exact at sharing my measurements, but it works out I promise.  Oh, I did do my stamping before I scored, forgot to mention that.

For All Things

I have held the box together using the tear n tape adhesive.  I do like that stuff, easier to work with than sticky strip.  The flaps are folded together and adhered with the same and then I got to sponging.  All the edges and even on these bitty little flowers.  I love that look!  I put the largest basic pearls inside each flower and grabbed for a scrap of ribbon.  The dotted lace trim has a good bit of stretch to it, so it is held on just by that.  Not a glue dot or anything.  That makes it easy to use and re-use.  A simple bow and it was all done!

For All Things

Have a creative day!

Moana

Floral Frenzy

After a huge workshop I usually just take a break from my desk, but yesterday was different.  I got back home and found myself drawn into a project that was clean and full of floral punches.  No stamping at all.

Floral Frenzy

I think I just needed to make something in a calm setting away from the frenzy.  It can get a bit wild with too many people, especially with new stampers.  I think it is time to split the group.  We will have to see. 

Floral Frenzy

There isn’t even any ink here at all.  No sponging or a sentiment either.  Very clean and simple, with a ton of flowers, my favorite.  Kind of like my comfort craft.  All this card is about is punches, punches and more punches.  Five different flowers all layered about with basic pearls to finish them off.  I used the striped cotton ribbon because I wanted it to physically stand out as much as the flowers would.  Bows and flowers and now I feel better.

Floral Frenzy

Have a creative day!

Moana

Journal Inspired Butterfly Basics

My husband bought this pretty journal and I immediately took it to my desk to stare it down.  I just knew there was a card in there somehow.  Well, after sharing swaps for nearly two weeks my creative bug was on high alert.  I sat down last night and gave myself some time to go at it.  And I did.

Journal Inspired Butterfly Basics

Isn’t is uncanny how close the colors are?  I guess that is why I migrated to it.  I have other off market stamps that might have gotten closer to the tree, but I really wanted to get my brain in gear for workshop this weekend.  I couldn’t be happier with the end result.

Journal Inspired Butterfly Basics

The borders are a narrow 1/8″, my favorite.  I bravely opened up my new elegant dots embossing folder and rubbed Stazon all over one side and then ran it through the  big shot.  I loved the result, and most of the ink came off.

Journal Inspired Butterfly Basics

I used lots of butterfly framelits and layered everybody up.  The smaller one has two black die cuts over the delightful dijon layer.  Light sponging made everything look a little grungy and tied it together.  There is a little stamping inside, as well as more sponging.  I used plenty of glue dots to hold the butterflies together and layered like crazy with dimensionals.  So fun!

Have a creative day!

Moana

Dude, Happy Birthday

While chatting with my daughter I asked her for a little inspiration for a project.  She came up with these two stamp sets.  She remembers the Paper Pumpkin stamps much better than I do.  Good to get a reminder or two.

Dude, Happy Birthday

I have to admit, I am really into the Bombs Away Birthday set.  This particular one is my favorite, but they are all pretty awesome.

Dude, Happy Birthday

I was originally going to spritz the designer paper, but I forgot to get a re-inker in tip top taupe.  Ooops!  So I opted to sponge it instead.  The geometric pattern looks pretty darn cool.  A little bit of layering, lifting everything up on dimensionals, touches of silver mini brads and a finish with silver metallic thread and this card is ready to go.

Dude, Happy Birthday

I need to remember to get those paper pumpkin stamp sets out more often.  The kits are so fun to work with when they first come, but I often put the stamps away and then move on.  I think I will have to work on getting them in cases to keep them more visible.

Have a creative day!

Moana

For All Things and Flower Patch

While enjoying a long and lovely visit with my daughter this morning, fall came up.  It is her favorite season of the year.  She is getting excited because where she is attending university fall has begun.  The temperatures, the colors, the smells, she loves it all.  So, together we created this card.  What a fun way to stay connected.

For All Things and Flower Patch

The card is made from a Hello Honey card base, layered with a Cajun Craze framed stamped card front.  I used the leaf stamp from the For All Things set to create the paper.  One full ink stamp and then several others around it until the ink runs out.  I did this using Cajun Craze, Hello Honey and Almost Artichoke.  Such a great trio.

For All Things and Flower Patch

A quick stamp from the Flower Patch set for the sentiment and it was nearly done.  I adhered a strip of the new Striped Cotton Ribbon and layered my sentiment with a bit of color.  The Bitty Banner Punch helped me get the banner edges and it was all done.  Well, I did have to sponge nearly everything of course.

For All Things and Flower Patch

Have a creative day!

Moana

Floral Gift Box

When my daughter came home this week for her university break she brought this little birdhouse box with her.  My mother had given it to her to deliver to me to try and create a version of it.

Floral Gift Box

I don’t have a diecut that would do this, so I had to think it out a little bit.  Although I had several frustrations, I ended up with something cute.

Floral Gift Box

I started out with a piece of paper 7″ x 8.5″.  I scored along the 8.5″ side at 2, 4, 6, and 8″ leaving an edge of a half inch.  I turned it one quarter around and scored it at 2″.  This became the bottom.  Along the top, with the long scores going up, I proceeded to cut with my trimmer, not scissors.  I cut along the score lines down to 2.5″ on all score lines.  This gave the top flaps.  Two of them were punched with the scallop tag topper and the other two were trimmed down a bit.  My design became a bit flawed and I had to improvise a bit.

Floral Gift Box

I stamped the paper with versamark ink and applied white embossing powder to give me the cute little flowers you see.  They turned out so pretty.  The rest of the box assembly was pretty basic.  I know I don’t give a lot of detail, I get impatient.  I am working on it.

Have a creative day.

Moana

Hello You

How do you decide what to work with?  Today, I went with my skirt as inspiration.  While I am not wearing black and white zebra stripes with butterflies, the colors are right on.  I could hold it on display and coordinate so nicely.  I love how it turned out.

Hello You

I have to admit, this is the first time I have used my file tab edgelits and I have had them for a long time.  I wanted to use them, just in a different way.  The paper helps out a lot here, and I like them vertical instead of horizontal the way a file folder would normally look.  Mission accomplished.

Hello You

In order to coordinate the inside with the outside, I took the small butterfly stamp from Kinda Eclectic and stamped away.  It makes me so happy to have the inside match the front.    The card actually is quite simple, with patterned paper like this you do have to have some limits, just some.

Hello You


Have a creative day!

Moana

No Bones About It

No, I don’t have little children, and yes, I did have to have this set.  I actually pegged it for a favorite when the new catalog first came out.  It really isn’t the speed of my card group I teach, but I wanted it for myself.  How cute is it?

No Bones About It

There are four different dinosaurs in the set, all with matching skeletons, some fossil plant looking stamps, some splats and these awesome footprints.  As well as a few super cool sentiments to go along.

No Bones About It

This card was done in mossy meadow and whisper white with no frills.  I embossed the base with the chevron folder and made my layered tag from the tags & labels framelits set.  Plenty of dimensionals for everyone and there you go.  I did accent it a bit with some linen thread using the 1/16″ hand held punch for the knot to show through.

No Bones About It


I am going to really enjoy this set a lot, and I mean a lot.

Have a creative day!

Moana

Sea Street Pick Me Up

Today would be one of those days where I could use about eight arms or so to get all the things done I need to.  Hence the cute little guy on the front of this card.  I haven’t always had a smile on today though.

Sea Street Pick Me Up

A very simple card though it doesn’t look too boring.  Probably because of the awesome striped designer paper.  I have hesitated using this pattern because it is so strong.  It looks perfect here though.

Sea Street Pick Me Up

A simple stamp, layered once, put up on dimensionals and centered, a little bow made from the beautiful dotted lace trim, which I stuck on with a few glue dots, and this precious little card was done!  It may be late in the day, but I still got it done.  One more thing off my list and it gave me a big smile right back.  Totally worth it!

Sea Street Pick Me Up


Have a creative day!

Moana

Sending Good Thoughts

Yesterday quite simply just ran away from me.  Sometimes there are too many things to get done, too many people to help, and one too many places to go.  So, this was for yesterday.

Sending Good Thoughts

How about a nice masculine all occasion card?  Nice combination if you ask me.  When you have a great background stamp like Hardwood, the card almost finishes itself.  The front was stamped in early espresso and sponged lightly until I liked the look.  I tried something a little different for my inside stamping.  I just used this huge stamp at an angle and stamped opposite corners.  It worked out pretty good.

Sending Good Thoughts

I had to stamp my sentiment a few times though,  I wasn’t being very patient and then it didn’t look straight.  It doesn’t have to be perfect to make me happy, but maybe not look all wonky either.  A quick trip to the banner triple punch and my front layering was done.  How easy is that?

Sending Good Thoughts


I did layer the banner element up on dimensionals and accessorized lightly with two silver mini-brads.  That is all it needed.

Have a creative day!

Moana

It’s Your Day

I think I am ready for summer to cool off.  Looks like I am thinking of a spring day here.  My daughter told me this looks like a dress.  Would be a cute one.

It's Your Day

I thought it would be fun to use a stamp in a different way than intended.  This leave bouquet is in a thanksgiving themed set. Also, I hadn’t used pink pirouette for quite some time and decided to put the two together.  At first I wanted to use the flower punches as if they were a flower at the end of each stem.  Well, looking at them they created stripes of flowers.  Not so good.  They looked much better placed randomly.

It's Your Day

I used glue dots to secure them.  I didn’t feel like it, but I did sponge them all.  It made a difference, really.  Plenty of basic rhinestones to go around and I loved the sparkle it gave.

It's Your Day

The sentiment came from the endless birthday wishes set.  I really had ignored this one, but it is so great!  I love, love, love how you can partner the typeset phrases with pretty cursive ones.  A tiny tag with a bow in the middle and it was all done.  Of course I had to echo stamp the inside to match the front though, then it was really done.

Have a creative day!

Moana

Go Wild All Occasion Card

Such a simple card for today, but it really makes me smile.  I did really try for a sentiment, some kind of cute stamped phrase, but couldn’t do it.  I just really liked it how it was.

Go Wild All Occasion Card

I guess that will leave this truly an all occasion card waiting for who knows what.  I think it leans more to the feminine side, but maybe a bit of room for masculine?  Your choice.

Go Wild All Occasion Card

The card base is made with tip top taupe layered with basic black and a front of this awesome go wild designer series paper.  I brought out the banner triple punch to give me these perfect banners.  I love not having to snip or make a square punch try to work.  I even repeated the pattern inside the card.  Not my usual, but I do like stamping on the inside.

Go Wild All Occasion Card

A touch of satin stitched ribbon around the banner trio and this card was done.  Super simple with a great look.  I think this might be my make and take for a demonstrator event I am attending this month.  Hmmmm…

Have a creative day!

Moana

Lovely as a Tree

This project was actually ready for yesterday, there just wasn’t the time to sit down and put it together.  Yesterday was all about family and it was wonderful.

Lovely as a Tree

I started with ribbon.  Not my usual, but I am trying to get used to this new striped cotton ribbon, and the only way to do that is to use it.  Hello honey was the ribbon color, so I coordinated the card front with the same color cardstock.  It was too smooth so to the big shot it went for some embossing.  Since it was a tree image, woodgrain worked great for me.

Lovely as a Tree

Before I forget, as I finished up with my sponging, I decided I couldn’t see the embossing like I wanted, so I lightly rubbed my inked sponge across the top of the embossing until it was dark enough.  Loved how that turned out.

Lovely as a Tree


For this pretty tree.  A single stamp in mossy meadow on watercolor paper, that is all.  I wanted to soften it a bit, so I spritzed it was water and allowed the image to blend some.  Sponging with  sahara sand for everyone, a touch of tearing, plenty of dimensionals, and this was done.  I don’t often make masculine cards, let alone an all occasion one.  But here you have it.

Have a creative day!

Moana

Irresistible Beautiful Bunch

Some days the creativity flows effortlessly and some days it would be easier to birth an elephant.  That would be today.  I had to walk away two different times before I called it done.

Irresistible Beautiful Bunch

The color me irresistible designer series paper is so very cool.  I love that I get to choose which colors I want to create as well as others that are already done and full of interest, especially this black paper.  Isn’t it so elegant?

Irresistible Beautiful Bunch

These flowers just about took me down, they still just might.  I was determined to use these new pearl embellishments and picked this flower stamp and coordinating punch to frame them.  Well, they turned out too light with my method of water coloring and I didn’t like the boarder from the punch, even though it was small, it made the flower just too light.  I did more painting and added black ink in too.  Just a bit, but it is there.  Tried curling the flowers more, and then just about tore them up.

Irresistible Beautiful Bunch


I just put them in place and grabbed the ribbon.  I wasn’t going to use a ribbon, but a sentiment layered on tags.  When I gave it a try, I decided it wasn’t so horrible after all.  I am sure there could have been other things to help, but I just had to call it and walk away.  Either way, I really don’t hate it anymore.

Have a creative day!

Moana

Boho Chic Gift Bag

The UPS man brought this lovely little box yesterday that had some really fun things inside.  One of which was the new striped cotton ribbon.  I held off for a bit, but went for it when they went on sale.

Boho Chic Gift Bag

I wasn’t disappointed, let me tell you.  So, I wanted to make something that really put the ribbon out front.  No stamping today, how odd.  Some embossing though, had to have something.  The boho chic embossing folder is really too cool.

Boho Chic Gift Bag

That was also a new product I wasn’t very sure about.  As you can see, the pattern is great and will be tons of fun.  I haven’t gotten the designer series paper it coordinates with, but I will soon enough.  Can’t have it all, at once that is.

Boho Chic Gift Bag


This is one whole sheet of tangelo twist and two pieces of very vanilla.  With my trusty score board by my side, I can make all kinds of fun boxes and bags.  Such a great go to tool.  Highly recommended.

Have a creative day!

Moana

Thanks A Latte

Well then, how about these precious little cups!  Last Saturday a good friend of mine came over to paper craft with me and we just got out several of my paper pumpkin kits and went to work.  Some were partials and some were unopened, sorry to say.  Busy crafter here.

Thanks A Latte

But this one is actually the current July kit.  By itself it is absolutely adorable.  I really let myself play on this one.  The instructions showcase simple stamping and there you go, totally adorable.  I had to watercolor.

7-27

After making a lovely little wisteria wonder cup and a little plant set I knew I wanted to do more.  The next cup I took the flowering stamp, it could be a plant but I made them flowers, that would have been the plant growing out of the cup.  I created a pattern on the cup with it, colored them with markers, and then went to town with my aqua painter.  The cup is a little more than an inch square.

7-27 (2)

The new flowers were punched with the floral punch from the itty bitty accents punch pack and the stems were from variegated embroidery floss.  A bit tricky to put together, but lovely at the end.

If you have ever thought about a paper pumpkin subscription, just look at how much fun you can have with them!  There was enough material to make eight cards in this kit, plus totally adorable envelopes.  And, I now have the so cute stamps that came with.

Have a creative day!

Moana

That Thing You Did

This stamp set is just the best.  The combination phrases really get me laughing.  This one in particular is my favorite.  You’re on my mind, but not in a creepy way.  How great is that.

That Thing You Did

I like how it looks all pretty and then this secondary saying just throws it off like crazy.  Almost like if you aren’t really paying attention, you will totally miss the joke.  My favorite.

That Thing You Did

A simple embossed background with the new cool boho chic folder.  I wasn’t sure at first, but that didn’t last long.  It is way cool.  Lots of options there.

That Thing You Did

This is short and sweet today because first, the card just doesn’t need a lot of explaining.  Second, I am posting ahead because I am taking my girls to a concert, that they have been waiting for since Christmas, and I wanted to focus on that.  I made this card as a thank you for my sister-in-law for letting us stay over at her place after the concert.  I also made a little matching tote with a bunch of other cards for her to use as part of the thank you.  Good stuff there!

Have a creative day!

Moana

You’ve Got This

My mind is a little more scattered than usual this morning.  That is because there are more than one exciting things going on.  Yes, and that includes me finally getting to showcase this awesome stamp set!

You've Got This

Good things are about to happen, truly.  This is a weekend made for family, friends, and fun.  How exciting, right?

You've Got This

This card though.  I kept the layering very simple and clean.  I wanted to see both of these stamps well and not have one overpower the other.  I think that worked out pretty darn well if I do say so myself.

You've Got This

I stamped the image in versamark ink and heat embossed it using clear embossing powder.  When I stamped over with the background stamp, in sahara sand, the image showed through so nicely.  I did have to rub it a bit with a paper towel to get the ink off the embossing, but not much.  And there you have it!

I repeated the stamping somewhat on the inside using the background stamp edges.  I can see so many possibilities with this set.  I think I will have to set one day aside to see just what I can do with it.

Have a creative day!

Moana