Fruit Stand Delight

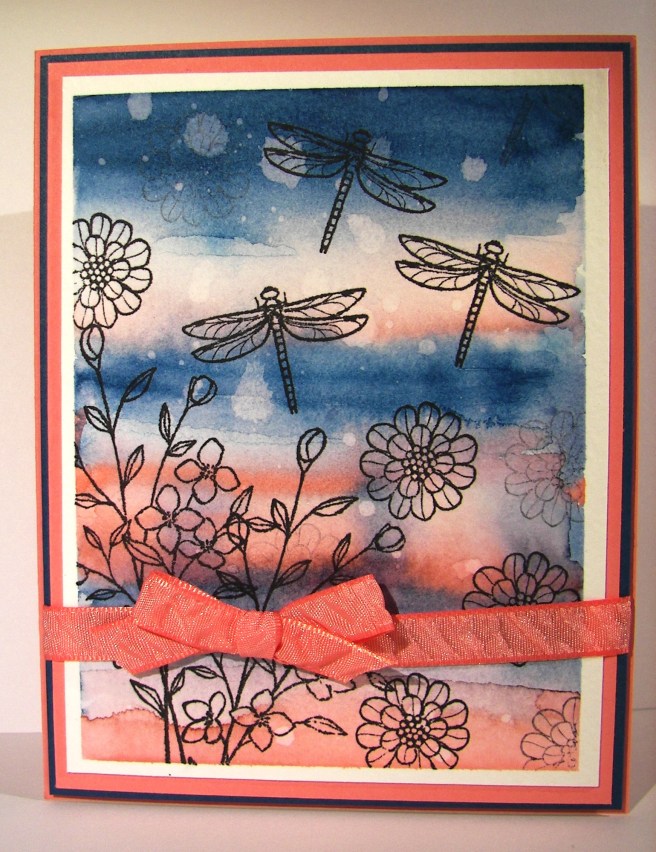
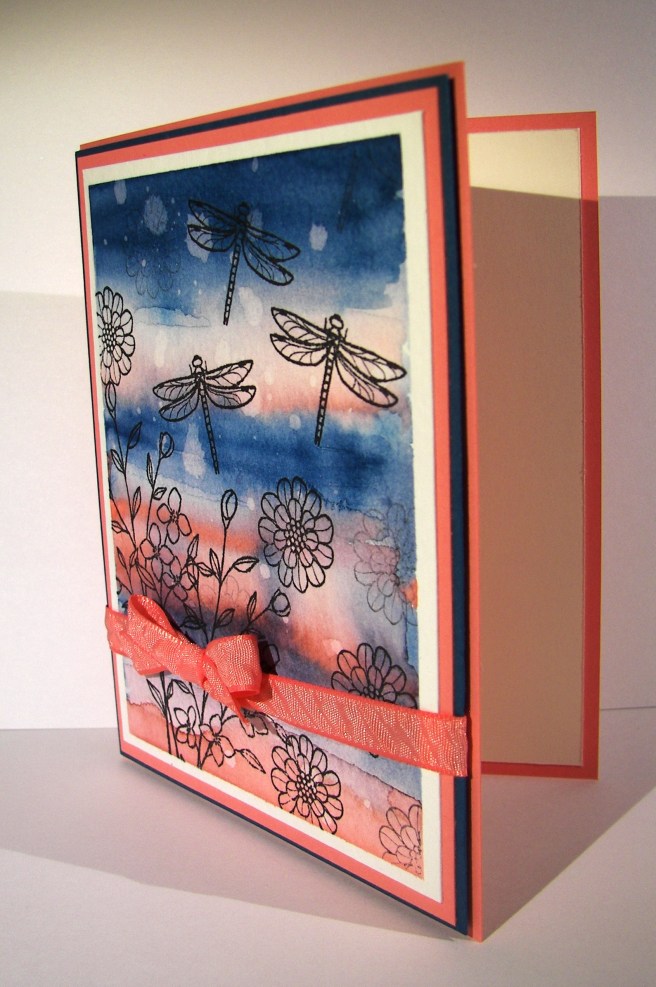
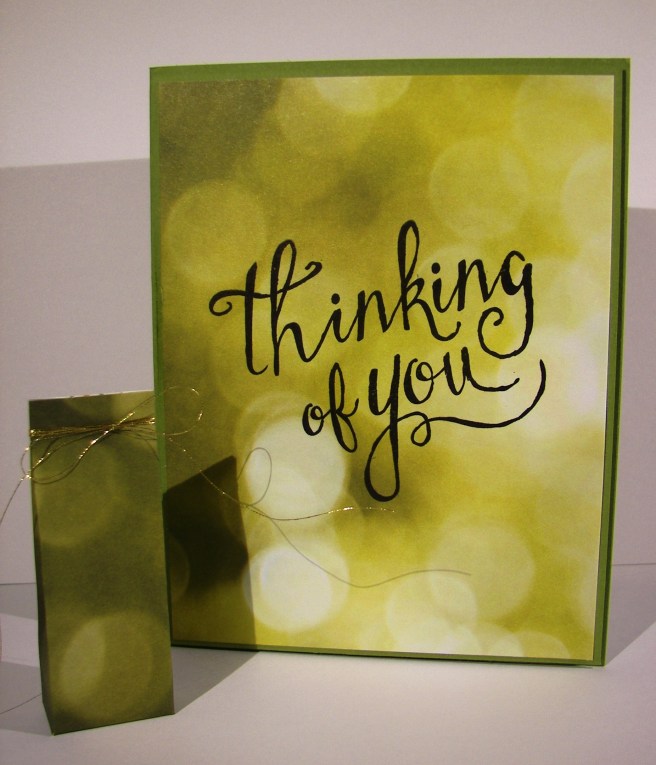
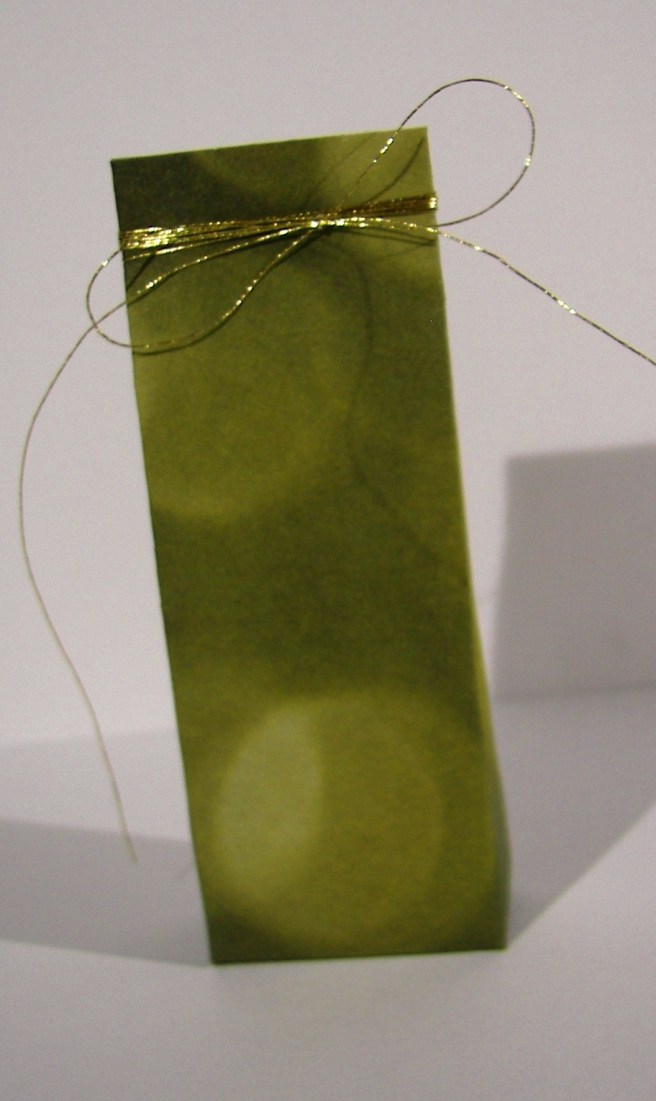
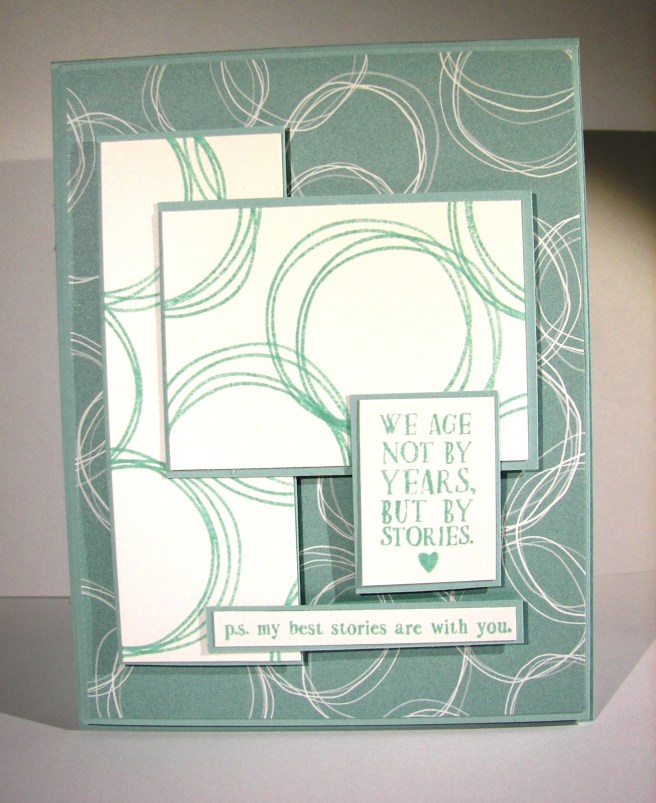
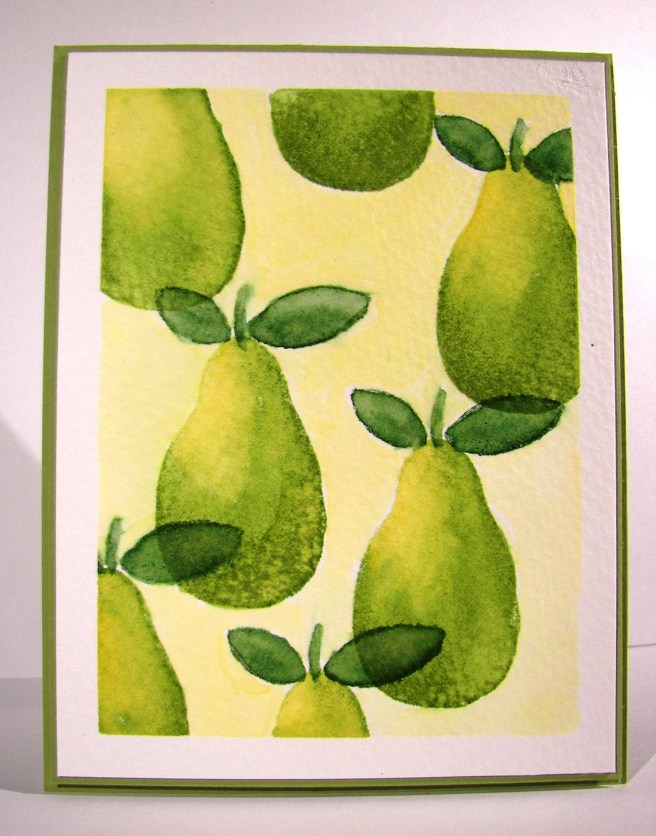
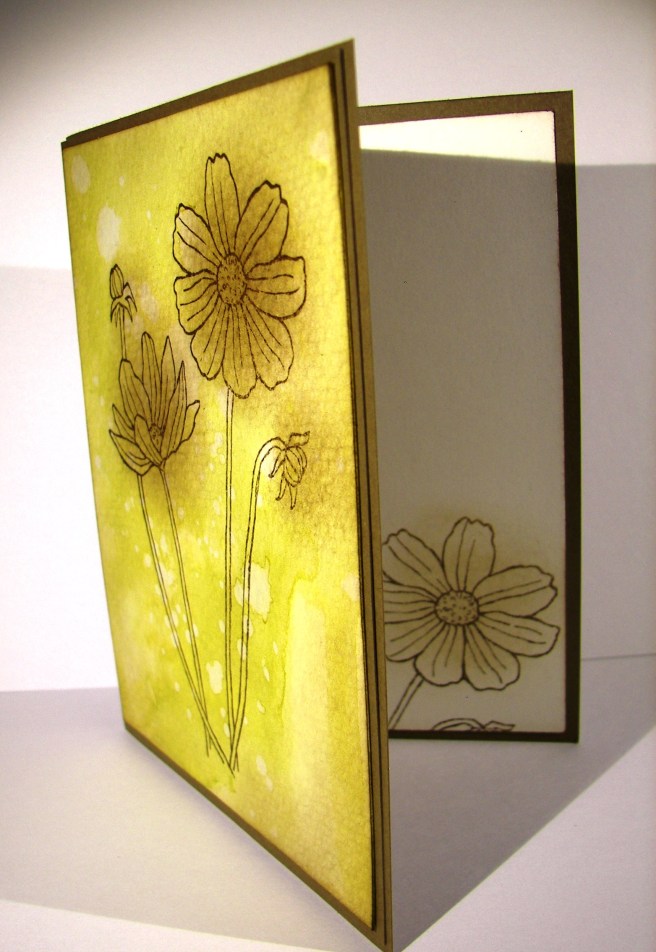
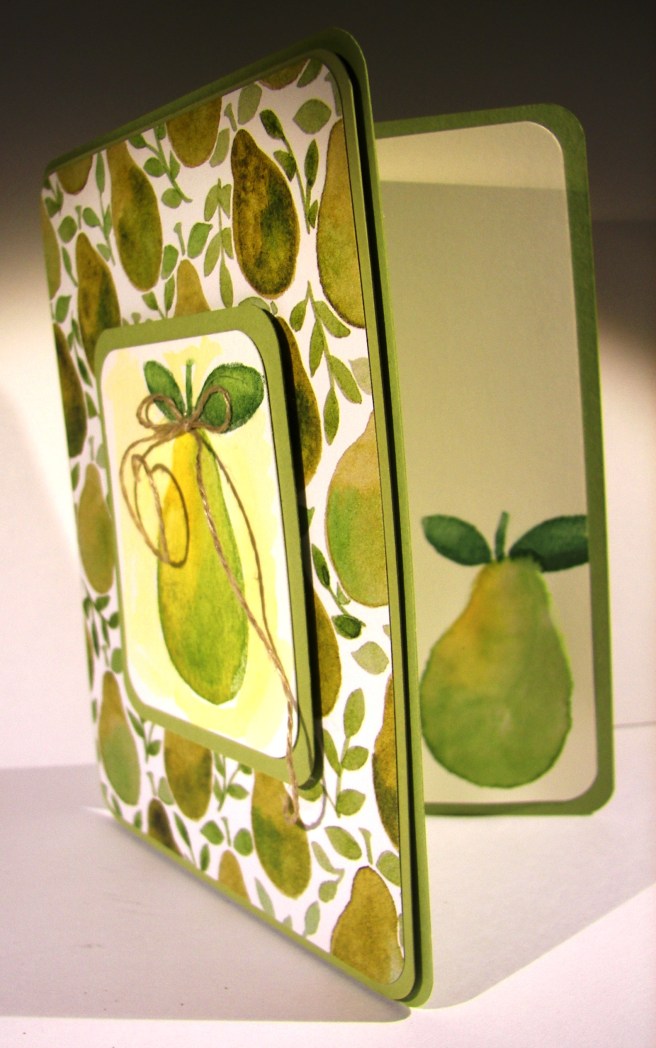
This project is a different take from a prior card I made.  The first one was a full water color card front, stamped and water colored.  This one uses the coordinating designer series paper with a single pear stamped and water colored.  I like the difference, and so did my card workshop ladies.  They are the best!

8-24

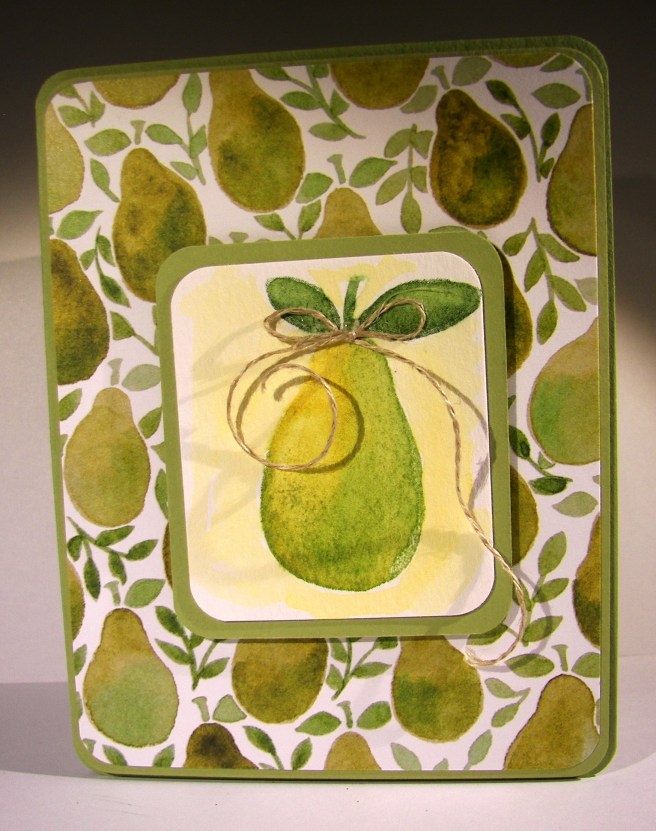
I added an extra layer, but the process was the same.  A single pear stamp in pear pizzazz, and water color the lighter areas of the image with daffodil delight and blend it together. The leafs and stem were done in garden green and blended a bit too.  The background was a light wash of daffodil delight.  Then, top the pear with a tiny bow of linen thread with a glue dot and grin at your work.  What a fun way to spend time with friends, making cards like this.

8-24 (1)

Have a creative day!

Moana

It’s Your Birthday!

Shaker cards are so much fun, and they really are quite trendy in card making.  I finally broke down and had my card ladies make one for one of our workshop projects this last weekend.  They did great!

8-23

Of course it helps when you have a great stamp set to work with.  This set has a few fun combinations that fit perfectly with this style.  Cutting out the window was made super easy with the layering squares framelits.  I don’t mind fussy cutting things out, but I would rather not.  It also kept the edges nice an clean.  Now we have a card that is neutral enough for anyone, yet fun for most ages.  Great project!

8-23 (1)

Have a creative day!

Moana

Fear Not My Friend…

When I am wanting to convey more emotion in a card, I go directly to water coloring.  The softness it creates is perfect.  And with this card, I literally poured my heart into it.

8-20

I wanted more space to work with so I created a larger card than normal.  This one measures 5″ x 6.5″.  Big, but not too big.  I also created my inside writing panel at the same time.  This card wasn’t going to just get a blank insert, or even a nicely stamped one. Besides, I love writing on water color paper, so very satisfying.

I stamped my floral image and sentiment first so I could control the strength of color where they were.  Then I brushed the papers with clean water to allow plenty of color movement. I kept the background light and tried to keep mixing to a minimum.  The colors I choose don’t always blend nicely, but that doesn’t stop me.  I dried, distressed a bit, and dried until I was happy.

I painted the flowers with strong color, allowed them to dry clean.  Then worked them over properly.  This included adding, dobbing, and adding color on the flower petals for a bit.  I centered the flowers with a strong yellow, but kept the color from the edge of the flower center.  Then I hit that area with a water spritzer and watched the flower bloom all over again.  The color moved nicely and then was dobbed some more.  Gold wink of stella was brushed into the petals and blended with water again.  The overall effect was lovely.

A special card for a very special friend.  She is far more brave than I can imagine.

8-20 (1)

Have a creative day!

Moana

Touches of Texture

Where has the time gone?  Always rushing away, but I managed to sneak a few extra minutes to play with some water coloring.  During the summer I thought nothing of spending a good hour or so creating a project.  Well…maybe that will have to be a weekend thing now that school is back in session and schedules have changed.  It still felt good, even if it was a quick one.

8-19

I masked my paper around the edges and applied a wash of clean water.  From there I just started to make stripes.  First with the blue and then the pink.  However, I applied the blue in stripes tipping the project so the ink could flow down a bit.  Then I flipped it around and applied the pink, also tipping the project, this time so the pink could flow into the blue. There was hardly any blending on my part.

The stamps were all from the same set, Touch of Texture.  That is a big set.  Definitely wants time to sit down and really play with the layering options.  I stuck with basic black with a little stamping off too.  Then I distressed with water droplets and called it.  I wasn’t sure if I wanted it to be done or not, but the clock said yes.  So there it is!

8-19 (1)

Have a creative day!

Moana

Thinking of You

What an impact some pretty paper and a lovely stamp can make.  I tried to think of other things to add to embellish this project and kept coming up empty.  So, I left it as is and was quite happy with the simplicity of it.

8-18

The designer paper stack is measured 6 x 6 and I used every bit.  The card front was measured out first which left me a wide strip.  Yup, I made a tiny gift bag to go with.  What can I put inside?  I thought of several that would work and I can’t wait to give it a try.  It was a tricky little bag to put into place.  Any piece of leftover paper seems to find its way to a gift bag or box with me, I do hate wasting!

8-18 (2)

Have a creative day!

Moana

We Age Not by Years, but by Stories

Well, I survived the first couple of days back to school.  Time to get other things back into place as well.  Seems like there isn’t enough time for the fun things.  I will just have to sneak it in when I can.  Like this little project.

8-17 (1)

I opened a new dsp stack and found a bunch of great paper.  One side is a variety of printed photo images and the other is designer paper.  I intended on using a distressed wood pattern, but looked on the other side and found this one.  It reminded me of a stamp in my new Fresh Fruit set and the project was on its way.

I created a coordinating piece of white card stock double stamping the swirly circles in pool party.  I thought that was pretty cool.  Then I stamped two sentiment parts and layered the lot of them.  A simple arrangement stuck together and then raised up all together on dimensionals.  With a little bit of stamping inside as well, of course.

8-17

Have a creative day!

Moana

You’re in My Thoughts

This is me getting more comfortable with this sassy paper stack.  I have to admit though, the colors are what make it work.  Aren’t they beautiful together?  I don’t think I would have paired them myself, but I will be now.

8-14

Sometimes a simple card works for me.  This one just has a few layers focusing on the patterns of the paper and a simple sentiment.  I left a bit of a gap at the top of the sentiment so I could wrap a bit of ribbon around it.  This ribbon, I love it.  It looked kind of funky in the catalog, but I went for it anyway to share it with my class.  Glad I did.

8-14 (1)

Have a creative day!

Moana

Fresh Fruit

The same stamp set as yesterday, but fruit as promised.  I went much lighter in tone and worked with water coloring for a softer look.  Maybe this is my guilt for not picking pears that are ready to go, but I would rather just enjoy the art of it instead.  I do have pears to pick though…

8-13

This particular stamp set recreates the look of water coloring so nicely.  I started with a base image of the pear in pear pizzazz of course.  The light area is left blank, all ready to receive another color.  I painted in some so saffron and then blended into the green.  It was really fun.  The stem and leaf stamp is one and was stamped in garden green.  I also went over that image lightly with a wet brush to blend again.

I thought about leaving the background blank, but decided it looked unfinished.  I kept with the so saffron, just diluted it a bunch more.  I didn’t worry about being too perfect around the edges, but since I was working wet on dry I didn’t have too many problems.  There you have it!  I even made a pretty pear on the inside of the card.  I think I should go pick pears, put them in a basket and give them to someone along with this card.  Maybe tonight when it cools off some.

8-13 (1)

Have a creative day!

Moana

Love You More

Smudges and all, I love this card.  Leave it to me to use a stamp set that is filled with two step fruit images to use the flowers instead.  Like I said, I love flowers.  The fruits are great though, and I do plan on making fun projects with them too.  I actually used an old kit from nearly a year ago.  I love putting old kits to use.

8-12

The prior kit had patterned paper in these colors, but has been retired, so I thought I would make my own.  Making background images is so much fun to me.  It takes me back to the roots of my stamping, using quality tools for endless creativity.  This stamp set is made for just that thing.  You will be seeing it a lot I think.

The flowers were stamped first in calypso coral and then outlined with the coordinating stamp.  They match, but don’t have to be exact.  It goes with the artsy look it is designed with.  Works even better for me.  And the sentiment, how perfect is that.  I opted to center the flowers with large basic rhinestones instead of the stamped center.  Either would have been nice, but I wanted sparkle.  A finishing touch of solid bakers twine with a sweet bow. It actually came together pretty quick, it helps to have leftover kits to work with.  That makes me fuss less when I have last minute class cancellations because I know I will put the pre-cut kits to good use eventually.

8-12 (1)

Have a creative day!

Moana

You’re So Fancy

Did I take a day off yesterday?  Well, yes I did.  My daughter and I had a serious movie fest to take care of, and it was fantastic.  My baby is almost 16 and I need to make the most of these fun times together.  Besides, who doesn’t love a Lord of the Rings Fest? (We already had started with a Hobbit Fest earlier on… tee hee!)

8-11

This simple little gift bag turned out better than I thought.  The bold stack the paper comes from is taking a while to grow on me.  So I thought I would make a bag that would show a small amount of pattern at a time.  Well, instead of being pleased how it balanced out, I decided this brick pattern is all right!  Good thing there are four pages of each pattern so I can go back and try my hand at something else.

Lots of treats will fill this little number up, or maybe even a nail polish or two.  It would be a fun thing to find in a lunch box for back to school too.  Wow, that is just next week.  Okay, here we go!

Have a creative day!

Moana

Thoughtful Branches Thankyou

This card comes from a limited time stamp and framelit bundle.  There are many options within, all kinds of trees and fun things, but this is why I bought mine.  I love hydrangeas so much.  I am so going to enjoy this set.

8-9

I put a new stamp pad to use.  Stampin’Up! has produced a few ombre pads, this one in particular is rich razzleberry.  I am usually a bit more traditional, wanting more self control over the colors I use.  But this was pretty darn fun.  I like how it turned out and I am glad I bought them.  I wanted the color to bleed some, so I spritzed the flower with water after it was die cut.  It softened the color without compromising the ombre effect.

I painted another piece of water color paper with almost artichoke and used the stem die cut.  I didn’t have to add any color afterwards, it turned out nice.  I knew I would be working in water color paper, so I made both flower parts and the card front from the same paper. That way the ink would react the same and have a uniform look.  The background was done with a light wash in crushed curry.  No distressing, just painting.

I stamped the sentiment directly to the card front and called it good.  I did layer it up on another piece of almost artichoke paper for a bit of interest and to help control curling of the card front.

8-9 (1)

Have a creative day!

Moana

L is for Love

Current product is always fun and often a bit too exciting.  How about something that isn’t brand new, but new to you?  I was given a few stamp sets from my daughter-in-love and I couldn’t have been more pleased.  We did some stamping together and she just might have gotten the bug.  How fun!

8-8

These stamp sets are over a decade old, but just adorable.  The word set is fantastic.  I don’t know how I missed these because they are just what I would have purchased.  Well, they are mine now and I didn’t even have to hunt them down on eBay or something.  Retired product can be found all around online, but isn’t always priced reasonable.  If you find something you love in a current catalog, you should just get it.  Like I need another flower stamp set.  I don’t think I will ever stop buying floral stamps.

I brushed the background with ink until I got good coverage and then blotted a bit with a paper towel.  Then I used the largest floral stamp and put them all over the front overlapping generously.  I stamped ‘love’ on another piece of paper, trimmed it and placed it over a wrap of cotton ribbon, also retired.  Just because product gets retired doesn’t mean it isn’t beautiful.  It just means I can’t sell it because of availability.  No big deal there.

8-8 (1)

Have a creative day!

Moana

Oh Happy Day

There is a certain someone getting close to having a baby girl and this just about sums it up. It is truly a happy day and I can’t wait.  And with the heat we have been having I am sure she is more than excited.

8-6

The very fun and exciting playful palette designer series paper stack almost overwhelmed me. The colors and patterns are so busy, almost too busy for me.  I started out with the most subtle one in the stack.  I can’t imagine some of these patterns in a 12 x 12, good thing this is contained to a 6 x 6 stack.  There will be a lot of fun card and gift bag sets I think. Smaller than my regular by far, which makes it much more manageable.

I punched several balloons from plain card stock, but wanted a different look too.  With my aqua painter I covered a section of water color paper with wide light swipes of coordinating ink.  I did sponge all of them as well. The stamp set, Thoughtful Banners, has tons of sayings that fit inside the banner stamp.  There is a coordinating punch for the banners, so that makes me very happy.  I did my stamping, but trimmed it right to the stamp so I could punch another one from card stock and have a tiny border all the way around.

8-6 (2)

The solid bakers twine really makes me happy.  I had longer strings attached to each balloon and trimmed them after they were squished into place with glue dots.  With the extra hanging off the card I tied one simple knot and used it as the embellishment for the gift card sized gift bag.  I do hate wasting product.  It turned out great!

Have a creative day!

Moana

I’m Here For You

Don’t you just love these two?  I am not one to fall for whimsy stamps, especially cutsie animal ones.  But these guys got me.  The whole set is that way and I have used it so much. It is only a host set, so you can’t just buy it, but need to host a workshop to get to it. Totally worth it though.  Who doesn’t love a fun creative workshop though, right?

8-5 (2)

I was actually able to put to use an old workshop kit for this project.  It was a sympathy card with a totally different look, but it worked great for this one too.  I sometimes put leftover workshop kits back into my supplies, but sometimes I just keep those kits separate.  They have come in handy more than once, so I keep a small stash on hand.

Simple stamping and light sponging across the embossed folders was really all there was here.  I did run the linen thread across a bone folder to help get the kinks out and give the ends a curl as well.  I didn’t paint or sponge these two, amazing for me really, but I managed.

8-5 (1)

Have a creative day!

Moana

Building With Peekaboo Peach

The last days of summer are waning and I love spending a lazy morning with my youngest. We have had more laughs than tasks done, but I wouldn’t have it any other way.

8-4 (2)

I very much enjoyed giving myself a bit of a challenge with this one.  Working with one color can seem limiting, but can turn out more lovely than you might think.  The tone on tone stamping certainly made a difference and I think it is my favorite part of this card.

The floral die cuts did get put through some distressing with a large tipped stylus and a foam mat.  It helped lift them off the card front without obvious creases.  A simple yet effective technique.  I work the back side of the flower first then turn it over and hit the center.  It curls wonderfully, give it a try.

I hid my adhesive under the flowers and ribbon since it is not an attractive part of using velum card stock.  The inside of the card also got a bit of stamping to tie it together, but that was about it.

8-4 (1)

Have a creative day!

Moana

Enjoy…

Yummy, yummy and yummy.  That is what this card is.  It could be the paper, the delicate tag or the precious bit of copper metallic thread.  More likely, the combination of the three. Some simple cards are way more than simple.  I am going to have to get more of this paper for sure.

8-3 (2)

I looked through my stamp stash for a tiny phrase or saying that would be noticed but not distract.  One tiny word from the Endless Birthday Wishes set was just right.  It also helped to make the card truly an all occasion theme.  This project is likely to be reproduced a few times over.  Such a great layout and color scheme.

8-3 (1)

Have a creative day!

Moana

Happiest of Birthdays to You

Who doesn’t need a simple, yet lovely, birthday card?  It is always useful to have one on hand for those last minute gifts, or even the birthday you forgot.  I keep a few cards on hand at all times, you just never know.  I recently got to share creating a simple card with my daughter-in-love and it was the best.  This is yet another one of the cards I made to rebuild the stash I gave her.  She loves using them, and now making them.  Woo hooo!

8-2 (2)

The paper is lovely, the sentiment sweet, layered tags are one of my favorite, but this ribbon.  It is so beautiful.  It has texture yet shines, is thick but ties beautiful bows and knots, and the colors are the best.  I normally don’t go through my ribbons too quickly, I try to make them last.  But these won’t with me, I see having to replace them sooner than later.

Having great tools and beautiful paper really makes quick work of a card like this.  One layer of designer series paper layered on a piece of crumb cake card stock, a ribbon tied in a bow around it, and then raised up on dimensionals on the coordinating card base.  The tag was stamped and die cut super quick and layered up again.  The inside has a clean piece of very vanilla and that makes it complete.

8-2 (1)

Have a creative day!

Moana

Happy Birthday

When you have beautiful paper you really don’t need to worry about much else.  This particular specialty designer series paper is exceptionally beautiful.  Truly beautiful.

8-1 (2)

What does that mean for this card?  You don’t really need much else.  I kept the copper theme going along and embossed the outline and happy birthday sentiment.  Then, the coordinating die cut from the rose garden thinlits set made it very easy.  A few loops of copper metallic thread off to the side and this project was done.  So elegant with all of the foil and copper.  It will be enjoyed I am sure.

8-1 (1)

Have a creative day!

Moana

Delightful Garden in Bloom

This project is a companion to yesterdays post.  Both card fronts were made with the same combination of distress inks, just in different sequences.  This one was actually done first which is why the colors are more distinct.  I certainly am enjoying this kind of painting.

7-31 (2)

As I placed the water color paper into the smeared and spritzed inks I made sure to allow white spaces to remain.  I had to make myself stop adding color before some of that effect was lost.  I can’t wait to try it some more.

When I finished drying the piece it felt like something more was needed to tie it together. I found a great stamp from the Garden in Bloom set and did some random stamping. The ink was too dark full strength, so these flowers were stamped off once before being applied. Then a fun ribbon for a bit of interest to finish the front.  A little echo stamping was applied to the inside and the card was done.

7-31 (1)

Have a creative day!

Moana

Simple Distressing

I love it when a card looks more complicated to make than it really was.  This is a great example of that process.  This is probably as close to clean and simple as I get while staying comfortable with the end product.

7-30 (2)

I began with a piece of water color paper.  Normally I mask it to a board and apply ink to the surface.  This time I took some distress inks, rubbed them onto a craft surface, spritzed them with water and began to lay the paper into the ink.  I moved it around until I was happy with the coverage and dried it completely.  I sprinkled water with a wet brush to give the light spots.

One large stamp is all I wanted.  I sponged all around the edges to darken it a bit then decided to sponge the flowers themselves.  A simple task, but a lovely look. I left it at that, no other embellishments and I was good with it.  I did repeat it on the inside and loved it.

7-30 (1)

Have a creative day!

Moana