Sweet Happy Birthday

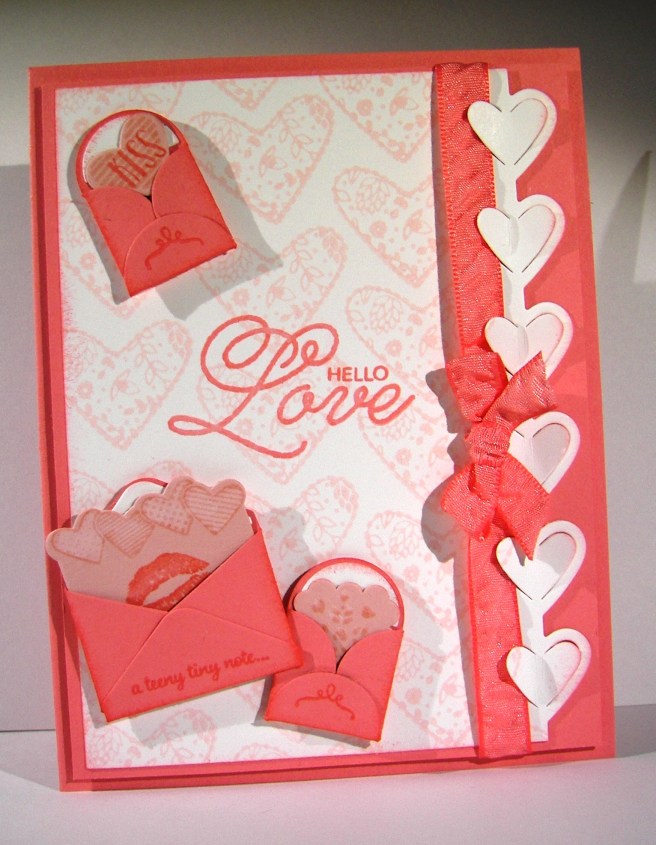
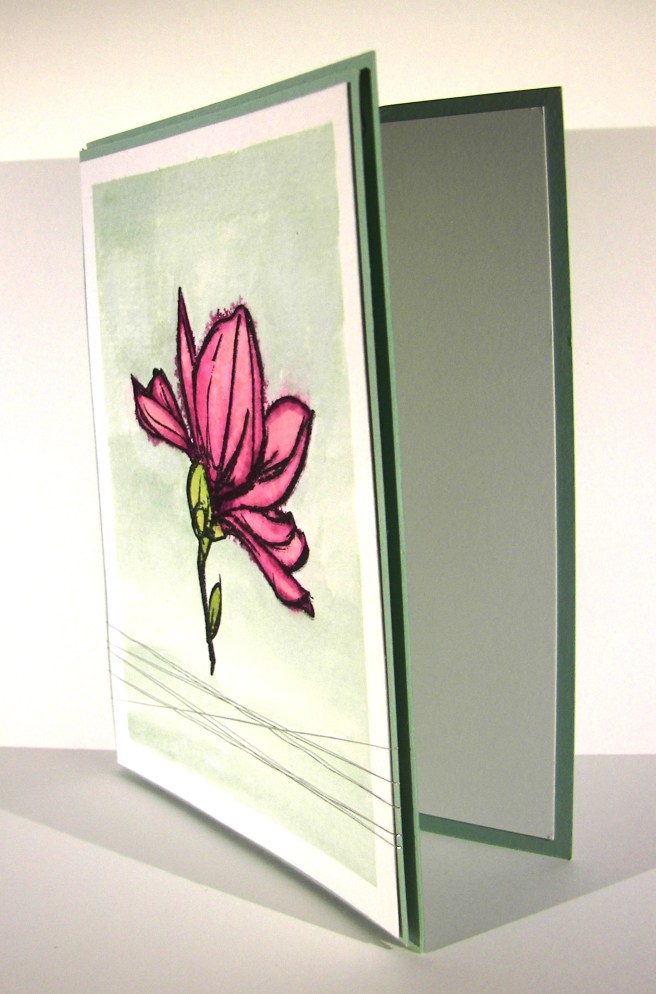
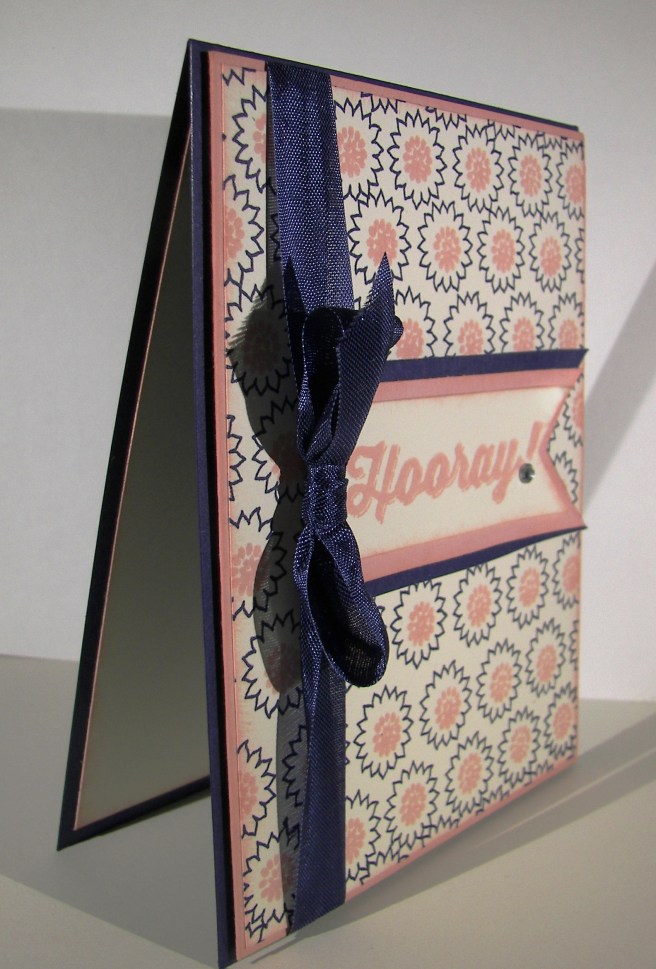
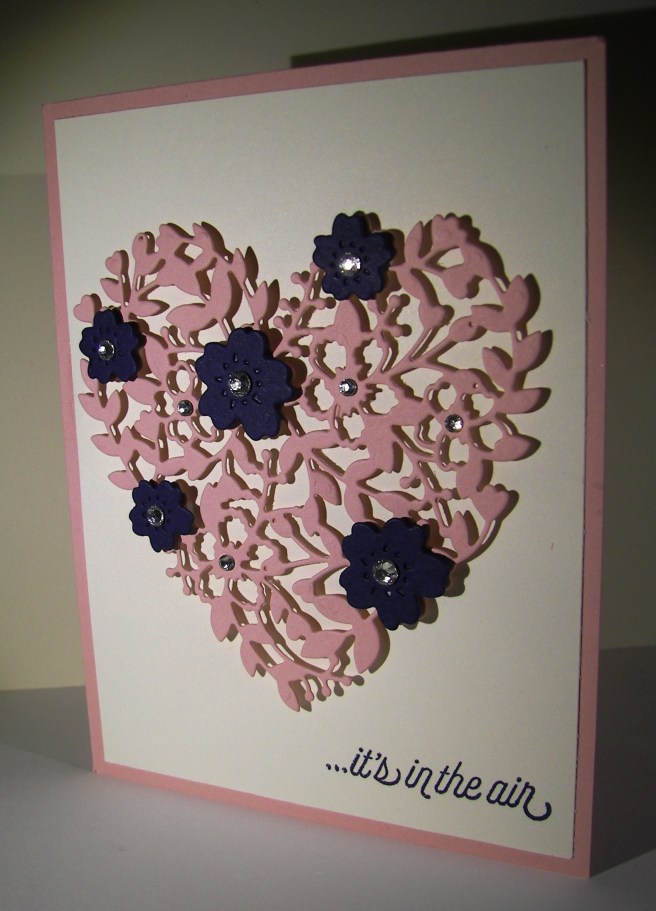
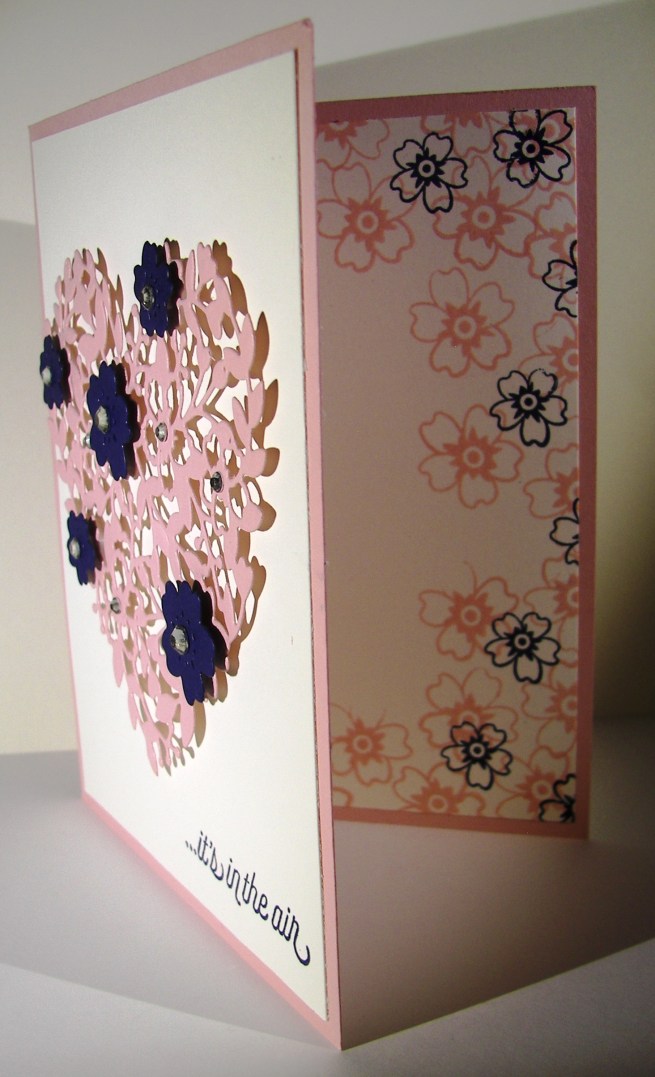
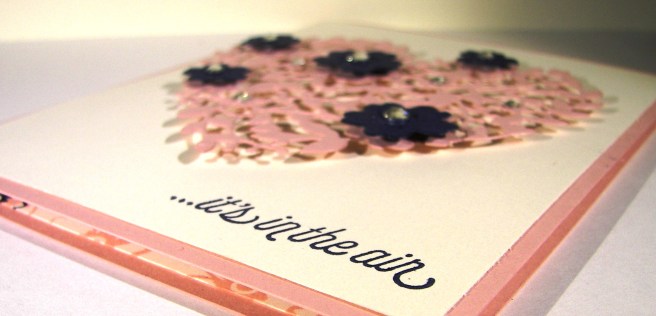
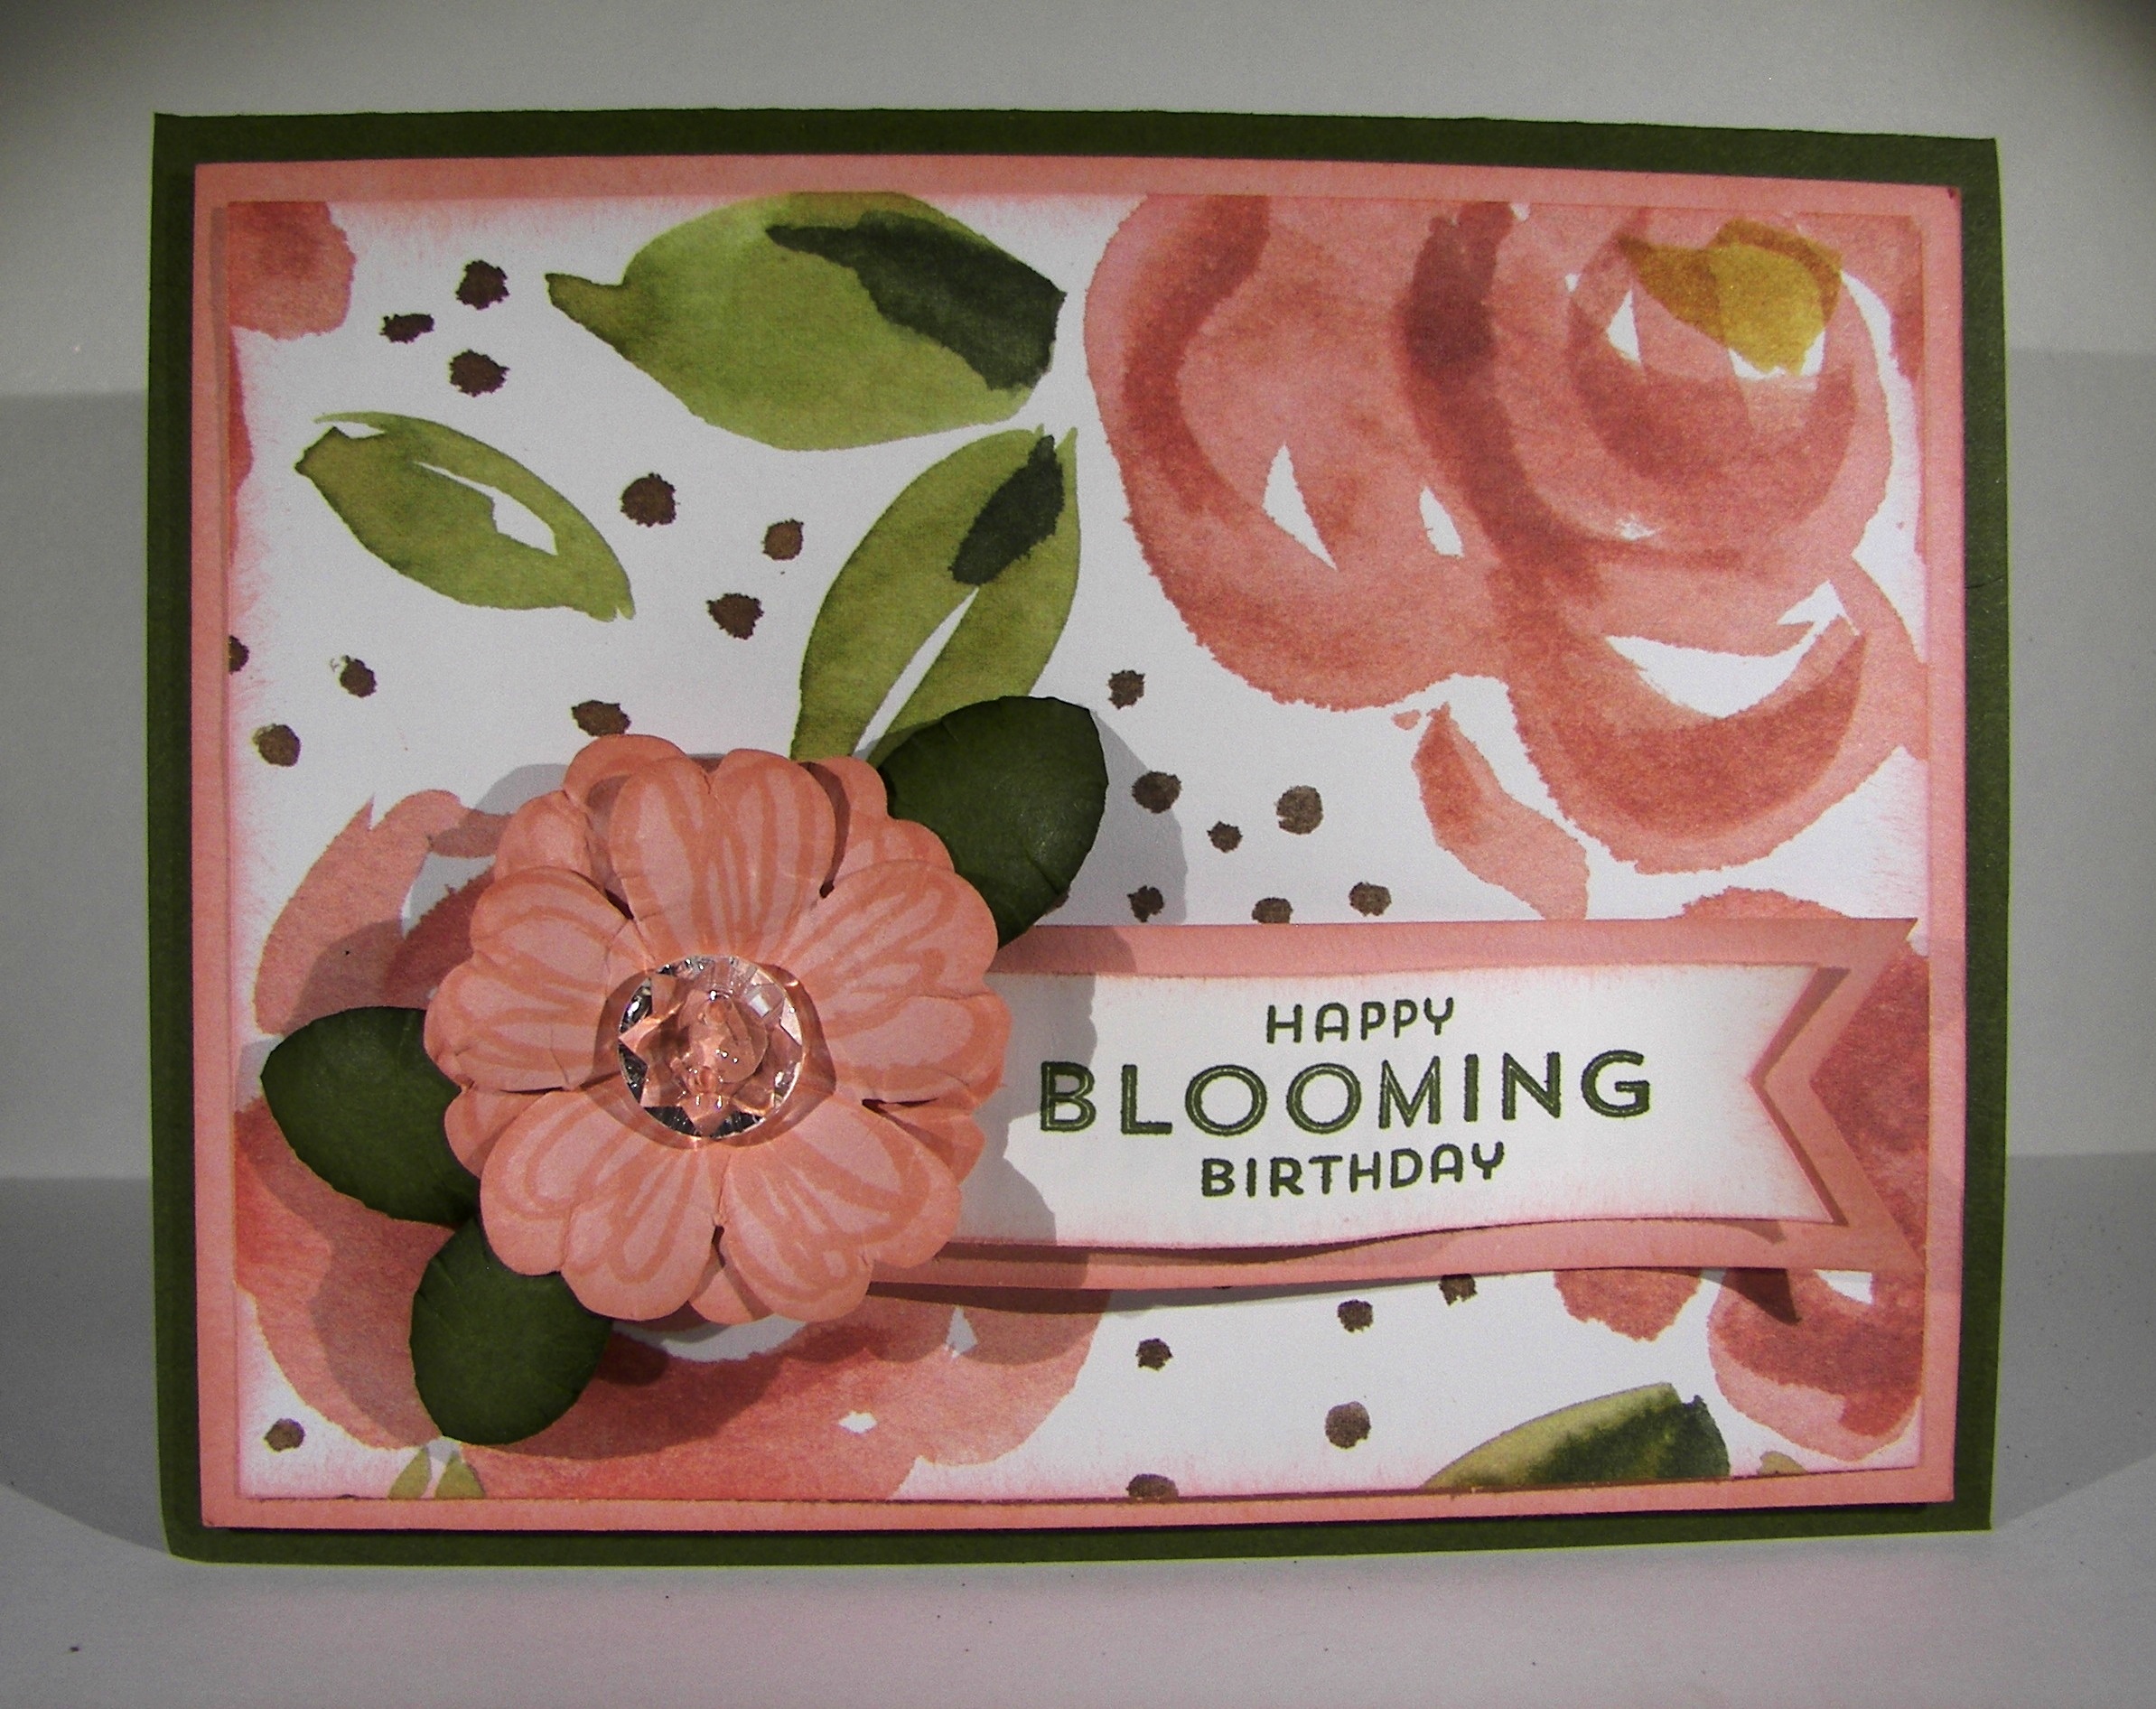
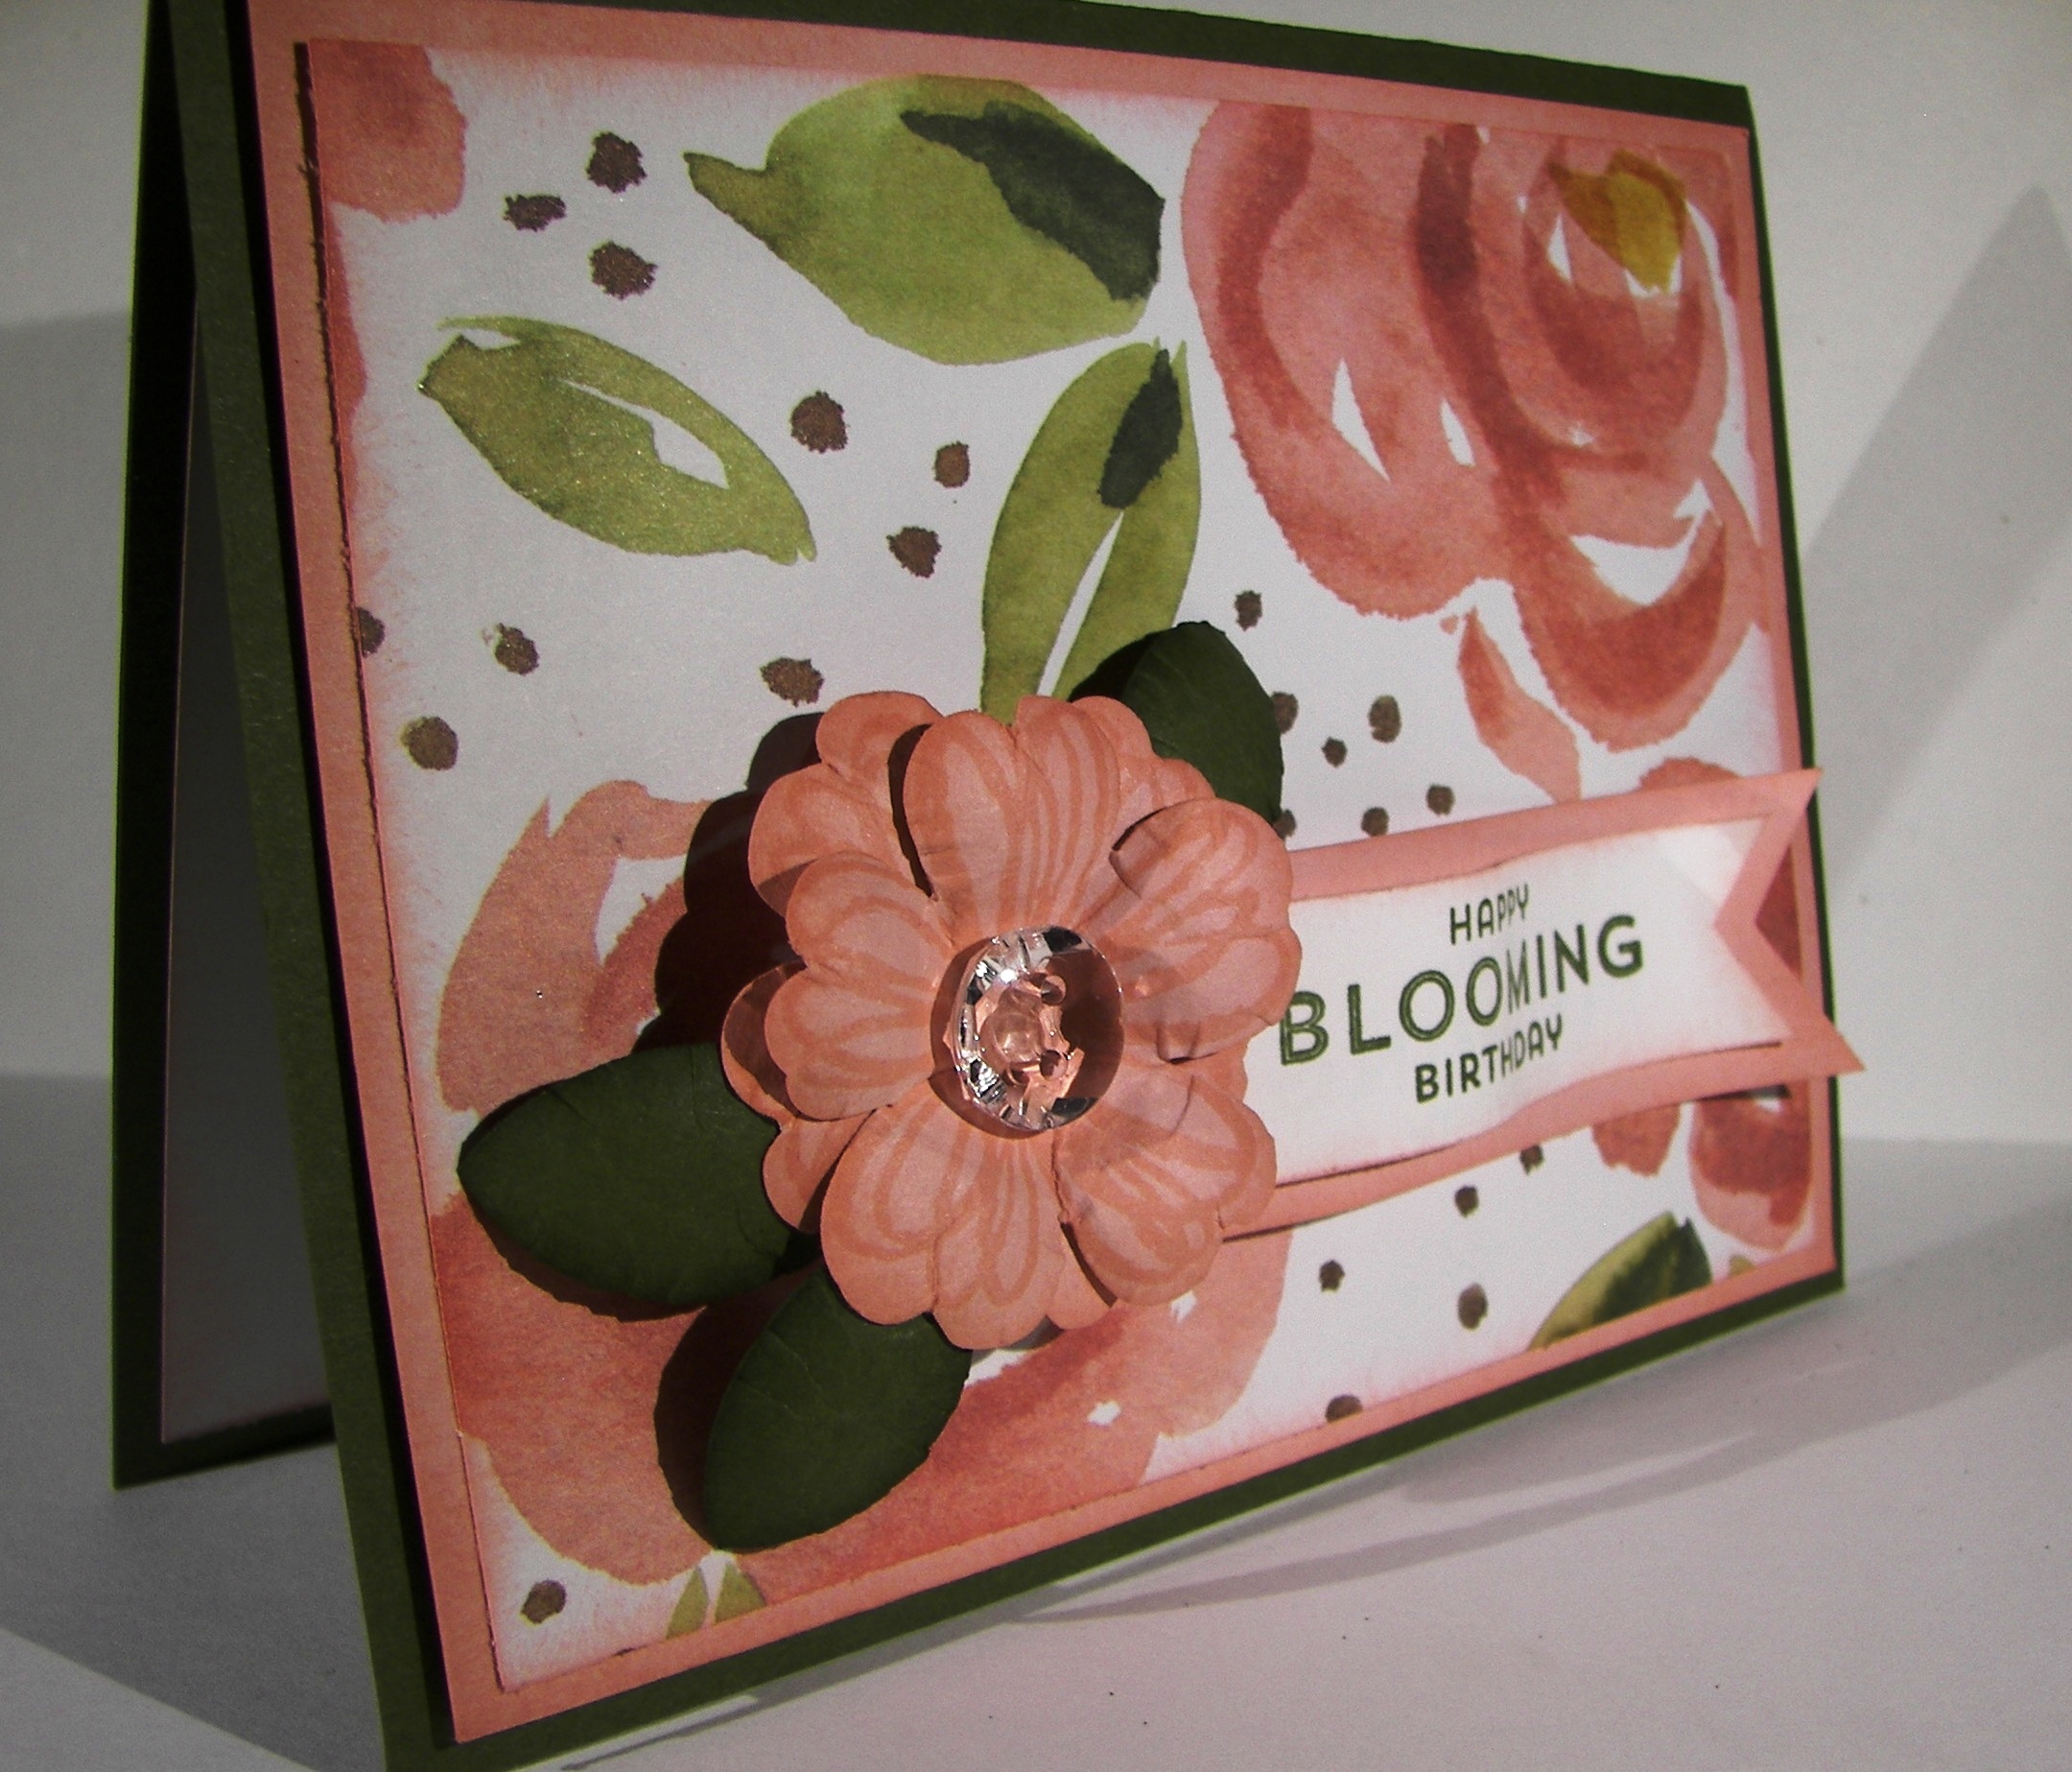
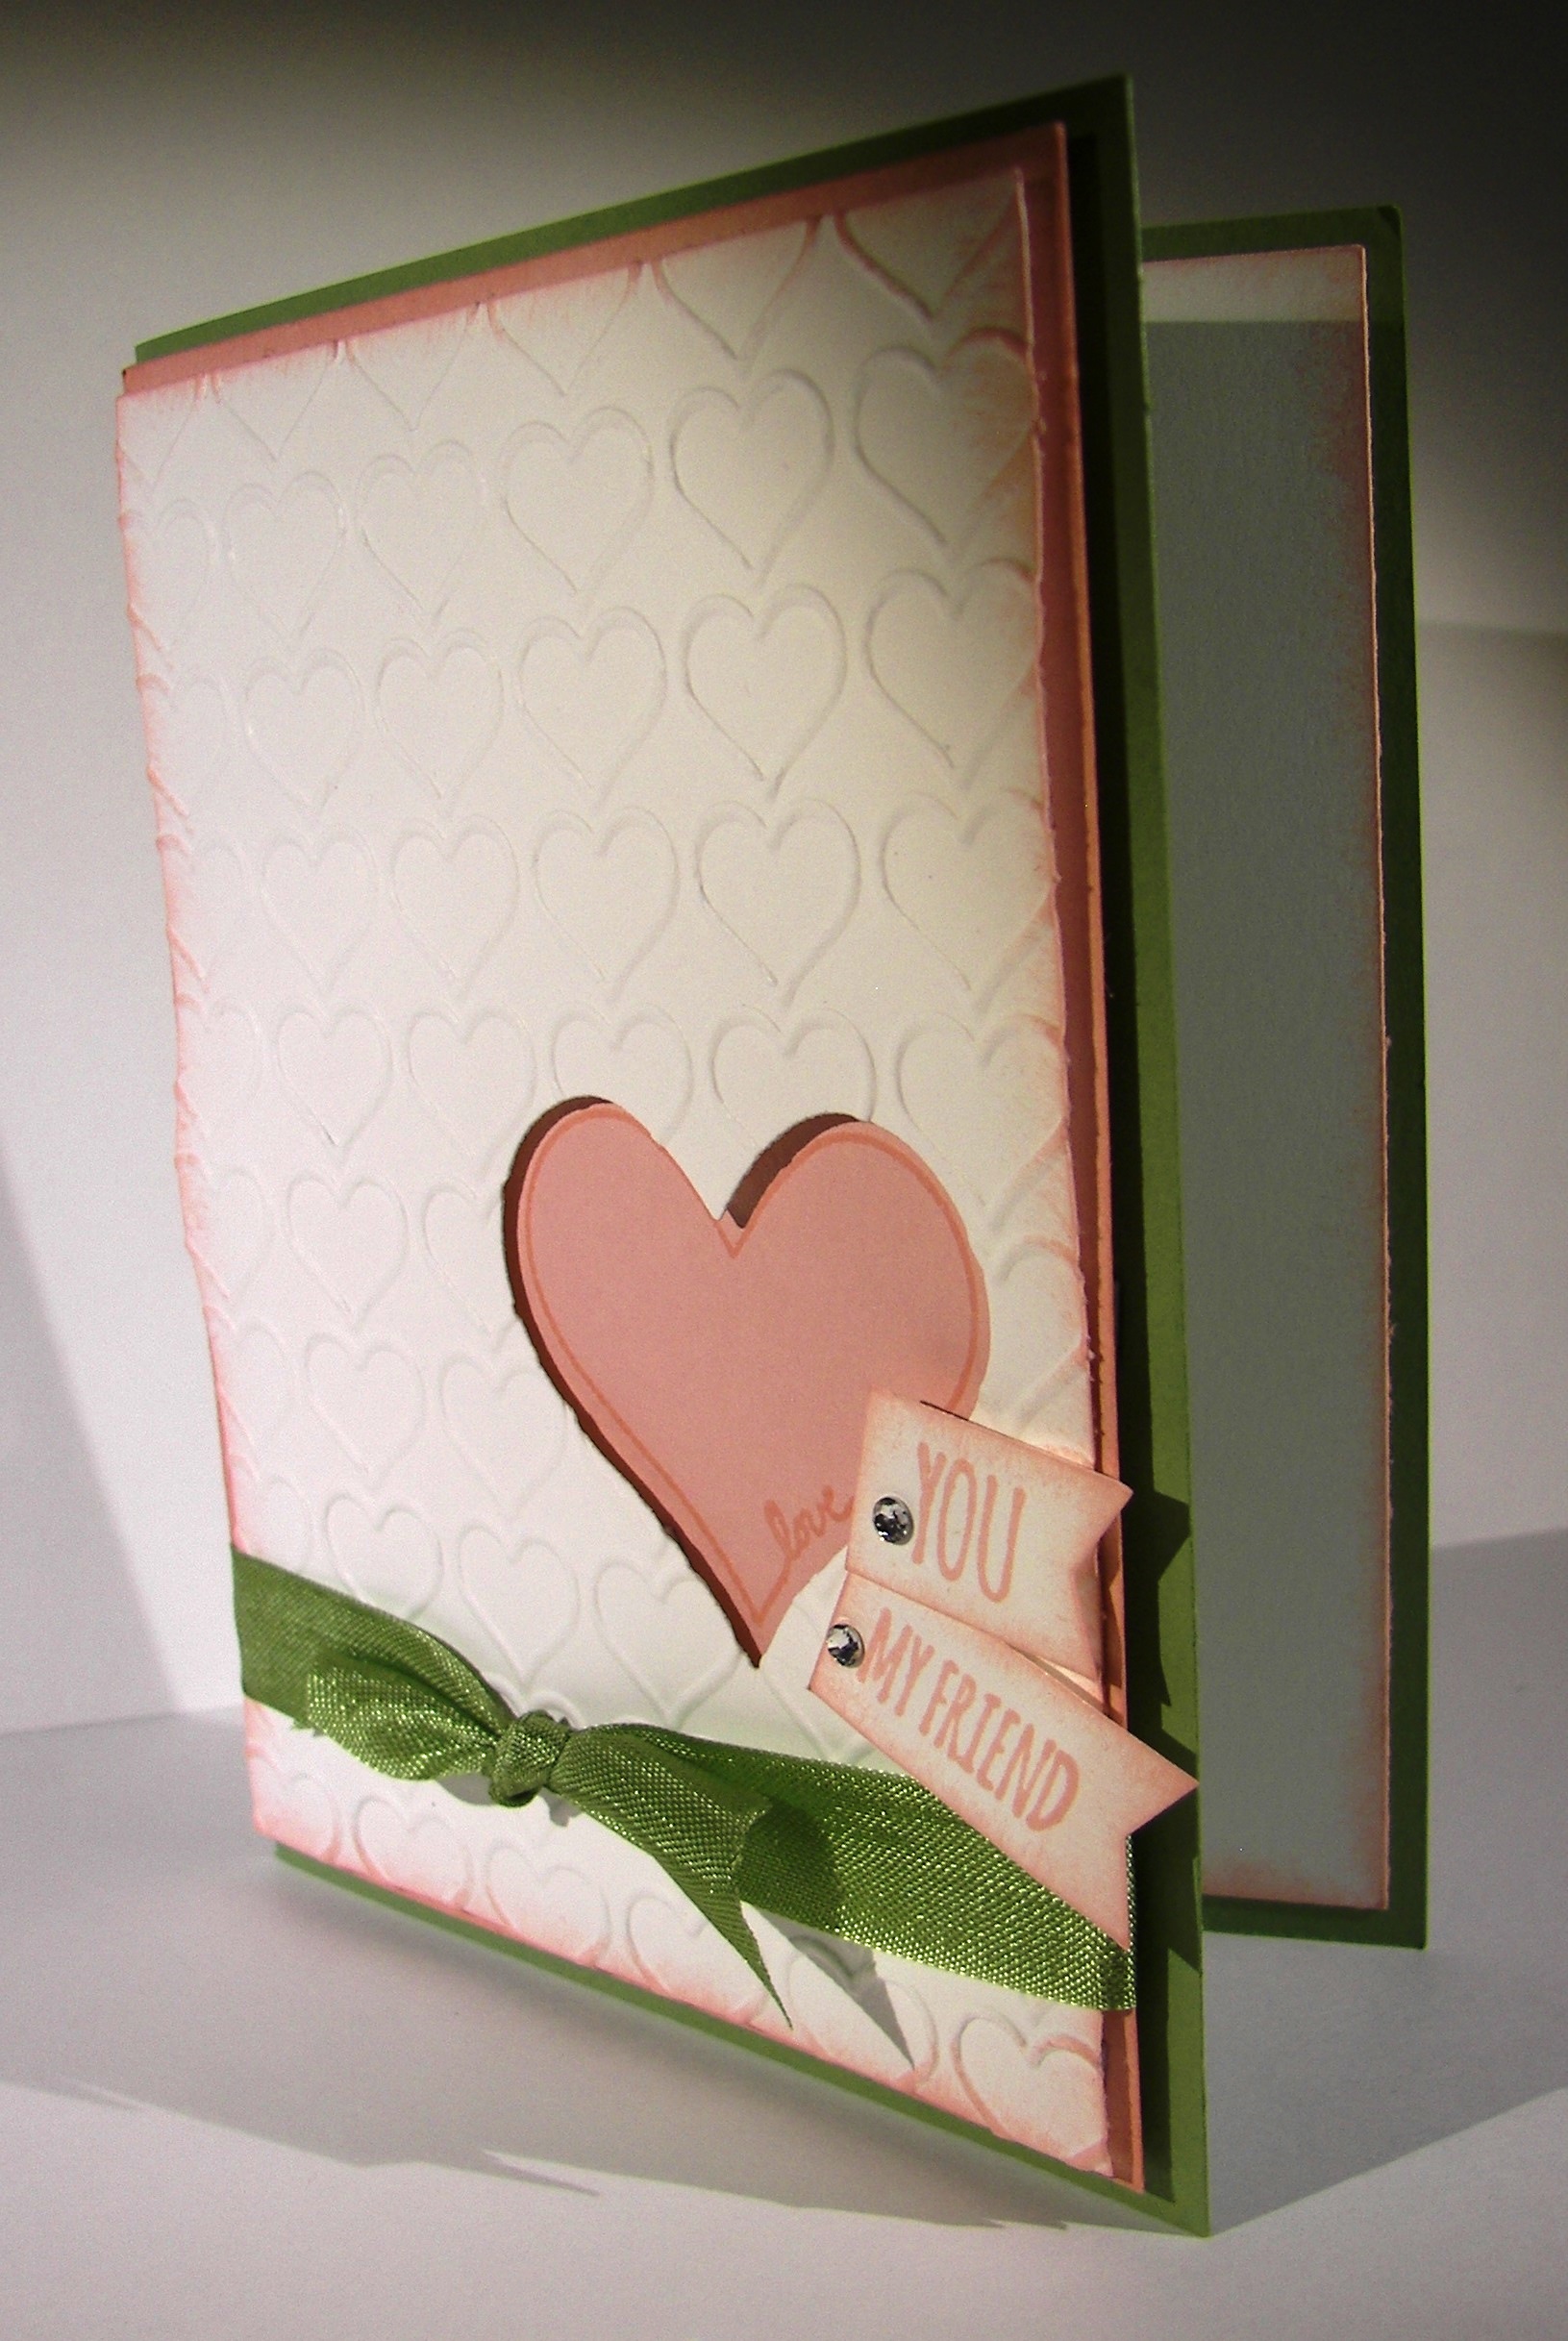
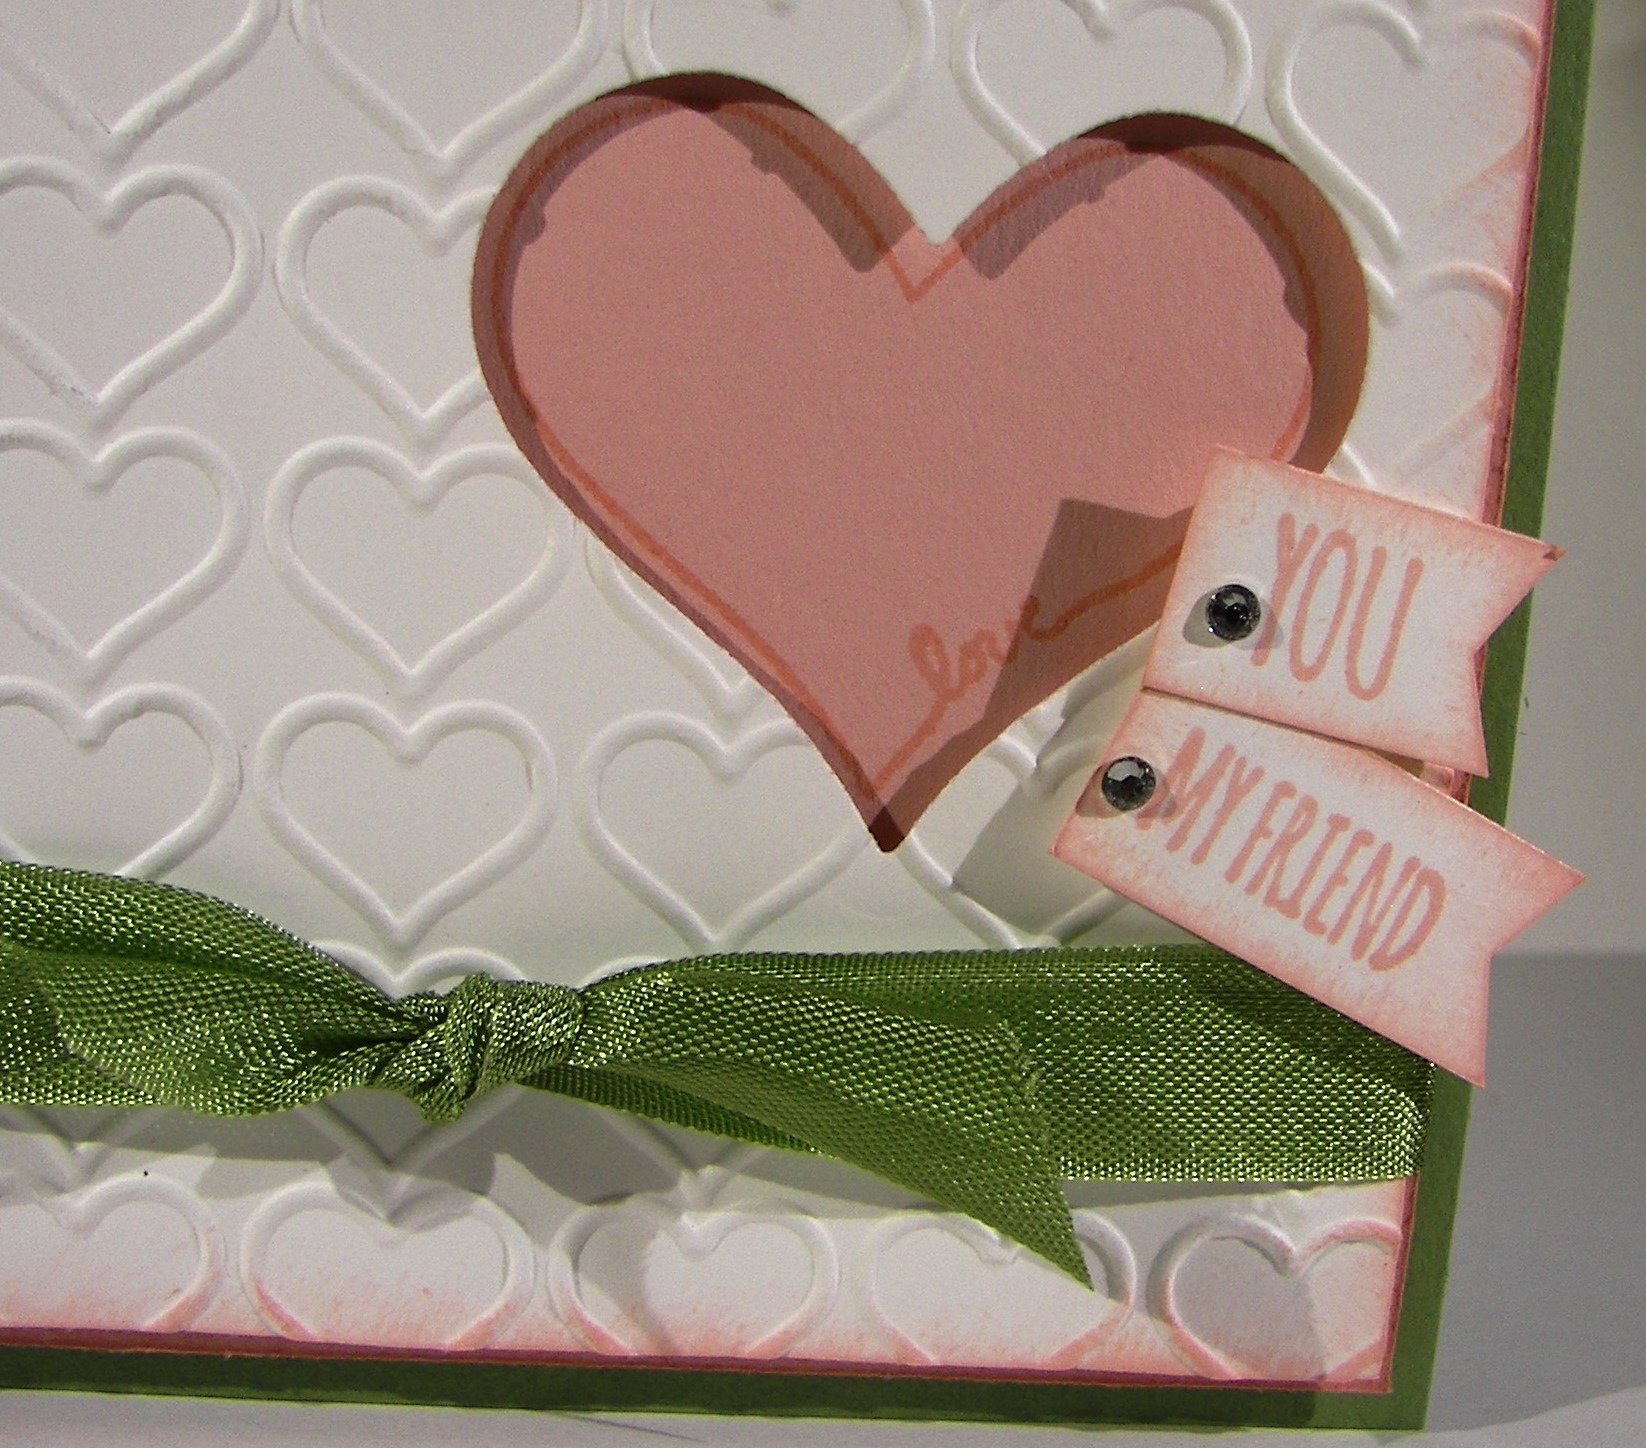
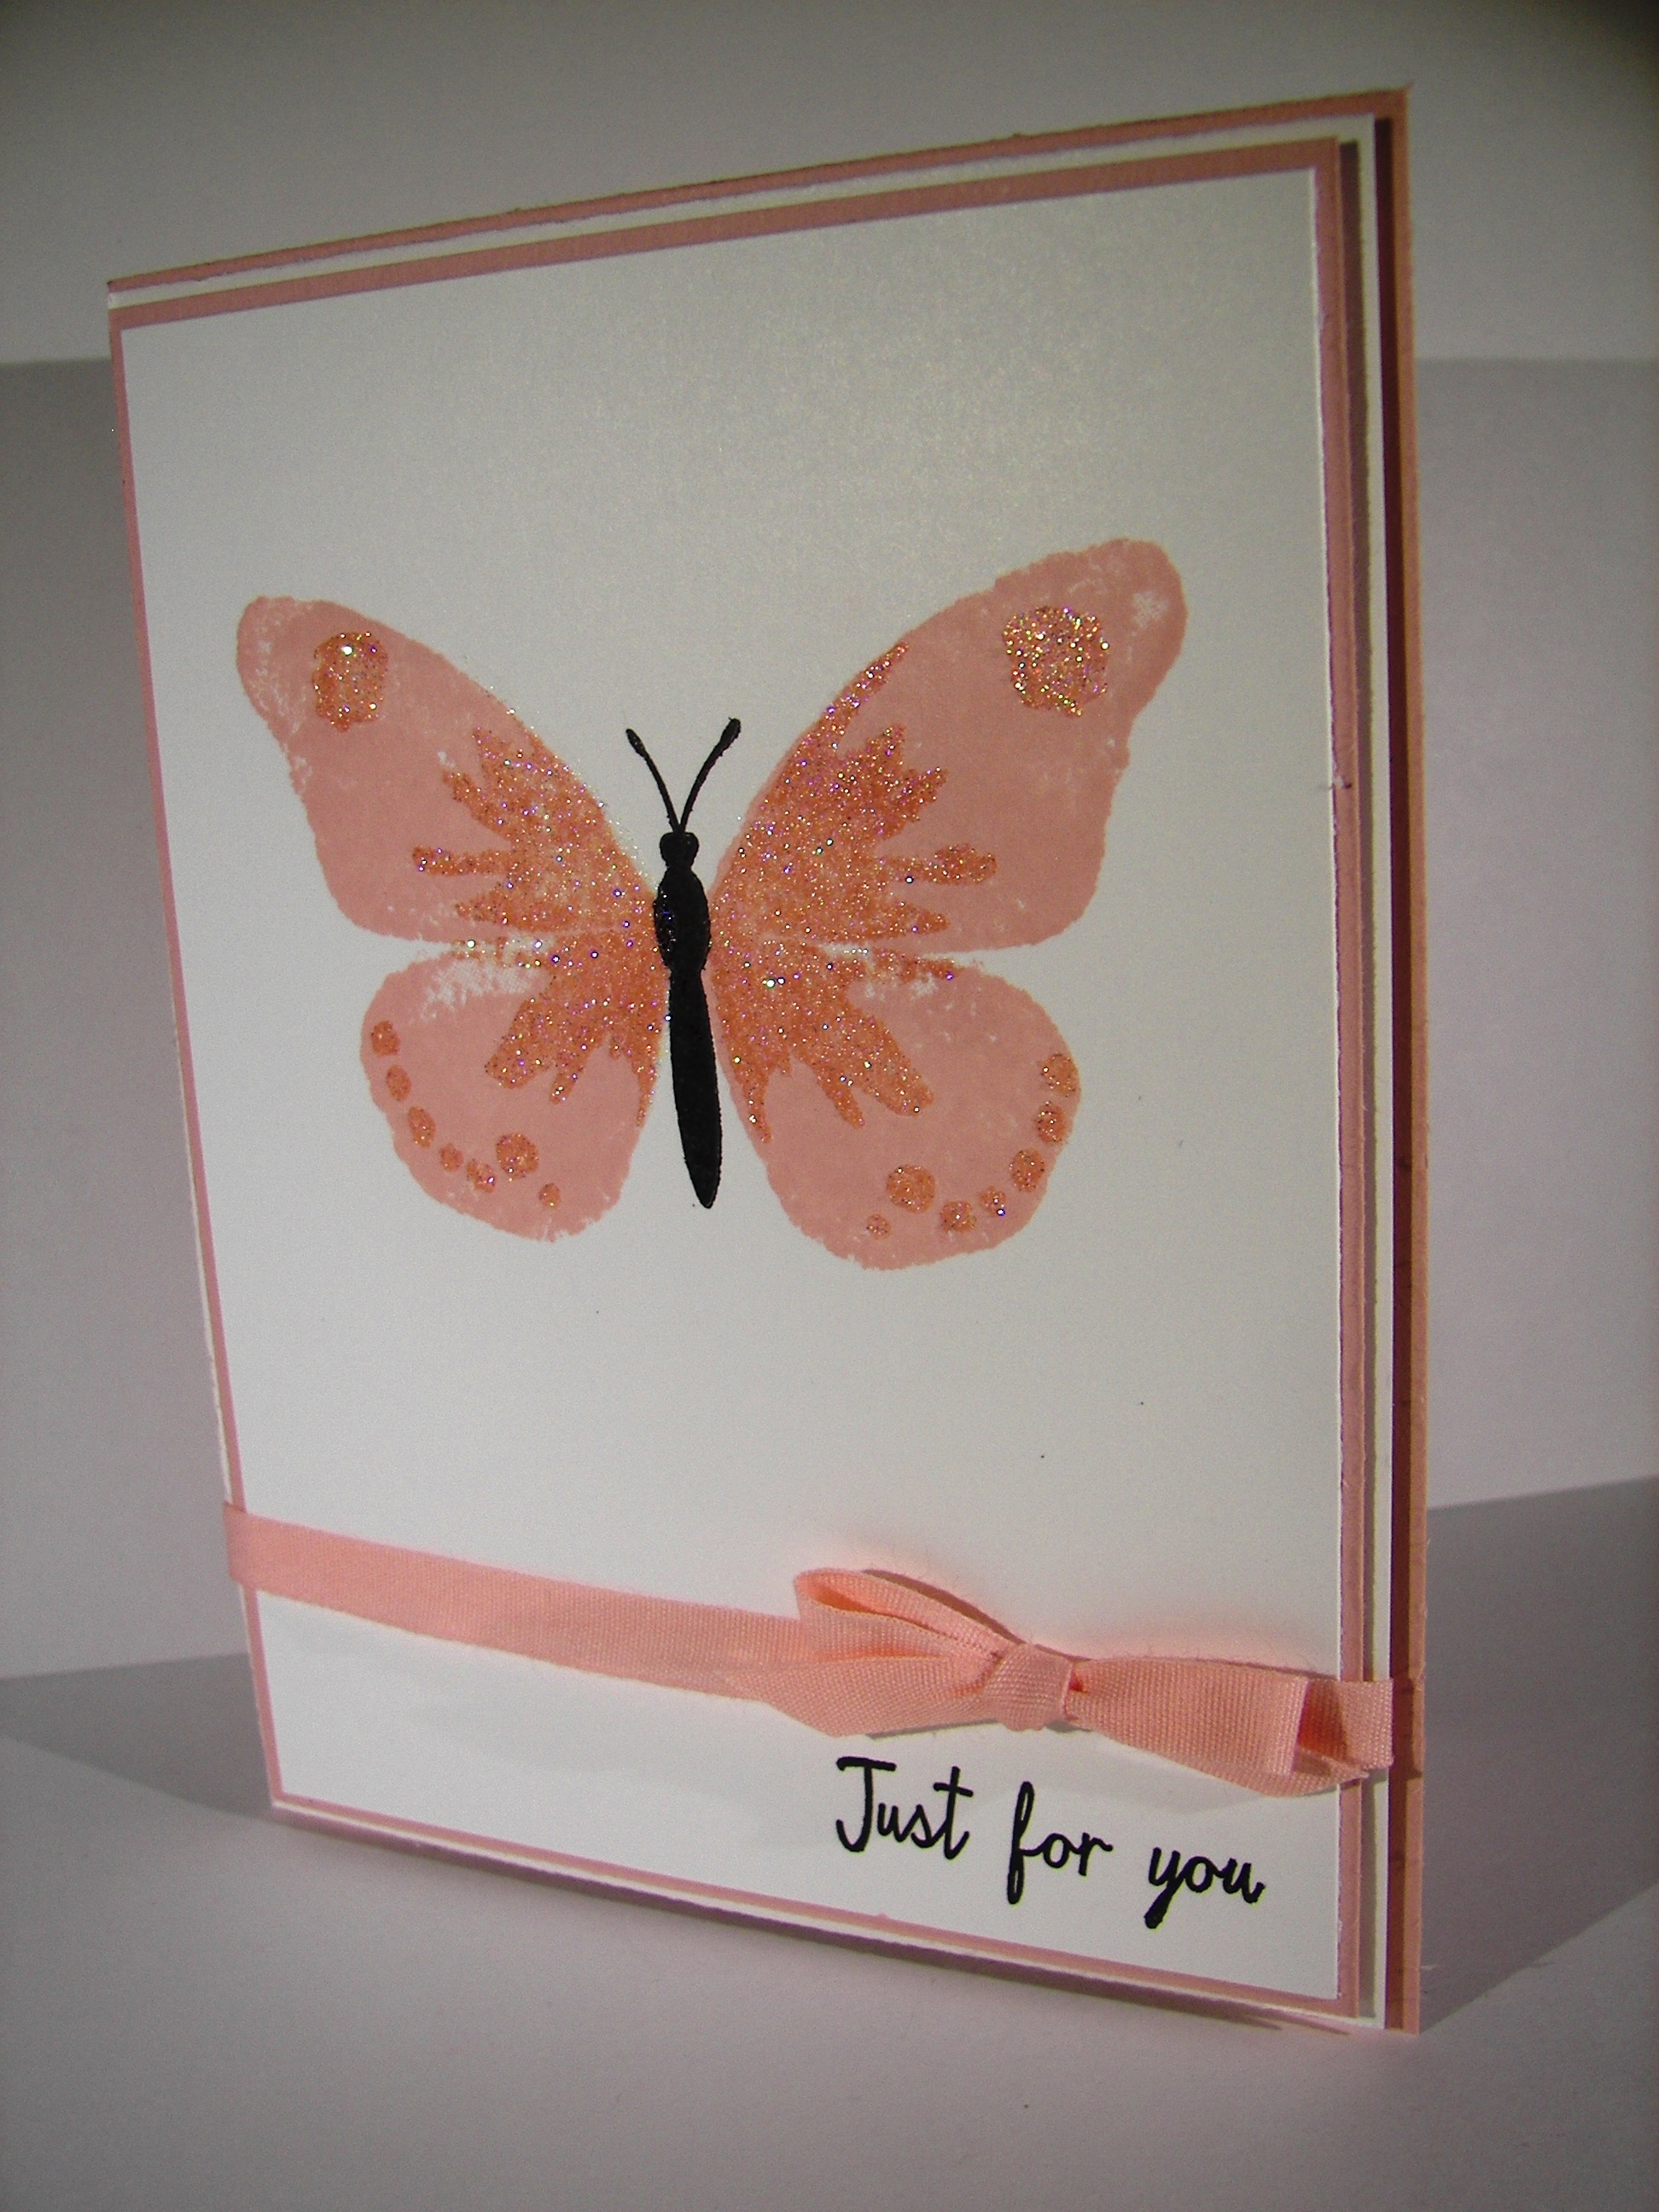
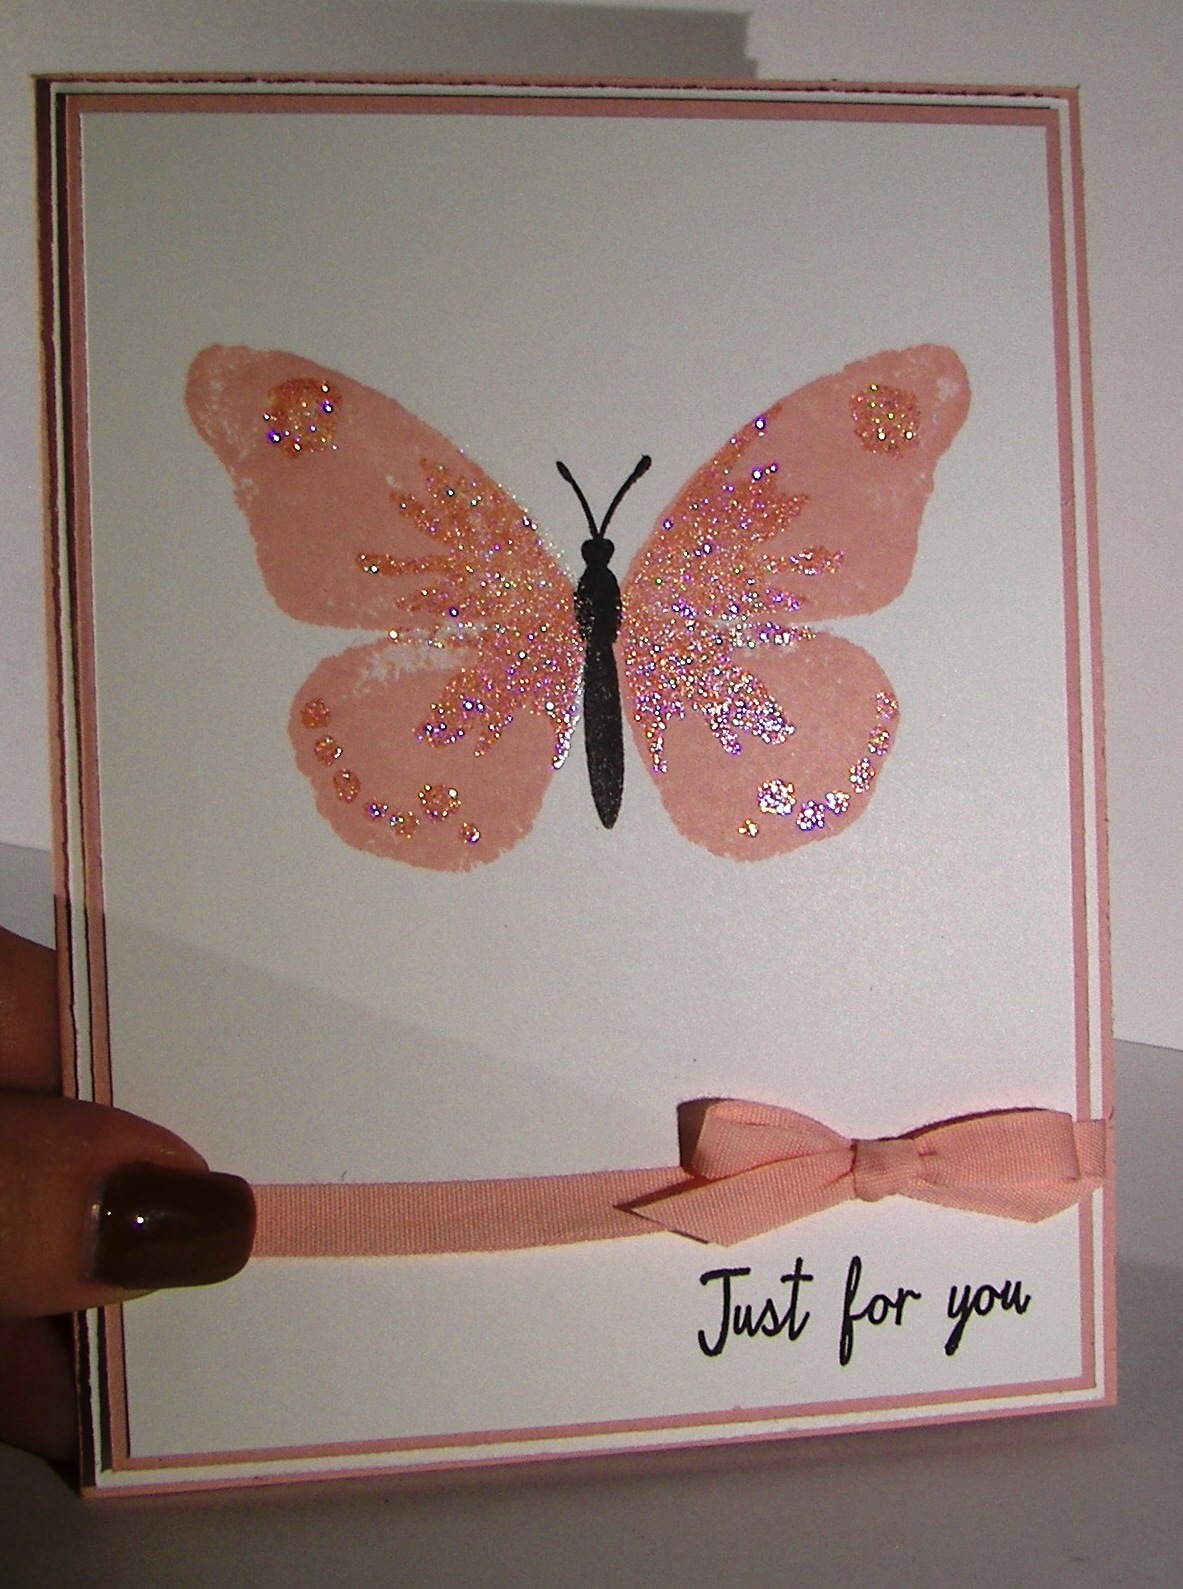
This recycled kit was originally a valentines card with all kinds of little die cuts and stamping.  Real big difference and I am totally in love with it.  It is so sweet, and I came across a stamping technique that it going to be used again and again.  It isn’t new I am sure, but new to me, so it counts.

4-2

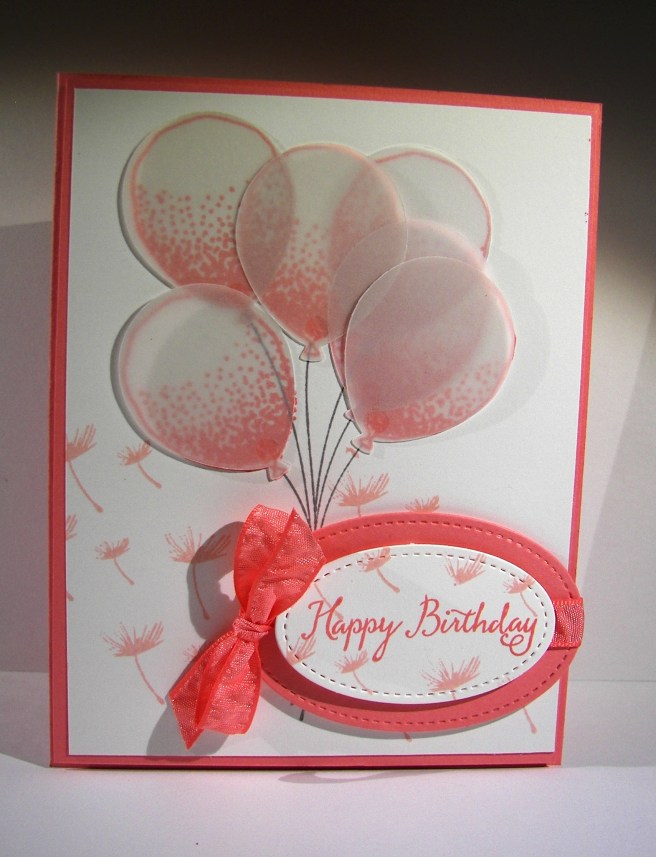
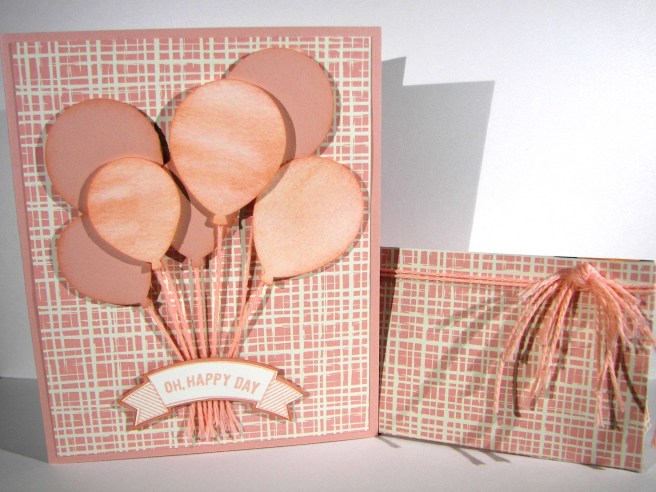
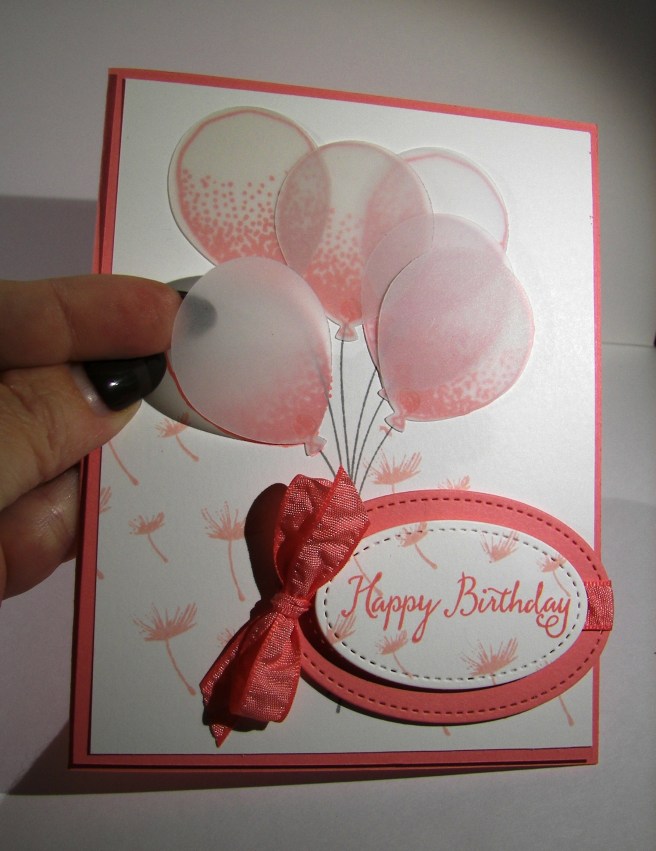
I love this particular balloon stamp set.  The outline images and then the fill stamp to give it a little interest and fun.  My first thought for the card front involved several free floating balloons with hand drawn strings.  Those strings just didn’t do it for me, they were distracting from the pretty balloons.  So I tried again using the bouquet of strings for the balloons.  That worked much better for me.  I then adhered punched out balloons over the top of the stamping using a glue dot at the base of each balloon.  It was enough to hold it in place and I don’t even mind that you can see the adhesive, totally worth it.

4-2 (2)

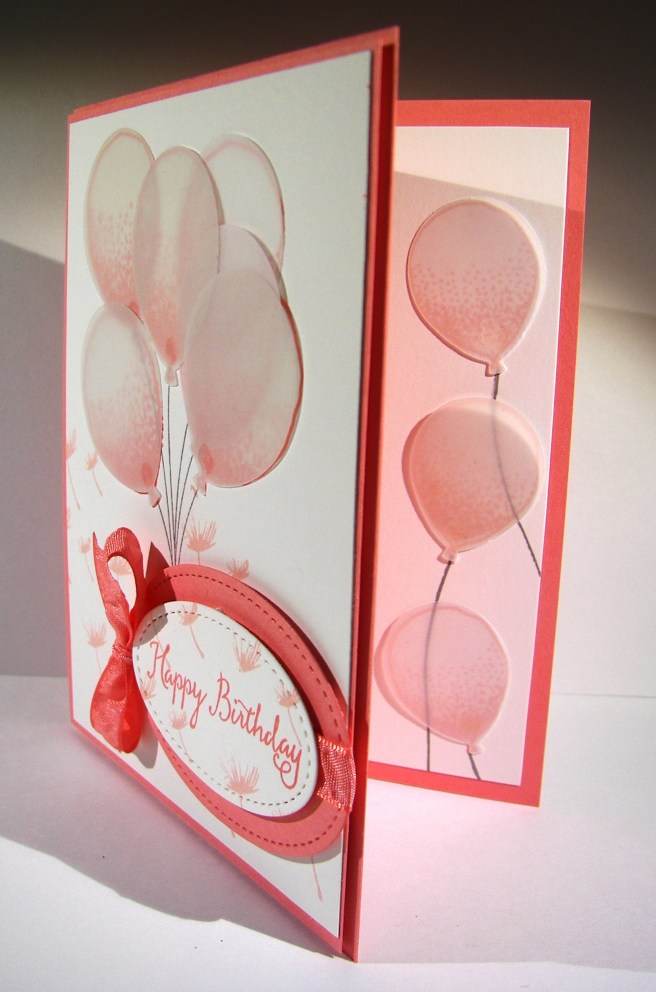
I had to add some on the inside as well.  Giving the interest I love without a lot of bulk. Don’t get me wrong, when it is time to pile it on I go for it, but sometimes it is nice to not worry about putting something through the mail.

The tag was fun to add.  The stitched framelits are adorable.  They give a lovely finished edge so easily.  I wanted to use the ribbon from the kit but I didn’t want to interrupt the lines of the balloons, so I kept the ribbon to the tag.  I thought that worked out nicely.

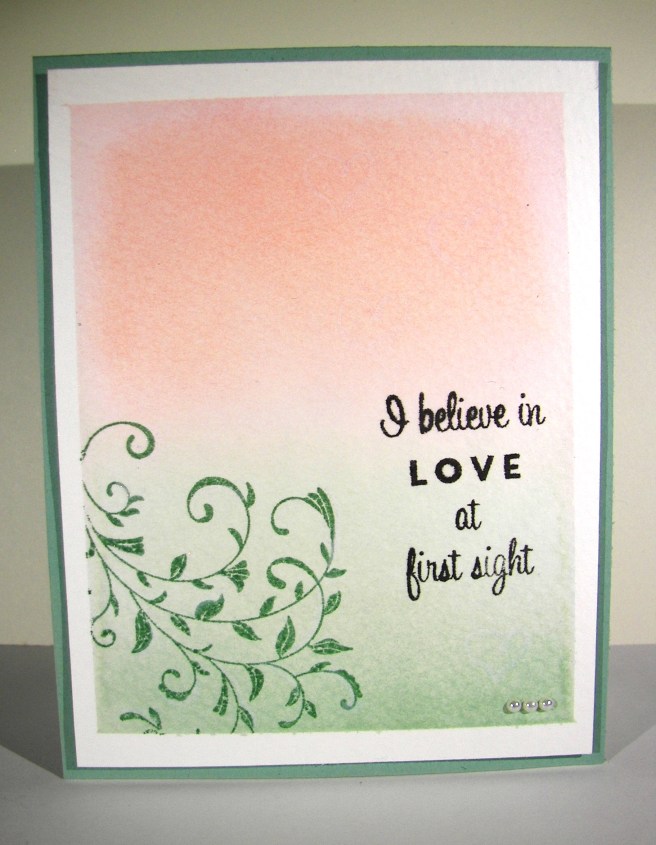
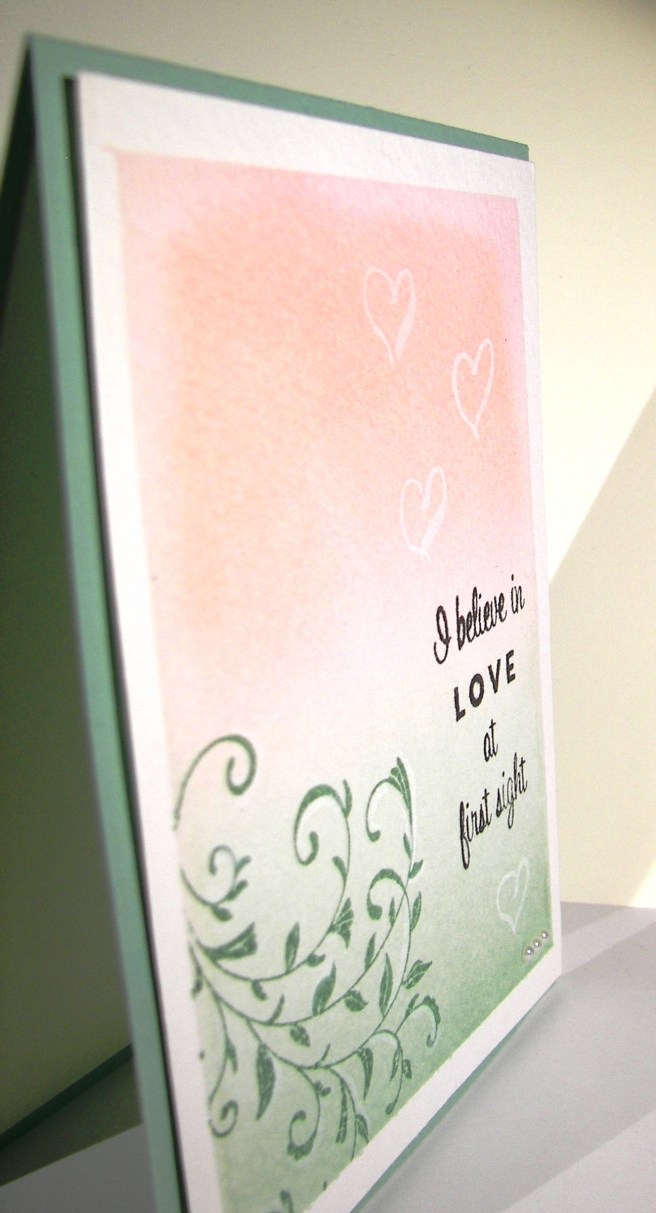
While I love the look of a clean and simple card, the tag had a burst of color and it left the balloons out of balance.  So I went back to the stamp set looking for some help. There are these two little dandelion flower guys that I thought could work.  I placed them on the same block and stamped them across the bottom of the card in a bit of an upward angle.  I thought it looked like the breeze was blowing them gently up into the air.  The tag looked a bit bleak, so I gave it the same treatment.  For me, the new technique was to carry the look of motion, or the flowers blowing, across the front of the tag.  So fun!

4-2 (3)

Taking these old kits and putting them to work in a different way has been so much fun. Only two more days of sharing this little series, but I think it will change how I work. I always want to have kits on hand to play with.

Have a creative day!

Moana

Don’t Quit Your Day Dream

Glimmer paper makes everything look better.  How fun!  These projects were part of this last weekends workshop and the ladies really enjoyed making one.  Good thing we worked with the glimmer paper from this years sale-a-bration because it ran out and they would have missed out completely.  So glad I could share a little at least.

3-22

Pretty straightforward cards here.  A few layers, some stamping and a delicate little bow. I helped out the ladies by pre-diecutting their leaves.  Folks get a bit frustrated waiting to die cut or emboss their work, so I try to make it a bit easier.  Maybe one day I will add a second Big Shot, maybe.

The sweet sugarplum glimmer paper may be gone, but the blushing bride is part of the annual catalog, so I can make more of these.  I am thinking about a thank you card gift set and this might just be the thing, with a different sentiment of course.  I think yes.

3-22 (1)

Have a creative day!

Moana

You’ve Got This

A simple floral card really speaks to me.  Like so often happens, I had started in a different direction with this project, but it took its own way.  I love how it turned out, but I don’t know if I can make it happen like this again.

2-23

The background stamp came from the same set as the flower and sentiment, You’ve Got This. It is supposed to look a little more water colored, or even just painted.  Well, I believe my water color paper acted a bit more like a resist than intended.  I thought about spritzing it to have the color spread more, but decided to leave it until it was time to color the flower.

The flower and sentiment were both stamped with versamark ink and embossed with copper embossing powder.  With the flower I forgot to use a static resist tool and it was very obvious.  I cleaned it up as well as I could without destroying the image, but it still showed my mess.  The sentiment, I remembered and it is super clean.  I did water color the background of the sentiment, but very lightly.

I painted the flower with sweet sugarplum, blushing bride and old olive.  It turned out really lovely.  The odd messy dots of extra embossing really add to it.  That is what I meant by trying to re-create it somehow.  Accidents aren’t always easy to control a second time.

2-23-1

Either way, it turned out quite lovely.  A sweet inspirational card is wonderful to make, but even better to give away.

Have a creative day!

Moana

Hello Love

If you know me well, you know I absolutely adore tiny things.  This little number took longer to finish because I was having so much fun playing with the tiny elements.  Seriously, they are so adorable!

1-17

The card base was done in flirty flamingo along with the card front matte, the die cut envelopes and the coordinating ribbon.  The tiny little cards were cut in blushing bride surrounding tiny precious stamps stamped in the same color.  I added a second stamp to two of the tiny cards in flirty flamingo as well as accent stamping and sponging .  The heart stamping on the card front was done in pink pirouette with the main sentiment in flirty flamingo.

I wasn’t sure if this was too much of a card to do for my workshop ladies, but it is was so much fun we just might need to.  I can’t wait!  I almost forgot the edge of the card.  All of the die cutting done on this card came from the same set of framelits.  This edge of dimensional hearts is so fantastic.  It totally works for Valentine’s Day, but I can see wedding cards and then some going on here.

1-17-1

Have a creative day!

Moana

Thank You Very Much

Holiday weekends offer a lot if you are willing to enjoy.  I love the extra time to sort through all of life’s adventures and endless “to do” lists.  But it is also a time to pace yourself and reflect.  This project offered me that time.

1-16

I started with the idea of more precise painting, but quickly learned that it had other things in mind.  Since I have such a hard time waiting for much of anything, my colors couldn’t stay still.  So I went with it and created a much more fluid and dreamy look.  You can tell from the warp of the side of the paper just how much water went into this project.  I had fun though, and it was truly relaxing.

1-16-1

The sentiment was stamped on very vanilla and cut out using one of the dies from the Bunch of Banners framelits set.  I love the crisp edges of a die cut.  The inside stamp was another image from the same stamp set.  This particular set isn’t available for regular purchase, but at a reduced price when you host a workshop.  Sounds like a win win to me!

Have a creative day!

Moana

Blooms & Wishes

This stamp set sat in the annual catalog and teased me often.  I would try to pass by it saying that I surely did not need yet another floral stamp set.  Well, I broke down and bought it.  So very glad I did.  What a beautiful watercolor piece, right?  Great stamps make all of the difference.

1-15

I chose a few spring colors to work with, focusing on daffodil delight.  With all of the rainy, cloudy days we have had I wanted something bright and cheery. Mission accomplished for sure!  I stamped the large flowers from the set in different colors, stamping off as I went along.  The centers were all daffodil delight and more of an idea than a detailed center.  I sponged more yellow ink all around the flowers filling in most of the white areas before moving on to spritzing with water.  It was just a matter of managing the water spritzing to allow some ink movement, but not blurring too much.  It didn’t take long before I was satisfied.  A quick drying moment or two with my heat tool and it was ready for the sentiment.

That was stamped on a strip of velum cardstock and then wrapped around the bottom of the card front.  I used a lovely mint macaron satin ribbon to accent the bottom and layered it up with dimensionals.  Such a lovely spring card.  Of course I had to stamp a bit inside with a few yellow daisy images and one for the back too.

1-15-1

Have a creative day!

Moana

Oh Happy Day

There is a certain someone getting close to having a baby girl and this just about sums it up. It is truly a happy day and I can’t wait.  And with the heat we have been having I am sure she is more than excited.

8-6

The very fun and exciting playful palette designer series paper stack almost overwhelmed me. The colors and patterns are so busy, almost too busy for me.  I started out with the most subtle one in the stack.  I can’t imagine some of these patterns in a 12 x 12, good thing this is contained to a 6 x 6 stack.  There will be a lot of fun card and gift bag sets I think. Smaller than my regular by far, which makes it much more manageable.

I punched several balloons from plain card stock, but wanted a different look too.  With my aqua painter I covered a section of water color paper with wide light swipes of coordinating ink.  I did sponge all of them as well. The stamp set, Thoughtful Banners, has tons of sayings that fit inside the banner stamp.  There is a coordinating punch for the banners, so that makes me very happy.  I did my stamping, but trimmed it right to the stamp so I could punch another one from card stock and have a tiny border all the way around.

8-6 (2)

The solid bakers twine really makes me happy.  I had longer strings attached to each balloon and trimmed them after they were squished into place with glue dots.  With the extra hanging off the card I tied one simple knot and used it as the embellishment for the gift card sized gift bag.  I do hate wasting product.  It turned out great!

Have a creative day!

Moana

Hello Baby!

A good friend of mind is expecting her third child soon, a baby girl.  It was a huge surprise but it is finally getting exciting for everyone.  Thought it was about time I made a special card or two just for the occasion.  What is it about pink and sparkles anyhow?

7-11

I haven’t purchased much in the department of this years designer series paper department, nor do I have any current baby themed stamp sets, so I had to get a bit creative.  It may be on the elegant side, but I do like how it turned out.

I made a couple of layers of blushing bride card stock to add to the card base, with the top most layer being embossed for a little texture.  Love it! I then decided to break out the flourish thinlits set and cut a few of the images in glimmer paper.  Again, it was totally working for me.  When it came time for a sentiment, I really had to look.  I found this treasure in the beautiful banner set and thought it to be perfect.  The sentiment was layered on more card stock and both layers were edged in the banner style.  A little wrapping with metallic thread and one huge metal rimmed pearl later and I called this one done.  Yes!

7-11 (1)

Have a creative day!

Moana

Enjoy the Little Things

Yesterday was a very thoughtful day.  I was able to enjoy a day all to myself, which is quite rare in itself.  I had grand plans, a bit too grand, but decided to change them all around and enjoy it differently. This was one of my moments spent, a very indulgent chunk of time working ink all over this lovely card.

7-9

I was given some new paper and brushes for my birthday, so of course I had to get to work using them.  I took this beautiful paper to the brink of maximum absorption.  Sometimes it just takes more time to get the colors just the way you want them.  If you were to smooth your hand over the top of this card you would feel the difference in texture.  The edges of course kept their very smooth surface, but the inked area is actually raised up.  Cool, right?

I did start with the embossed phrase first.  Then I worked around the edges and started in with all of the color mixing.  This copper embossing powder is so fantastic, I absolutely love the color.  It gives a much more masculine feel and goes better with my kind of color pallet ideas for sure.  So, I basically just embossed my sentiment and then went to town on the ink til I was happy.  And I am so happy, so very happy with this one.  I tend to do my best work when I am creating for someone in particular, especially when that someone is my husband.  What more can I say?

7-9 (1)

Have a creative day!

Moana

We’ll Weather This Together

A project can go through several phases, and some can be unexpected.  The original vision kind of got lost somewhere along the way, had some confusion, but ended up reasonably pleasing.  These ladybugs though, too much love there.

6-22

My daughters have a canvas in their bedroom that inspired this little card.  I was looking at it recently and thought of the new stamp and framelit set that could help me create my own version.  I pulled some of my favorite pastel colors for the background and started the process.  The more colors I use the longer it takes me to become satisfied with how they blend and flow together.  I went through this one three different times and then once more when I added in the yellow around my little bugs.

6-22 (1)

I water colored on a scrap piece a mix of pool party and blushing bride.  The umbrella was then cut out and hit again with more blushing bride.  The clouds and raindrops were cut from areas that just had pool party.  And yes, I did glue all of those parts down, even those little drops.  I love the dimension the thick water color paper gives to them. Before I stamped my sentiment I added a touch of wink of stella to the clouds and raindrops.  All the pieces were layered together and put in place.  And before the blog had even been finished I was able to use it to brighten someones day.  Wonderful.

Have a creative day!

Moana

English Garden with Rose Wonder

The morning may be trying to run away from me, but I am trying to keep up.  I did get this set made yesterday, but haven’t had the chance to get it shared yet.  Let’s hear it for lunch breaks, everyone needs one.

4-29 (3)

The card was the beginning of this trio, and the paper was the focus.  It is sad to say that this paper is retiring soon, I sure have loved using it.  What can be better than water colored floral paper?  With my kind of projects, not much.  Unless I sit down and paint my own, with paper this pretty I don’t have to.

The designer paper is layered on a piece of blushing bride cardstock and then on a pear pizzazz card base.  Old olive is actually the light green used in this paper, but I wanted a lighter tone and thought it looked nice.  All of the sentiments come from the Rose Wonder stamp set, there are some lovely ones in there.  I stamped, did a banner punch, sponged and then sponged another one to layer underneath.  The strip is 1/2″ wide and was left over when I cut the piece of whisper white for the inside card panel.  I love those little leftover strips, they always come in handy.

4-29 (2)

I made a couple of gift bags with totally different dimensions in mind.  I usually work with tall rectangle shapes, but went with a short clutch concept.  The cardstock version could hold heavier tall items, but the designer series paper needs to keep it light.  I had several ideas of gift items that would fit inside easily inside, lots of chocolate to be honest.  I love sharing a chocolate treat or two, you should give it a try.

4-29 (1)

Have a creative day!

Moana

Beautiful Ride for Newlyweds

It may be hard to tell, but there are an absolute ton of colors going on here.  I had a blast working on this set.  When I finally finished I was a bit surprised to see how late it got, but it was worth it for sure.  I love making wedding cards just for special people in your life. This one is no different.

4-21

I worked the colors to create a sunrise look and I think it turned out really nice.  I was having a chocolate craving last night, so I settled for chocolate chip paper.  Not quite delicious, but it still worked out.  That led me to marina mist for the car color. From there everything else just came together.

4-21 (2)

I wanted a gift bag to go along with the card to give the gift card something to go in.  I think I will put a tiny selection of rich chocolates around it, wouldn’t you like to get a treat too? Opening gifts can be exhausting for a newlywed couple, so they deserve a sugar boost along the way.

The details in this set are really busy and probably hard to notice.  I think a project like this should look simple even if you know better.  Not everyone knows how much work goes into a tiny work of art like this, but that doesn’t stop me from sharing them.  Just a few more weeks and this card will find its way to the deserving adorable couple.

4-21 (1)

Have a creative day!

Moana

Remarkable You

It is so nice to have a day off from school and work, but it does put things off more than a bit.  I seem to be having more and more of that as of late, but I do keep trying to get it back in the right gear.  Now I have wedding reception plans to toss into the mix.  Exciting!

2-15

I pulled a few ink colors that I wondered about going together.  Blackberry bliss is such a strong color I hesitate sometimes to put it with others.  This pastel grouping compliments it nicely though.  I don’t think I have watercolored with it yet either.  That was fun for sure.  I used a basic card front made from cold pressed water color paper, masked a quarter inch border off and got to work.  This project was one of the times I just let it happen without too much planning or thought.  I find that less stressful because you don’t have an exact finish in mind, just simple imagery and colors.  Works well for me.

I layered my front on a backgroun of mint macaron with a narrow 1/8″ border, and then placed it again on the card base.  I didn’t do any inside stamping this time.  Just a simple and clean piece of whisper white waiting to be written on.  I think that was all it called for.

2-15 (2)

Have a creative day.

Moana

Hooray! for Perfect Pairings

I could probably keep making samples for these bridal shower invitation choices.  Where do you draw the line?  Is three enough?  How about five?  Perhaps four is just right…

1-27

Even though this is still floral, it is has a much stronger navy blue influence.  With the soft seam binding ribbon, the navy doesn’t seem too overpowering.  Not too complicated a card here.  There are 1/8″ simple borders layered with a decorated front.  I started with the navy flower background stamping and then included the pink centers.  How fun is it to have just the colors you want.  The beauty of stamping.

1-27 (2)

Have a creative day!

Moana

Rose Wonder

This was a fun project for sure.  As you have heard me say so much recently, I do love to water color with my stamping.  I wasn’t sure if these two colors would come together in an attractive mix, but they did well.  Having the touches of navy with the blush as a primary is really enjoyable.

1-26

I think I might be making the decisions a bit tricky for these bridal shower invitation choices.  I am not sure which one I like better between the two, guess I will have to come up with another one just for good measure.  I can’t spend too much time playing though, I have workshop coming this weekend.  It is fun to play though.

I stamped this huge wonderful rose on water color paper with stazon ink.  I didn’t goof it up too much, so I went with my first attempt.  I did a trial run with the colors on a scrap of water color paper just to check it out and I liked it.  So, I wet down my stamped image and got to work.  I spent a bit of time trying to be cautious, then I just went for it.  That is why I love to water color, it is pretty darn forgiving.  I even used my trial scrap as a background punch, cool right?  I do try not to waste.

1-26 (1)

Have a creative day!

Moana

Bloomin’ Love

I do enjoy making something special by request.  It isn’t always easy to start, but once you do, the ideas just begin flowing.  This is my first go at a bridal shower invite.

1-25

The brides colors are a blush pink and navy blue.  My blue looks a bit royal purple here, but it is a deep navy.  How about this lovely framelit die cut?  I thought I might go a bit bonkers trying to get it all detailed out, but I managed.  I am not always the most patient one, but this die requires it.  I had to put it through the big shot back and forth several times to get all of the cuts done.  It was worth the fussing though.  The detail is amazing.

1-25 (1)

I might have gotten a bit carried away on the inside stamping.  I was chatting while I stamped and before I knew it, it had gotten pretty busy.  If this one ends up being the choice, we might have to print the details on velum to be an overlay.  That would be pretty though too.  Love is definitely in the air.

1-25 (2)

Have a creative day!

Moana

First Sight

I keep getting drawn into playing with water colors.  Maybe that is just my thing for right now, and I love it.  The effect is just so soft and subtle.  And it isn’t even very tricky.

1-18

I do have a hard time putting embellishments on top of this kind of card front.  So I settled for a short strand of basic pearls and a hint of Wink of Stella.  I drew a few hearts and hi-lighted my stamped flourish to give it a little interest.  You have to turn the card to see it, so it is very subtle.  I didn’t want much to get in the way of the color blending.  When I tried different ribbon options it just was this huge separation that was pretty sad.  Clean and simple does the trick today for sure.

1-18 (1)

Have a creative day!

Moana

English Garden with Flower Patch

Can we just not jump right into the next holiday?  That is my theme for today.  I know everyone will be all into Christmas, blowing right by Thanksgiving, but I am going to take a break in between.  So, how about a lovely birthday card?

English Garden with Flower Patch

This paper is so absolutely wonderful.  I would love it in fabric so I could have it all around.  However, I wanted to partner a technique I recently learned with flowers, so I knew the pretty paper wouldn’t be the focus.  Is that even possible?

English Garden with Flower Patch

After stamping and punching out these pansies, I tried the technique out.  I used a very large stylus to just roll around the petals, slowly breaking down the fibers and creating curl.  Oh, you do this on a foam pad so you can squish a lot. It was so fun.  I did the same thing with the little leaves I made.  For those I punched a circle and then used the same punch to punch a section out of both sides giving the leaf shape.  It leaves kind of an apple core looking center behind.  Hope that makes sense.  One day I will get brave and try videos, not there yet though.  Lots of sponging for everything involved and tons of dimensionals.  This is one thick card, extra postage for sure.

English Garden with Flower Patch

Have a creative day!

Moana

Love You My Friend

In the middle of cleaning out book shelves I had an idea for a card.  So I went to my desk, pulled out the stamps, dies and ribbon, and went back to my shelving.  This morning I just looked at them and thought, “What did I have in mind?”  Not sure, but this is what I ended up with.

Love You My Friend

I think it is funny because if you don’t read the little word love that is inside the heart cut out, the tags just say “you my friend”.  A bit basic, but really made me laugh.

Love You My Friend

All of the detail work went pretty quickly.  I started out by using the heart die cut on the whisper white paper and then ran it through the big shot to emboss it.  I thought the stamping inside the heart would be tricky to place.  Not at all.  I just eyeballed it and it was perfect!  Go figure!  The tags were simple stamping on scrap.  I do save scrap a bit too much sometimes.  But, the half inch that gets cut off when I trim down my paper works perfectly for sentiments and the banner punch.  Some might call it clutter, but I have used them so many times.

Love You My Friend

Have a creative day!

Moana

Just For You

Sometimes I feel like there are one too many butterflies flying around my craft area.  But then I remember, you can never have too many butterflies!  Especially when Stampin’Up! keeps coming out with even more exciting stamps to use.  This set is just one of those types.  I could just put these everywhere.

Just For You

The color scheme is very simple, blushing bride and whisper white with tiny 1/8″ boarders.  I do love those.  Only one butterfly on this card front.  The base image is done in blushing bride.  The next layer, the detailed image, was stamped in versamark ink.  That alone looked wonderful with the darker tone.  A quick sprinkle of iridescent ice went over the versamark while it was still sticky and took a trip to the heat gun to melt it in place.

Just For You

I tried to angle the photo to show you the almost purple glimmer that comes from the powder.  You can kind of see it.  Absolutely lovely stuff.  The body and antennae are separate stamps that make the body.  And yes, this is a photopolymer set.  You just have to see through these stamps to get images just where you want them.

A quick sentiment from the same set and a tiny cotton ribbon bow, and it was done.  I did stamp a few dots on the inside panel, of course.

Have a creative day!

Moana