Country Livin’ Rocks!

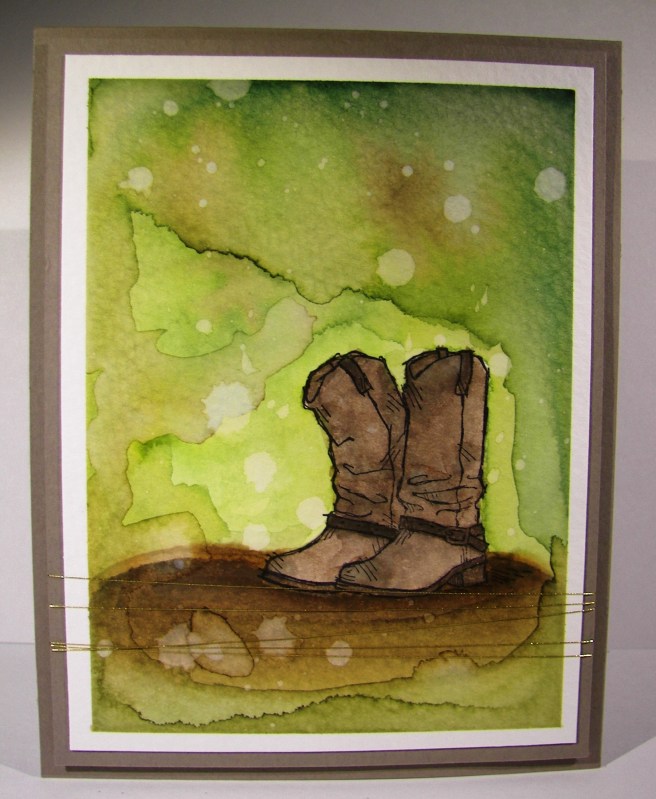
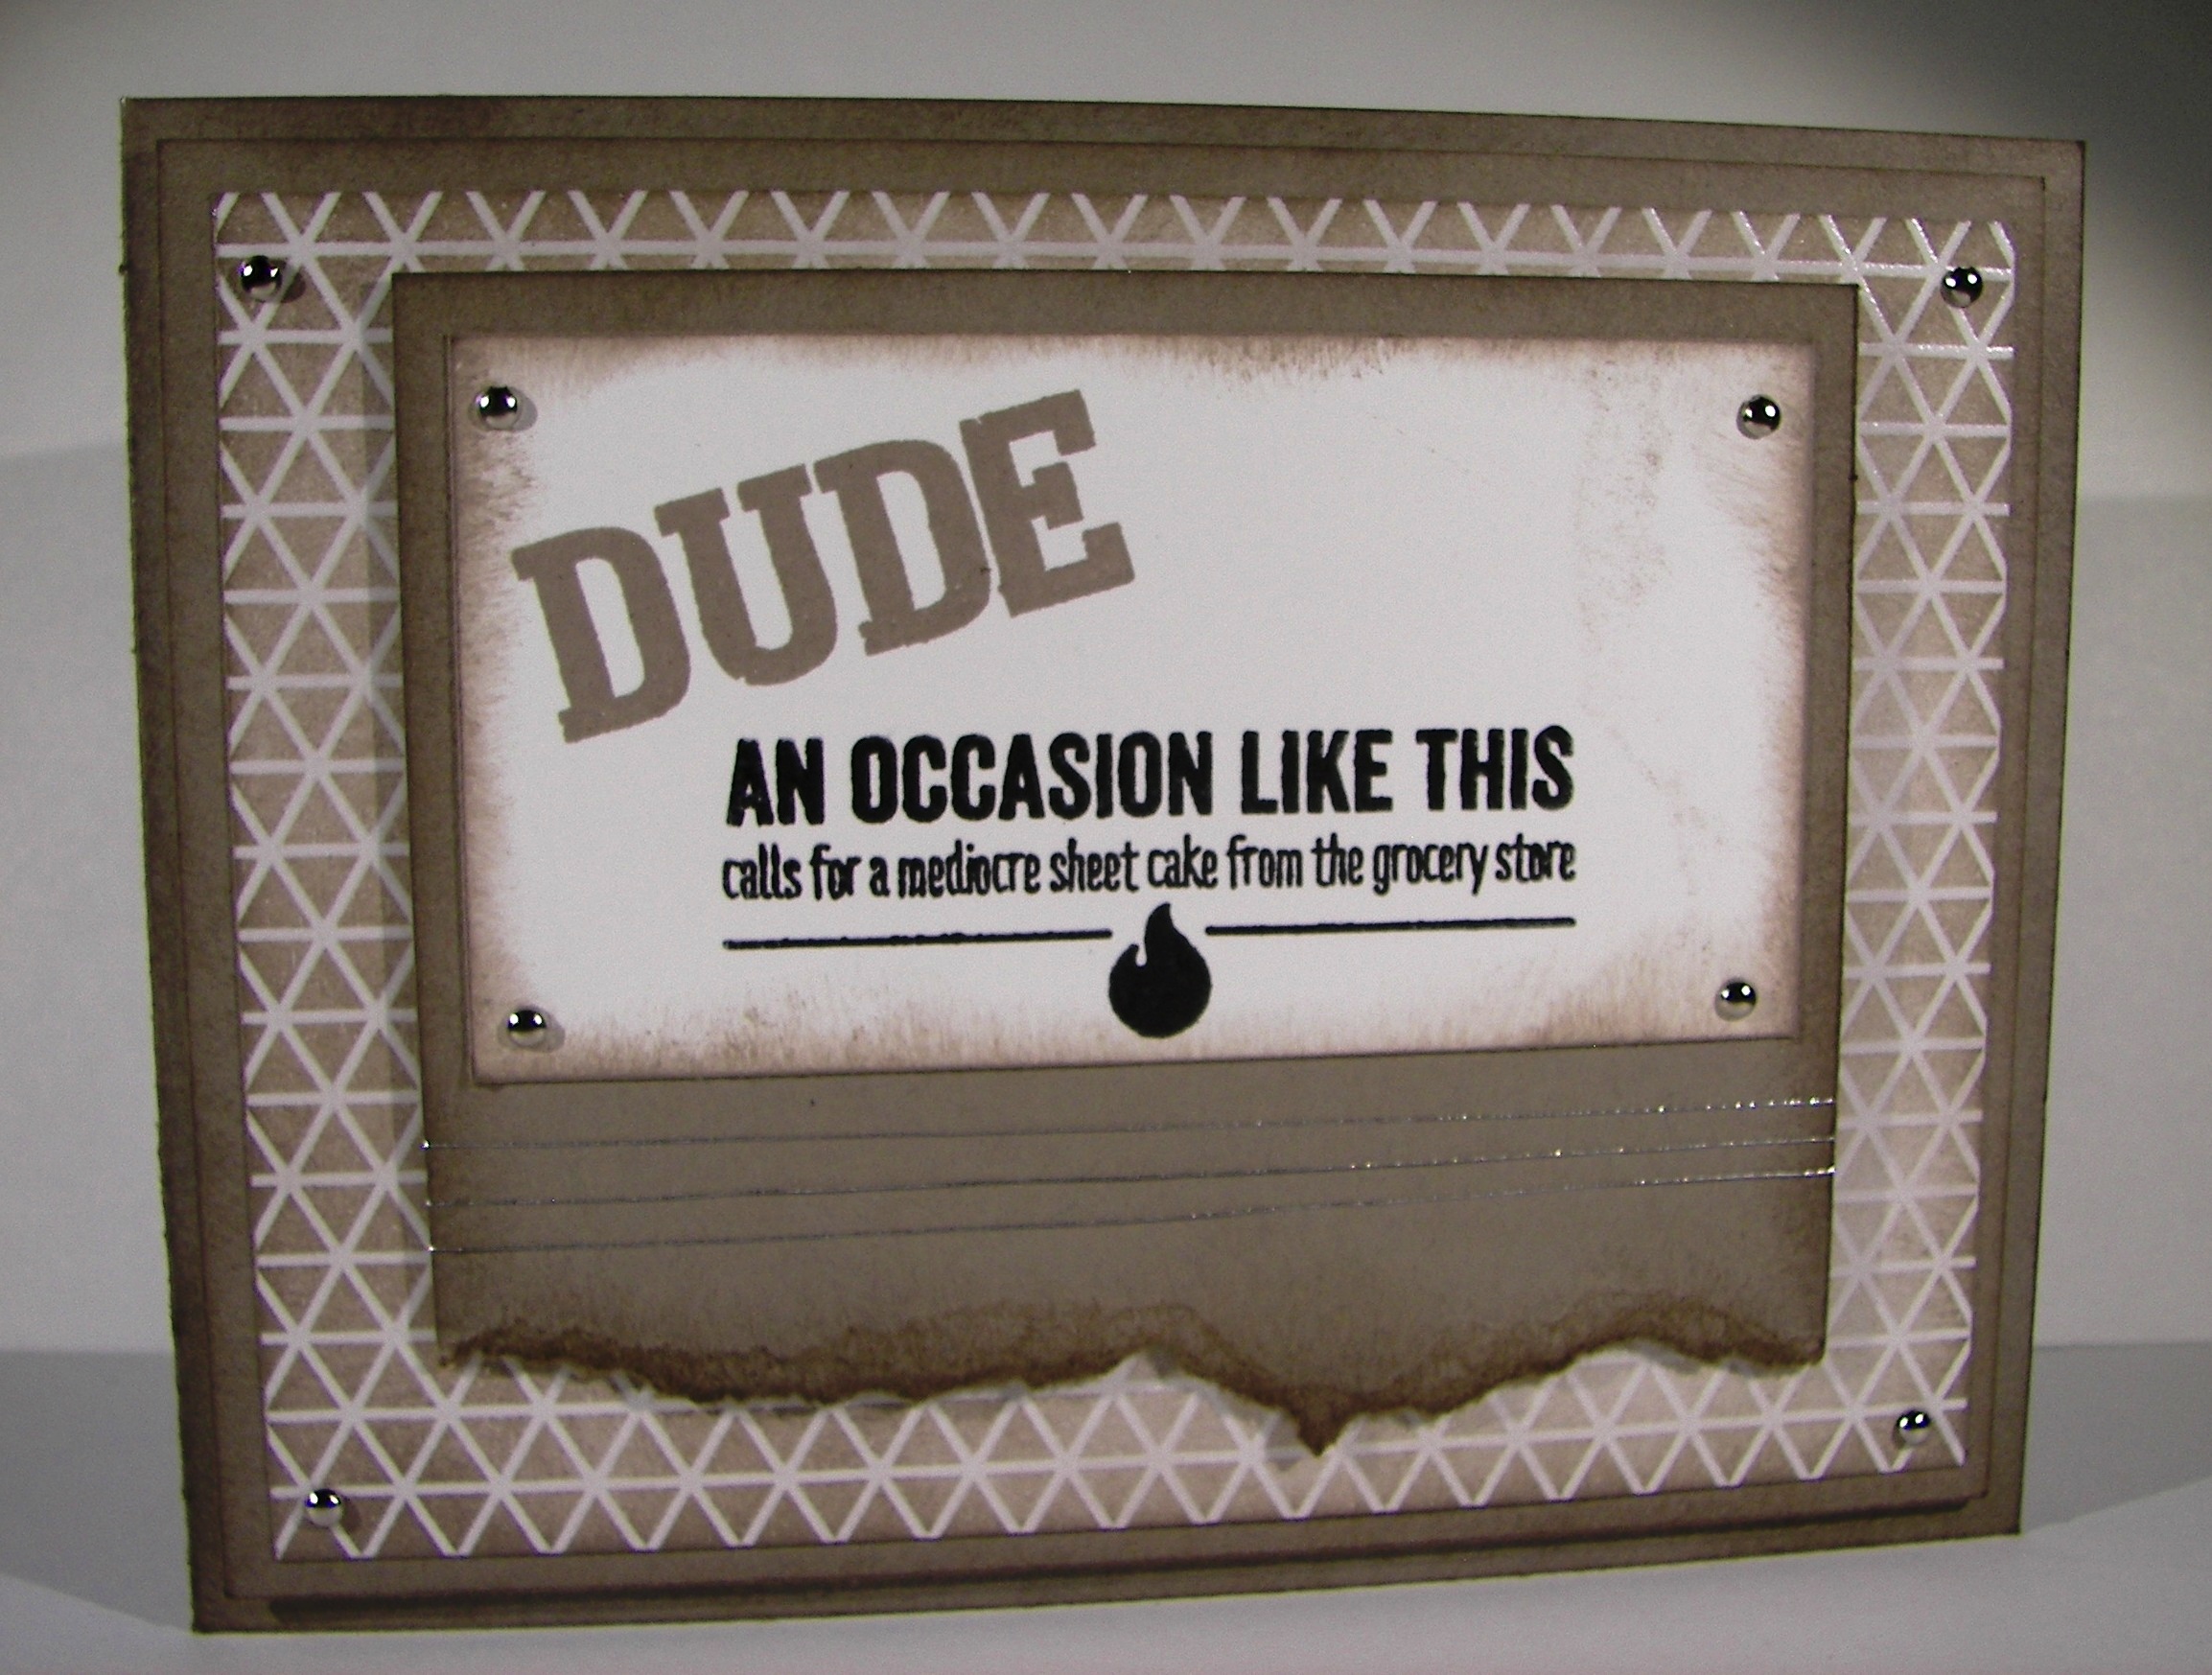
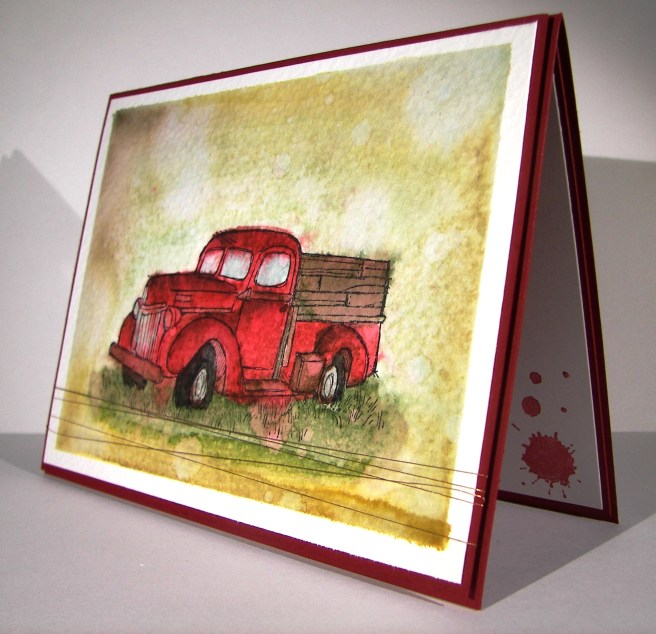
Living in the country has its perks, and wouldn’t this be just one of them?  I unfortunately do not have an adorable old truck like this, but it sure would be wonderful!  I will have to settle for the stamp and my imagination.

7-2

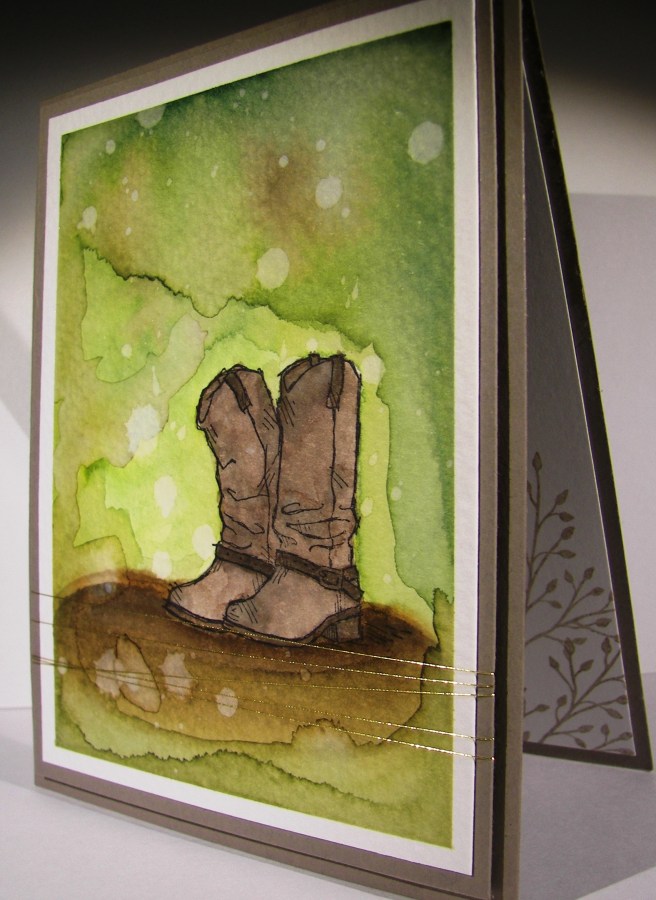
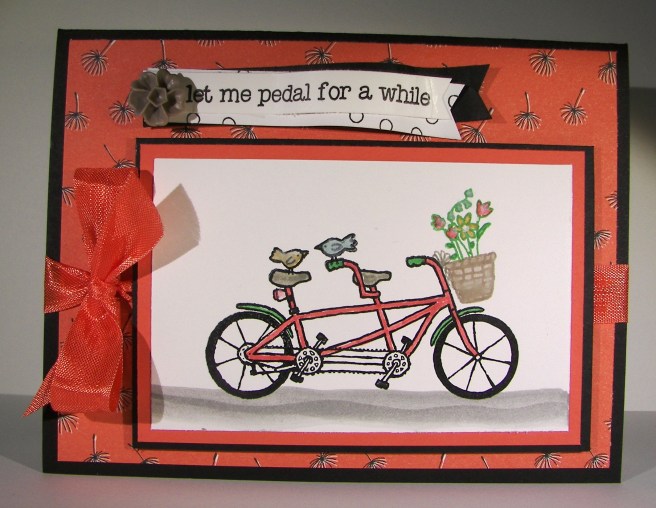
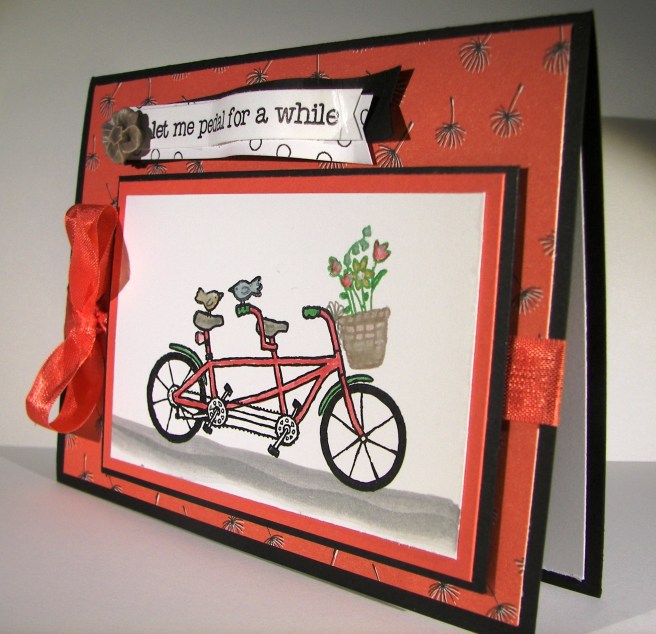
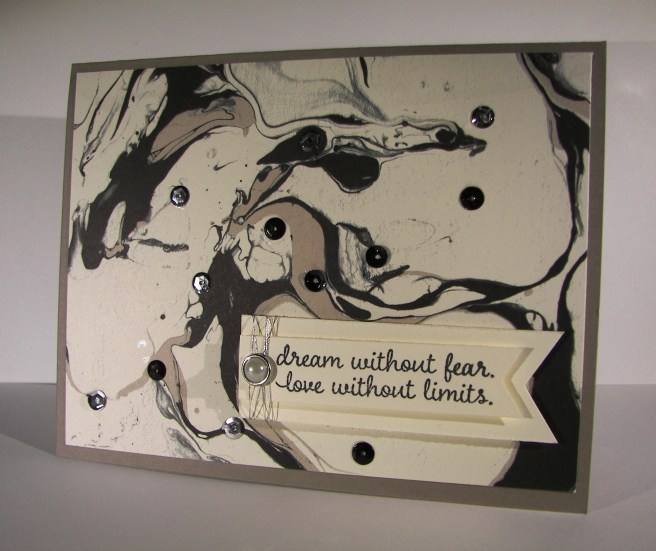
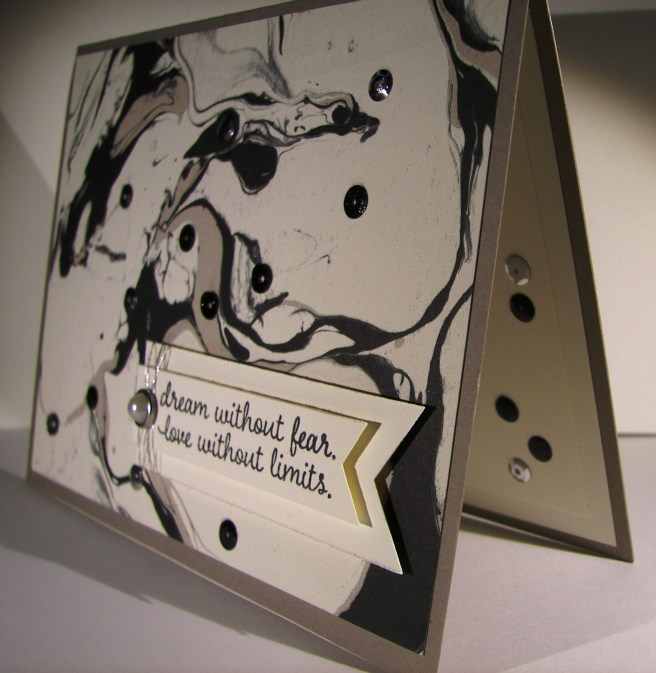
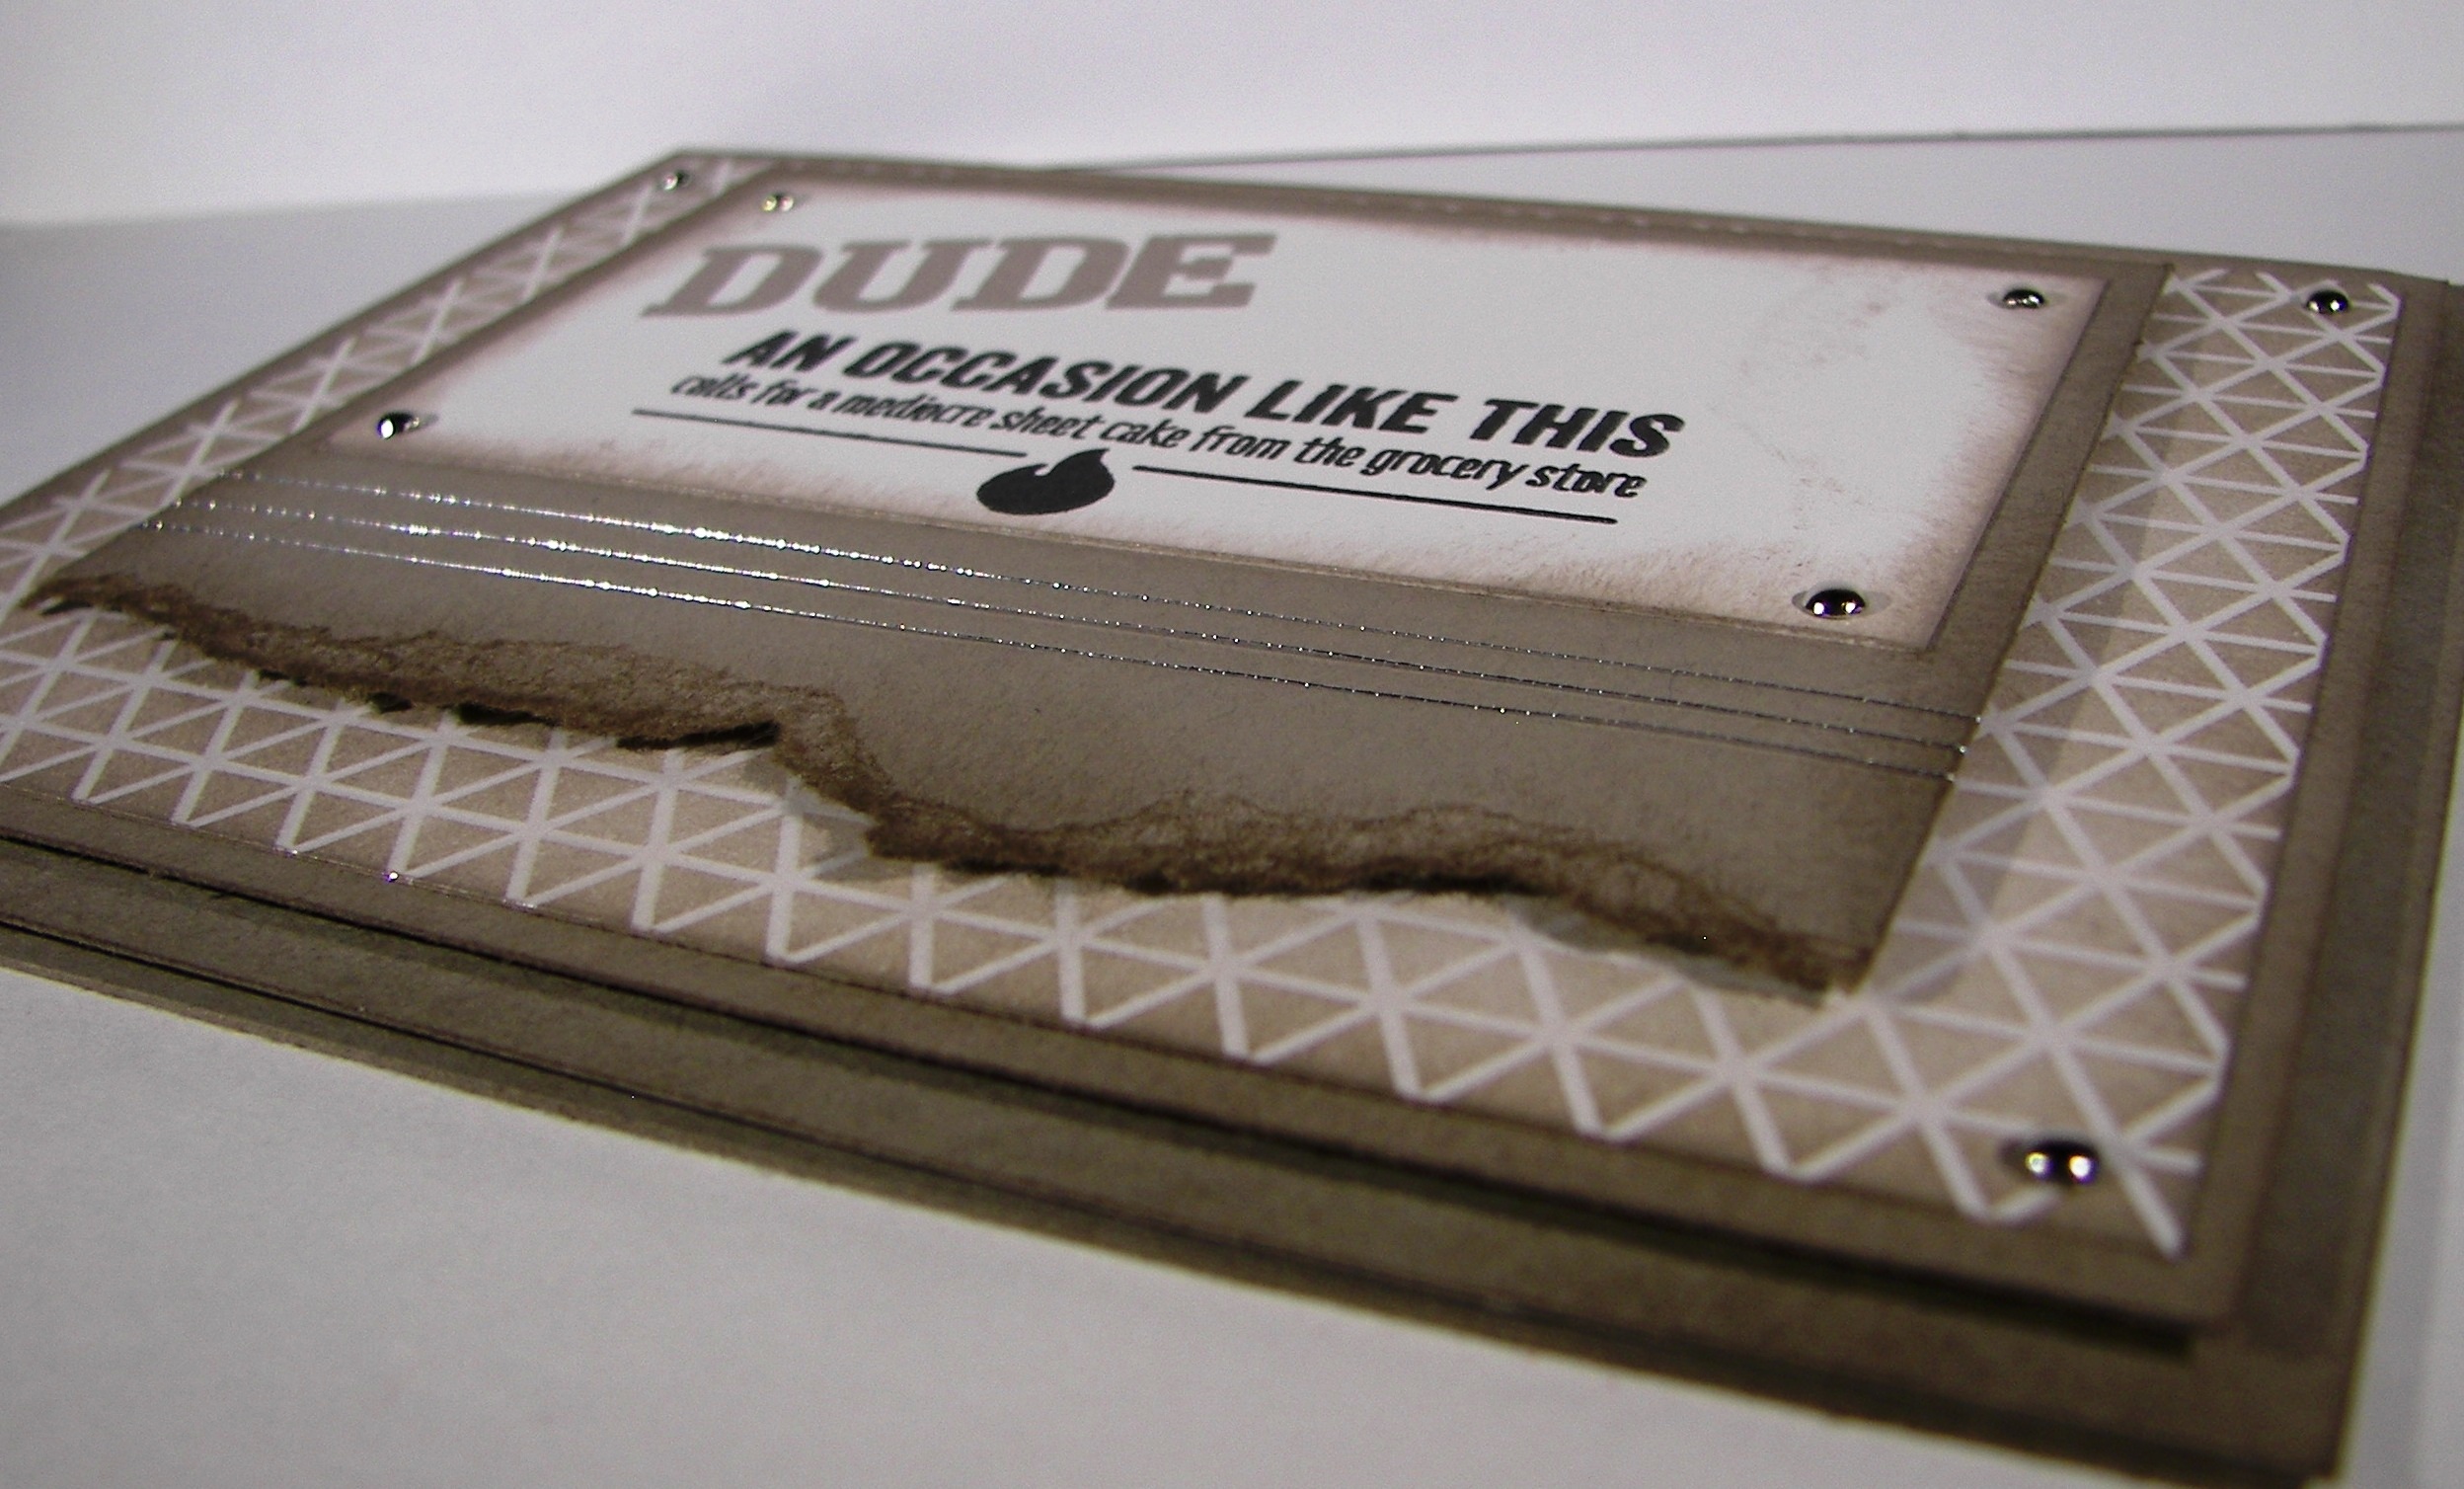
This image was stamped with black stazon ink on water color paper and then adorned with a whole bunch of ink colors.  I started with a pallet of six colors, but it didn’t stay there.  I ended up with ten, but it called for it.  That doesn’t include the colors that emerged from simple blending and colors flowing together.  This kind of work is my favorite.  No real rules, just lots of distressing.

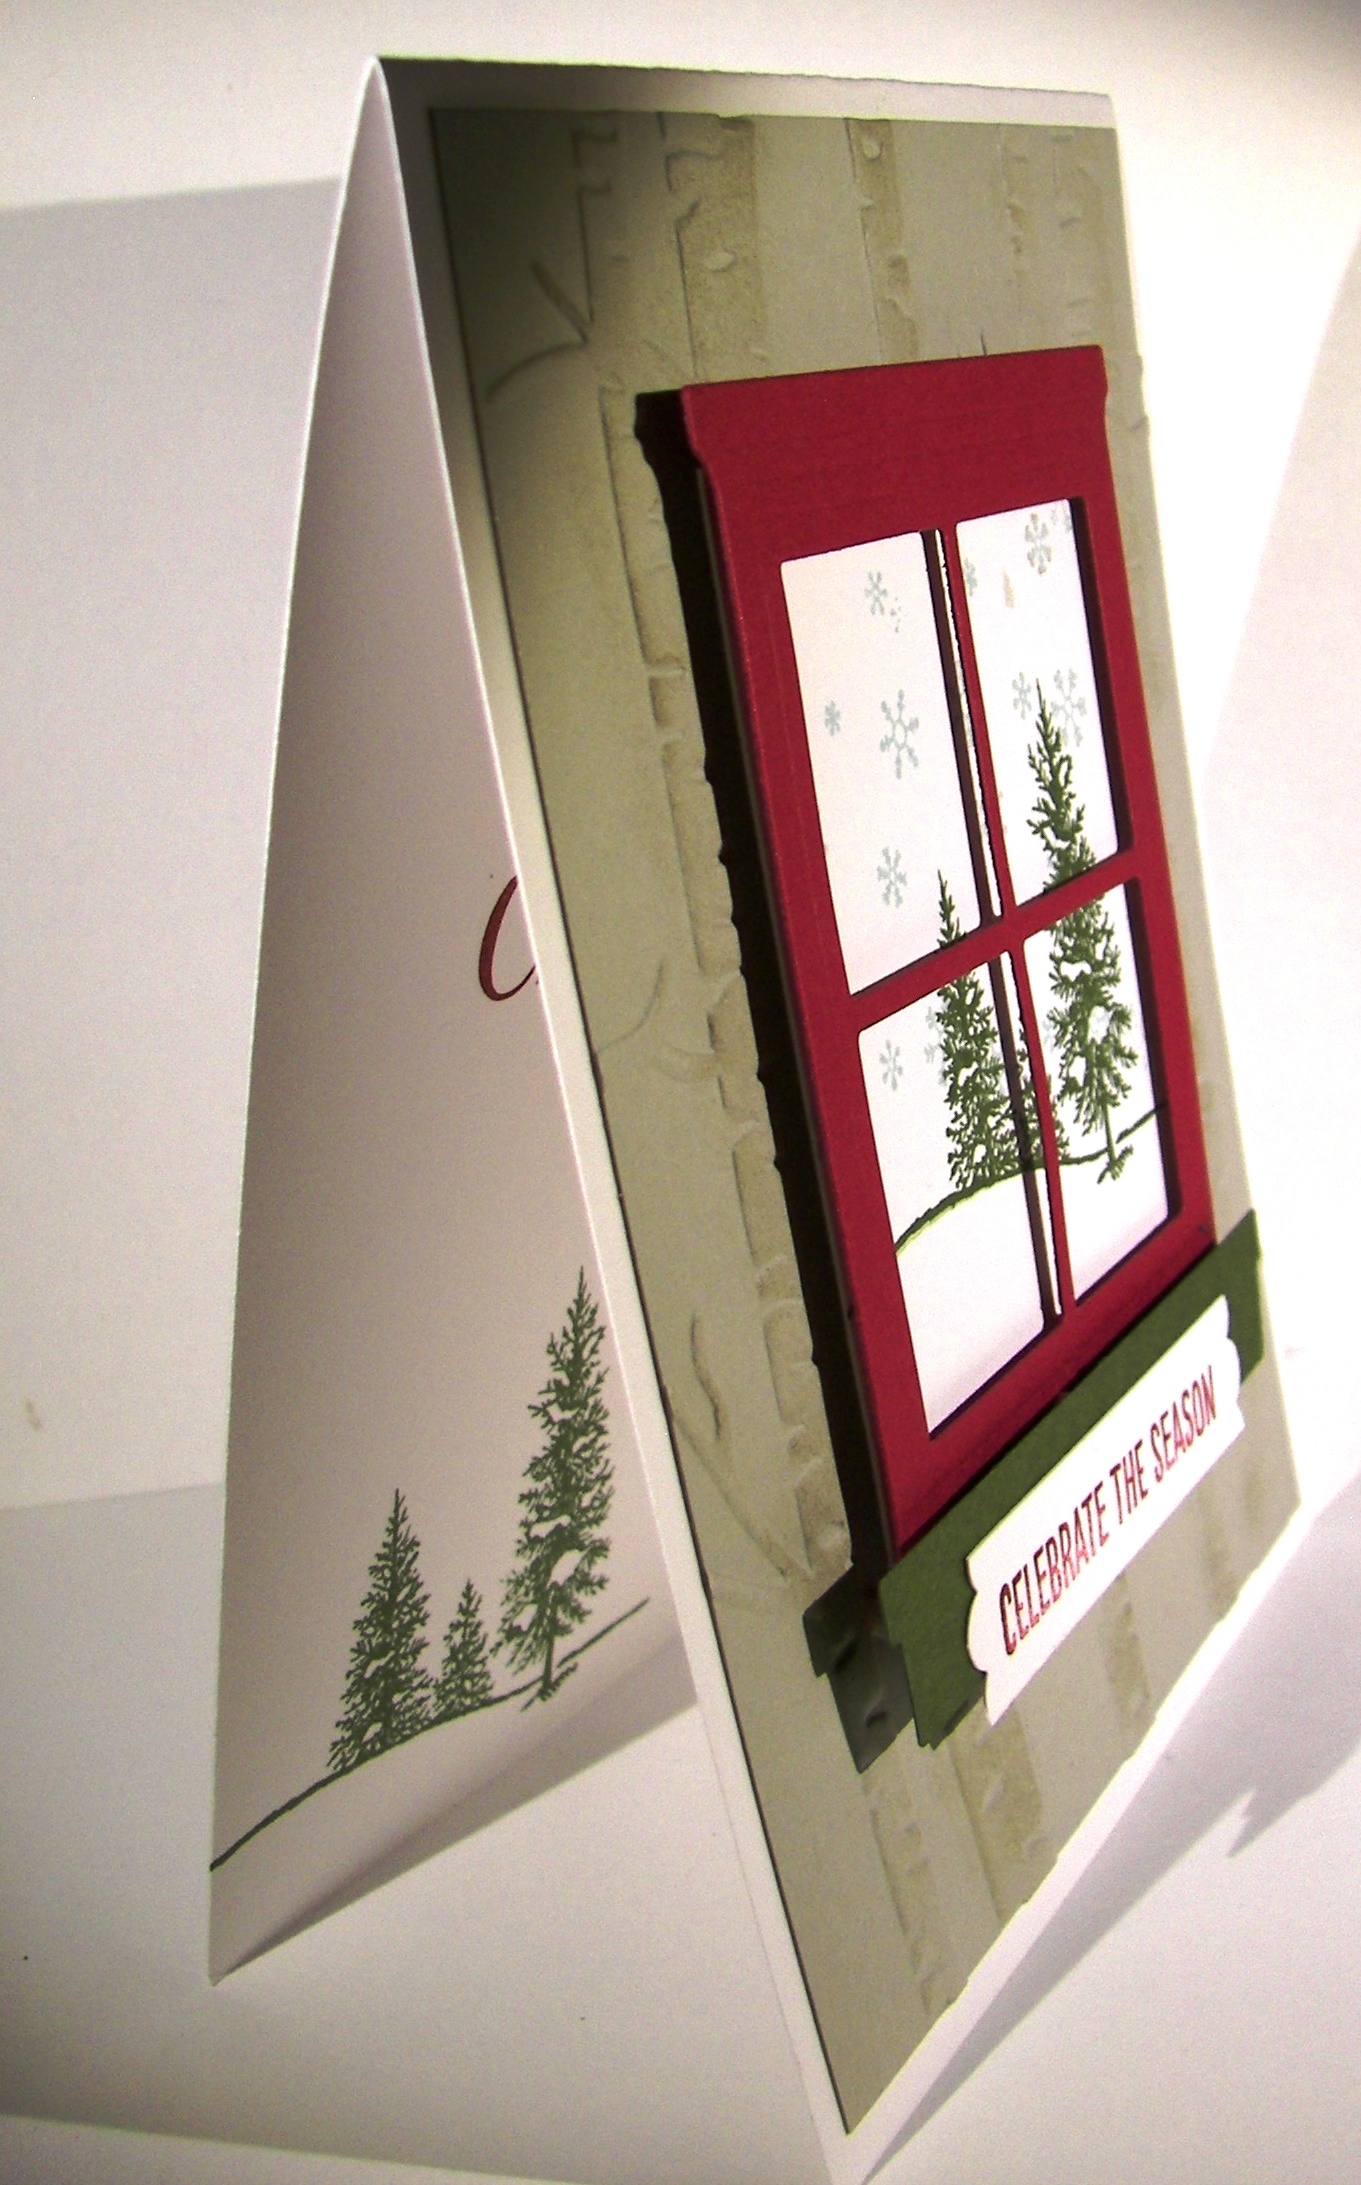
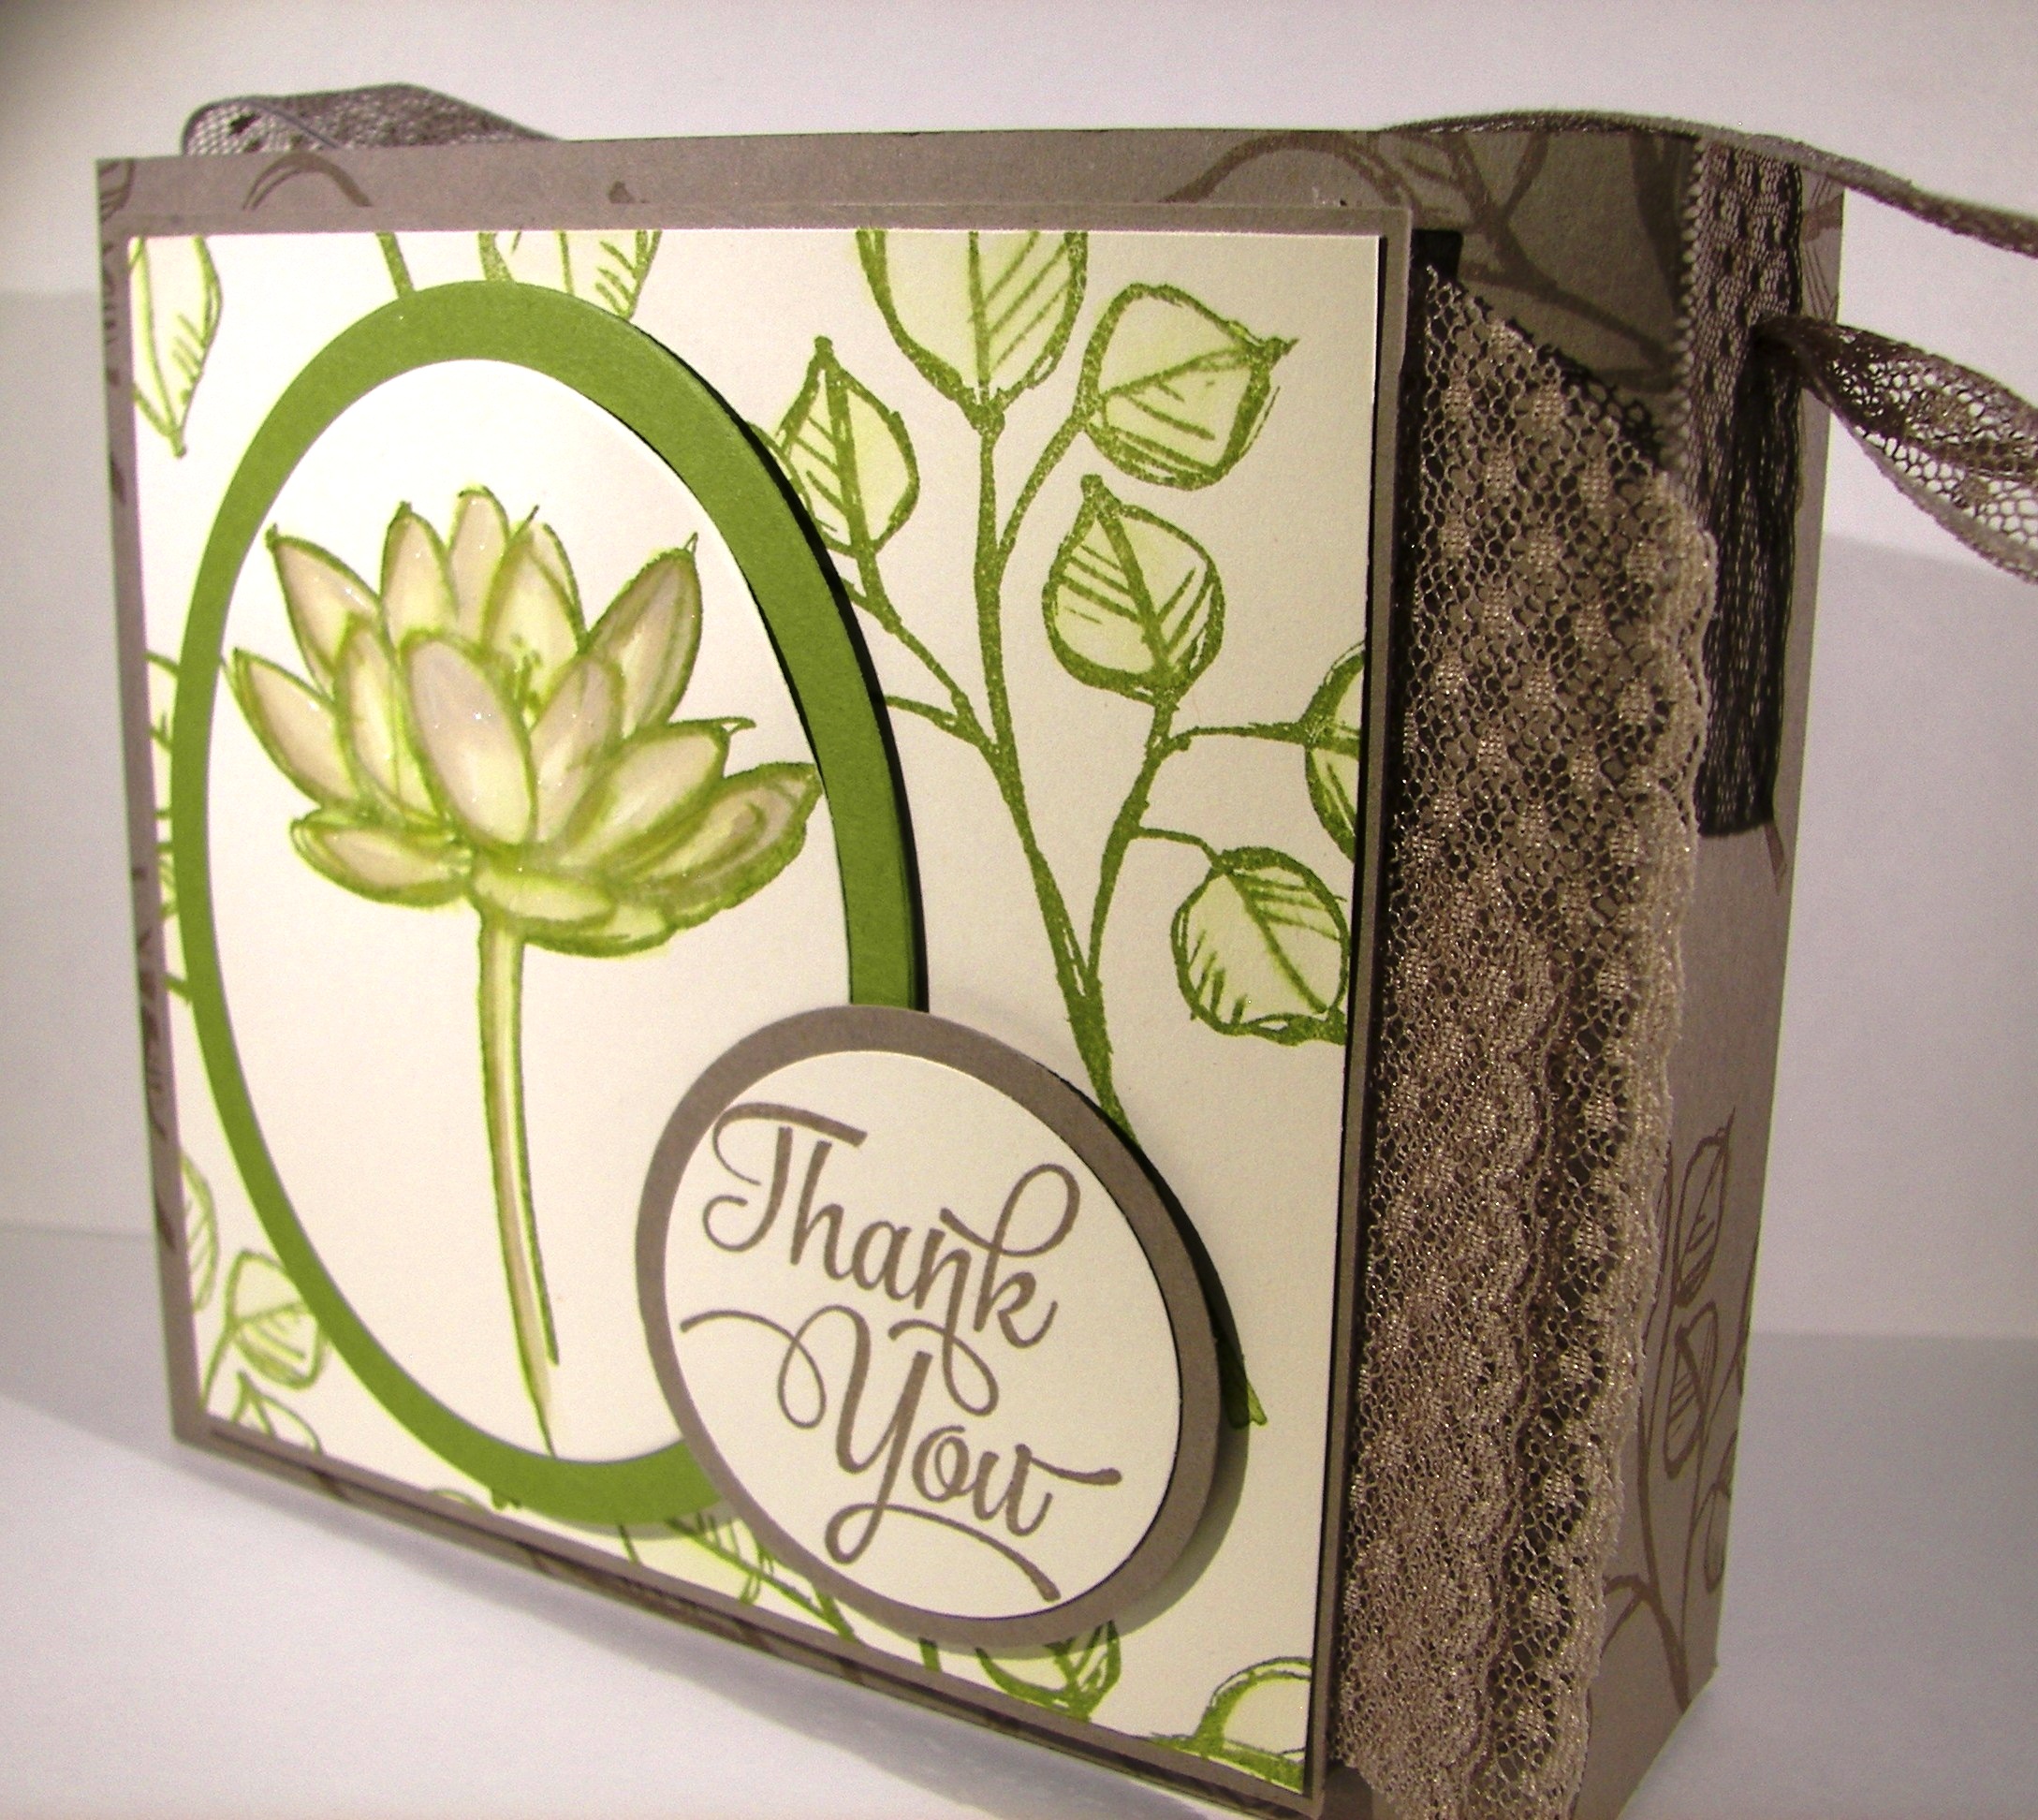
The perfect companion to the card is the new copper metallic thread.  It almost reminded me of barbed wire or old fence wire.  I like a little of embellishment, but don’t want any distractions when I water color.  The thread works for me.  There was a touch of stamping on the inside panel.  The splat image from the perpetual calendar set with cherry cobbler stamped off once.  Yummy!   I do think it would be interesting to try and paint this stamp with flames and metallic chrome.  I will have to see on that.

7-2 (1)

Have a creative day!

Moana

Country Livin’

There is something so calm about a nice long water coloring session.  When I found myself needing a break from putting away yet more wedding reception decorations I looked for this stamp set.  When I saw these boots. I knew I would love creating with it.  I was right.

6-15

I honestly stamped just the boots in the lower right hand corner of the water color paper and started to layer color and distress it like crazy.  I can’t tell you how satisfying this card was to make.  I thought about putting a sentiment to it, but couldn’t find something that I thought worked well enough.  So I decided to leave it as an all occasion card.  I have adorable country girl friends that would enjoy this card just as much as any man.  And it is always great to have a great masculine card on hand, especially an all occasion one.

6-15 (1)

Have a creative day!

Moana

City By the Bay

Wouldn’t you love a view of the city like this?  Well, my view is a whole lot more country, but I would one day love to be able to enjoy one like this.  I might have to settle for occasional holiday trips, but it would still be wonderful.

4-30

I put quite a bit of planning into this project.  I had to think backwards in order to keep the layers straight.  I embossed my whisper white piece with elegant dots and used the recessed side to make my ‘wall’.  I inked up my sponge and just pounced in here and there to create this look.  I kept going until it looked more like a textured wall than a piece of embossed paper.  The edges got sponged.

The hearth and home thinlit of the window was used twice.  Once to create the hole in the wall and again to make the window frame.  I glued the white one to the tip top taupe one with tombo liquid glue and nestled it back into place with the card front.  That way it looked raised up without a lot of fuss.

The skyline was created with the calling all heroes set.  It was stamped with black stazon onto water color paper.  The texture of the paper made it look really neat.  I went to work on the water line and then moved up to the sunset.  The windows were colored in with gold wink of stella, even though you can’t tell as much, they do sparkle.  That was centered in the window and got a heavy dose of dimensionals.  I am sure I could have worked it out easier if I had thought a bit more, but sometimes a creative journey takes a few extra turns.

4-30 (1)

Have a creative day!

Moana

Woodland Baby Shower Gift Set

I admit it, I love giving gifts of thank you cards.  Especially when everything goes together so nicely.  This sweet friend was given a woodland themed baby shower and I knew I had just the right paper to fit the bill.  The invitations even had turtles and foxes on them.  Fun work time for me!

4-25 (2)

The gift box and gift bag were even fun to make.  I honestly haven’t purchased a gift bag in the longest time.  I love it.  Gifts usually aren’t that large, for the most part.  I just set the gift on my score board, measure some and go for it.  I am usually right on target, the box for the card set was a bit long, but it still worked out.  How about the foil cloud bag though, so adorable right?  I hadn’t paired the silver satin ribbon with it yet, and it looks perfect together.

4-25 (3)

The cards were very assembly line, both sets the same.  The background paper was cut with 1/4″ borders and a contrasting, but still coordinating, strip of designer paper from the same set was placed near the bottom.  A card stock 2″ circle layered with a stamped 1 3/4″ circle on top.  I stapled matching ribbon along the side of the circles for one more tiny layer and a bit of interest.  I do think they turned out adorable.

Inside this most adorable bag are two very silly baby books.  One is called “Toot”.  And yes, it is all about passing gas.  Just too funny to not share.  Both books were 7″ wide and 1″ thick, so that was easy enough to measure.  I scored at 2″ along each side and made the bottom scoring at 5″ and 7″.  This gave me a bag that measured 7 x 5 x 2 and worked out great!

All in all the set came together really fast.  From basic design concept, product choice and complete assembly it took about three hours.  Two gift bags and 24 cards, not too bad if I do say so myself.  I couldn’t attend the shower myself since I was teaching my card workshop, but one of my club ladies was also going and she took it with her.  It worked out great.

4-25 (1)

Have a creative day!

Moana

Dear Heart, Sweet Boy

This project was all about giving myself a challenge.  I grabbed a piece of dsp, decided on three colors, picked a stamp set I hadn’t used a long time and went for it.  This was definitely not my usual style, but it felt good.

3-20

The card itself wasn’t too complicated, just one layer for the background.  I stamped my little boys on water color paper with black stazon and opened the ink pads.  Their faces were done with a very diluted wash of pink pirouette with the hair in tip top taupe.  I wanted them to look like the same boy just doing different things.

Each boy face was accented with one color only.  For the darker areas I kept the ink fairly strong.  When I accented I diluted it a bit more and even more for the outlined areas in the background.  I left it simple because I wasn’t really going for perfection, just soft coloring. I punched their faces out with the 1 3/4″ circle punch and a background of black with the 2″ circle punch.  They were arranged on the front and layered with a bit of dimensionals.

The banner was stamped from the same set and a light wash of each color was put on its own section.  Then each end was punched with the bitty banner punch.  I also put that up on dimensionals.  I repeated the pattern of paper inside with more dsp and a smaller piece of very vanilla to write my message on.  Such a sweet card, for a very sweet boy indeed.

3-20 (1)

Have a creative day!

Moana

Pedal Pusher Through Wildflower Fields

I was so excited for this stamp set to show up I could hardly stand it!  Last year during Sale-a-bration Stampin’Up! added some new freebies half way during the sale to perk things up. It went so well they did the same thing this time.  This little set is one of them and it is the best!  It even made my husband grin.

2-26

There are other sentiments, but this one is my favorite.  There are several different items that could be stamped in the basket, but I chose flowers to coordinate with my background paper choice.  Talk about riding through a spring meadow, wish I really could though. Having a tandem bicycle is something my husband and I can’t wait to have.  Maybe that is why I love this set so much.

I also broke out some markers to do my coloring.  I tend to prefer my aqua painter, but it is good to use other things too.  They worked great, of course!  I did water color the basket, the bike seats, and my country road.  What a fun time I had creating this project.  Like I said, I just got it yesterday.  The rest of my box is still on the kitchen table, not gone through, not inventoried or anything.  I just dug through it, got this set out and made something right away.  The sign of a great stamp set for sure.  This could also be a workshop project I think.

2-26 (1)

Have a creative day!

Moana

Sweet Li’l Things

I haven’t visited my little chickie for a while now and loved saying hello again.  This stamp just says adorable like crazy.  I normally wouldn’t get a stamp set for just one image, but this one was just too perfect to pass up.  Of course it helped that it was a free gift with purchase, so there you go!

2-24

I used the Sweet Li’l Things DSP for the background.  That is how I created the pallet for my water coloring today.  I was a bit distracted chatting on the phone with my daughter while painting, so I didn’t dry as often as I should have, but I decided I could live with the little edge goofs here and there.  Besides, I wasn’t going for a blue ribbon, just a smile or two.

The strawberry patterned paper underneath the card is the other side of the designer paper I used for the background.  I think I will turn that into a matching gift bag when I decide to use the card.  Might not be too soon because I want my lil’ chickie to be on my desk for a while.  I made a tiny triple banner set for the greeting and used the bitty banner punch for the edges.  So easy to make the edges just right.  The paper strips are 1/2″, so they fit right inside the punch.  I twisted them the way I wanted them and gave them a quick staple.  Then I used my bone folder to give them a bit of a curl then added a ribbon knot to finish it off.

Everyone is layered in 1/8″ borders and set up on dimensionals.  This one would definitely require extra postage going through the mail.  But since I plan on using this as a gift set, I didn’t worry one bit about how thick it got.

2-24 (1)

Have a creative day!

Moana

Dream Without Fear

Last weekend was a great workshop and more often than not, there a one or two people that don’t show.  This leaves behind extra kits that I get to play with.  Sometimes I file the materials back, often I will make them up and make gift sets, and there are times I make something different.  That would be today.

2-6

The card made with this kit was more about the embossing folder and the paper was background only around the edges.  I decided to make it a focal point and just show it off. Truly, this paper pack is so fantastic.  I think I will be getting an extra one just for myself.

The fine tip glue pen is new to me, and I haven’t quite mastered it yet.  I have watched others use it with sequins and decided to try it out.  Not so easy as it looks, but I did get better as it went on.  On the whole, I think it turned out.  With such pretty paper, you don’t notice all of my glue adventures.  I have two more of these kits, I wonder how I will use them up?

2-6 (3)

Have a creative day!

Moana

Happy Christmas Exchange

I usually don’t get the chance to blog on a workshop morning, but since we are doing things a little differently, my morning is a bit different.

Happy Christmas Exchange

For today’s workshop, my club ladies are each sharing a project and making a kit for everyone to complete.  This is my contribution.  It does need to be simple, the prep work done, and the project should be able to be completed in 5-10 minutes.  We then get to come home with several different projects and my ladies get a chance to show off their skills too!  I call that a win.

Happy Christmas Exchange

This project is all about simple layering with 1/4″ borders, two stamps, two different sized square framelits and a touch of ribbon.  Oh, and sponging please, plenty of sponging.  Really, it should be pretty satisfying.

We are also doing a little gift exchange and I am bringing my big bin of retired product that is their own little clearance rack.  I drag that out every 3-4 months after I add a bit here and there into it.  This will be our third year doing this, and I think it is a tradition here to stay.

Happy Christmas Exchange

Have a creative day!

Moana

Sheer Perfection Gift Set

Sitting down with a tool in mind instead of color, design, or even a sentiment can get a bit interesting.  I wanted to make a quick pillow box with a new punch board I just bought and needed some paper that was six inches wide.  Sounds like an easy start, right?

Sheer Perfection Gift Set

The only thing I had at the ready was a retired velum stack, not the easiest stuff to make boxes with.  But, I was trying to be quick, so I stuck with it.  The board wasn’t too tricky, but I was scared of tearing the paper, so I was a bit timid.  It managed to work out.

Sheer Perfection Gift Set

I thought it needed a matching card and this little number came together.  But I kept on getting held up on embellishments.  Little flowers on top, nope, coloring, nope, tags, nope.  So, I just left it as is and called it all occasion.  Good enough?  It was for me.  And it turned out that my daughter needed a little thank you gift and card this morning, so treats went in and smiles will happen.

Sheer Perfection Gift Set

Have a creative day!

Moana

Glittering Holidays

After nearly a two week run of a clean and simple holiday gift set I have been more than ready to make something fabulous.  That is exactly what I did, if that sounds a bit showy, well, just look at it!  I have been planning it all week.

Glittering Holidays

I really just had the flowers in mind and knew they should go on top of a box.  So, to get my brain going, I picked some paper, ink and a stamp and got to work.  The paper alone was just lovely.  I stamped in a way to further elongate the tall box I had in mind.  I really wanted it to be about the flowers.  I did have to use my hot glue gun to keep these guys in order.  After they were assembled I attached them to each other.  The ribbon is threaded between them to hold them on top, so they are not attached otherwise and can be used again.

Glittering Holidays

The box is just scored every two inches for the side measurements and the same for the top and bottom.  Simple there for sure.  I closed the bottom, but just folded the top in place.  I am so going to use this for a wonderful gift, so I needed to get back inside.  Not just for a blog post, nope.

Glittering Holidays

My husband actually designed the card for me.  We chatted while he drove to work and he did a great job with the stamp choices I must say.  I stamped in silver ink and heat embossed in clear to give it an extra shine.  So pretty.  I added flowers with metal rimmed pearls in the centers and added a thin ribbon to finish it off.  The ribbon also helped tie the gift box in as a set.

Glittering Holidays

Have a creative day!

Moana

Neutral Toned If the Broom Fits

I know today is Halloween, but I was just feeling a bit mellow about it.  Could that be a result of being with students all day that were super costumed out and completely mental about it?  Or maybe because I went back to take yearbook pictures that evening during the carnival and dance?  Sounds about right.  Let’s just settle down a bit, but still enjoy the holiday.

Neutral Toned If the Broom Fits

This stamp is just too funny.  I think that I have shown myself that even though there is definitely a Halloween theme with the stamp, it doesn’t have to be used that way, and that always makes me happy.

Neutral Toned If the Broom Fits

Instead of focusing on the holiday, I went with a focus on the brooms themselves.  This included giving the background a run through with the woodgrain embossing folder, wooden handles on the broom.  Also, I did  a little piercing around the brooms themselves so I could thread some of the ever so lovely linen thread around the bristles and give it some dimension.  I think that looks pretty darn cool.  All kinds of dimension going on here.  What a great card!

Neutral Toned If the Broom Fits

Have a creative day!

Moana

Grateful Gifts

When you are trying to wind down from a way to crazy day, what do you do to relax?  Well, today I went straight to my desk and worked a day ahead.  This is going to be one ridiculous weekend and I need to get as much out of the way as possible.  Of course I do the fun things first.

Grateful Gifts

The new designer series paper pack is so much fun.  Here is one sheet, showing both sides of it.  I cut one strip 4″ wide and it gave me the card front and the paper for the tiny gift bag.  Yup, 4″ x 12″ is all it took.

Grateful Gifts

I do think that this dotted lace trim has become my favorite ribbon.  I am definitely a girl who loves a bargain, but even if it is a bit pricier, I love it every time I use it, with no regrets.  I can’t always say that about embellishments.  I used both the negative and positive die cuts, one for each project.  Once more, I am totally happy with this set.  I might be on a bit of a gift set kick again.  Hmmm…

Grateful Gifts

Have a creative day!

Moana

Sheltering Tree

Who doesn’t love the look of the beginning of fall?  The leaves are just starting to turn in my yard.  Some bright, some darker, and then there are those lovely dark ones that look almost burgundy.  Those would be my favorite.

Sheltering Tree

The tree is stamped in tip top taupe, the leaves in pear pizzazz and the turning leaves in perfect plum.  The card base is also in perfect plum with a slight framing in tip top taupe.  Very clean look for sure.  A few wraps with some linen thread and it was nearly done.

Sheltering Tree

I did a little echo stamping inside the card with the accent leaf color, just a bit in opposite corners.  I like to have enough there to connect to the front, but not so much that it interferes with the writing room.  It is still a card after all.  The front is popped up on dimensionals and that is all there is to it.  the outer dimensions are 4 1/4 x 4 1/4, a little different for me.  I am not prone to square cards, but I was working with my scrap pile, and that is what I had at ready.

Sheltering Tree

Have a creative day!

Moana

Banner Blessings Gift Set – Thanks

Another wonderful day with many adventures ahead.  I feel so blessed and grateful to be able to spend time here with my children.  How fortunate I am to have a husband that allows me to do so.

Banner Blessings Gift Set - Thanks

This lovely card came together pretty darn quick. A few simple layers with my favorite sponging left it nearly done.  I wanted to use the trim without covering up the beautiful embossing from my favorite embossing folder.  I think everyone should have this one. It is so great to have a tool like this that can be used in so many ways.  So I just attached a simple knot of trim instead of a card front wrap.

Banner Blessings Gift Set - Thanks

I chose the pattern of the DSP with the tiny flowers.  It went better with the nature look of the trees.   A touch of dimensional a went with the sentiment layer only.  Simple to make and easy to mail.  Sounds like a win to me.

Banner Blessings Gift Set - Thanks

Have a creative day!

Moana

Planning Ahead for Christmas

These cards feel like such a cozy Christmas, don’t you think?  We are making plans for a sunny holiday this year, but peeking out a window to a snowy scene is more than inviting.

Planning Ahead for Christmas

This window framelit set is sure to be one of my favorites.  Peeking through the window, could this snowman be any cuter?  I don’t think so.

Planning Ahead for Christmas

I love inside stamping.  It makes the card feel so much more complete.  Sometimes we need a place to write a nice long note, but other times it is just wishing someone a happy day, or a happy holiday.

Planning Ahead for Christmas

Most people enjoy displaying their holiday cards as part of their seasonal decorations.  These two swaps would definitely be a welcome addition to anyone’s Christmas decorations.

Have a creative day!

Moana

Dude, Happy Birthday

While chatting with my daughter I asked her for a little inspiration for a project.  She came up with these two stamp sets.  She remembers the Paper Pumpkin stamps much better than I do.  Good to get a reminder or two.

Dude, Happy Birthday

I have to admit, I am really into the Bombs Away Birthday set.  This particular one is my favorite, but they are all pretty awesome.

Dude, Happy Birthday

I was originally going to spritz the designer paper, but I forgot to get a re-inker in tip top taupe.  Ooops!  So I opted to sponge it instead.  The geometric pattern looks pretty darn cool.  A little bit of layering, lifting everything up on dimensionals, touches of silver mini brads and a finish with silver metallic thread and this card is ready to go.

Dude, Happy Birthday

I need to remember to get those paper pumpkin stamp sets out more often.  The kits are so fun to work with when they first come, but I often put the stamps away and then move on.  I think I will have to work on getting them in cases to keep them more visible.

Have a creative day!

Moana

One Big Meaning and Remarkable You

To get my mind off the heat last night I sat down at my desk and got a little more creative.  It has been a bit since I spent this much time for one project, but to be fair, I didn’t have any idea what I was going to do when I sat down.

One Big Meaning and Remarkable You

I used a whole sheet of tip top taupe to make the bag.  Just simple scoring there, nothing fancy.  I did forget to stamp before I scored, ooops.  So, my stamping does have little crease marks on the edges.  Can’t be perfect.

One Big Meaning and Remarkable You

The base has two layers, tip top taupe and a stamped layer of very vanilla.  I brought out the aqua painter again, oh how I love that tool.  Just using the ink from the stamp gives such a soft look.

One Big Meaning and Remarkable You


The oval framelits were put to work again for the focal point.  What a lovely flower.  I brought in tip top taupe into the flower and water colored it into the old olive.  I can tell the color difference, but I can also see a hint of lavender forming.  Interesting.  Crystal effects really made a difference in the look of the flower.  I could really use that stuff way too much.  A final stamped sentiment layered with some circle punches finished the front.

A touch of dotted lace trim was put to the side and also used to make a simple handle for the bag.  It really turned out beautiful.

Have a creative day!

Moana

Love

How would you suggest I celebrate my 200th blog post?  Some would perhaps do a give away, a special sale, or something else full of excitement.  I just might be a little different.  How about showing something simple, something that I love.

Love

How about just saying that I have loved my journey so far, and am looking forward to continuing.  I do love being creative, love sharing it with others, and love the joy that comes from helping others find they are creative and talented too.  There, love.

 Love

This cute little bag?  How about using a 6×6 piece of paper, like this Go Wild DSP stack, scoring it at 2″ on all four sides, quick snip on both score lines on opposite sides, and watch it come together.  A little hole punching for the ribbon, which I do love the dotted lace trim too much, and a sweet bow.

Love

One tiny stamp with one tiny tag layered on another tiny tag.  Two little basic rhinestones and it is all finished.  I do love a simple project that shares more than just pretty product that is fun to work with, it shows you care about someone enough to do something special.  That is what I love.

Have a creative day!

Moana

Go Wild All Occasion Card

Such a simple card for today, but it really makes me smile.  I did really try for a sentiment, some kind of cute stamped phrase, but couldn’t do it.  I just really liked it how it was.

Go Wild All Occasion Card

I guess that will leave this truly an all occasion card waiting for who knows what.  I think it leans more to the feminine side, but maybe a bit of room for masculine?  Your choice.

Go Wild All Occasion Card

The card base is made with tip top taupe layered with basic black and a front of this awesome go wild designer series paper.  I brought out the banner triple punch to give me these perfect banners.  I love not having to snip or make a square punch try to work.  I even repeated the pattern inside the card.  Not my usual, but I do like stamping on the inside.

Go Wild All Occasion Card

A touch of satin stitched ribbon around the banner trio and this card was done.  Super simple with a great look.  I think this might be my make and take for a demonstrator event I am attending this month.  Hmmmm…

Have a creative day!

Moana