Birthday Blooms with Blackberry Bliss

And a happy good morning to everyone!  I do love a Friday that is full of promise and enthusiasm.  The only problem is that I usually have my goals too high and get frustrated when I fall short.  Either way, I love Friday and the fun evening often in store.

4-15 (3)

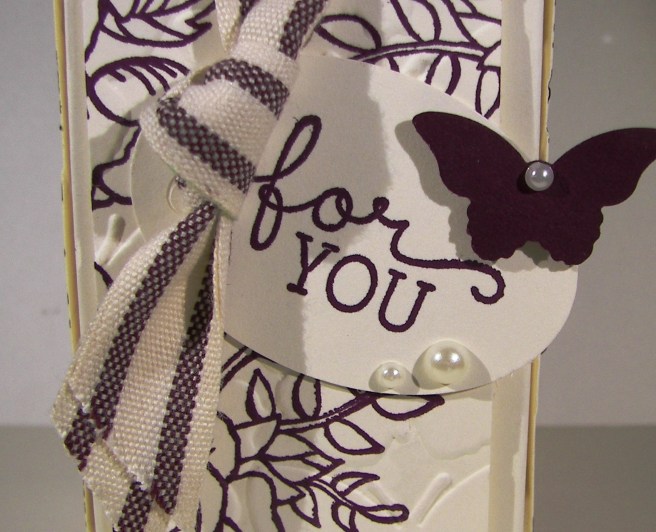
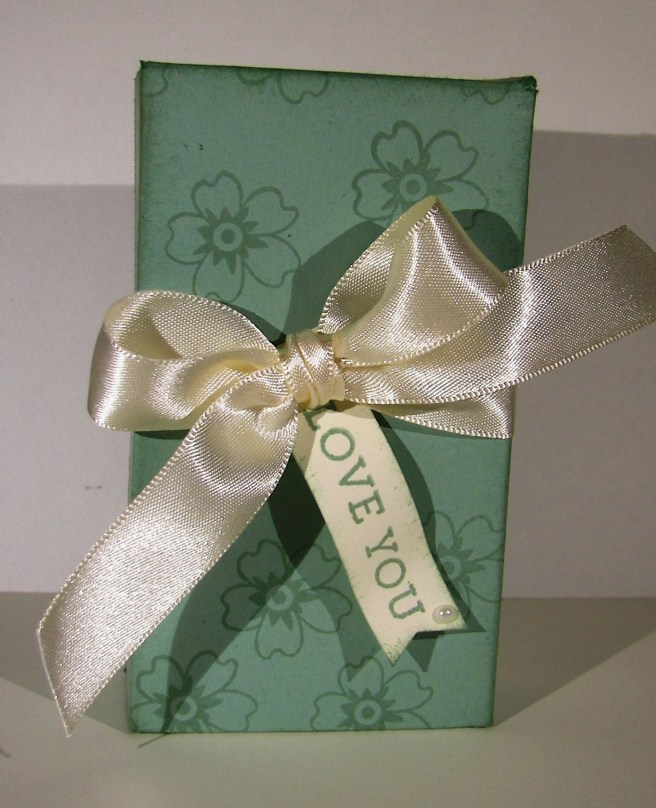
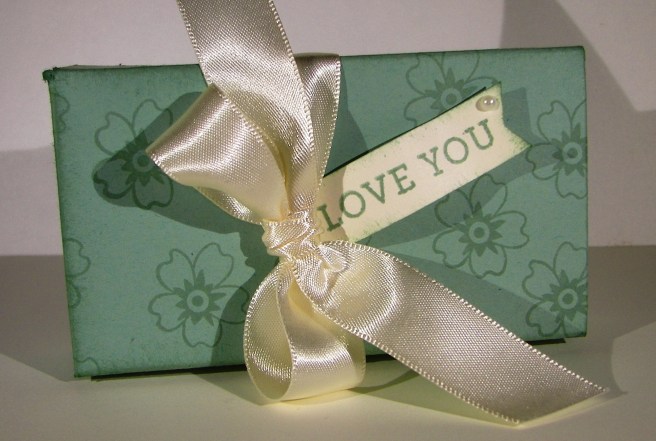
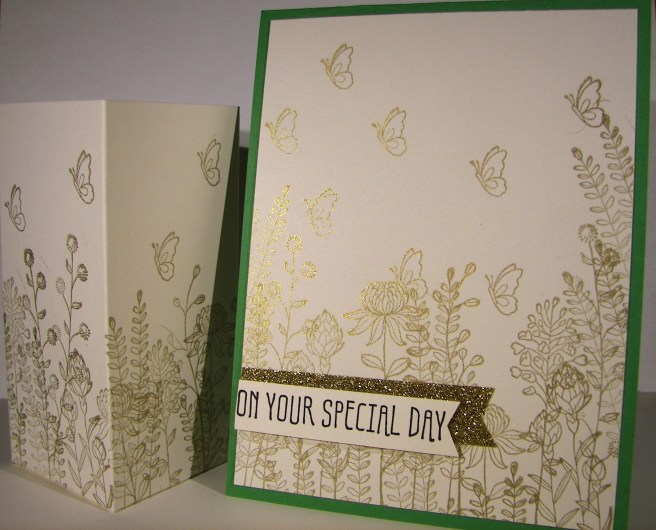
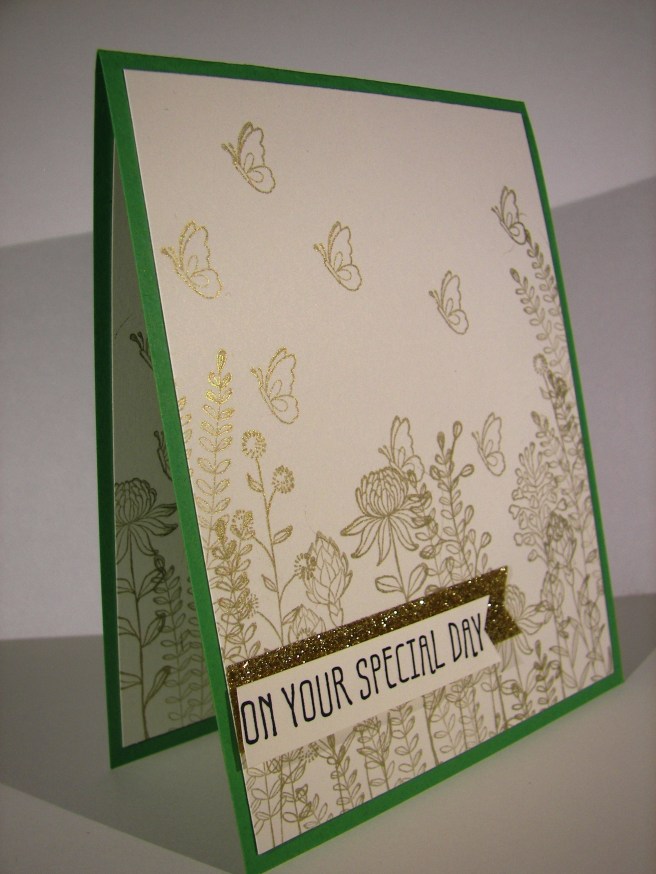
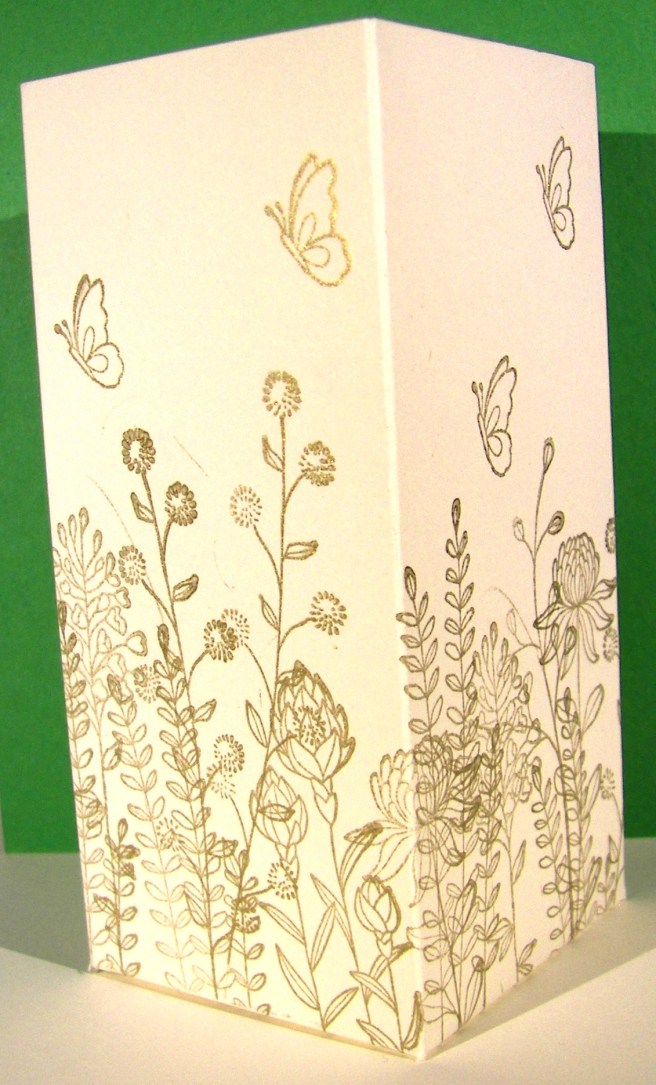
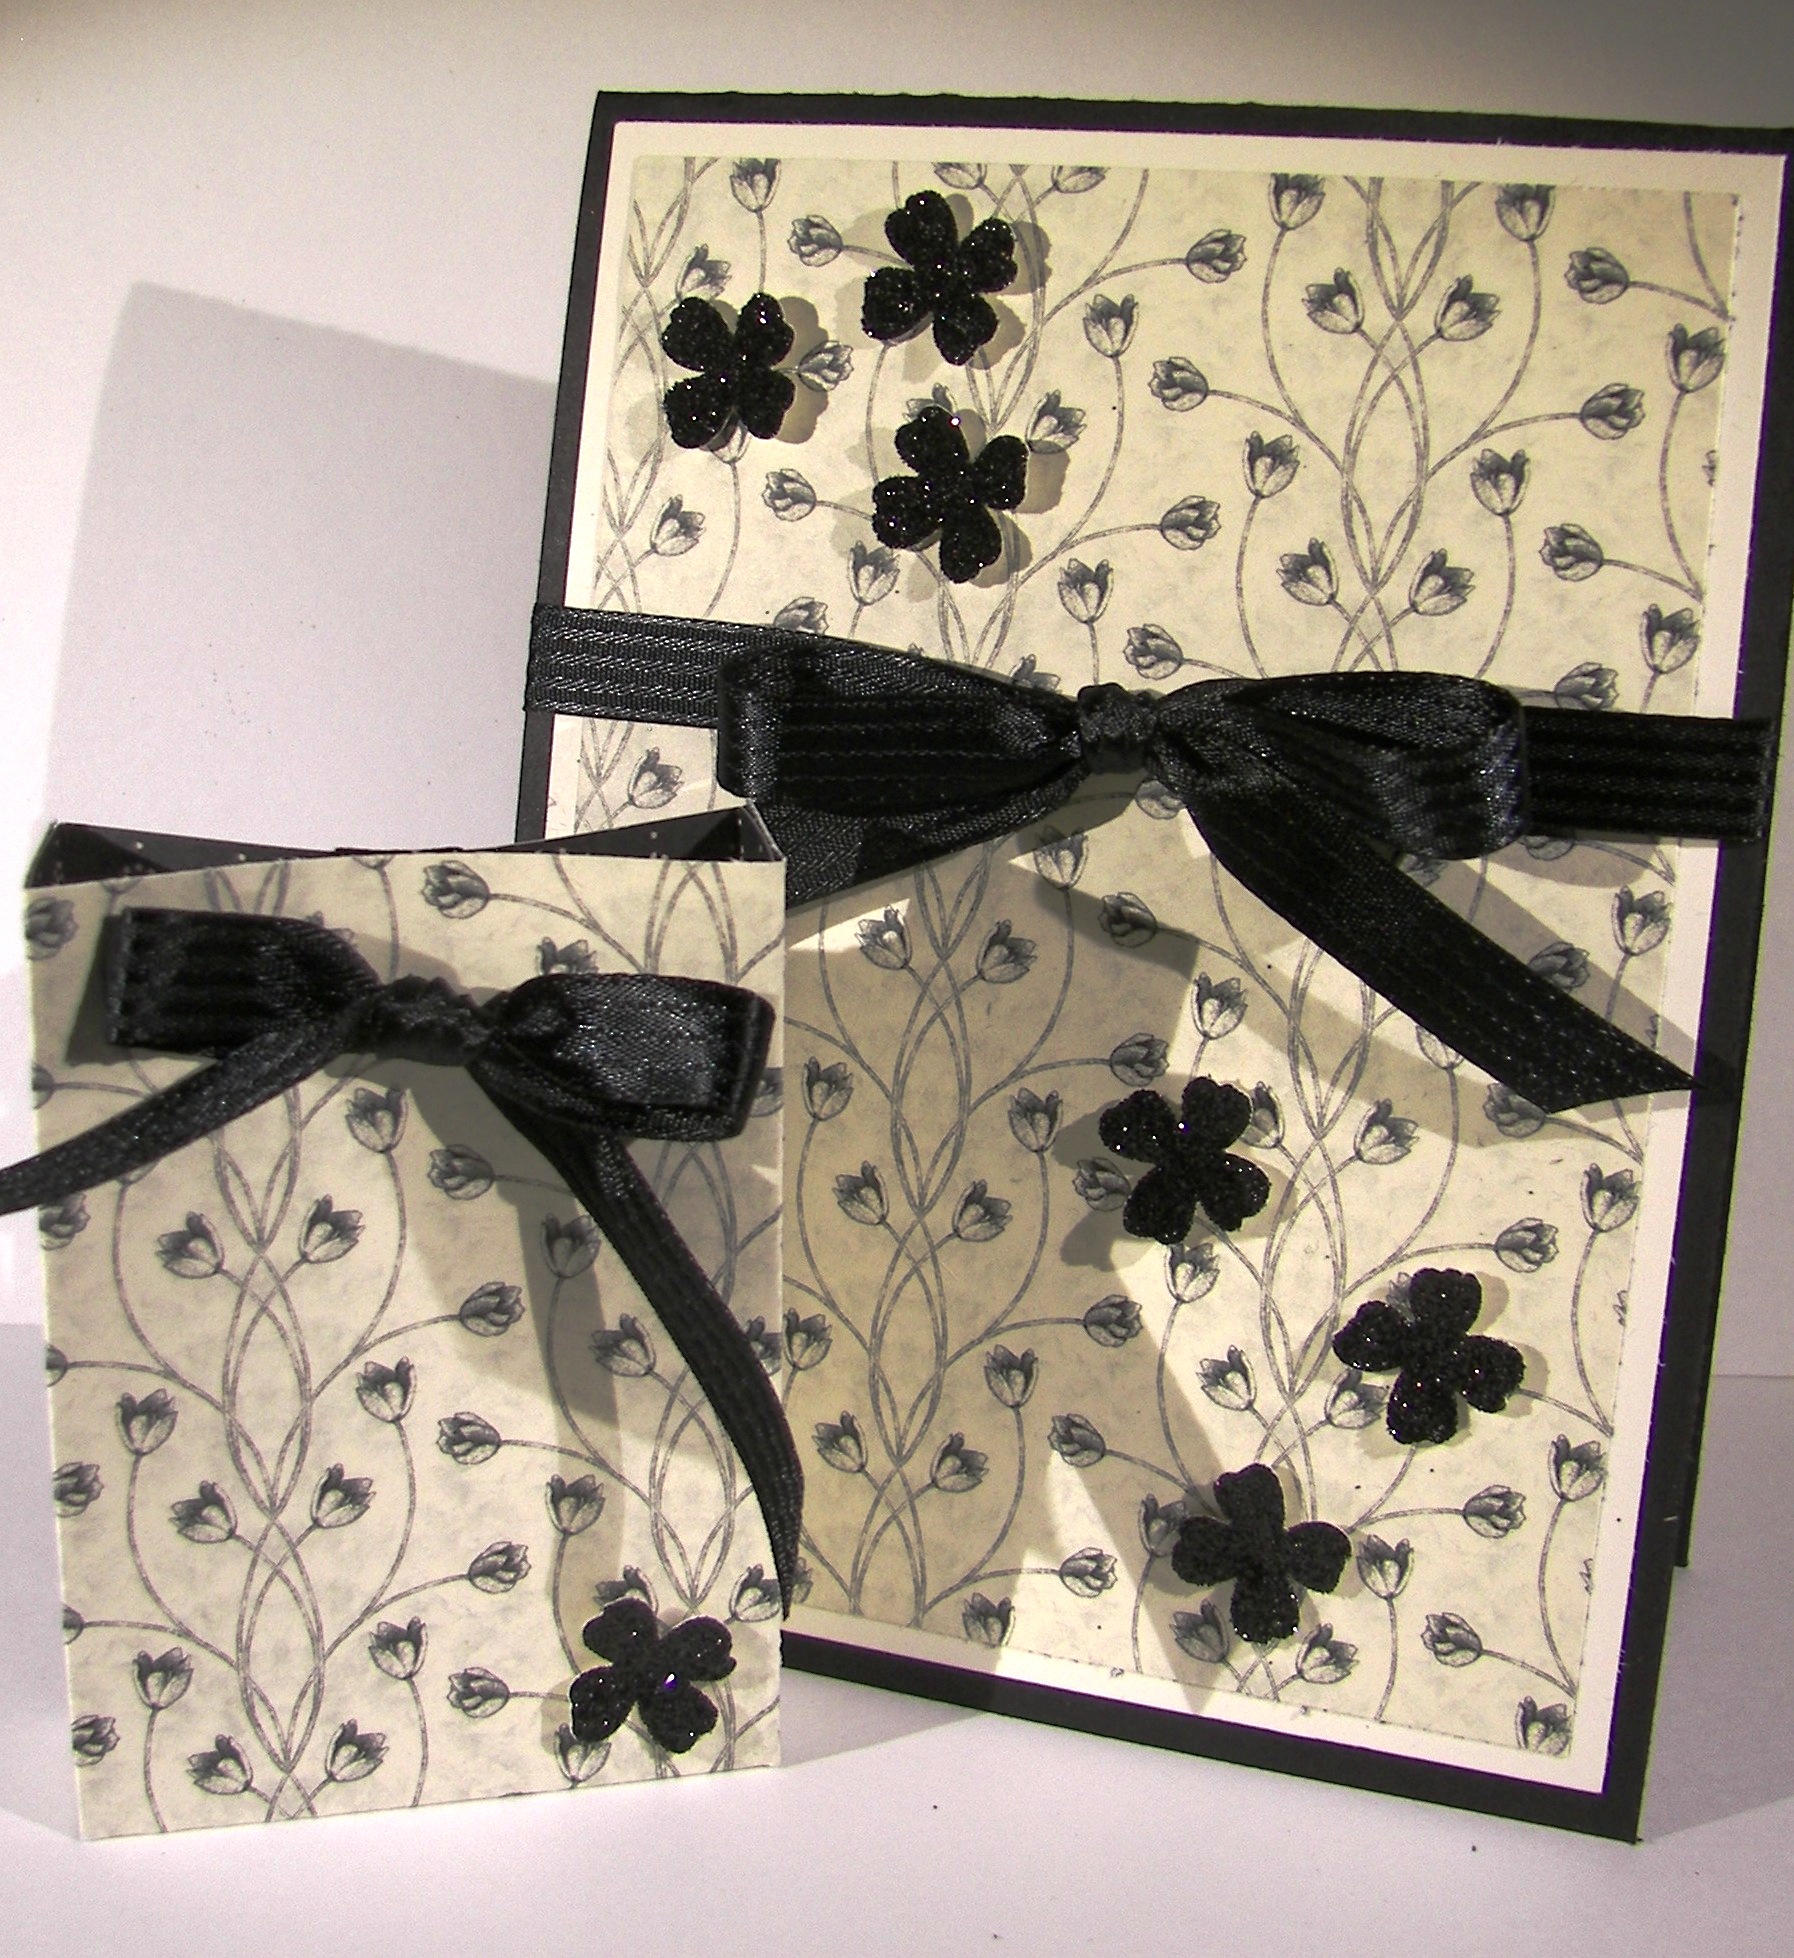
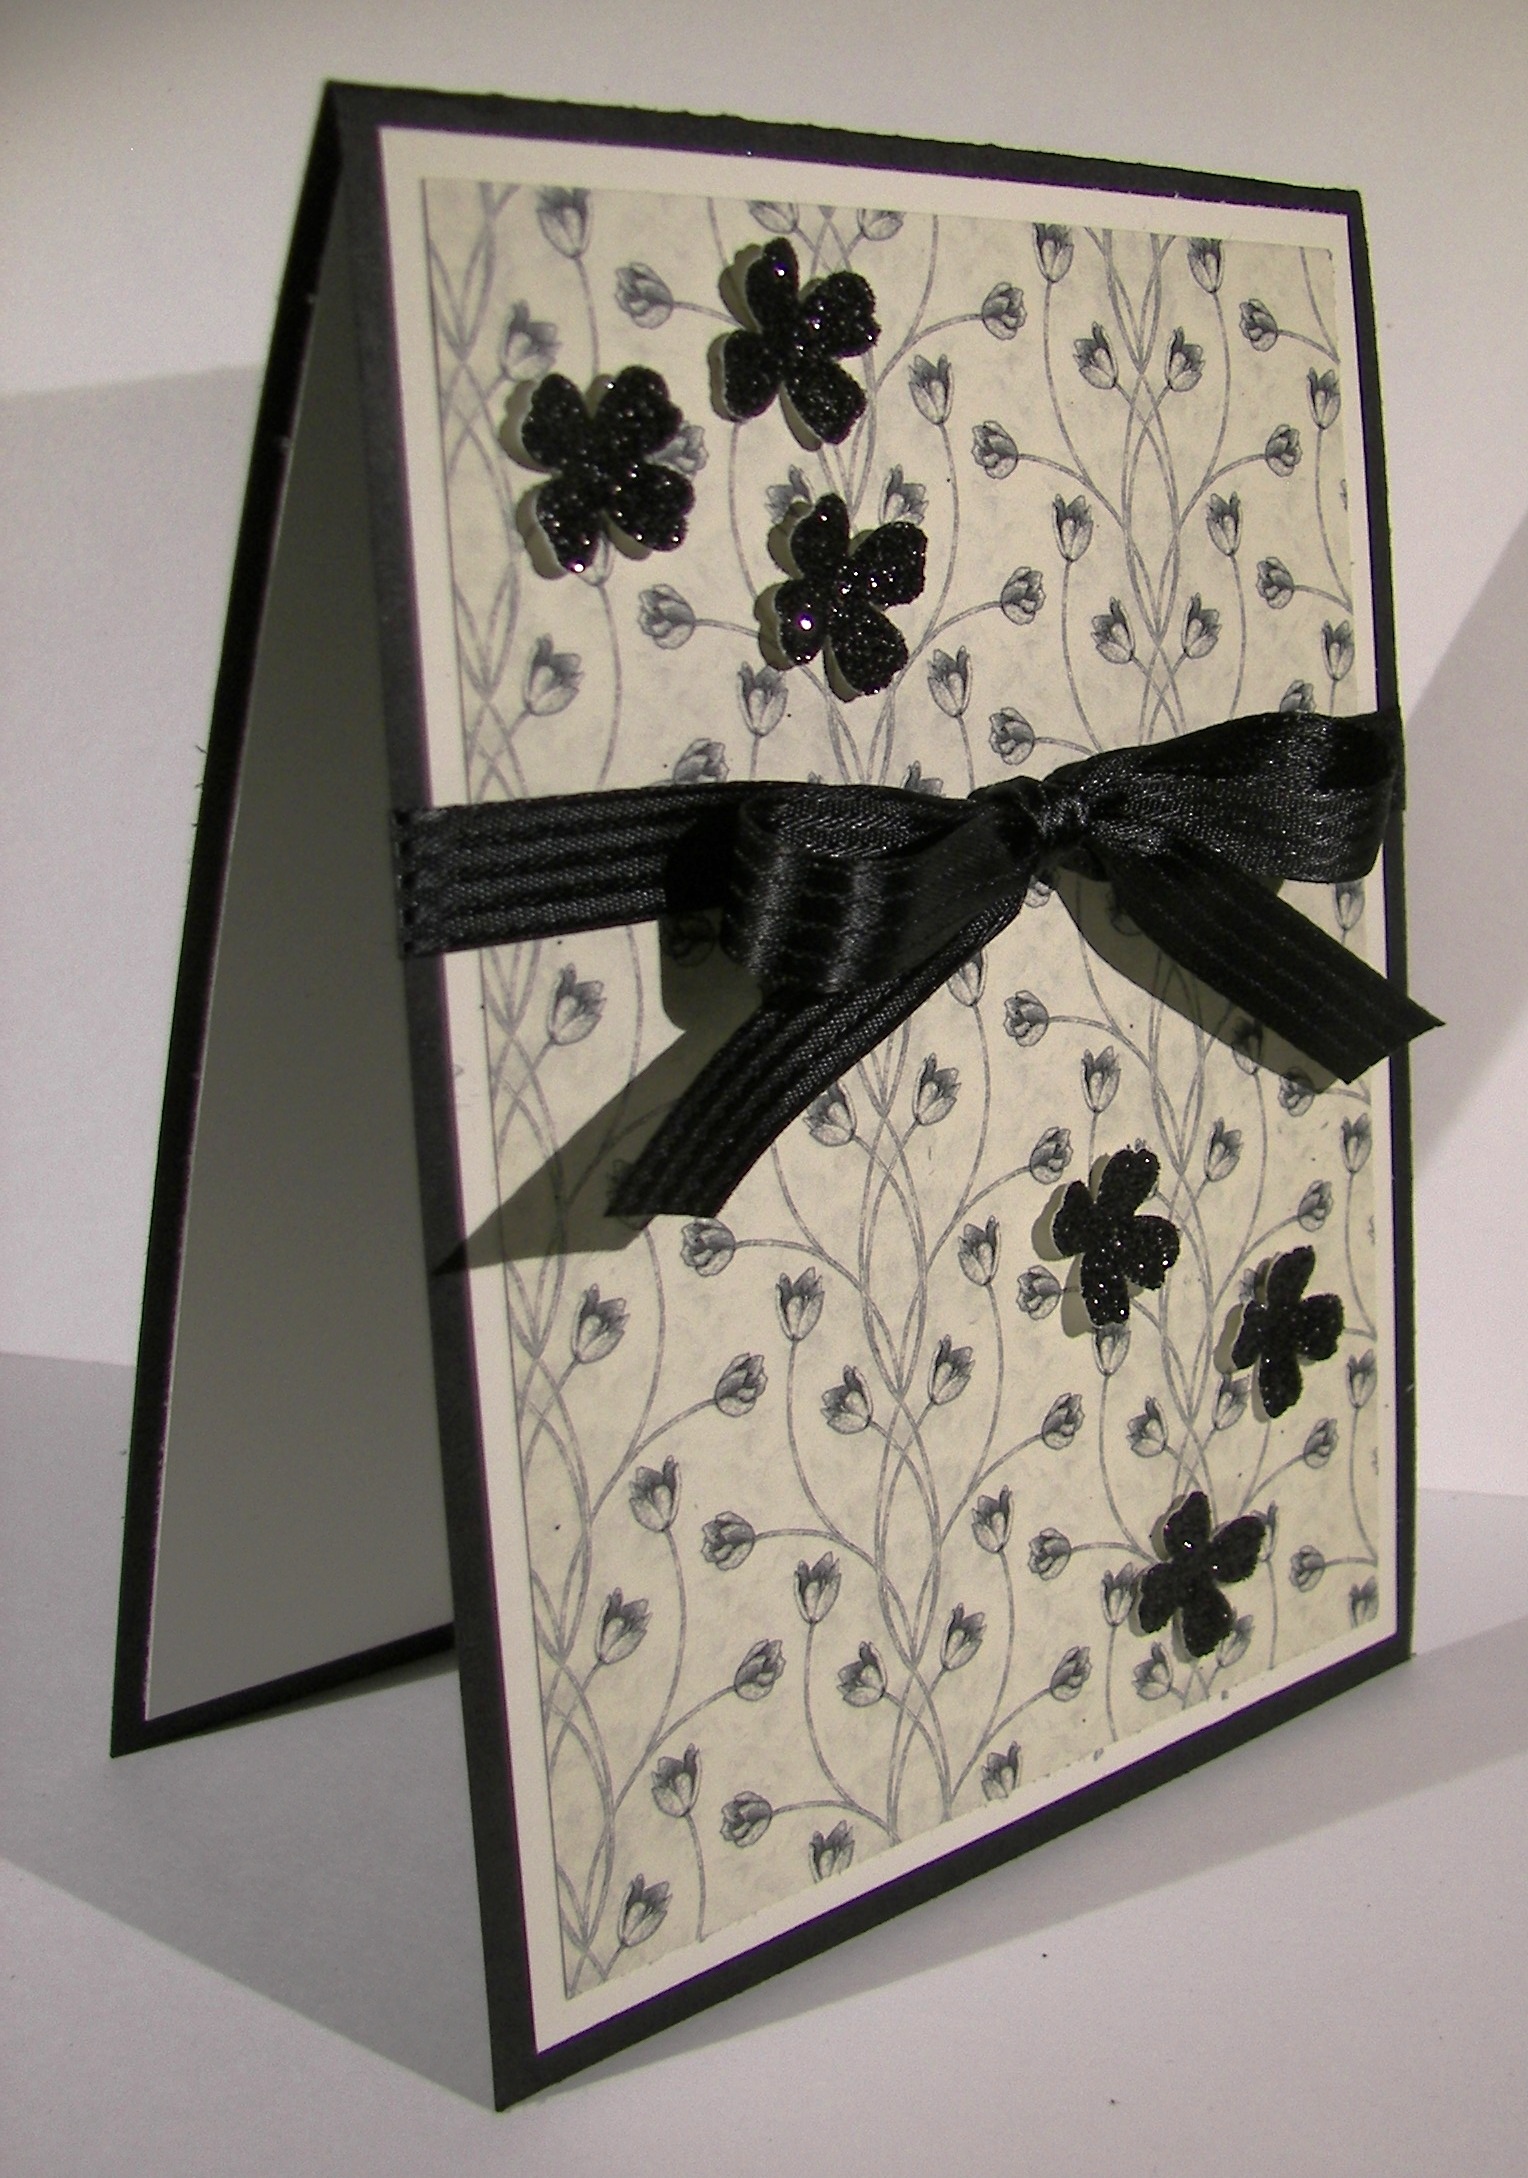
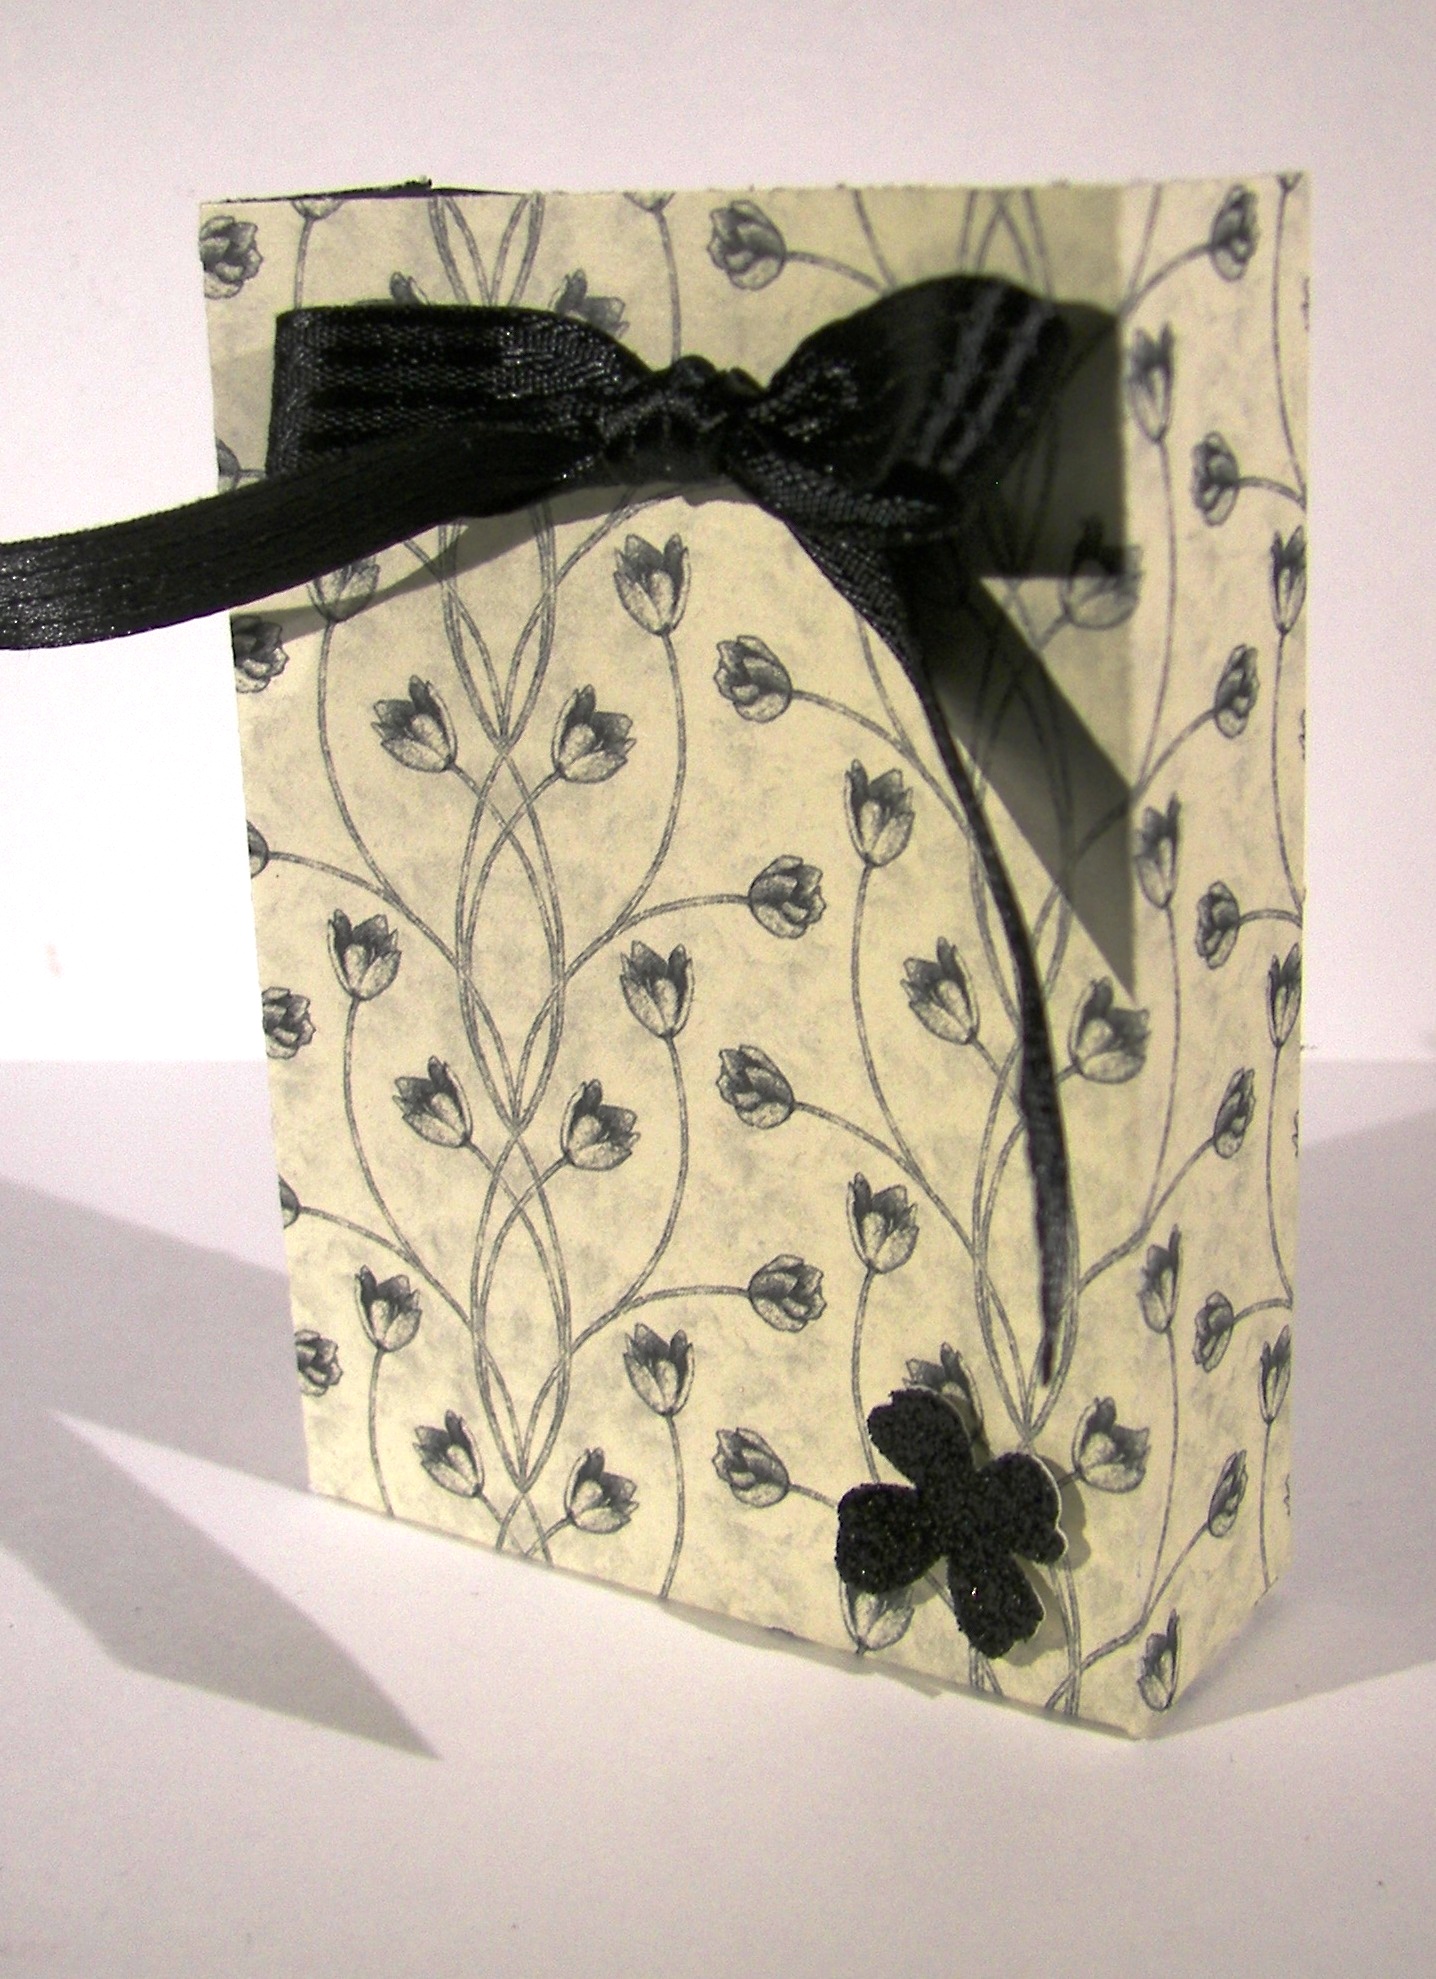
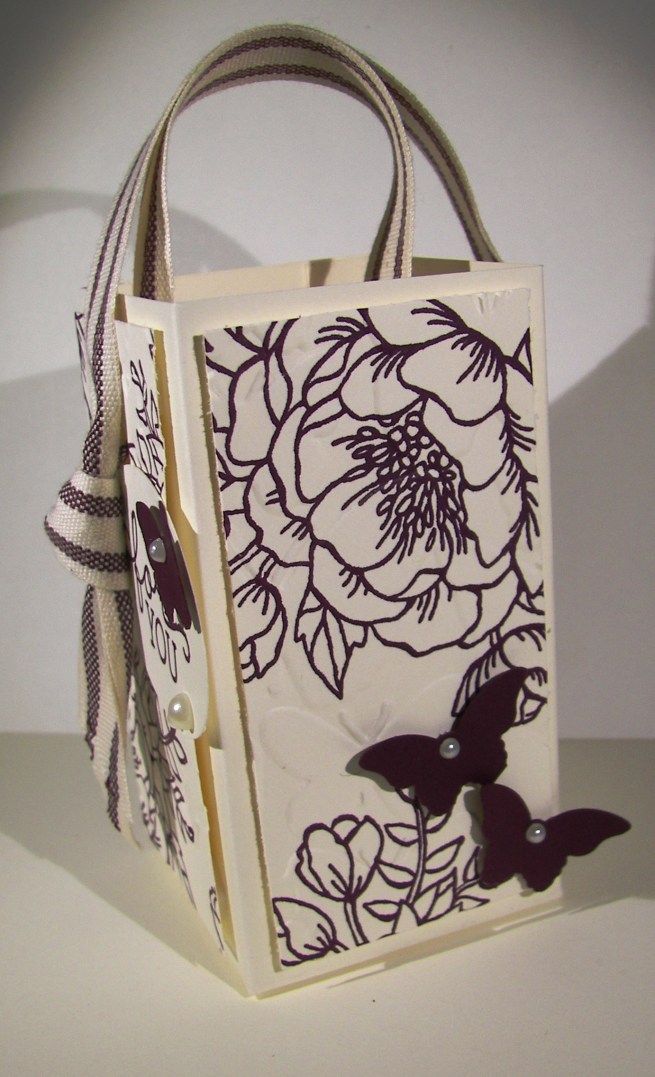
This little thank you is so adorable, yet lovely.  I used a half sheet of very vanilla for the box, scoring at 2″, 4″, 6″, and 8″.  Then turning one quarter turn, portrait now, to score at 2″ for the bottom.  I used a companion piece of very vanilla for the stamped and embossed layers. The piece is cut first at 3 1/2″ so the stamping could be done.  I just used the large floral image to create a pattern.  Then the second cuts came at 1 3/4″ each, needing four of these all together.

4-15 (1)

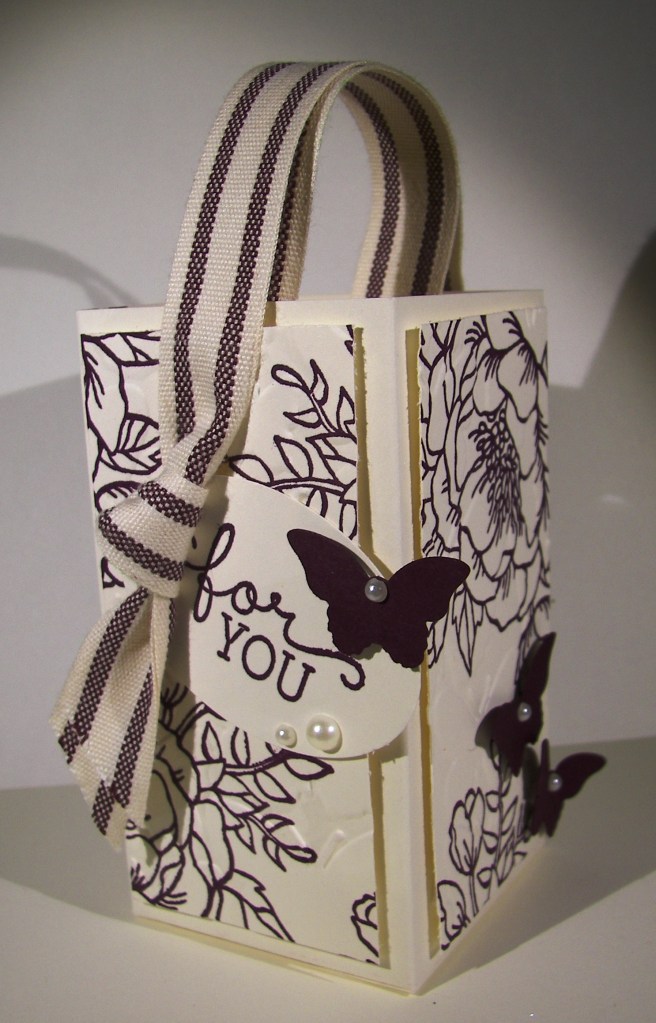
Before they were attached I embossed them with the fluttering embossing folder.  Such a nice result.  I layered them up with dimensionals and thought about leaving it just the way it was, but continued on with the plan.

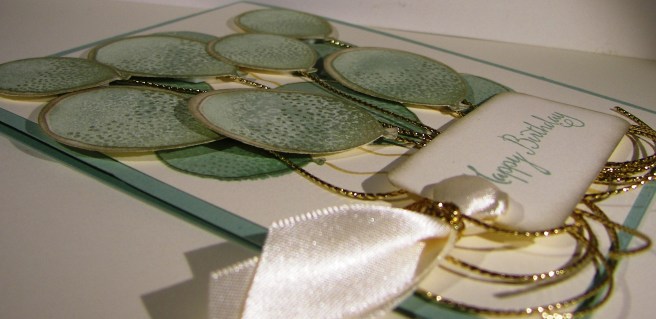
I made the tag from the scrap left over from stamping and punched it with the extra-large oval punch.  A added a ribbon handle and attached the tag to the under side of the ribbon tail.  A few butterflies later and a smidge of pearls and I was ready to add my treats.  So much fun, just so much fun.  Now to deliver!

4-15 (2)

Have a creative day!

Moana

Love You Bloomin’ Love

Just when I thought I could sit down and make something new my time got snatched up. It seems to happen that way more often than I would like, but we do what we have to do.  So, I grabbed a leftover kit from last months workshop and turned a card base into a box.  Pretty cool if I do say so myself.

4-11

I stamped tone on tone with mint macaron using one of the larger flowers from the Bloomin’ Love set to create the background pattern.  My tag was a tiny piece of very vanilla which measured 1/2″ x 4″.  After I stamped the ‘love you’ sentiment from the same set I punched a banner at the end with the bitty banner punch and sponged around the edges with the same ink.  I curled the banner a bit before I set it in place.

The cardstock was cut at 4 1/4 x 11″.  All ready to be a tall folded card.  I scored along each of the long sides at 1″, turned it one quarter turn and scored at 5″ and 6″.  Those last two scored would become the hinge side of the box.  Scoring, snipping and a bit of gluing later and this little box came together.

4-11 (1)

I chose the large satin ribbon for my bow.  That is such a rich ribbon.  I just wrapped it around the short side and tied a pretty bow, leaving the tails a bit longer than normal.  I usually wrap my boxes up more, but wanted to be able to slide the ribbon off easy to fill with treats when the time came.  I also decided to add a tiny basic pearl on the banner, but just one.  How cute is that?

Have a creative day.

Moana

Balloon Bouquet Celebration

I finally got my back ordered balloon bouquet punch and I am totally celebrating!  This punch is just the coolest thing and totally worth the wait.  This will be getting tons of use, just tons.

3-23

I may have gone a bit overboard with the balloons, and the cording, but I love how pretty it is.  One special person will get this card, and I think I know who it is.  Not everyone appreciates how much time can go into a hand made card, but those that do deserve every one they get.

3-23 (1)

I used a leftover kit from Saturday’s workshop to make this project.  I stamped several balloons on the background paper.  To get the tone I wanted I stamped off once before I applied it to the card.  Then on my other paper, that I would be punching, I stamped off twice.  Both sets of balloons were also stamped with the dotted accents in mint macaron and gold encore ink.  I added gold to everything and sponged away.  Too cute!

3-23 (2)

Have a creative day!

Moana

Flowering Fields with Botanicals for You

I did start out with a St. Patrick’s Day card set in mind.  Hence the green and gold. However, it quickly changed into something more elegant and much more useful.  I do know several people that truly do love to celebrate this holiday and this would work wonderfully for them as well.  What fun, right?

101_1224

This Flowering Fields stamp set will be gone soon.  I do love the fun free products available during Sale-a-bration, but always are sad to see them go.  I do know that there are always new things on the horizon that I will love equally well, but I do have my favorites that stick around year after year.

101_1225

I ended up using a full sheet of very vanilla, part for the card front and inside, and used the rest to make a gift bag.  I prefer to have paper used up with as little waste as possible.  I even used the snipping left from cutting the front and inside to be my sentiment tag.  Very little waste today indeed.

This glitter tape is so much fun.  I admit I have stashed it a bit too long, I thought I had learned my lesson.  Guess not.  So, I broke it out and put it to work.  Just a little bit does so much.  And it is so tidy, no glitter messes to be found.  A win for everyone for sure. I do think I will use some tape to close the bag when it gets filled with a treat or two.  Yeah!

101_1226

Have a creative day!

Moana

Hello Bohemian DSP!

Guilty as charged.  I have loved this pack of paper and haven’t cut into one single sheet.  For shame, I know.  However, I have sorted that out and made something I quite like.  So much so that I think it will make it into this Saturday’s workshop.  I have a few ladies in particular that enjoy this paper as much as I do.

101_1164

I haven’t done a ‘z’ fold card for some time.  I saw some projects done by a few people I follow and thought I would give it a go.  The card turned out pretty darn good if I do say so myself.  Also, I love how I have been able to showcase so much of this fantastic paper.  The ribbon on the back of the card is also something new, but thought it brought a nice balance the the closed project.

101_1165

Have a creative day!

Moana

Sending Good Thoughts with Perfect Pennants

Everyone loves a fun surprise, especially me.  Last night my husband brought home some items from the store I asked for, and a few others to boot.  Several basic t-shirts, always need those, and this adorable top with my favorite colors.  Classic me, after my thank you’s were shared, my brain went straight to a card idea.  And that would be this little number.

2-17

It also works out that I am trying to build a small arsenal of birthday cards for my mother-in-law.  She is so diligent in her efforts to send cards to all of her family, all the way down to great-grandchildren.  So, she keeps me pretty busy sometimes.

2-17 (2)

This card was fairly simple by design and pretty easy to put together.  Only one stamp on a piece of very vanilla, punched and layered on some calypso coral which was punched as well.  Love that triple banner punch for fun like this.  The card front is made from very vanilla and layered with a strip of chocolate chip.  I put them together and ran them both through with an embossing folder so the pattern would be continuous.  Love that look.  I chose the boho chic embossing folder because it is nearly the same pattern as the coordinating scarf for my new top.  A reason for everything.  The banner tag was layered on the card front with dimensionals and I called it done.  I didn’t sponge anything or even stamp inside.  Don’t worry, I lived.

2-17 (3)

Have a creative day!

Moana

Wink of Stella Rose Garden

I have wanted to use this thinlit for some time, but didn’t want to go traditional.  It is obvious that it is a rose, but what if I didn’t want it to look too realistic.  I do love the matching stamp set and have water colored that one plenty, but I wanted this to be different.

2-16

Different in a good way though.  I think I like it, but am not quite sure.  However, when I start something I just stick with it through the end.  The positives?  No additional postage required.  There is dimension without too much layering.  It is delicate and masculine at the same time.  And, it is definitely different than how I have seen it used.

What is my hangup then?  I honestly don’t know how I feel about the designer paper showing through without the flower being a solid color, or an obvious floral color.  Personal hangup I guess, but still, there it is.

2-16 (3)

I painted the surface of the flower and leaves with the white glitter wink of stella brush.  I love how easy it is to add a lovely glitter look.  And it is almost even goof proof.  I wasn’t too focused on the detail when I painted and it was already adhered when I did.  But it was easier to paint it on the card than trying to hold it at different spots while I got it done.

I normally have my card base heavier to support all of the goodies I layer on, but I really wanted a very vanilla card.  So I gave the inside a little extra layering to keep it strong enough to stand up.  All good here, it worked like a charm.

2-16 (1)

Have a creative day.

Moana

Bloomin Hearts Everywhere!

Springtime sure does bring a lot of beauty, especially love.  It is so much fun to hear about new engagements and wedding plans.  There are three this spring and early summer that are pretty darn exciting, one in particular, my son’s.

2-11

I was getting a little misty eyed and created a couple of cards with their wedding colors so I could write them each a personal note of congratulations.  I really had fun just taking my time and enjoying the process.  I did have a brief thought that these could be a lovely wedding invitation front.  Then I thought about having to make 400 or so and quickly decided that would be a lot of time spent that could be better spent otherwise.

2-11 (4)

The detail on this framelit is just so wonderful.  It makes such a pretty piece of art you don’t need anything else on the front.  I did do a little more, but just embellishments. Two varieties of pearls, one with the added framelit flowers, each with a different embossed background, and both finished off with very vanilla satin ribbon.  What an elegant look.

They are very similar, but also uniquely different.  Just like the two people I was thinking about when I made them.  This weekend we are hosting an engagement party for them. It should be so much fun!  I am new to this part of life, but I am definitely up for it.

2-11 (2)

Have a creative day!

Moana

Everything Botanical

Well, this project started somewhere else, but the results are great.  Sometimes it is hard to see past your ‘opportunity mistakes’, I managed though.  Once I fussy cut designer series paper I am totally committed.

2-8 (3)

The free items you can earn from Sale-a-bration are all unique, but this one caught my eye right away.  A patterned velum paper that not only coordinates, but actually outlines designer series paper, well that is amazing.  I fussed a bit matching it up, but found the exact spot.  I almost did a 6 x 6 card just so I could see the whole pattern line up.  It would have been worth it, it looked so pretty all lined up.  I moved on though.

2-8

My opportunities came from the glue experience.  I thought I could put tiny tiny dots of glue on little flowers and it would look kind of neat, and hide the adhesive at the same time.  Well, my tiny dots were not as tiny as they needed to be.  Several fixes later, it worked out.  Basic rhinestones, a larger sentiment with tag layering, and using one of the many coordinating framelits.  Phew!

I added a touch of inside stamping with a leaf from the coordinating stamp set.  I don’t usually go for a whole suite of product.  This one is different, I loved all of it.  However, it is my favorite color pallet, floral, and it goes together so wonderfully.  I couldn’t resist it.  So I didn’t.

2-8 (1)

Have a creative day!

Moana


Dream Without Fear

Last weekend was a great workshop and more often than not, there a one or two people that don’t show.  This leaves behind extra kits that I get to play with.  Sometimes I file the materials back, often I will make them up and make gift sets, and there are times I make something different.  That would be today.

2-6

The card made with this kit was more about the embossing folder and the paper was background only around the edges.  I decided to make it a focal point and just show it off. Truly, this paper pack is so fantastic.  I think I will be getting an extra one just for myself.

The fine tip glue pen is new to me, and I haven’t quite mastered it yet.  I have watched others use it with sequins and decided to try it out.  Not so easy as it looks, but I did get better as it went on.  On the whole, I think it turned out.  With such pretty paper, you don’t notice all of my glue adventures.  I have two more of these kits, I wonder how I will use them up?

2-6 (3)

Have a creative day!

Moana

Hooray! for Perfect Pairings

I could probably keep making samples for these bridal shower invitation choices.  Where do you draw the line?  Is three enough?  How about five?  Perhaps four is just right…

1-27

Even though this is still floral, it is has a much stronger navy blue influence.  With the soft seam binding ribbon, the navy doesn’t seem too overpowering.  Not too complicated a card here.  There are 1/8″ simple borders layered with a decorated front.  I started with the navy flower background stamping and then included the pink centers.  How fun is it to have just the colors you want.  The beauty of stamping.

1-27 (2)

Have a creative day!

Moana

Bloomin’ Love

I do enjoy making something special by request.  It isn’t always easy to start, but once you do, the ideas just begin flowing.  This is my first go at a bridal shower invite.

1-25

The brides colors are a blush pink and navy blue.  My blue looks a bit royal purple here, but it is a deep navy.  How about this lovely framelit die cut?  I thought I might go a bit bonkers trying to get it all detailed out, but I managed.  I am not always the most patient one, but this die requires it.  I had to put it through the big shot back and forth several times to get all of the cuts done.  It was worth the fussing though.  The detail is amazing.

1-25 (1)

I might have gotten a bit carried away on the inside stamping.  I was chatting while I stamped and before I knew it, it had gotten pretty busy.  If this one ends up being the choice, we might have to print the details on velum to be an overlay.  That would be pretty though too.  Love is definitely in the air.

1-25 (2)

Have a creative day!

Moana

Hello Little Sunshine

It is so wonderful to have stamp sets that speak to you.  I literally would say this phrase over and over to my children when they were little.  Now that they are much older, it still manages to sneak in for a tender moment or two.

Hello Little Sunshine

When I started making the background for the card by just stamping off as I went along, I knew I needed to make a coordinating gift bag.  That little sunshine stamp is so adorable.  I could see myself sneaking it in lots of places.  And to top it off, the Hello stamp set is a free one during Sale-a-bration!  Free is nice, but free and adorable is not a common thing.

Hello Little Sunshine

A tall slender gift bag was in order today.  I was feeling like a different gift option, but of course I could totally see a big yummy candy bar going inside.  How about a fat quarter of fabric instead?  Yes, my quilting friends would totally agree with that one.  Maybe I could find some sunshine paper too?  Or stamp some to match?  A project and a gift, sounds great!

Hello Little Sunshine

Have a creative day!

Moana

Sky is the Limit

I love it when a card comes together better than intended.  This is a mix of three awesome products, one of which is free during Sale-a-bration.  How great is that?

Sky is the Limit

The mottled dsp stack is fantastic.  The color combinations and patterns are so strong.  They lend a masculine feel, but I don’t think they are exclusive.  The free stamp set is actually really versatile.  This is the sentiment, but there is a great plane, fun clouds and some other elements as well.  I wasn’t too sure about it, but my youngest talked me into it.  I am so glad I did.

Sky is the Limit

I layered two pieces of very vanilla with the spacing I  needed.  I used just a touch of snail to keep them together during the embossing.  But before I  did the embossing, I stamped the sentiment in the upper right trying to predict a bit where a smooth place would remain.  When I placed the papers in the folder, I centered the sentiment in Asia, or the part shown, so it would stay smooth.  It worked great!  I wanted the embossing to stay lined up, so I picked up one side, put two dimensionals down, then picked up the other side and did two more dimensionals.  I raised up the levels and kept the embossing lines in place.  I am in love with this folder.

Sky is the Limit

Have a creative day!

Moana

Paper Pumpkin Re-Make

What says thank you better than a big bar of chocolate?  A really pretty bar of chocolate with a coordinating card, that’s what!  I really like how this Paper Pumpkin set got used  so differently than I normally do.

Paper Pumpkin Re-Make

I have mentioned my teacher aides before and how awesome they are.  The holidays are the perfect time to share that gratitude.  Especially when they feel special and others get to see that too.  Okay, they are teenage boys that love to feel awesome and oh so cool.  This works very well, just like they do.

Paper Pumpkin Re-Make

I used the card base to wrap over my vanilla cardstock and it fit around so nicely.  I was able to give it nice little scores and get two swipes of fast fuse to keep this together.  After a hefty wrapping of ribbon, I know it is so secure.  These holly leaves and little adhesive backed berries are so adorable though.  I could definitely get into a die cut to make more of these.  I will have to look around for one.

It is fun to go to work when you have this kind of joy to share.  Besides, today is the last day of school before a very nice and long three week break.  Phew!

Paper Pumpkin Re-Make

Have a creative day!

Moana

Sheer Perfection Gift Set

Sitting down with a tool in mind instead of color, design, or even a sentiment can get a bit interesting.  I wanted to make a quick pillow box with a new punch board I just bought and needed some paper that was six inches wide.  Sounds like an easy start, right?

Sheer Perfection Gift Set

The only thing I had at the ready was a retired velum stack, not the easiest stuff to make boxes with.  But, I was trying to be quick, so I stuck with it.  The board wasn’t too tricky, but I was scared of tearing the paper, so I was a bit timid.  It managed to work out.

Sheer Perfection Gift Set

I thought it needed a matching card and this little number came together.  But I kept on getting held up on embellishments.  Little flowers on top, nope, coloring, nope, tags, nope.  So, I just left it as is and called it all occasion.  Good enough?  It was for me.  And it turned out that my daughter needed a little thank you gift and card this morning, so treats went in and smiles will happen.

Sheer Perfection Gift Set

Have a creative day!

Moana

Sparkly Seasons Pumpkin Patch

It may not look very busy, but these little pumpkins almost did me in.  I nearly got to the point of just showing you how frustrated I was and that there was not much to show for it.  Then I thought about iridescent ice, and the world came together.

Sparkly Seasons Pumpkin Patch

I love that stuff.  It can make the most simple things look almost magical.  I used three different framelits for my pumpkins and got to work.  I used a large stylus to create grooves and texture to the surface, but from the back side.  It really broke down the fibers a lot.  Then I began to water color streaks to give dimension.  That didn’t do a whole lot.  Then I spritzed water and swiped ink on with my finger.  It got better.  Then I sponged with pumpkin pie and added early espresso too.  At that point they looked okay, but still kind of sad.

Sparkly Seasons Pumpkin Patch

That is when I tried the iridescent ice.  I daubed the whole surface with versamark and sprinkled on the powder.  I only used one coating and thought that would be enough.  It was just right.  I did sponge a bit more with early espresso afterwards.  I layered the pumpkins together using dimensionals, with the stems too, and wrapped them all in linen thread.  I wanted to leave it then, but decided on a simple word phrase.  And there you go!

Sparkly Seasons Pumpkin Patch

Have a creative day!

Moana

Timeless Elegance with Black Glimmer Paper

It is so enjoyable to create something very lovely that is so simple to put together.  That is just how nice it is to work with great product that makes you feel so creative and talented.

Timeless Elegance with Black Glimmer Paper

I had been wanting to use this fun black glimmer paper differently than shown in the catalog.  It was fun to see it with all of the Halloween projects, but I think it has a lot more uses.  Simple little flowers for instance.  I didn’t want to use a punch too large because I wasn’t sure how to center them.  These little flowers didn’t require a button or anything.  So adorable.

Timeless Elegance with Black Glimmer Paper

I cut a strip of the dsp 3 3/4″ wide for the card front and thought it would be nice to make a matching gift bag with the rest of the strip.  It worked out pretty nicely, don’t you think?  It is big enough for a few treats, or even a gift card.  Just my kind of favorite thing, a card and matching bag.

Timeless Elegance with Black Glimmer Paper

Have a creative day!

Moana

Neutral Toned If the Broom Fits

I know today is Halloween, but I was just feeling a bit mellow about it.  Could that be a result of being with students all day that were super costumed out and completely mental about it?  Or maybe because I went back to take yearbook pictures that evening during the carnival and dance?  Sounds about right.  Let’s just settle down a bit, but still enjoy the holiday.

Neutral Toned If the Broom Fits

This stamp is just too funny.  I think that I have shown myself that even though there is definitely a Halloween theme with the stamp, it doesn’t have to be used that way, and that always makes me happy.

Neutral Toned If the Broom Fits

Instead of focusing on the holiday, I went with a focus on the brooms themselves.  This included giving the background a run through with the woodgrain embossing folder, wooden handles on the broom.  Also, I did  a little piercing around the brooms themselves so I could thread some of the ever so lovely linen thread around the bristles and give it some dimension.  I think that looks pretty darn cool.  All kinds of dimension going on here.  What a great card!

Neutral Toned If the Broom Fits

Have a creative day!

Moana

Death By Chocolate

Another card with this wonderful set.  How much fun is a stamp that says, ‘Death by Chocolate’.  I am sure many would agree that is more than a fun idea.

Death By Chocolate

I did think it would be nice to make it with non-traditional coloring though.  When I think of chocolate, these are the colors I come up with.  A pretty gold wrapper with something dark and rich inside.  Sounds like a winner!

Death By Chocolate

Stamping perfectly isn’t always my strength, so when I make a background like this I stamp off center on purpose just to take the stress off.  Has to be fun, right?  And this card was.  Some simple layering with a few embellishments to spruce it up.  I applied the ribbon in kind of a caution tape fashion giving the hint of Halloween, but not right out saying it.  Maybe a gift card from a candy store should go inside for the perfect grown up Halloween treat?  I like it!

Death By Chocolate

Have a creative day!

Moana